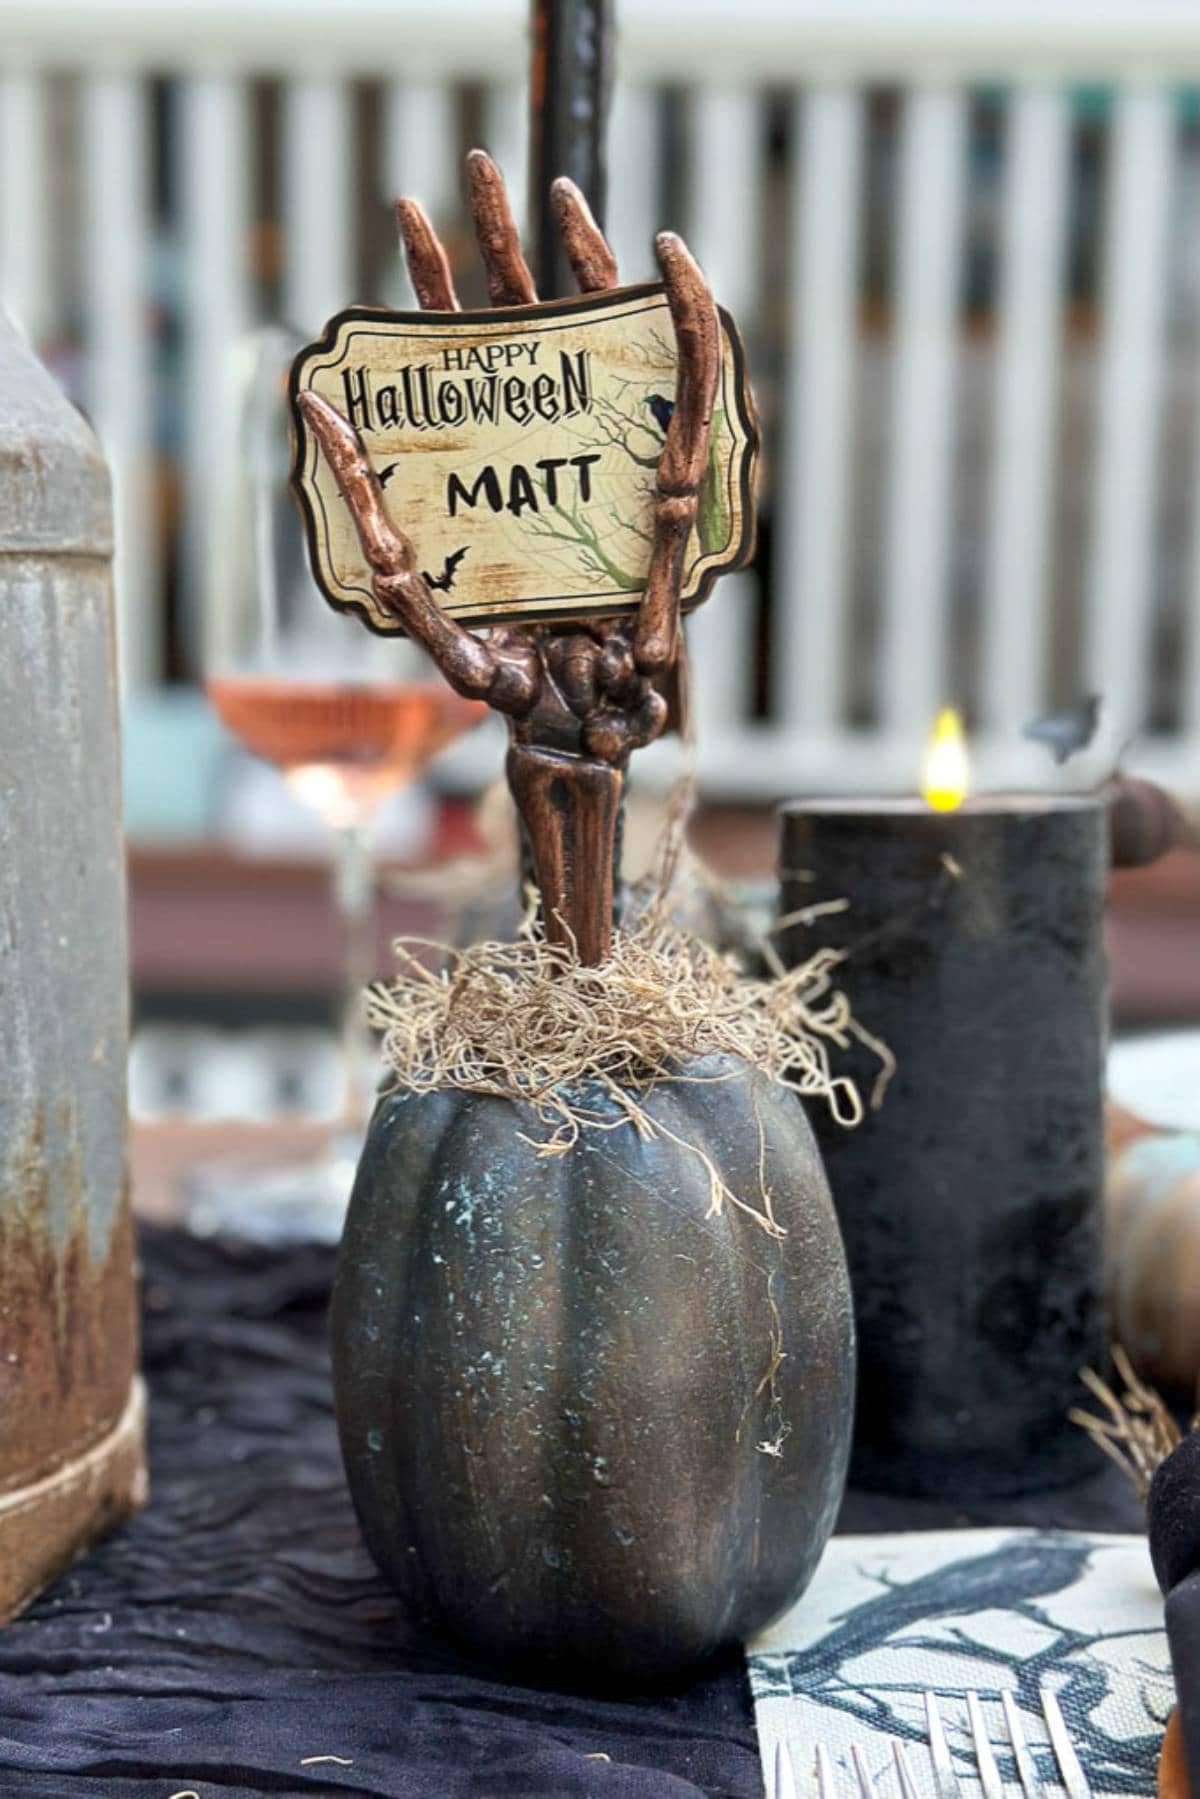
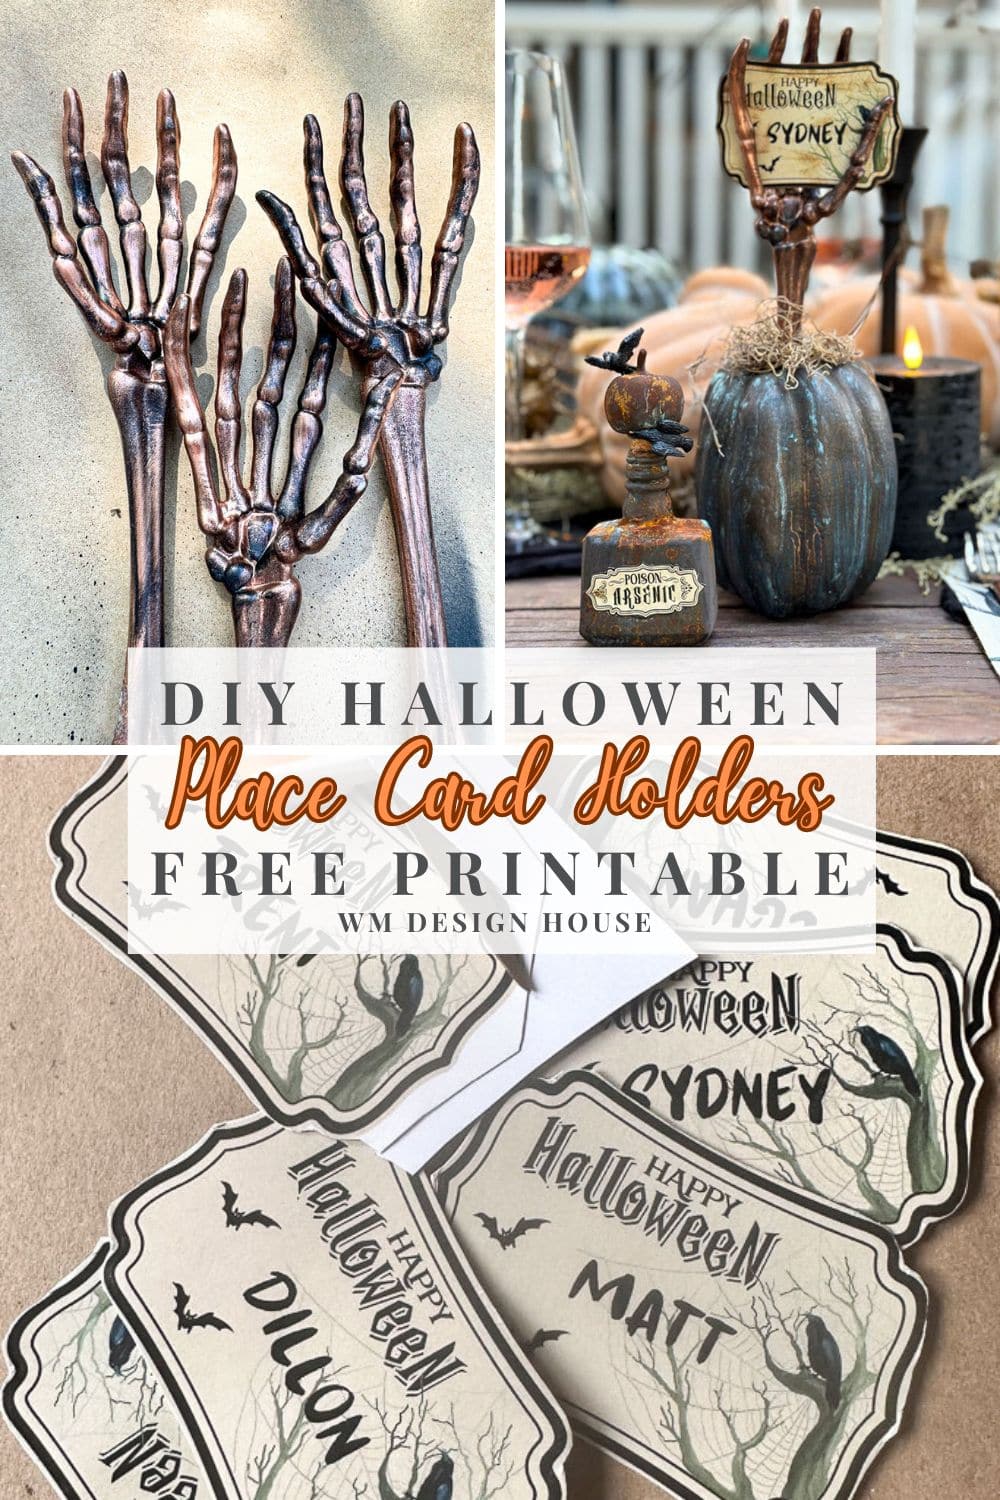
DIY Halloween Place Card Holders: With Free Printable
Ready to add a dash of spooky charm to your Halloween table? These DIY pumpkin place card holders are the perfect way to bring your tablescape to life—without spending a lot of money! With an easy-to-follow guide and a free printable, you’ll have your guests boo-ing in delight at your crafty genius.
On my blog WM Design House, I may sometimes use affiliate links, which means a small commission is earned if you purchase via the link. The price will be the same whether you use the affiliate link or go directly to the vendor’s website using a non-affiliate link. Read my full disclosure policy here.
Introduction of Project
These DIY Halloween place card holders are more than just a fun project—they’re a fabulous way to add a personalized touch to your Halloween dinner party. Each guest will love having their own spooky place setting, and the best part? They get to take home an adorable keepsake! Even better, with affordable Dollar Tree supplies, you can create these unique and festive place card holders without blowing your budget.
Materials for DIY Halloween Place Card Holders
You can purchase most of these at Dollar Tree or local craft stores.
Additional Tools You’ll Need
Step-by-Step Instructions for Pumpkin Name Card Holders
Follow these easy step by step instructions to create the spookiest card holders.
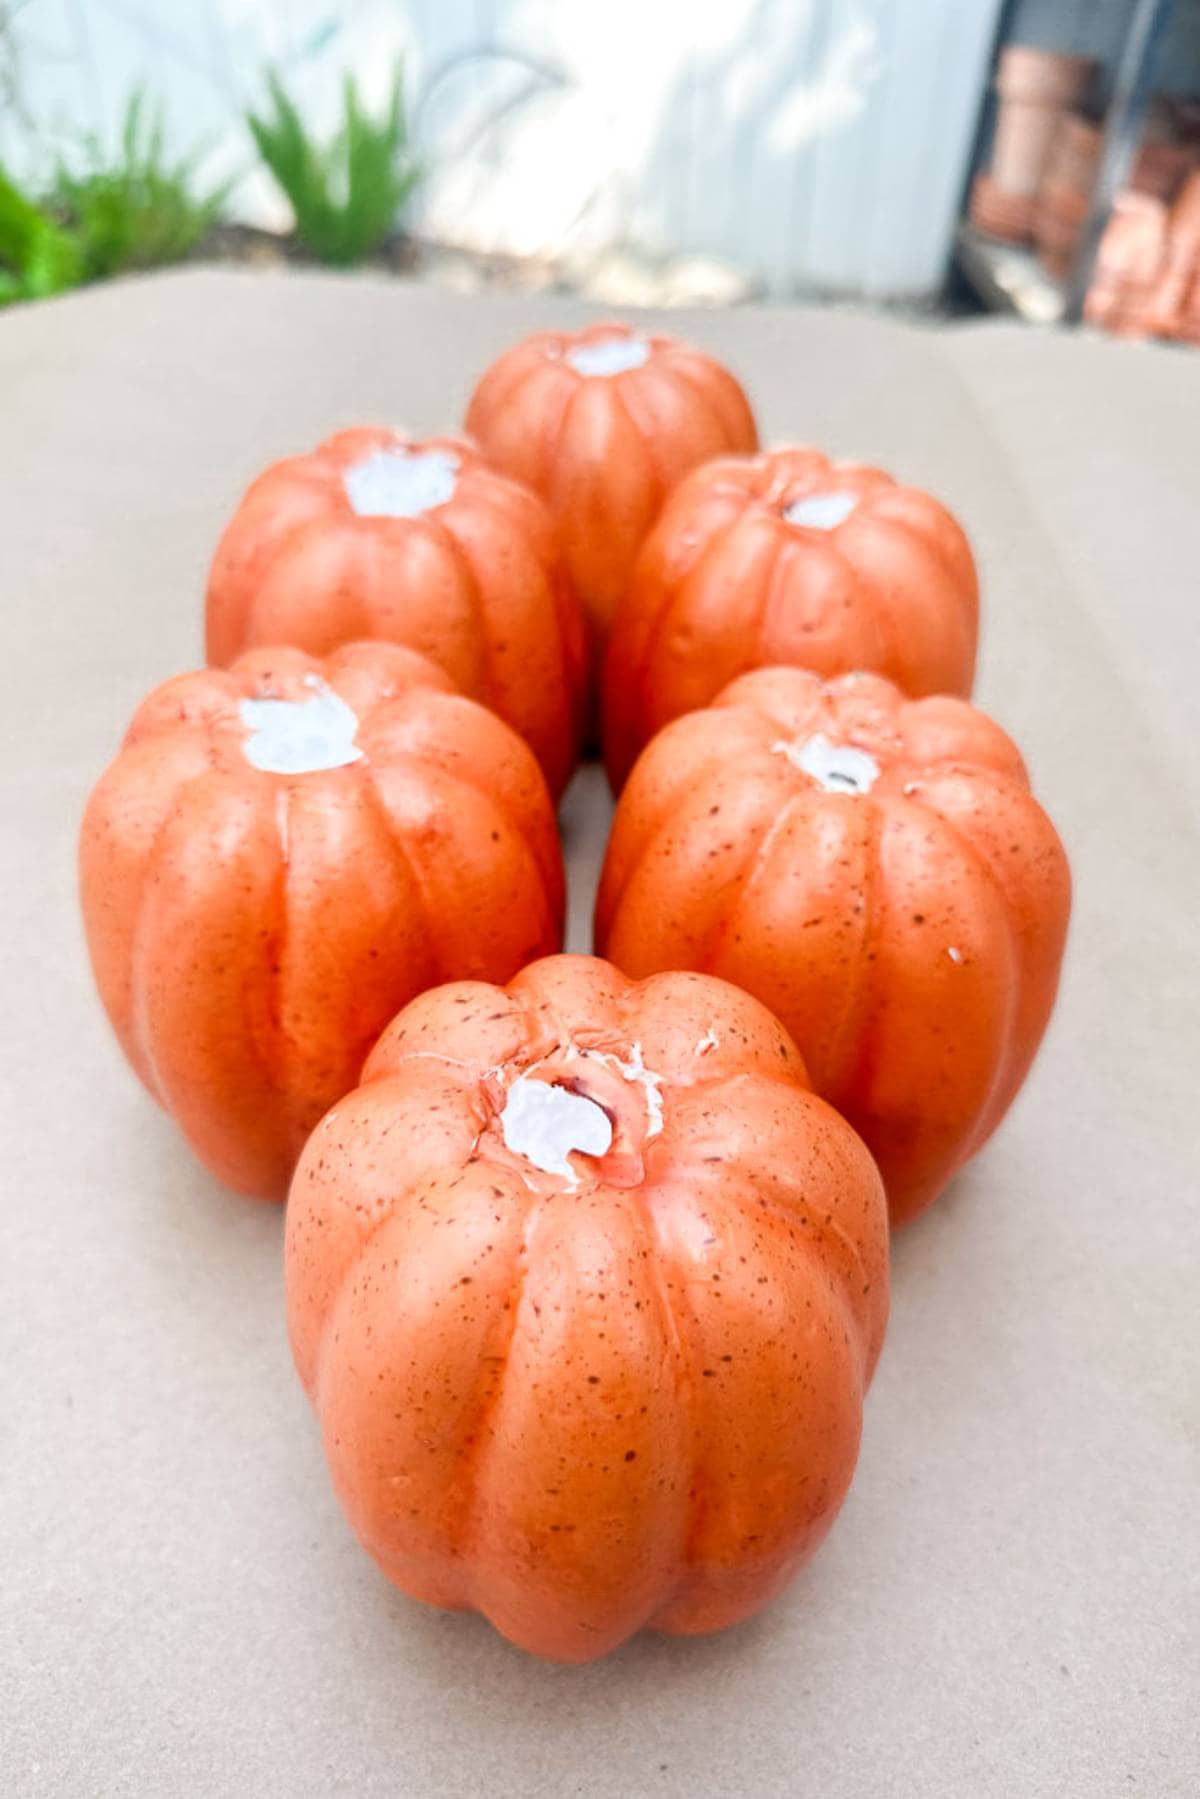
Step 1: Remove pumpkin stem
Remove the pumpkin stem and insert a wood skewer into the hole on top of the pumpkin.
Tip from wendy’s craft room:
Modern Masters Metal Effects paints come in various colors and metal finishes. Don’t be afraid to get creative and experiment with them to discover unique combinations and effects. Mix and match for truly custom results!
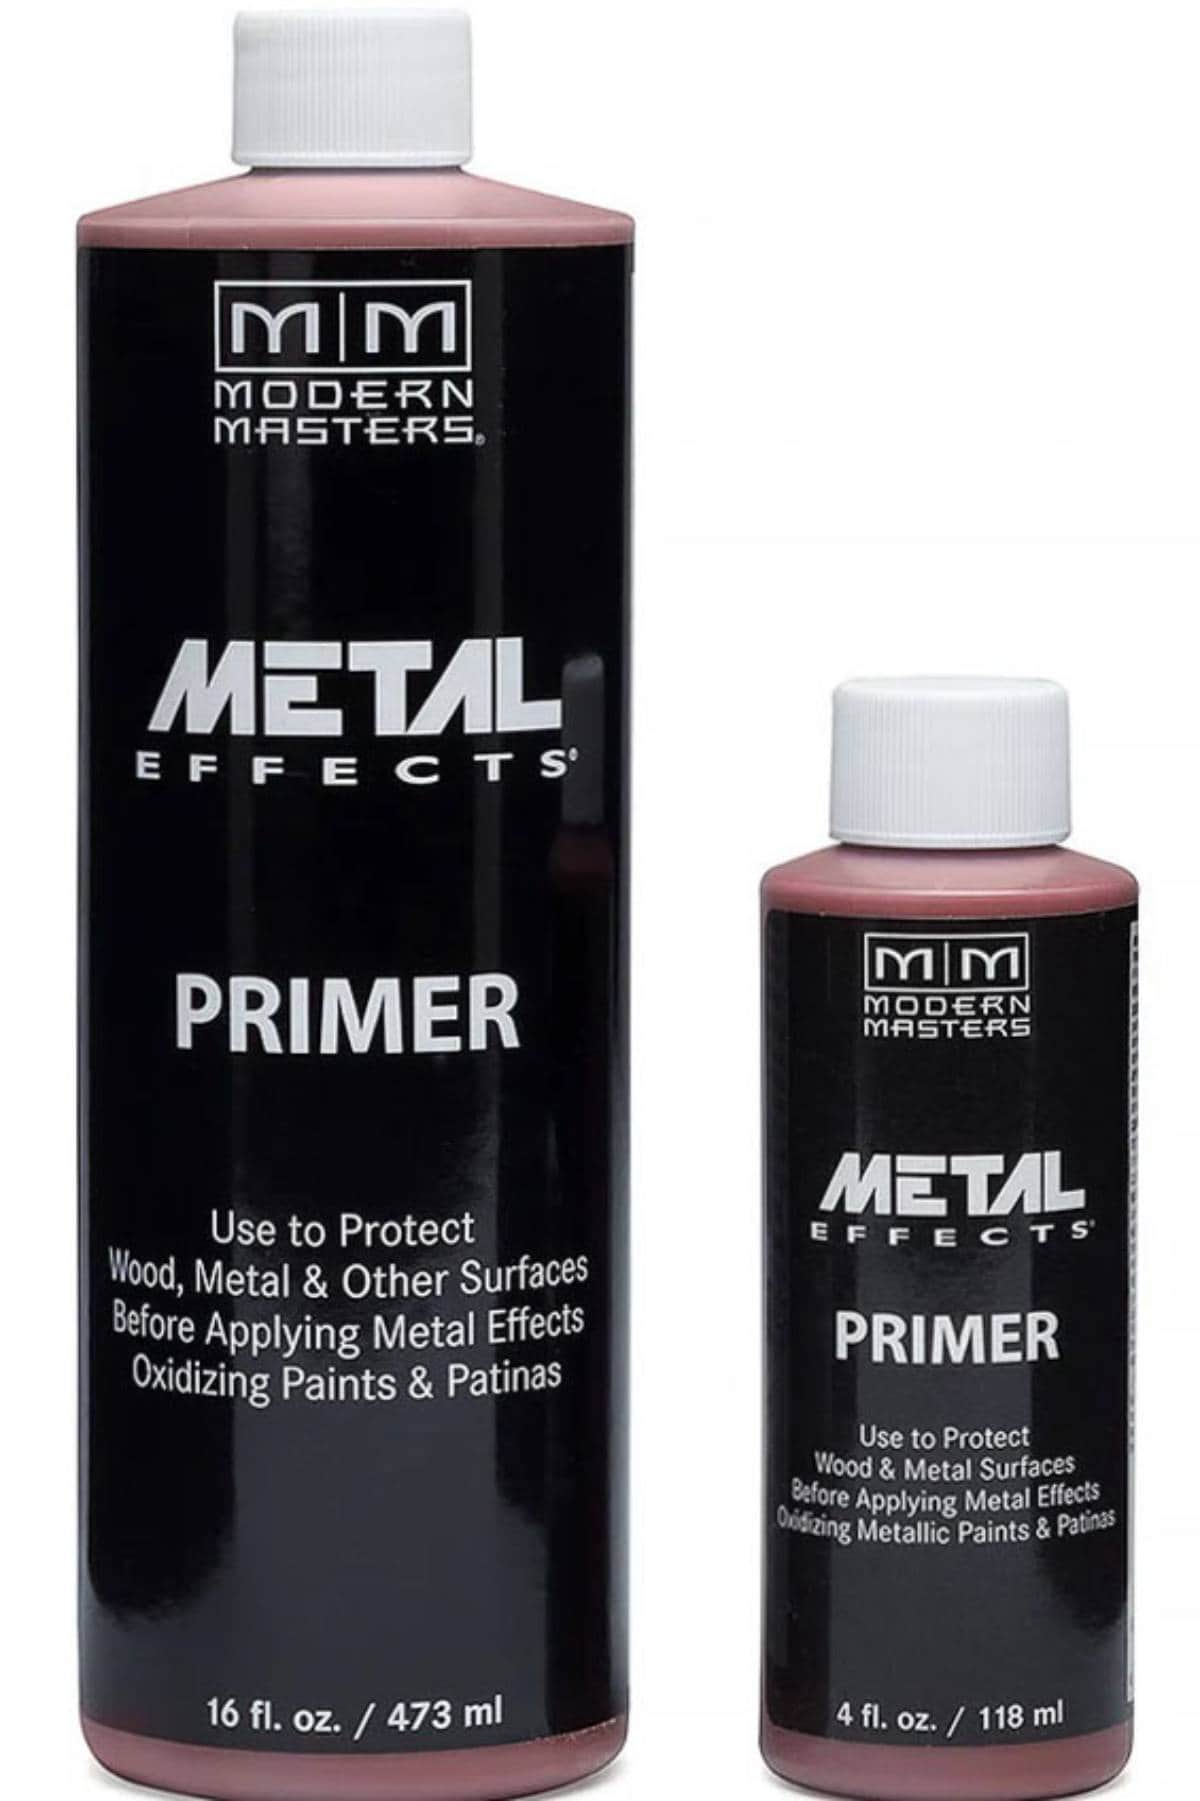
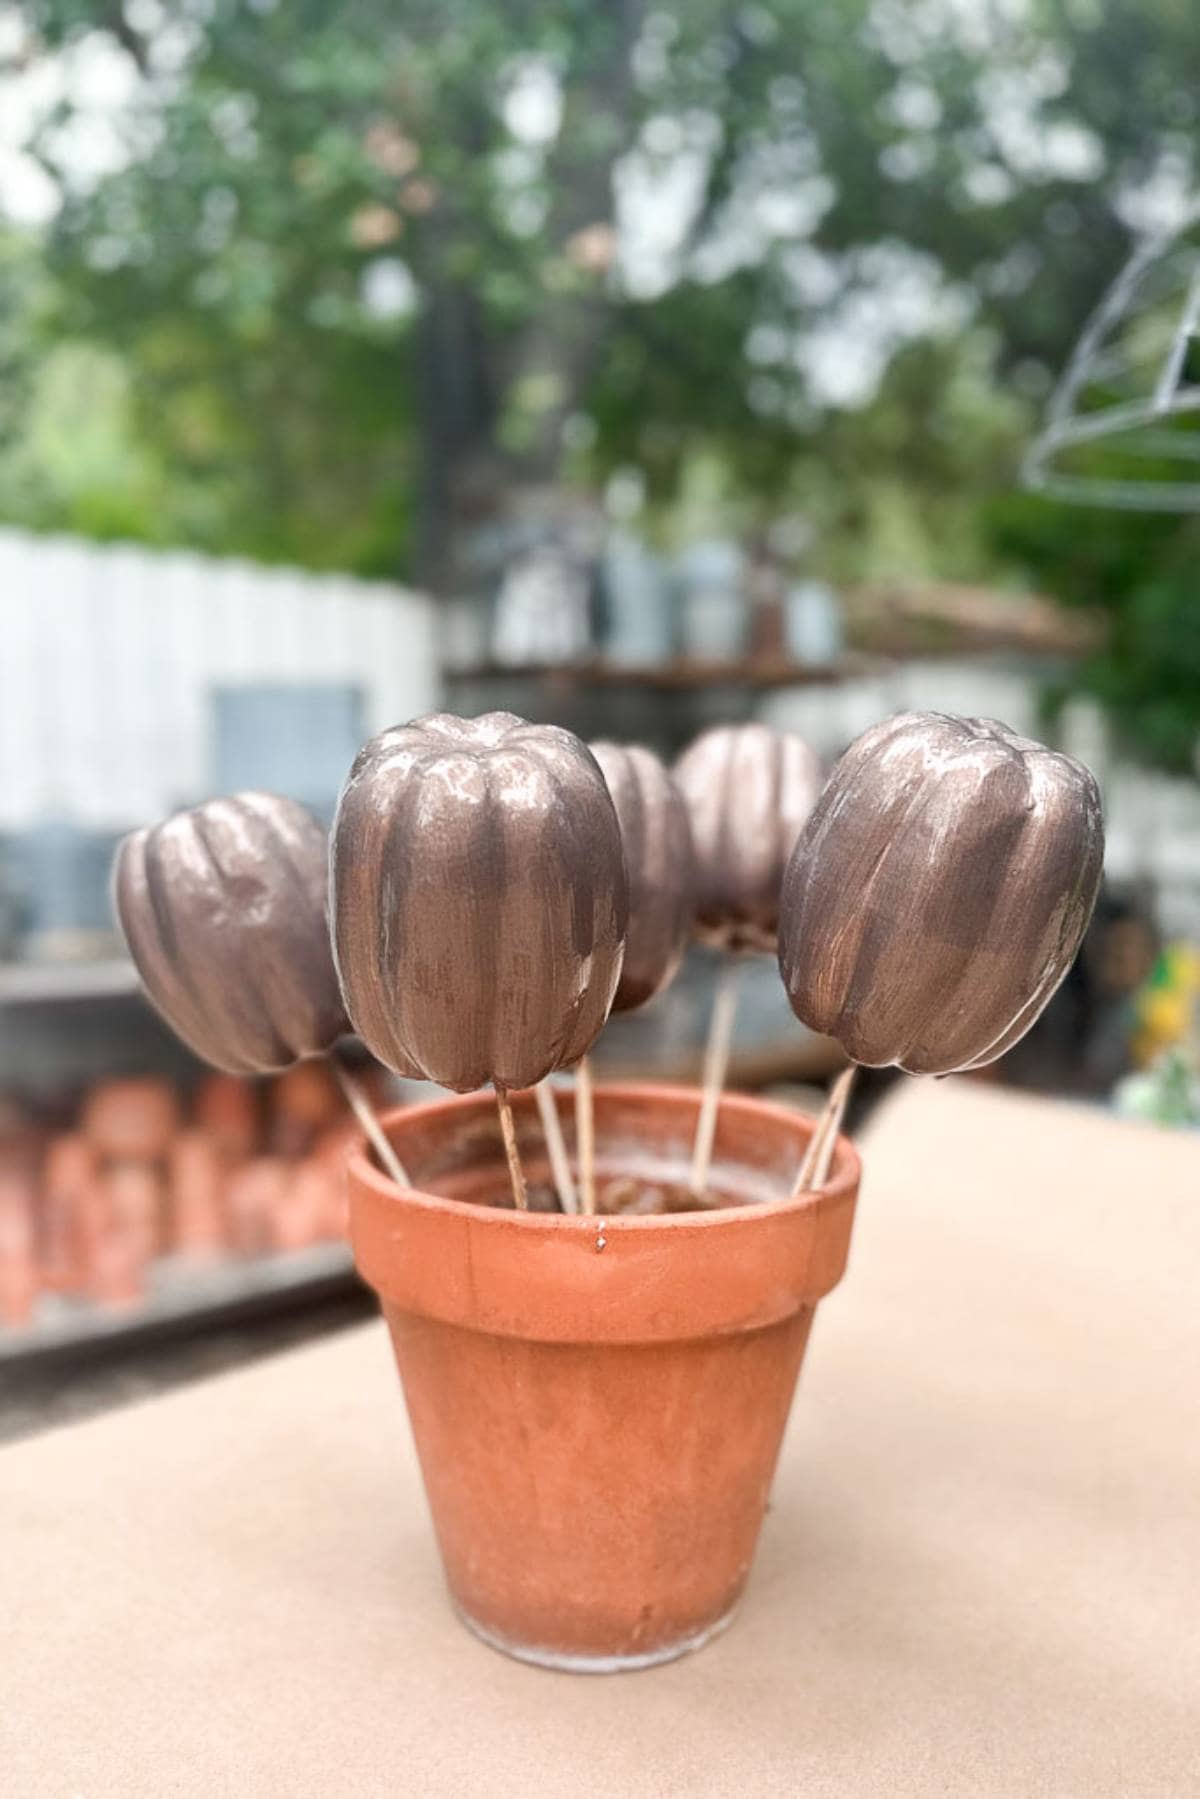
Step 2: Primer the pumpkins
While holding the skewer, apply an even layer of Modern Masters primer to the pumpkin.
Place the skewer in the pot of dirt so the pumpkin can dry.

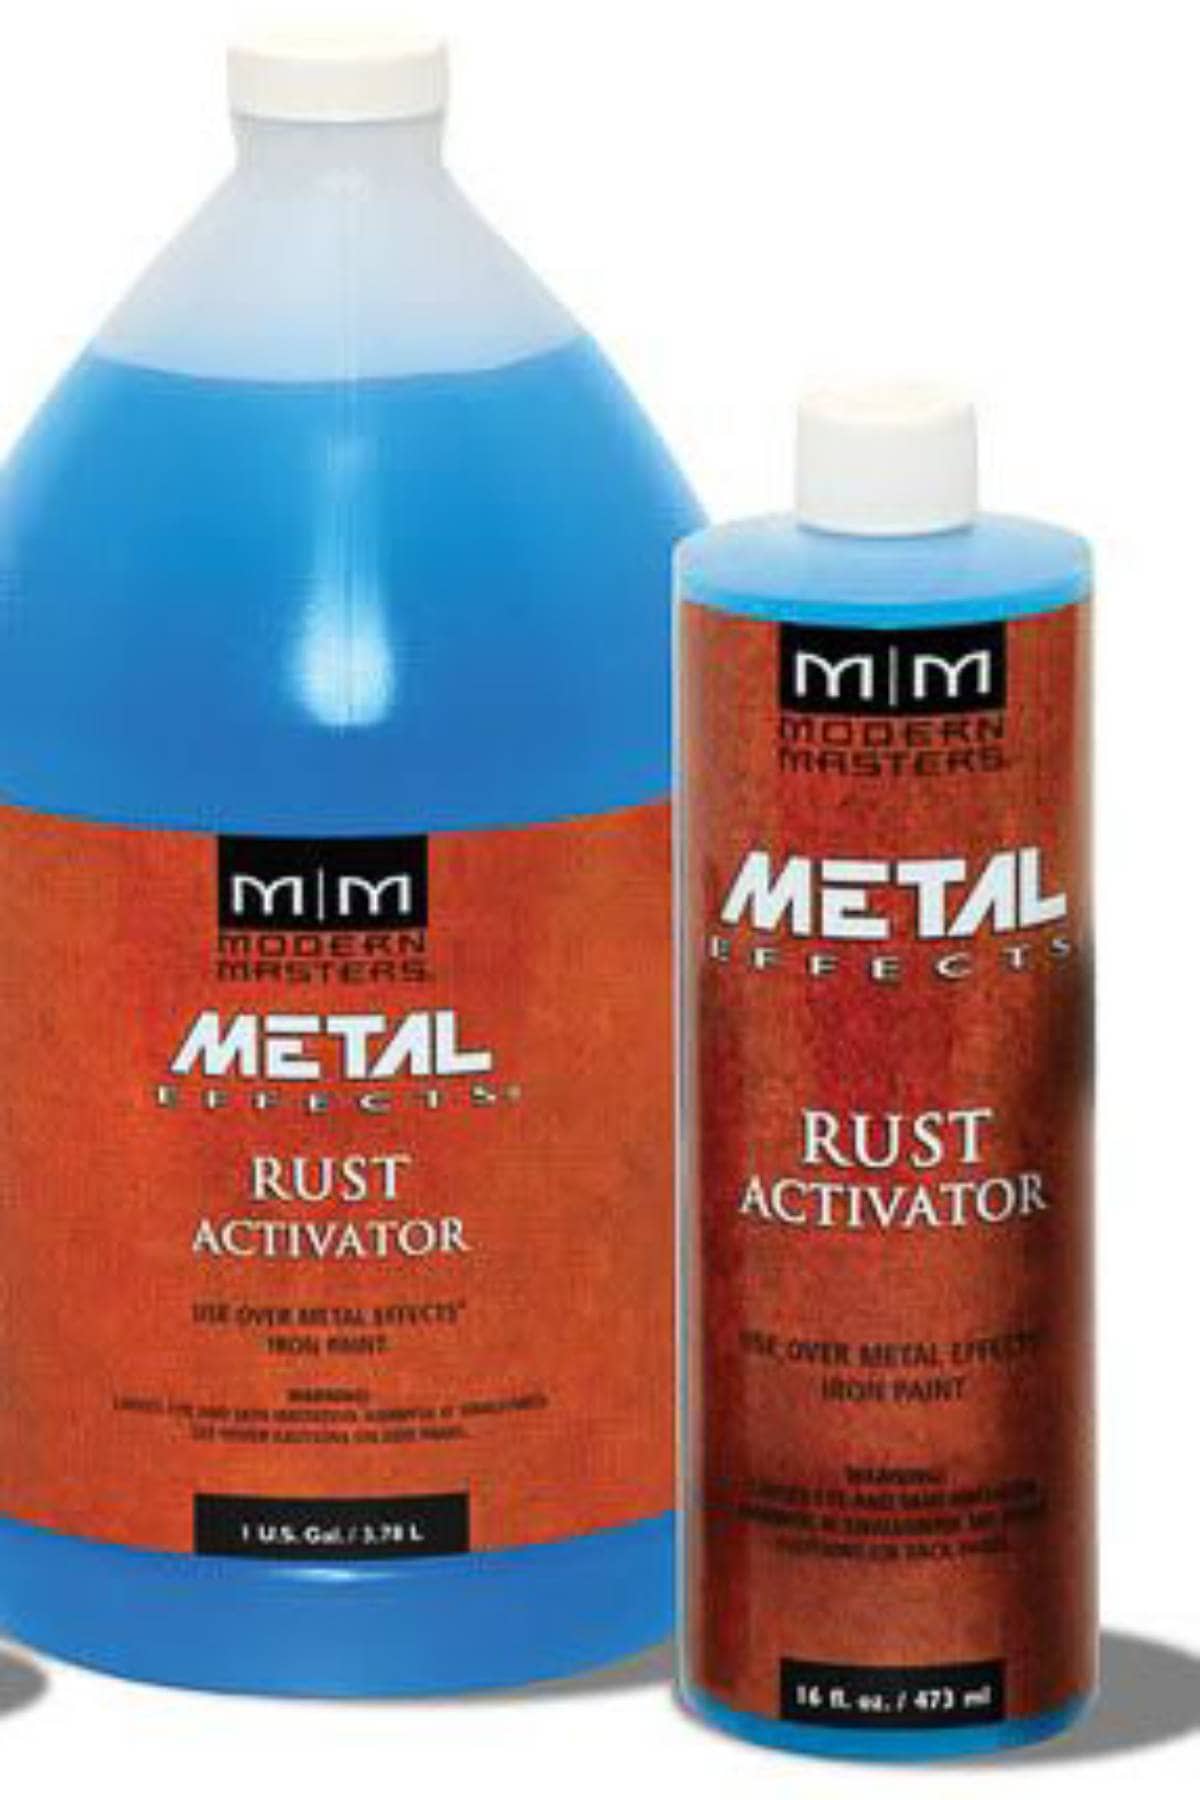
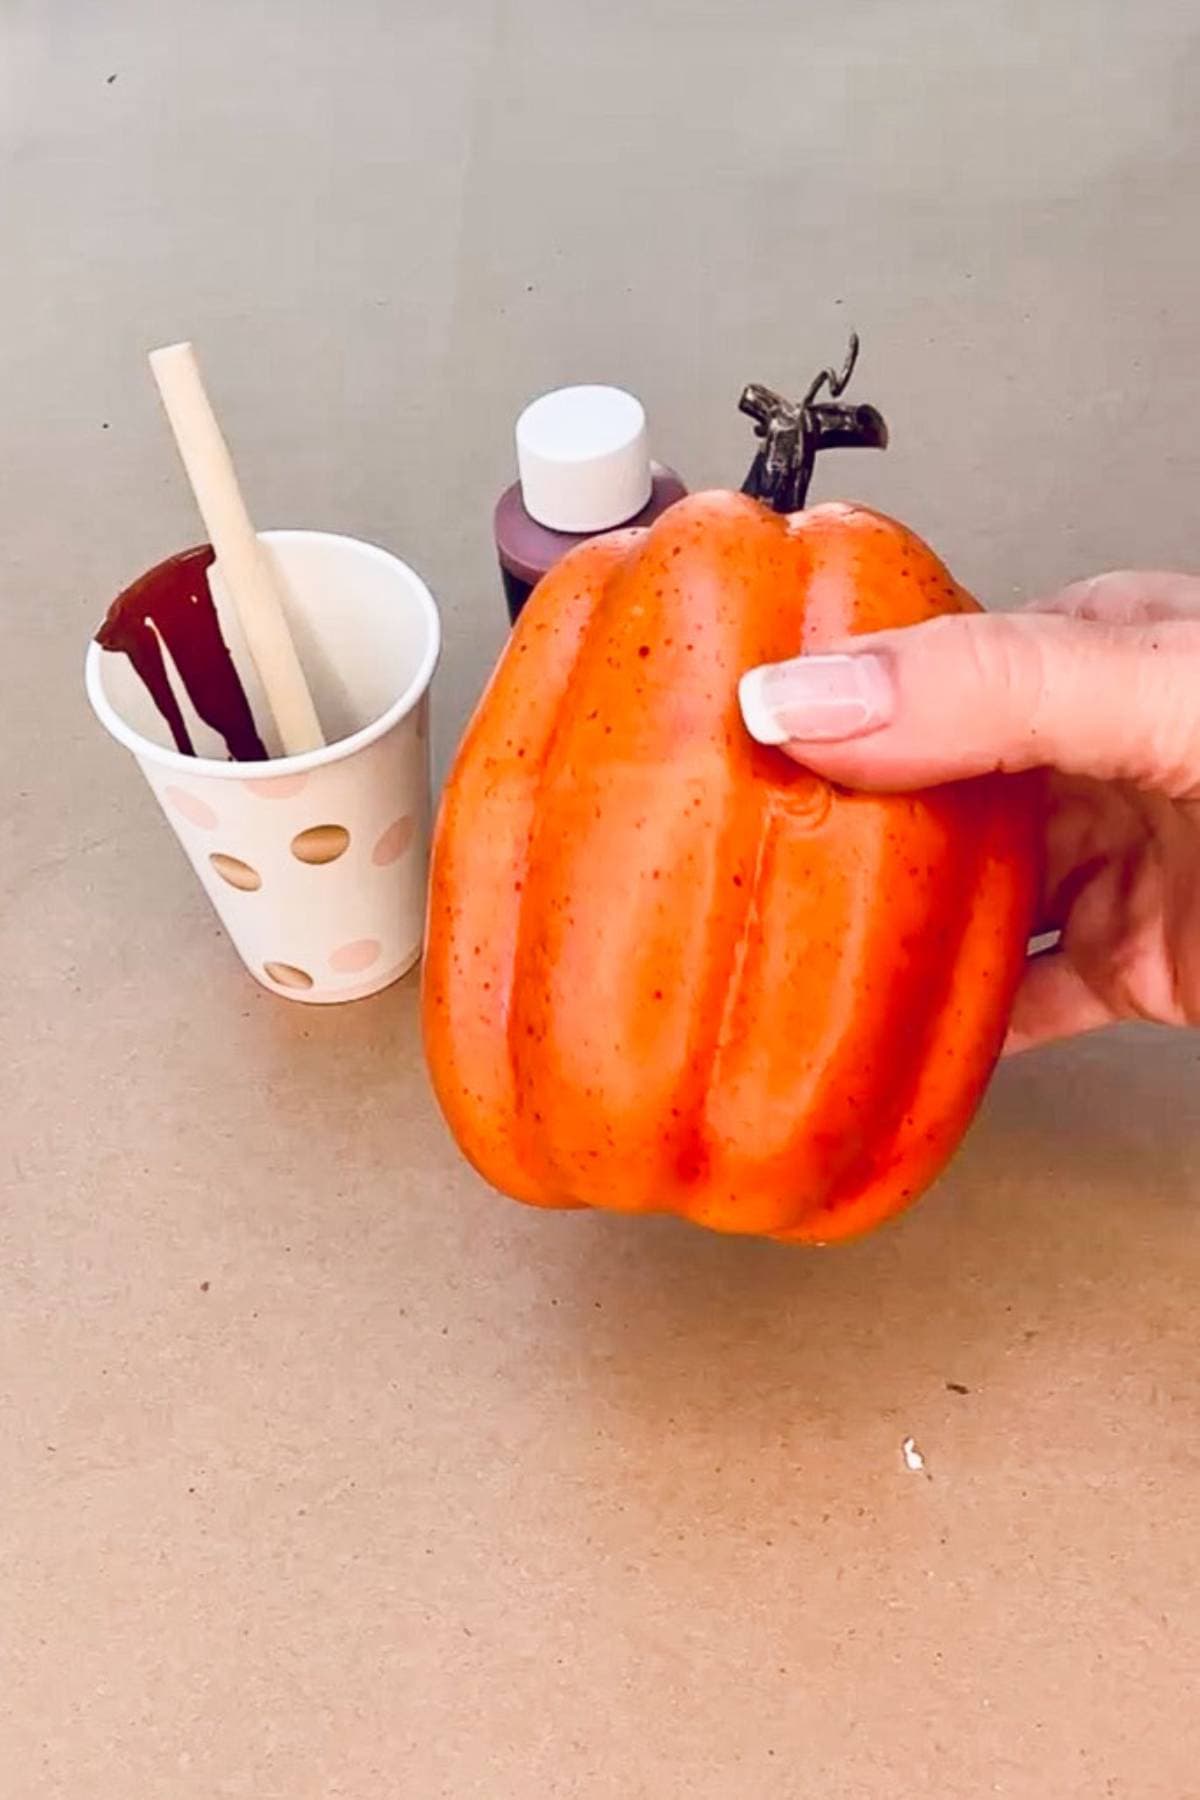
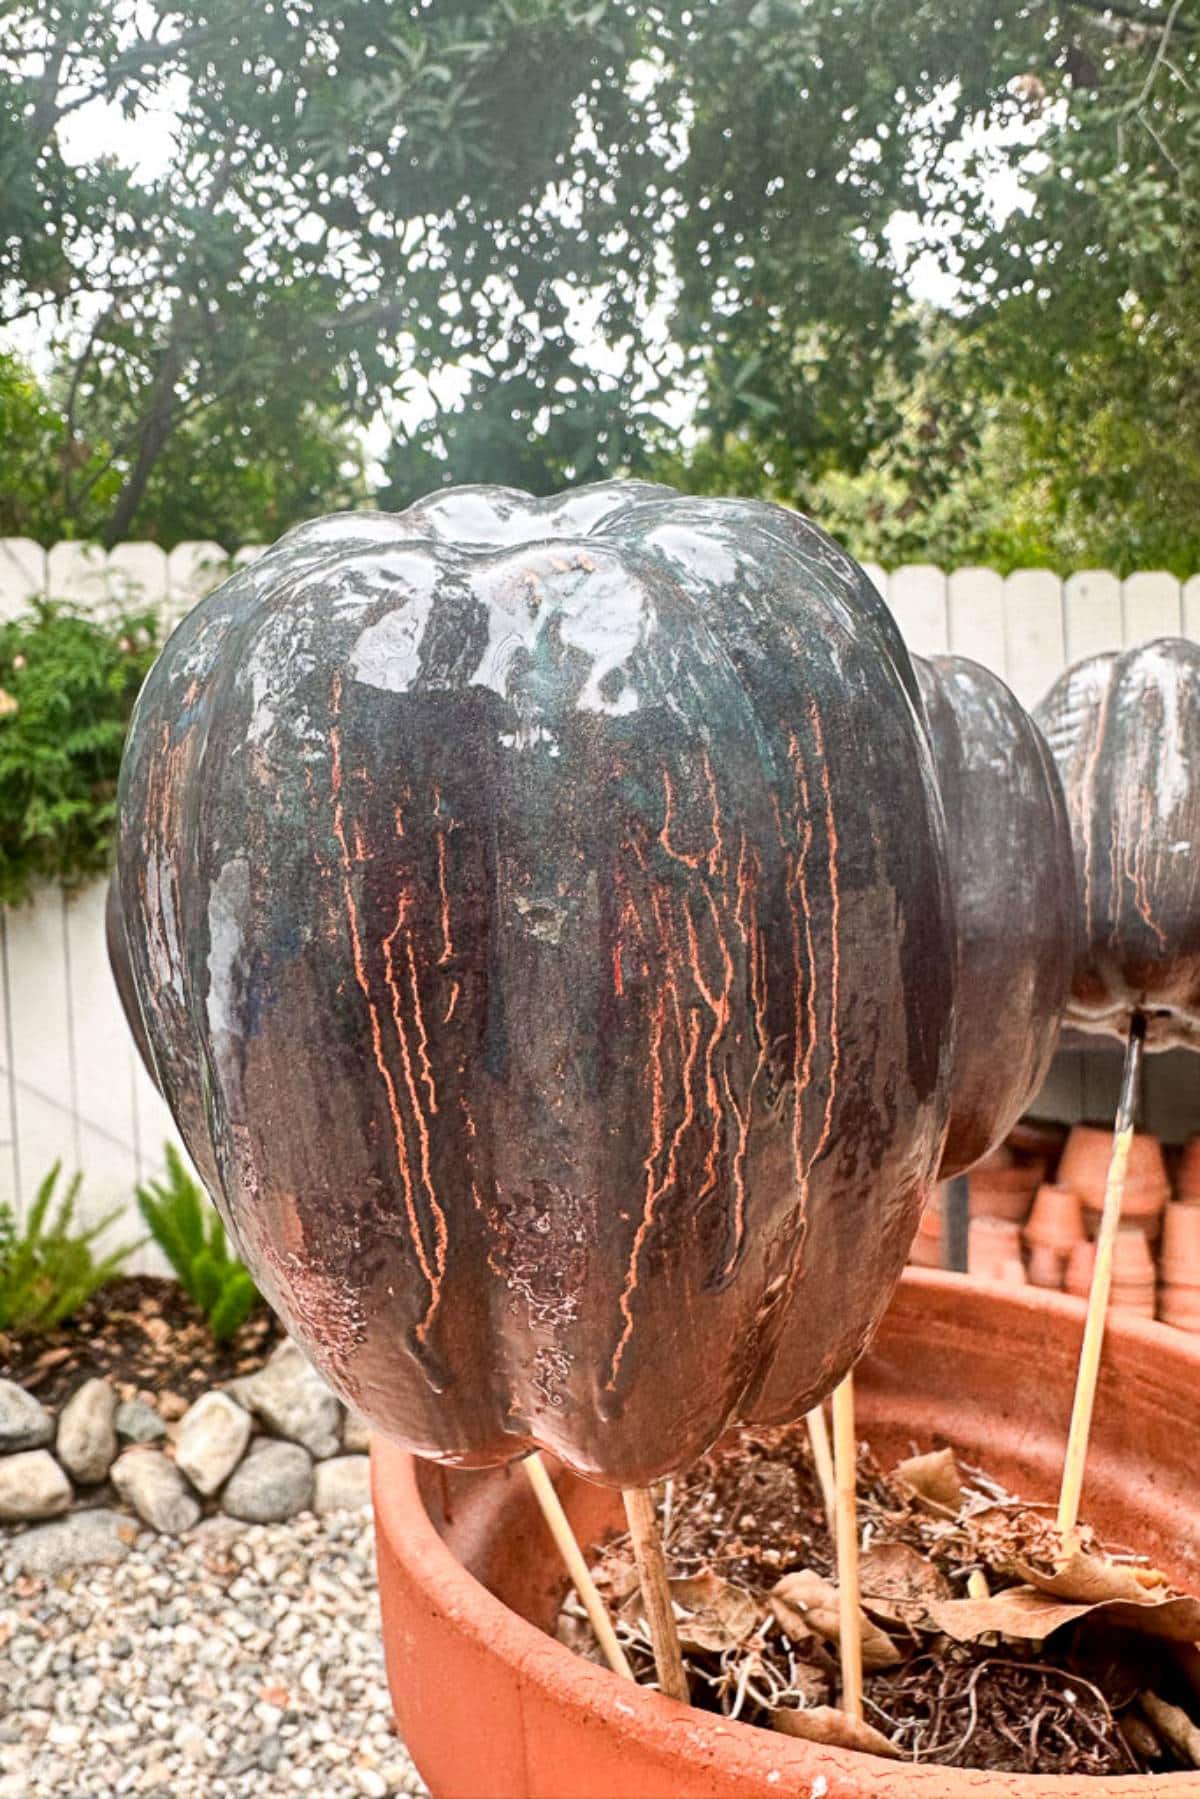
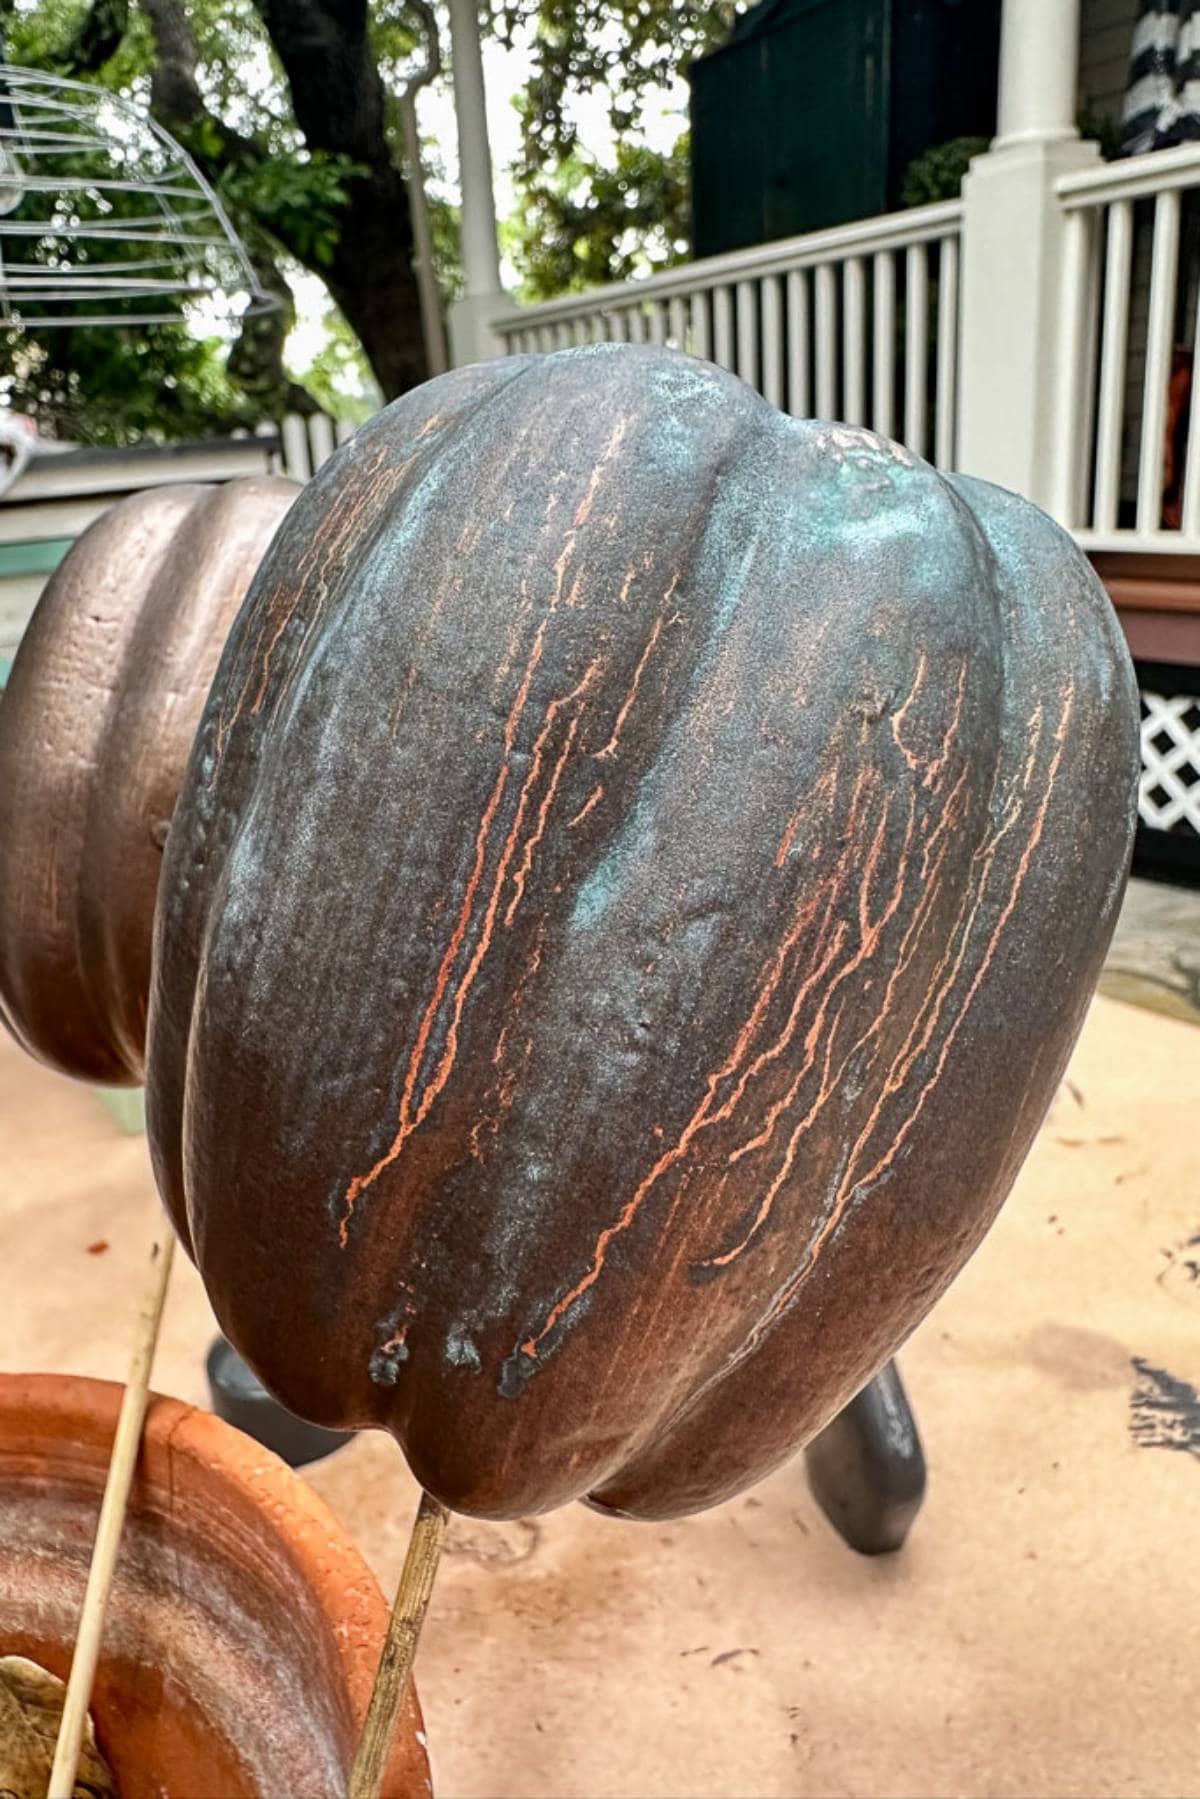
Step 3: Paint and patina the pumpkins
Apply a coat of Modern Masters oxidizing bronze paint over the primed surface. While the paint is still wet, generously spray it with the rust activator to kickstart the rusty patina pumpkin effect. Once done, carefully place the skewers into the terra cotta pot of dirt to dry completely.
Tip from wendy’s craft room:
Experiment with applying multiple coats of paint and rust activator to achieve different effects and finishes.
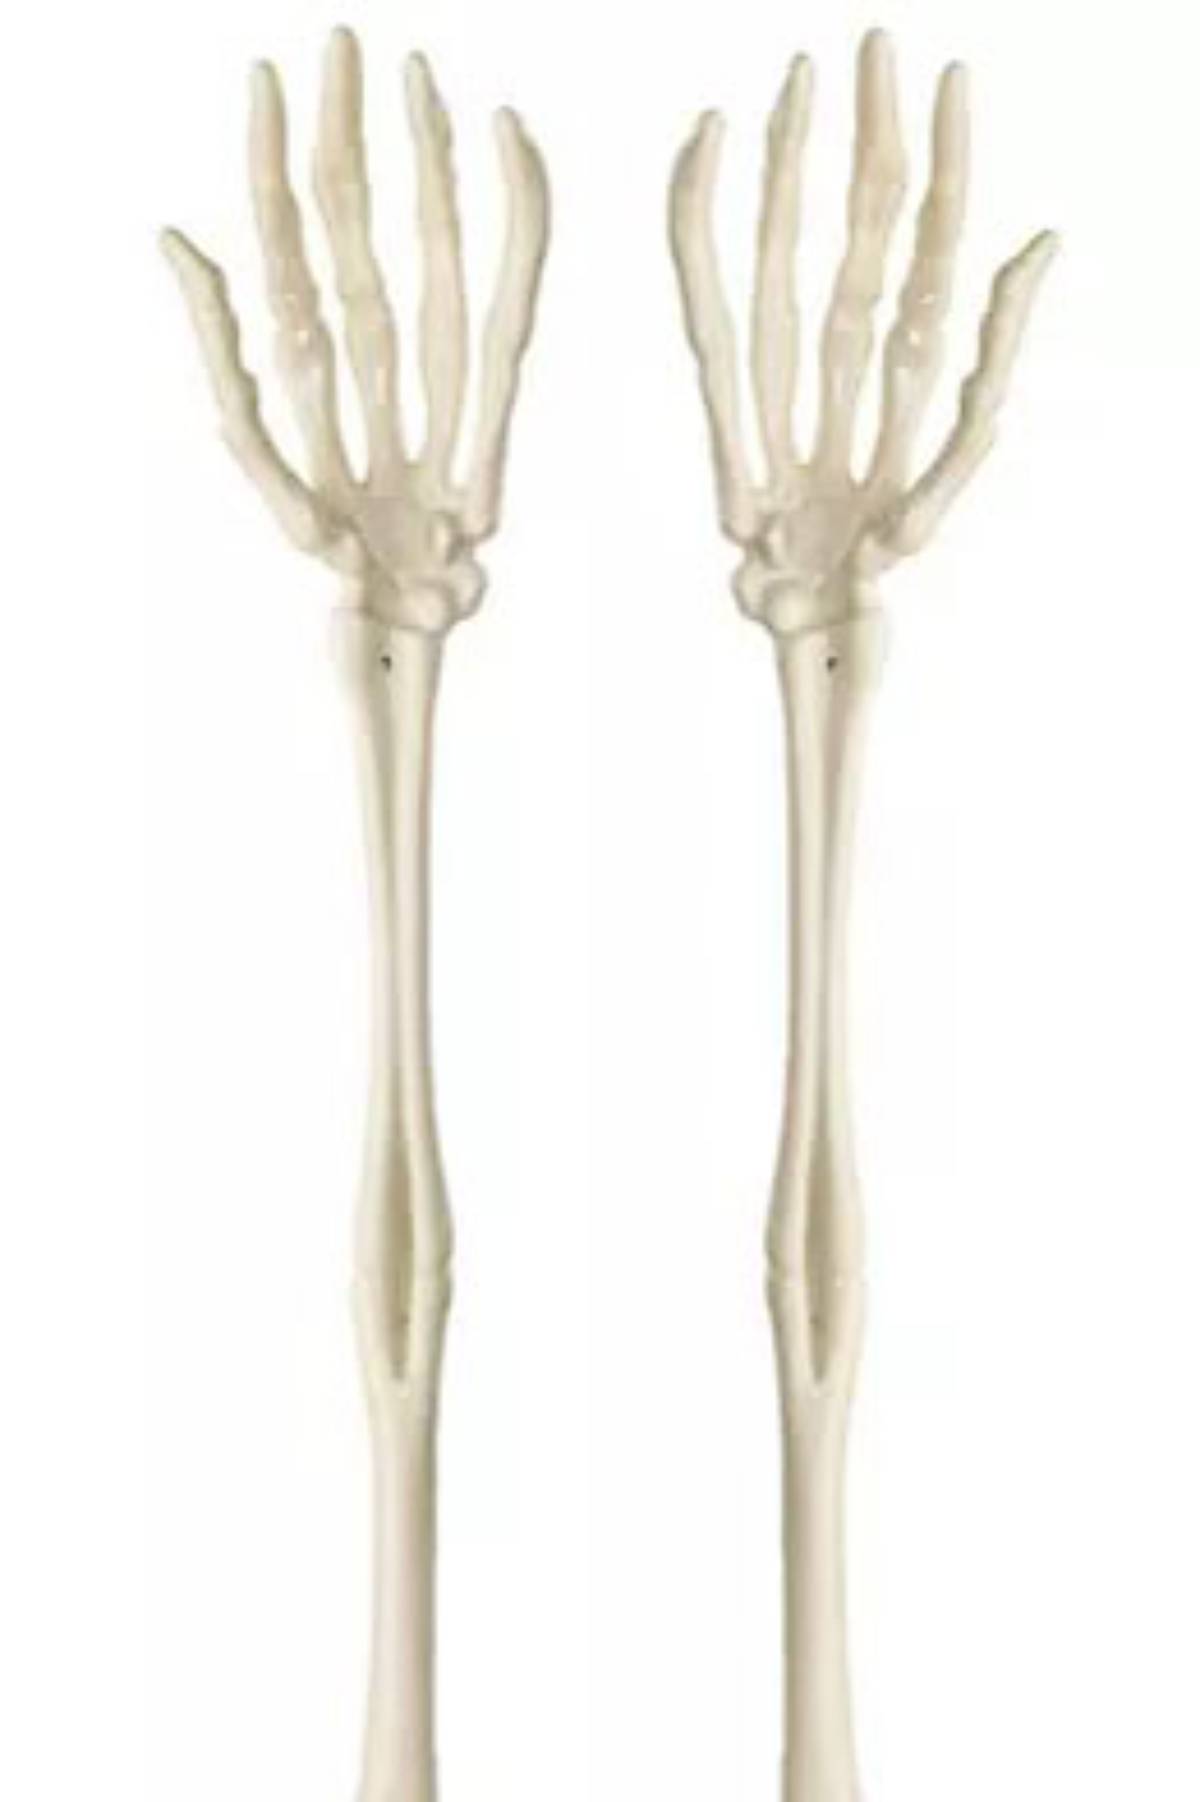
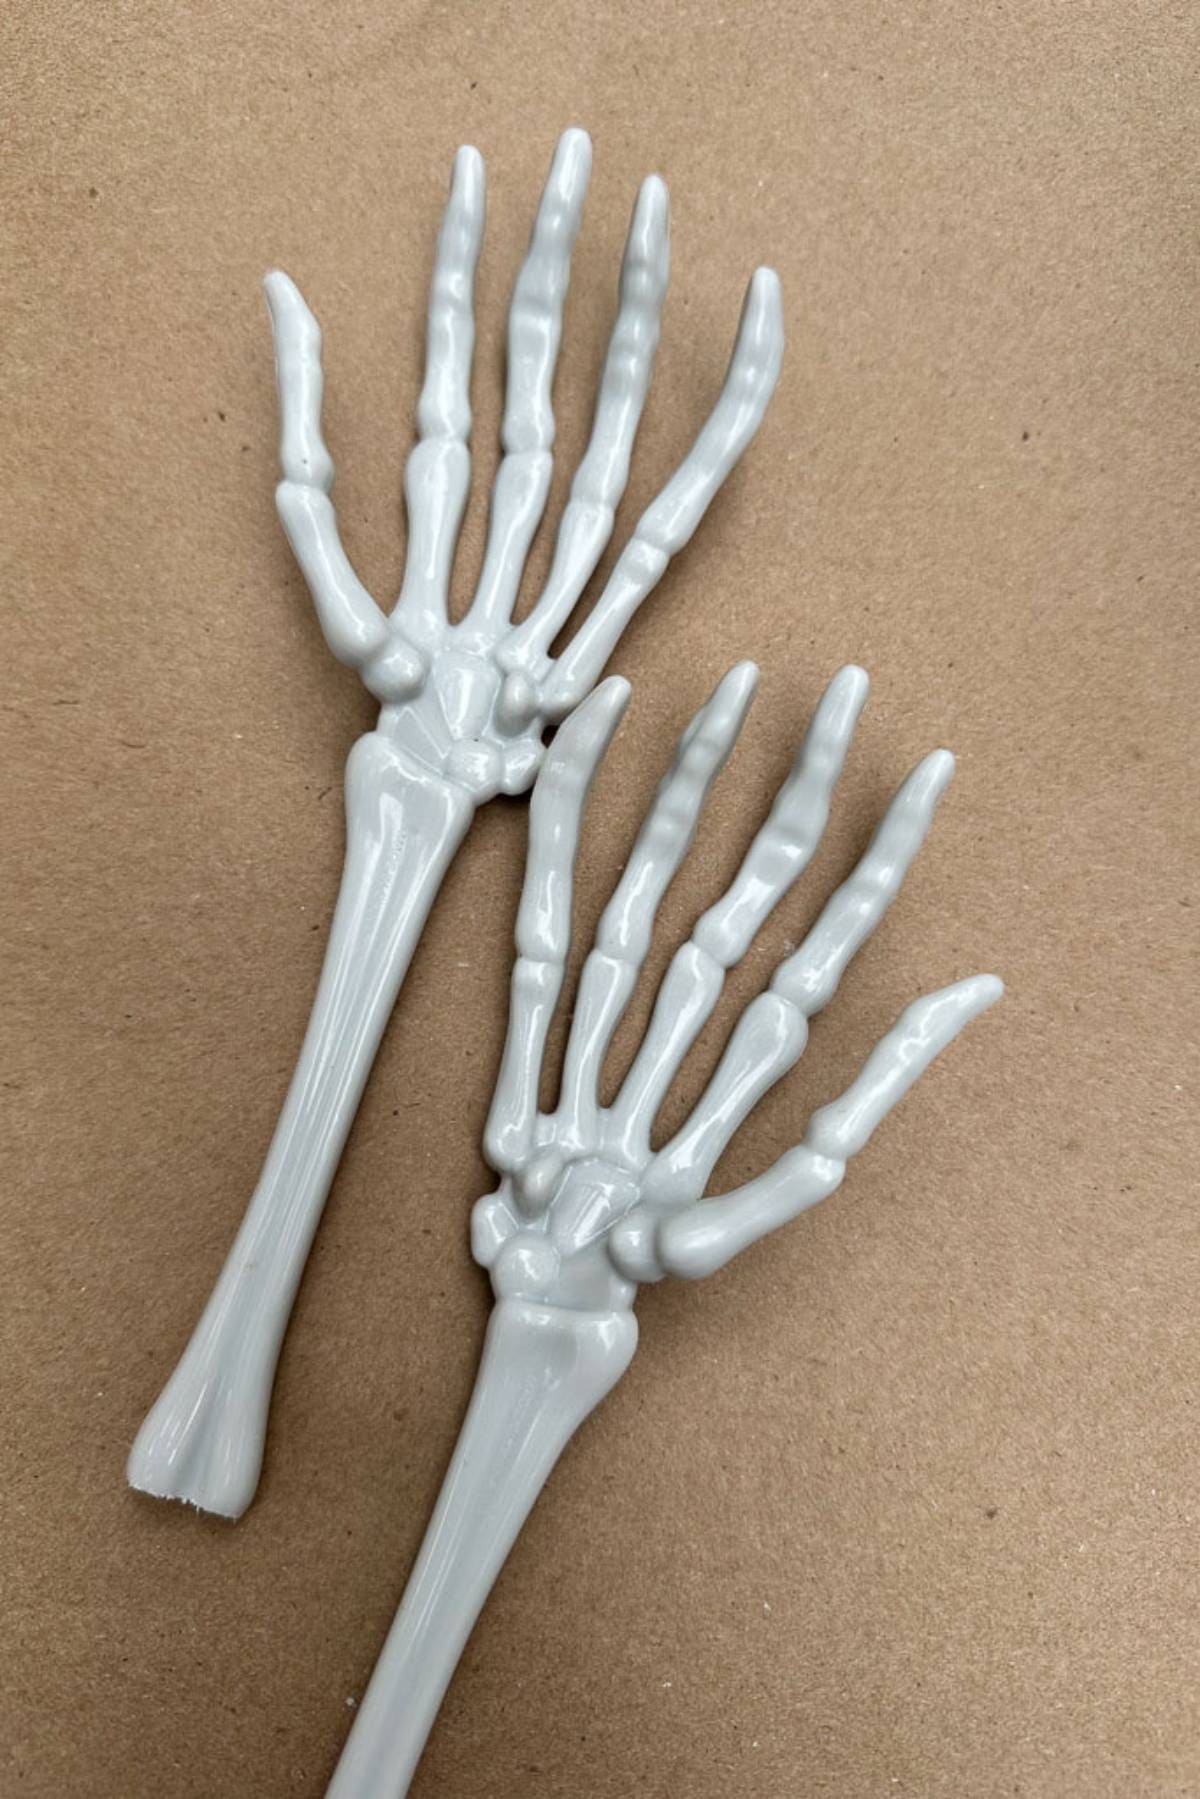
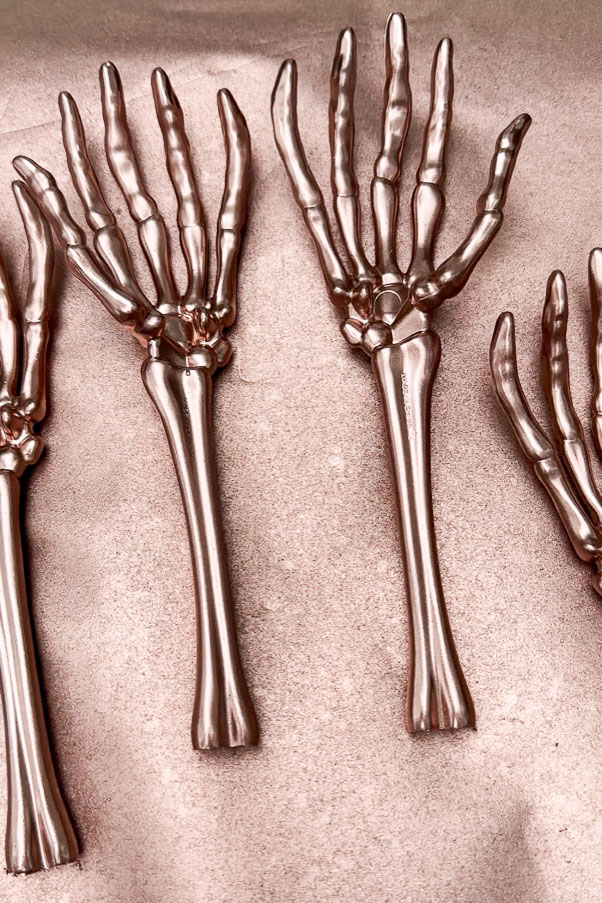
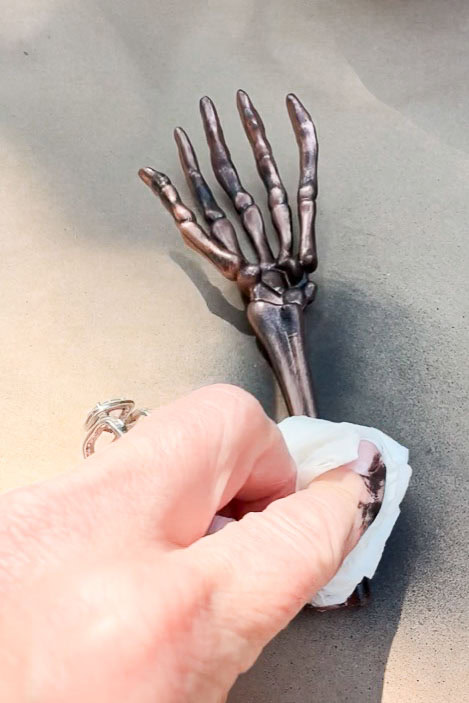
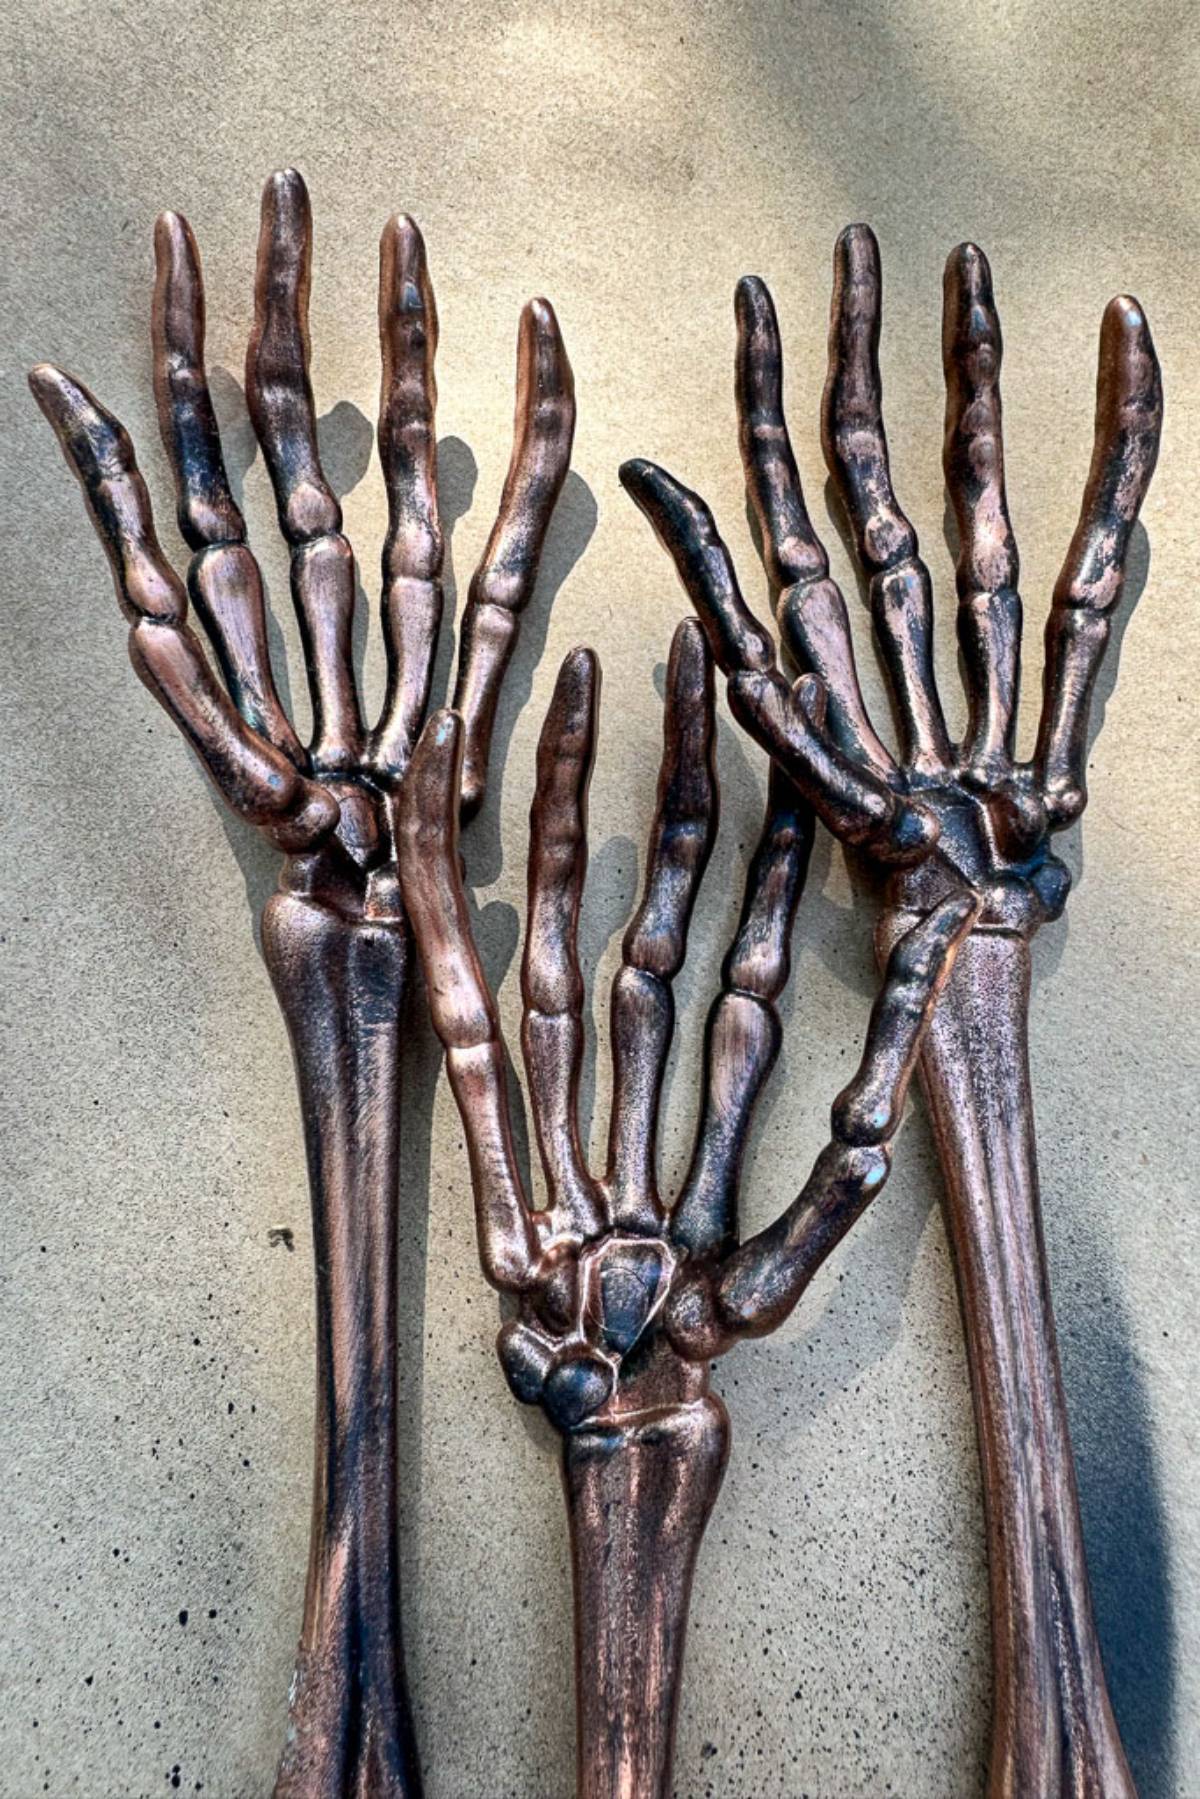
Step 4: Preparing the skeleton hands for diy Halloween place card holders
Follow these next steps.
- Cut the plastic skeleton arm bone in the center using a small hand saw.
- Spray paint the skeleton hands with rose gold spray paint, allowing them to dry completely.
- Apply a light coat of black craft paint or spray paint to the skeleton hands. Use a paper towel or a rag to wipe some of the black paint off so you can see the rose gold paint. You can also use a toothbrush and flick it with your finger to get a speckle effect.
Tip from wendy’s craft room:
Be sure to wipe off the excess paint quickly as it dries fast.
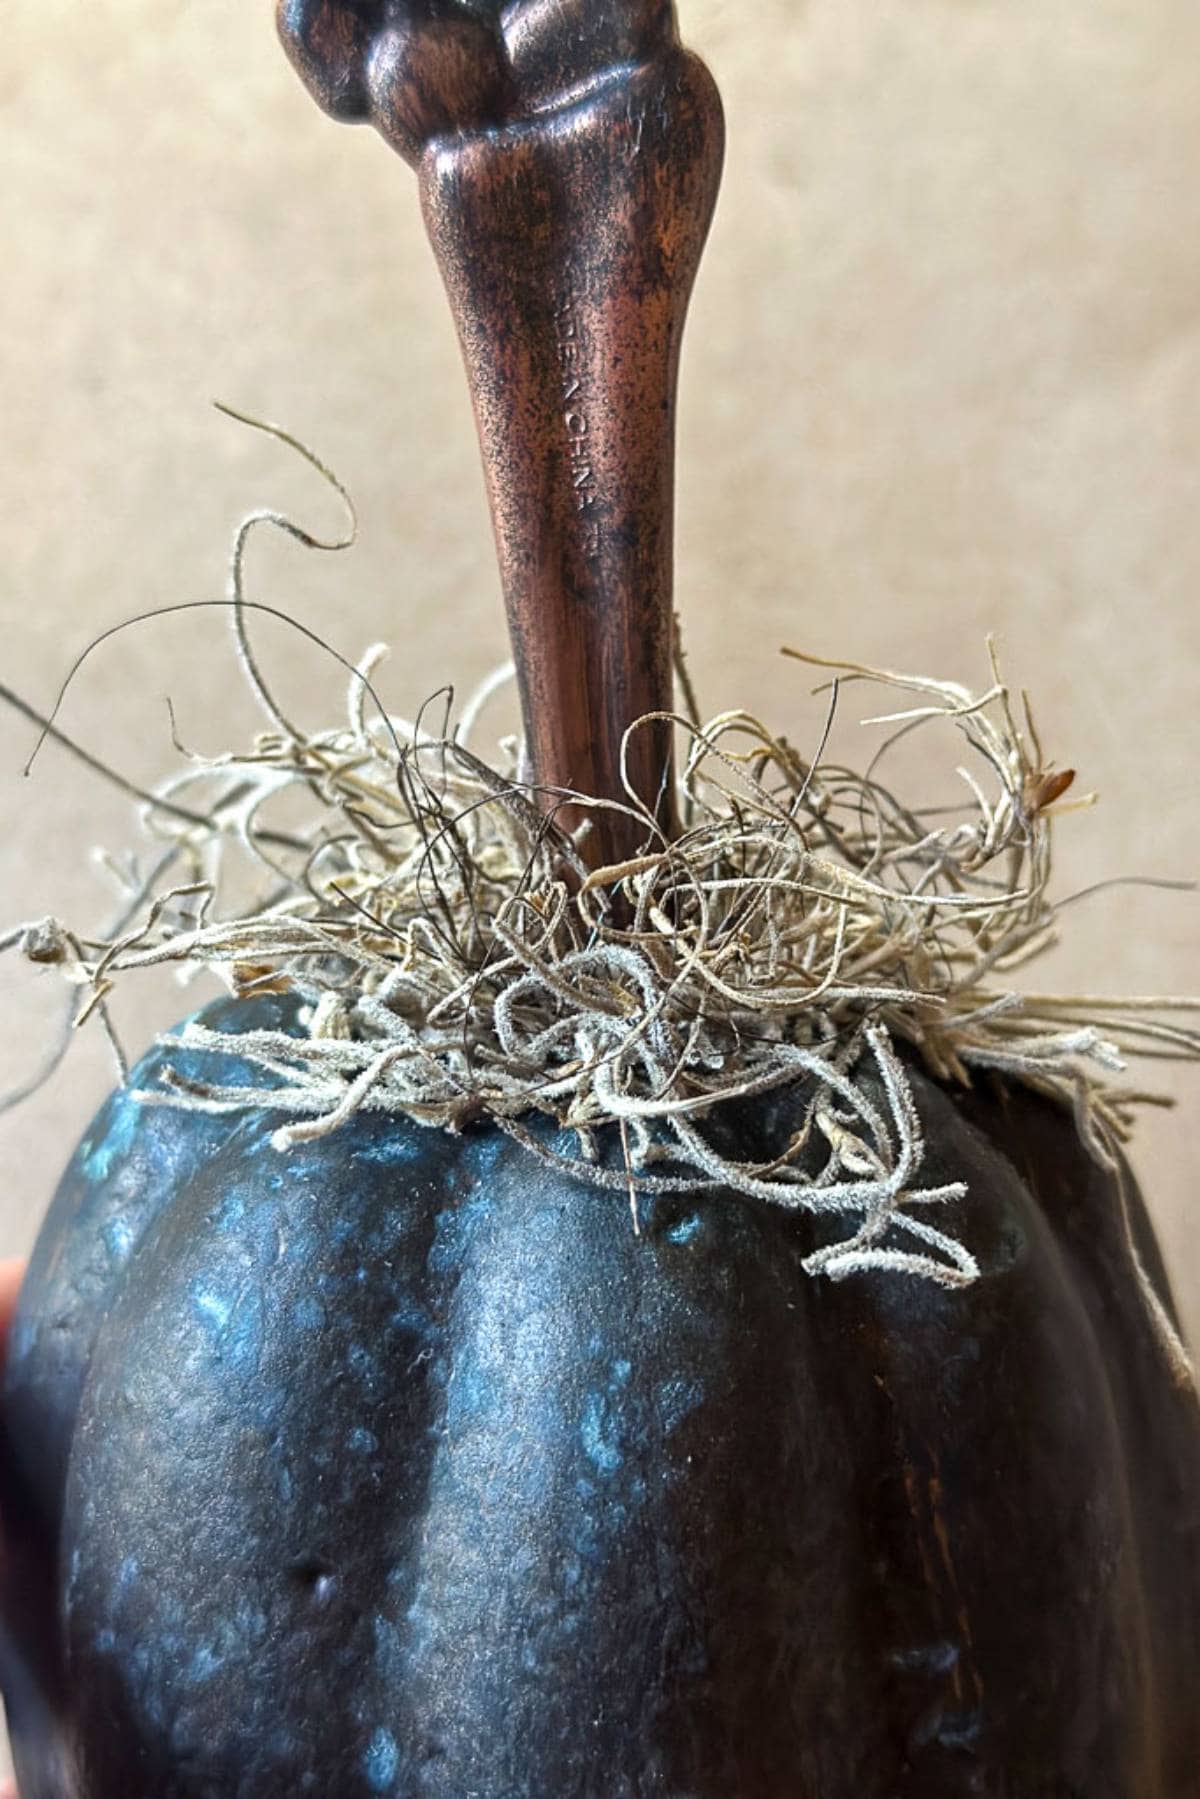
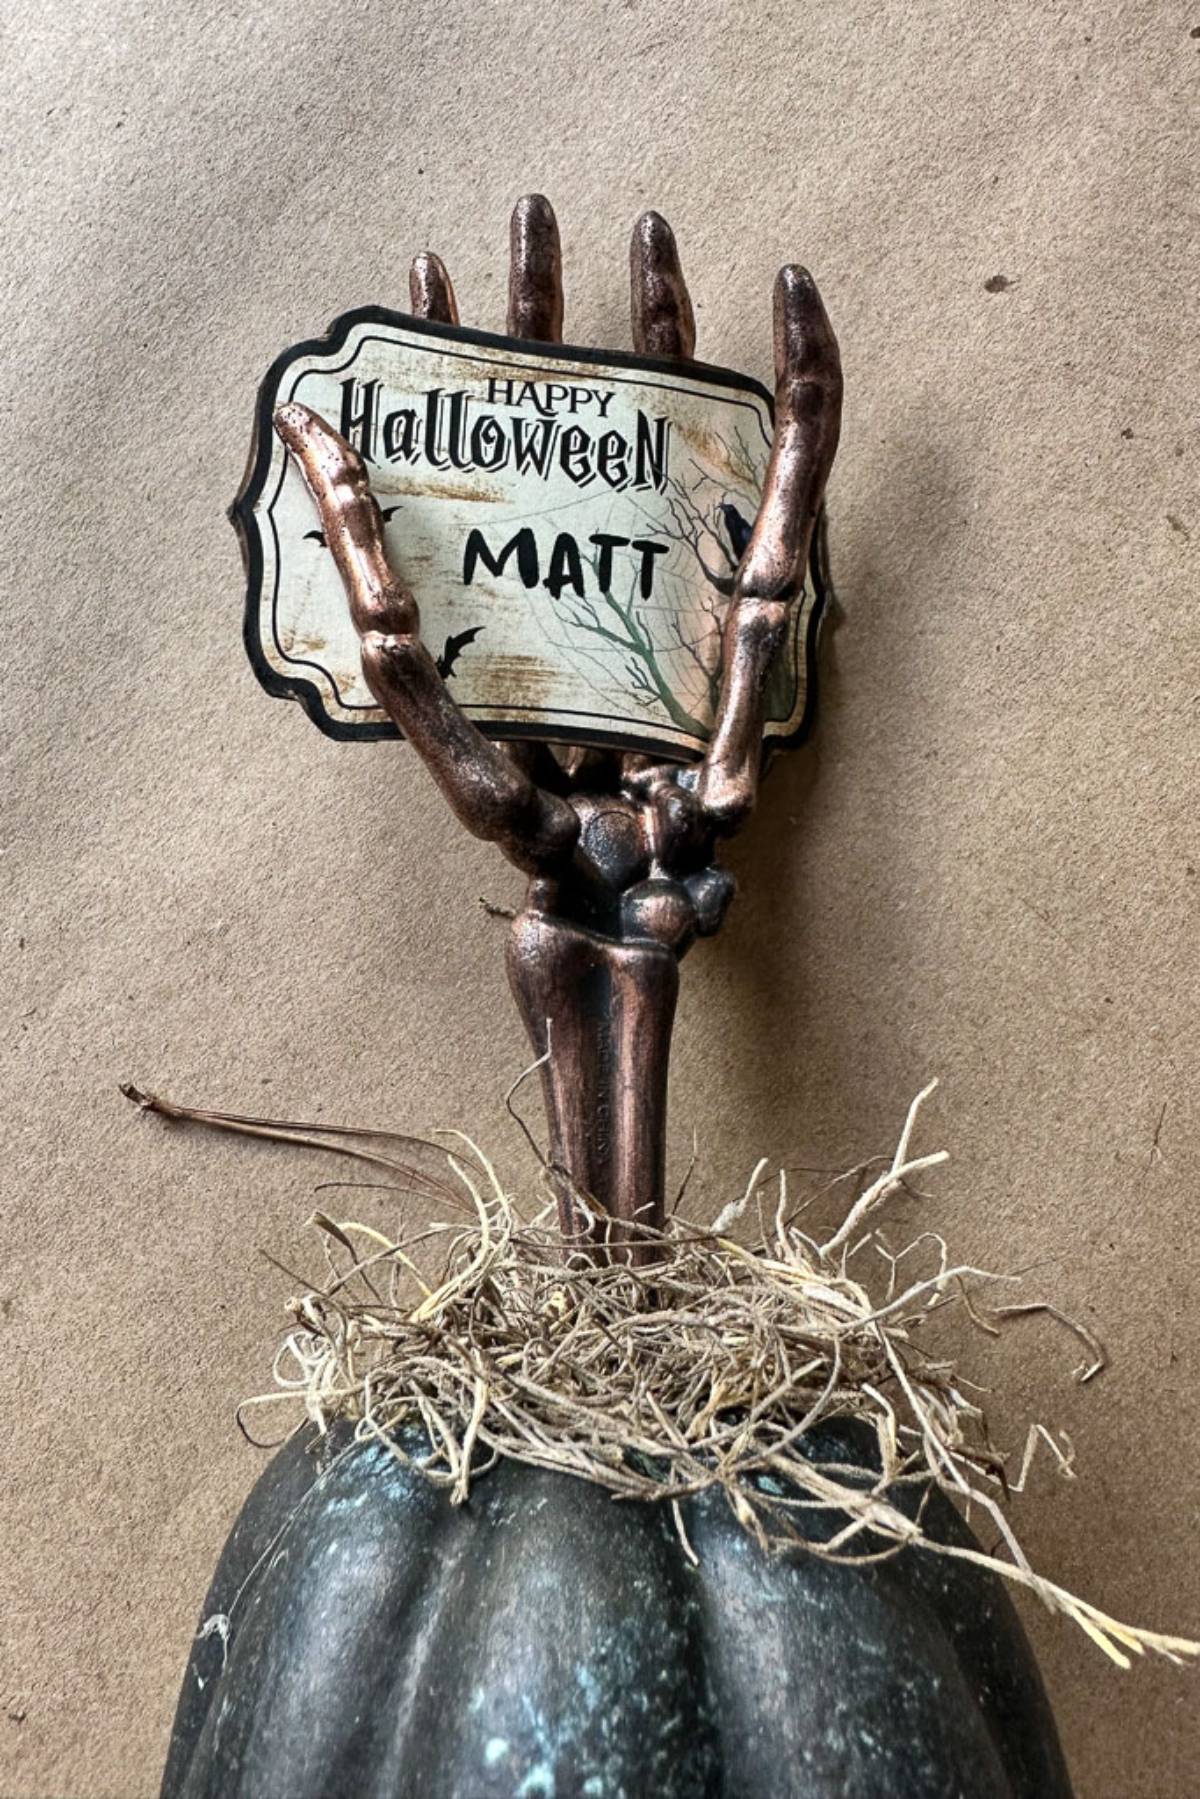
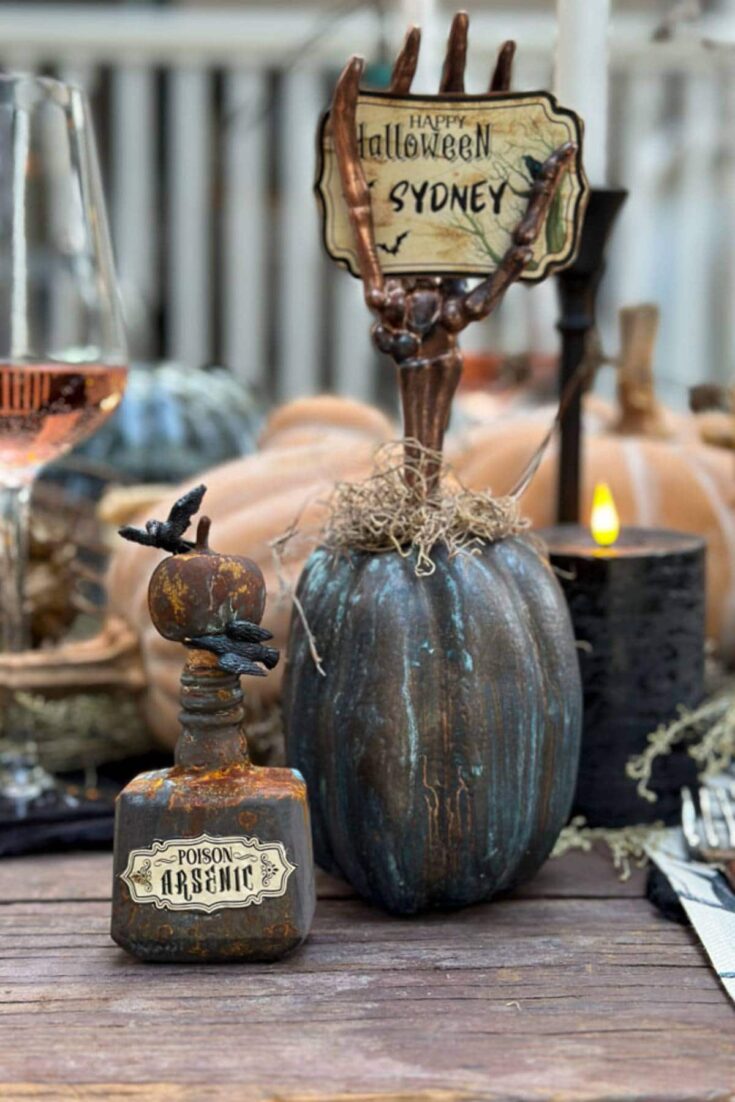
Step 5: Putting the hand into the pumpkin
- Add a little hot glue in the small hole of the pumpkin and insert the skeleton hand.
- Add a small amount of Spanish moss around the small hole of the pumpkin where you inserted the skeleton hand.
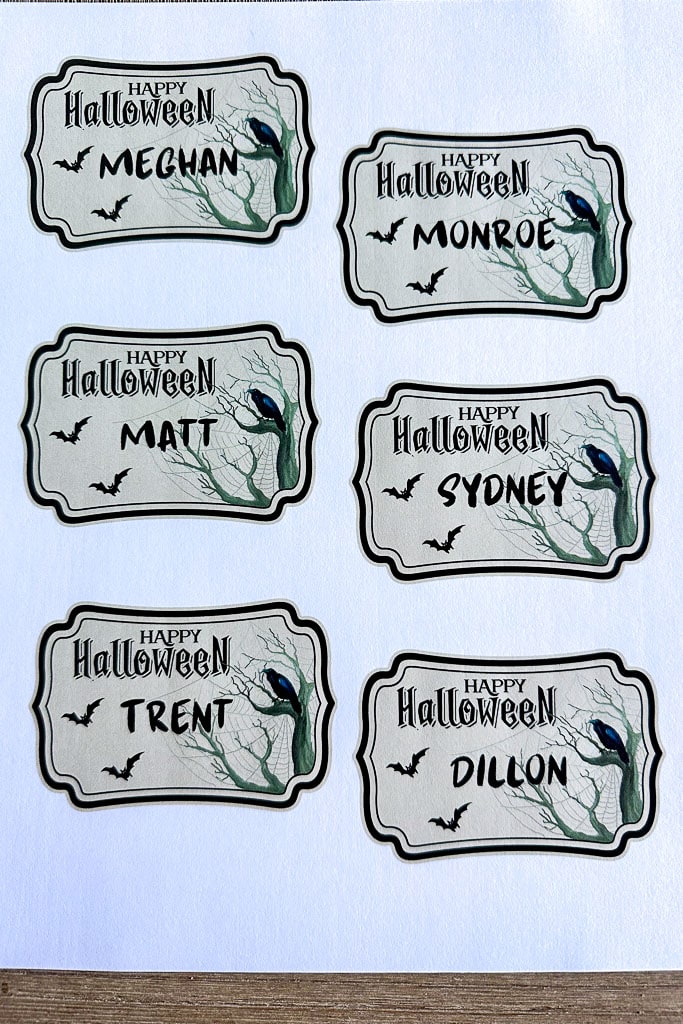
Step 6: Prepare your Halloween Place Cards
- Download the template for the DIY place cards.
- Type in your guest’s names and print them on card stock paper.
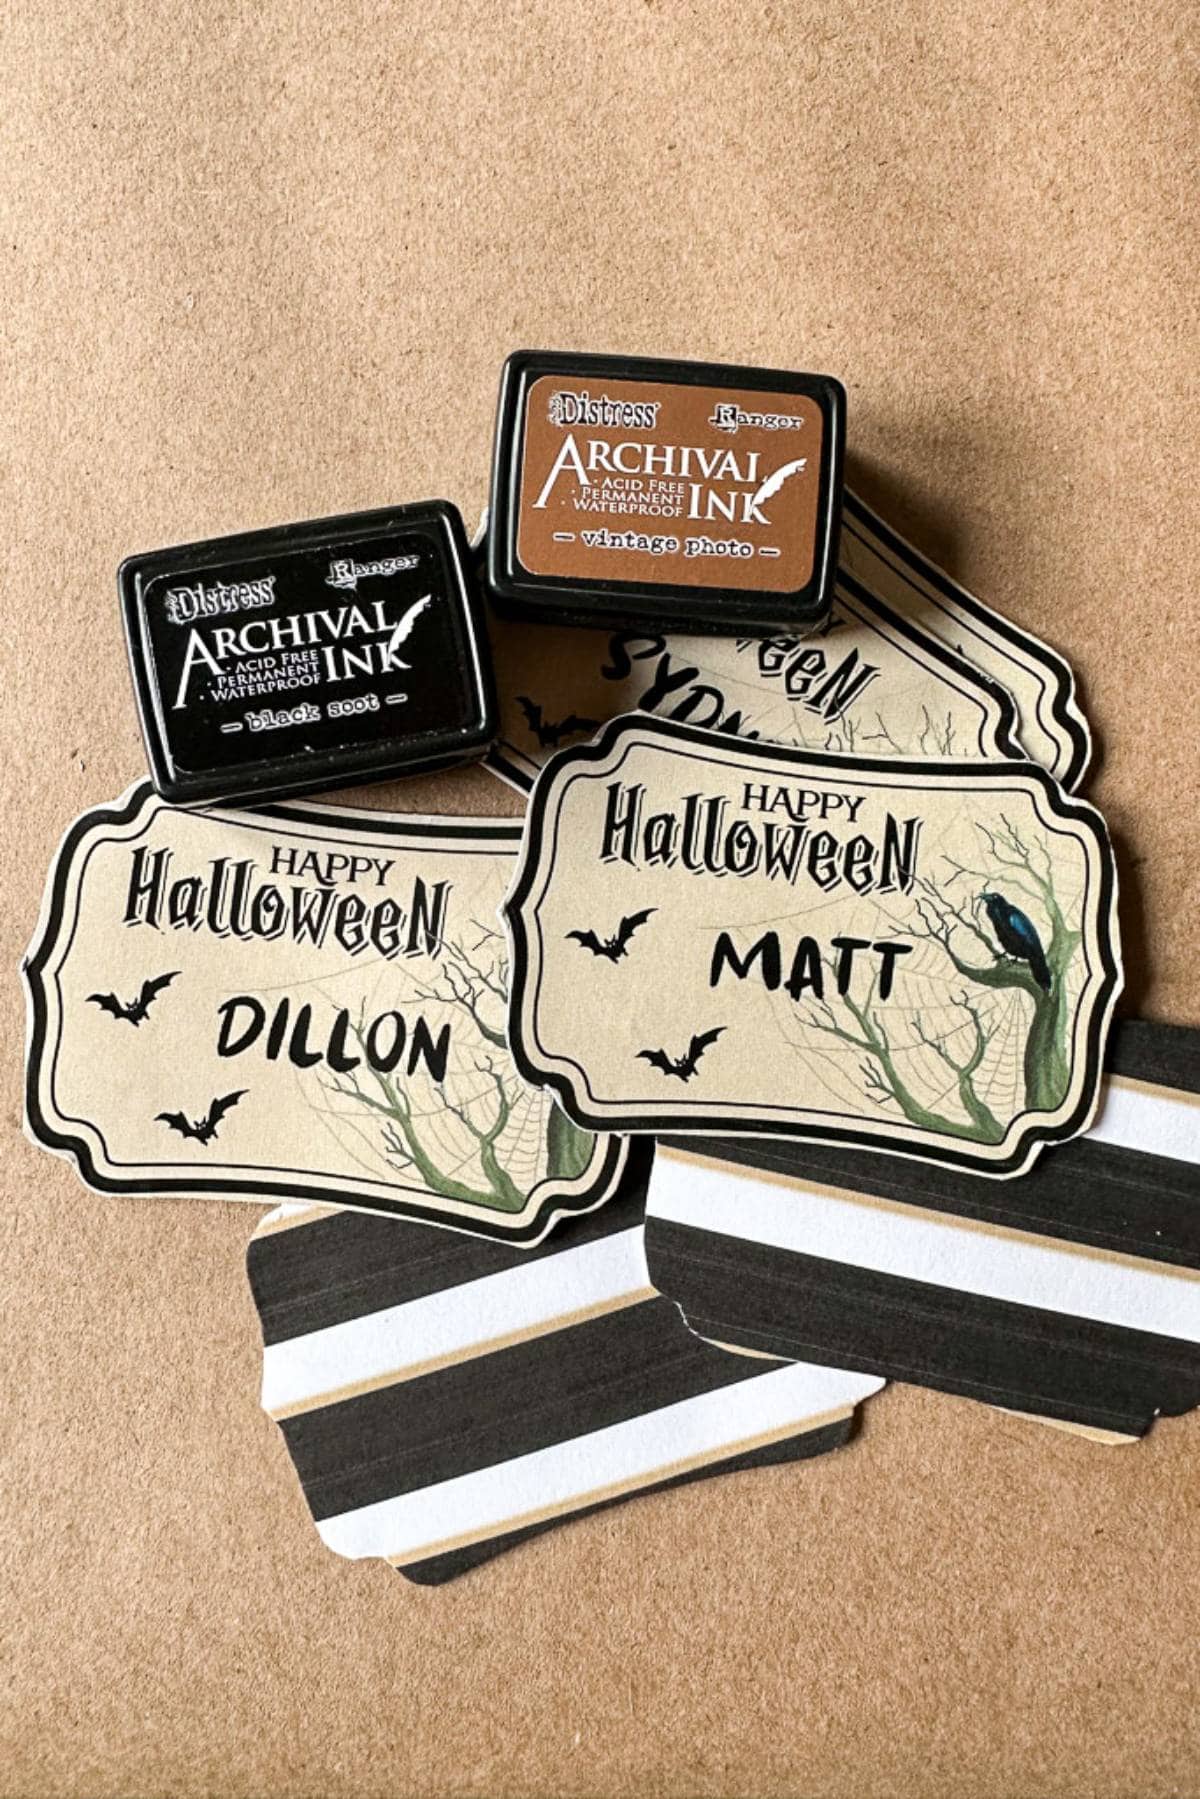
- Grab a festive Halloween-themed piece of paper from Michael’s and glue it to the back of your printed name cards. Let it dry completely.
- Cut out the name cards using small scissors.
- Use the archival ink around the edges to give them a spooky touch.
- Insert the name cards into the skeleton hand.

How to Make DIY Halloween Place Card Holders
These DIY pumpkin place card holders are the perfect way to bring your tablescape to life—without spending a lot of money! With an easy-to-follow guide and a free printable, you'll have your guests boo-ing in delight at your crafty genius.
Materials
- Dollar Store foam pumpkin with a flat bottom
- Dollar Store skeleton salad tongs
- Rose gold spray paint
- Black craft paint or black spray paint
- Modern Masters metal effects primer, paint, and rust activator
- Spanish moss
- Archival Ink
- Card Stock
- Free printable template
- Wood skewers
- Large terra cotta pots filled with dirt
Tools
- Hot glue gun
- Small hack saw
- Scissors
Instructions
- Remove the pumpkin stem and insert a wood skewer into the hole on top of the pumpkin.
- While holding the skewer, apply an even layer of Modern Masters primer to the pumpkin.
- Place the skewer in the pot of dirt so the pumpkin can dry.
- Once the primer is dry, Apply a coat of Modern Masters oxidizing bronze paint over the primed surface. While the paint is still wet, generously spray it with the rust activator to kickstart the patina pumpkin effect. Once done, carefully place the skewers into the terra cotta pot of dirt to dry completely.
- You can repeat step four as many times as you like until you get the perfect patina.
- For the next steps. Cut the plastic skeleton arm bone in the center using a small hand saw.
- Spray paint the skeleton hands with rose gold spray paint, allowing them to dry completely.
- Apply a light coat of black paint to the skeleton hands using either black craft paint or spray paint. Use a paper towel or a rag and wipe some of the black paint off so you can still see the rose gold paint. You can also use a toothbrush and flick it with your finger to get a speckle effect.
- Add a little hot glue in the small hole of the pumpkin and insert the skeleton hand.
- Add a small amount of Spanish moss around the small hole of the pumpkin where you inserted the skeleton hand
- Prepare your Halloween Place Cards
- Download the template for the DIY place cards.
- Type in your guest's names and print them on card stock paper.
Grab a festive Halloween-themed piece of paper from Michael's and glue it to the back of your printed name cards. Let it dry completely.
- Cut out the name cards using small scissors.
- Use the archival ink around the edges to give them a spooky touch.
- Insert the name cards into the skeleton hand.

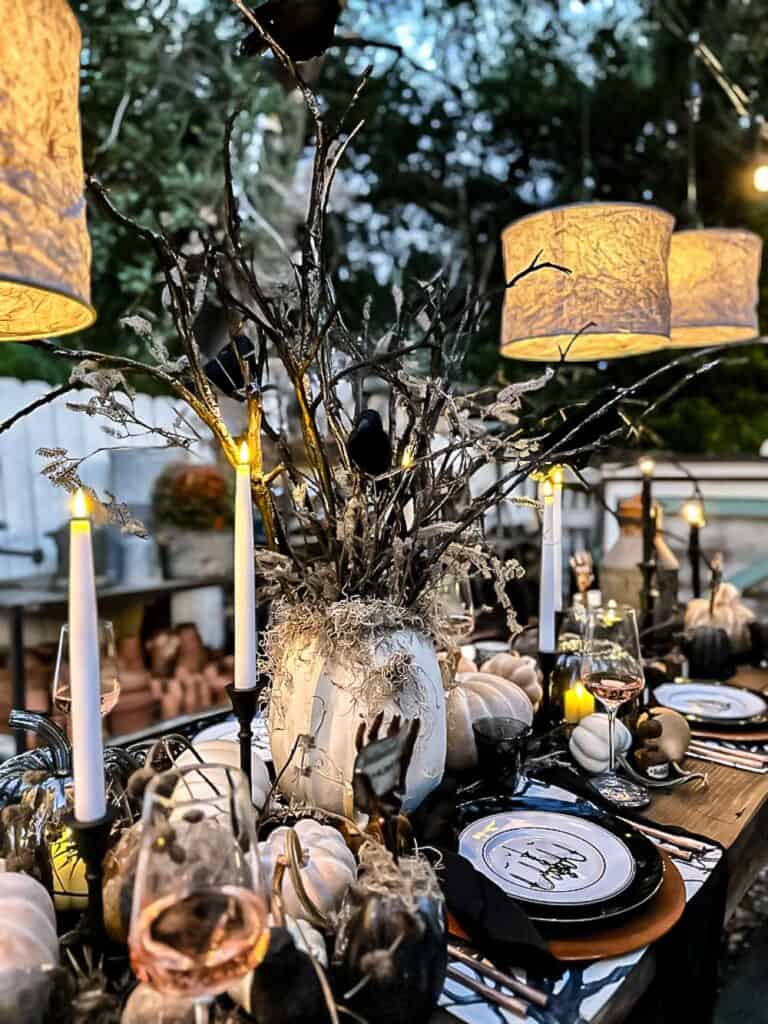
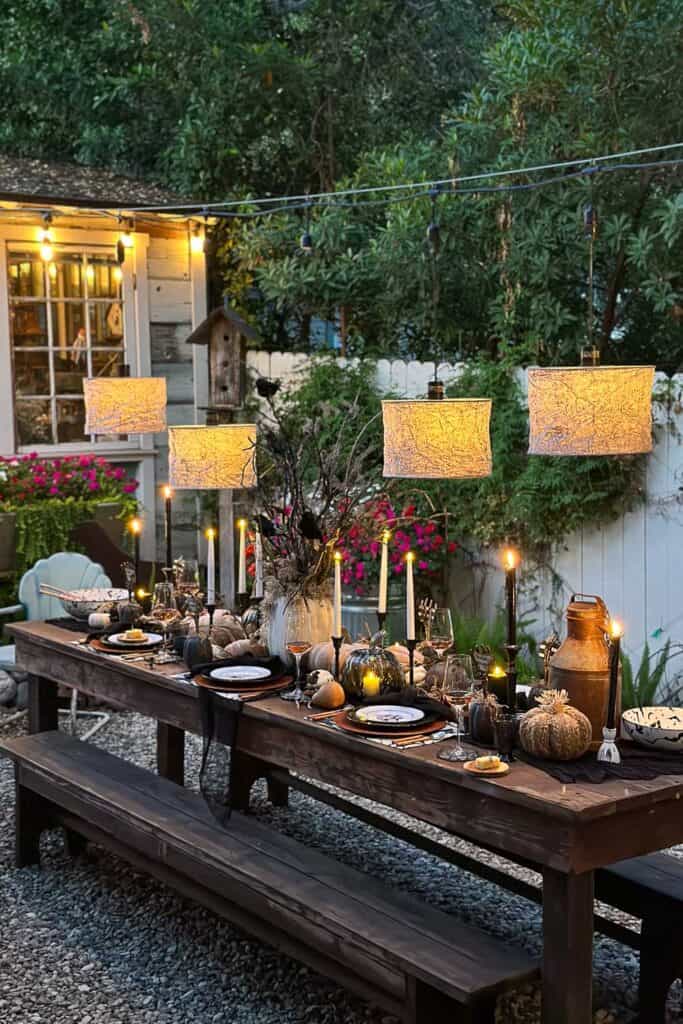
How to Style Your Halloween Tablescape
I love crafting an enchanted Halloween table where eerie meets elegance and ghouls gather for a celebration filled with tricks and treats.
Here are a few suggestions to help you create a beautiful table this Halloween.
- Choose a fun location to host your party.
- Choose a theme if you like. I went with an eerie, elegant crow crossing Halloween theme.
- Choose your table linens, plates and silverware, create a great centerpiece, make some fun decorations like terra cotta pumpkins or these diy apothecary jars.
- Use your diy pumpkin place card holder to identity your guest seats.
- Add lots of candles and ambient lighting.
- Create a fun Halloween menu with drinks to go with your holiday table and theme.
- Add spooky elements like plastic rats, spiders, spider webs, and skulls can add a creepy factor.
Tip from wendy’s craft room:
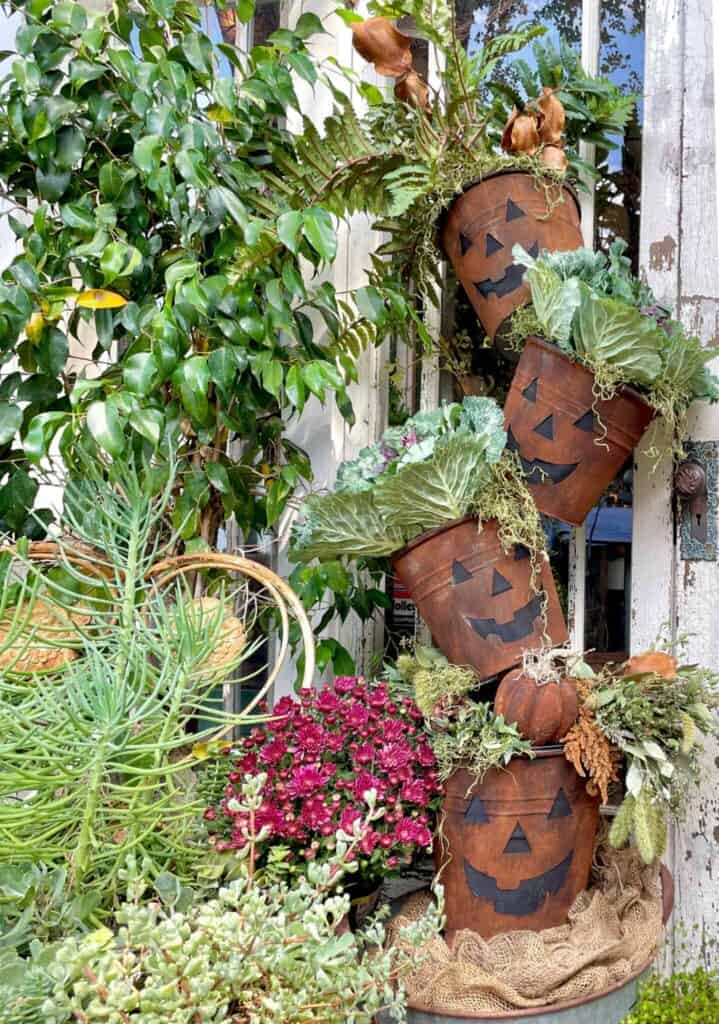
Create other fun items to incorporate into your Halloween table. Try making epoxy google eye coasters, or terra cotta pumpkins. These are all easy and fun crafts you can make with your family and add so much to your tablescape.
Expert Crafting Tips and Tricks
Customize the design to match your style and put your own personal spin on it! Instead of using pumpkins, try swapping them out for mini terra cotta pots or painting them in unexpected colors like metallic gold, deep plum, or terra cotta. The possibilities are endless, and these small changes can make your place card holders truly unique and perfectly tailored to your party’s theme.
More Halloween Ideas from WM Design House
If you love this spooky and elegant Halloween DIY, you might also enjoy some of my other favorite Halloween ideas.
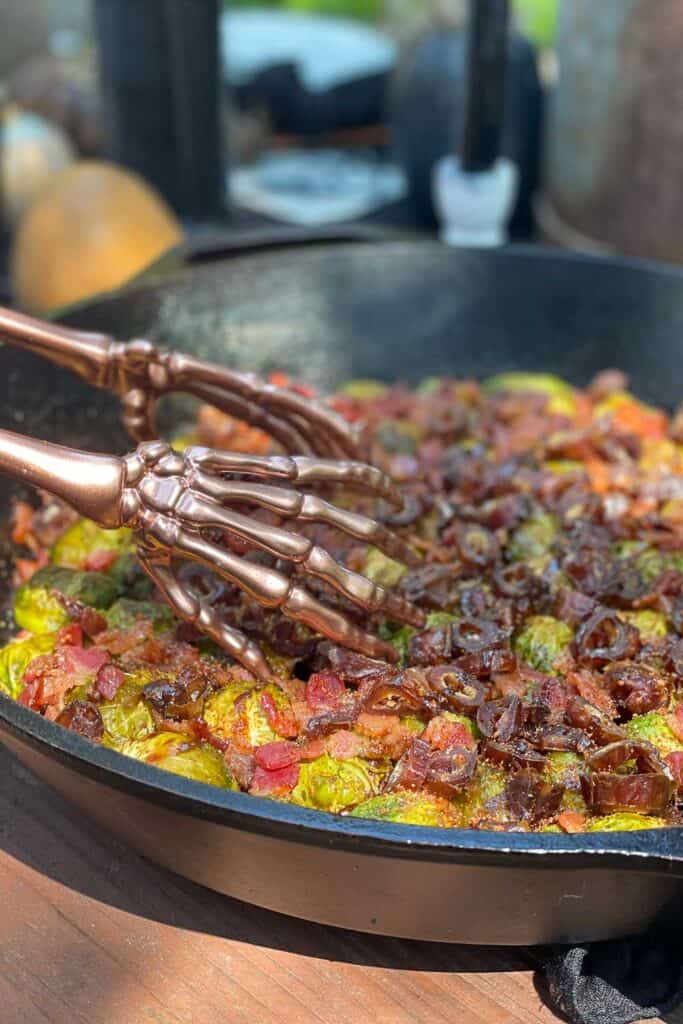
Easy Smoked Brussels Sprouts Recipe with Maple Bacon
6 Spook-tacular Recipes for A Halloween Dinner Party
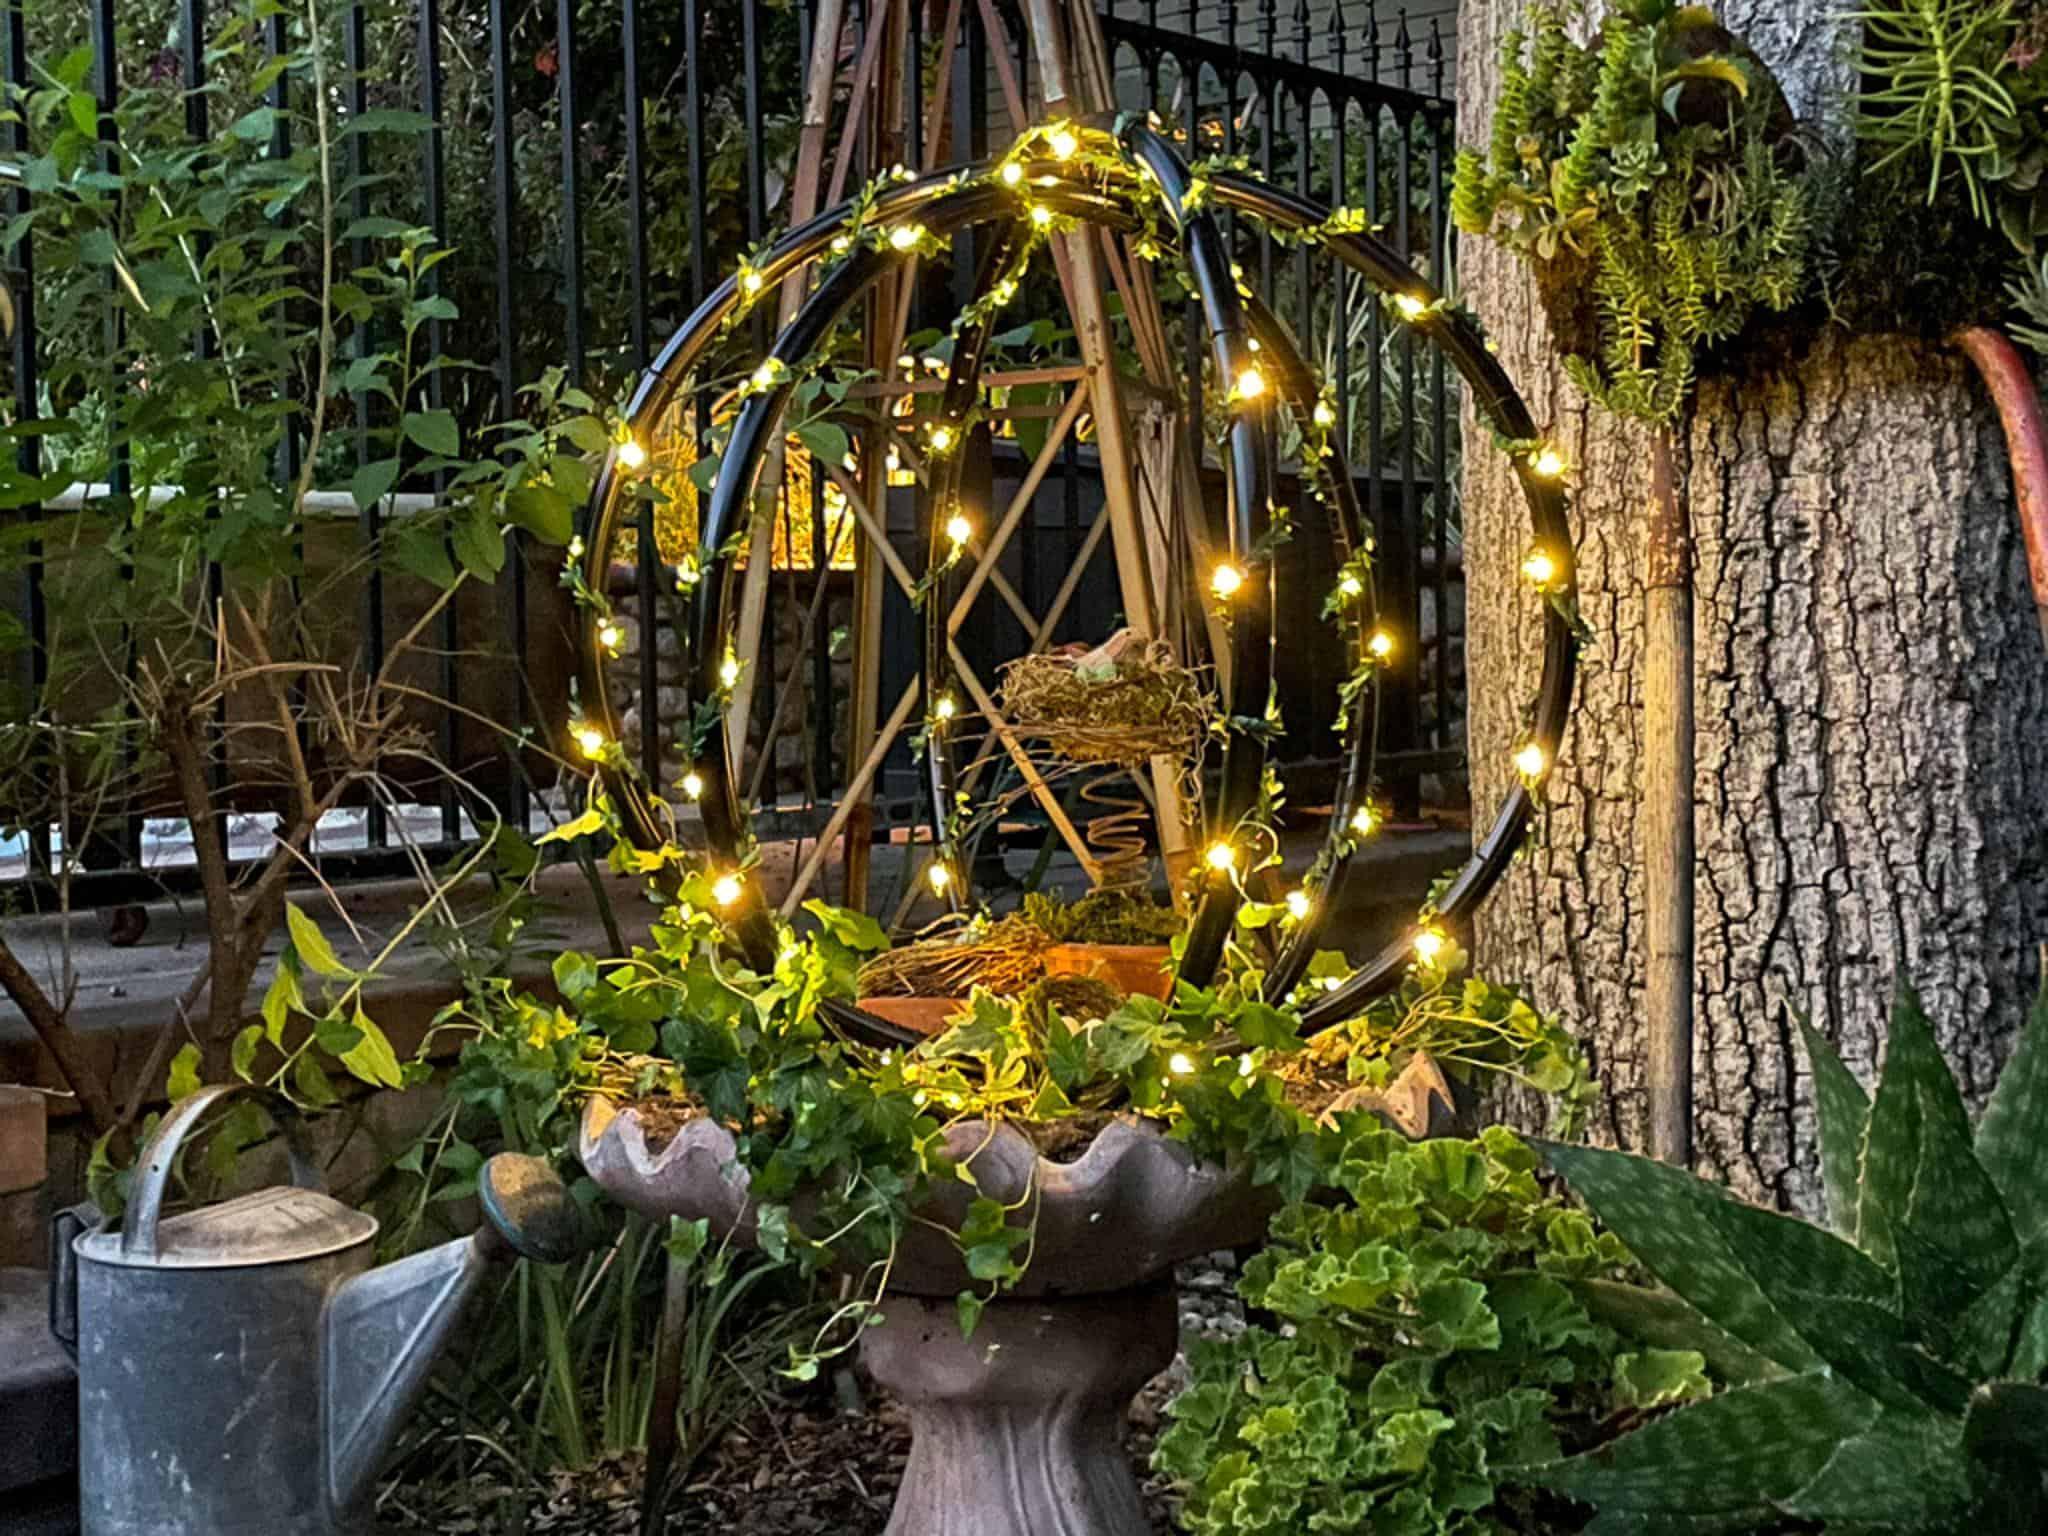
DIY Outdoor Jack O’ Lantern Pumpkin Topiary
In the end, creating your own unique and spooky Halloween place card holders is a fun and simple way to add a personalized touch to your holiday tablescape. Whether you choose to stick with classic pumpkins or put your own twist on the design, your guests will be wowed by the attention to detail and creativity. Plus, with affordable supplies and easy steps, you can enjoy crafting these without the stress. So, get inspired and start crafting to make your Halloween party decor truly unforgettable!


Did you make this craft?
We would love to see what you have created, so mention us @wmdesignhouse or tag us using #wmdesignhouse so we can see your creations!
More about me!

Hello, I’m Wendy – a dedicated homemaker with a deep passion for decorating, gardening, cooking, and crafting. I find joy in harmonizing beautiful elements to fashion a space that is both comfortable and inspiring. I will help you create a beautiful home, one project at a time.


You had me smiling from the first photo. Such a creative project! Looks great on your amazing spooky table!
These are fantastic Wendy! Always love a good Dollar Tree project. Love that they can be taken home by guests. Happy October! XO- MaryJo
Super creative and crafty, Wendy! They look so cute on that table setting. Hope you are enjoying the fall!