Rusty Patina: How to Create Rusty Old Mini Liquor Bottles
If you’re looking to add some spooky charm to your Halloween decor, creating a rusty patina on mini liquor bottles is the perfect DIY project. With just a few simple steps, you can transform plain bottles into eerie, vintage-looking pieces that are perfect for haunted displays or creepy centerpieces.
On my blog WM Design House, I may sometimes use affiliate links, which means a small commission is earned if you purchase via the link. The price will be the same whether you use the affiliate link or go directly to the vendor’s website using a non-affiliate link.
Do you love a rusty patina?
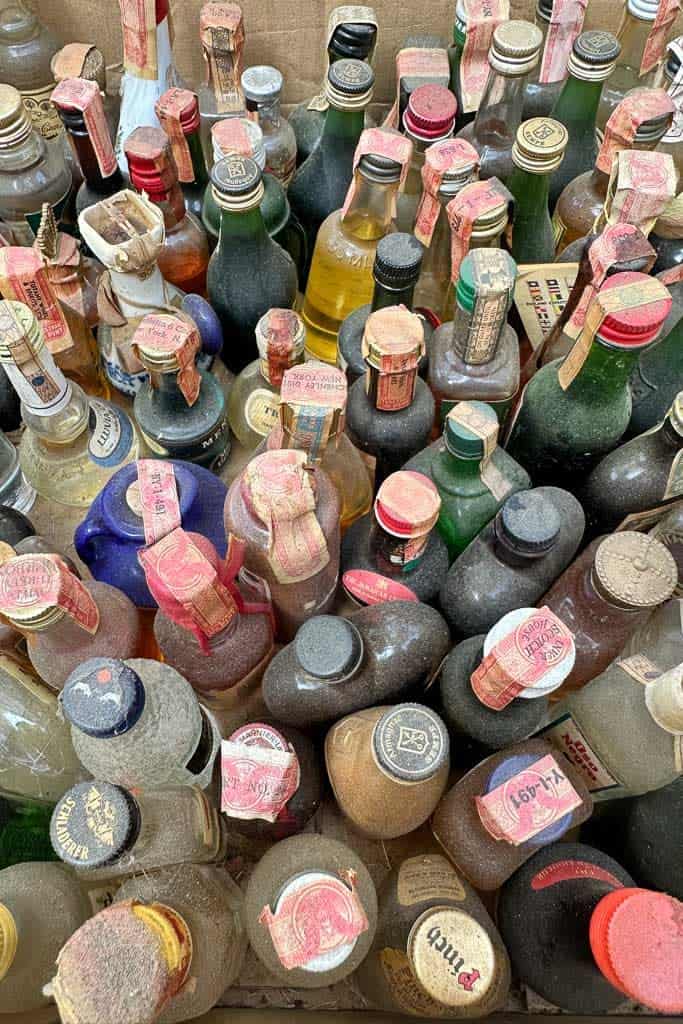
A while back, a friend of mine stumbled upon several boxes of vintage miniature liquor bottles.
She was sure that I’d have a creative use for them. I, on the other hand, thought they needed to go in the trash.
As luck would have it, I didn’t throw the bottles away, but rather promptly tucked them in a cupboard and forgot all about them.
That is until recently, when inspiration struck.
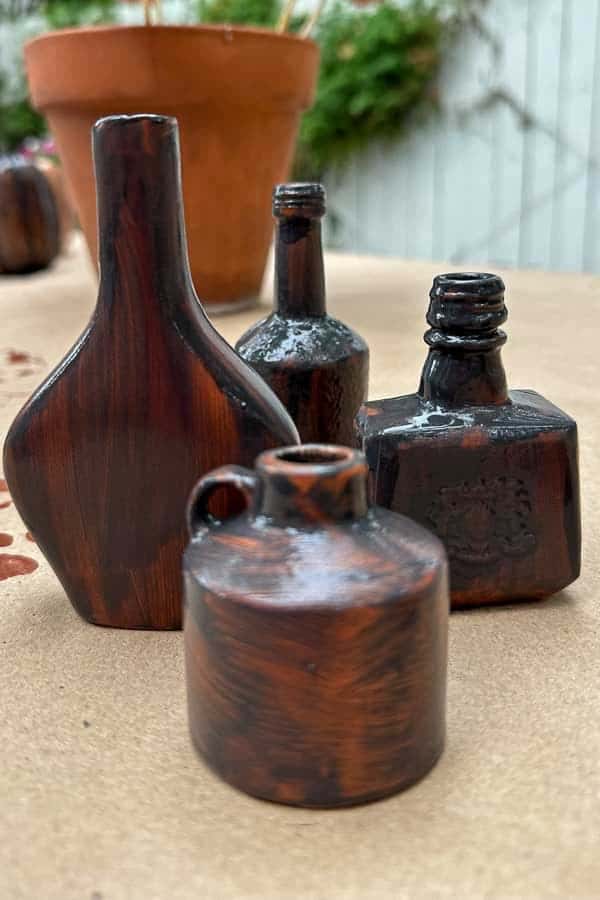
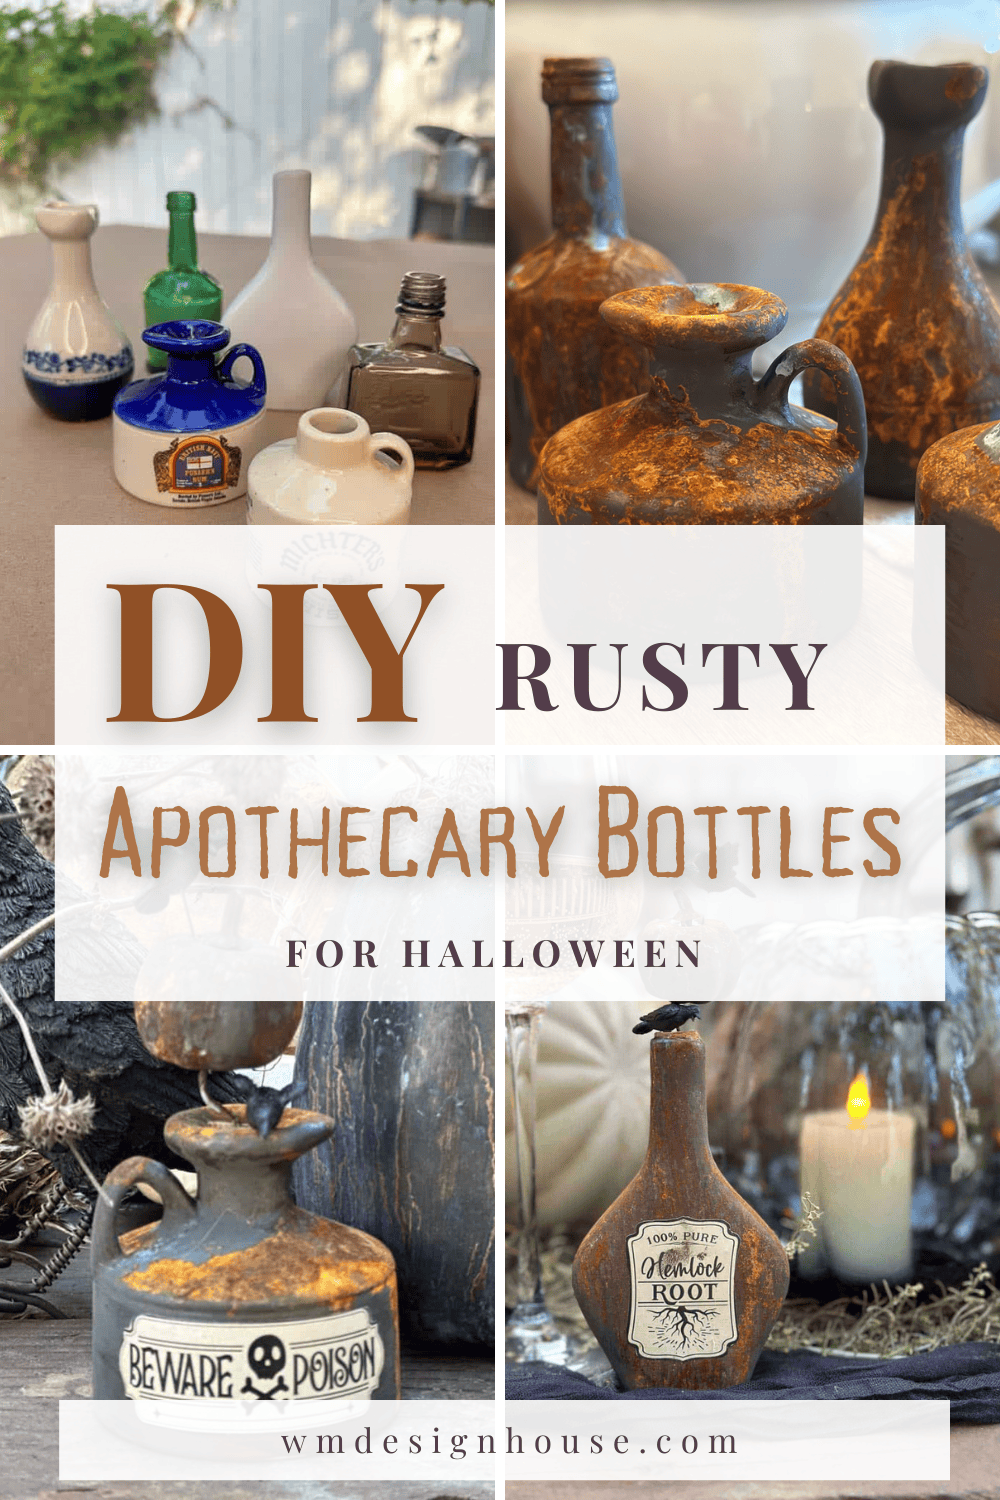
While scrolling Pinterest, I saw some spooky-looking vintage apothecary bottles. So, I decided to embark on a project to transform those old bottles I had stashed away by applying a patina spray for an authentic rusted patina.
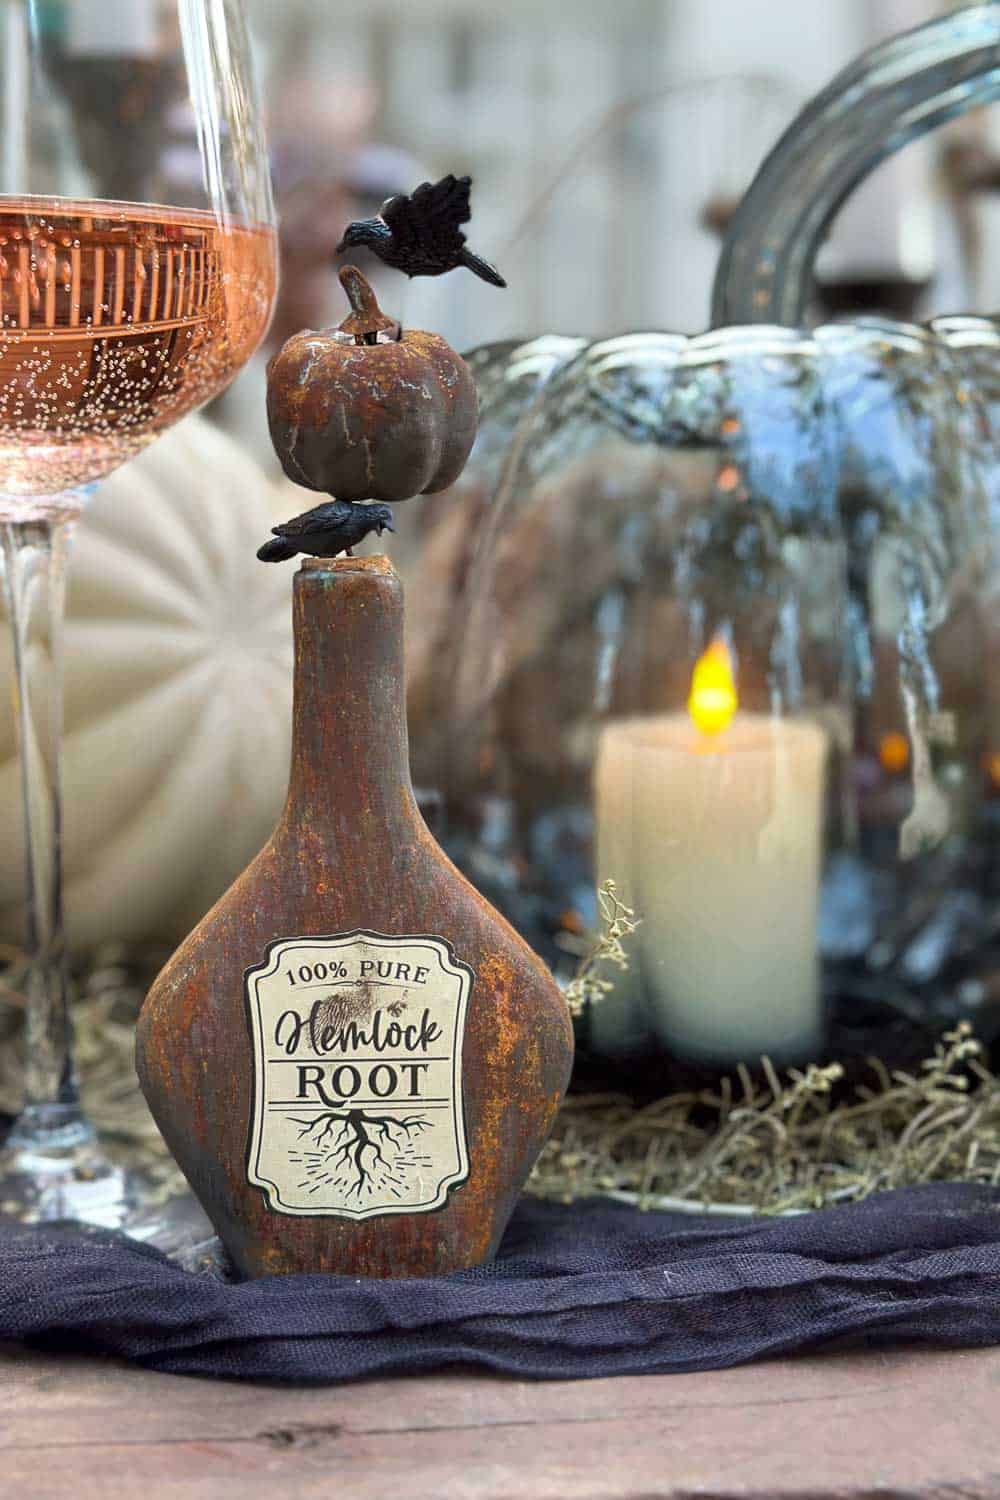
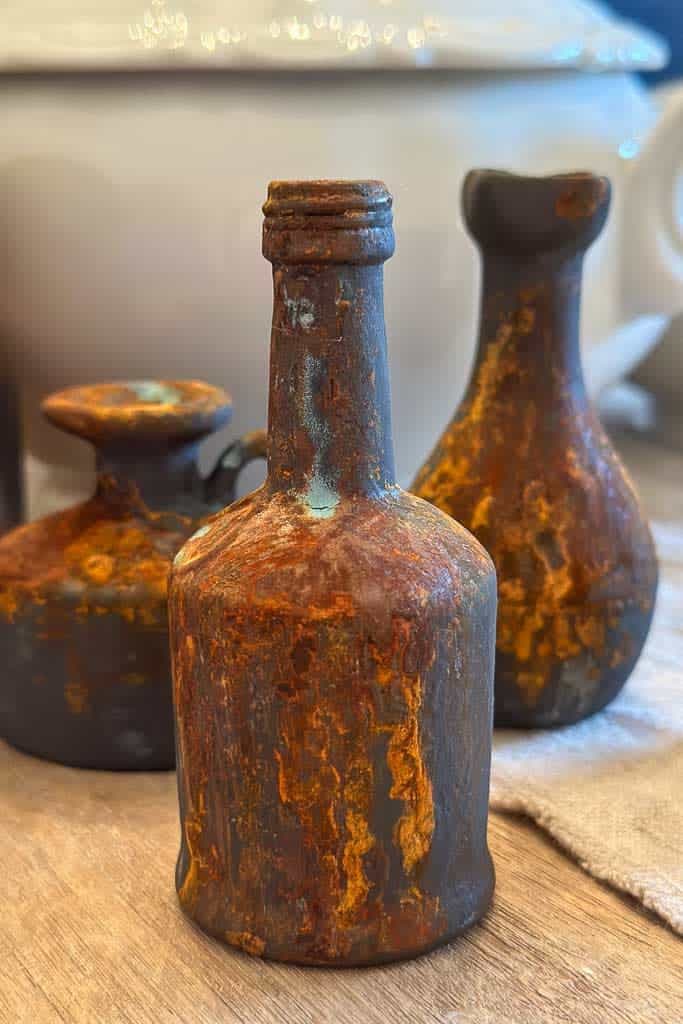
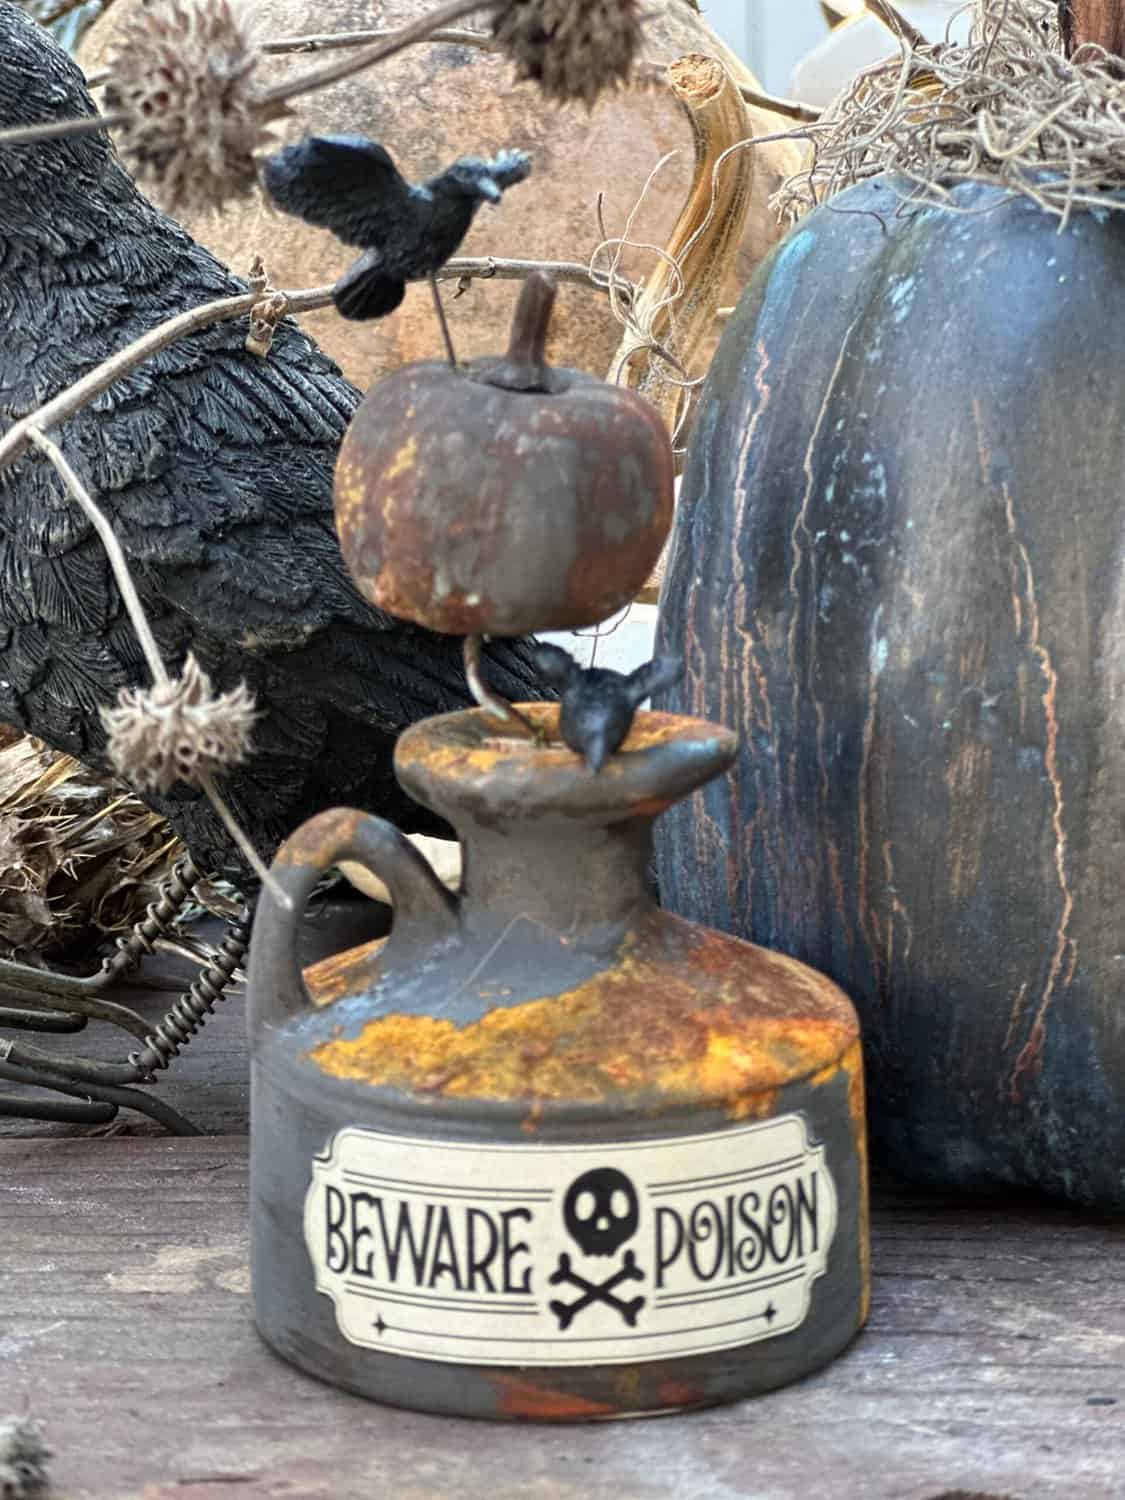
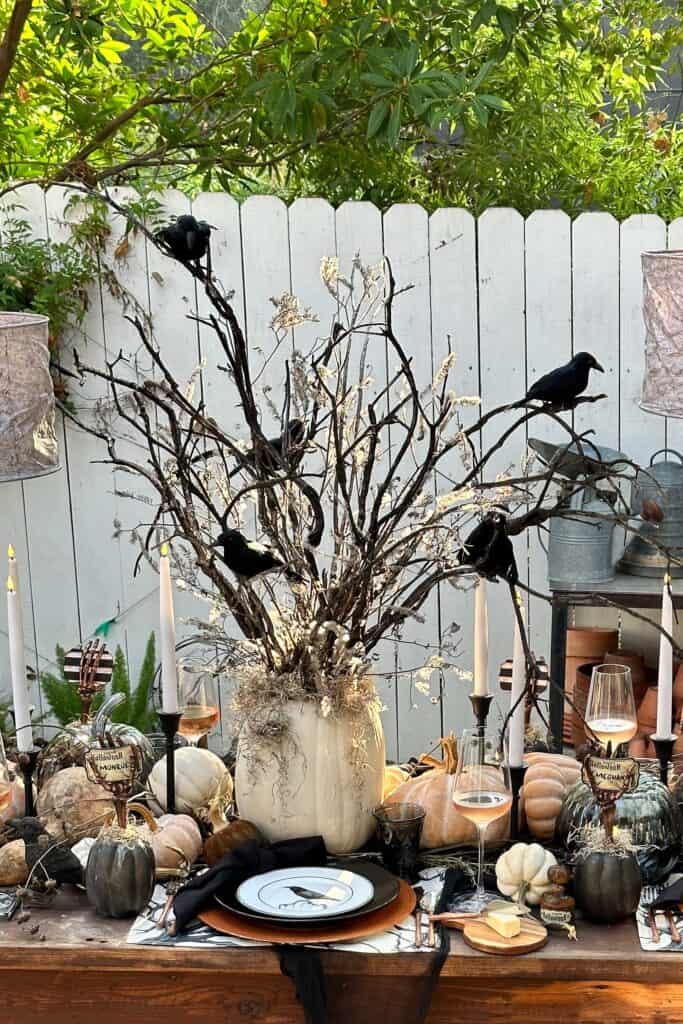
And just look at the end results! These bottles were so fun to make and the perfection addition to my spooky Halloween table.
Read on to learn how you can easily make your own!
What is a Rusty Patina?
A rustic patina, also known as a rust finish or rusted appearance, is a surface coating that develops on iron or steel when it comes into contact with moisture and oxygen over time.
It’s a type of corrosion that occurs as iron or steel reacts with the oxygen in the air, forming iron oxide, commonly known as rust.
Rust is often regarded as an adversary, prompting us to reach for rust remover to banish its presence.
Still, some of us, myself included, really appreciate the beauty that comes with rust and aging. There’s just something special about the natural patina and those rich, earthy colors that develop over time.

How Do you Make Something Look Rusty?
Mother Nature causes rust when metal is exposed to the elements without protection
You can also use a rust treatment to create your own patina finish.
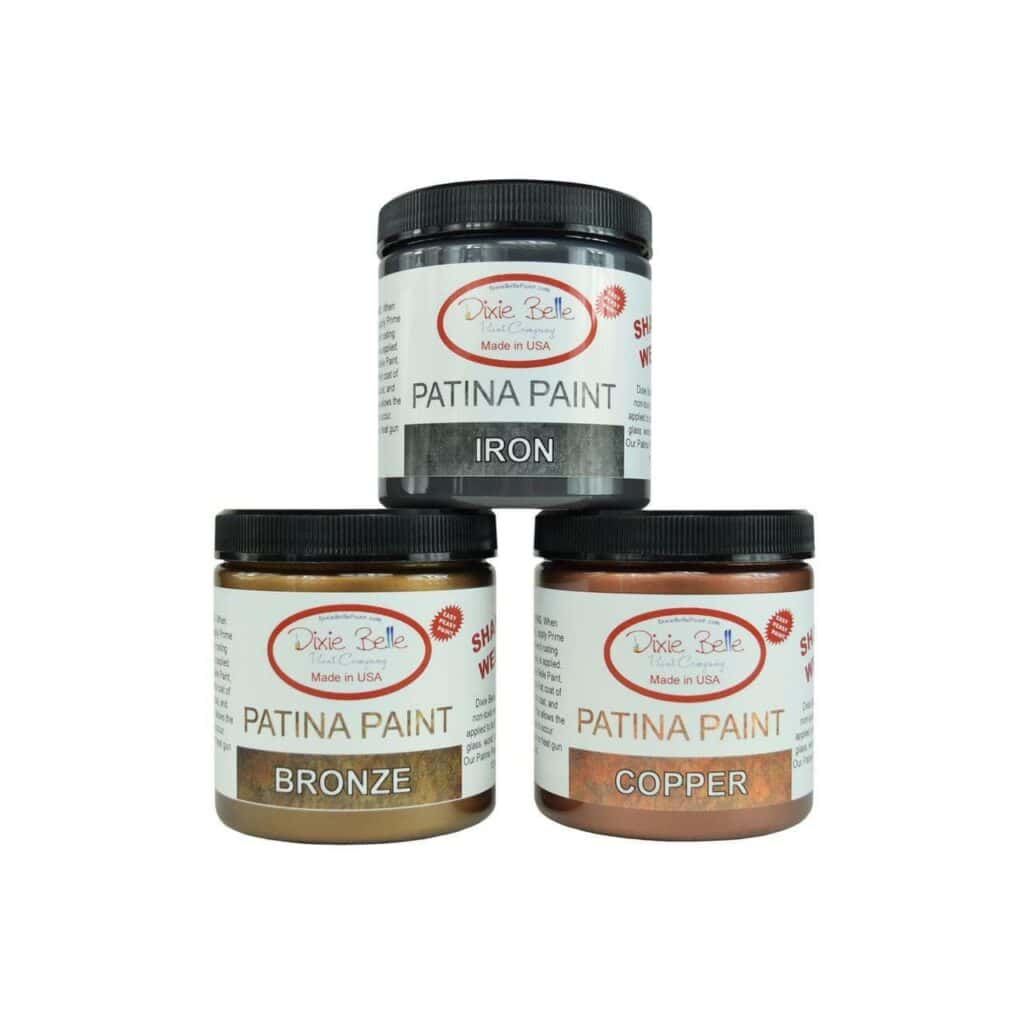
There are two products I love to create a rusty look on glass: ceramic or metal. The first is Modern Masters Metal Effect Paint, and the second is the Dixie Belle Patina collection.
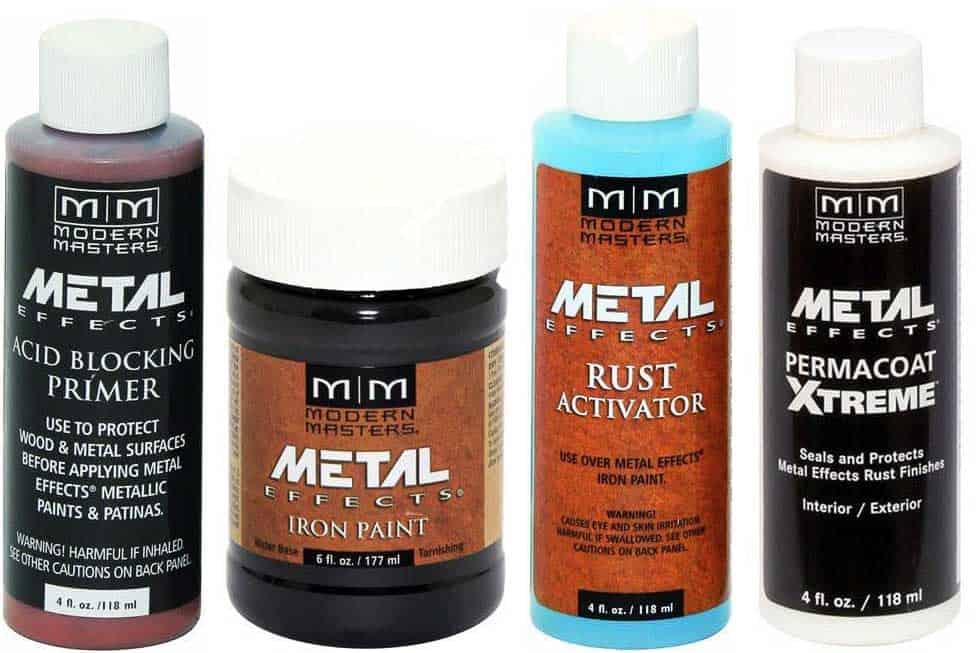
These paint collections require a base coat, a few coats of metal paint, and a patina spray, to create a rich rust color and achieve an authentic weathered look.
What Does a Rusty Patina Look Like?
A rust finish can vary in appearance depending on several factors, including the type of metal, the environment in which it forms, and the duration of exposure to moisture and oxygen.
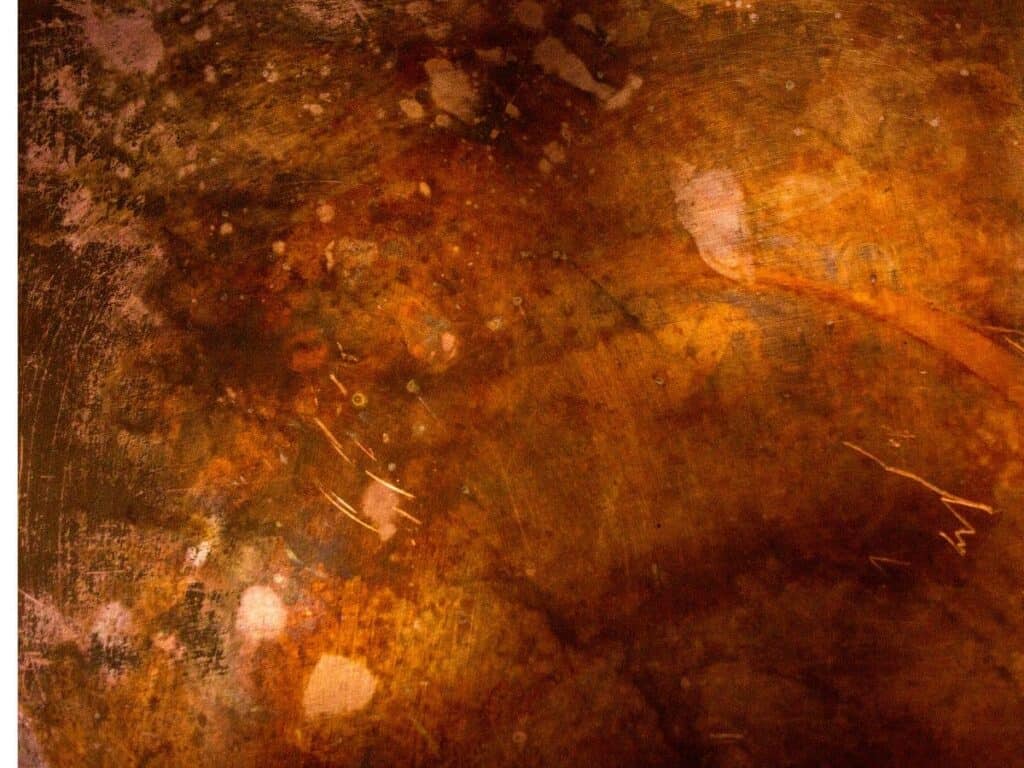
Typically, a rust finish exhibits earthy colors with an aged look.
The patterns and distribution of rust are unique, with swirls, streaks, and irregular patches of color, adding to the distinctive character of the rust finish.
A rust finish often has loose rust pieces that can chip off the metal.
What Supplies do You Need to Make a Rusty Patina?
Now that we’ve covered what rust is and how it forms, it’s time to dive into making your own DIY rusty patina apothecary bottles.
Here is a list of the supplies you need to make this spook-tacularly fun Halloween craft.
- Rubber gloves
- An item to rust, I used mini liquor bottles
- Dixie Belle patina paint
- Modern Masters primer
- Modern Masters metallic paint in Iron
- Modern Masters Rust patina spray
- Paintbrush
- Mod Podge
- Labels for your bottles – Download my free printable
- Antique dark wax
How to Make Rusty Patina Bottles
Making these bottles is super easy and a lot of fun! The best part is that each one turns out totally unique, and the surprise factor makes it even more exciting—you never know exactly how they’ll look in the end.
Step One: Prepare Your Bottles
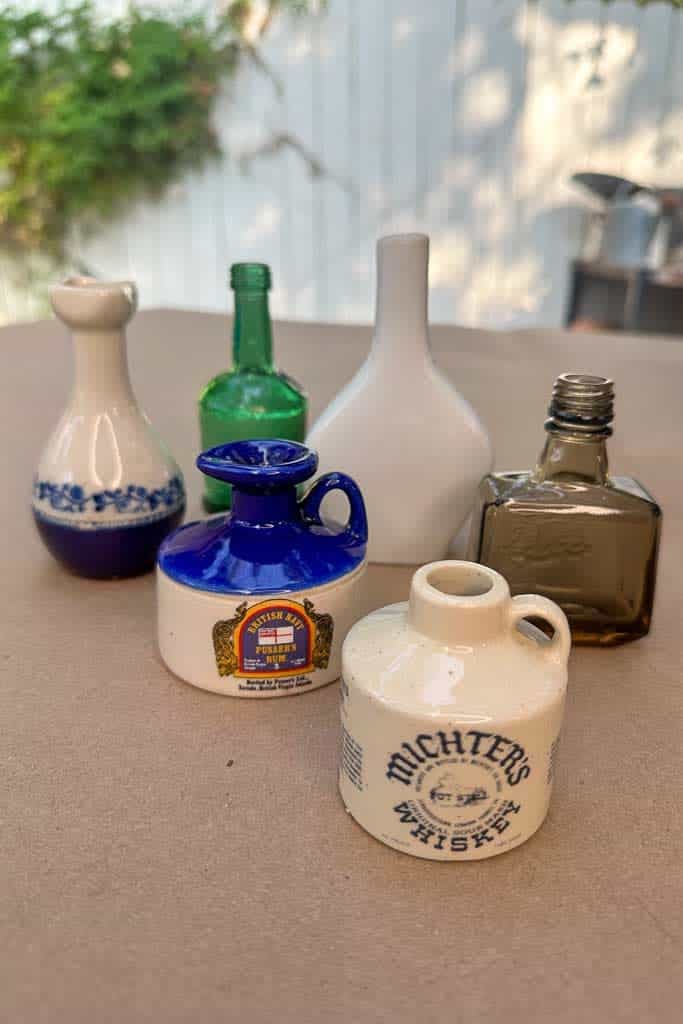
Start by picking out an assortment of bottles in different shapes and sizes to give your display more character.
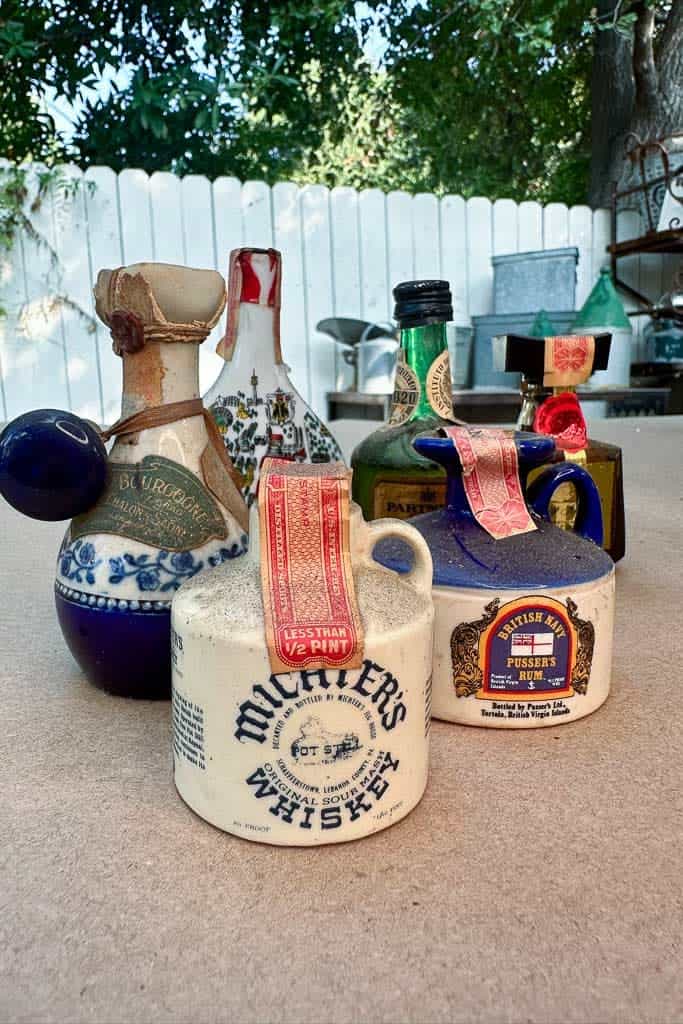
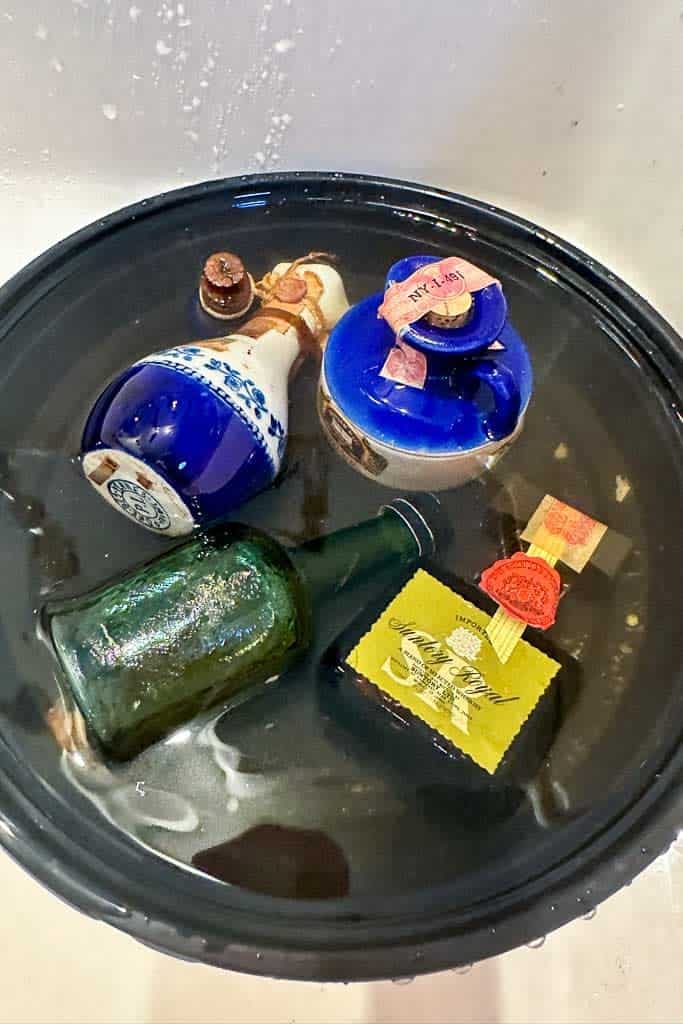
Whether they’re from the thrift store or leftover mini liquor bottles, variety is key! Before you begin the patina process, make sure to give each bottle a good cleaning and remove any labels.
This step is important because any leftover dirt or sticky residue can mess with the finish. Once your bottles are clean and dry, you’ll be ready to start transforming them with that cool, rusty look!
Step Two: Apply Primer
Start by painting a thin coat of primer on each bottle and let it dry completely—don’t rush this part!
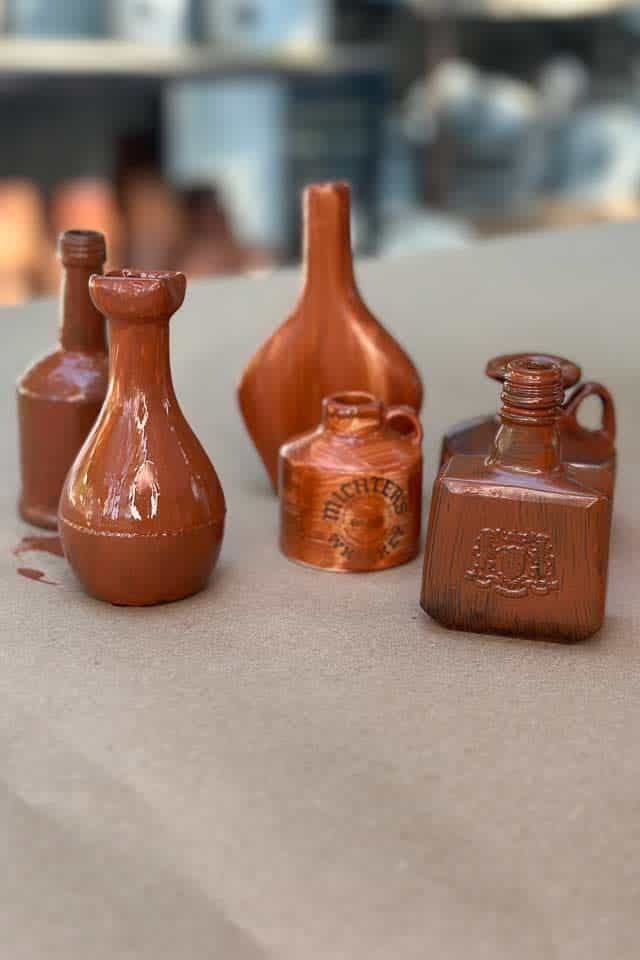
Once it’s dry, go ahead and apply a second coat to make sure you’ve got a solid base for the patina to stick to. This double layer of primer will really help the rusty effect pop later on.
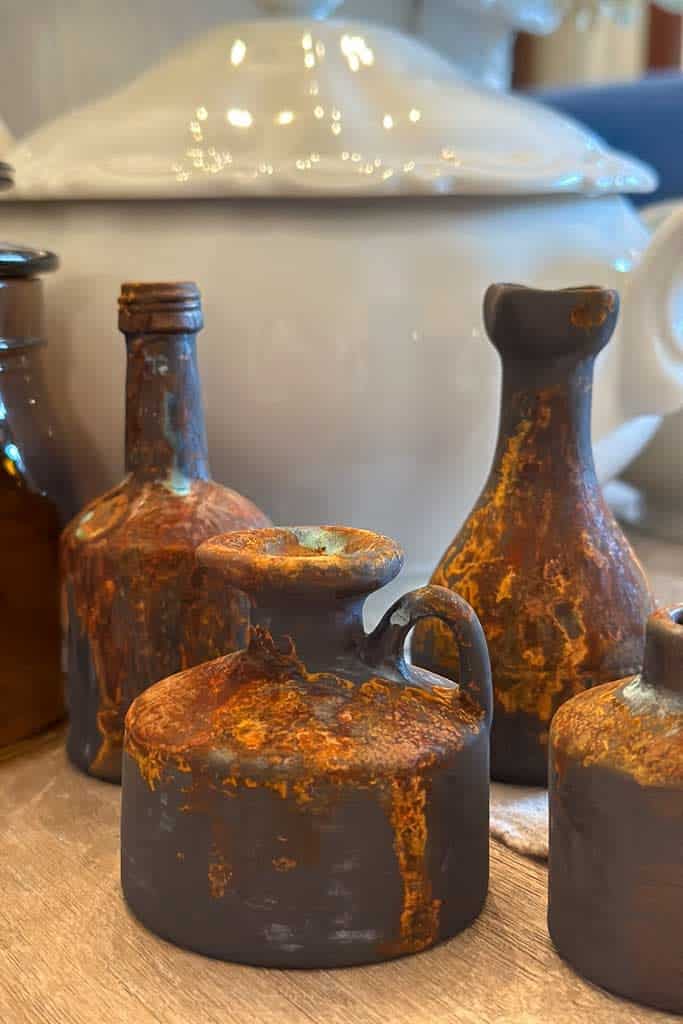
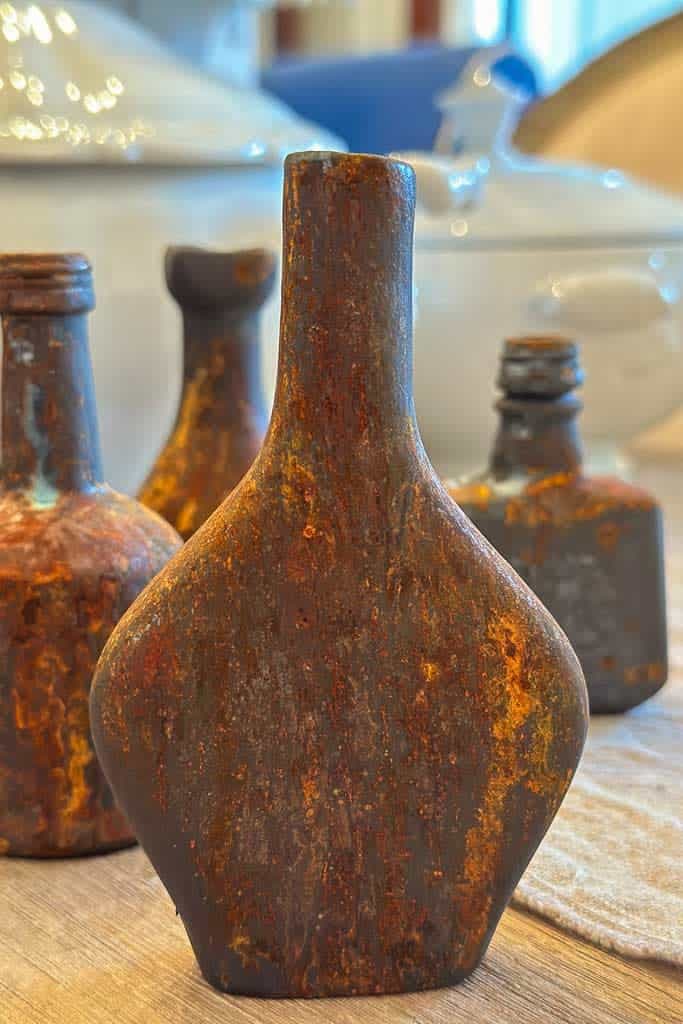
Step Three: Apply the Metallic Coating
Next, paint a thin layer of black iron metallic paint on each bottle and let it dry.
Once that’s set, apply a second coat, but here’s where the magic happens—while the second coat is still wet, spray on the rust activator and watch as the colors start to change right before your eyes!
You can keep layering the paint and patina spray to create a deeper, more rustic effect until you get the perfect faux rust finish.
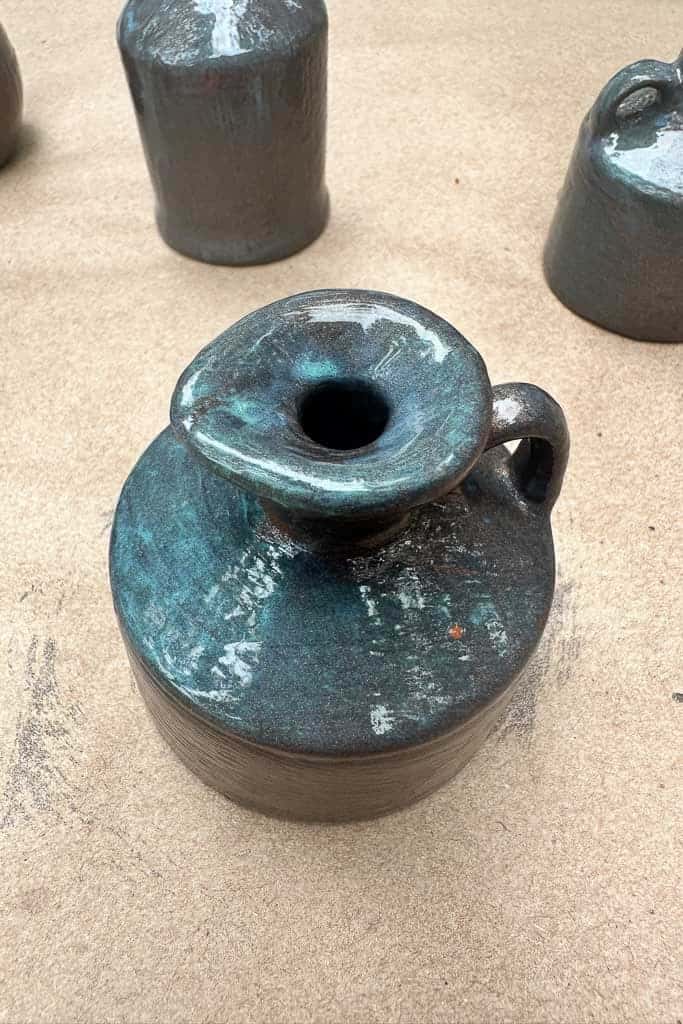
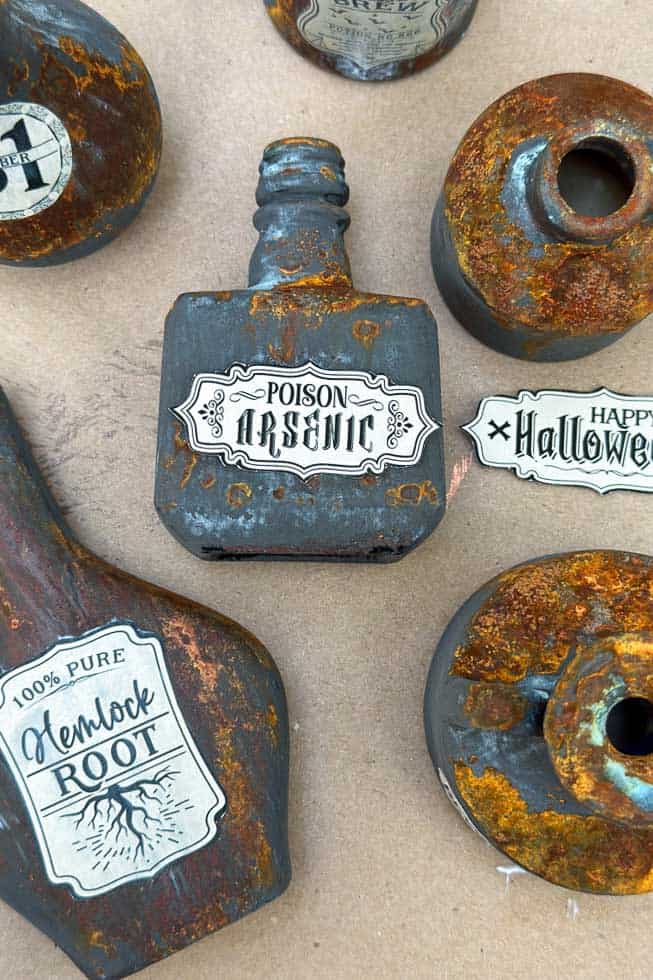
I had fun experimenting with different combinations, like using copper paint with a green patina spray. I also adding black iron paint with a rust patina on a few bottles.
And, I even ended up with a beautiful blue finish! The results were stunning, and the best part is you can mix and match the patinas and create all kinds of unique looks.
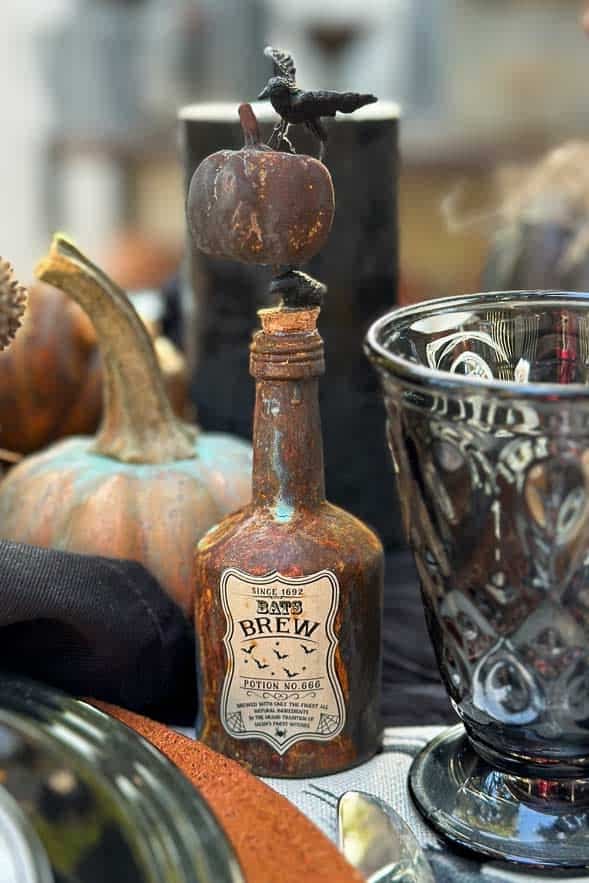
Step Four: Apply Some Halloween Labels
Now you’re ready to add the finishing touches to your rusty patina Halloween apothecary bottles!
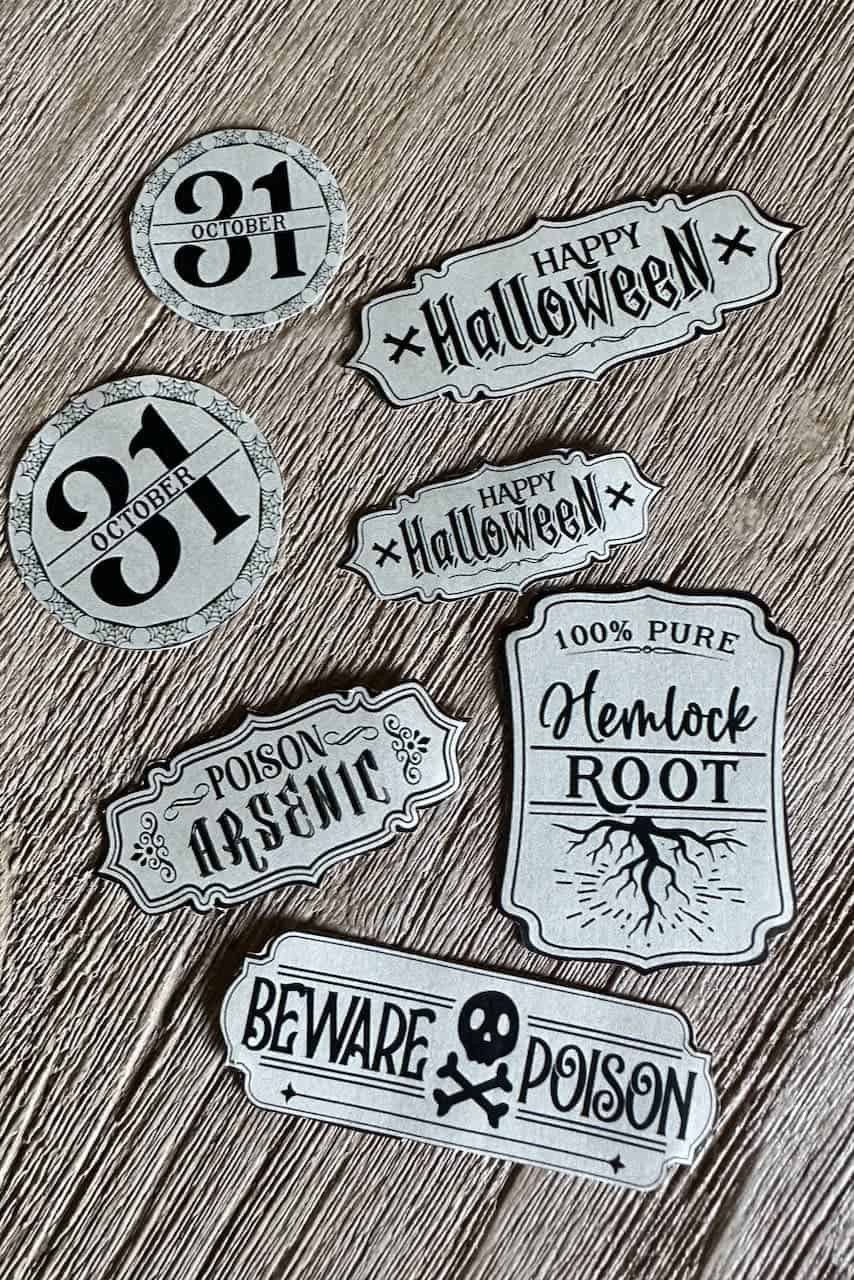
First, start by printing out my free bottle labels, available exclusively to my subscribers! If you’re not a subscriber yet, don’t worry—you can click here to sign up and get instant access to these labels along with my entire library of free printables.
Once you’ve printed the labels, carefully cut them out with small scissors. Attach them to your bottles using Mod Podge, making sure to smooth out any wrinkles.
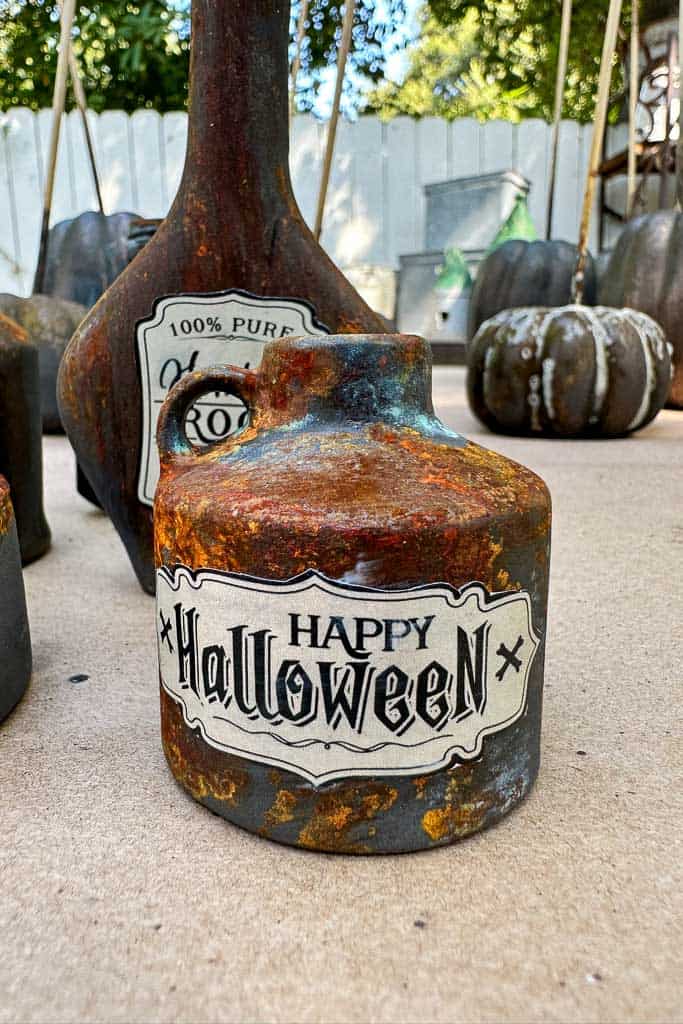
For an extra vintage touch, you can brush a little dark antique wax over them once they’re dry to give them a perfectly aged look!
Step Five: Add the Finishing Touches
To finish off the look, I painted a few small pumpkins using the same rusty patina process and popped them into a small cork at the top of each bottle.
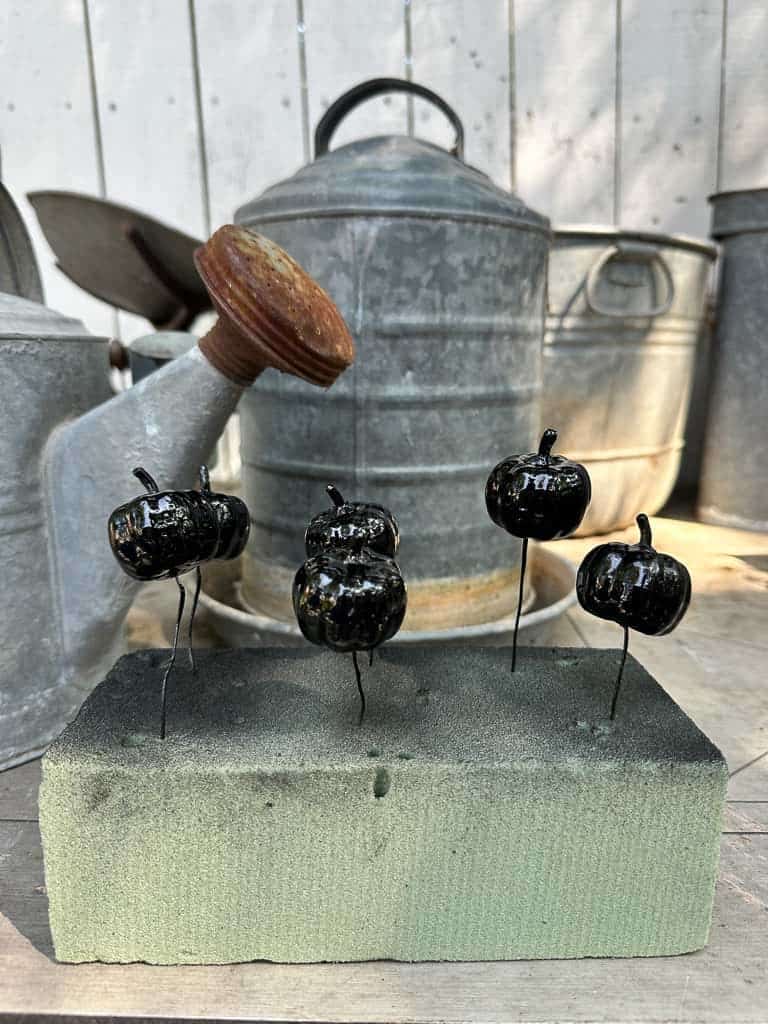
It adds a fun, festive touch! For even more character, I placed a few tiny black crows around the bottles, giving them that perfect spooky Halloween vibe.
How to Style Your Rusty Patina Halloween Apothecary Bottles
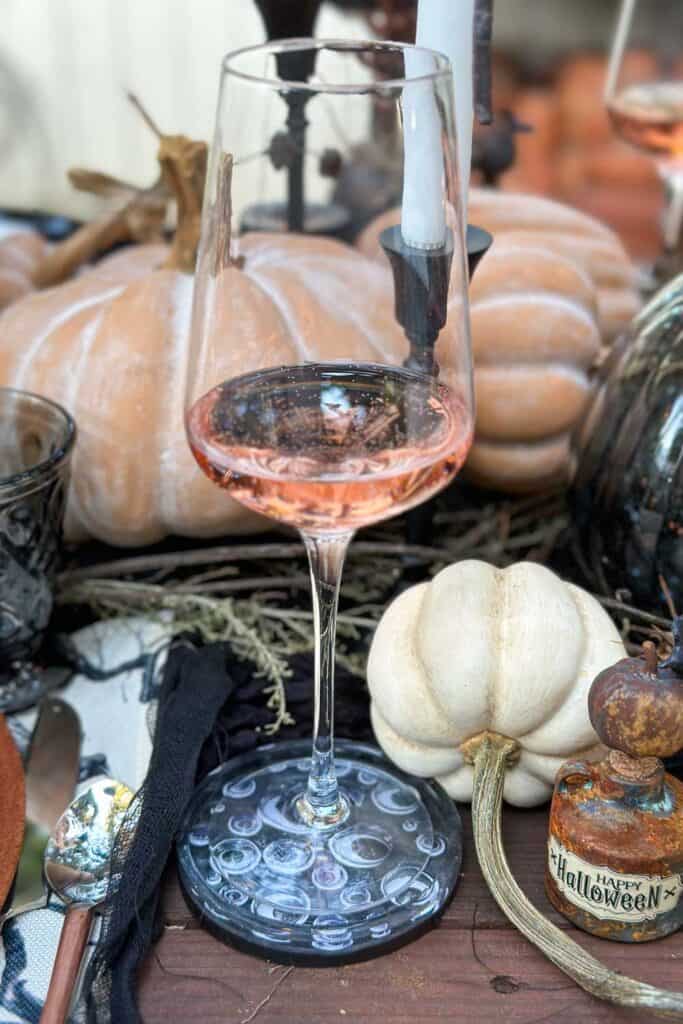
Styling your rusty patina Halloween apothecary bottles is so much fun, and they’re the perfect addition to a spooky Halloween table!

These bottles add just the right amount of eerie charm and vintage vibes, making them a great conversation piece.
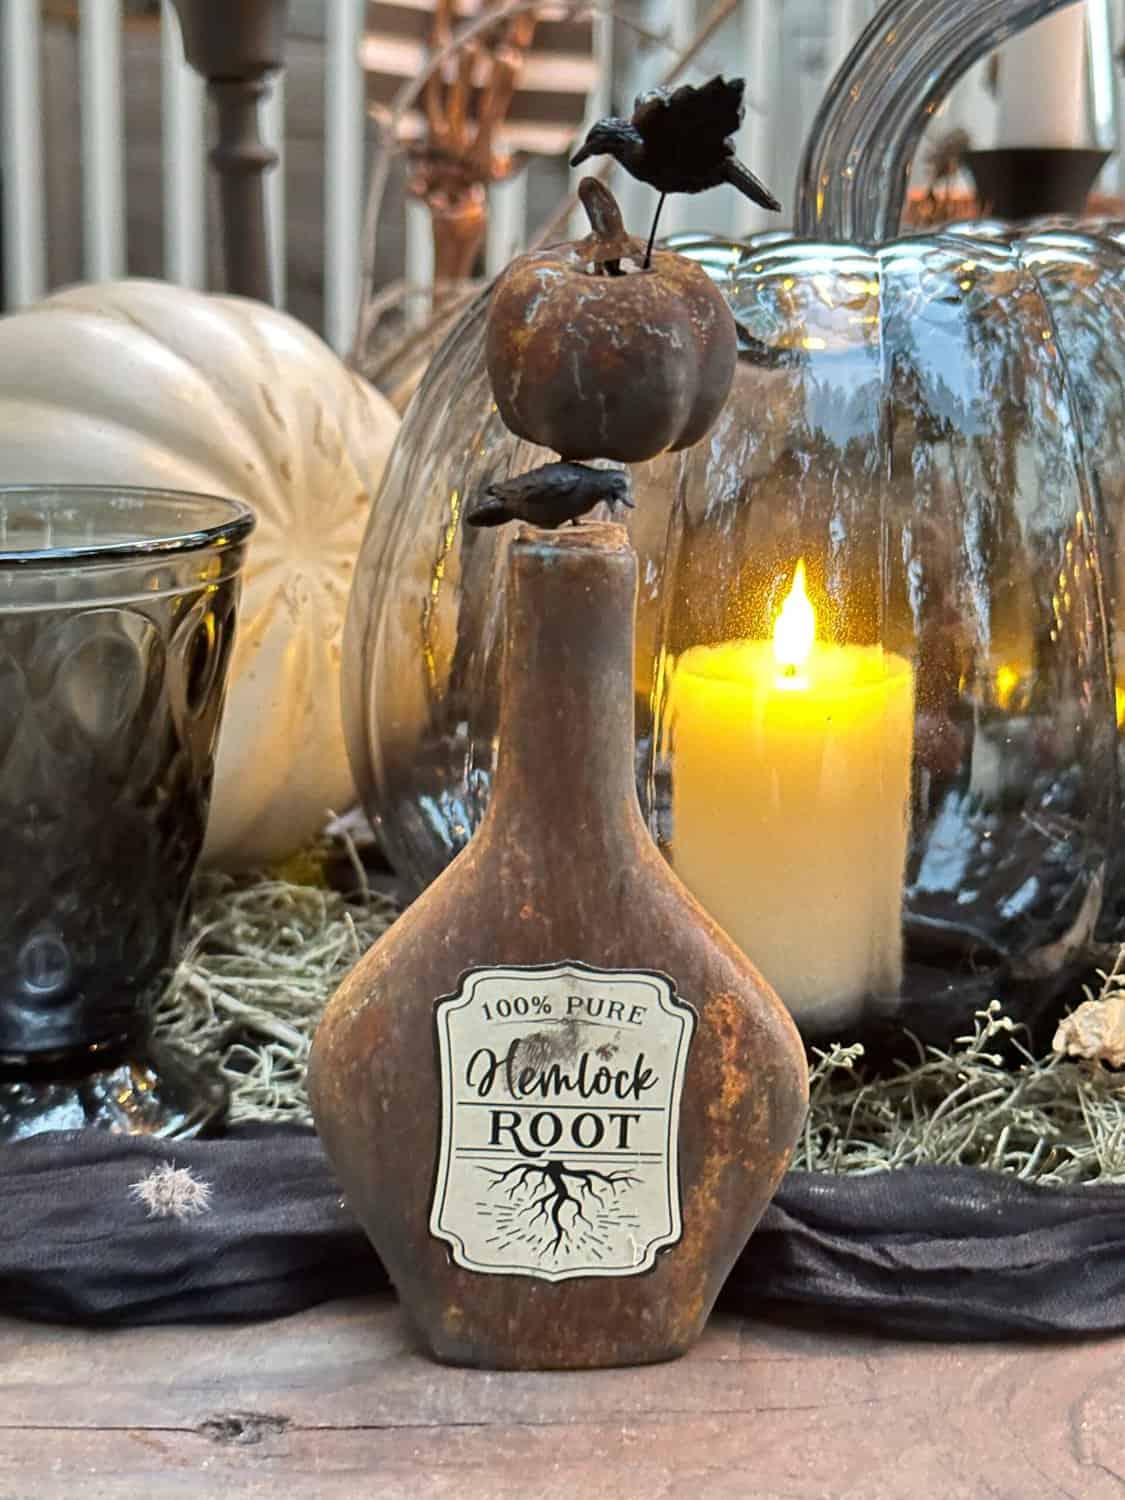
Not only do they look amazing, but they also make fantastic guest party favors that your friends will love to take home.
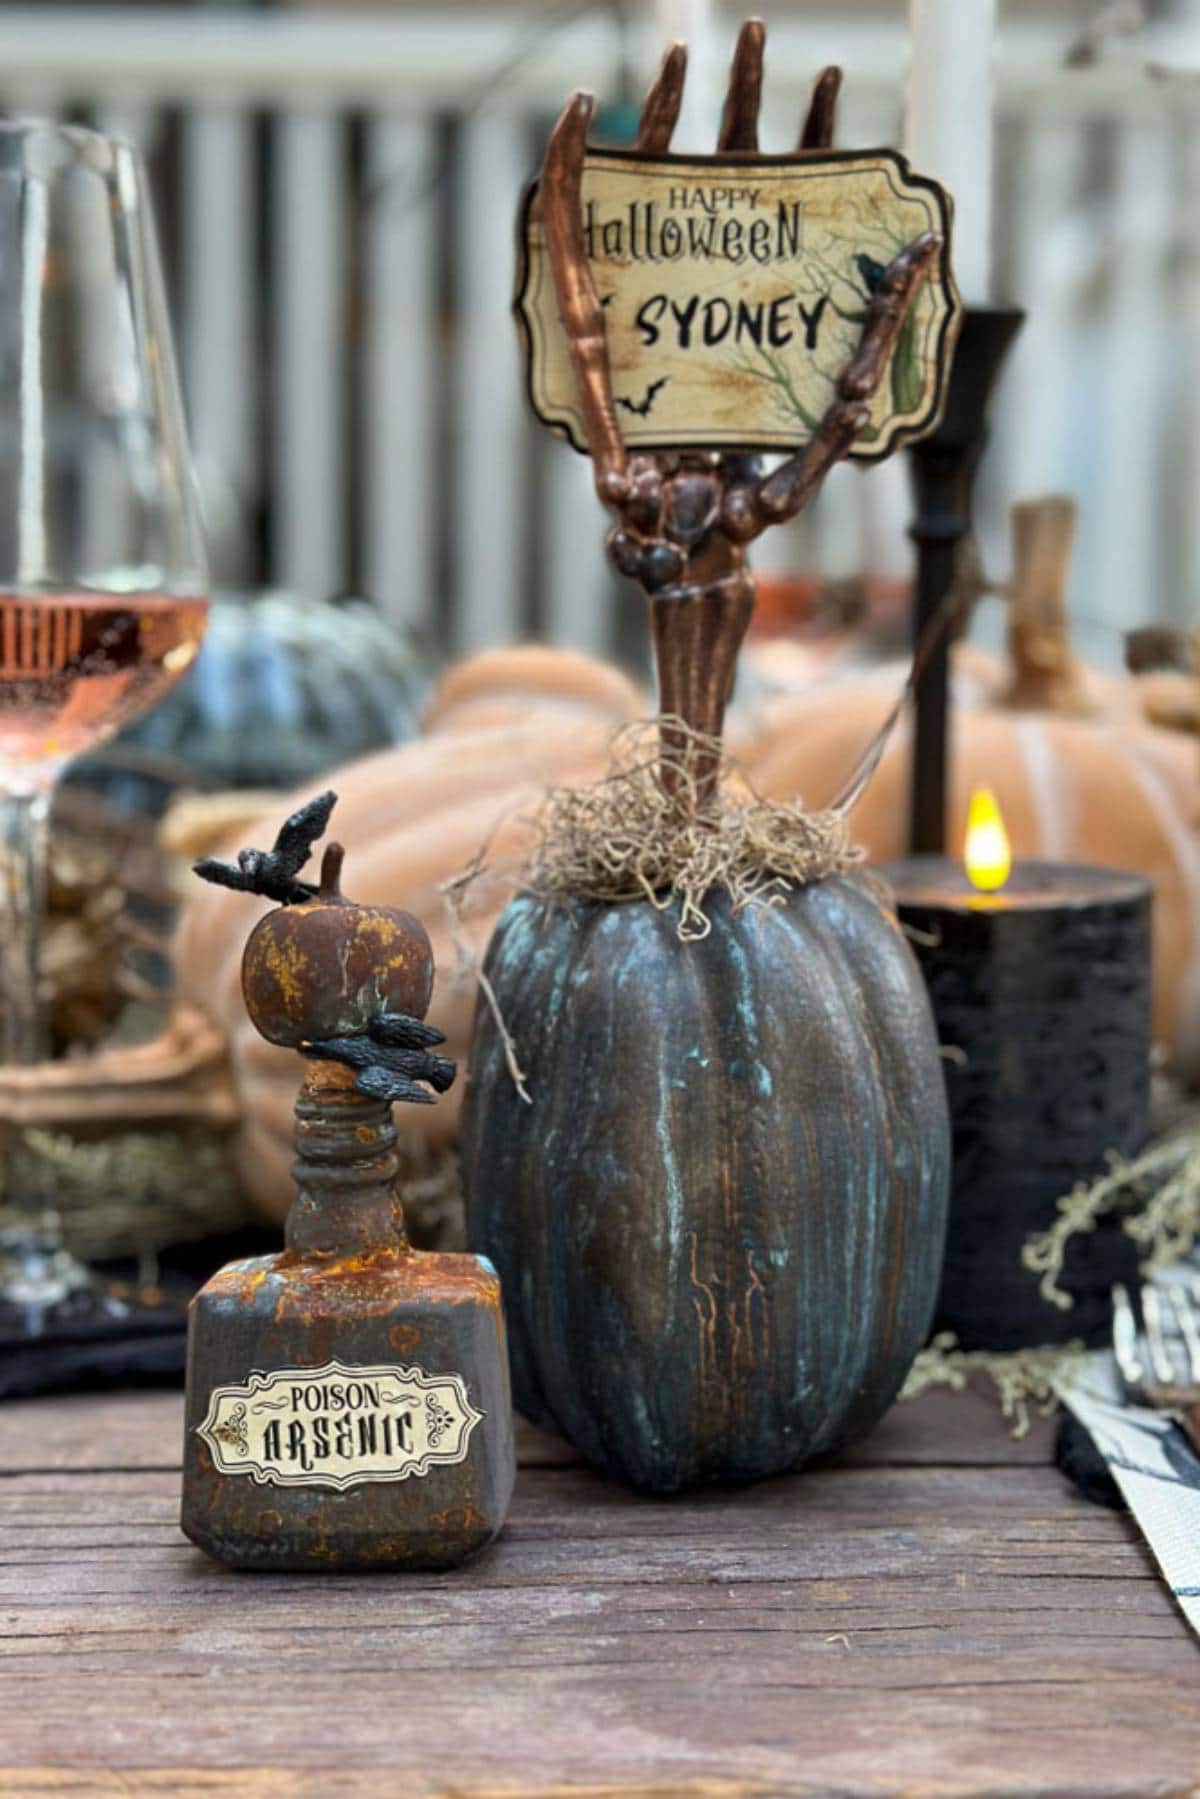
Pair them with spooky skeleton place card holders and matching printables for a cohesive and creepy table setting. The mix of rustic patina bottles and spooky accents will give your Halloween decor that hauntingly beautiful finishing touch!
FAQ’s About Achieving a Rusty Patina
How Do You Make Rust Look Old?
To make rust look old and achieve an authentic weathered appearance, you can follow these steps:
- Expose to the Elements: Place a metal object outdoors, preferably in a location where it will be exposed to moisture, humidity, and air. This allows natural rust formation to occur over time.
- Accelerate Rusting: If you want to speed up the process, spray the metal with water, salt water, or a rust-inducing solution, such as vinegar and hydrogen peroxide. This will accelerate the rusting process and create the aged look more quickly.
- Enhance Texturing: Promote a textured appearance by occasionally scraping or roughening the surface with a wire brush, sandpaper, or other abrasive tools. This helps create a more weathered and uneven texture.
What Liquid Makes Metal Rust the Fastest?
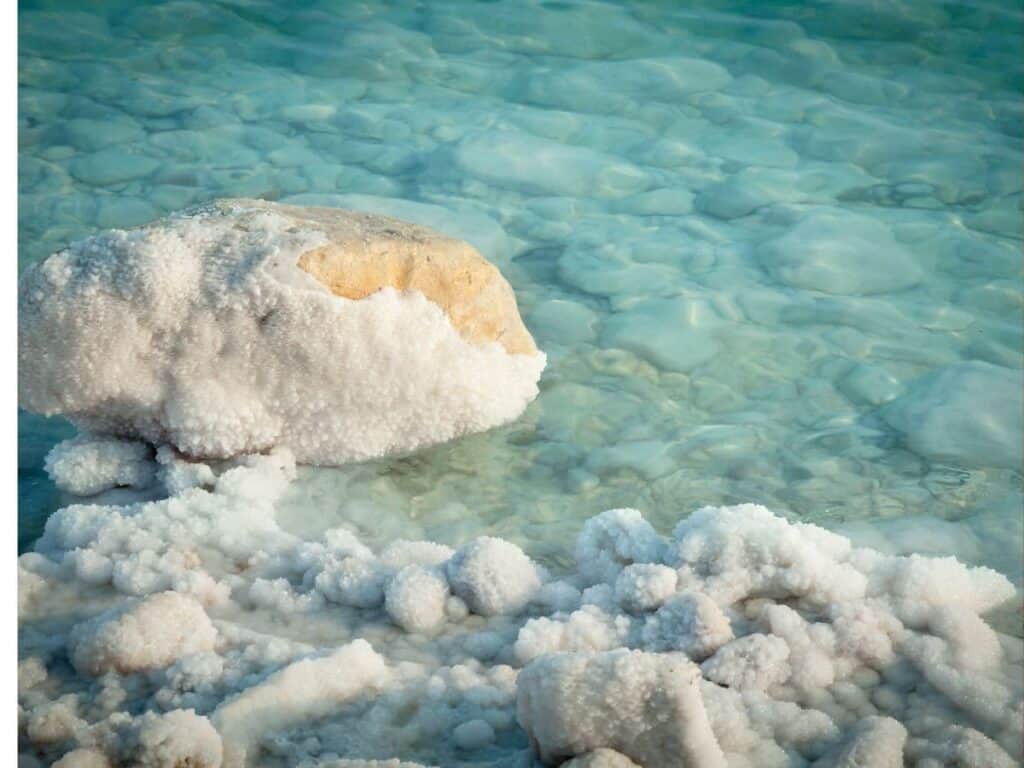
Saltwater is one of the liquids that can make metal rust the fastest. This is because saltwater contains dissolved salt (sodium chloride), which is an electrolyte.
When metal is submerged in saltwater, it becomes more electrically conductive, allowing for a more rapid electrochemical reaction, which leads to accelerated rusting.
You can use muriatic acid (hydrochloric acid) to rust metal intentionally. Muriatic acid can strip away existing rust and prepare the metal’s surface for rusting or accelerating the process. Here’s how you can use muriatic acid to rust metal:
Safety Precautions:
First and foremost, always take safety precautions when working with muriatic acid. Wear appropriate personal protective equipment, including gloves, safety goggles, air ventilated mask, and suitable clothing—work in a well-ventilated area, preferably outdoors.
Clean the metal:
If the metal has existing rust, clean it by removing as much rust and contaminants as possible. To prepare the surface, you can use a wire brush, sandpaper, or a rust remover.
Dilute the Acid:
Muriatic acid is highly concentrated and caustic, so it should be diluted with water. Typically, you can use a solution of one part muriatic acid to three or four parts water. Always add the acid to the water, not the other way around, and do so gradually.
Application:
Apply the diluted muriatic acid solution to the metal surface using a brush or a spray bottle. Ensure even coverage and allow it to sit briefly, usually a few minutes, to start the rusting process.
Neutralize:
After achieving the desired rust effect, neutralize the acid by rinsing the metal with water. Baking soda or a baking soda-water solution can help neutralize any remaining acid.
Accelerate Rusting:
If you want to accelerate the rusting process further, you can expose the metal to moisture and air, which will react with the exposed metal and develop rust more quickly.
It would be best to exercise extreme caution when working with muriatic acid, a hazardous chemical. Additionally, the rusting effect obtained through this method may vary based on factors like the type of metal, environmental conditions, and the concentration of the acid solution, so experimentation may be necessary to achieve the desired result.
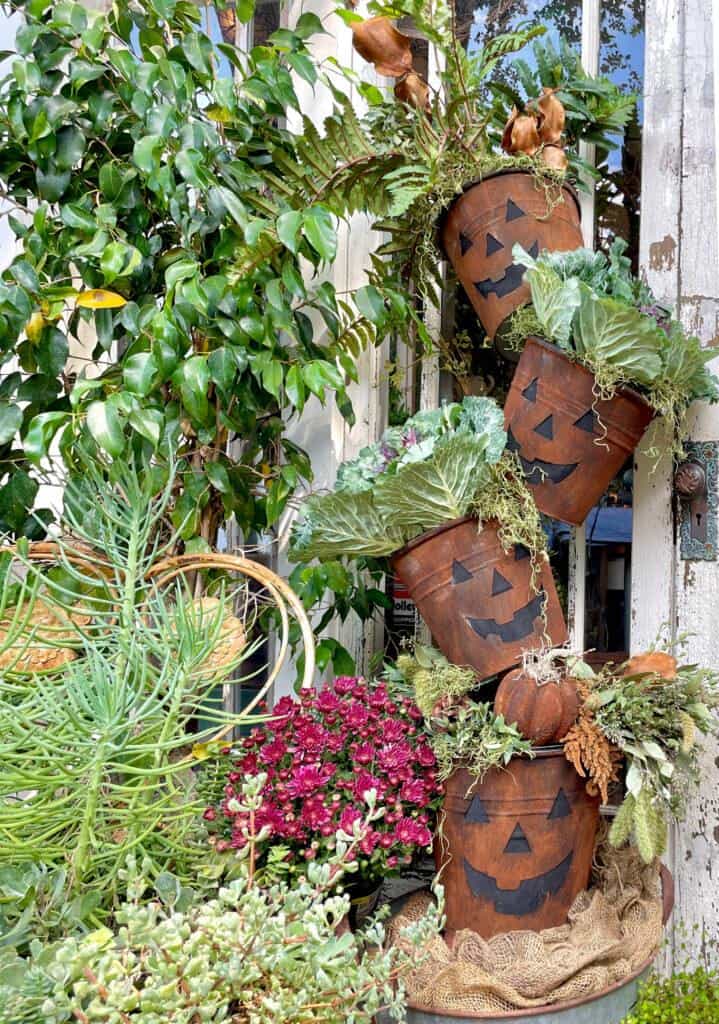
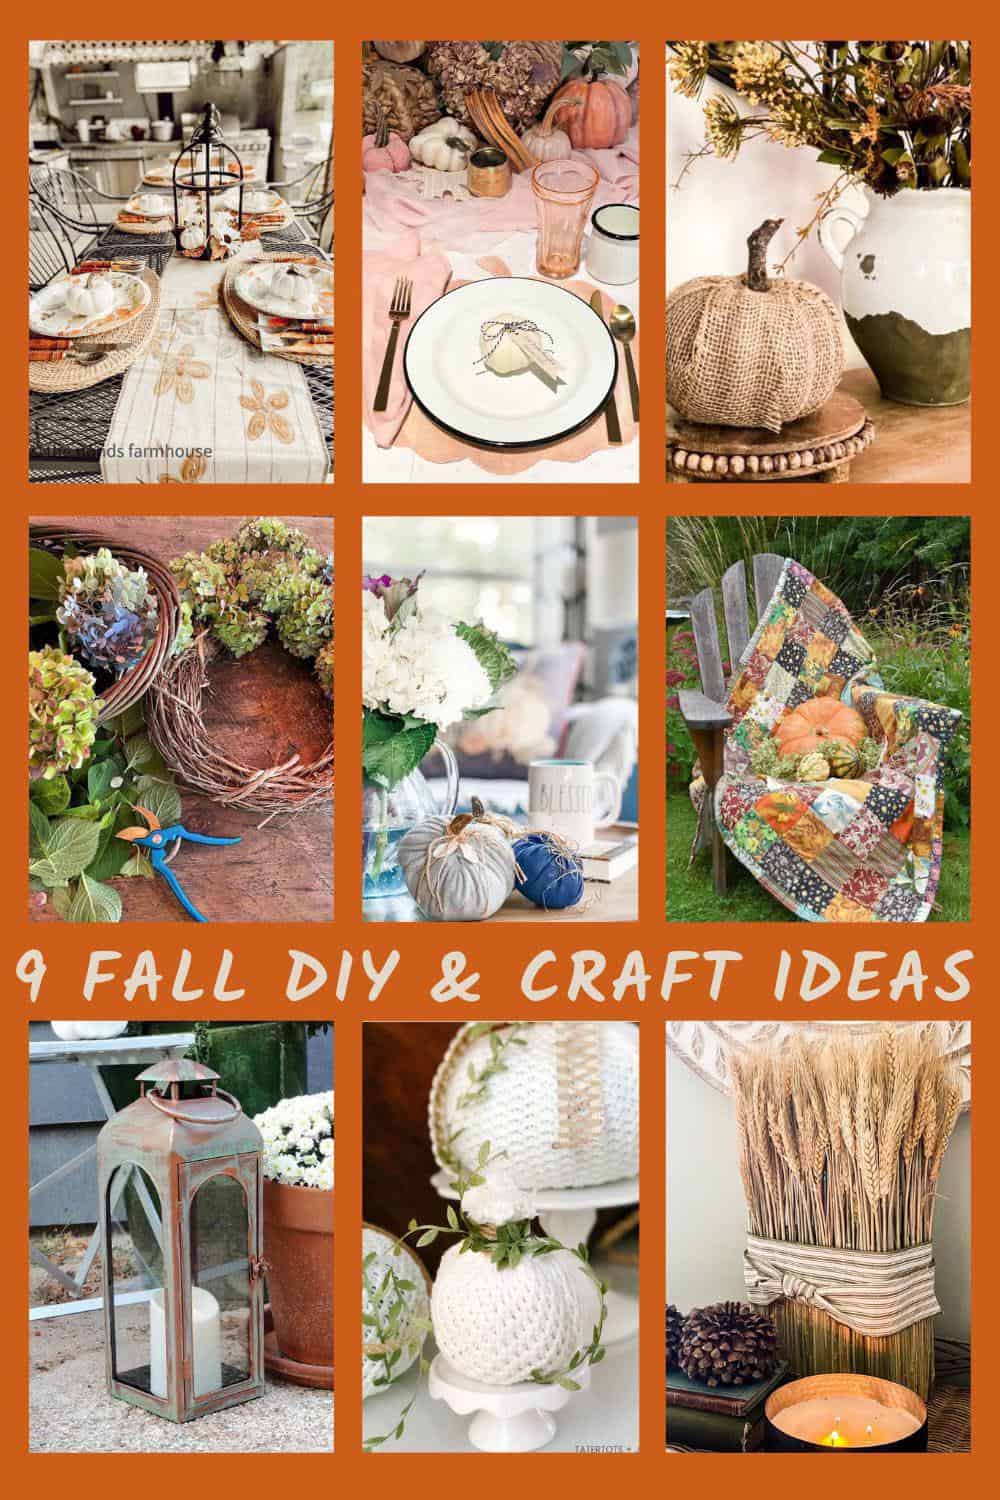
Other Halloween Decor and DIY Ideas from WM Design House
If you love this post, you might also enjoy some of my other favorite Halloween inspiration.
Wrapping Up
And there you have it—creating these rusty patina Halloween apothecary bottles is such an easy and fun way to add some spooky charm to your decor! With a little paint, creativity, and a few finishing touches, you can make each one unique and perfect for your Halloween table or as party favors.
Have fun experimenting with different patina effects, and enjoy the process of making your Halloween decor extra special this year!


More about me!

Hello, I’m Wendy – a dedicated homemaker with a deep passion for decorating, gardening, cooking, and crafting. I find joy in harmonizing beautiful elements to fashion a space that is both comfortable and inspiring. I will help you create a beautiful home, one project at a time.

Wendy these look so cool! And your halloween table!!! Fabulous!
I’m a subscriber and was browsing in your freebie library. Sadly, the Halloween bottle label folder was “Empty” when I tried to download that item. Thank you.
Thank you for letting me know, I sent you an e mail with the link.
Oh, my uncle used to collect such bottles and he had a lot of them. It just became his hobby, and he really liked doing it. He was constantly in his garage polishing his bottles. He devoted a lot of time to this and it was clear how much he was getting high from the process. I think this hobby is actually cool. It is soothing and very cool to be able to see the result of your work. It’s very beautiful, I really like it. Keep up the good work!
Hi Tony, thank you for stopping by. I love to hear these kinds of stories from the past. I frequent a lot of estate sales and it is so interesting to see what people collect. I am glad you enjoyed this project. Have a great week-end.
I’m so glad you didn’t throw them away! The bottles are such interesting shapes and I love the rusty patina! Spooky!
Thank you, Missy. I’m glad too! I really love how they turned out!