How to Make the Easiest DIY Spring Moss Mushrooms
Learn how to quickly and easily make whimsical DIY moss mushrooms to decorate your home for spring.
On my blog WM Design House, I may sometimes use affiliate links, which means a small commission is earned if you purchase via the link. The price will be the same whether you use the affiliate link or go directly to the vendor’s website using a non-affiliate link. Read my full disclosure policy here.
Easy to Make Moss Mushrooms
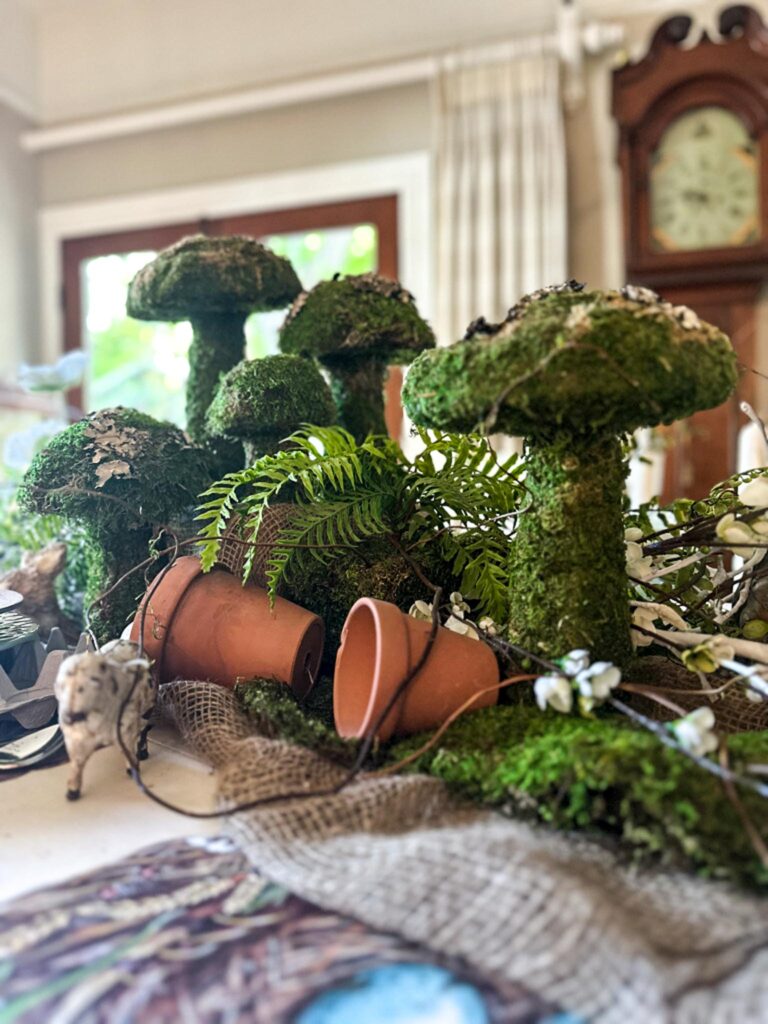
I wanted a natural centerpiece for the spring season, and these moss mushrooms were just what I needed.
Lately, I’ve been spotting mushroom decor everywhere, especially at the flower market. They even had some darling moss mushrooms, but they were $30 each and only came in one size.
So what’s a girl to do? Make her own, of course!
And guess what? You can too! I’m going to show you how to create your own whimsical moss mushrooms in a few easy steps using simple materials and a whole lot of creativity.
So grab your supplies and let’s get crafting!
Materials You’ll Need to Make DIY Moss Mushrooms
How to Make DIY Spring Moss Mushrooms
Ready to create your own spring mushrooms? Here’s how you can easily make a whole garden of them, no matter your crafting skill level!
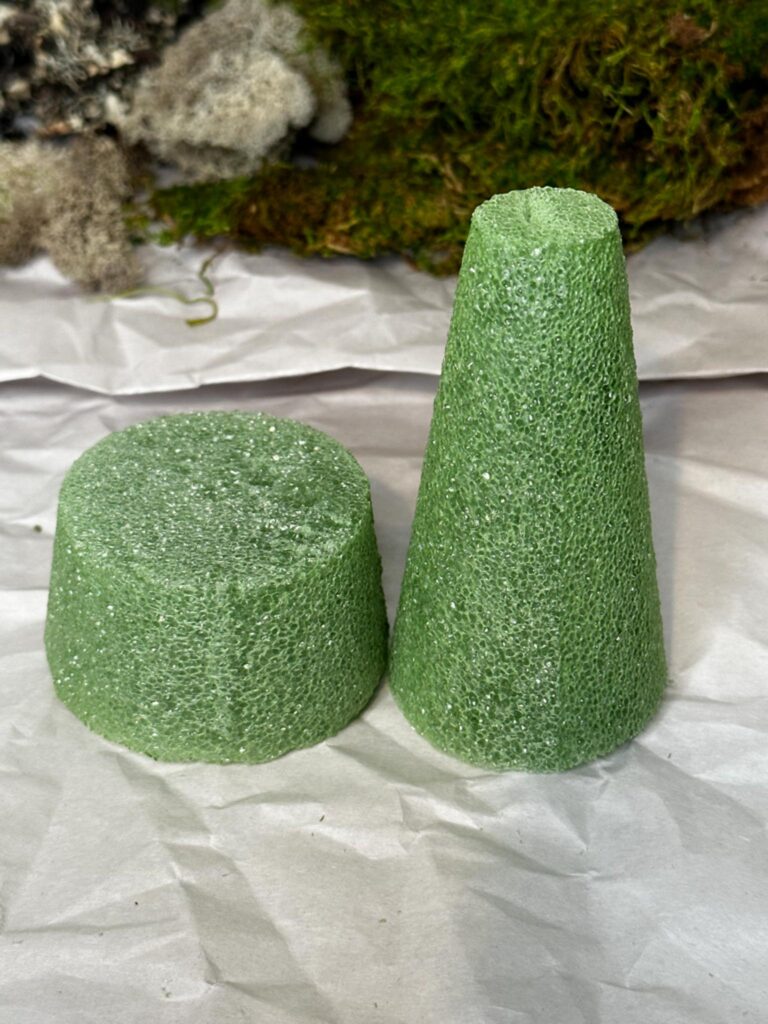
Step 1: Gather Your Supplies
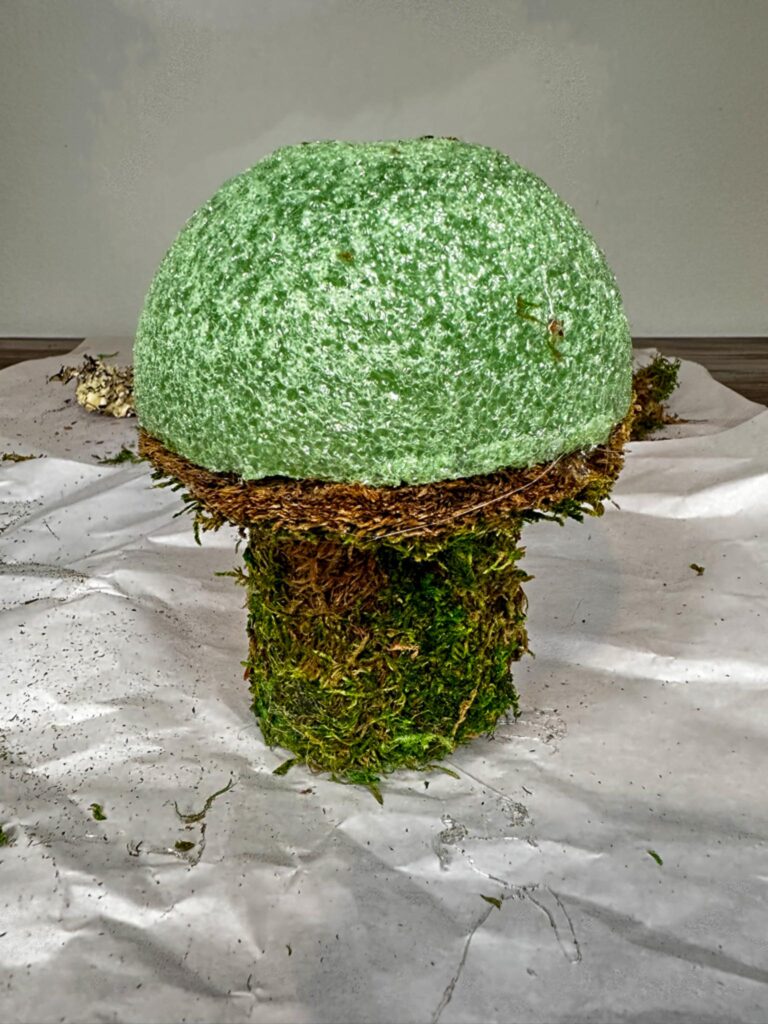
Start by collecting your materials. I used styrofoam cones in different heights for the stems, and styrofoam balls for the mushroom caps. You can mix and match sizes for a more natural, varied look.
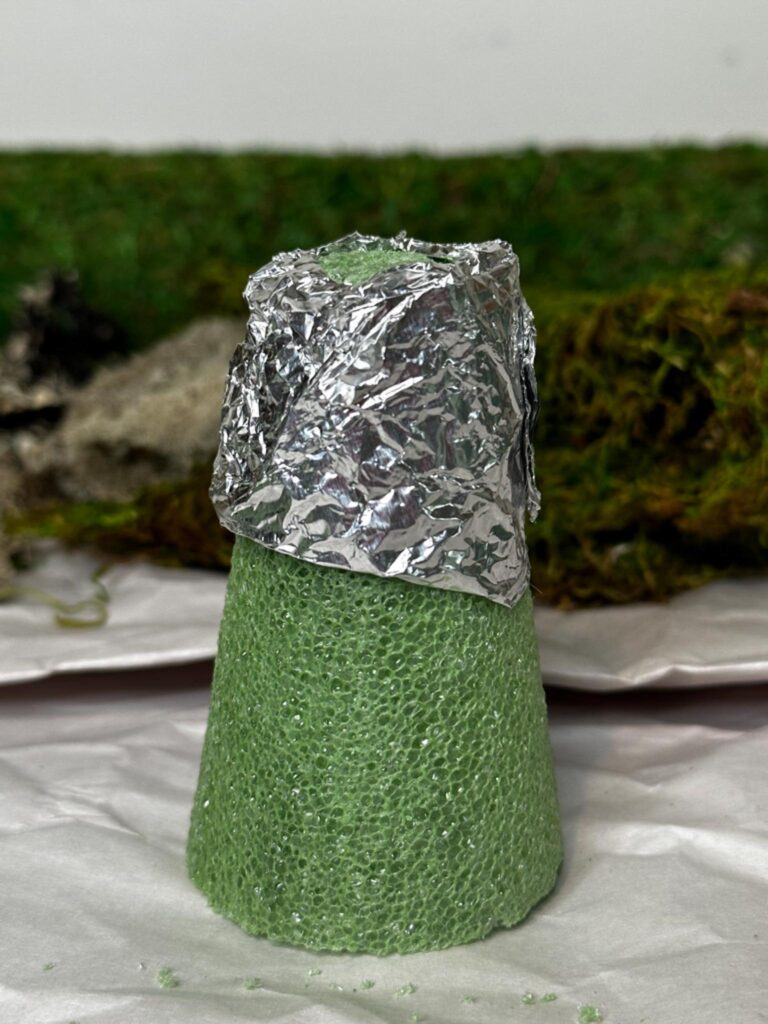
Step 2: Customize the Size and Shape of Your Stems
Trim your styrofoam cones to different heights to add variety. If you’d like the tops of your stems to be a little thicker, you can also wrap a small amount of foil around the upper part of the cone before attaching the cap. This adds a more natural, realistic feel to your mushrooms.
Tip from wendy’s craft room:
I trimmed about 2 inches off a few cones and only used foil on two of them—just enough to give my mushroom garden a little personality and dimension!
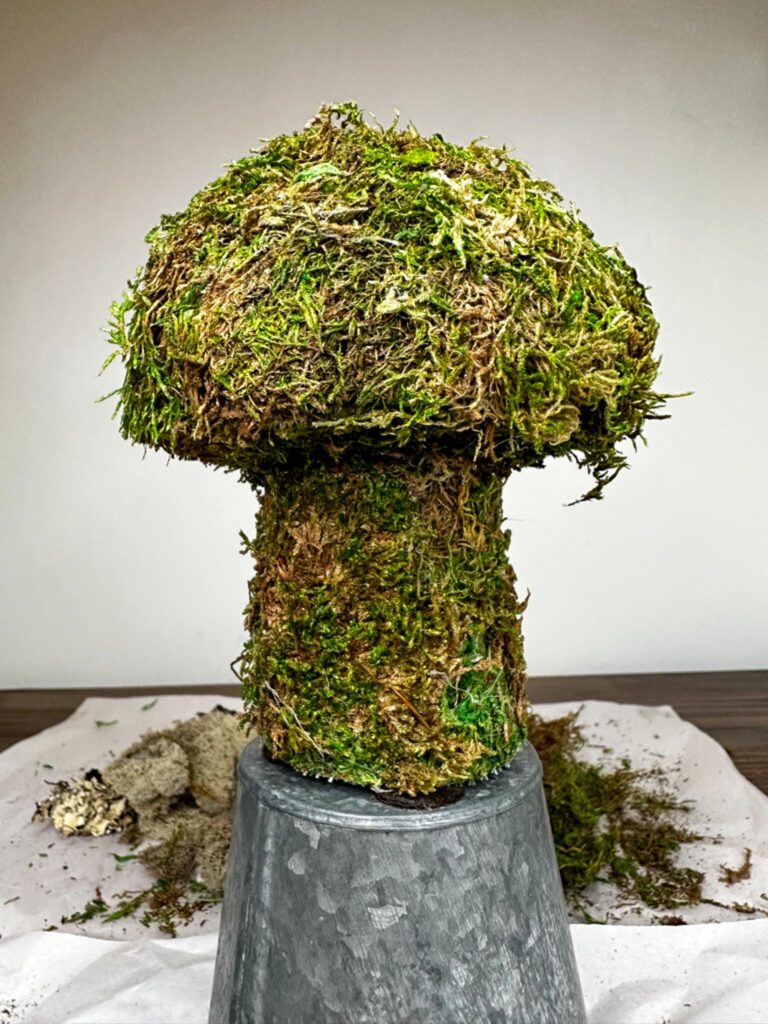
Step 3: Cover the Stems with Moss
Now for the fun part! Hot glue sheet moss all around each cone to create earthy, textured mushroom stems.
You can use either man-made sheet moss or natural moss. I personally love the look and feel of natural sheet moss you can peel right off the tree.

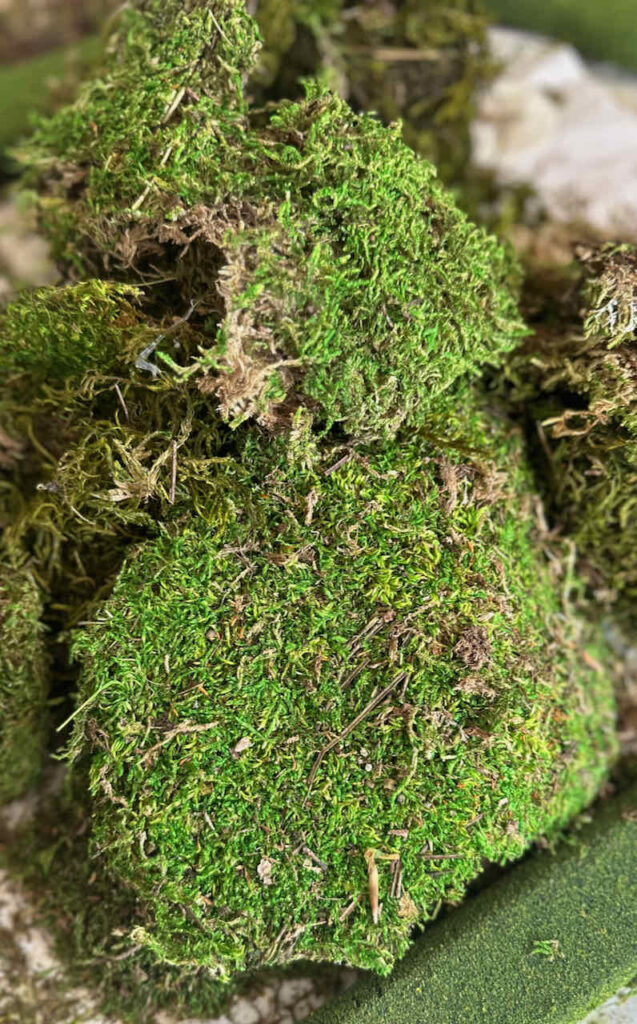
Use a hot glue gun to attach sheet moss around each cone, completely covering the surface.
Tip from wendy’s craft room:
Work in small sections and press the moss down firmly as you go to help it stick securely.
Step 4: Create and Attach the Mossy Caps
To make the mushroom tops, start by cutting a piece of moss to fit the flat bottom of each styrofoam ball.
Then cut a small hole in the center of the moss so the cone (stem) can fit snugly.

Add a dab of hot glue to the top of the cone and press the cap into place. Once it’s secure, use your hot glue gun to cover the entire cap of your mushroom with moss for that perfect woodland look.
Tip from wendy’s craft room:
Let the moss be a little uneven or scruffy. It adds to the charm and makes each one of your moss mushrooms feel one-of-a-kind.
Final Touches for Your DIY Moss Mushrooms
If you want to give your mushrooms a little extra charm, try adding some lichen to the tops. It gives them such a fun, woodsy look like you just picked them from a forest floor.
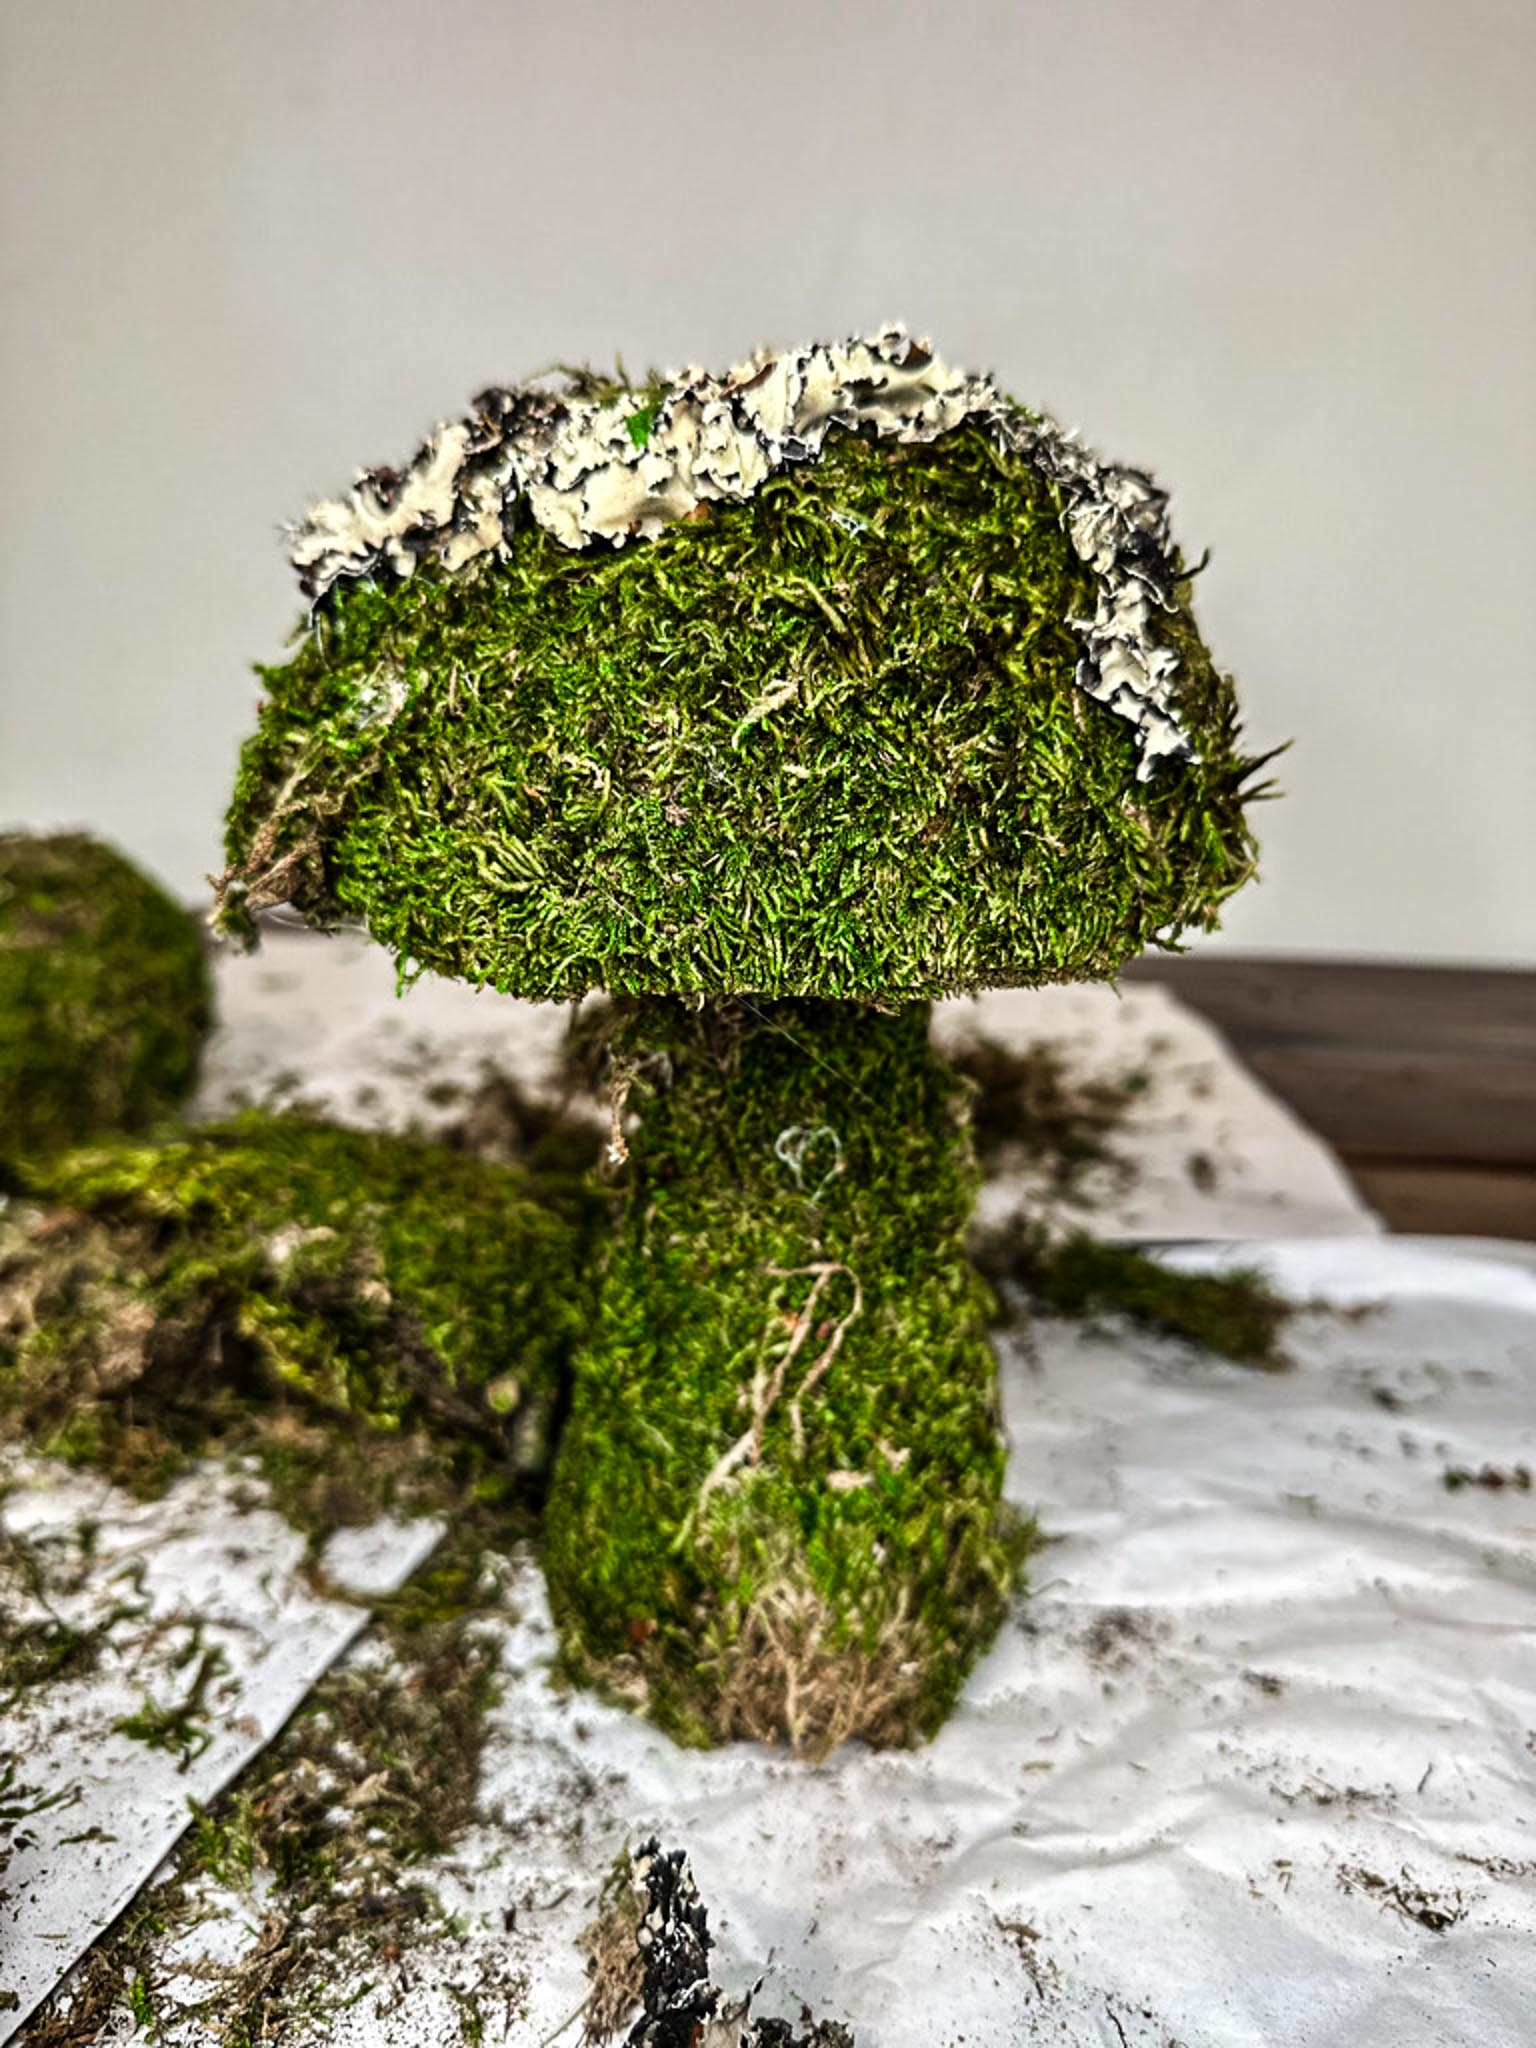
You could also tuck in a bit of Spanish moss or even attach few tiny faux ladybugs or butterflies for a playful touch.
And if you’re feeling creative, a light dusting of glitter would add just the right sparkle. It’s those little details that really make your mushrooms feel special and one of a kind.
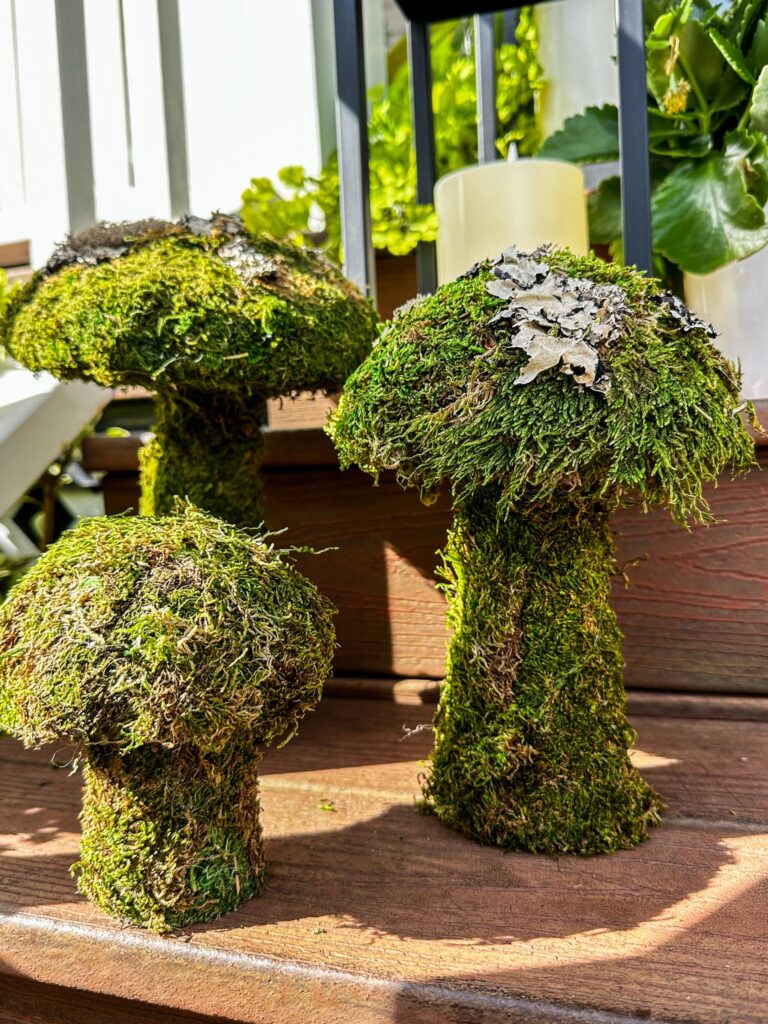
How to Style and Display Your Moss Mushrooms
Now that your mushrooms are complete, it’s time to have fun with them!
I used mine to spruce up my front door and as a centerpiece on my kitchen table, and let me tell you, they totally stole the show.

This is such an easy craft, and there are so many creative ways to use these mushrooms in your spring decor. Here are a few simple ways you can display them and incorporate them throughout your spring home decor:
- You could make smaller versions and tuck them into a spring wreath, or group a few together to create your own version of a mossy wreath.
- Grab a basket or tray from the thrift store and build a little mushroom garden to display on the coffee table in your living room .
- Use a wooden tray or shallow bowl to create a pretty spring floral arrangement by adding your moss mushrooms with a few faux flowers or greenery.
- Keep it simple and create a little garden-themed centerpiece on your dining table.
- Want something more rustic? Try placing a few mushrooms in an antique container for a vintage-inspired centerpiece.
- You can even display them outdoor by lining them up on the steps of your front porch to welcome guests with a bit of garden charm.

Want to see exactly how I made these? Watch the step-by-step video tutorial below for an up-close look at how I brought these moss mushrooms to life. It’s easier than you think, and so much fun!
Tip from wendy’s craft room:
Try pairing your mushrooms with other natural elements like twigs, mossy stones, or tiny faux flowers to bring your display to life. They also look darling nestled around potted plants or in a fairy garden setup!
Other Spring Flower Arrangement Ideas from WM Design House
If you love this fun DIY moss mushrooms you might also enjoy some of my other favorite spring crafts.
How to Make A DIY Moss Frame Art Gallery
Box Spring Upcycle: ( giving old mattress springs new life)
How to Make a Lemon Wreath

Final Thoughts
These moss mushrooms are a beautiful and unique decoration that can be added to any home. I was thrilled with the results and my guests were delighted to see such a fun, eye-catching addition to our dining table.
Whether you’re making mushrooms for yourself or a party, I hope this quick tutorial will help you create your own unique designs.
Don’t forget to experiment and have fun!


These are so adorable!
I love these Wendy. I was actually considering making some very similar when I was at the dollar tree the other day but changed my mind. Now I’m regretting it after seeing how great yours came out. I love mushrooms, have for a long time and your table is gorgeous. XO- MaryJo
Thank you, Marjo, they are so fun and easy to make, and I have found so many uses for them. It’s never too late to go back to the Dollar Tree.
ADORABLE Moss Mushrooms, Wendy! We will be featuring you starting Wednesday at the Creative Crafts Linky Party! Pinned and shared!
Creatively, Beth
Thank you Beth, that is very kind of you. I cannot wait for Wednesday!
These moss mushrooms are adorable Wendy. Moss is one of those natural elements that make everything look so inviting. I have not been able to get on the mushroom bandwagon, but you are making me change my mind with this one… thank you for sharing!
Thank you Cara, wait until you see today’s moss post :))))) it will make you smile, I promise.
The how-to process is easier than it looks. Nice post, and I like knowing the “trends”.
Thank you Jeanne, I am glad you enjoyed the post. Thanks for stopping by.
Wendy these mossy mushrooms are just the cutest! I love projects like this!
Thank you, Michelle, it was simple, fun, and easy! just what I like.
Super cute and so pretty. Pinned it
Visited you via Eclectic Red Barn Wonderful Wednesday Blog Hop!
If not already part of SSPS, this is a personal invite to hop over and come and share your posts with us at Senior Salon Pit Stop. See my entries: 65+66 and navigate to the bottom of my page for the Senior Salon Pit Stop linkup, we hope to virtually meet you there.
Hi there, thank you so much for stopping by! I appreciate your kind comment so much. I will have to stop by the senior salon pit and link up.
Awesome, thanks for linking up, and hope and trust to see you on a regular basis at our weekly Linky.
goodness, these are just darling – and elegant at the same time. they’d certainly enhance any style of home decor… well done! (i saw your link on the Team Creative Crafts link party and just had to come see them – so glad i did!)
These are totally gorgeous—I will try and make some ‘mini’ scale 1:6 for my barbie garden center…so cool! Hugs, Sandi
What a great idea. I want to start a Barbie garden for my granddaughters.
These faux mushrooms are lovely. I love cute mushrooms so it’s good to know I’m on trend!
Thank you, Julie, if you love mushrooms, you certainly are on trend! Thanks for stopping by.
These are so stinking cute, Wendy. I love this project. The moss mushrooms came out nice.
Thank you Tammy! they were so fun to make.
So fun Wendy! How cute are these! They would look great on any spring or summer picnic table!
Thank you Susan!
These are beautiful, Wendy! And I love how you styled them with the terra cotta pots! Great post!
Thank you, Missy!