Upcycled Crafts; Ideas for easy upcycling craft projects
Learn how to make upcycled crafts. Take your trash and create a treasure. Let me show you what amazing projects you can make.
There is something very therapeutic about a DIY project and creating beautiful decor for your own home. In addition, there are many benefits to crafting.
Here are just a few of the benefits. Crafting is a great way to:
- Reduce stress. …
- Relieve and reduce depression and anxiety. …
- Help build self-esteem. …
- Decrease the risk of cognitive impairment as you age. …
- Help with insomnia. …
- Create relaxation which reduces irritability and restlessness. …
- Build community and friendship.
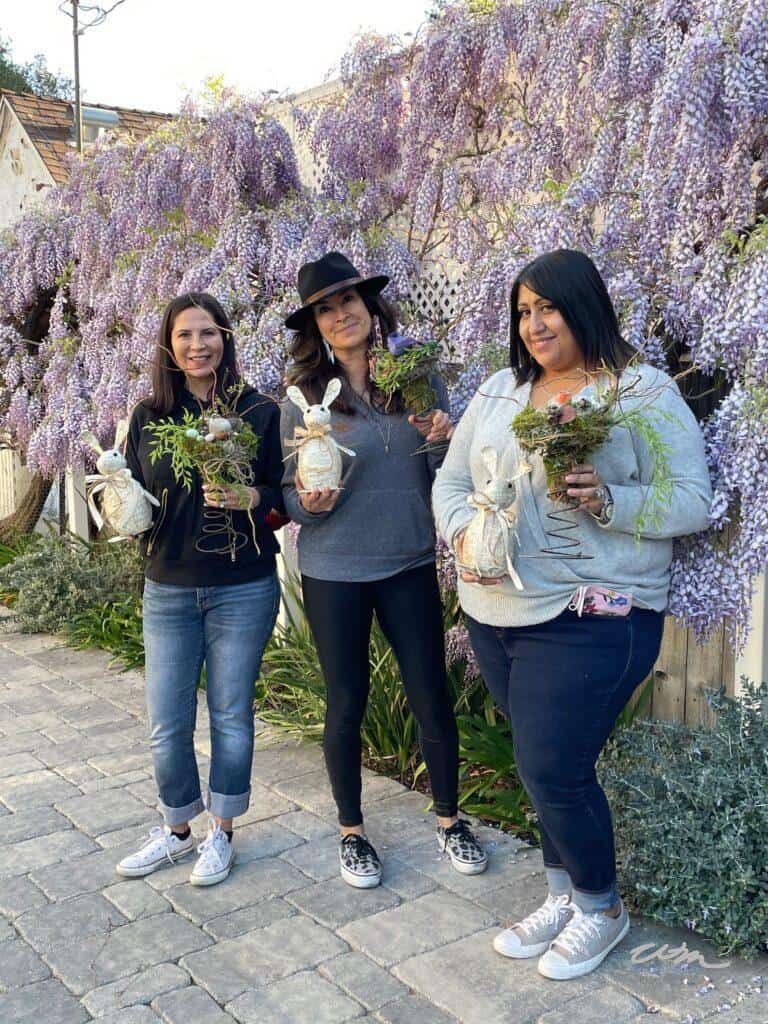
This is why I love to gather people together to create beautiful things.
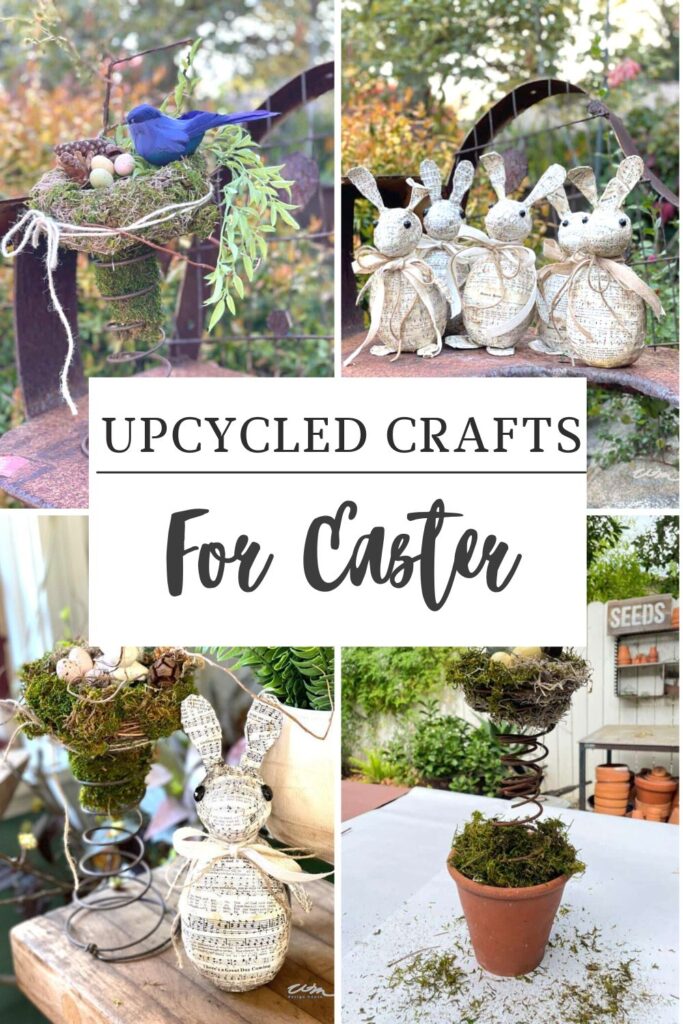
This past weekend I taught a class on how to create a bird’s nest on top of a vintage box spring and the cutest Easter rabbit. Who would have thought? So today I would like to show you how to create your own.
What is Upcycling and how do you do it?
Upcycling is the process of creating something new out of old or used materials.
Upcycling is easy to do, just take a look at what you might be throwing away or recycling and think about how you can put that item to good use and create something beautiful.
What are some of the benefits of upcycling trash?
Upcycling is a new way to get creative and do something good for the environment.
By transforming broken or trashed items into artful treasures, you can reduce clutter in your home while making a positive environmental impact.
You’ll also feel an incredible sense of accomplishment with every successful project you create. With just a little bit of creativity and a few items from around the house, you can create seasonal decor for your home.
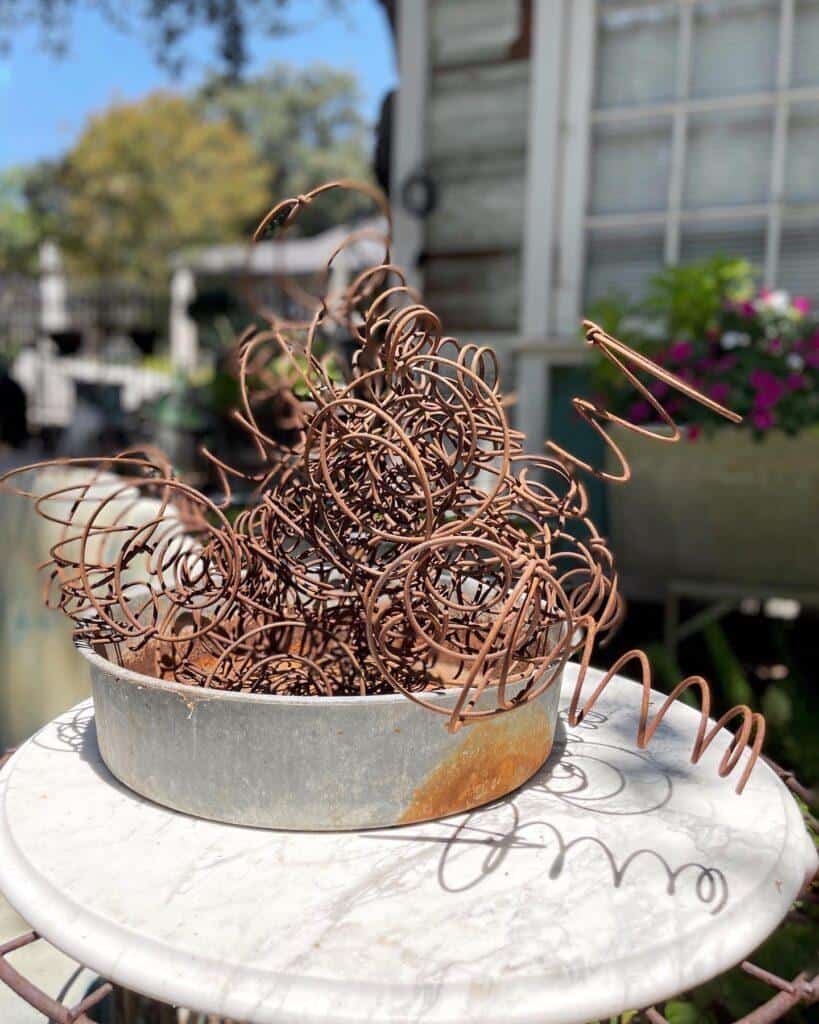
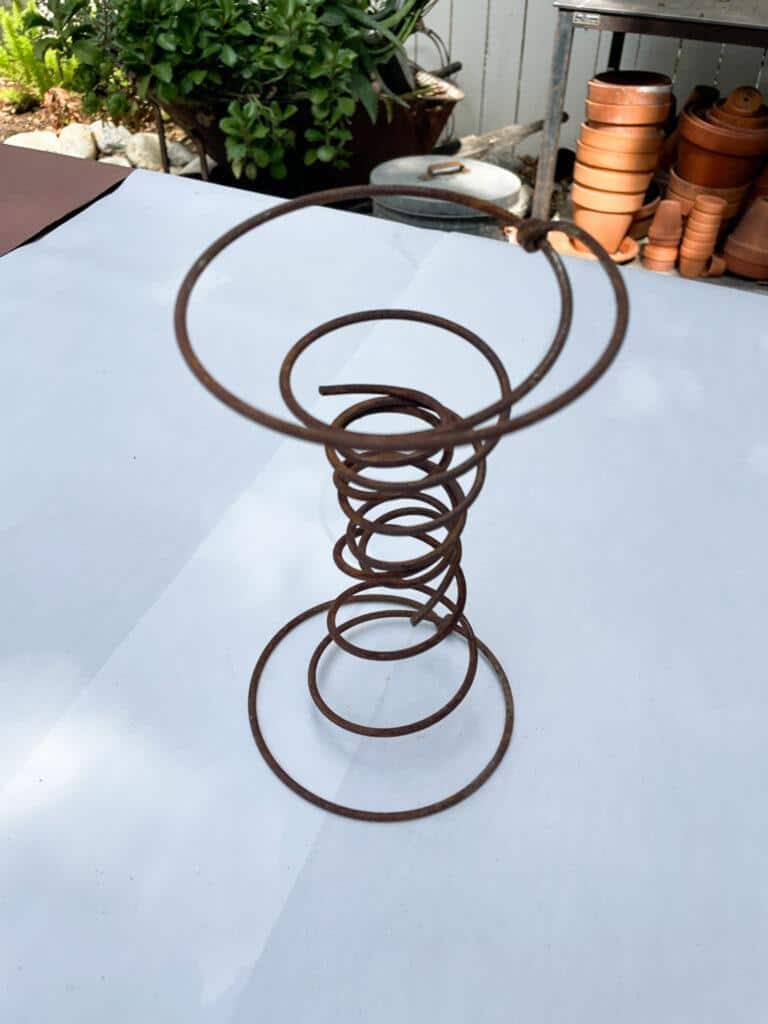
Below you can see the pile of rusty bedsprings that I rescued out of the trash and turned into treasures.
I have this beautiful spring wreath I created using the box springs, you can read that post HERE. Along with several other ideas for upcycling box springs.
Upcycled Craft Idea
Today I want to share a few great ways to put new life into some old treasures or trash you may have at home.
If you don’t have these items at home, don’t worry, you can easily find these items at flea markets, thrift stores, or a yard sale.
There is nothing more rewarding than when we take our genius idea and put our trash to good use. Think of every day as earth day by putting a little bit less in your trash can.
Recyclable Materials to use for Crafting
Just think of all of the items we put in the recycling bin on a daily basis. Cardboard boxes, old sweaters, plastic bottles, cereal boxes, old board games, a cell phone, an old vase, water bottles, old t-shirts, tin cans, toilet paper rolls, and more.
Just get on Pinterest, or read my blog and you will find so many upcycling ideas for kids of all ages as well as adults.
There are so many crafts that we can make out of these items from the recycle bin. In the fall, I love to make pumpkins out of old sweaters, and I use tin cans to make candle lanterns for Halloween. Toilet paper rolls are another favorite of mine, you can create beautiful art with these cardboard tubes. And one of my all-time favorites is old books. You can check out one of my posts on what I do with old books here.
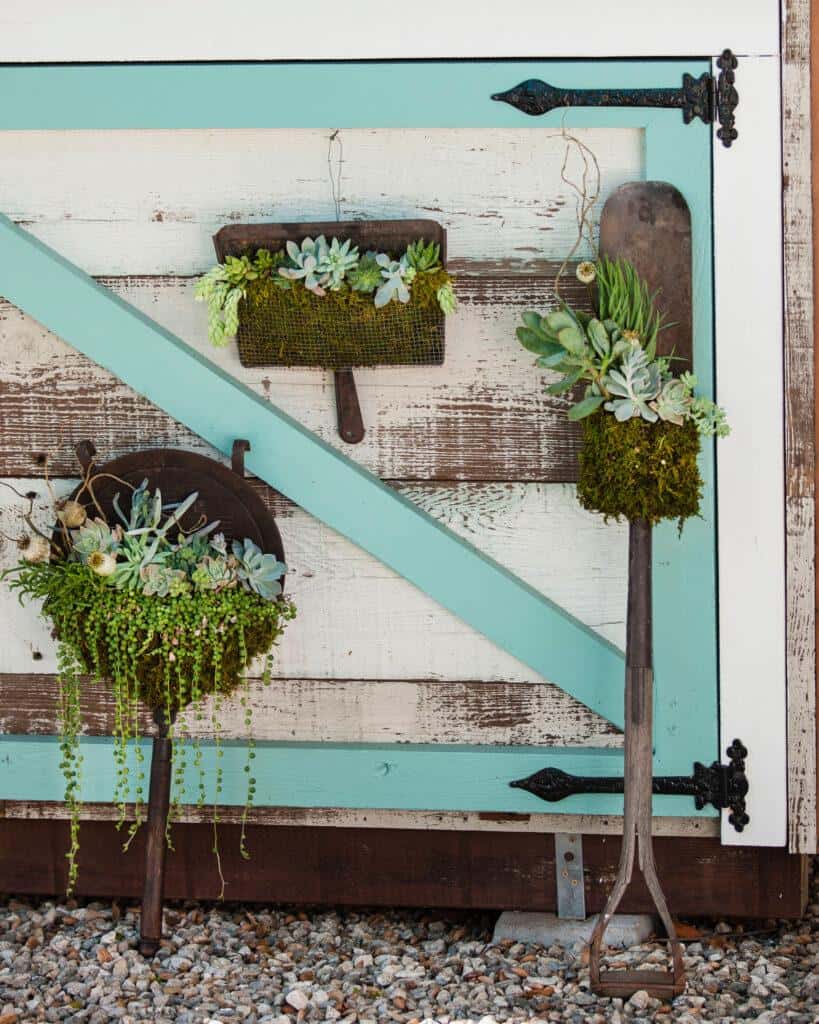
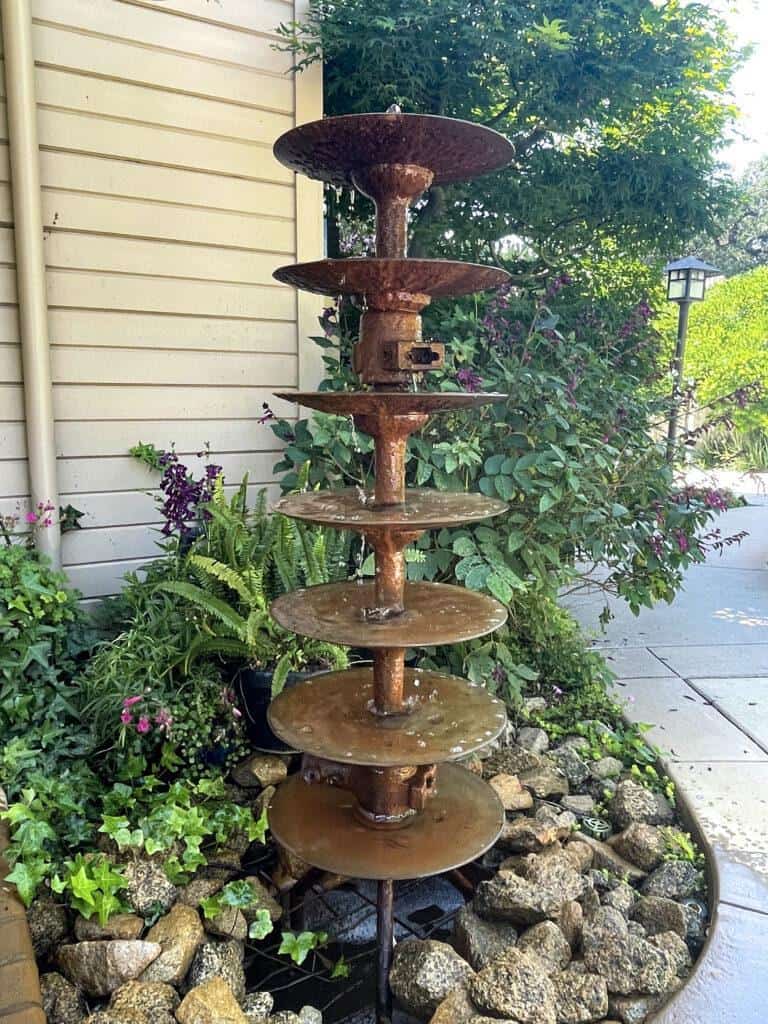
Outdoor Upcycled Idea
Here are a few of the outdoor projects I have done over the years. You can click on the image to see the full post.
Crafting is also the perfect thing to do on a rainy day, so let’s get started.
Creative Ideas for Upcycled crafts
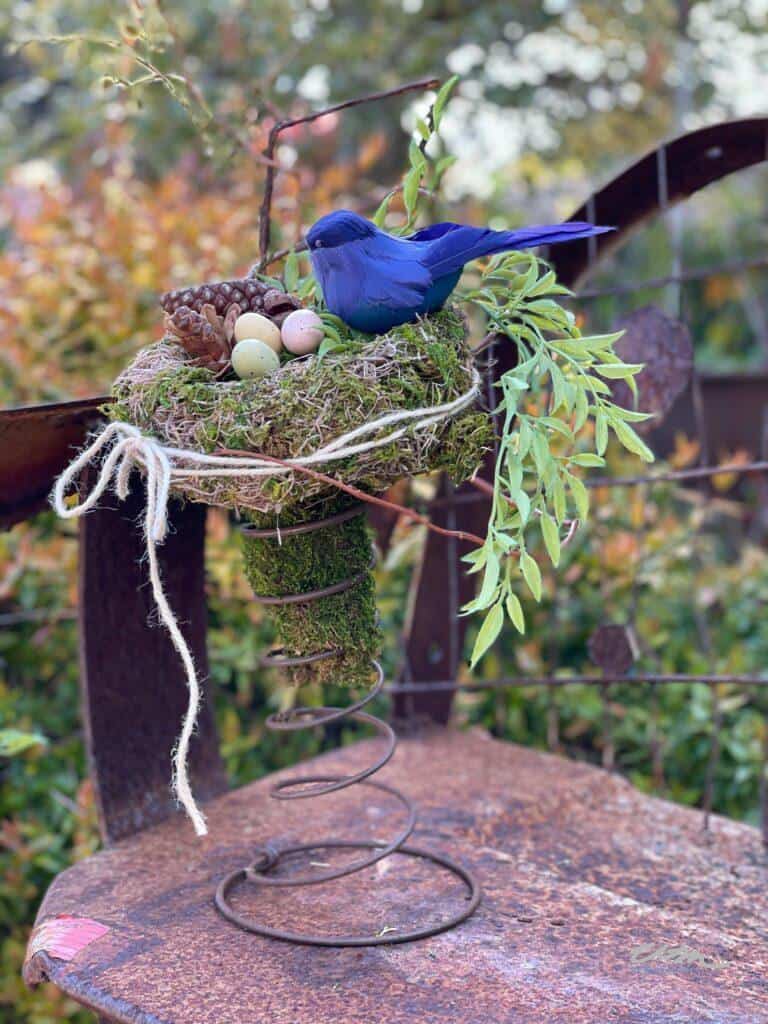
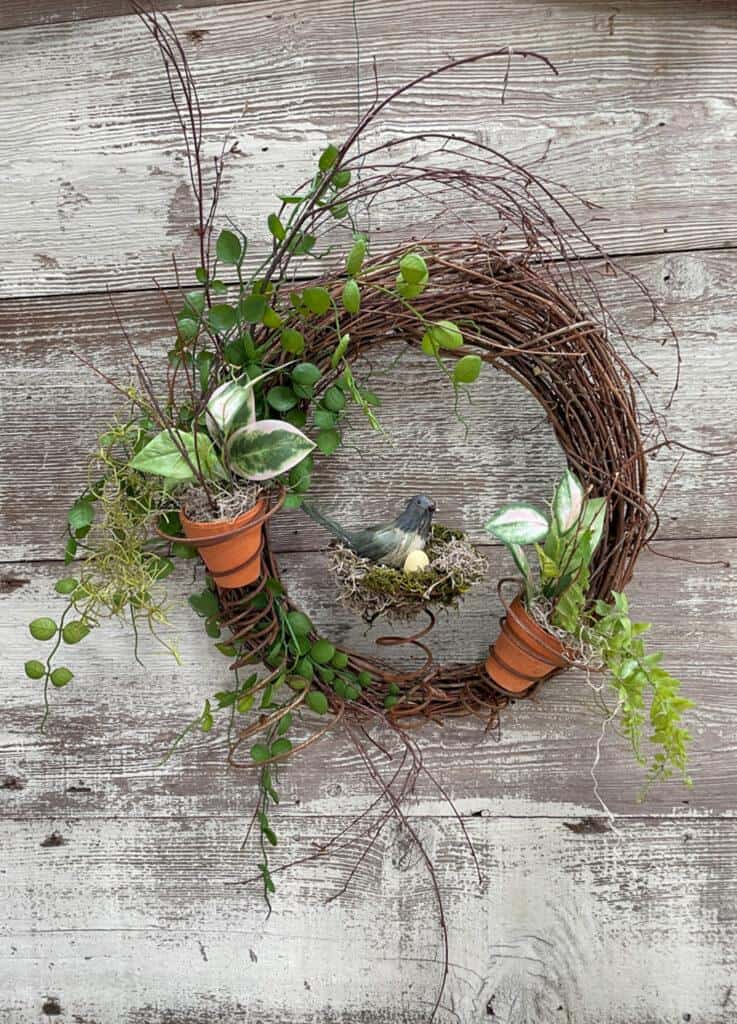
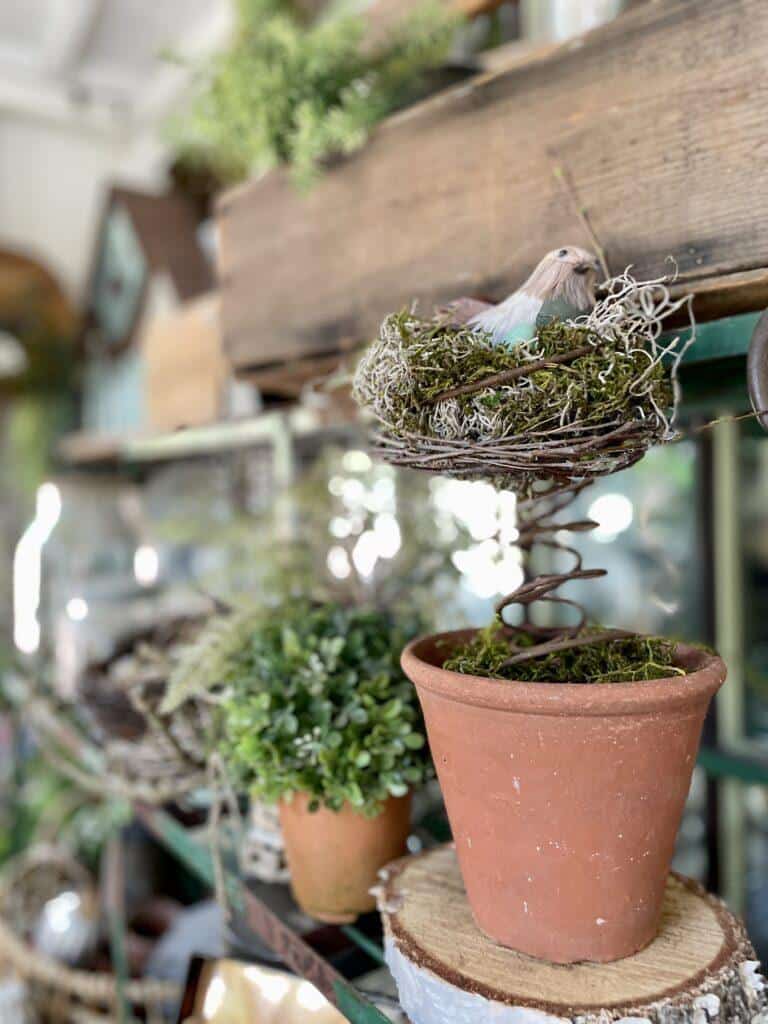
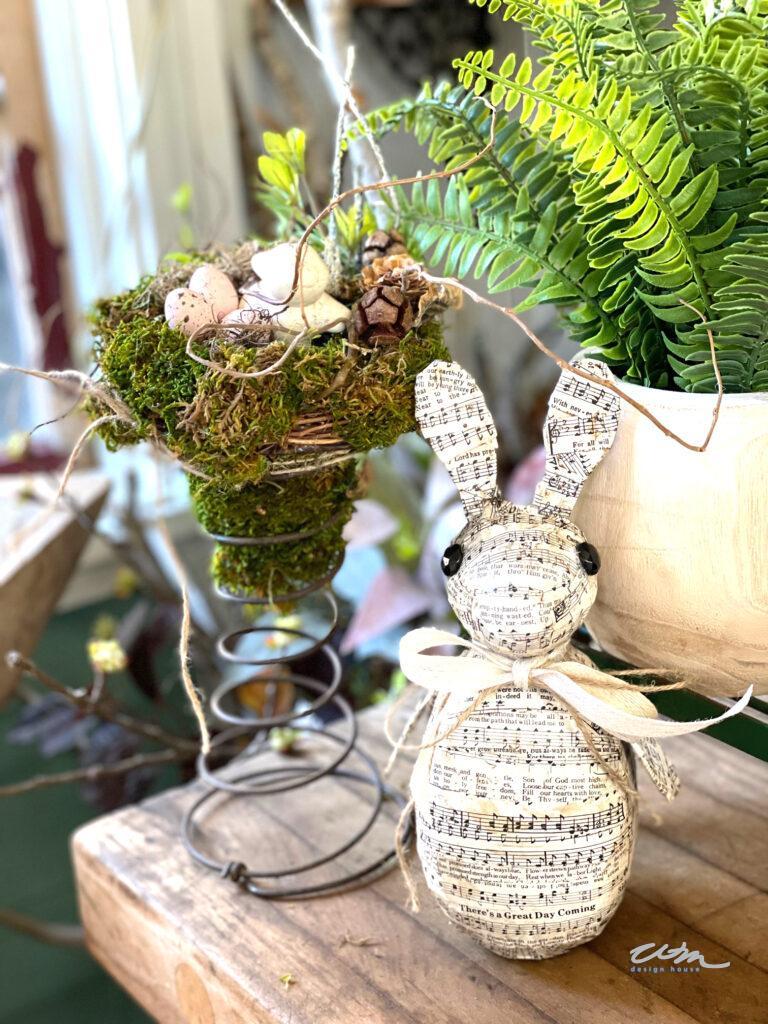
The first craft we are going to make is the sweetest bird’s nest in an old box spring or bed spring. The bird’s nest makes the cutest spring decoration to sit on your kitchen counter or anywhere in your home.
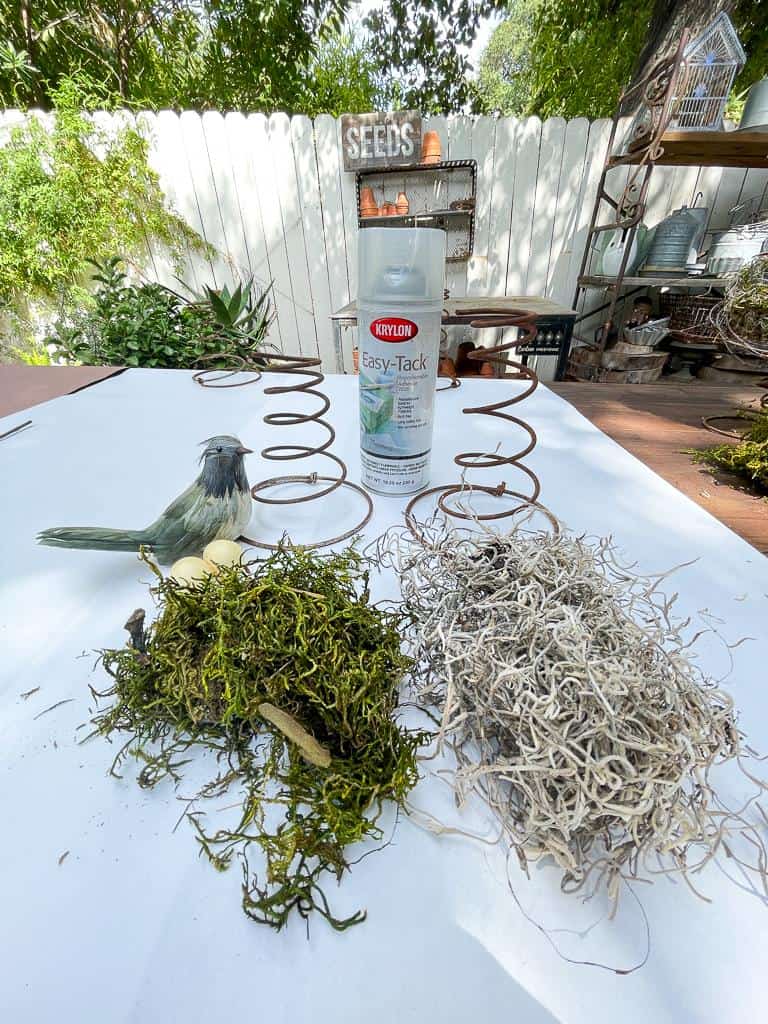
Craft Supplies Needed for a bird’s nest in an old box spring
You can pick up most of these items at the craft store. or you can use my affiliate links to purchase the goods.
- 1 old 9″ box spring
- 1 6″ grapevine wreath
- An assortment of moss, I used Spanish moss, green moss, and some shredded straw for the actual nest
- I used a small piece of sheet moss to put down inside of the spring as a base for the nest
- Pods from a tree, or pinecones ( think about the natural things that a bird would add to a nest)
- Pieces of string or thread
- Twigs or curly willow
- A sprig or two of faux greenery
- 1 bird
- 3 small faux eggs
- Twine
- Spray Glue
- Disposable gloves
- Glue Gun
- Glue sticks

Instructions to make a bird’s nest in an old box spring
- Hot glue the wreath onto the top of the widest end of the box spring.
- Roll up the small piece of sheet moss to fit inside of the spring to create a base for the nest to rest on
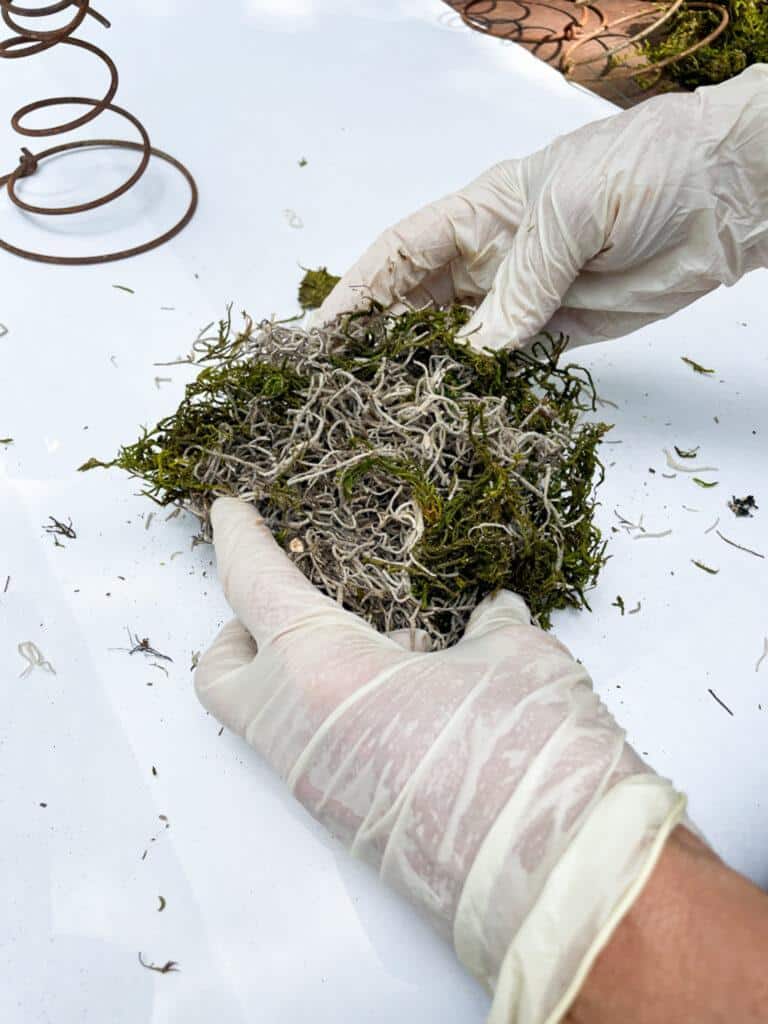
- Mix up an assortment of mosses, threads, leaves, etc, and put it in a pile on a table covered with paper.
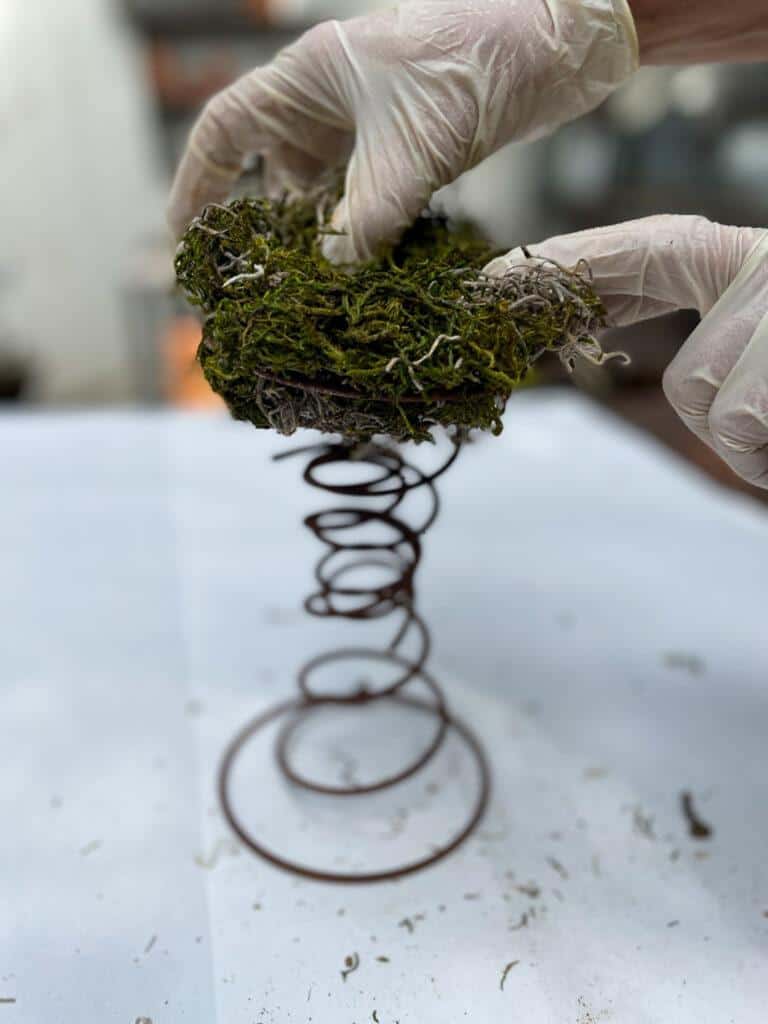
- Spray the pile with spray glue and form it into a nest with a shallow divot for the bird and eggs. ( be sure you are wearing disposable gloves)
- Turn it over and spray the bottom and use your hands to form the moss and other items into a nest.
- Insert and mold the nest into the spring.
- Using a hot glue gun add some twigs in and around the nest.
- Using the hot glue gun add your greenery and any other pods or curly willow you may be using.
- Add your bird and eggs, and make sure your divot in the nest is not too deep as you want to be able to see the eggs and the bird.
- Tie a piece of twine around the nest and tie it in a bow.
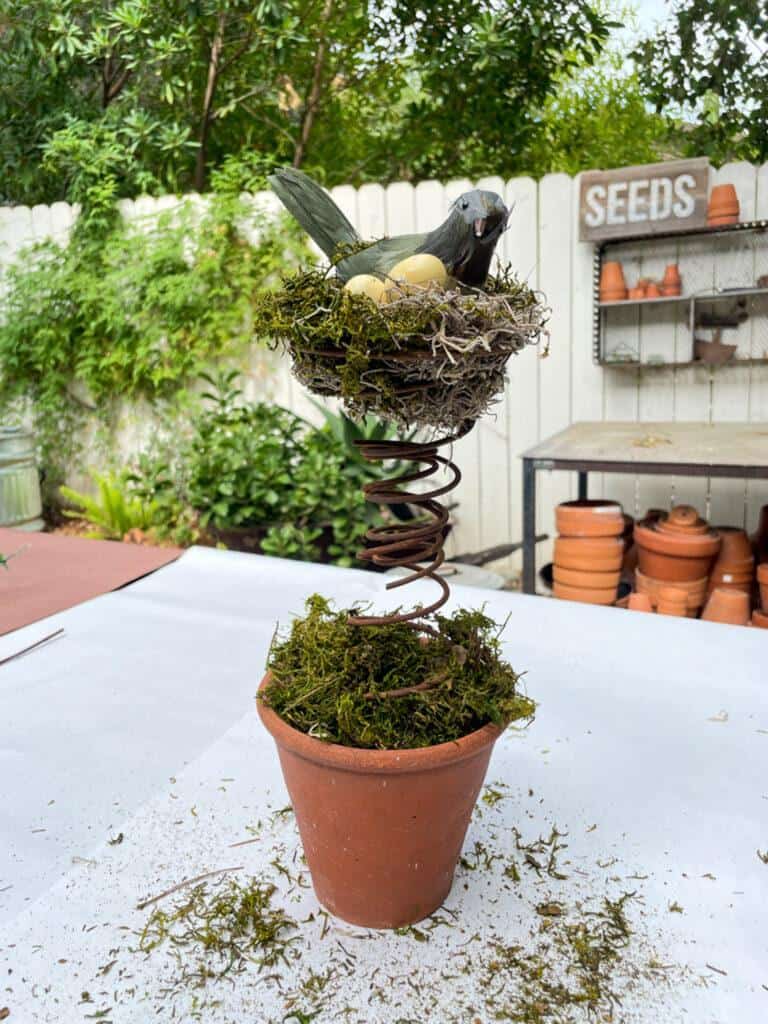
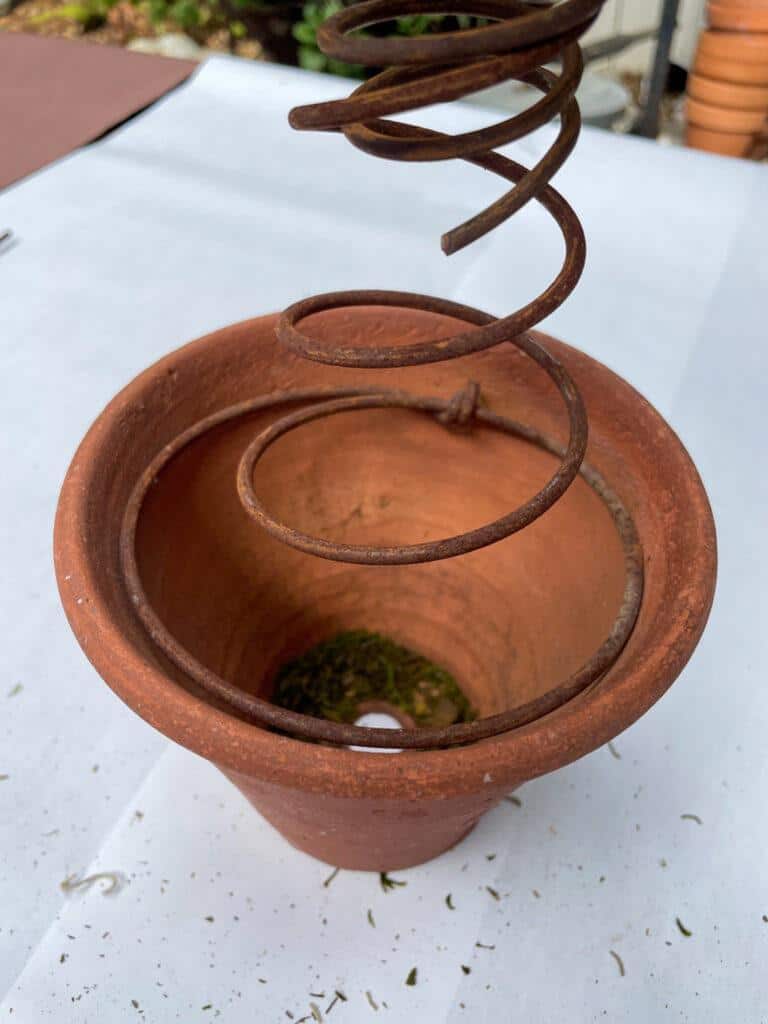
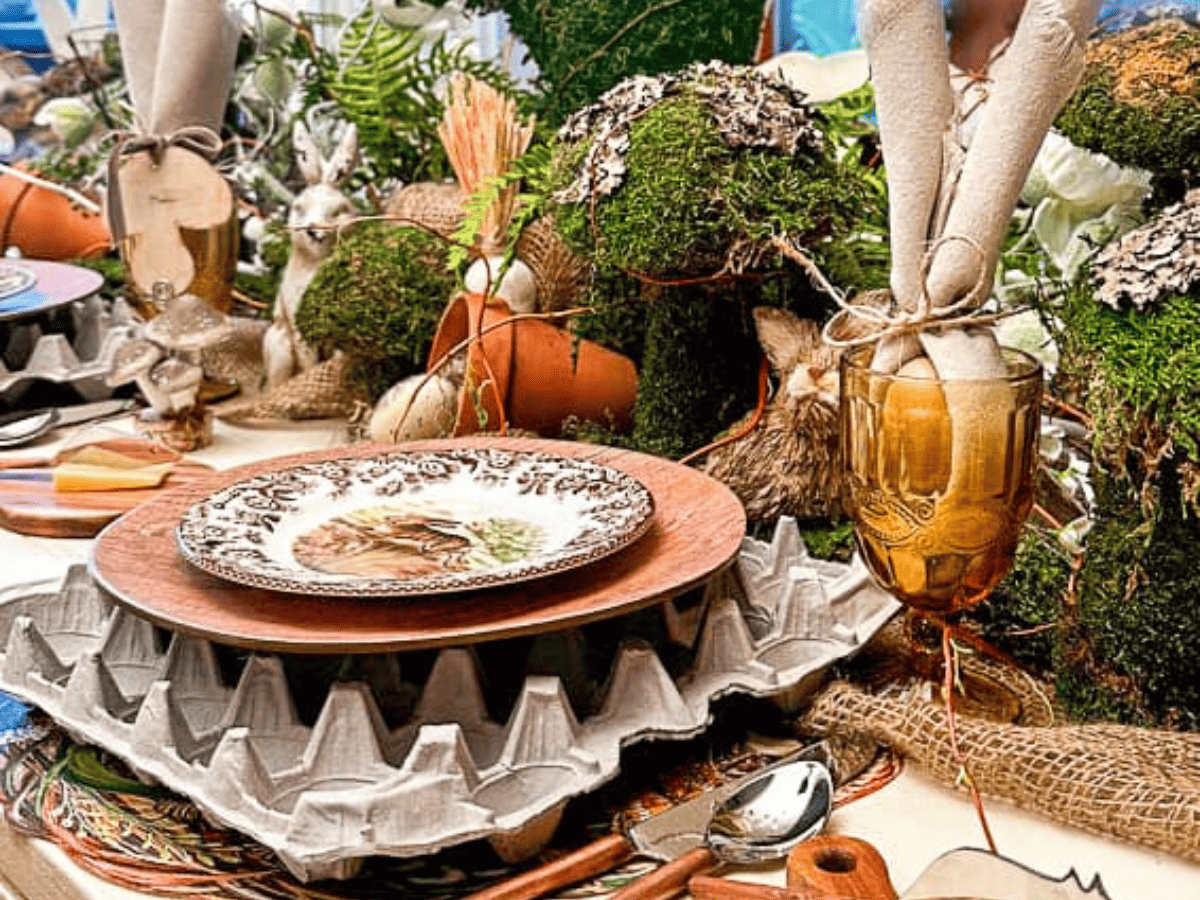
- If you would like, you can put your spring into a clay pot and add some moss around the bottom, see the below images.
- Now put your spring somewhere where you will enjoy it.
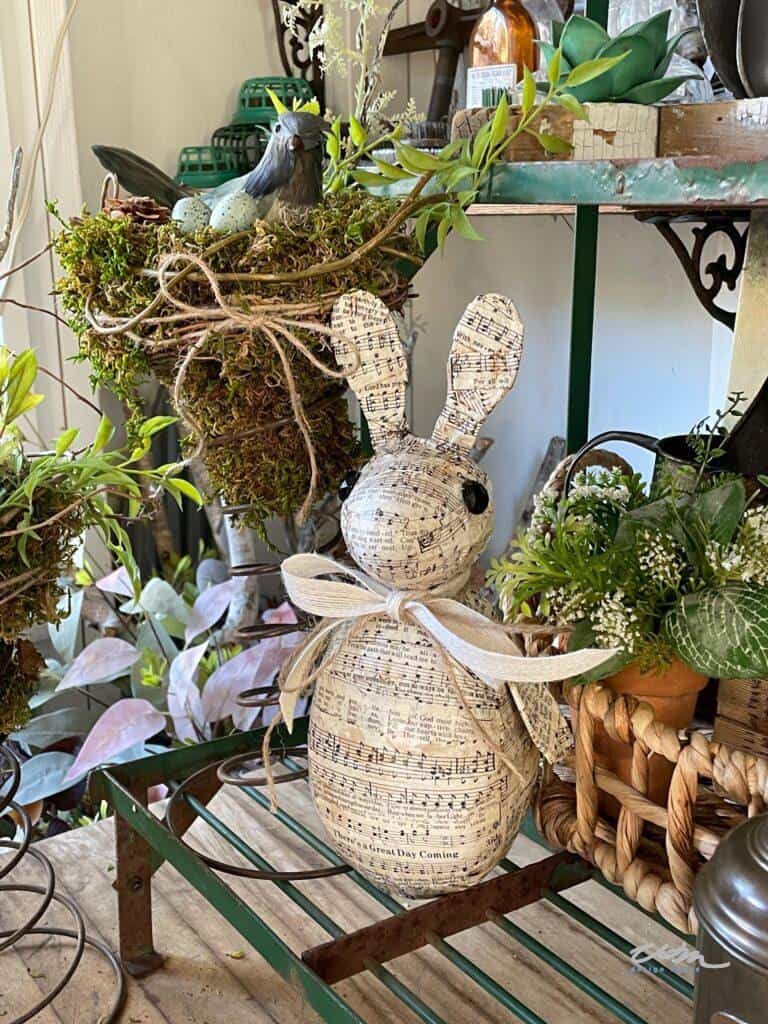
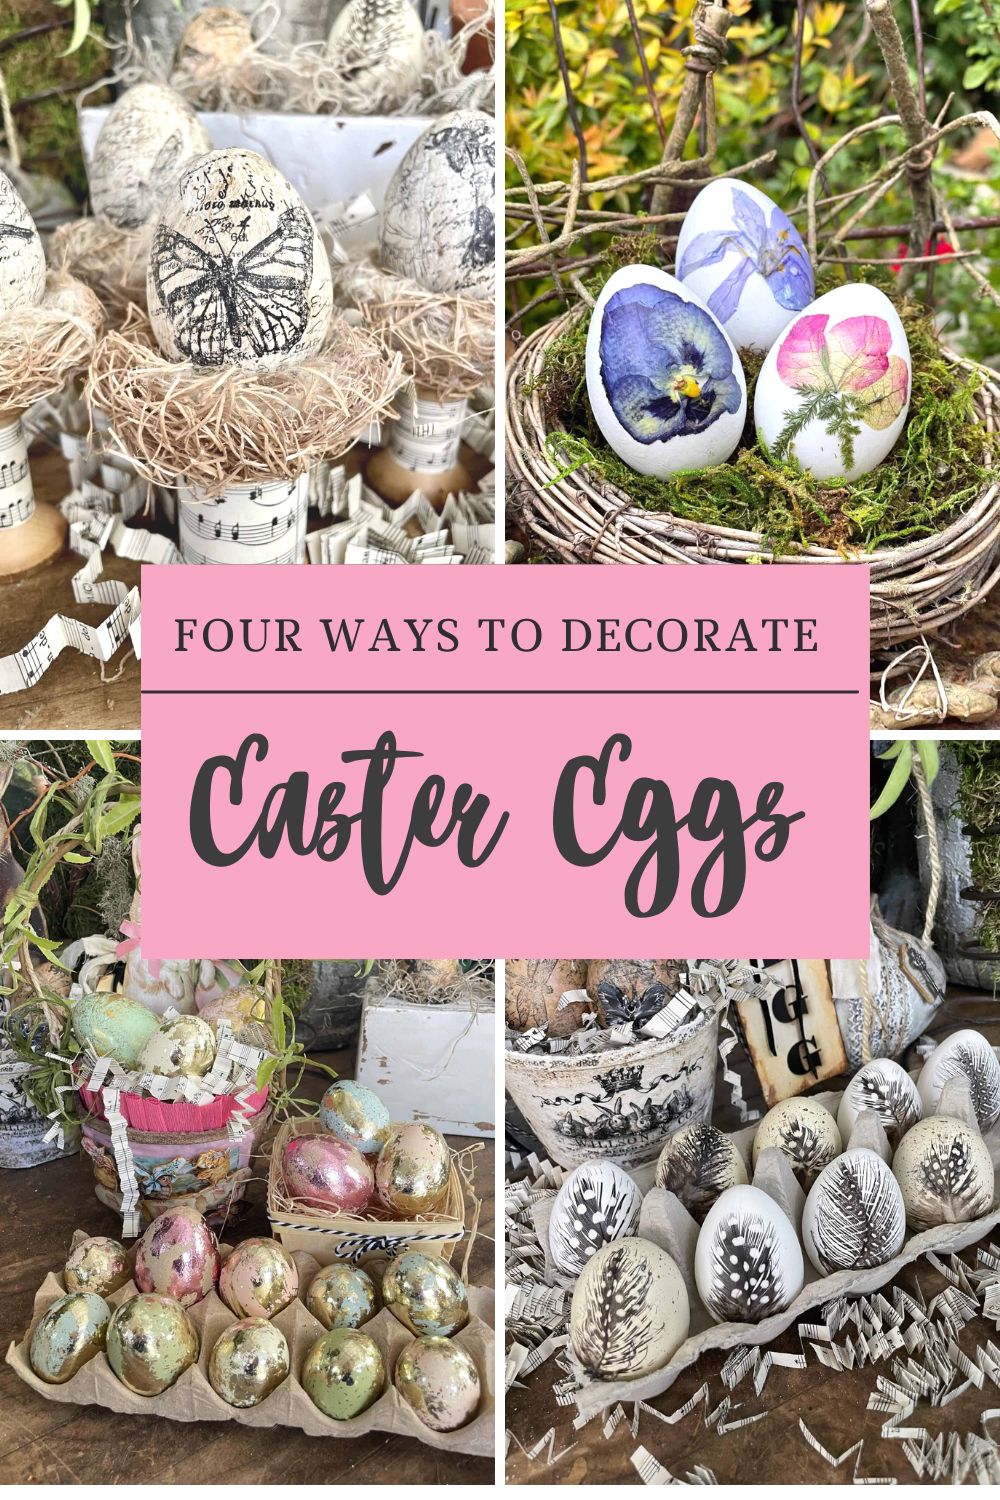
Easy upcycles; How to use an old hymnal book or sheet music
With Easter quickly approaching, it’s time to start thinking of ways to spruce up your home for the holiday.
One creative way to do just that is by making a festive Easter Hymnal Rabbit.
This little bunny rabbit is so fun to make and you won’t believe what we are going to start with.
Upcycled craft idea #2
Craft Supplies Needed for a Hymnal Easter Bunny
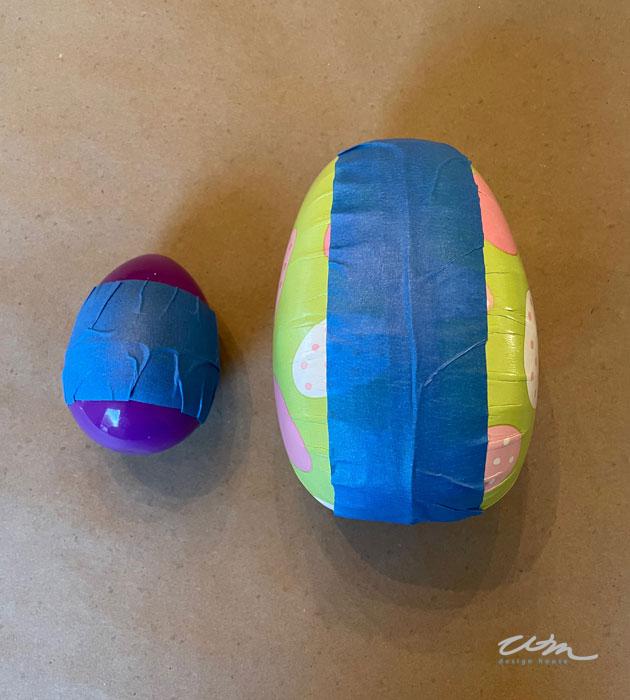
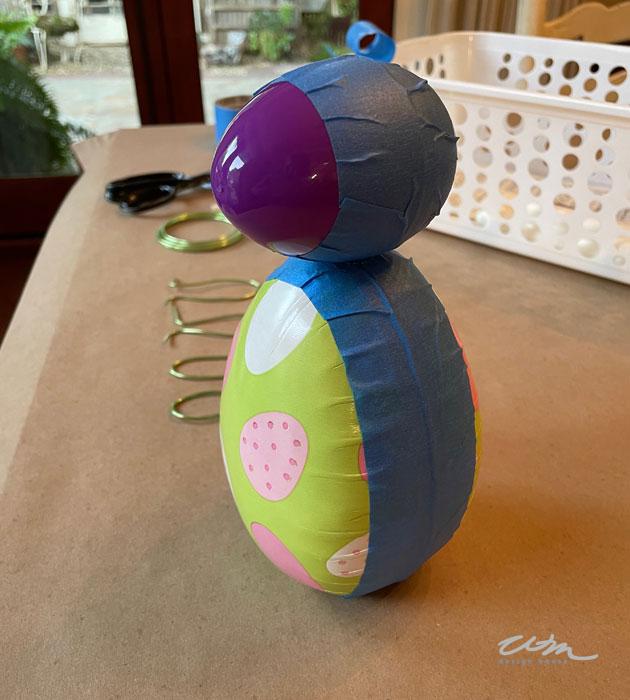
- 1 large 6″ egg, styrofoam or paper mache, flatten the bottom by tapping the largest end of the egg against a flat surface.
- 1 large plastic Easter egg, about 3″
- Soft craft wire
- Masking tape
- Pages from an old hymnal or sheet music
- Modge podge
- 2 eyes, I used small black buttons
- Ribbon to tie around his neck
- Dark wax for antiquing
- Dry chip brush if you are going to antique your rabbit
- Dry rag
Step By Step To Create The Best Hymnal Music Rabbit
- Tape the seam of the giant egg with masking tape all the way around.
- Create a flat base to place your large egg on if you are using a plastic egg. I suggest you hot glue the egg onto an oval cardboard base.
- If you are using a paper egg, you can smash the bottom a bit to flatten it.
- Masking tape the seam on the small egg all the way around.
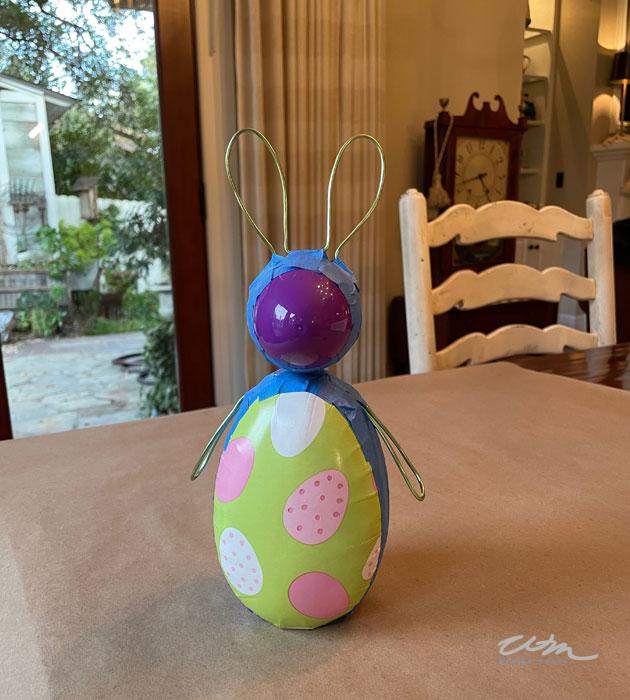
- Hot glue the plastic egg on top of the small end of the giant egg.
- Masking tape the egg on for extra security.
- Bend your wire into an ear shape, don’t be afraid to get creative, leave about 1/2 inch of wire on either side of the ear so you can glue and tape your ears onto the head of the rabbit.
- Make both of the ears before you tape them on to be sure they are similar sizes.
- Using the same method create two arms to go on the sides.
- Hot glue the arms and tape them so they are secure.
- You can also make two feet if you would like, using the same method.
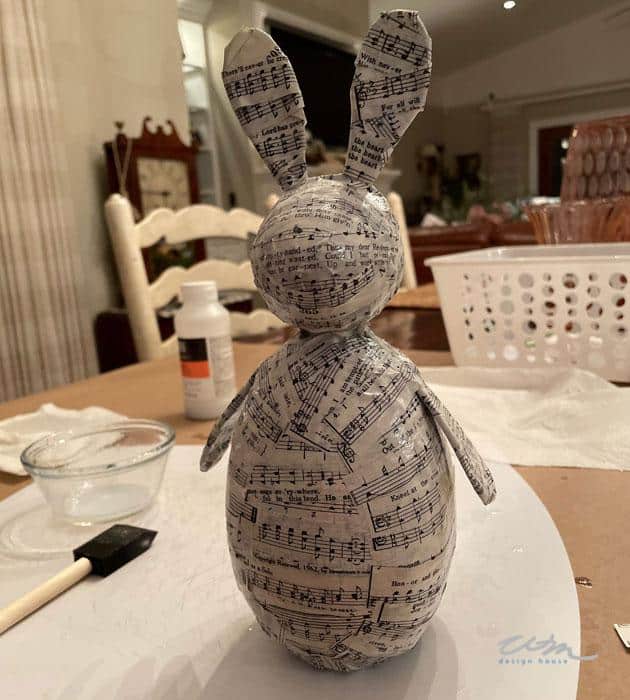
Mod Podge your rabbit with hymnal music
Cut your music into strips that are about 3″ long x 1/2 wide.
Using the Modge Podge, paint some glue on the rabbit and then place the strips onto the rabbit and paint over the strips.
I did the front and back of the body first, then the sides.
For the ears, arms, and legs, you will need to put Mod Podge onto the paper on both sides and then wrap the paper around the wires in both directions until none of the wires is showing.
For the head and neck, you may want to use some long strips and some that are shorter.
I added some extra layers on his cheeks to build it up a bit.
Add a second layer of paper strips if you can see any of the colors underneath.
Once you have completely covered the rabbit, let him dry.
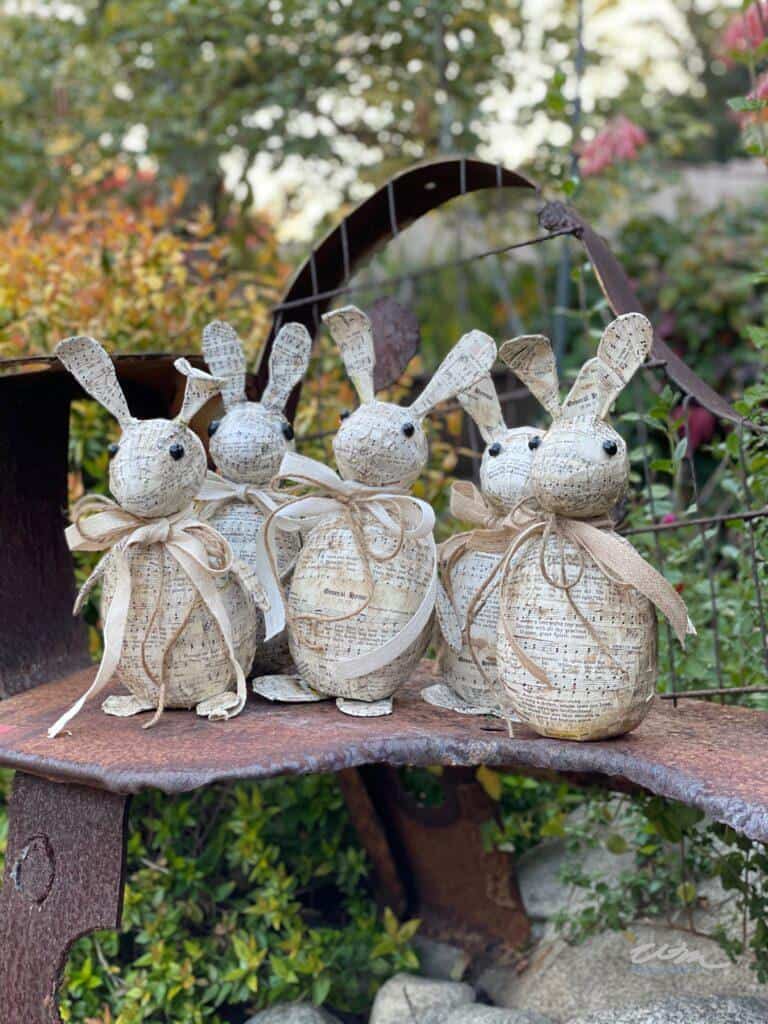
Antiquing the rabbit
If you choose to antique your rabbit, use a dry brush with very little dark wax and paint it onto the rabbit. Using a clean dry cloth, rub the wax until you get the look you want.
A little tip, if you get too much dark wax onto the rabbit, you can put a little bit of clear wax on a rag and wipe off some of the dark wax.
Once the wax dries, you can buff it to get a nice shine.
Hot glue your eyes on the sides and tie a ribbon around his neck.
Upcycling trash and vintage items into craft projects are a great way to be creative and reduce waste. By using trash such as old Easter eggs, toilet paper rolls, cardboard boxes, and more, you can create fun projects at practically no cost! Plus, it’s a great way to teach your kids or grandkids about the power of recycling and repurposing things that would otherwise become trash. So next time you find yourself with some extra trash around the house, don’t throw it away – upcycle it into something amazing!


You may also enjoy these other DIY projects
A DIY to Create Beautiful French Botanical Books for Home Decor
Those bunnies are SO, SO cute!! I had a rabbit figurine that the ear broke off of. I glued the ear on, but you could tell that it had been broken. I decided to just mod podge chinoiserie napkins all over him and no one knew the better!
I am giggling because we had an accident with this guy and he broke! we glued him back together and put moss on his ears, LOL
My goodness Wendy, these are so adorable. Isn’t it amazing what you can make in an afternoon with a few recyclables. I cannot pick between the two, both are too cute! Thank you for sharing with Whimsy Home Wednesday.
Thank you so much, Cara. It really is amazing when we can think outside of the box and use something that is recycled.
Thank you REnae, He is one of my favorites~
Great projects, Wendy! My favorite is the hymnal music bunny. And, with all of the bunnies grouped together…you have an adorable “Bunny Choir!”
Thank you Missy, maybe you can come teach them how to sing.
Love this project Wendy! It will be such a great touch of spring in your home. Always so much fun to get together with friends and craft. Love what you did with bunny too! Have a great day!
Thank you Denise, it really is fun t bring spring into your home and this little nest is the perfect addition. I hope you get a chance to give it a try.
What a sweet little project and looks like it was so much fun! Vintage bed springs are such a great way to decorate!
Thank you Melanie. The springs were sitting around for a while until I came up with this idea.
I hope you give it a try.