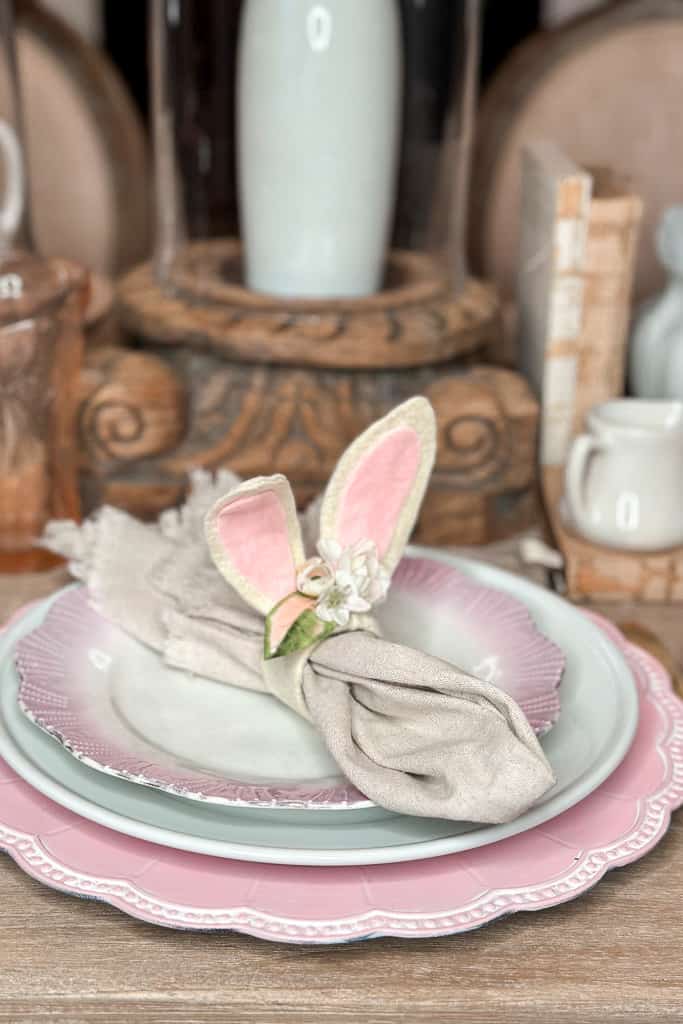
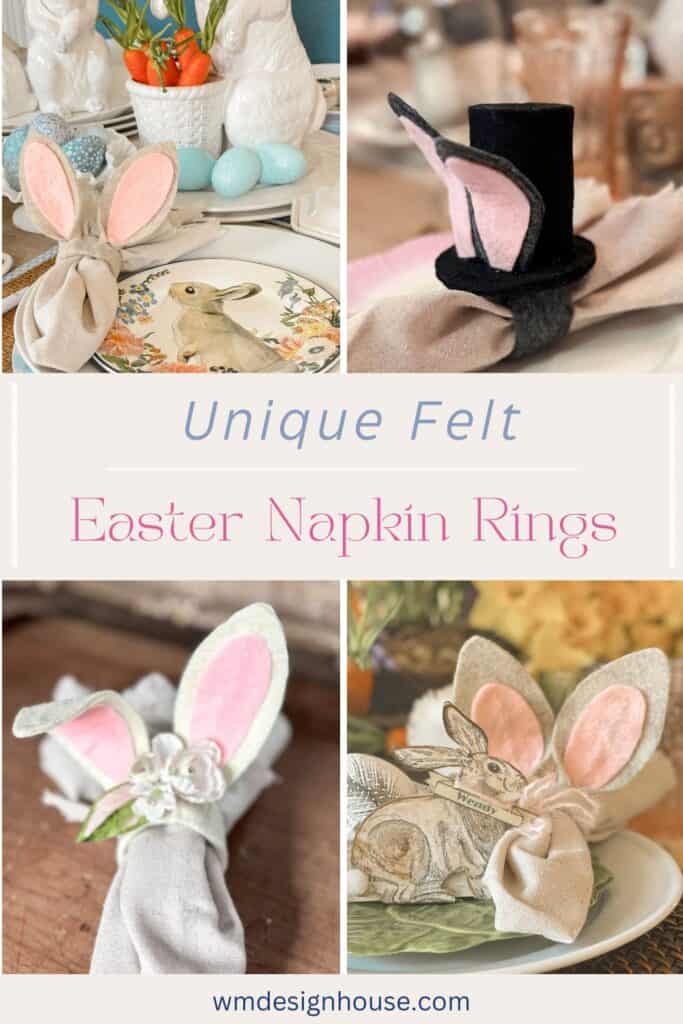
How to Make Easy DIY Bunny Easter Napkin Rings
Get ready to hop into the spirit of Easter with our easy-to-follow directions on DIY Easter napkin rings. These bunny ears will add charm and character to your table settings!
On my blog WM Design House, I may sometimes use affiliate links, which means a small commission is earned if you purchase via the link. The price will be the same whether you use the affiliate link or go directly to the vendor’s website using a non-affiliate link. Read my full disclosure policy here.
DIY Bunny Easter Napkin Rings
Spring always puts me in the mood for a creative Easter craft. There’s something special about designing a beautiful Easter table setting, especially when I can add my own DIY touch.
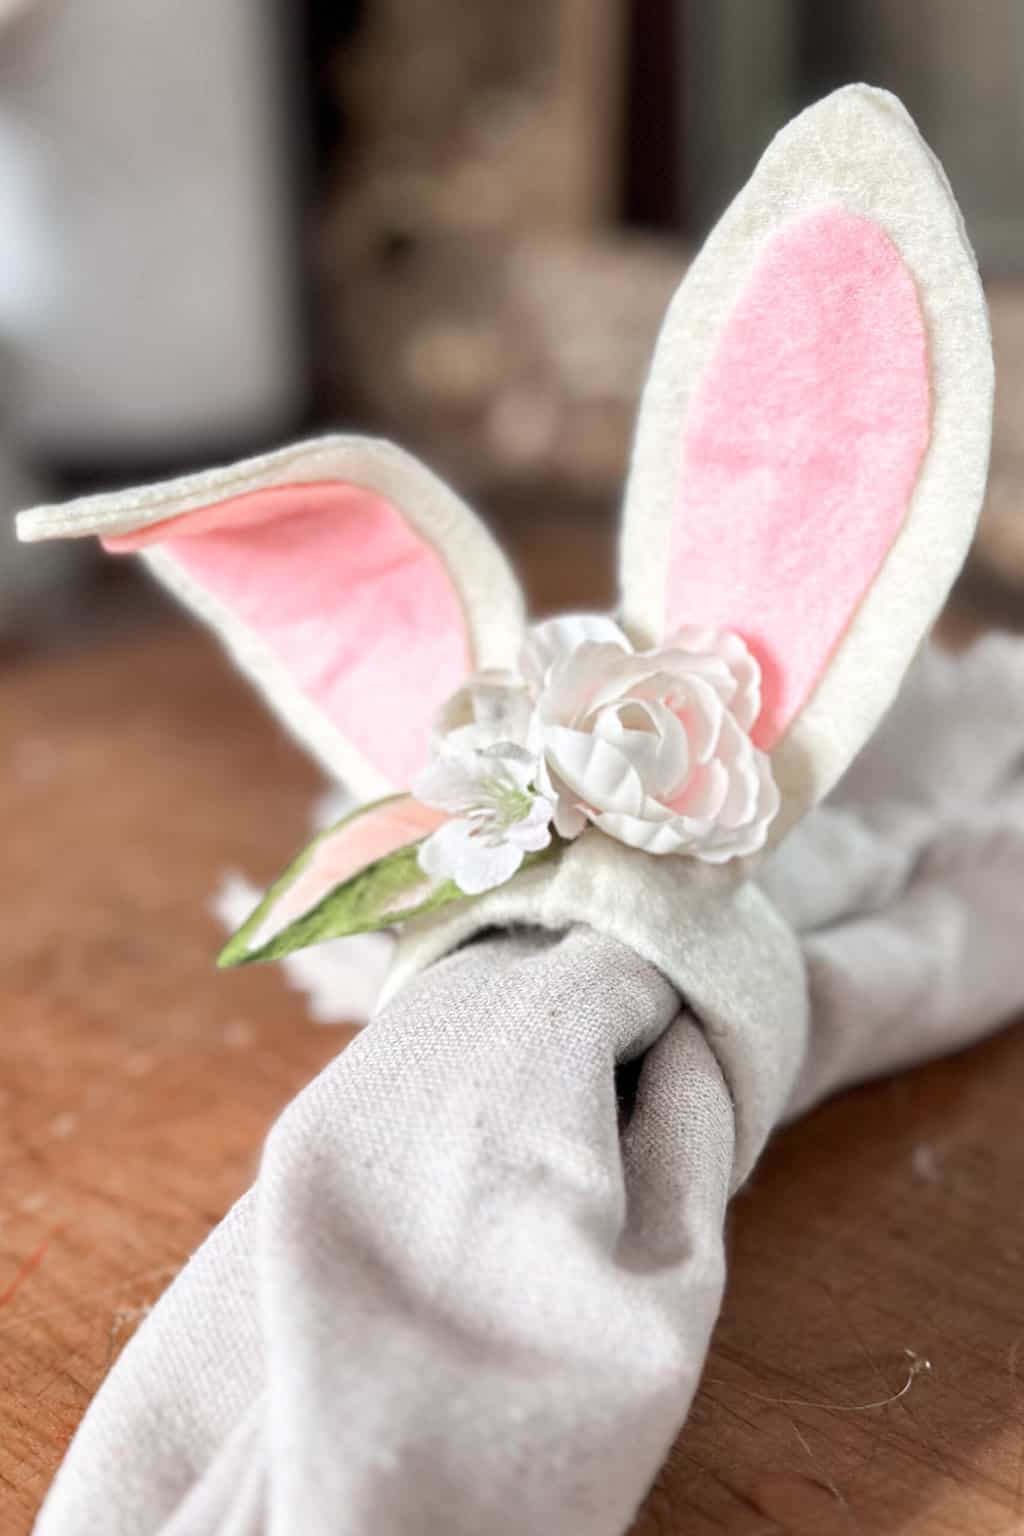
These napkin rings might look familiar, but I’m giving them my own flair! We’re paying homage to the classic Mr. Benjamin Bunny, and adding a touch of floral flair to Mrs. Cottontail.
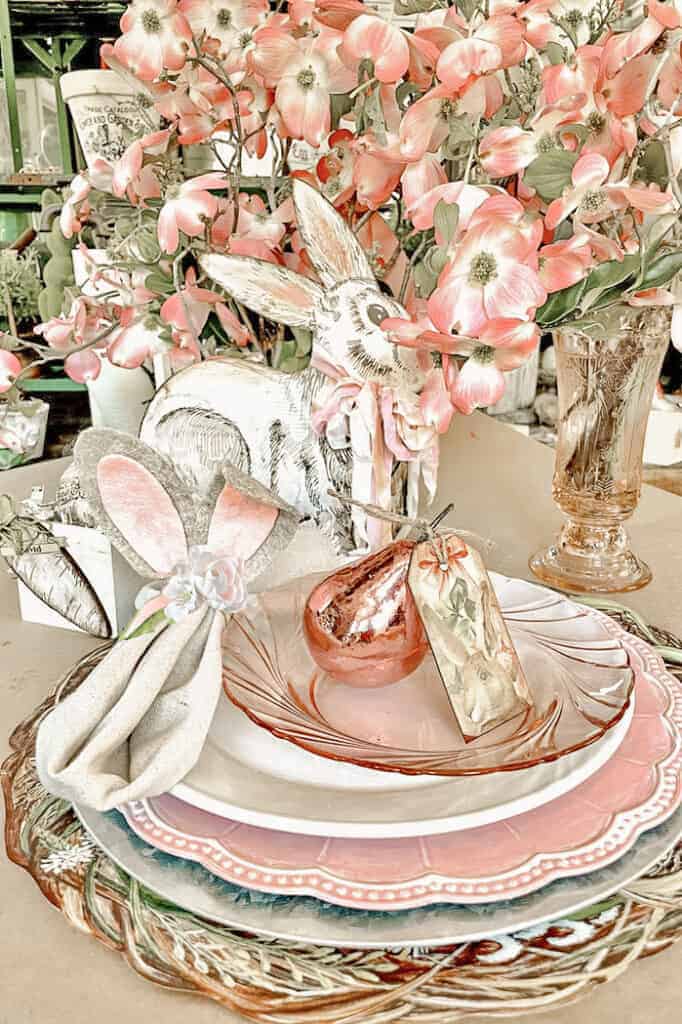
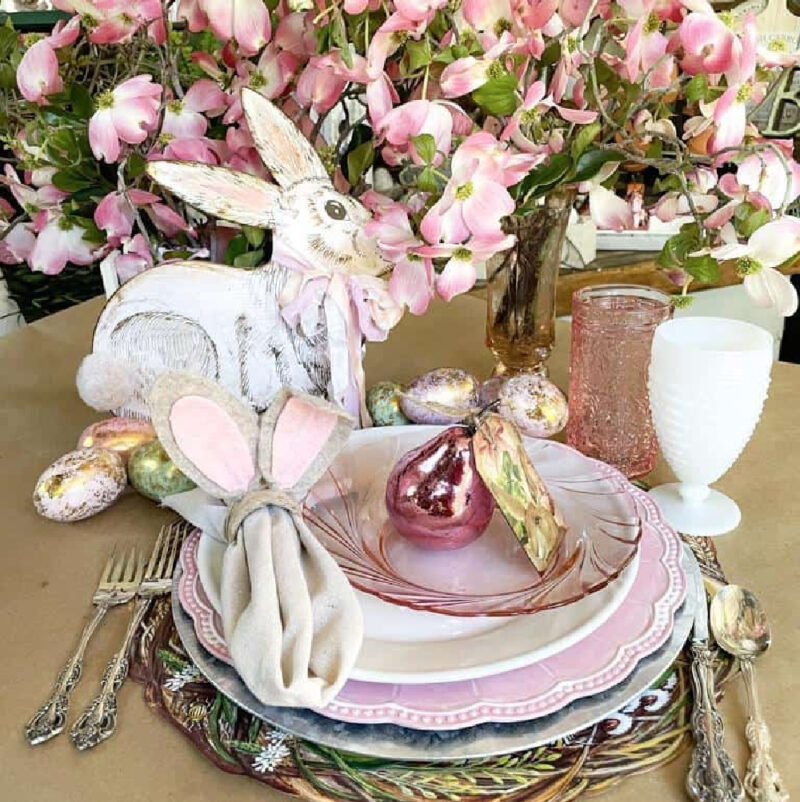
In addition to these adorable napkin rings, I’m adding a special touch with pink-hued, foil-wrapped pears that include a handwritten note from me. To complete the springtime theme, I’ll be incorporating floral arrangements featuring fresh-cut dogwood branches, showcasing their beautiful pink blooms.
Today I am sharing with a group of other talented bloggers hosted by my friend Carol Landers @blueskyathome. Be sure to stop by and visit all of their wonderful spring projects at the end of this post.

Supplies Needed for Easy Easter Napkin Rings
You can easily pick up these supplies at your local Dollar tree or craft stores.
Additional Tools You’ll Need
Directions for Felt Bunny Ear Napkin Rings
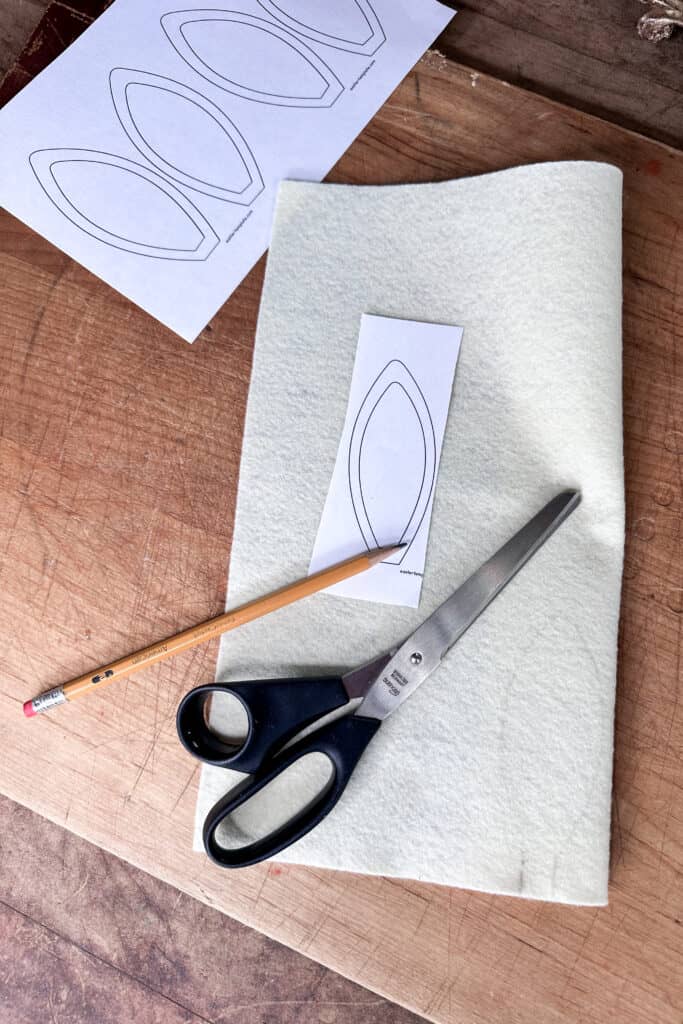
Preparing the materials
- Trace your pattern pieces onto your fabric.
- Using scissors, cut four large ears out of your base color felt.
- Cut two inner ear pieces with your second fabric, felt, or a cute cotton print.
- Cut a ring of the paper towel tube 2.5″ wide.
- You will need a piece of felt the same color as the ear base that is 4.5″ wide x 8″ long.
- Prepare two pieces of wire or pipe cleaner that are 8″ long.


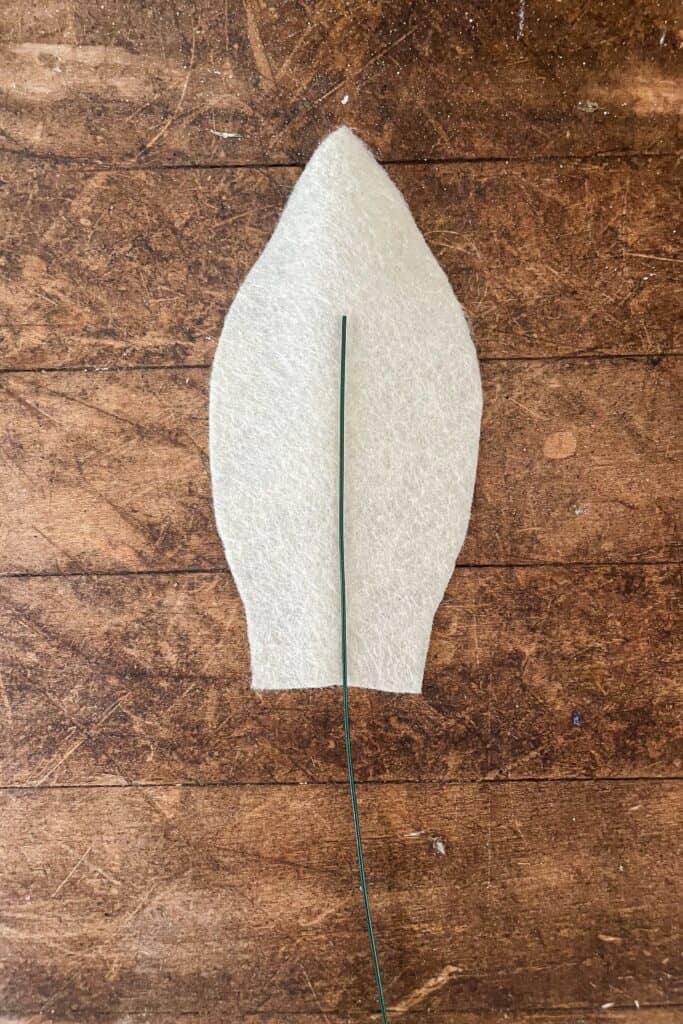
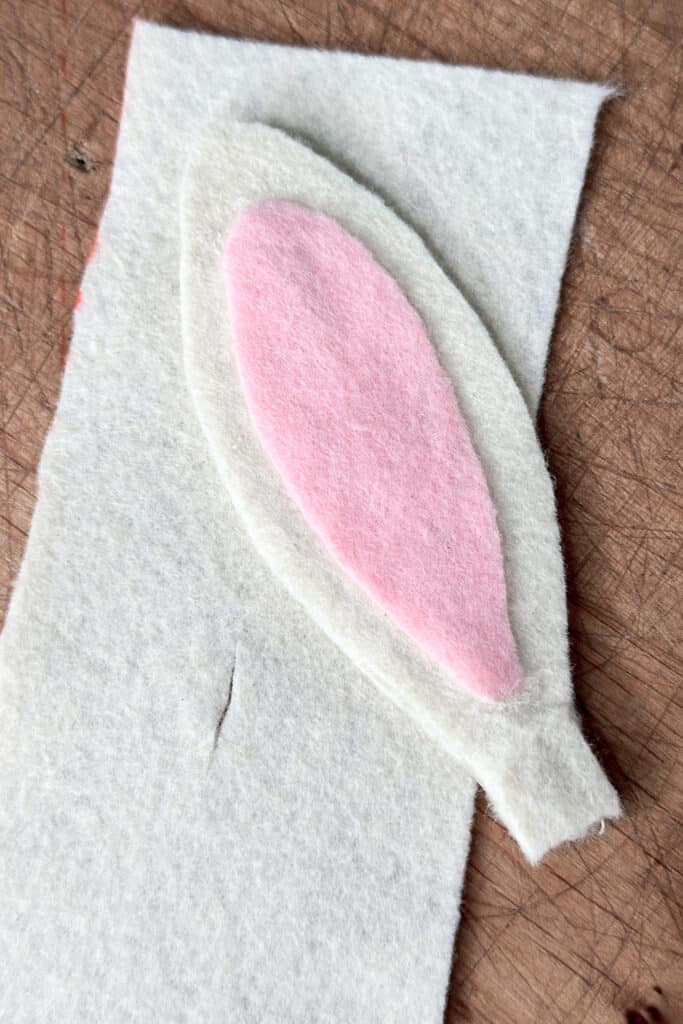
Making the Bunny Ears
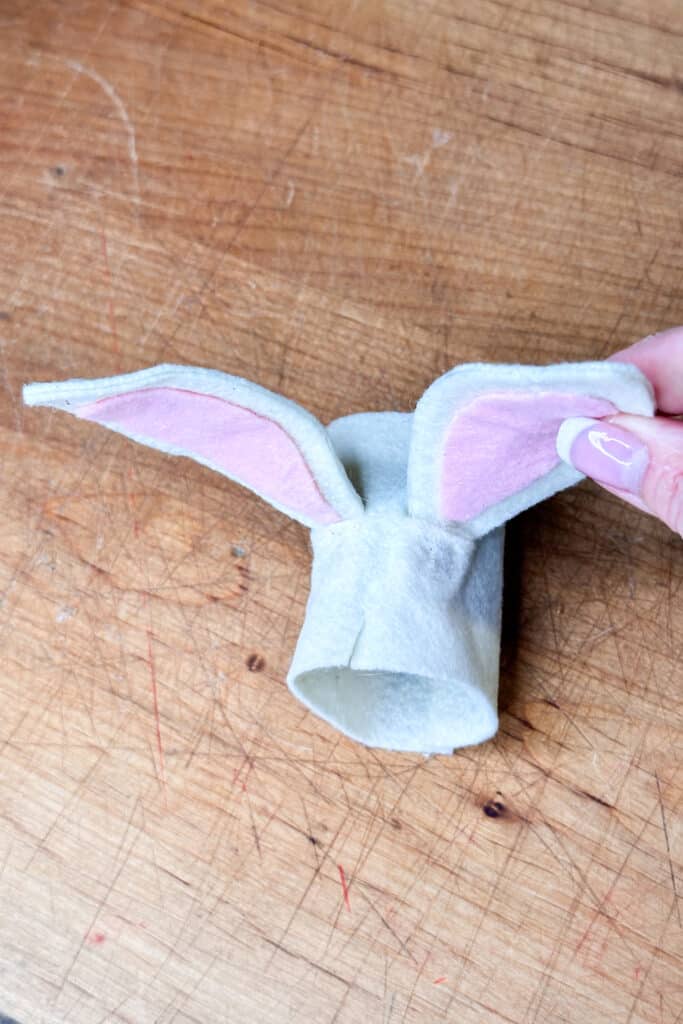
- Glue the wire to the middle of one of the white ears.
- Glue the second piece of white felt over the top of the wire or pipe cleaner.
- Repeat these steps on your second ear.
- Glue the pink center of the ear into the middle of the white ear piece.
- Trim the wire.

Assembling the napkin rings
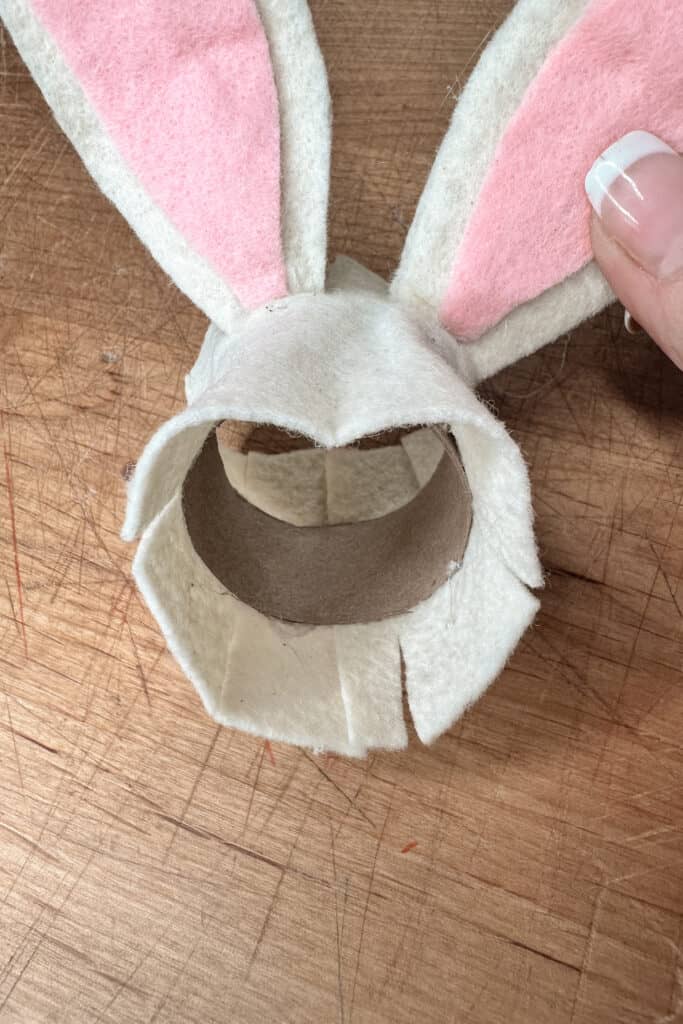
- Fold the long piece of felt in half and snip a small slit in the center about 1/2″ long. Just enough to fit the end of the ear through the slit.
- Place a second small slit 1/2″ away from the first slit.
- Add a small dab of hot glue onto the ends of the ears that are through the slits and attach them to the piece of felt.
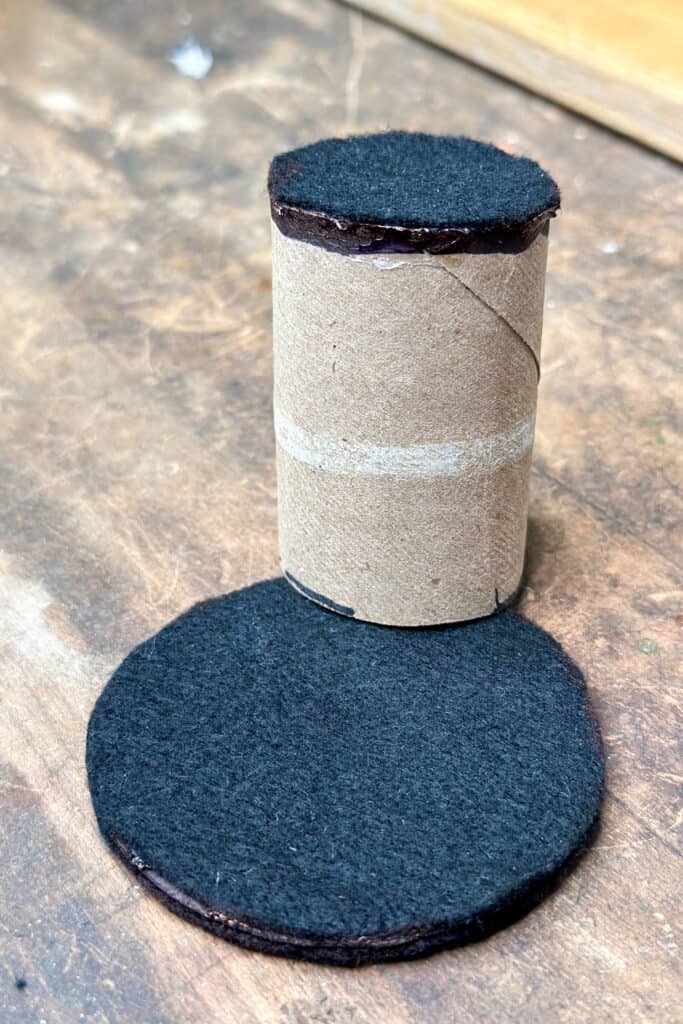
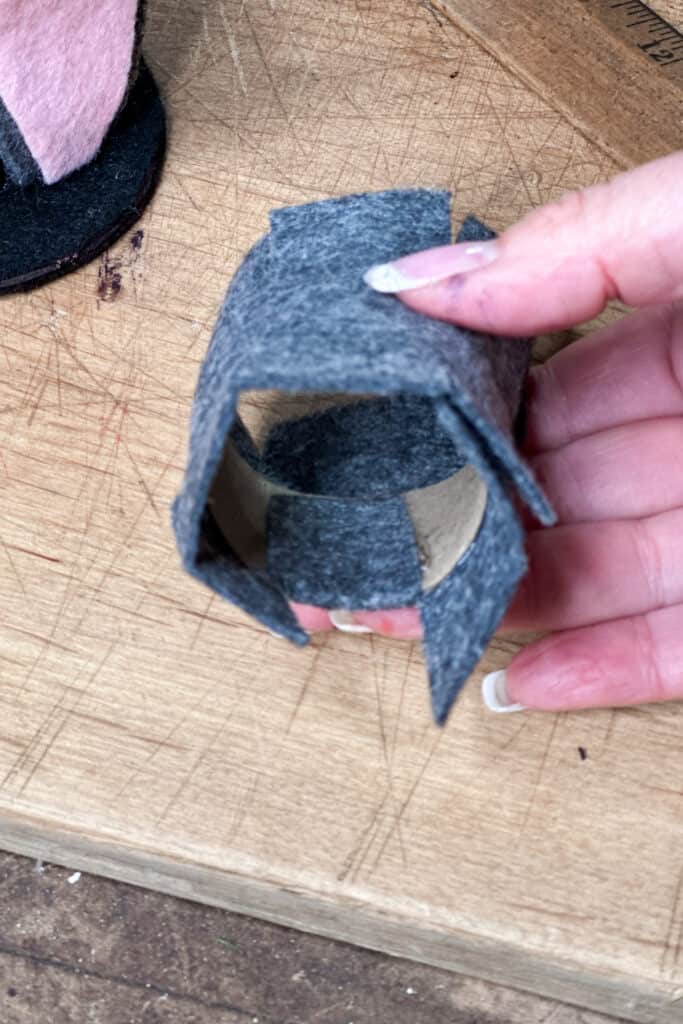
- Put some hot glue on your cardboard ring you cut from the TP or paper towel roll.
- Lay the ring in the center of the felt strip and wrap the felt around the ring.
- Slightly overlay the felt and hot glue it. Trim the felt if needed.
- Cut slits approximately every 1/2 – 3/4 ” on the excess felt on both ends.
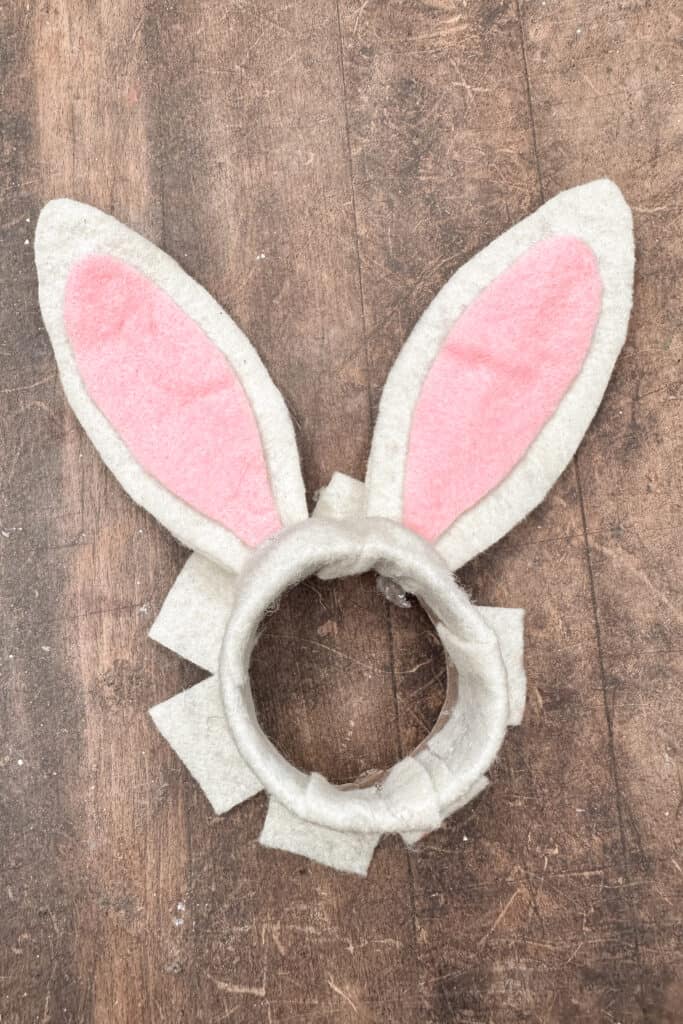
- Hot glue each section onto the inside of the ring until you have glued all of the tabs. This makes a nice, smooth edge around your napkin ring.


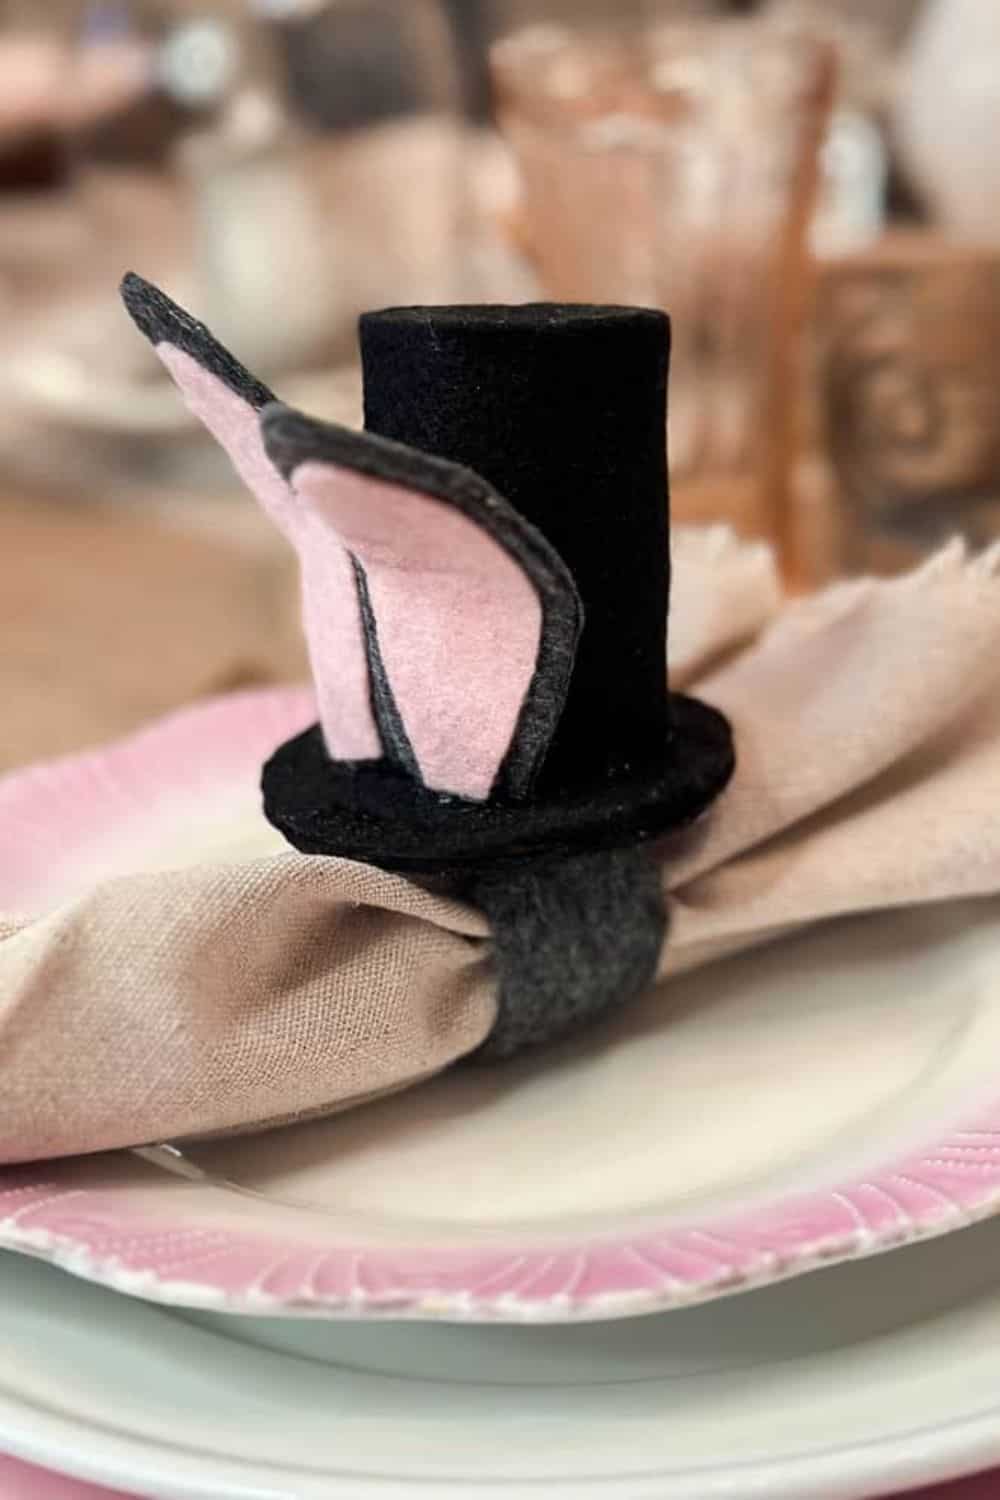
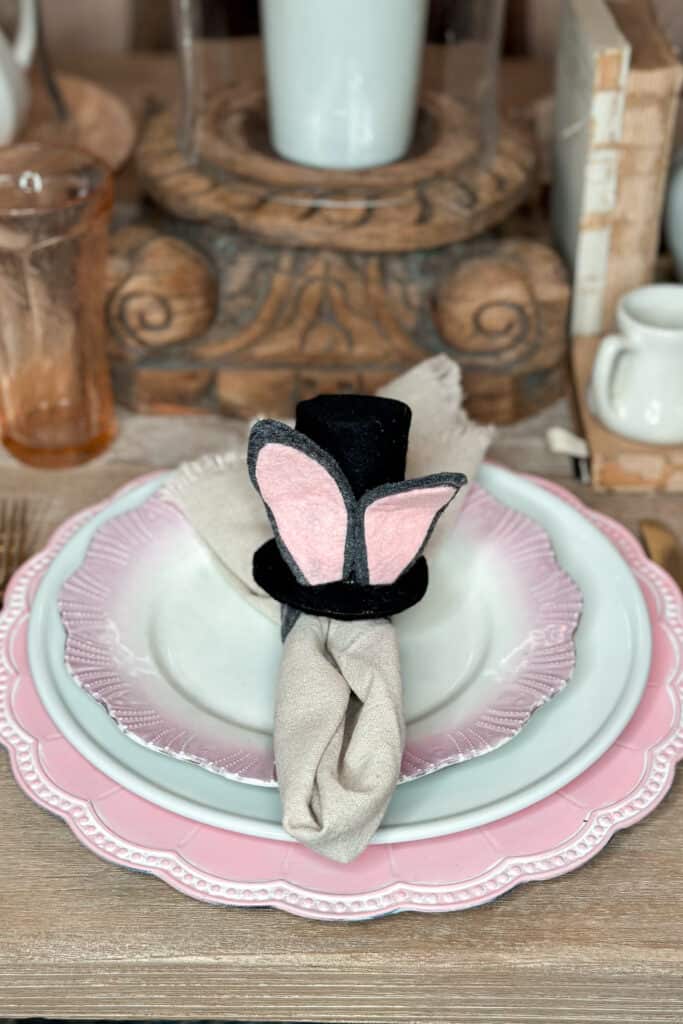
How to Make Benjamin Bunny Top Hat Napkin Ring
Assembling the pieces of the top hat
- Cut a 3″ round circle out of a piece of chipbaord.
- Use a black marker and color the edge of the chipboard.
- Cut two 3″ circles out of black felt.
- Hot glue the chipboard circle onto one on the black felt circles.
- Trim if necessary.
- Glue the second piece of black felt on top of the chipboard.
- Trim if necessary.
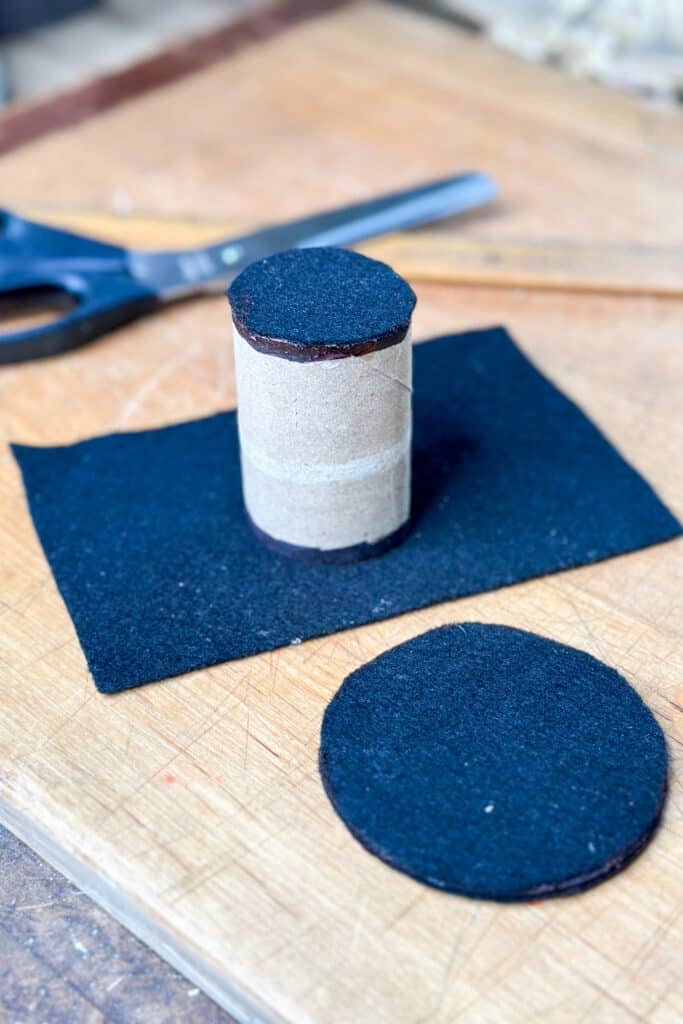
- Cut a piece of the TP roll that is about 3″ tall.
- Trace a small black felt circle using the TP roll as your template.
- Use the black market around the top edge of the TP roll.
- Hot glue the TP roll to your small black felt circle.
- Trim any excess felt.
- Cut a piece of felt that is 5 inches wide and long enough to wrap around your TP or paper towel roll.
- Hot glue the paper roll in the center of the long piece of felt, leaving 1″ on both the top and the bottom of the roll.
- Hot glue and wrap the entire roll in the black felt.
- Slit the remaining one inch of felt on both the top and the bottom.
- Glue one piece of the edge into the inside of the TP roll at a time until you have glued all pieces.
Tip from wendy’s craft room:
DO NOT GLUE THE TOP ONTO THE BASE OF THE HAT YET.


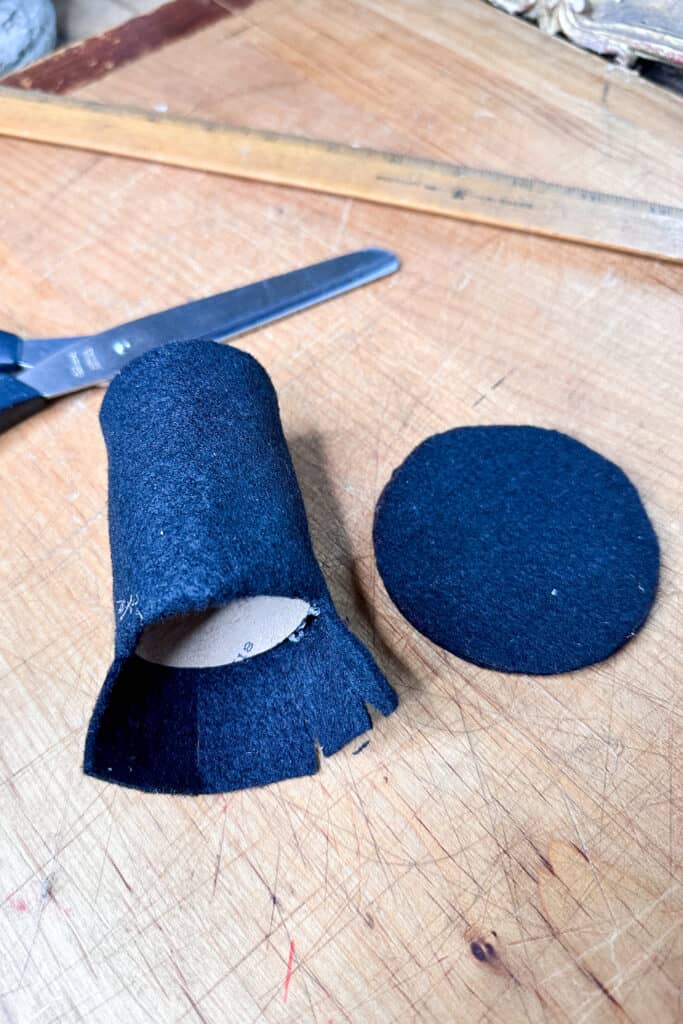

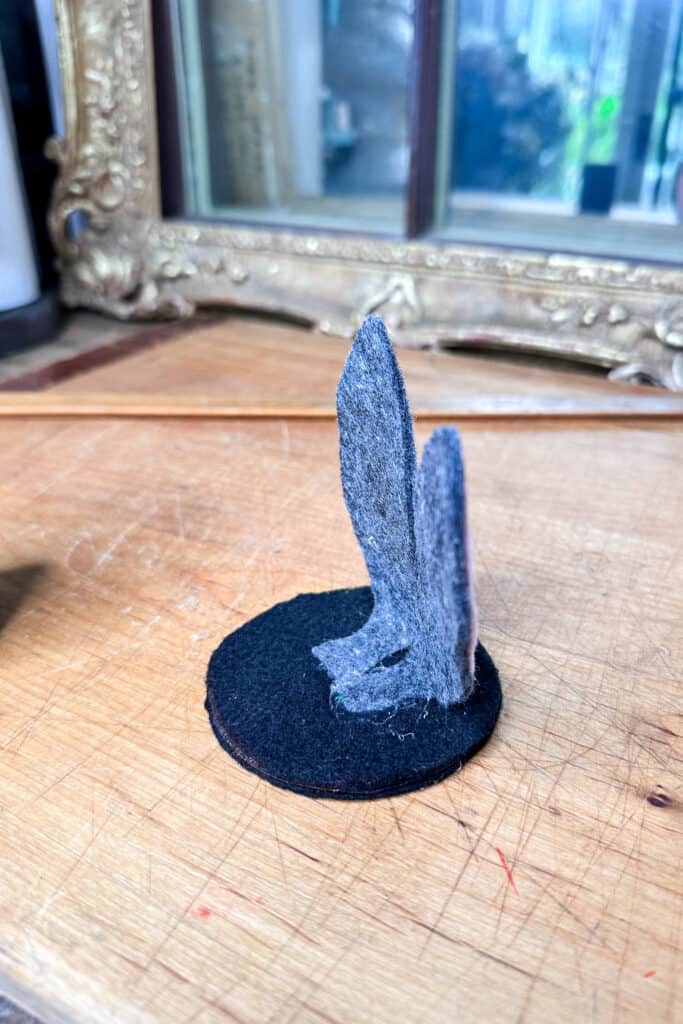
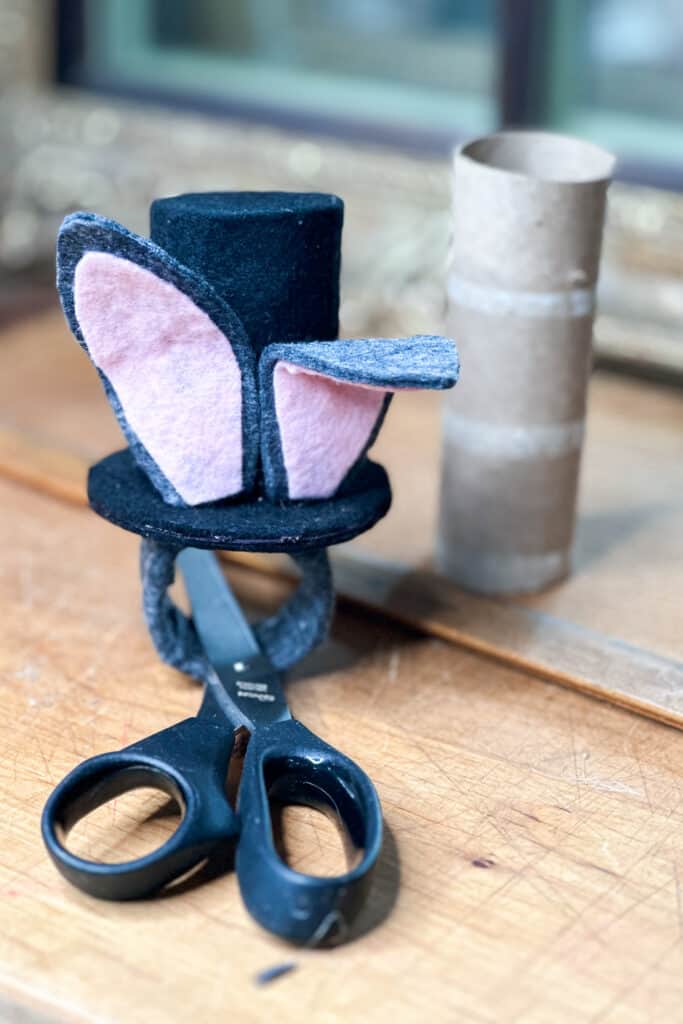
Prepare the two bunny ears
Follow step 2 above for making the ears for Mrs. Cottontails ears.
- Trim the wire off the end of the ears and bend the tabs in.
- Position the ears so they will fit under the top part of the hat and hot glue them down.
- Hot glue the top of the hat over the tabs of the ears and onto the base of the top hat.


Tip from wendy’s craft room:
Stuff the rings with paper towels when you are finished and store in a plastic shoe box.
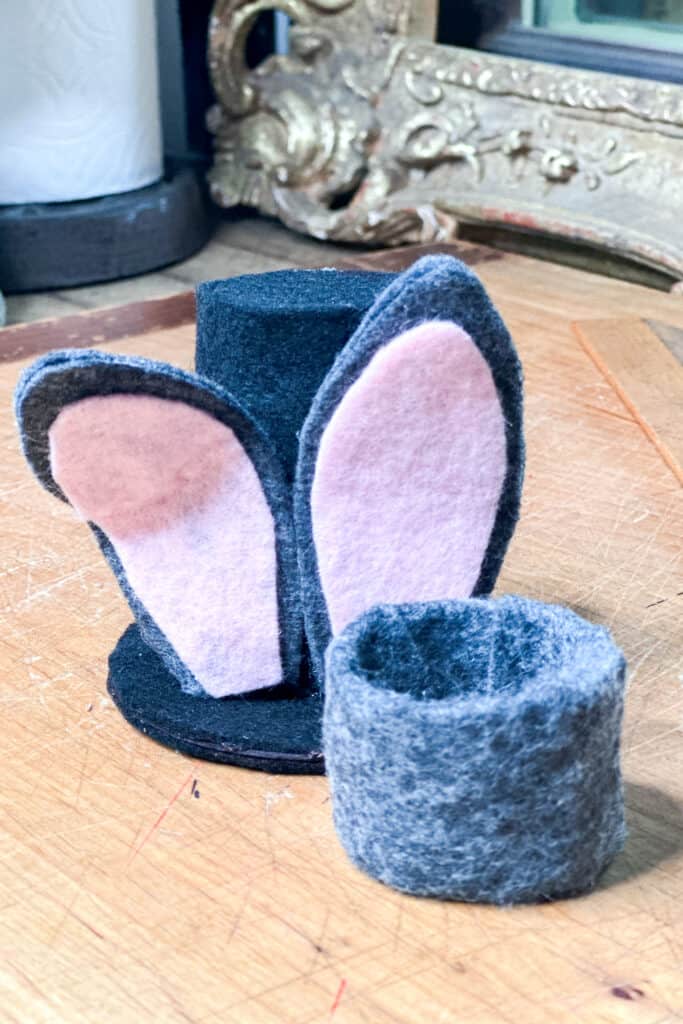
Completion of the top hat napkin ring
- Cut a 1.5″ wide ring of your TP roll.
- Cut a piece of the grey felt that is 3.5″ wide and long enough to wrap around your ring.
- Hot glue the ring in the center of the felt going lengthwise.
- Continue to hot glue the felt until it covers the entire ring.
- You should have a one inch overhang on both ends.
- Cut small slits all the way up to the edge of the ring.
- Hot glue them to the inside of the ring one at a time until you have glue both sides of the edges in.
- Lastly, you will hot glue this ring to the bottom of the base of your top hat
Customization Ideas
Customizing DIY felt bunny ear napkin rings can turn a simple craft into a personalized and creative addition to your Easter table. Here are several ideas to make each napkin ring unique:
- Incorporate different materials such as cotton, burlap, or lace to add texture. For instance, lace could add a delicate touch to the ear edges.
- Choose a fabric with a pattern for the inside of the ears for a more colorful look. Polka dots, stripes, or floral prints can add an interesting visual element.
- Embroider a whip stitch around the edge of the bunny ears.
- Personalize each napkin ring by adding guests’ names embroidered or written on a small piece of felt attached to the napkin holder, making them double as place cards.
- Paint some texture onto the ear’s interior using acrylic paint.
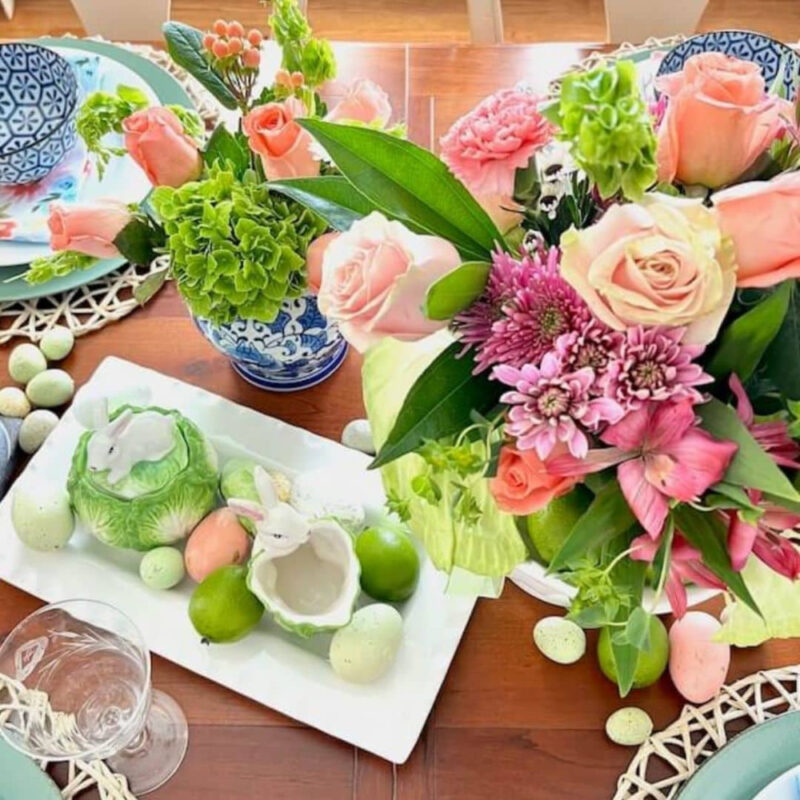
Style Your Easter Table Decor
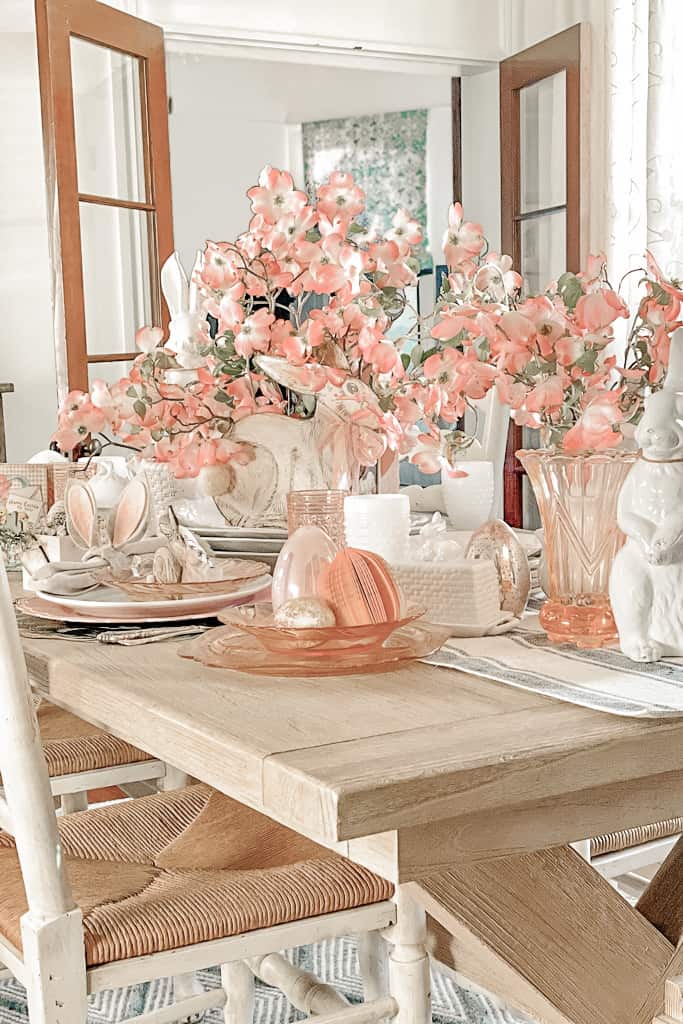
Now that we have made these cute Easter napkin rings let’s create an Easter tablescape.
To add interest to your place settings, the key is to use several layers.
- Start with a placemat or tablecloth.
- Add a charger plate or two. I layered a galvanized charger with a DIY pink charger for another layer.
- A white dinner plate with a pink vintage glass salad plate.
- Add water and wine glasses to match.
- Add some foiled pink pears. This is an easy way to get a pop of color.
- Include a personalized place card with each place setting.
- Place your rolled napkin inside of your easy DIY Easter napkin rings and place them on the plate.


DIY Easter Napkin Rings
Equipment
- Hot glue gun
- Scissors
Materials
- Felt squares in 2 colors for Mrs. Cottontail and 3 colors for Benjamin Bunny – One color of your choice will be used to cover the napkin ring and I used an ivory color for the exterior of the ear. The second color should be a pink shade for the ear’s interior ( you will get about three napkin rings for each square of the exterior color and about 6 for the interior color).
- Wire or pipe cleaners
- 1 Piece of chipboard
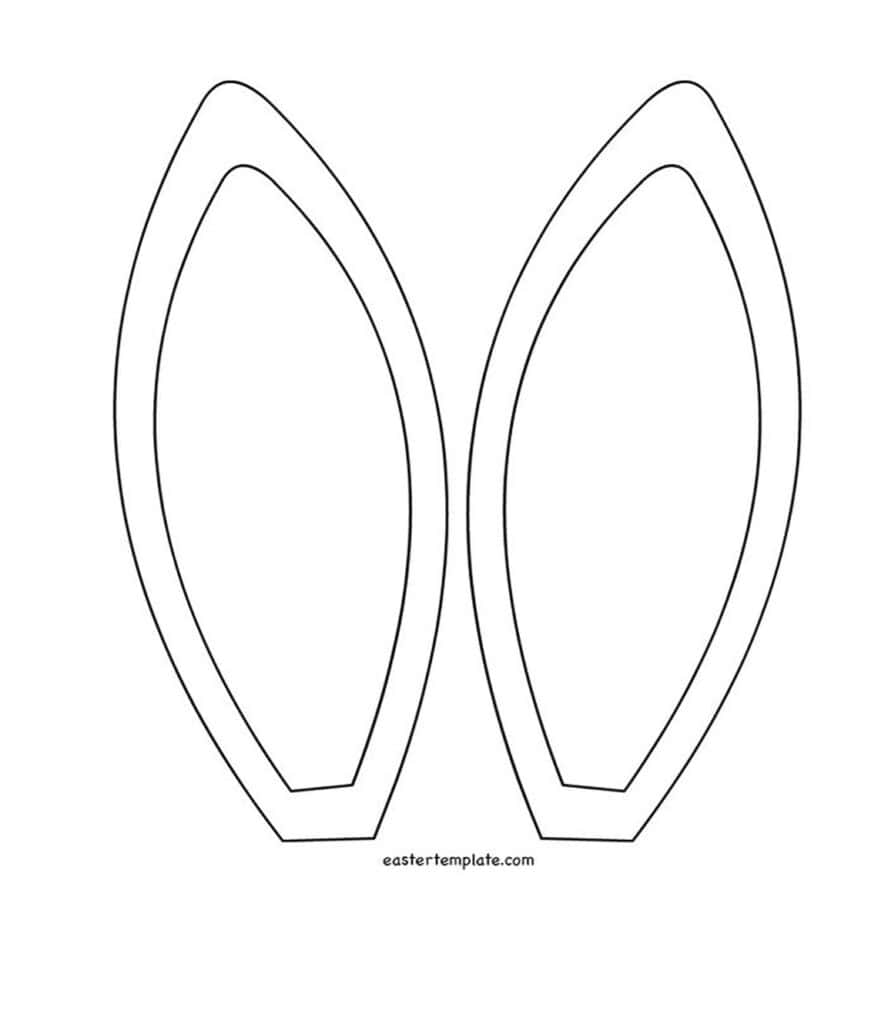
- Paper pattern out of card stock for your ears. Here is a template you can use.
- A few small silk flowers
- Paper towel tubes or toilet tissue roll
Instructions
- Step 1: Preparing the materials
- Trace your pattern pieces onto your fabric.
- Using scissors, cut four large ears out of your base color felt.
- Cut two inner ear pieces with your second fabric, felt, or a cute cotton print.
- Cut a ring of the paper towel tube 2.5" wide.
- You will need a piece of felt the same color as the ear base that is 4.5" wide x 8" long.
- Prepare two pieces of wire or pipe cleaner that are 8" long.
Aha! Moments with Wendy
Have you ever had those ‘aha’ moments mid-project and thought, “I wish I knew that before I started”?
Me too!
Below are a few tips and tricks that worked for me while making my Easter napkin rings.
Whether you’re a crafting newbie or a seasoned pro, I hope these tips and tricks take some of the guesswork out of creating your own bunny ears.

Expert Crafting Tips and Tricks for Making Felt Bunny Ears
- Ear Shape and Size: Take the time to carefully cut out your bunny ears. A smooth, consistent shape is key to making your napkin rings look professional and adorable. Consider creating a template first to ensure all ears are uniform.
- Decorations: When adding flowers or crafting the top hat, the details will make all the difference. For the floral version, arrange the flowers in a balanced way, and consider using a mix of sizes and colors for depth and interest. For the top hat version, ensure it’s proportionate to the ears and napkin ring for an elegant, whimsical look.
Other Posts from WM Design House
If you love this DIY Project, you might also enjoy some of my other favorite Easter Projects.
I hope you enjoyed this fun post as much as I enjoyed making them. Don’t forget to check out all of the fun spring and Easter projects below from my friends.

Did you make this craft?
We would love to see what you have created, so mention us @wmdesignhouse or tag us using #wmdesignhouse so we can see your creations!
More about me!

Hello, I’m Wendy – a dedicated homemaker with a deep passion for decorating, gardening, cooking, and crafting. I find joy in harmonizing beautiful elements to fashion a space that is both comfortable and inspiring. I will help you create a beautiful home, one project at a time.
Connect with Wendy
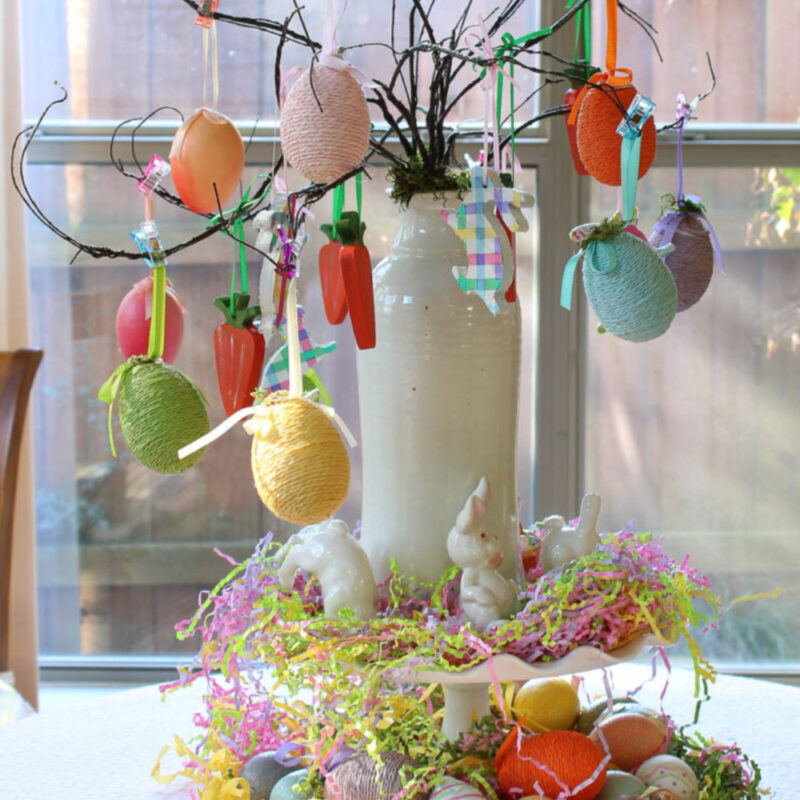
Bluesky at Home – How to Make a Easter Bunny Tree
Perfecting Places – Easter Tablescape Decor
Everyday Edits – Spring Console Table
WM Home Design – Easter Bunny Napkin Rings
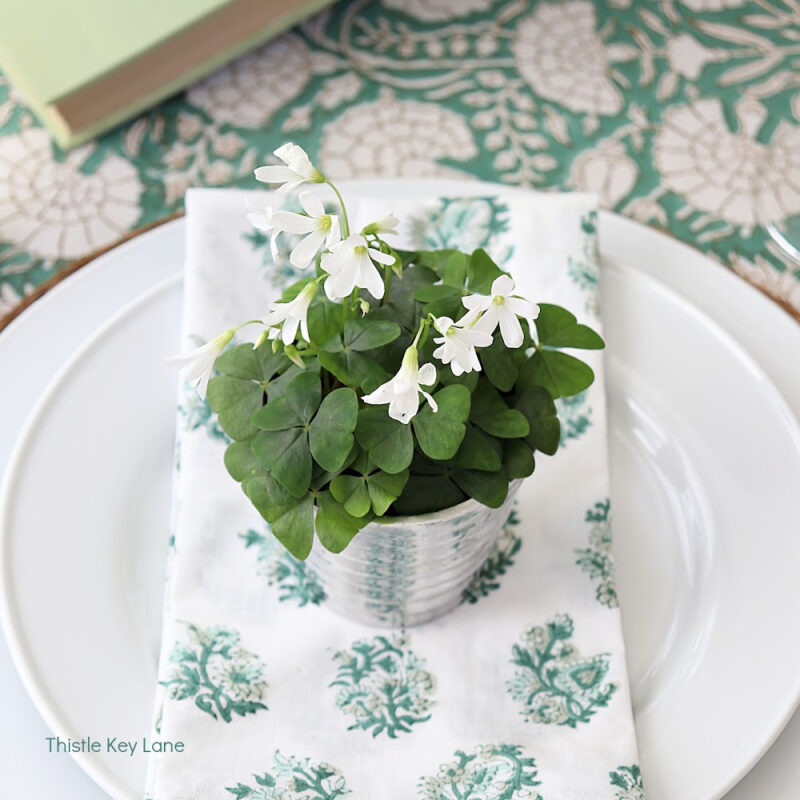
Thistle Key Lane – Green and White Spring Tablescape
White Arrows Home – Reusing Holiday Decor for Easter
Peacock Ridge Farm – Adding Beautiful Spring Touches
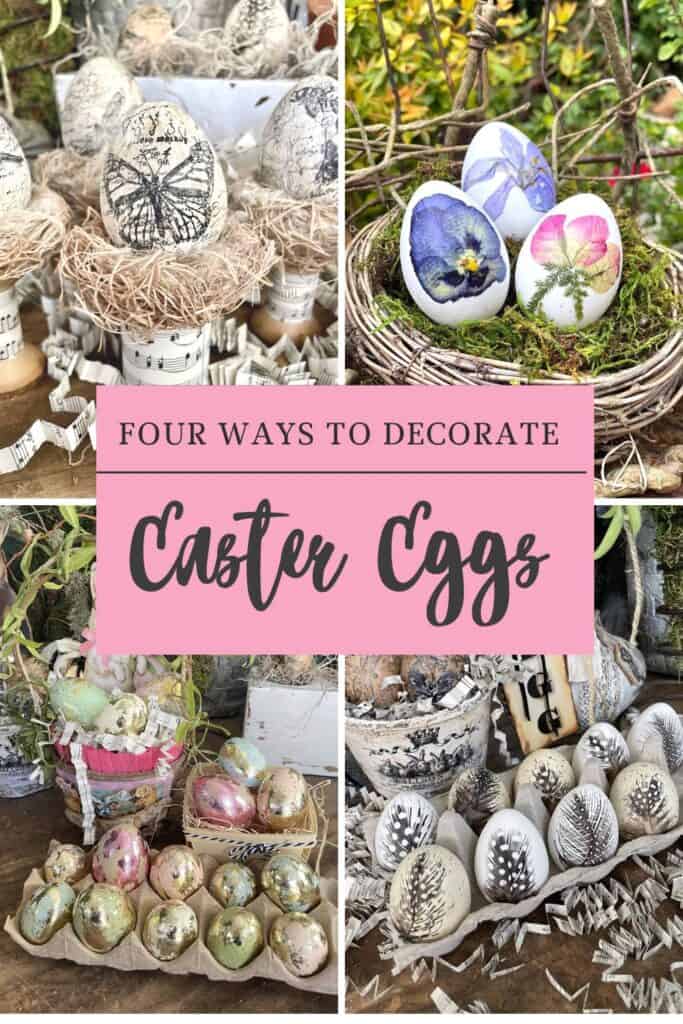
Masterpieces of My Life – 7 Ways to DIY Easter Eggs
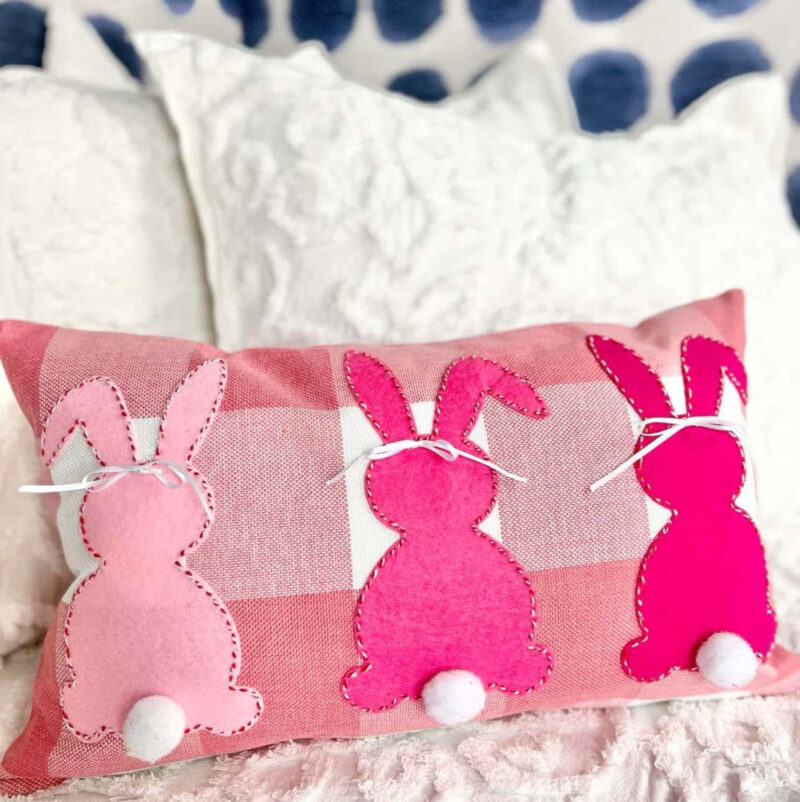
Sonata Home Design – DIY Pink Bunny Pillow


What a beautiful table Wendy, and how creative you are with these napkin rings. Your mention of one of my favorite books growing up took me back to childhood and reading every night before bed. I imagine your guests will love the handwritten sentiments too. Have a wonderful Easter.
These napkin rings are adorable, Wendy. What a cute way to a fun and festive vibe to an Easter table. Thanks so much for sharing at Celebrate the Holiday.
Thank you Carol, they were so fun to make.
These bunny ears are so cute and the little top hats are genius! These are so fun to add to napkins for an Easter table! Great tutorial, Wendy!
Thank you so much, Missy! They were really fun to make and so easy.
Wendy these are super, super cute!! I love that you did a Benjamin Bunny version. So clever! Your littles are going to love the table as much as the adults. Thanks for sharing your genius. XO- MaryJo
PS. I’ll send you an e-mail about glass glitter.
Thank you so much, Mary Jo; the grands will love these. I am going to have them make some more with me.
Wendy your bunny napkin rings are too cute for words! I would love to make these for my Easter table, and see what the grand littles say! Pinning!
Thank you, Micelle; I hope they love them! The top hats are really fun to make.
Wendy, your table is gorgeous and the bunny ear napkin rings are adorable! Such a whimsical, yet elegant Easter table!
Thank you, Kim! I always try to aim for a touch of whimsy for Easter so the kids can really enjoy as well as the adults.
Wendy
These napkin rings are so so cute. Can’t wait to share them on my DRA post.
Thank you, Rachel!
Your napkin rings are the
Cutest and your tablescape is stunning! Happy spring, my friend.
Thank you Renae!
Wendy! These are adorable!!! Gosh I don’t know how you come up with all of these incredible ideas. So stinkin’ cute for the Easter table! Pinned!
Thank you Rachel! you are such a doll.
Hi Wendy,
Love the bunnies. FYI there is a video ad that blocks half the project (it might just be on my end). Such a cute project! xo laura
Those darn ads…. ugh, they are the worst. I really need to reevaluate them. Thanks Laura
Your napkin rings are adorable, Wendy.
Thank you, Tammy! They are super easy to make and a fun project to do with the grandkids.