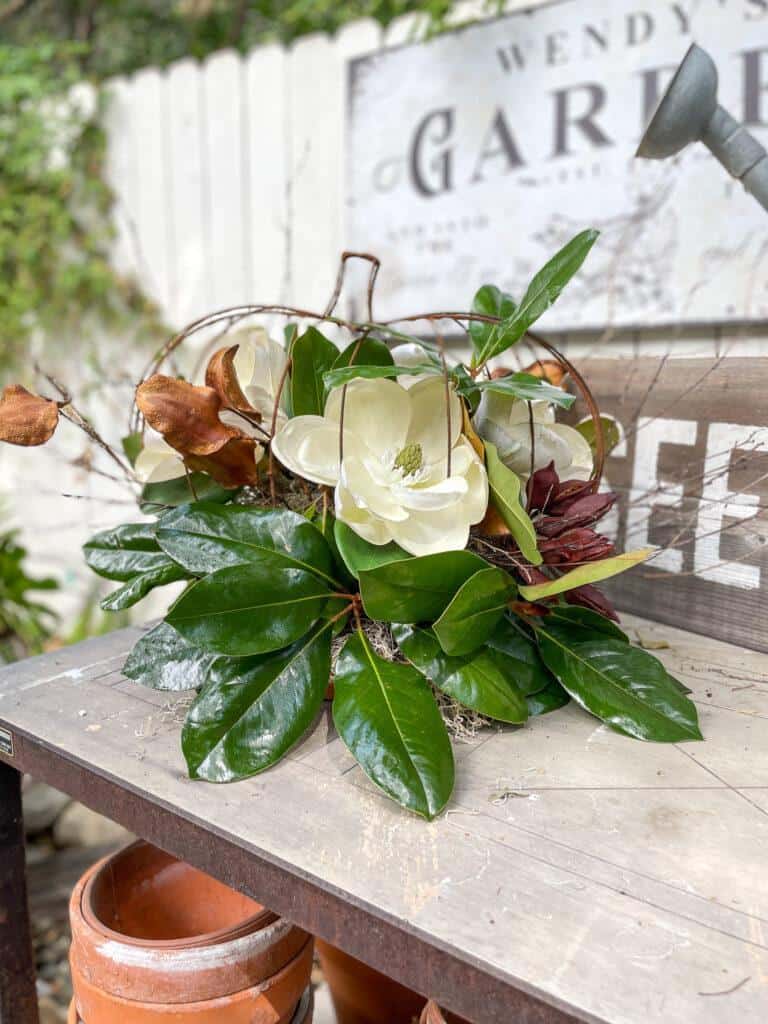
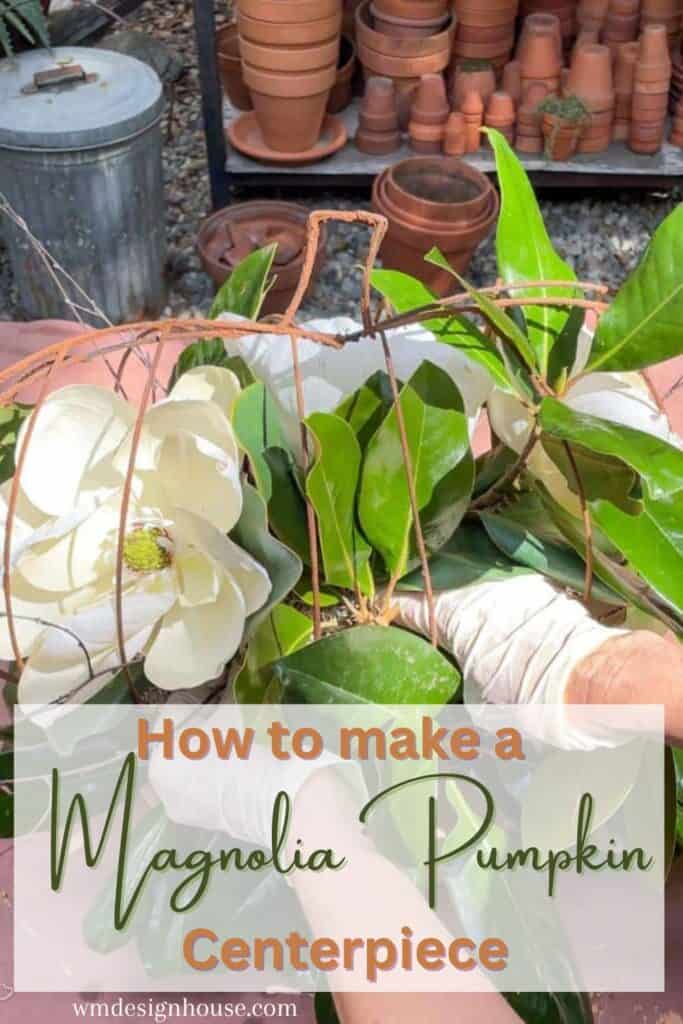
Simple DIY Magnolia Fall Centerpiece in a Pumpkin Frame
Make a simple DIY magnolia centerpiece for fall with a cinnamon pumpkin frame.
Fall is approaching, so it’s time to start cozying up our homes for the season. One of my favorite ways to do this is to make a beautiful centerpiece that smells amazing. This DIY magnolia centerpiece is the perfect way to do just that!
This centerpiece is made with a Dollar Tree pumpkin wreath form, floral foam, moss, faux magnolia flowers, and real magnolia leaves. It’s a great way to add color and texture to your dining room table for the fall season. You can also use this arrangement to decorate your coffee table in the living room, a side table in the family room, or place it on the kitchen counter.
The best part about this centerpiece is that it’s easy to make.
On my blog WM Design House, I may sometimes use affiliate links, which means a small commission is earned if you purchase via the link. The price will be the same whether you use the affiliate link or go directly to the vendor’s website using a non-affiliate link.
DIY fall centerpiece supplies
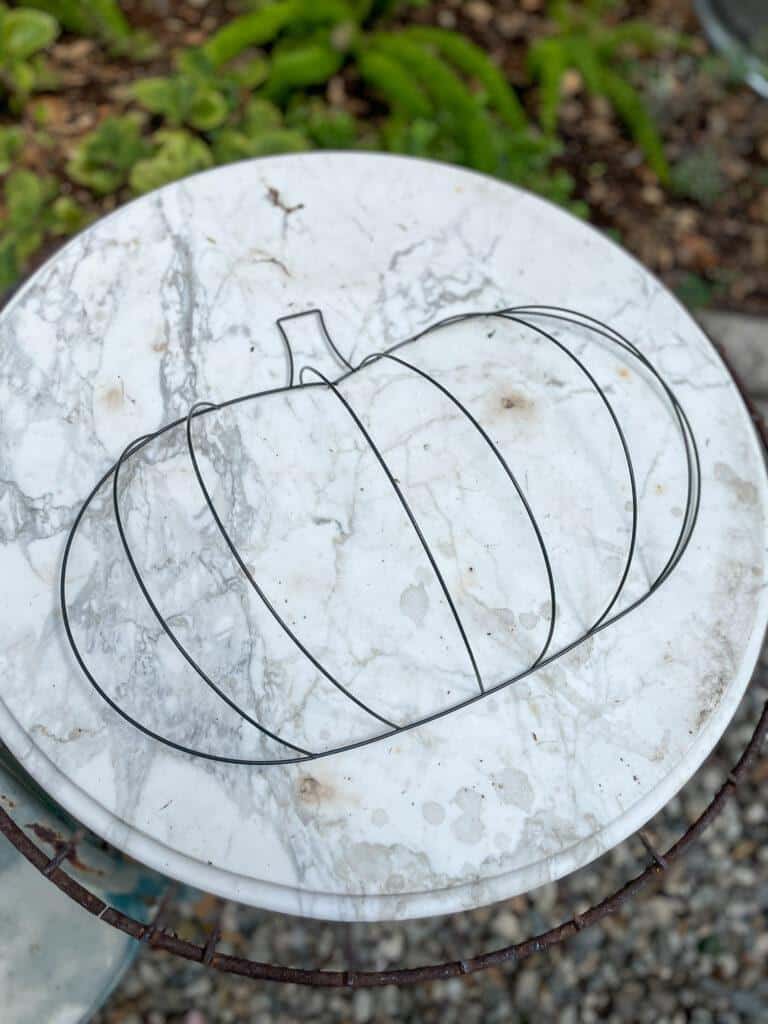
- Two pumpkin wreath frames (Tip: Make sure the stems line up to create a whole pumpkin shape)
- Mod Podge
- Ground cinnamon
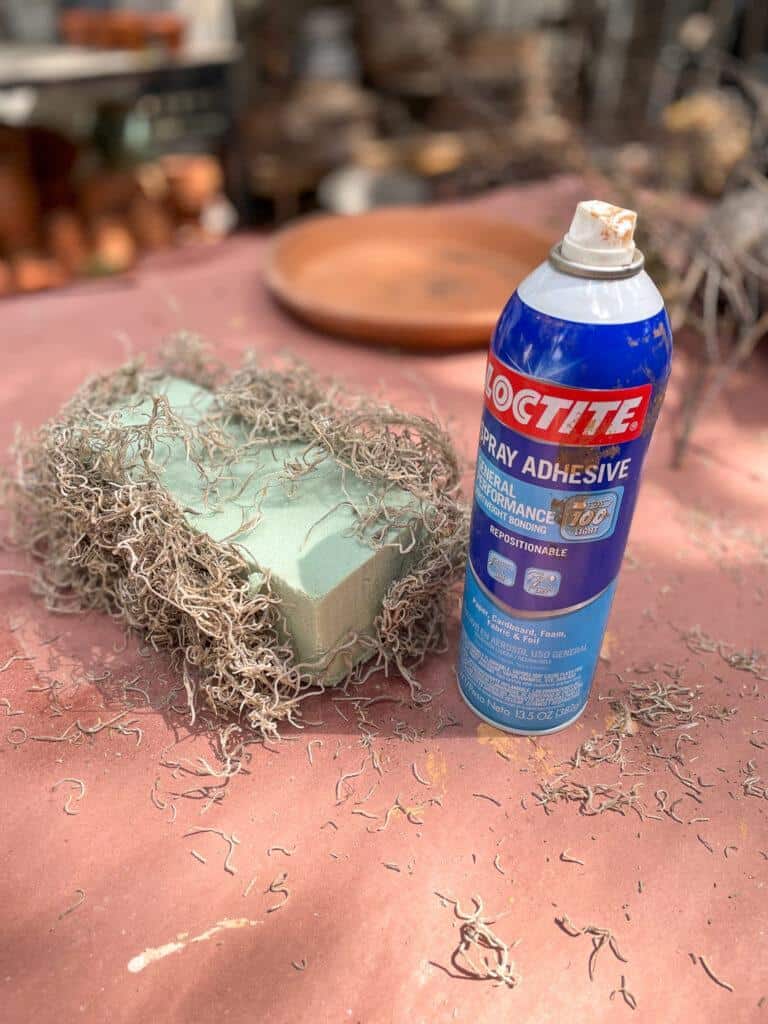
- Two blocks of dry floral foam
- One clay saucer 10″-12” round
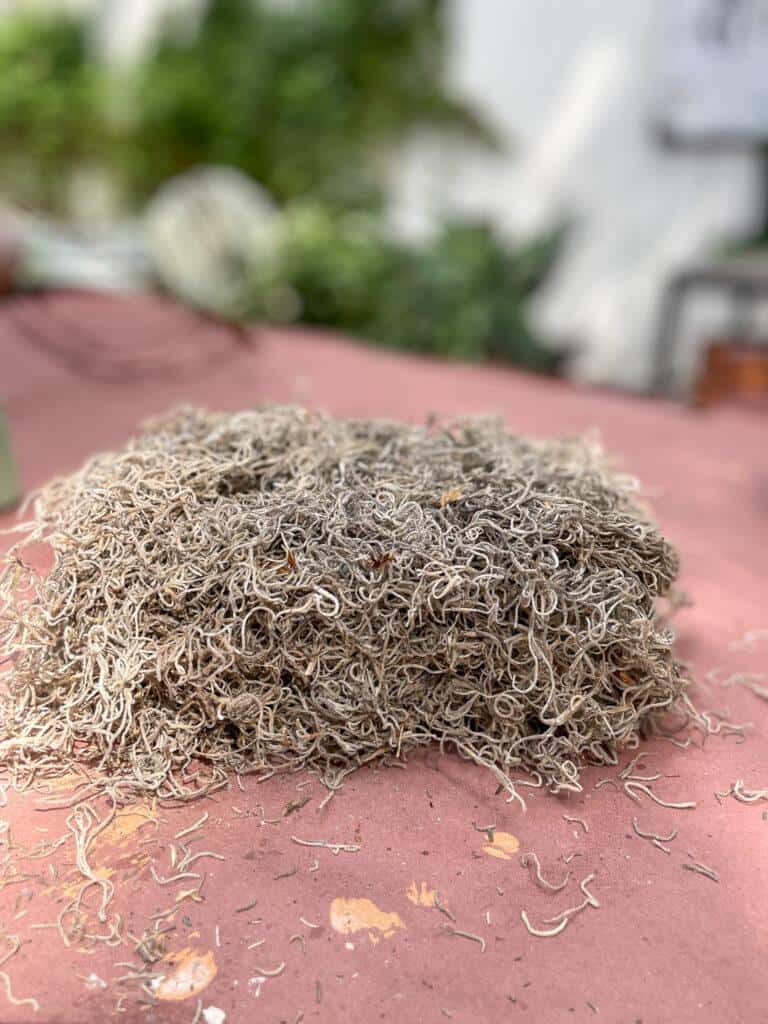
- 1 Bag of Spanish Moss
- Floral pins
- Spray glue
- Hot glue
- Floral wire
- Small magnolia branches with green leaves
- Five faux magnolia flowers
- Dried birch branches
- Natural elements like pods from trees or pine cones
Instructions to make the diy magnolia centerpiece for fall
In addition to the instructions below, you can watch my YouTube video to see how easily this beautiful arrangement comes together.
Follow these easy steps to make your fall centerpiece.

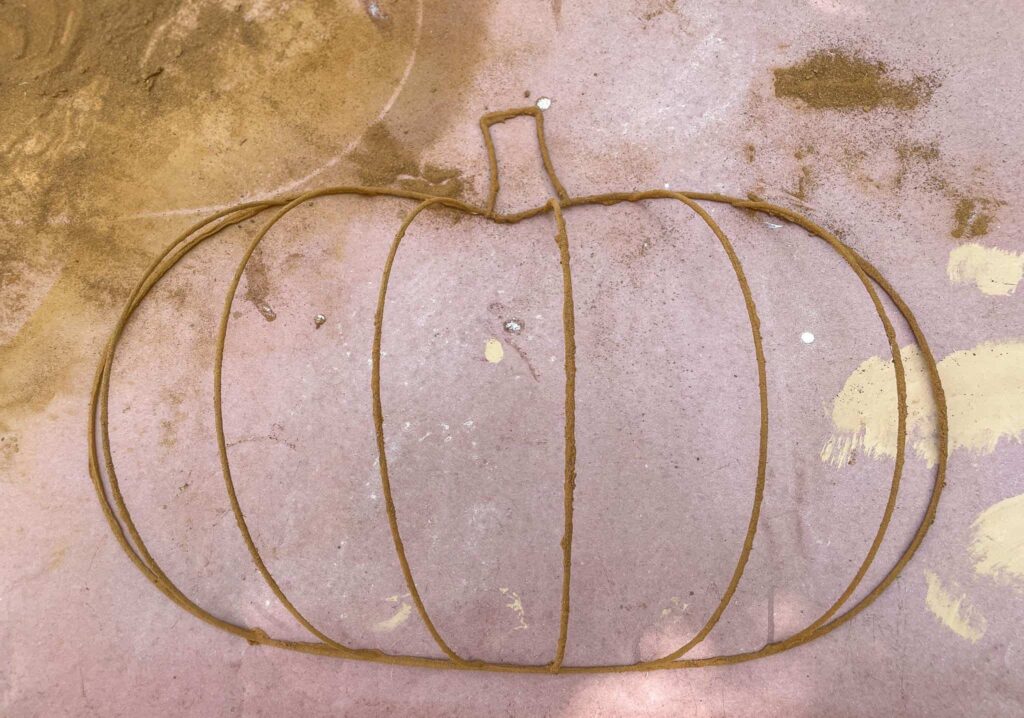
step 1: Cover the wreath frames with cinnamon
Covering the wreath frame with cinnamon will give the pumpkin a fun rustic feel, like it has been around for a few years. In addition, it will smell so good on the table.
- Paint a coat of Mod Podge over a section of the frame.
- Sprinkle the painted section with cinnamon.
- Repeat this process until the entire metal frame is covered.
- Do the same process to the second frame.
- Allow these to dry for several hours.
step 2: Cover the piece of dry floral foam with moss
- Cut a V-shape along the top of one of the foam blocks, no more than one inch deep.
- Using spray glue and the floral pins, cover the sides of the foam with Spanish moss.
- Then, using hot glue, attach this foam block with the V cut on top of a terracotta saucer.
- Using Spray glue and floral pins, cover the top and sides of the second floral foam block with Spanish moss and set it aside. Do not cover the bottom of the foam.
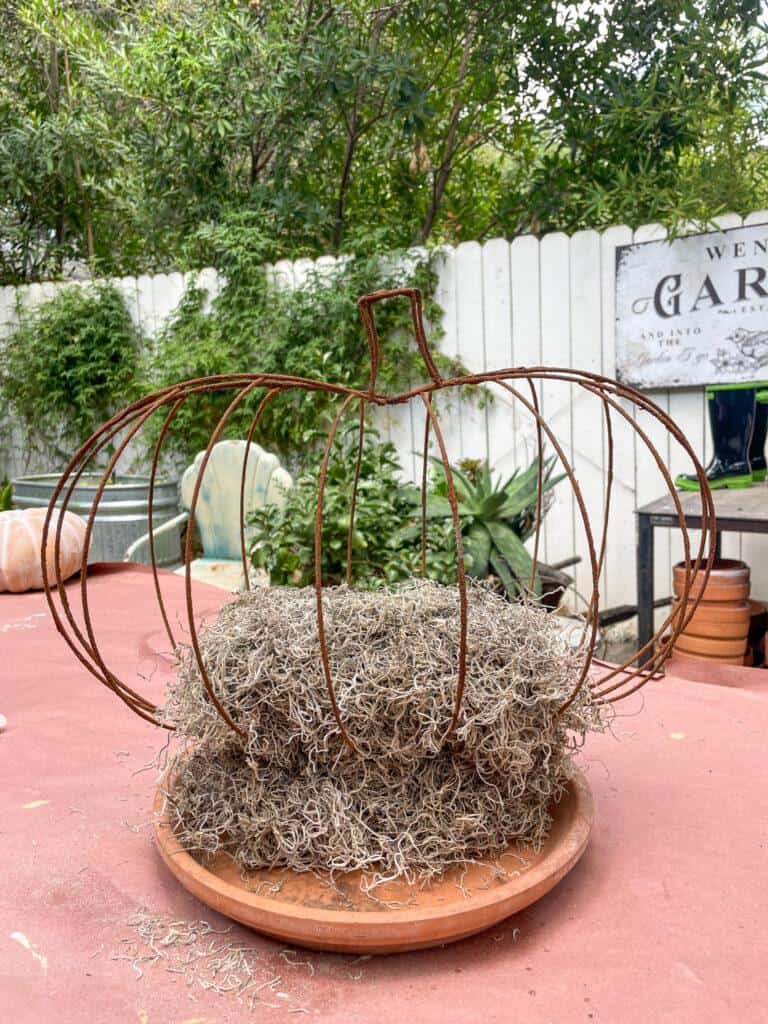
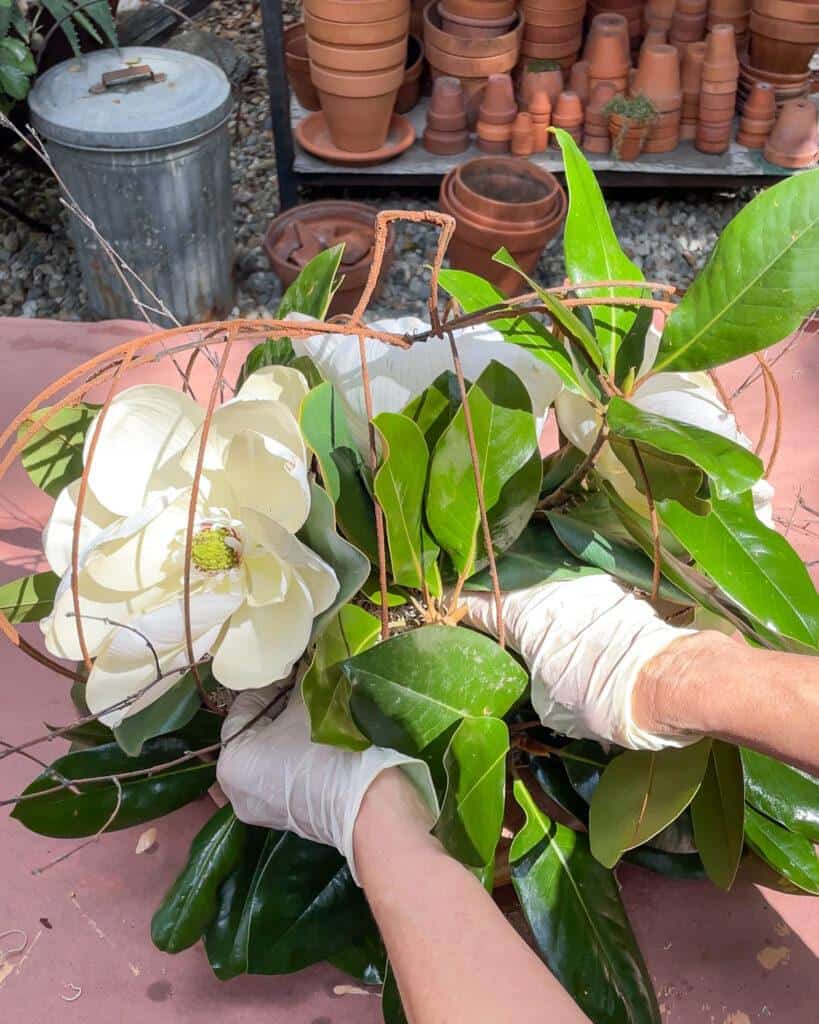
step 3: Putting the two frames together
- Put the two frames together to create a 3D pumpkin. Before wiring them together, place the second floral block (covered on all sides but the bottom with moss) between the two frames and wire it shut on all four sides. The floral foam should now just be floating inside the pumpkin.
- Place the bottom of the two pumpkin frames inside the V of the first foam block glued to the terracotta saucer.
- Using the floral pins, attach the frame to the foam.
- Secure with hot glue on top.
Secure with hot glue on top. Take a small wire and attach the two stems to close your pumpkin.
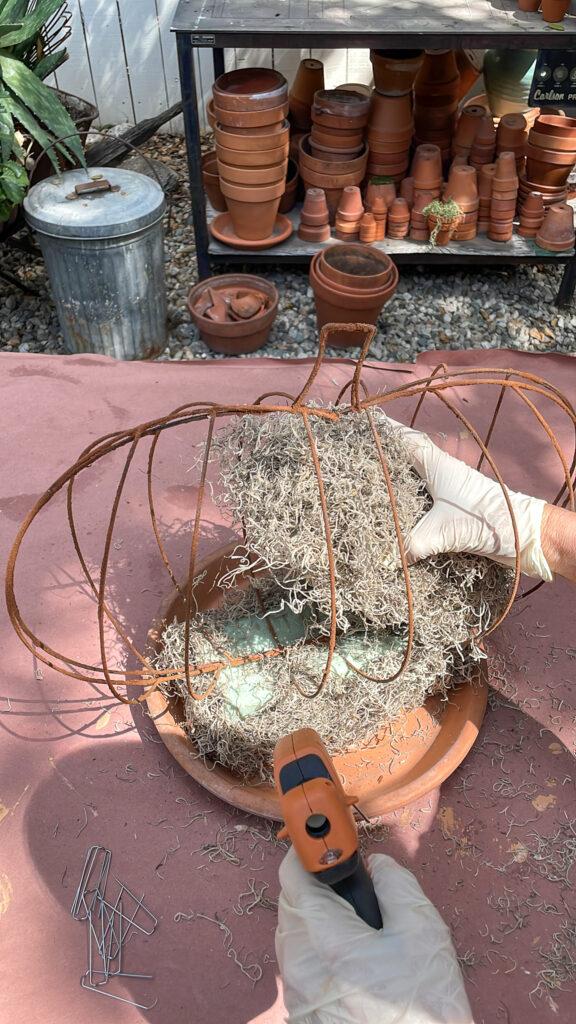
step 4: Attach the two foam blocks
Using hot glue, glue the bottom side (with no moss) of the foam block inside the pumpkin to the foam block holding the pumpkin frame.
Now that you have the frames connected and foam blocks secured, you can begin to decorate.
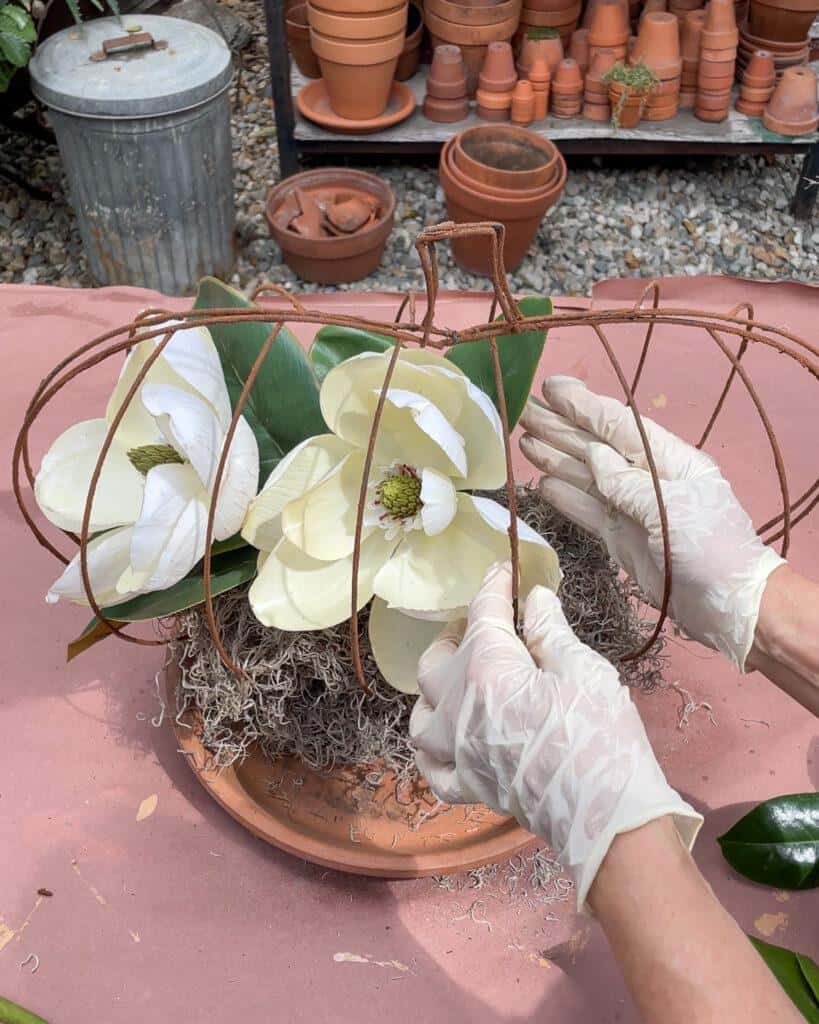
step 5: Add magnolia flowers to create a focal point
- Cut the stems of the magnolia flowers to about 6-8 inches long.
- Insert the stems of the flowers into the floral foam inside the pumpkin wreath frame.
- Space the flowers evenly around the frame.
A Few Tips
01
Use a sharp knife or scissors to cut the stems of the flowers.
02
Insert the stems of the flowers at a slight angle so they are secure in the foam.
03
Space the flowers evenly around the frame to create a balanced arrangement.
04
Adjust the flowers as needed to create the desired look.
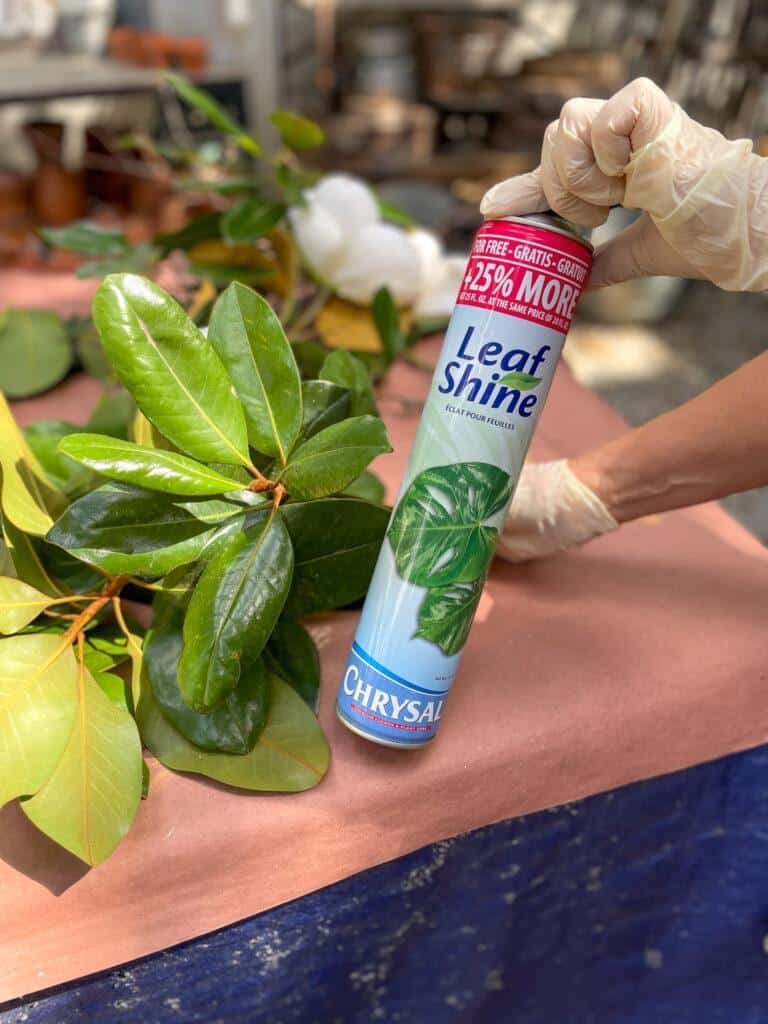
step 6: Add magnolia leaves to your diy magnolia centerpiece for fall
- Cut the stems of the magnolia leaves to about 1 6 inches long.
- Insert the stems of the leaves into the dry floral foam around the centerpiece.
- Space the leaves evenly around the centerpiece.
- Adjust the leaves as needed to create a balanced arrangement.
Tip: To give fresh magnolia leaves a pretty and shiny look, spray them with leaf shine before adding them to your centerpiece. Leaf Shine is a clear, water-based solution that gives leaves a glossy sheen that makes them look their best.
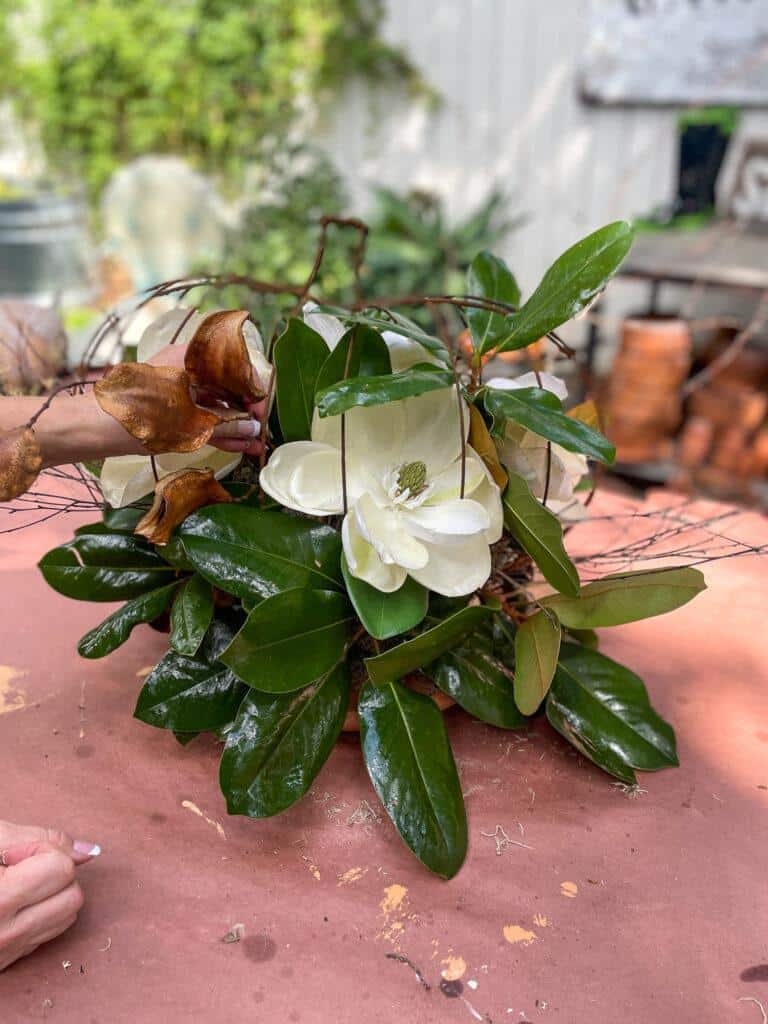
step 7: Add birch branches
Add a few birch branches for added texture and color.
step 8: Final touches to your table centerpieces
- Gather a variety of pods or pine cones.
- Tuck the pods or pine cones into any spaces in the arrangement that needs something.
- Secure the pods or pine cones with hot glue.
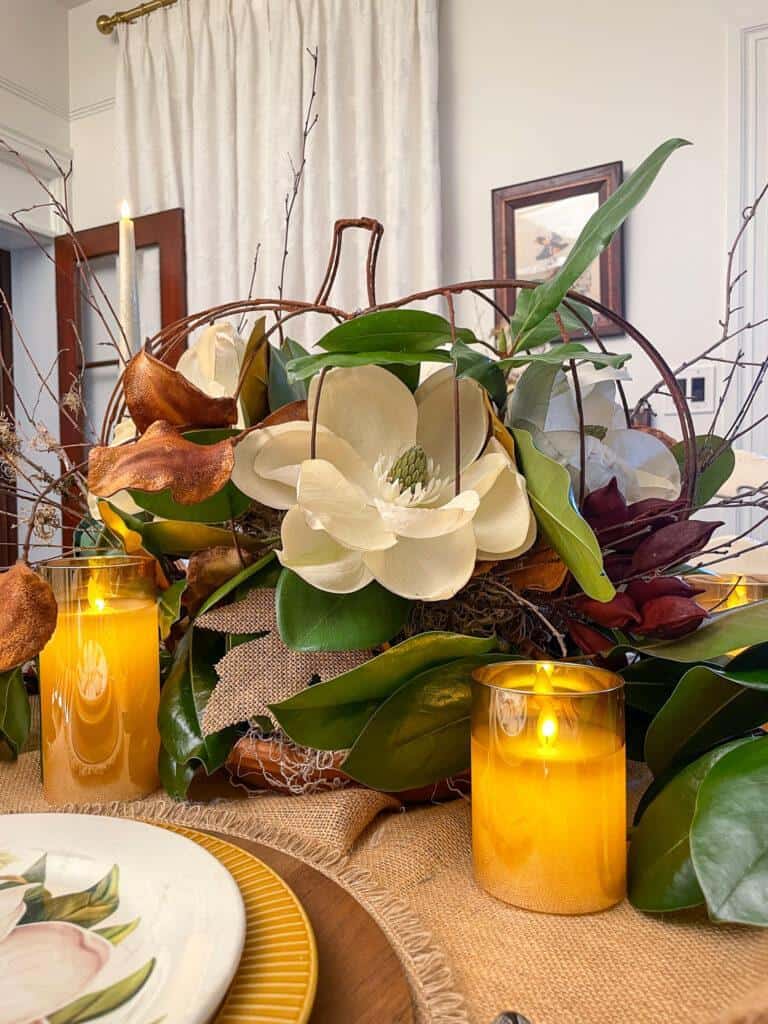
How to style your gorgeous DIY magnolia centerpiece for fall
Fall decorating is so warm and cozy with the colors of fall foliage.
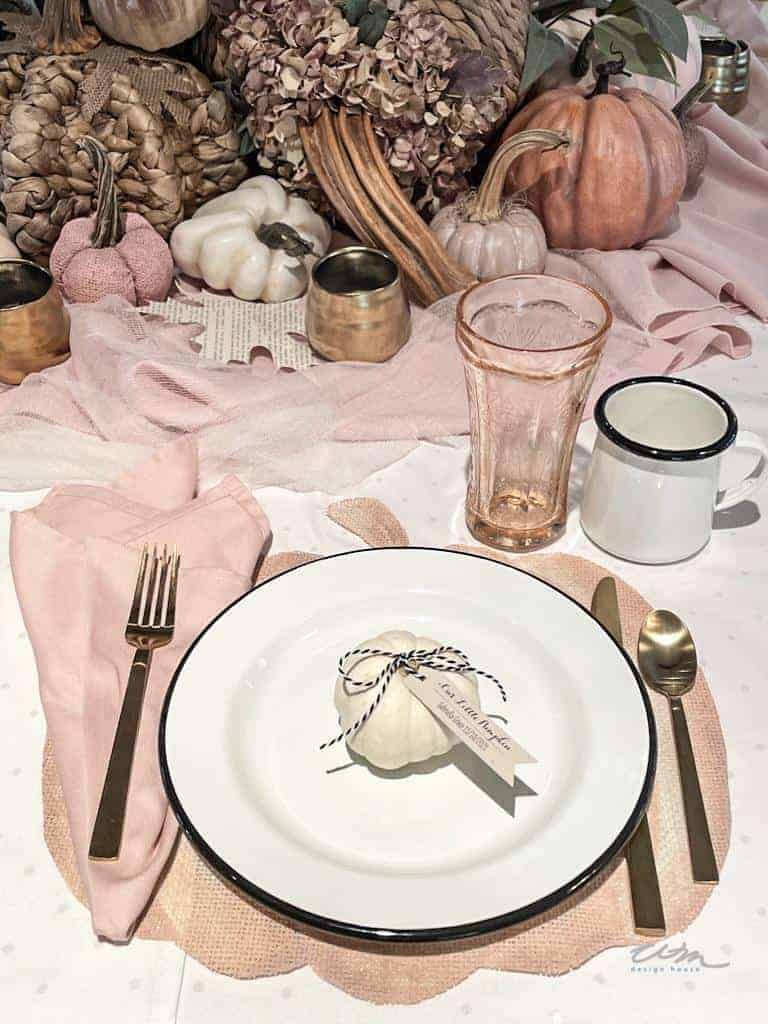
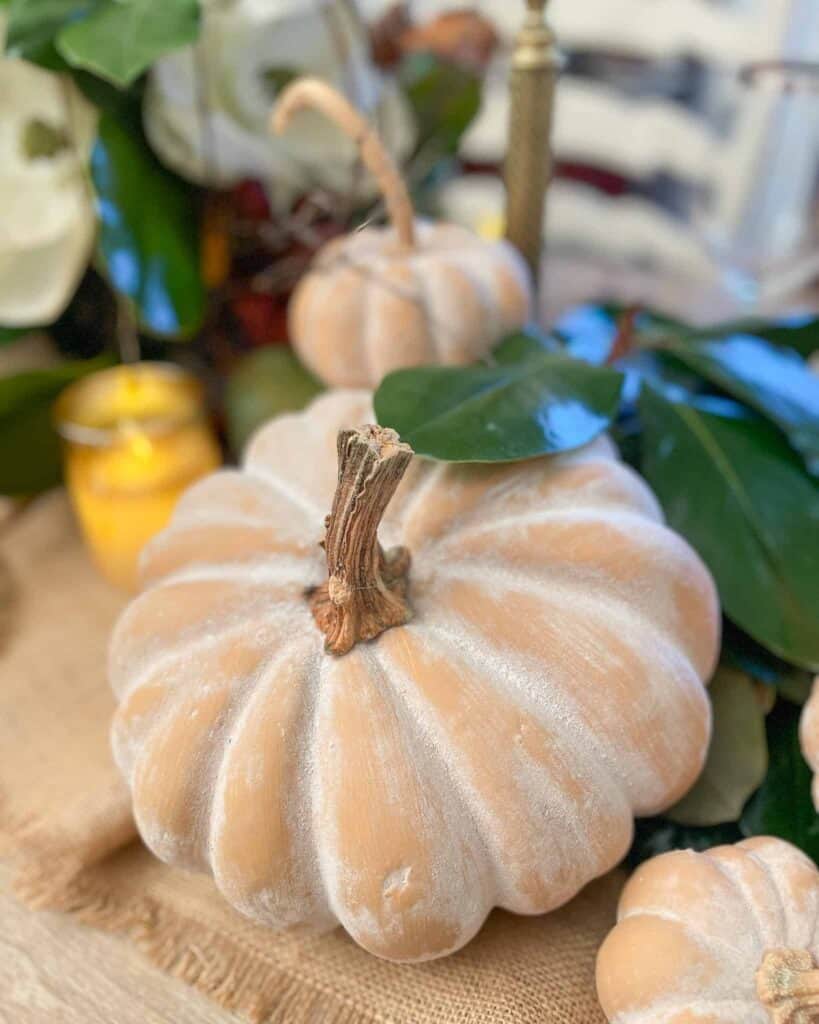
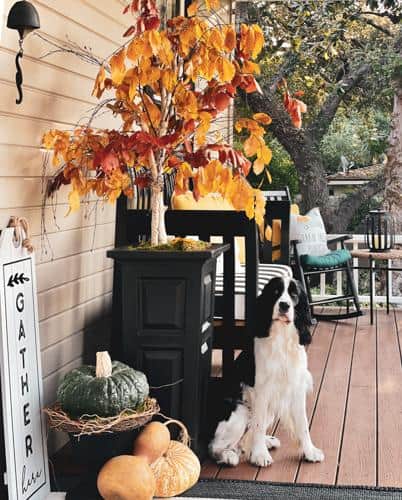
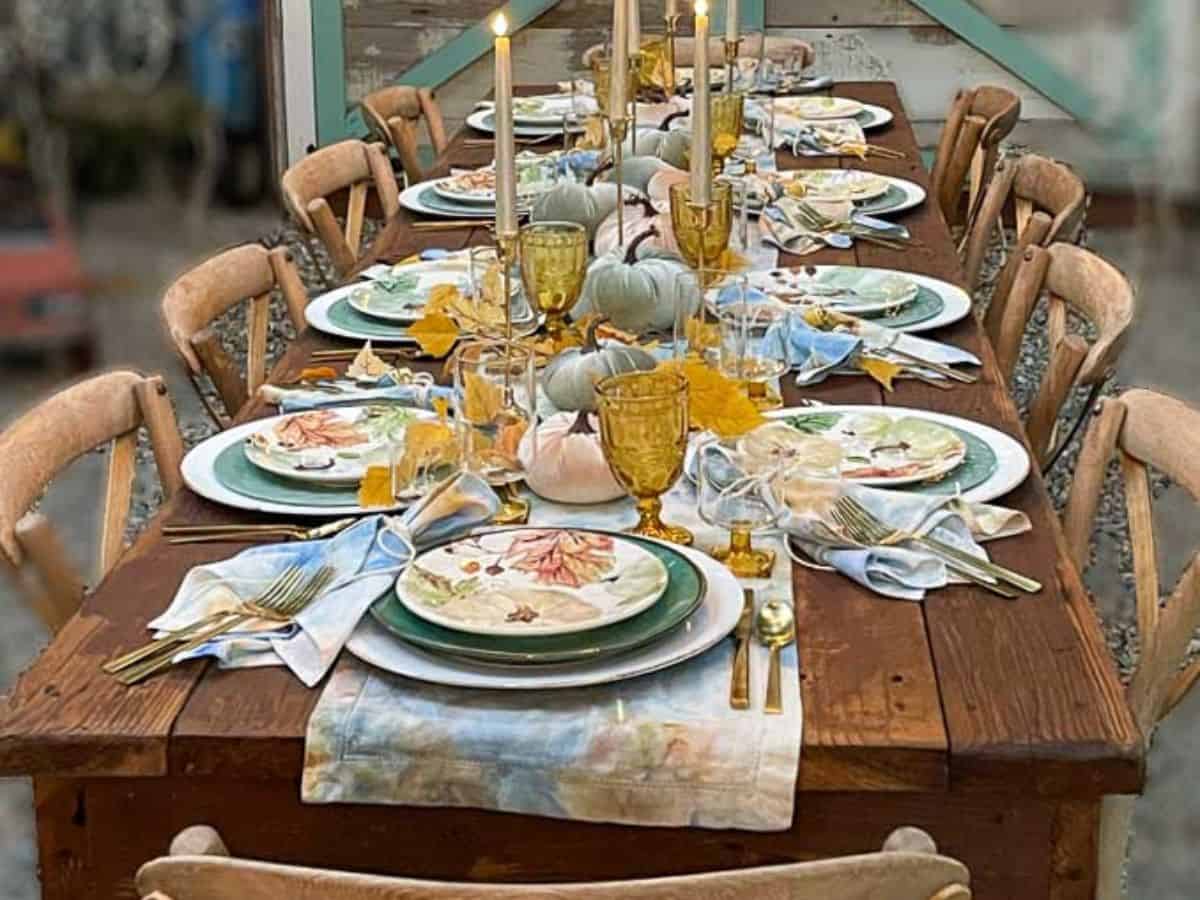
Using this arrangement for your Thanksgiving dining table is a perfect idea. Place it in the center of the table and pair it with your favorite place settings, amber glasses, other magnolia stems, and faux pumpkins.
Try using your simple fall centerpiece in the Living room
- The centerpiece would look lovely on a coffee table or side table.
- Pair it with a stack of books or magazines.
- You could add a few throw pillows or a blanket to the couch or a chair to create a more inviting space.
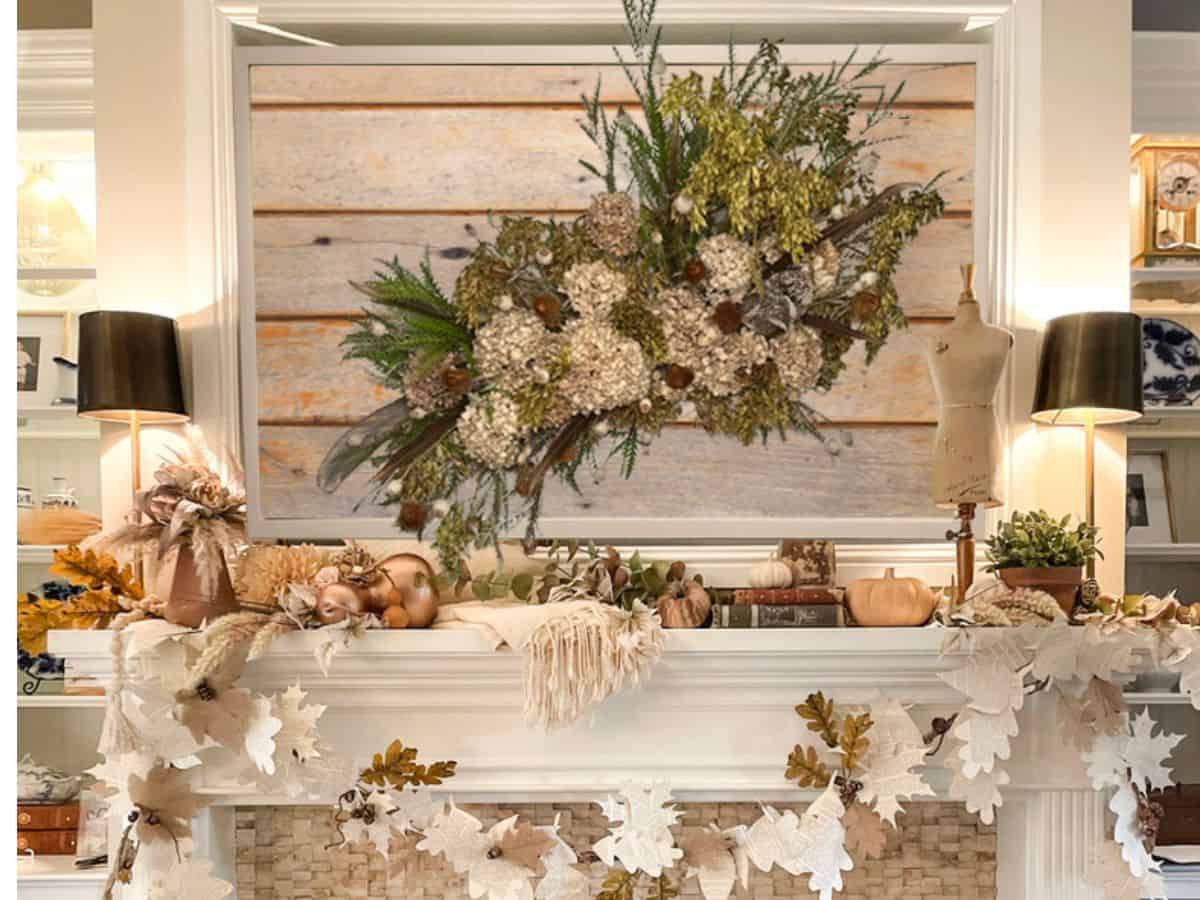
- Place the arrangement on your mantel for a focal point.
- Place the arrangement in a dough bowl on a sofa back table.
There are endless ways you can style your beautiful arrangement in your home. Think outside the box. A centerpiece does not always have to be on a table.
I hope these ideas help you style your fall home decor and you can sit back and enjoy what you have created.

You will also love these easy Fall DIY projects
Make Simple and Easy Fabric Pumpkins

How To Card for Magnolia Centerpiece

DIY Magnolia Centerpiece
Equipment
- Glue Gun
- Wire cutters
- Garden Shears
Materials
- * 2 pumpkin wreath frames Tip: Make sure the stems line up to create a whole pumpkin shape
- * Mod Podge
- * Cinnamon
- * Two blocks of dry floral foam
- * “One clay saucer ”10-12” round
- * 1 Bag of Spanish Moss
- * Floral pins
- * Spray glue
- * Hot glue
- * Floral wire
- * Small magnolia branches with green leaves
- * Five faux magnolia flowers
- * Dried birch branches
- * Natural elements like pods from trees or pine cones
Instructions
- Cover the wreath frames with cinnamon
Covering the wreath frame with cinnamon will give the pumpkin a fun rustic feel, like it has been around for a few years. In addition, it will smell so good on the table.
1. Paint a coat of Mod Podge over a section of the frame.
2. Sprinkle the painted section with cinnamon.
3. Repeat this process until the entire metal frame is covered.
4. Do the same process to the second frame.
5. Allow these to dry for several hours. - Cover the piece of dry floral foam with moss
1. Cut a V-shape along the top of one of the foam blocks, no more than one inch deep.
2. Using spray glue and the floral pins, cover the sides of the foam with Spanish moss.
3. Then, using hot glue, attach this foam block positioned with the V cut on top of a terra cotta tray.
4. Using Spray glue and floral pins, cover the top and sides of the second floral foam block with Spanish moss and set it aside. Do not cover the bottom of the foam. - Putting the frames together
1. Put the two frames together to create a 3D pumpkin. Before wiring them together, place the second floral block (covered on all sides but the bottom with moss) between the two frames and wire it shut on all four sides. The floral foam should now just be floating inside the pumpkin.
2. Place the bottom of the two pumpkin frames inside the V of the first foam block glued to the terra cotta tray.
3. Using the floral pins, attach the frame to the foam.
4. Secure with hot glue on top. - Attach the two foam blocks
Using hot glue, glue the bottom side (with no moss) of the foam block inside the pumpkin to the foam block holding the pumpkin frame. - Add magnolia flowers to create a focal point
* Cut the stems of the magnolia flowers to about 6-8 inches long.
* Insert the stems of the flowers into the floral foam inside the pumpkin wreath frame.
* Space the flowers evenly around the frame.
Simple tips for adding your flowers:
* Use a sharp knife or scissors to cut the stems of the flowers.
* Insert the stems of the flowers at a slight angle so they are secure in the foam.
* Space the flowers evenly around the frame to create a balanced arrangement.
* Adjust the flowers as needed to create the desired look.
- Add magnolia leaves
1. Cut the stems of the magnolia leaves to about 1 6 inches long.
2. Insert the stems of the leaves into the dry floral foam around the centerpiece.
3. Space the leaves evenly around the centerpiece.
4. Adjust the leaves as needed to create a balanced arrangement.
Tip: To give fresh magnolia leaves a pretty and shiny look, spray them with leaf shine before adding them to your centerpiece. Leaf Shine is a clear, water-based solution that gives leaves a glossy sheen that makes them look their best. - Add birch branches
Add a few birch branches for added texture and color. - Final touches to your table centerpieces
1. Gather a variety of pods or pinecones.
2. Tuck the pods or pinecones into any spaces in the arrangement that need something.
3. Secure the pods or pinecones with hot glue.


Thanks for sharing on Crafty Creators! I’ll be featuring your post on tomorrow’s party. Hope to see you there!
Thank you so much Niki, I appreciate the feature so much.
This is so beautiful! I love the magnolia with the pumpkin! Happy fall!!!!
KariAnne
Thank you KariAnne.
Wendy this is such an amazing fall DIY!
Such a cute idea!
Wendy, this is so gorgeous and perfect for Fall! I love that cinnamon trick, so good!
This is absolutely stunning, Wendy. I love your fall centerpiece. And it looks so simple to make too! Thank you for sharing!
Wendy,
This is such a cute idea. Thanks for sharing it on the round up.
Thanks for including me, Rachel. I need to get off my stick and have one soon.
Wendy, this turned out so beautiful my friend. I love how you made it rusty looking with the cinnamon! Great call on the leaf spray. I need to buy some ASAP. Have a wonderful week.
Thank you, Meagan. I love working with cinnamon and it makes everything smell so good. I hope you have a fabulous weekend.
How pretty this turned out. I bet it smells good too.
Yes, You really can smell the cinnamon, it smells so good.
Using the cinnamon is genius Wendy! I love the shiny magnolia leaves as well. Gorgeous project!
Thank you so much, Susan, I do love that leaf shine!
OOOOH, Wendy, this is adorable!!
Thank you so much, Jennifer. I would love to have you on my life as a guest, do you have a project you would like to share? Something we could both make together>
This turned out so pretty! I love the burlap with it too!
Thank you Kim. I thought the burlap was a good choice for my dinnerware.
Such a clever project, Wendy! I love the Leaf Shine tip! So beautiful for any Fall table! ~Missy
I can’t live without my leaf shine! :)))))
So, I love this idea, but the cinnamon is pure genius! I have a wrought iron piece I have been wanting to age, and cinnamon did not cross my mind until you suggested it for this project! I am so excited, thank you so much for sharing. I’m feeling giddy as a school girl. Happy Friday, and thank you for sharing and hosting!
Hi Cara, you will have so much fun with the cinnamon. I can’t wait to see your piece, please be sure to send me a pic or let me know if you do a blog post on it. Did you see the entire buckets I did, they were really easy to do. I hope your weekend was wonderful.
I will send you a pic when I finally get around to working on the wrought iron. teehee… you know, it is always a good idea to come back, I missed a step on my first visit. I am going to be on the lookout for these pumpkins now. My project list is growing… have a wonderful evening!
This is beautiful Wendy! Who knew you could put cinnamon on a dollar tree pumpkin? Pinned ?
Thank you so much, Cindy. I hope you are having a great week. I am in TExas as a conference, so forgive me for responding to your comment so late.
Very pretty. Don’t you love the you love the cinnamon trick?
Thank you Cindy, it sure is a fun process to make.
this is so pretty, using magnolia blossoms in the fall with the amber votives. I’m still a fan of burlap, especially for a rustic look, especially in the fall. Happy week, Wendy!