How to Make Simple and Easy Fabric Pumpkins
Learn how to make fabric pumpkins using old clothes or thrifted fabric. A fun, easy DIY that adds cozy, handmade charm to your fall decor.

On my blog WM Design House, I may sometimes use affiliate links, which means a small commission is earned if you purchase via the link. The price will be the same whether you use the affiliate link or go directly to the vendor’s website using a non-affiliate link. Read my full disclosure policy here.
DIY Fabric Pumpkins
Pumpkin season is here, and instead of spending too much on store-bought décor, why not try something more personal? Learning how to make fabric pumpkins is simple, affordable, and a wonderful way to add cozy, handmade charm to your fall home.
The best part is, you don’t need a sewing machine—just a needle, thread, and a little creativity. By using old clothes, thrifted sweaters, or leftover fabric scraps, you’ll give new life to materials you already have while creating pumpkins that are completely unique to your style. From tiny tabletop accents to oversized porch pumpkins, this project is as fun as it is budget-friendly.
Why You’ll Love This Project
- Customizable for any space – Make tiny pumpkins for tiered trays, medium ones for shelves, or oversized styles for your mantel or porch.
- Beginner-friendly – If you can thread a needle, you can make these. No sewing machine required!
- Eco-friendly – Reuse old clothes or thrifted fabric for a sustainable craft that gives new life to materials.
- Reusable every year – Unlike real pumpkins, these won’t rot. Pack them away and enjoy them season after season.

How To Make Fabric Pumpkins From Thrifted Fabric
Materials
- Scissors
- Upcycled fabric or clothing
- Twigs or small stem
- Preserved real fall leaves or faux leaves
- Pinto beans or rice
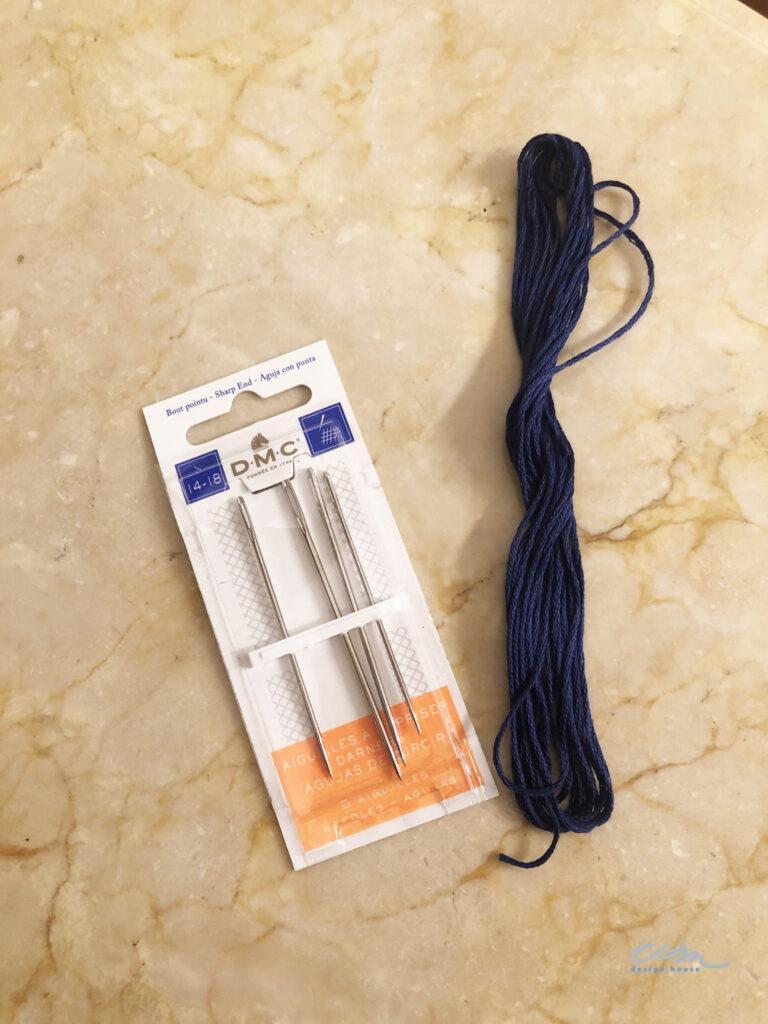
- Embroidery thread and needles
- Hot glue gun and glue sticks
- Templates
Instructions
How to Make Fabric Pumpkins (Quick Guide)
- Cut a circle of fabric in your desired size (6–16″).
- Stitch around the edge with embroidery thread, leaving a long tail.
- Add weight and stuffing (rice/beans + polyfill) to form the pumpkin.
- Pull thread to close and wrap it around to create 6–8 pumpkin ribs.
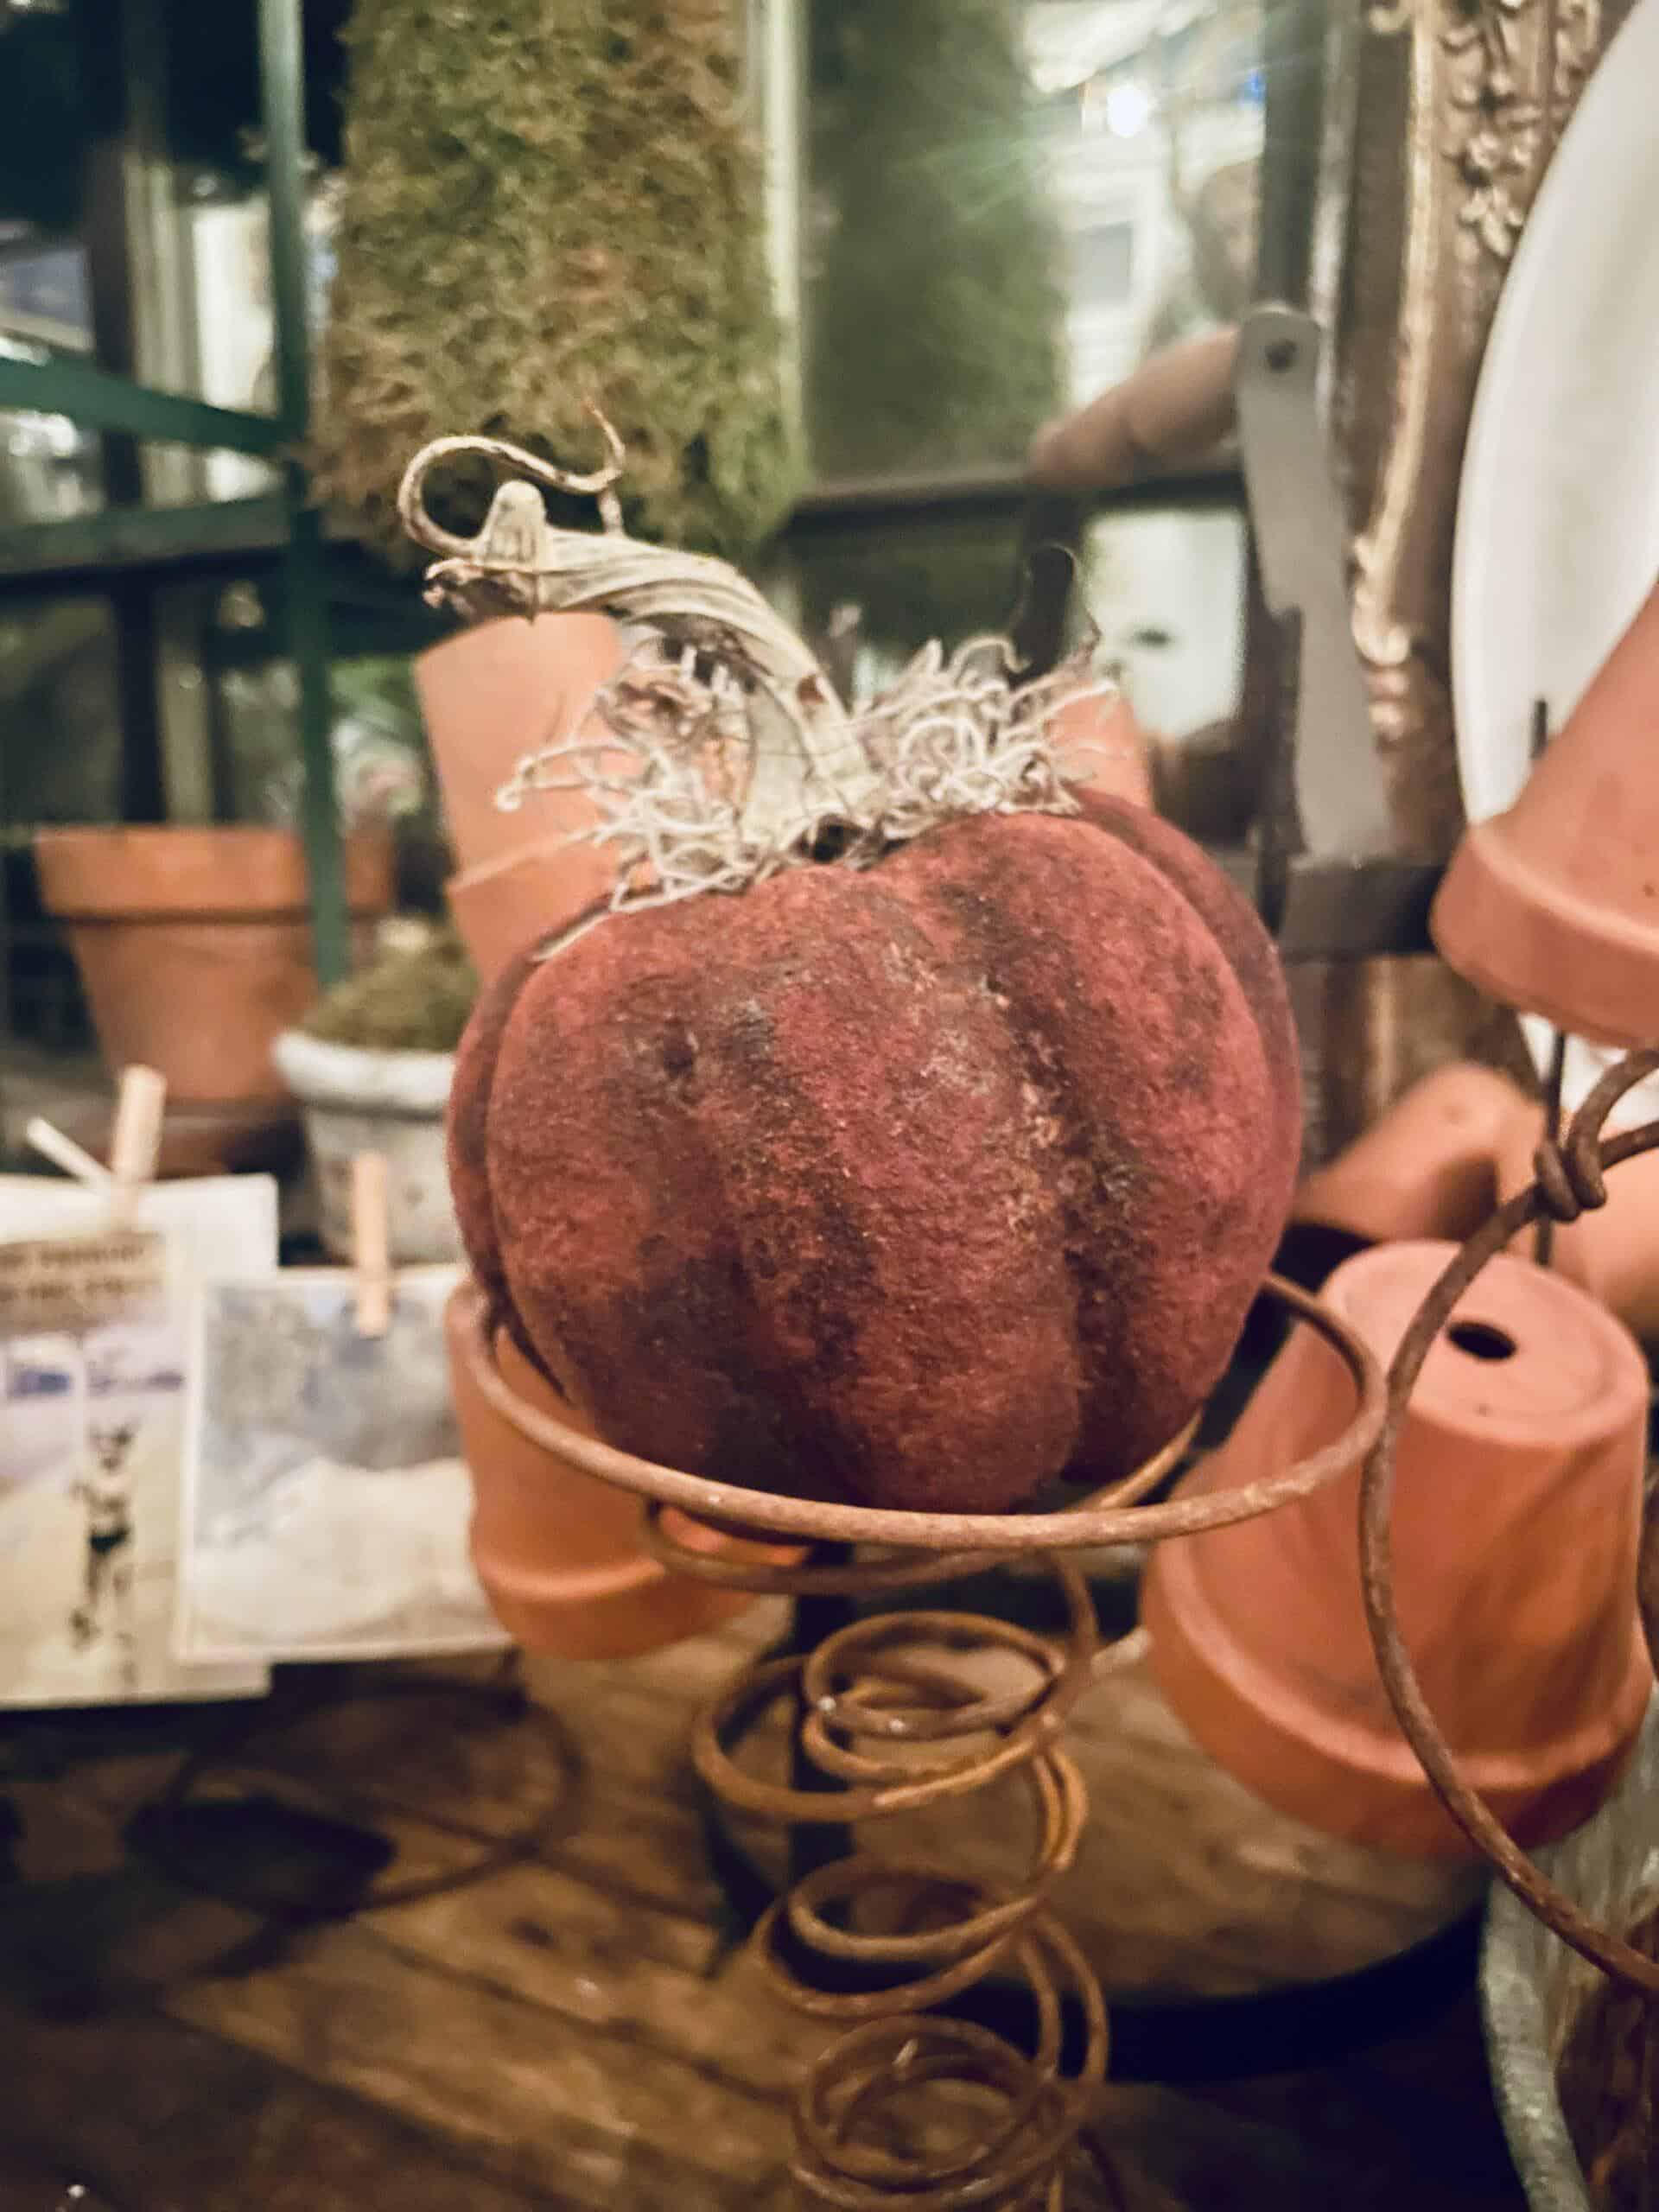
- Glue on a stem (real or faux) and decorate with moss, ribbon, or leaves.
✨ Tip: Use thrifted sweaters, flannel shirts, or vintage linens for unique texture.
How to Make Fabric Pumpkins
DIY Fabric Pumpkins
Step 1: Gather Your Materials
One of the most fun parts of making fabric pumpkins is hunting for the perfect material. Start by taking a look in your closet to see what you already have on hand. Old sweaters and old plaid shirts can all be repurposed into beautiful pumpkins.
If your closet does not turn up any treasures, try a local thrift shop or estate sale. These are some of my favorite places to find fabric with character. Look for soft flannels, stretchy jersey knits, or even drapery scraps that have wonderful weight and texture. Using secondhand fabric is not only inexpensive but also gives each pumpkin its own personality.
The more variety you add, the more collected and layered your pumpkin display will appear.
Choose an assortment of fabrics and textures in colors you like. I like the stretch jersey knits. They are effortless to work with and mold very well.
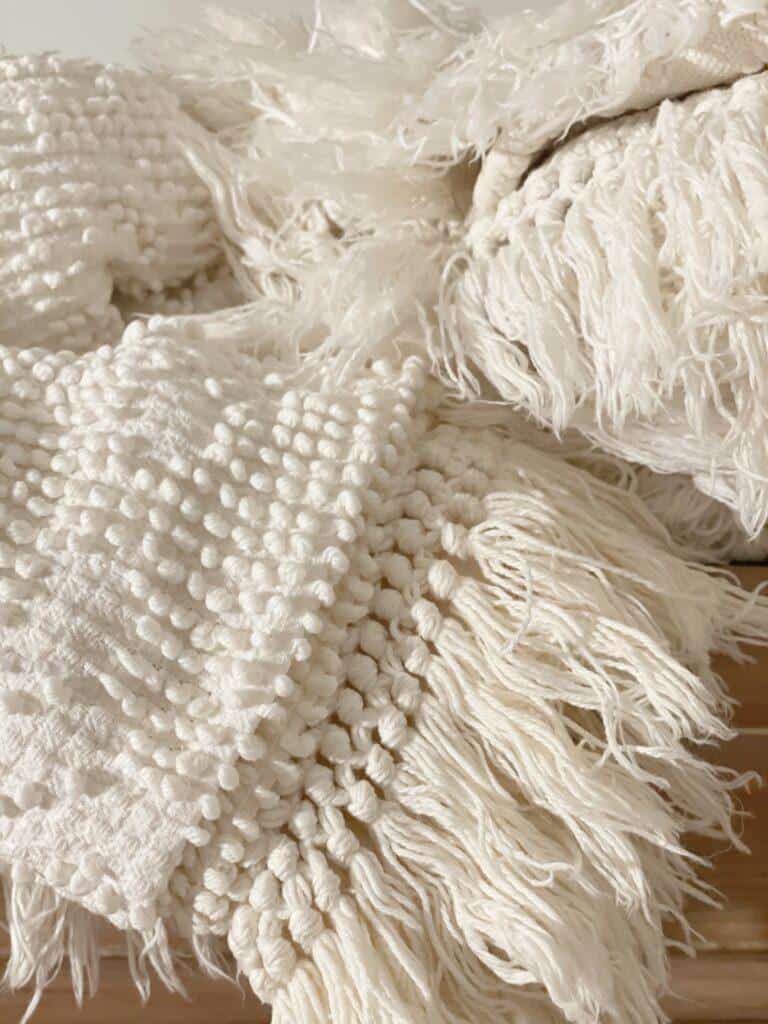
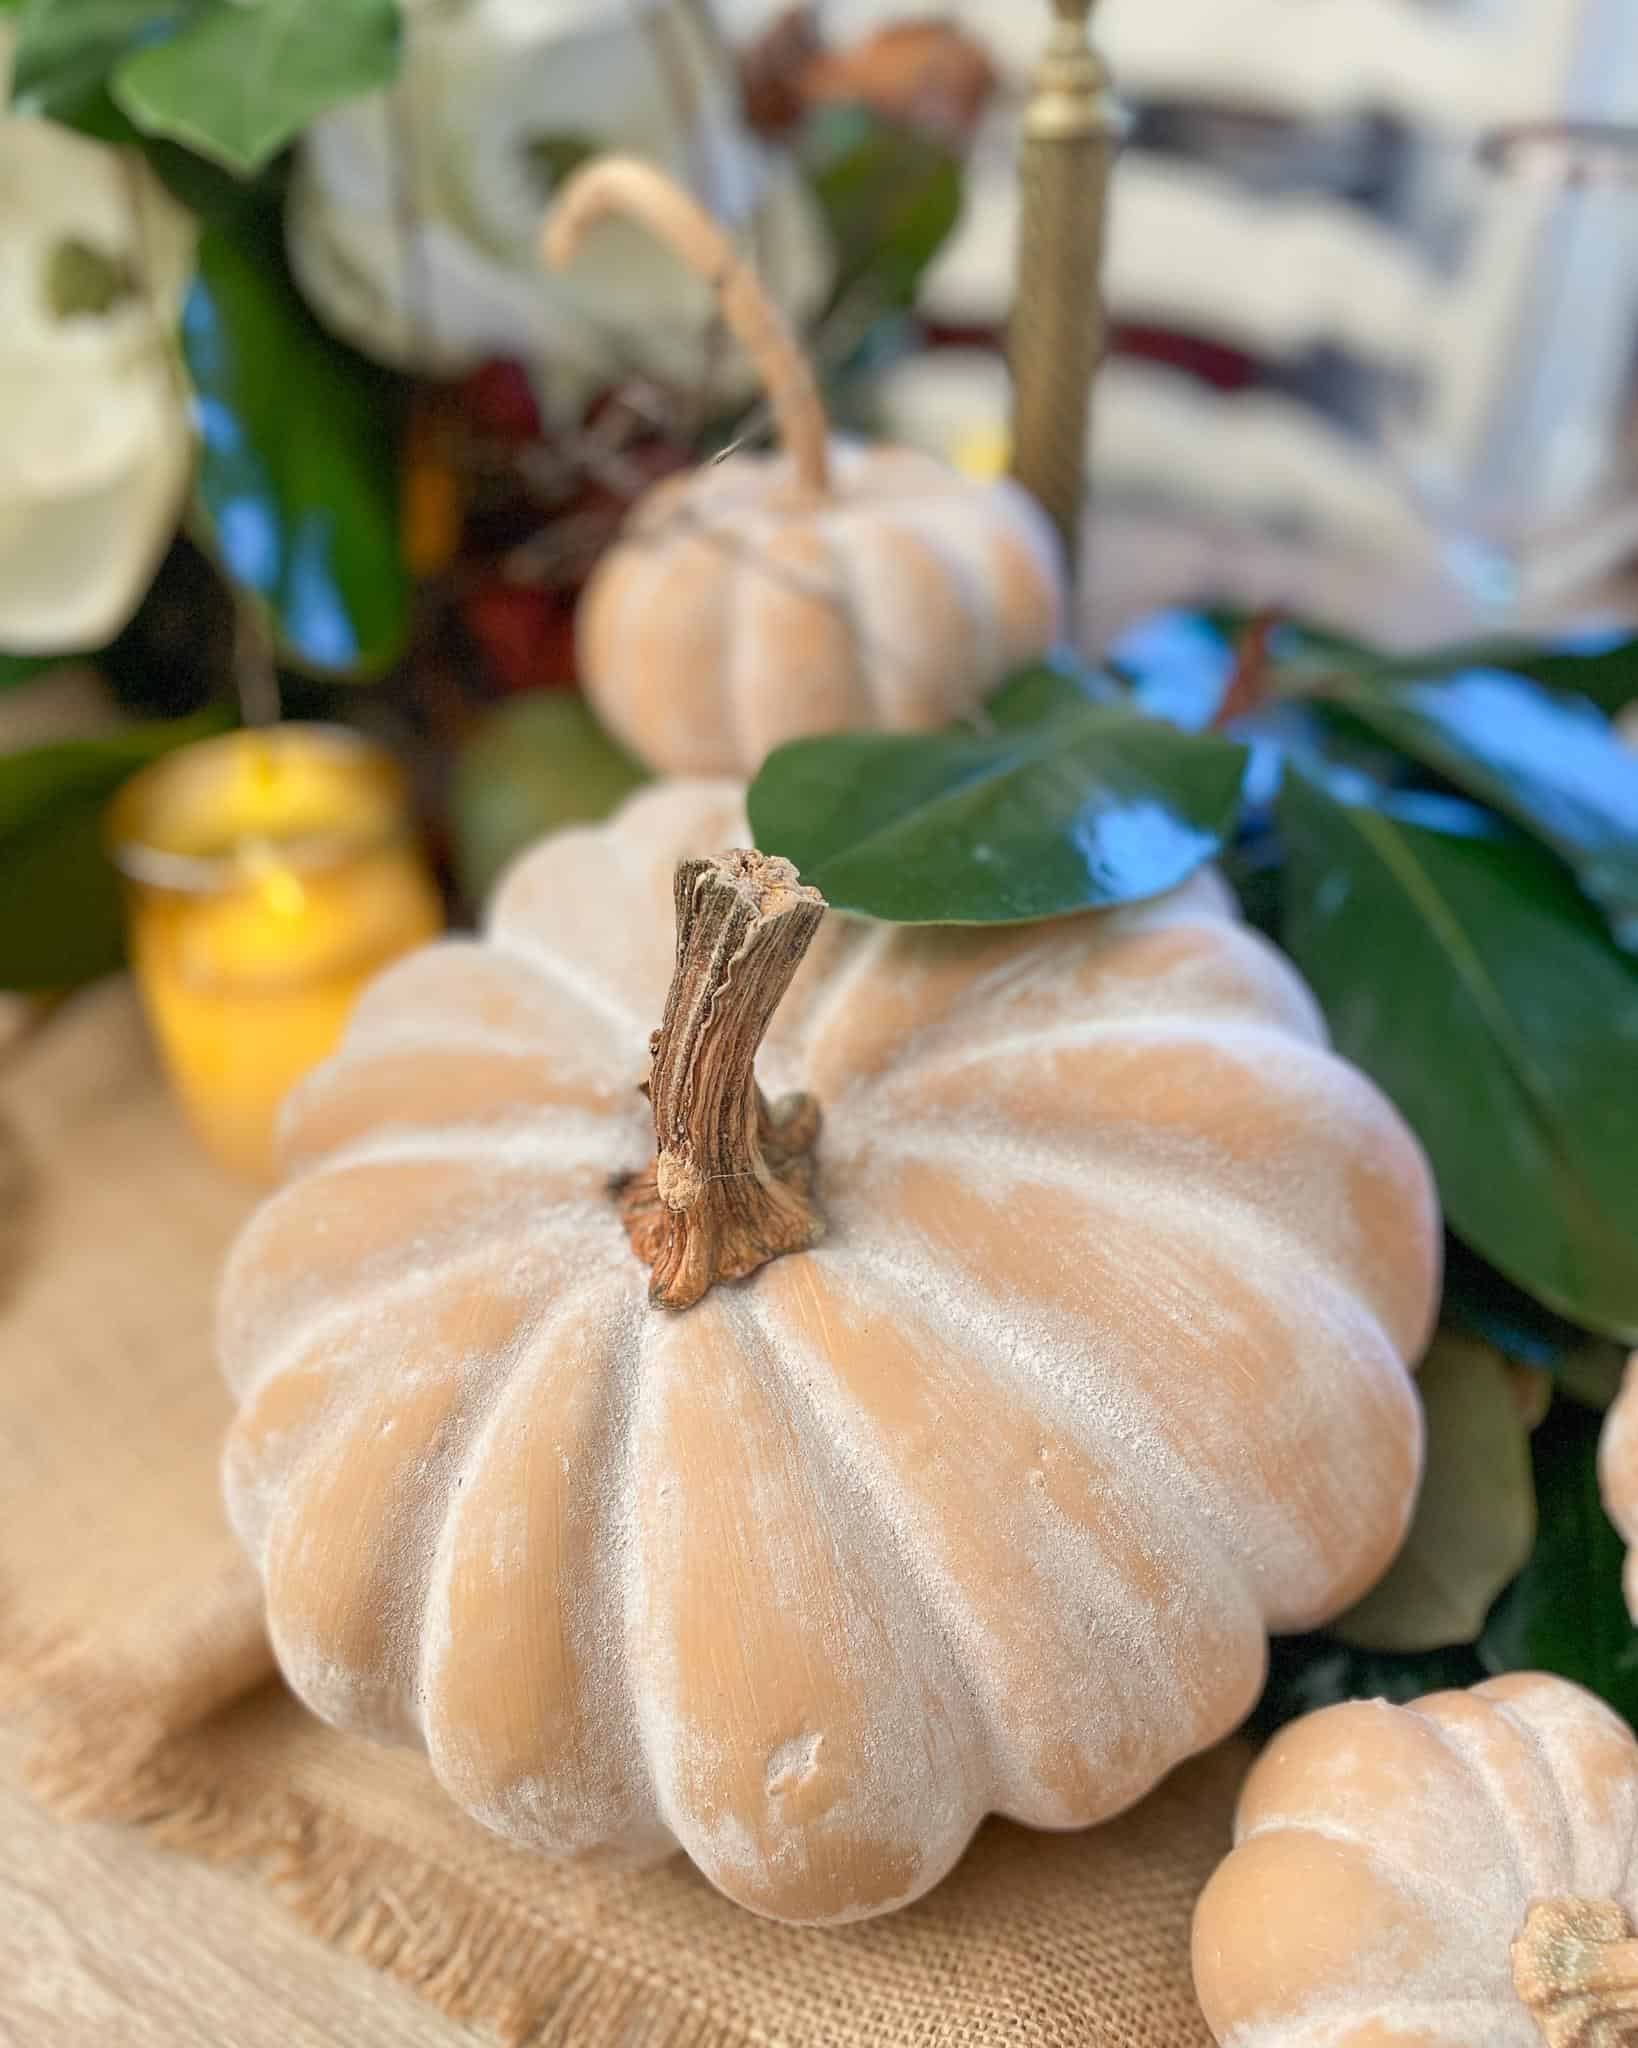
I have even bought this beautiful old chenille bedspread to make my pumpkins. The Chenille gives such a great texture and pattern to the pumpkin.


Tip from wendy’s craft room:
I find that stretch jersey knits are some of the easiest fabrics to work with because they mold into shape so well. Old plaid flannel shirts are another favorite choice since they instantly create a cozy fall feeling. If you want your pumpkins to really stand out, keep an eye out for textures like chenille, velvet, or vintage linens.
Step 2: Create a Pattern and Cut Out Your Circles
The first step in making a fabric pumpkin is to prepare your circle templates. I like to use brown grocery bags or pieces of cardboard since they are sturdy but still easy to cut.
Cut out circles in a few different sizes. I made 6″, 8″, 10″, and 12″ patterns, which give a nice variety when the pumpkins are displayed together.
Once your templates are ready, lay them on your chosen fabric and cut out matching circles.
Fabric Pumpkin circle Size Chart
This chart makes it easy to know exactly how much fabric to cut and how big your finished pumpkin will be.
Circle Diameter (inches) ⎸ Approx. Finished Pumpkin Size (inches)
6″
3–4″ (small pumpkin, great for place settings)
8″
4–5″ (medium pumpkin, good for shelves)
10″
5–6″ (medium-large pumpkin, versatile size)
12″
6–7″ (large pumpkin, centerpiece size)
14″
7–8″ (extra large pumpkin, statement piece)
16″
8–9″ (jumbo pumpkin, floor or porch decor)
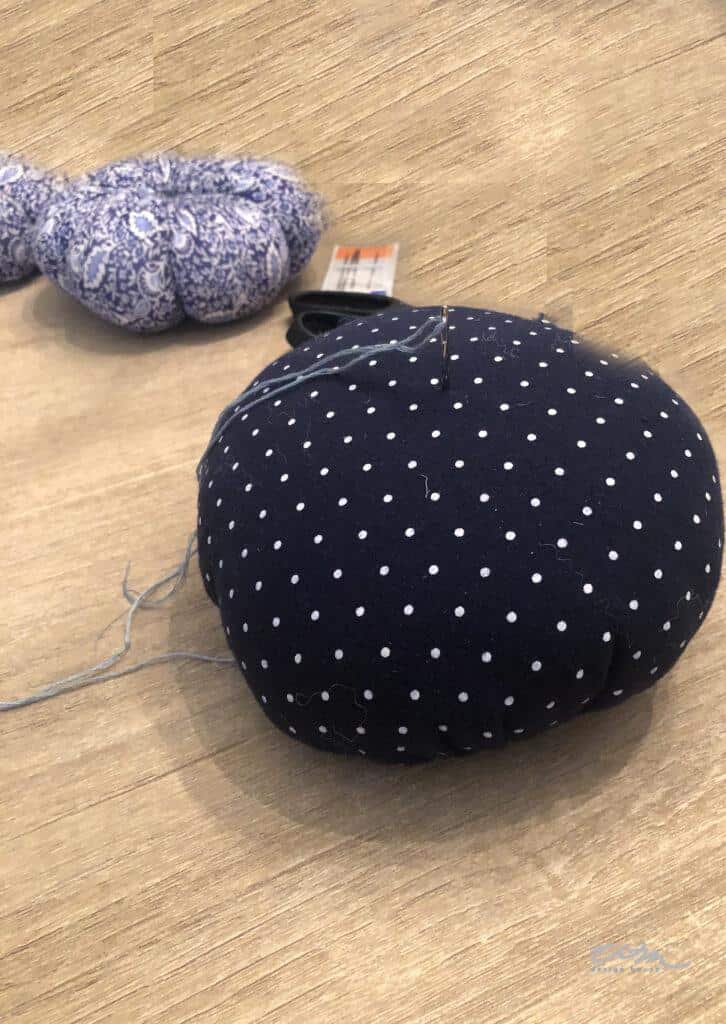
Step 3: Sew a Running Stitch
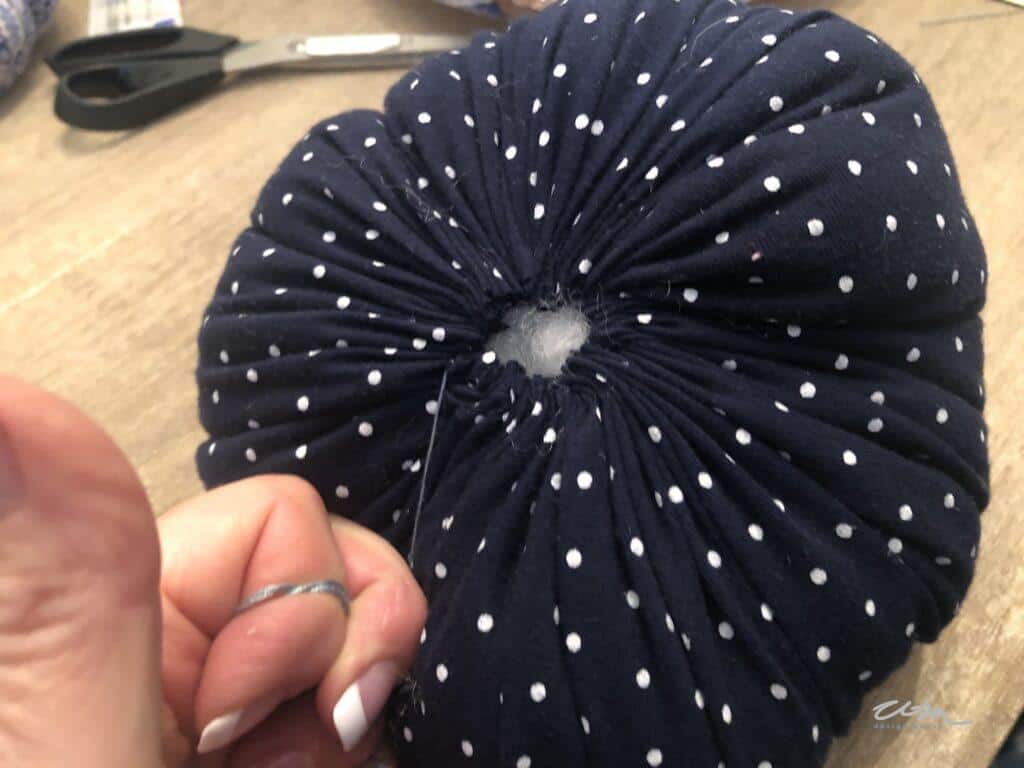
Next, create a running stitch around each piece of fabric.
Use embroidery thread and a large needle to stitch around the circle’s edge, about ½” from the border.
There is no need for this stitch to be perfect, as you will never see it when you finish the pumpkin. I move very quickly when creating this running stitch around the edge of the fabric.

Gather the fabric around the circle, like in the image above. When sewing around the edge, leave one end of the thread to pull. Then, gather up the fabric to create a pouch.
Step 4: Stuff and Weight the Pumpkin
To give your pumpkin a nice, sturdy base, start by adding a handful of rice or dried beans to the bottom of the fabric pouch. This little bit of weight helps the pumpkin sit upright and feel more substantial.

Next, fill the pouch with polyfill until it reaches the shape you like. I prefer my pumpkins to be full and plump, so I add a generous amount of stuffing. Just be careful not to overfill, since you’ll need to pull the fabric together at the top to close it securely.
Tip from wendy’s craft room:
The amount of stuffing you add changes the personality of your pumpkin. A little less filling creates a softer, more relaxed shape, while extra stuffing gives you a round, plump pumpkin that really pops in your fall displays. Try mixing both styles for a more natural look.
Step 5: Close and Shape the Pumpkin
The amount of stuffing you use will give each pumpkin its own personality. A little less filling creates a softer, more relaxed shape, while extra stuffing makes a round, plump pumpkin that really stands out. Mixing both styles in your display will give a more natural and collected look.
Now it’s time to form the ribs. Thread your needle and wrap the thread around the side of the pumpkin, pulling it up through the center at the top. Pull tight to create the first section.
Move over about two inches and repeat the process—poke the needle through the bottom, bring it up through the center top, and pull snugly.
Continue working around the entire pumpkin until you have 6 to 8 ribs, depending on the size of your pumpkin. These stitched sections help give your pumpkin that realistic shape and dimension.
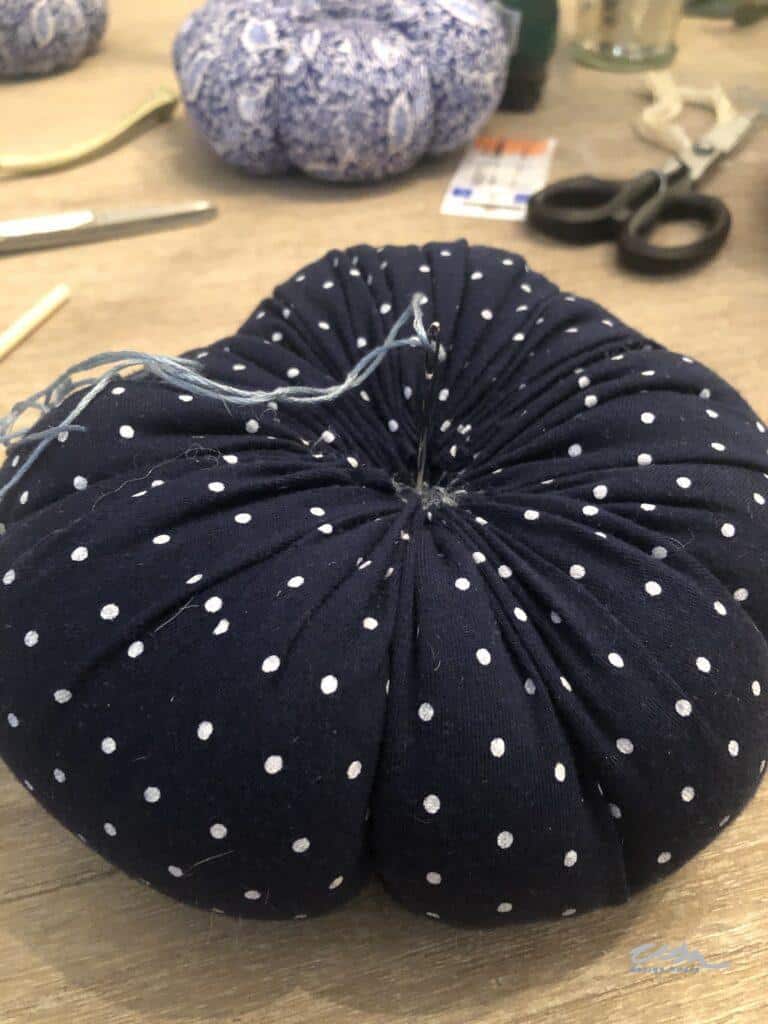
Using the embroidery thread and the heavy needle, thread a long piece of embroidery thread onto the needle and tie a knot on one end of the line.
Insert the needle in the center of the bottom of the pumpkin and push the needle through to the top of the pumpkin.
Tip from wendy’s craft room:
Don’t worry about making each section perfectly even. Pumpkins in nature are never identical, and a little variation adds to their charm.
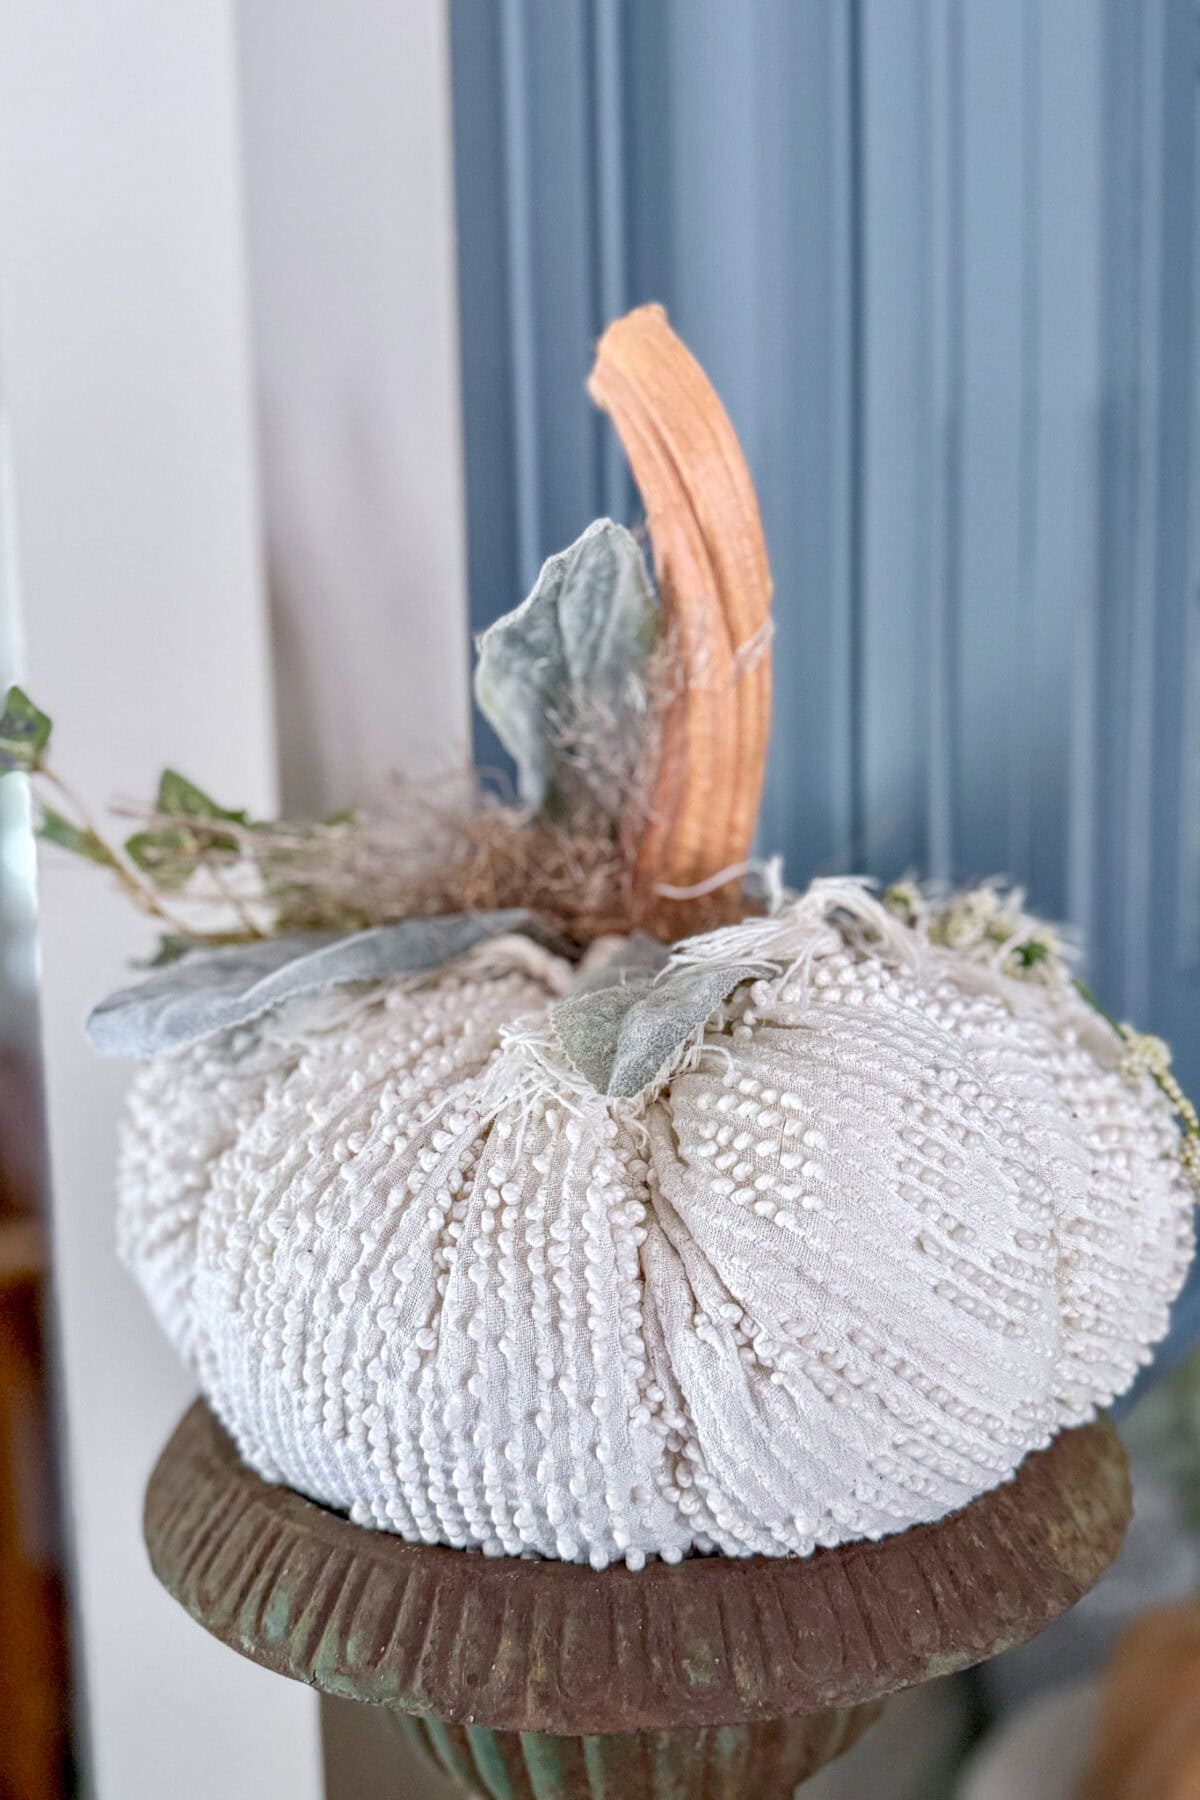
Step 6: Add a Stem
My favorite part of the whole process is adding the stems. This little detail makes the pumpkins look so realistic and brings them to life.
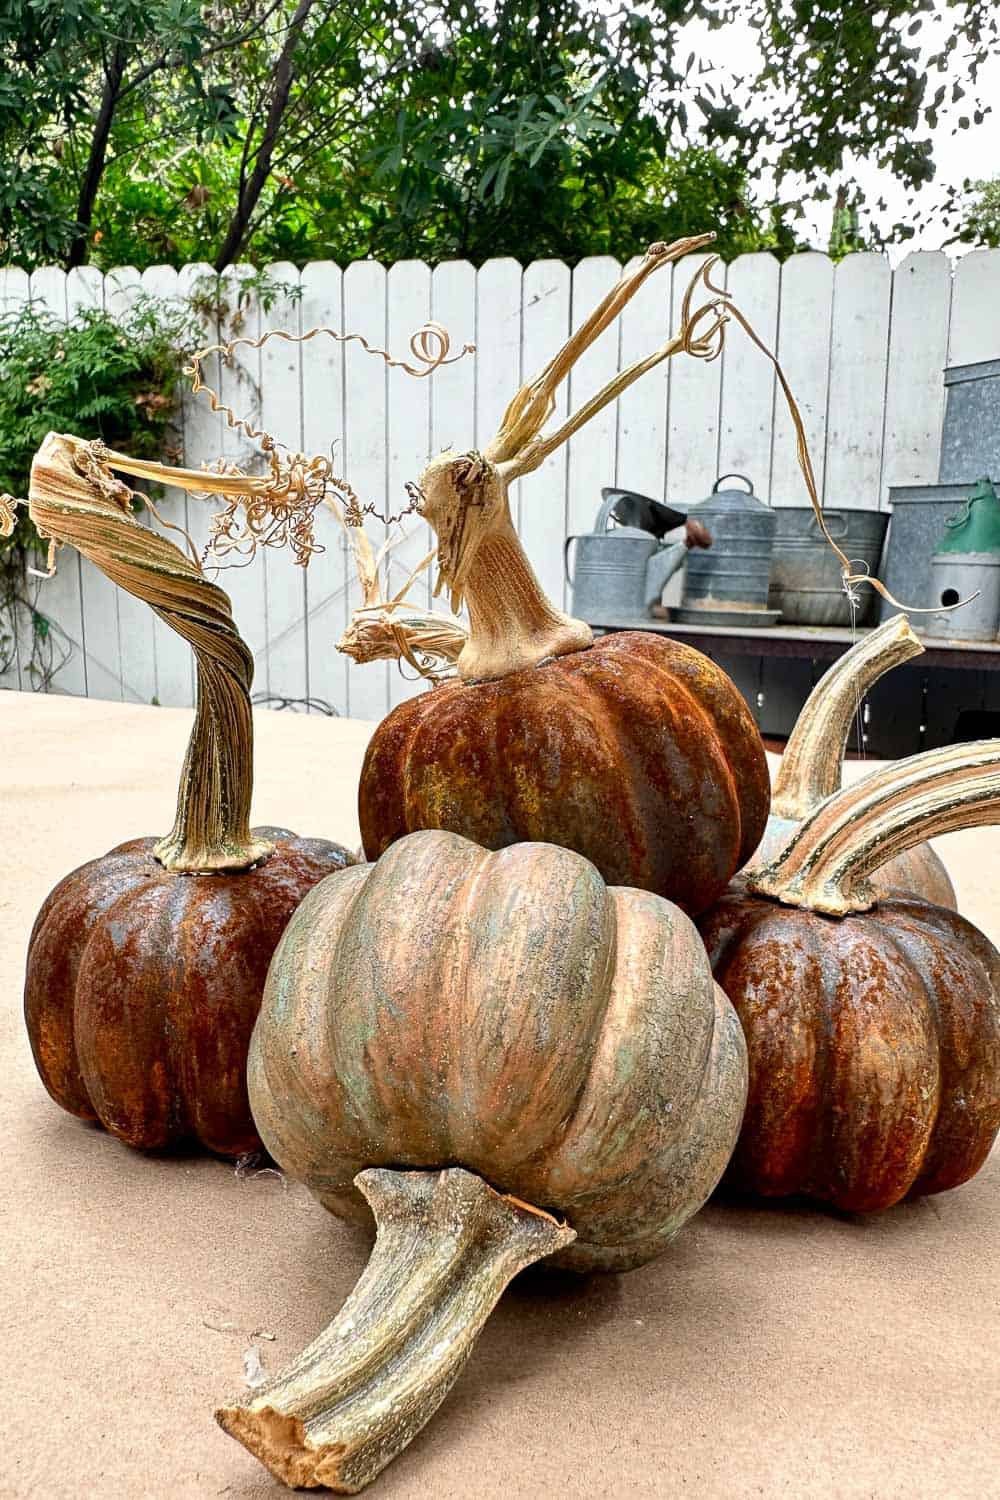
You might wonder where to find stems. I like to save mine each year by cutting them off my pumpkins before tossing them out. You can also collect stems from the ground at pumpkin patches, check the bins at grocery stores, or even purchase them online.
Once you have a nice variety, gather extra touches like fall leaves, moss, or even a bit of ribbon. This is where you can get creative and make each pumpkin your own.
Using a hot glue gun, attach the stem firmly to the top of the pumpkin. Then add your decorative accents until you are happy with the look. Each one will turn out a little different, which makes your collection feel unique and handmade.
Tip from wendy’s craft room:
Save a bag of stems each fall so you’ll always have them ready for next year’s projects. They dry beautifully and can be reused again and again.
Other Variations
One of the best parts of this project is how easy it is to make each pumpkin your own. With a few simple tweaks, you can create a whole collection of pumpkins that all feel unique and special.

Try different fillings: Instead of just polyfill, experiment with fabric scraps, weighted beads, or cotton batting. Each option gives your pumpkin a slightly different shape and feel.
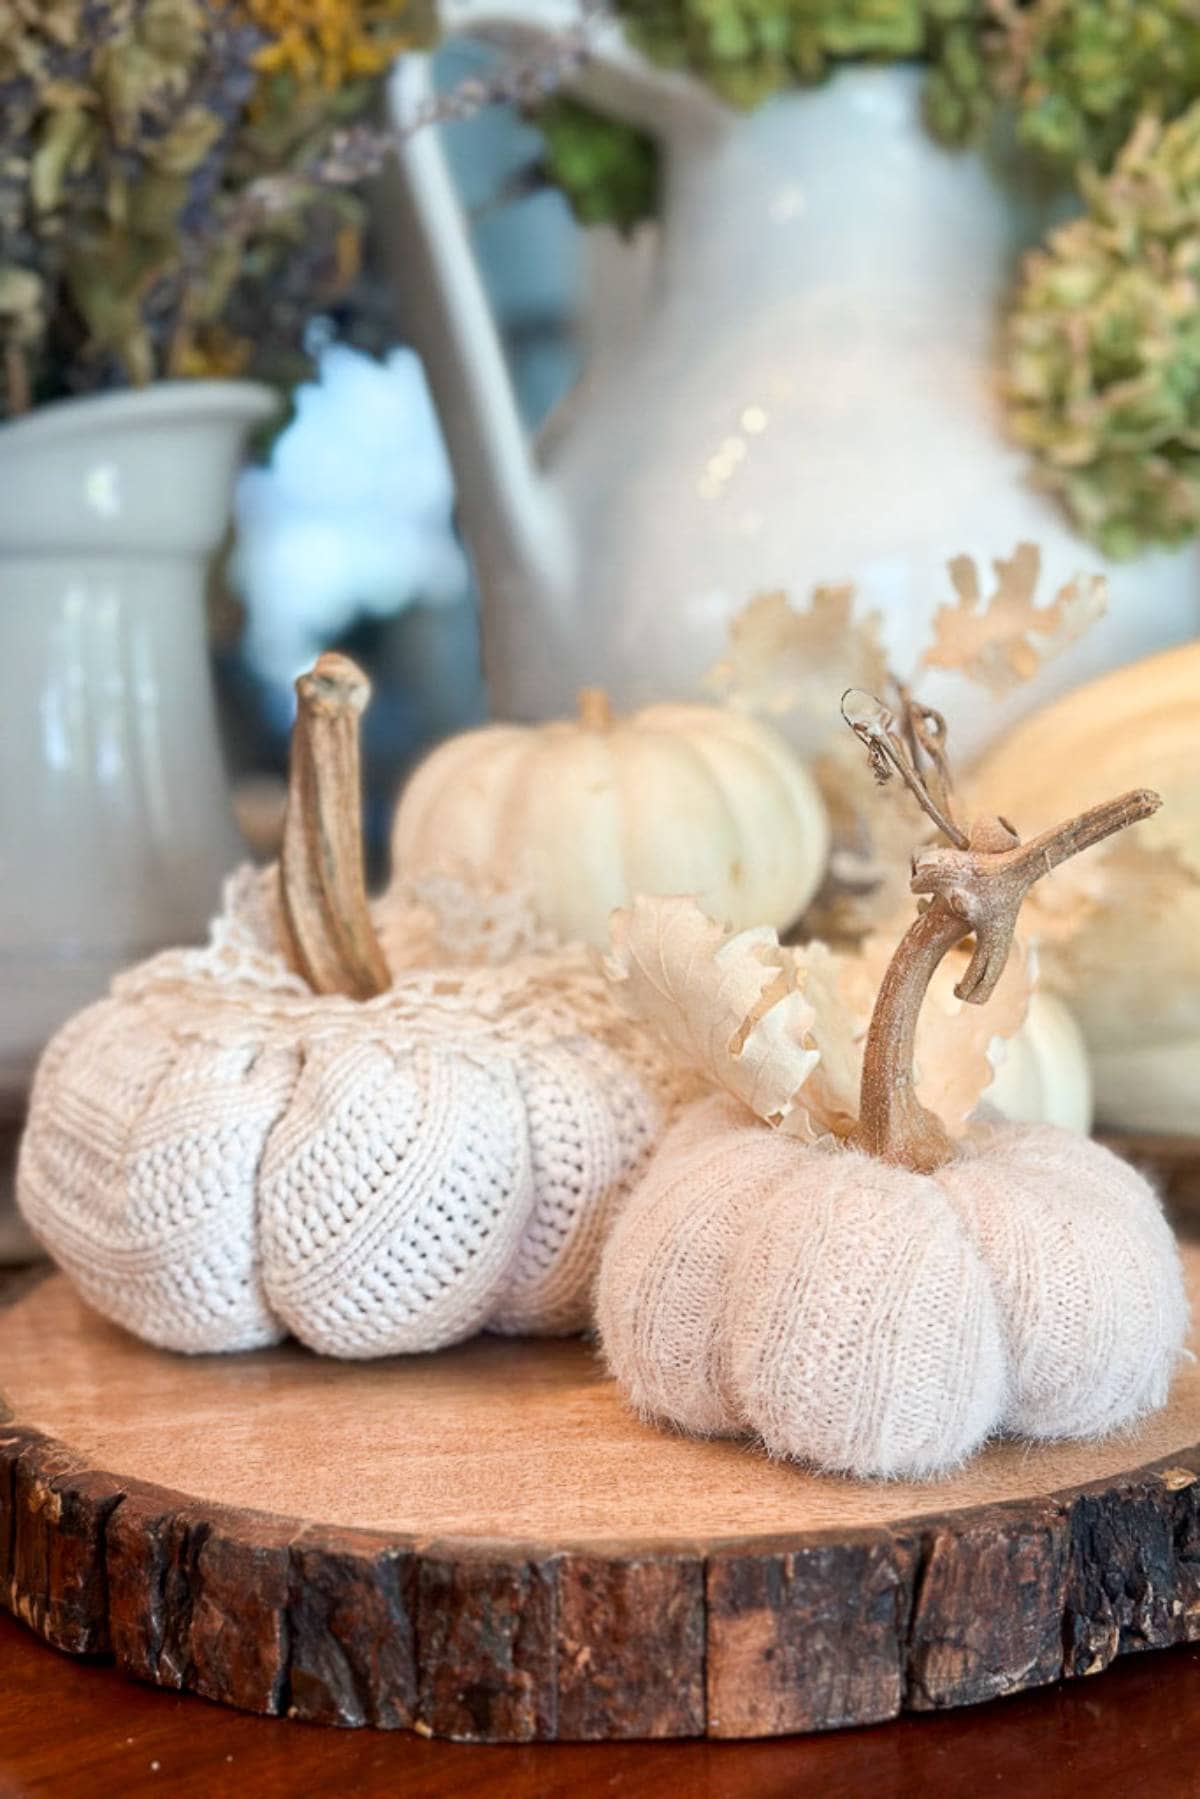
Play with textures: Corduroy, velvet, denim, lace, or even a mix of fabrics can give your pumpkins an elevated look. Try layering a lace overlay on top of cotton for something unexpected.
Add decorative details: Go beyond a simple stem by adding moss, velvet ribbon, or twine bows. Dried hydrangeas, fall leaves, or even seed pods from your garden make beautiful finishing touches.
Get creative with accents: Embroidered details, painted fabric, glitter, or buttons can add personality and whimsy. Stamping designs onto the fabric is another fun way to customize.
Tip from wendy’s craft room:
I love mixing different sizes, fabrics, and embellishments together. A group of pumpkins looks so much more interesting when some are plump and simple, while others are dressed up with ribbon, moss, or flowers. Variety really brings your display to life.
How to Make No-Sew Fabric Pumpkins
DIY No-Sew Fabric Pumpkins
If sewing isn’t your thing, don’t worry. You can still make adorable fabric pumpkins in just a few minutes. Here’s how:
- Cut your fabric: Start with a fabric square (about 12″ x 12″ for a medium pumpkin). The larger the square, the bigger your pumpkin will be.
- Wrap and stuff: Place a ball of polyfill (or even plastic grocery bags for a thrifty option) in the center of the fabric square. Pull the fabric up and around the stuffing until it’s fully covered.
- Secure the top: Gather the fabric together at the top and tie it tightly with twine, yarn, or string. Tuck in or trim any excess fabric for a clean look.
- Add a stem: Hot glue a stick, cinnamon stick, or real pumpkin stem to the top.
- Decorate: Finish with moss, ribbon, or a bow to give it personality.
Tip from wendy’s craft room:
If you want ribbed sections like the sewn version, simply wrap twine around the pumpkin a few times before gluing on the stem. It gives the same realistic look without a single stitch.
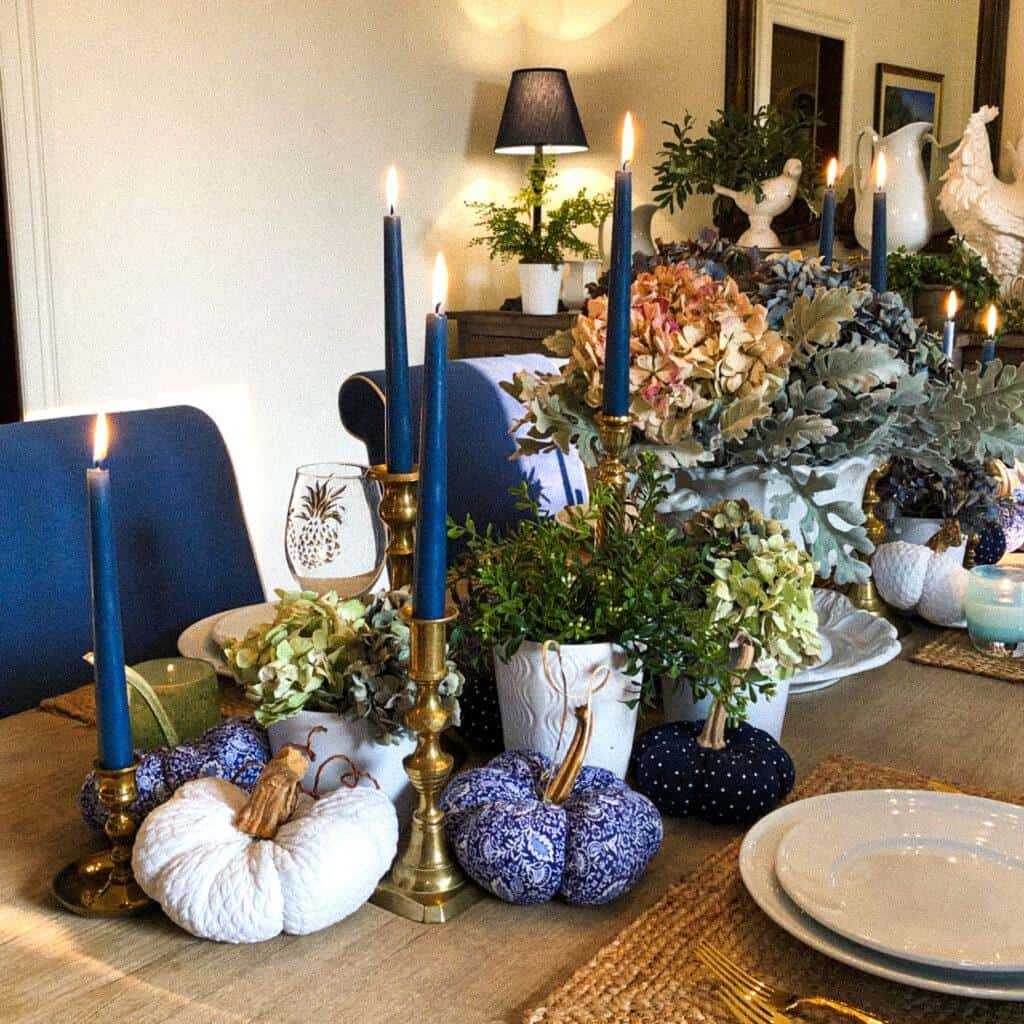
Styling Ideas for Your Fabric Pumpkins
Once your fabric pumpkins are finished, the fun begins with styling them. You can create a fun fall
vignette on a shelf. On the dining table, they look beautiful scattered down the center or tucked into a fall centerpiece with candles and greenery. They pair perfectly with a fall tablescape where seasonal colors and cozy textures come together.
In the living room, fabric pumpkins can be placed on a coffee table tray or grouped on the mantel with candlesticks and garlands.
They are equally charming in an entryway. A few tucked into baskets, styled on a shelf, or displayed alongside vintage books and a vase of dried hydrangeas create a welcoming first impression. These little touches remind me of the inviting displays from my fall vignette ideas.
The kitchen is another wonderful spot. Try piling them into a wooden dough bowl on the counter or tucking a few on open shelves. These small details add to the atmosphere of a cozy fall kitchen and make the season feel special even in everyday moments.

Other Fall Crafts You’ll Love!
Final Thoughts
I hope this tutorial has inspired you to try making your own fabric pumpkins. They are such a fun and budget-friendly way to bring a cozy, handmade touch into your home for fall. Whether you use thrifted sweaters, old flannels, or leftover scraps from your sewing basket, each pumpkin turns out unique and full of personality. The best part is that you can reuse them year after year, adding to your collection as the seasons go by.
Now it’s your turn to give this project a try. Gather some fabric, add your personal touch, and see how many different ways you can style your pumpkins this season. I would love to hear how yours turn out, so share a photo or drop a comment. I cannot wait to see the cozy creations you come up with.
Happy crafting, friend!


Did you make this craft?
We would love to see what you have created, so mention us @wmdesignhouse or tag us using #wmdesignhouse so we can see your creations!
More about me!

Hello, I’m Wendy – a dedicated homemaker with a deep passion for decorating, gardening, cooking, and crafting. I find joy in harmonizing beautiful elements to fashion a space that is both comfortable and inspiring. I will help you create a beautiful home, one project at a time.
Wendy, your pumpkins and tablescape are lovely.
Wendy,
These look easy enough that even I can pull these off this year! I love the idea of thrifting to find some unique fabric to use to make them! Thanks for sharing! I will be sharing these in my newsletter today! HUGS! Chloe
Thank you so much, Chloe, I appreciate the share. Have a great week.
Wendy, such a fun DIY. I have an old bathrobe that I bet could be used for this!
Yes, robes are perfect! they typically have great texture. I hope you give it a try.
These turned out great! And I’m a big fan of blue so your table really caught my eye!
Shelley
Thank you so much, Shelley. My entire house is primarily blue; as hard as I have tried to have a neutral pallet, I can’t get away from the blue.
I plan on saving all my real stems starting this year! Your table looks stunning with those blue and white pumpkins. What a great way to use some old clothes too.
Thank you, Meagan. They are so fun to make. By the way, I was trying to link to your party the other day and I could not find the post. are you weekly?
Wendy, your pumpkins are beautiful and the tutorial makes them look so easy! I might have to try to make a few!
Thank you Elizabeth, they are very simple and you should have most everything on hand to make them. Just a little trip to the Dollar Tree.
I love this project Wendy! The pumpkins are so cute. What a genius you are to look for pumpkin stems that have fallen off!!! I definitely will be cutting the stems off of all my pumpkins this year! Thanks for sharing.
If you saw the mountain of pumpkin stems I have now grown, LOL I found a bin that had been missing for a while. Happy stem collecting.
I even have my grandchildren trained to look for stems now. I love it when I get a call and one of them says, IYA, I found you a stem today! Such great memories.
LOVE these. Thanks for sharing the diy. Using the real stems makes all the difference. I recently tried your paint/soda method to coat the plastic pumpkins. They turned out great and I’ll share one or two with a link back to your post. I didn’t use the wax, but did a clear spray coating. The texture is really unique. Have a great week, Wendy.
Yeah, I am so glad you tried it Debra, I can’t wait to see them. I am sure they look fabulous. Thank you so much.
I didn’t realise these were so easy to make. They look fantastic and the skies the limit with colour and texture.
You got it! Super easy, and yes, the sky is the limit. I like to use a stretch jersey. It’s very easy to work with.
These look so good! Love the chenille! I have fabric pumpkins on my to do list! Pinning now! Thanks!
Thank you Donna. They are very fun and easy to make. I too love the chenille when you can find a good old bedspread.
Wow Wendy! You hit this one out of the park! Your pumpkin ideas are fabulous! I just love the blue pumpkins to coordinate with your decor! The blue candles are brilliant! I’m sure you are selling them on your website, right! Plus, your photography is wonderful! You have such talent!
Why thank you for the lovely comment, I wonder where I learned all of this, lol!!!!
I do the same every year and have a collection of stems
Pinned
Too funny! but the real stems make such a difference, right?
Wendy
Great post, Wendy! I love the fabric you found. Looks great on the table! ~Missy
Thank you Missy. I purchased an old robe and a dress at the thrift store to use.