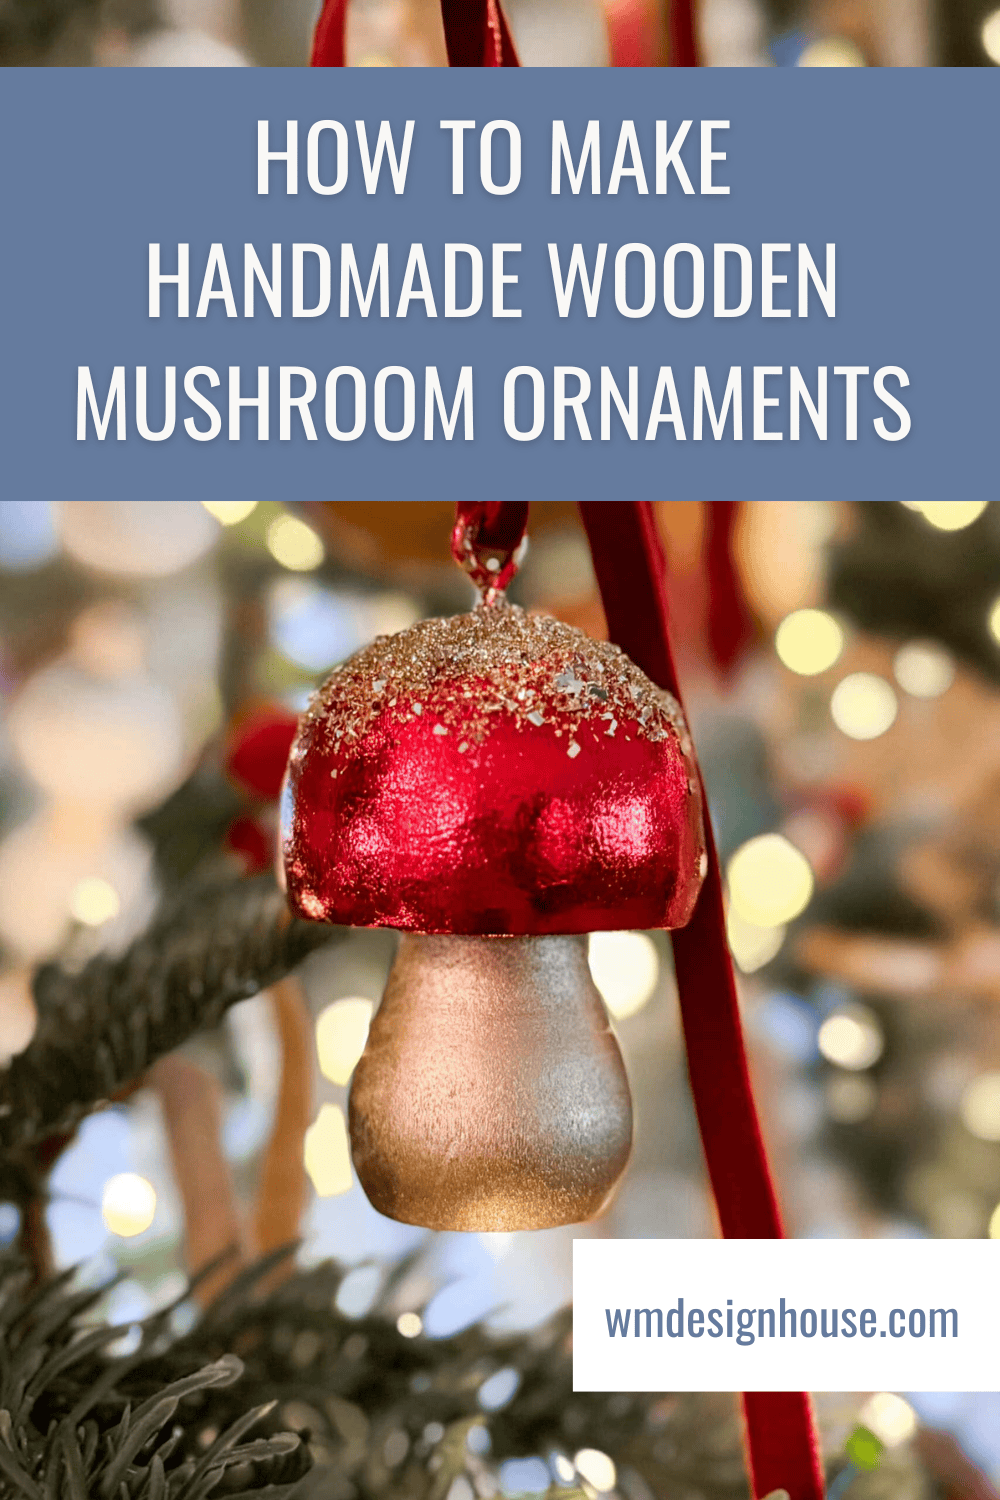
How to Make Easy and Stunning Wood Mushroom Ornaments
Create your own wood mushroom ornaments with these two simple methods that blend rustic style, holiday whimsy, and a hint of garden-inspired beauty.
On my blog WM Design House, I may sometimes use affiliate links, which means a small commission is earned if you purchase via the link. The price will be the same whether you use the affiliate link or go directly to the vendor’s website using a non-affiliate link. Read my full disclosure policy here.
I’ve always loved mushrooms. Maybe it comes from all the years I have spent in the garden, or the fact that these cute little toadstools have a place in Christmas folklore. Whatever the reason, they feel like a natural extension of my gardens and are the perfect way to bring a bit of the outdoors in during the colder winter months.
Many of the pretty mushroom ornaments I’ve seen in stores and online cost far more than I was willing to spend, so like any good crafter, I decided to make my own!
If you love Christmas decor that feels rustic and just a touch whimsical, I’m sharing two simple ways to create your own wood mushroom ornaments. Both styles are easy to make, creative, and the perfect way to add a bit of nature to your holiday decorating.
So gather a few supplies and follow along as I show you how to make your own rustic handmade mushroom ornaments for your Christmas tree this year.
Why You’ll Love Making Wood Mushroom Ornaments
If you enjoy Christmas decor that feels natural, cozy, and a little whimsical, you’re going to love making these wood mushroom ornaments. They’re simple to create, easy to customize, and add the sweetest handmade touch to your tree.
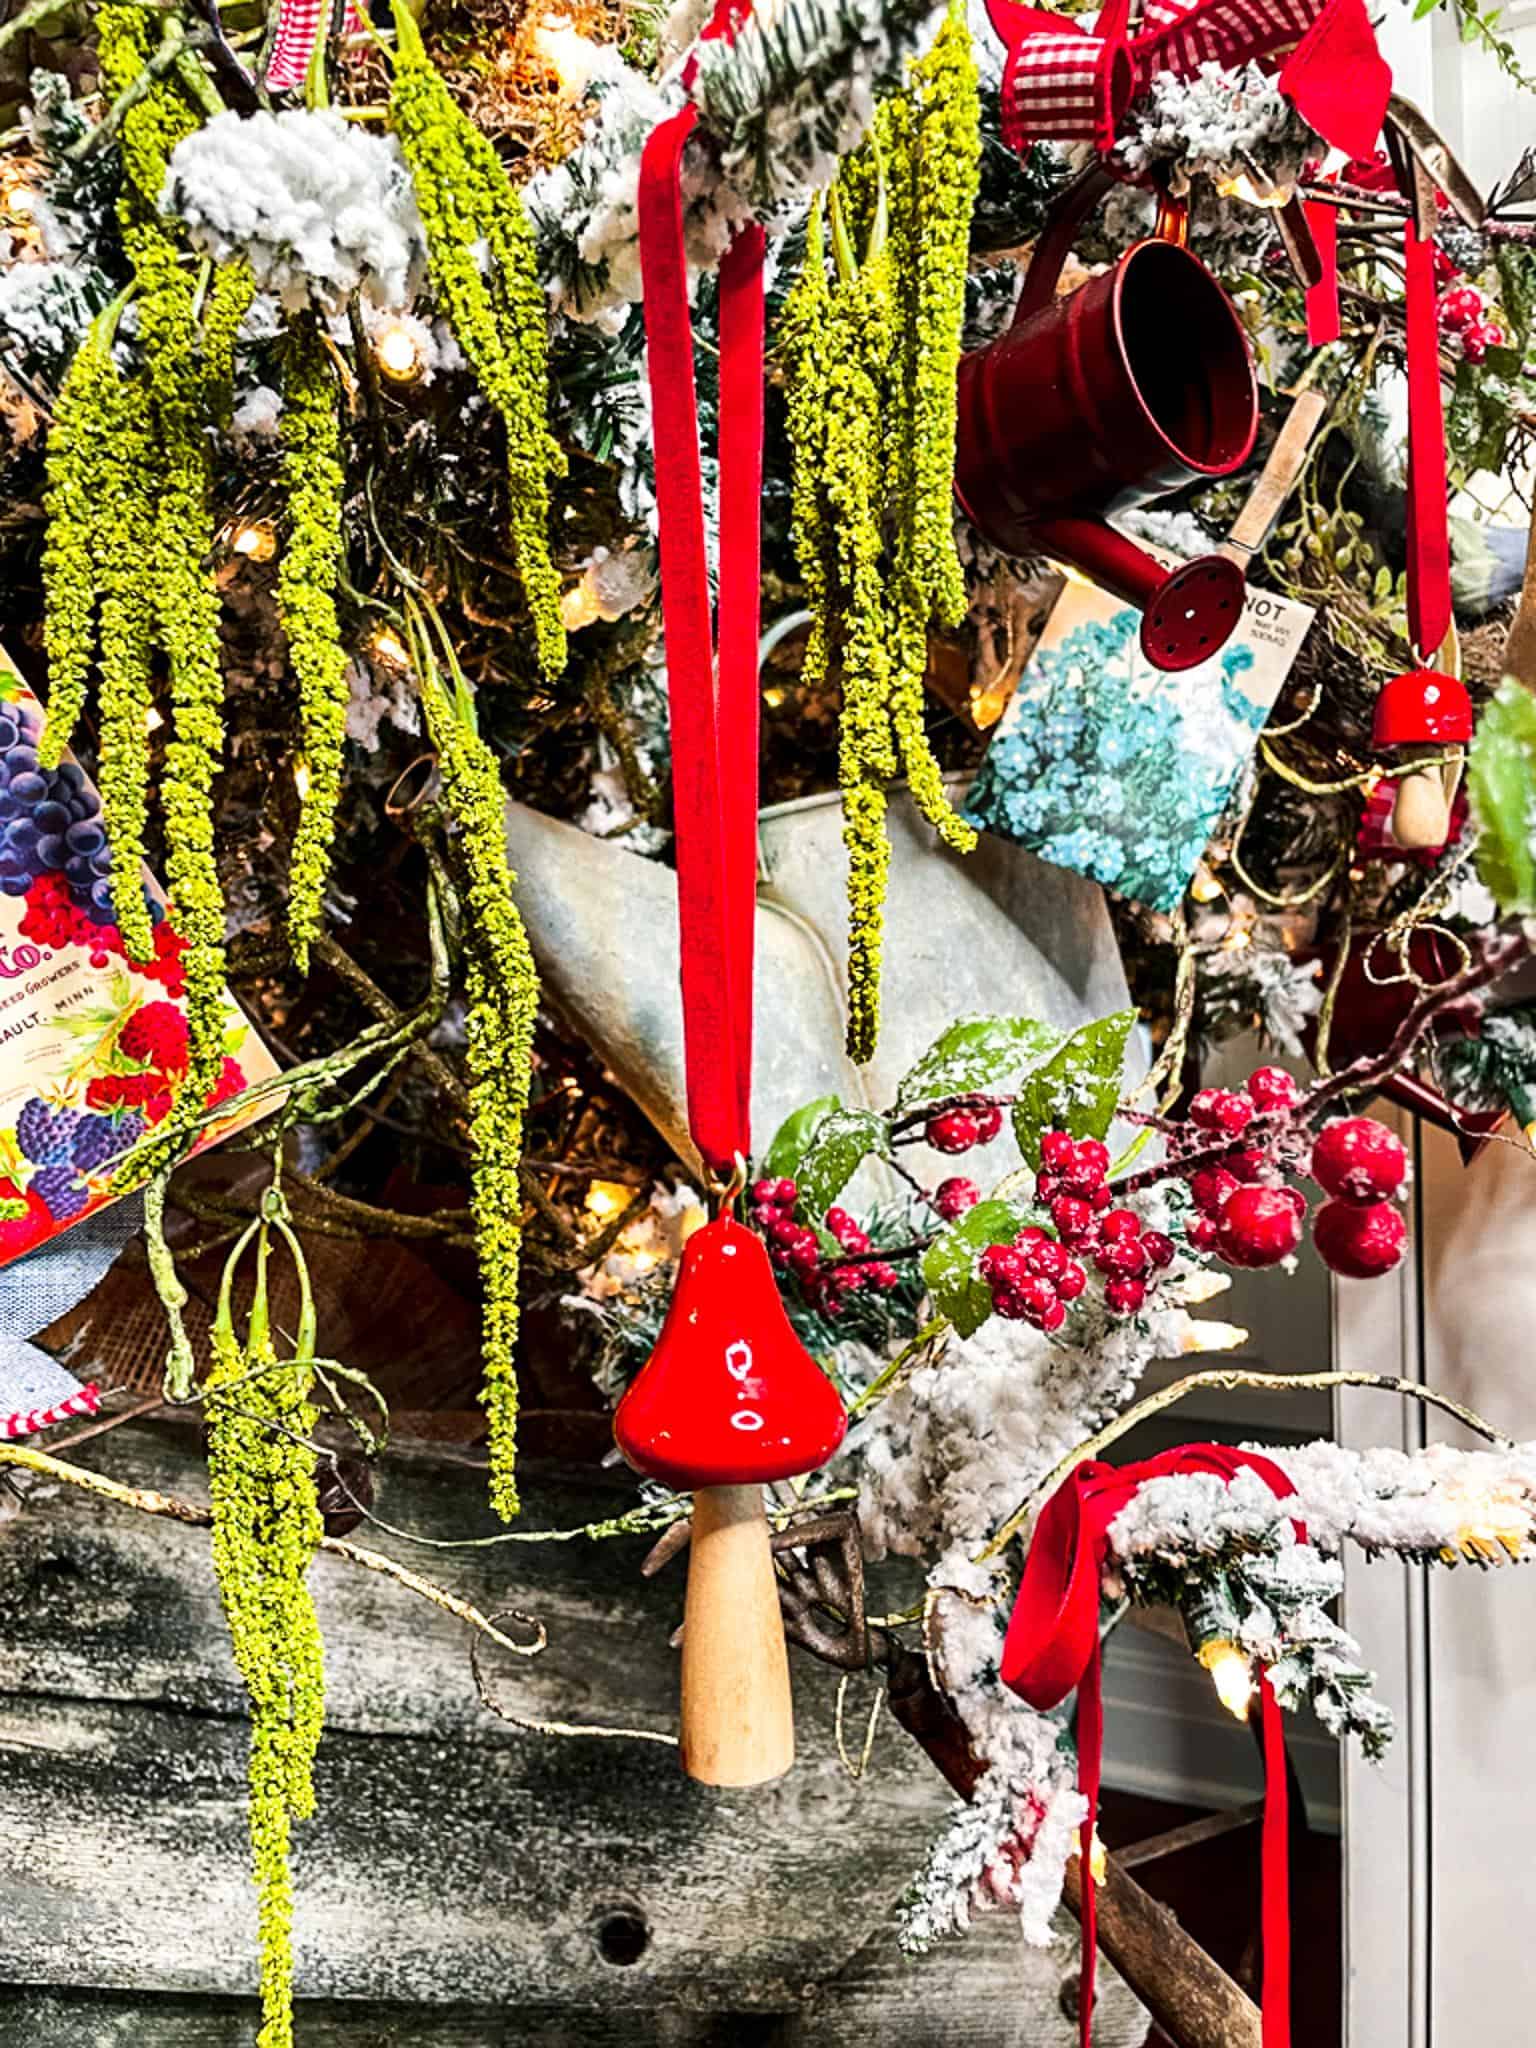
You can style them on a woodland-themed Christmas tree, tuck them into a wreath, or tie one onto a wrapped gift for something extra special. No matter how you use them, these little toadstools will add a bit of magic to your holiday decor.
Here are a few more reasons you will enjoy making these wood mushroom ornaments:
Beginner friendly
These wooden mushroom garden ornaments are simple to make and perfect for any skill level. You only need a few basic supplies and a little time. Each mushroom turns out slightly different, which makes every ornament feel unique and handmade.
Naturally charming
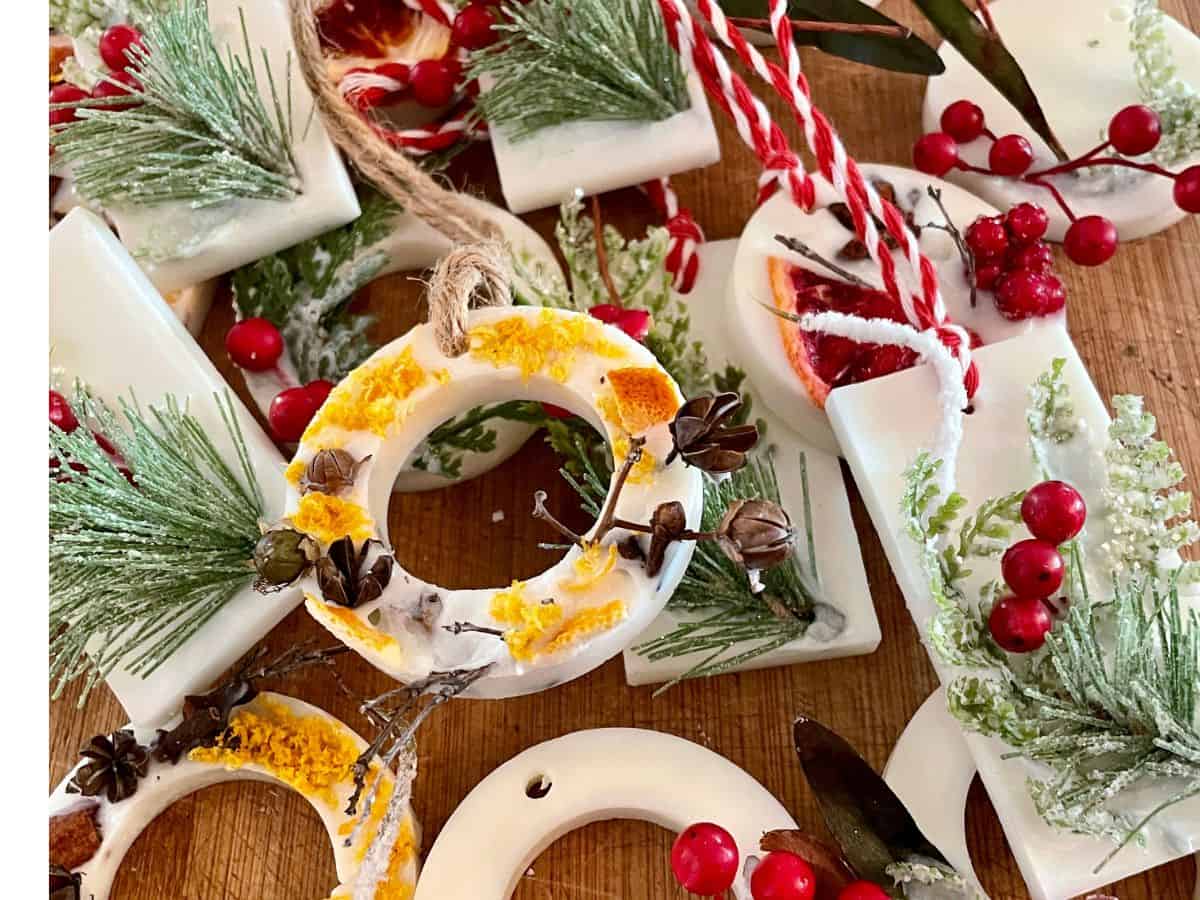
Wood mushrooms add warmth and character to your Christmas decor. They blend beautifully with greenery, dried pinecones, diy dried orange ornaments, and all the natural elements you may already use in your holiday decorating.
Great for gifting
Handmade mushroom ornaments make such thoughtful gifts. You can tie one onto a present or share them with friends and family.
Budget friendly
Store-bought mushroom ornaments can be surprisingly expensive. Making them yourself is an easy and affordable way to fill your tree with something beautiful, personal, and timeless.
A Little History of Mushroom Ornaments
Mushrooms have a long and charming place in Christmas traditions. In German folklore, the classic red and white toadstool is known as the glücklicher Pilz which means lucky mushroom. It was believed to bring good fortune, happiness, and a fresh start for the year ahead.
The Amanita muscaria, the bright red mushroom most people picture, grows near the same types of trees often brought into homes for Christmas.
It’s easy to imagine families spotting them in the forest during winter walks and carrying that sense of magic into their holiday celebrations. Over time, mushrooms found their way into Christmas decor, artwork, and eventually ornaments.
Including these little toadstools on the tree feels like a quiet nod to the forest and its stories. It is one of the reasons they blend so beautifully with natural holiday decorations and why they have become such a sweet and nostalgic part of Christmas ornament collections.
Let’s Make Some Mushroom Ornaments
Now that you know a little of the charm behind these tiny toadstools, it is time to make your own. Wood mushrooms are incredibly simple to work with and there are so many ways to finish them.
You can keep them classic and bright, give them a soft rustic look, or try something a little more playful.
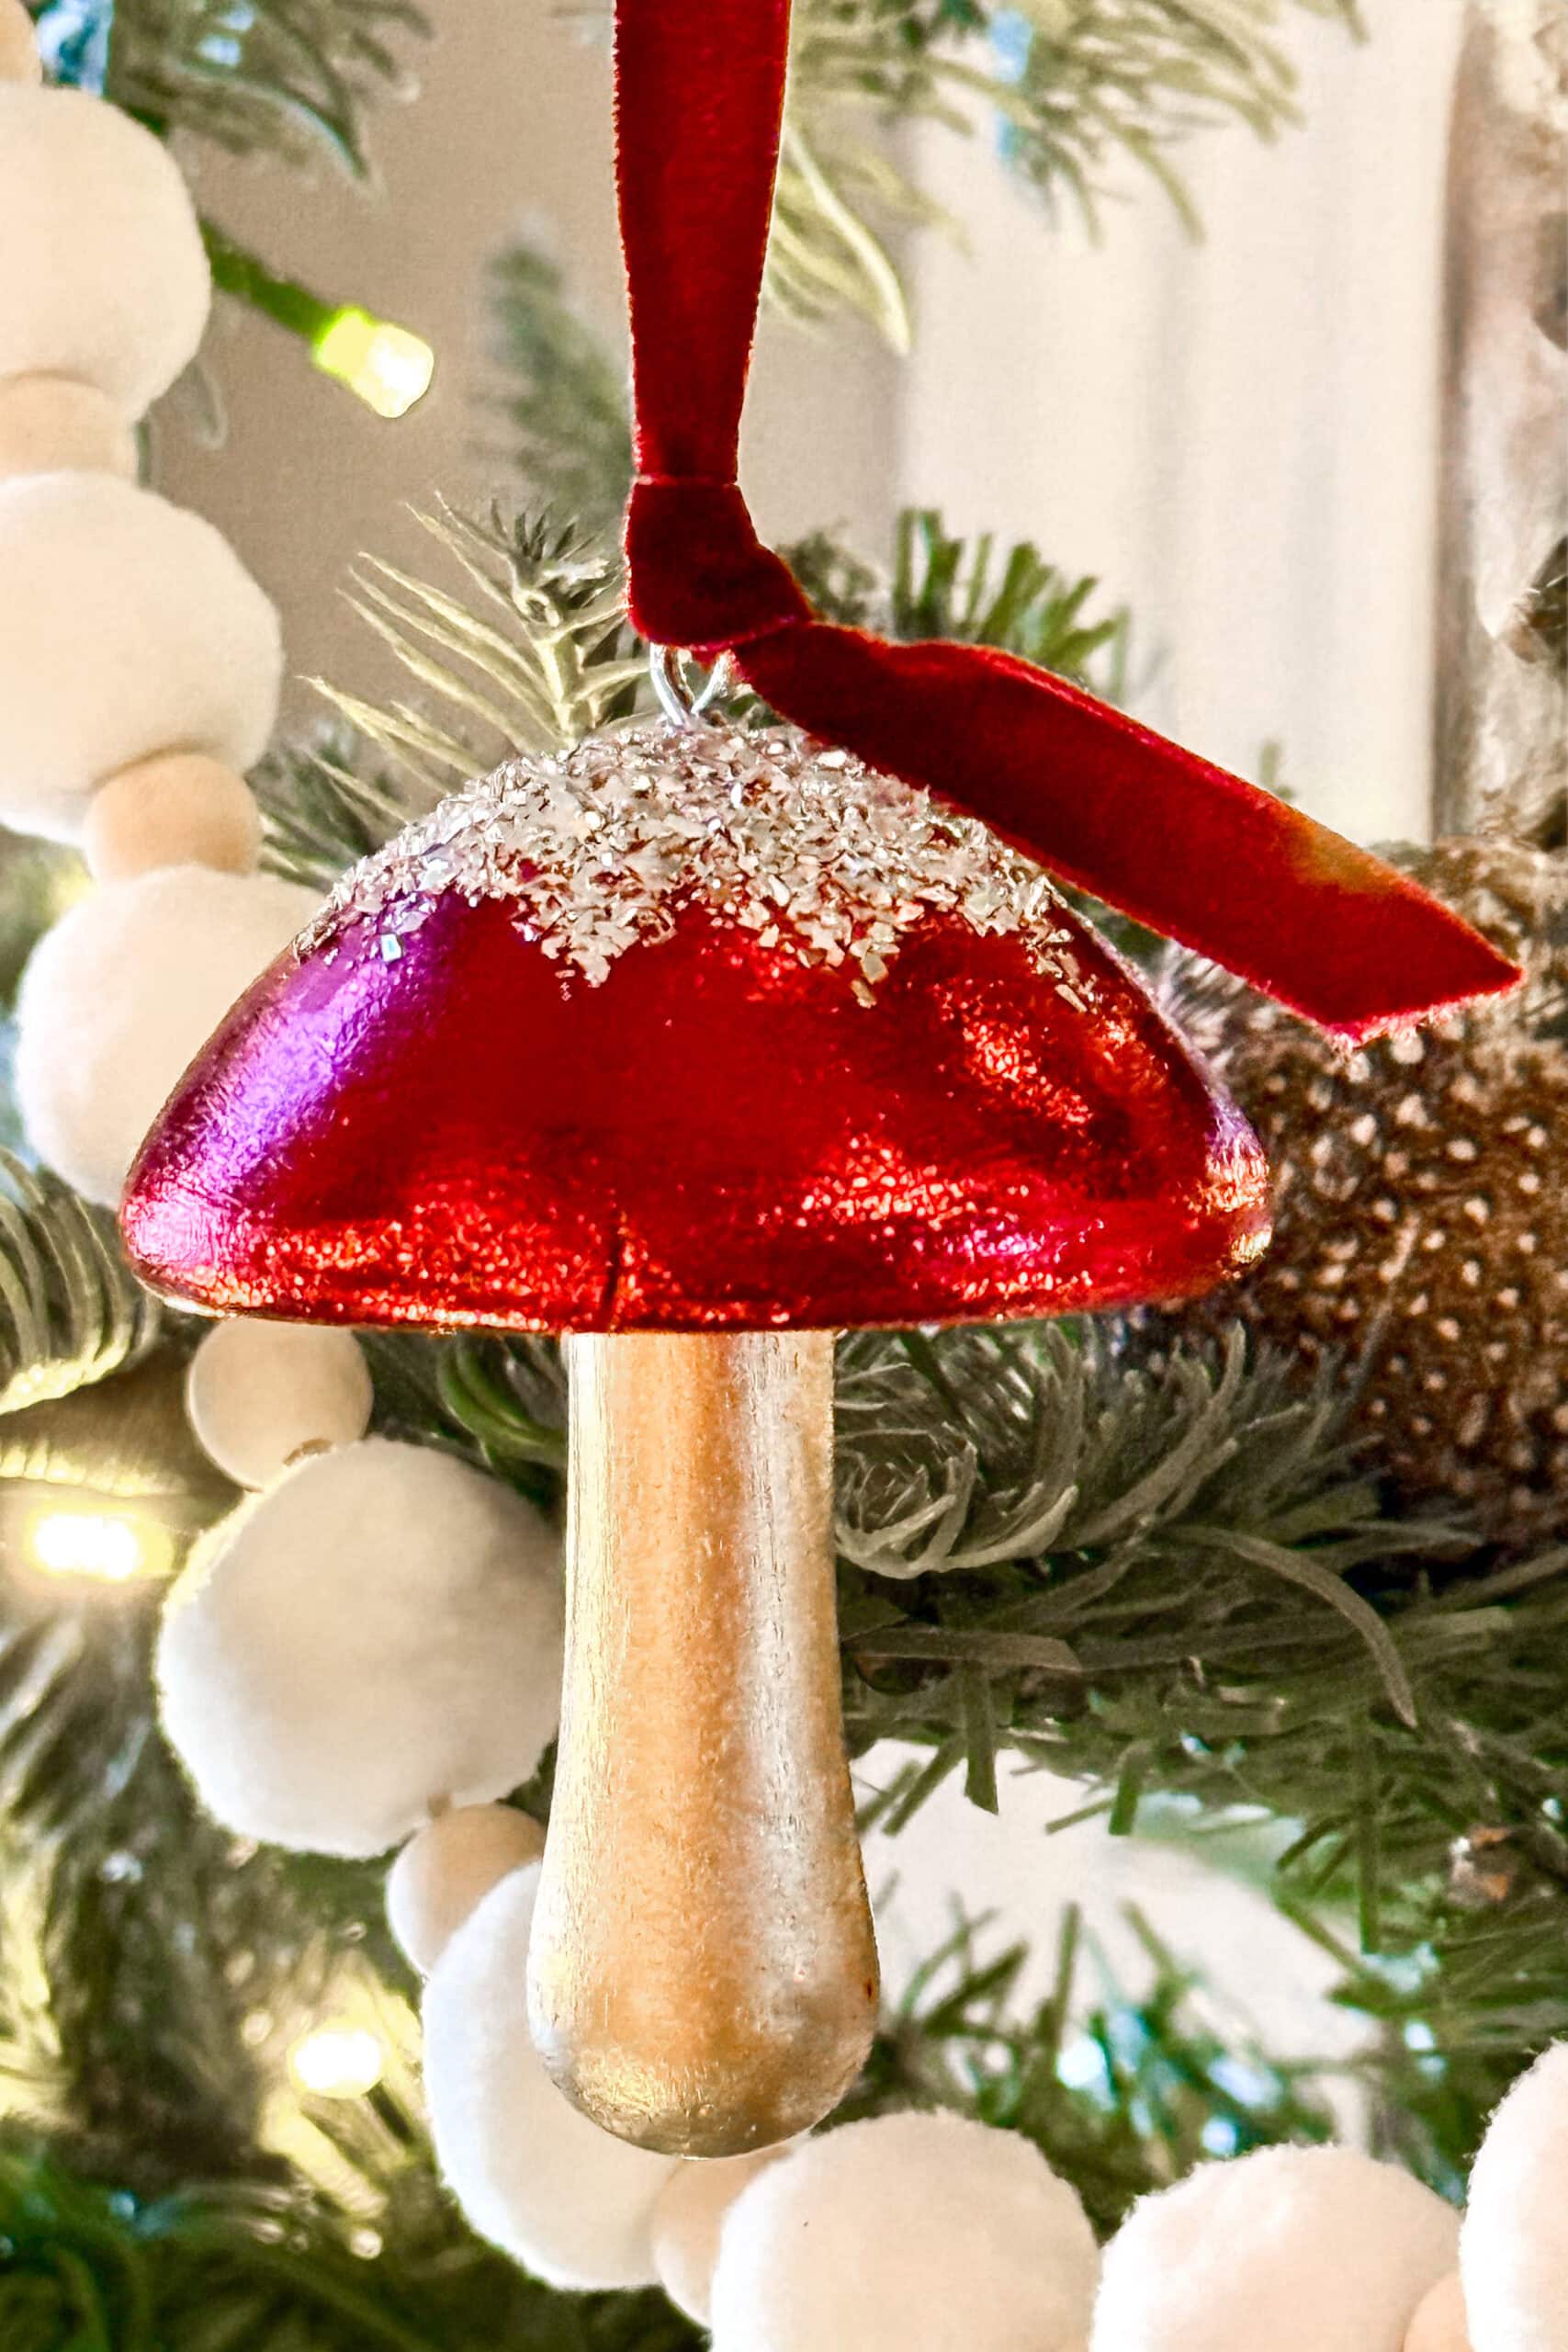
Version One: Classic Glossy Red Wood Mushroom Ornaments
I am sharing two different methods so you can choose the style that fits your holiday decor.
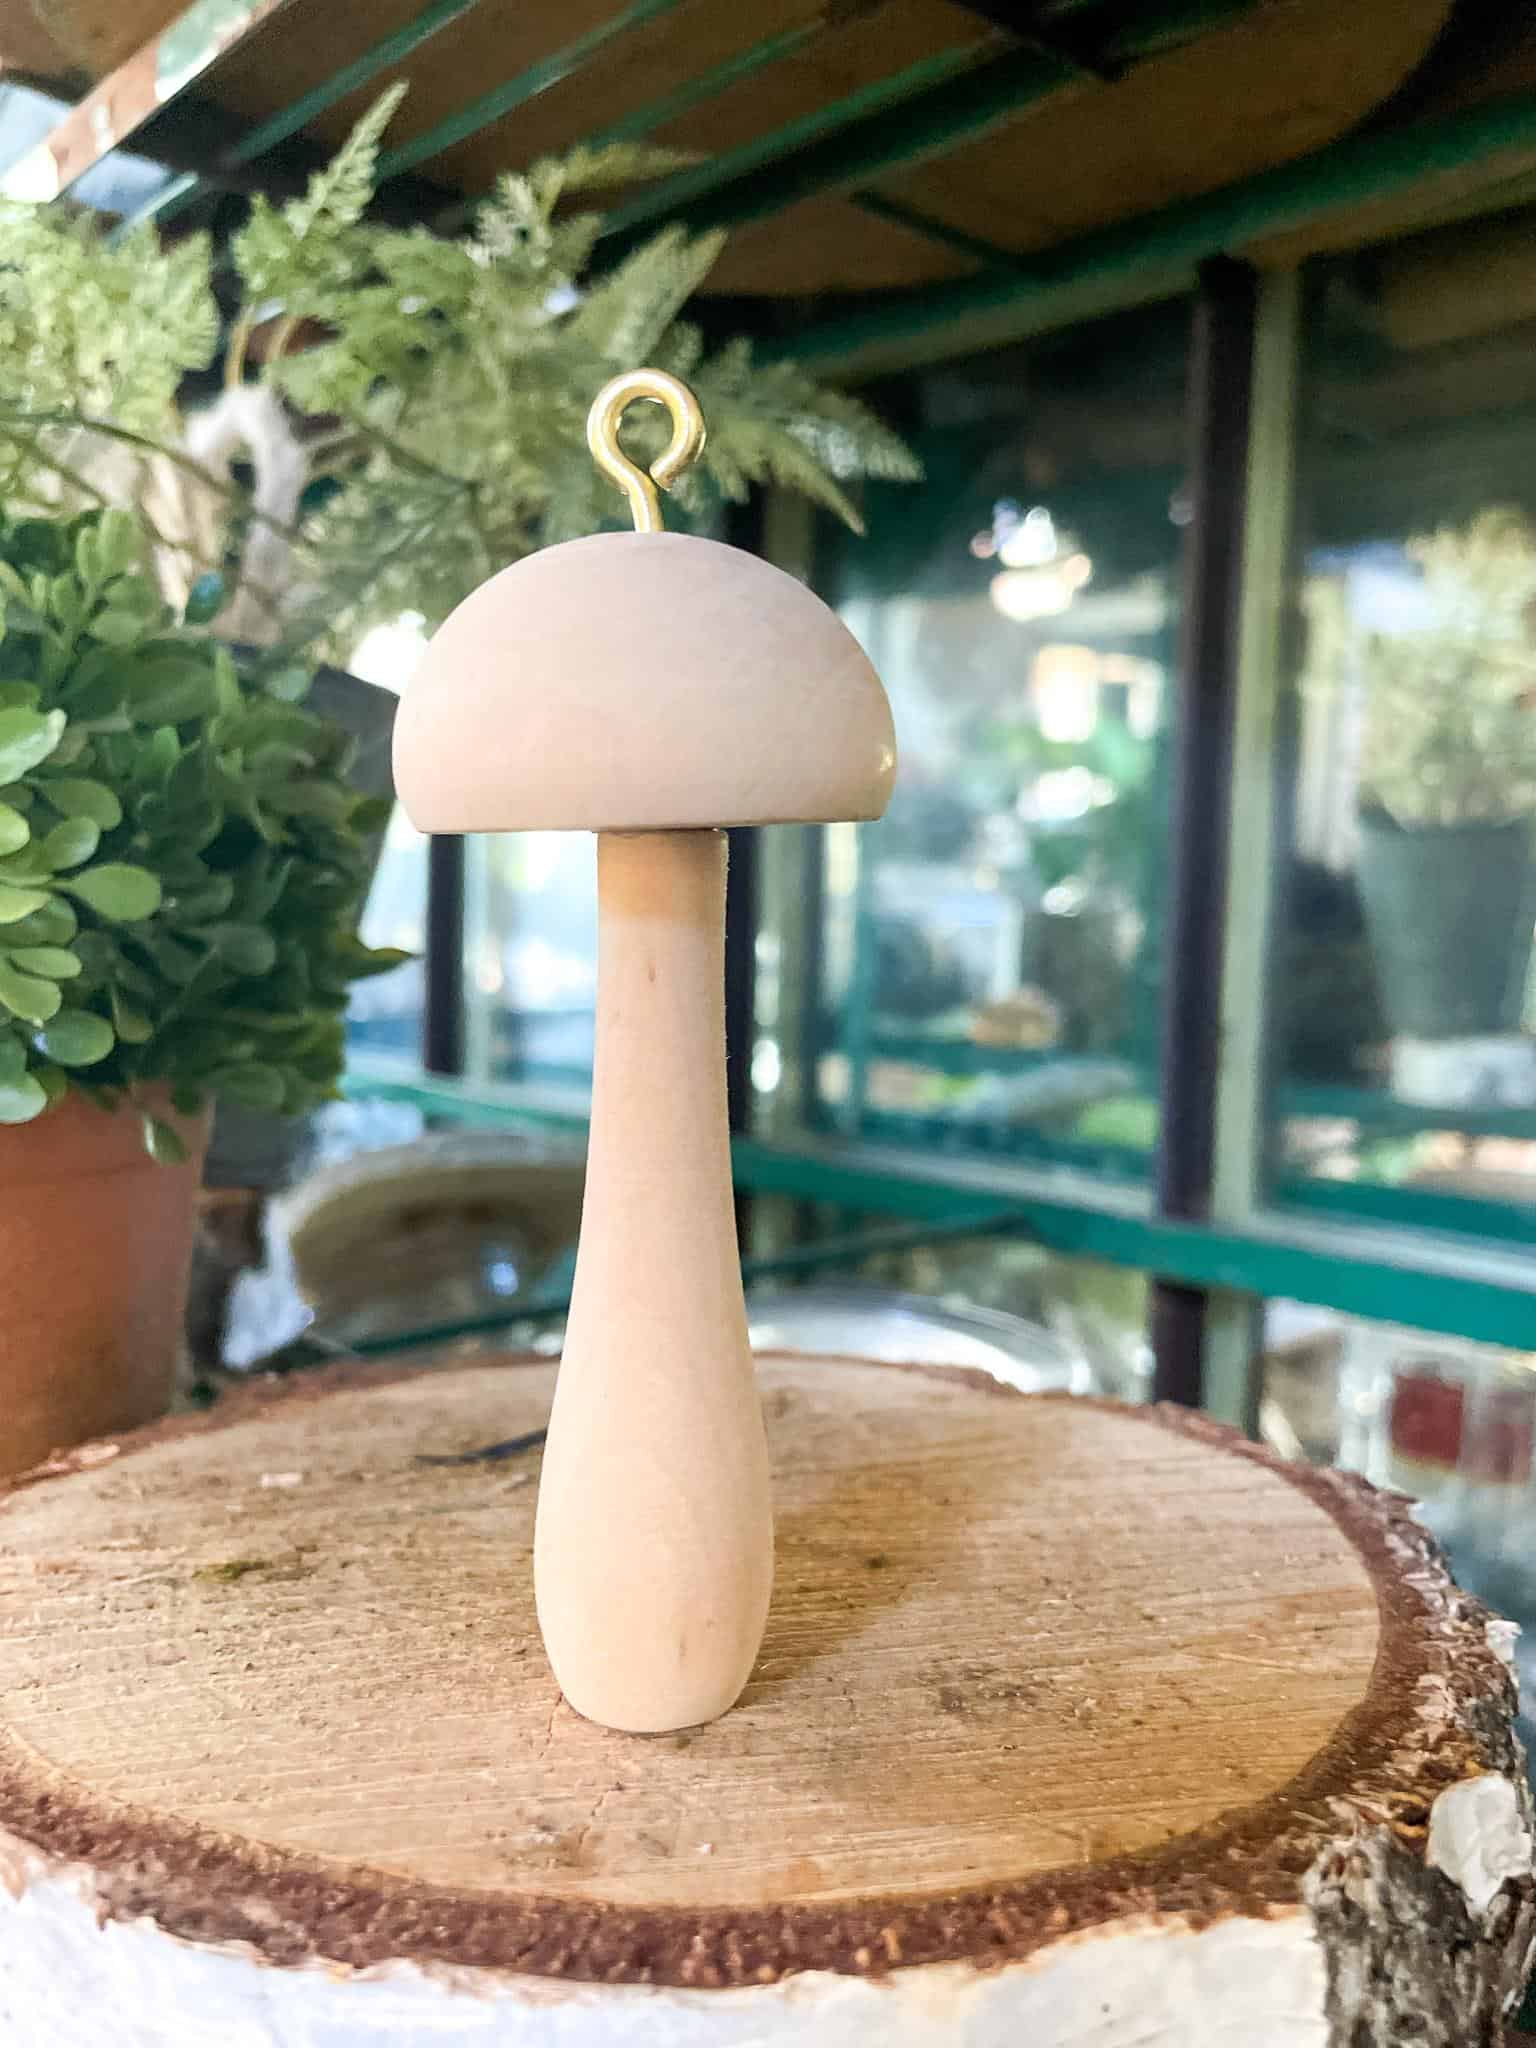
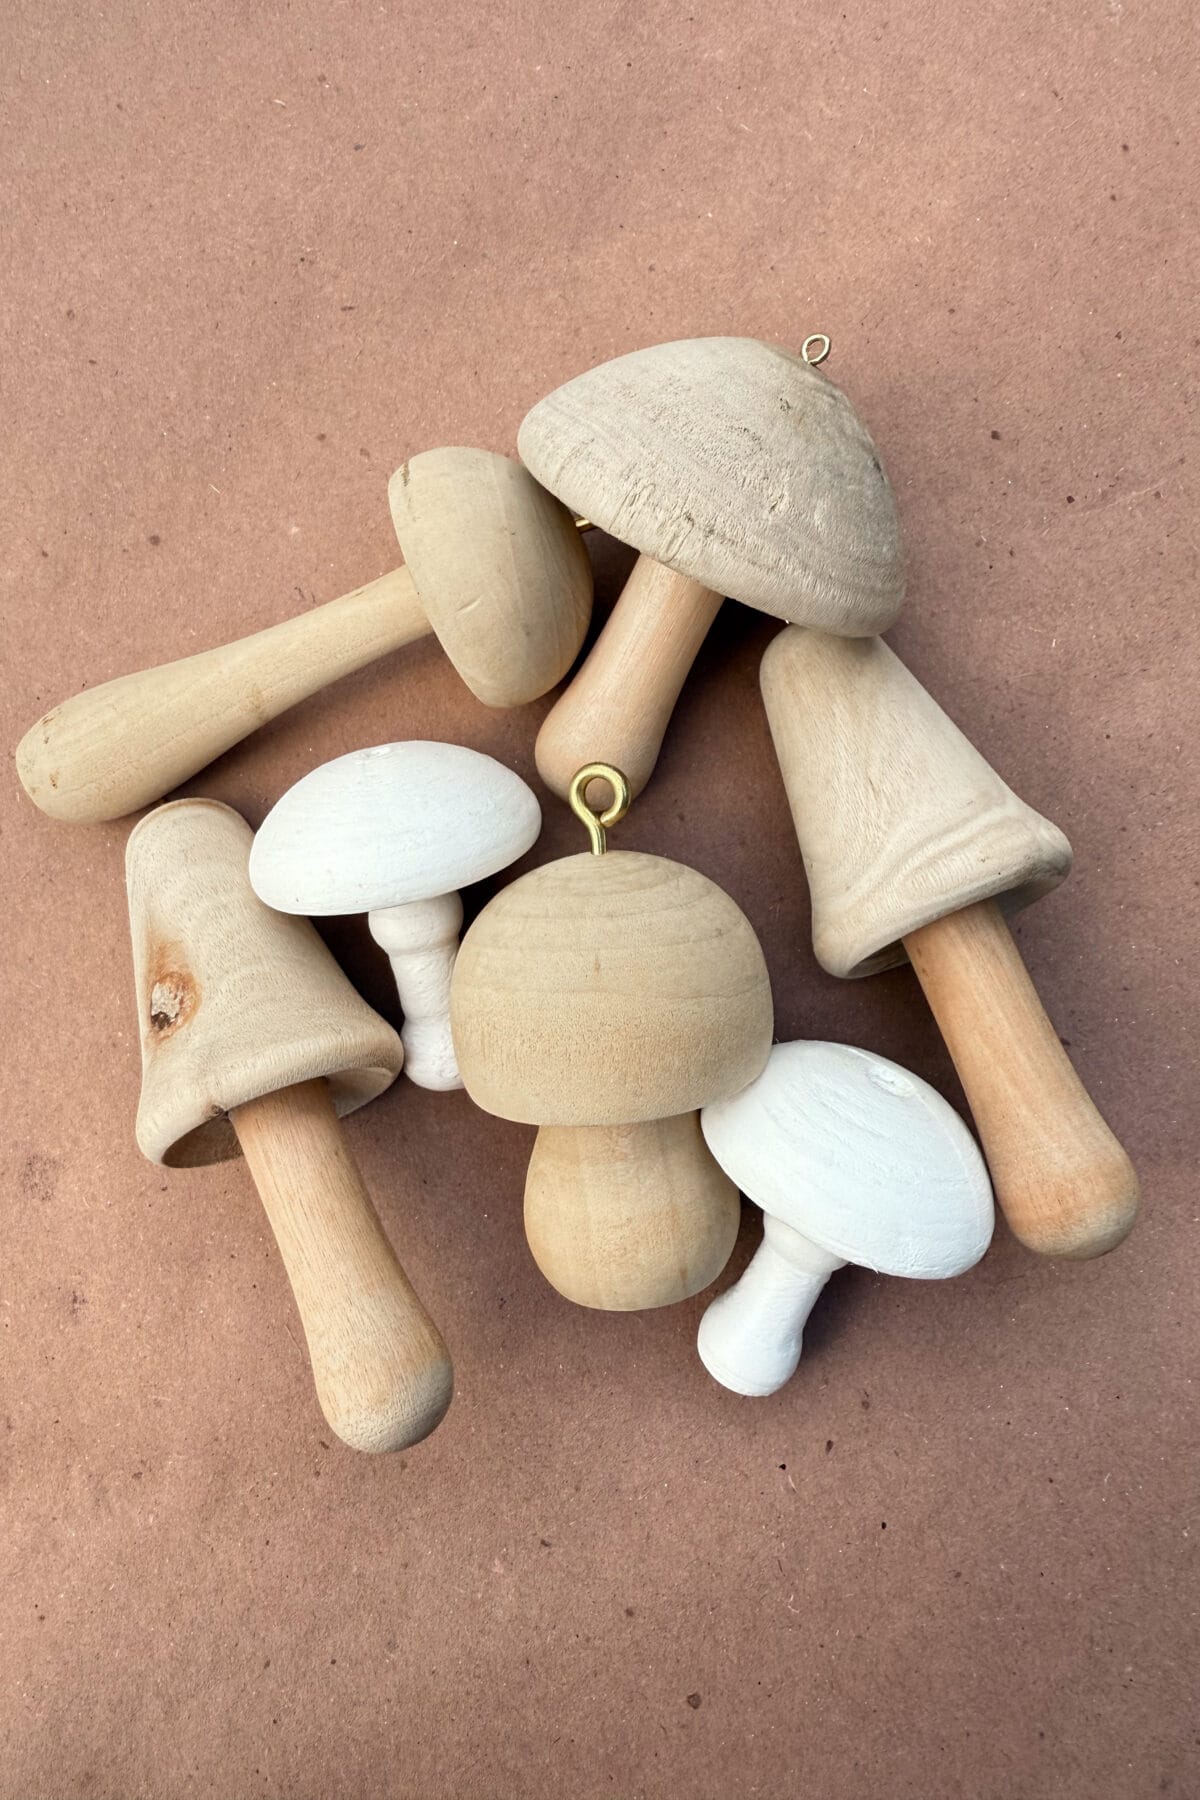
Both versions start with the same unfinished wood mushrooms, and each one turns into a sweet little ornament that brings a bit of nature to your Christmas tree.
Supplies Needed
How to Make Classic Wood Mushroom Ornaments
Step 1: Prepare the Mushroom
Drill a small hole in the top center of each wood mushroom cap.
Twist an eye screw into the hole. Use pliers if needed.
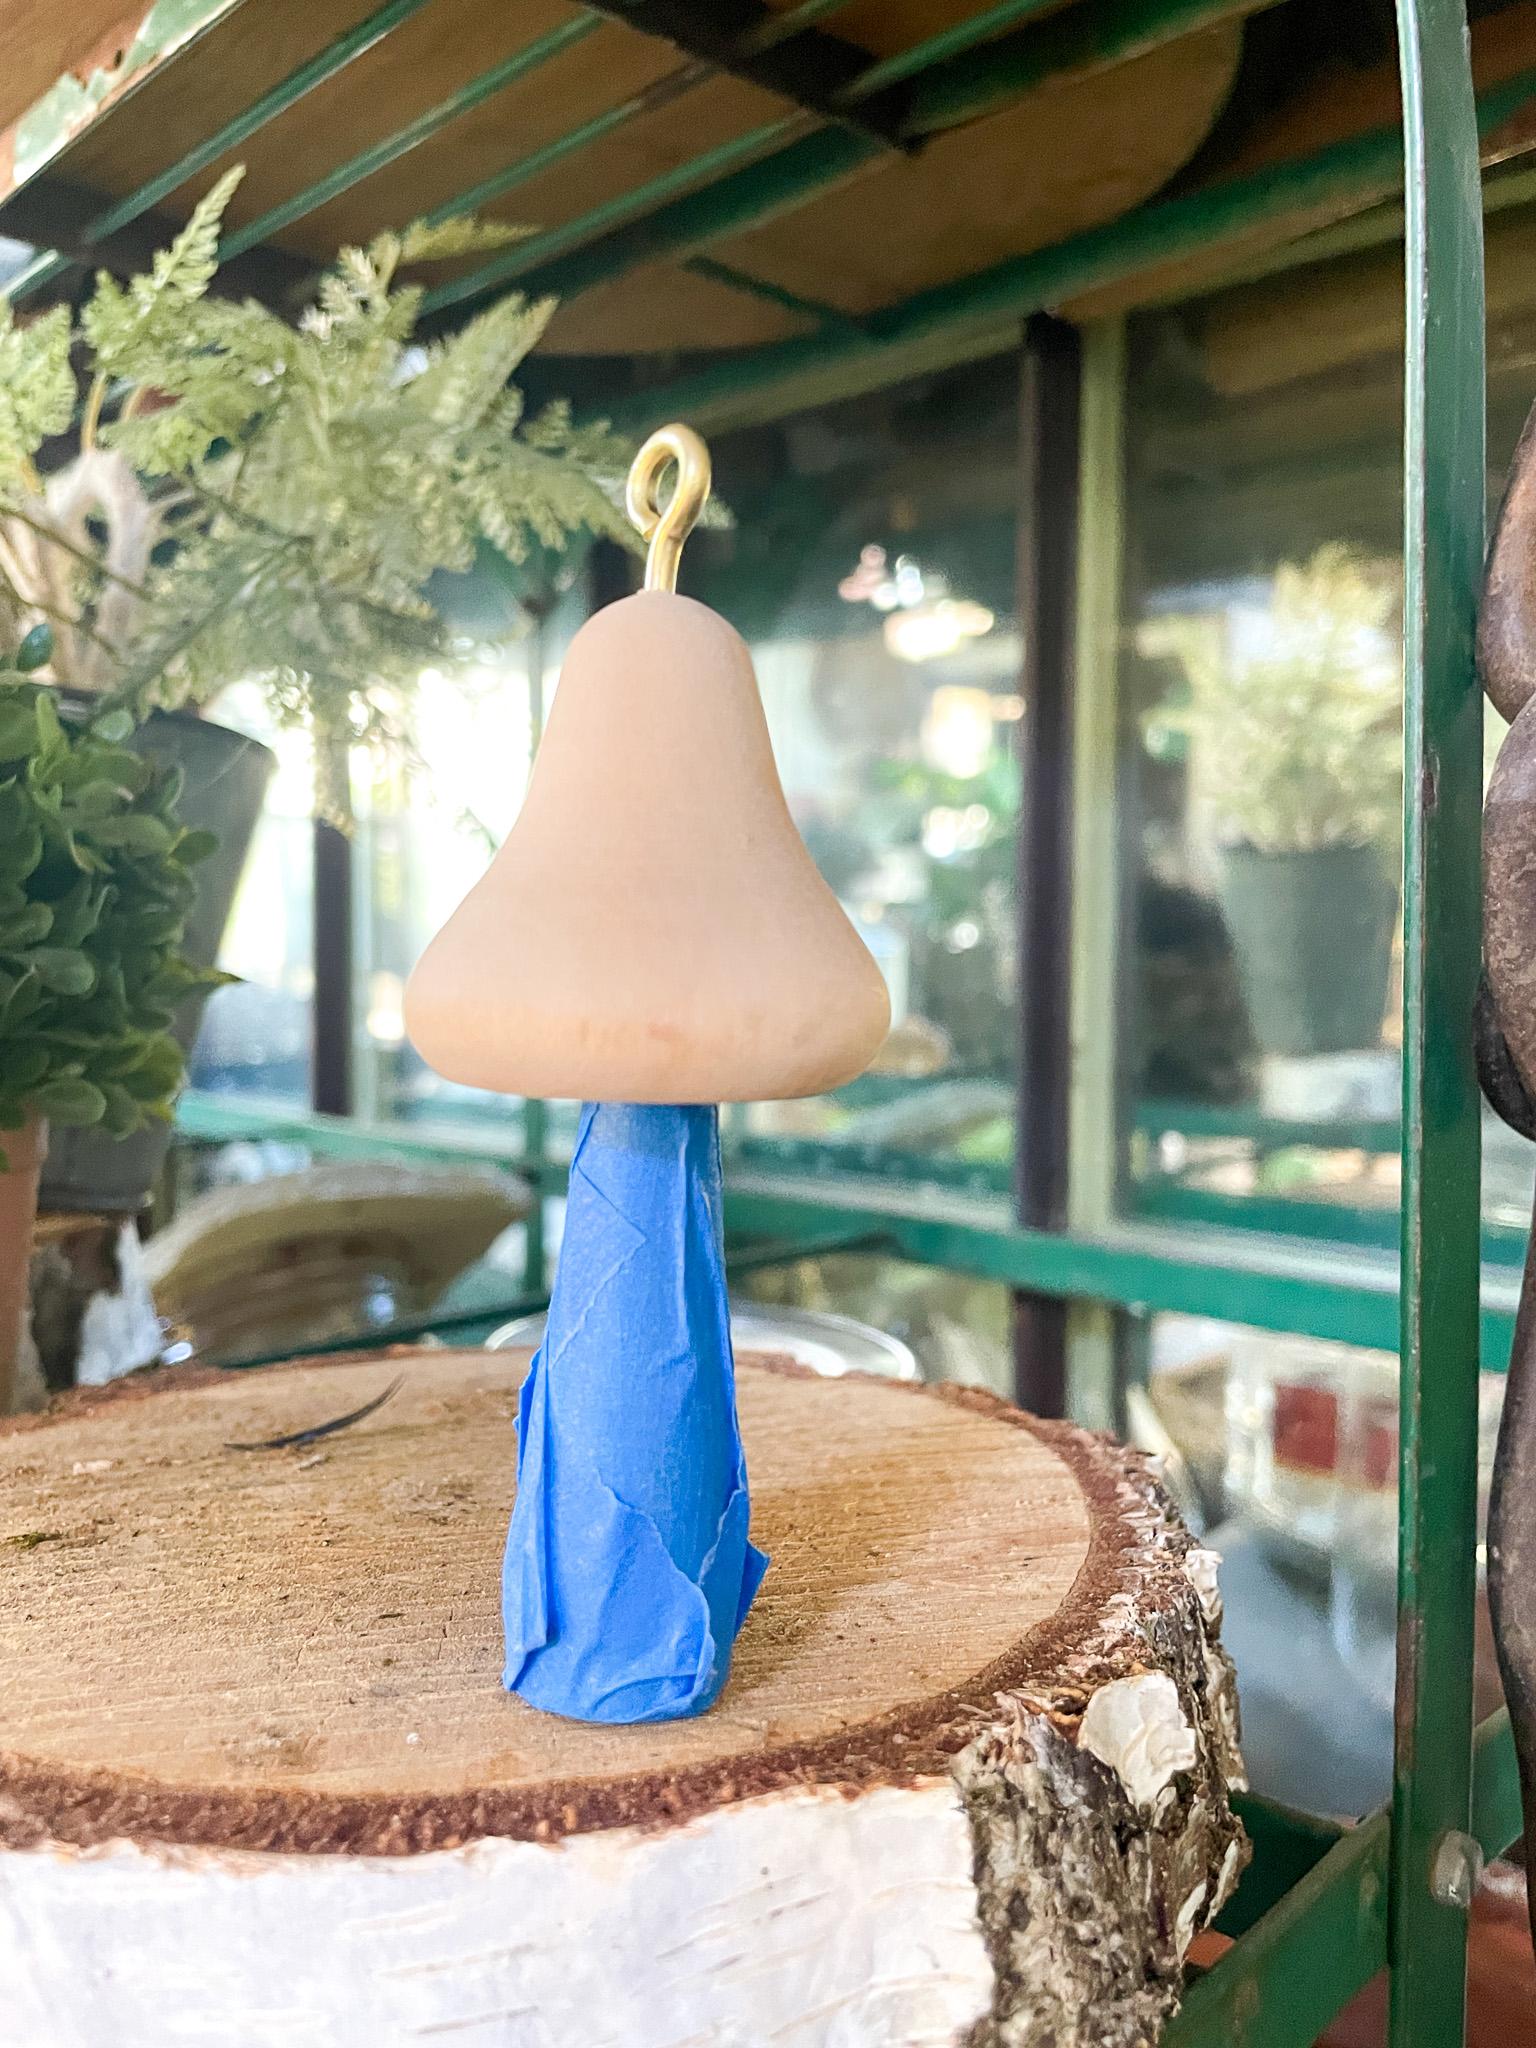
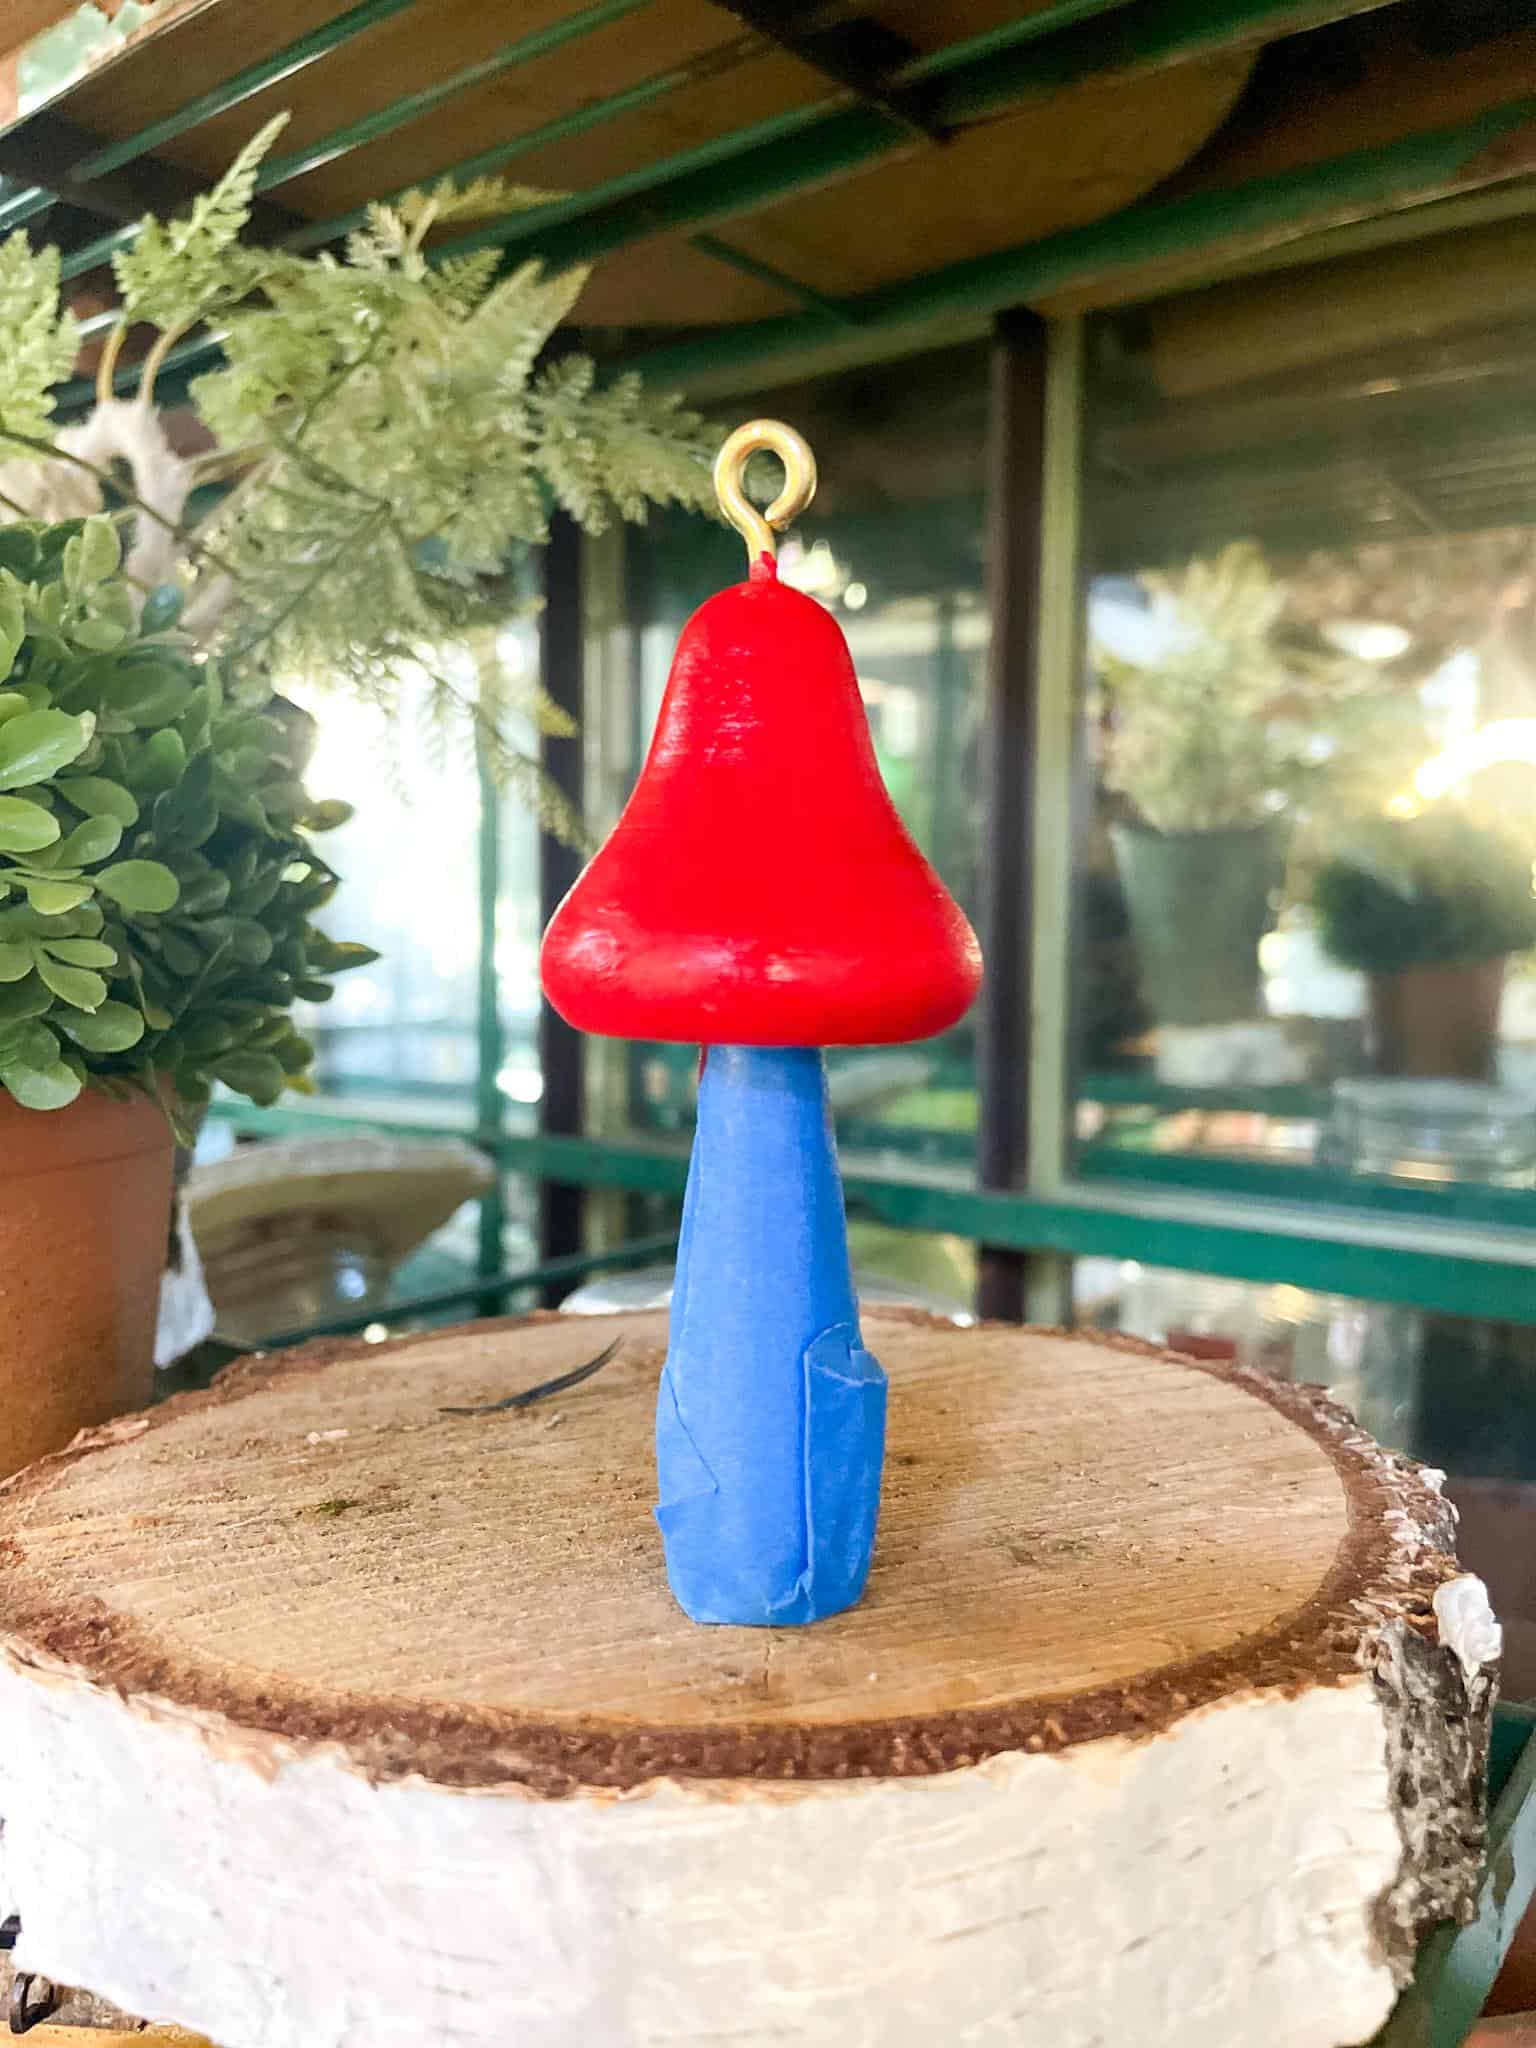
Step 2: Tape the Stem
Cover the stem with Frog tape so the resin stays only on the cap.
Make sure the bottom is taped so the mushroom sits level while drying.
Step 3: Paint the Cap
Add one coat of red acrylic paint and let it dry completely.
This creates a bright base color so the resin looks rich and vibrant.
Step 4: Mix and Pour the Resin
Next, mix equal parts of resin A and B in a disposable cup for a full 5 minutes.
Be sure your resin is at room temperature.
Add red candy coloring until you get the depth of color you like.
Let the resin sit 5–10 minutes so it thickens slightly before pouring.
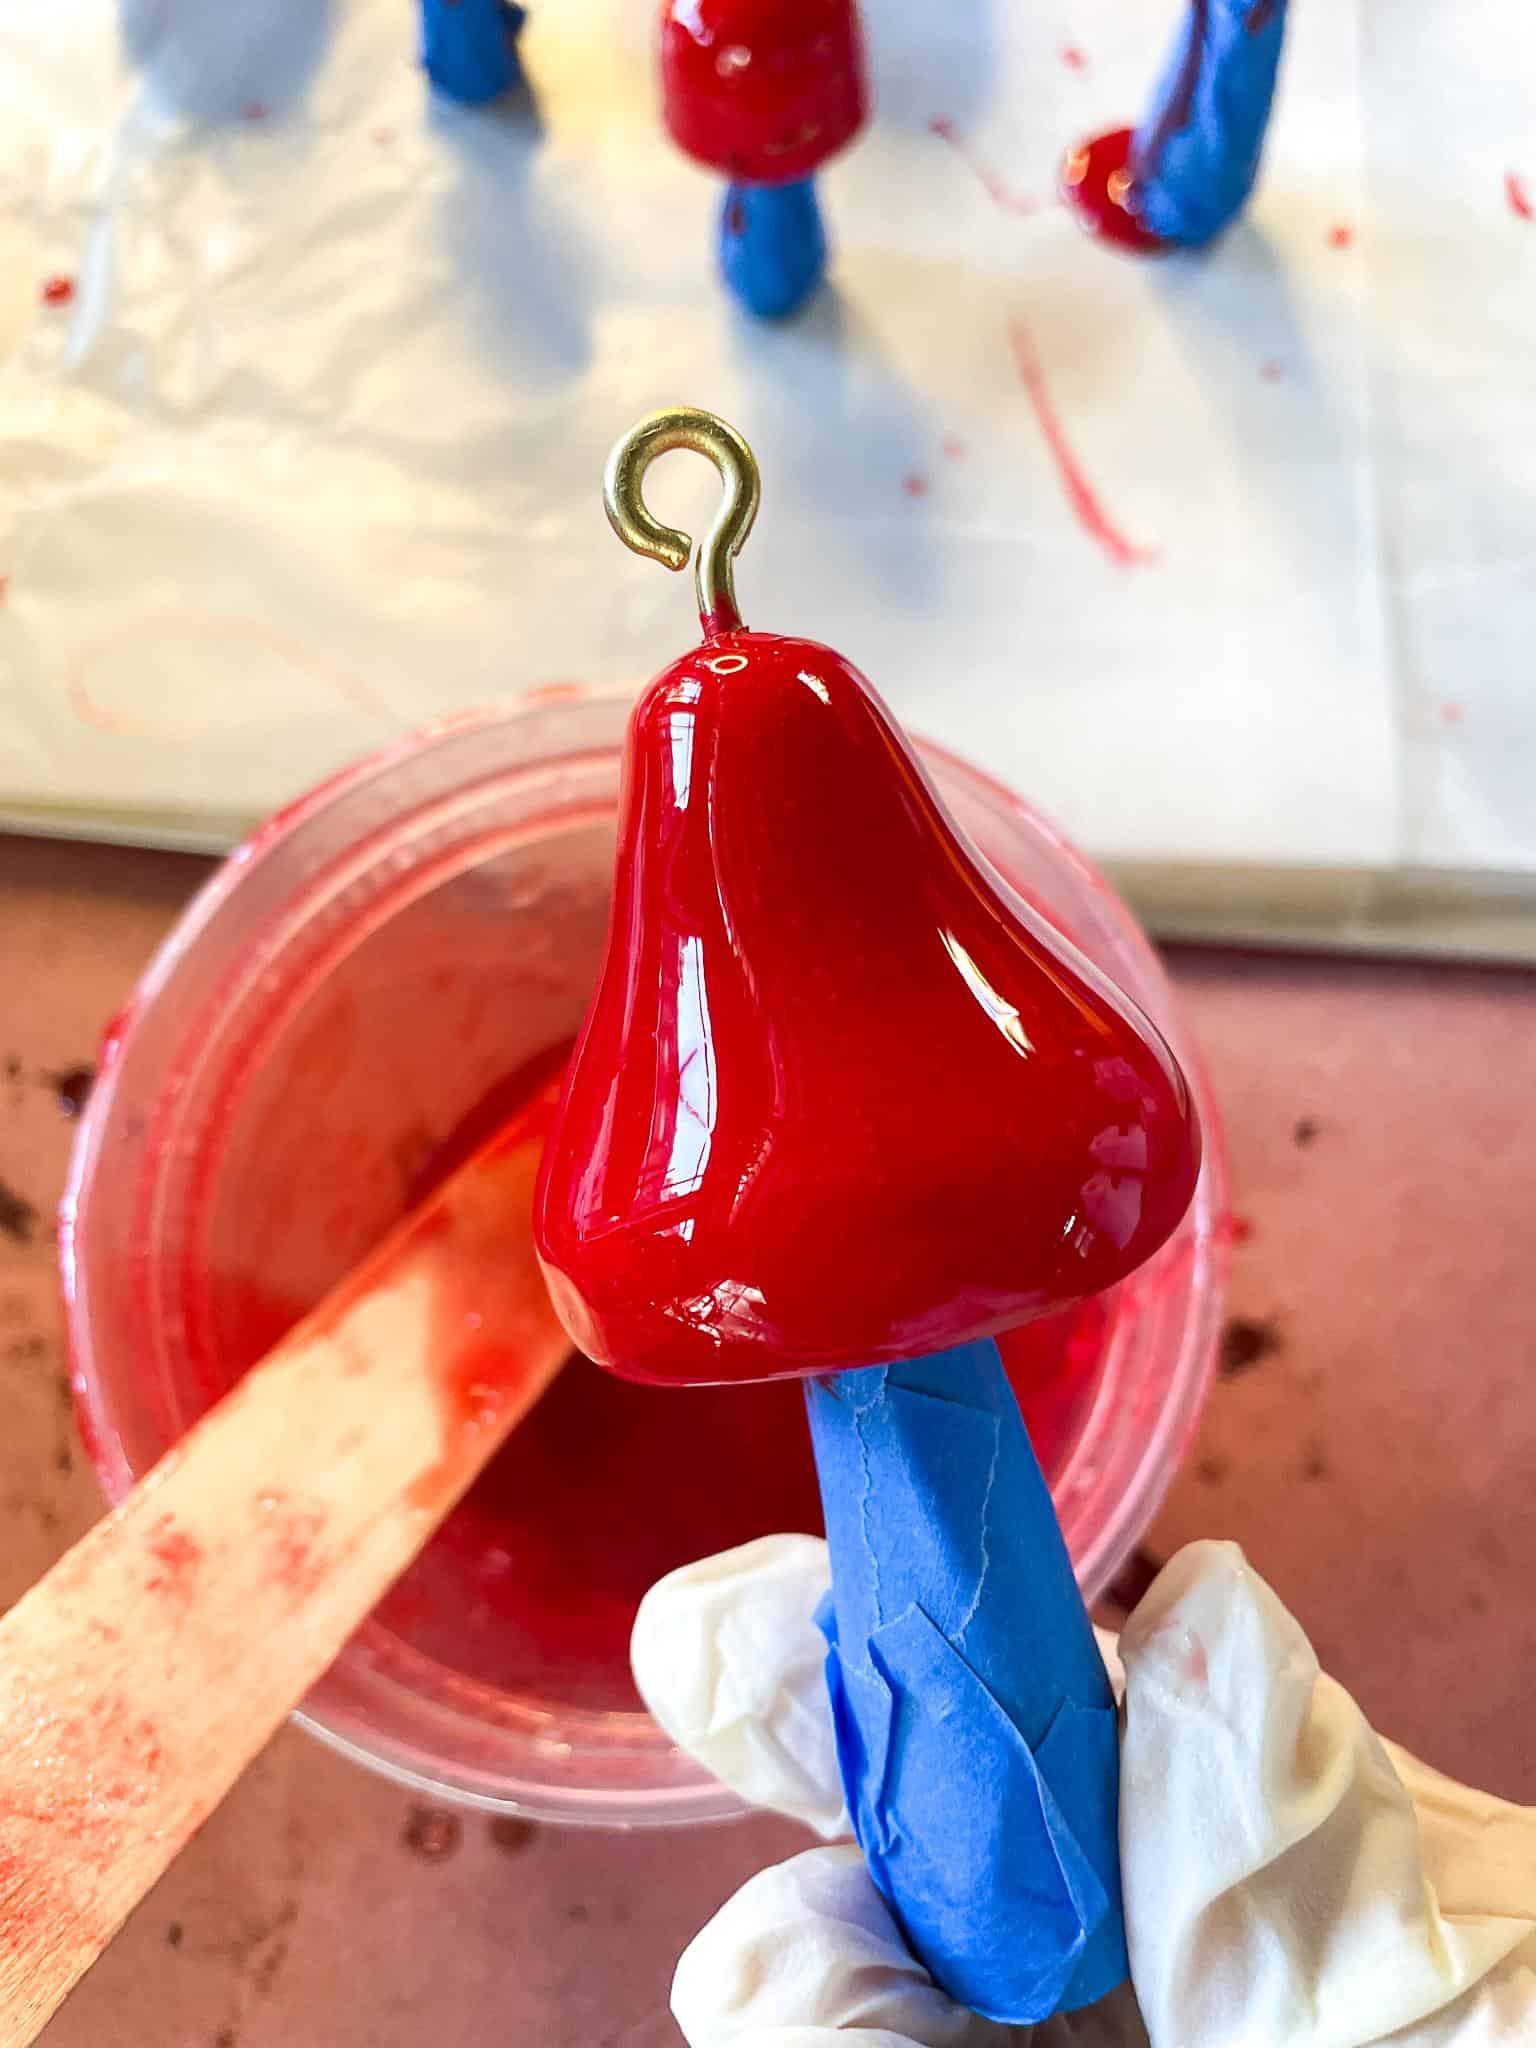
Hold your wood mushroom over an empty container and begin pouring the resin slowly onto the center of the cap.
Let it pool for a moment, then gently tilt and turn the mushroom so the resin flows toward the edges and creates a smooth, even coat.
Allow the excess to drip back into the container so you do not waste any.
Once the cap is covered, use a heat gun on a low setting to warm the surface and release any air bubbles. Move the heat gently around the mushroom so the finish stays glossy and even.
When the resin looks smooth and bubble-free, set each mushroom upright on wax paper on top of a cookie sheet.
Make sure they sit flat and are not touching one another. Allow them to cure undisturbed for at least 12 hours.
Decorating and Finishing Your Ornaments
Once the resin is fully cured, remove the tape.
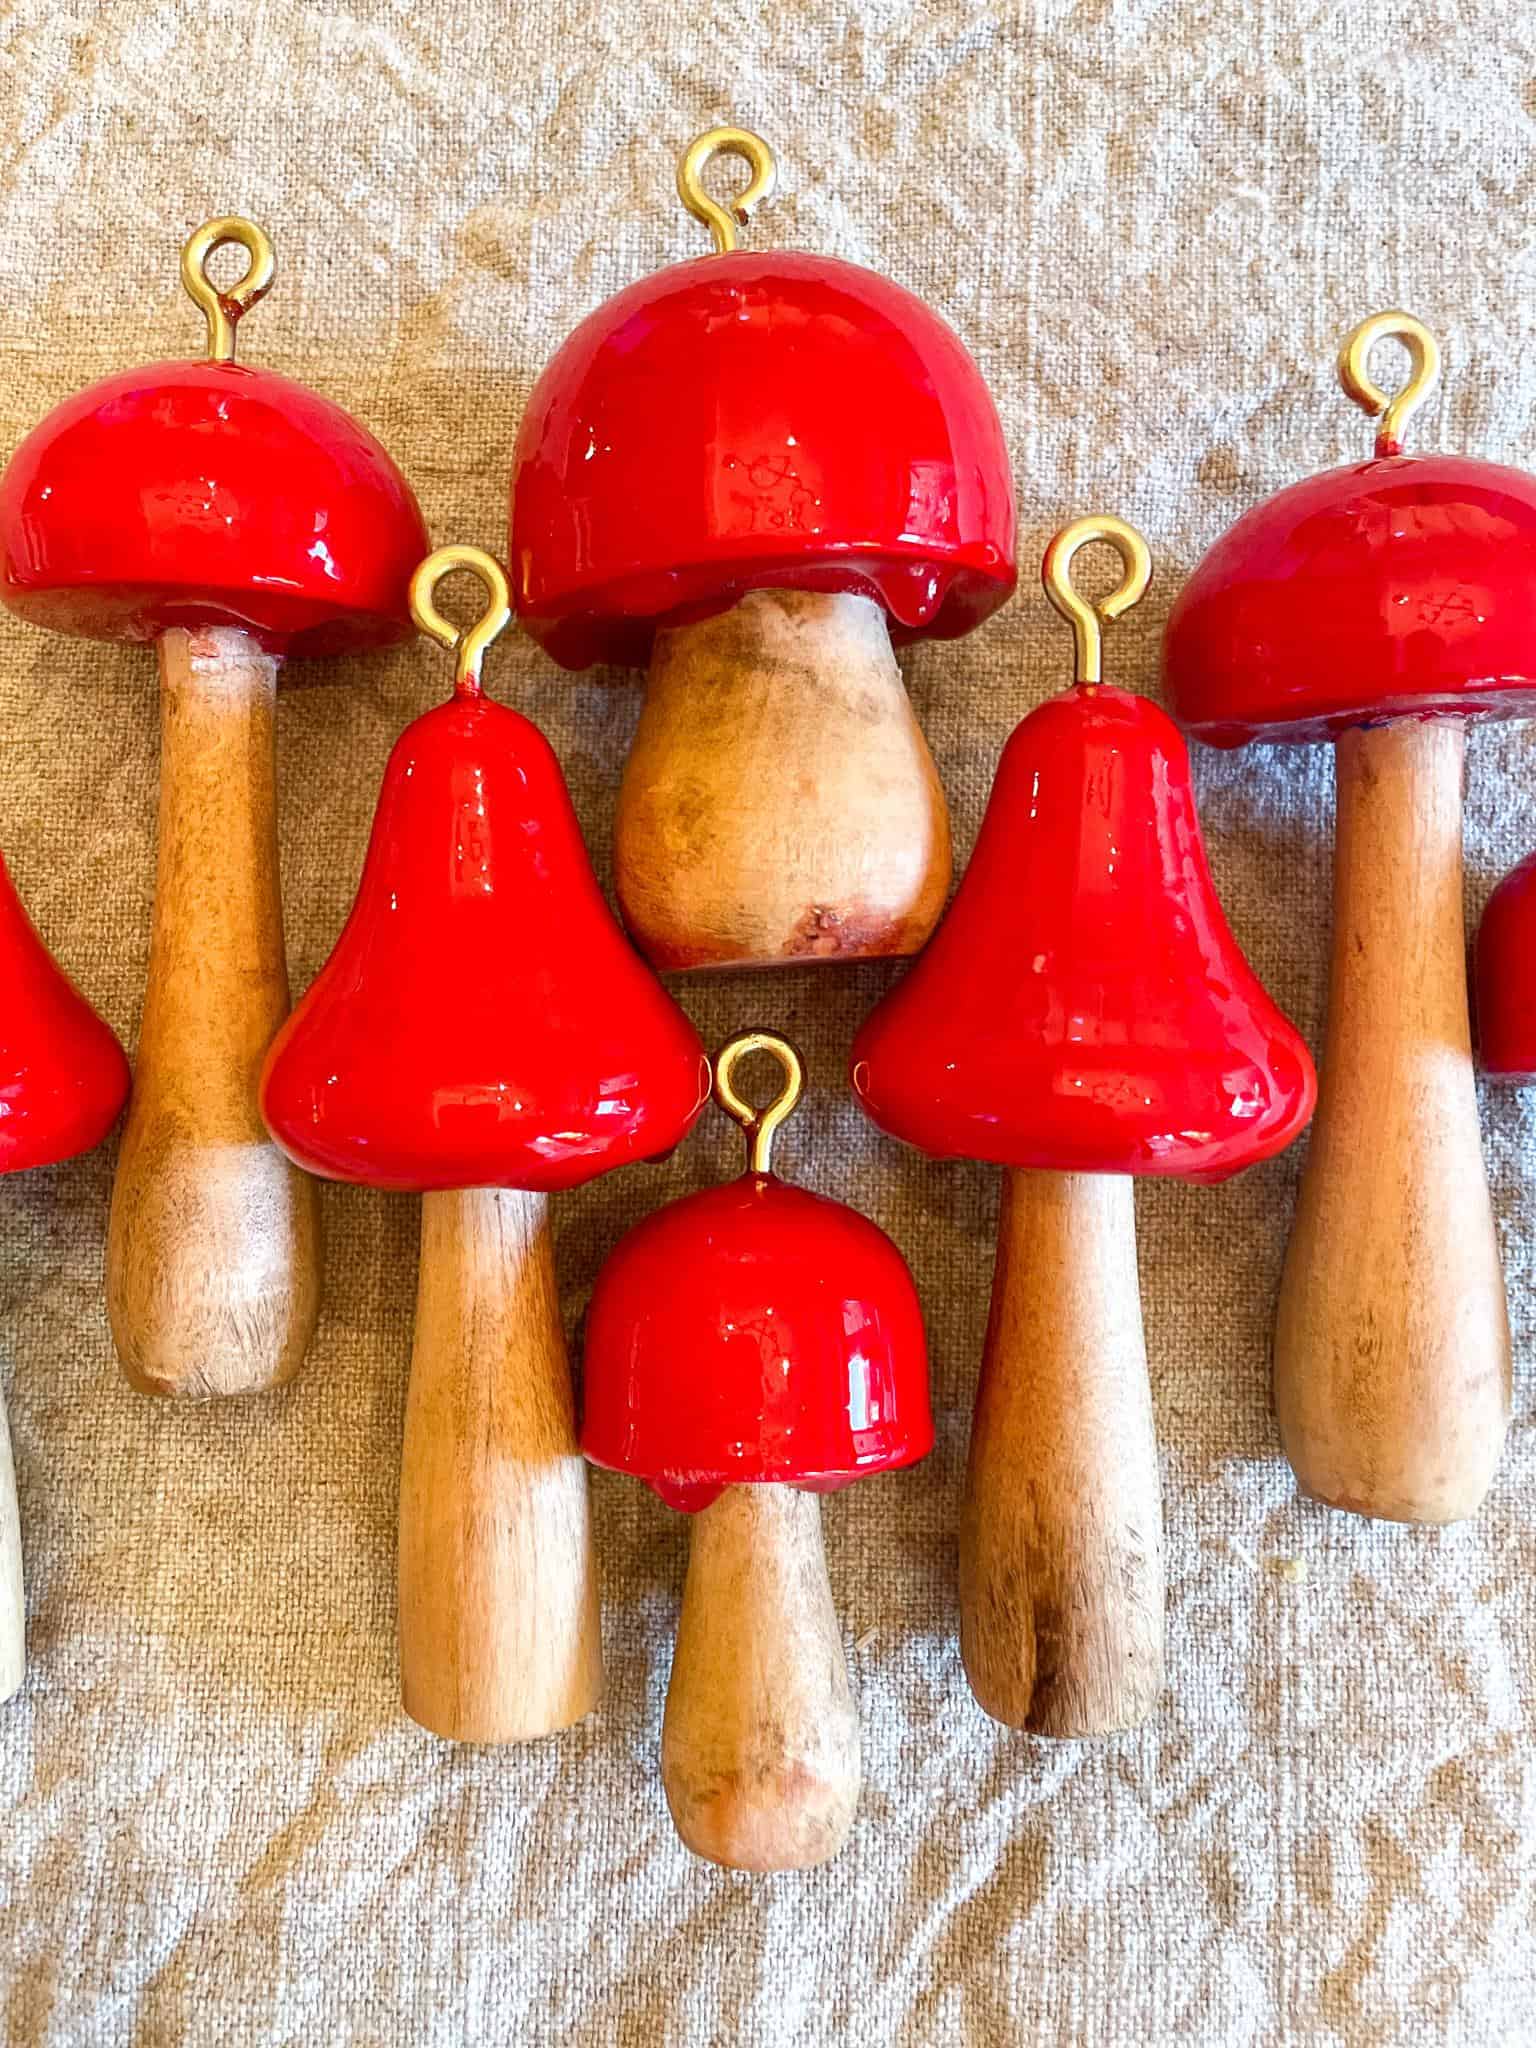
Use a soft cloth to apply dark wax to the stem for a warm, vintage look.
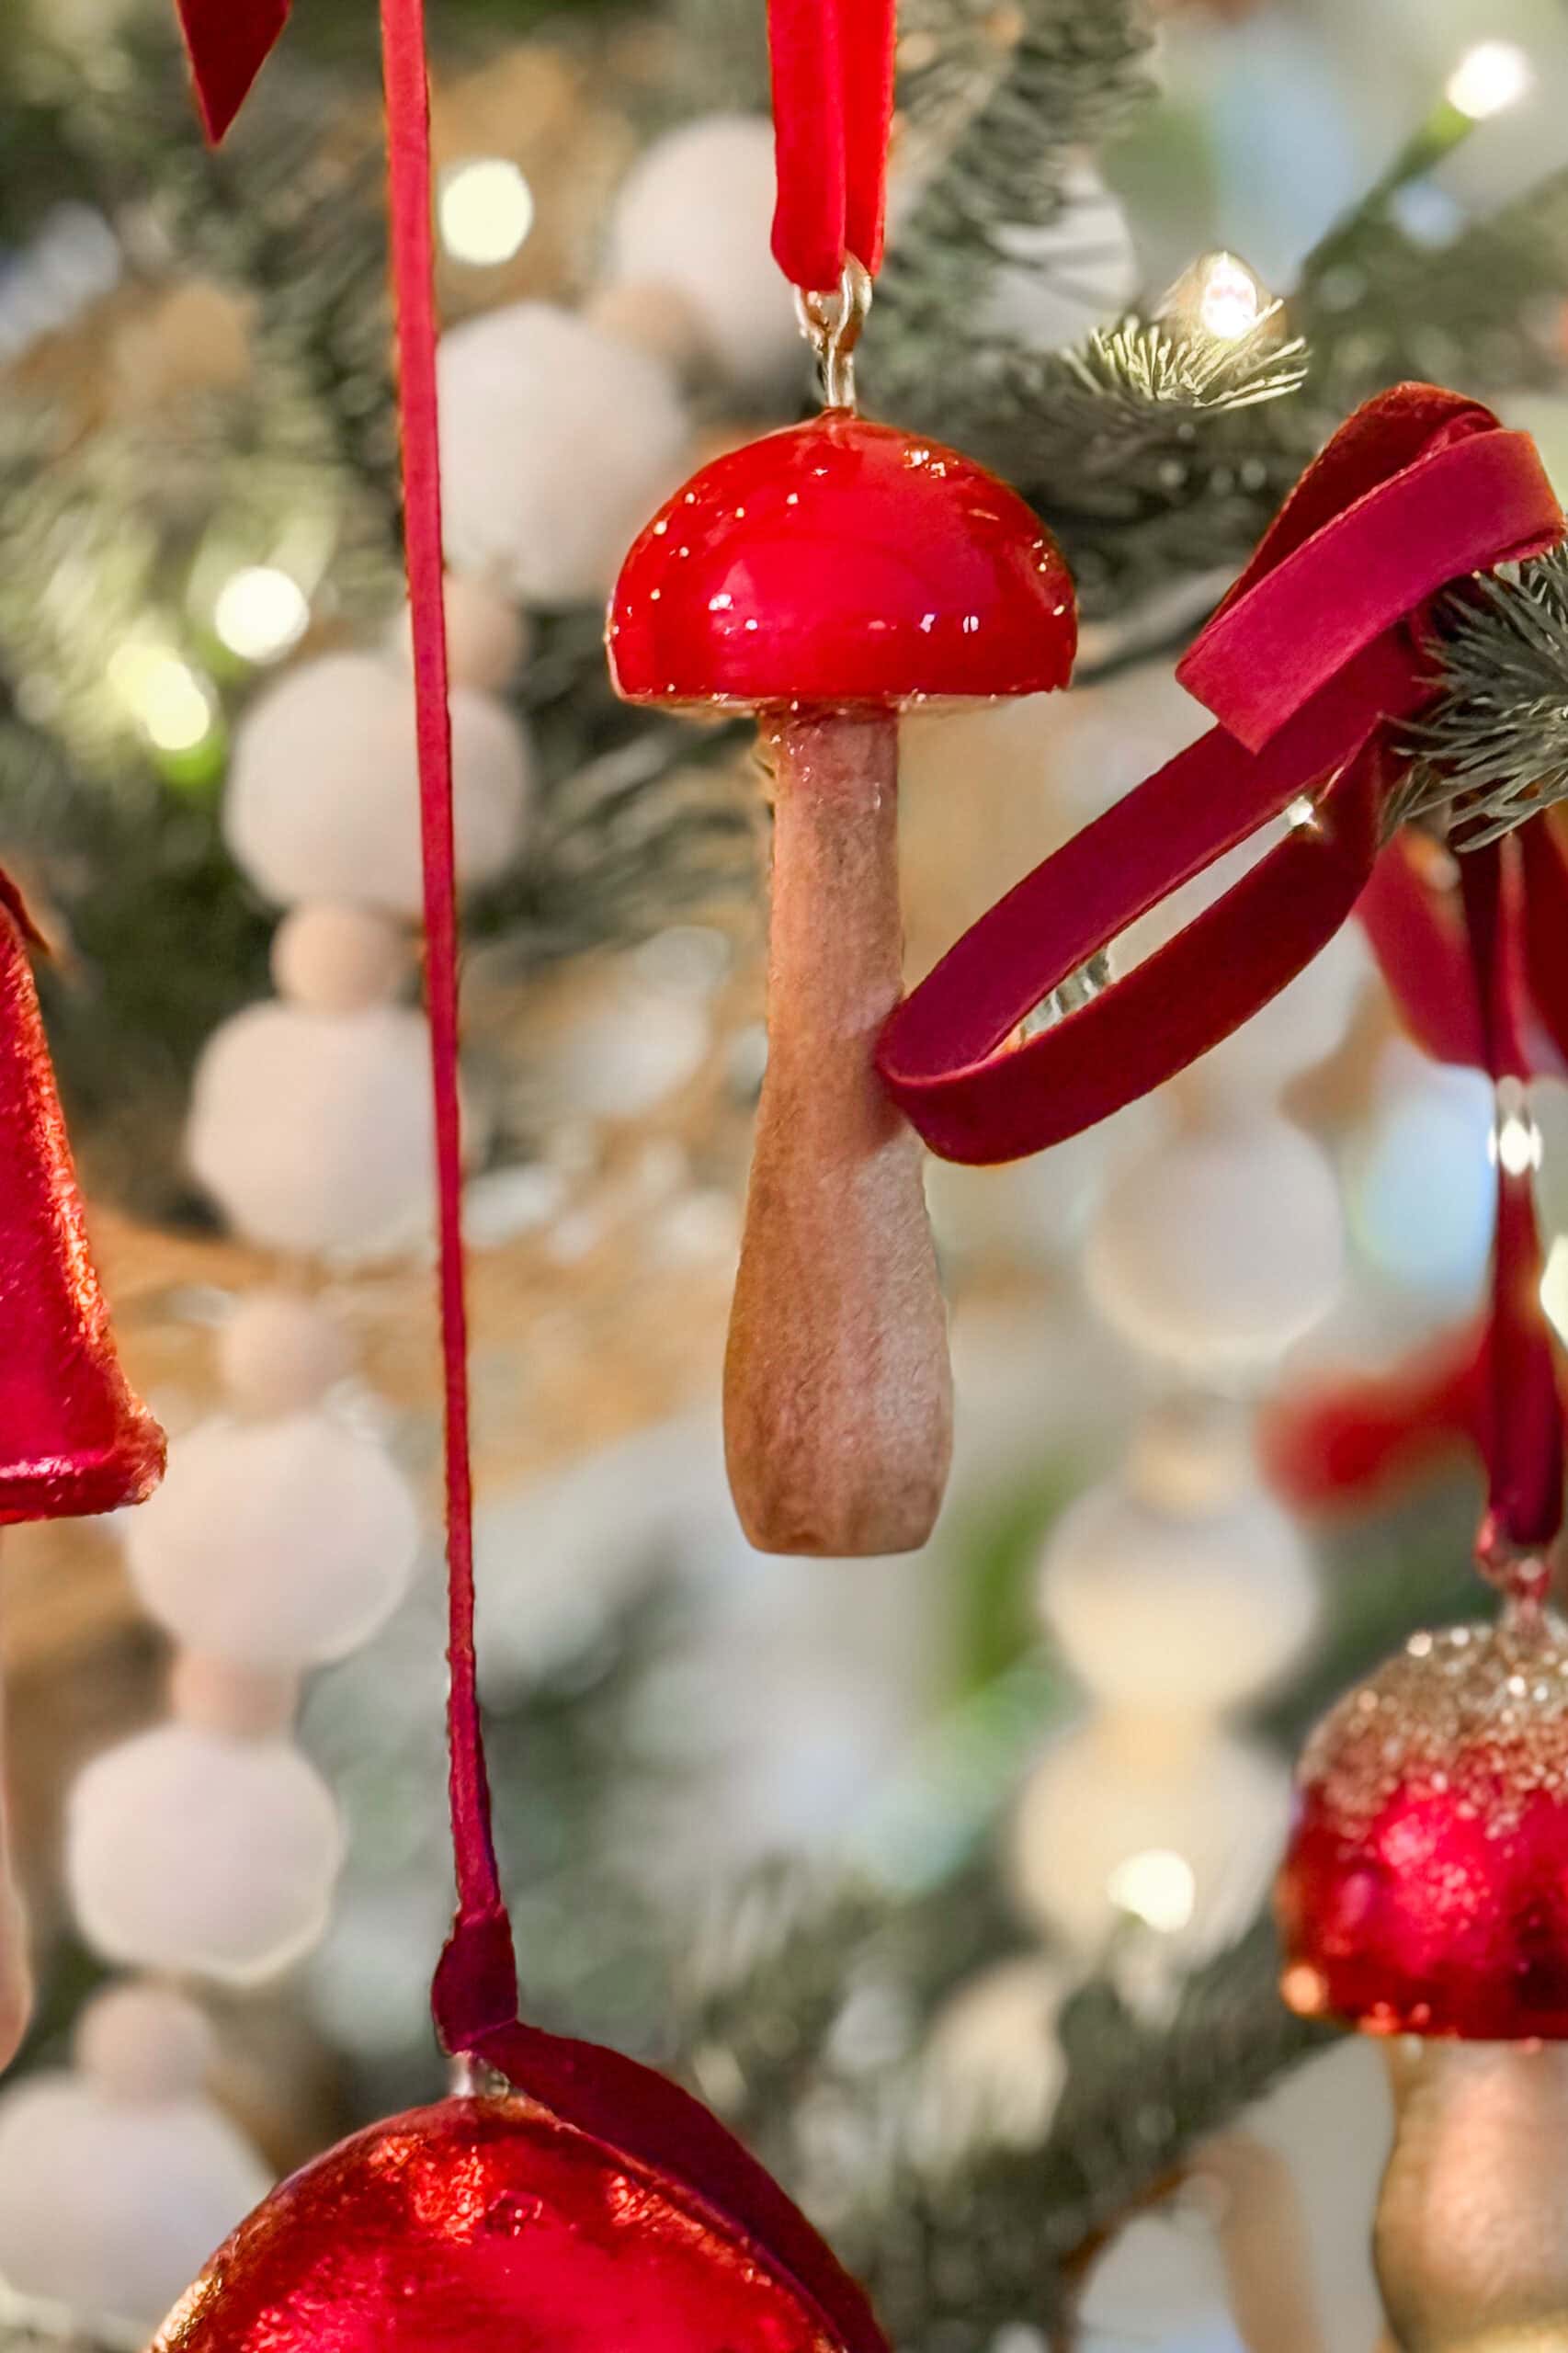
You can keep the caps solid red or add white dots for a classic mushroom look.
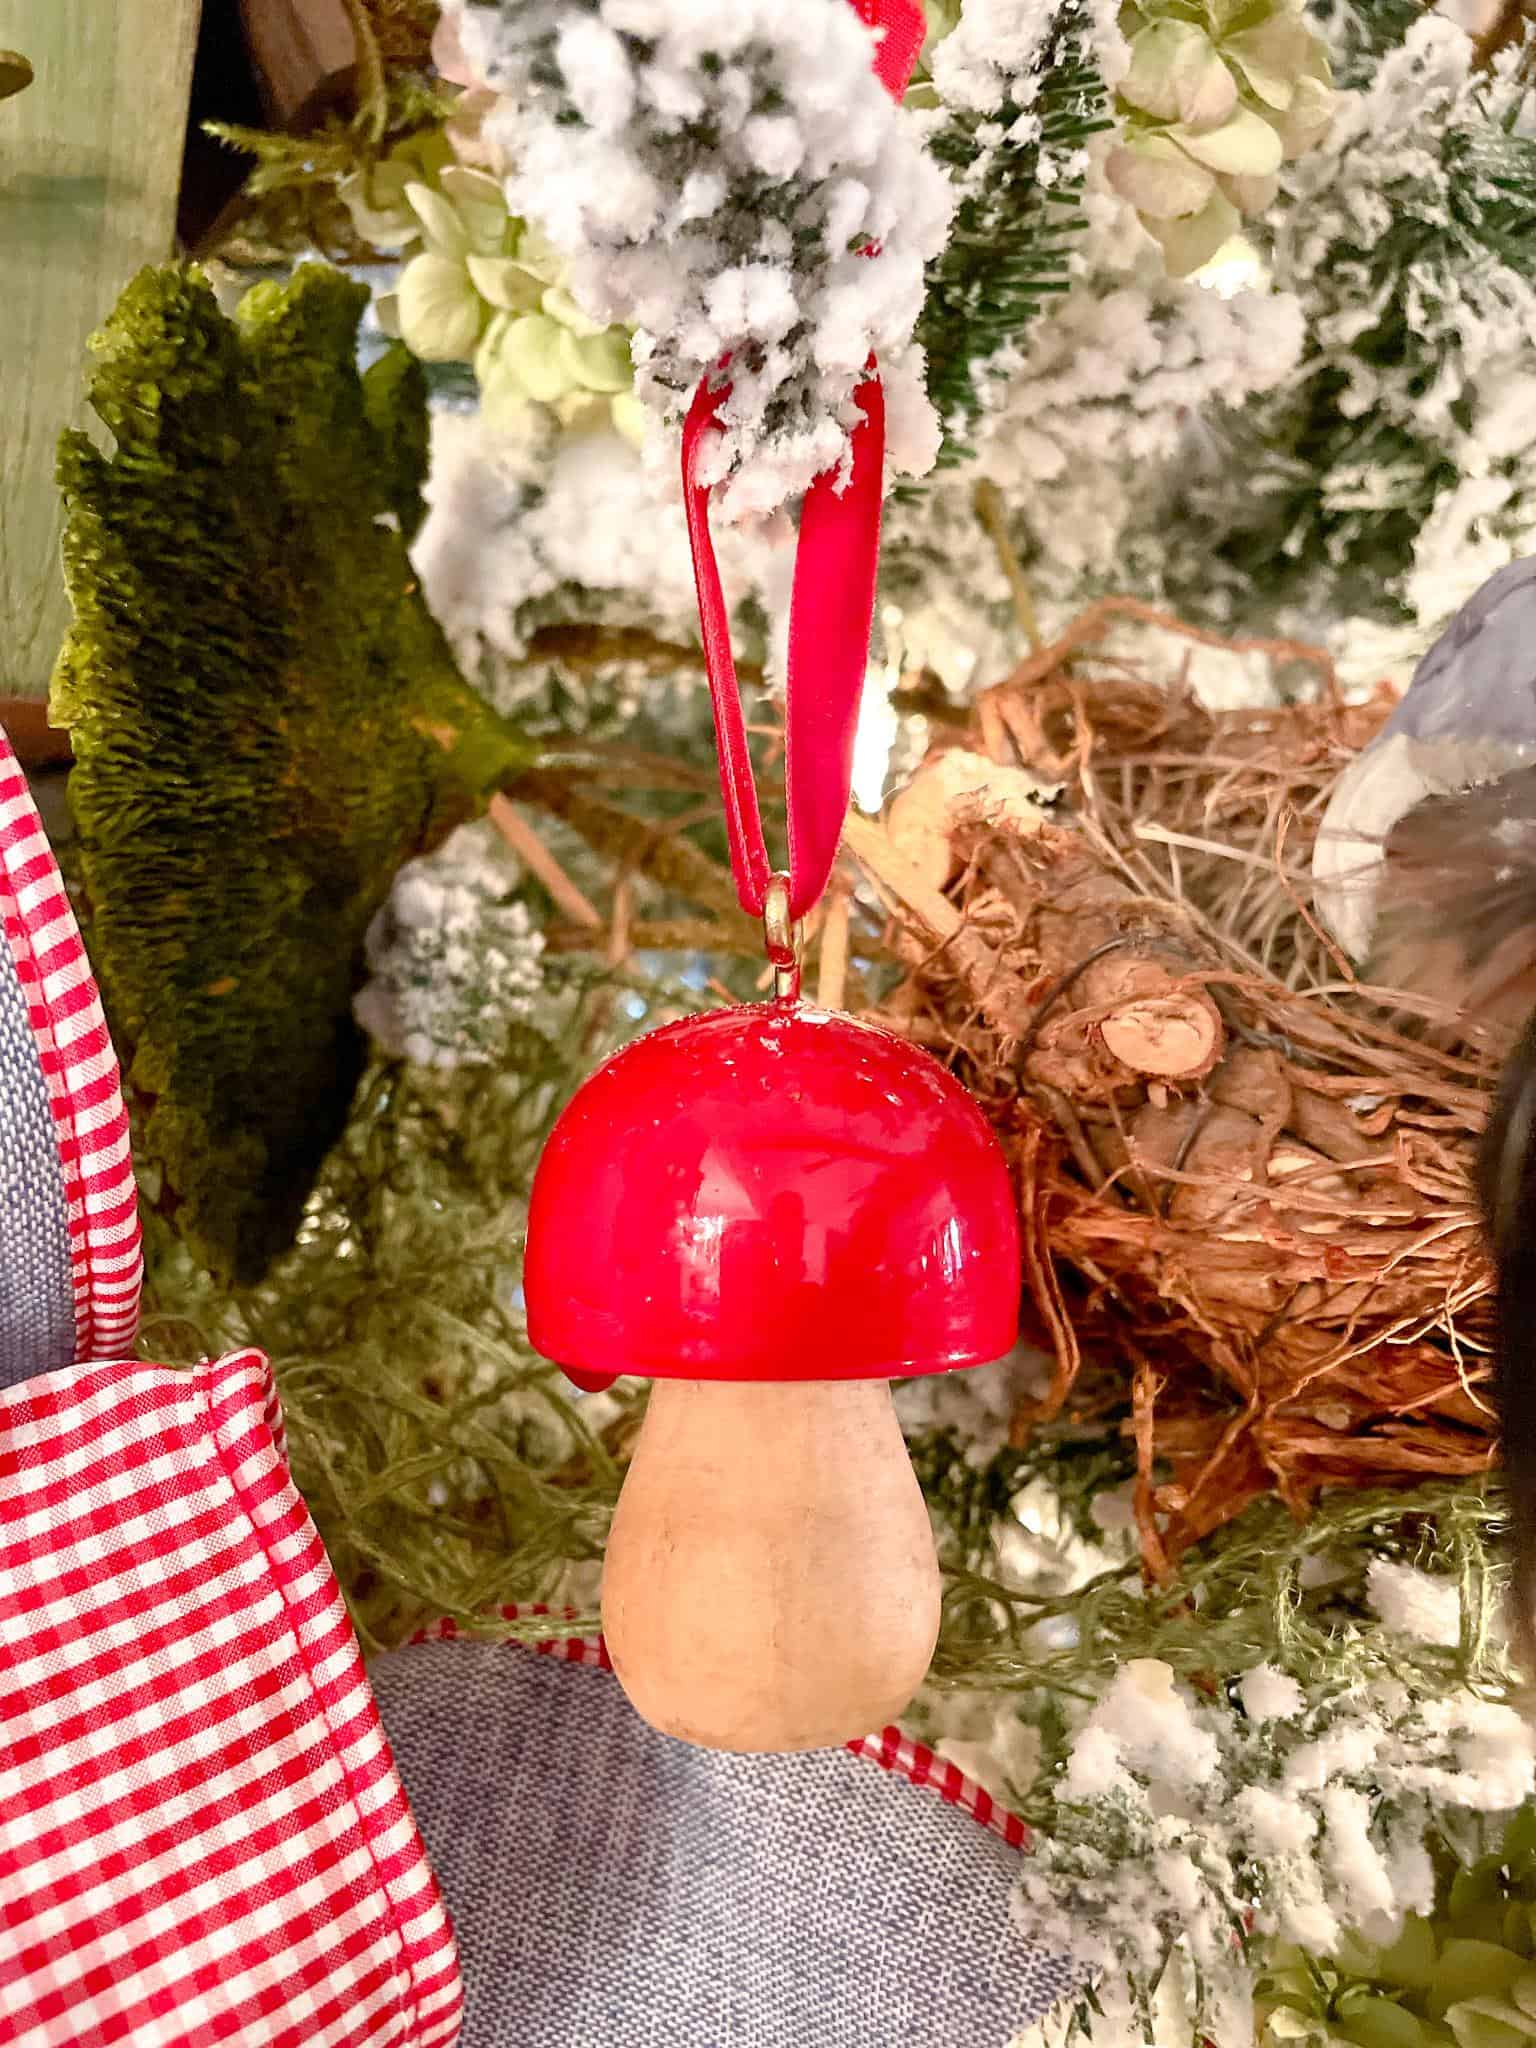
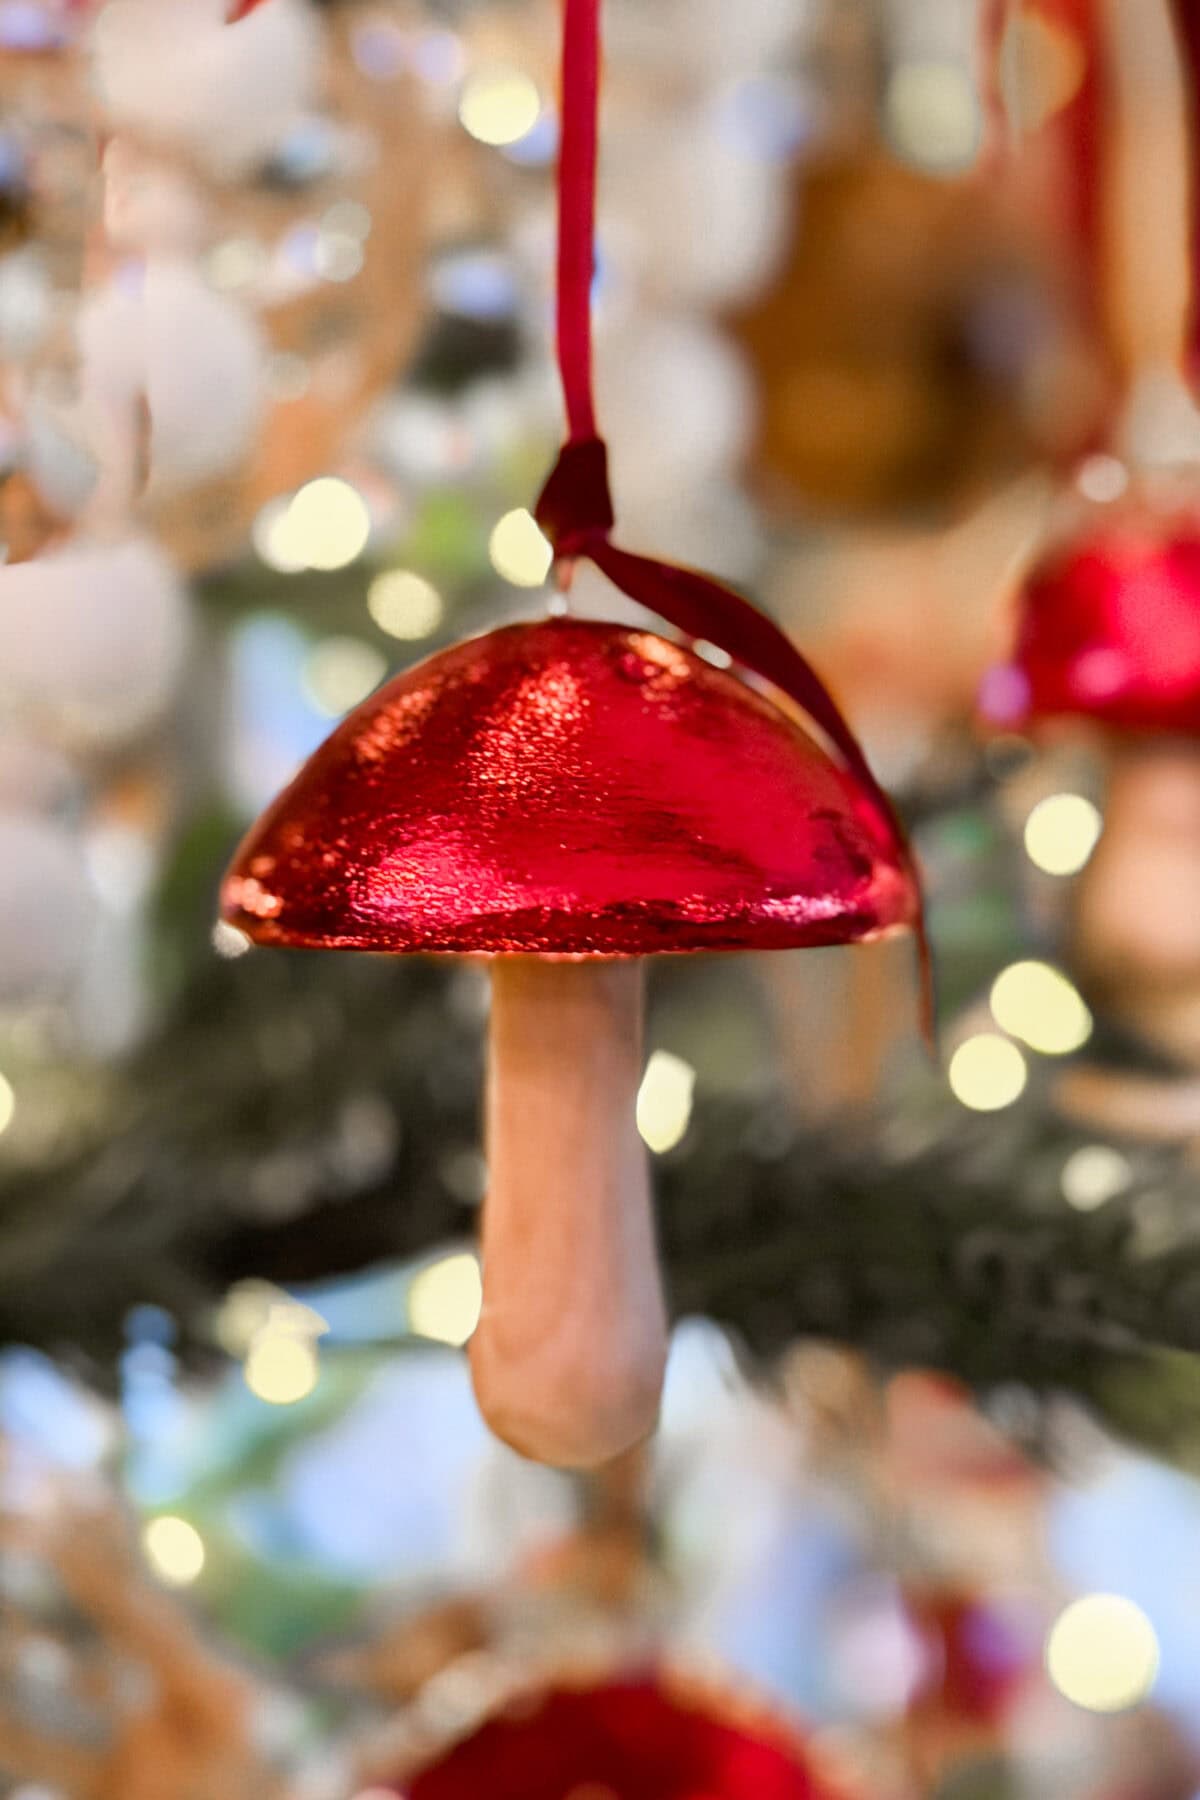
Finish by tying velvet ribbon through the eye screw for hanging.
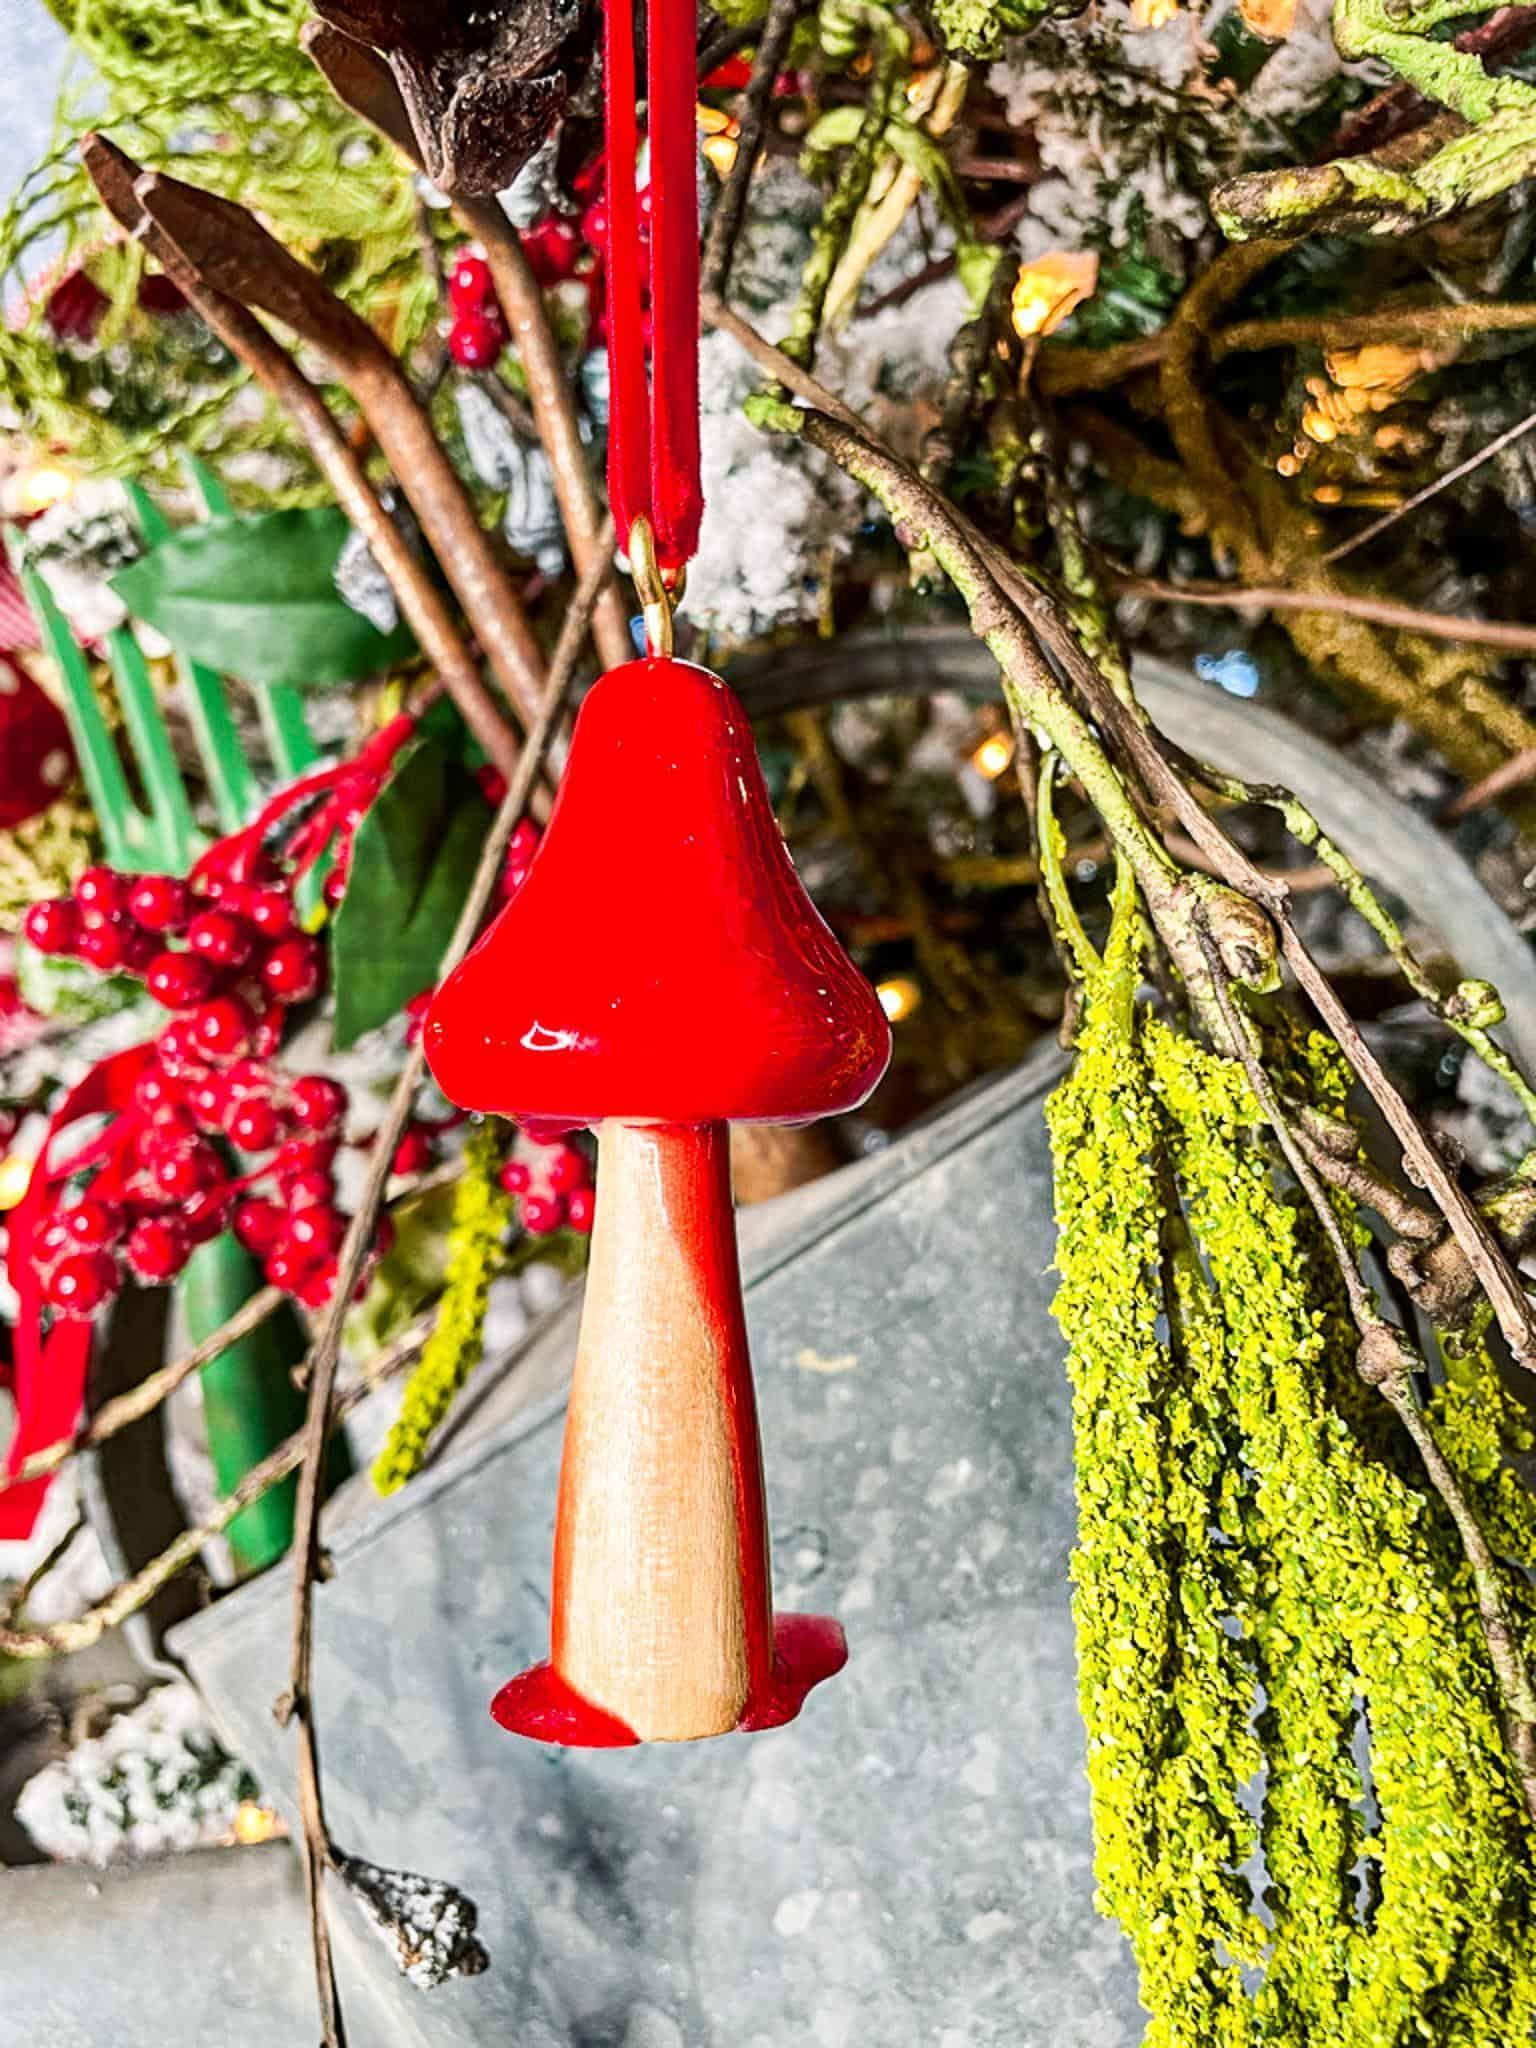
These glossy wood mushroom ornaments look beautiful on the tree and mix nicely with vintage ornaments, diy mercury glass Christmas tree ornaments, or woodland-themed holiday decor.
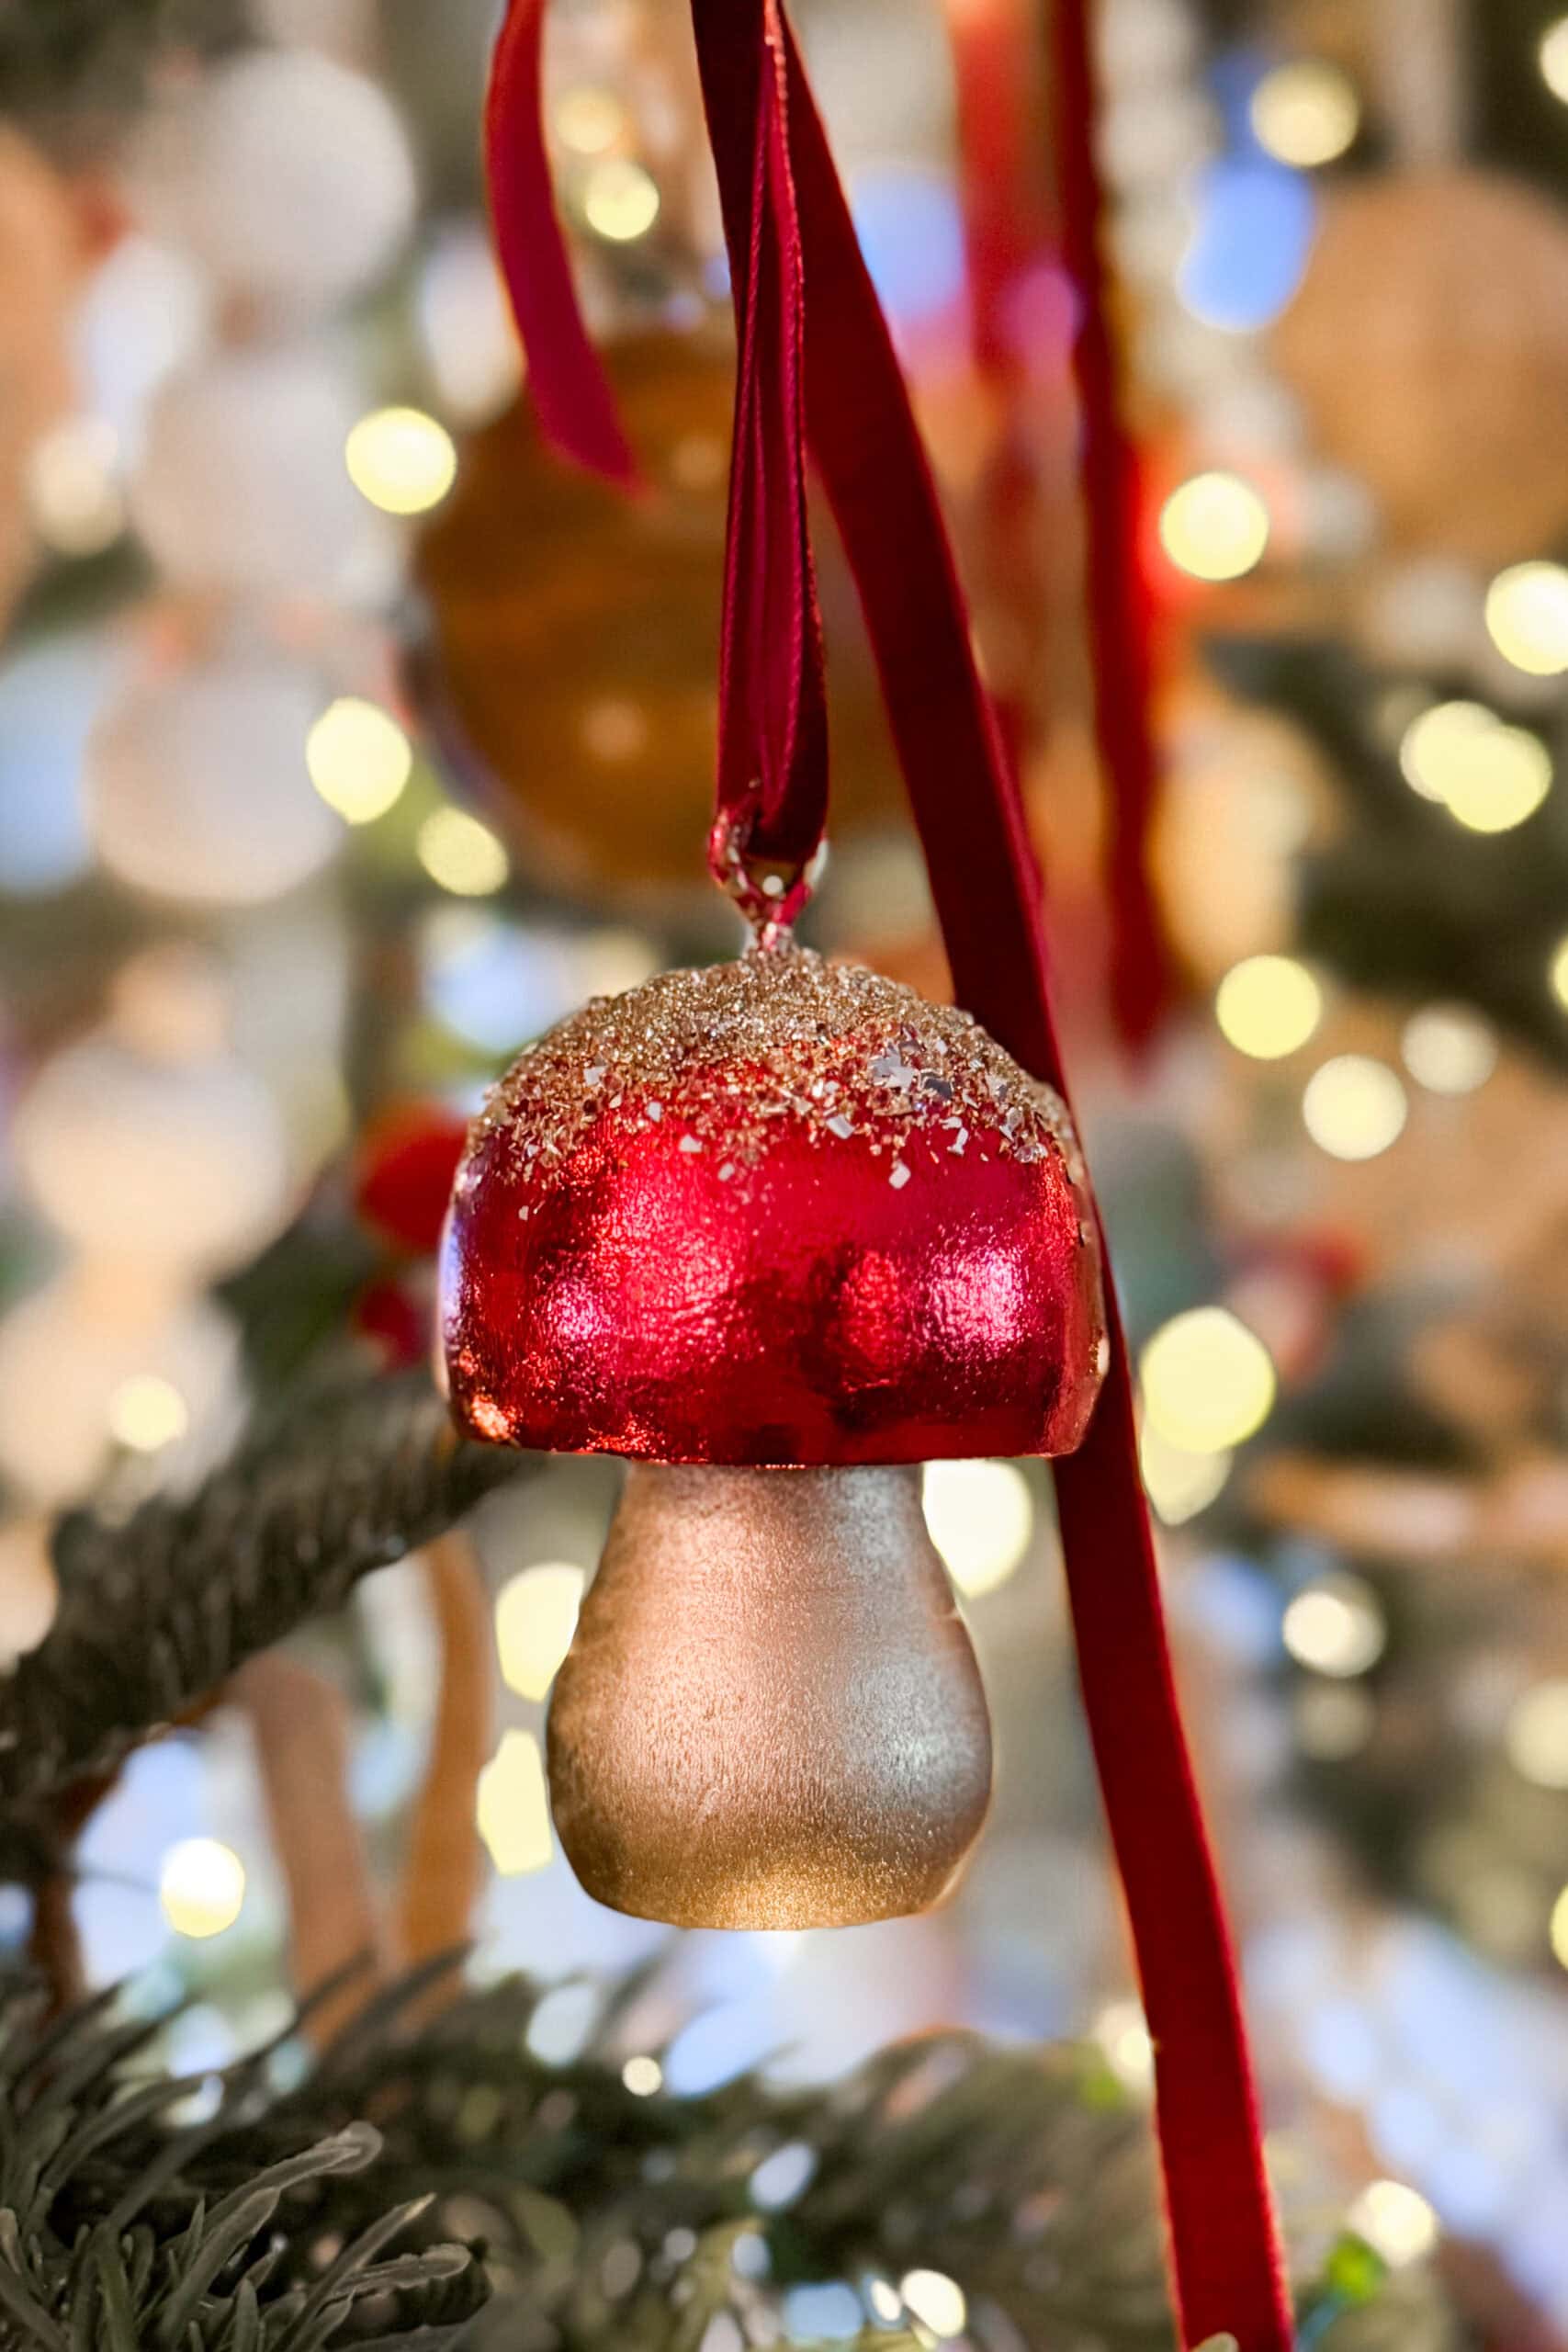
Version Two: Luxe Red Foil Wood Mushroom Ornaments
If you love the look of rich metallics, these red foil wood mushroom ornaments are a stunning variation.
The foil gives them a beautiful shine and texture, perfect for pairing with gold decor, elegant Christmas tablescapes, and glamorous holiday trees.
Supplies Needed
How to Make Red Foil Mushroom Ornaments
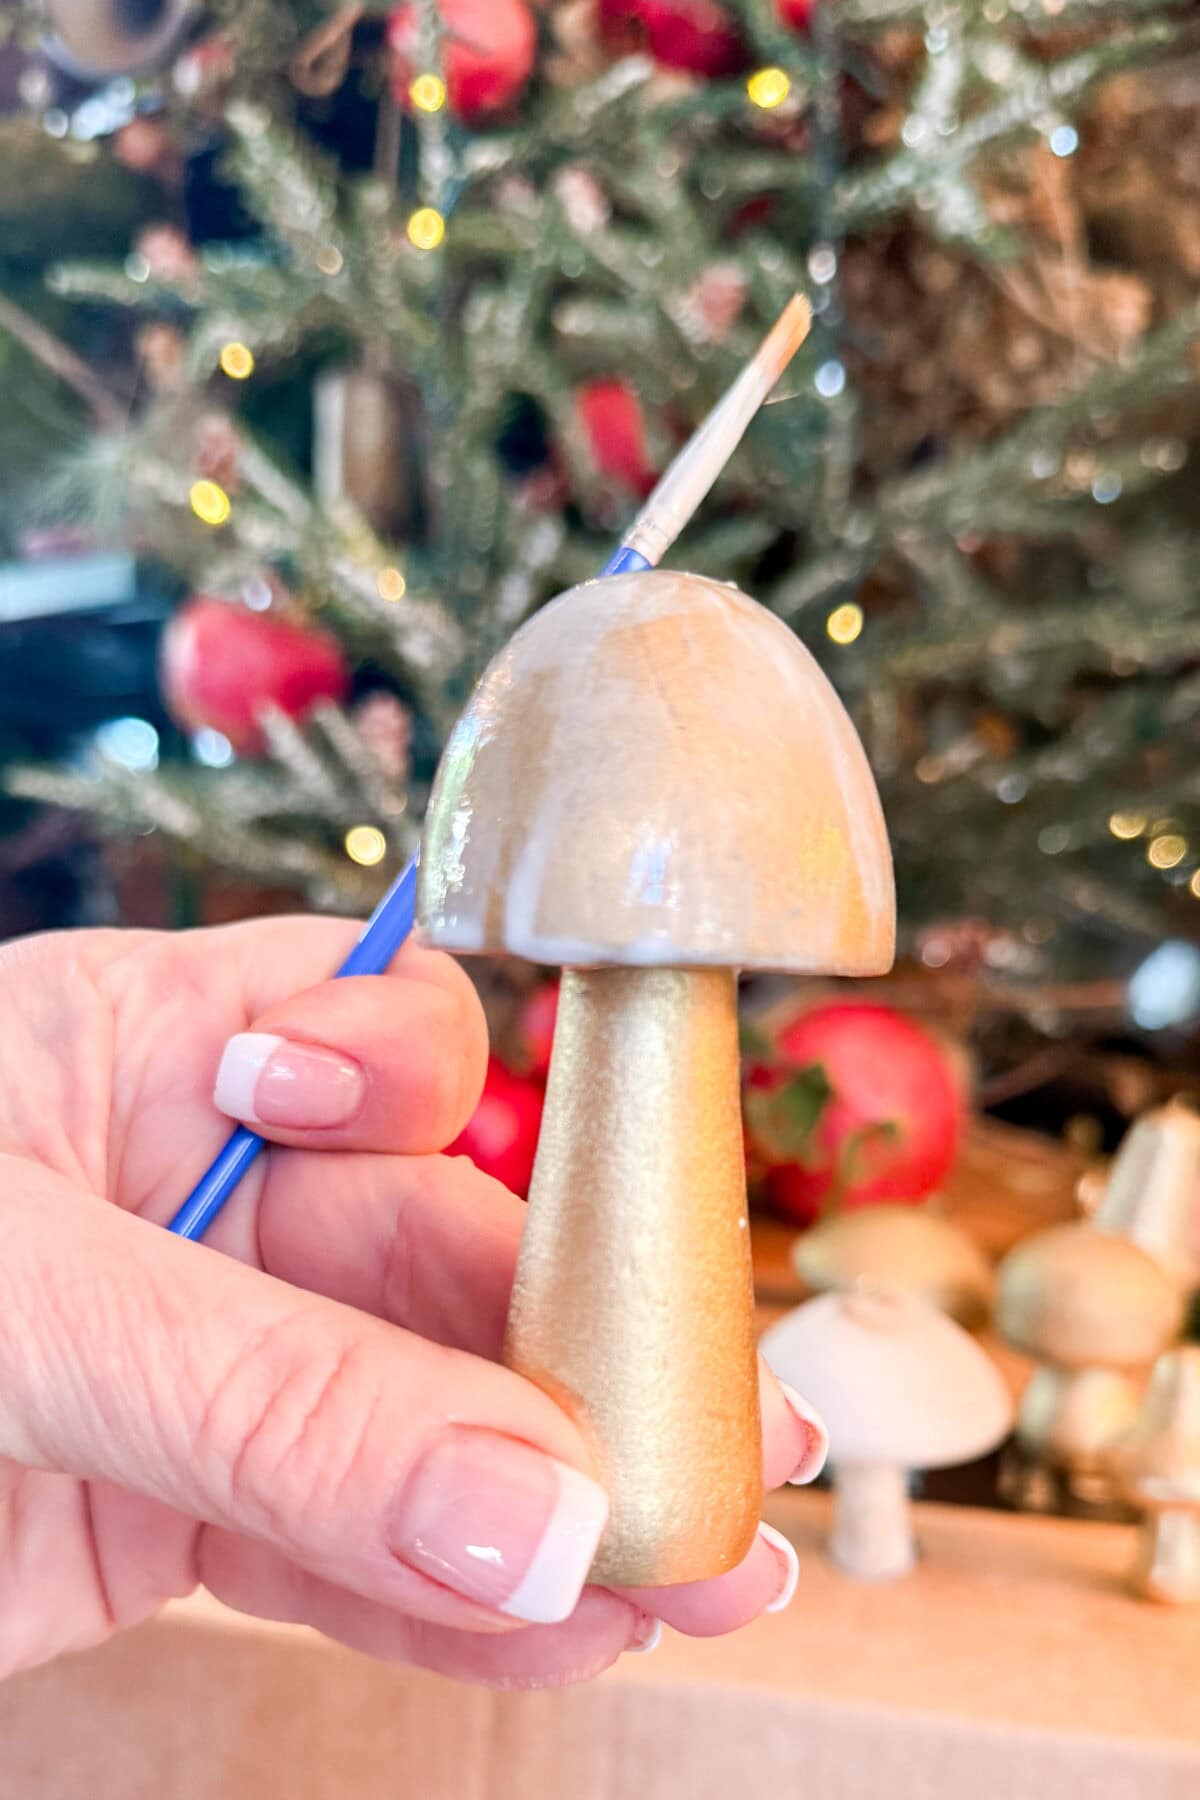
Step 1: Prepare the Mushroom
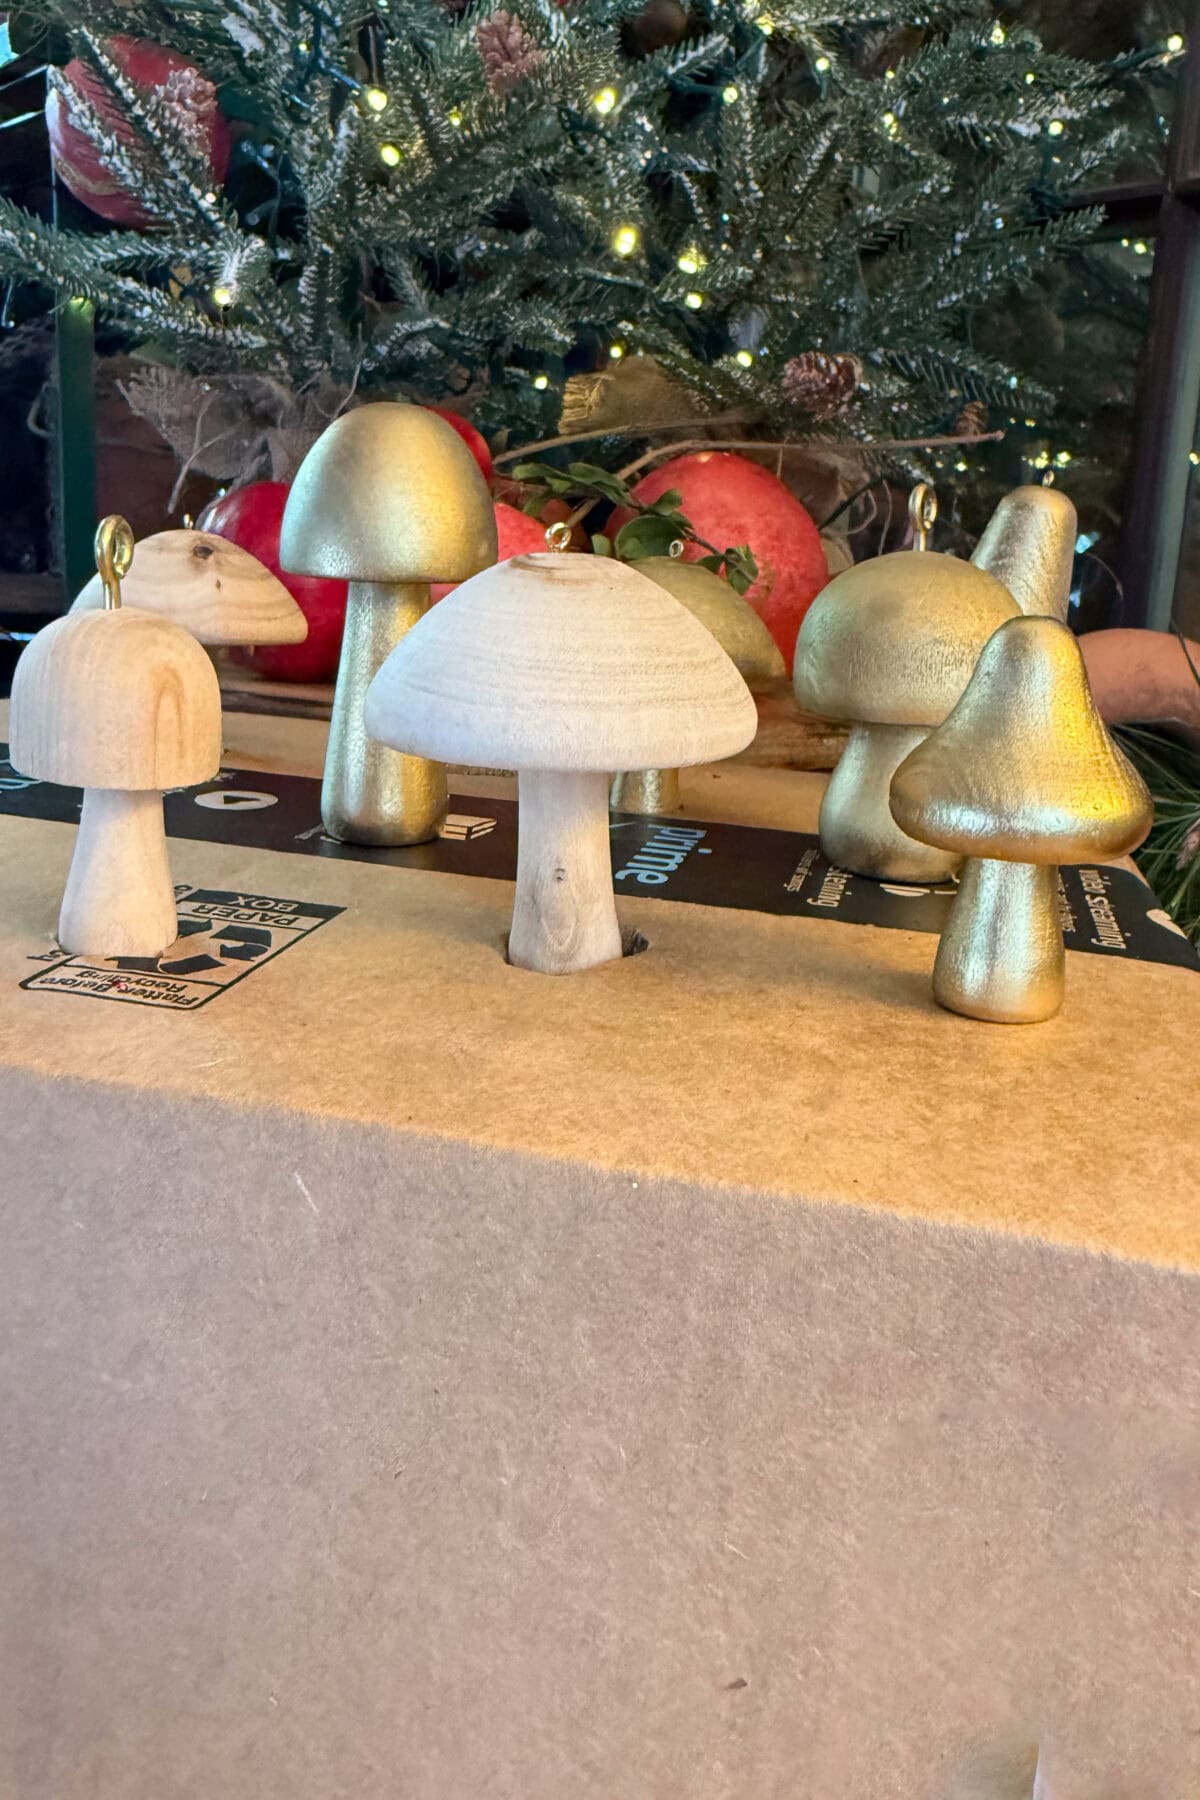
Give each wood mushroom a light coat of gold spray paint. You do not need heavy coverage here.
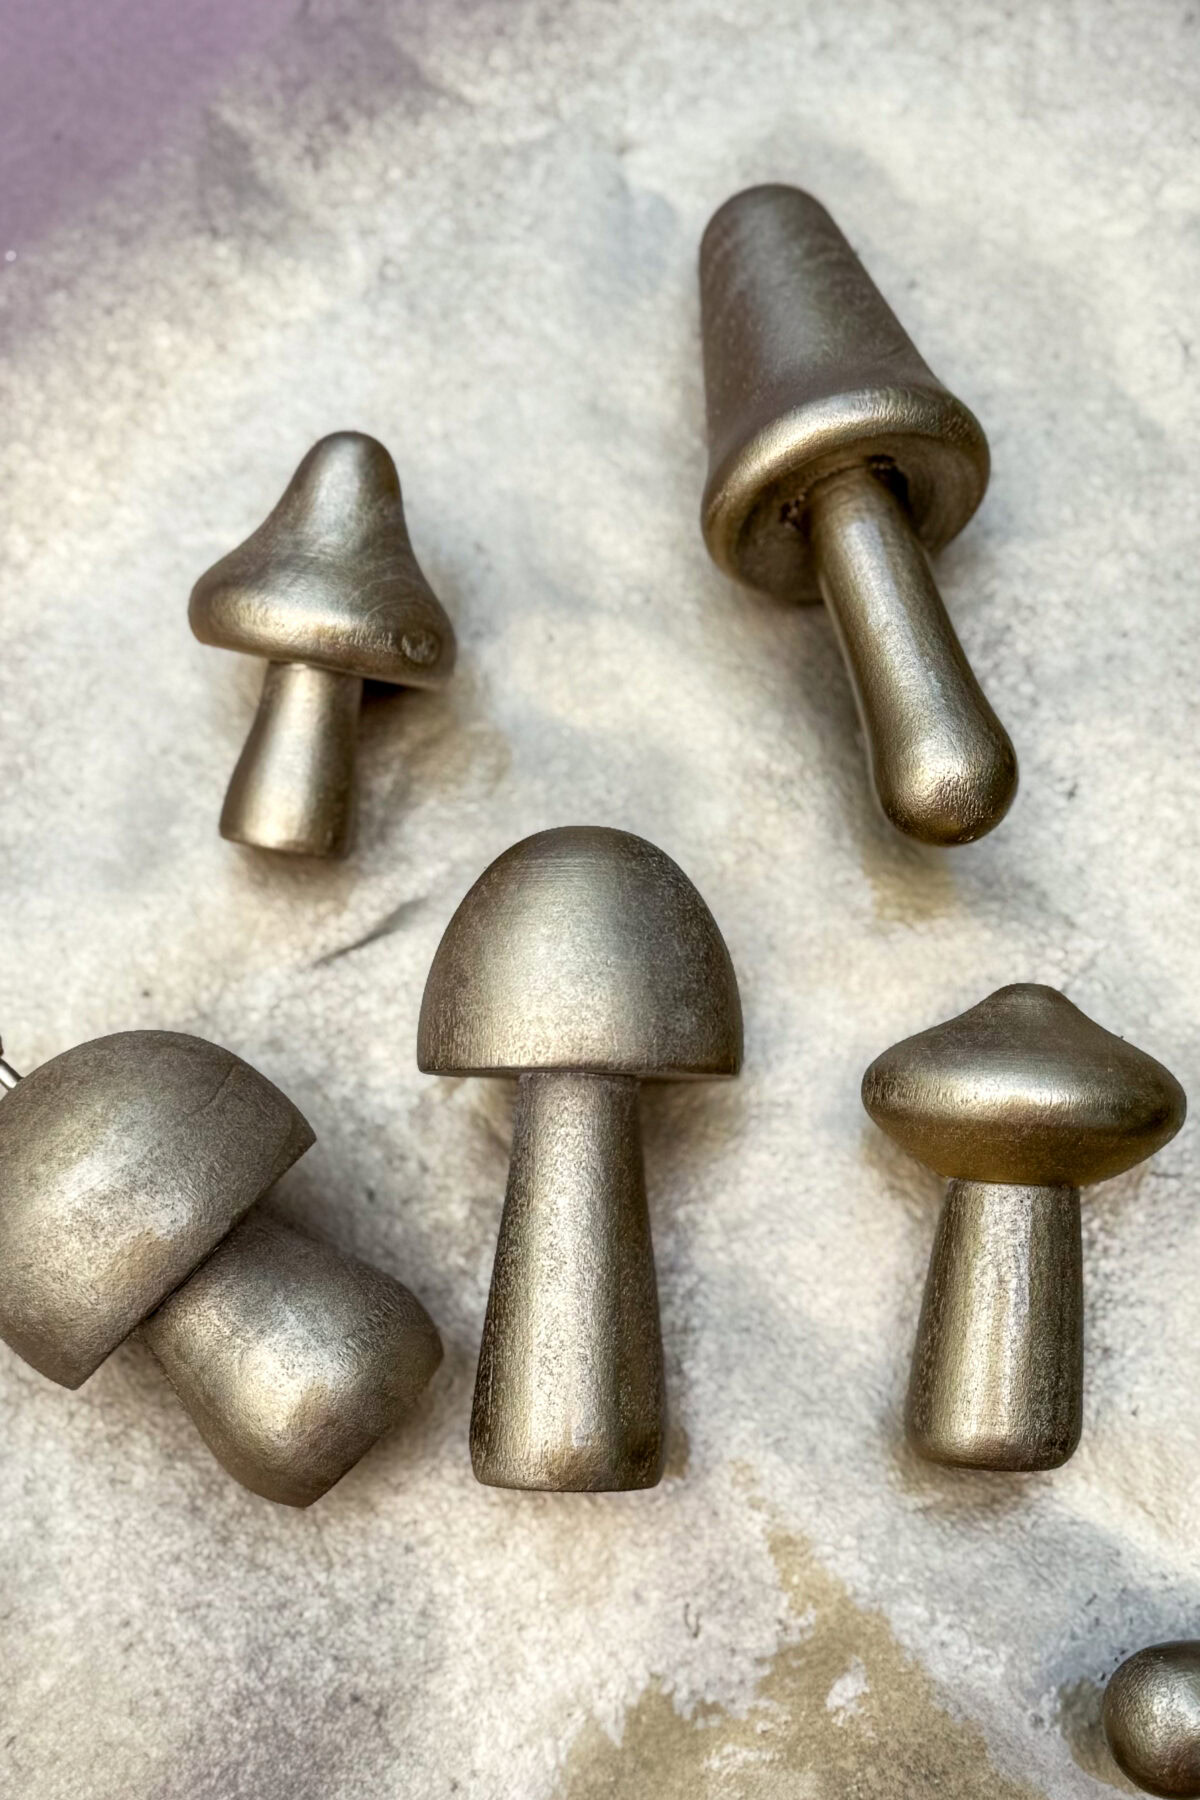
A soft layer is enough to give the foil a warm base and create that pretty vintage look once everything is finished. Set the mushrooms aside to dry completely.
Step 2: Apply the Foil Adhesive
Using a small craft brush, paint a thin layer of foil adhesive on the mushroom cap. Keep the coat even and light.
The adhesive will look milky at first and then turn clear and tacky, which is exactly what you want. Leaving a little of the gold peeking through adds character, so you do not have to cover every inch.
Step 3: Press on the Red Foil
Once the adhesive feels tacky to the touch, place a sheet of red foil over the mushroom cap. Gently press it down with your fingers or a soft brush so it adheres.

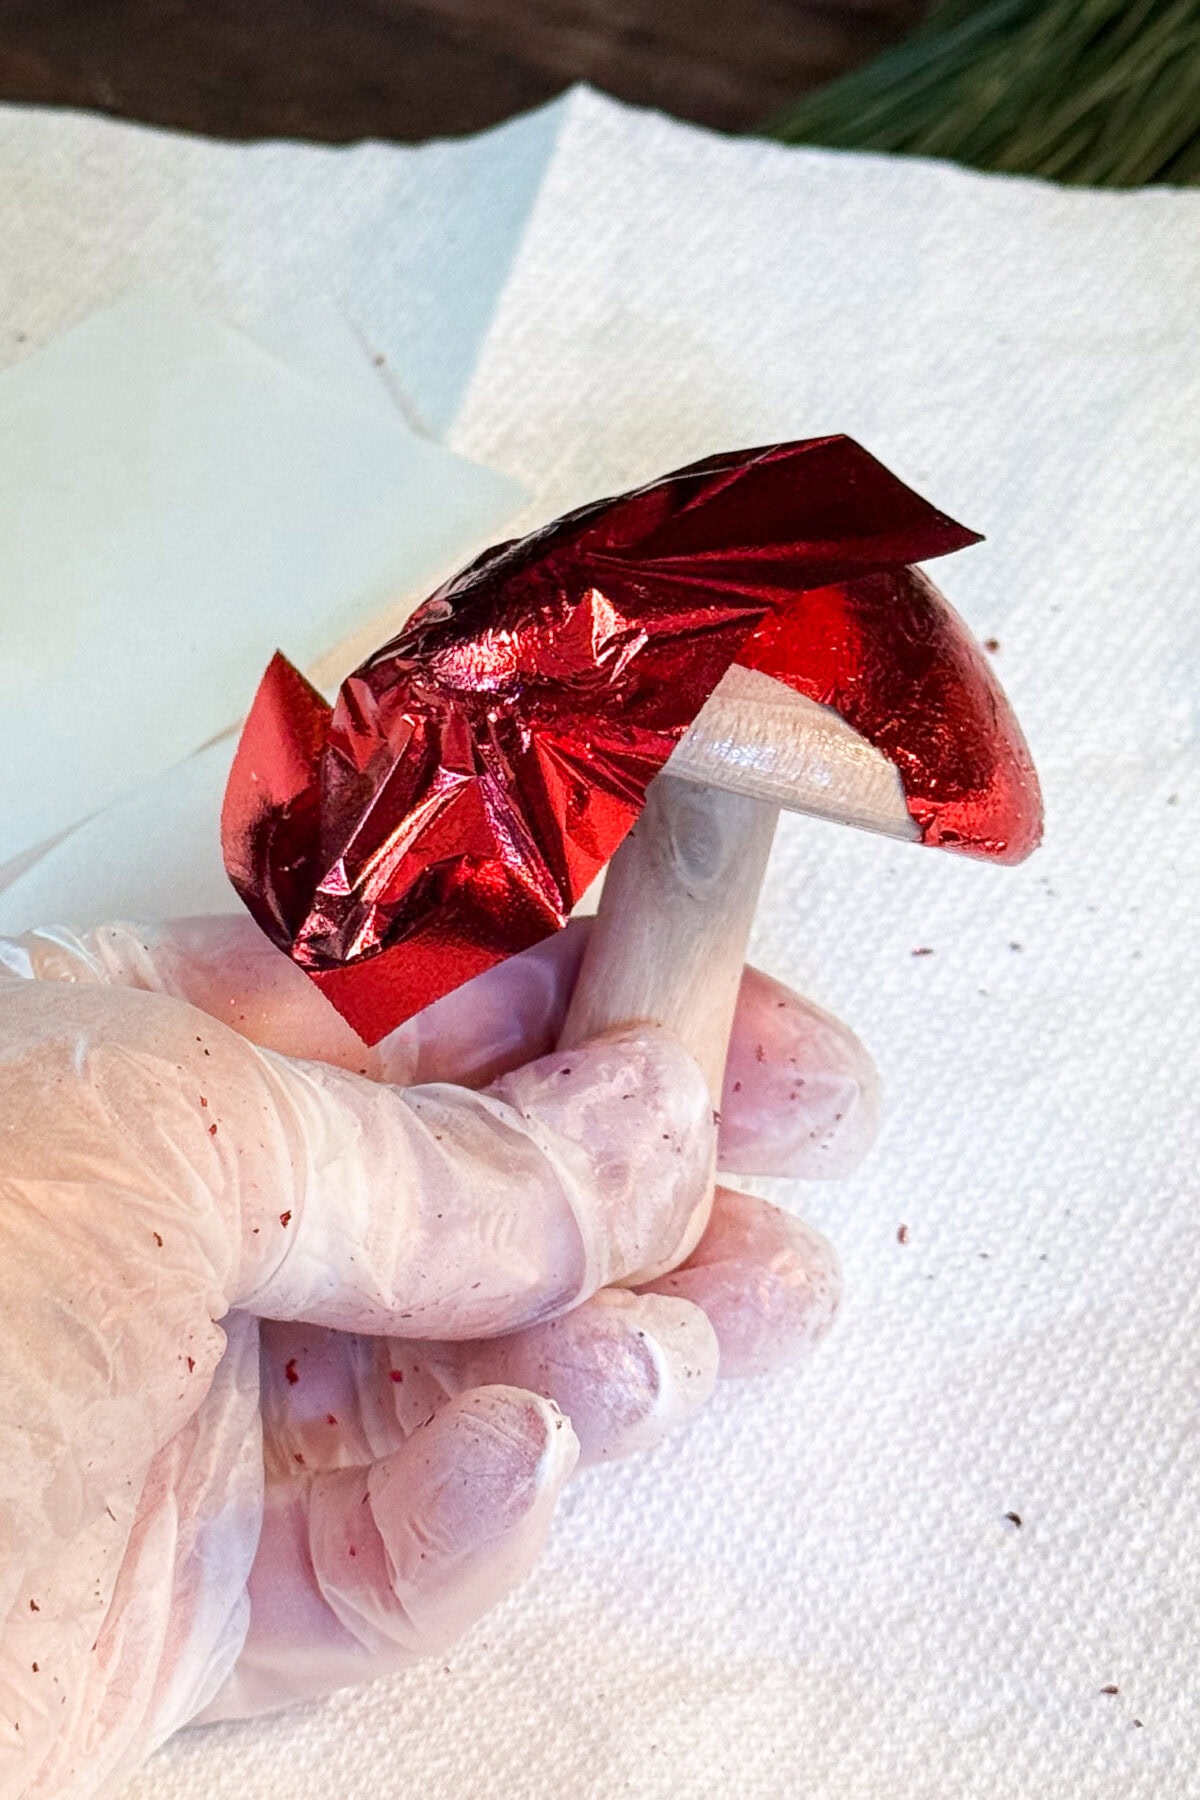
If you see open spots where you want more coverage, lay down another small piece of foil and press again. It does not need to be perfect to look beautiful.
Tip from wendy’s craft room:
I suggest wearing gloves for this step since the foil and adhesive can get a little messy.
Step 4: Burnish the Foil
Take a dry chip brush and lightly sweep it over the mushroom cap.
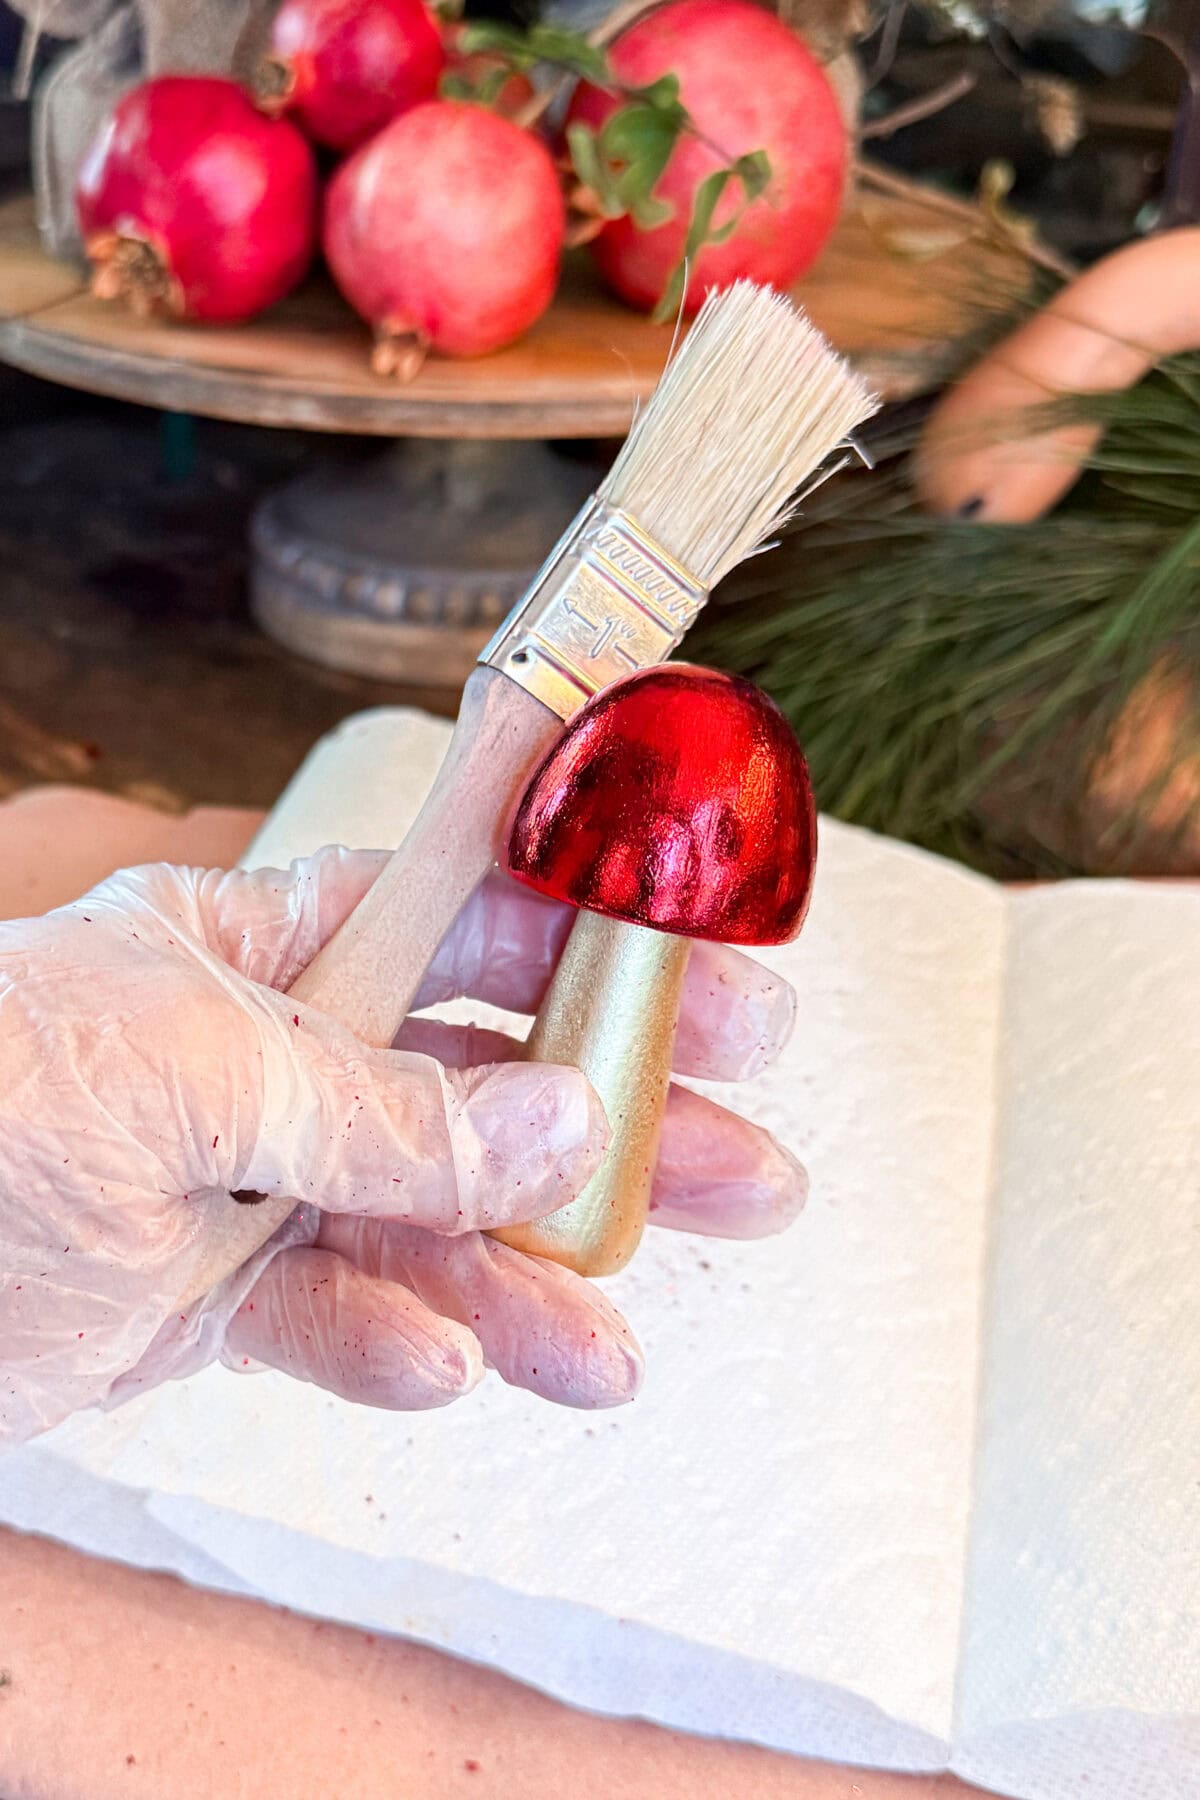
This will remove the loose flakes and help the foil settle into place. It brings out the shine and gives the mushroom that lovely textured look.
Step 5: Add a Little Sparkle (Optional)
If you want a hint of shimmer, brush a light coat of Mod Podge onto the cap and sprinkle on a small amount of glitter.
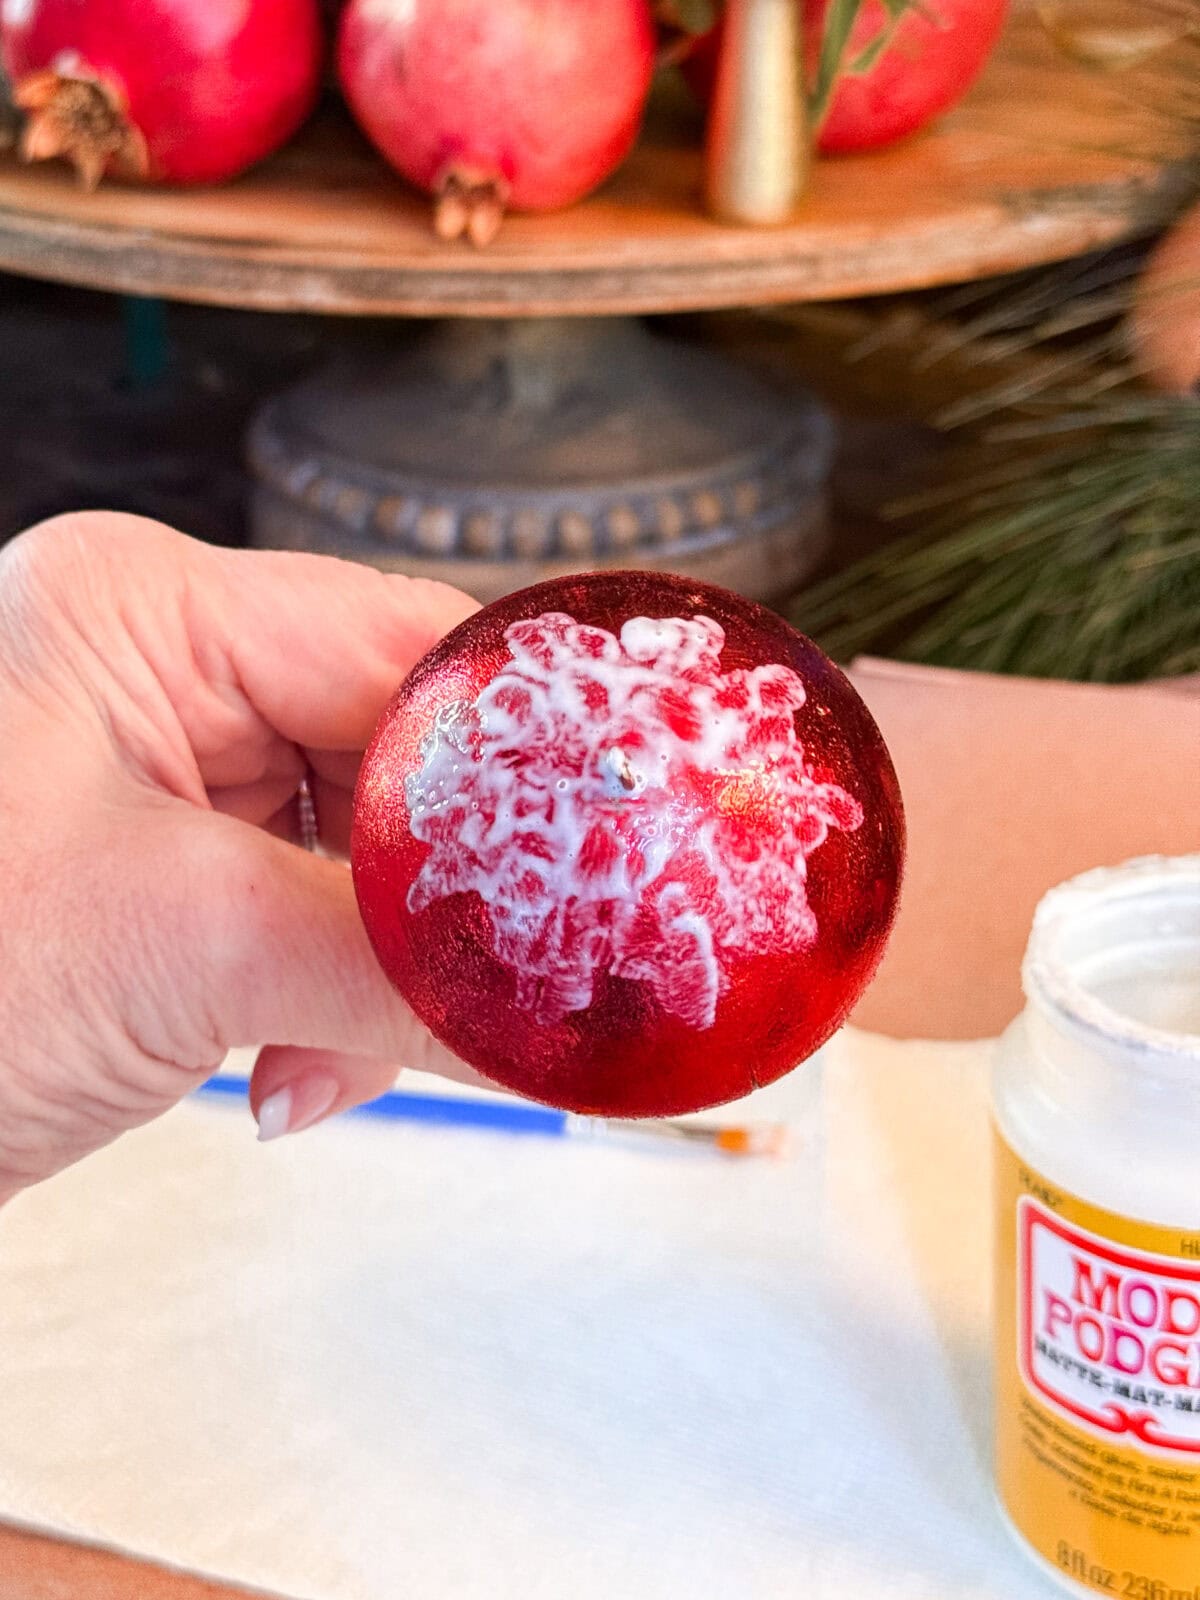

It catches the lights on the Christmas tree in such a pretty way.
Step 6: Seal the Finish (Optional)
You can leave the mushrooms as they are or protect the foil with a clear sealer. A matte finish gives them a soft aged look, while a glossy sealer will make them shine even more.
Step 7: Add the Hanger
Once the mushrooms are completely dry, tie a ribbon, twine, or string through the top so they are ready for the tree.
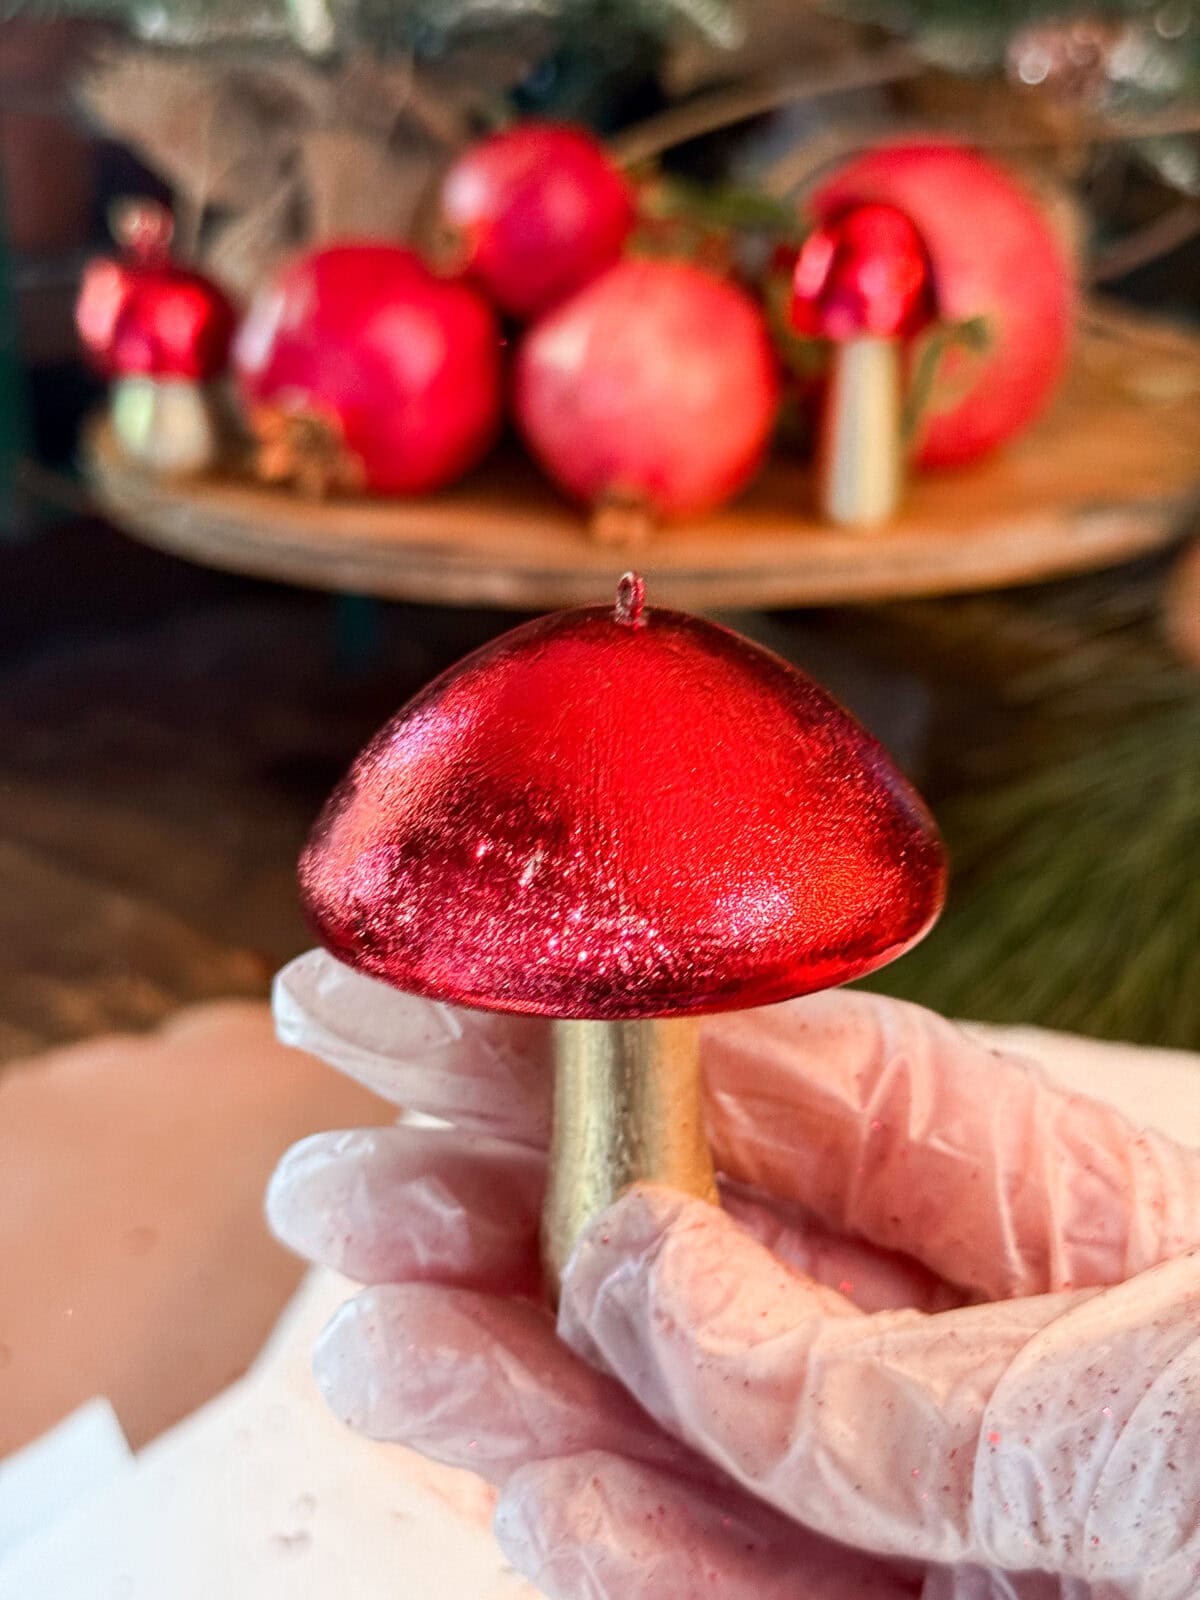
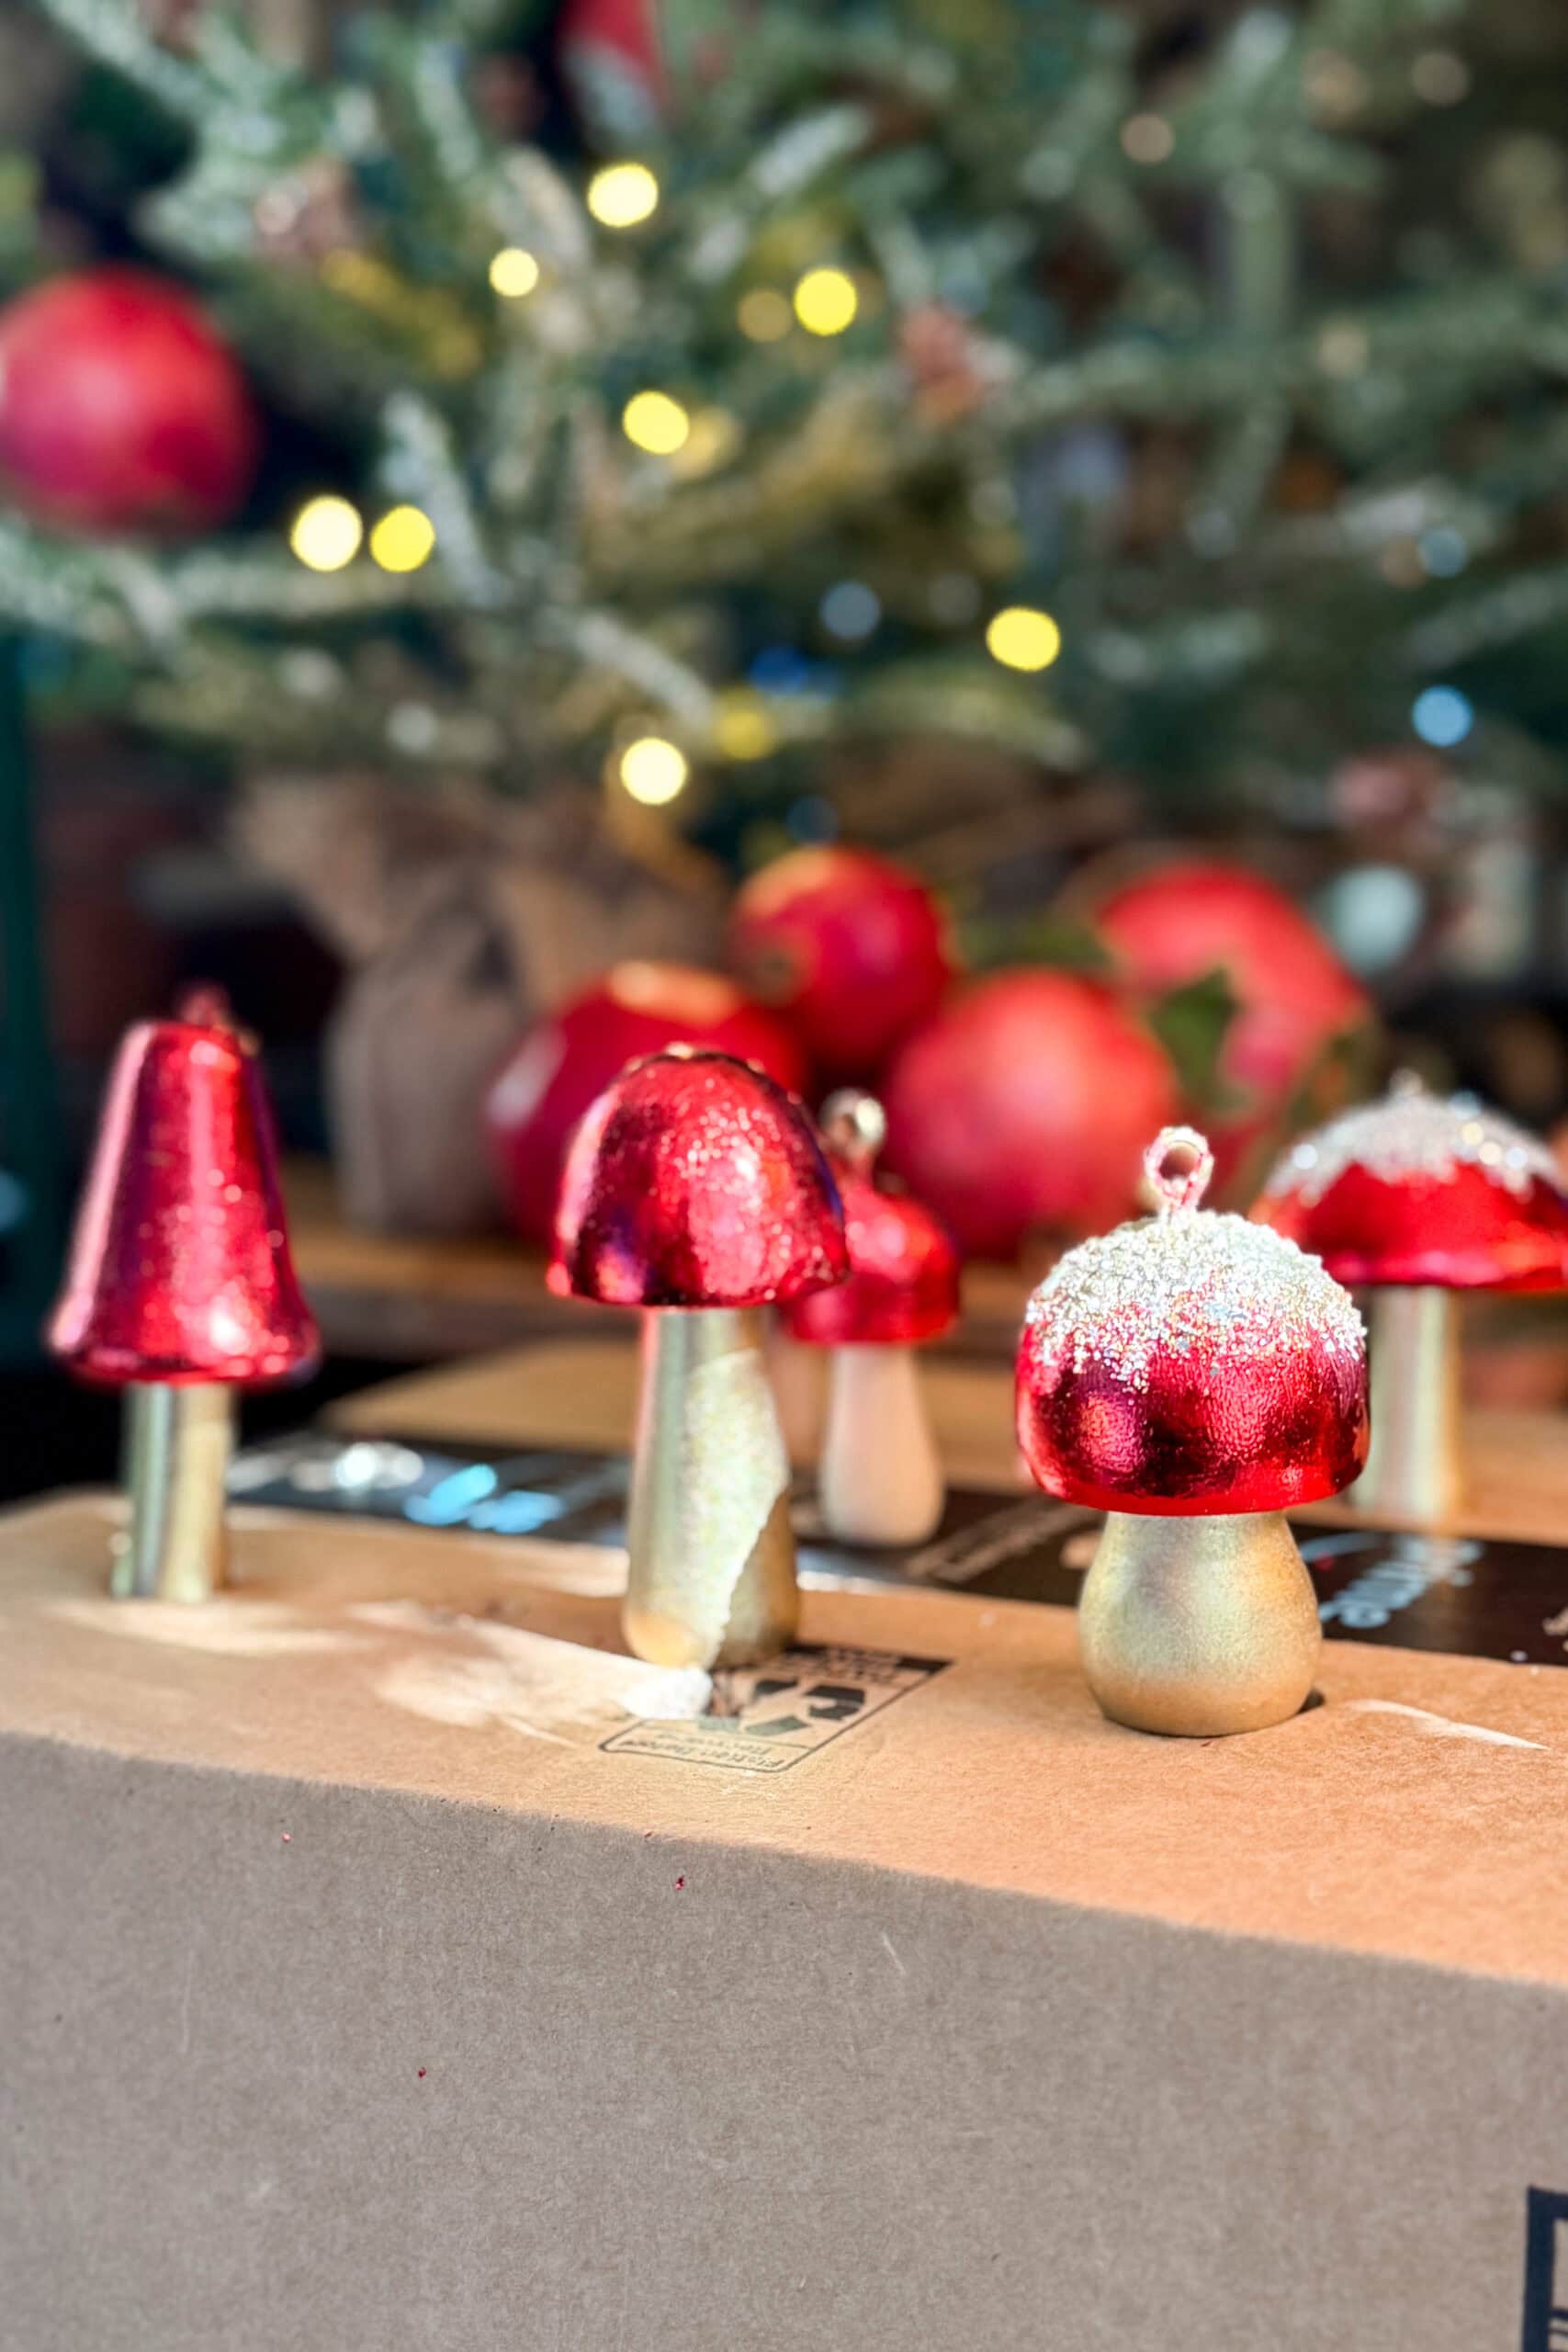
These red foil mushrooms add such a pretty pop of color and have the sweetest woodland sparkle.
Tips for a Smooth Foil Finish
A few small details make a big difference in how your foil turns out. Keep the adhesive layers very thin so the foil transfers cleanly and evenly.

Once the ornaments are fully dry, you can burnish the caps with a soft cloth to bring out a little extra shine.
Decorating and Finishing Your Ornaments
Once your foil mushrooms are completely dry, they are ready to display. Add a ribbon, twine, or string to the top, then have fun finding the perfect spot for them.

These DIY mushroom ornaments look beautiful tucked into the branches of a Christmas tree, especially near twinkling lights that catch the shine of the foil.
However you use them, these pretty foil mushrooms add a little sparkle and woodland charm to your holiday decor.
How to Style Your Wood Mushroom Ornaments
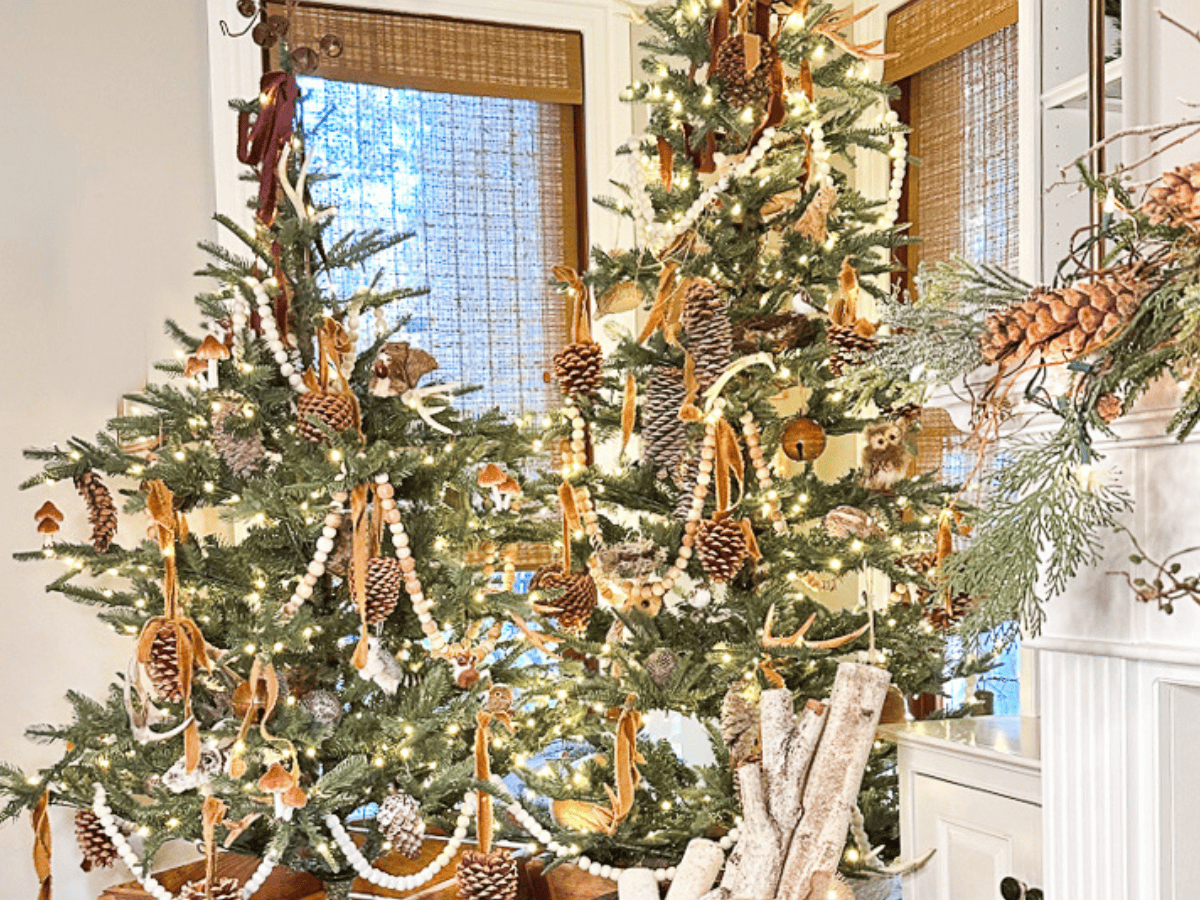
Once your handmade wood mushroom ornaments are finished, there are so many ways to use them throughout your home. They add a sweet woodland touch to your holiday decorating and blend beautifully with both rustic and classic Christmas styles.
On your Christmas tree
Wooden mushroom ornaments look especially charming tucked into the outer branches where you can see their color and texture. They pair well with natural greenery, warm lights, and simple ribbon.
Layered into garlands
Tuck a few mushrooms into a fresh or faux greenery garland for a soft, nature inspired look. They work especially well alongside pinecones, dried oranges, and other handmade ornaments.
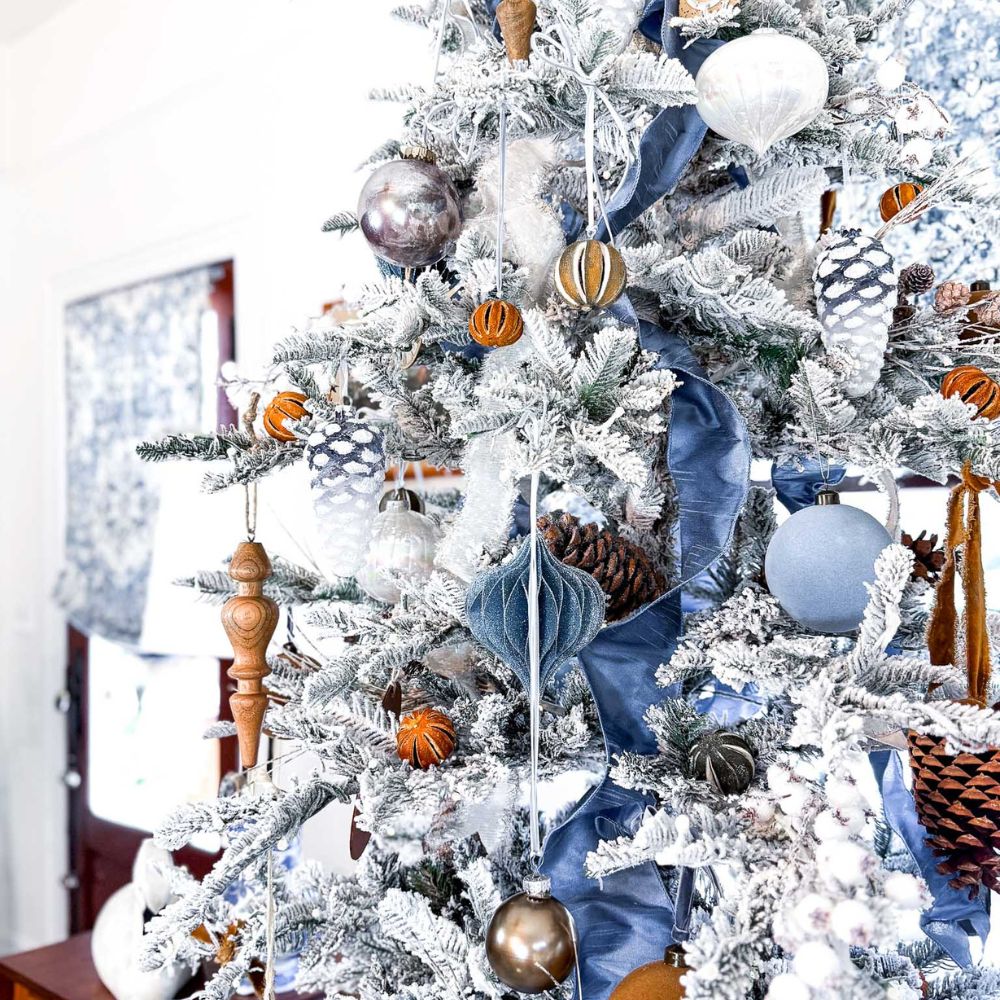
Added to wreaths
Place them around a holiday wreath at different angles for a cozy look. They also mix beautifully with eucalyptus, cedar, pine, and dried winter florals.
In a bowl or basket
If you have a few extra wooden mushroom ornaments, gather them in a shallow bowl with pinecones, nuts, or small ornaments. It creates an easy and affordable holiday accent for your Christmas coffee table, kitchen counter, centerpiece for your dining table, or arrange some in a beautiful hurricane vase to display in your entryway.

More DIY Christmas Ornaments You’ll Love
If you loved this tutorial for wooden mushroom Christmas ornaments, you might also enjoy some of my other favorite ornament ideas:
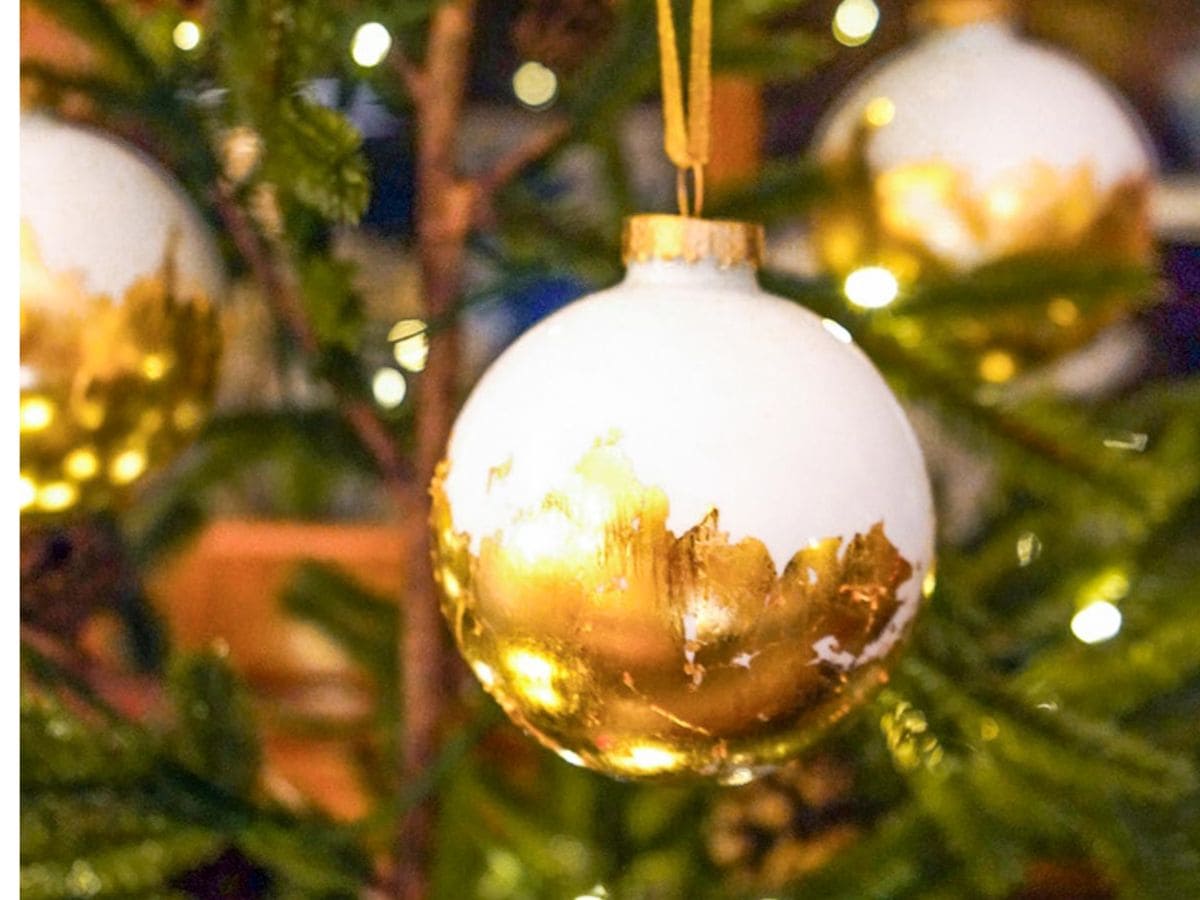
DIY Gold Leaf Ornaments
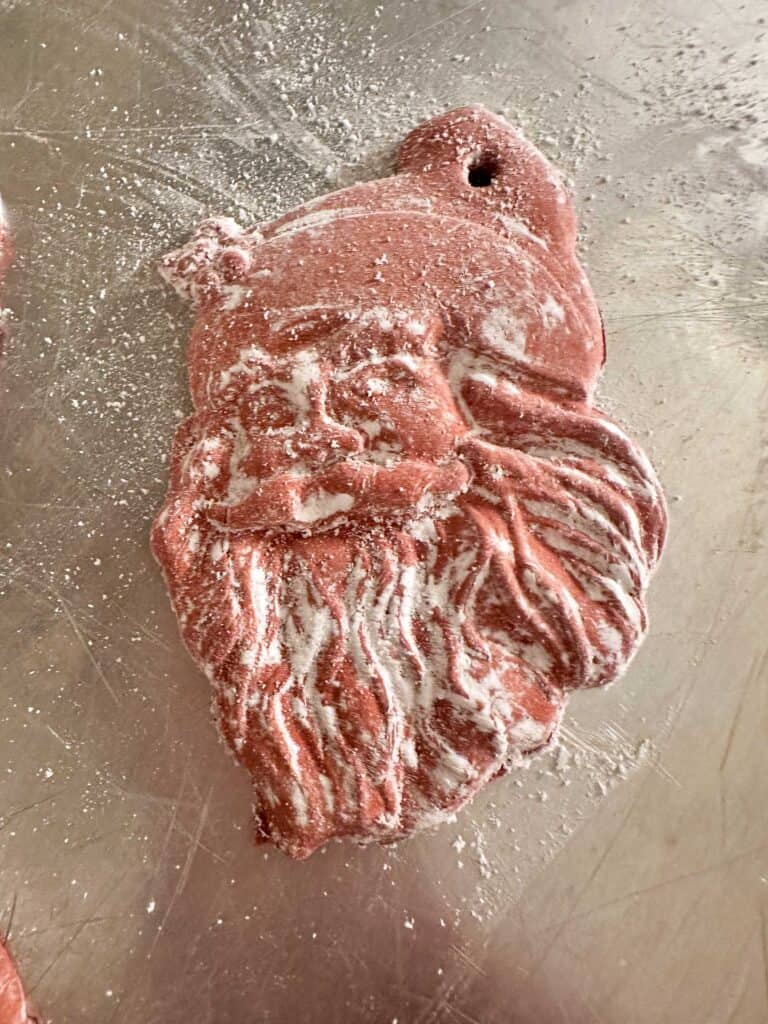
DIY Air Dry Clay Ornaments – Christmas Gingerbread Men
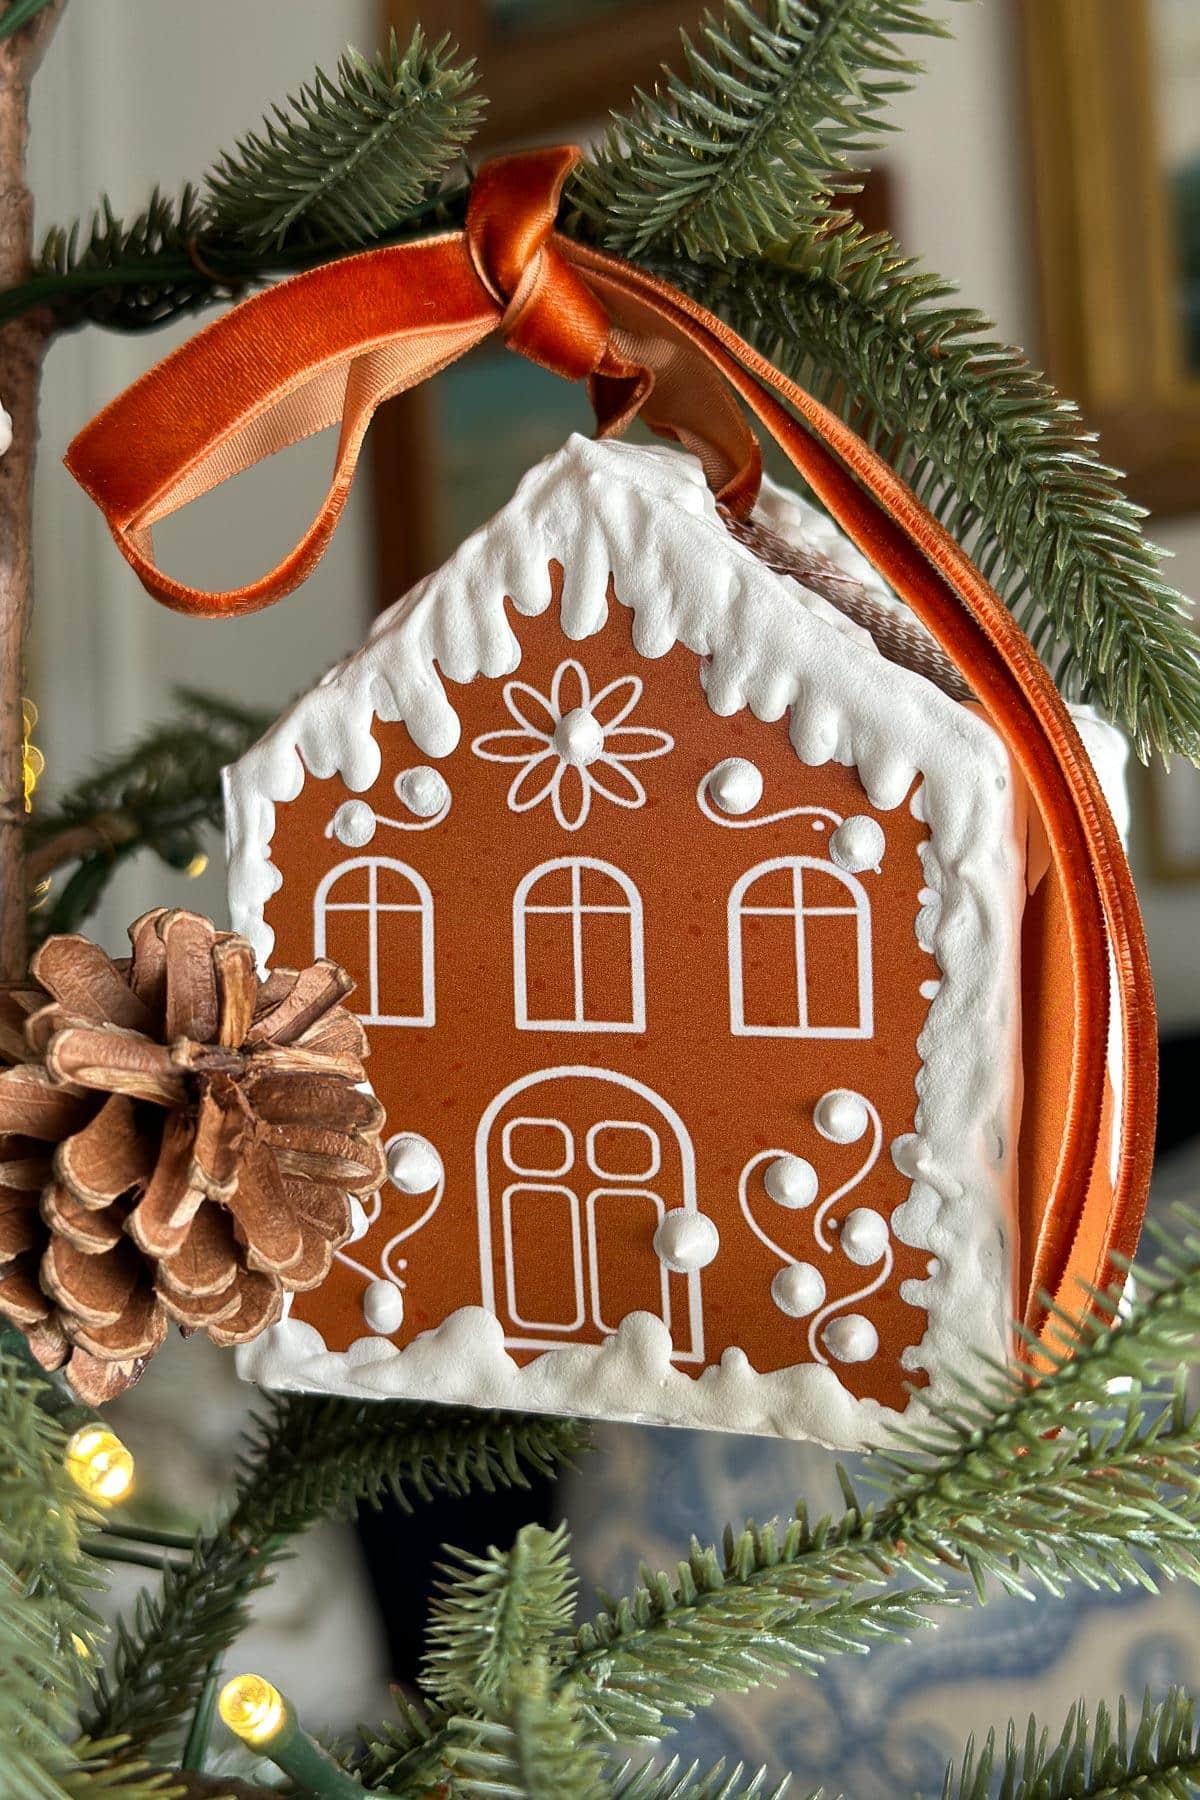

EASY DIY Gingerbread House Ornaments: 3D Free Printable
Even More Handmade Ornaments To Make This Season
And, here are even more handmade Christmas ornaments I think you’ll love!
The DIY mercury glass ornaments are quick and always turn out nice. The feather ornaments are light and easy, and the velvet ornaments have a soft look that I really love.
Bringing It All Together
Making your own wood mushroom ornaments is such a simple way to add a little handmade charm to your holiday decorating.
Whether you choose the classic glossy red style or the pretty red foil version, each one brings a soft touch of nature to your Christmas tree. They are easy to create, fun to personalize, and a sweet reminder of the beauty found in the garden even during the colder months.
I hope this tutorial inspires you to try a few of your own. These little diy mushroom Christmas ornaments are a joy to make and even more fun to decorate with. If you create some, I would love to hear how you used them in your holiday home.
Happy crafting!


DIY Painted and Foiled Wood Mushroom Ornaments
Ingredients
For the Red Glossy Mushroom Ornaments
- Wood mushrooms
- Drill
- Small eye screws
- Frog tape
- Red acrylic paint
- Paintbrush
- Totalboat 2-part epoxy
- Wilton red candy coloring
- Wood popsicle sticks
- Two small disposable containers
- Rubber gloves
- Heat Gun
- Cookie sheet
- Wax paper
- Annie Sloan dark wax
- Velvet ribbon 3/8″ wide
For the Red Foil Mushroom Ornaments
- Wood mushrooms
- Drill
- small eye screws
- Frog tape
- Red metallic foil sheets
- Foil adhesive
- Gold spray paint
- Glitter
- Mod Podge
- Small chip brush
- Small paintbrush
- Rubber gloves
- Velvet ribbon 3/8" wide, string, or twine
Instructions
For the Red Glossy Mushroom Ornaments
- Drill a small hole in the top of each wood mushroom and screw in an eye hook.
- Tape off the stem so only the cap is exposed.
- Paint the cap with red acrylic paint and let dry.
- Mix equal parts of two part epoxy and tint with red candy coloring.
- Pour the resin over the cap, turning the mushroom so the excess drips off.
- Use a heat gun to remove bubbles, then set the mushrooms upright on wax paper.
- Let cure for at least twelve hours.
- Remove the tape and apply dark wax to the stem if desired.
- Add ribbon or string for hanging.
For the Red Foil Mushroom Ornaments
- Lightly spray paint the wood mushrooms with gold paint and let dry.
- Brush a thin, even layer of foil adhesive onto the cap and allow it to turn clear and tacky.
- Press red foil sheets onto the adhesive and smooth gently with your fingers or a soft brush.
- Burnish with a dry chip brush to remove loose pieces and enhance the shine.
- Add glitter with a light coat of Mod Podge if desired.
- Seal with clear spray (optional) for added protection.
- Add ribbon, twine, or string to hang the ornament.
Did you make this craft?
We would love to see what you have created, so mention us @wmdesignhouse or tag us using #wmdesignhouse so we can see your creations!
More about me!

Hello, I’m Wendy – a dedicated homemaker with a deep passion for decorating, gardening, cooking, and crafting. I find joy in harmonizing beautiful elements to fashion a space that is both comfortable and inspiring. I will help you create a beautiful home, one project at a time.


Those are cute.
Thank you very much.
Wendy, these are adorable. I purchased the same wood mushrooms a few weeks ago to make my own mushrooms! Have a wonderful evening.
Thank you, Elizabeth. Have you made yours yet? I can’t wait to see them.
Wendy,
These are just so cute. I love them.
Thank you Rachel. I hope you are doing well. Such a busy time of the year. XO