NEW- How to Make Air Dry Clay Ornaments: Easy DIY Christmas Craft
Learn how to make beautiful air dry clay Christmas ornaments at home with this quick and easy DIY tutorial — no baking required!

On my blog WM Design House, I may sometimes use affiliate links, which means a small commission is earned if you purchase via the link. The price will be the same whether you use the affiliate link or go directly to the vendor’s website using a non-affiliate link.
Have you ever worked with air dry clay before? Honestly, I used to be intimidated by it, but I’ve grown to love it.
If you haven’t tried working with air dry clay before, it’s a simple and versatile material that hardens naturally as it’s exposed to air. No oven or kiln needed!
They’re simple to make, look beautiful on a Christmas tree, and add that handmade touch that makes holiday decorating feel extra special.

So grab some clay and follow along as I show you how to make these adorable clay ornaments at home for your own tree this year.
Why You’ll Love This Project
Beginner-friendly – Air dry clay is simple to work with and doesn’t need baking or special tools! Perfect for any level of crafter.
Budget-conscious – A block of clay goes a long way, making this an affordable way to fill your Christmas tree with beautiful handmade ornaments.
Family-friendly – This is a wonderful craft to do with kids or grandkids. I can already picture how much fun it would be to sit around the table with my granddaughters, creating something special together.
Supplies Needed to Make DIY Air Dry Clay Ornaments
Most of these supplies are easy to find at your local craft store, but I’ve also linked them below to save you a little time.

- Air dry clay
- Cookie cutters
- Wood cookie molds
- Corn starch
- Wax paper or parchment paper
- Cookie sheet
- Drinking straw or chopsticks
- Rolling pin
- Ribbon or twine
- Paintbrush
- Small knife
- Acrylic paint (Optional, and only need if you want to paint your ornaments)
- Mod Podge (Optional if you want to decoupage or seal your ornaments)
- Dark Wax (Optional if you want to give your ornaments an aged look)
Tip from wendy’s craft room:
I’ve tried both Crayola and DAS air dry clay. I love the color of the Crayola clay, but DAS is a little easier to roll out and shape. Either one works beautifully, so choose the color and texture you like best!
Step-by-Step Tutorial: How to Make Air Dry Clay Ornaments
There are several ways to make air dry clay ornaments. While the most common method uses traditional cookie cutters, I’ve also enjoyed experimenting with wood and silicone molds.
The molds create such beautiful texture and intricate detail, though I still love the simple charm of a cookie cutter, especially my pinecone-shaped one.
Follow this easy tutorial and have fun trying different techniques to see what works best for you.
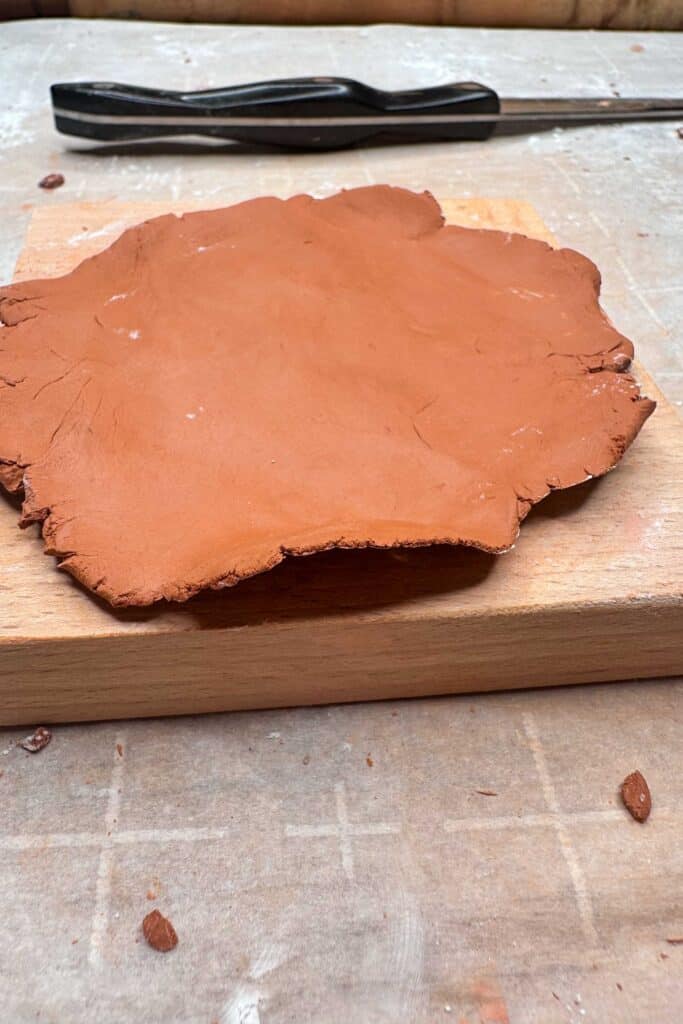
Step 1: Roll Out Your Clay
First, cover your cutting board or work area with parchment or wax paper to keep the clay from sticking.
Next, cut off a small piece and roll it to about ¼ inch thick.


If you’re using a wooden cookie mold, lightly dust it with cornstarch. I like to leave a little extra in the mold for a soft, aged look on the ornaments.
Step 2: Press and Shape Your Clay
If you’re using a mold, press the clay in firmly so it fills all the details. For cookie cutters, roll the clay flat and cut out your shapes just like you would with cookie dough.

Either method works beautifully. Just be sure the surface is smooth and even. You can also roll the clay lightly over the top of the mold to create a smooth back on your ornament.
Tip from wendy’s craft room:
For best results, remove the clay from the mold while there’s still a little edge around it. It will release more easily and keep the shape of your ornament intact.


Step 3: Remove Your Clay and Trim the Excess
Next, carefully remove your clay ornament from your wood cookie press (or cookie cutter).
Once you have removed the clay, you can trim the excess clay off with a small paring knife. Be sure to make quick and clean cuts!
Tip from wendy’s craft room:
If you notice any uneven spots, dip your fingertip in a little water and gently smooth the edges and surface. This small step gives your air dry clay ornaments a clean, finished look once they’re dry.
Step 4: Create the Hanging Hole
Use a straw, chopstick, or the end of a paintbrush to make a small hole near the top of each ornament. Make sure it’s large enough for ribbon or twine to fit through once the clay is dry.


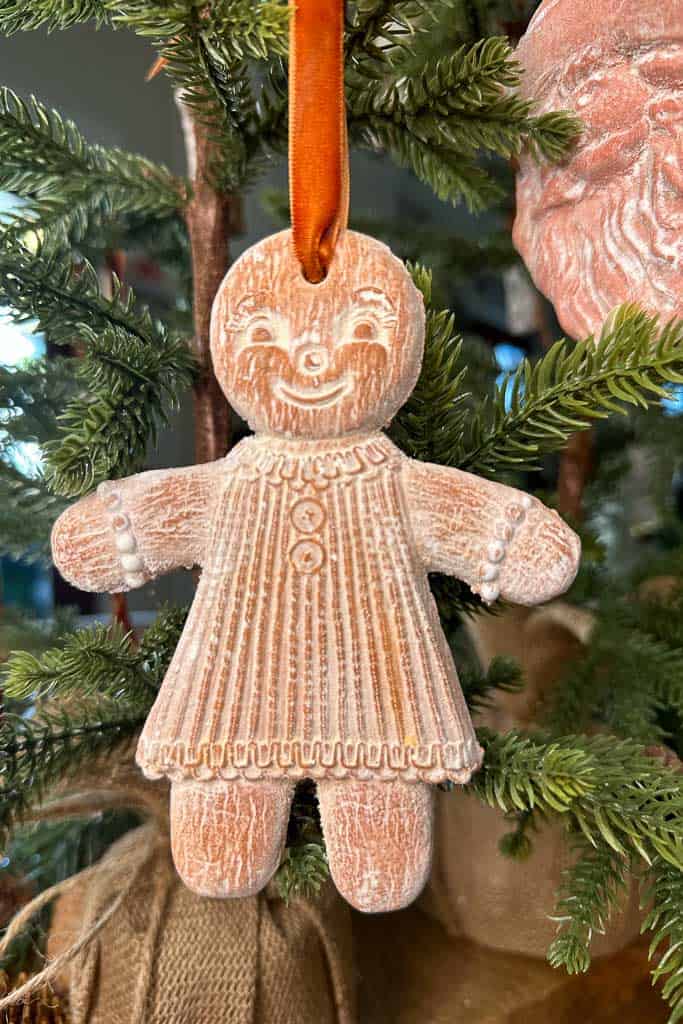
Then use a dry paintbrush to dust the surface of each ornament with cornstarch. Add a little more or less depending on whether you want a soft matte finish or a cleaner, more polished look.
Drying Your Homemade Christmas Ornaments
Allow your air dry clay Christmas decorations to cure for several days. Either leave them on a flat surface like your kitchen counter or somewhere in the house where they are out of your way.
Keep them out of direct sunlight and away from heat to prevent cracking.
Once they’re completely dry, you can gently buff them with a dry paper towel or soft cloth to remove some of the cornstarch and create a more finished look.

Tip from wendy’s craft room:
DIY air dry clay Christmas ornaments can take a few days to harden completely, depending on thickness and humidity. Be patient and resist the urge to speed things. Slow drying helps prevent cracks and keeps your ornaments looking smooth and beautiful.
Tips for Decorating Air Dry Clay Ornaments
One of the best parts about making these easy clay ornaments is how simple they are to personalize. You can keep them simple and natural or add a little creative flair to match your holiday style.
Here are a few ideas to try:
Decorating Tips for DIY Clay Ornaments
- Paint Them: Use acrylic or tempera paint for a pop of color or soft pastels for a Scandinavian look. Metallics like gold or silver add a festive touch.
- Add Texture: Experiment with various textures by pressing objects onto the clay before it dries. You can use stamps, lace, fabric, or even leaves to create interesting imprints on the surface of the ornaments.
- Try Decoupage: Decorate the surface of the ornaments using decoupage techniques. Cut out decorative paper or napkins and adhere them to the clay with Mod Podge.
- Carve or Etch Them: Use sculpting tools or toothpicks to carve intricate designs or etch patterns into the surface of the clay. This can create stunning details and textures.
- Add Natural Elements: Incorporate natural elements like dried flowers, twigs, or pinecones into your clay ornaments. Press them gently onto the surface or embed them while the clay is wet.
- Personalize Them: Write or stamp messages, names, or dates onto the ornaments to personalize them. This could be done with small letter stamps, carving tools, or freehand.
Frequently Asked Questions About How to Make Clay Ornaments for Christmas
How long does air dry clay take to dry?
Drying time can vary depending on the thickness of your ornaments and your home’s humidity, but most air dry clay ornaments are fully hardened within two to three days.
Can I speed up the drying process?
It’s best to let them dry naturally. Using an oven or heat source can cause cracking, so patience pays off for smooth, sturdy ornaments.
What kind of paint works best on air dry clay?
Acrylic paint works beautifully once the clay is completely dry. You can also seal the paint with a light coat of Mod Podge for extra durability.
Do air dry clay ornaments last?
Yes! If you store them carefully in a dry, airtight container, they can last for many years and become special keepsakes.
Can I use cookie cutters instead of molds?
Absolutely. Cookie cutters are an easy way to create clean shapes, and you can add detail by pressing textures or stamps into the surface before drying.

Watch it on YouTube
Watch this quick tutorial for my in-depth details on how to make your own air dry clay gingerbread Christmas ornaments.

How To Style Your Own Air Dry Clay Ornaments
Once your air dry clay ornaments are dry and ready, there are so many fun ways to style them around your home. Here are a few ideas to get you started:

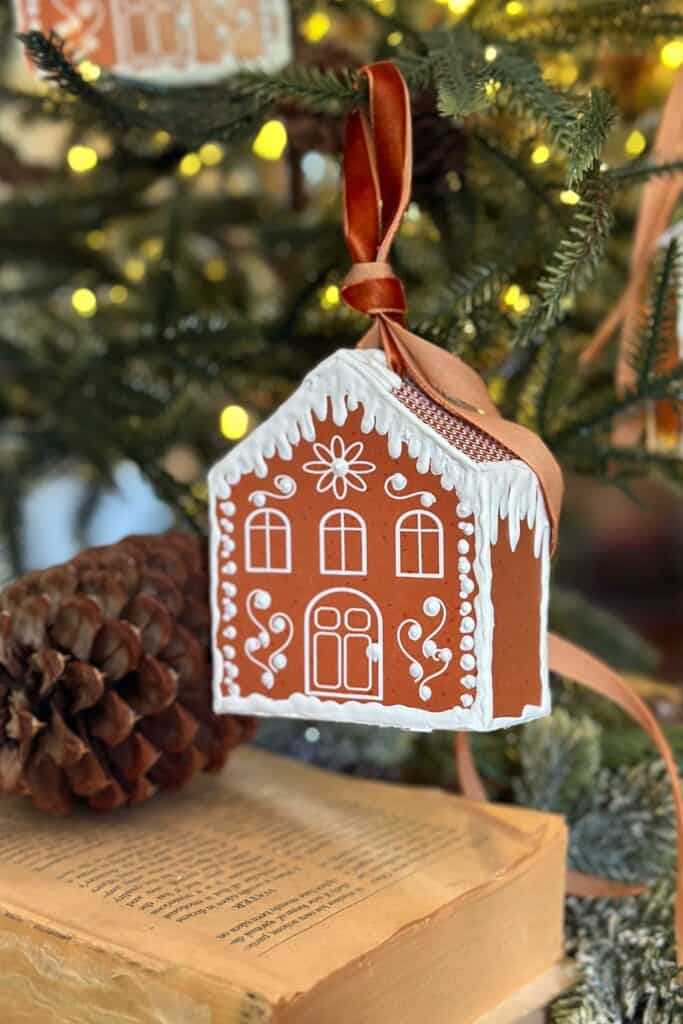
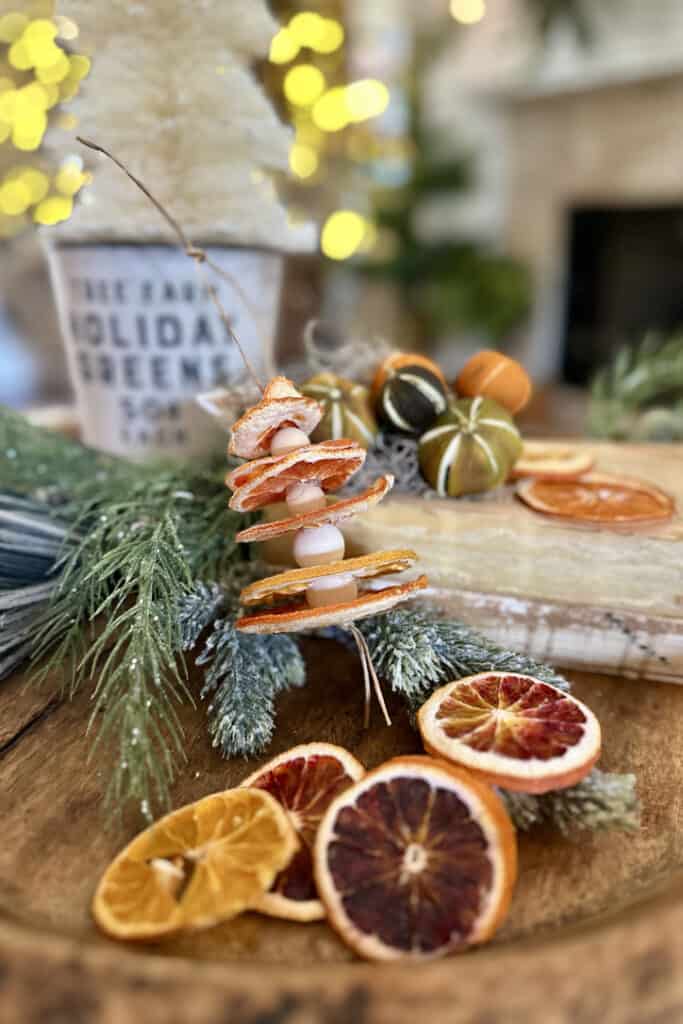
- Christmas tree ornaments: Add a small amount of velvet or satin ribbon and tie them onto the branches of your holiday tree. I added nothing more and love how my tree looks in the kitchen.
- Create a wreath: Arrange ornaments on a wreath frame, securing them with wire or hot glue to create a decorative ornament wreath for your front door or entryway.
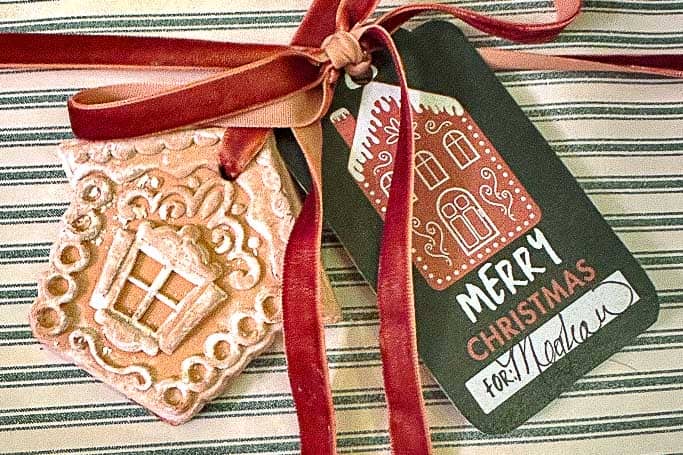
- Use the ornaments as gift tags: Add extra embellishments or accents to the ornament, such as a small bow, a sprig of greenery, or additional ribbons that complement the gift wrapping.
- Party favors: Having a small Christmas dinner party? Use these ornaments as party favors; your guests will love them.
- Place card holders: Tie a small name card to the ornament and lay it on the plate on your table.
- Display them in a decorative bowl – Arrange a few ornaments in a dough bowl or in a decorative holiday bowl and place it on your coffee table for a simple, festive accent.
Caring for and Preserving Your Air Dry Clay Ornaments
Once the holiday season is over, store your ornaments in an airtight container to protect them from breakage. I like to wrap each one in tissue paper or bubble wrap and keep them in a cool, dry place.
With a little care, your handmade air dry clay ornaments will stay beautiful for years to come and can become a treasured part of your holiday decor.
More Christmas Inspiration
If you loved making these DIY clay ornaments, you might enjoy a few of my other favorite holiday crafts and festive ideas, too. There’s plenty of inspiration to keep the Christmas creativity going.

Bringing It All Together: How to Make Handmade Air Dry Clay Ornaments
Creating your own air dry clay ornaments is such a rewarding holiday project. With just a few simple supplies, you can make something beautiful, personal, and lasting.
Whether you hang them on your Christmas tree, tie them to gifts, or display them around your home, these little handmade touches add so much warmth to the season.
I hope this post inspires you to give air dry clay ornaments a try this year. They’re simple to make, fun to personalize, and sure to become a favorite part of your holiday decorating traditions.
Happy crafting,

Printable Instructions Card for Air Dry Clay Christmas Ornaments

How To Make Air Dry Clay Ornaments
Equipment
- Paintbrush
- Small knife
- Rolling Pin
- Cookie Sheet
Materials
- Air dry clay
- Cookie cutters or wood cookie molds
- Corn starch
- Wax paper or parchment paper
- Drinking straw or chopstick to create a small hole in the top of the ornament
- Mod Podge optional if you want to decoupage or seal your ornaments
- Ribbon or twine to create an ornament hanger
- acrylic paint if you want to paint them optional if you want to paint your ornaments
- Dark Wax If you want to wax them and give them a darker look like the pinecone
Instructions
- Cover your cutting board with wax or parchment paper.
- Cut a small piece of clay from the block and roll it to about 1/4" thick.
- Brush the wooden cookie press with cornstarch and press the clay into the mold until you feel you have filled all of the space.
- Use a rolling pin to gently roll over the back of the mold. This flattens the clay slightly and gives the back of your ornament a nice, smooth finish.
- Remove the clay from the mold while there is still an edge on it. This way, it comes out of the mold easily and does not damage the shape of the new ornaments.
- Once you have removed the clay, trim the excess off with a small paring knife. Be sure to make quick and clean cuts.
- If you have rough edges, you can smooth them with your finger and a small amount of water.
- Create a hole at the top of the ornament with a drinking straw, chopstick, or the end of a paintbrush.
- Use a dry paintbrush, and you can brush the surfaces of the ornaments with more or less cornstarch to give your ornaments an aged look.
- Allow the handmade clay ornaments to dry for several days on a flat surface. Keep them away from windows and the stove to prevent cracking.
- Once completely dry, buff them with a dry paper towel to remove some cornstarch and create a more finished look.
- Add ribbon or twine to hang.
Did you make this craft?
We would love to see what you have created, so mention us @wmdesignhouse or tag us using #wmdesignhouse so we can see your creations!


More about me!

Hello, I’m Wendy – a dedicated homemaker with a deep passion for decorating, gardening, cooking, and crafting. I find joy in harmonizing beautiful elements to fashion a space that is both comfortable and inspiring. I will help you create a beautiful home, one project at a time.


Where can we find that amazing gingerbread cookie mold? It’s gorgeous!!
Hi there, if you are referring to the gingerbread man, here is the link for the mould. https://rstyle.me/+PFazI6GE2K3-YpnRZNxuDg
Your tutorial was very well done and your ornaments were adorable! I would like to try this–for NEXT Christmas!!!
Thank you so much Kathy. They are really fun and easy to make. Merry Christmas.
These are adorable, and your tutorial is great, Wendy! Pinned, and I’m delighted to be featuring your post at Tuesday Turn About this week.
Thank you so much Julie! I am honored to be featured.
Wendy you continue to amaze me. These are so darling. I love this project and the cute frosty look! Such a great DIY.
Thank you Susan!
Wendy these diy clay gingerbread are so adorable. A great project and such a fun look. I am happy to feature your darling diy air dry clay ornaments at Love Your Creativity. Happy holidays.
Thank you so much, Linda; I appreciate the feature so much.
These are beautiful and so realistic looking! Hope you are feeling better.
Your amazing cookie molds yielded AMAZING ornaments! They look so charming on your tree!
Thank you Missy!
The cornstarch makes all the difference, they look like they are antiques. I love them Wendy! Maybe I will can try this one next year, I love each and every one of them, perfection! You always come up with the best ideas. I am saving this one to my list to try!
Hi Cara, thank you so much. You would enjoy making these, they are super easy, just a bit messy. I loved the cornstarch, I agree
it really gave them a special look. Happy holidays.
You outdid yourself!!! These are absolutely adorable and I love all your decorating suggestions.
Thank you, Diane. They were very fun to make. XO
I’m obsessed with your gingerbread ornaments Wendy! They are absolutely adorable and I love the details! Pinned!
Oh my goodness! Those are absolutely adorable! So cute!
Thank you, Susan! I hope you are surviving the holiday season well.
Wow, Wendy! These are ADORABLE!! I love the white almost frosty look of them from the cornstarch. Such an amazing way to create DIY decor for the season!! Pinned!
Thank you so much, Rachel. They were so fun to make, and I agree. I, too, love the cornstarch on them.