How to Make a Foraged Fall Wreath with Natural Materials
Discover the art of crafting a delightful foraged fall wreath using natural materials that cost under $15.00!
Fall is my favorite time of the year, and I daydream about hanging a beautiful wreath on my front door for the season.
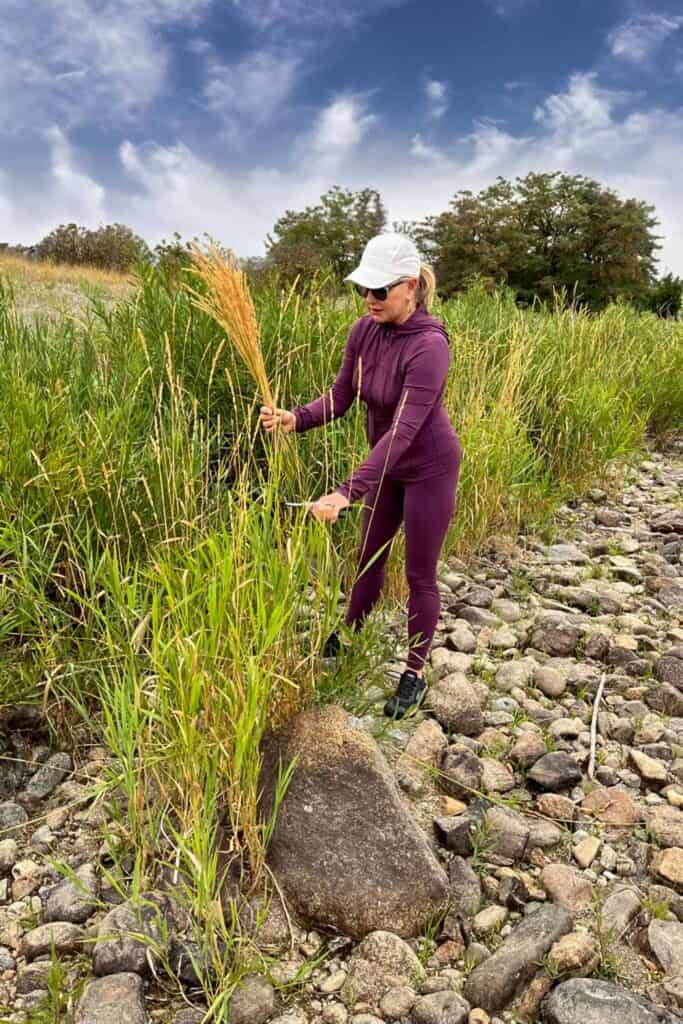
Come along on my foraging adventures as I head into the great outdoors.
If you’ve been following me for a while, you know my passion for foraging.
It’s nearly impossible for me to take a stroll without returning home with a new found treasure. And I never leave home without scissors or clippers in tow.
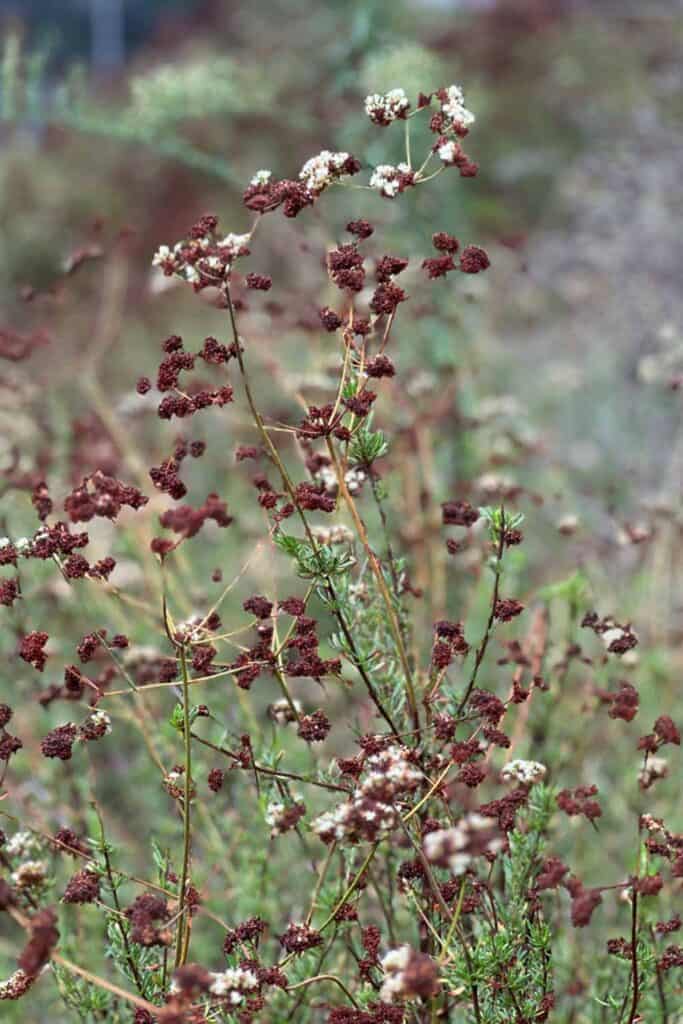
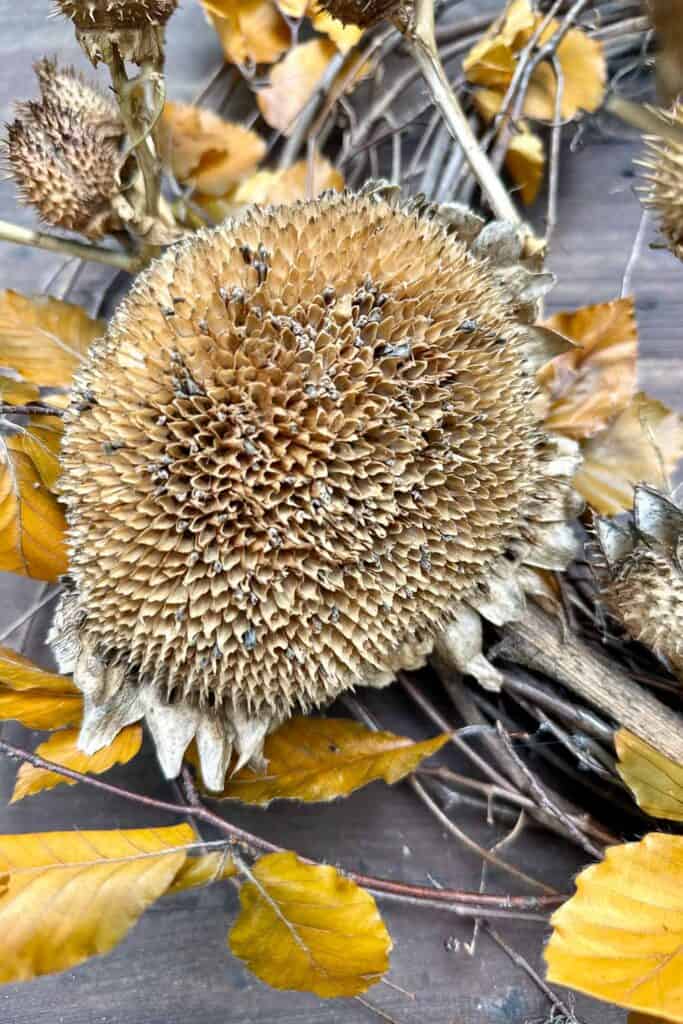
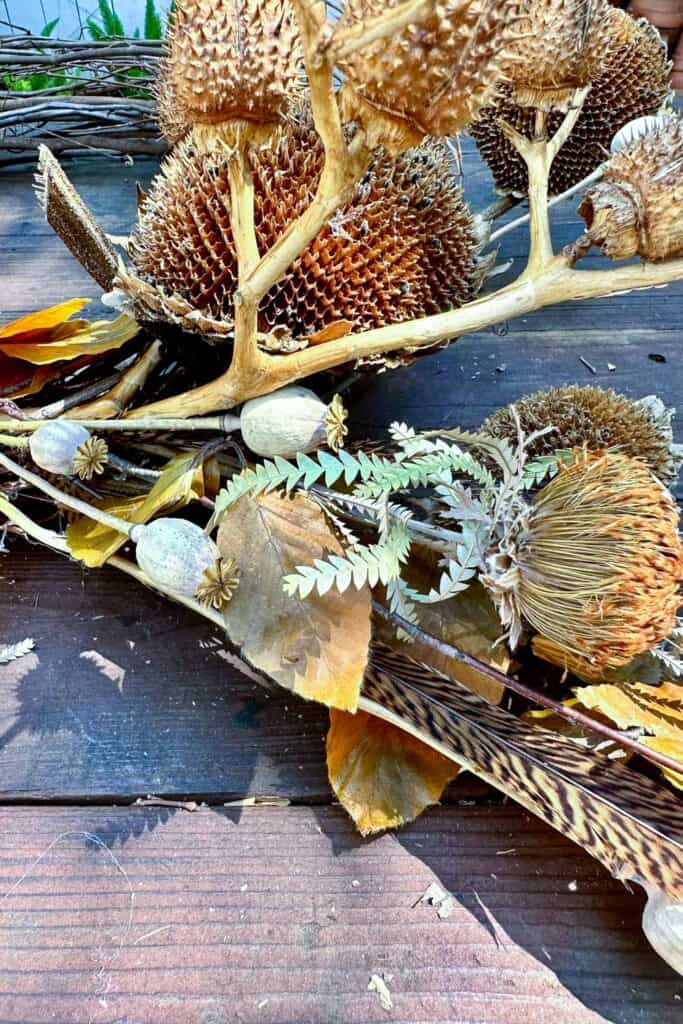
There’s an undeniable beauty in the branches, pods, pinecones, rose hips, and leaves that Mother Nature offers, particularly during the fall season.
These natural elements are ideal for crafting an exquisite fall front door wreath.
On my blog WM Design House, I may sometimes use affiliate links, which means a small commission is earned if you purchase via the link. The price will be the same whether you use the affiliate link or go directly to the vendor’s website using a non-affiliate link.
Why use natural foraged materials
Integrating foraged items into your fall wreath captures the season’s essence and shows sustainability, resulting in a stunning decoration . Every foraged arrangement I create has a unique story; my friends and family often delight in these captivating and sometimes whimsical tales.
Here are a few benefits of making a foraged wreath.
- Eco-Friendly: Foraging minimizes the environmental impact since you’re not relying on commercially produced or artificial materials. It promotes sustainability by reducing the need for you to purchase goods.
- Cost-Effective: Foraged items are usually free or come at a minimal cost, making it an affordable way to decorate your home for fall.
- Unique and Personal: No two wreaths will be identical, allowing you to express your creativity.
- Connection to Nature: Foraging encourages a deeper connection with nature. It offers an opportunity to appreciate and engage with the environment, fostering a sense of mindfulness and gratitude.
- Seasonal Aesthetics: The colors and textures of the leaves, twigs, and seed pods reflect the season’s beauty.
- Longevity: Many natural materials used in fall wreaths, when properly prepared and maintained, can last throughout the season and even longer, ensuring that your wreath remains beautiful for months or years.

What are the best foraged materials?
While out foraging, you’ll encounter numerous exquisite and rustic treasures, and my advice is to pick up whatever you love and think will work for your project. Here are a few of my favorites.
Keep in mind that this list may vary depending on your geographical location. I live in Southern California and this is what I typically find on my foraging trips.
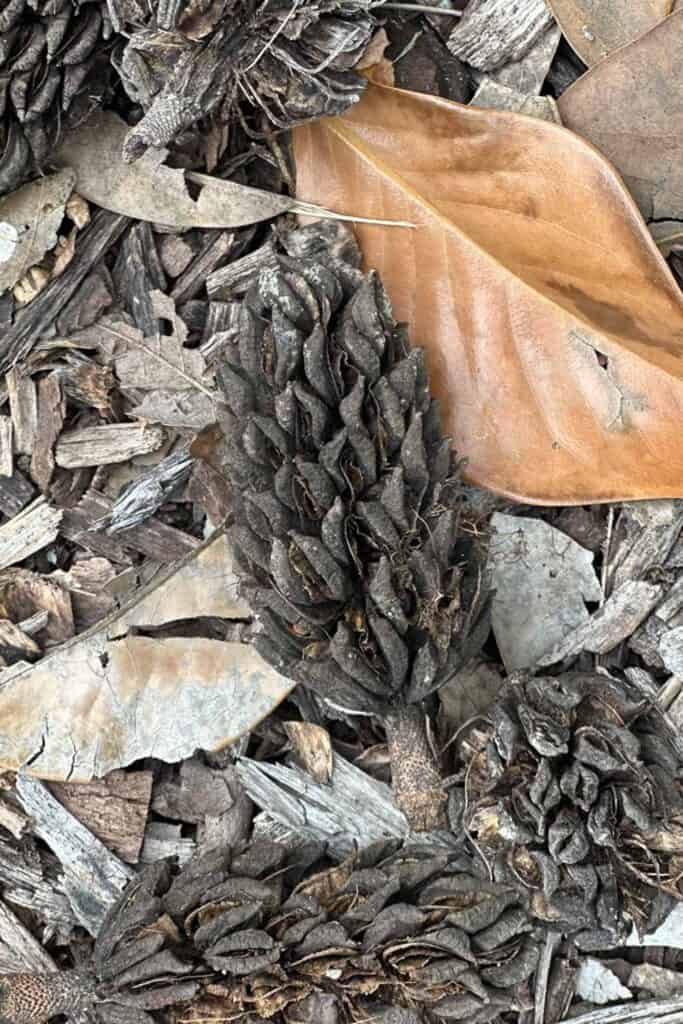
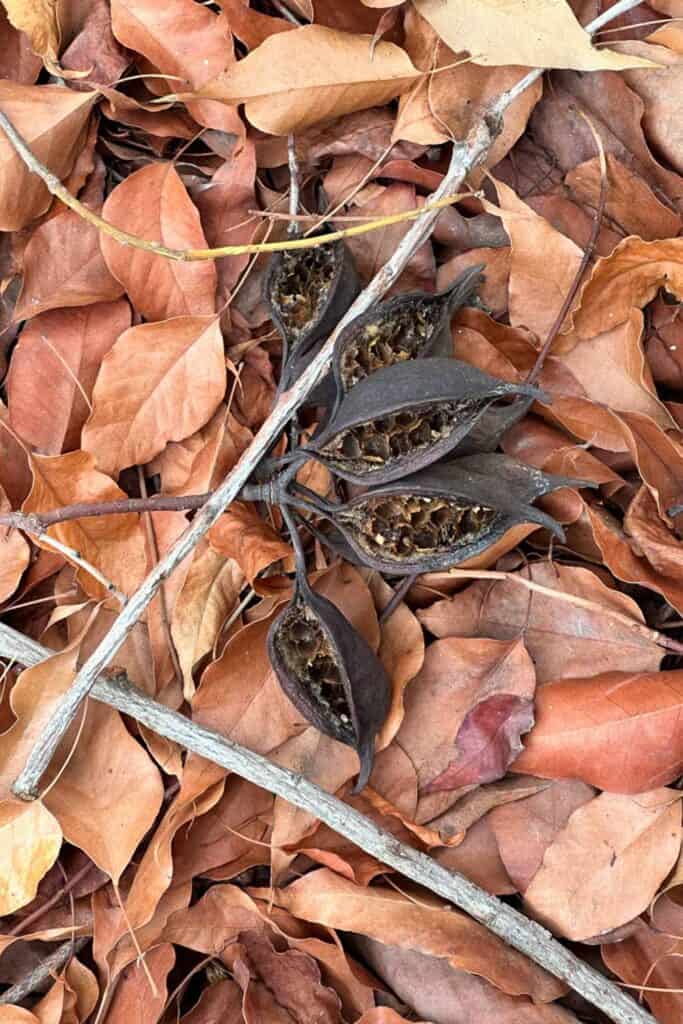
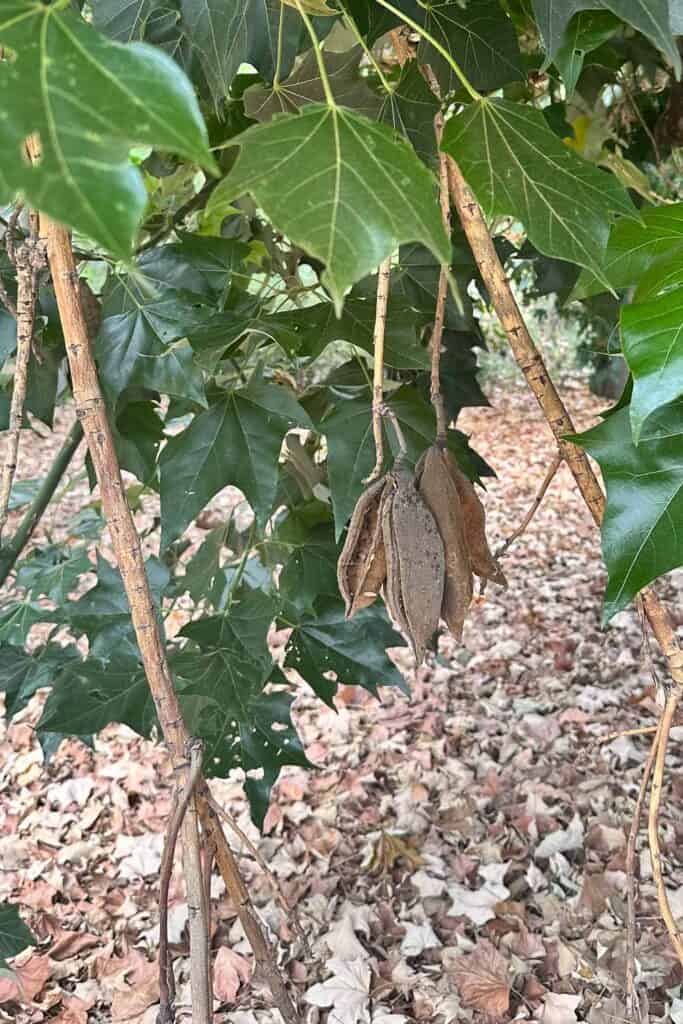
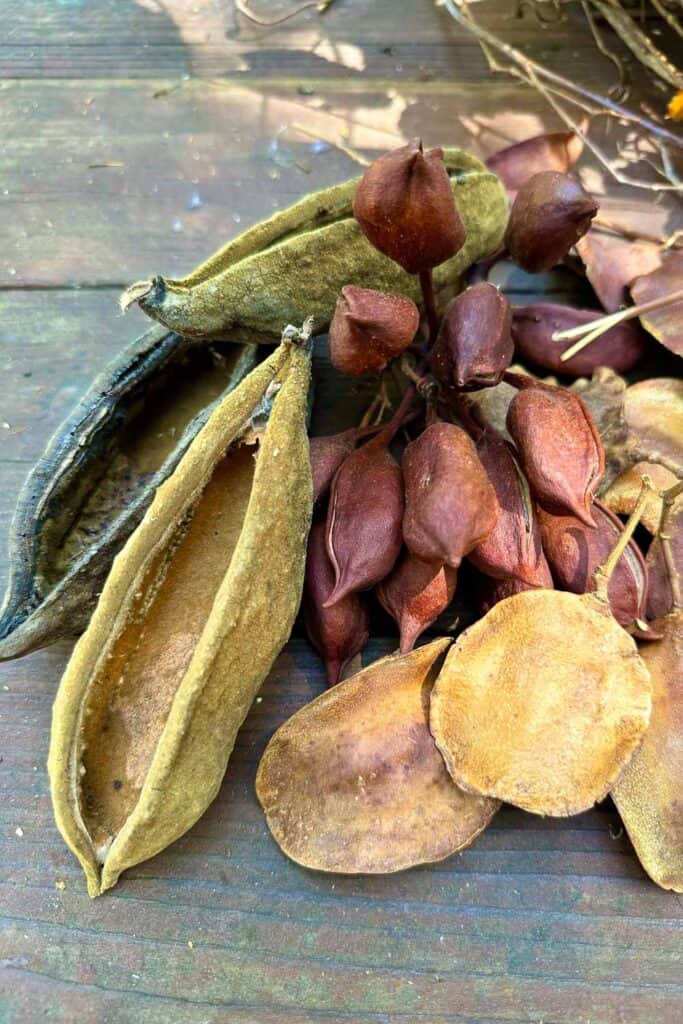
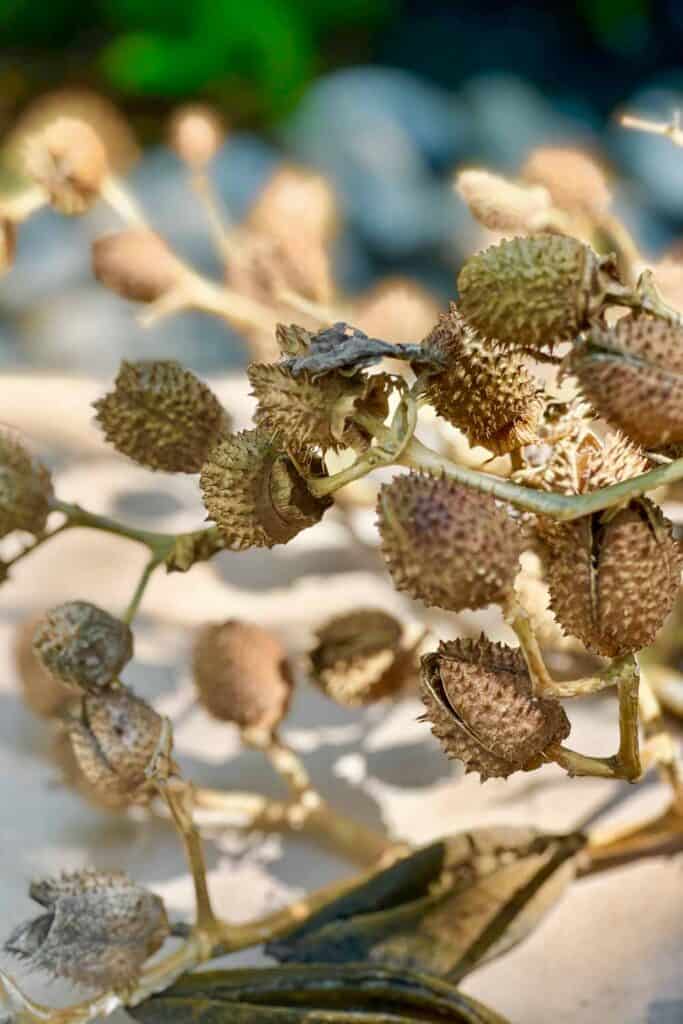
Seed Pods
- Jacaranda seed pods
- Bottle tree pods
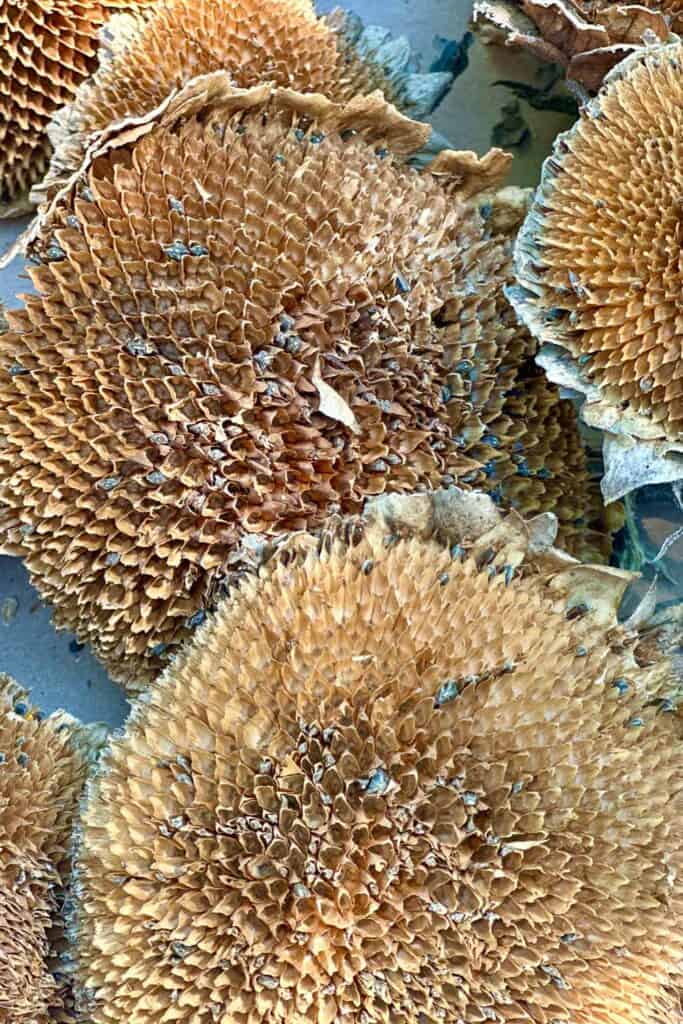
- Magnolia seed heads
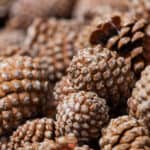
- Pine cones
- Shandong Maple pods
- Honey locust pods
- Sweet gum pods
- Redwood Sequoia mini pinecones
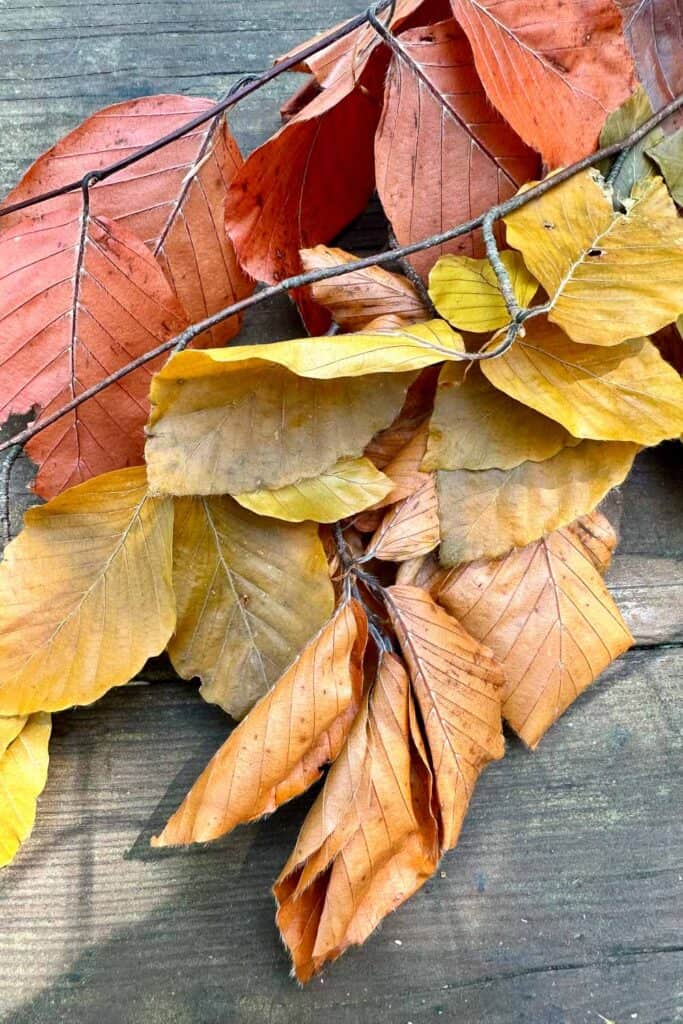
Fall leaves, branches, and grasses
There is so much beautiful foliage this time of year, so you shouldn’t need to struggle to find colors of fall to add to your festive wreaths. Here are a few favorites I like to add to my seasonal decor.
- Pampas grass
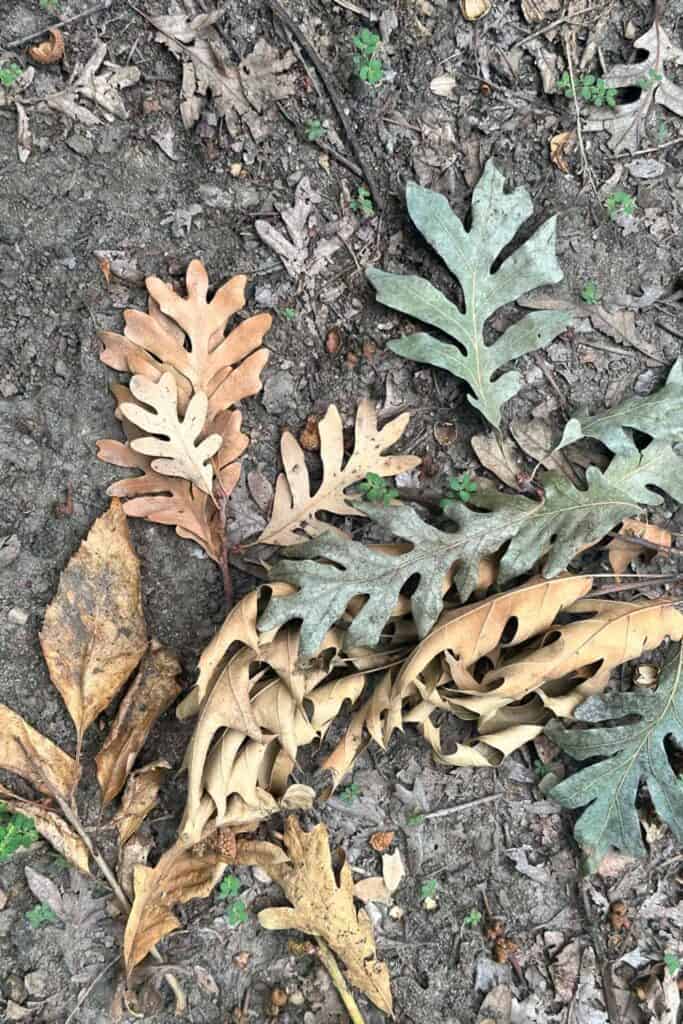
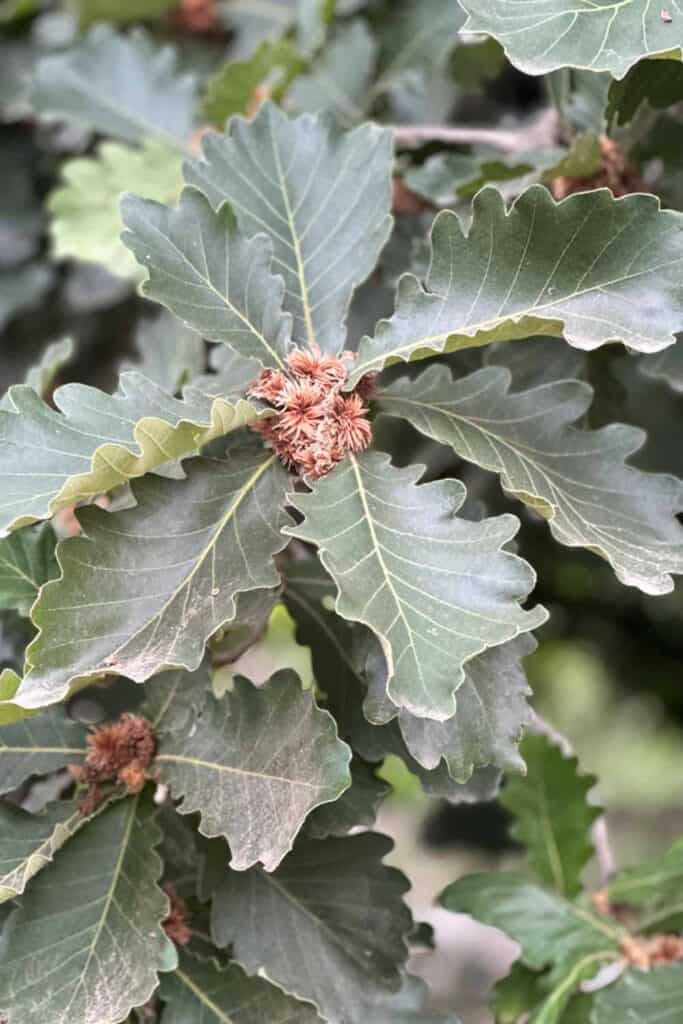
- Oak leaves
- Maple leaves
- Bunny tails
- Corn husks
- Heavenly Bamboo
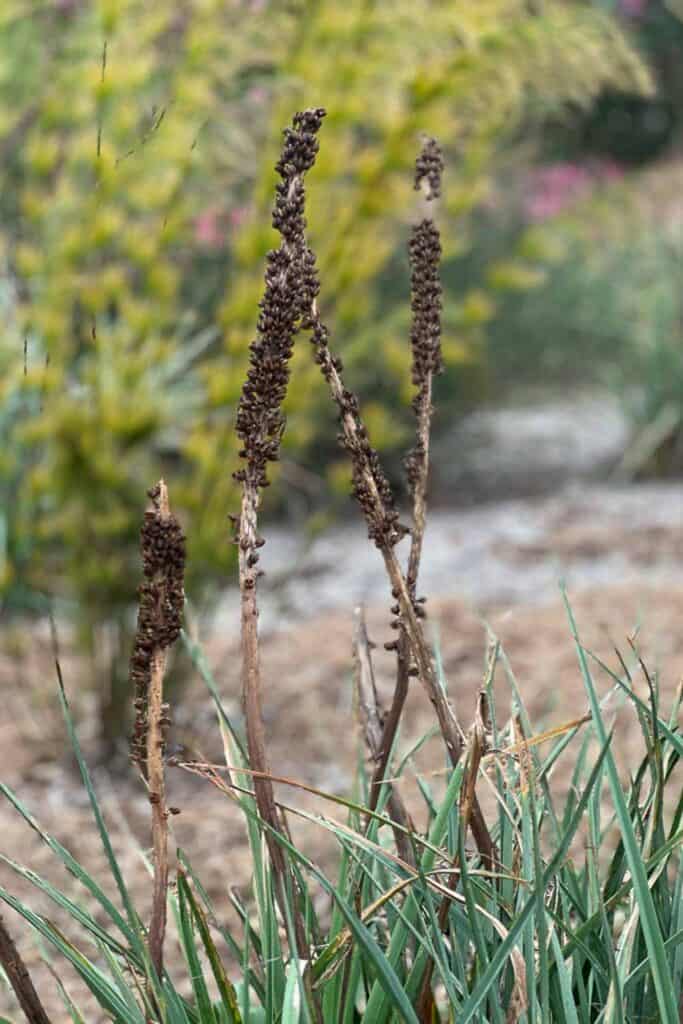
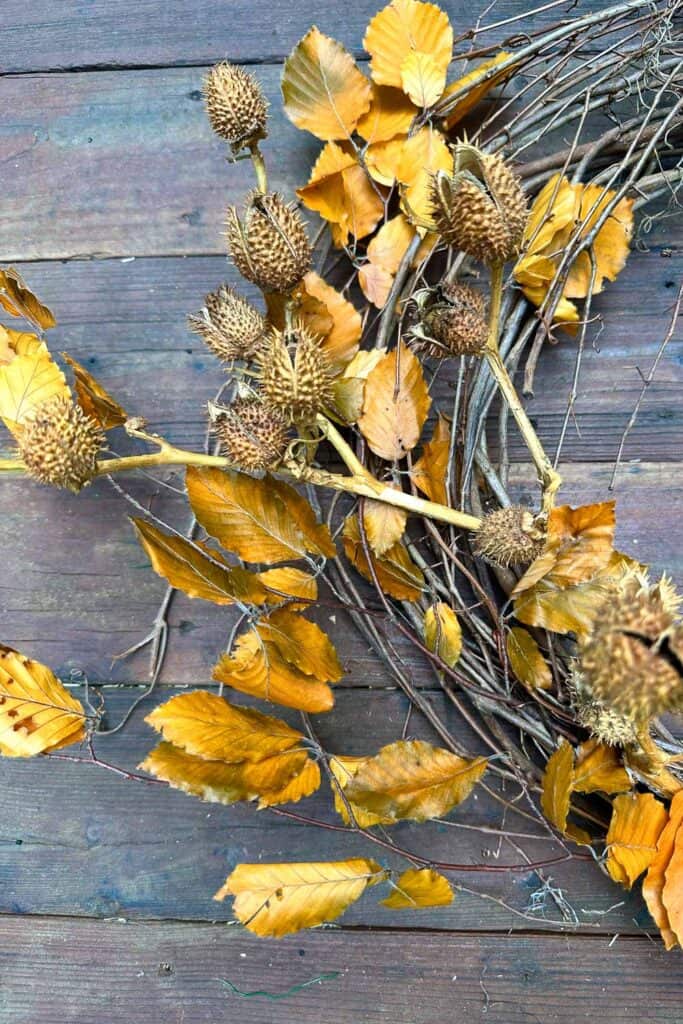
- Thistles
- Sunflowers
- Protea

Additional Items to forage
Foraging goes beyond leaves and branches. You can discover an array of fascinating natural materials to incorporate into your fall wreath. Here’s a brief overview of additional items.
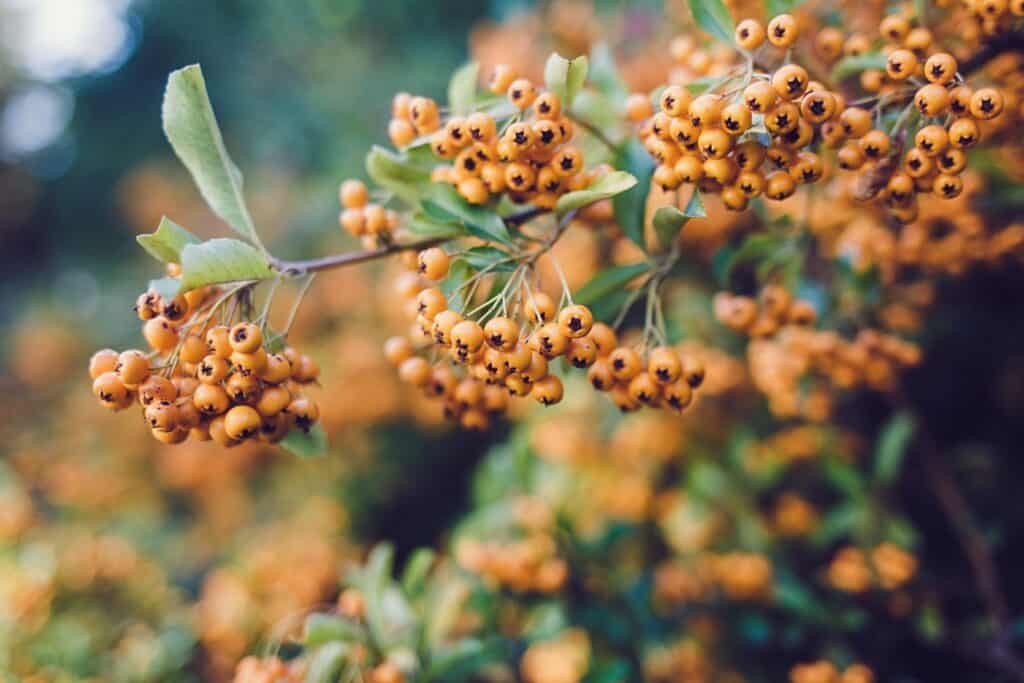
- Berries:
- Berries come in various shapes, sizes, and colors, making them excellent for adding pops of color to your wreath.
- Lichen:
- Lichen is a symbiotic organism composed of fungi and algae, often found on rocks, trees, or branches.
- Moss:
- It thrives in damp, shaded areas and is commonly found in forests, on rocks, and in bodies of water.
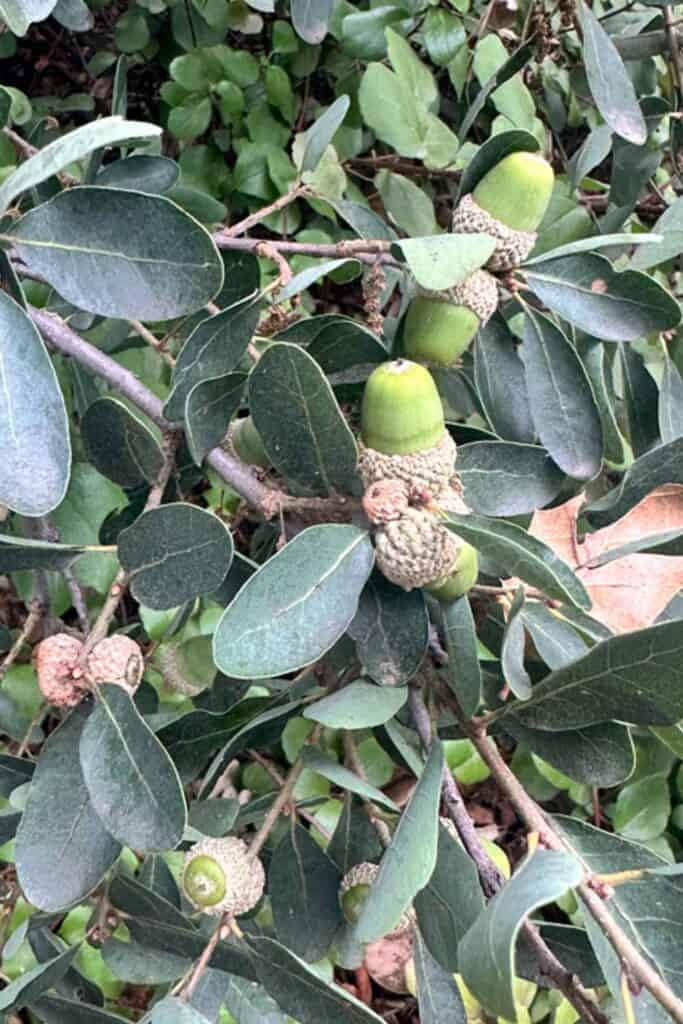
- Acorns:
- Acorns are the small, nut-like fruits of oak trees, typically found in wooded areas.
- They can be painted, gilded, or used as-is to add a touch of rustic charm to your wreath.
Remember to practice ethical foraging, ensuring you’re not harming the environment or disturbing wildlife habitats when foraging for these items.
Where are the best places to forage
You don’t need to venture far to begin your foraging journey; you can start right in your own backyard.
The essence of foraging lies in creativity and thinking beyond the ordinary.
Consider experimenting with branches from your yard and observe how they dry over time.
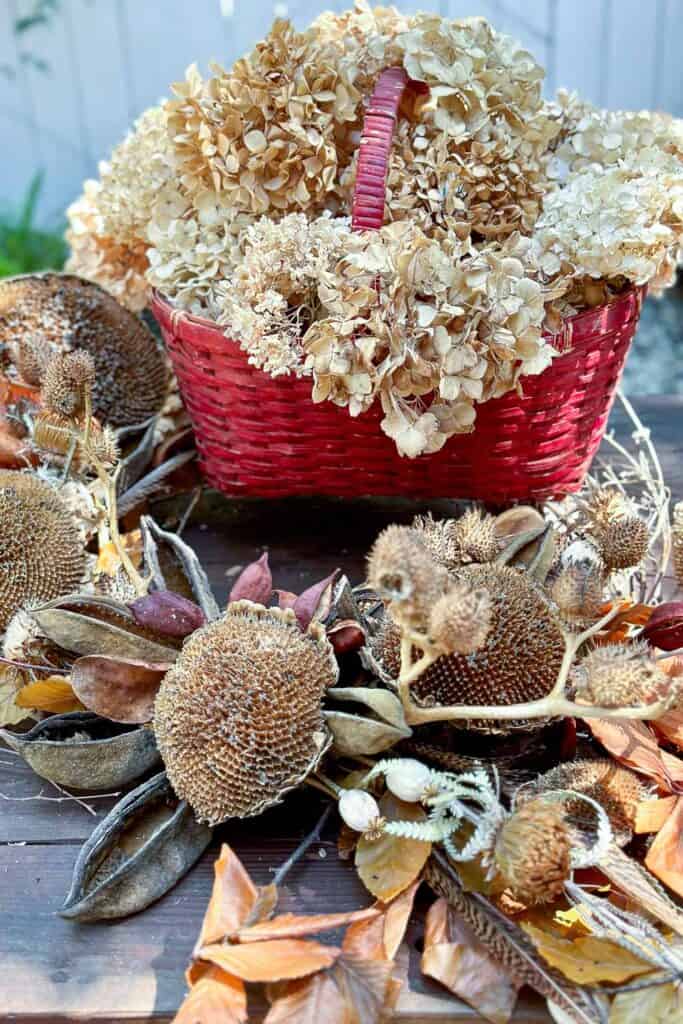
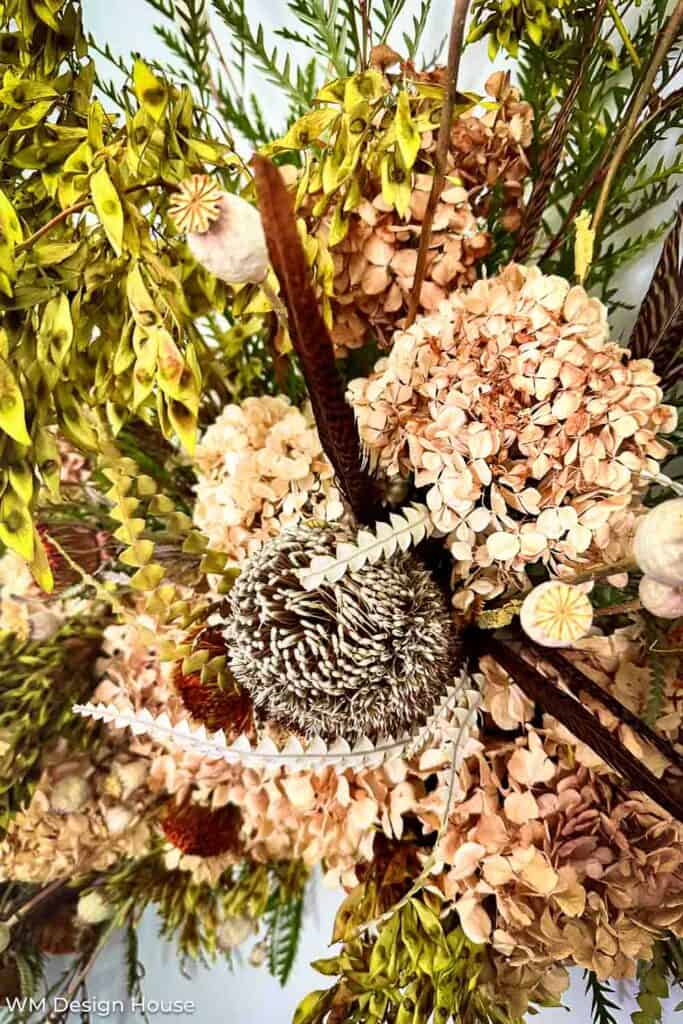
I grow hydrangeas and find them easy to dry. They maintain their color for several months until they turn this yummy brown color, making them a splendid addition to a fall wreath. A few other flowers that dry well are lavender, sunflowers, statice, and strawflowers.

I love to hike and find myself in far-off places that are easy to forage. Here is a short list of a few places to think about foraging. And don’t forget to always carry a bag and clippers with you.
- Forests: Wooded areas, mainly deciduous forests, are prime locations for foraging fall foliage. You can find many leaves, acorns, pinecones, and more.
- Your Own Yard: Like I said earlier, don’t overlook your own backyard or garden.
- Open Fields: Fields and meadows may yield unique grasses, dried flowers, and seed pods perfect for wreath-making.
- Riverbanks and Lakesides: These areas can offer a different perspective, with water plants and reeds that can complement your fall wreath.
- Friend’s or Neighbor’s Properties: With permission, you might find interesting foliage on the properties of friends or neighbors, especially if they have a diverse landscape.
Remember to respect local regulations and private property rights when foraging. Additionally, be mindful of the environment by not over-harvesting and following sustainable foraging practices.
Now that we have covered how and where to forage, let’s make a foraged fall wreath.
Cleaning your foraged finds
Cleaning foraged foliage, pods, and pinecones is essential to prepare them for use in your fall wreath or other craft projects. Here’s the best way to clean these materials:
- Shake and Brush: Begin by gently shaking and brushing off any loose dirt, insects, or debris from the foliage, pods, and pinecones.
- Soak in Water: Fill a large container or sink with lukewarm water. Submerge the foraged materials in the water, ensuring they are fully covered. Allow them to soak for about 15-30 minutes.
- Gently Scrub: After soaking, use a soft brush or toothbrush to scrub the surfaces of the materials gently. Be cautious not to scrub too vigorously, as you don’t want to damage delicate foliage or petals.
- Rinse Thoroughly: Rinse each piece thoroughly under running water to remove any remaining dirt or soap residue. Ensure that all materials are clean and free from contaminants.
- Dry Completely: Lay the cleaned foliage, pods, and pinecones on a clean towel or paper towel to air dry completely. Please make sure they are in a well-ventilated area with good air circulation. Depending on the thickness of the materials, this may take a few hours to a few days.
- Inspect and Trim: Once dry, inspect each piece for any remaining debris or damaged sections. Trim any brown or damaged parts with scissors or pruning shears to ensure your materials are in their best condition for crafting.
- Optional Disinfection:
- Baking pods in the oven can effectively kill pests, especially if you suspect they are infested with insects or their eggs. Here’s a step-by-step guide on how to do it safely.
Disinfecting Pinecones and Pods
Equipment
- 1 Cookie Sheet
- 1 Roll of foil
- 1 Pot holder
Materials
- 12 Pinecones
- 12 Acorns
- Any additional types of pods
Instructions
- * Preheat the Oven: Start by preheating your oven to a temperature between 140°F (60°C) and 180°F (82°C). This range is effective for killing most pests without damaging the pods. It's important not to exceed this temperature range to avoid overcooking the pods.
- * Prepare the Pods: Inspect the pods for any visible signs of infestation. Remove any pods that are severely damaged or show signs of rot or mold. Healthy pods are best for this process.
- * Spread Pods: Lay the pods out in a single layer on a baking sheet. If you're concerned about the pods sticking to the sheet, you can line it with aluminum foil.
- * Bake the Pods: Place the baking sheet in the preheated oven with the pods. Set a timer for 30 minutes to start. The exact time may vary depending on the size and moisture content of the pods.
- * Rotate and Check: After 30 minutes, rotate the baking sheet to ensure even heating. Check the pods for any signs of pests or damage. If you see any pests or suspect some pods might not have been adequately exposed to the heat, you can leave them in the oven for another 30 minutes or as needed.
- * Cool Down: Remove the baking sheet from the oven. Allow the pods to cool down completely before using them or storing them.
- * Store Properly: Store the baked pods in an airtight container to prevent future infestations. Please keep them in a cool, dry place, away from direct sunlight.
- * Remember that the exact time required for baking may vary based on the type and size of the pods, as well as the specific pests you're trying to eliminate. Continuously monitor the process and adjust the baking time if needed. This method is generally adequate for killing most pests but may not be suitable for all types of pods.
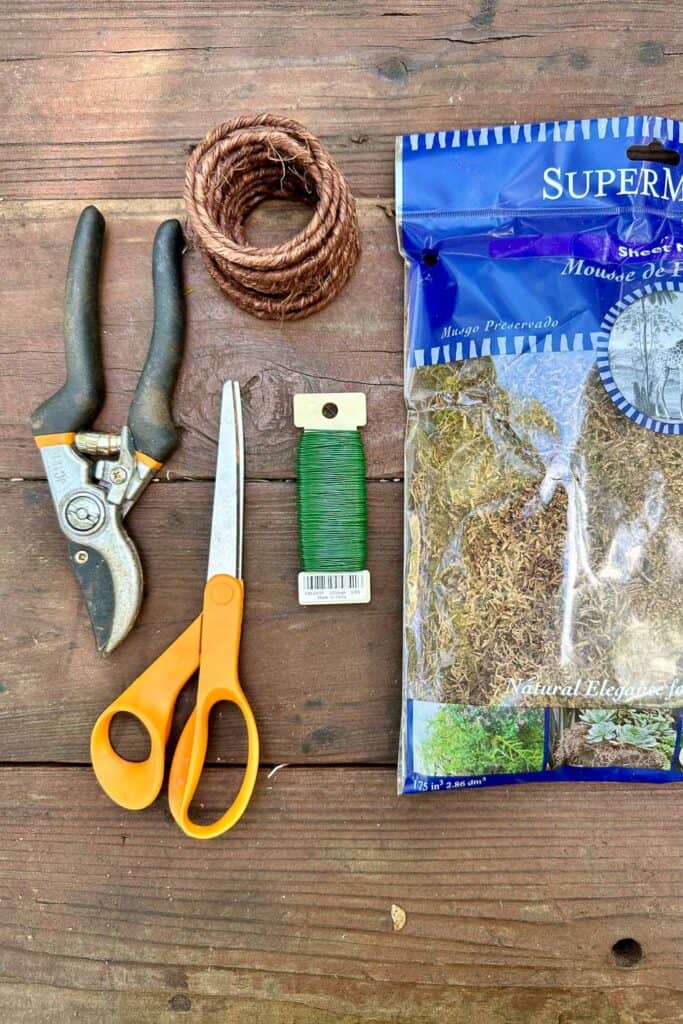
Material needed to make a beautiful fall wreath
You can buy most of these supplies at any craft store if you do not have them at home.
- A grapevine wreath, straw wreath form, or wire wreath form
- Hot glue sticks
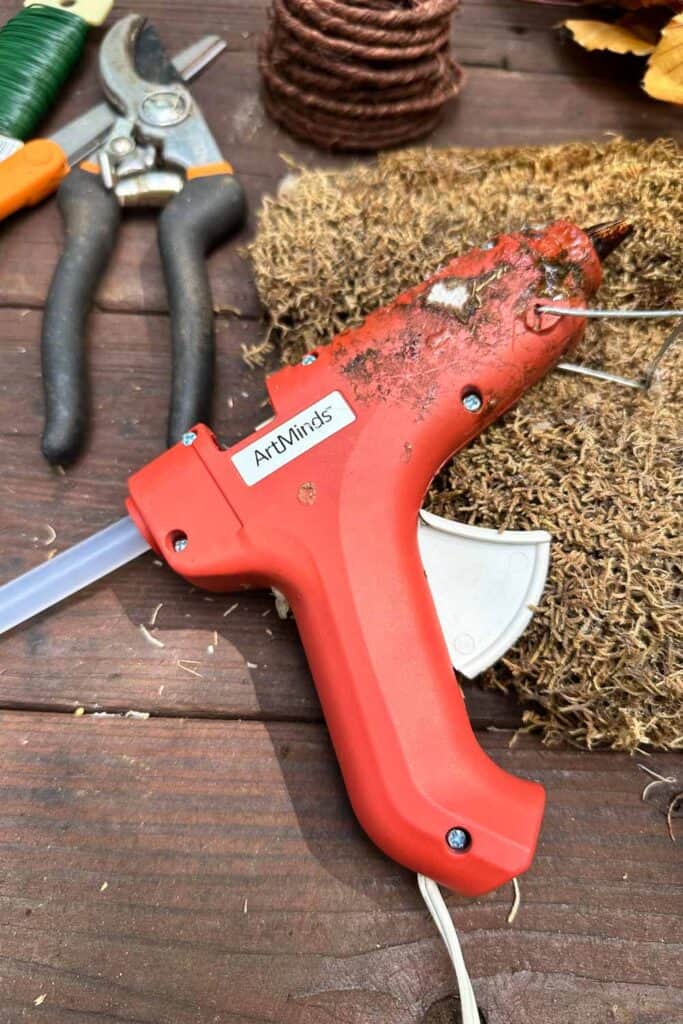
- Glue gun
- Floral wire
- Garden clippers
- Scissors
- Zip ties
- sheet moss
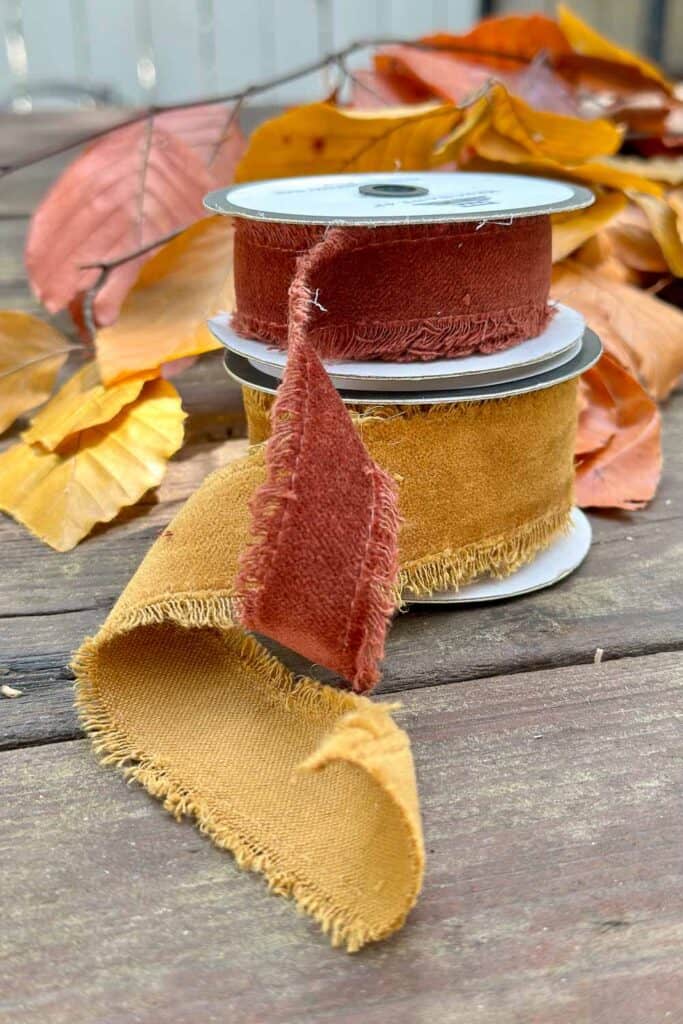
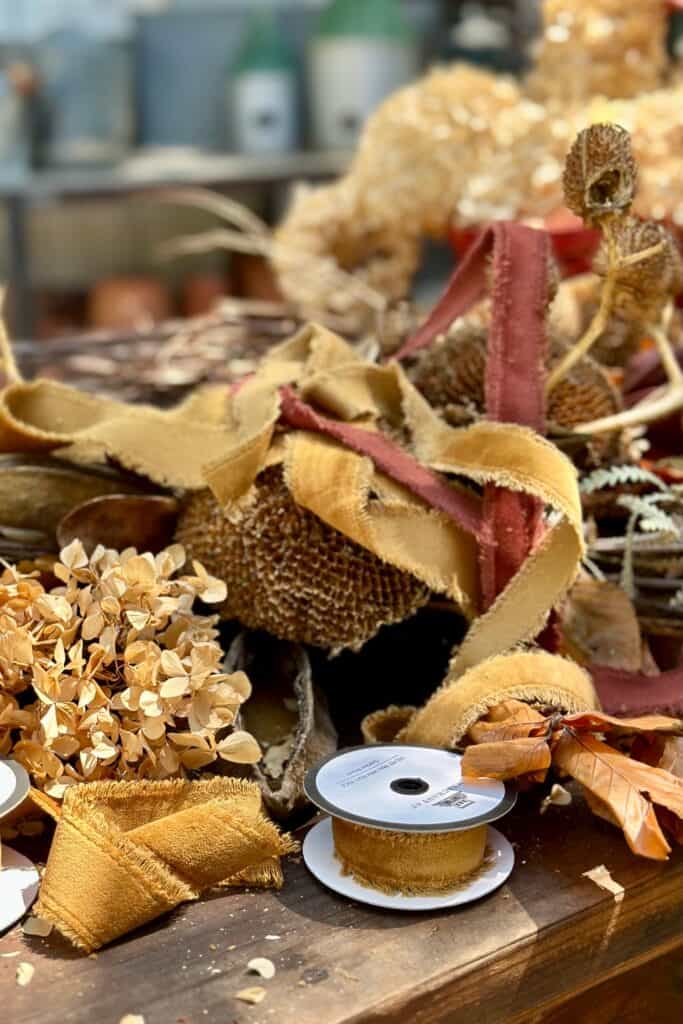
- burlap ribbon or velvet ribbon (optional)
- Foraged foliage, pods, and branches
- One pack of preserved leaves (optional)
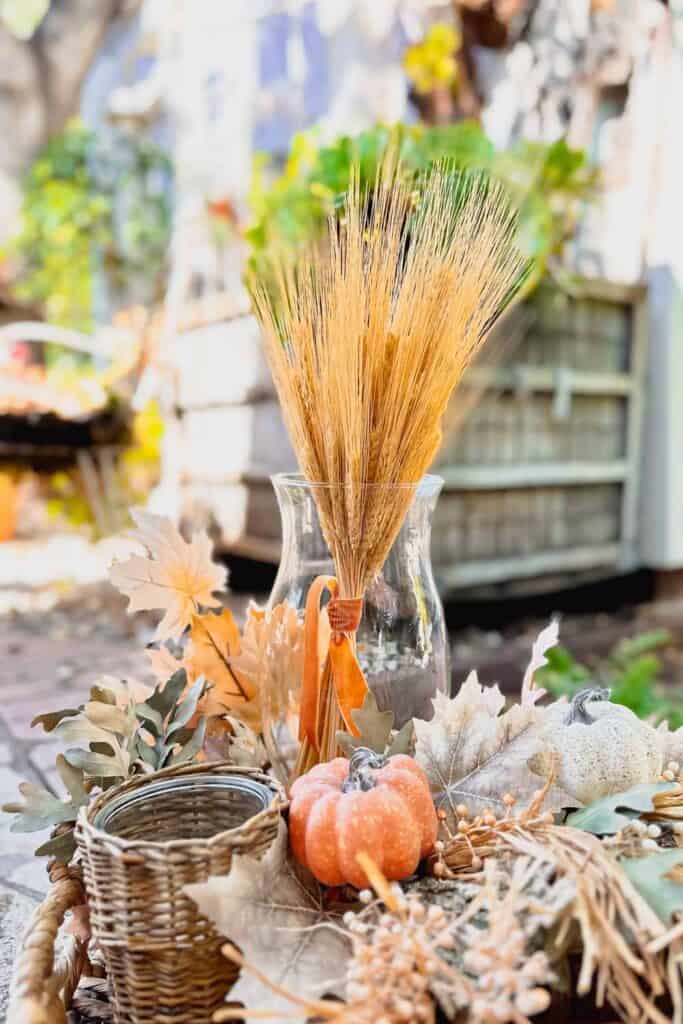
- Mini pumpkins and gourds (optional)
- One can of clear coat varnish in the finish of your choice
- Feathers of your choice
Selecting your wreath base
You have three fundamental choices of a wreath that you can purchase: a grapevine wreath, a straw wreath form, or a wire wreath form.
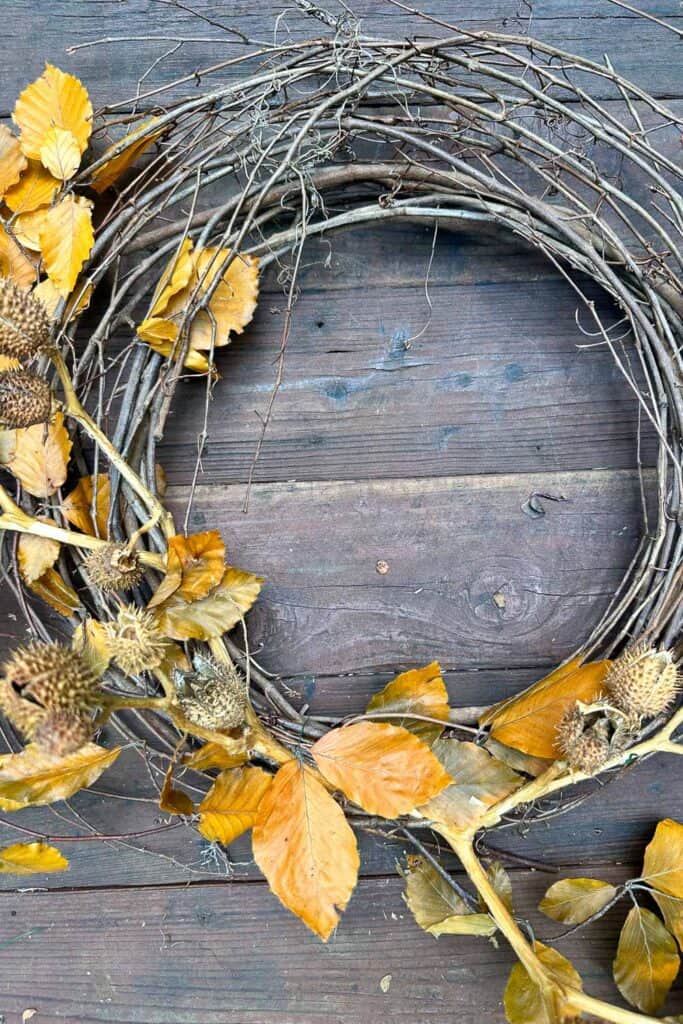
I opted for a grapevine wreath due to its appealing natural appearance.
Since I wanted to leave a part of the wreath visible, its aesthetic was important.
I bought this wreath for $5.00 from Hobby Lobby and removed the binding parts that held the vines together to enhance its natural look.
Alternatively, you can craft your wreath using birch branches or other small vines for a personalized touch.
Directions to assemble your fall wreath
- Spray your branches, wreath, and pods with a clear coat of varnish.
- Using a small floral wire, create a loop on the back of the wreath for a hanger.
- Use the floral wire or zip ties and attach your leaves and long stems of pods (I used thistle pods) onto the wreath frame in your desired position. (I like to create a flow going up on the left and down on the right for balance).
- Afterward, I incorporate the largest flowers into the arrangement. For securing the sunflowers, floral wire is most effective; for added stability, a touch of hot glue works wonders.
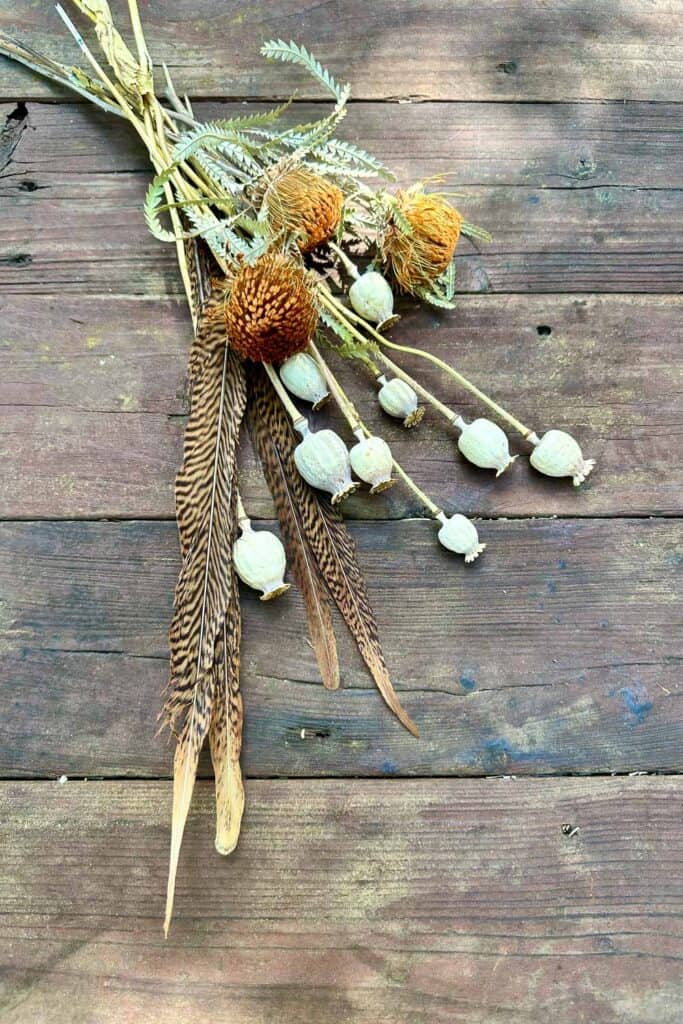
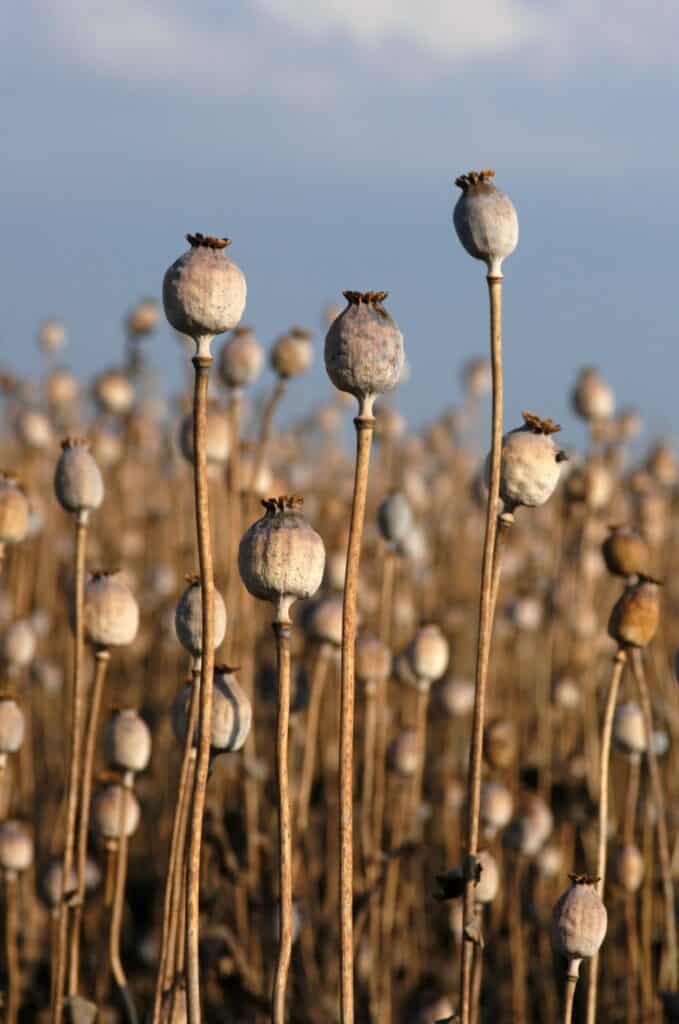
- Using a hot glue gun, I added a few feathers, poppy pods, and dried protea flowers from my garden.
- Next, add some large pods to create a base in the center of the bottom of the wreath using hot glue and or florist wire.
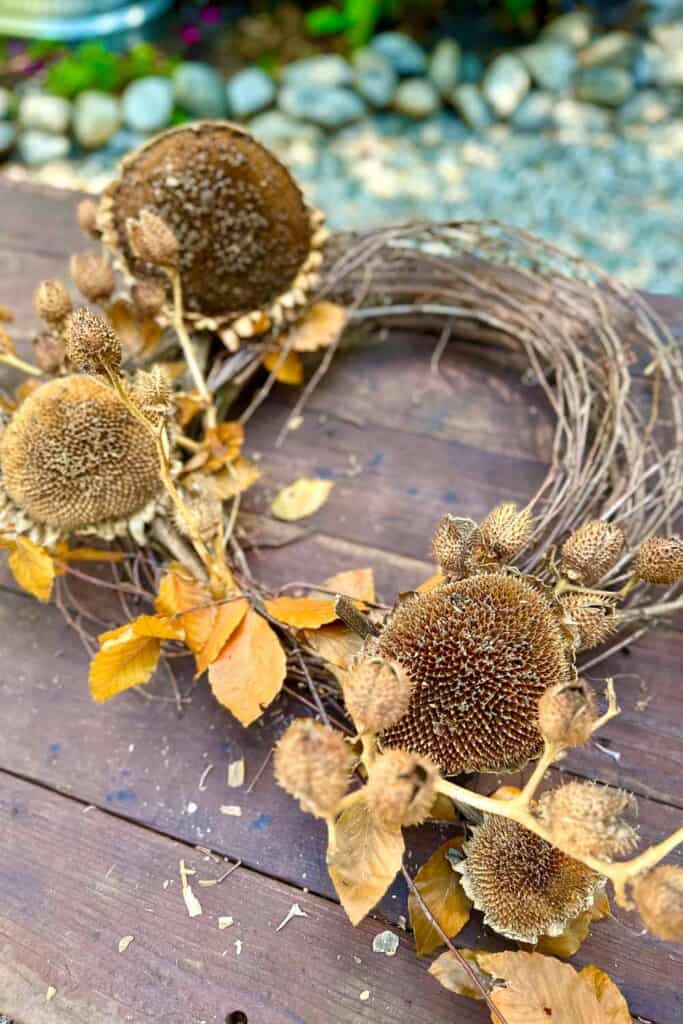
- Add one large flower to the bottom of the wreath on top of the pods.
- Add additional pods to fill in any gaps or spaces.
- Adding ribbon is a great way to add a touch of elegance to your autumn door wreath. You can tie a bow or add a few pieces of ribbon like I did.
- Add some finishing touches with dried hydrangea to add color and texture.
Styling your new fall wreath
Now that you’ve crafted a unique masterpiece, it’s time to put it on display.
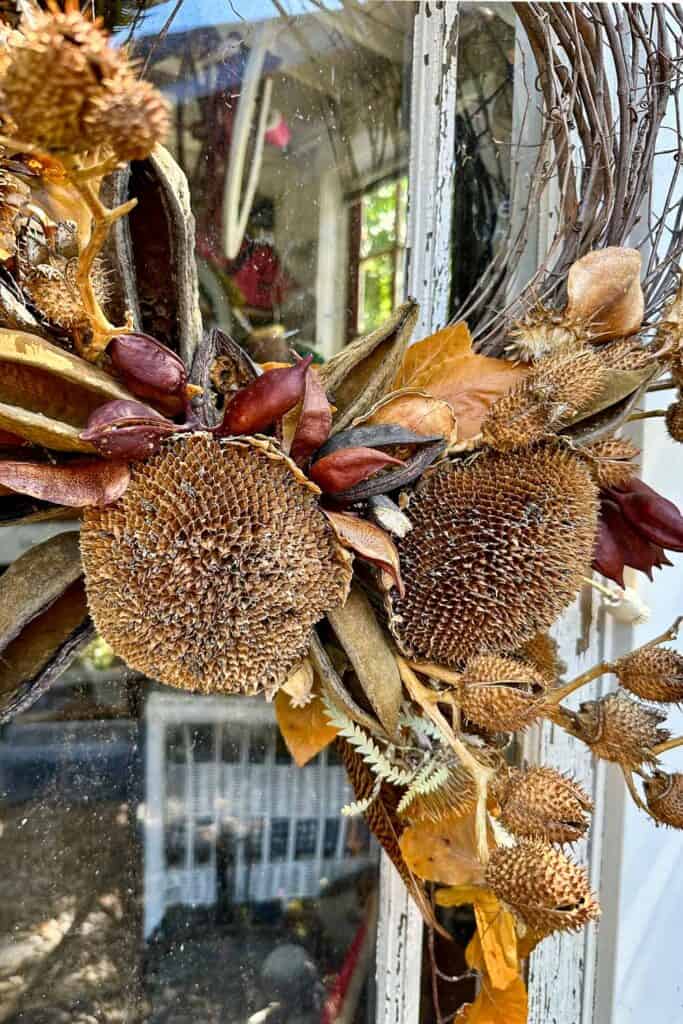
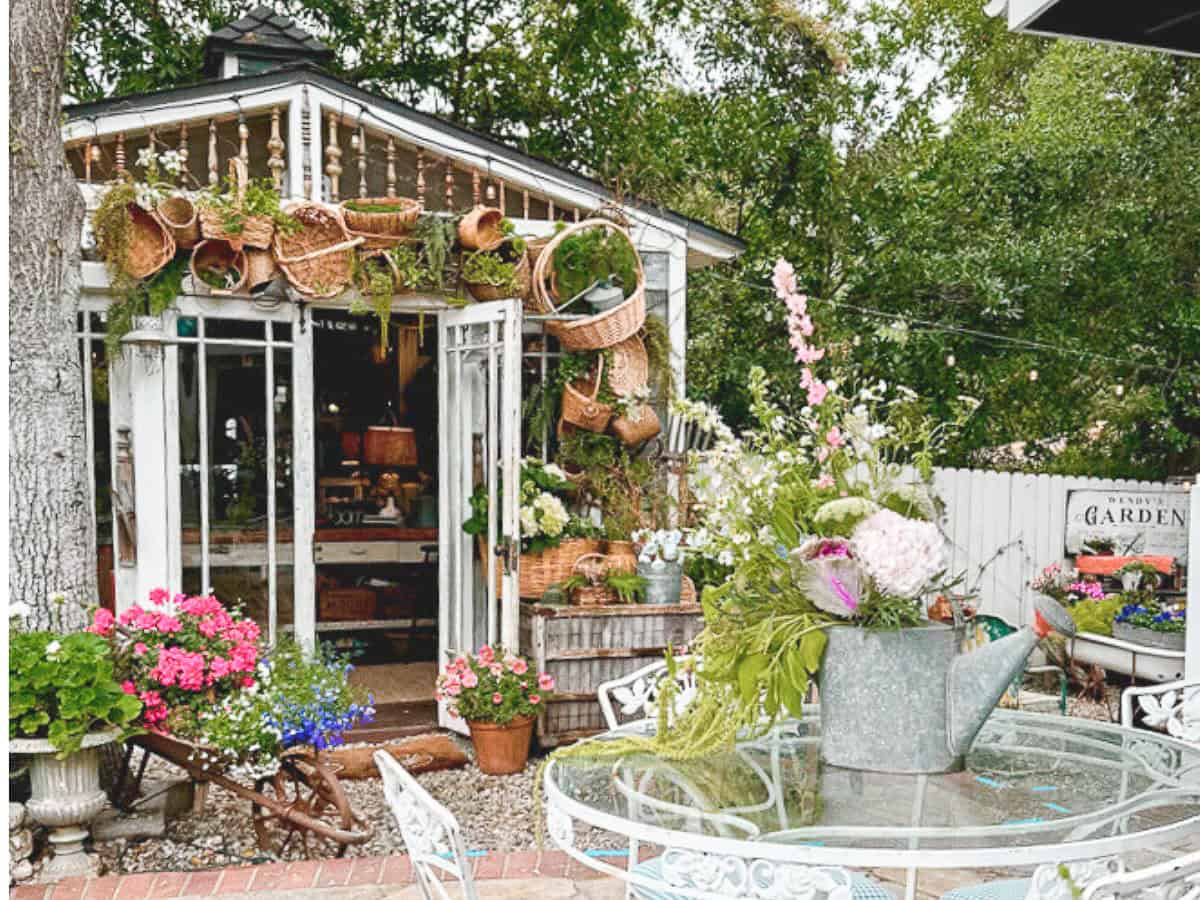
Hang your wreath proudly on your front door, an interior wall in your home, or on the door of your “She-shed,” just as I did.
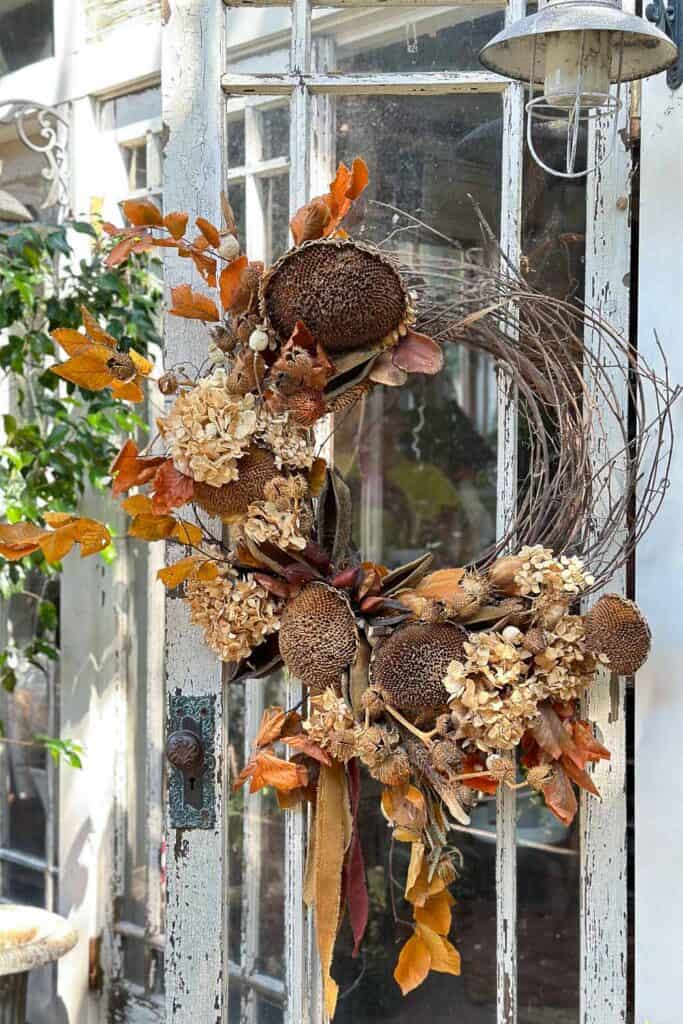
This wreath is certain to extend a warm welcome to all your guests throughout the season.
Conclusion
Crafting a foraged wreath with natural materials is a delightful way to celebrate the season’s beauty while fostering a deeper connection with nature. Whether foraging in your backyard or exploring local trails, the result is a unique and sustainable decoration that adds warmth and charm to your home. So, embrace your creativity, venture into the great outdoors, and let nature inspire your next crafting adventure.


Fall DIY’s
Fall is just around the corner, so it’s time to start thinking about all the fun DIY crafts and decor projects you can make to get in the spirit. Whether you want something simple or elaborate, I am here to inspire you. Click the button to see all of my fall projects.


Seriously gorgeous Wendy! You have a gift and I’m so glad you share it with all of us. pinned++
Thank you so much, Cindy, you are so kind. I feel the same way about you.
Foraging and shopping my home is my favorite type of decorating, and Fall is the best for this. Some great tips here! Sandi from Vintage Charm
Thank you, Sandi! I have to agree. We had an issue this year, and I was not able to get to much fo my fall decor. I had so much fun shopping my home and foraging and made it happen.
Thank you so much for the share! you are sweet hearts!
Wow! This wreath is absolutely gorgeous, Wendy! Can’t wait to share it with our readers this week.
Thank you so much! I appreciate you sharing my post.
Wendy,
This wreath is so beautiful, and I love foraged materials. I’m sharing a link on Sunday.
Thank you Rachel, I am glad you liked it. So kind of you to share.
Thank you so much Kim! I hope you had a wonderful weekend.
I love this wreath Wendy! I’ve been making wreaths, but nothing like this beautiful one. I think I will try taking a walk and seeing what I can find and create. You are always such an inspiration for me. Hope you have a wonderful weekend!
Thank you Cara, you are so kind. I hope you have a good outcome from your walk. Enjoy the ret of your weekend.
Your wreath is stunning Wendy! Now I’m ready to go on a hike with pruners in hand!! The pretty ribbon added the perfect touch to your foraged materials! What a great way to start the Fall season!
Thank you so much Donna. Happy foraging.
Thank you so much Renae, I appreciate your sweet comment so much.
Gorgeous, nature’s gifts are amazing for decorating.
I have over 100 acorns I cleaned and baked over the years.
I love this! It is all beautiful!
Thank you so much Susan!
My favorites are the pods! They are always so unique and interesting! I love how you create and decorate with them , Wendy!
Absolutely Gorgeous! What a lovely creation. Foraged naturals make the MOST beautiful wreaths and arrangements!
Thank you Debra It is one of my favorite things to create. Happy Fall.