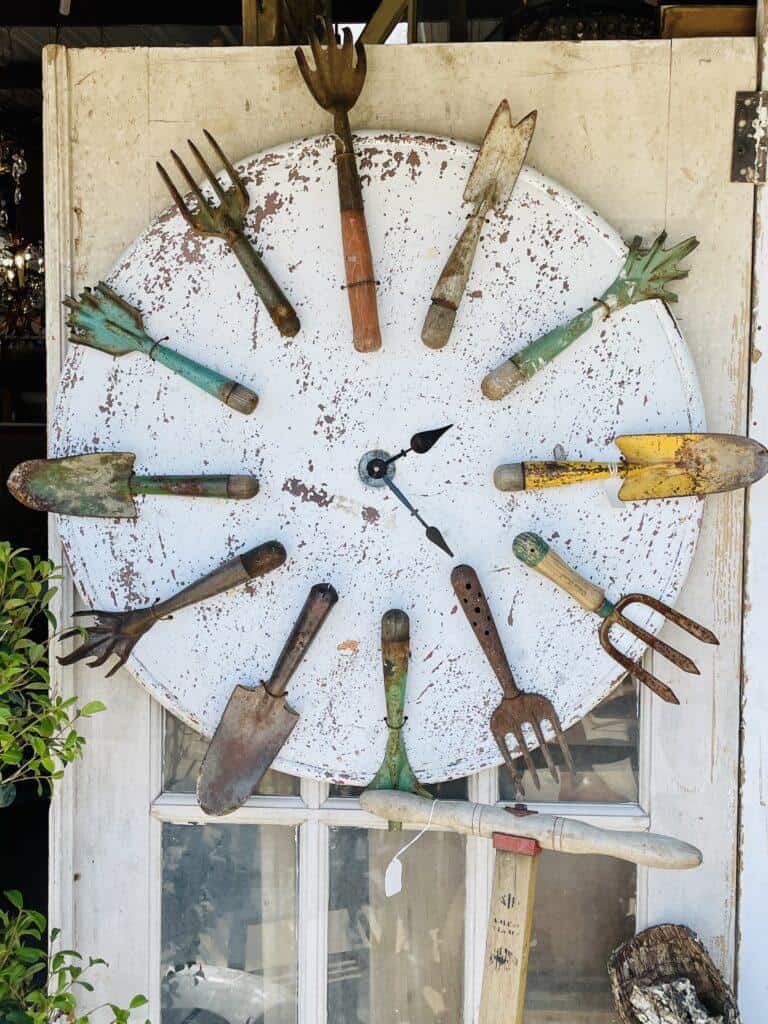
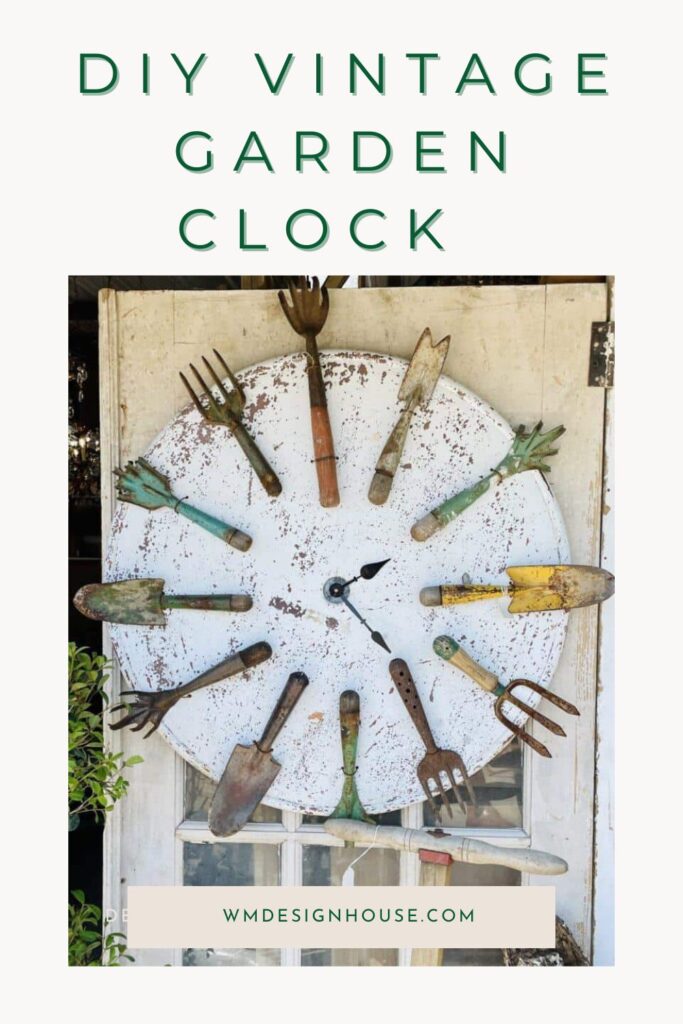
How to Make the Best DIY Outdoor Wall Clock for the Garden
Let’s make a DIY outdoor wall clock for your garden. You could buy a new clock, but what fun is that when you can have the most unique clock on the block?
I adore the style and colors of vintage garden tools.
Modern styles are practical and do the job, but they don’t make them like they used to.
The good news is that you can still find vintage tools at yard sales, estate sales, and flea markets.
Or, maybe you have a collection of old rusty garden tools waiting to be turned into something new. I have the perfect DIY project.
This fun project is easy to complete and will add personality to your outdoor space. Not only will it bring a stylish design to your garden, but it will also help you keep track of time.
It’s a double win! This post will show you how to make the best outdoor garden clock using simple supplies. So, gather up your materials, and let’s get started!
Gather your materials to create your DIY outdoor wall clock
- Wire Cutters
- 12 vintage gardening tools (you could use new ones if you choose)
- 1 24-30″ lid of an oil drum or any large round flat item
- Electric drill with a bit made to drill through metal
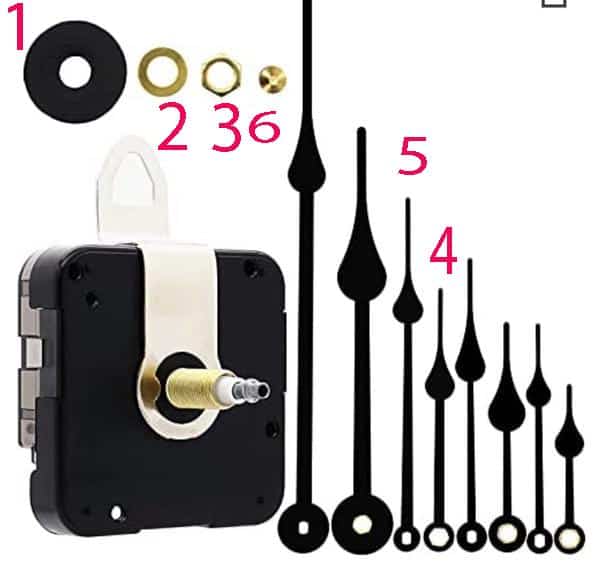
- One box of clock parts
- 22-gauge green wire
- One piece of white paper
- Pencil
- Scissors
- Black sharpie marker
You can order the clock parts here. This clock kit includes two sets of clock hands and a battery-operated clock mechanism that can be used to repair an old wall clock or make a new one.
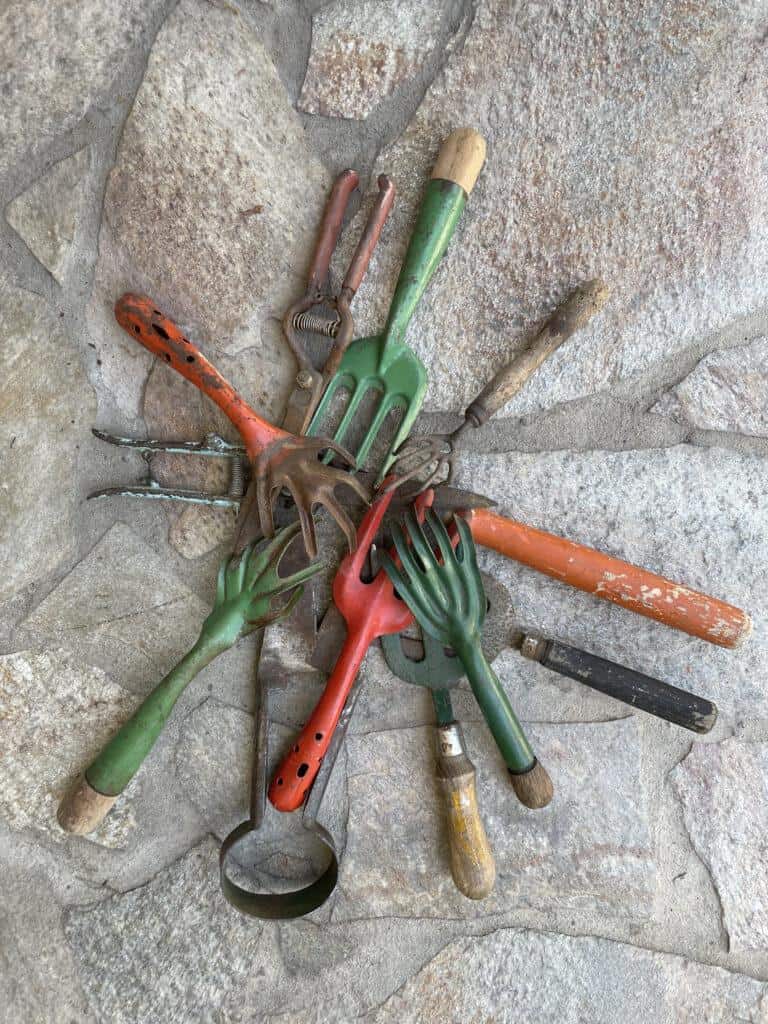
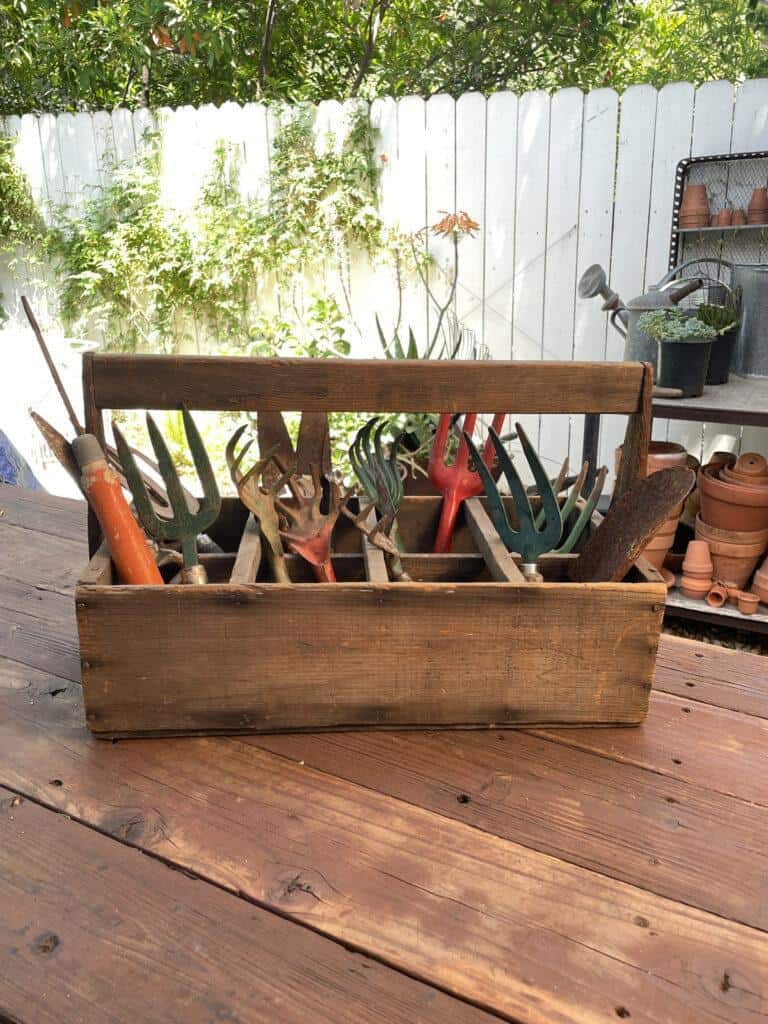
Selecting your vintage garden tools
On my blog WM Design House, I may sometimes use affiliate links, which means a small commission is earned if you make a purchase via the link. The price will be the same whether you use the affiliate link or go directly to the vendor’s website using a non-affiliate link.
I am a vintage lover and enjoy collecting old garden tools, especially those with a bit of color on the handles. I have had luck finding them at estate sales and yard sales and can usually get them at a reasonable price, which to me is about $5 per tool.
If you are at an estate sale, remember to check the backyard. Sometimes you must do some digging, but that’s part of the fun!
These tools may have moved soil, planted, weeded, or raked leaves.
Try to find an assortment of essential tools, like a shovel, clippers, pruning shears, weeders, a hoe, etc.
You may need to be patient until you can find the right tools. It took me some time to gather enough to make this clock, but it was worth it! Once you have enough (12 different) tools, you’ll be ready to make your own clock, a truly unique piece of wall art for your garden!
Where to find an old oil drum lid
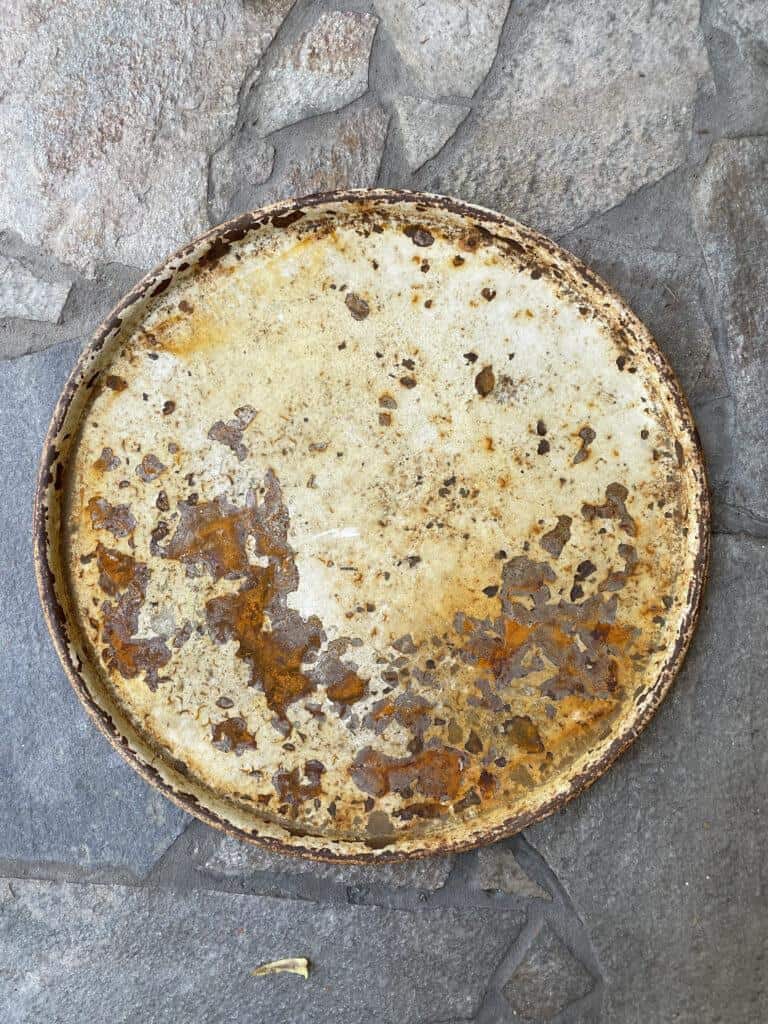
The oil drum lid will be used as the base of your clock and will serve as the clock face.
The circular shape and weathered look make the perfect background for our collected vintage garden tools.
You could try giving it a coat of white paint for a different look first. I found this old drum lid at an antique shop for $10.
You could try an antique shop near you, or you might even have luck looking in a junkyard. Keep your eyes peeled; you never know where you might find one!
It is also a good idea to paint a coat of waterproof seal on the clock base to protect it from the elements.

Directions to make a DIY outdoor wall clock
Now, let’s get started! For this project, choose a day when the weather is nice, and you can work outside. This will make the process much easier.
1. Prepare your oil drum lid
Before we can start to assemble the clock, you need to paint or seal the drum lid.
- Sand any rough spots that may be on the drum lid.
- If you choose to paint your lid, now is the time. You can use good spray paint or choose an exterior latex paint.
- Seal your drum lid with a waterproof sealer.
- Let this dry overnight.
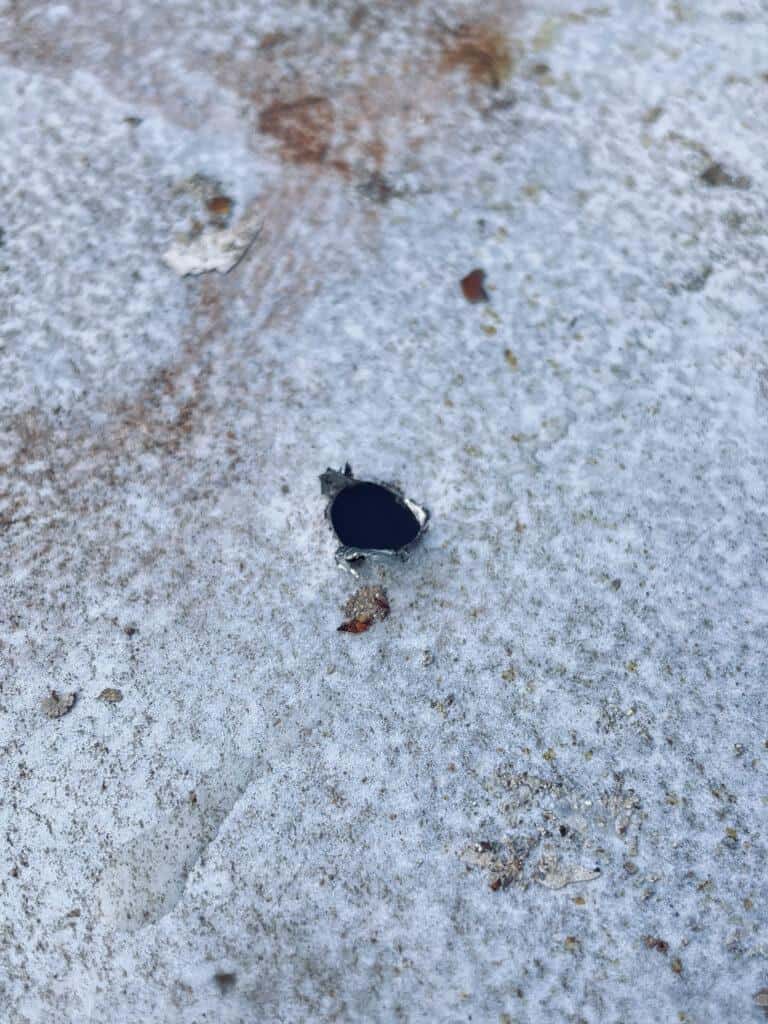
2. Drill a hole in the center of the drum lid
- It is essential to use a drill bit made for drilling metal and drill a hole in the centre point of the lid.
- Be sure the hole is large enough for the stem of the clock mechanism to fit through.
- See the image of the square clock part holding the inner workings that will fit through this hole.
- Place the stem of the clock parts through the hole.
- Place the hands over the stem.
- Secure the parts on the clock mechanism.
3. Attach clock parts and measure hands
- Next, choose a set of clock hands from the parts and attach the mechanism. I used numbers 4 and 5 from the image.
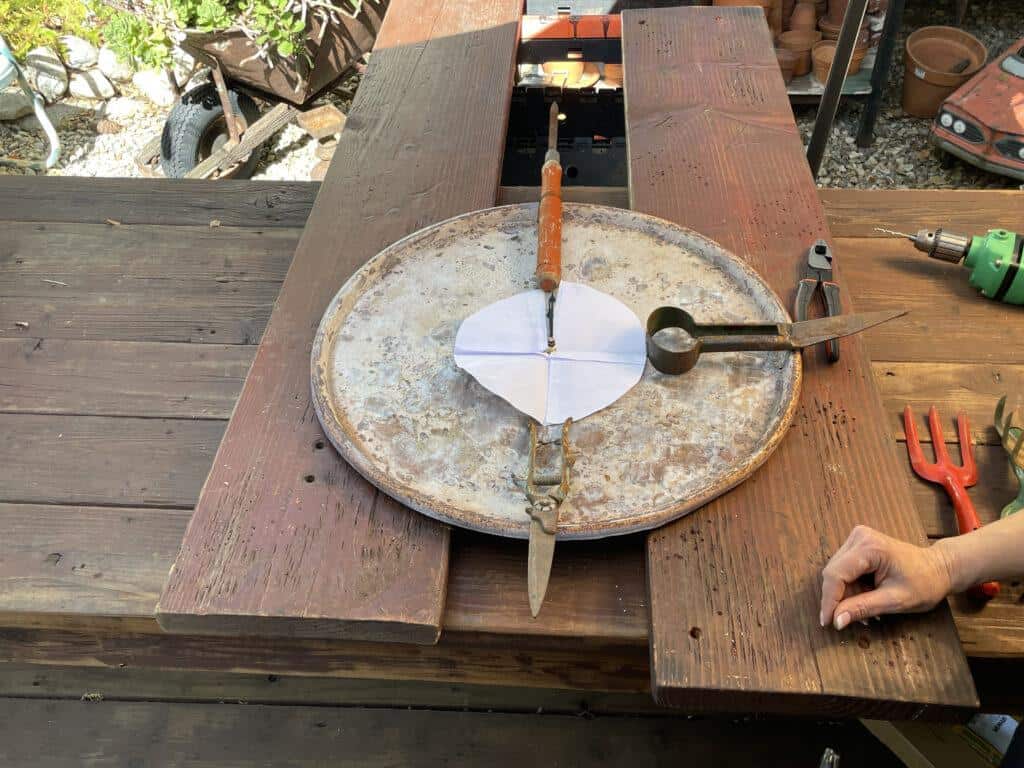
- Measure the length of the long hour hand and cut a circle out of paper with the same circumference. It should be around 5 to 6 inches.
- Cut a slit in the paper on one side to the center.
- Finally, put the paper around the base of the clock part on the front of the clock. This circle will show you where you should start to place your tools to ensure they are the proper distance from the clock hands.
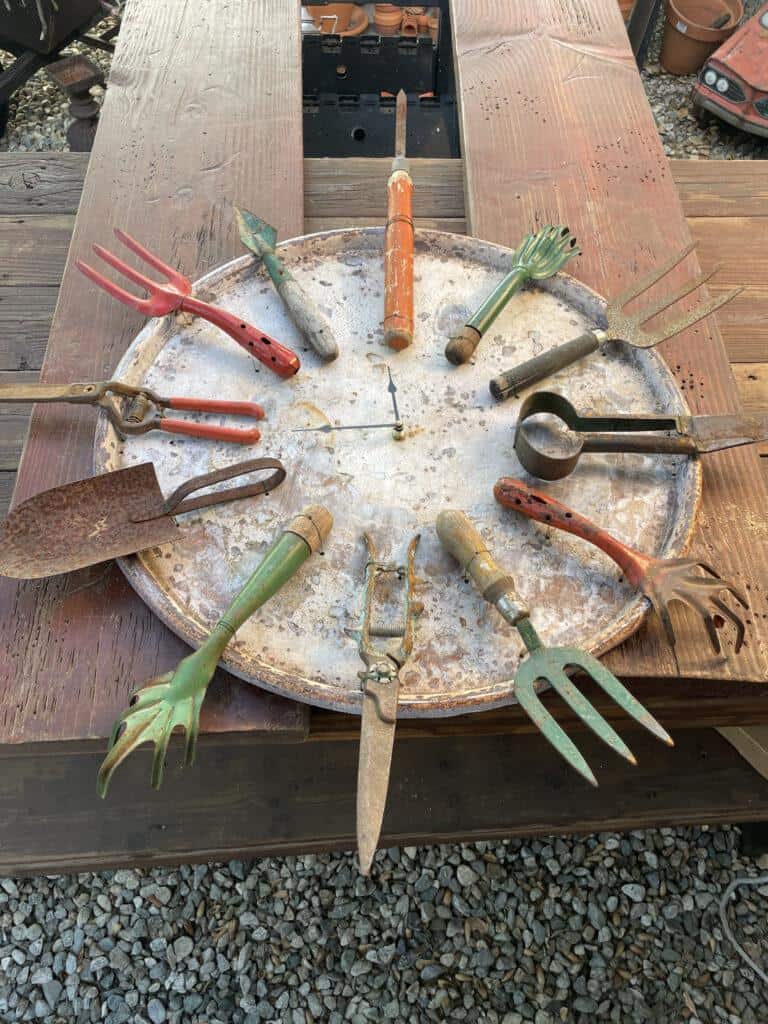
4. Place your tools on the clock face
- Place one garden tool at the twelve, three, six, and nine.
- Add one tool in between each of these four tools.
- You may need to try different configurations, arranging them by different colors and tool types until you are happy with the look. You want to be sure the spacing between the tools is even before attaching them to the back of the clock.
5. Attach your tools
Once you have placed the tools, you can start to attach them to the base. I started by attaching the number twelve first, then the 6, the 3, and the 9.
- Using the black Sharpie pen, place a small dot on either side of the tool handle (where the tool connects to the handle) near the edge of the lid.
- Place two dots towards the opposite end of the handle, one on either side (so you can feed the wire up one hole, over the handle, and into the second hole).
- Using the drill and a metal bit, drill a small hole where these dots are placed.
- If your tool has a good solid wood handle, you can add an additional hole in the middle of the handle for extra support.
6. Now you have the best garden clock to hang in your outdoor space
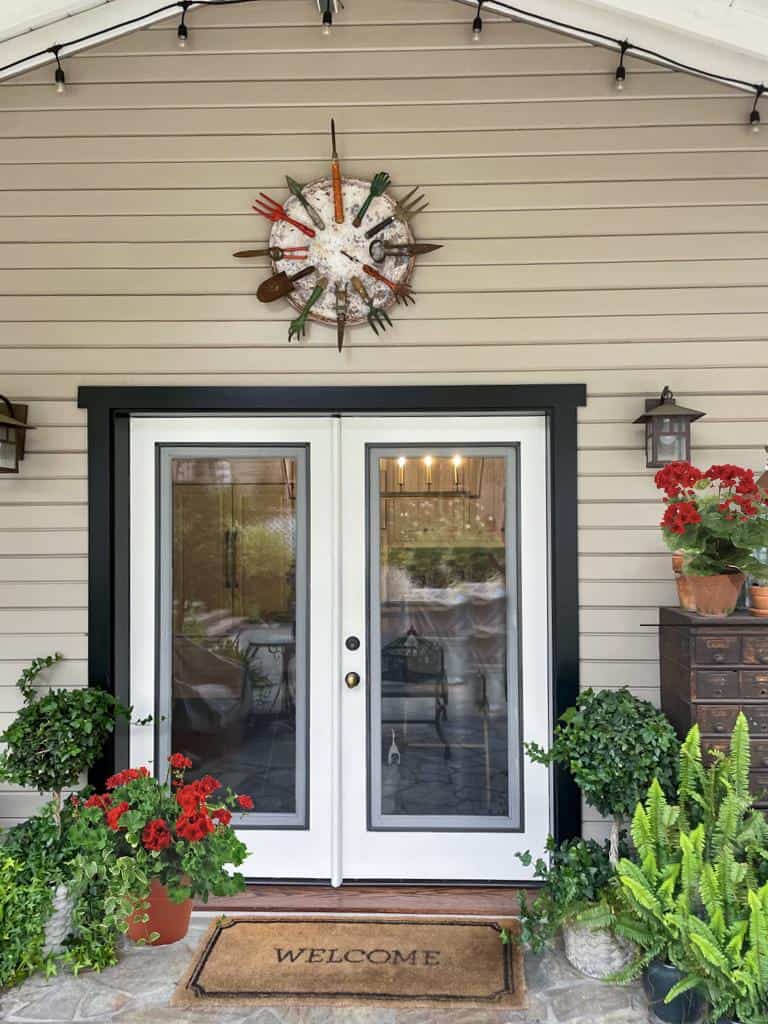
Now that our garden clock is complete, it’s time to hang it up in the garden. We chose a beautiful spot above our back door, so everyone can see it when they enter the house. I love how the clock looks here, adding some extra color to our patio.
You may hang your clock on the wall of a patio or above your potting bench. Or, displaying it on an external wall of your outdoor living space to show it off to the neighbors. Alternatively, you can make a statement by mounting it on an interior wall of your home. You really can’t go wrong!
How to care for your outdoor clock
- Keep it clean. Dust and dirt can build up on an outdoor wall clock, making it difficult to read and damaging the clock over time. Use a soft cloth to regularly wipe down the clock and remove any debris caught in the gears or mechanisms.
- Protect it from the elements. Outdoor wall clocks are exposed to the elements, so protecting them from rain, snow, and direct sunlight is essential. If you live in an area with extreme weather conditions, you may want to consider storing your clock indoors during the winter or periods of heavy rain or snow.
- Replace the batteries regularly. Most outdoor wall clocks are battery-powered, so it’s important to replace the batteries regularly to ensure that the clock keeps accurate time.
- Inspect the clock regularly. Inspect your outdoor wall clock regularly for any signs of damage, such as loose or broken parts, rust, or mold. If you notice any damage, take steps to repair or replace the clock as soon as possible.
Perhaps a DIY Clock is not your style!
I know that DIY is not for everyone, and perhaps you would prefer to purchase an outdoor wall clock.
Here are a few tips for choosing the perfect clock for your home.
- The style of your home. If you have a traditional home, you might choose a classic outdoor clock with Roman numerals and a wood or metal frame. If you have a more modern home, you might choose a sleeker clock with a minimalist design.
- The size of your outdoor space. If you have a small outdoor space, you’ll want to choose a smaller clock that won’t overwhelm the area. If you have a larger outdoor space, you have more options and can choose a larger clock or even a clock with multiple faces.
- The materials of your outdoor space. If your outdoor space is made of wood, you might choose a clock with a wooden frame or a clock with a natural finish. If your outdoor space is made of stone or concrete, you might choose a clock with a metal frame or a clock with a more modern design.
- The climate in your area. You’ll want to choose a weather-resistant clock if you live in an area with extreme weather conditions. Look for a clock made of durable materials with a protective coating to protect it from the elements.
- Your personal style. Ultimately, the best way to choose a style of an outdoor clock for your home is to choose a style that you love and reflects your style. So many different styles of outdoor clocks are available, so you’ll surely find one you’ll love.
Other great projects to add an artistic flair to your garden
Garden art can be anything that you make and put in your garden. It can be functional, like a birdbath or large outdoor clock, or it can be purely decorative, like a statue or piece of metal art. Garden art has no rules, so let your creativity run wild!
Here is a list of my favorites.
- Wind chimes made from vintage garden tools
- A birdbath made from an upcycled sink or bowl
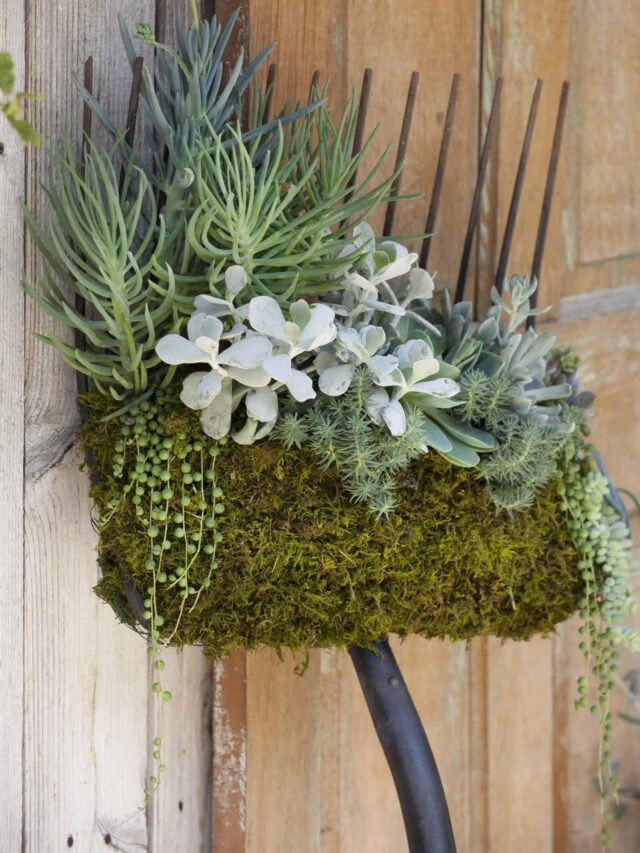
- A planter made out of shovels and rakes
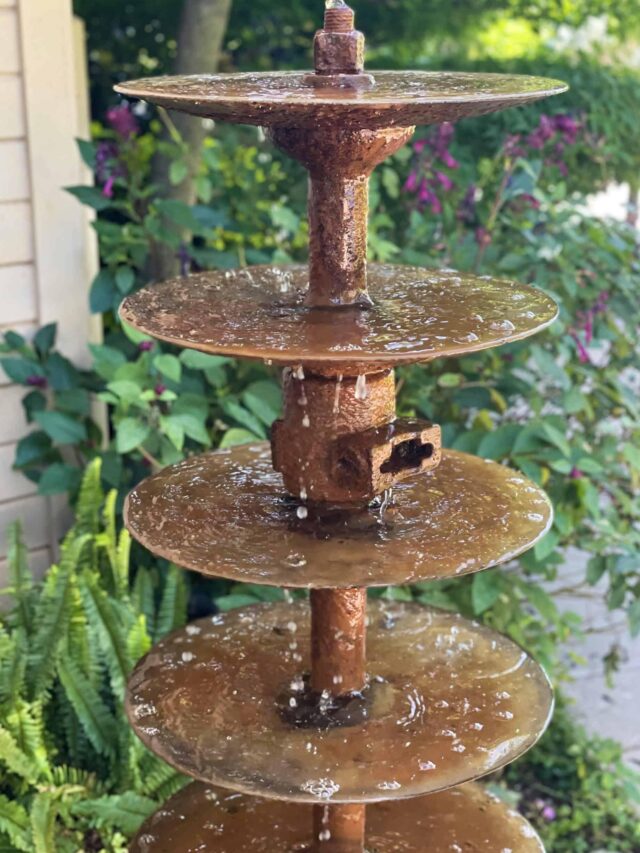
- A fountain made out of a tractor disk
- A birdhouse made from an old pallet
- A sundial made from a piece of slate or concrete
- A sculpture made from old garden pots
- A mosaic made from broken tiles or glass
DIY GARDEN CLOCK TIPS
Following these simple tips can help your outdoor wall clock last many years.
- You can leave the oil drum lid unfinished to make your clock look more rustic. However, if you prefer a more polished look, you can give it a coat of paint or stain.
- If you live in an area with direct sunlight, you may want to consider using UV-resistant paint on your clock. This will help to protect the colors from fading.
- You can use any wire to attach the tools to the base, but I recommend using a 22-gauge green wire. This will blend in with the tools and make the clock look more natural.
- When you are placing the tools, make sure that they are evenly spaced around the clock face. This will help to create a symmetrical look.
Have you made any great DIY projects for your garden this year? I would love to see what you have created!


You know I cannot seem to grow a thing Wendy, but it does not stop me from loving all things garden. This clock is so stinkin’ adorable! Now that our yard is completely boxed in, I am so looking forward to filling it up with precious finds. Hope you are having a wonderful summer.
Hi Cara, have you tried a raised flower bed? I find they make such a big difference. Maybe try just one and see how it goes.
This upcycle is BRILLIANT, Wendy! We will be featuring you starting Wednesday at the Creative Crafts Linky Party! Pinned and shared!
Creatively, Beth
Hi Beth, I apologize for my late reply. I was traveling to the bloggers conference last week and I am so behind on comments. Thank you so much for the feature. I appreciate you so much.
This is just super cute, Wendy! Finally something to do with those rusty old tools!
Thank you, Sue. Yes, it is the perfect answer to repurpose your old garden tools.
super creative and practical for outdoors and using old tools.
Thank you from your SSPS Team for sharing your links with us at #270 SSPS Linky.
If you have not as yet shared your IG and FB URL and handles, please email me at [email protected] otherwise please ignore.
Thank you so much, Rachel. I appreciate the share so much!
This is such a clever use for vintage tools. I love that you left the patina of the beautiful color!
Thank you Missy!
Love that clock – #1, I like the garden tools, #2, I like rusty!, #3 It’s a great way to repurpose and give yourself something useful!
Hi Barbara, Thank you so much! I am glad you enjoyed the post. We love that clock in our garden. It adds so much charm to our outdoor space.
I too love anything vintage and rusty. Start collecting the tools and you will have a clock in no time flat.
This is so clever and creative, Wendy. What a fun outdoor project. I adore how it turned out. I’m going to feature your DIY clock in my recap post on Sunday. I think my readers will love it as much as I do.
Happy weekend!
Thank you so much, Jen! I appreciate you so much. Have a great weekend.
What a great clock for an outdoor space!
Thank you, Stacy! Have a great weekend.
Wendy this clock is so cute! What a great way to use vintage tools! Pinning now!
Thank you so much Donna.
That s fantastic. Love the rusty colors.
Thank you, Cindy! The older and rustier the better.
I love this post Wendy. With all my estate sale shopping you’ve given new life and ideas for what to do with all the garden tools I see!
Thank you, Susan. If you find any and don’t want them, you know where to send them. :)))))
This project is so stinking cute! I love it.
Thank you Tammy! We sure do enjoy this clock on the porch.