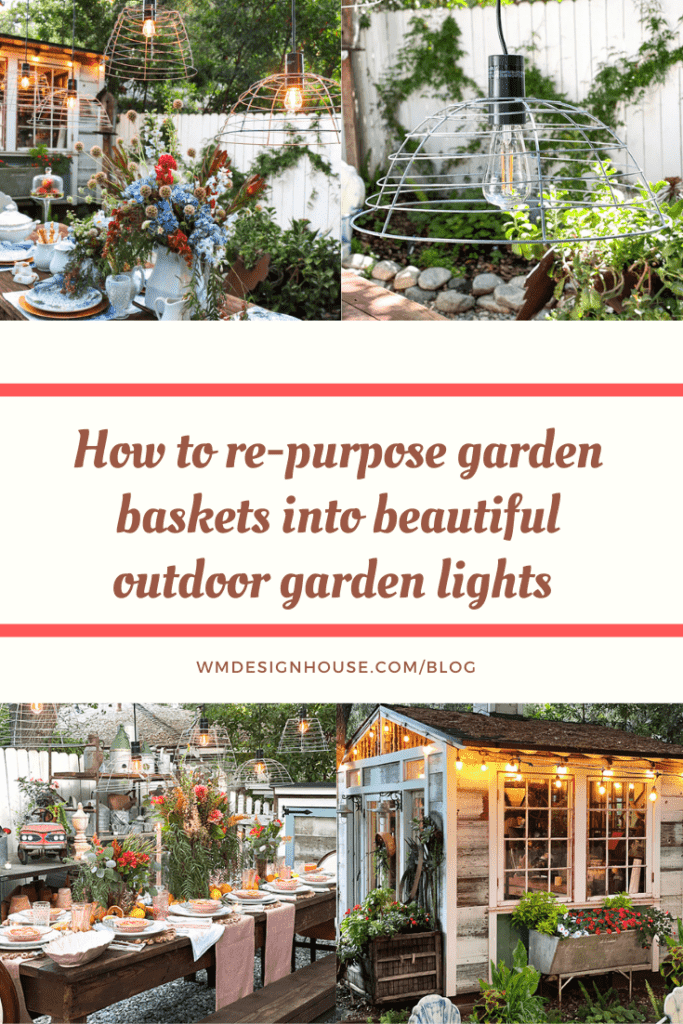
Repurposed Garden Baskets Make Beautiful Outdoor Hanging Lights
Learn step-by-step how I made this DIY basket pendant light to hang above the table in my planting garden.
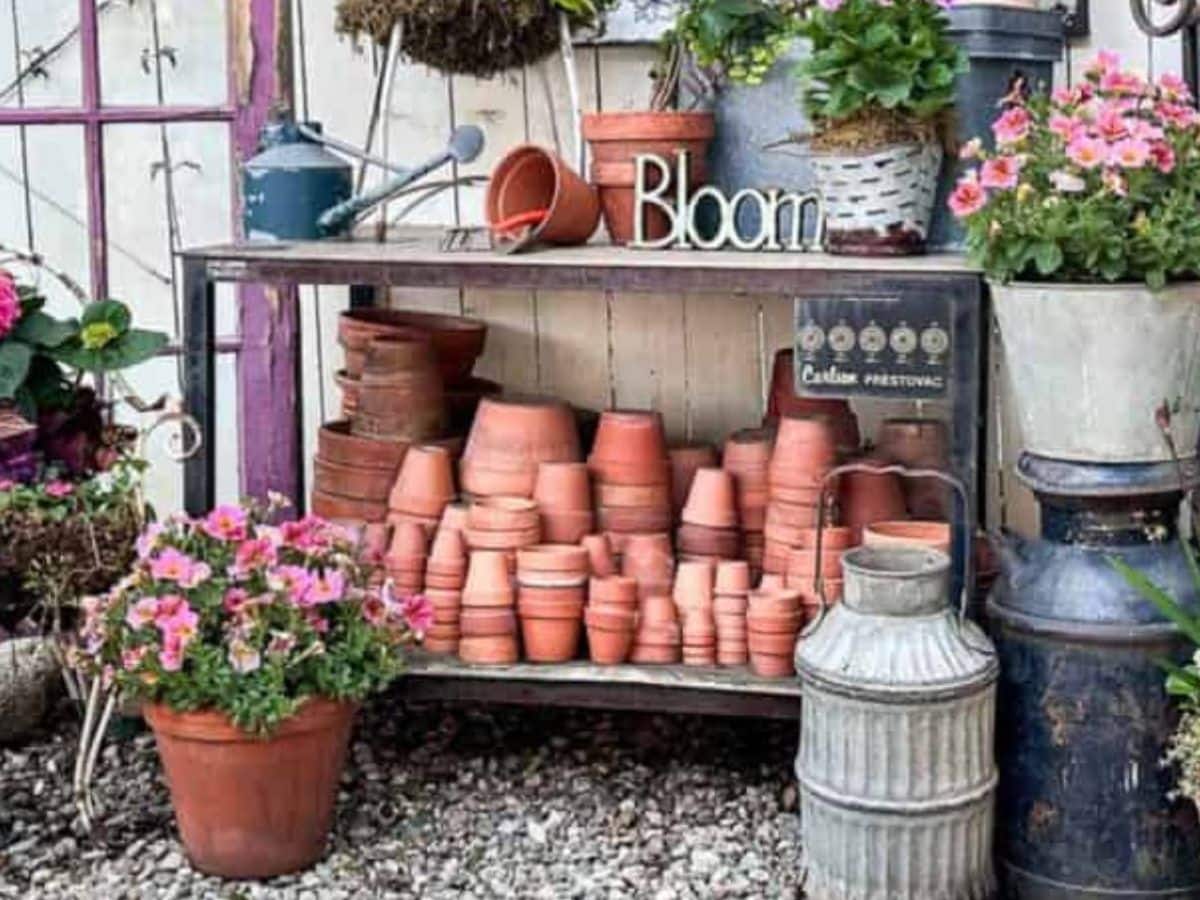
We have lived in our home for over 25 years. During that time, we have created several outdoor spaces, but my planting yard has to be one of my favorites. This space is full of rusty charm. I have vintage scaffolding lined with galvanized watering cans, slices of wood, and old birdhouses. My workbench has all the charm of a well-used workspace, filled with stacks of red clay pots and all my favorite tools.
The one thing this area lacked was great lighting. So, I decided it was time to get creative and design something incredible. I knew I didn’t want just any ordinary lighting. I wanted something unique that would match the aesthetic of my gardening space.
Suddenly, it came to me. I had a vision to make outdoor hanging lights using the same wire baskets we use in the garden. If you wonder where I am going with this, you are not alone. My husband was not quite sure about this idea either. But stay with me. I could see it clearly; our garden baskets were the right size, style, weight, and shape to make the perfect pendant light fixture.
I did my research and found out what I was going to need to make them.
Supply List
Here is a list of supplies we used to make our pendant lamp. You can pick up most of these at a local hardware store or easily purchase online through the links provided.
- Outdoor string lights (like these market lights)
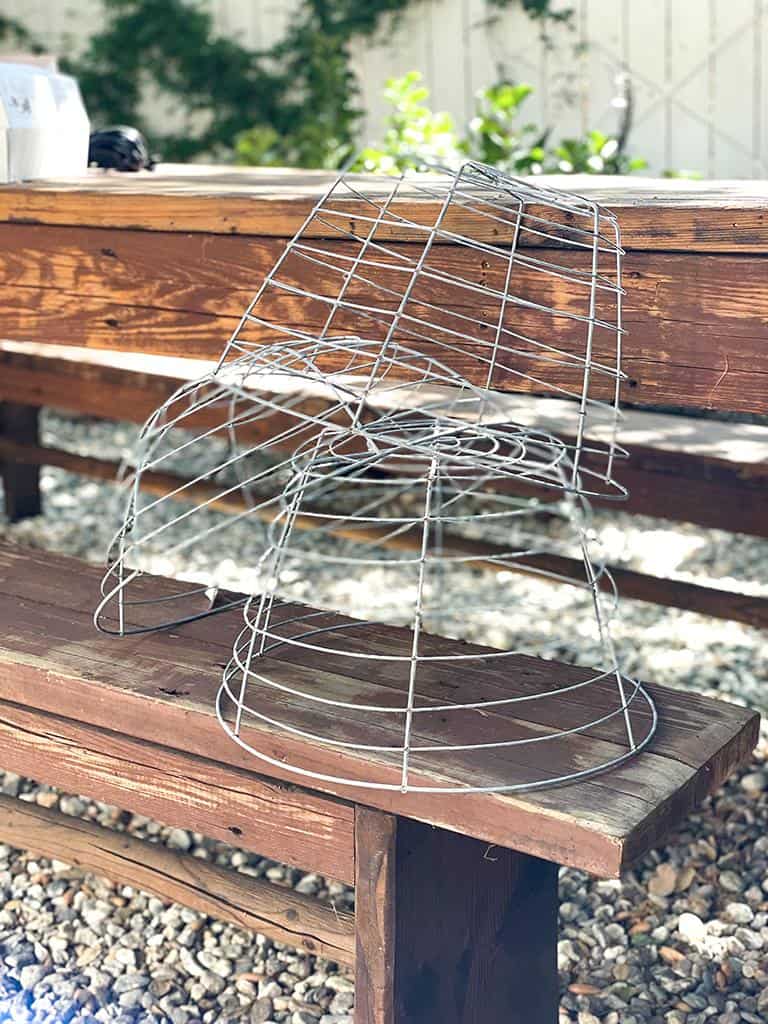
- Garden baskets (like these galvanized wire baskets)
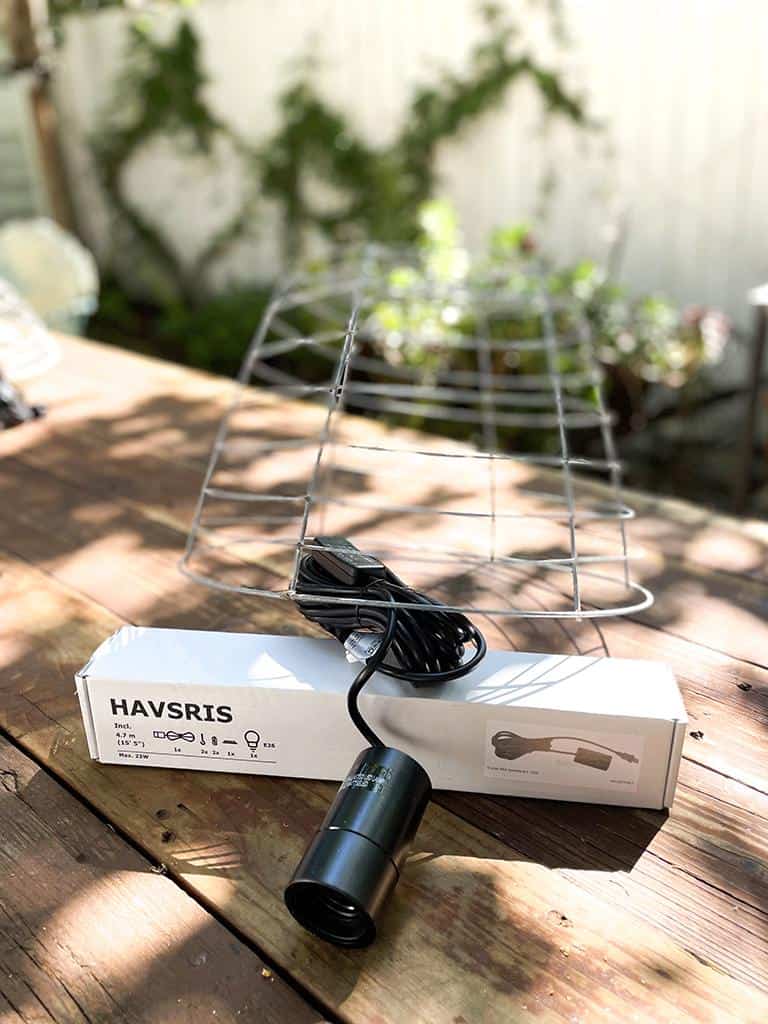
- One light socket with cord per light fixture (like these hanging light cords)
- One small plug per light fixture
- One socket adapter per light fixture
- Wire cutters
On my blog WM Design House, I may sometimes use affiliate links, which means a small commission is earned if you make a purchase via the link. The price will be the same whether you use the affiliate link or go directly to the vendor’s website using a non-affiliate link.
Directions: Basket Pendant Light DIY
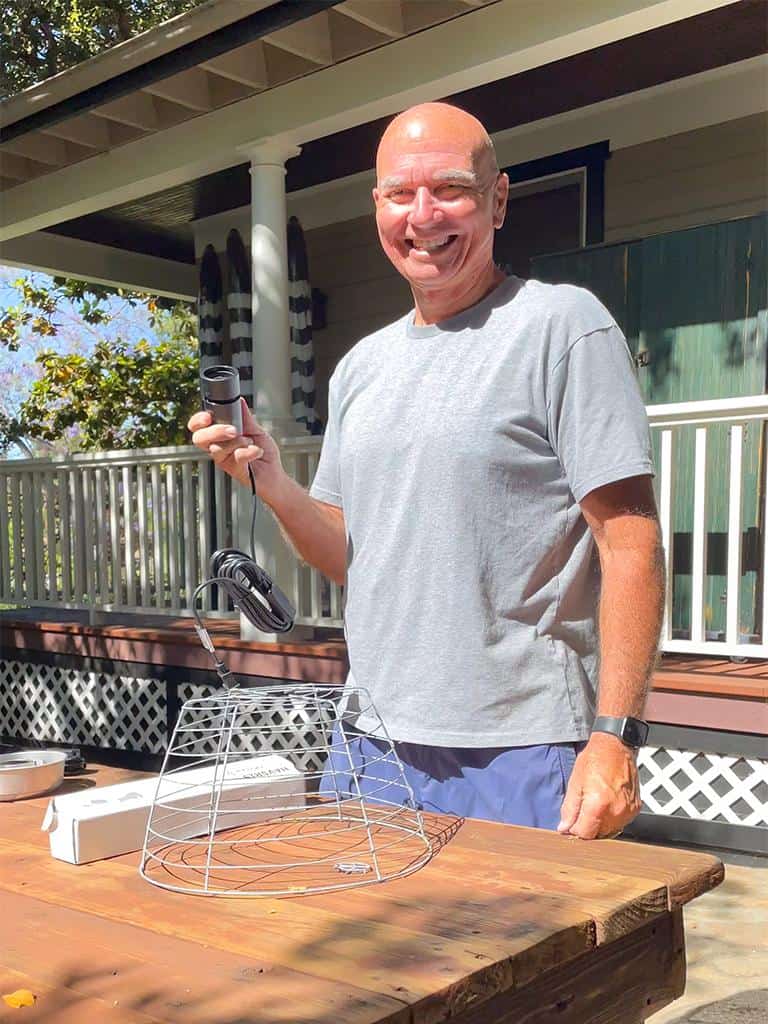
Once we had all of our supplies, it was time to get to work. We had a vision and a general idea of how to accomplish it, but we knew it would take a little bit of trial and error to get it just right.
We already had a set of outdoor market lights in our backyard. So, all we had to do was adapt the sockets. Easy, right? While it may sound complicated, it actually is a simple process. It just takes patience. And I have to admit, I had some help. A little manpower is always good for the heavy lifting.
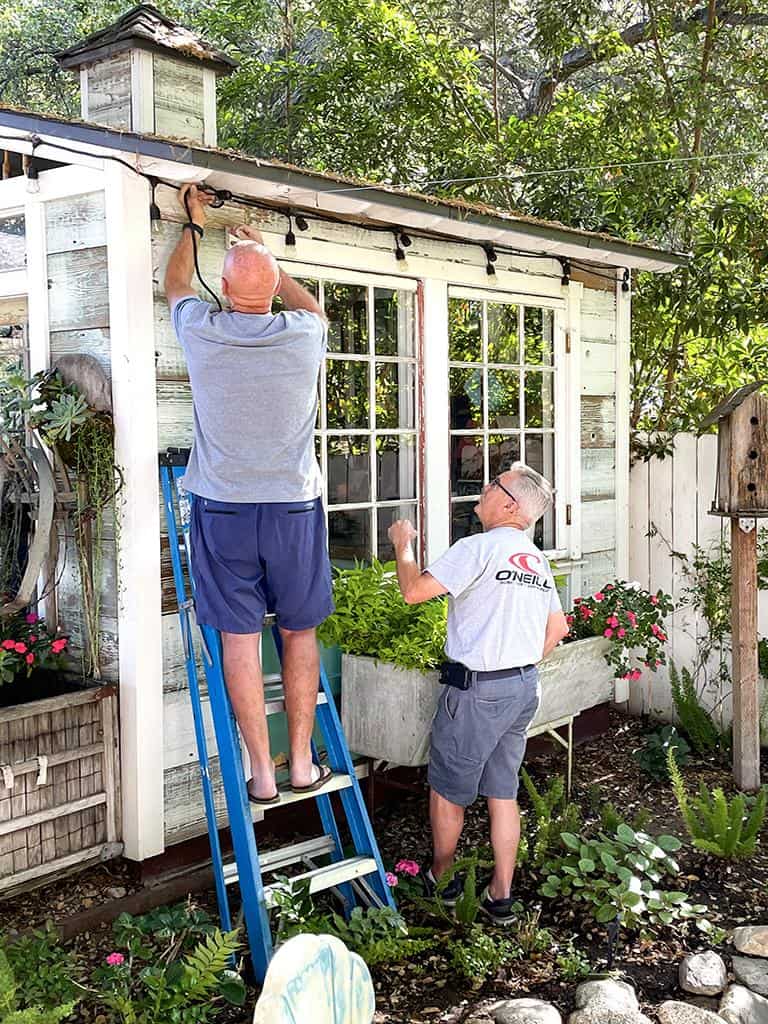
The first thing we did was measure the desired height of the pendant light above the table, so we knew how long to cut the light cord. I bought this cord at Ikea, but the ones linked will work great too. The cord is very long so you will need to cut it down to fit your needs.
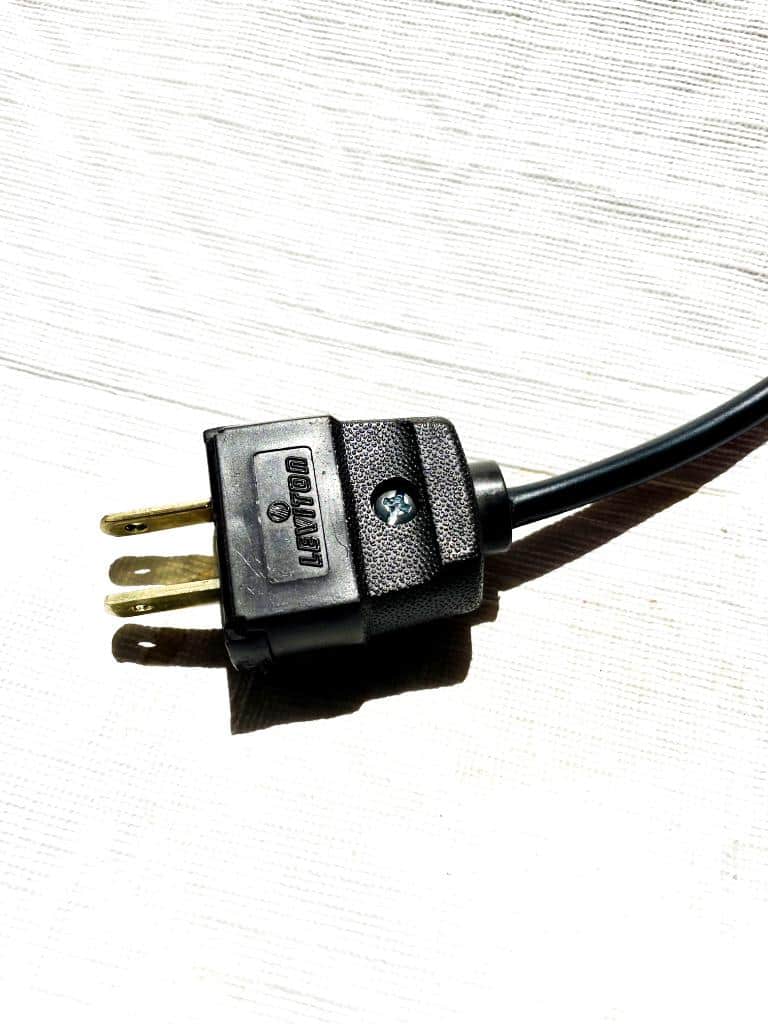
Next, you’ll need the small plug from your supplies.
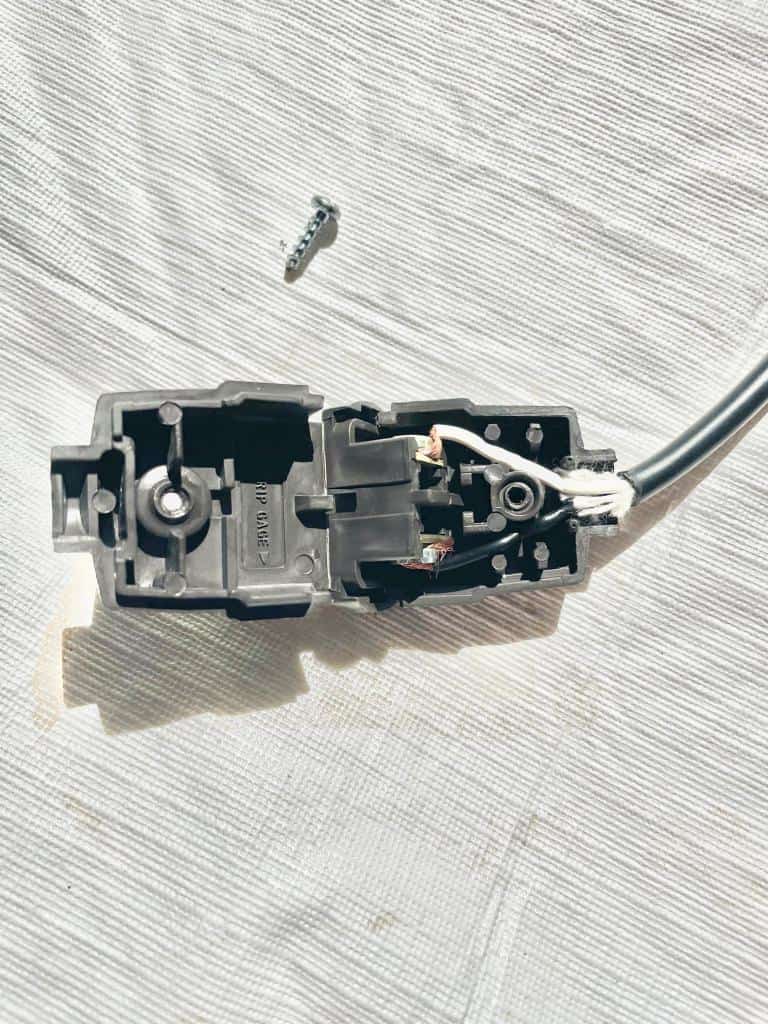
Remove the outer coating on the last inch of your wire and separate the black and white wires. Attach per the image above. Fold the top over and close it with the screw supplied with the plug.
Now you are ready to attach the socket end to the basket. You will need to clip a small hole in the bottom of your basket, large enough to be able to insert the light bulb socket.
Remove the end part of the socket, insert the cord end through the top of the basket and then attach the piece you removed back onto the socket inside the basket. Now, insert the light bulb into the socket.
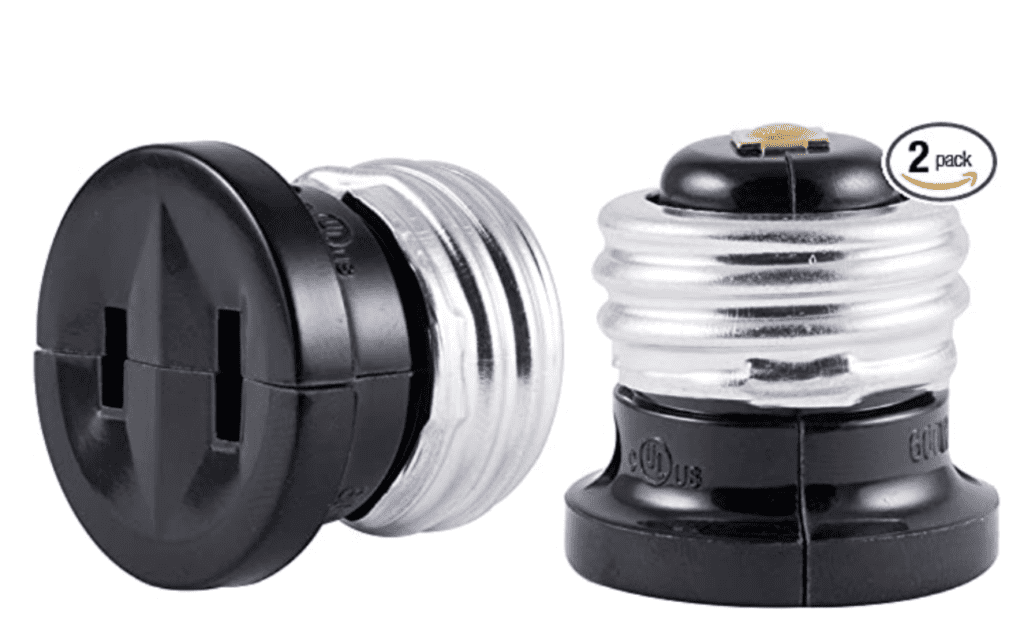
Next, you need to remove the light bulbs from the sockets you want your lights to hang. Replace the light bulb with the socket adapter.
.
Lastly, insert your plug into the socket where you removed the light bulb.
Now your light is ready to hang!
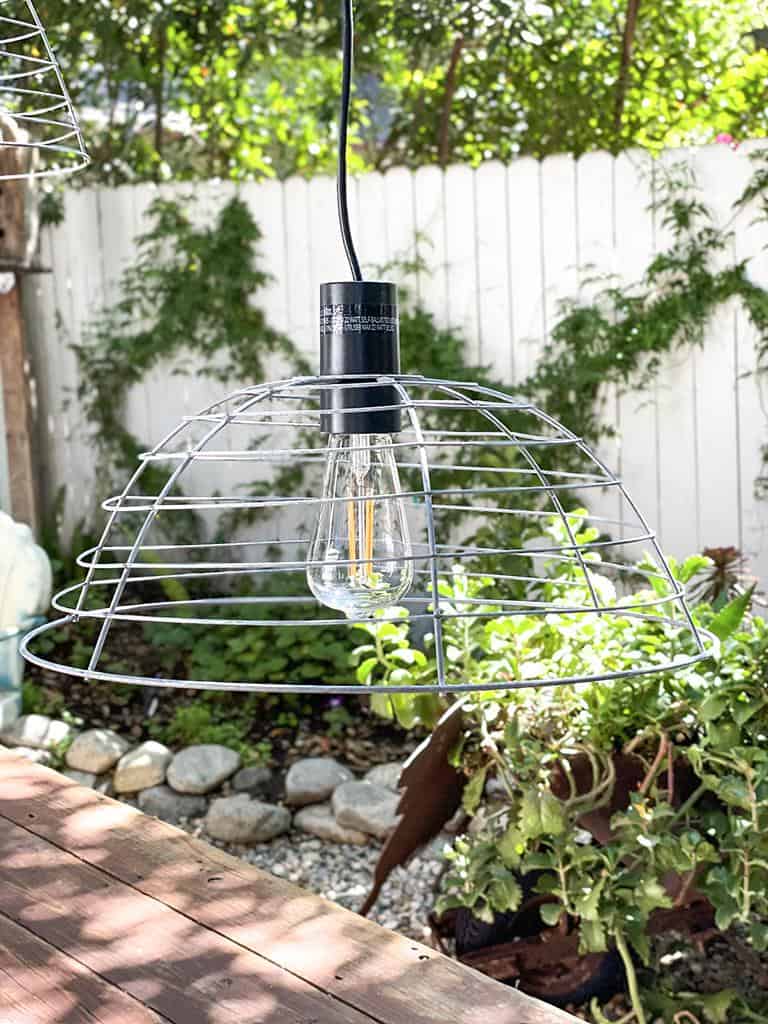
Finished Project
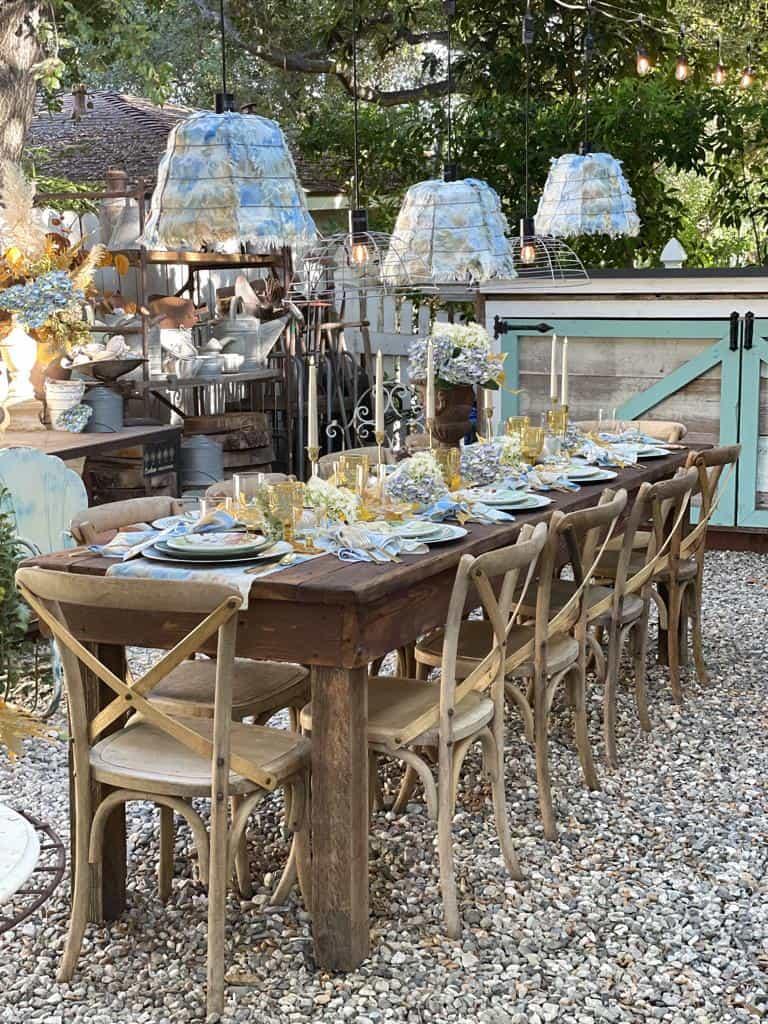
I love how this basket pendant light DIY came out. They are the perfect charming accent we needed to complete this space.

While I love the look of the plain wire basket, it also serves as a good structure for adding other decorations to change up the look for different occasions.
One idea is to use napkins for a fun look. Cut them into 4″ strips and weave the fabric through the wires. It creates a rustic fabric-like shade that is so interesting.
At Christmas time, add fresh greenery around the edge to create a simple wreath on the light fixtures.
The possibilities are endless. Just be sure not to add anything too heavy that may weigh down the lights too much.
See my fall table decorations to see how we enjoy these lights in October.
More DIY Light Fixture Ideas
Are you looking for more inspiration to make a new light fixture for your space? There are so many ways you can take this basic DIY and modify it in different ways to fit any style or space. Here are some good ideas to consider.
- While this particular design is meant for outdoor use, you can also make a hanging light for inside your home. Design a new accent piece to hang above your favorite reading chair in the family room or some new overhead lighting to illuminate your dining table, kitchen island, or breakfast nook.
- If wire baskets aren’t your style, try using different materials for your basket shade. You might like the look of a woven basket with a tight or open weave, keep the look of natural fibers or use spray paint to make it a different color.
- You can find cute baskets just about anywhere. Find an old basket around the house or at a yard sale, or you can shop anywhere from a home decor store to a dollar store for inspiration.
- For a boho vibe, make a rattan pendant light using a rattan basket.
- For a more dramatic look, use different shapes of baskets and hang them at different heights.
- Think beyond the basket. If baskets aren’t for you, choose something else for your pendant shade. Just be sure to use something lightweight that the sockets can hold. Some ideas include small mason jars or a paper lamp shade from an old light.

If you loved this project, be sure to check out my page All About DIY and Crafts for more inspiration.


SHOP MY GARDEN
What a pretty project to use outdoors any time of the year! It really adds a cozy factor to your outdoor area!!
Thank you, Rachel. Outdoors is my favorite place to be.
What a fantastic summer project! To add so much light to your outdoor space is great. The garden baskets are perfect.
Thank you so much Judy and it is so nice to meet you! you too have a beautiful blog. I tried to comment and sign up, but was unable to find a pop up. Did I miss something?
Wendy, I loved this project so much and I just had to feature it on Tuesday Turn About link party this week! Thanks for the inspiration! Have a great week my friend!
Thank you so much Cindy, I am thrilled! YOu are such an inspiration to me my friend. XO
Hi, Wendy! I’m hoping over from Julie’s blog at My Wee Abode. I absolutely love this idea. It’s so clever and turned out beautifully! I’d love to share a link to your post in my week in rewind recap tomorrow.
Your garden dining area is stunning! We love being outdoors, and I can just imagine having a gathering in that pretty space. Bravo!
Niky @ The House on Silverado
Thank you Niky. It is a very fin space to dine in. Very eclectic and full of interesting things to look at. I hope you have a very happy Easter and I look forward to blog sharing with you again.
This is an awesome idea! And your garden setting is absolutely gorgeous! Nice for helpers to bring your ideas to reality;)
Thank you so much Lora. I look forward to sharing with you tomorrow.
This is just the cutest idea, Wendy. I really want to try and make a couple of these for my deck eating space. I’d like to share this on my weeklySaltwater Sounds blog post on Sunday.
Thank you so much Kim. I am honored that you would like to share. How is all of the fish mulching going? I was so jealous when I saw
your story.
I love your outdoor dining space with the garden lights, and the sparkle they add to your table. Pinning, so I can figure out how to use these lights on a smaller scale! ?
I love your outdoor dining space with the garden lights, and the sparkle they add to your table. Pinning, so I can figure out how to use these lights on a smaller scale! ?
Hi Michelle, thanks for stopping buy and reading my blog post. Please let me know if you try them, I would love to see what you do with them.
Wendy,
These are just the cutest idea. I love them with the fabric woven through also. So clever.
Thank you, Rachel. There are so many different things with these lights fixtures. I am looking forward to blog hopping with you next week. I sure appreciate the invitation. Wendy
Wendy, I love these lights so much! I don’t have garden baskets but maybe I could use wire lampshades without the fabric! Thanks for sharing – pinned!
Thank you so much Cindy, I cant wait to share your beautiful Shuuter post next week. I will be spending my weekend working on my post.
It has been such a busy week and it is always hard getting back in the groove after a little vacay.