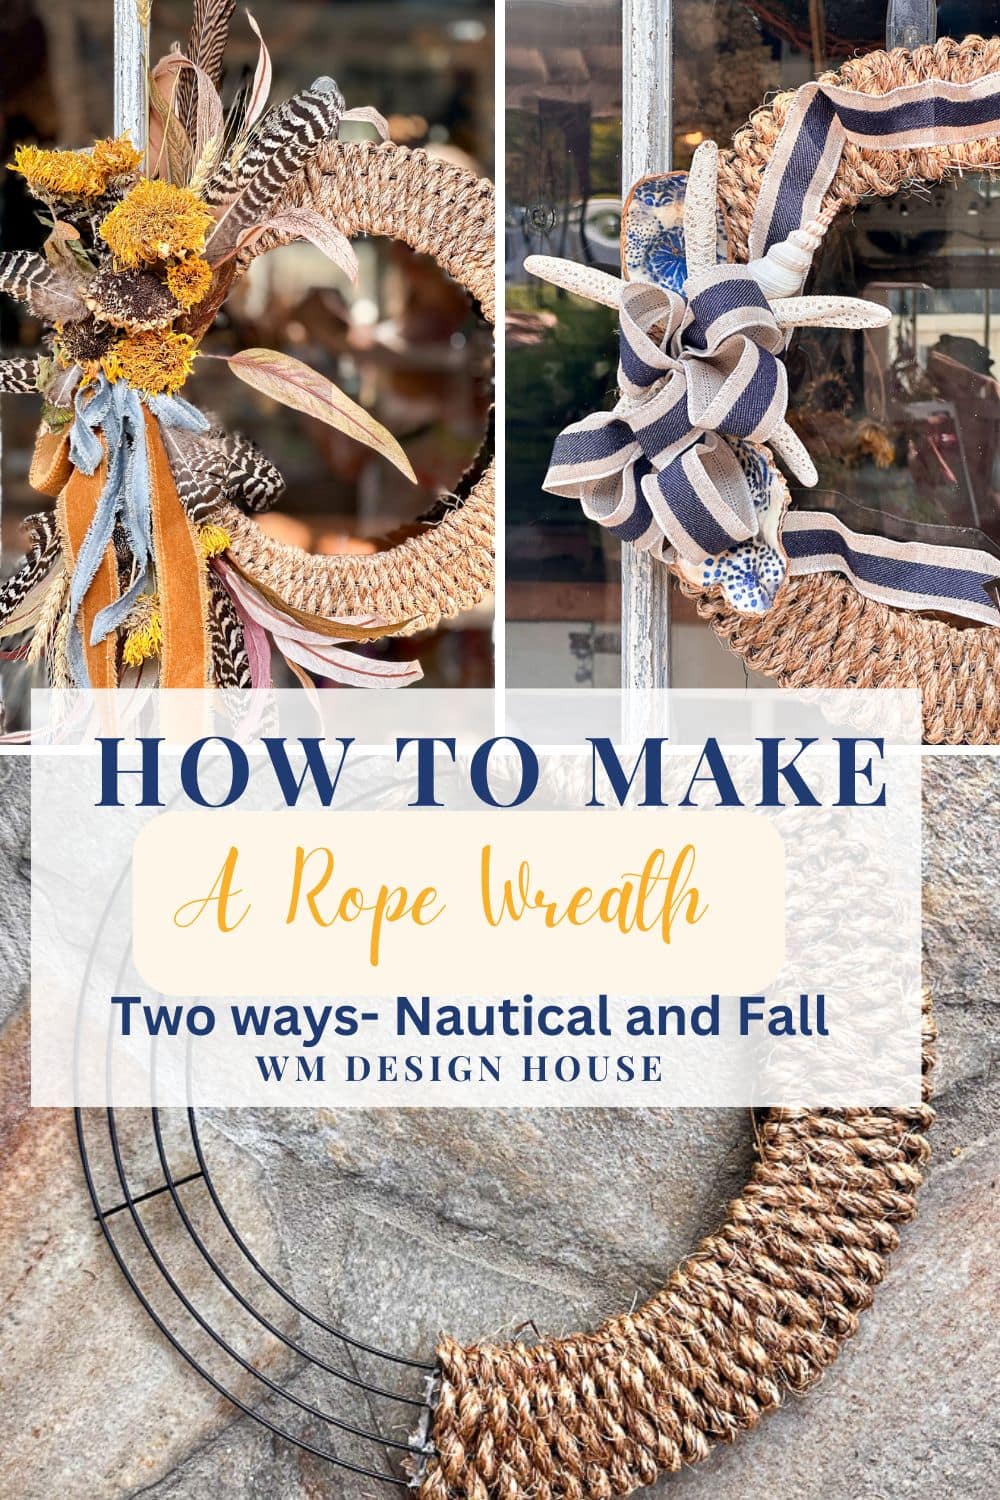
How to Make a DIY Rope Wreath For the Fall Season
Learn how to create a versatile and beautiful rope wreath that can be easily transformed for any season with simple decorations.
On my blog WM Design House, I may sometimes use affiliate links, which means a small commission is earned if you purchase via the link. The price will be the same whether you use the affiliate link or go directly to the vendor’s website using a non-affiliate link. Read my full disclosure policy here.
Today is our Handcrafted Society post, where I gather together with several of my blogger friends and we all create a project out of the same medium.
This month, we were all challenged to create a beautiful project using rope or twine. Be sure to check out all of the other projects my friends made at the end of this post.
Crafting a Rustic DIY Rope Wreath: A Step-by-Step Guide
Creating your own DIY rope wreath is a fun and creative way to add a touch of rustic charm to your home decor. Whether you’re looking to spruce up your front door, add a unique element to a gallery wall, or craft a seasonal accent piece, a rope wreath can suit any style or occasion. Using simple materials and easy-to-follow steps, this project is perfect for both beginners and seasoned crafters. In this guide, we’ll walk you through making a beautiful rope wreath that looks expensive and effortless, adding a warm and inviting feel to any space in your home. So grab your supplies and let’s get started on this charming DIY project!
Materials Needed for a DIY Rope Wreath
You can purchase many of these items at the dollar tree.
Additional Supplies needed to decorate your wreath
Nautical themed wreath
Fall themed wreath
Step-by-Step Guide: Crafting Your DIY Rope Wreath
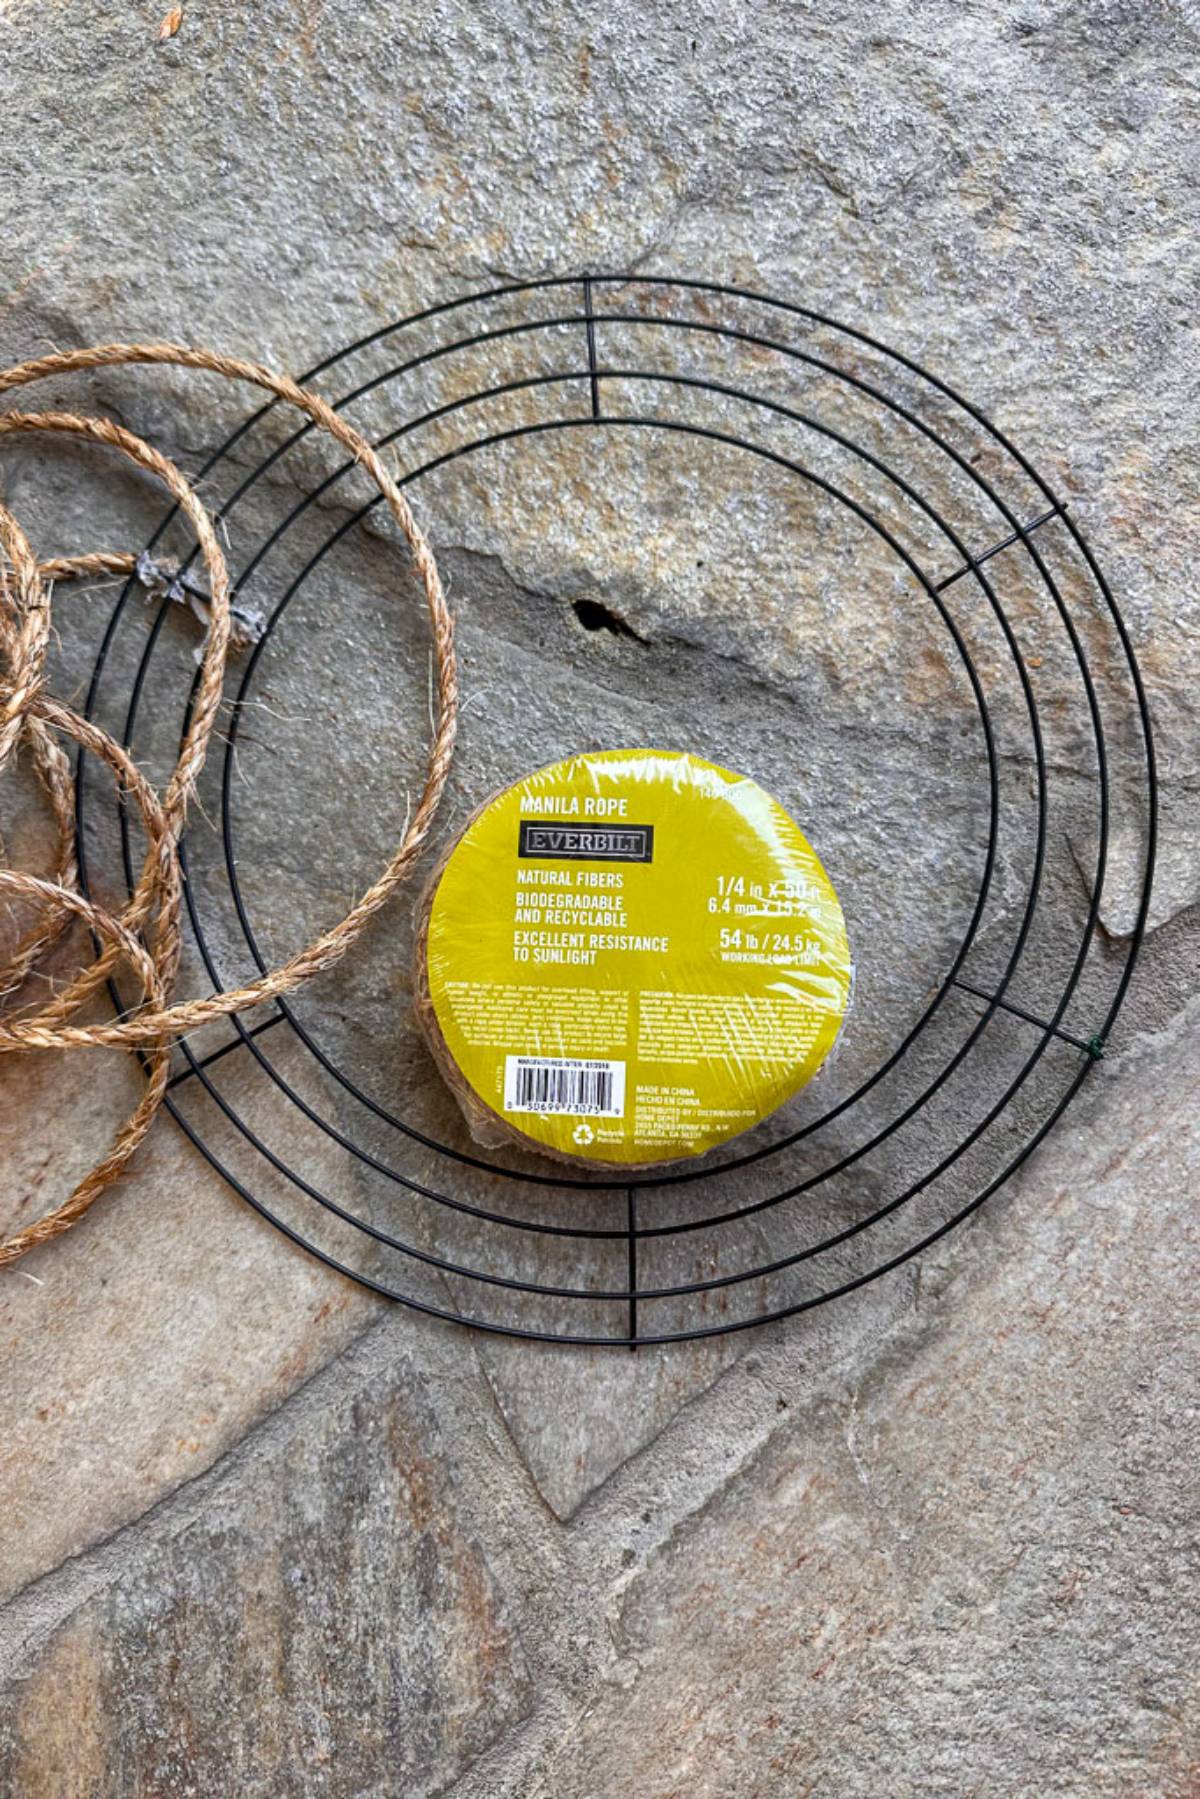
Prepare Your Rope:
Cut pieces of rope 2-3 yards long. If the pieces are shorter, weaving them through the wireframe becomes easier.
Start Gluing:
Begin by hot gluing one end of the sisal rope to the bottom of the wire frame.
Tip from wendy’s craft room:
I find that cotton rope is the easiest to weave, though other types of rope can also work well but may be slightly more challenging to handle.
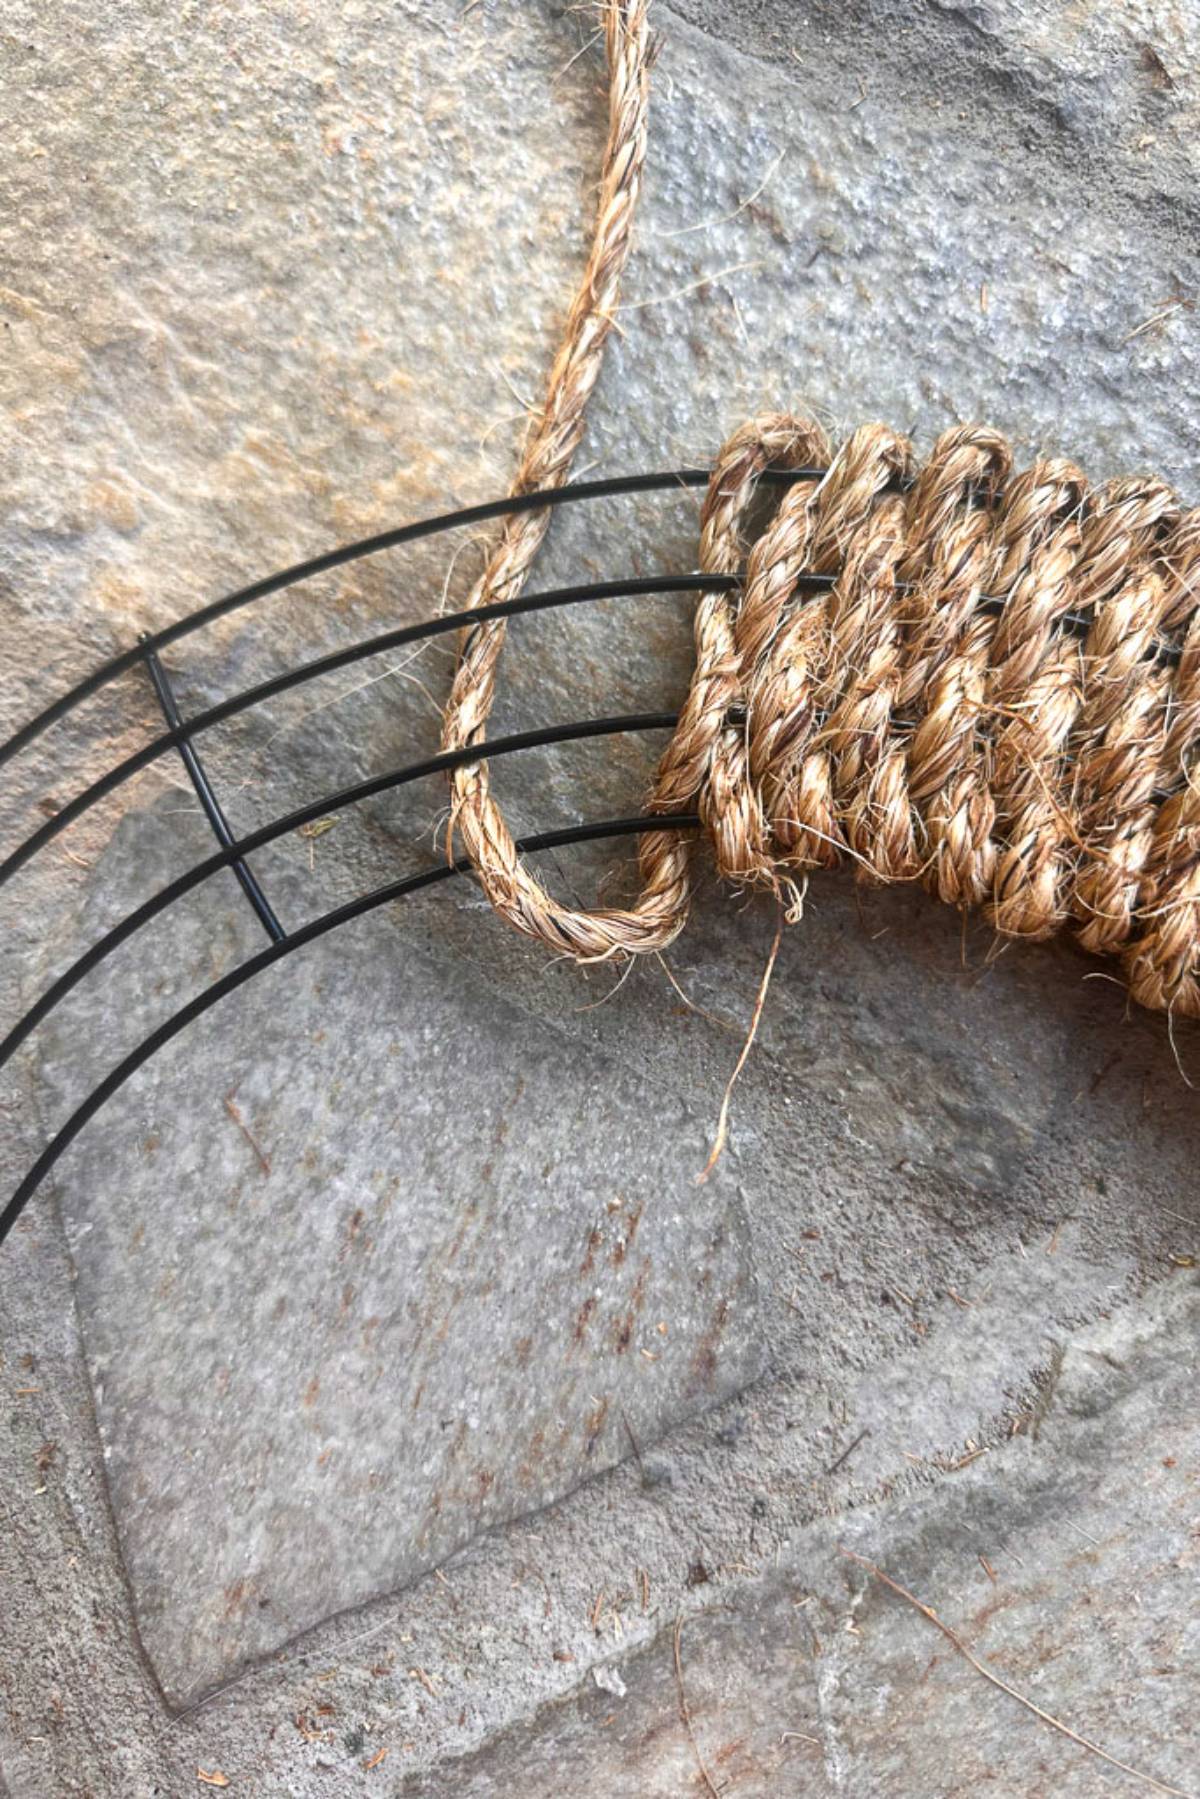
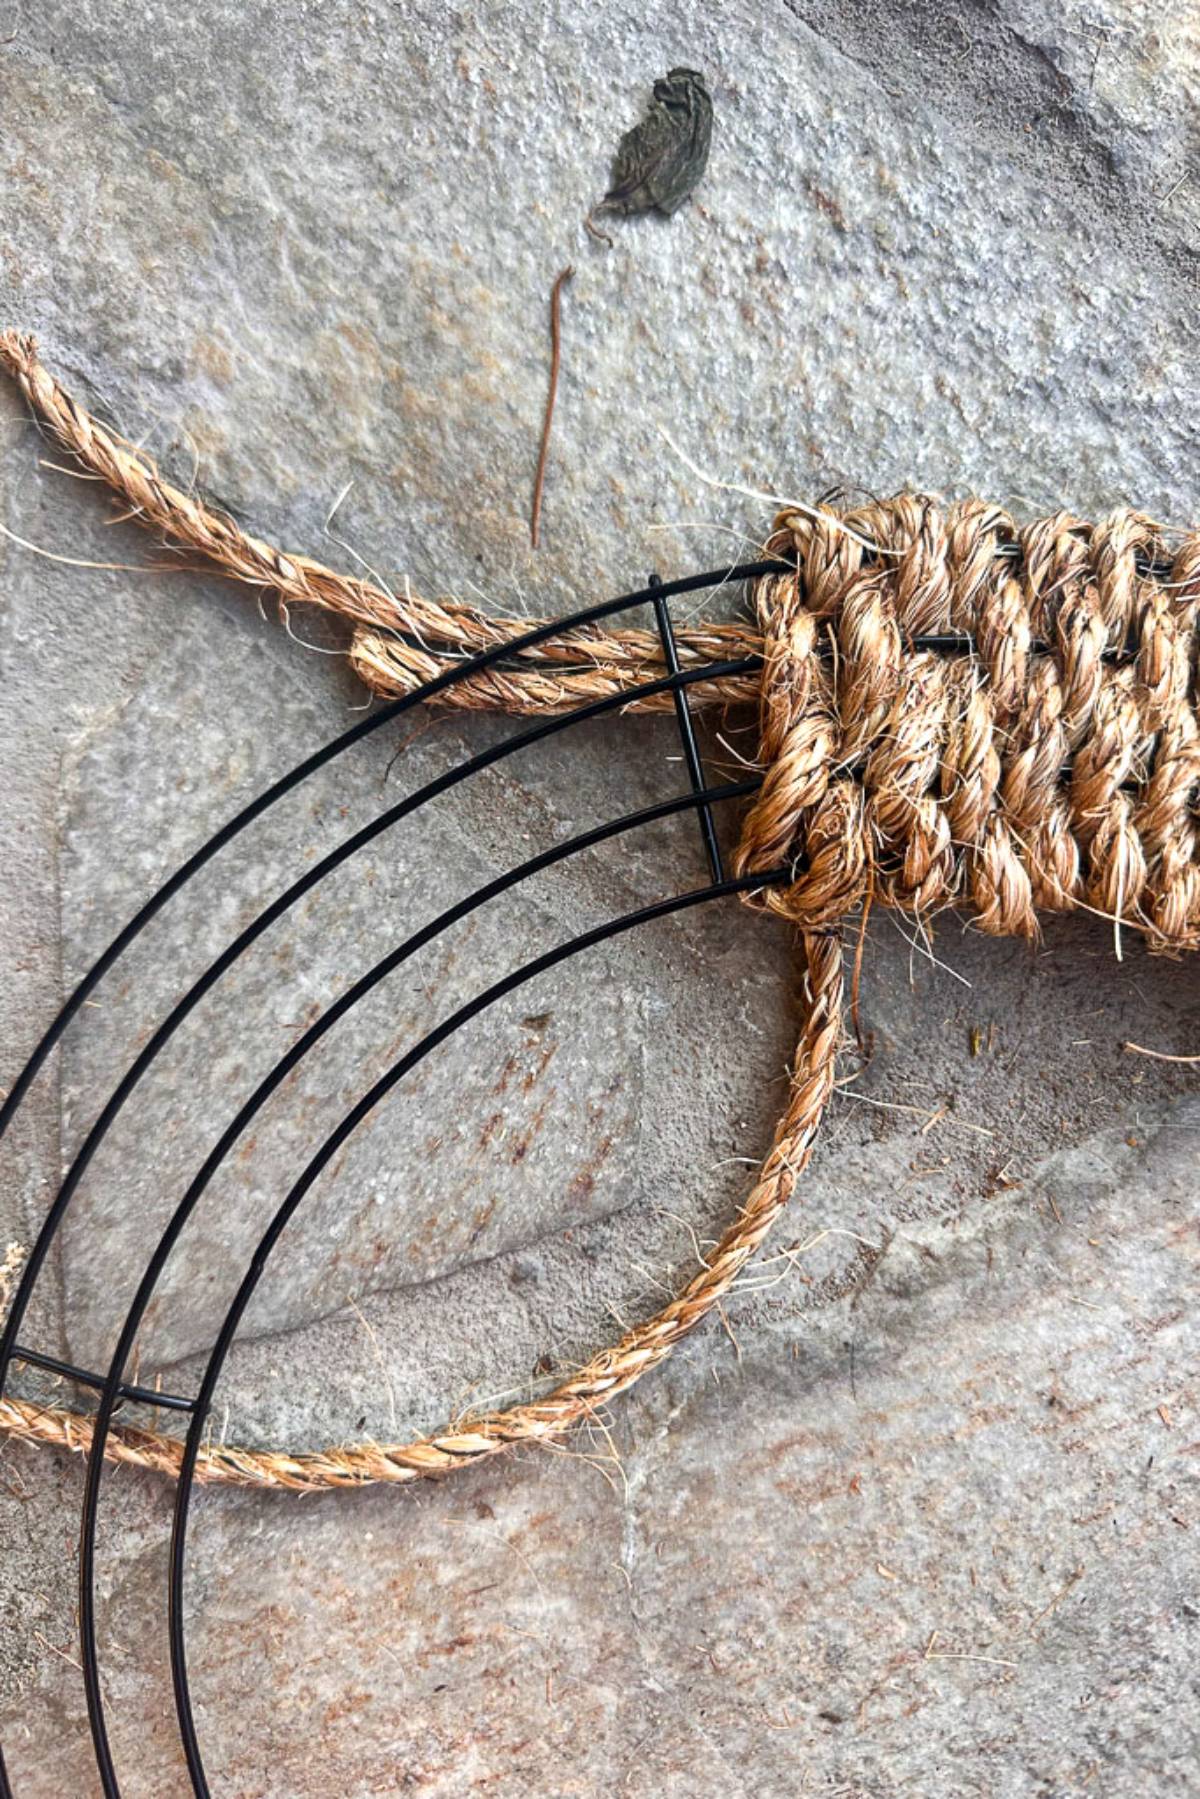
Begin Weaving:
Start on the outermost wire. Wrap the rope over the top, then under the second wire, pulling it tight. Hold the rope with your right hand and weave with your left hand for better control.
Continue Weaving:
Next, go over the third wire and under the fourth wire, pulling it tight again.
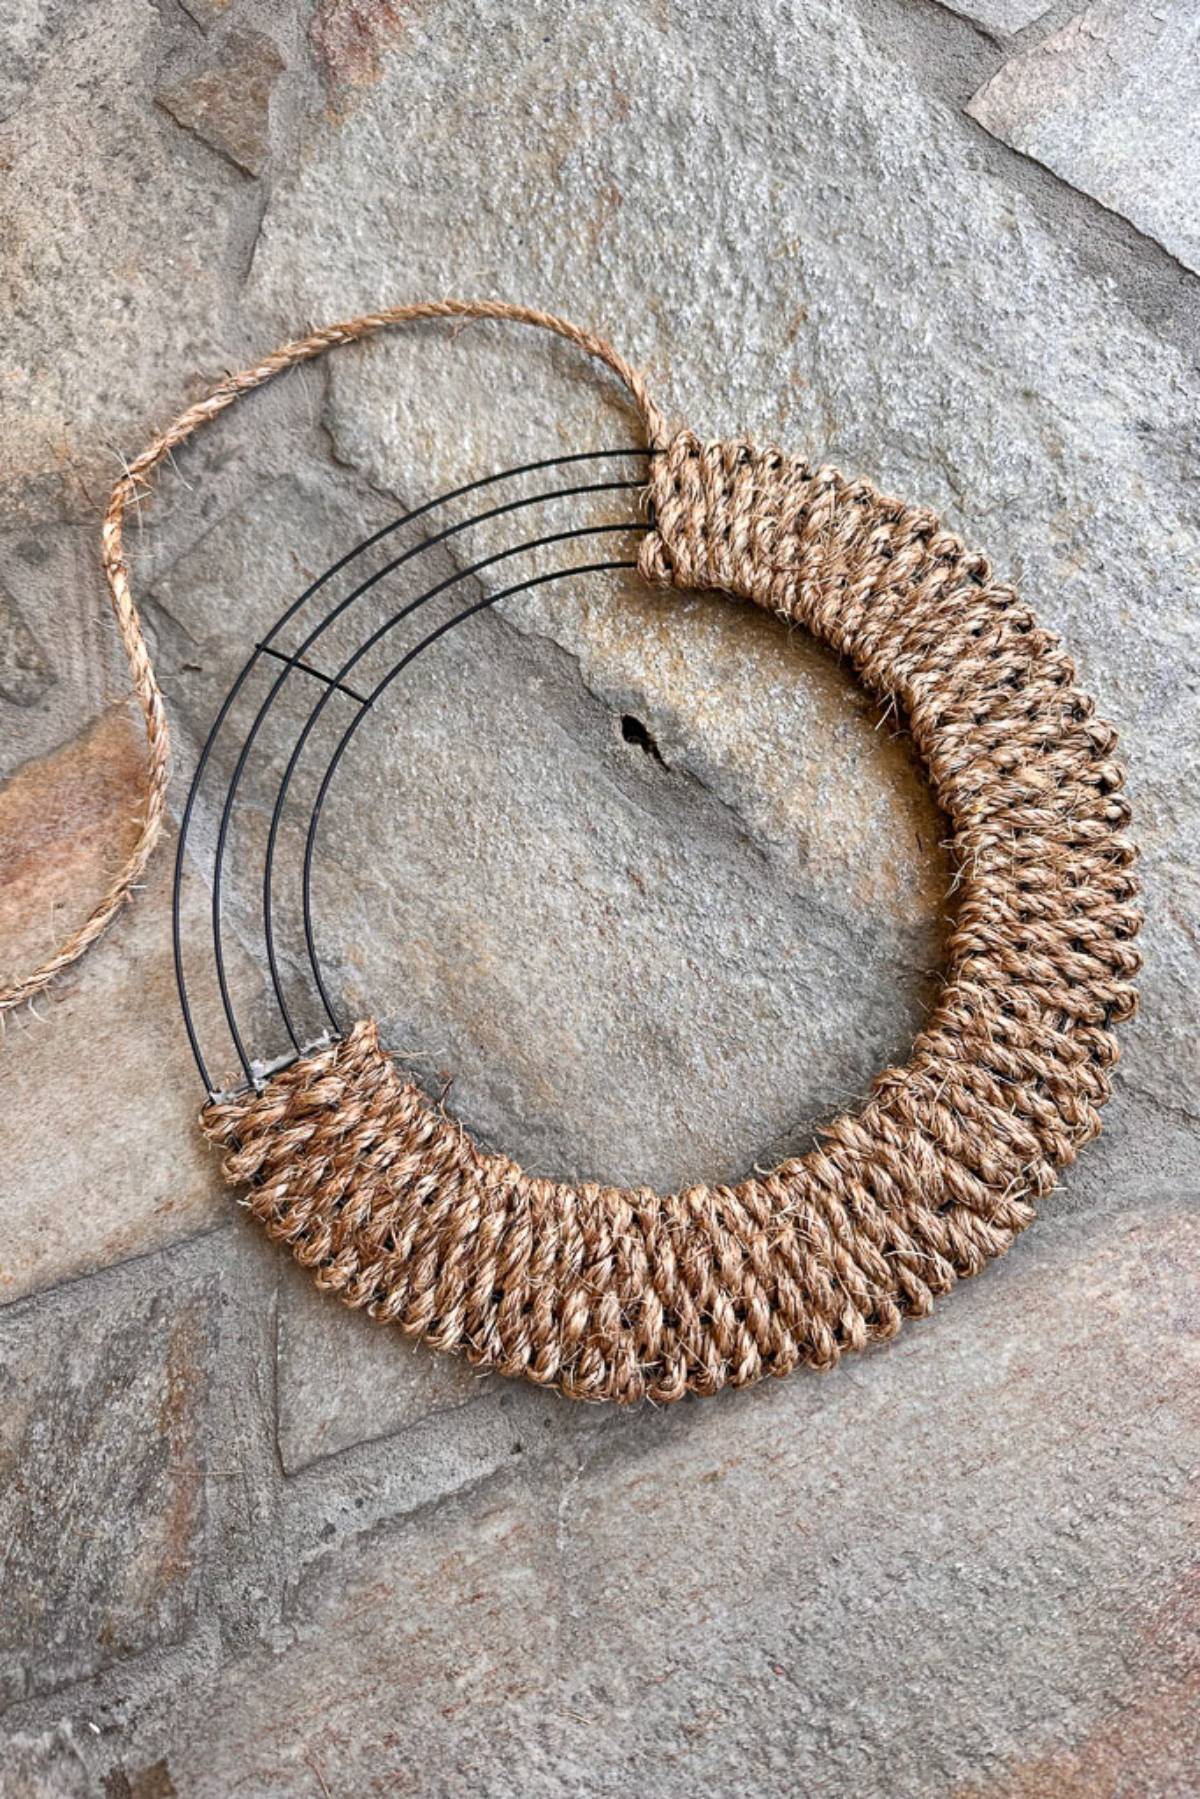
Complete a Full Pass:
Once you’ve woven across the frame, turn around and repeat the same process. Keep the rope as tight as possible to maintain the structure.
Tip from wendy’s craft room:
Keep the rope taut as you work to ensure a tight and uniform weave. This will help maintain the wreath’s shape and structure, preventing gaps or uneven sections.
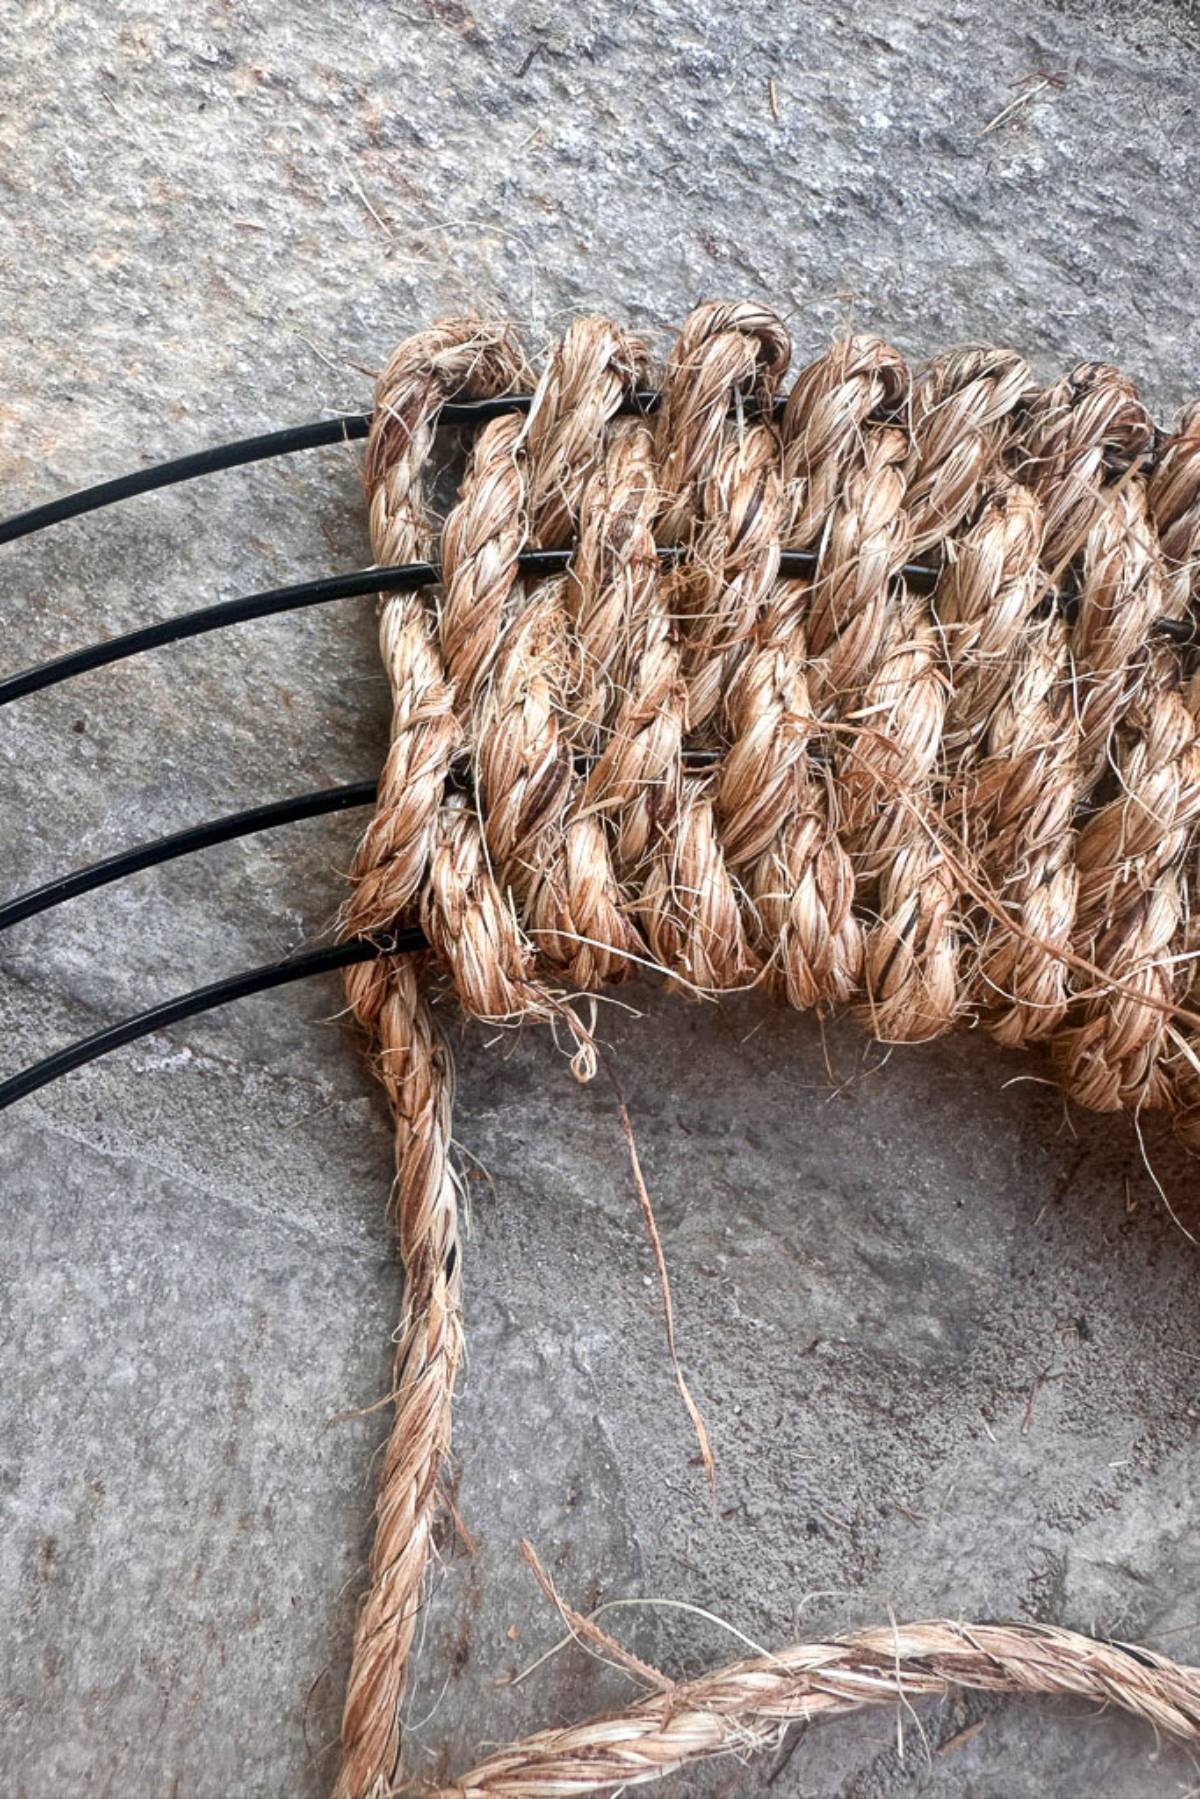
Reverse the Weave:
Go over the wire you just went under and weave back to the other side, continuing the over-under pattern.
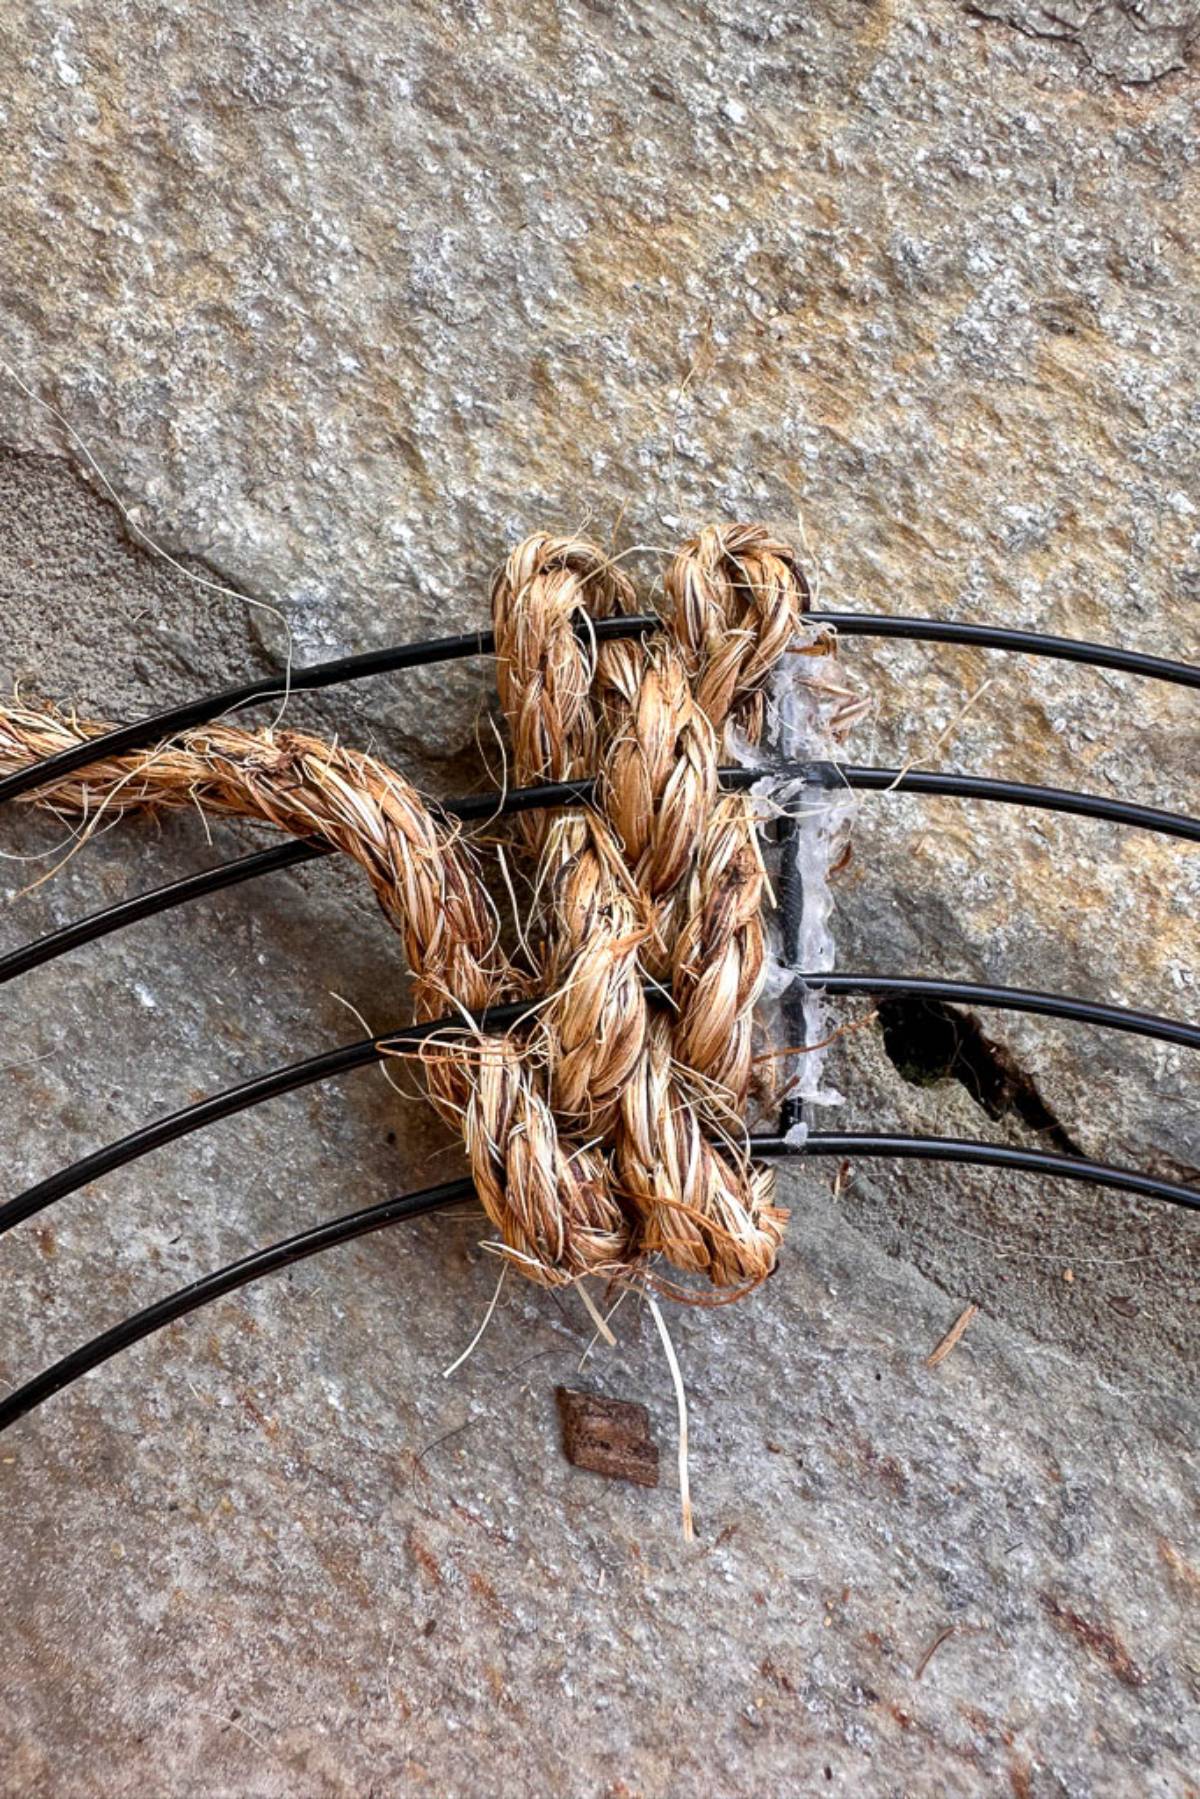
Adding More Rope:
When you reach the end of the rope, leave a 3-inch tail on the back. To add another piece, place the new rope’s end against the tail of the first piece. You can hold both ends with one hand in the direction you will weave.
Weave the New Rope:
Take the opposite end of the second rope and start weaving it through the wire wreath frame as before. As you weave back and forth, go over the two tails on the back to secure them. It’s okay if you can’t cover them on each wire as long as they are secured twice.
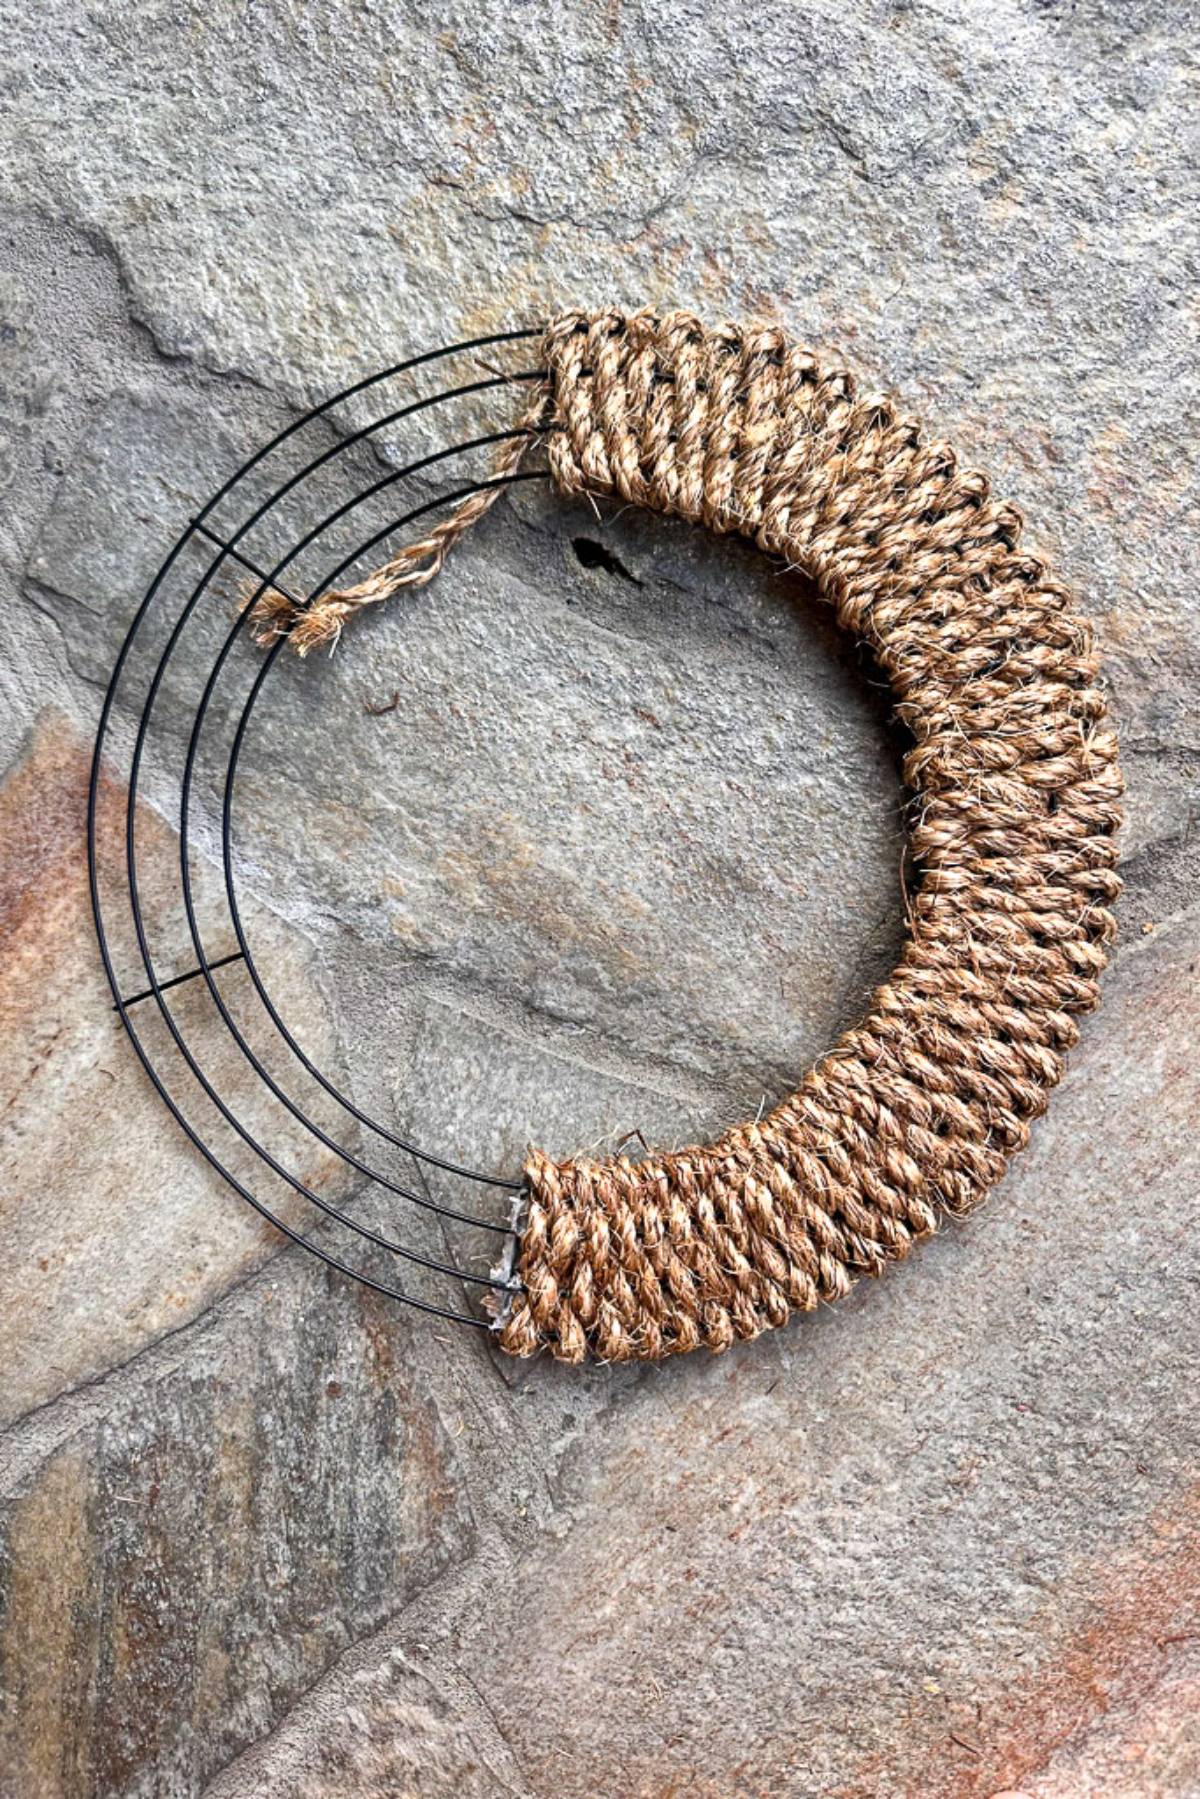
Trim and Continue:
Once you’ve completed a few rows, trim the tails and continue weaving until you reach the end of the frame.
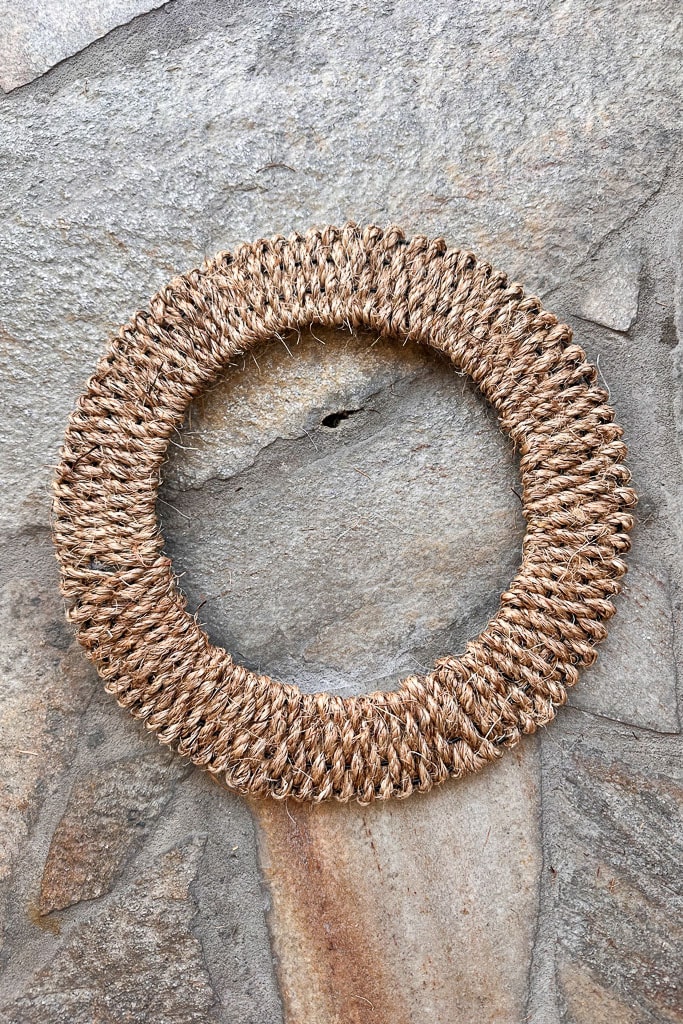
Finish the Weaving:
To finish, place the rope’s end on the back of the wreath and weave it under another loop. Then, tie it or hot glue the end on the back to secure it.
Styling Ideas for Your Finished Rope Wreath
Styling a rope wreath allows you to unleash your creativity and personalize your home decor for any season or occasion. Begin with a neutral base of natural rope to provide a versatile canvas.
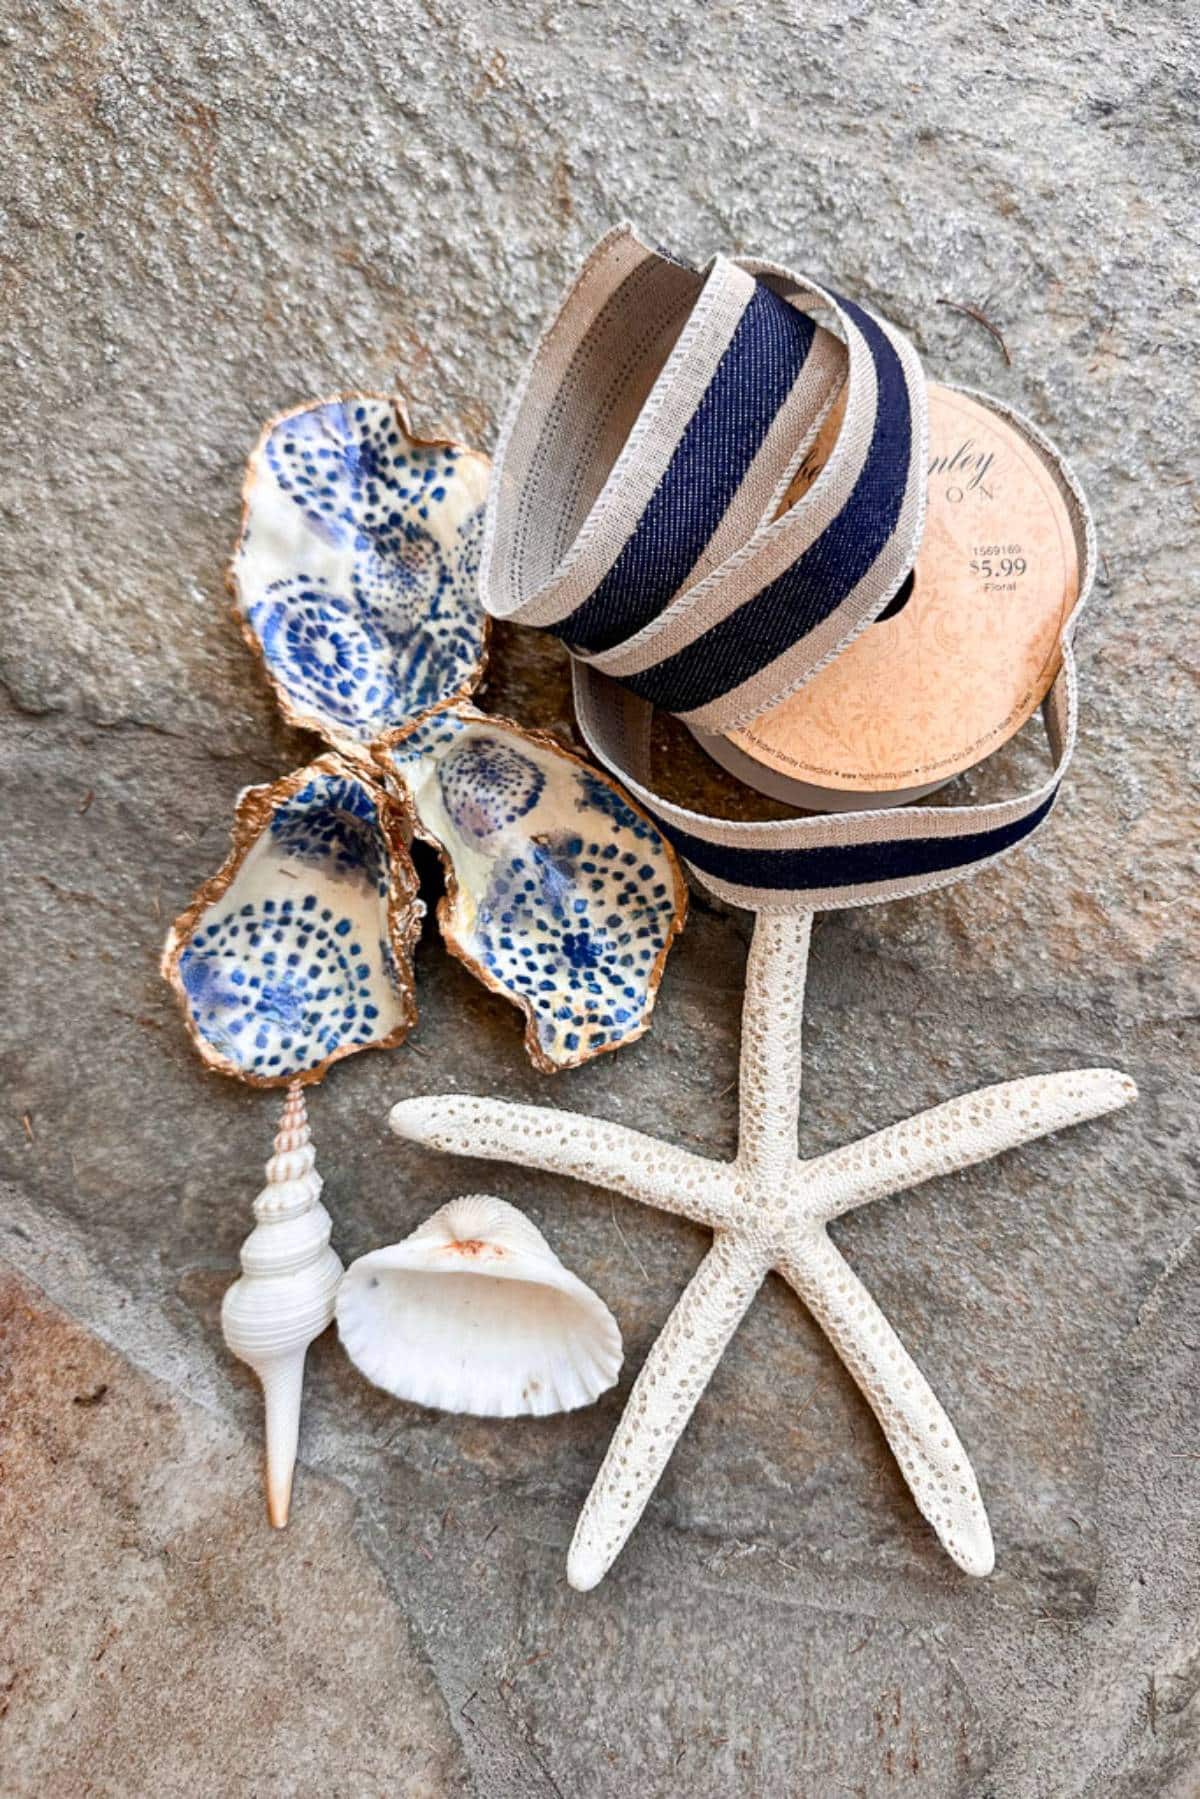
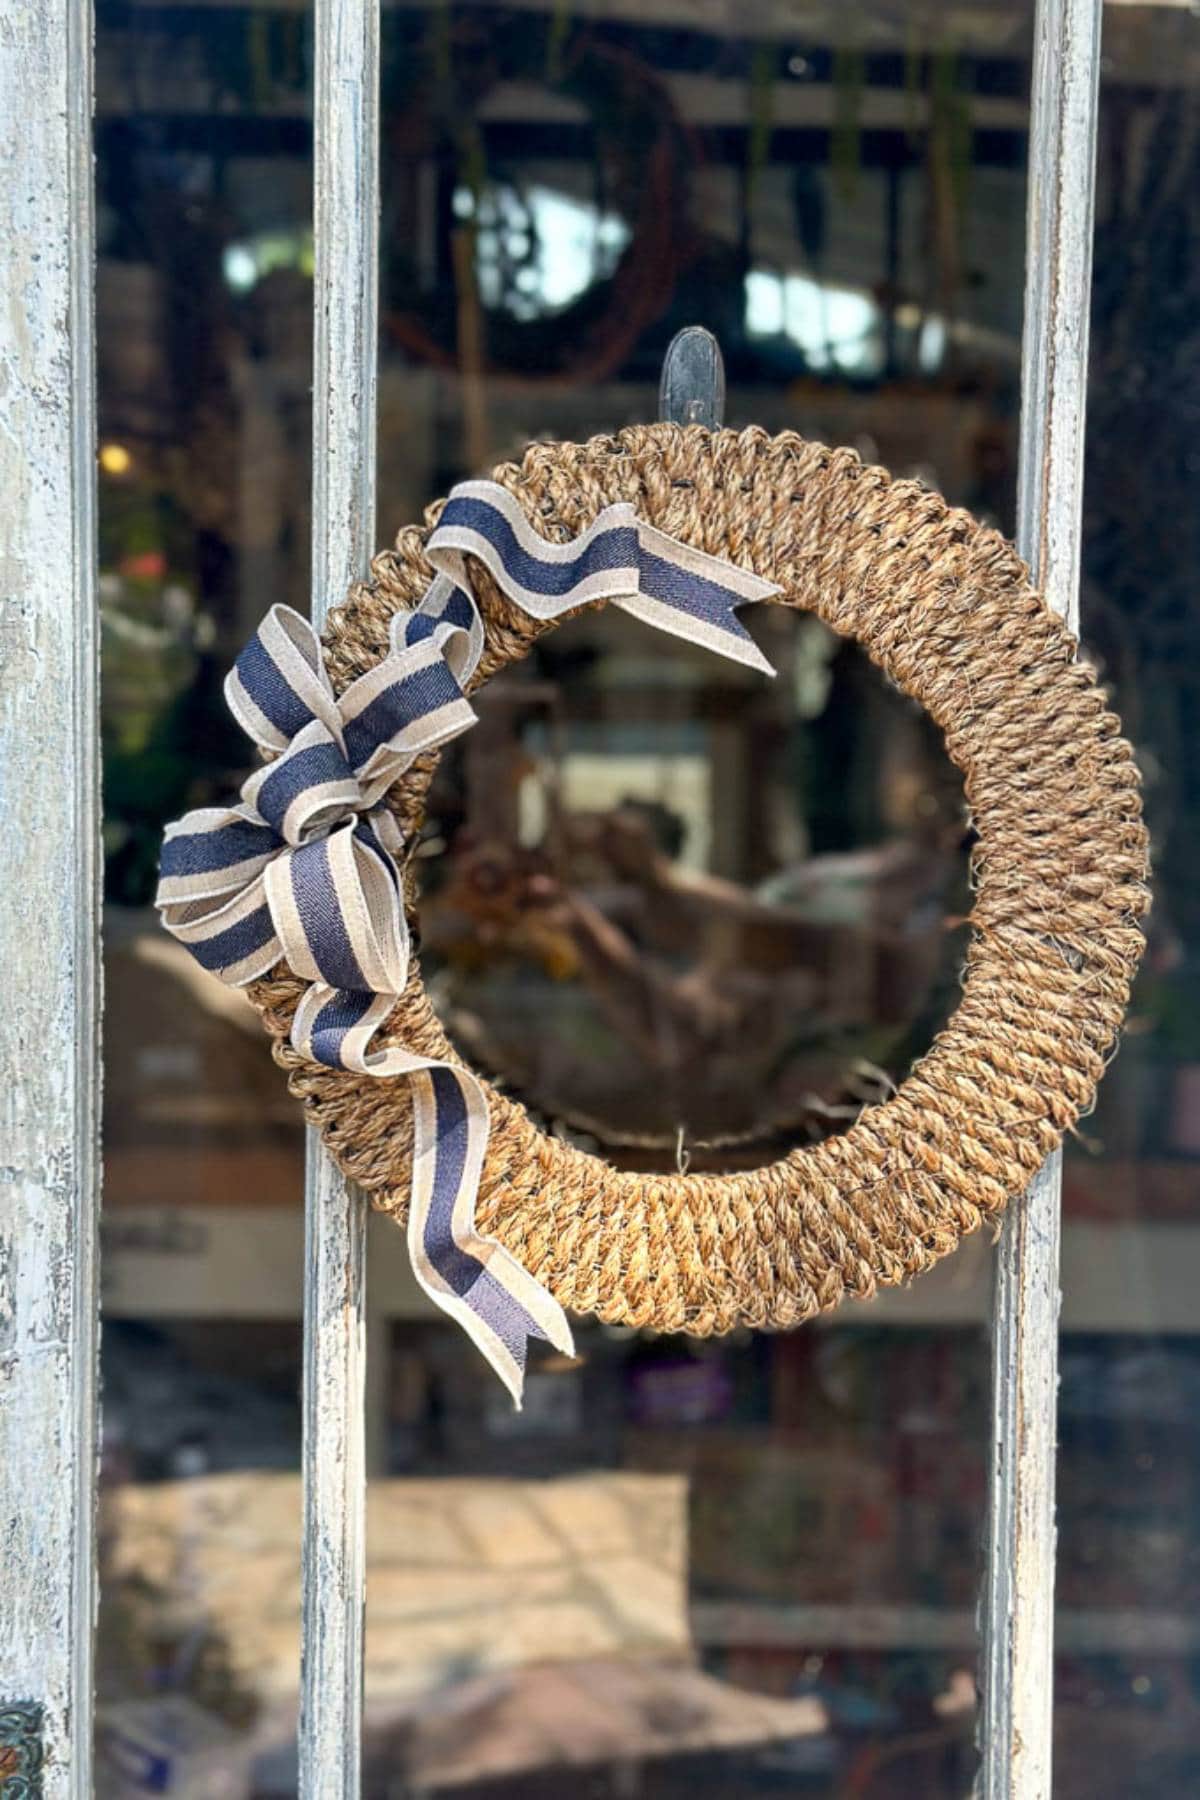
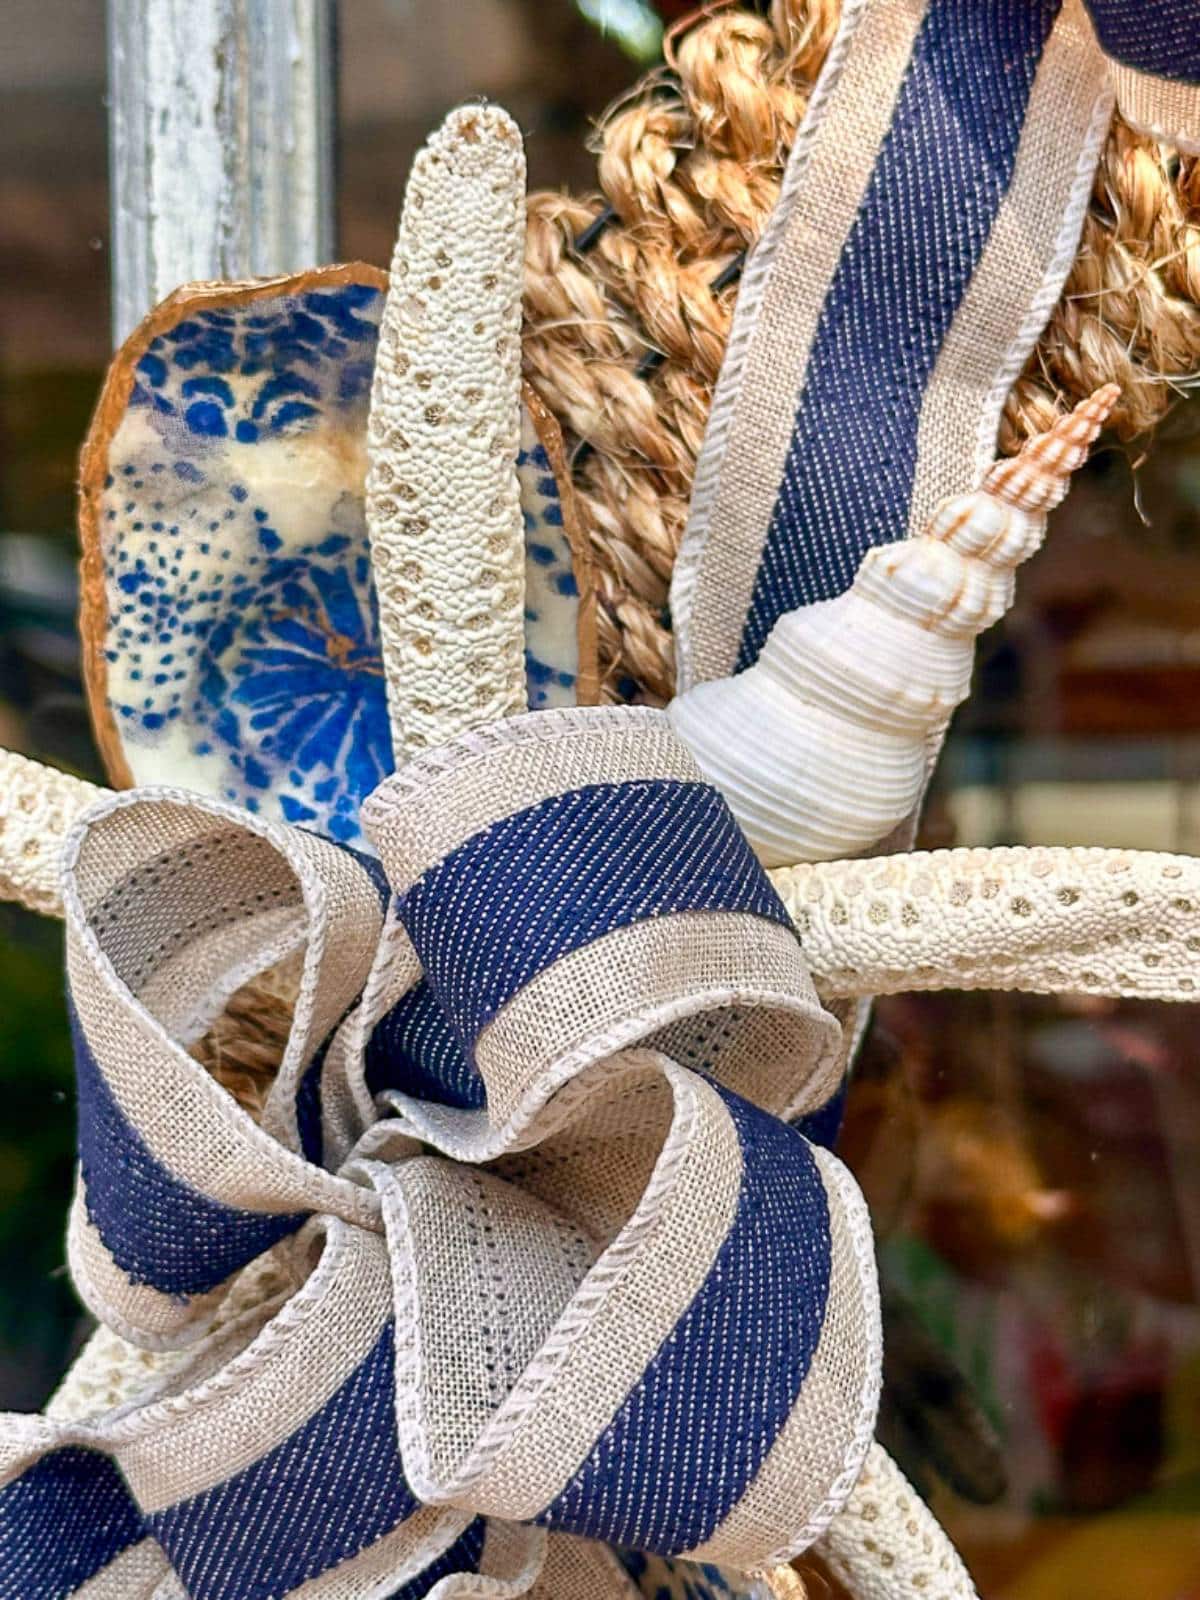
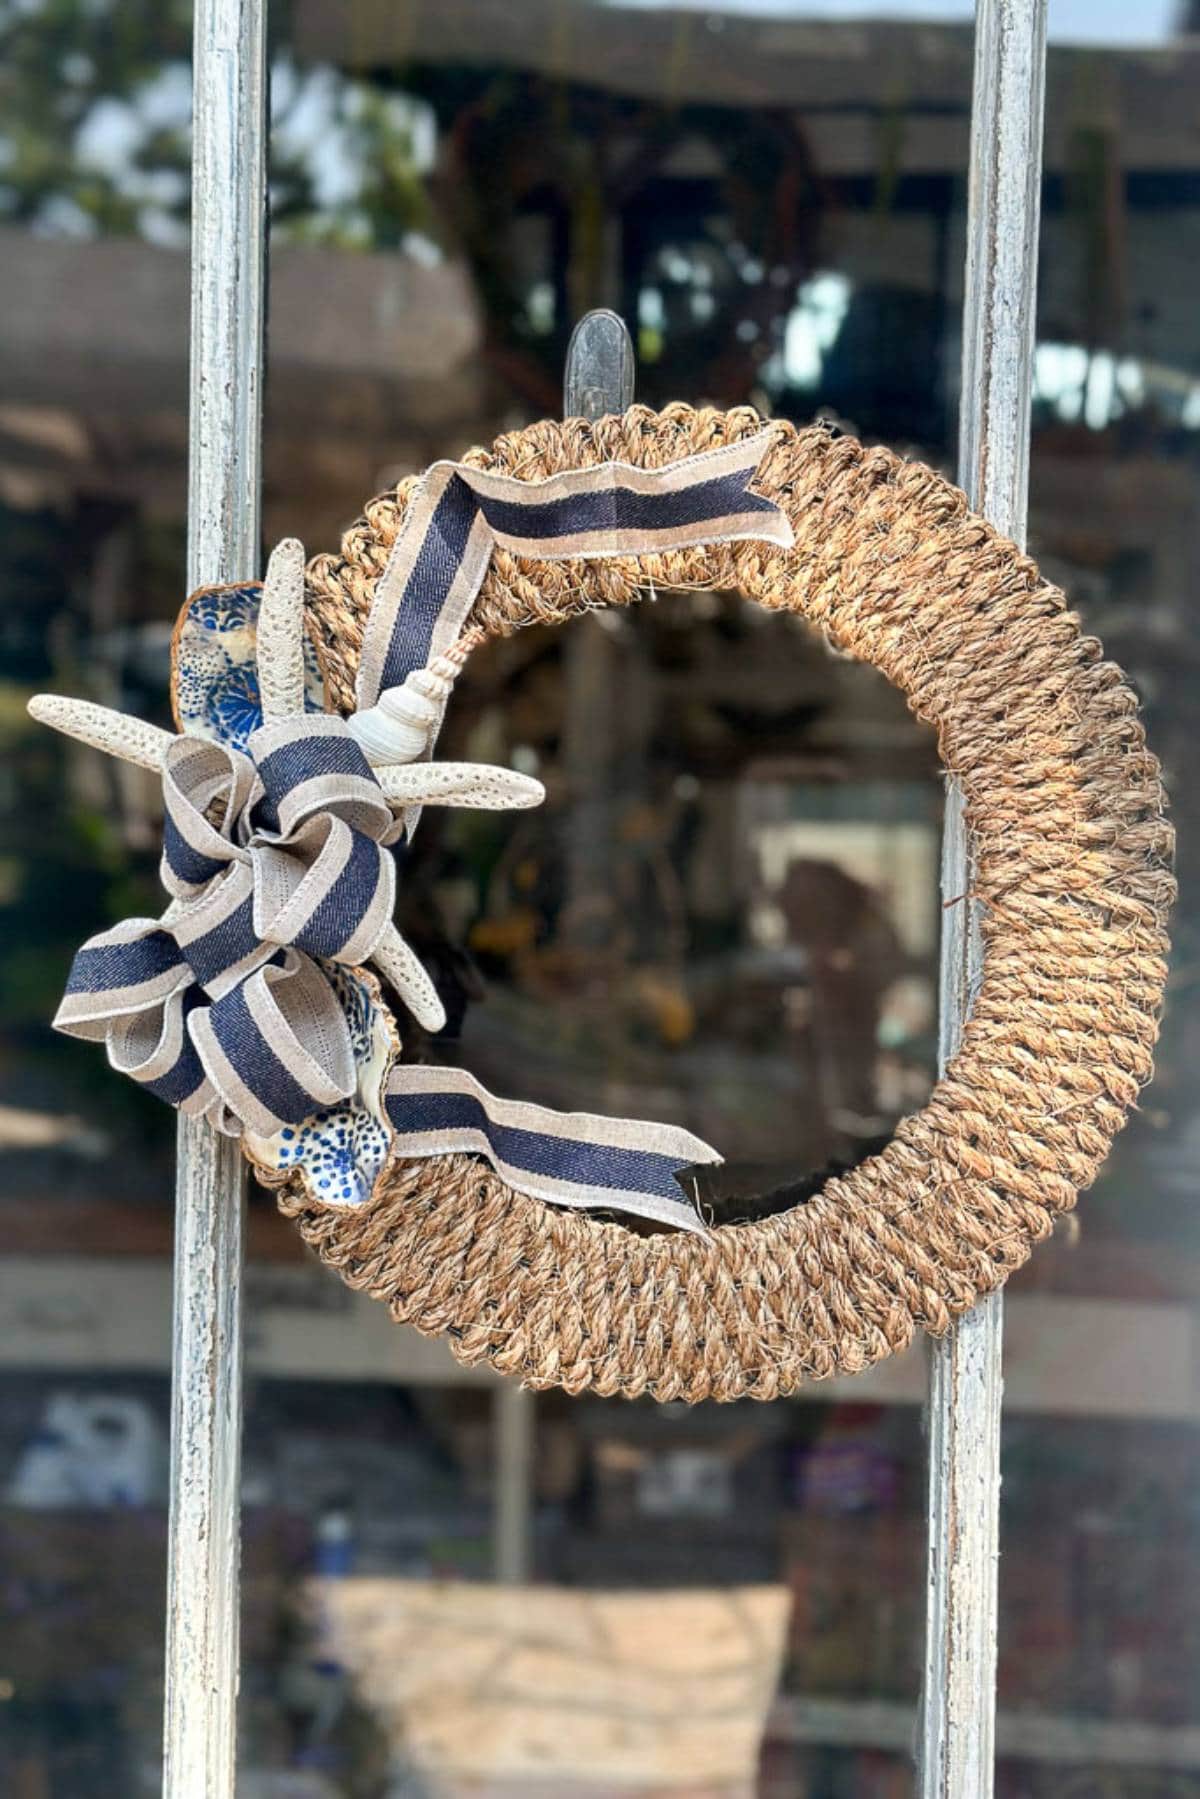
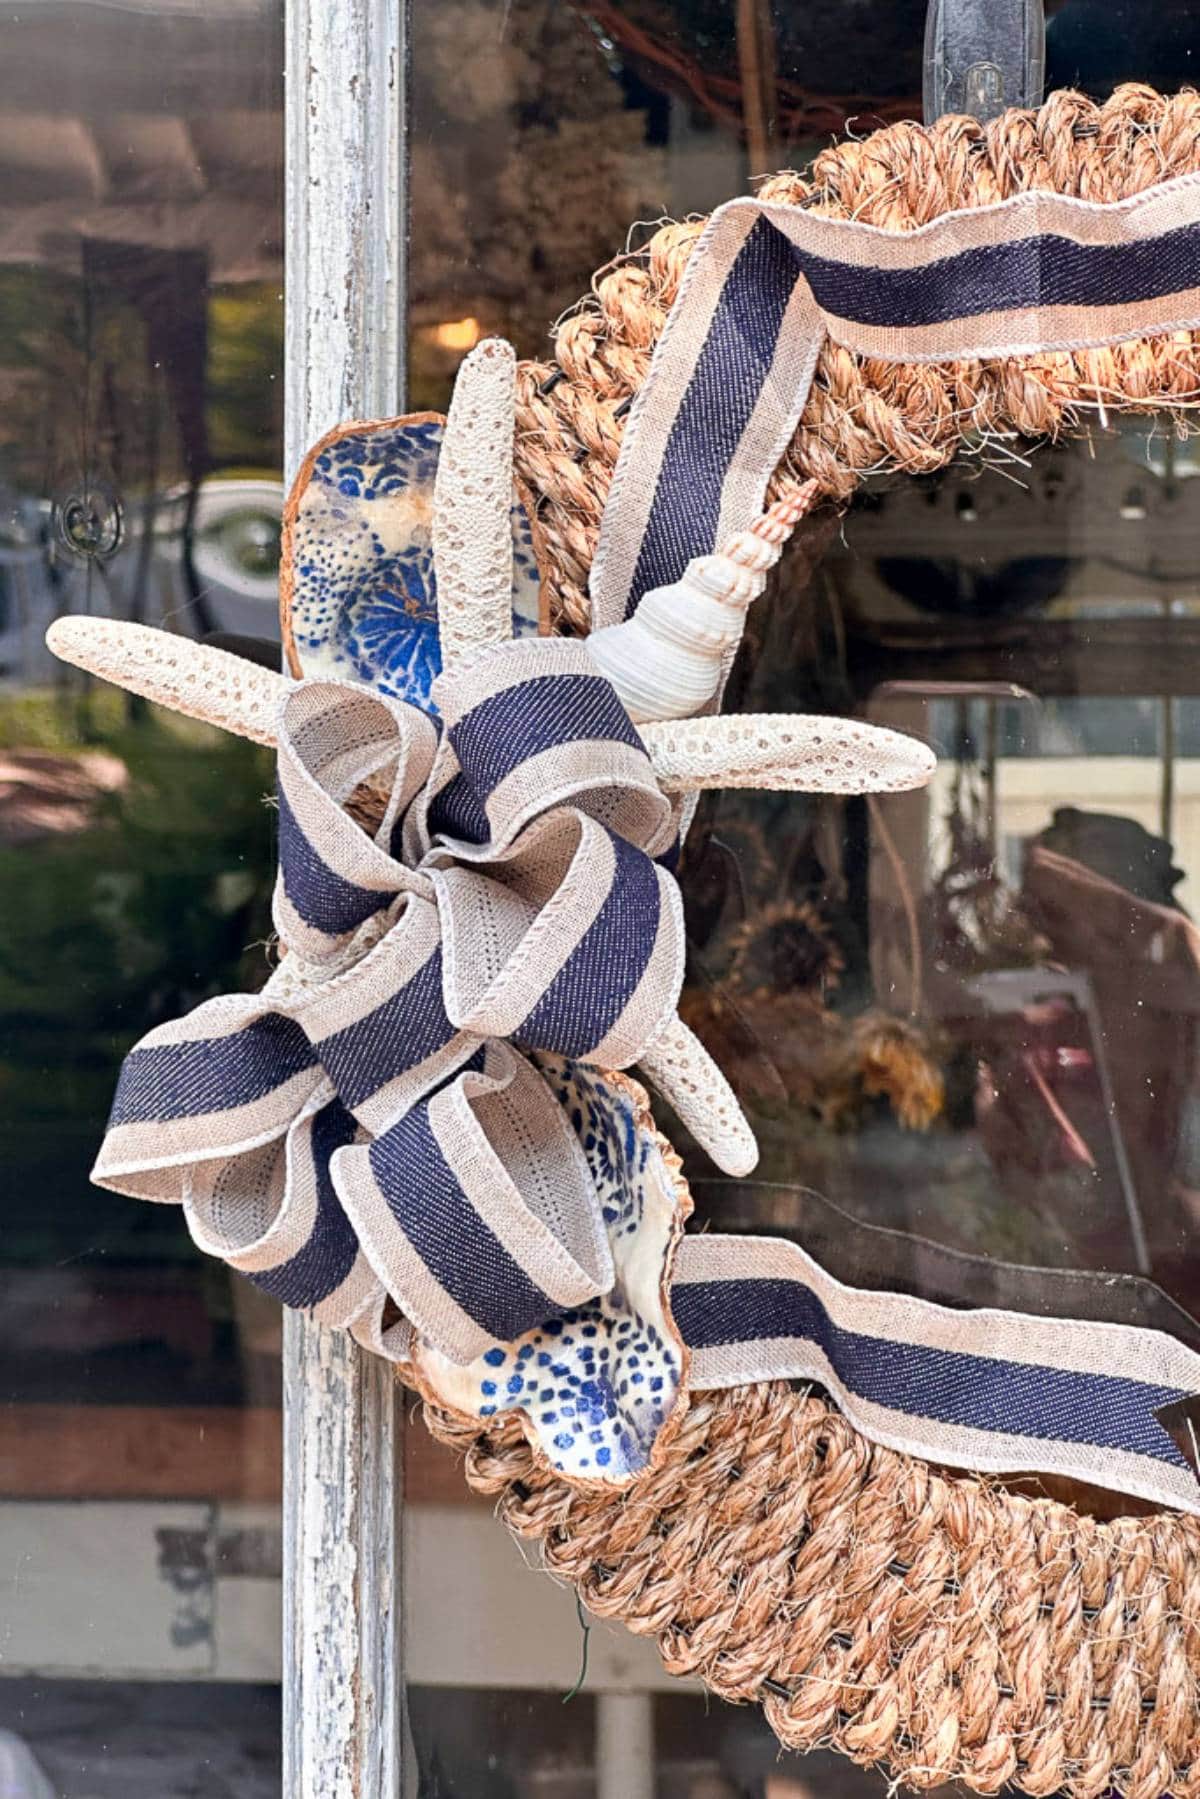
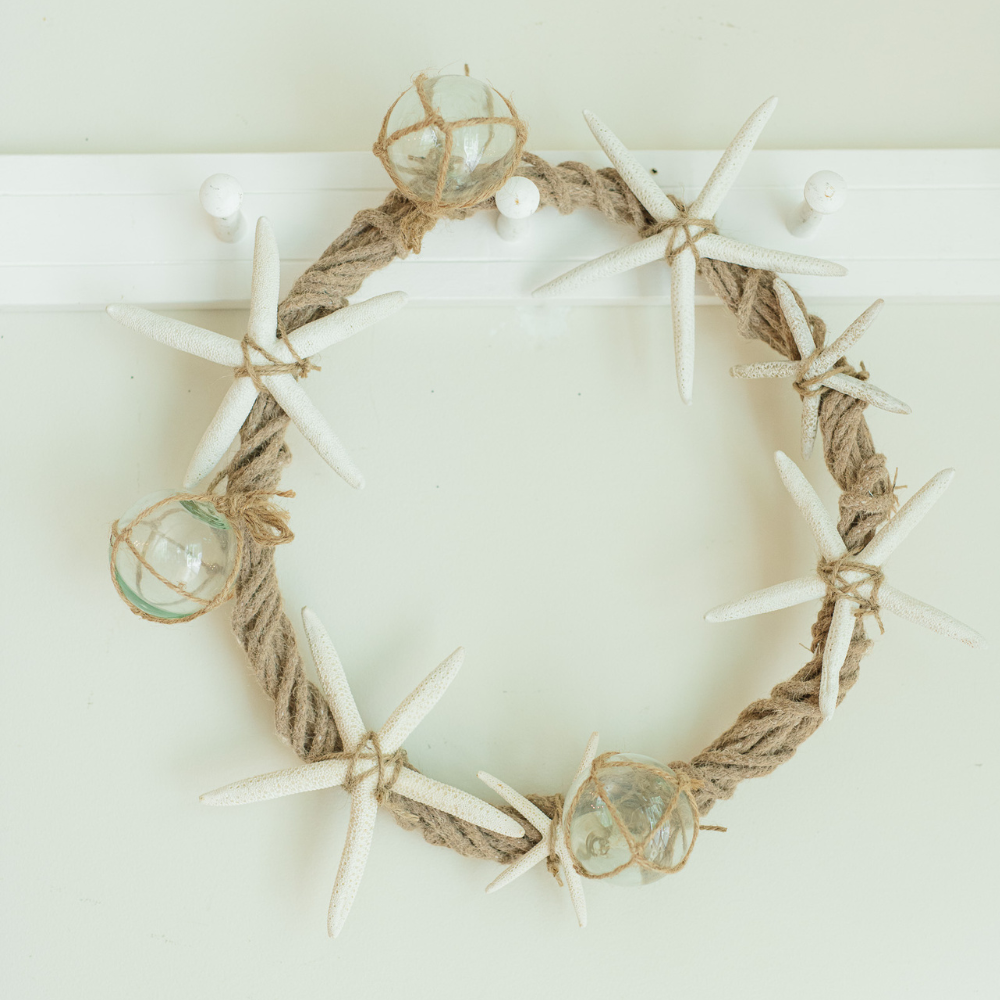
Adding Coastal Elements: Tips for a Nautical Look
Nautical rope naturally complements a coastal design style, evoking the relaxed and breezy beach vibes of the summer.
To enhance this coastal look, I started by adding a simple bow made from a beige and blue wired ribbon, which beautifully captures the colors of the sand and sea.
Next, I included some charming oyster shells that I decoupaged last year. I drilled small holes in the tops of the shells and wired them behind the bow for a creative touch that adds texture and interest to the wreath.
Finally, I completed the wreath with a white starfish and a collection of seashells, bringing the entire design together with elements that truly embody the spirit of the ocean.
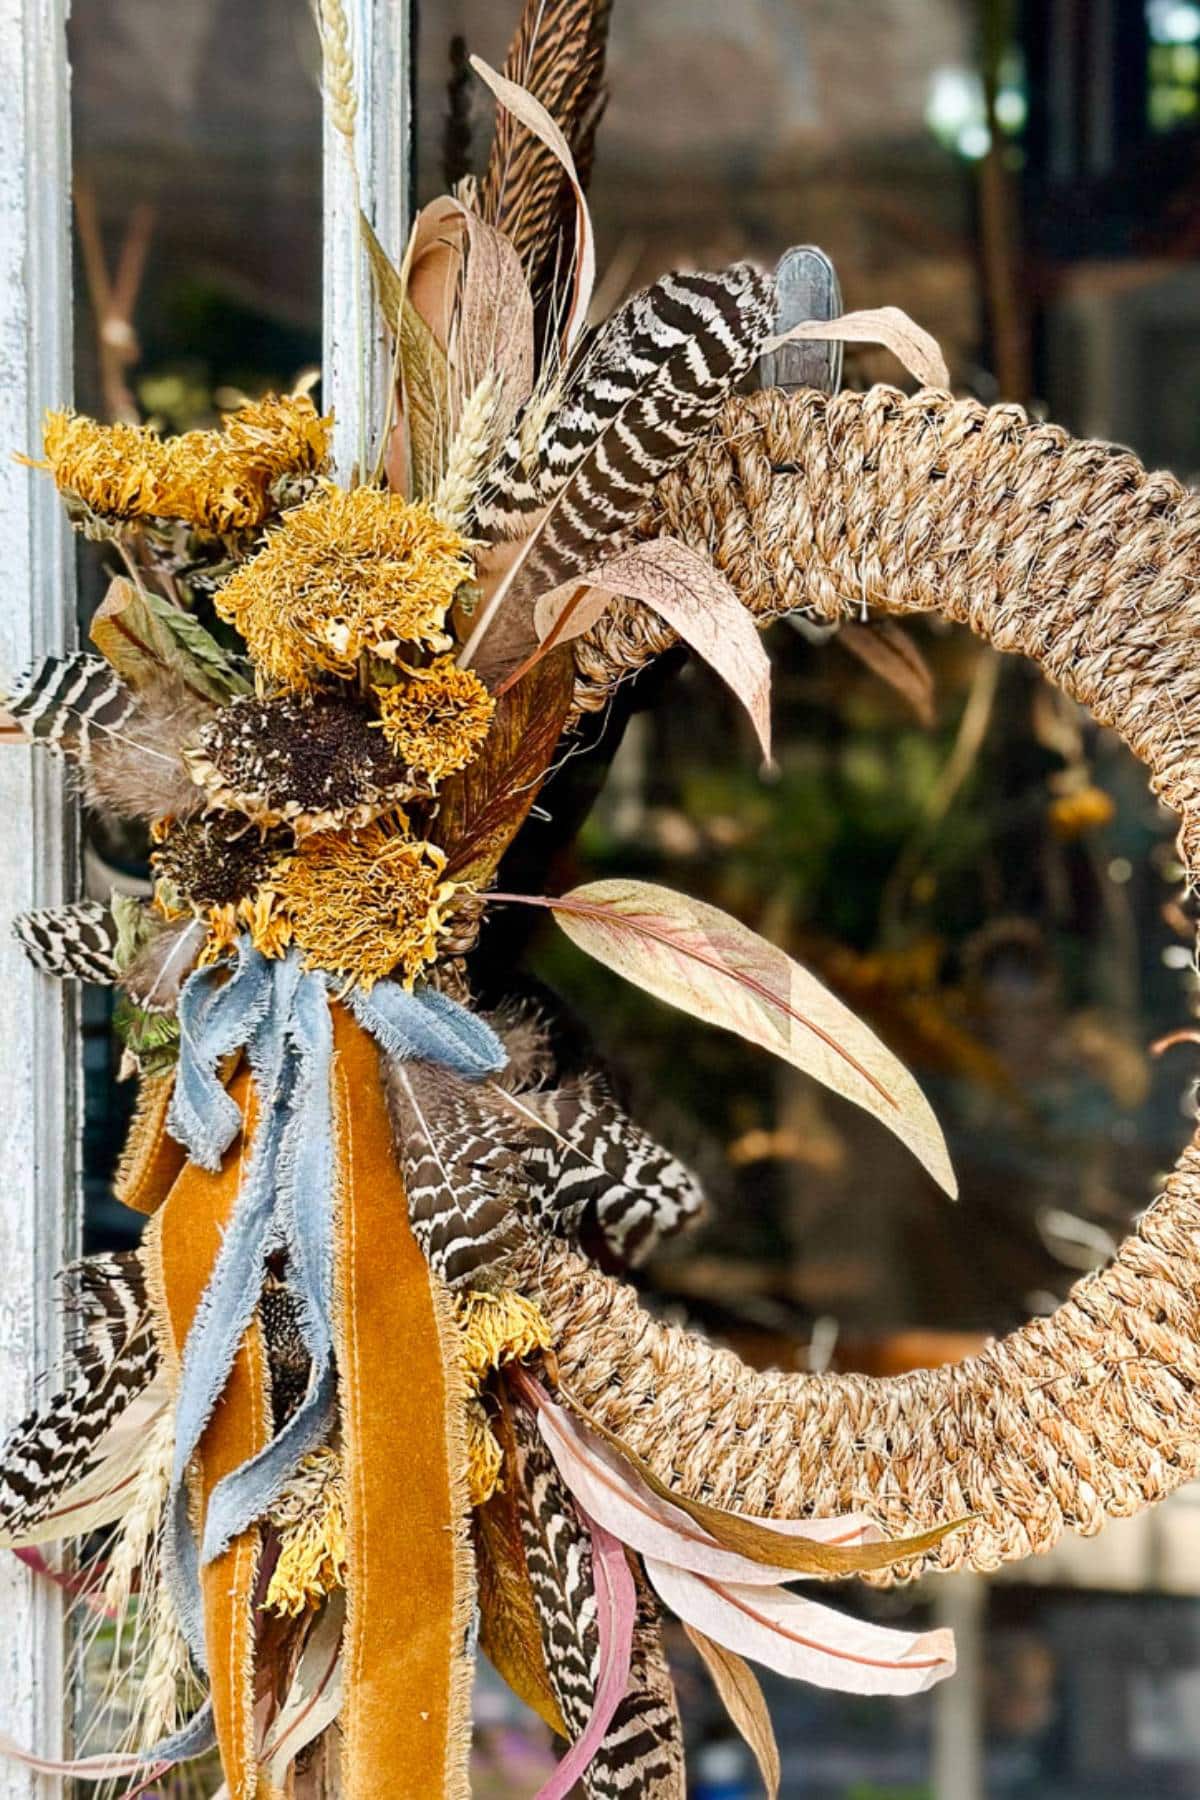
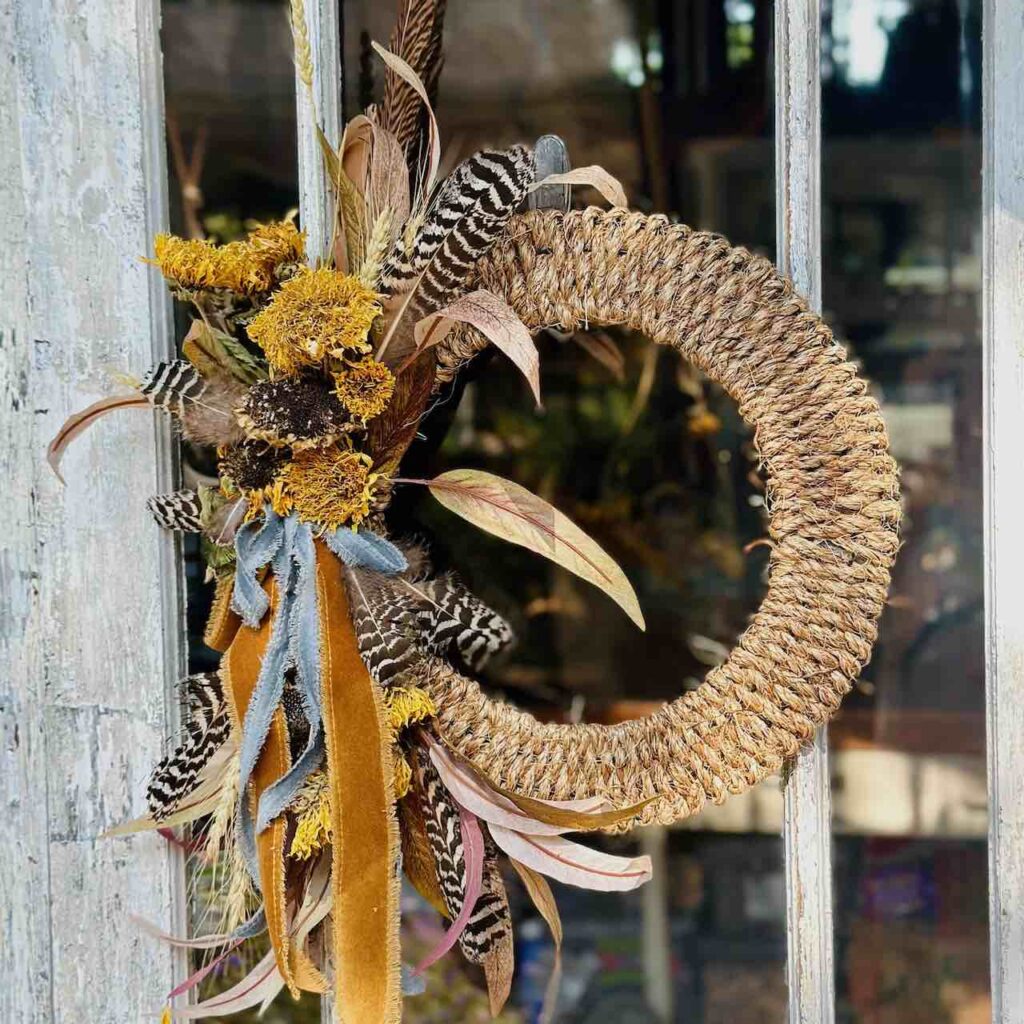
Creating a Fall-Inspired Rope Wreath with Seasonal Accents
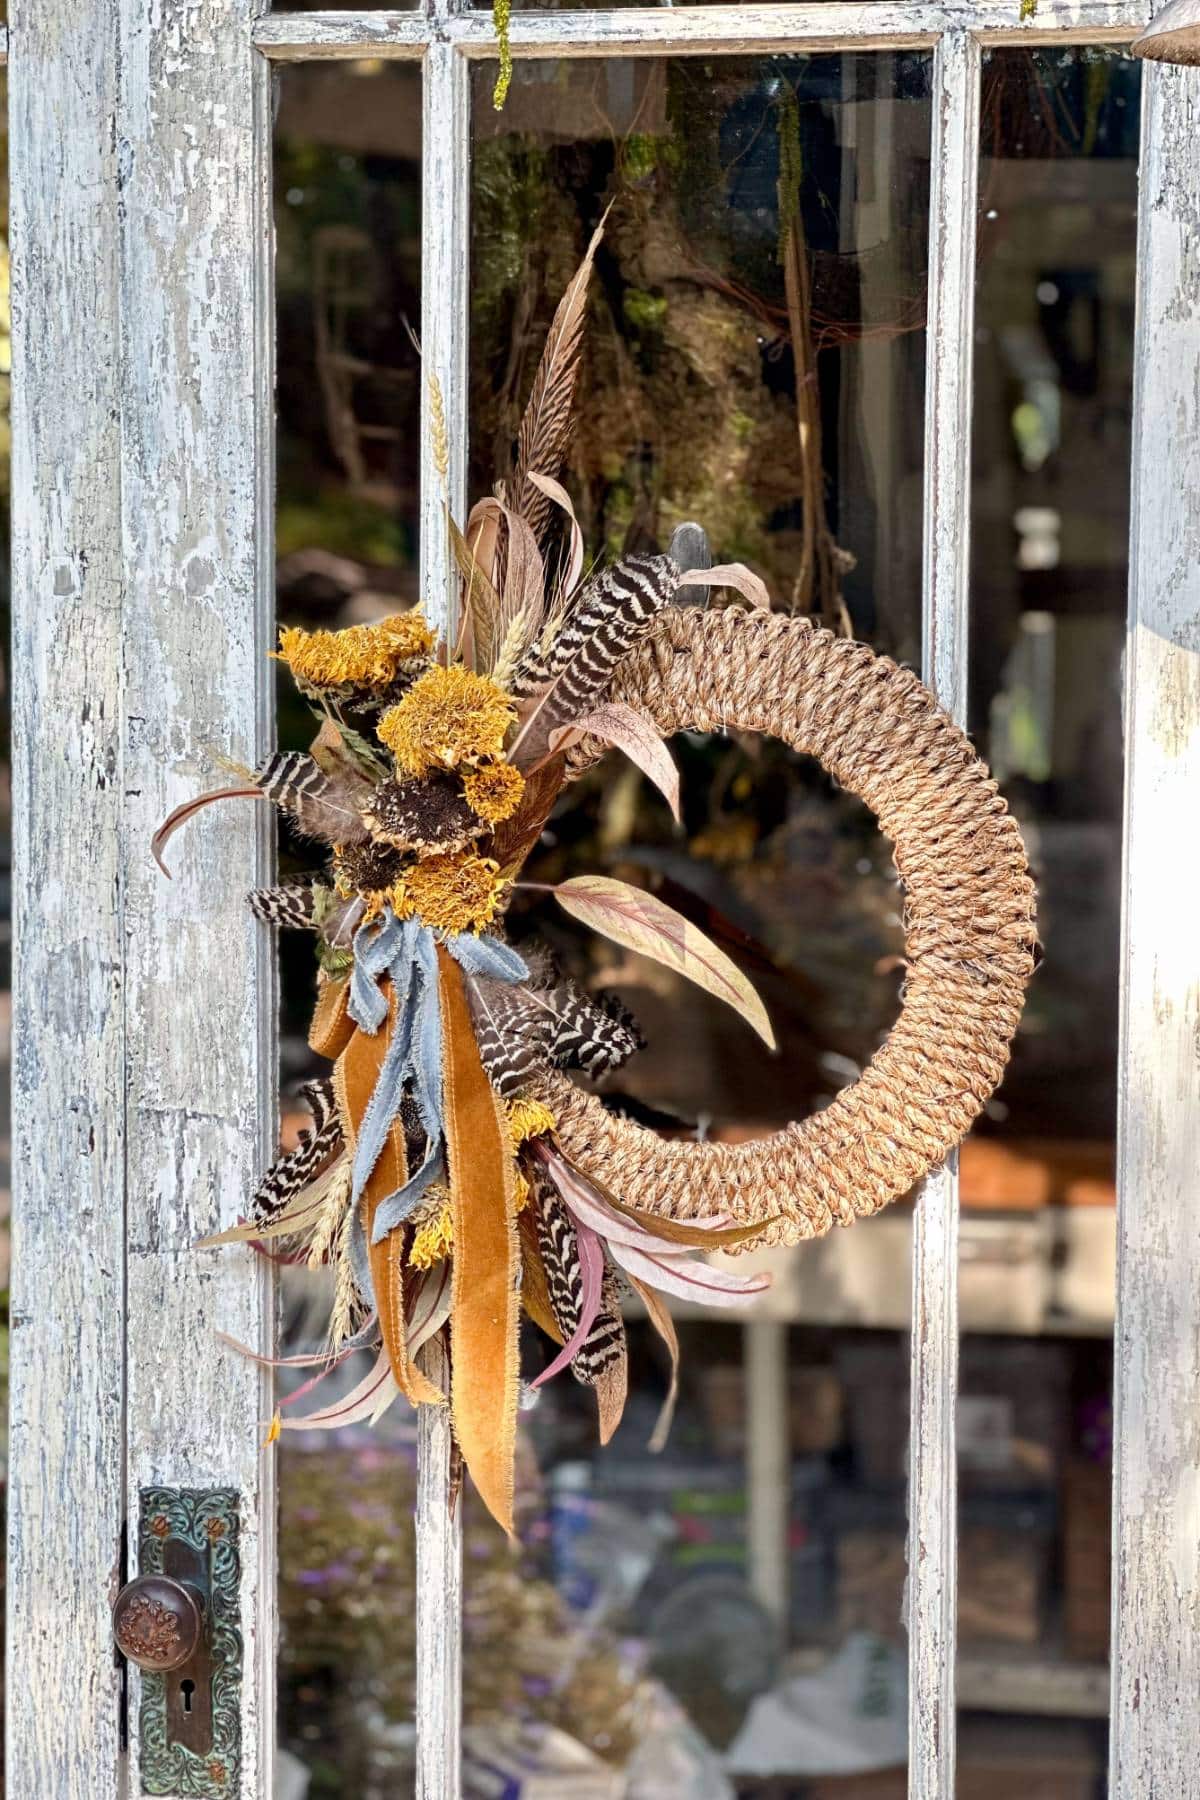
Fall is just around the corner, and there’s no better time to transform your home decor with a touch of autumnal charm. This year, I decided to give my trusty rope wreath a seasonal makeover to adorn the door of my she shed. I’m crafting fall wreaths that capture the season’s essence with rich textures and warm hues by incorporating dried sunflowers, feathers, and velvet ribbon. This DIY project is simple, budget-friendly, and a wonderful way to celebrate the changing seasons and add a personalized touch to your outdoor space. Let’s dive into how you can create your own stunning fall rope wreath!
Creating a Fall Wreath
.
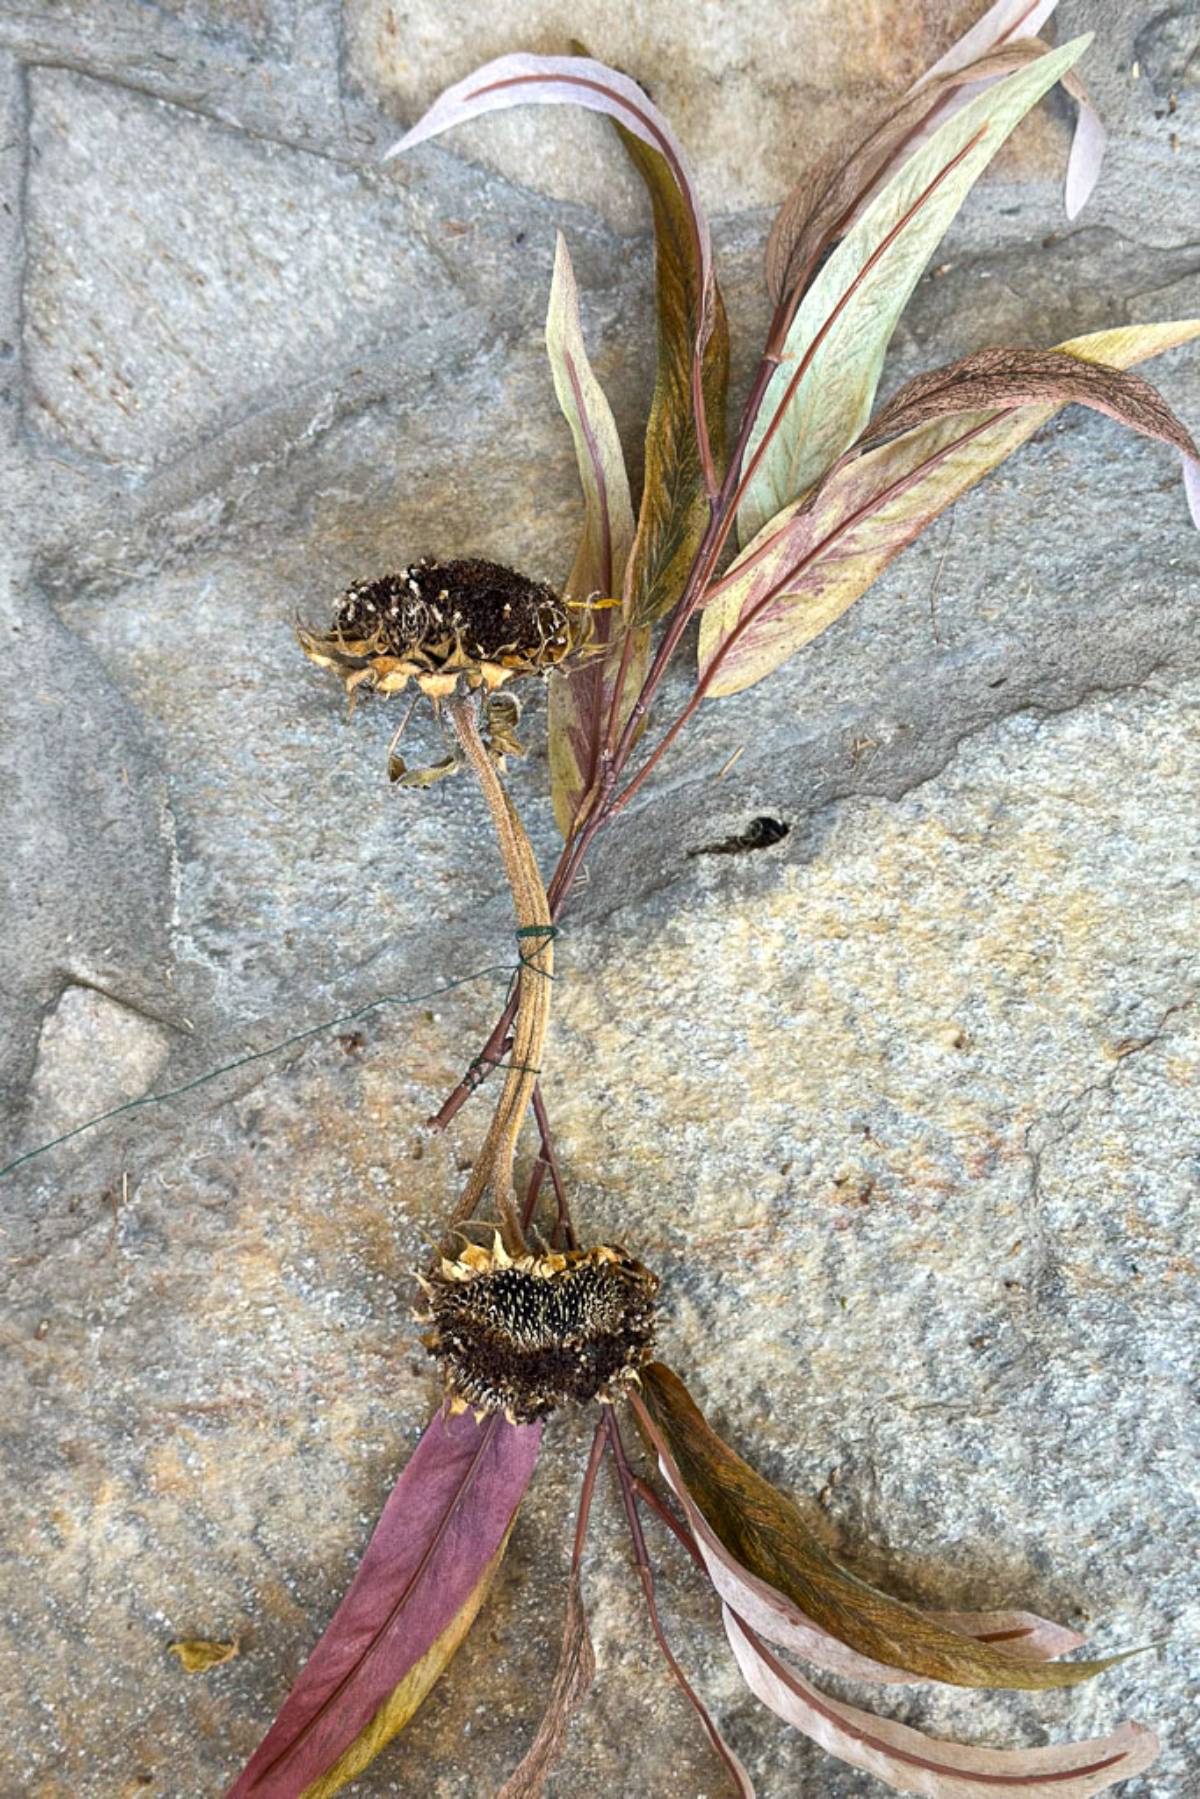
To decorate my rope wreath for fall, I crafted a small autumn arrangement using wire to secure everything in place.
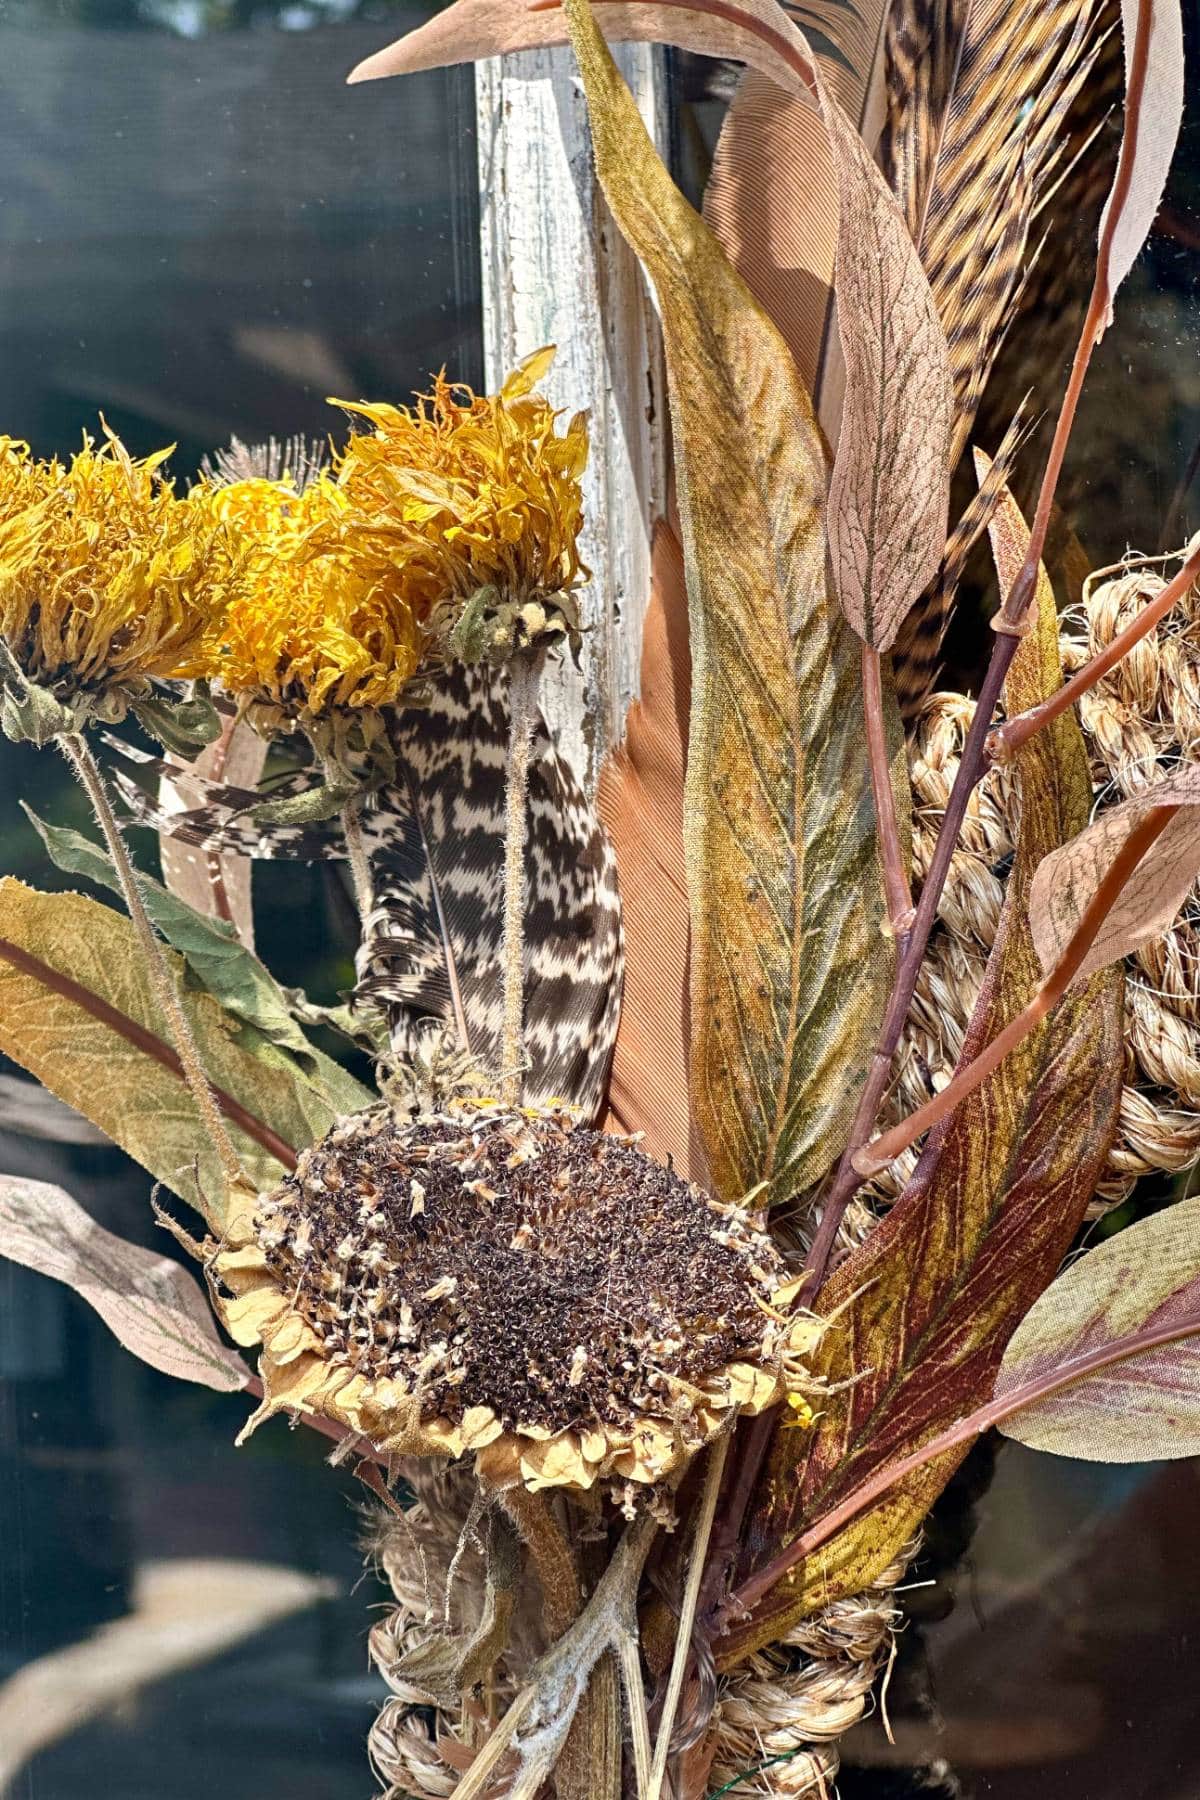
I began with faux eucalyptus leaves, arranging them to fan out in both directions, as shown in the image below. This creates a lush base for the rest of the elements.
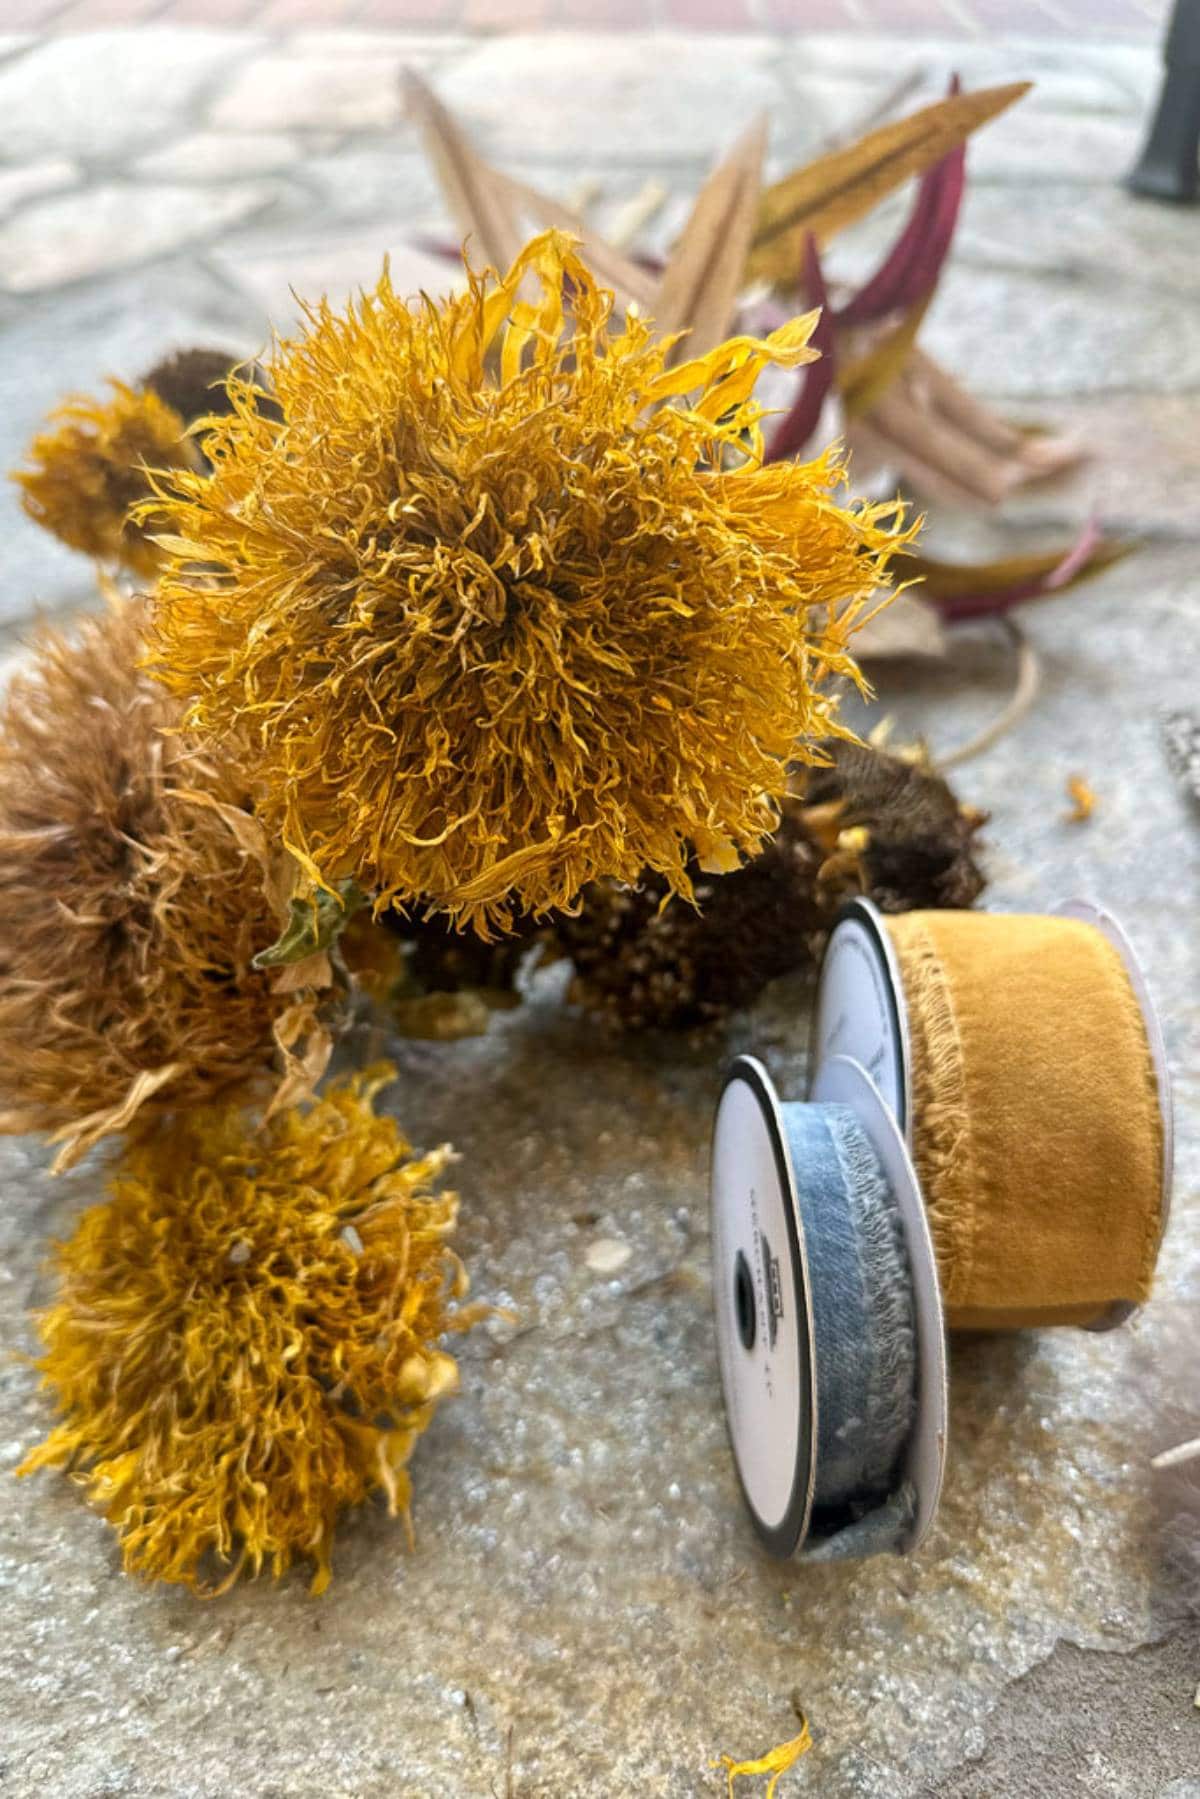
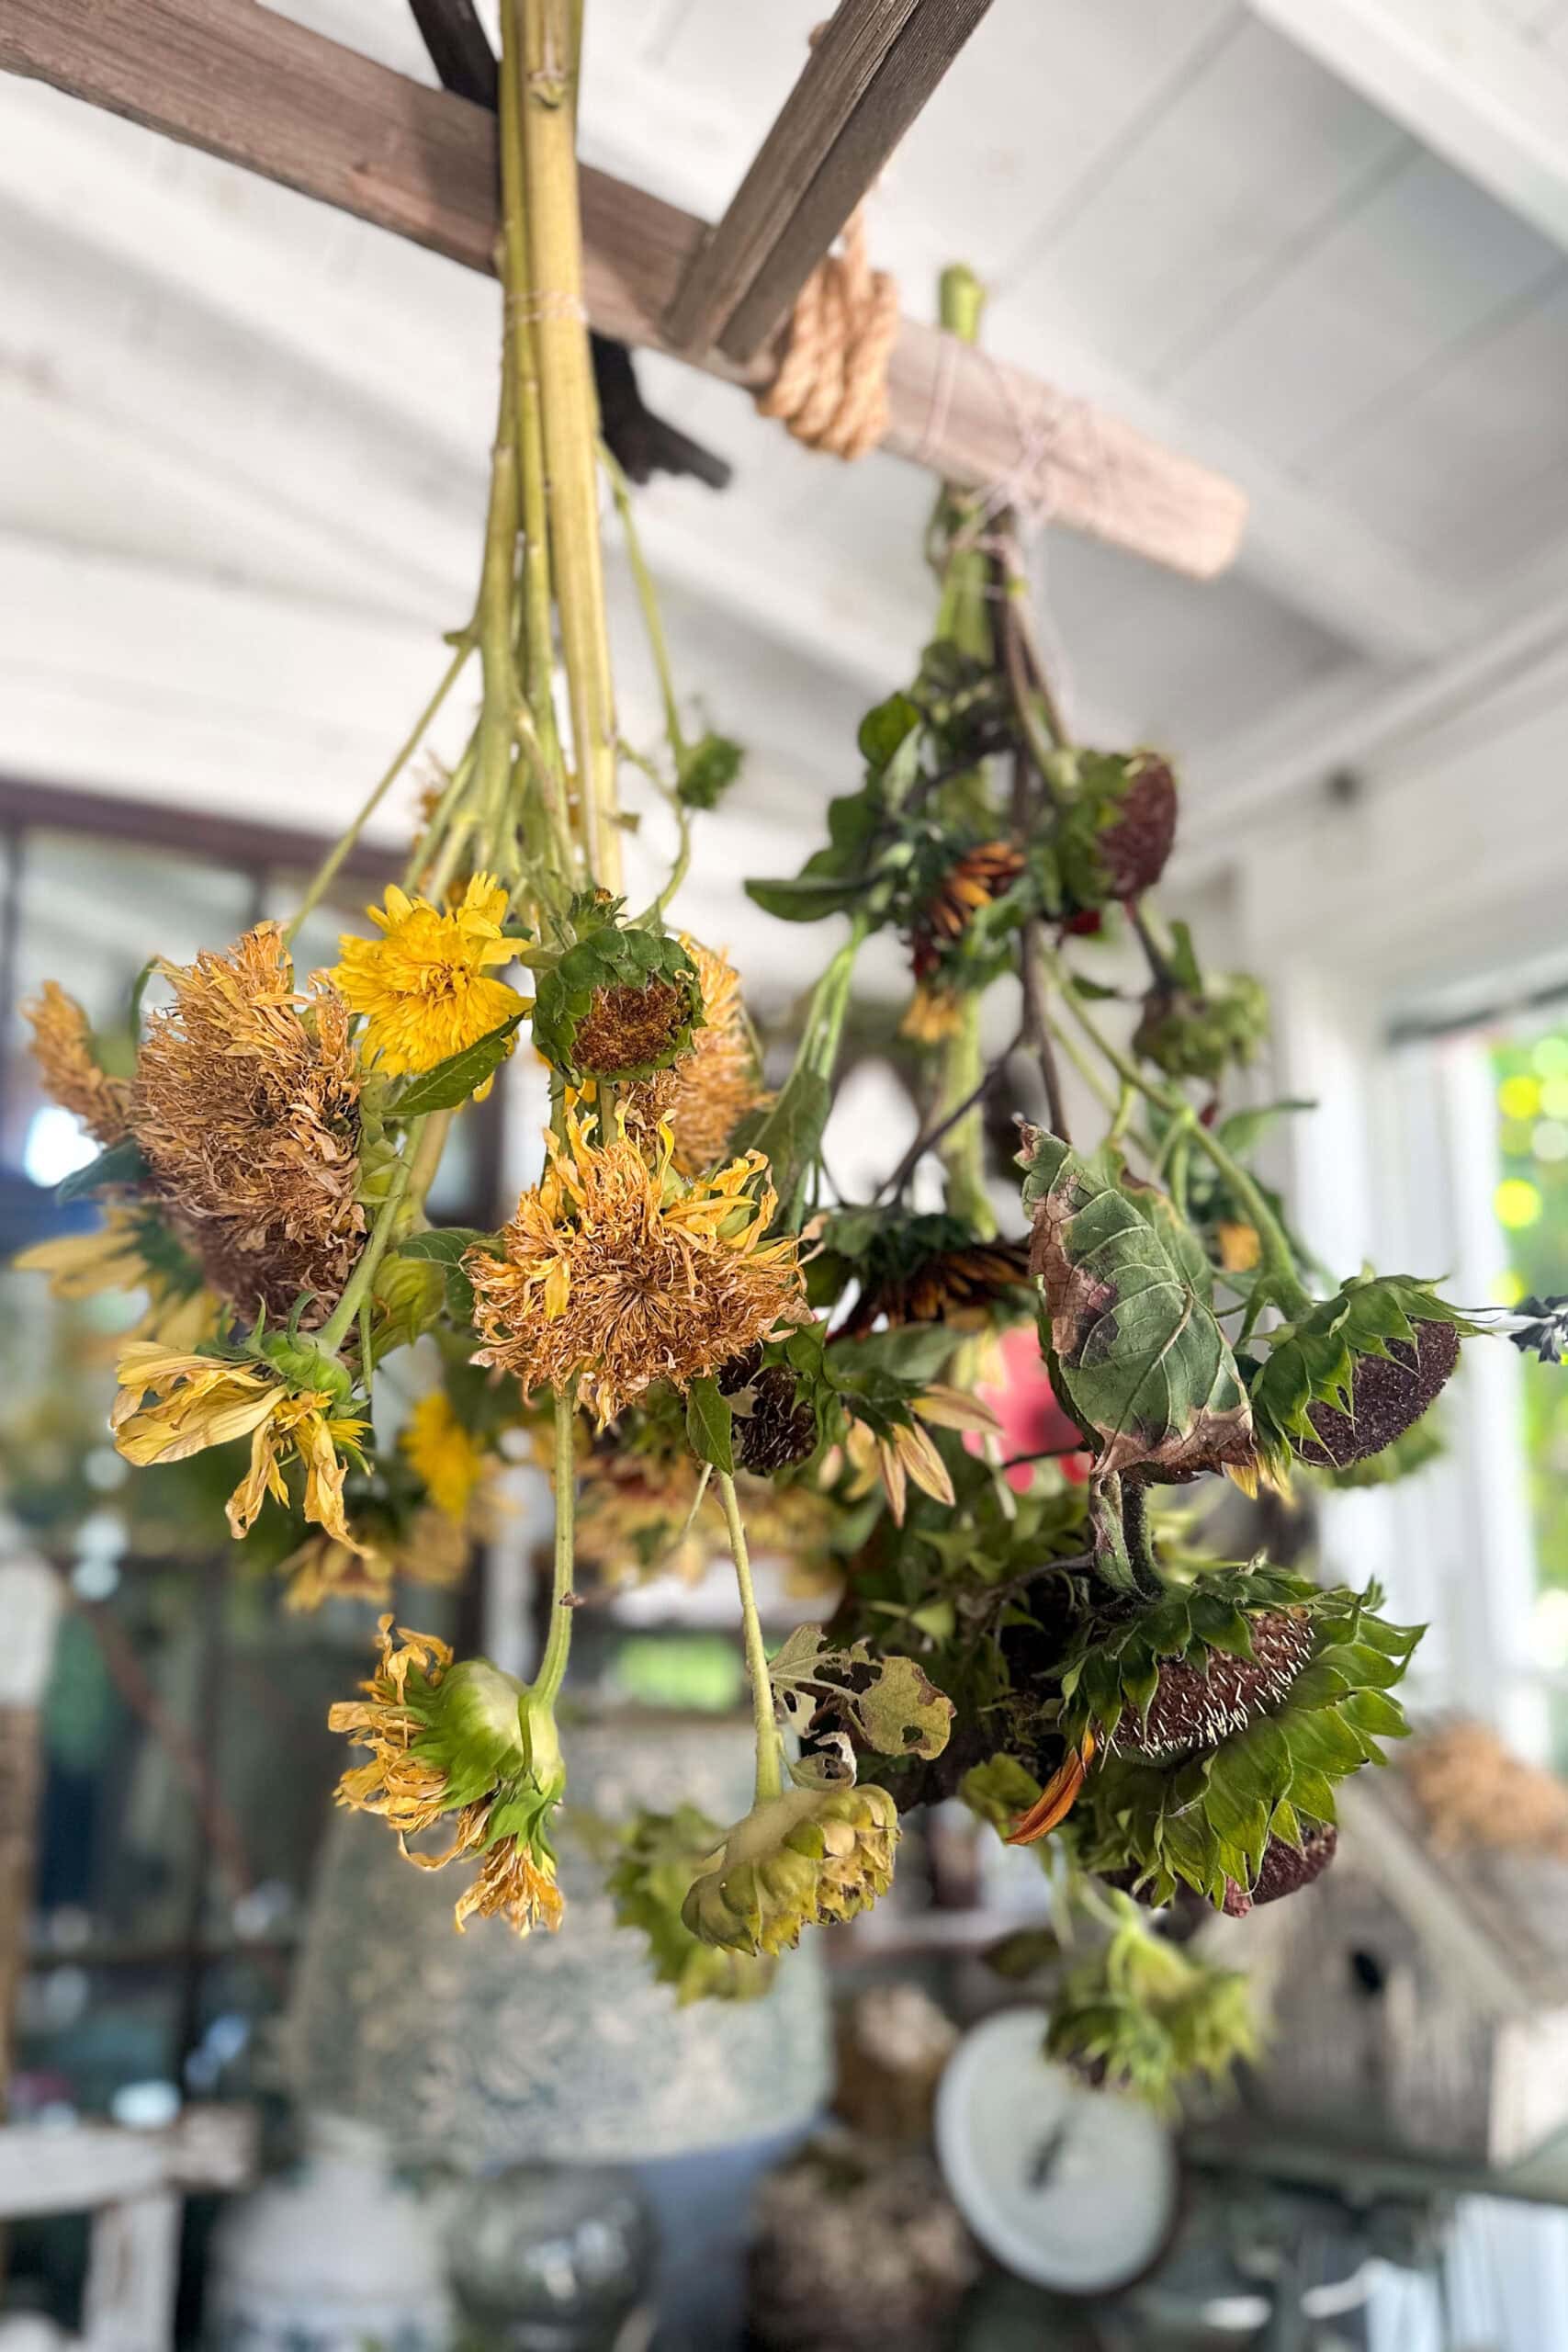
Next, I added dried sunflowers from my garden. After cutting them, I hung them in the shed for several weeks to dry, ensuring they would retain their shape and color.
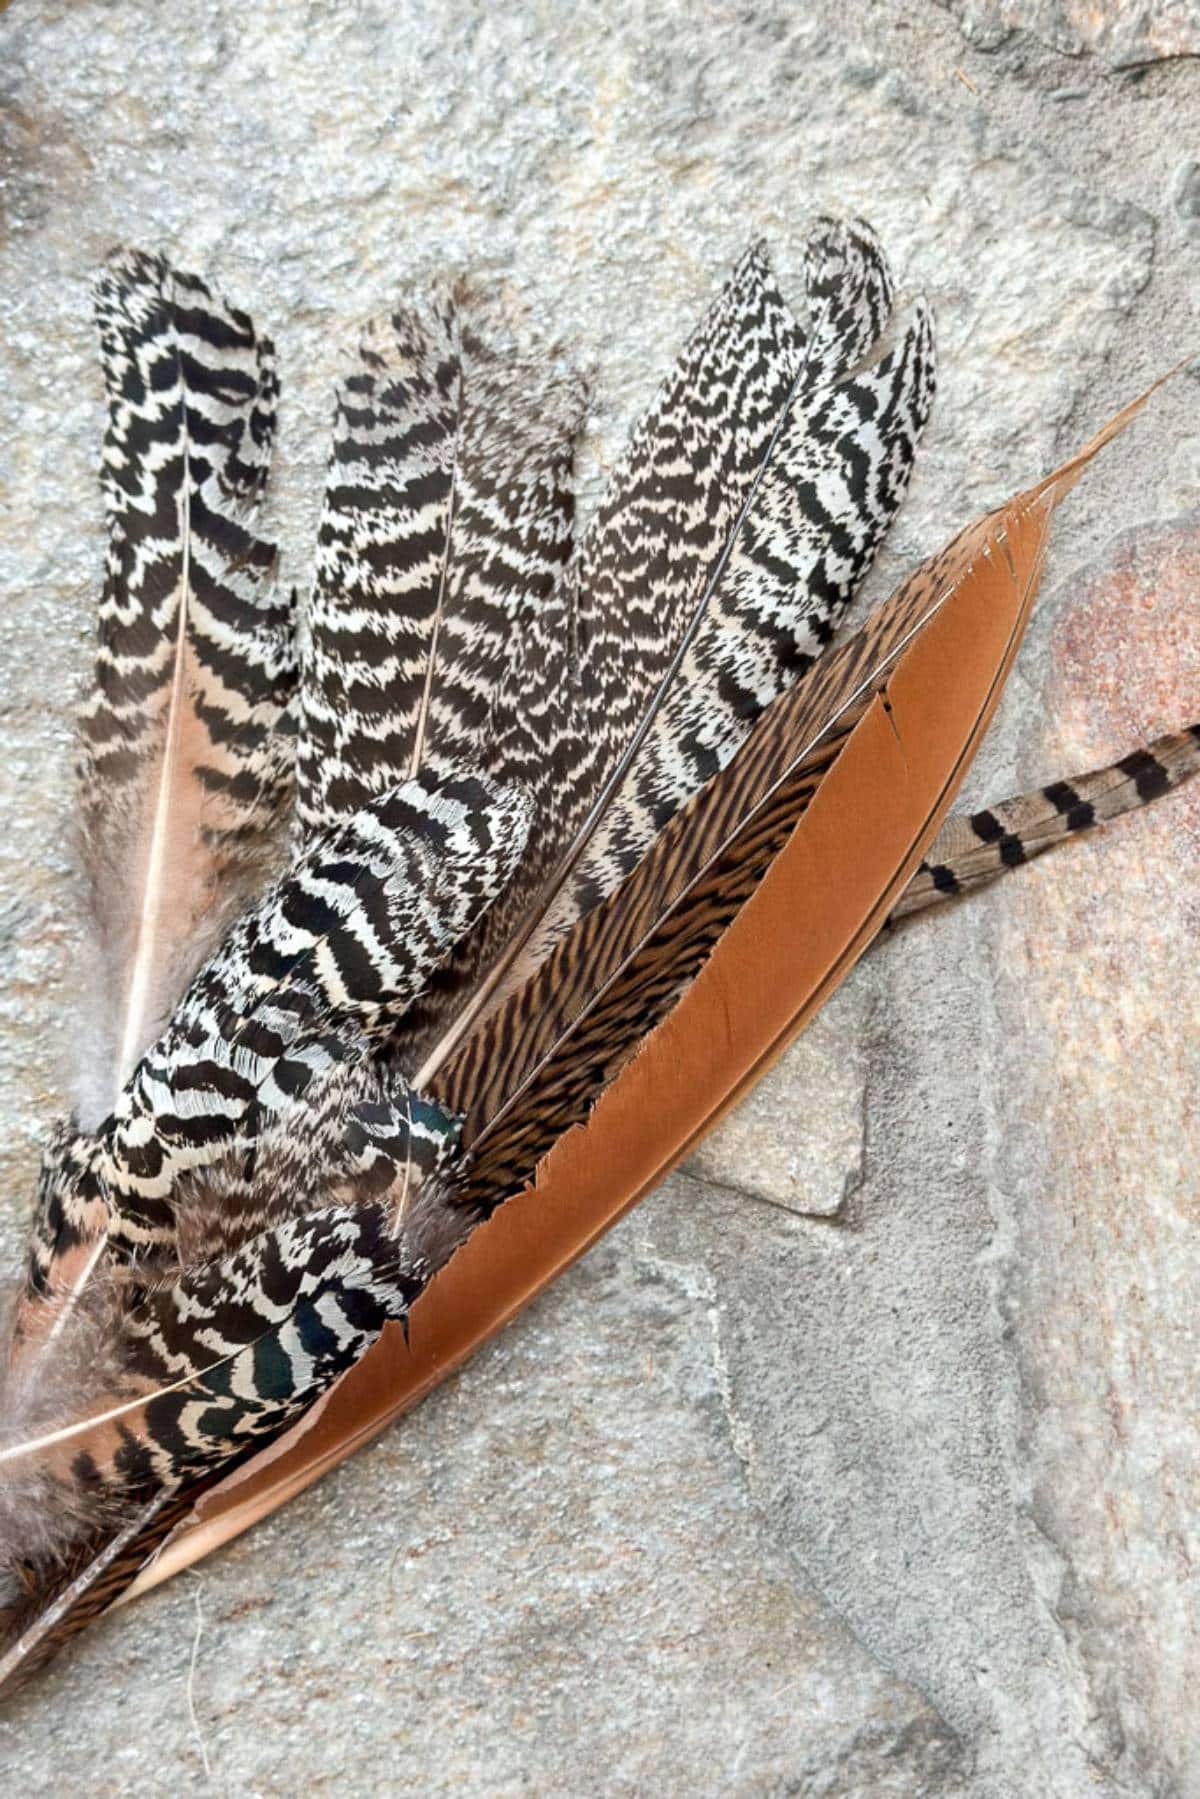
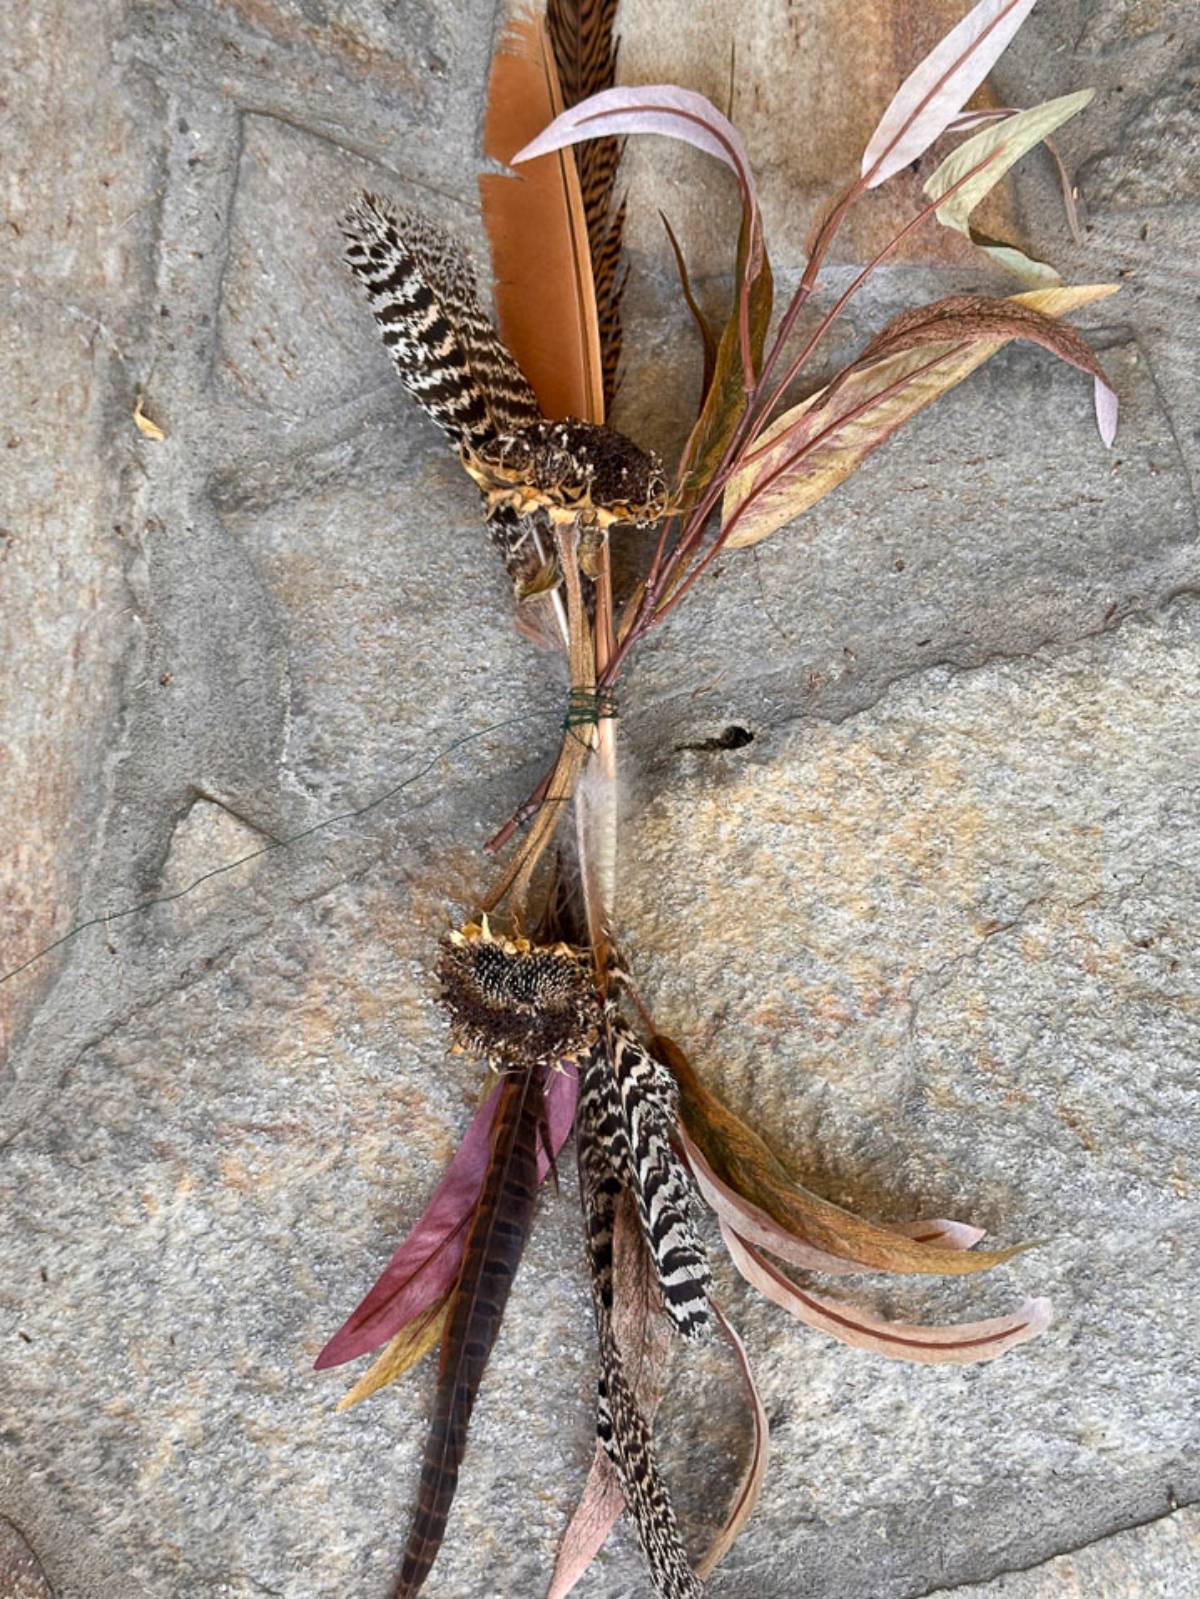
For an extra touch of texture, I incorporated several feathers. I used an assortment of peacock feathers that I foraged from our local arboretum and a few pheasant feathers I purchased.

Secure the entire arrangement to the left side of the rope wreath with wire, positioning it to create a balanced and visually appealing design.
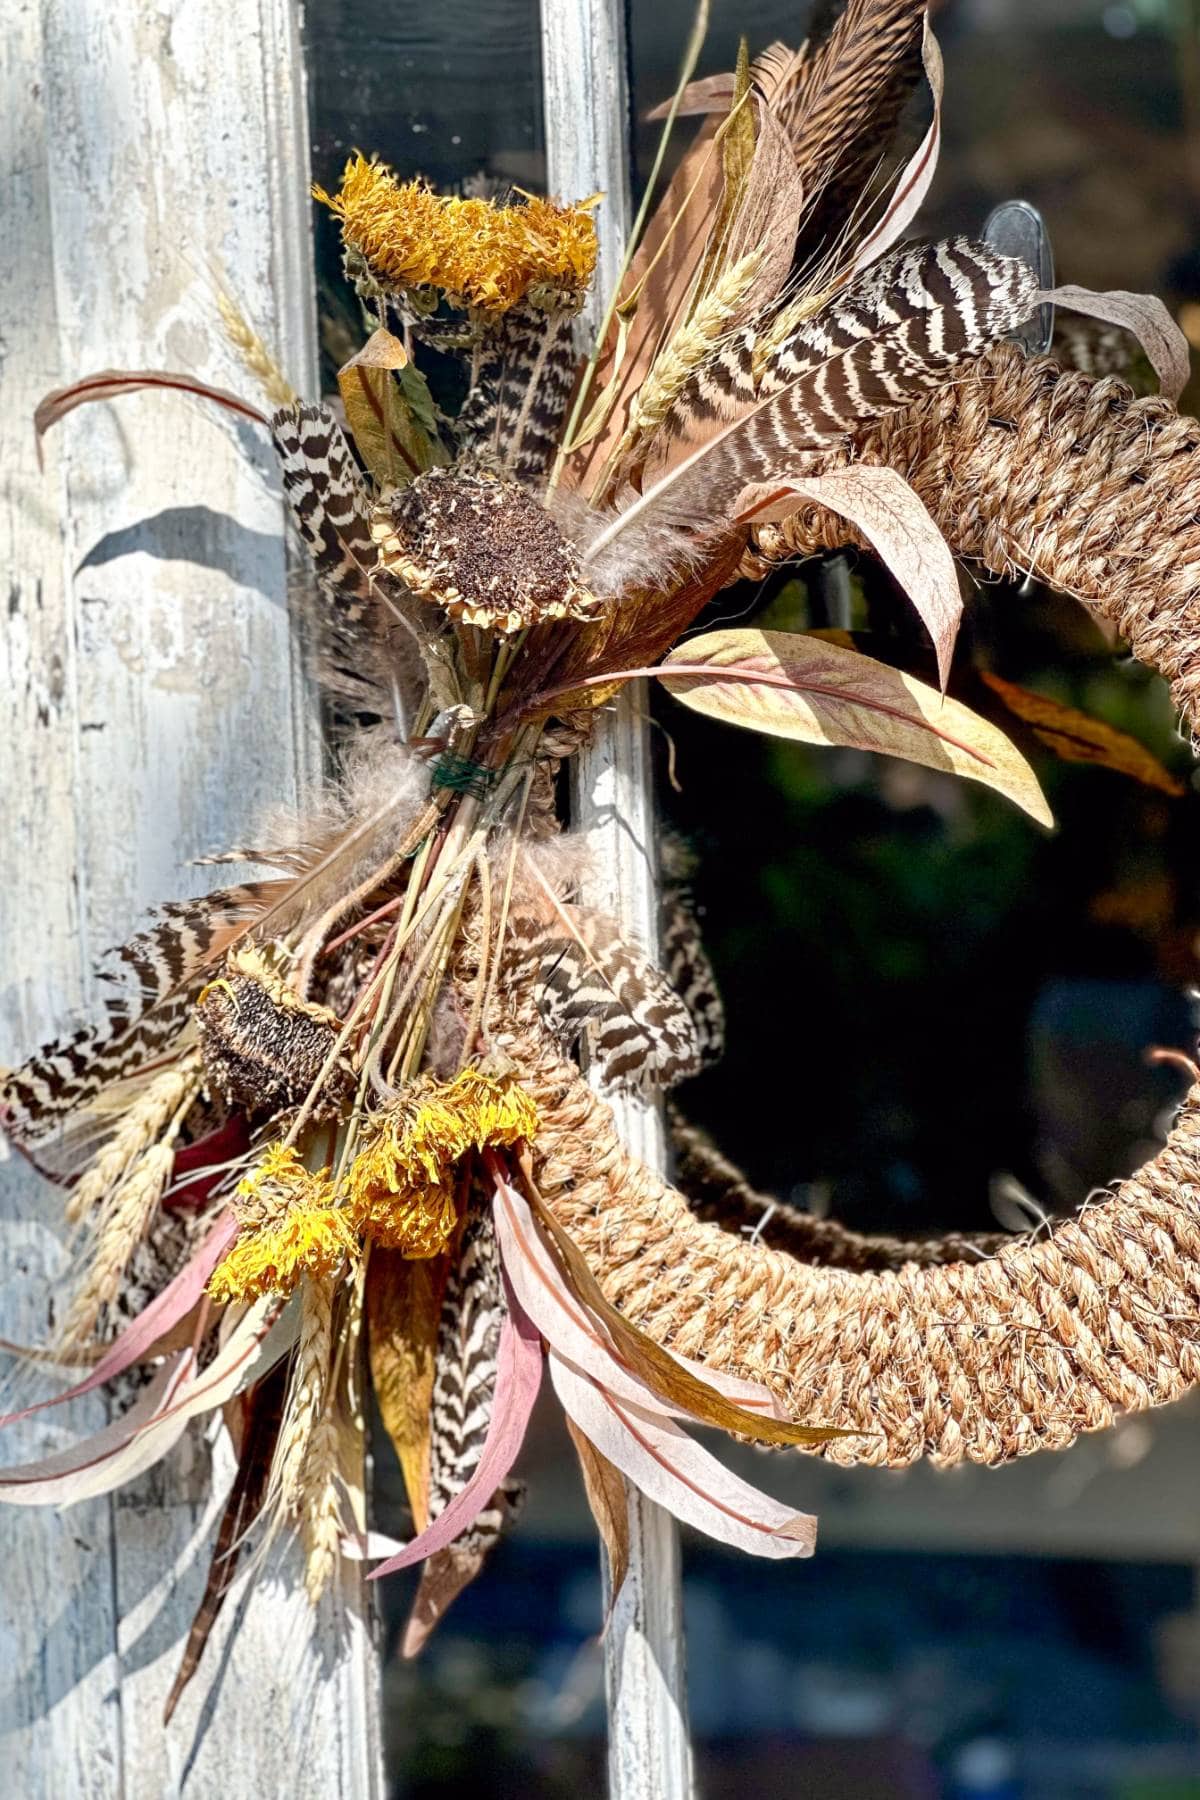
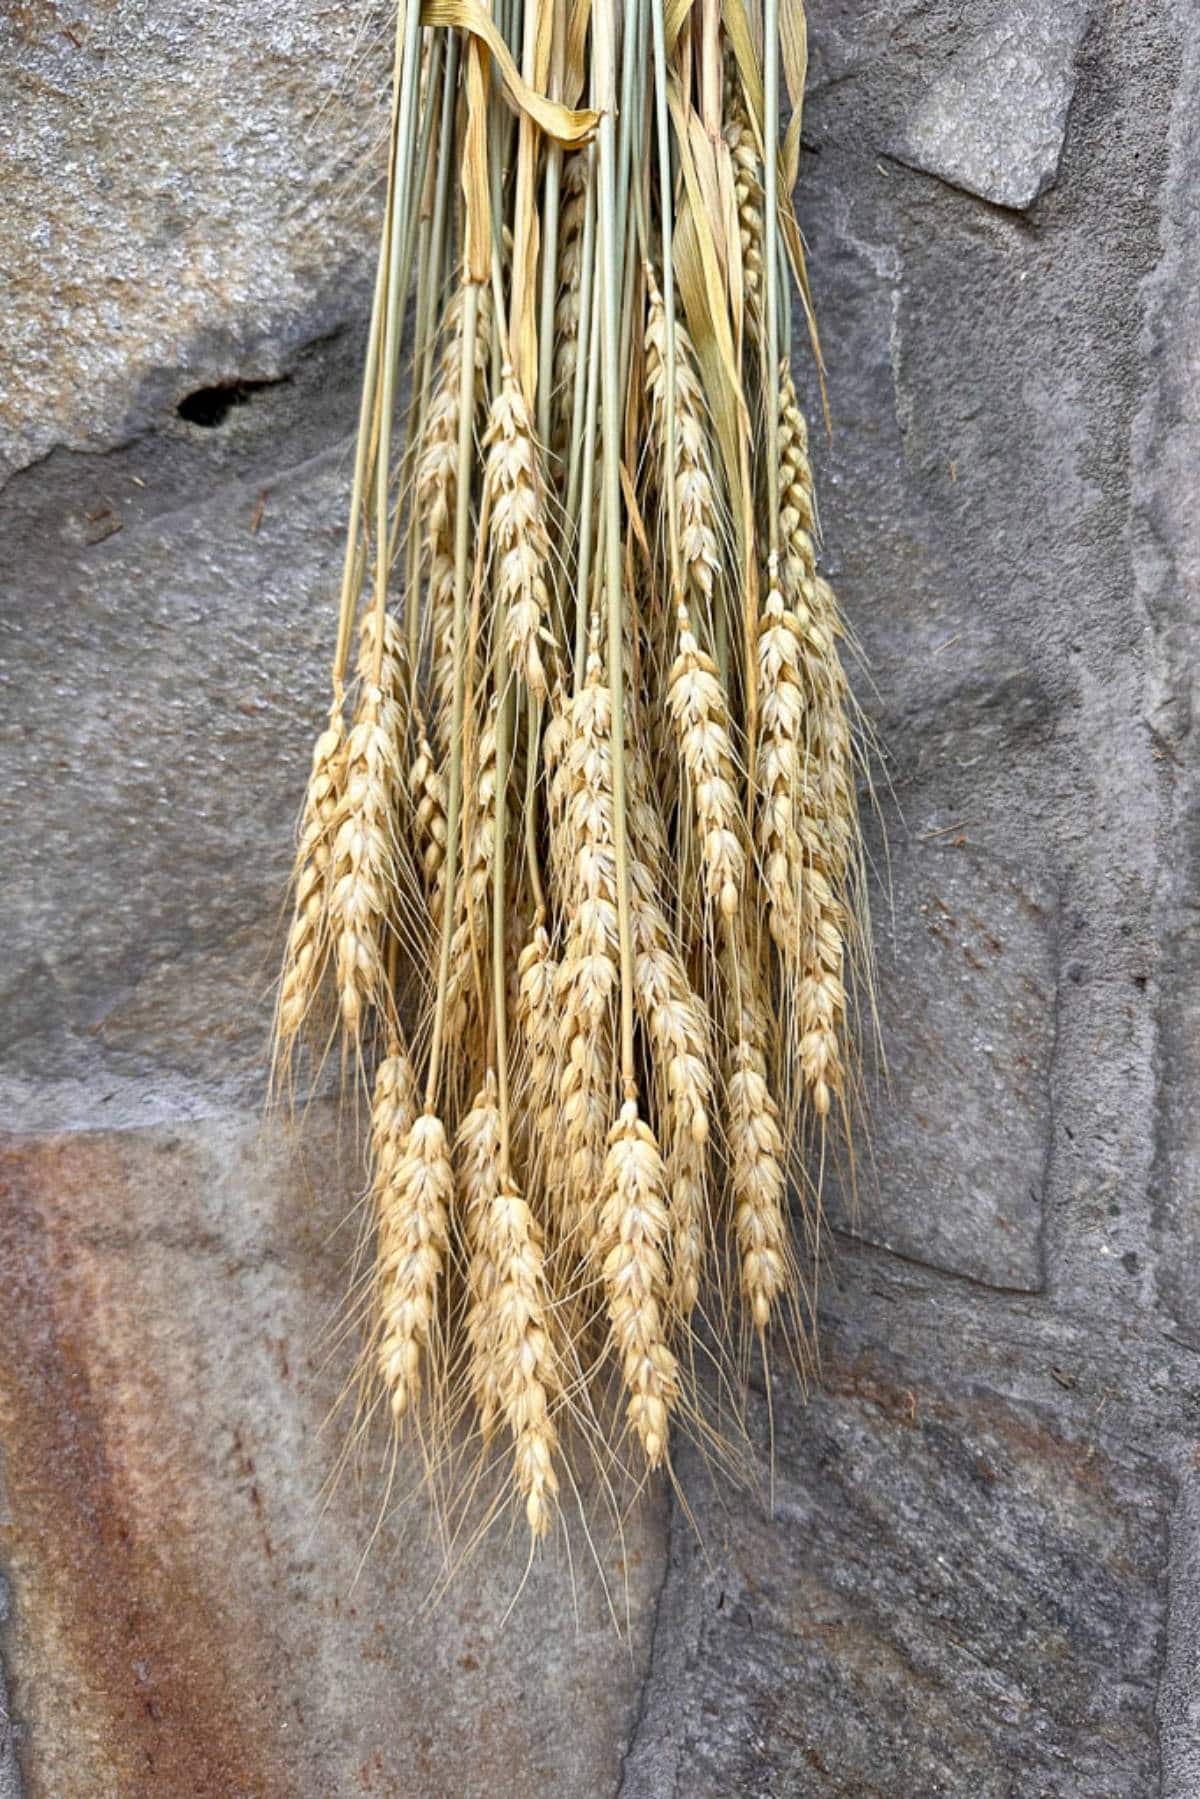
I added more dried sunflowers to enhance the wreath further, but you can also use faux ones if you prefer. Include some wheat and any other fall-themed elements you may have on hand.
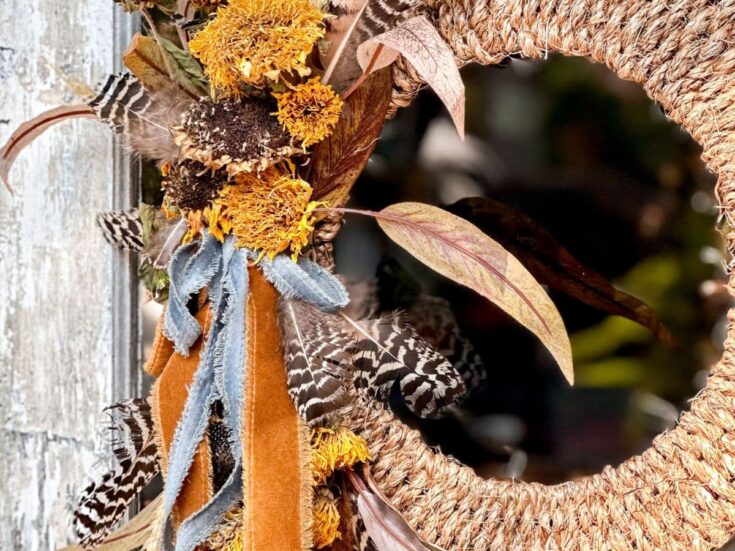
Finally, I tied everything together with soft velvet ribbons in gold and a hint of dusty blue to complement my blue house. You can adjust the colors to coordinate with your home decor.
This customized fall wreath adds a cozy seasonal touch to your space!


How to Make A DIY Rope Wreath
Learn how to create a versatile and beautiful rope wreath that can be easily transformed for any season with simple decorations.
Materials
- 1 Circle shape wire wreath form- 12- 18"
- Jute or sisal rope
- Feathers
- Faux greenery
- Dried Wheat
- Wire
- Wreath hanger
- Dried Sunflowers
- Velvet ribbon
Tools
- Hot glue gun
- Scissors
Instructions
- Prepare Your Rope: Cut pieces of rope 2-3 yards long. If the pieces are too long, weaving them through the wireframe becomes difficult.
- Start Gluing: Begin by hot gluing one end of the sisal rope to the bottom of the wire frame.
- Begin Weaving: Start on the outermost wire. Wrap the rope over the top, then under the second wire, pulling it tight. Hold the rope with your right hand and weave with your left hand for better control.
- Continue Weaving: Next, go over the third wire and under the fourth wire, pulling it tight again.
- Complete a Full Pass: Once you've woven across the frame, turn around and repeat the same process. Keep the rope as tight as possible to maintain the structure?
- Reverse the Weave: Go over the wire you just went under and weave back to the other side, continuing the over-under pattern.
- Adding More Rope: When you reach the end of the rope, leave a 3-inch tail on the back. To add another piece, place the new rope's end against the tail of the first piece. You can hold both ends with one hand in the direction you will weave.
- Weave the New Rope: Take the opposite end of the second rope and start weaving it through the wire wreath frame as before. As you weave back and forth, go over the two tails on the back to secure them. It’s okay if you can’t cover them on each wire as long as they are secured twice.
- Trim and Continue: Once you’ve completed a few rows, trim the tails and continue weaving until you reach the end of the frame.
- Finish the Weaving: To finish, place the rope's end on the back of the wreath and weave it under another loop. Then, tie it or hot glue the end on the back to secure it.
To decorate my rope wreath for fall, I crafted a small autumn arrangement using wire to secure everything in place.
I began with faux eucalyptus leaves, arranging them to fan out in both directions, as shown in the image below. This creates a lush base for the rest of the elements.
Next, I added dried sunflowers from my garden. After cutting them, I hung them in the shed for several weeks to dry, ensuring they would retain their shape and color.
For an extra touch of texture, I incorporated several feathers. I used an assortment of peacock feathers that I foraged from our local arboretum and a few pheasant feathers I purchased.
I secured the entire arrangement to the left side of my rope wreath with wire, positioning it to create a balanced and visually appealing design.
I added more dried sunflowers to enhance the wreath further, but you can also use faux ones if you prefer. I also included some wheat and any other fall-themed elements I had on hand.
Finally, I tied everything together with soft velvet ribbons in gold and a hint of dusty blue to complement my blue house. You can adjust the colors to coordinate with your home decor.
This customized fall wreath adds a cozy seasonal touch to your space!
Tips for Displaying Your Rope Wreath Indoors and Outdoors
Consider the Environment: Think about the weather where you live. When creating your wreath outdoors, choose weather-resistant decorations such as faux foliage, preserved flowers, or plastic embellishments to withstand the elements. Indoors, you can incorporate more delicate items like dried flowers, fabric ribbons, or paper ornaments that won’t be exposed to the weather.
Use a Versatile Hanger: Choose a hanger or hook that complements your wreath and is easy to change out, such as a decorative ribbon or a sturdy, adjustable wreath hanger. This allows you to effortlessly move your wreath between your front door, mantel, or wall, adapting your decor to different spaces and occasions.
Experiment with Placement: Let’s think beyond our front doors. Indoors, hang your wreath above a mantel, in a hallway, or on an interior door for a cozy touch. Outdoors, consider placing it on a gate, fence, or garden shed. The best part is experimenting with different locations, which can enhance your space’s overall decor and ambiance.
Wrapping Up
Creating a DIY rope wreath allows you to express your creativity while crafting a versatile decor piece that can be personalized for any season. By experimenting with different decorations and placements, your wreath will become a beautiful and unique addition to your home, reflecting your style and the changing seasons.
Other Fall Posts from WM Design House
If you love this post, you might also enjoy some of my other posts about growing and caring for dahlias.

Shop This Post


Did you make this craft?
We would love to see what you have created, so mention us @wmdesignhouse or tag us using #wmdesignhouse so we can see your creations!


Just gorgeous, Wendy. And I love that your shared two versions! I’m delighted to be featuring your post at this week’s Tuesday Turn About!
Love how this woven rope wreath can be re-dressed to fit a variety of styles and seasons, Wendy! Thanks for sharing this week! Creatively, Beth
This is gorgeous, thank you for sharing this with us at Handmade Monday
Friend, you outdid yourself with this wreath. It is absolutely stunning! I’m excited to share it with my readers today on my week in rewind.
I had to smile when I saw your sunflower wreathe. If you hear someone “knocking” on your door and there is no one there when you go to answer it–repeatedly, it may be a hungry bird pecking at the sunflower seeds. I had it happen to me when I hung a cluster of dried colored corn cobs on my front door! Finally saw the blue jay! I really enjoyed how easy your tutorial was to follow; I would like to try it!
Hi Wendy – I LOVE LOVE LOVE those dried sunflowers. They are fabulous! Your wreath is perfect for fall and the addition of the feathers is a nice touch. Thanks for inspiring us with another one of your amazingly creative projects.
The rope design looks so detailed and complicated, but you lay out the steps so well that this is doable by anyone. I love the different designs but I am partial to the feathers! Beautiful! Pinned! ~Missy
A beautiful piece with so much versatility, Wendy. I love how you wrapped the sisal rope around the wire wreath frame, too. The fall wreath has me so excited for cooler seasons. Pinning!
Love this wreath and the varieties you can make from the basics! Thanks for sharing Wendy!
What gorgeous wreaths! Love how you made the woven wreath with sisal rope and the versatility to change it up.
Wowza Wendy, both wreath versions are just gorgeous! There’s something so interesting about combining feathers and florals together for fall that I just can’t resist. I keep scrolling back to take another look!
Your wreath is really amazing, Wendy. I love the rustic rope texture, feathers and dried naturals. I’m so ready for fall and cooler weather!!
Just gorgeous, Wendy!! LOVE all of those dried flowers for fall!
Hi Wendy! I love a great DIY with items from the Dollar Tree and this one is fabulous! This is such a beautiful wreath for Fall but I love the nautical version too! I especially like the fact that the woven base can be used for every season! Thanks for the inspiration!
This is gorgeous, Wendy! I love how you used the same wreath form for both summer and fall. The colors and the layers of texture you added with the flowers and the ribbons and the shells are just beautiful! Sending you lots of hugs, CoCo
This is fabulous Wendy! I love all the organic elements. XO- MaryJo
Wendy, your woven rope wreath is such a versatile and beautiful wreath for so many different themes throughout the year! The coastal theme is gorgeous, but the fall version is my favorite with the gorgeous color combo you chose!! Such a fabulous idea—thanks for sharing!!