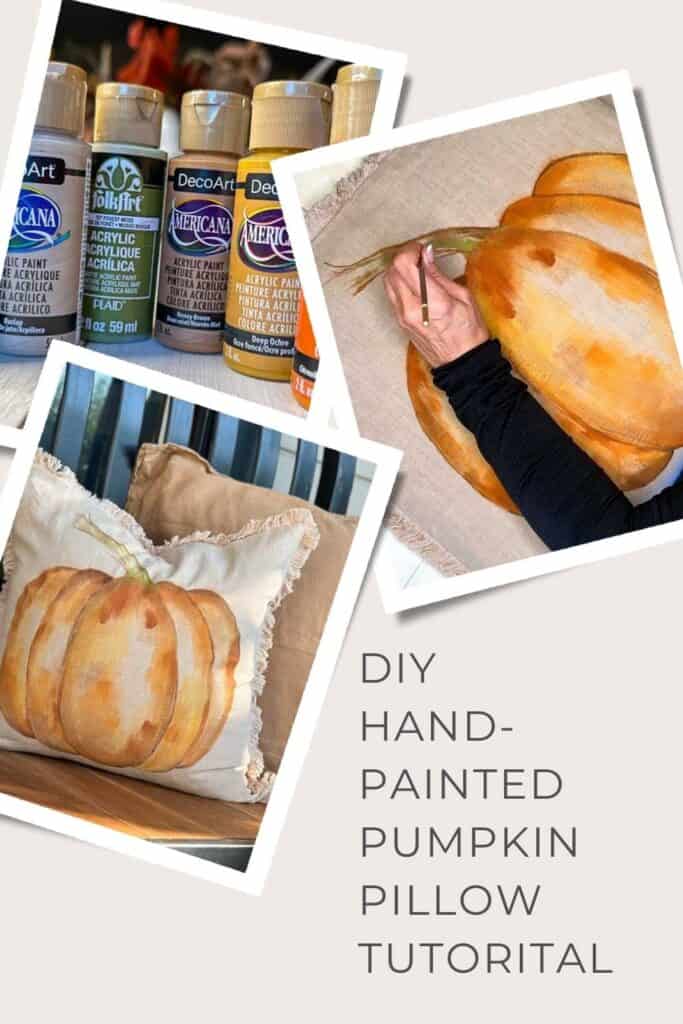
Painted Pumpkin Pillow for fall : Pottery Barn Inspired
Step-by-step instructions on how to make a painted pumpkin pillow.
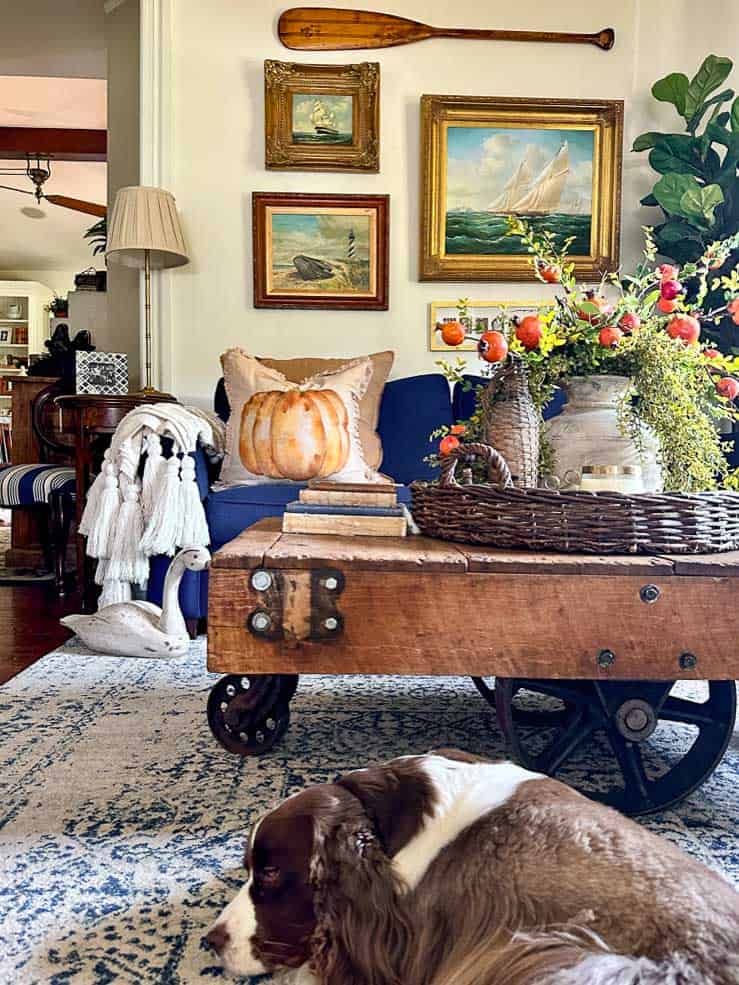
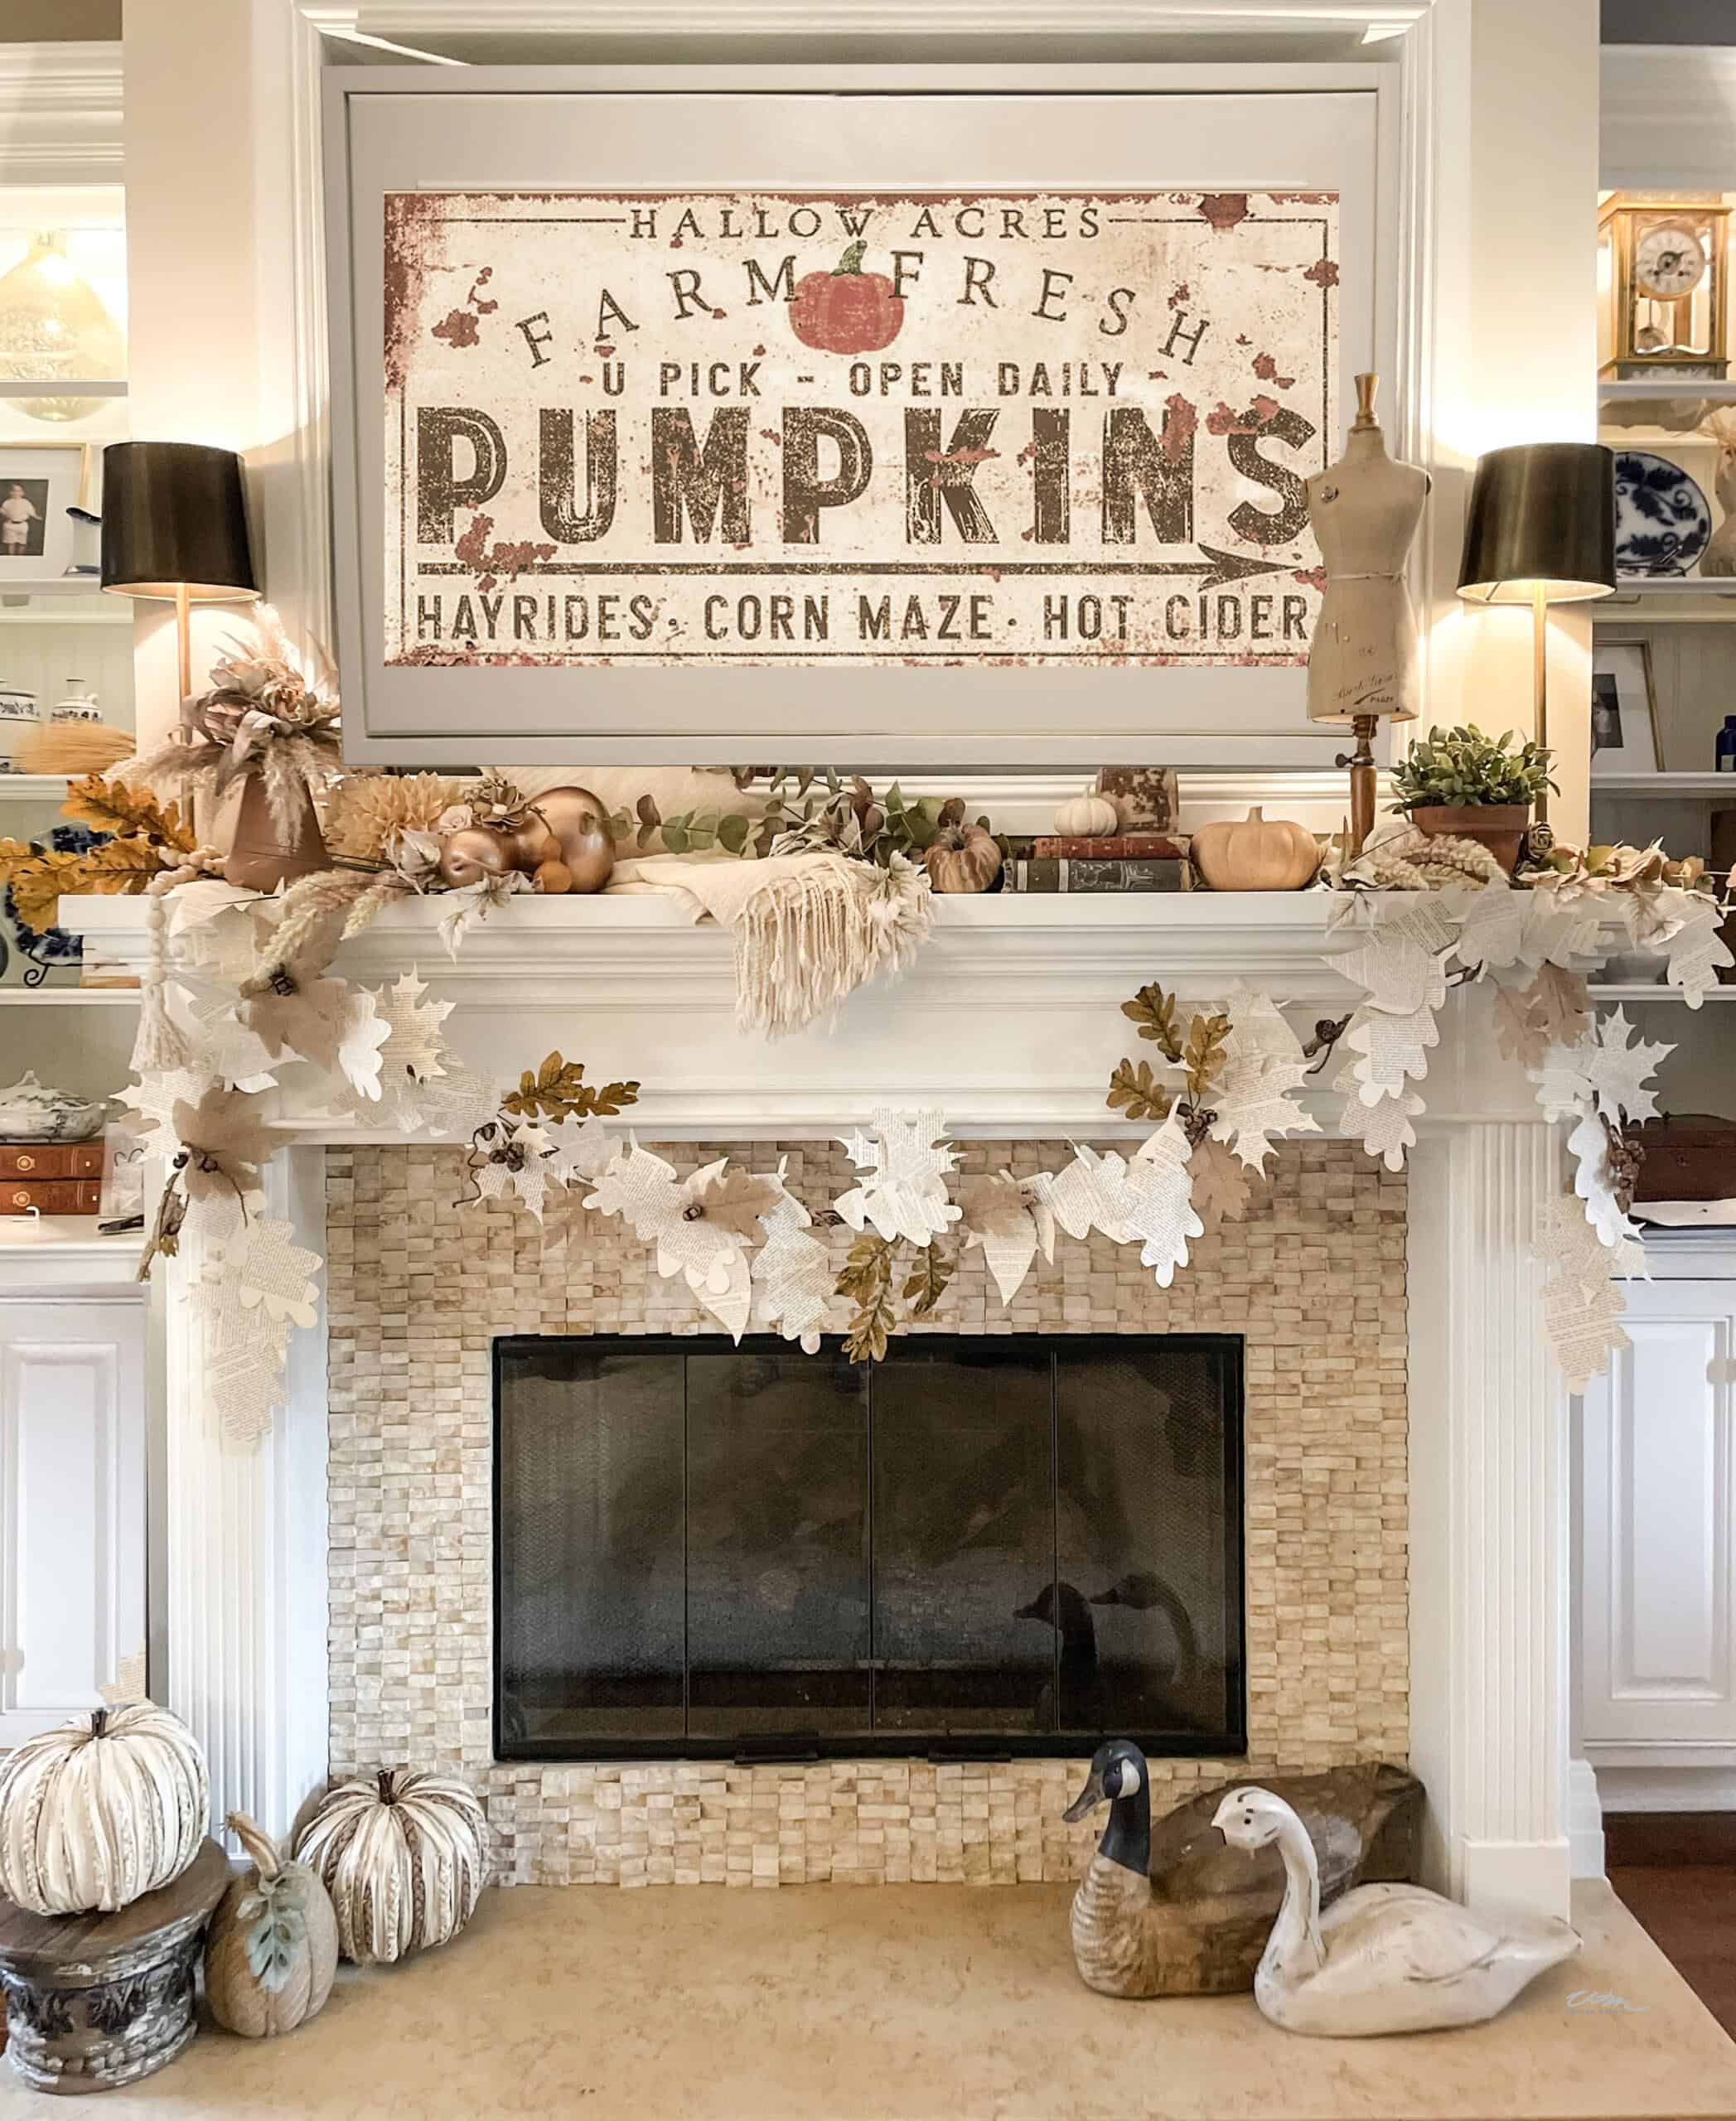
I adore this time of year and the colorful way you can decorate your house for the fall season.
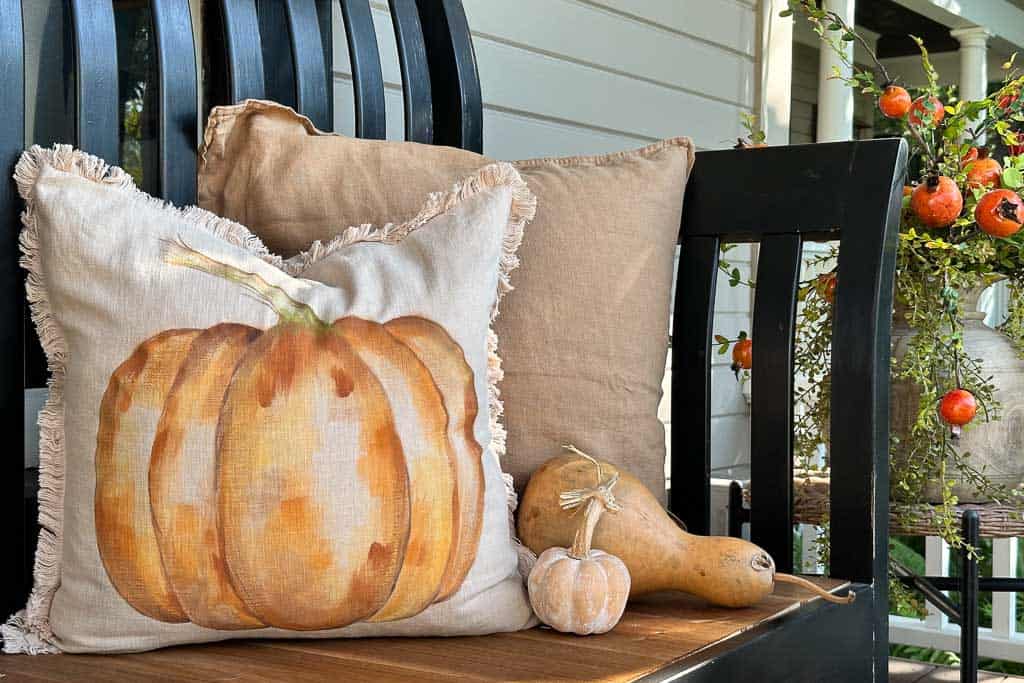
Adding a throw pillow to a bench or sofa is one of the most budget-friendly ways to infuse a seasonal touch.
While I appreciate Pottery Barn’s beautiful pillows, their prices occasionally surpass my budget for a seasonal item.
Hence, I decided to take matters into my own hands and craft my version of their delightful painted pumpkin pillow.
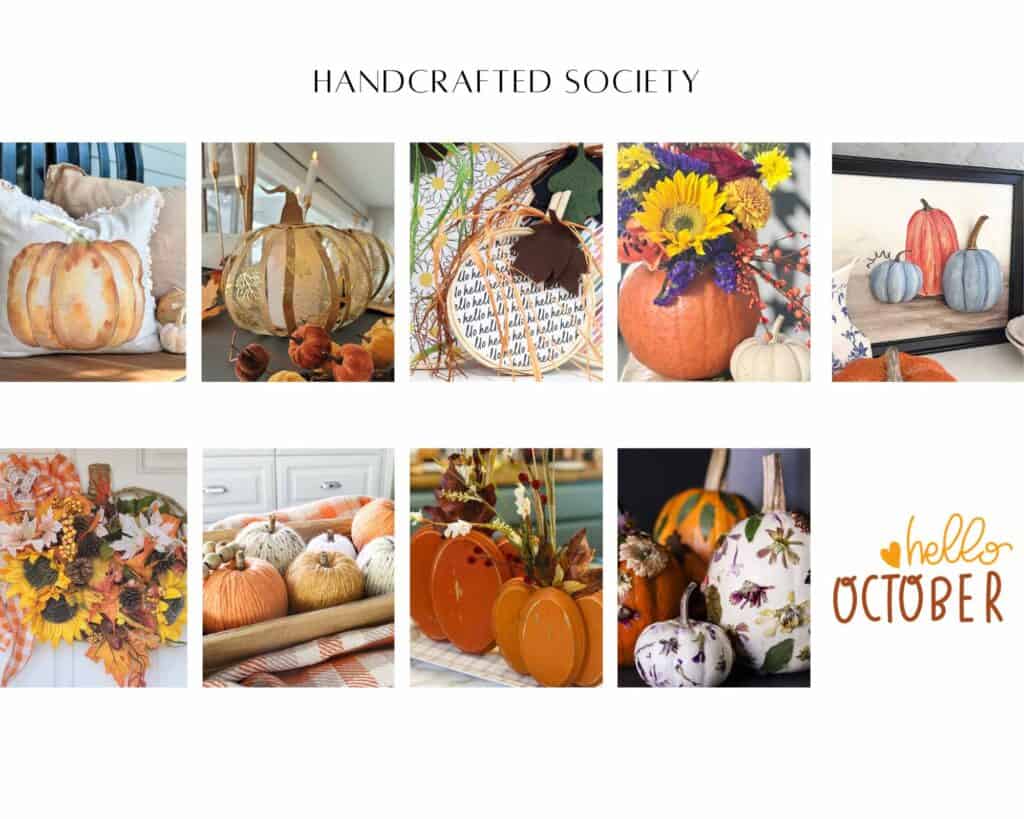
Hand Crafted Society
It is the first Tuesday of the month, so it is time for the Hand Crafted Society gals to share their creations with you.
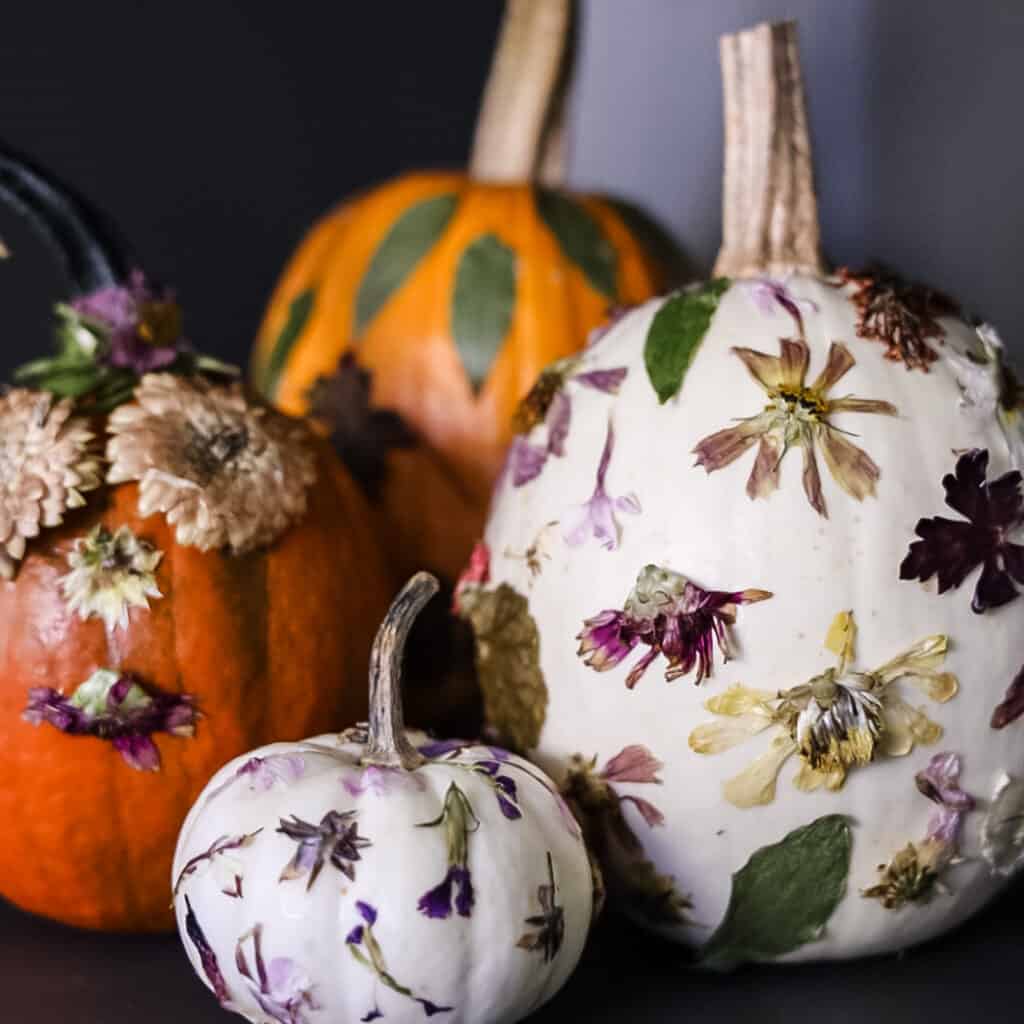
If you happen to come over from Jennifer’s @cottageonbunkerhill, welcome. She is so creative, and I have no doubt you loved her gorgeous pumpkins with the dried flowers. They are stunning.
We always invite a guest or two to join in on the fun. This month, we welcome Carol @bueskyathome and Crystal @sweetvalleyacres. We are so happy you joined us.

Painting On Fabric
Have you ever painted on fabric with acrylic paint? It is similar to using a canvas, but let me share a few tips before we begin.

On my blog WM Design House, I may sometimes use affiliate links, which means a small commission is earned if you purchase via the link. The price will be the same whether you use the affiliate link or go directly to the vendor’s website using a non-affiliate link.
- Fabric Preparation: Preparing the fabric properly before painting is crucial. Wash and dry it to remove any sizing or chemicals that might interfere with paint adhesion. Iron the fabric to create a smooth, wrinkle-free surface.
- Acrylic Paint Compatibility: Acrylic paint is water-based, making it suitable for fabric. It adheres well to natural fibers but may not work as effectively on synthetic materials.
- Textile Medium: You can add a textile medium with your acrylic paint for added flexibility. This fabric medium helps the paint bond to the fabric and prevents it from becoming stiff or cracking once dry. However, I did not do this on my pillow as I wanted a more watercolor effect.
- Painting Techniques: You can use various techniques with acrylics on fabric, including brushwork, stenciling, block printing, and even airbrushing. Experimenting with different brush sizes and strokes to achieve the desired effects is fun. It’s advisable to have a spare piece of fabric for experimentation. By doing so, you can fine-tune your skills and achieve the desired outcome.
Blending
- Layering and Blending: Acrylic paint lets you layer and blend colors on fabric. You can create gradients, shadows, and intricate designs by layering paint once the previous layer is dry.
- Drying and Curing: Let the fabric air dry, or use a hair dryer after painting. When your project is done, you can heat set it with an iron by simply placing a thin cloth over your painted fabric area and ironing.
- Washing and Care: Once cured, acrylic-painted fabric is usually washable, but following care instructions is essential. Turn the fabric inside out, use a gentle cycle, and avoid harsh detergents or bleach to prolong the life of your painted design.
Materials List
I love projects that require only a handful of materials.
Chances are, your craft room has most of what you require; however, in case of any shortages, these items can conveniently be found at Hobby Lobby or any craft store.
Additionally, I have conveniently provided links to the essential items in my Amazon shop.
Feel free to browse through and make a purchase if you find anything useful. Your support is greatly appreciated as it helps me maintain and improve my blog without any extra cost to you.
- Pillow Covers
- Pillow Inserts
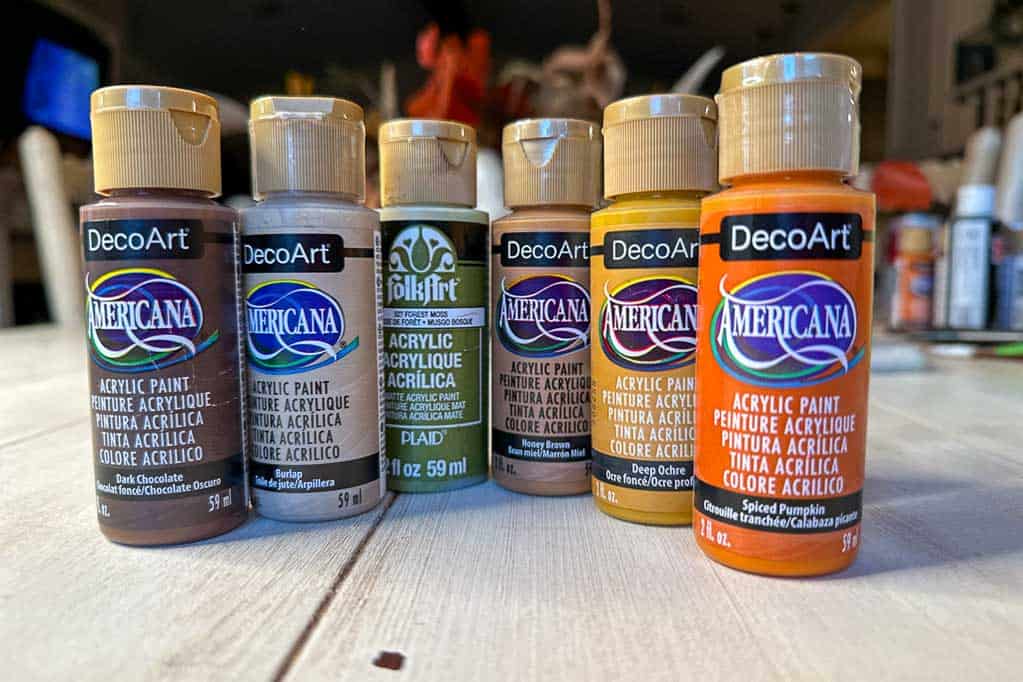
- Assorted colors of basic acrylic paint. Deco Art- Dark Chocolate, Burlap, Spiced Pumpkin, Honey Brown, and Deep Ochre. The green paint is Folk Art, Forest Moss. (you can also use acrylic fabric paint.)
- Assortment of brushes
- Paint tray
- Water
- Paper towels
- Pencil to draw or trace your pumpkin
Getting Ready to Paint
Ensure that your pillowcase is clean and free of wrinkles. To prevent paint from bleeding through, consider using a plastic shopping bag wrapped with a paper bag and inserting it into the pillowcase.
Additionally, choose a well-lit room when painting.
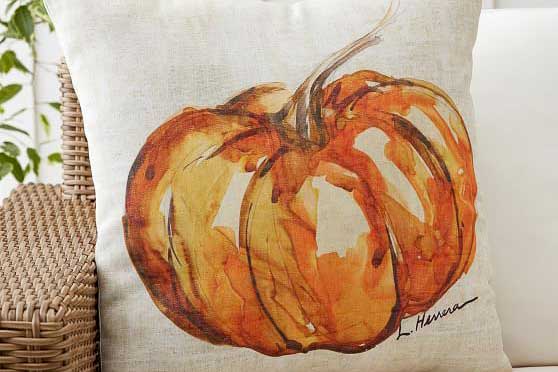
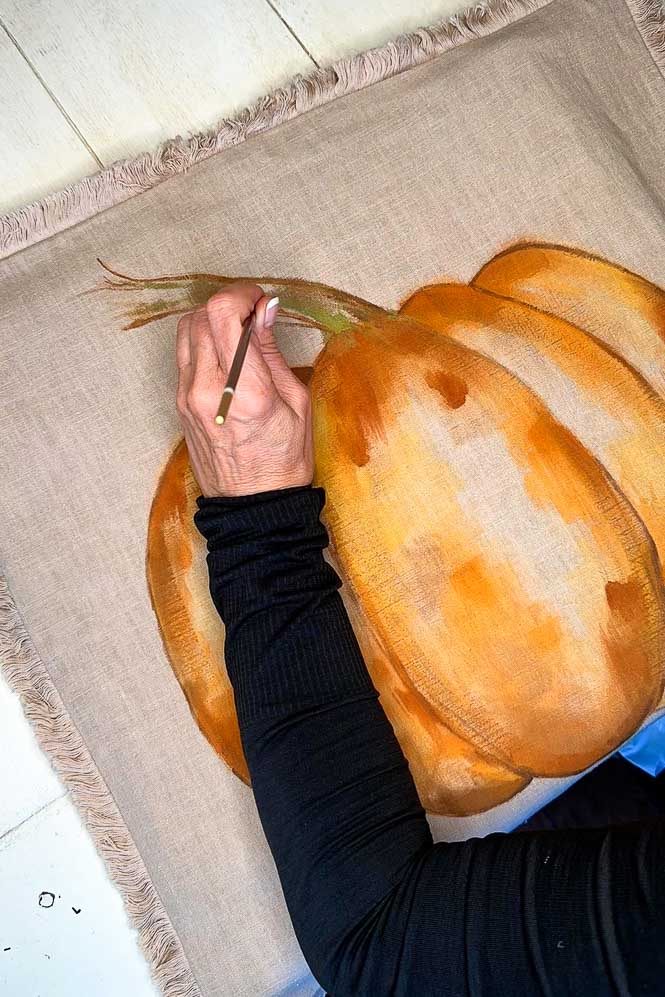
Painting the Pumpkin
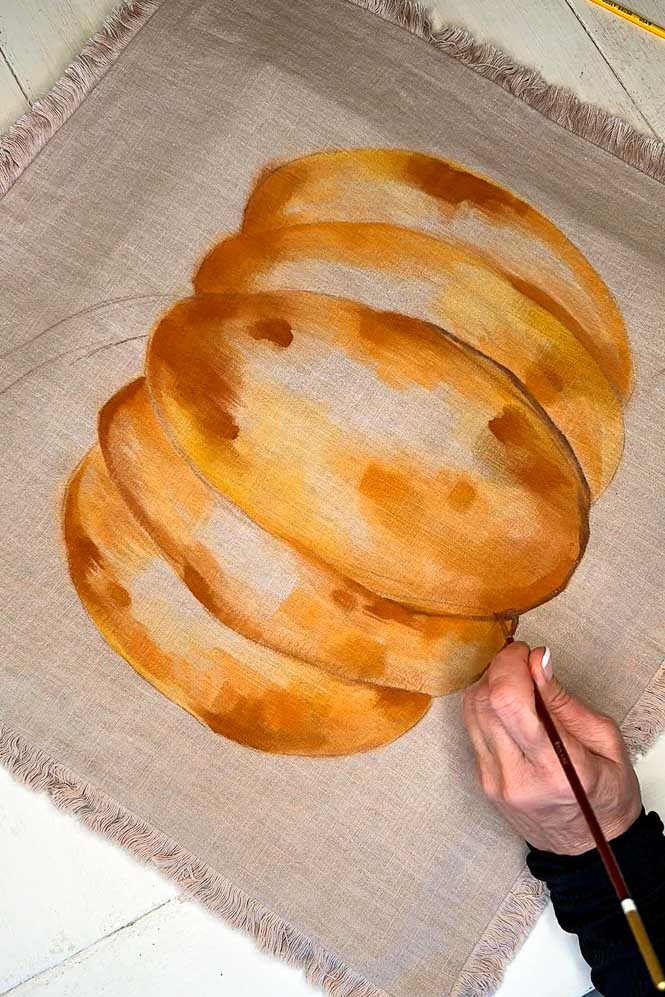
I didn’t want my pumpkin to have the same level of darkness as the Pottery Barn pillow, so I adjusted my colors by adding more water.
- I began by using the lightest shade, deep ochre, and gradually progressed to darker ones as I proceeded.
- Take a small amount of paint and mix it with a little bit of water. Test the color on a scrap of fabric or paper towel before placing the brush on your pillowcase.
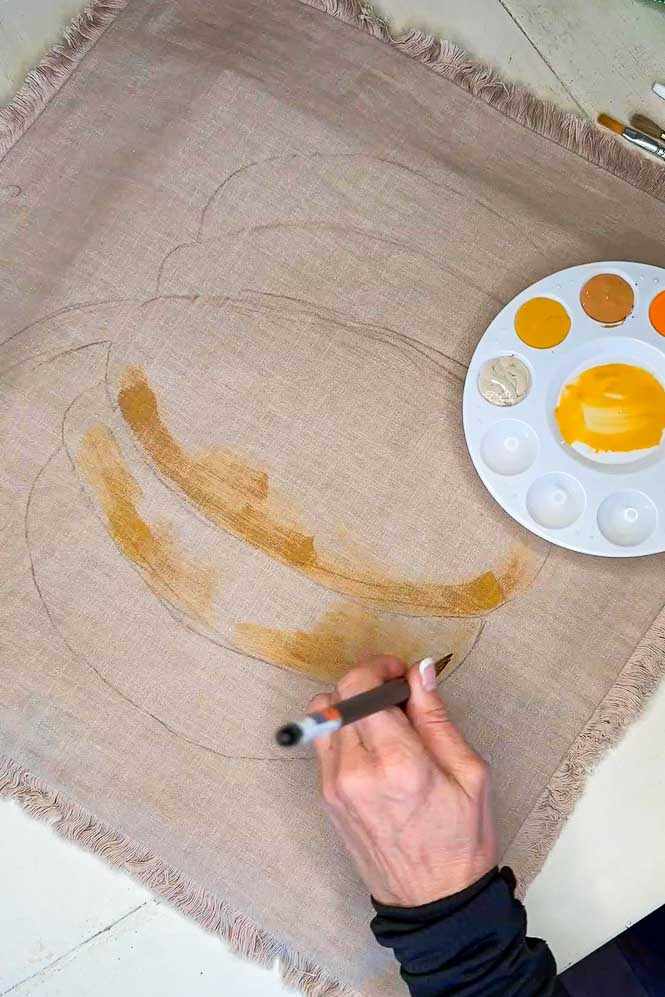
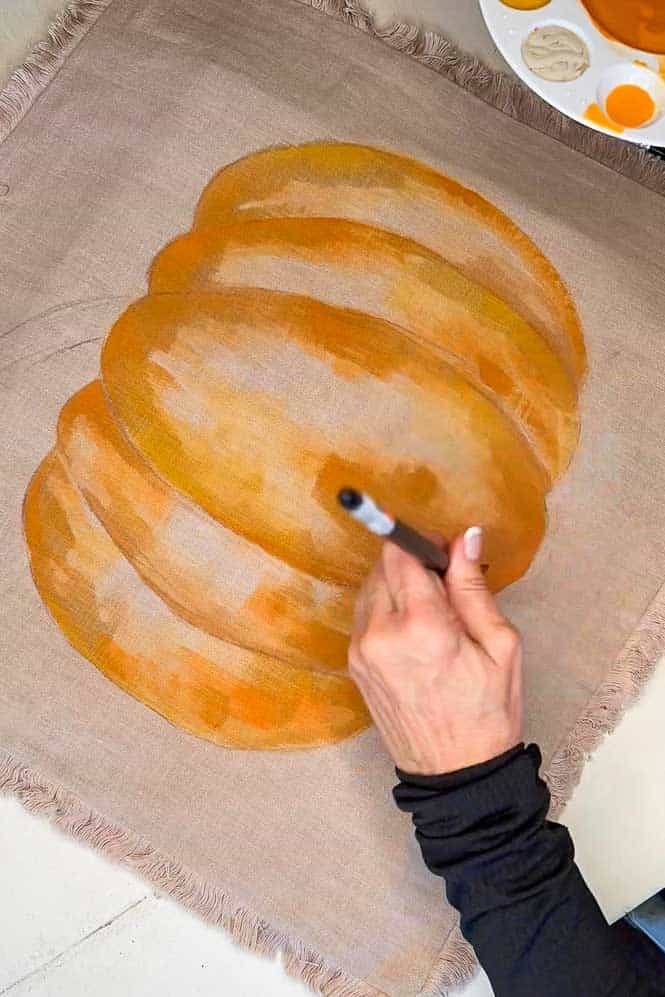
- Gradually start to define the sections of your pumpkin with strokes along the lines you have drawn.
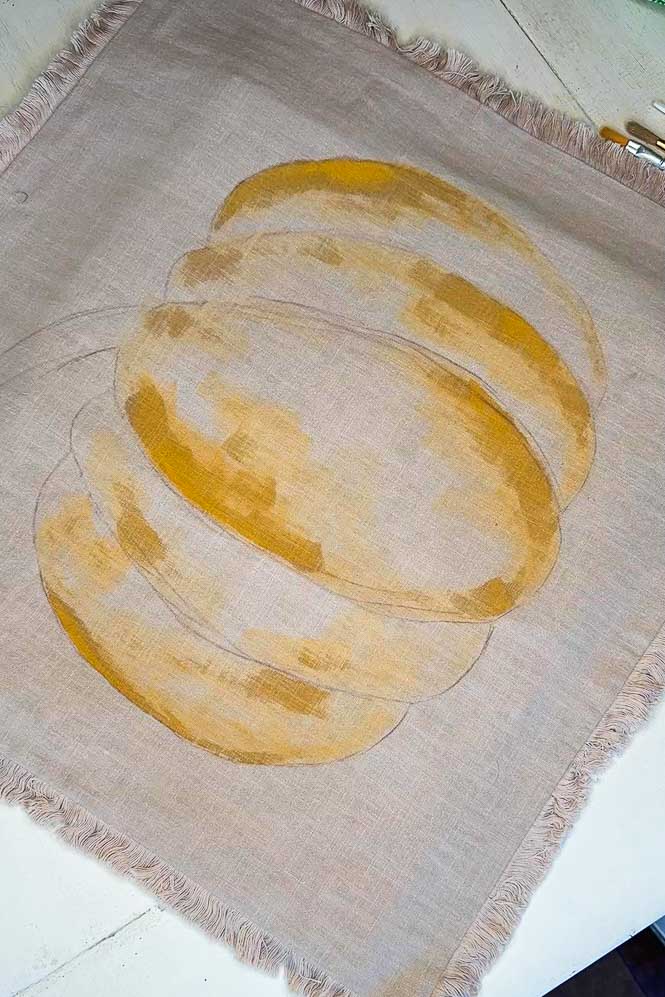
- Creating shadows with acrylic paint involves using various shades of the same color to give the illusion of depth and dimension in your artwork.
- By adjusting the amount of water used while mixing, you can create various shades and tones of a single color. This allows for versatility and customization in your creations.
- If you make a mistake, you can often correct it by letting it dry and then painting over it with the background color.
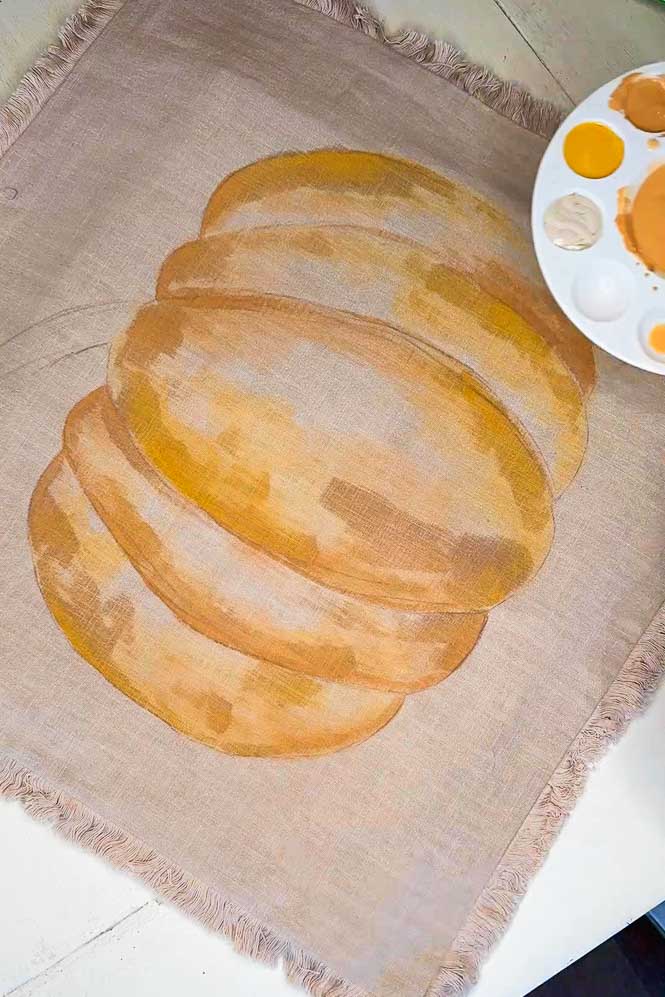
- Repeat this process with the next color, Spiced Pumpkin, then Honey brown.
- I then took a bit of the Burlap color, mixed it with some water, and used it to highlight some of the darker areas.
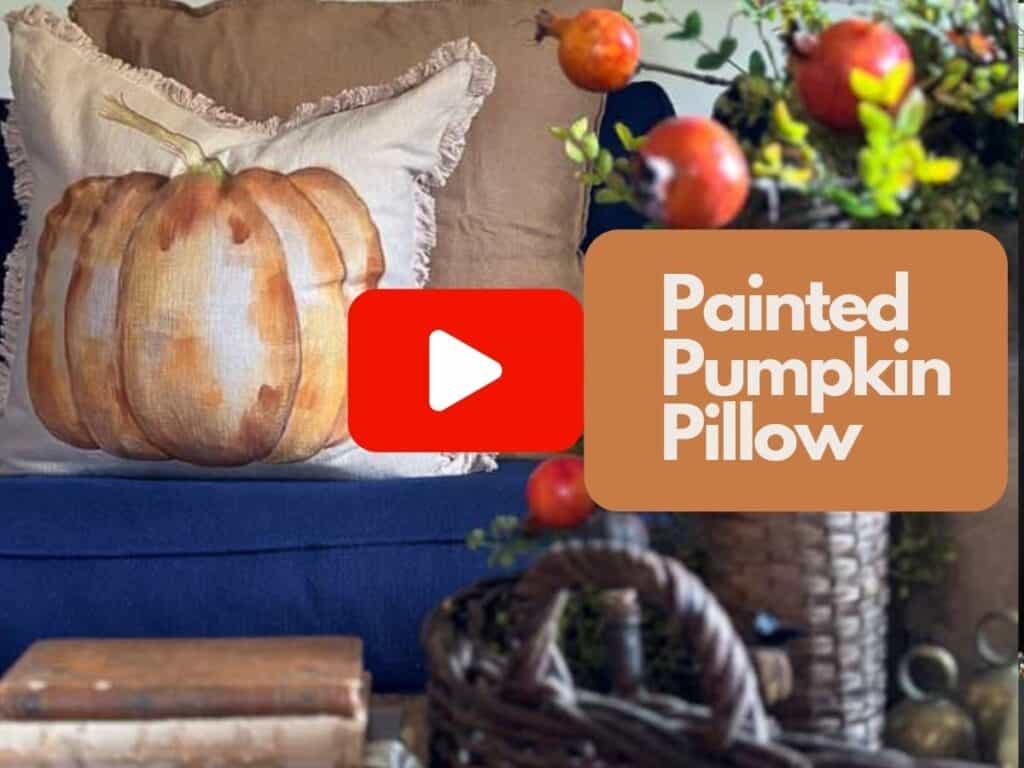
You can watch this quick one-minute video to see how I did this.
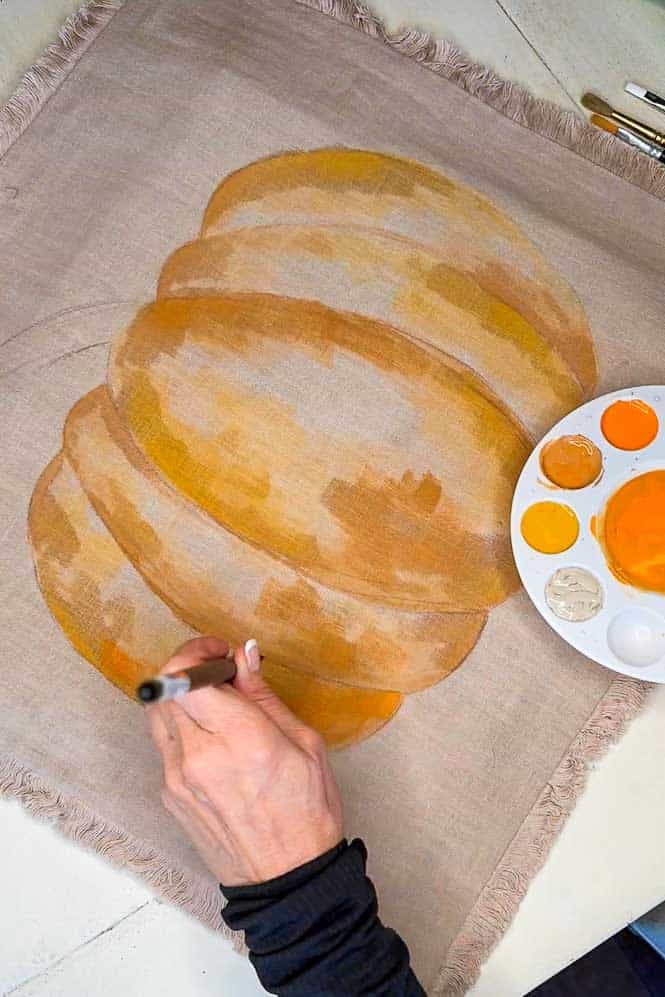
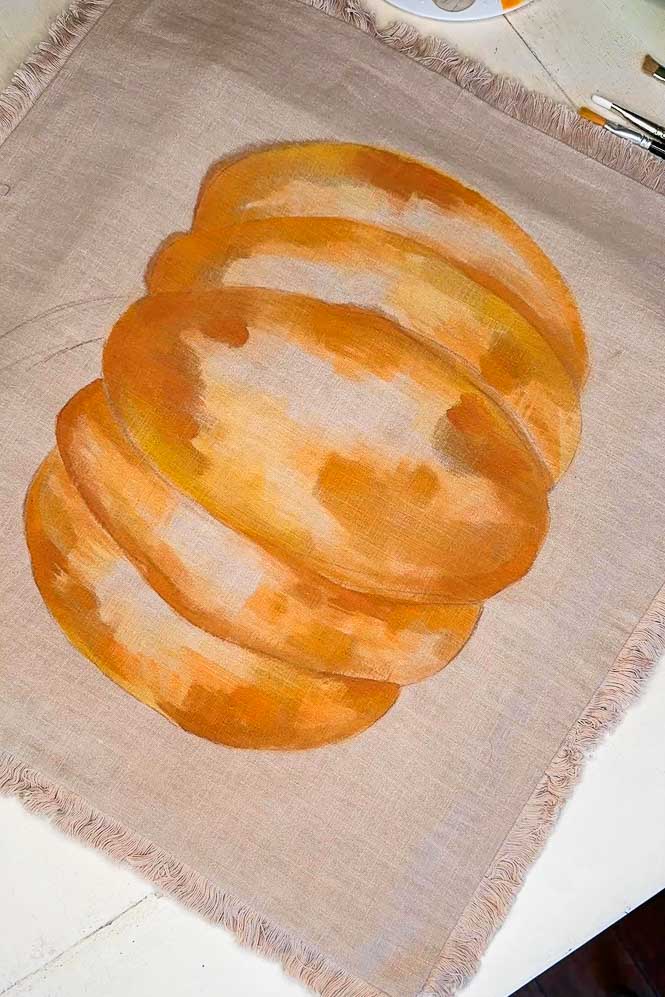
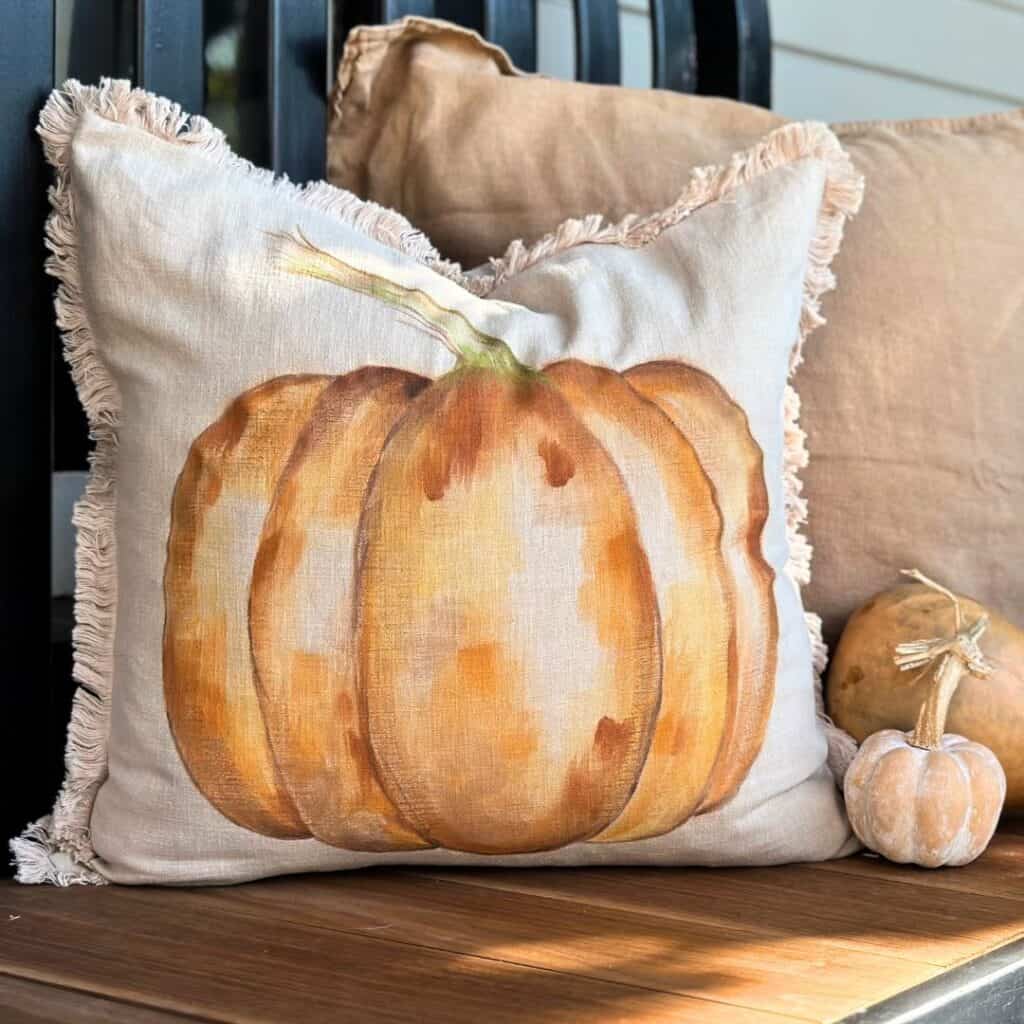
Accentuating the Pumpkin
I used a fine paintbrush and applied Dark Chocolate paint lines to accentuate the pumpkin.

Instead of outlining the whole pumpkin, I selectively emphasized its various sections.
Painting the Stem
I carefully started shaping the stem with the small brush I used to accentuate the pumpkin by applying dark chocolate paint.
Next, I gently brushed on a mixture of green paint and water along the edge where the stem meets the pumpkin, adding a touch of vibrancy to the overall composition.
I hope you found this project enjoyable and feel inspired to give it a try yourself.
Now, let’s visit my friend Amy’s beautiful blog. Prepare to be captivated by her exquisite wooden pumpkin creations alongside many other delightful pumpkin projects. Check out the links below to experience the pumpkin-themed magic from the other gals.


Wendy
Your version turned out beautifully. Great post.
Thank you Rachel. I need to make a few more next year.
You are so talented! The pillow looks great! Thank you for sharing it with us on Farmhouse Friday 321. I’ll be featuring it tomorrow! Pinned
Thank you so much, Cindy. I look forward to your feature.
Beautiful Wendy, great job on the pumpkin!
Thank you, Jenna!
That is absolutely beautiful! You did a great job. I’m happy to tell you I’ll be featuring this post at Thursday Favorite Things today, starting at 10:00 a.m. CST. 🙂
Thank you so much Pam, I am so honored to be featured on your blog.
I love this Wendy! It’s a fabulous dupe and I think I like yours better than PBs. Great job and great instructions. Thanks for the inspo. Pinning. XO- MaryJo
Thank you so much Mary Jo. You are too kind. I hope you are enjoying a wonderful week of fall weather.
Hi Renae, thank you so much for sharing my pumpkin pillow. I’m sorry for not getting back to you sooner. We went to visit all of our kids after the conference and just returned home. It was all I could do to just get my posts out. Thank you again.
What a great dupe! It turned out beautiful, Wendy!
Thank you Kim!
This is such a fun project for any season. I love how you shaded the pumpkins so perfectly. They look great in your home!
Thank you so much, Susan.
That’s just sooooo good Wendy!! Hope you had a fabulous time at the conference!!
Thank you, Jennifer. If you can believe it, I just got home and am trying to catch up… Yikes, Christmas is around the corner.
Wendy, you are so talented. Your pumpkin pillow could give Pottery Barn a run for its money. The tutorial is so well written and easy to follow. Thanks for including me in the Handmade Society this month. Great projects.
Thank you so much, Carol, you are very kind.
Beautiful, Wendy! You give such good step-by-step instructions on how to paint the pumpkin. Perfect for paint fraidy-cats like me! Great tutorial and beautiful pillow!
Thank you so much, Missy.
Such a pretty pillow, Wendy!! What a fun handmade piece of decor for the season!
Thank you, Rachel, I appreciate your comment so much.
Kudos for a masterly done pillow! I just love how well it turned out. Pinning!
Thank you so much, Diane. I am sorry for being so late to respond.
Wendy, your pillow turned out absolutely gorgeous! I’m so impressed with your paint skills. In fact, I like your pumpkin so much more than the PB!
Thank you so much, Michelle.
Adorable!!
Thank you Susan!
Love this project so much Wendy! You really nailed it perfectly!!! It looks fabulous in your home. Thank you very much for inviting me to be a guest this month. It was a lot of fun!
Thank you Crystal, we were so happy to have you. I hope you enjoyed it.
Dang it Wendy! You are so good! I love this pottery barn dupe pillow! I have to have one!
Thank you so much Amy!
So beautiful Wendy! You are one creative and talented lady!
Thank you so much Michele.
Oh, Wendy! This is absolutely gorgeous!! You are so creative, my friend!!
Thank you so much, Kim. I appreciate you!