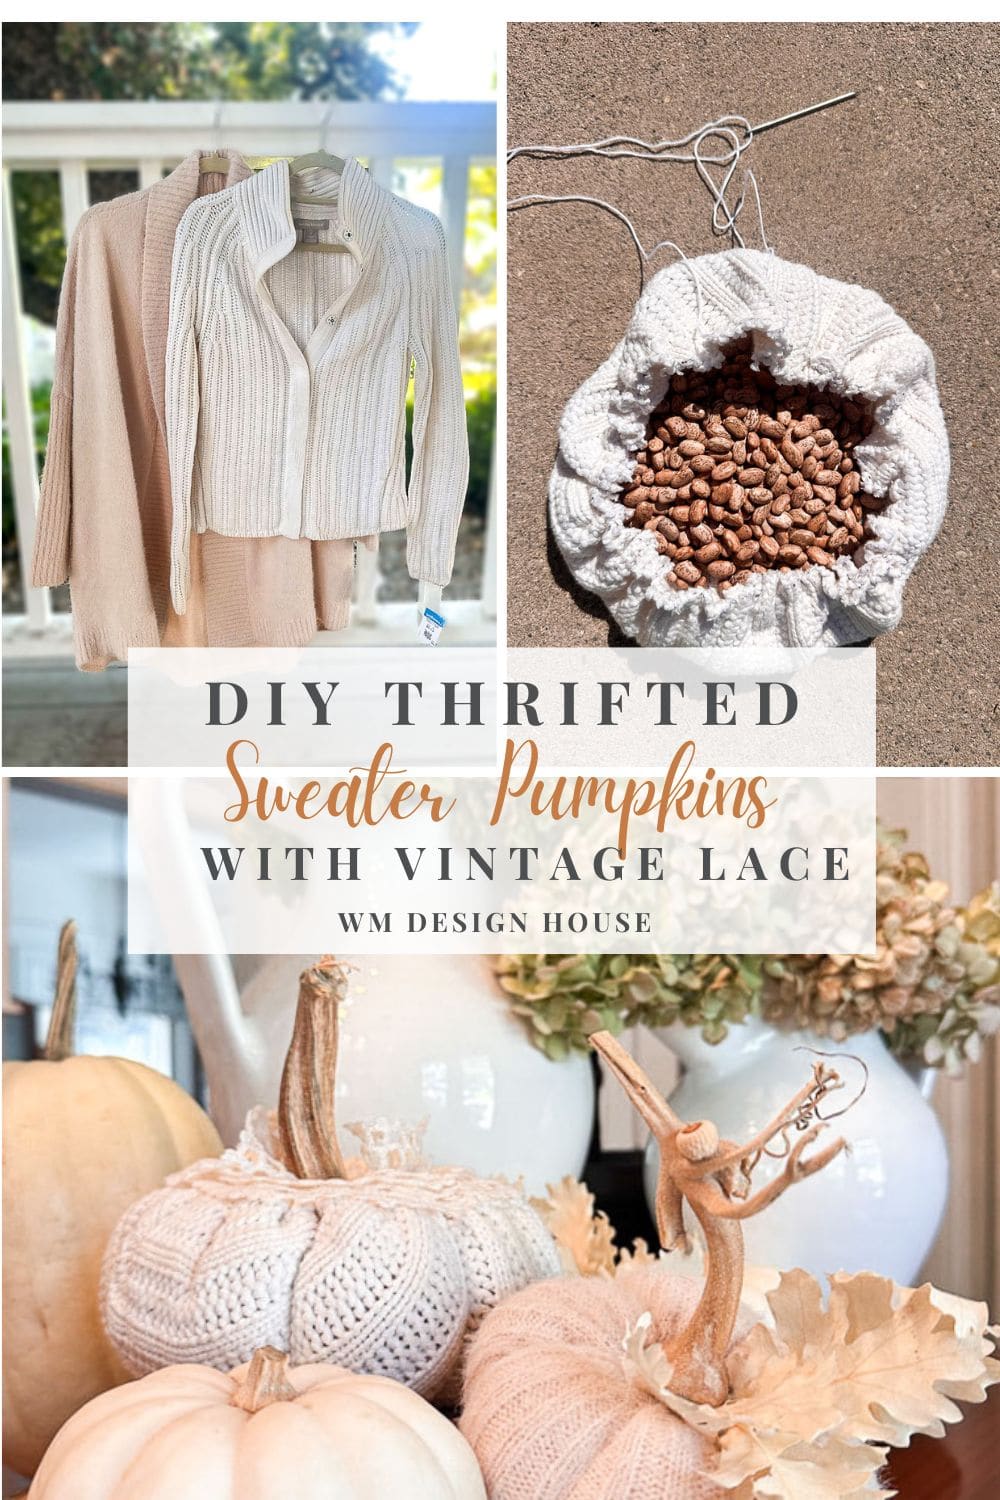
Sweater Pumpkins: How to Make the Cutest Pumpkins with Vintage Lace
Don’t toss out those old sweaters! With my step-by-step guide, you can quickly transform your old or thrifted sweaters into adorable sweater pumpkins.
On my blog WM Design House, I may sometimes use affiliate links, which means a small commission is earned if you purchase via the link. The price will be the same whether you use the affiliate link or go directly to the vendor’s website using a non-affiliate link. Read my full disclosure policy here.
Get ready for an exciting adventure with today’s Handcrafted Society post as we dive into a creative challenge using leather or lace. These two materials, though contrasting, offer endless possibilities for unique projects, whether adding rustic charm with leather or vintage elegance with lace. I’m always amazed by the incredible creations from the talented ladies in our group, and this challenge is no exception. From home decor to wearable art, their creativity continues to inspire. Join us as we showcase our latest projects and spark your DIY inspiration!
What are Sweater Pumpkins?
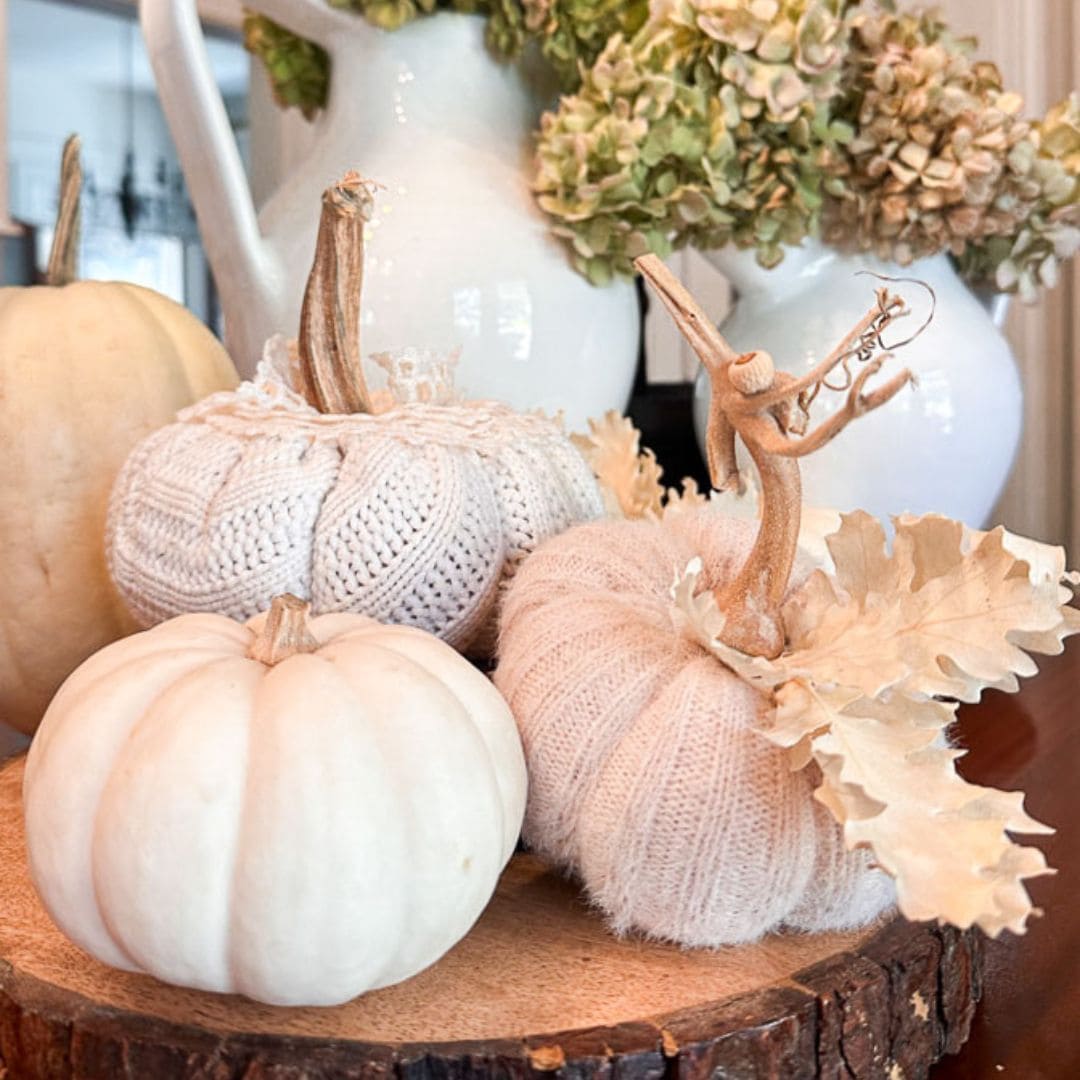
Sweater pumpkins are a popular and festive DIY decoration made from old sweaters. Their cozy texture, soft colors, and patterns create unique and charming fabric pumpkins that bring warmth and style to your fall decor. I will show you how to make two types of pumpkins using your old sweater. We will make small pumpkins using the sweater sleeves and a larger pumpkin using the body of the sweater.
So let’s get started.
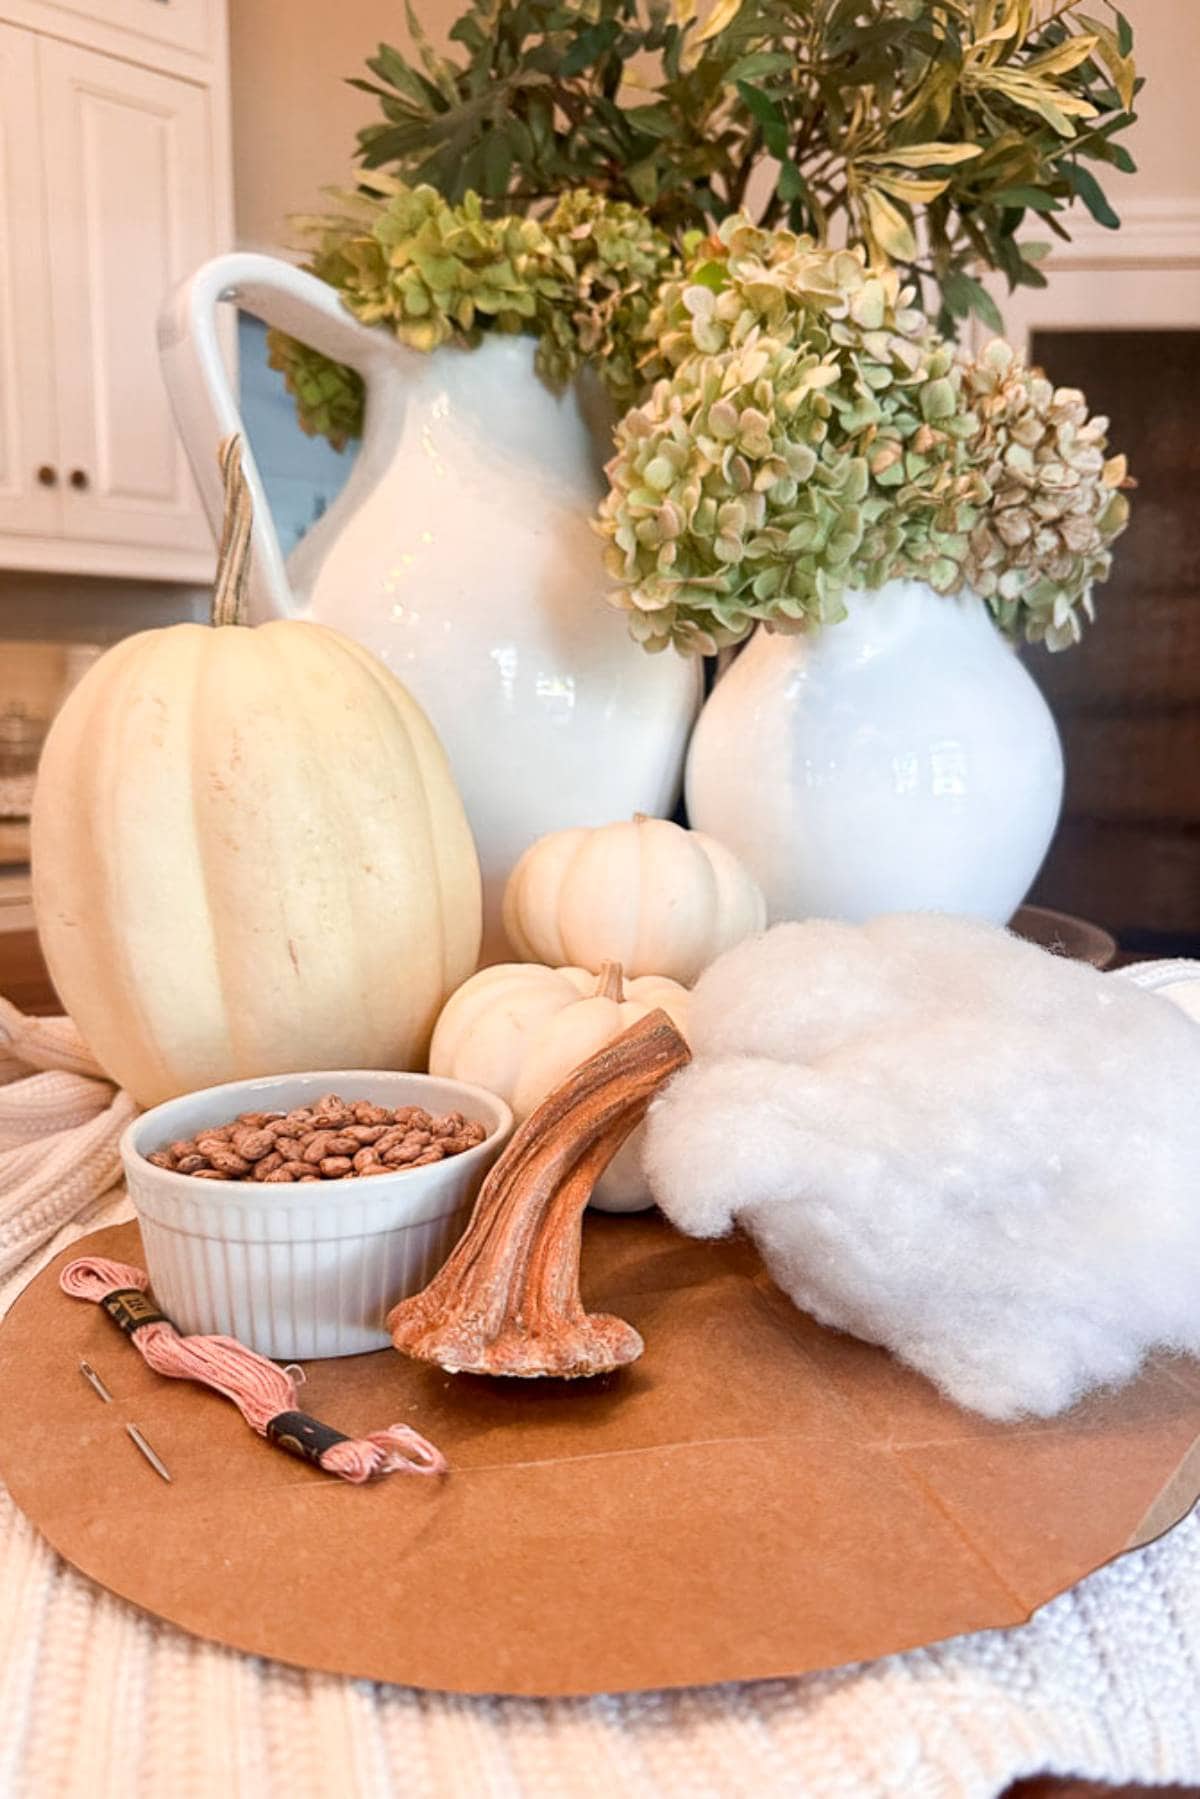
Materials Needed to Make Sweater Pumpkins
You can shop at your local thrift store, Hobby Lobby, Dollar Store, or Michaels for most of your supplies.
Additional Tools You’ll Need
Step-by-Step Tutorial for Sweater Pumpkins (using the body of the sweater)
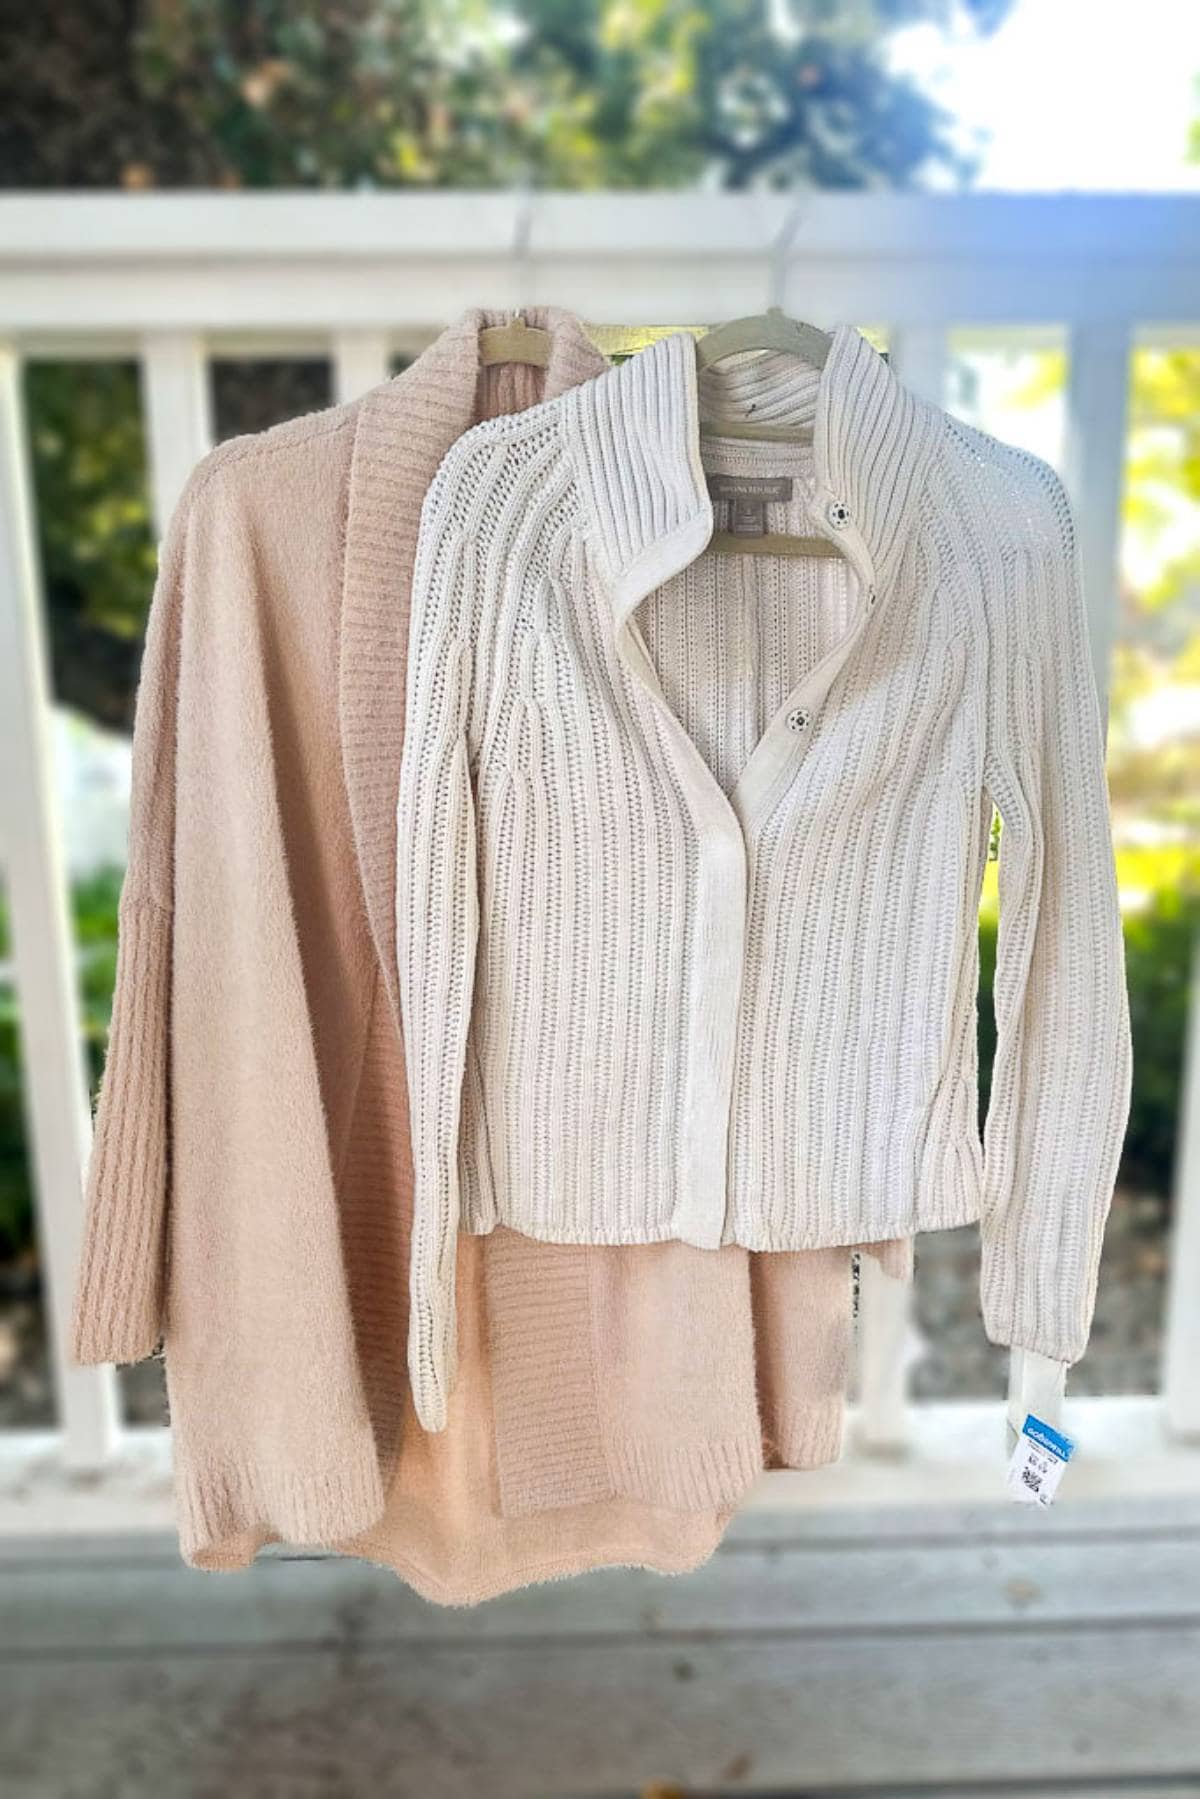
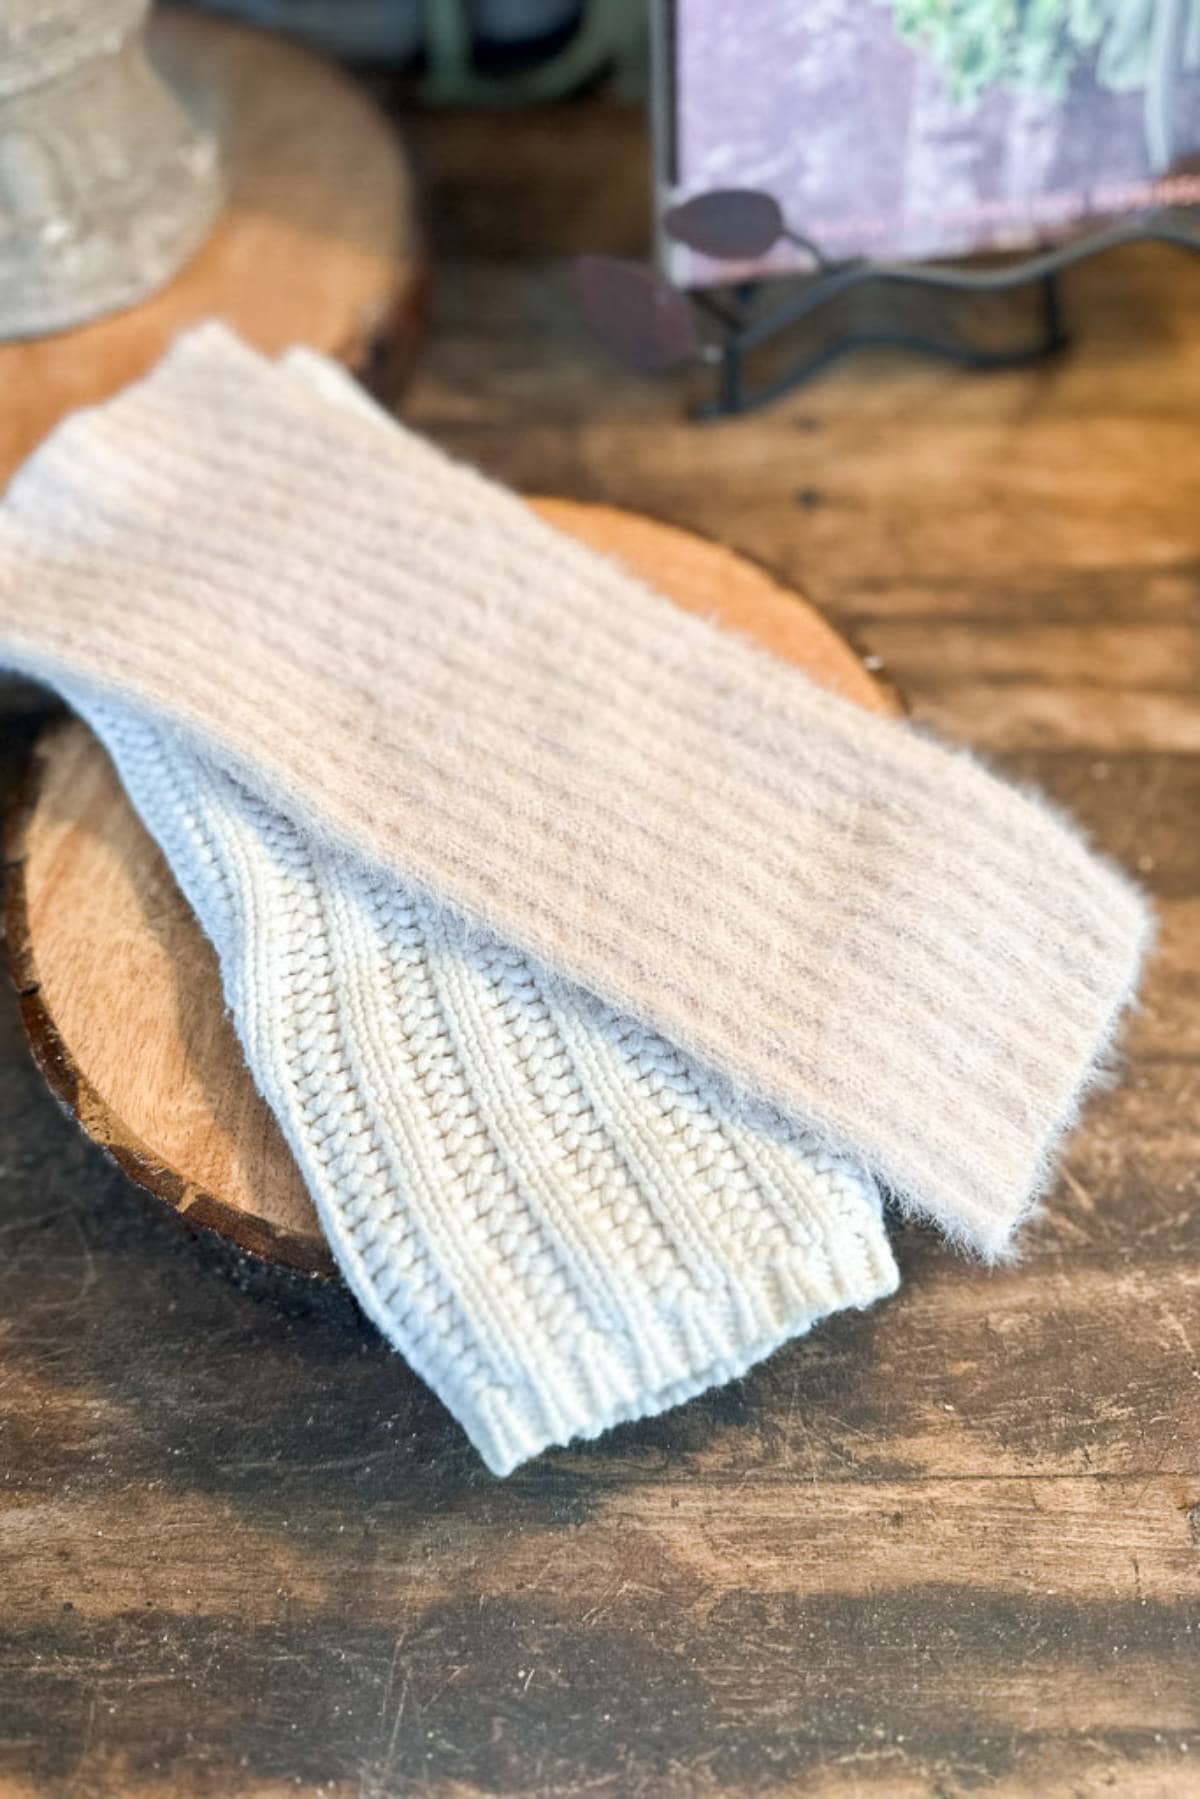
1: Choose Your Sweater
When choosing sweaters to make a thrifted sweater pumpkin, consider the colors and textures you want to incorporate. Mix different colors and textures for added interest, like I did. I used a natural-colored, heavy cotton cable knit sweater and a light pink Alpaca sweater for a soft, cozy look.
Tip from wendy’s craft room:
Start by shopping your closet! If you don’t find what you need, head to the thrift store for more options.
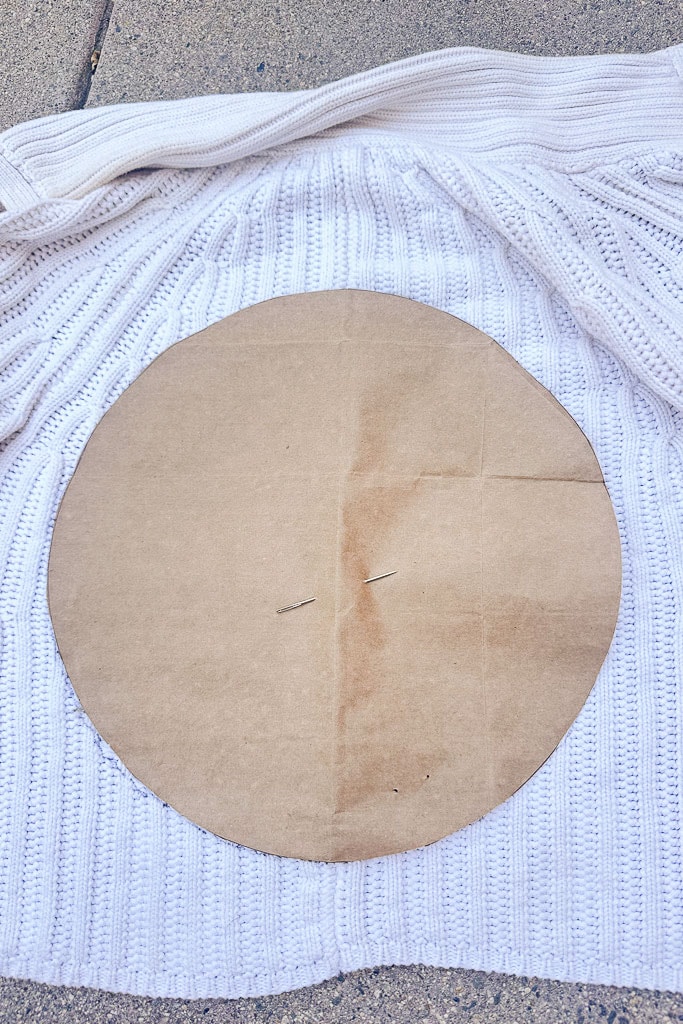
2: Cut the Sweater
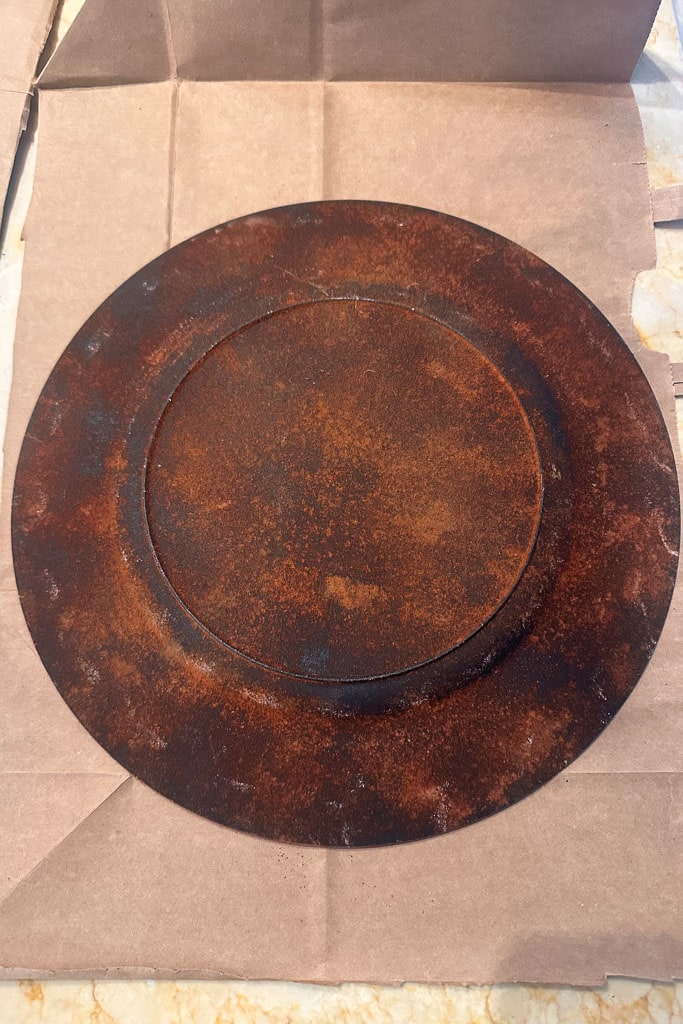
- Create a round pattern using a paper bag depending on the size of the pumpkin you want. Here are a few different sizes you can use: a 13″ circle to get a 7″ pumpkin. If you want a large pumpkin,10 inches, make your circle pattern 18″; if you want a smaller pumpkin, around 5″, make the pattern approximately 9″.
- Trace the pattern onto the sweater fabric (front or back of the sweater).
- Using sharp fabric scissors, cut the circle of fabric out.
Tip from wendy’s craft room:
Look for large round items in your house that you can trace and use for a pattern. I used a 13″ charger plate for an 7.5″ finished pumpkin.
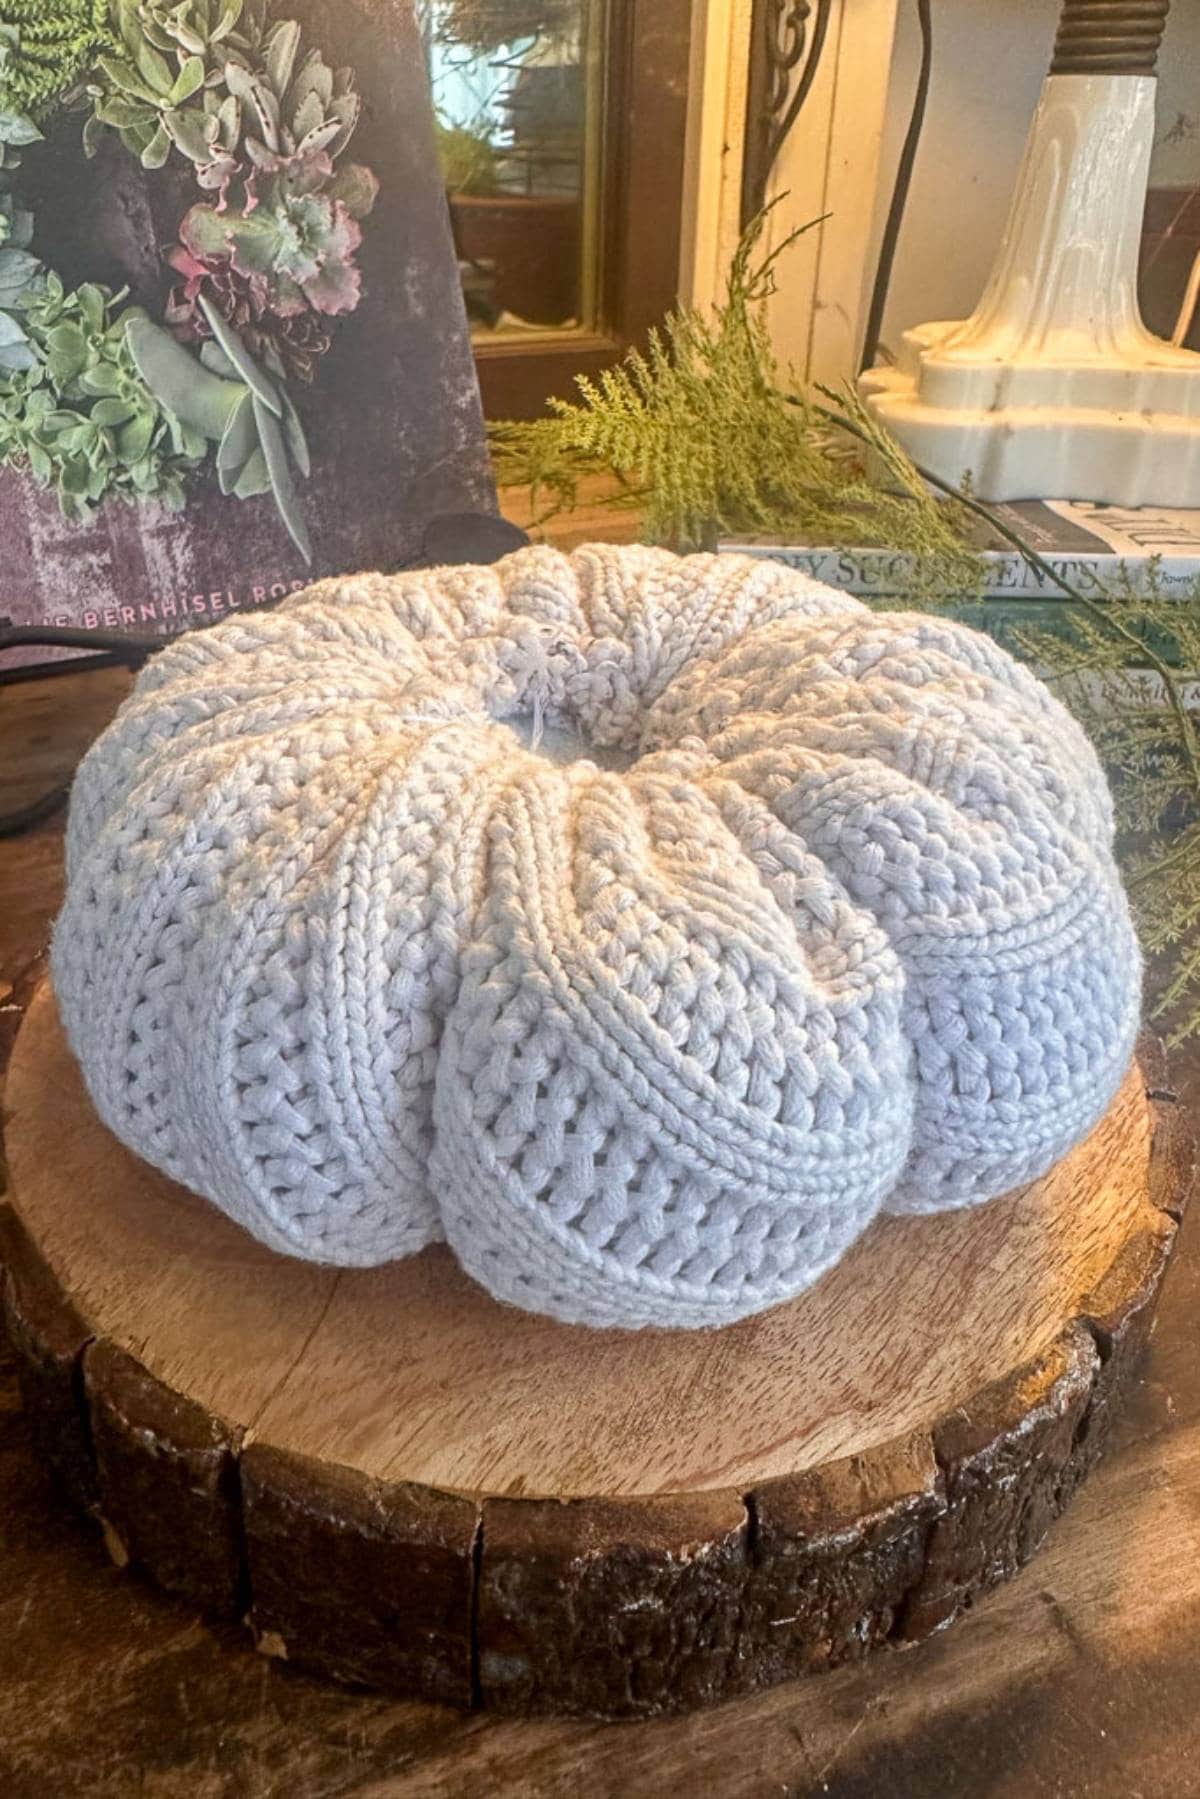
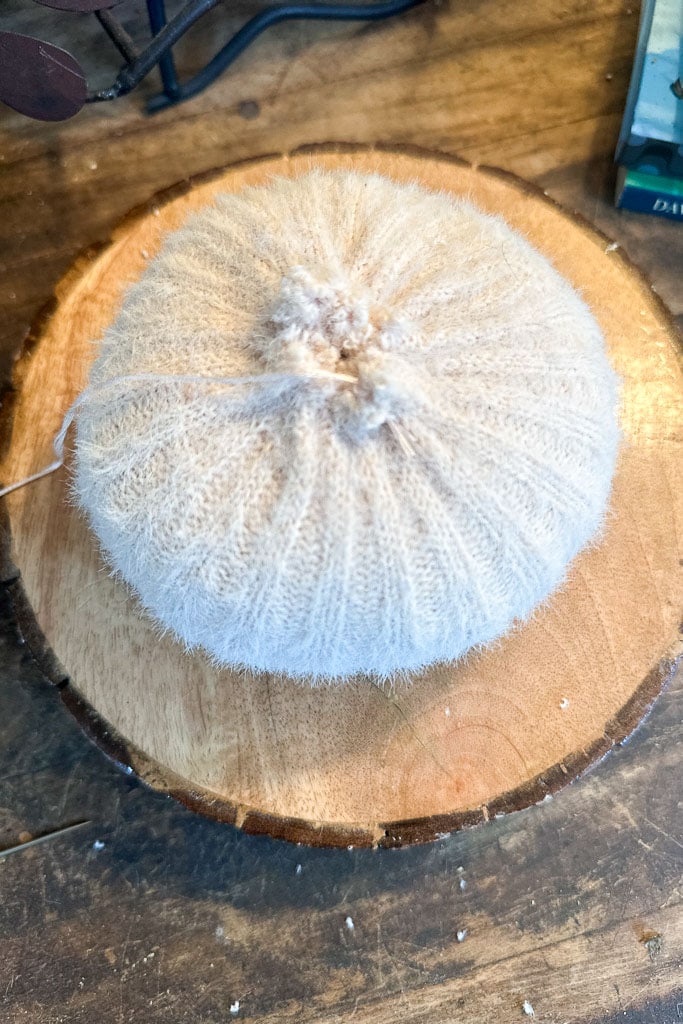
3: Stitch the Sweater Circle
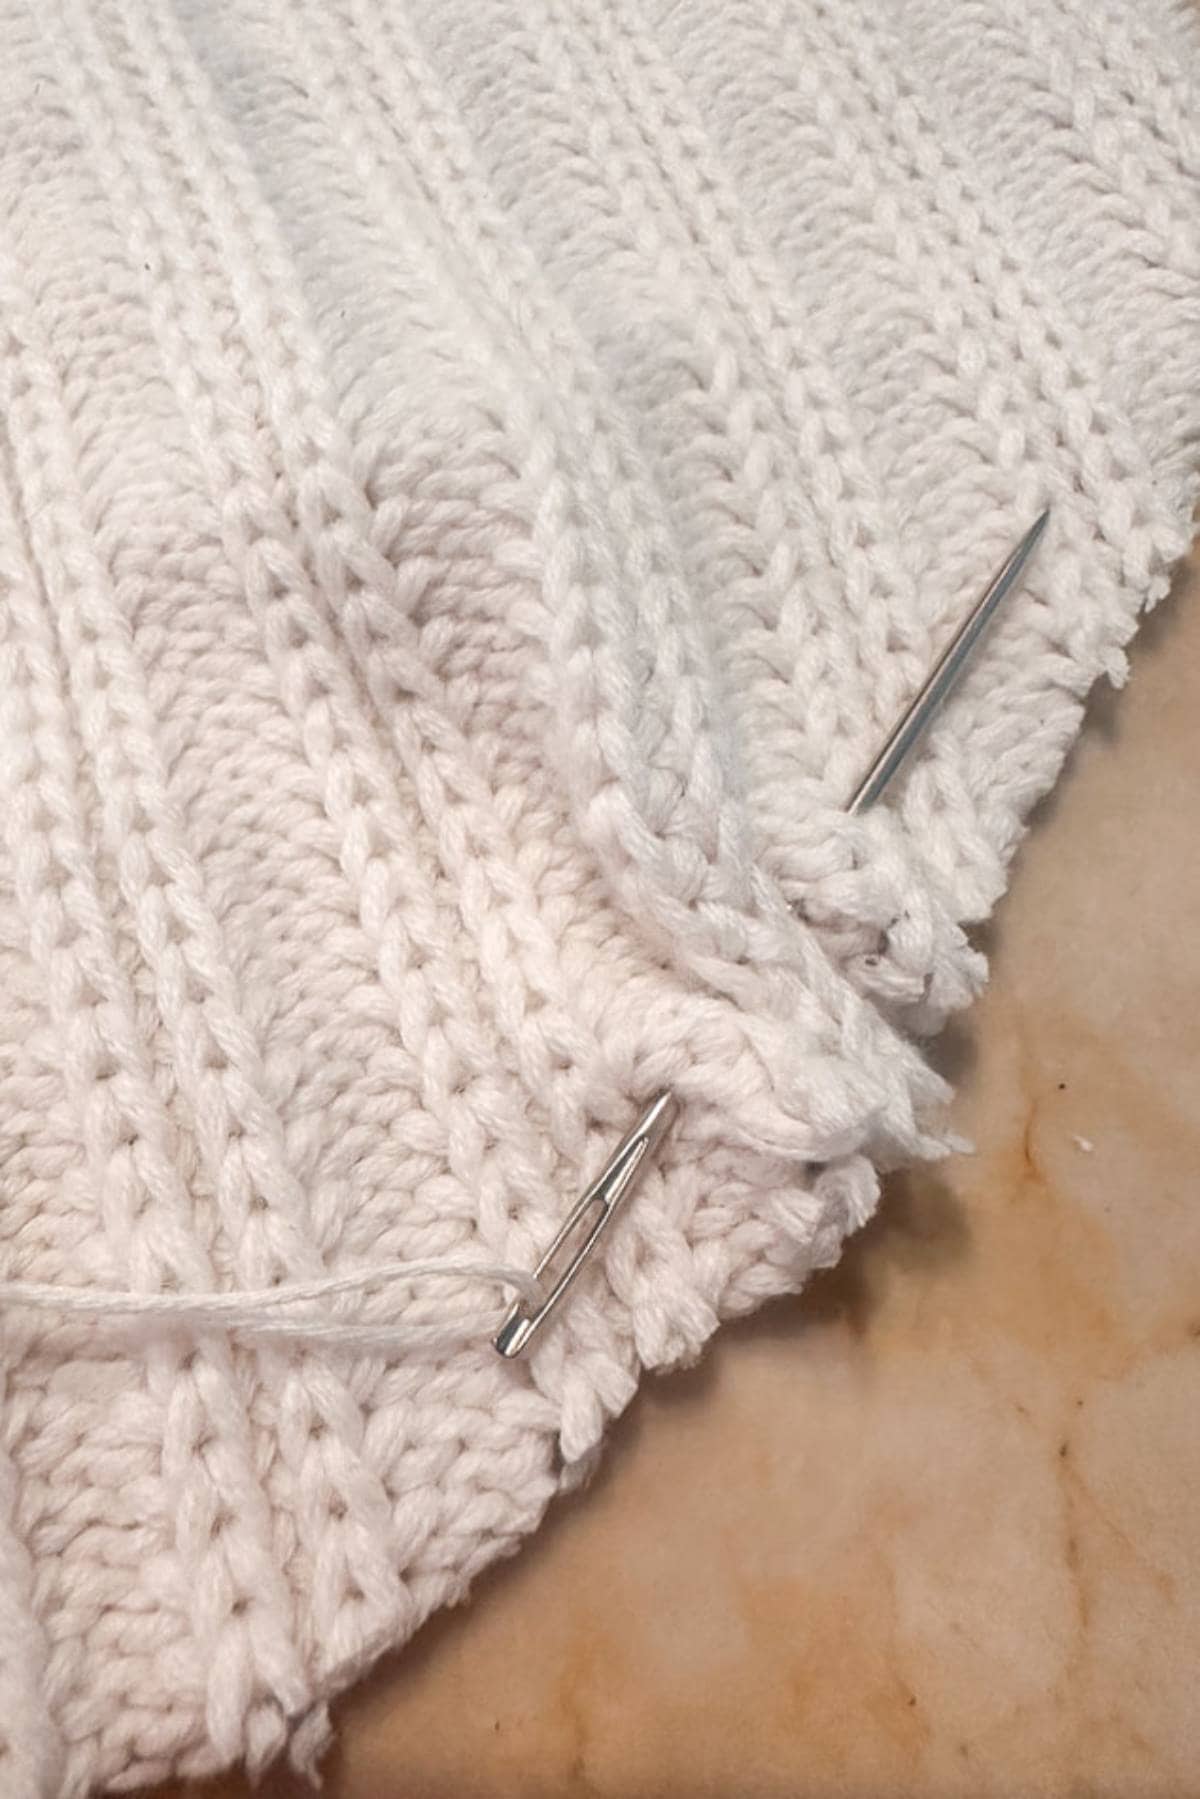

- Using a yarn needle, put the end of the thread through the eye of the needle and tie a knot on the end, leaving a five-inch tail.
- Create a running stitch around the fabric circle approximately 1/2 inch from the material’s edge. Leave a long tail on the end of the embroidery thread to pull your gathering stitch.
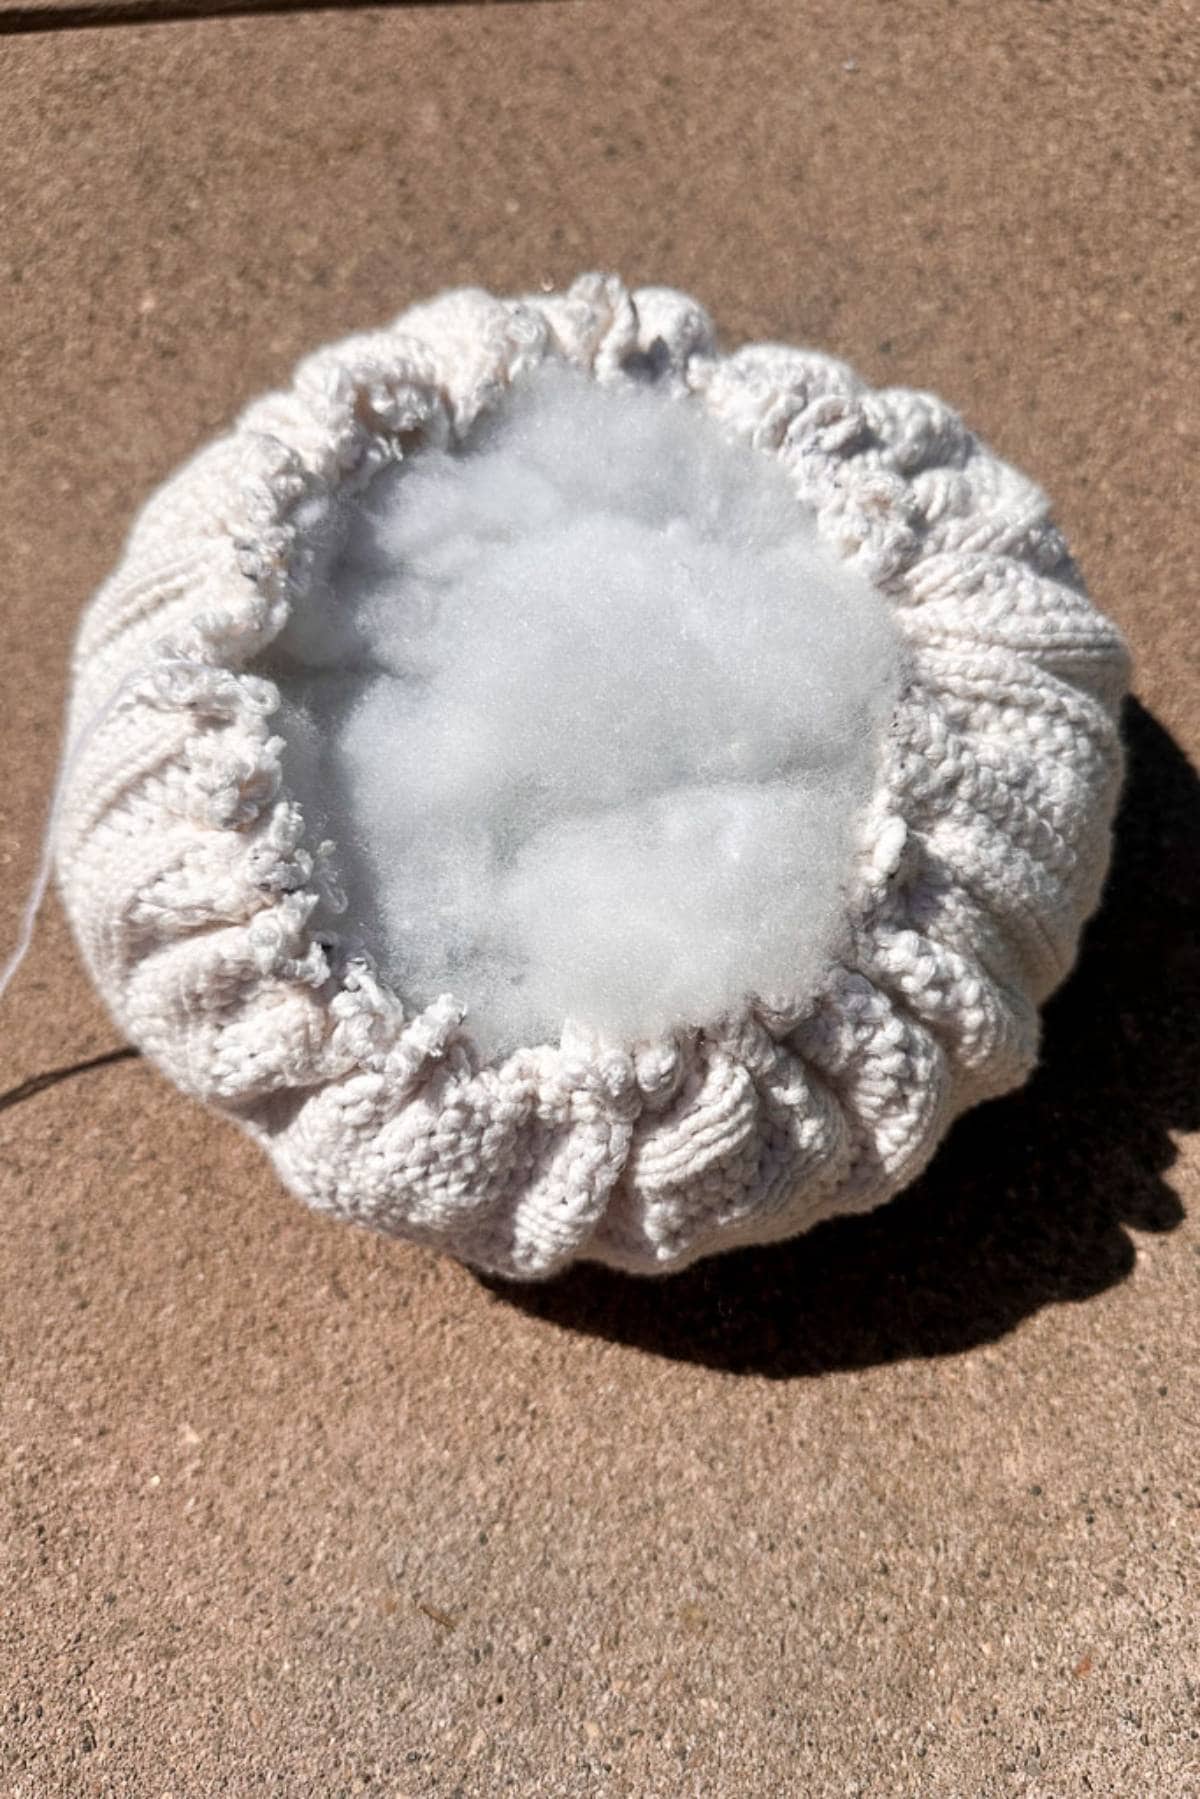
- Pull thread ends to gather the fabric into a pumpkin shape. (Do not pull all the way closed, until you have stuffed the pumpkin).
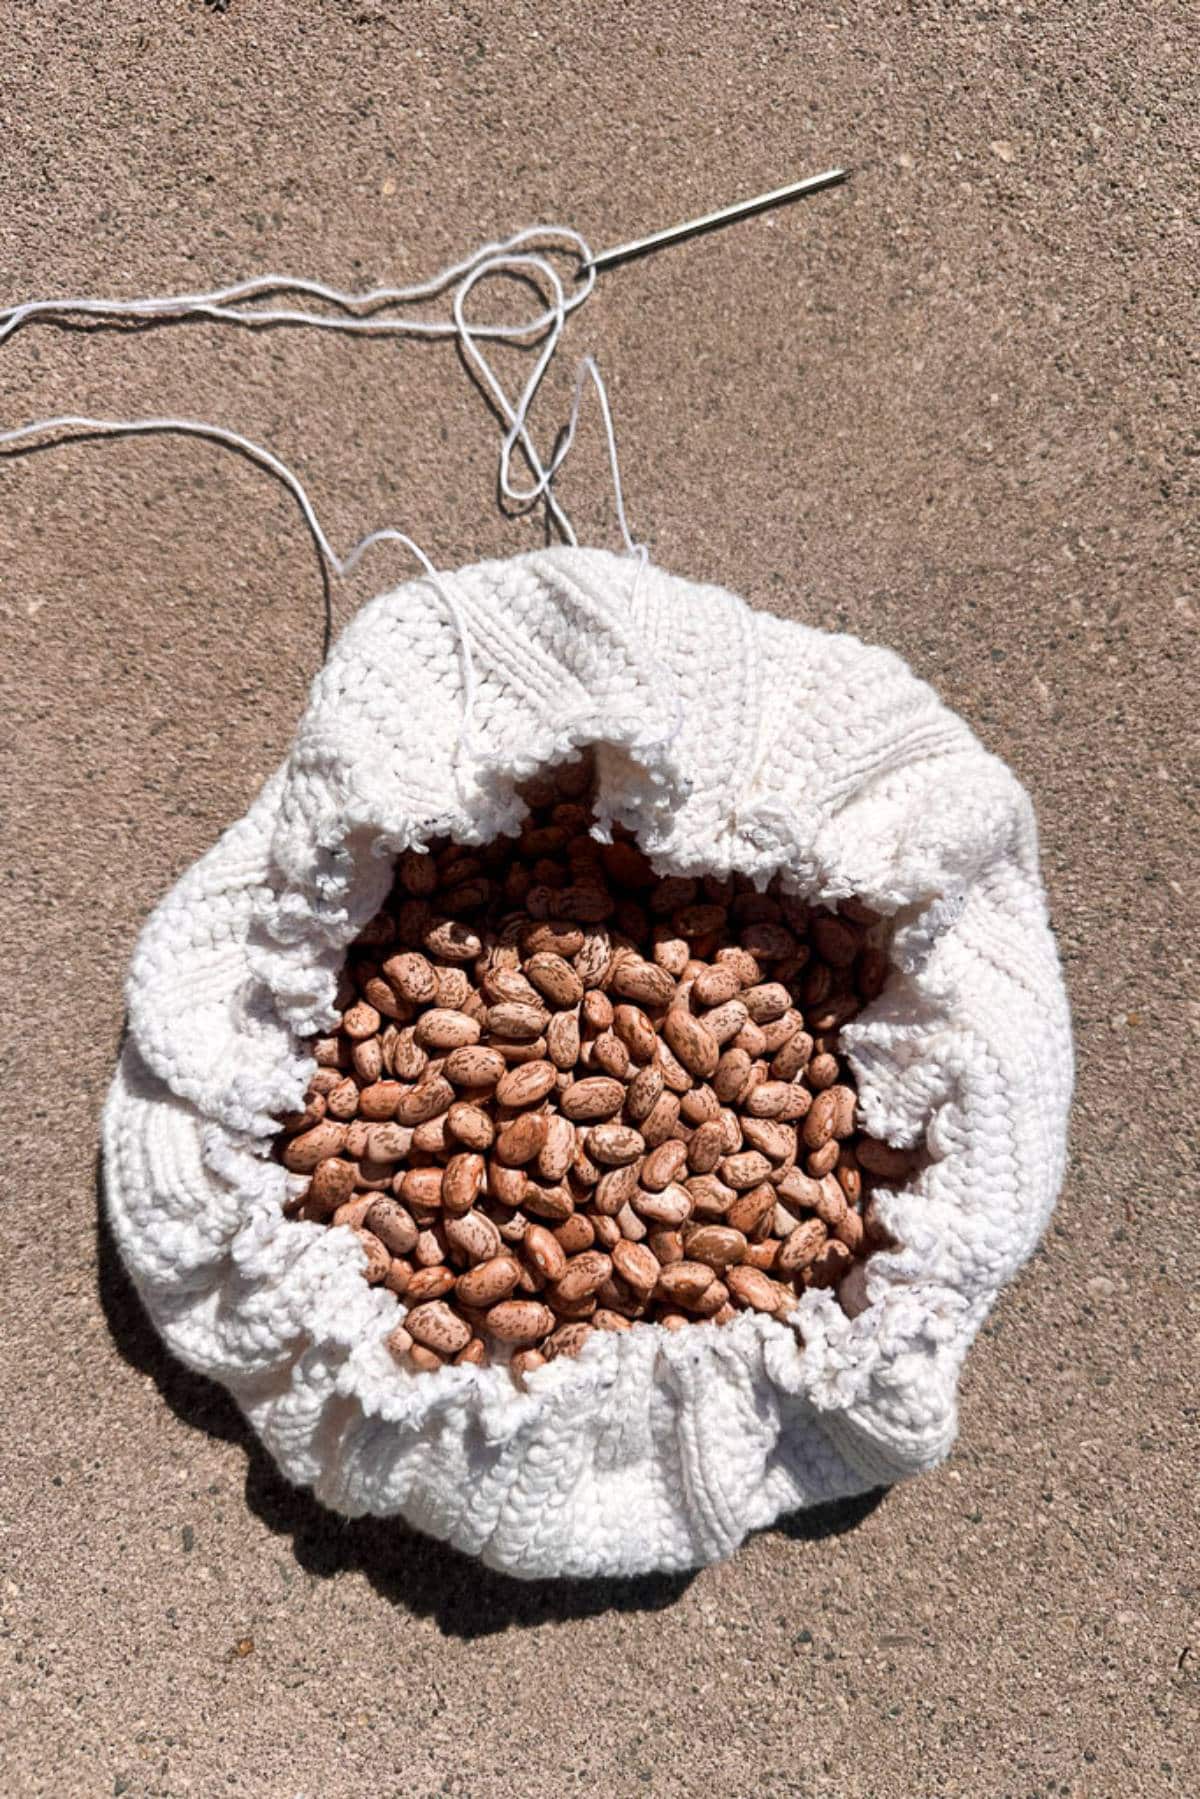
4: Stuff the Pumpkin
- Add a cup of dried beans to give your pumpkin some weight, and allow the bottom of the pumpkin to sit flat.
- Add fiber fill to the top of the pumpkin until you can’t add any more.
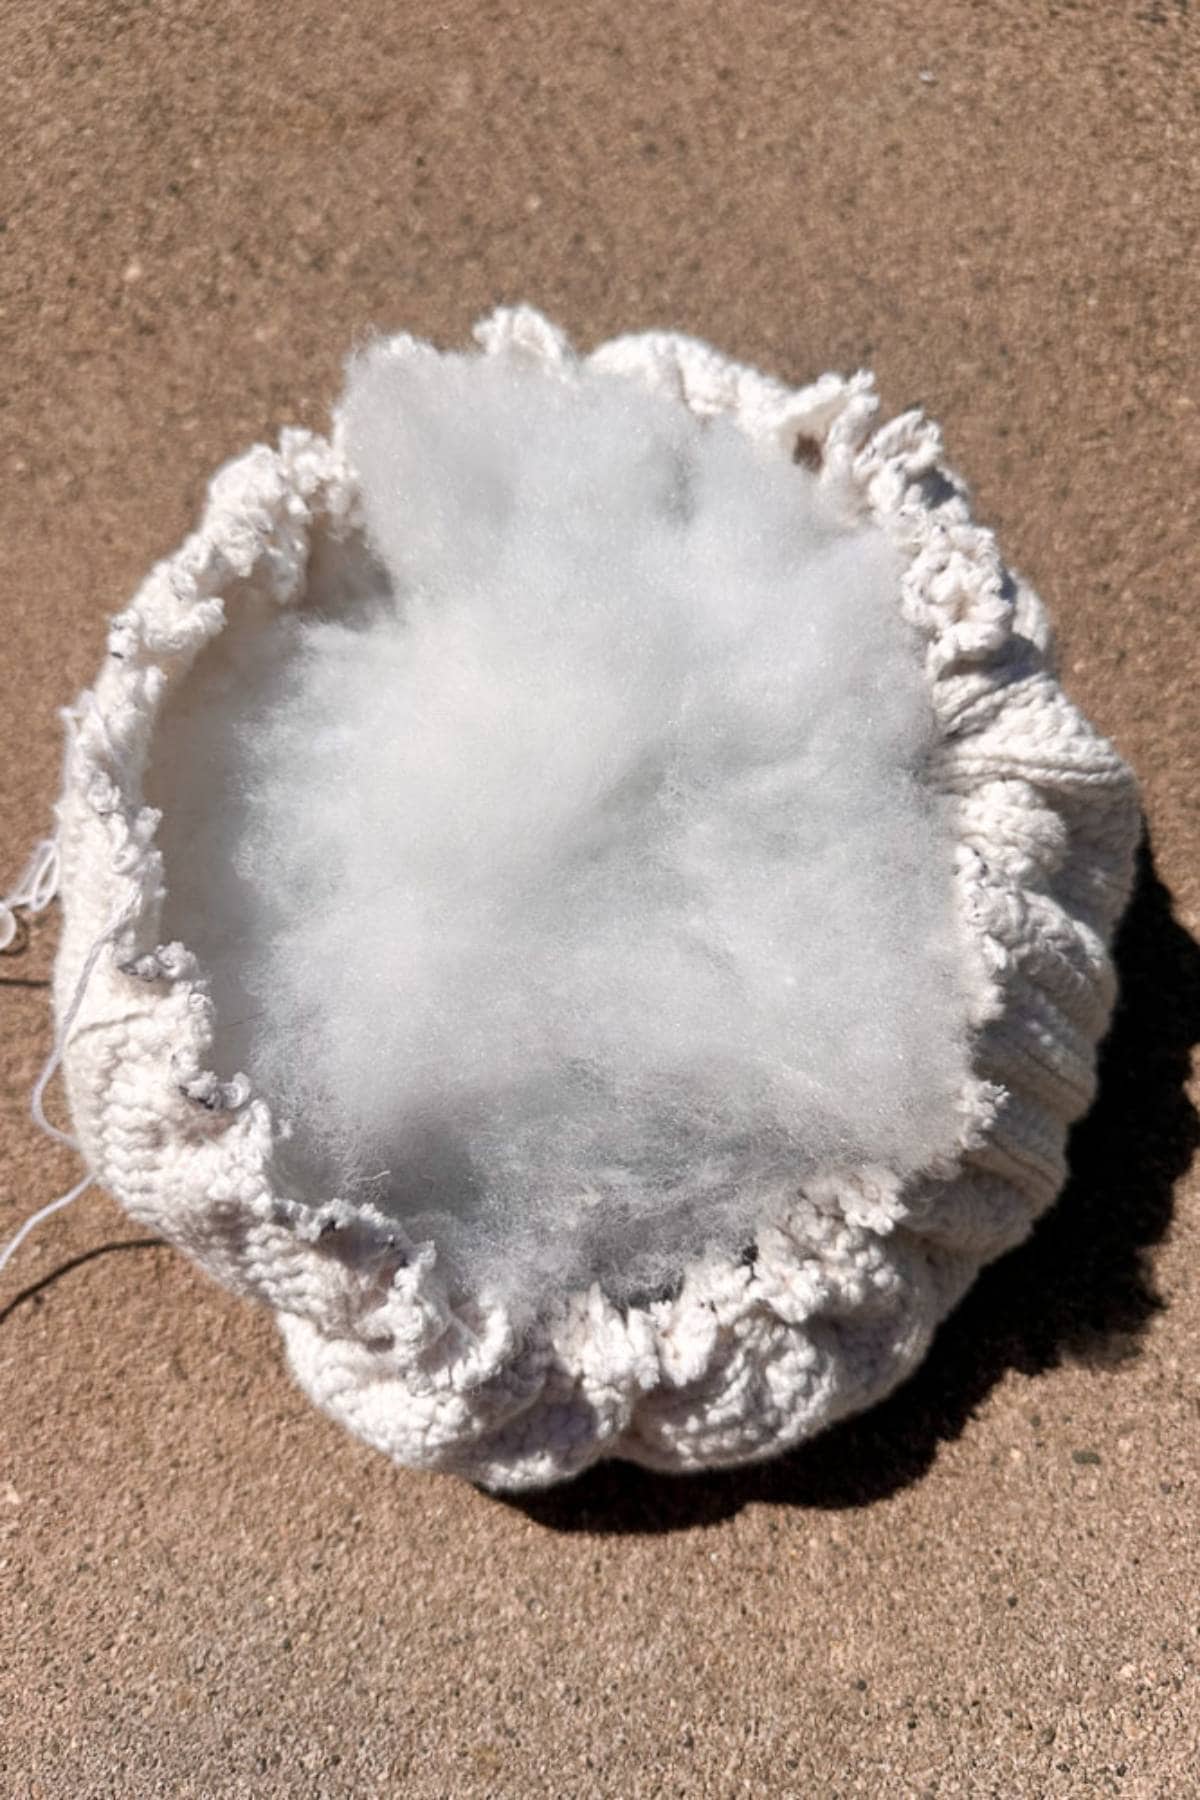
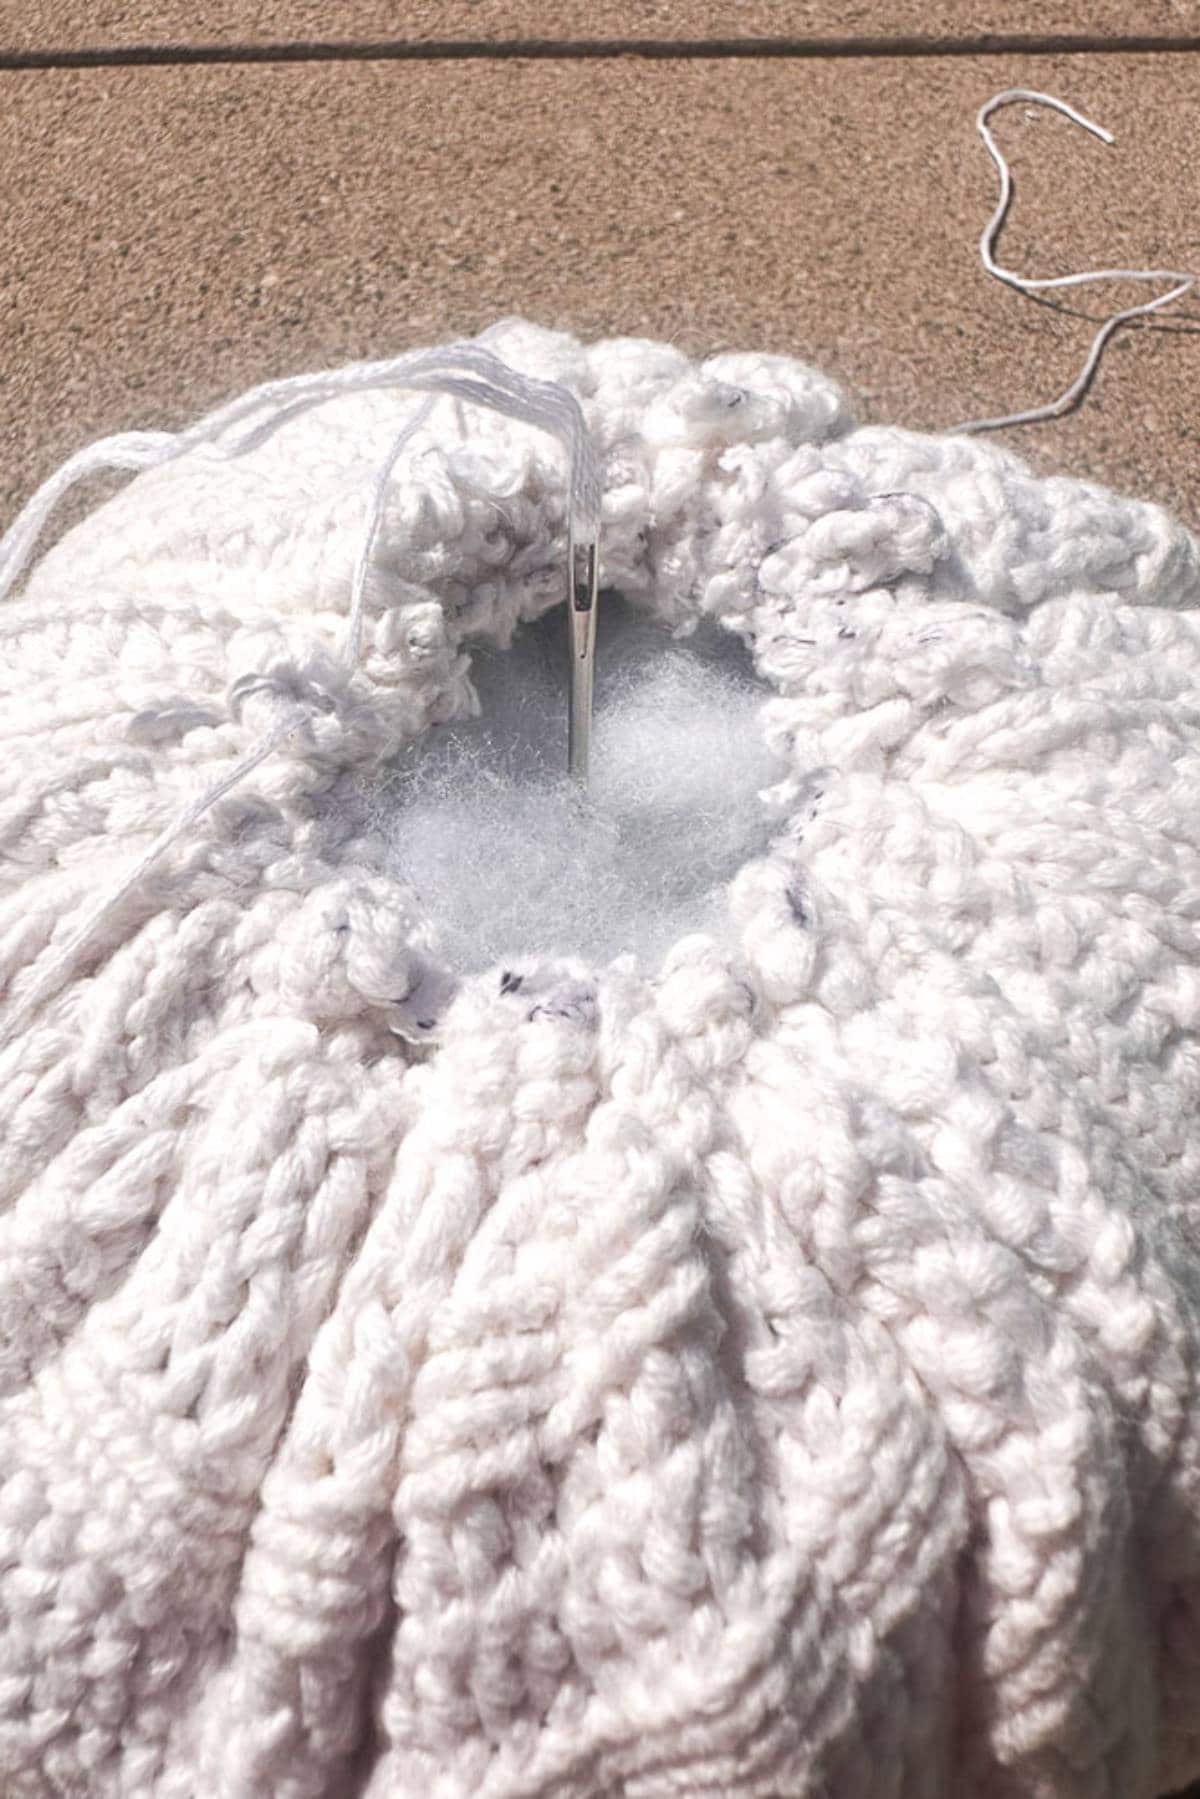
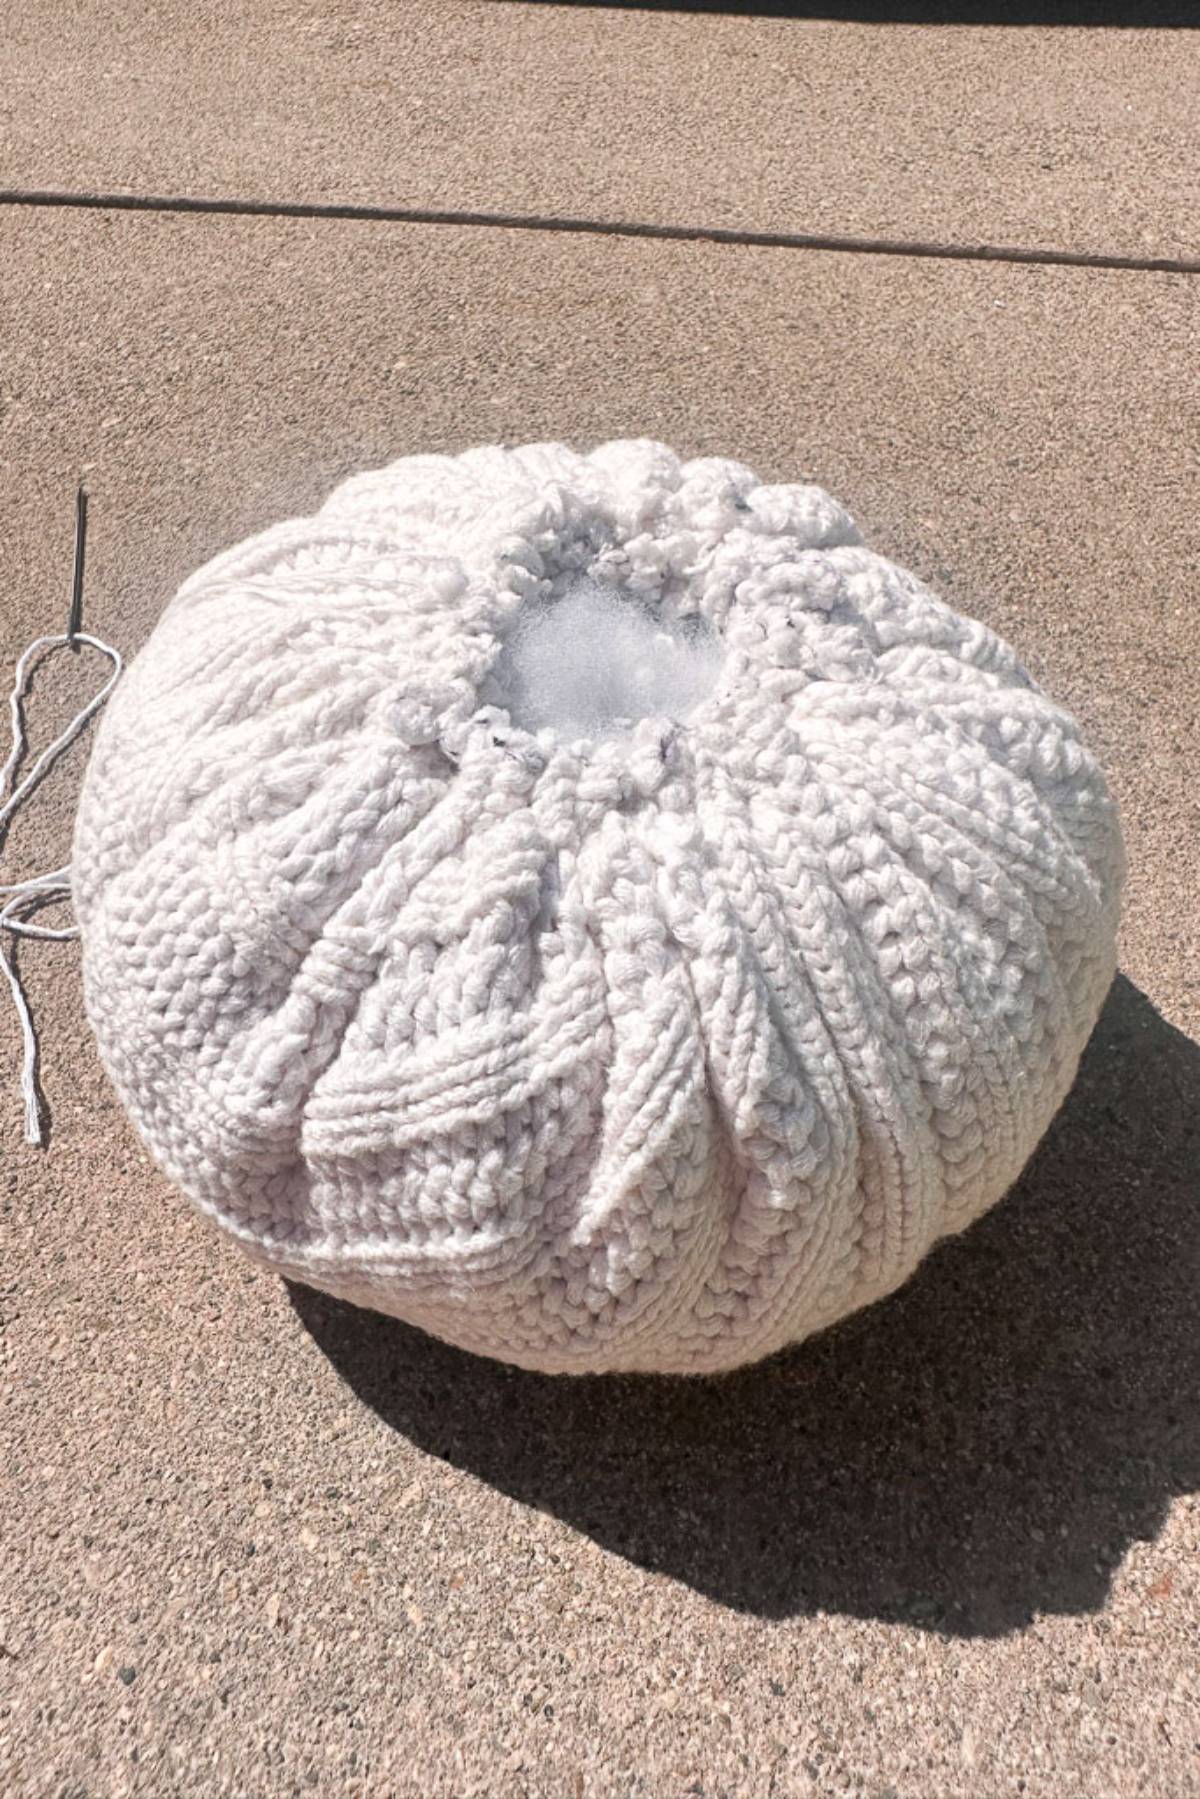
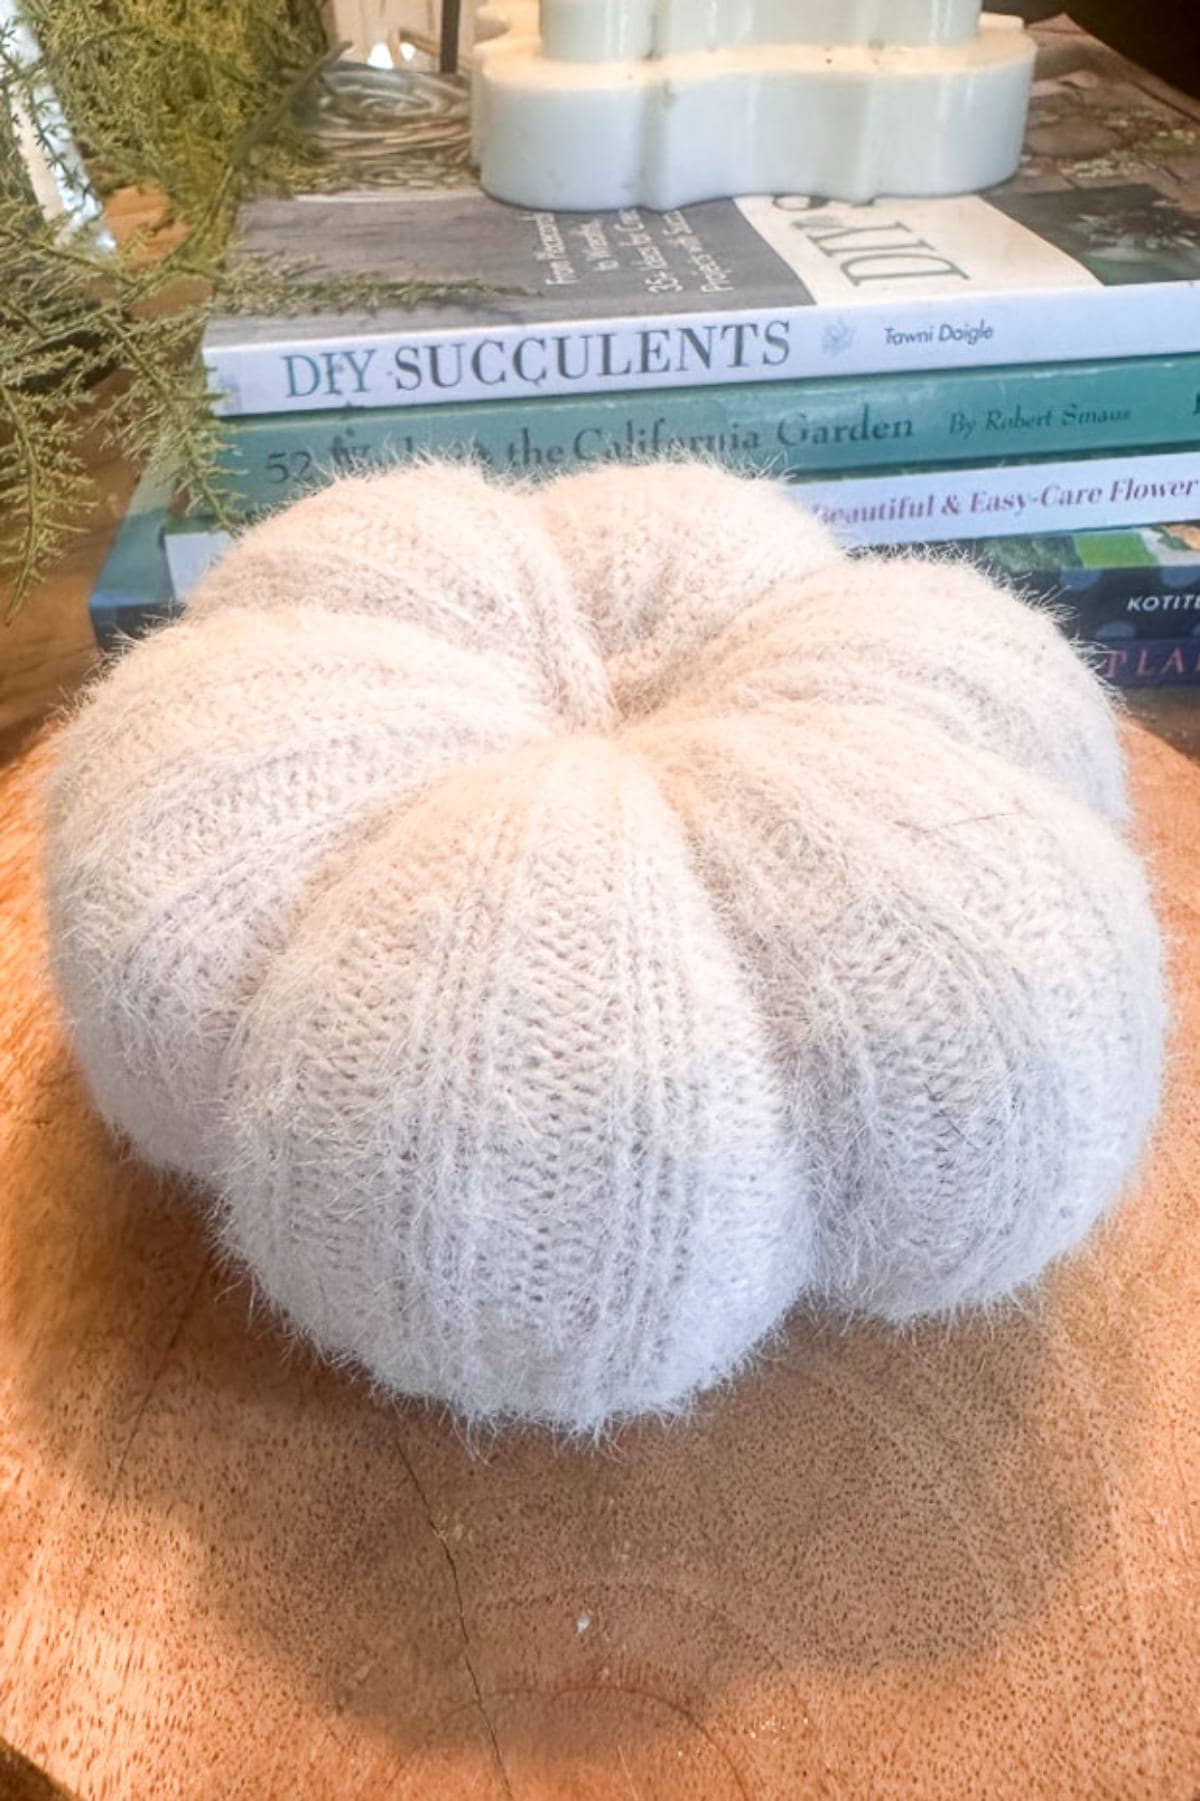
5: Close the pumpkin
- Pull the ends of the embroidery thread as tight as you can.
- Use your yarn needle with one end of the thread through the eye and tie off the closing on the top of your pumpkin. It may not close all the way if you use a heavy sweater like mine.
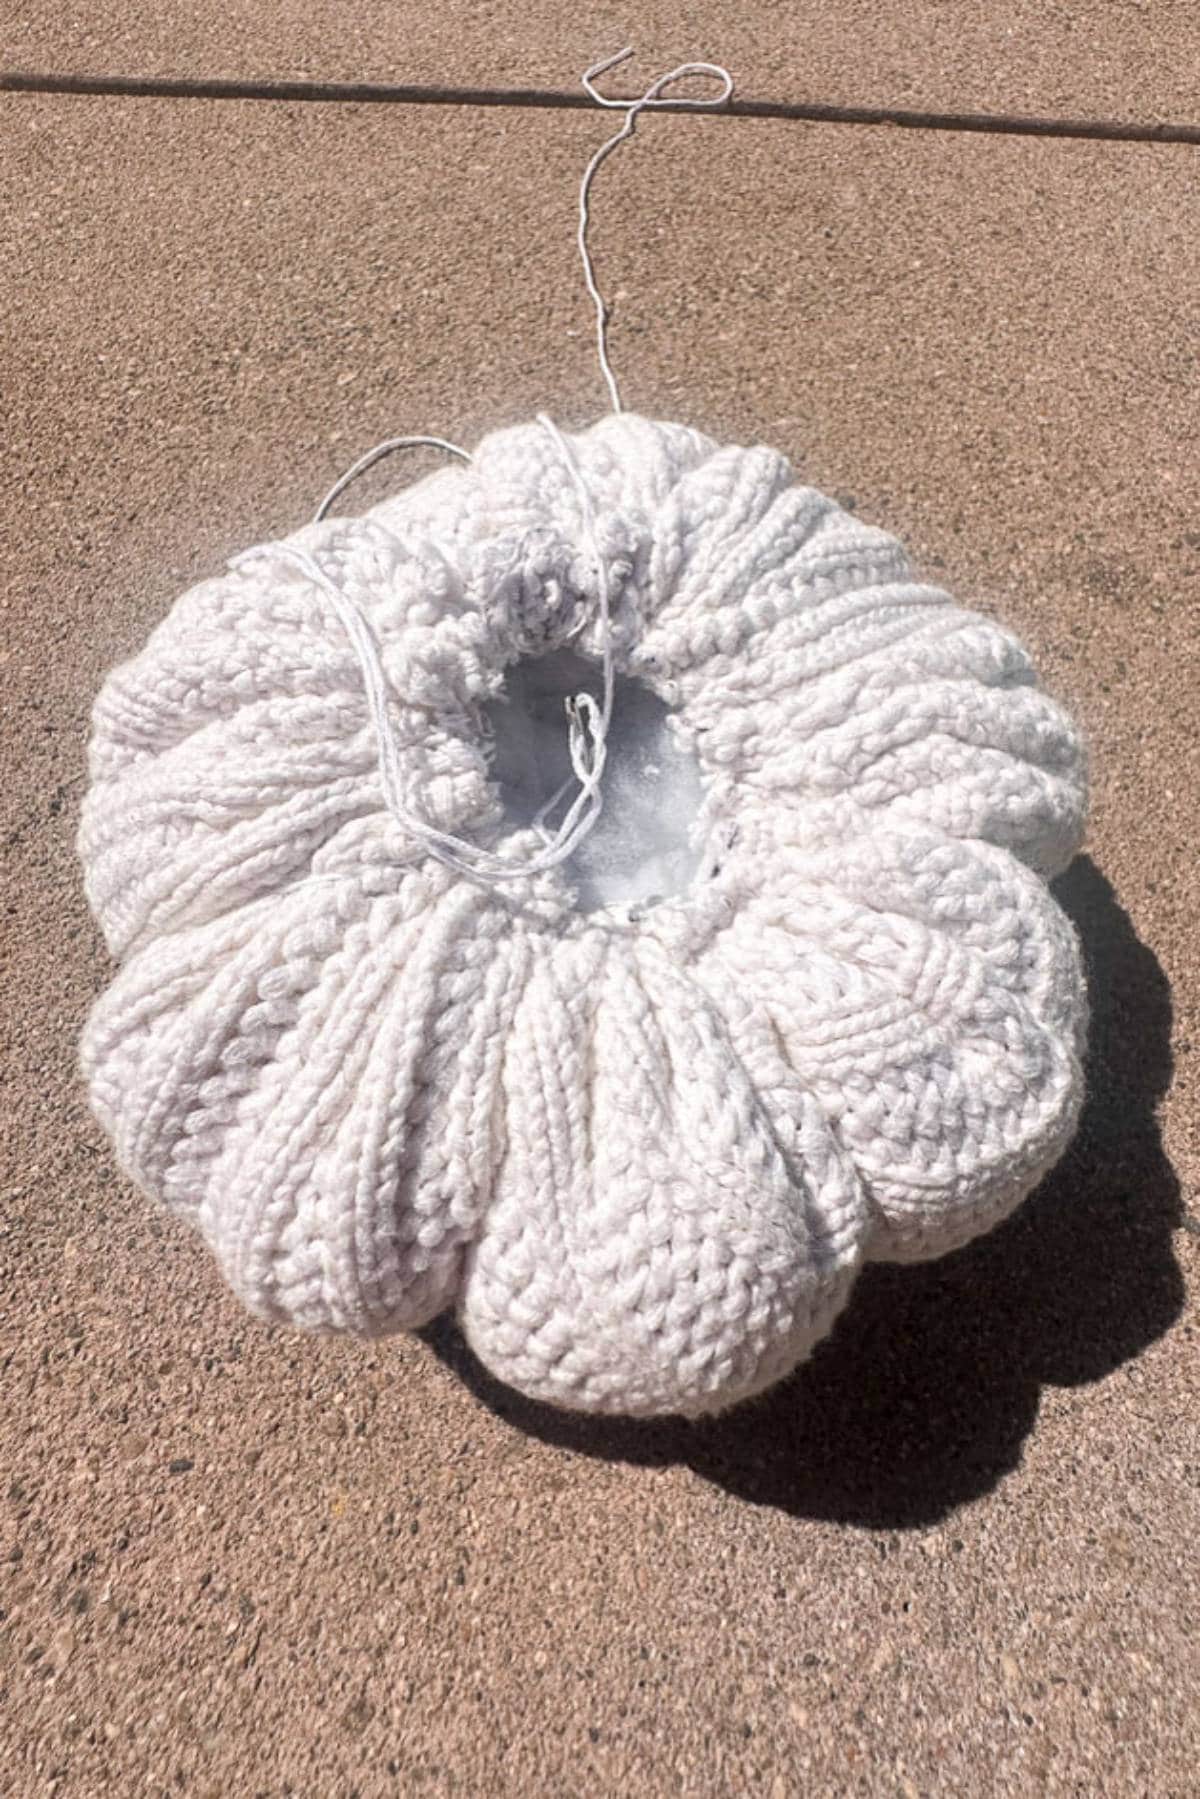
6: Create the Pumpkin Indents
- Cut a long piece of embroidery thread or thin jute twine and thread your yarn needle. Tie off the end with a double knot.
- Start by putting the needle down the center of the pumpkin (through the filling) and pull it out the center of the bottom of your pumpkin.
- Wrap the thread around the side of the pumpkin, pull it tight, and put it back through the center.
- Repeat this process until you have all of the pumpkin ribs you want.
Tip from wendy’s craft room:
Avoid using regular thread, as it’s not strong enough and will break easily. Trust me, embroidery thread is the way to go for this project!
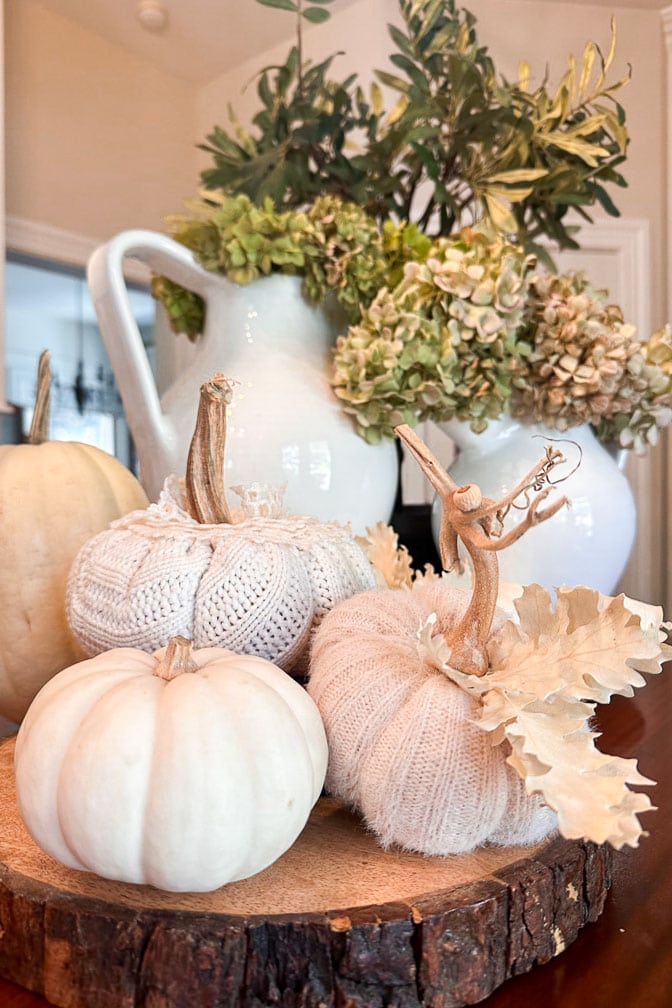
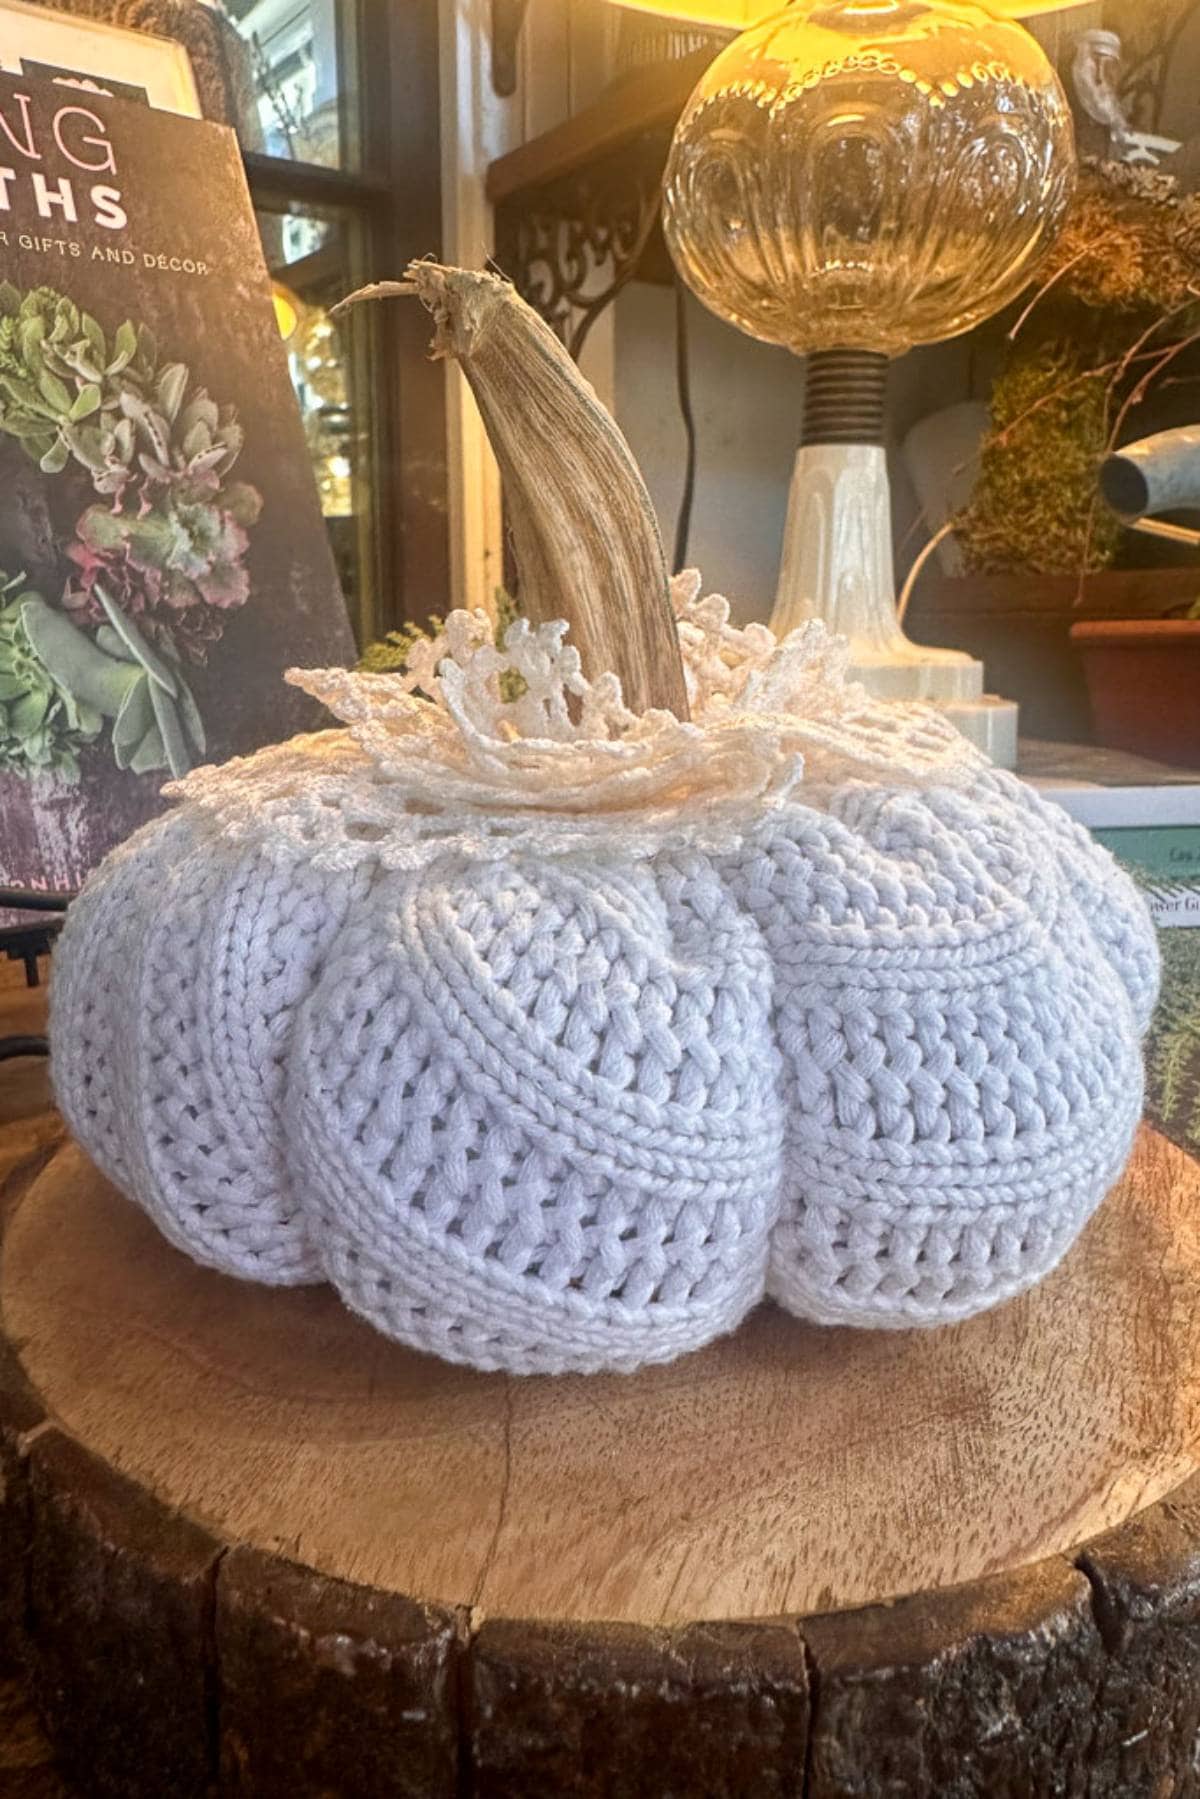
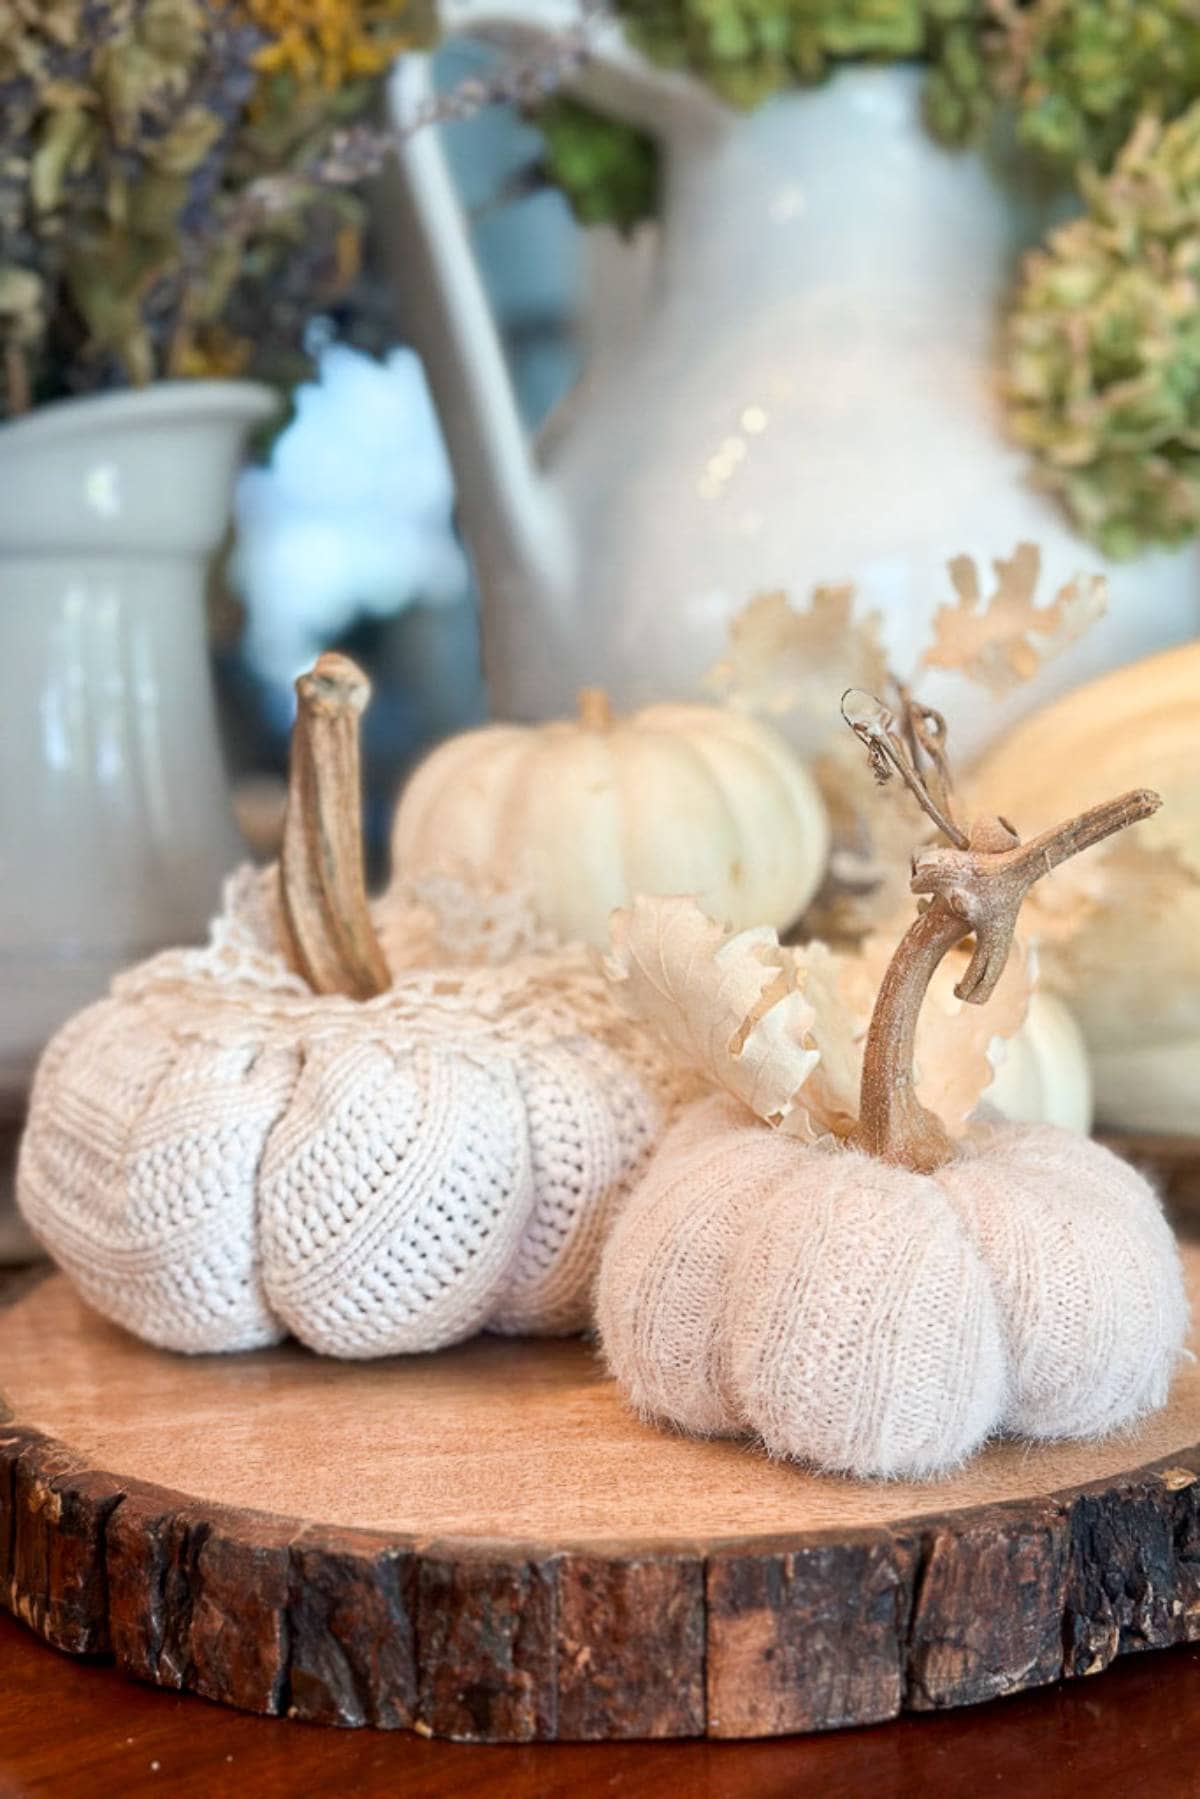
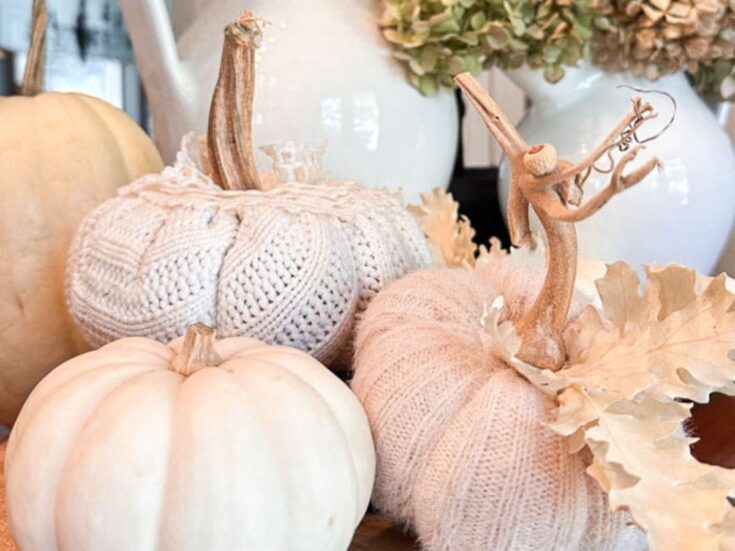
7: Decorate Your Pumpkin
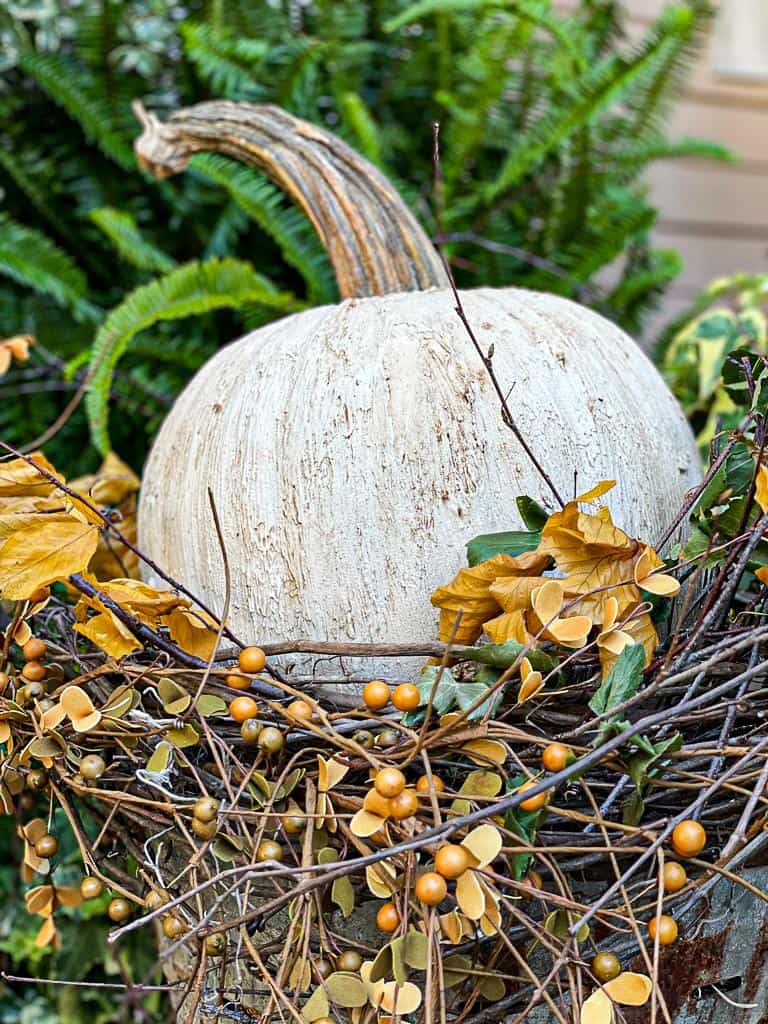
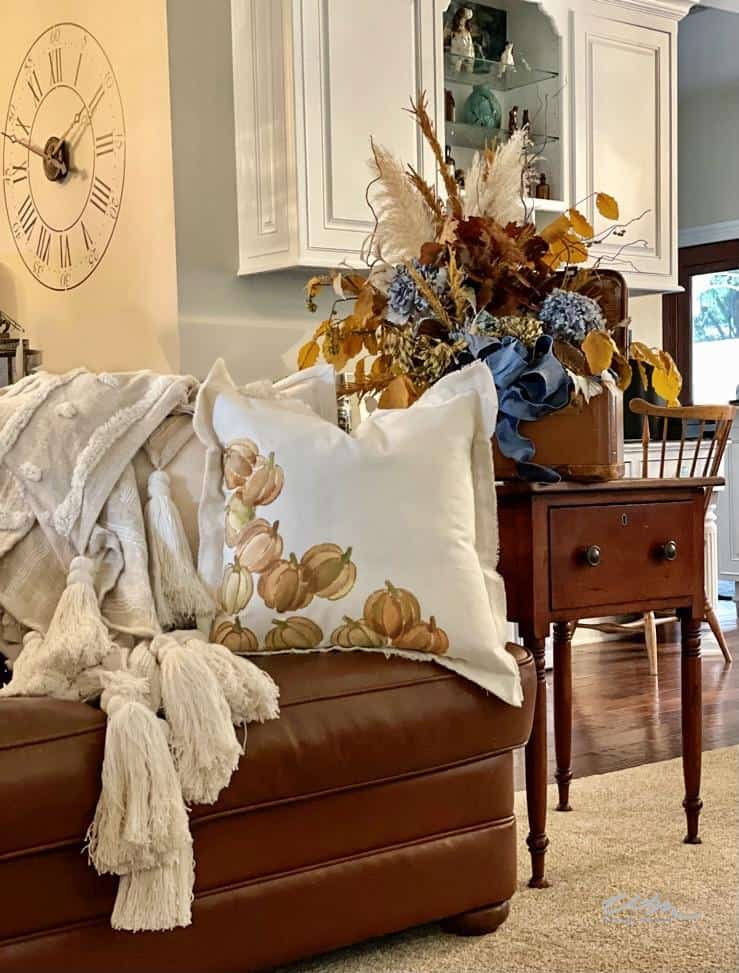
- Elevate the look of your pumpkins by adding vintage lace, decorative leaves, greenery, and even a real pumpkin stem for a touch of authenticity and charm. These details will give each pumpkin a unique and personalized style.
Step-by-Step Tutorial for Sweater Sleeve Pumpkins
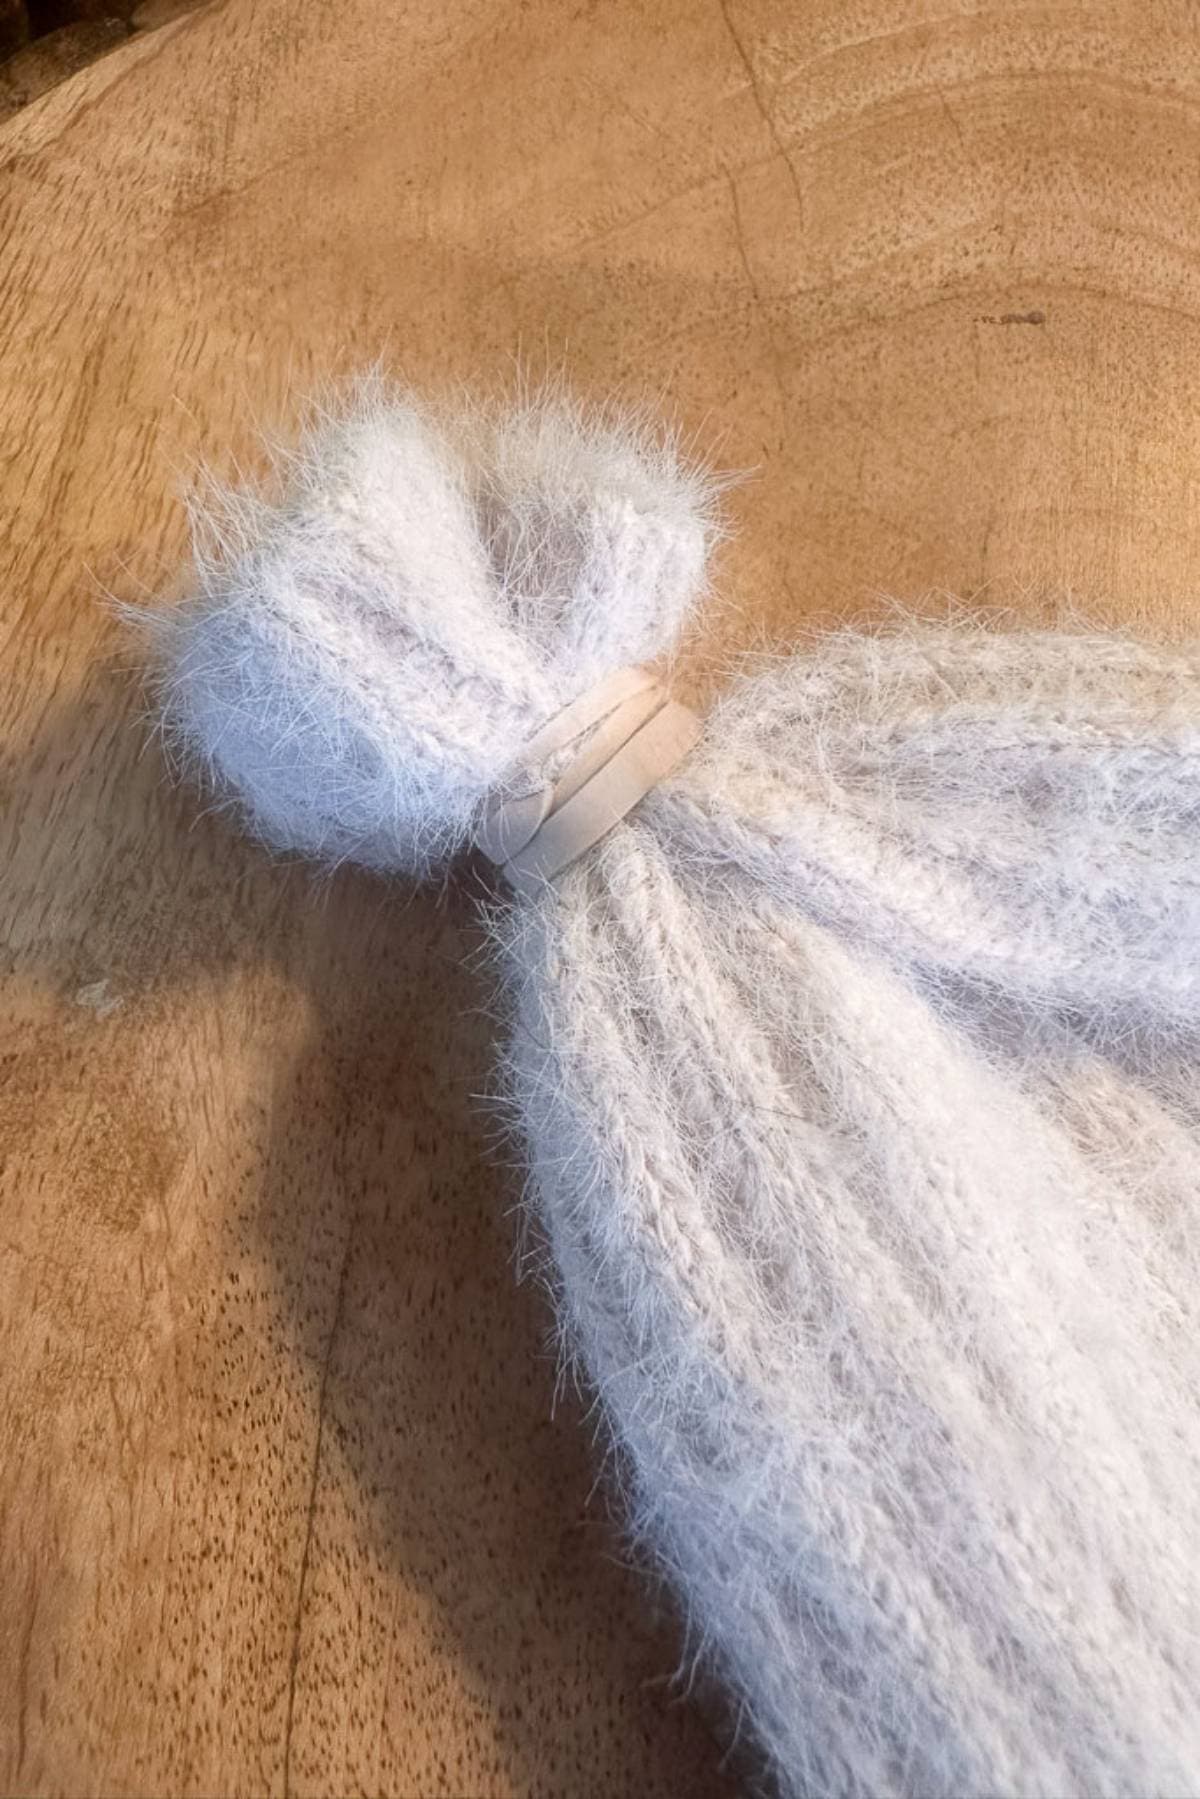
1: Preparing the Sweater Sleeve
- Cut the sleeve of your sweater approximately 8-10″ long.
- Turn the sleeve inside-out
- Use a rubber band and tie off the narrowest end.
- Turn the sleeve right side out.
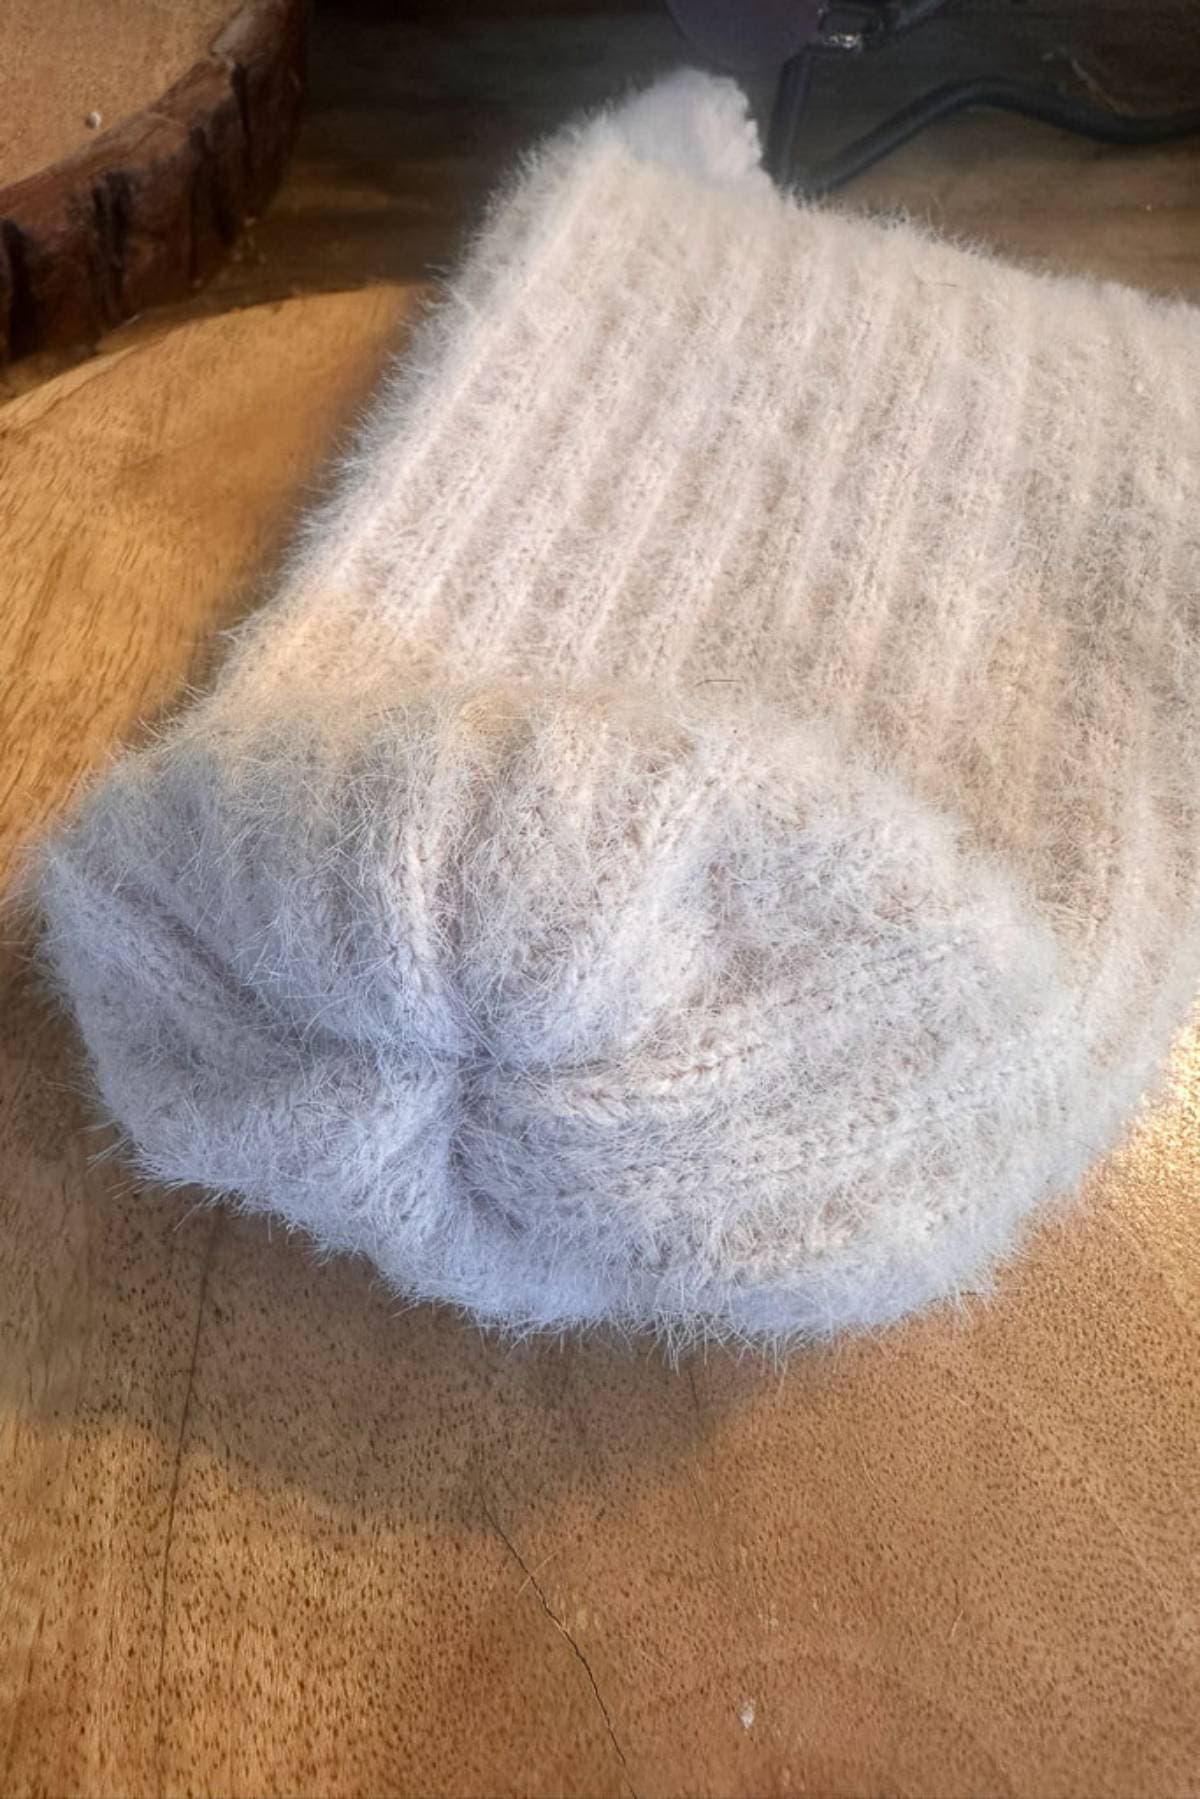
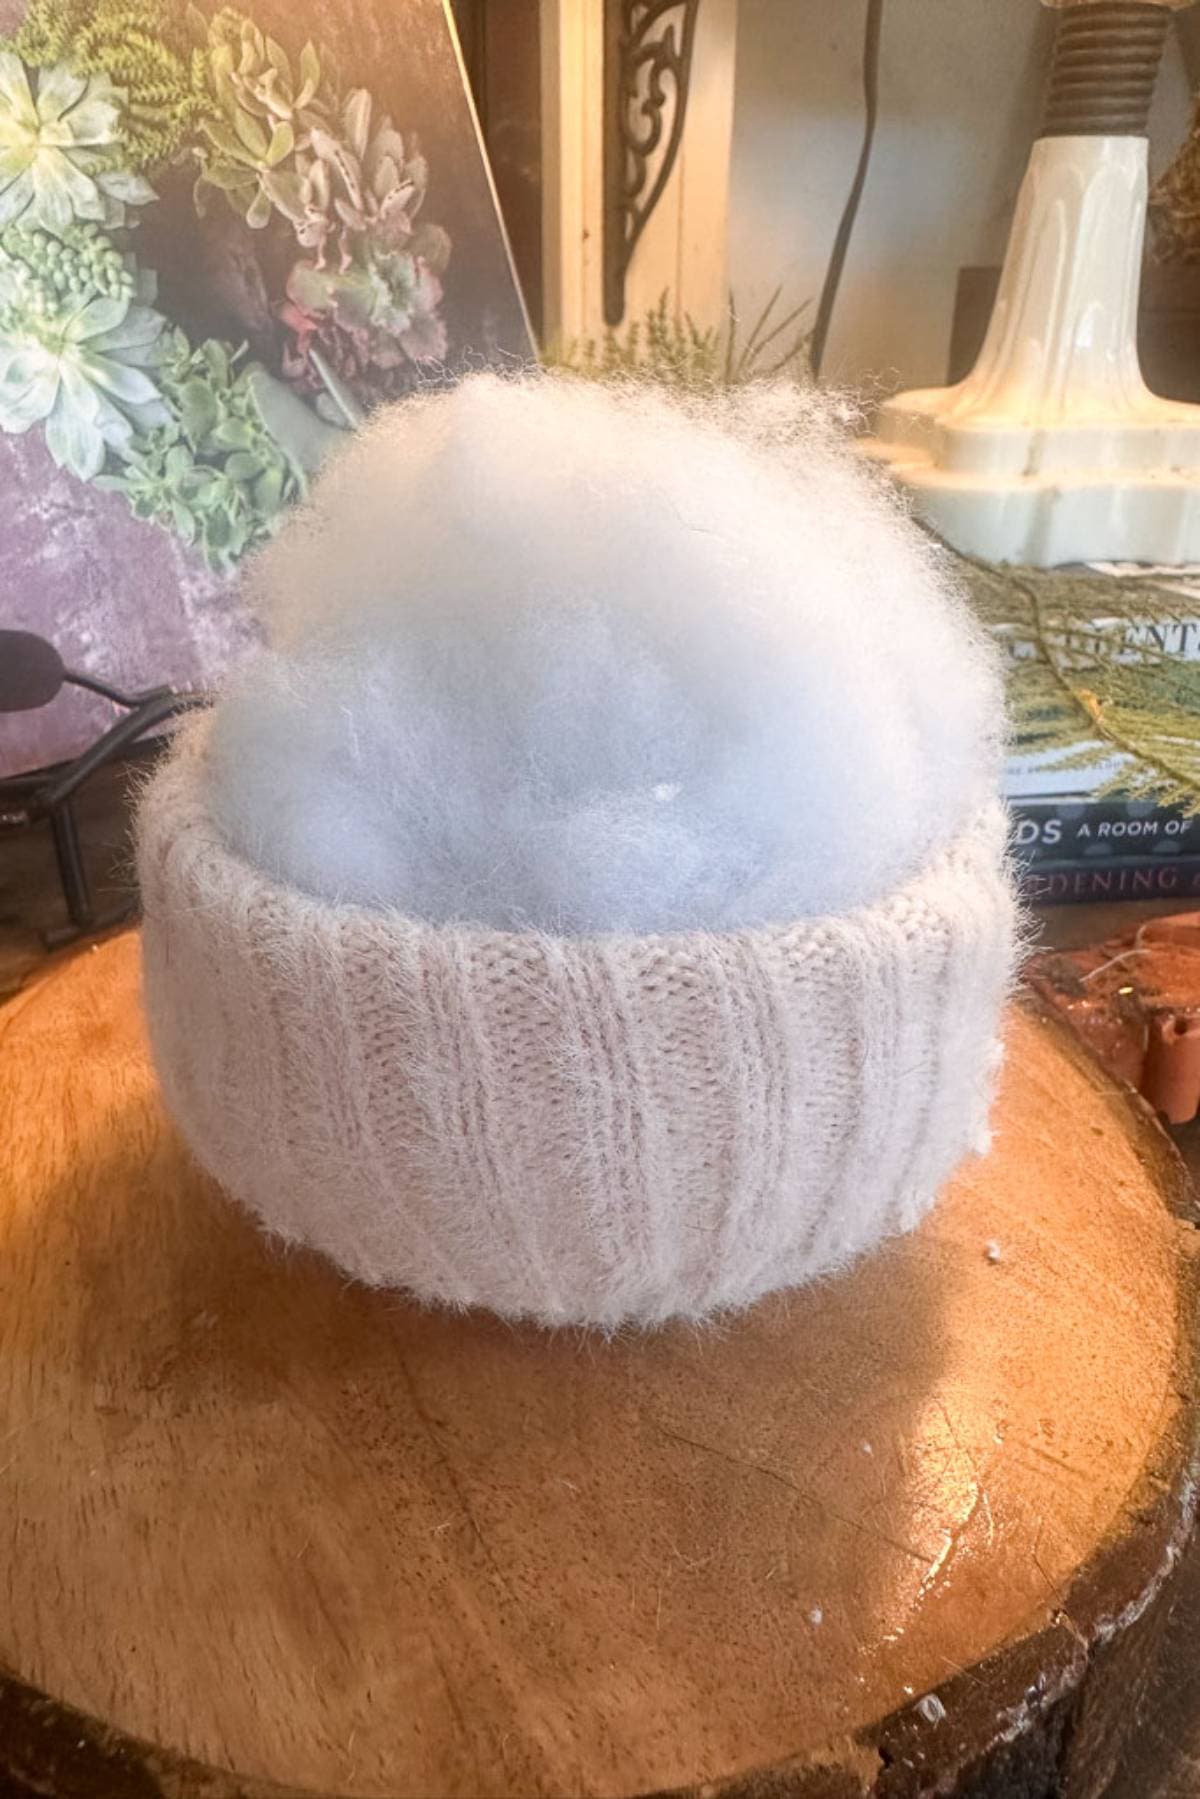
2: Stuff the Pumpkin
- Add some beans to the inside of the pumpkin to give it some weight.
- Next step, add fiber fill to the top of the pumpkin until you can’t add any more.
- Your sleeve may be too long. Feel free to trim it so you get the size of pumpkin you want.
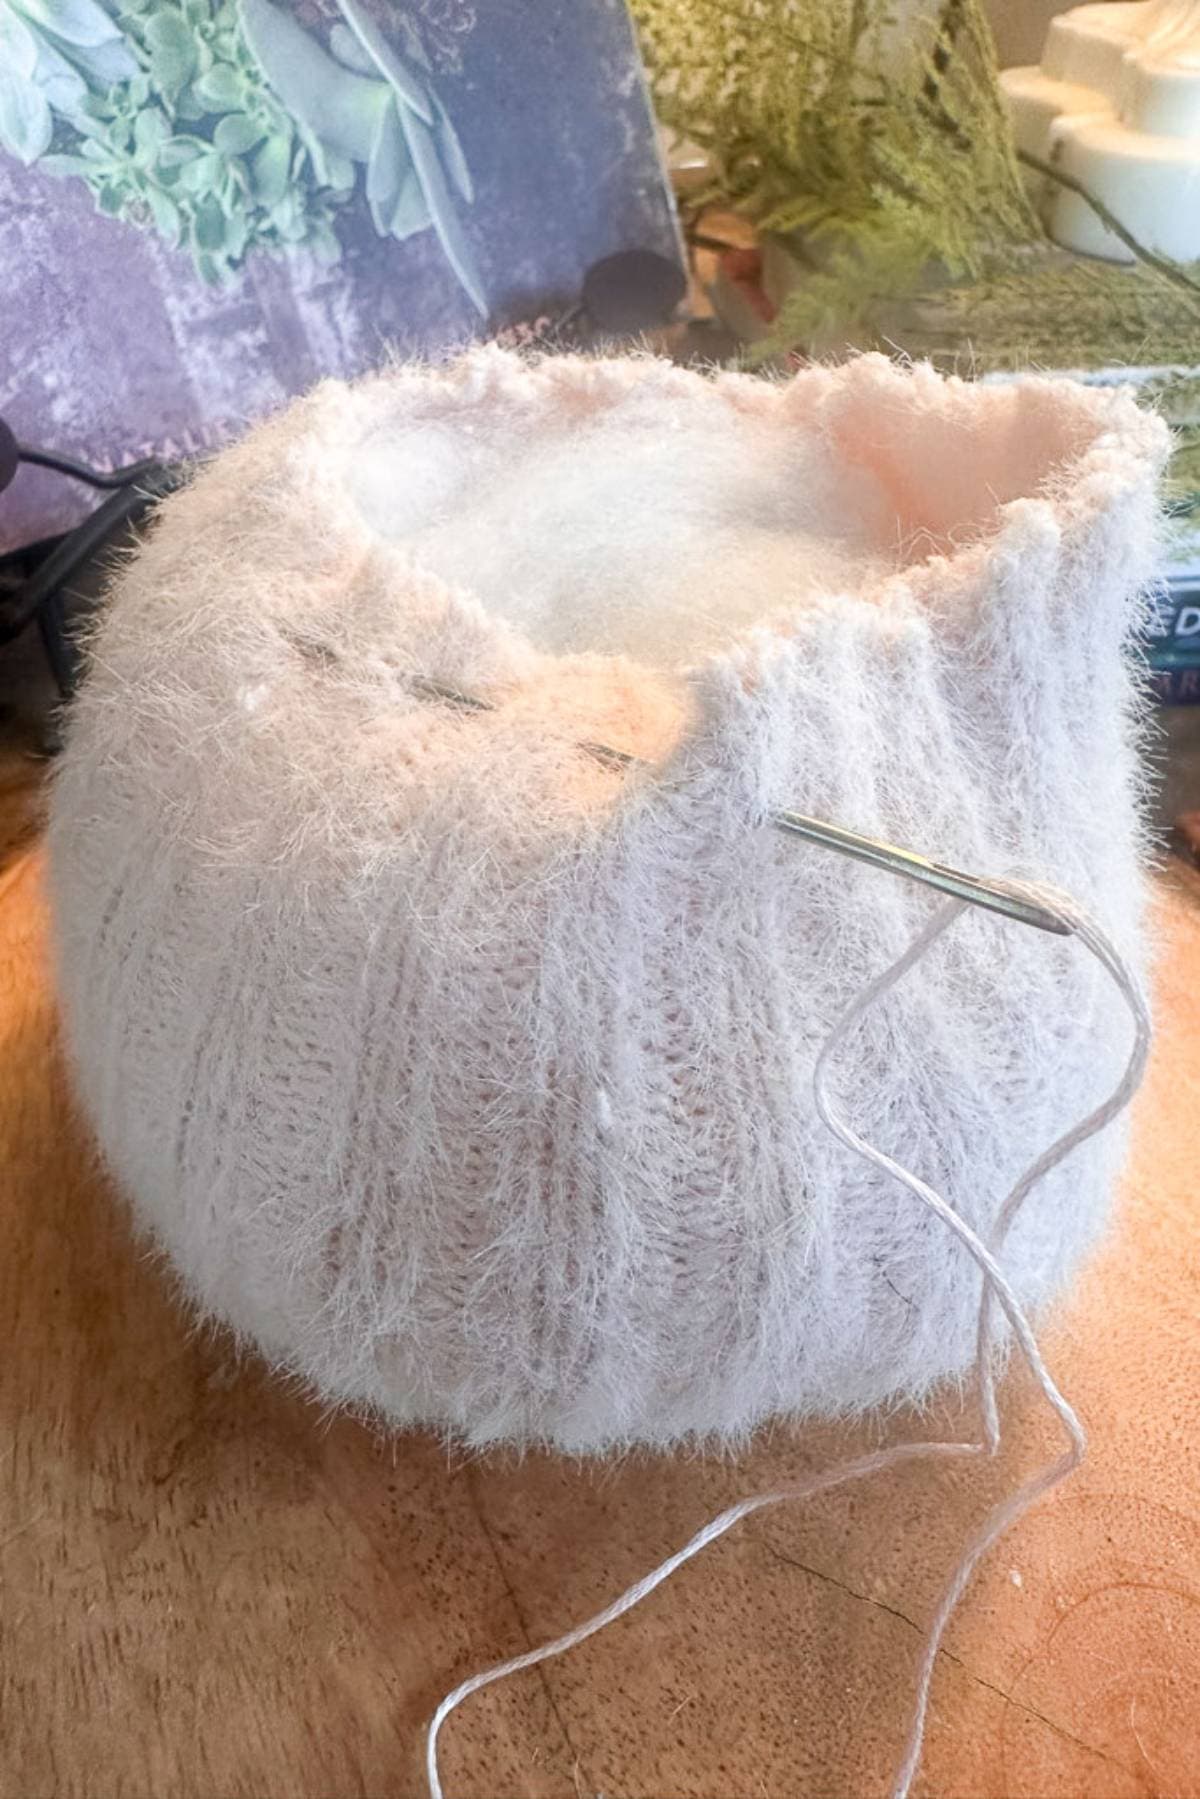
3: Closing The Pumpkin
- Sew a line of running stitches around the top of the pumpkin, approximately 1/2″ from the sleeve fabric’s edge.
- Pull the ends tightly to close the hole of the pumpkin.
4: Created the Ribs of the Pumpkin
- Cut a long piece of embroidery thread or thin jute twine and thread your yarn needle. Tie off the end with a double knot.
- Start by putting the needle down the pumpkin’s center and pulling it out the bottom.
- Wrap the thread around the side of the pumpkin, pull it tight, and put it back through the center.
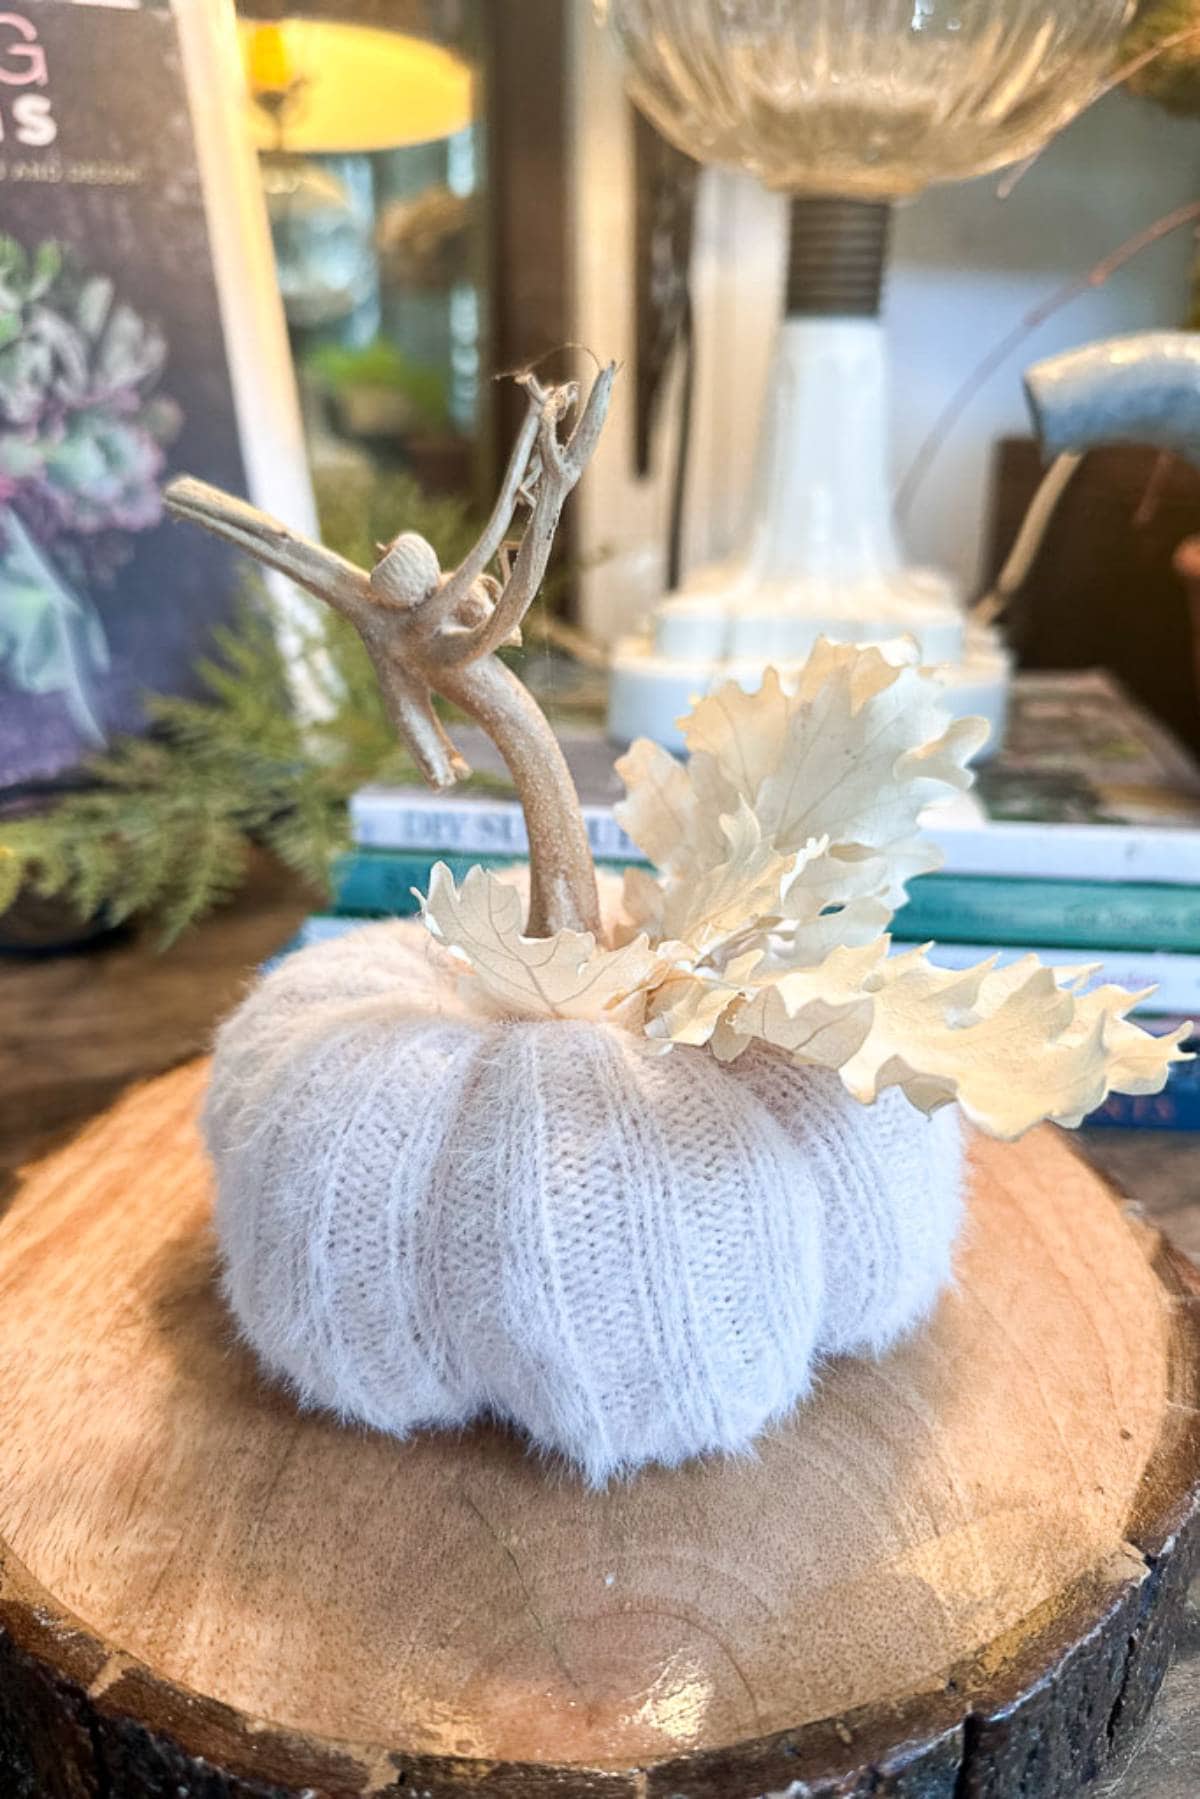
5: Decorate Your Pumpkin
- Get creative by adding natural elements like leaves or branches from your yard, or mix in faux greenery from your craft room for an added touch of texture and seasonal charm.

How to Make Sweater Pumpkins
In this simple DIY tutorial, learn how to create charming sweater pumpkins with vintage lace, perfect for adding a touch of fall to your home.
Materials
- Thrift store sweaters
- Fiberfill batting
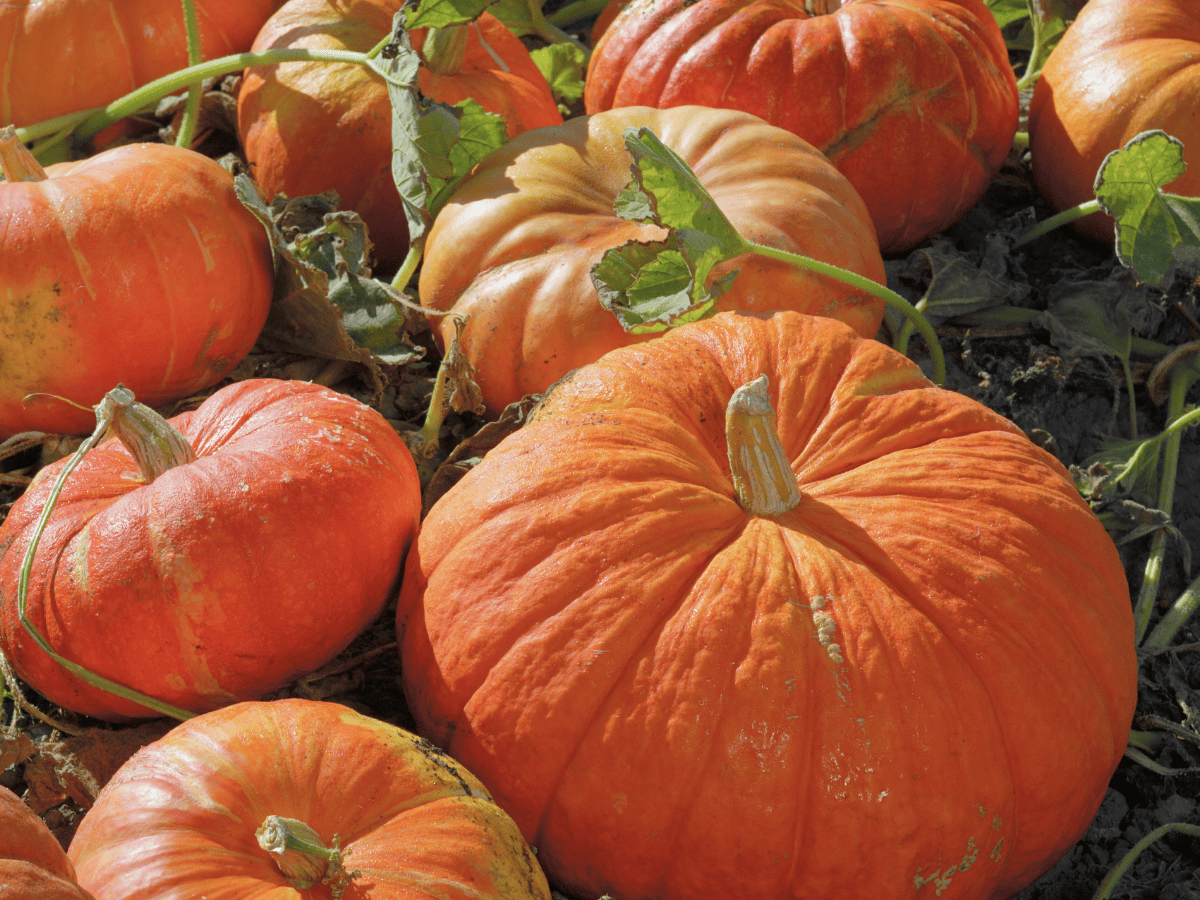
- Real pumpkin stems
- Dried beans
- Embroidery floss or embroidery thread
- Optional: Yarn, buttons, silk flowers, or vintage lace
Tools
- Yarn needle
- Hot glue gun
- Sharp Scissor
Instructions
Step-by-Step Tutorial for Sweater Pumpkins (using the body of the sweater)
- Choose Your Sweater from the Thrift Store:
- When choosing sweaters to make a thrifted sweater pumpkin, consider the colors and textures you want to incorporate. Mix different colors and textures for added interest, like I did. I used a natural-colored, heavy cotton cable knit sweater and a light pink Alpaca sweater for a soft, cozy look.
- Cut the Sweater:
- Create a round pattern using a paper bag depending on the size of the pumpkin you want. Here are a few different sizes you can use: a 13" circle to get a 7" pumpkin. If you want a large pumpkin,10 inches, make your circle pattern 18"; if you want a smaller pumpkin, around 5", make the pattern approximately 9".
- Trace the pattern onto the sweater fabric (front or back of the sweater).
- Using sharp fabric scissors, cut the circle of fabric out.
- Stitch the Sweater Circle:
- Using a yarn needle, put the end of the thread through the eye of the needle and tie a knot on the end, leaving a five-inch tail.
- Create a running stitch around the fabric circle approximately 1/2 inch from the material's edge. Leave a long tail on the end of the embroidery thread to pull your gathering stitch.
- Pull thread ends to gather the fabric into a pumpkin shape. (Do not pull all the way closed, until you have stuffed the pumpkin).
- Stuff the Pumpkin:
- Add a cup or so of dried beans to give your pumpkin some weight, and allow the bottom of the pumpkin to sit flat.
- Add fiber fill to the top of the pumpkin until you can't add any more.
- Close the pumpkin:
- Pull the ends of the embroidery thread as tight as you can.
- Use your yarn needle with one end of the thread through the eye and tie off the closing on the top of your pumpkin.
- Create the Pumpkin Indents:
- Cut a long piece of embroidery thread or thin jute twine and thread your yarn needle. Tie off the end with a double knot.
- Start by putting the needle down the center of the pumpkin and pull it out the bottom of your pumpkin.
- Wrap the thread around the side of the pumpkin, pull it tight, and put it back through the center.
- Repeat this process until you have all of the pumpkin ribs you want.
- Decorate Your Pumpkin:
Elevate the look of your pumpkins by adding vintage lace, decorative leaves, greenery, and even a real pumpkin stem for a touch of authenticity and charm. These details will give each pumpkin a unique and personalized style.
Step-by-Step Tutorial for Sweater Sleeve Pumpkins
- Cut the Sleeves from your Sweater:
- Cut the sleeve of your sweater approximately 8-10" long.
- Secure the end of the Pumpkin:
- Turn the sleeve inside-out
- Use a rubber band and tie off the narrowest end.
- Turn the sleeve right side out.
- Stuff the Pumpkin:
- Add some beans to the inside of the pumpkin to give it some weight.
- Add fiber fill to the top of the pumpkin until you can't add any more.
- Your sleeve may be too long. Feel free to trim it so you get the size of pumpkin you want.
- Sew a Running Stitch:
- Sew a line of running stitches around the top of the pumpkin, approximately 1/2" from the sleeve fabric's edge.
- Pull the ends tightly to close the hole of the pumpkin.
- Create the Pumpkin Indents:
- Cut a long piece of embroidery thread or thin jute twine and thread your yarn needle. Tie off the end with a double knot.
- Start by putting the needle down the pumpkin's center and pulling it out the bottom.
- Wrap the thread around the side of the pumpkin, pull it tight, and put it back through the center.
- Repeat this process until you have all of the pumpkin ridges you want.
- Decorate Your Pumpkin:
Elevate the look of your pumpkins by adding vintage lace, decorative leaves, greenery, and even a real pumpkin stem for a touch of authenticity and charm. These details will give each pumpkin a unique and personalized style.
Expert Crafting Tips and Tricks for Sweater Pumpkins
- Decorative Ideas:
- Vintage Lace Accents: Wrap or layer vintage lace around the pumpkin for a soft, elegant touch. You can tie it around the stem or secure it with fabric glue for a timeless look.
- Button Embellishments: Sew or glue vintage buttons onto your sweater pumpkins for a charming, rustic vibe. Use different shapes, sizes, and colors for added interest.
- Floral Appliques: Attach fabric or felt flowers to the sides or top of the pumpkin for a whimsical, feminine touch. Opt for neutral tones or fall hues to complement the sweater fabric.
- Wooden Tags or Mini Signs: For a personalized touch, attach small wooden tags or mini chalkboard signs to the stem with twine, featuring cute phrases like “Welcome Fall” or “Cozy Vibes.”
- Storing Your Fabric Pumpkins:
- To store your sweater pumpkins properly and keep them looking great for future use, follow these steps:
- Clean Before Storing: Make sure your sweater pumpkins are clean and free of dust or debris. Use a lint roller or gently shake them out if needed.
- Avoid Compression: Store them in a way that prevents them from being squished or losing their shape. Place them in a box or storage bin with enough space to keep them from being compressed.
- Protect from Moisture: Use airtight containers or bags to protect the pumpkins from moisture, which could lead to mildew or damage to the fabric. Add silica gel packets to help absorb any excess moisture.
- Keep Away from Heat: Store them in a cool, dry place away from direct sunlight or heat, which could cause fading or wear to the fabric.
- Label the Storage Container: If you store your pumpkins with other seasonal decorations, label the container to make it easy to find them next year.
Wrapping Up
Making these cute sweater pumpkins is a great way to add cozy fall decor to your home. This simple tutorial shows you how to create a variety of sweater pumpkins using the sleeve of an old sweater or the body and items like cinnamon sticks or dried leaves. Whether you’re crafting with creative friends or tackling this project solo, you’ll love how easy it is to achieve different looks. Happy crafting!
Don’t forget to check out all of the other girl’s creative projects below! There are many fabulous ways to use leather and lace in your fall projects this year. Remember


Other Fall Craft Tutorials from WM Design House
You might enjoy my other favorites if you love this fun pumpkin project.
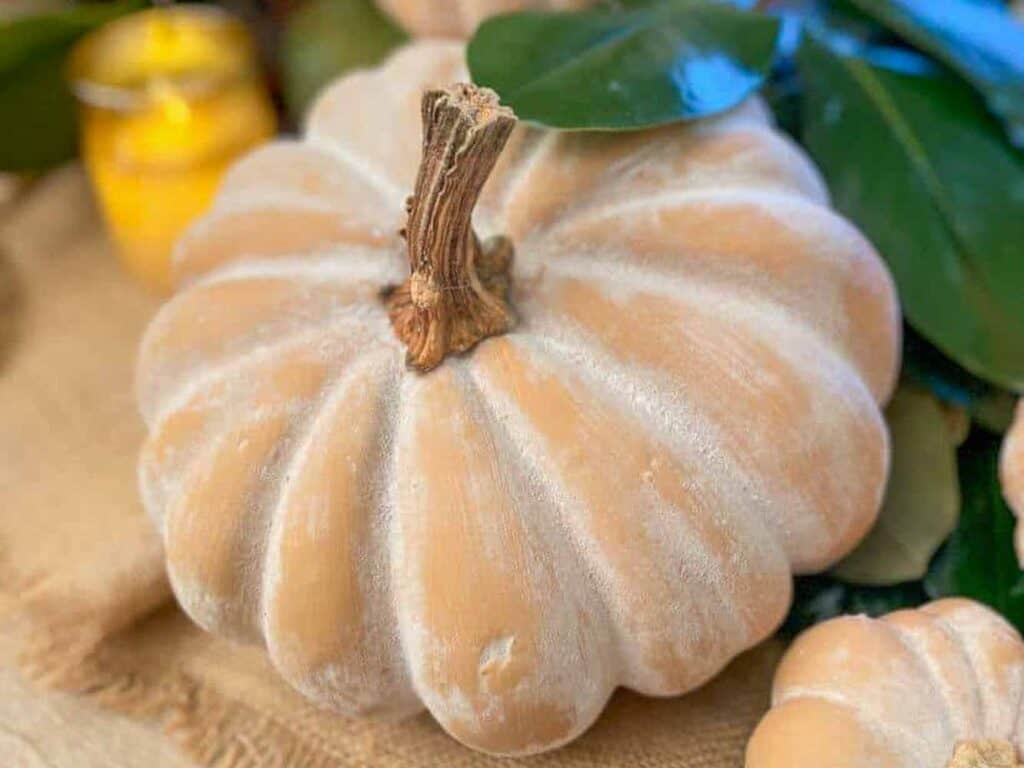
DIY Terra Cotta Pumpkin Dupe: Pottery Barn Pumpkins
4 Creative Ways to Transform Dollar Tree Pumpkins
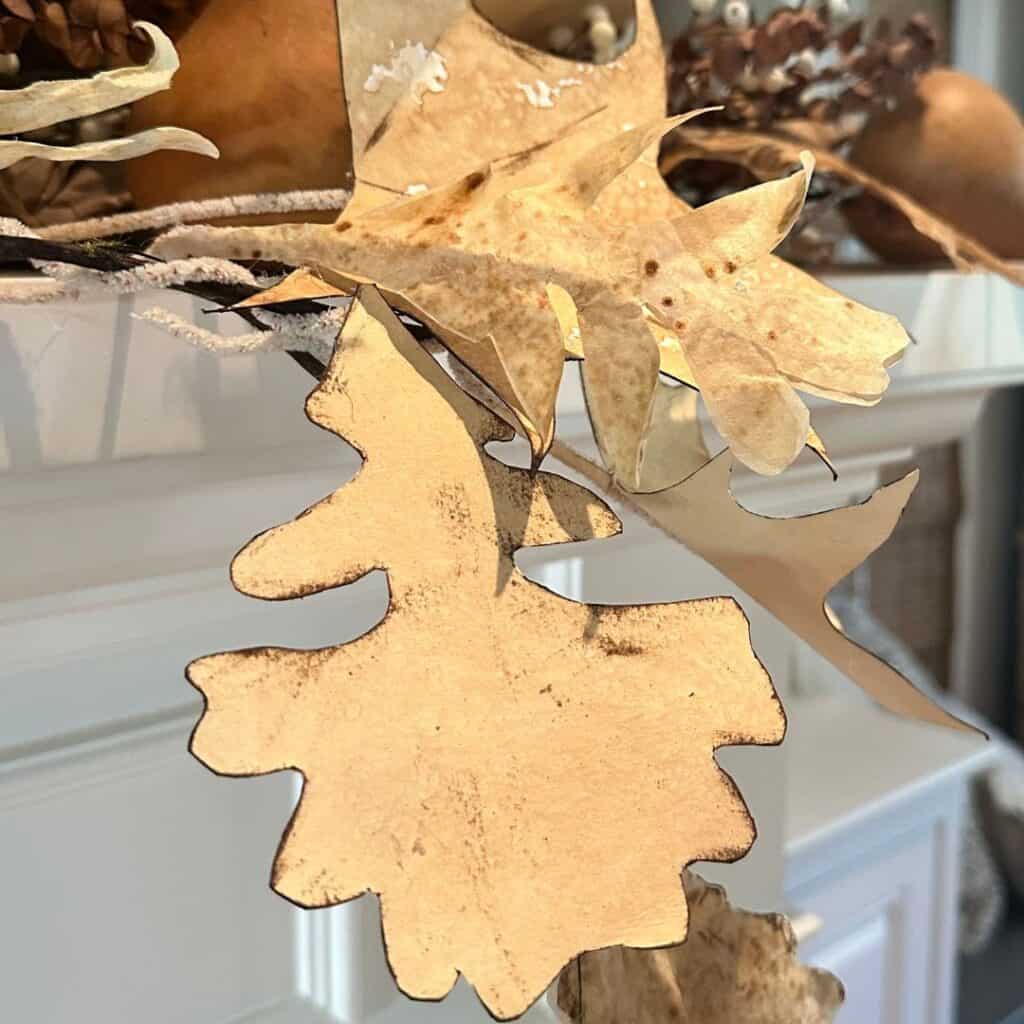
Simple DIY Fall Leaf Garland Made with Coffee Paper + Filters
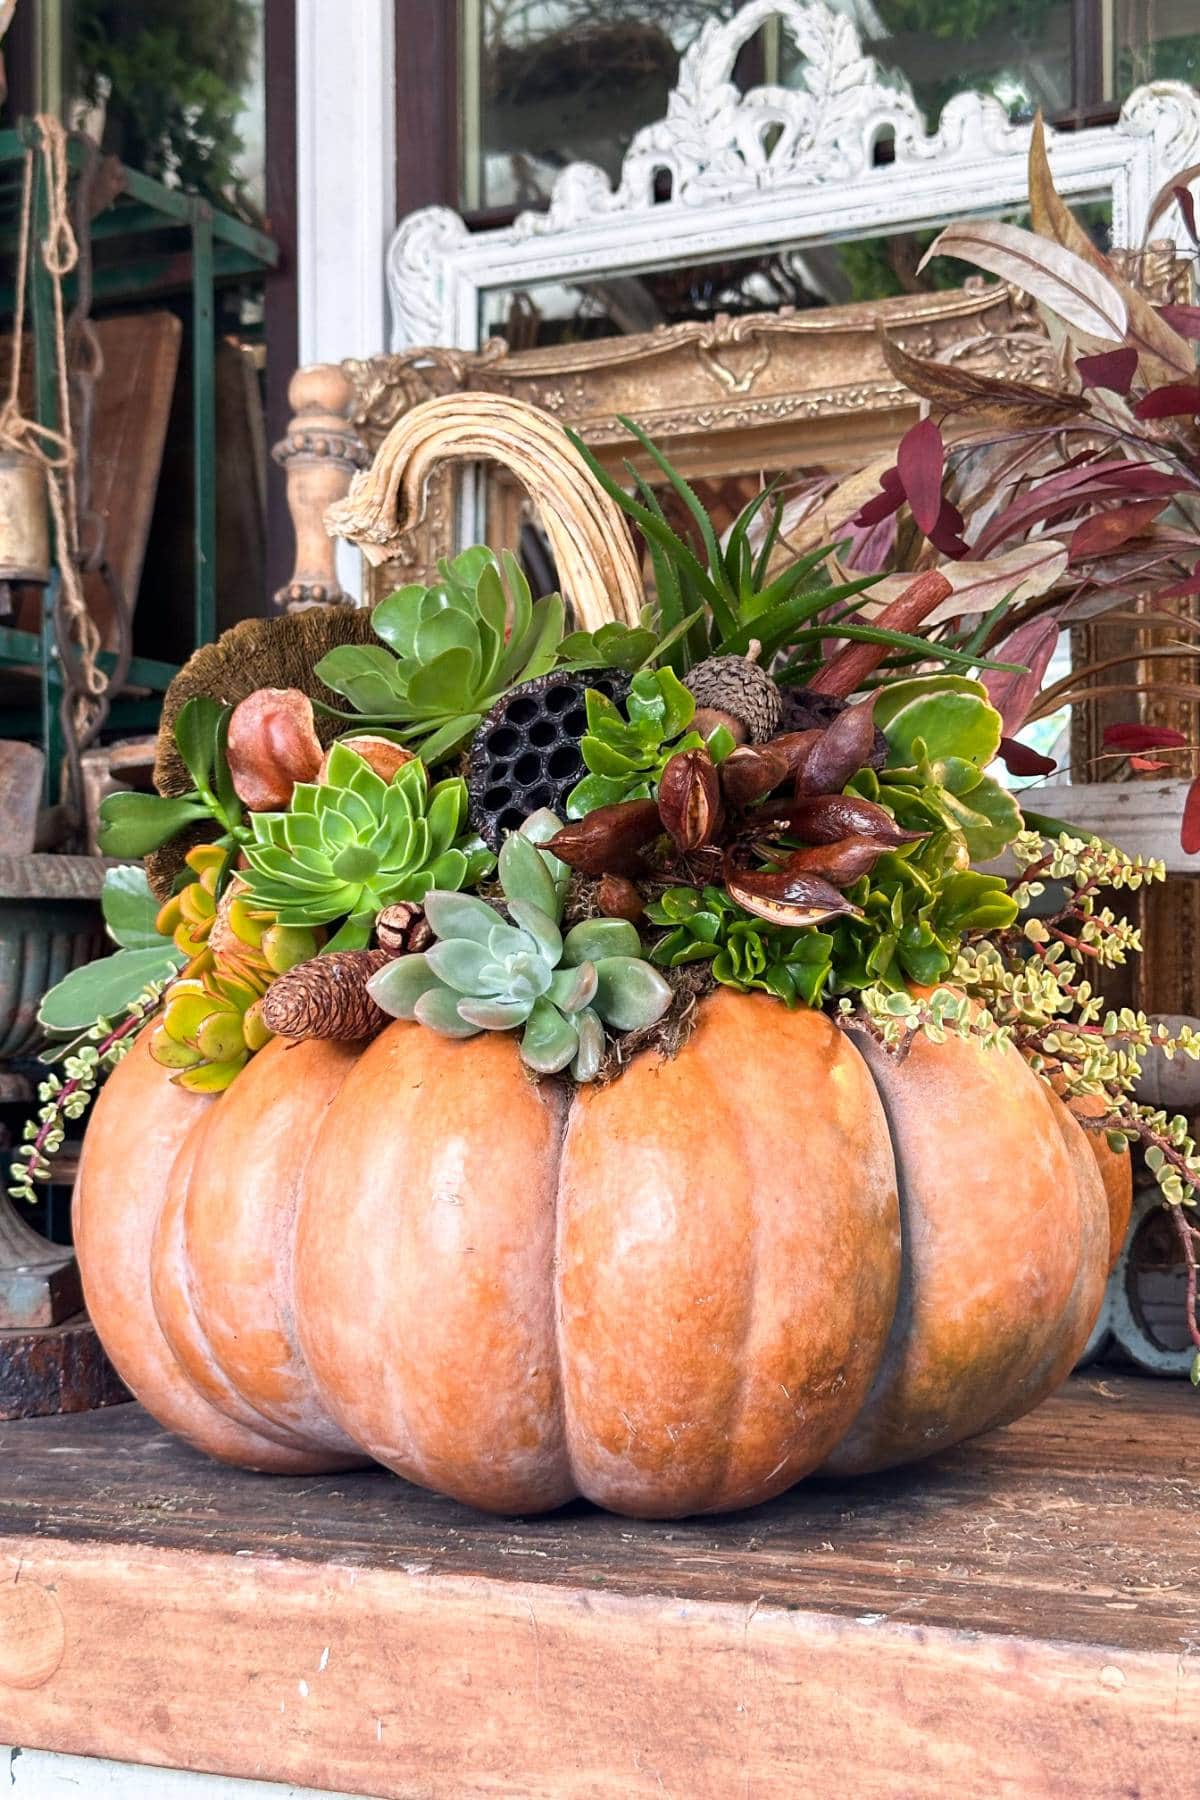
Easy Succulent Pumpkin Centerpiece: A Step-by-Step Guide

Did you make this craft?
We would love to see what you have created, so mention us @wmdesignhouse or tag us using #wmdesignhouse so we can see your creations!
More about me!

Hello, I’m Wendy – a dedicated homemaker with a deep passion for decorating, gardening, cooking, and crafting. I find joy in harmonizing beautiful elements to fashion a space that is both comfortable and inspiring. I will help you create a beautiful home, one project at a time.


Such a fun idea, Wendy. These turned out beautifully! I can’t wait to share a link to your post in my weekly recap tomorrow. Hugs!
That is so sweet of you. Thanks bunch, Jen!
Hi Wendy – These pumpkins turned out so cute. Thank you for the added tip of adding a cup of dried beans. Adding the lace and other decorative items to the top is charming. You seem to have an endless supply of creative energy!
Thank you, Anna. I’m so happy with how they turned out.
I adore DIY pumpkins and these are fabulous! I have some yarn pumpkins and your sweater creations would look fantastic paired with them. I love the lace touch you added! I’m pinning now so I can recreate these sometime! Thanks!
Thank you, Donna
Your pumpkins turned out darling, Wendy! It’s a great upcycle project, too.
Thank you, Kelly!
Your sweater pumpkins are the cutest, Wendy! I love that you used real pumpkin stems, They’re the perfect cozy vintage look for fall!
Thank you so much, Kim. I love how much the real stem adds to the look.
Adding the lace to your already adorable sweater pumpkin is a fabulous idea! Love it Wendy! Pinning for inspiration!
Thank you, Michelle!
These are beautiful Wendy! I made some years ago and really enjoyed the project. Yours turned out so cute! It makes me want to make more!
Thank you, Cindy. They are so fun and easy to make, aren’t they? I really enjoyed this project.
Wendy
These turned out so cute. I made some years ago before I was blogging. I love how you decorated yours. The lace makes them. Have the best day.
Thank you so much Rachel. It is so fun to see what we can create with thrifted goods! I hope you are having a great fall.
Learning how to make sweater pumpkins has been on my crafting bucket list forever, Wendy. Thanks so much for the easy to follow step by step directions. I love how these came together. The sweaters you chose are so pretty! Big hugs and thanks so much for putting these hops together. I always learning something new, CoCo
Thank you, CoCo. I am so glad you enjoyed the post. I can never get enough pumpkins during the fall season. I hope you get a chance to try them. They are really easy and don’t take much time at all.
I don’t need a thrift store… I have some old sweaters in my closet that are perfect for this fun project! Your pumpkins are sweet and pretty. Perfect for any fall-decorated room or table setting! Pinned!
Yeah….. your closet is the best place to start! I can’t wait to see what you create.
Totally adorable, Wendy!! How clever to use thrifted sweaters! Love the addition of the lace and stem accents…such pretty decor for the season!
Thank you sweet Rachel. I love creating something from thrifted goods just like you! Happy Fall.