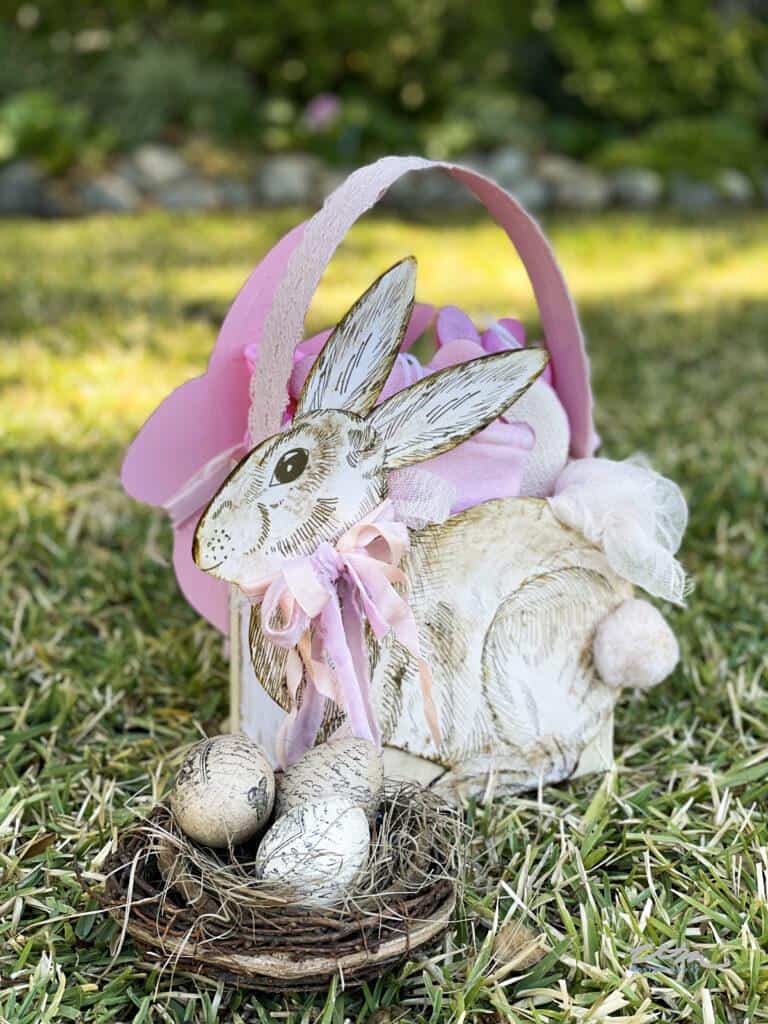
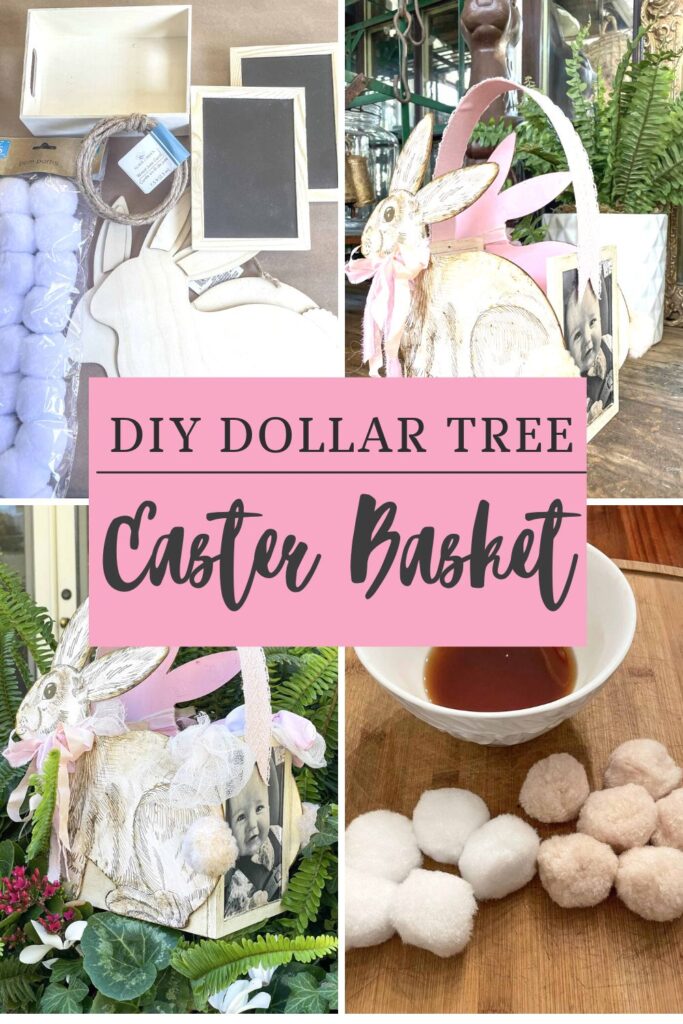
Easter Basket Ideas for a 1 year old; Easy DIY Dollar Tree Basket
Easter basket ideas for 1 year old babies. Make the cutest personalized Easter basket and fill it with your child’s favorite goodies.
Easter basket ideas for a 1 year old, can be a challenge.
One day last week, I wandered through Dollar Tree and came across the cutest flat wooded rabbits. Of course, it went into my cart immediately. Do you ever do that? It was like it just jumped into my cart.
I knew I would come up with great ideas once I started to think them through.
And then, magically, it came to me! (Don’t you love it when that happens)
Having four granddaughters, two are 1 year olds, and a brand new little guy. I knew this was the perfect time to create something special for them.
I would create a personalized Easter basket for all the little kids. They would love them and be able to use them for the Easter egg hunt we have every year on Easter morning.
These baskets are so much fun to make; the children will look adorable carrying them on Easter Sunday.
EASTER BASKET IDEAS FOR 1 YEAR OLD
Giving a baby’s first easter basket is very special and one to remember.
I love to give a gift I made with my hands. This DIY Easter basket is one of a kind, and your children, grandchildren, and other family members will cherish it for years to come.
Before we get to the actual part of making the basket, let’s talk about some great ideas to put in our basket.
GREAT EASTER BASKET FILLERS
Easter basket fillers can be fun but challenging at certain ages. Here is a great list of appropriate items for a one year old or toddler.
- Easter eggs
- Plastic eggs filled with jelly beans
- Small toys that help small children with fine motor skills
- Wooden toys (I love the ones made by Melissa & Doug )
- Sidewalk chalk
- Bath toys
- Stuffed animal
- Bubble machine
- Chocolate bunnies
- Board books
- Sippy cup
- Little chicks ( I prefer the wind-up kind)
- Easter outfit
- Finger puppets
- Adorable bunny ears
- Bath time. Think about bubble baths, bath crayons, finger paint, cute bath towels, sponges, and washcloths.

There are so many fun things you can fill a basket with. I add more clothes, age-appropriate easter books, sweet treats, money, get-out-of-chore notes inside of eggs, and water balloons for the older kids. These all make the best Easter gifts.
Disclosure Policy: I am an Amazon Associate and earn a small commission if you purchase a product through one of my affiliate links. The cost to you is the same. This is just a way for me to make a small commission. I appreciate your support, as this is what enables me to blog.
SUPPLY LIST FOR DIY Easter basket- Ideas for 1 year old ( toddler or young child)
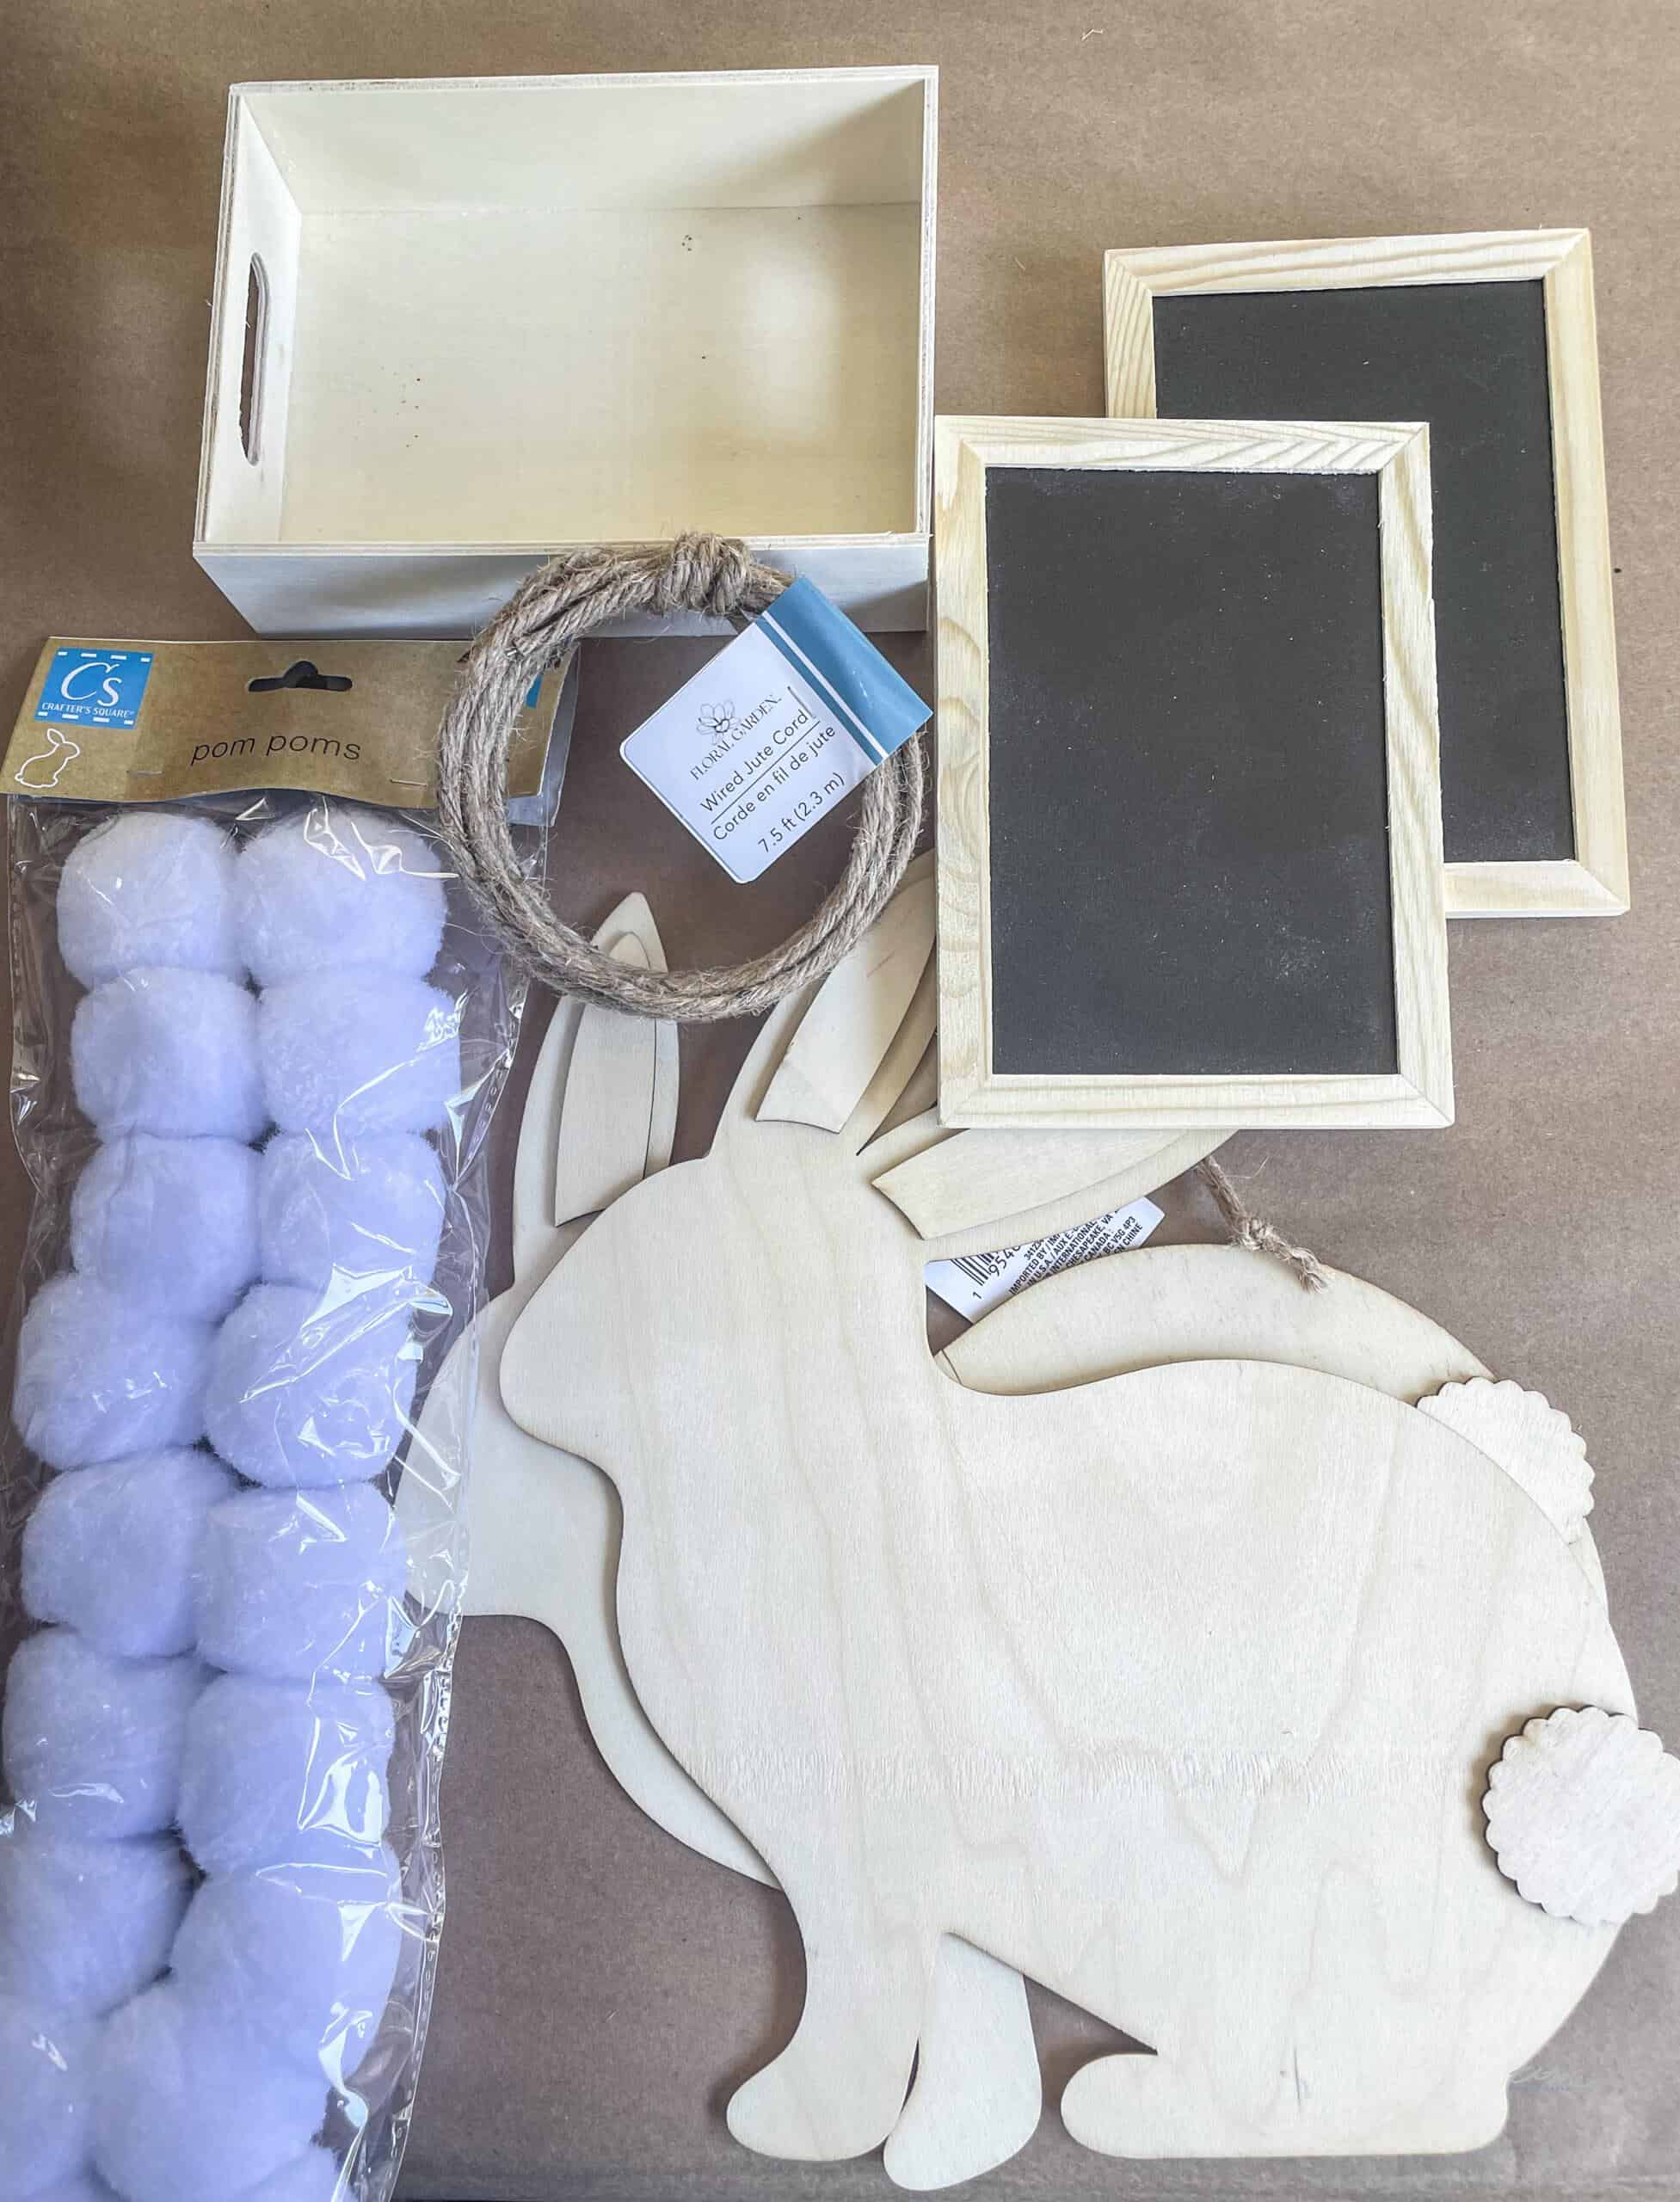
- Two flat wooden bunny rabbits from (Dollar Tree)- If you can’t find them at Dollar Tree you might find them here, but the shape may vary from my graphics.
- Two prints of rabbit art (If you would like to purchase these for $5.00, you can e-mail me at [email protected] ), or you can create your own.
- Once you have the files for the art, you need to have them printed on 11×17″ paper. (I had this done at FedEx printing)
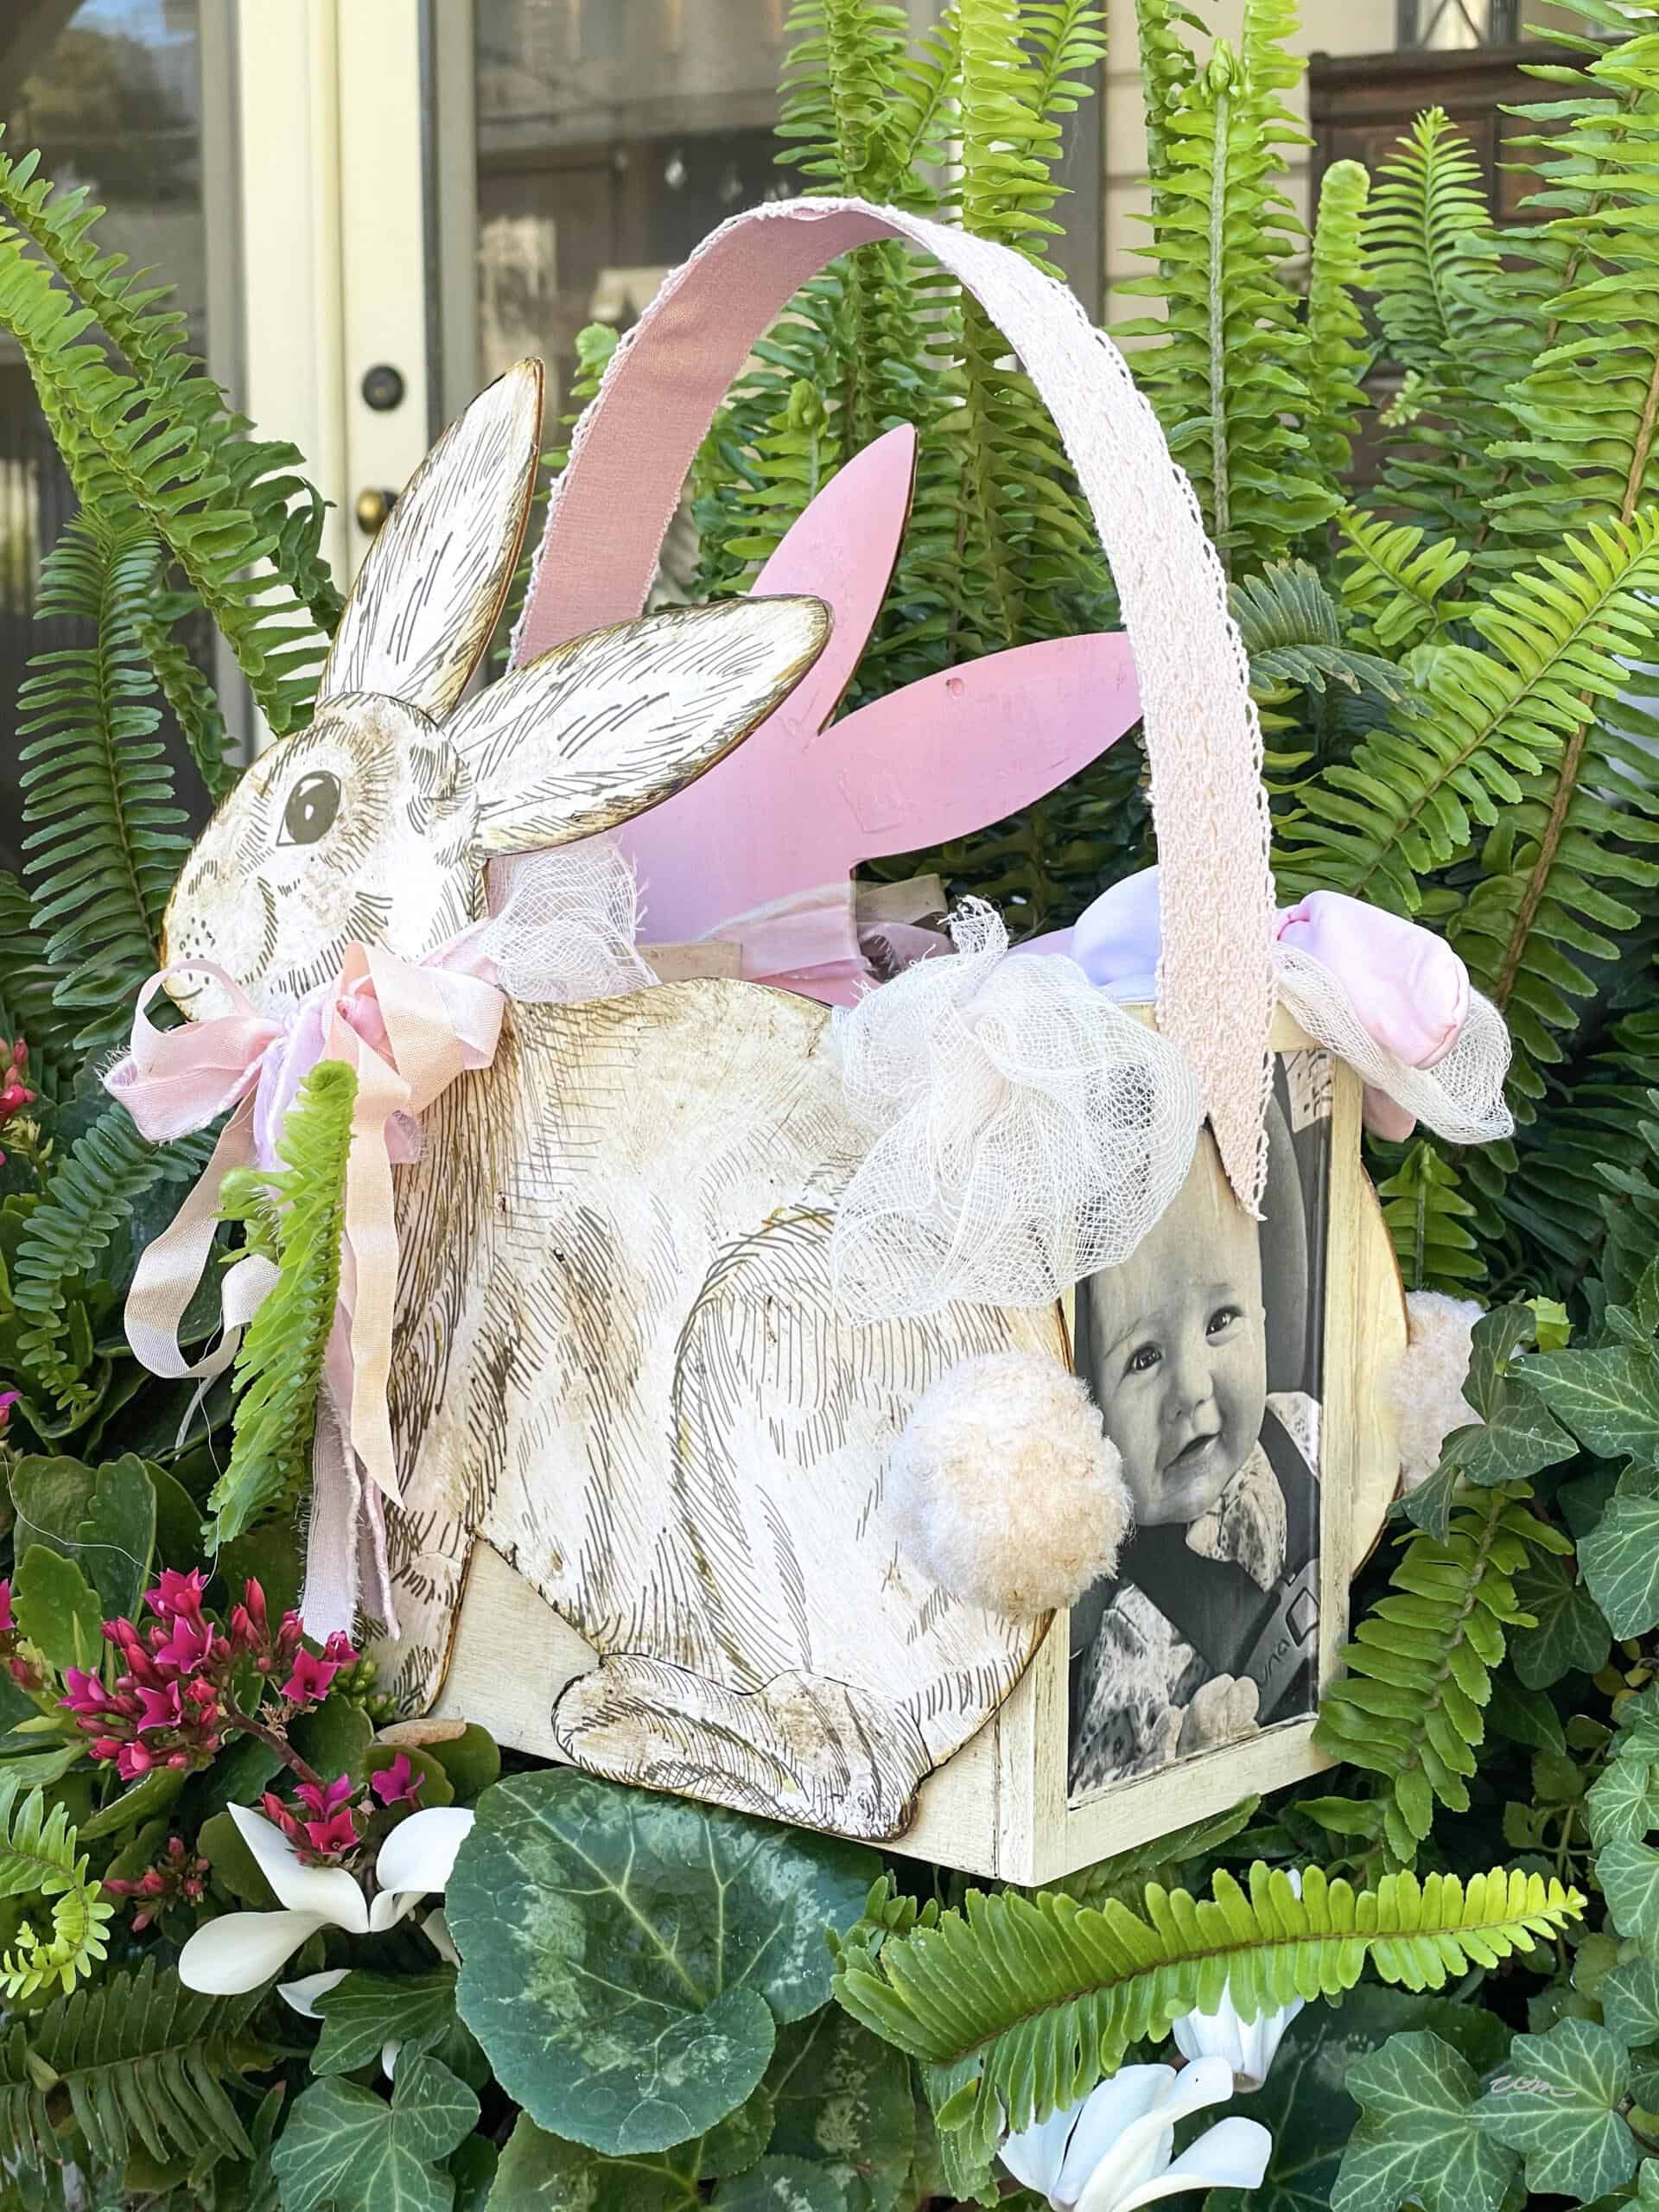
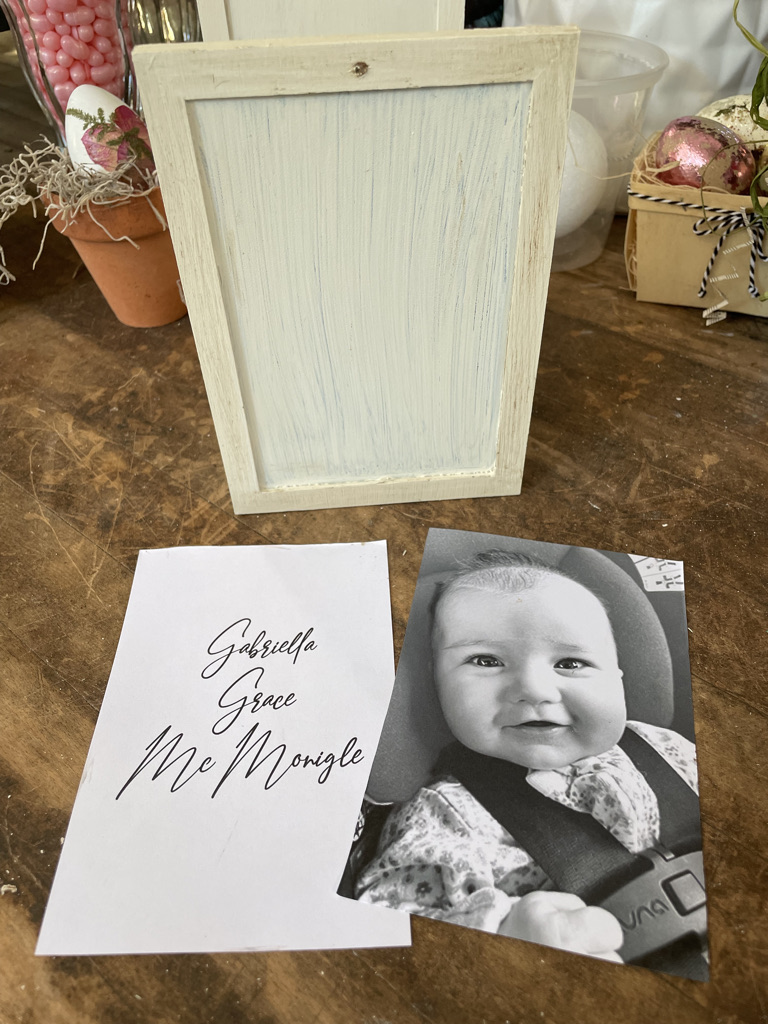
- One image of your child or grandchild cut the paper to 3.75″ x 5.75″ (print these on the computer using regular paper)
- One printout of their name cut the piece to 3.75″ x 5.75″ (print these on the computer using regular paper)
- One wooden tray (Dollar Tree)
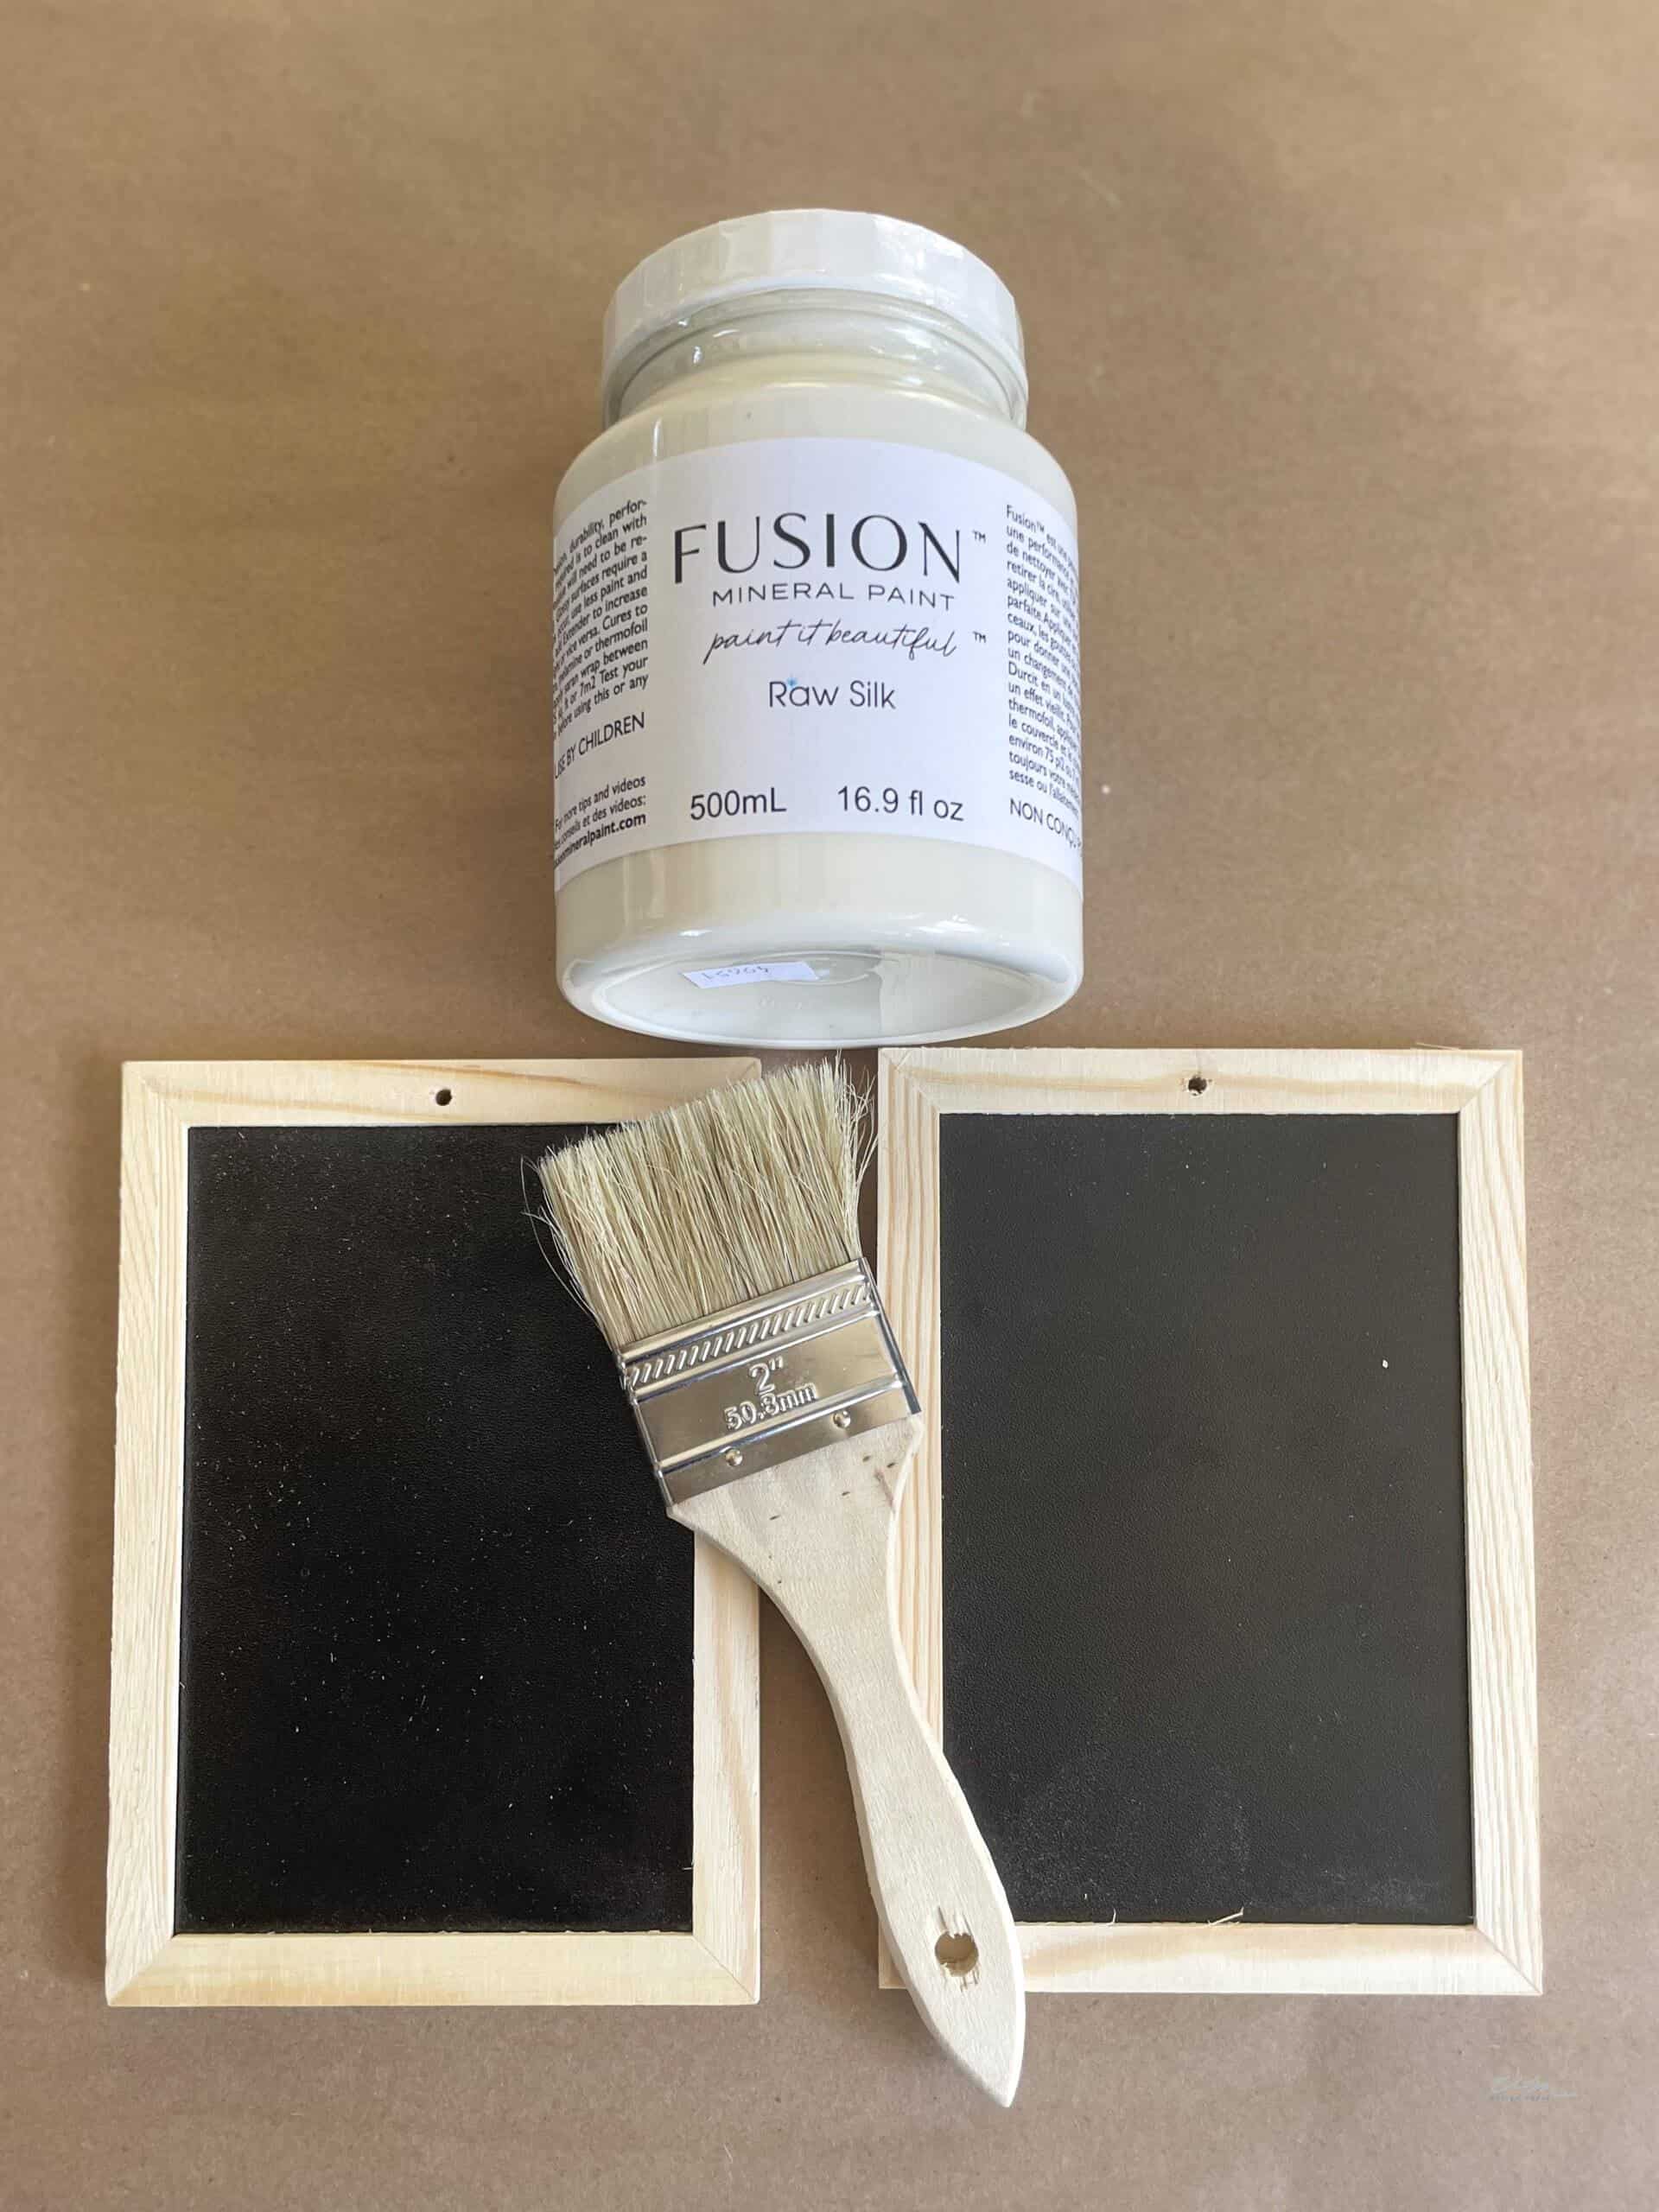
- Two black easels with wood frames (Dollar Tree)
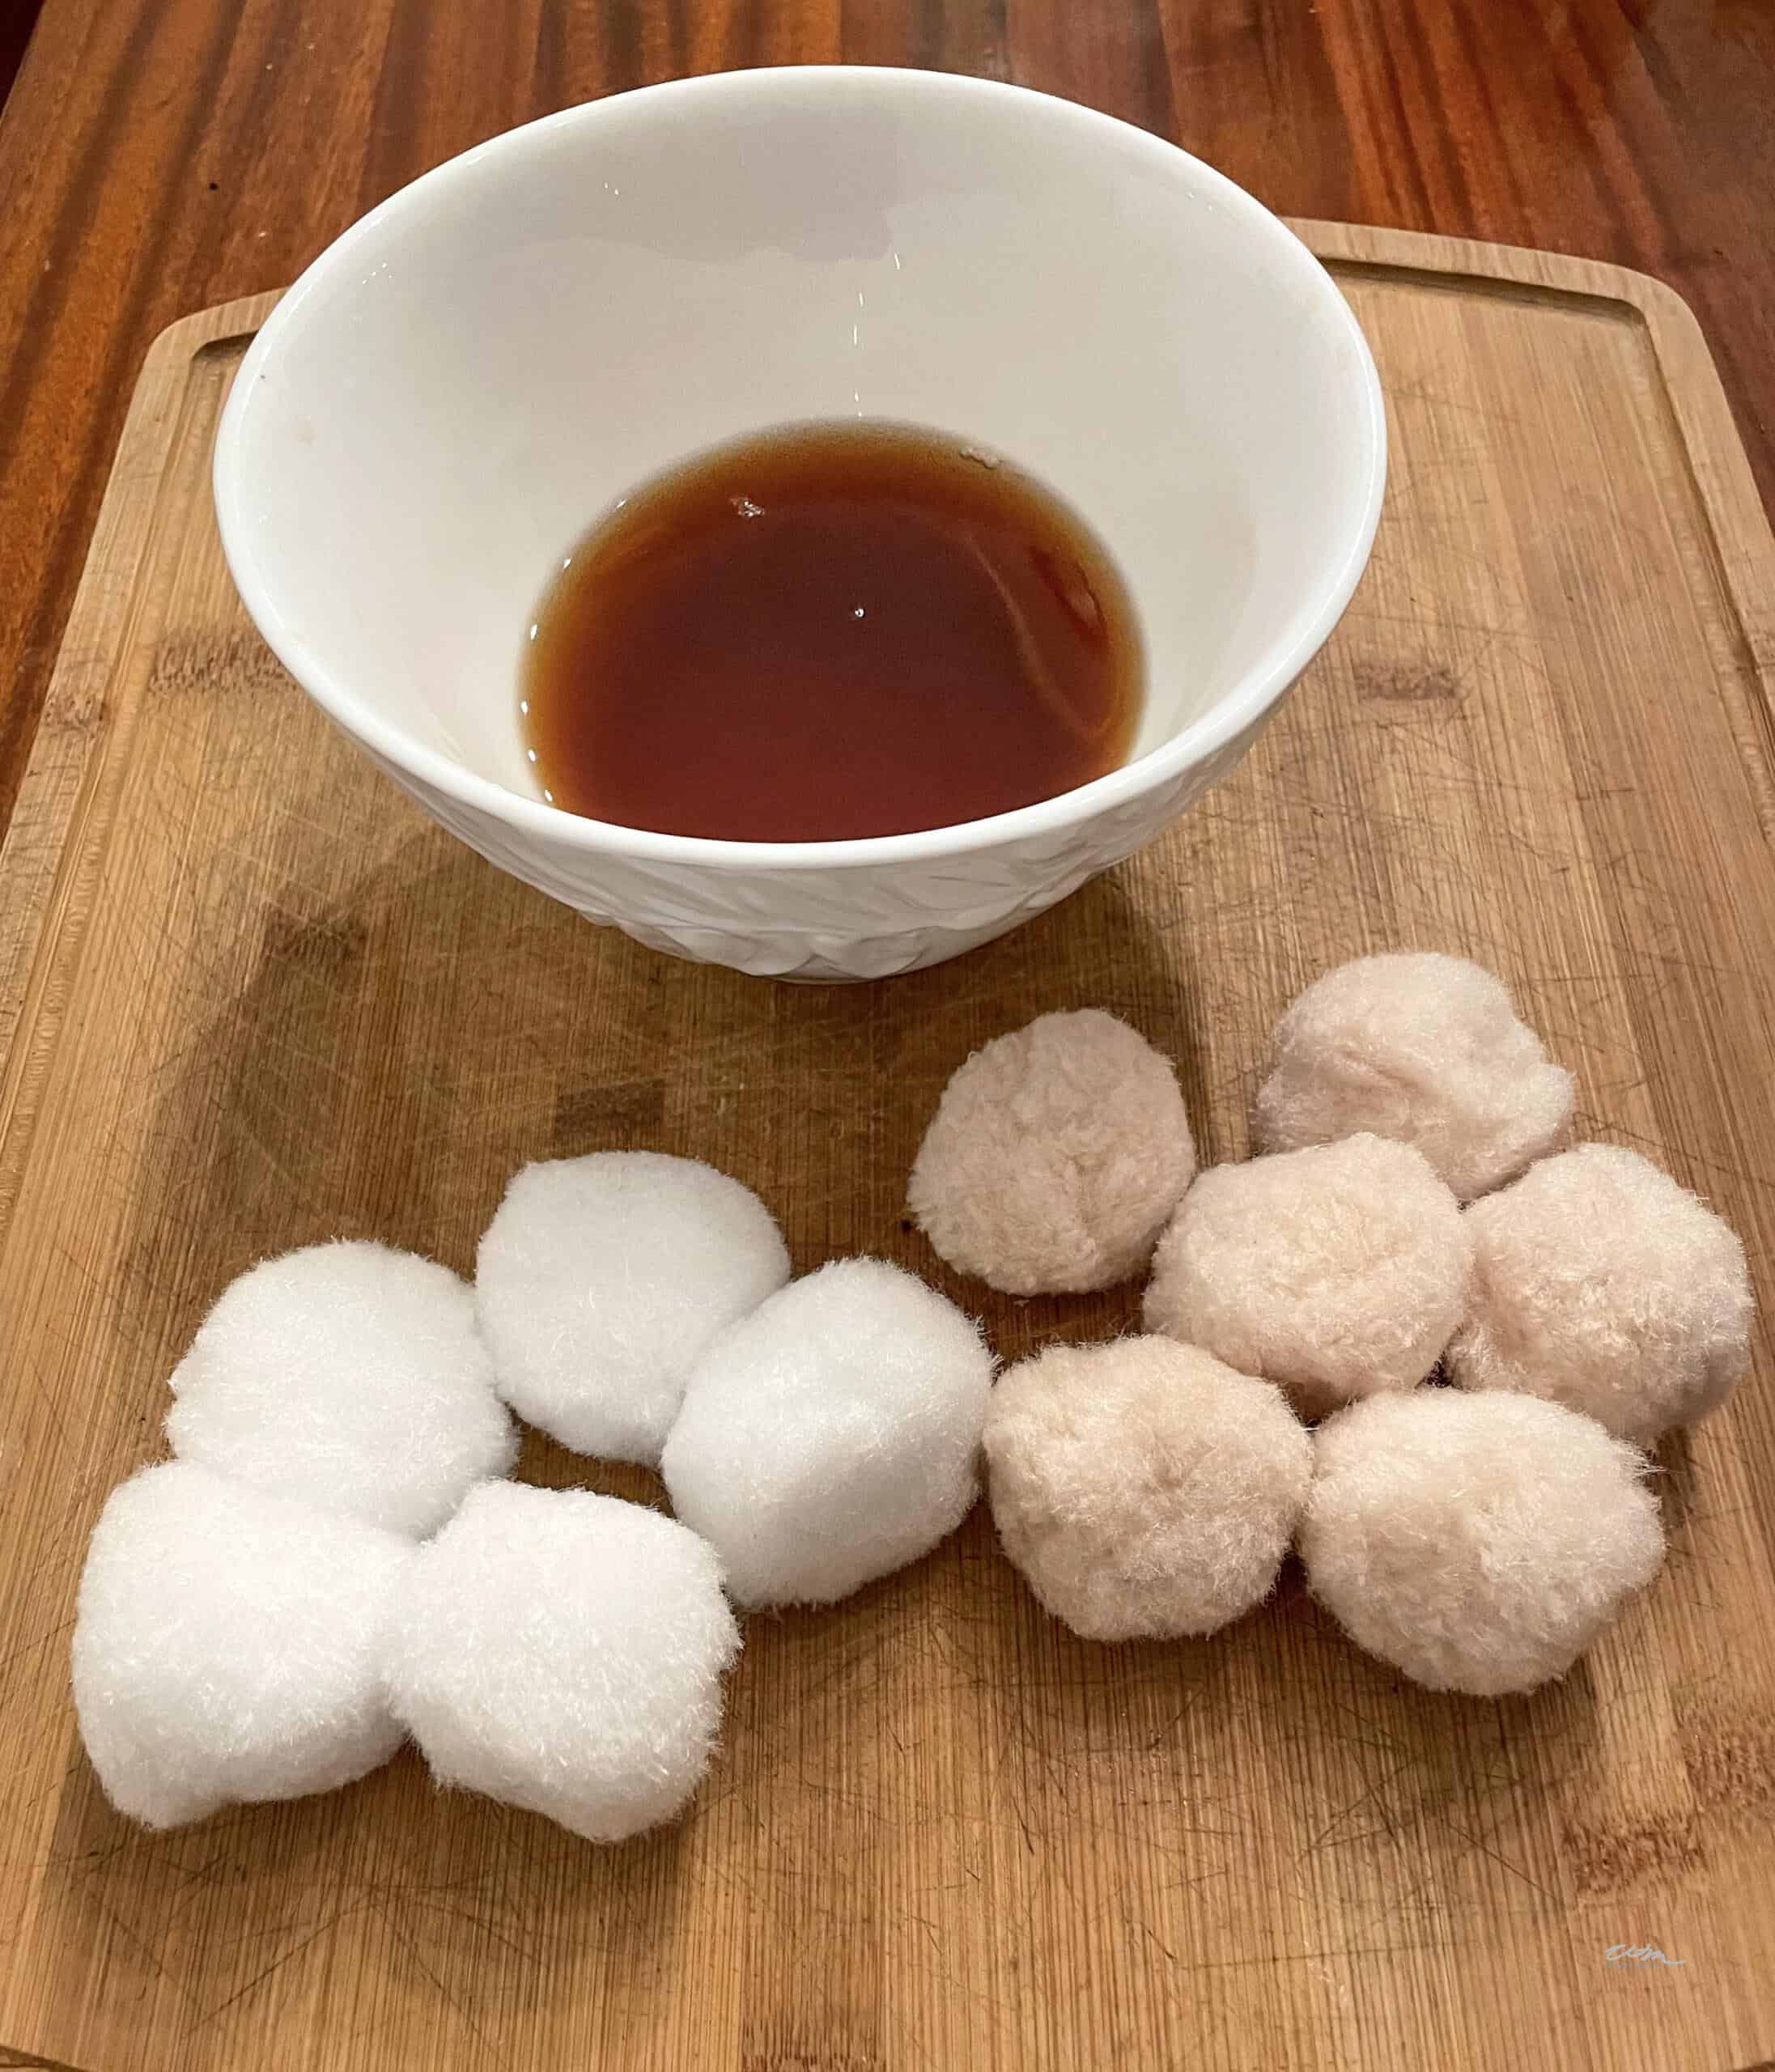
- 1 Bag of white pom poms (Dollar Tree) we will use these to give the little bunny a fluffy tail.
- You will need one tea bag to dye your pom poms ( to create fluffy tails).
- Mod Podge
- Chip brush
- White or Ivory chalk paint.
- Distress Archival Ink
- Pink or blue acrylic paint.
- Dark wax
- Clear wax
- A strip of poster board that is 1.5″ wide x 20″ long for the handle.
- 20″ of lace ribbon or ribbon of your choice.
- Twenty inches of solid ribbon for the handle.
- My dream Glue gun or a primary glue gun.
- Spray adhesive
- Ribbon of your choice for around the rabbit’s neck.
HOW TO MAKE YOUR baby’s 1st Easter basket
Prepare The Wooden Rabbits
- Remove the small inner wood piece on the ears and the tail of the wooden rabbit. I found this to be easier on some rabbits than others. If you create a mess, you can sand the rabbit after removing the pieces, and you could always fill it with wood filler if needed.
- Paint the inside of the rabbit the color of your choice. I chose pink for a little girl and blue for a little boy. (This is much easier to do at this stage than after you assemble the Easter basket, trust me)
- Keep in mind that both rabbits are facing the same direction, so you need to be sure you are painting the correct side of the interior of the rabbit.
- Let the rabbits dry for an hour.
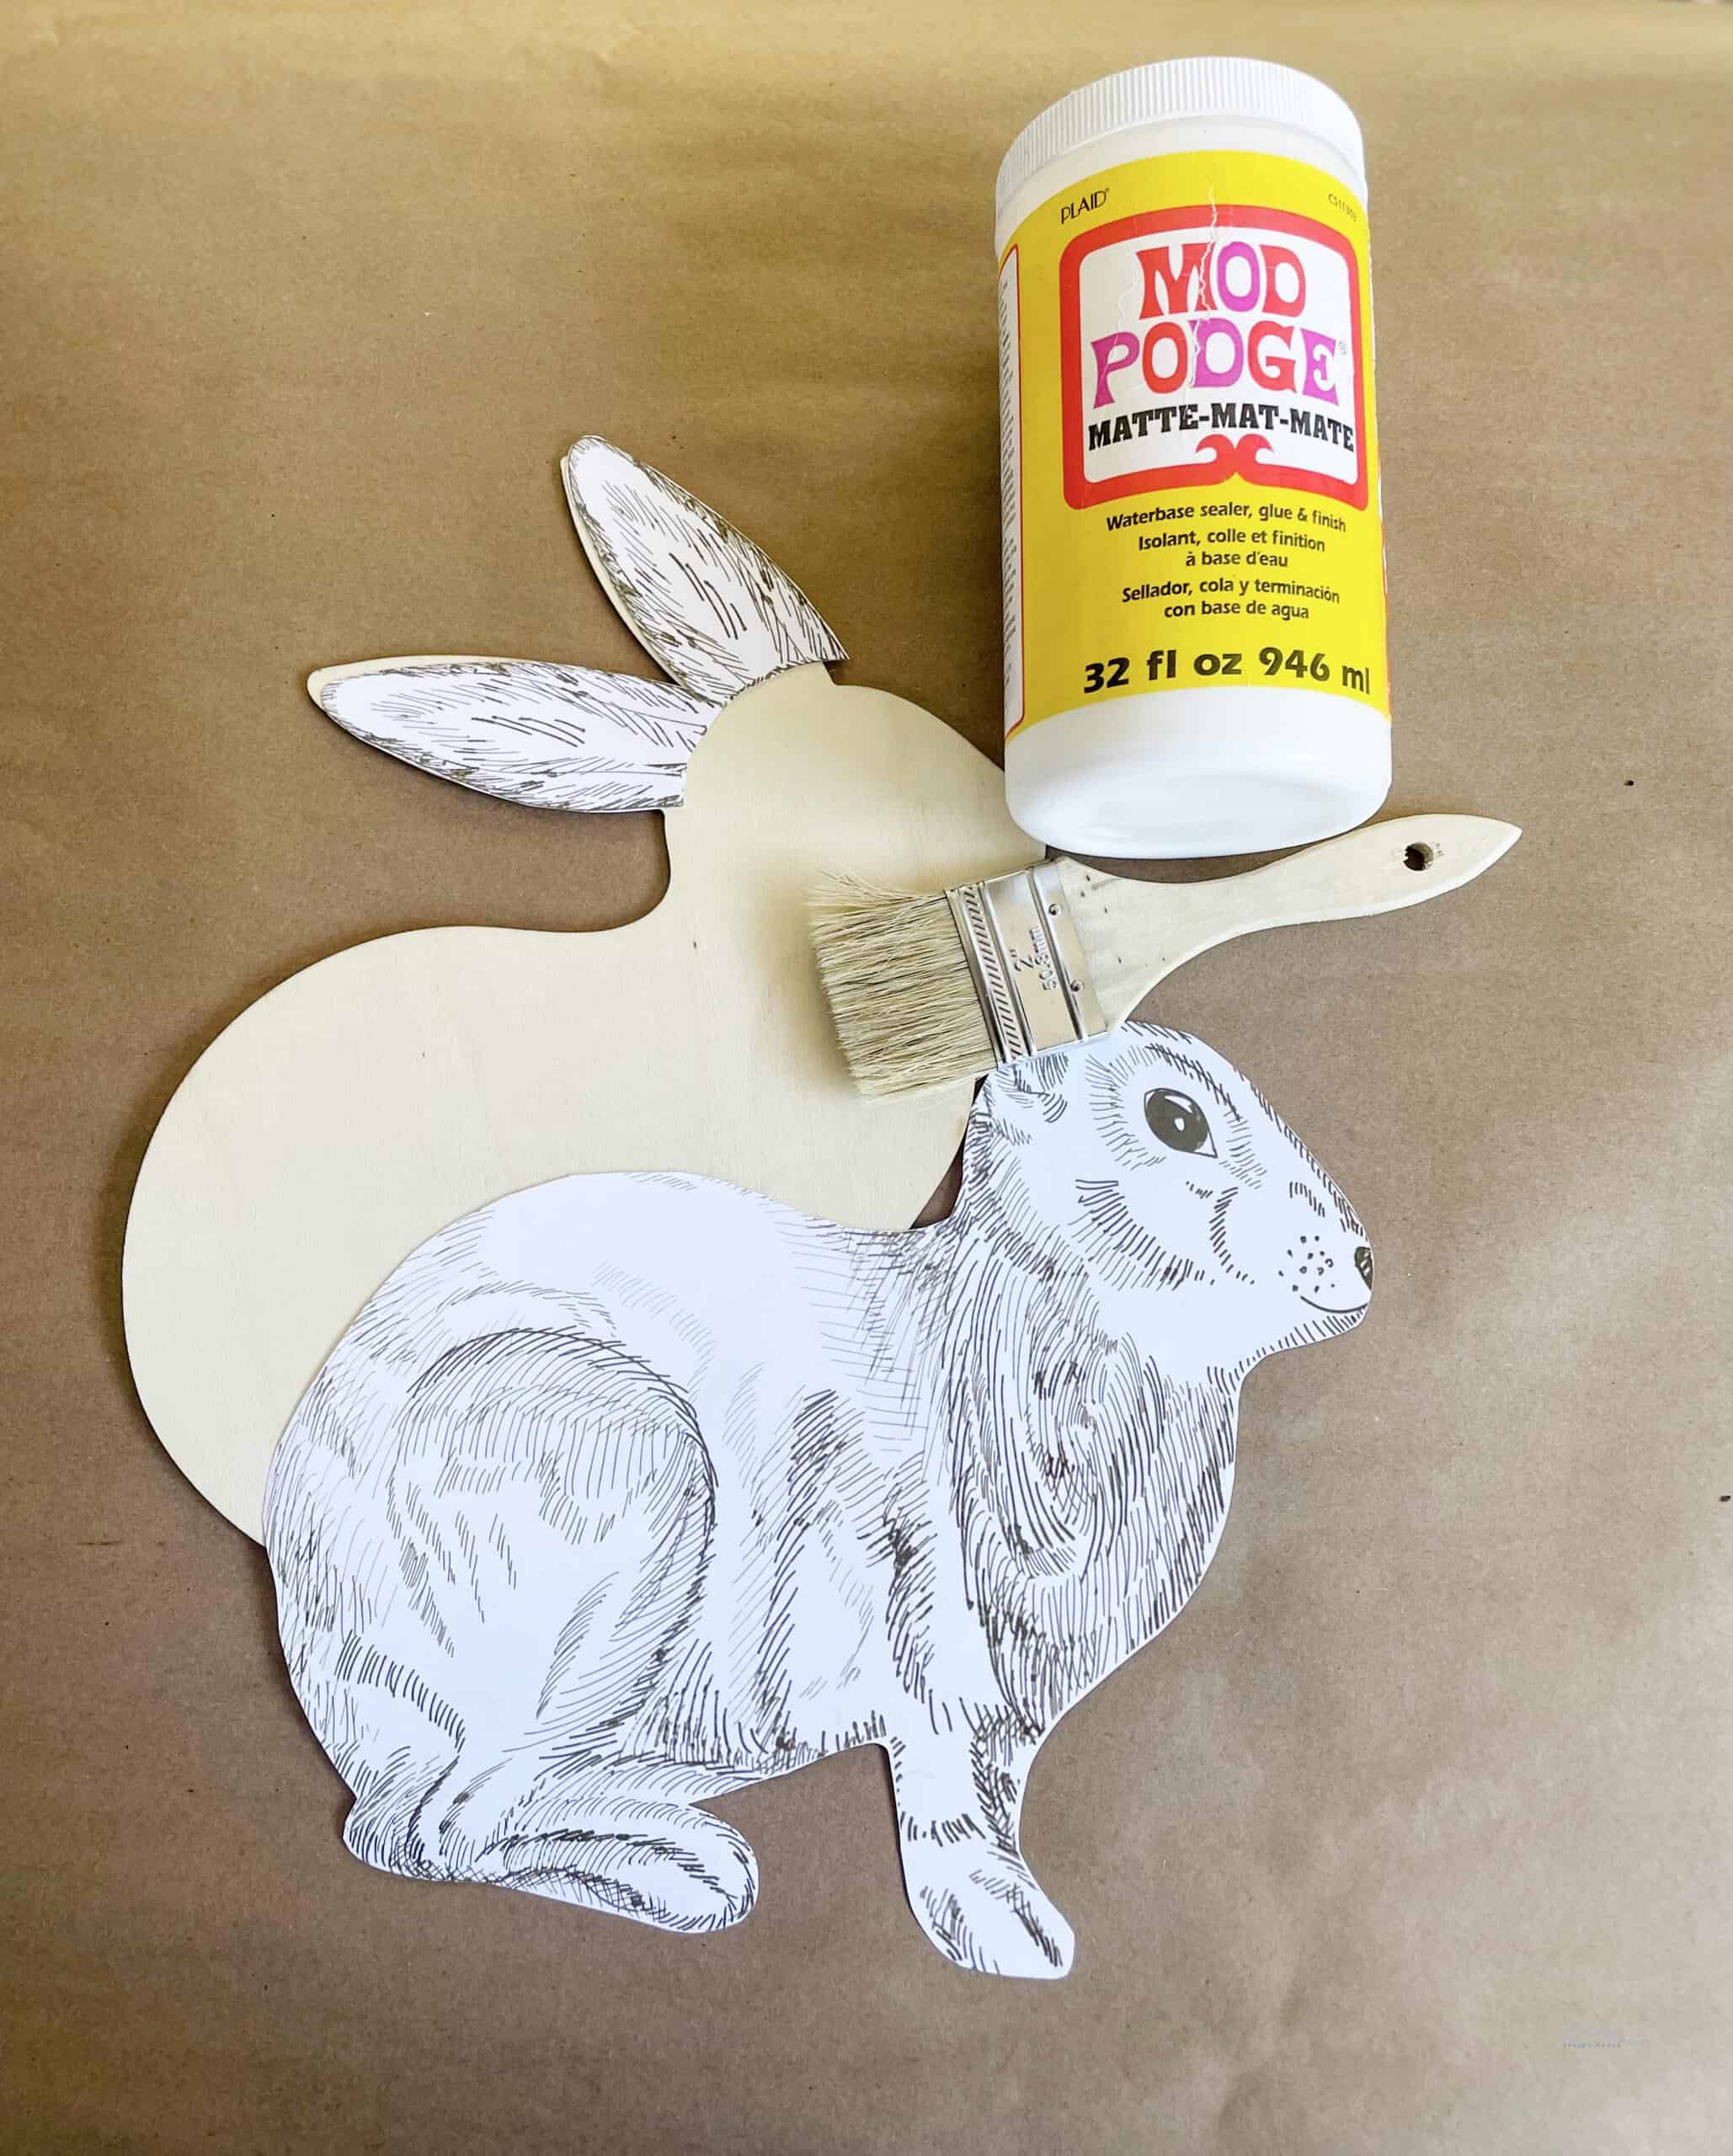
Attaching the Paper Rabbit to the Wooden Rabbit
- If you purchased the printed artwork from me, be sure to print it on an 11′ x 17″ piece of paper.
- This artwork is imperfect, so I found it easier to cut the ears and feet off and attach the ears and feet first and then the body.
- Paint a coat of Mod Podge onto the wooden ears, place the paper ears on top, and smooth out any lines or bubbles.
- Paint a coat of Mod Podge onto the wooden feet, place the paper feet on top, and smooth out any lines or bubbles.
- Paint a coat of Mod Podge onto the wooden body, place the paper body on top, and smooth out any lines or bubbles.
- Now paint a single coat of Mod-Podge over the entire rabbit.
- Remember we are going to antique the rabbit. Ultimately, you will not see any seams where you glued the feet or ears.
- Repeat this process on the other rabbit on the reverse side.
- Set the rabbits aside to dry.
- Trim the excess paper once they are dry.
Preparing the Easels and Wooden Box
- Remove the easel part on the back of the chalkboard that makes it stand up.
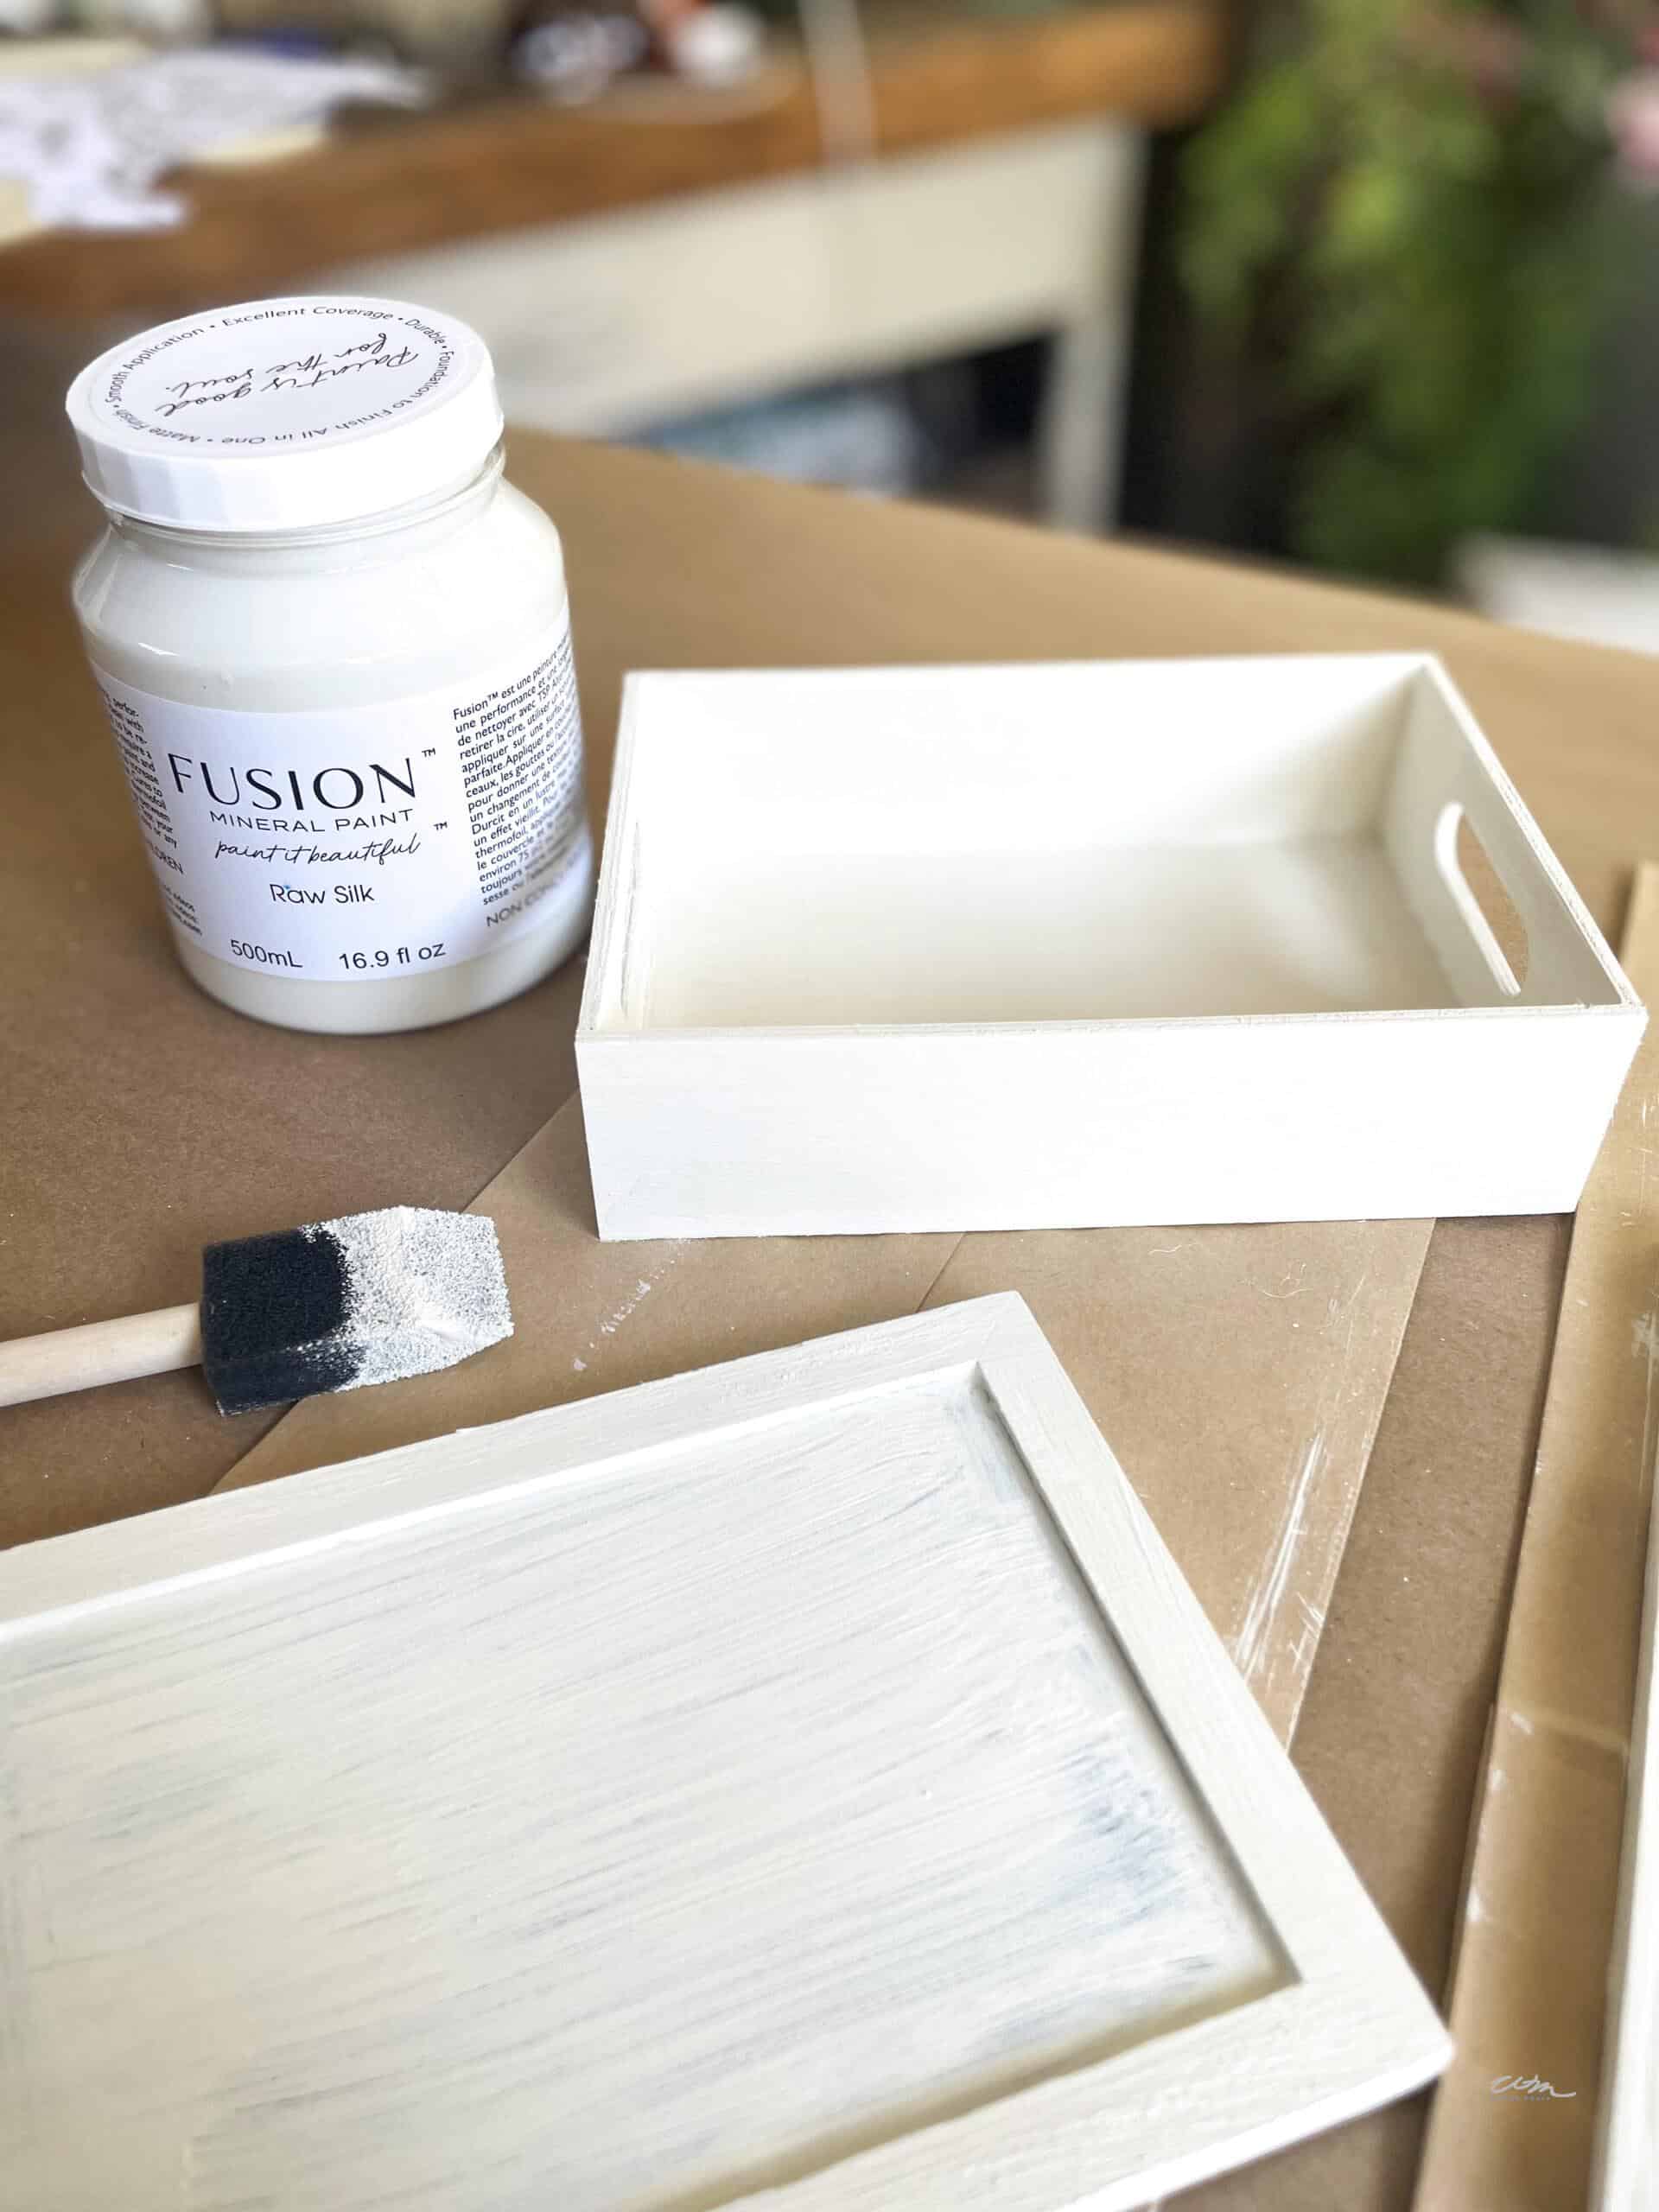
- Paint the two sides of the chalkboard and frame using white or ivory chalk paint.
- Repeat this process with a second coat of paint.
- Paint the wooden box as well. Two coats in total.
- Let all of these pieces dry well.
Attach the Photo and Name to the Easel Pieces
- Ensure your photo and name fit into the rectangle well, and trim if needed before you glue them into place.
- Paint Mod-Podge inside the frame on both pieces and place your photo in one and the name in the other frame on top of the Mod-Podge.
- Smooth out the paper using your fingers.
- Now, paint a second layer over the image and name using your chip brush.
- Let these pieces sit and dry to the touch.
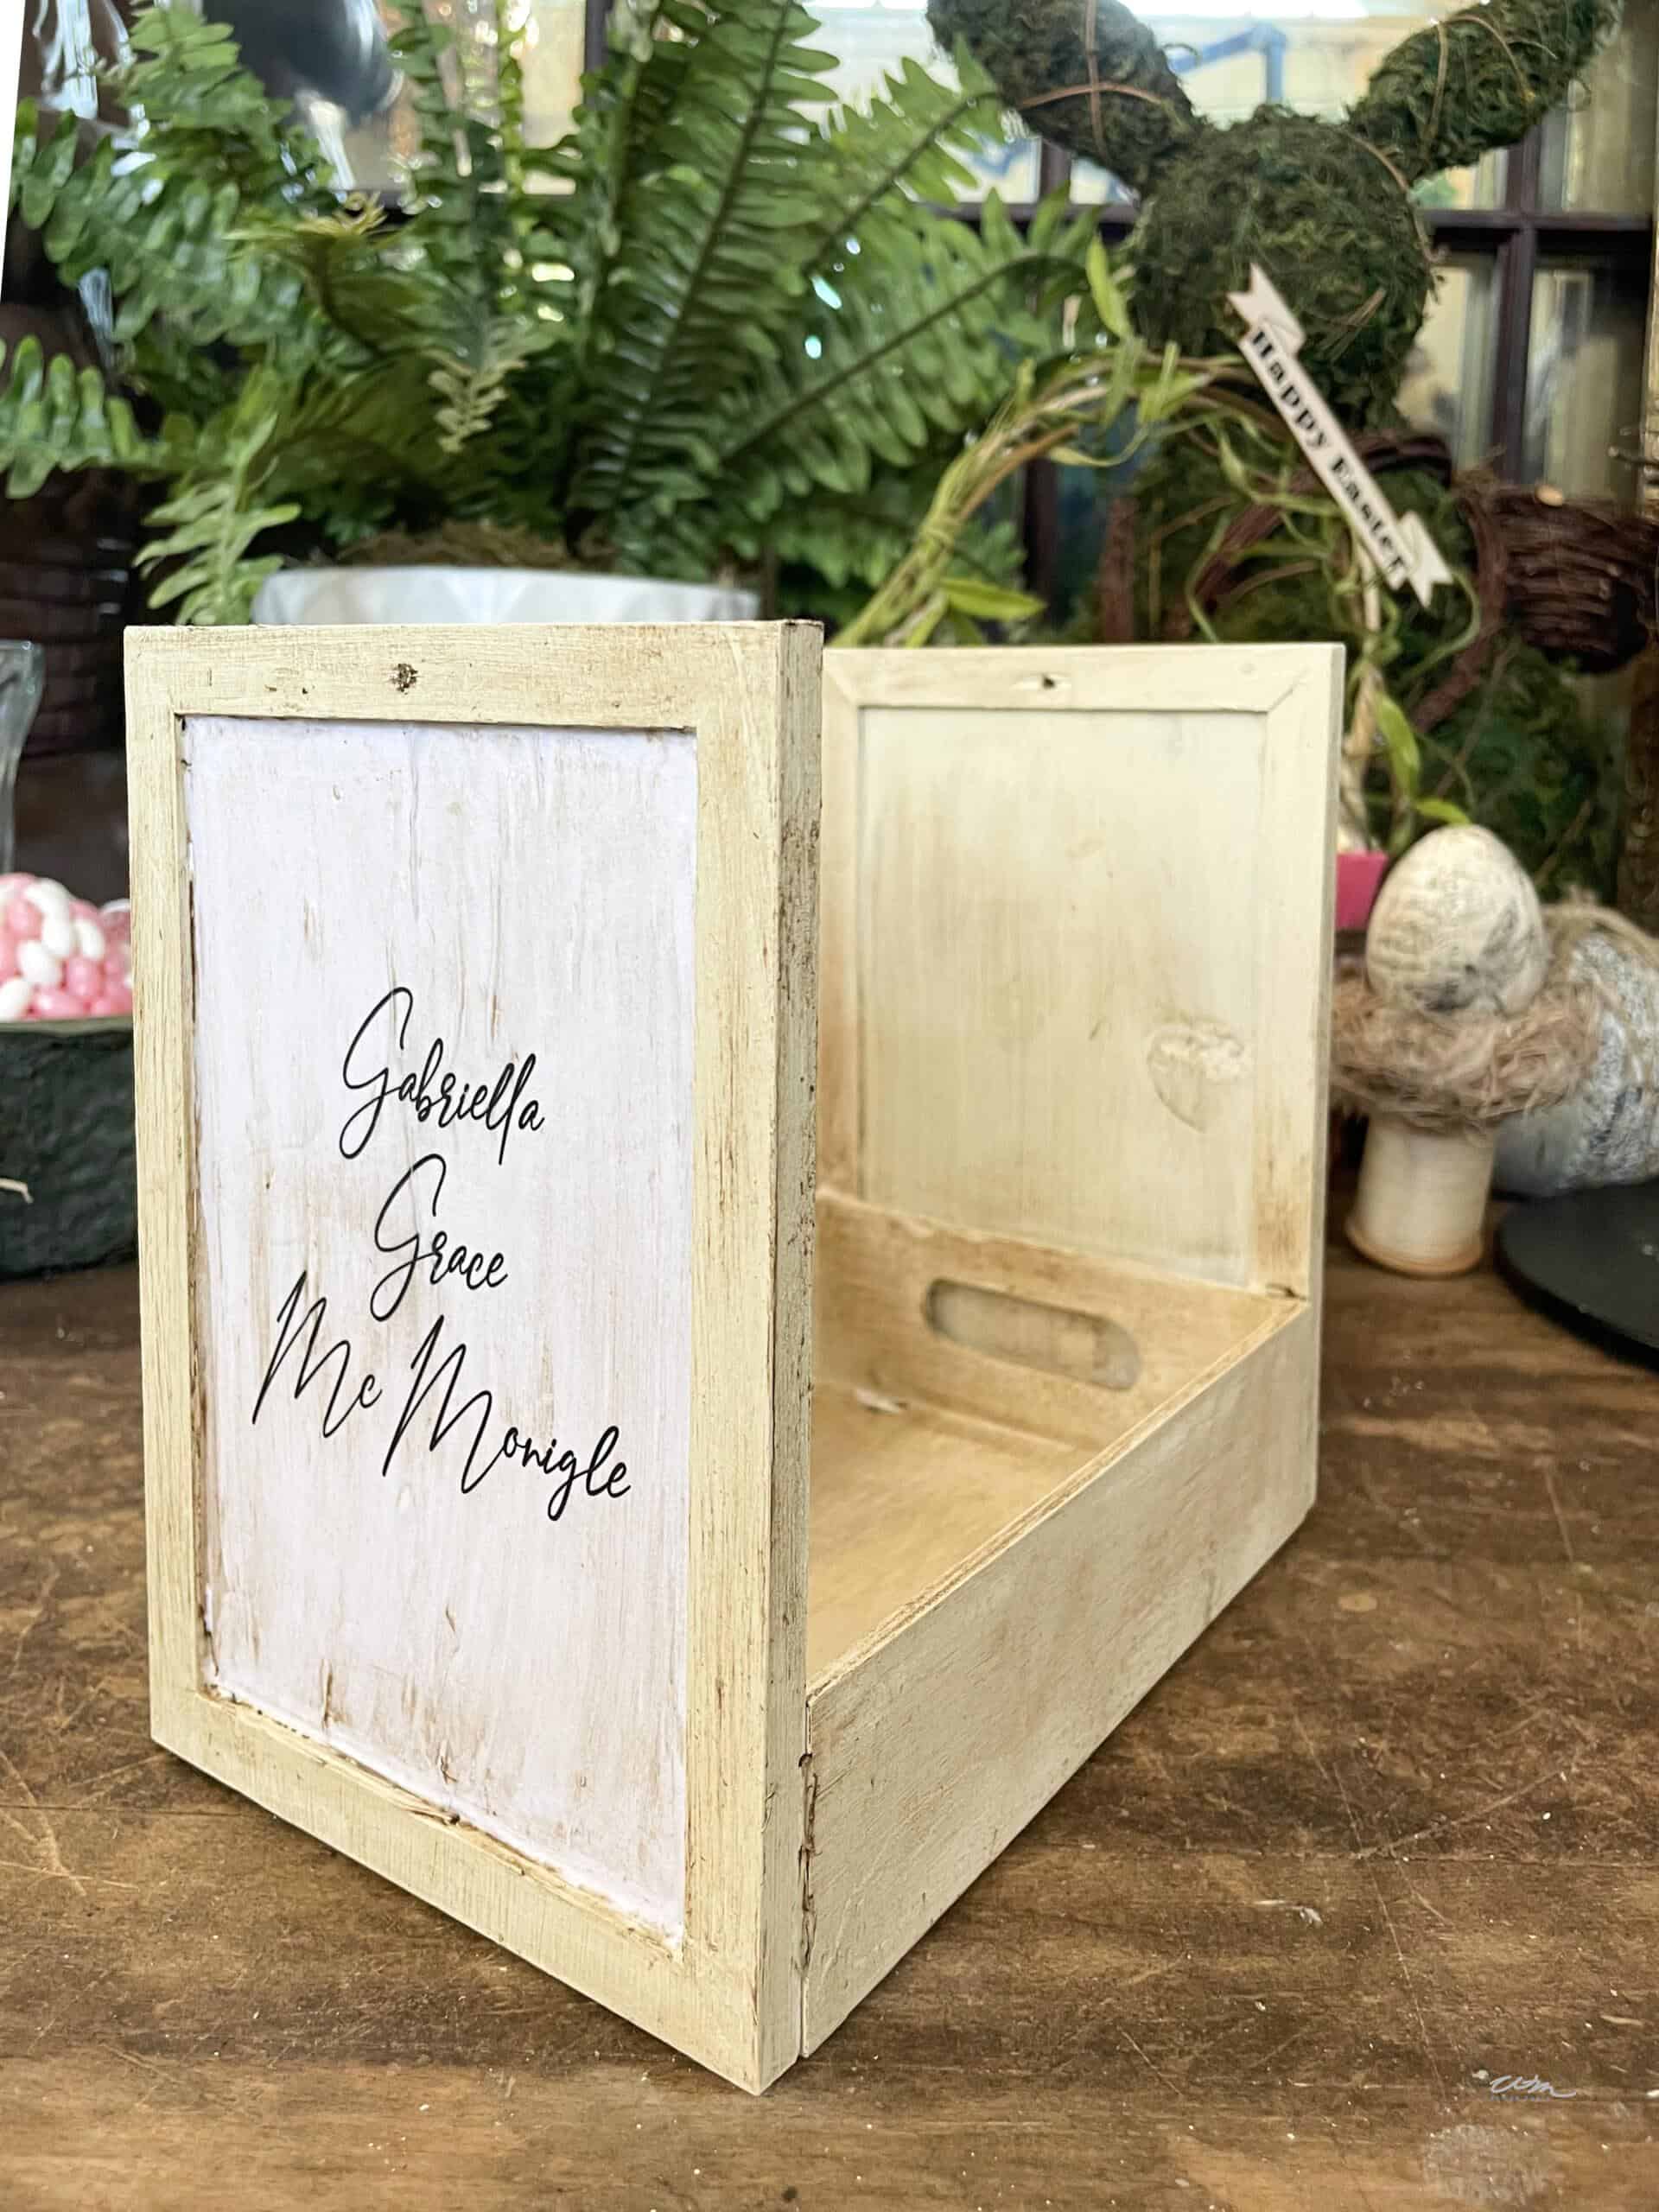
Antiquing the Photo, Name, and Rabbit
How to antique the Photo and Name
- Waxing is a process you may want to practice on paper first.
- We will use clear and dark wax to antique the frames with the images. ( you will antique the image and the entire frame)
- Use a rag or an old T-shirt to wax your pieces. ( you can also use a dry paintbrush if you like)
- Start by applying a coat of clear wax directly over the image of the child and the name.
- Dilute the dark wax with the clear, as the dark wax alone can be too dark. Start by using about a tablespoon of clear wax to a 1/4 teaspoon of dark wax.
- Using the diluted wax, lightly rub over your image and name. Rubbing in one direction.
- The beauty of waxing this way is if you get too much dark wax on the project, you can use a rag with a touch of clear wax to remove some of the dark as long as you put that first coat of clear on the image.
- Put enough wax on until you are happy with the look. Then, of course, you can always add more. Less is more when it comes to waxing.
- You want this to look antiqued and old, so do not aim for perfection.
Antiquing the Rabbits
Using the Distress Archival Ink, you can antique your rabbit around the edges and areas where you want it to be darker. You can see from my image that I made his ears and feet a bit darker. Also, adding some shadowing around his hip and neck. This small ink pad is straightforward to work with. However, I would suggest you practice on paper first.
Once you have enough shadowing, you can antique the rabbit with the same waxing process we used on the photo frames and images. Don’t forget to start with a coat of clear wax before applying the darker wax.
Add a bit of dark wax to your rag and rub in the areas you want the antiquing.
Once you have waxed, let the pieces dry for 24 hours.
If you want a shiny finish, you can buff the wax with a clean rag after drying it.

Assembling your baby’s Easter basket
Using a hot glue gun, you will hot glue the easel ends onto the ends of the wooden box.
Hot glue the two sides of the rabbit onto the wooden box and frames.

Creating a fluffy tail and handle for your child’s Easter baskets
Creating the Tail
- Make a cup of hot tea.
- Dip the white pom into the tea for a minute or two.
- Remove the pom poms from the tea.
- Soak up the majority of the tea with a paper towel.
- Let the pom poms dry overnight.
- Hot glue them to the rabbit in the morning.
Making the Handle
- Cut a strip of poster board that is 1.5″ wide x 20″ long.
- Spray the spray adhesive onto one side of the strip of the poster board. ( you can also use white glue for this).
- Attach the solid color ribbon to this side and smooth it out.
- Now spray the opposite side of the strip of the poster board.
- Attach the lace ribbon or ribbon of your choice to this side.
- Trim the ends into the shape you desire.
- Hot glue the handle onto the two sides to create the handle.
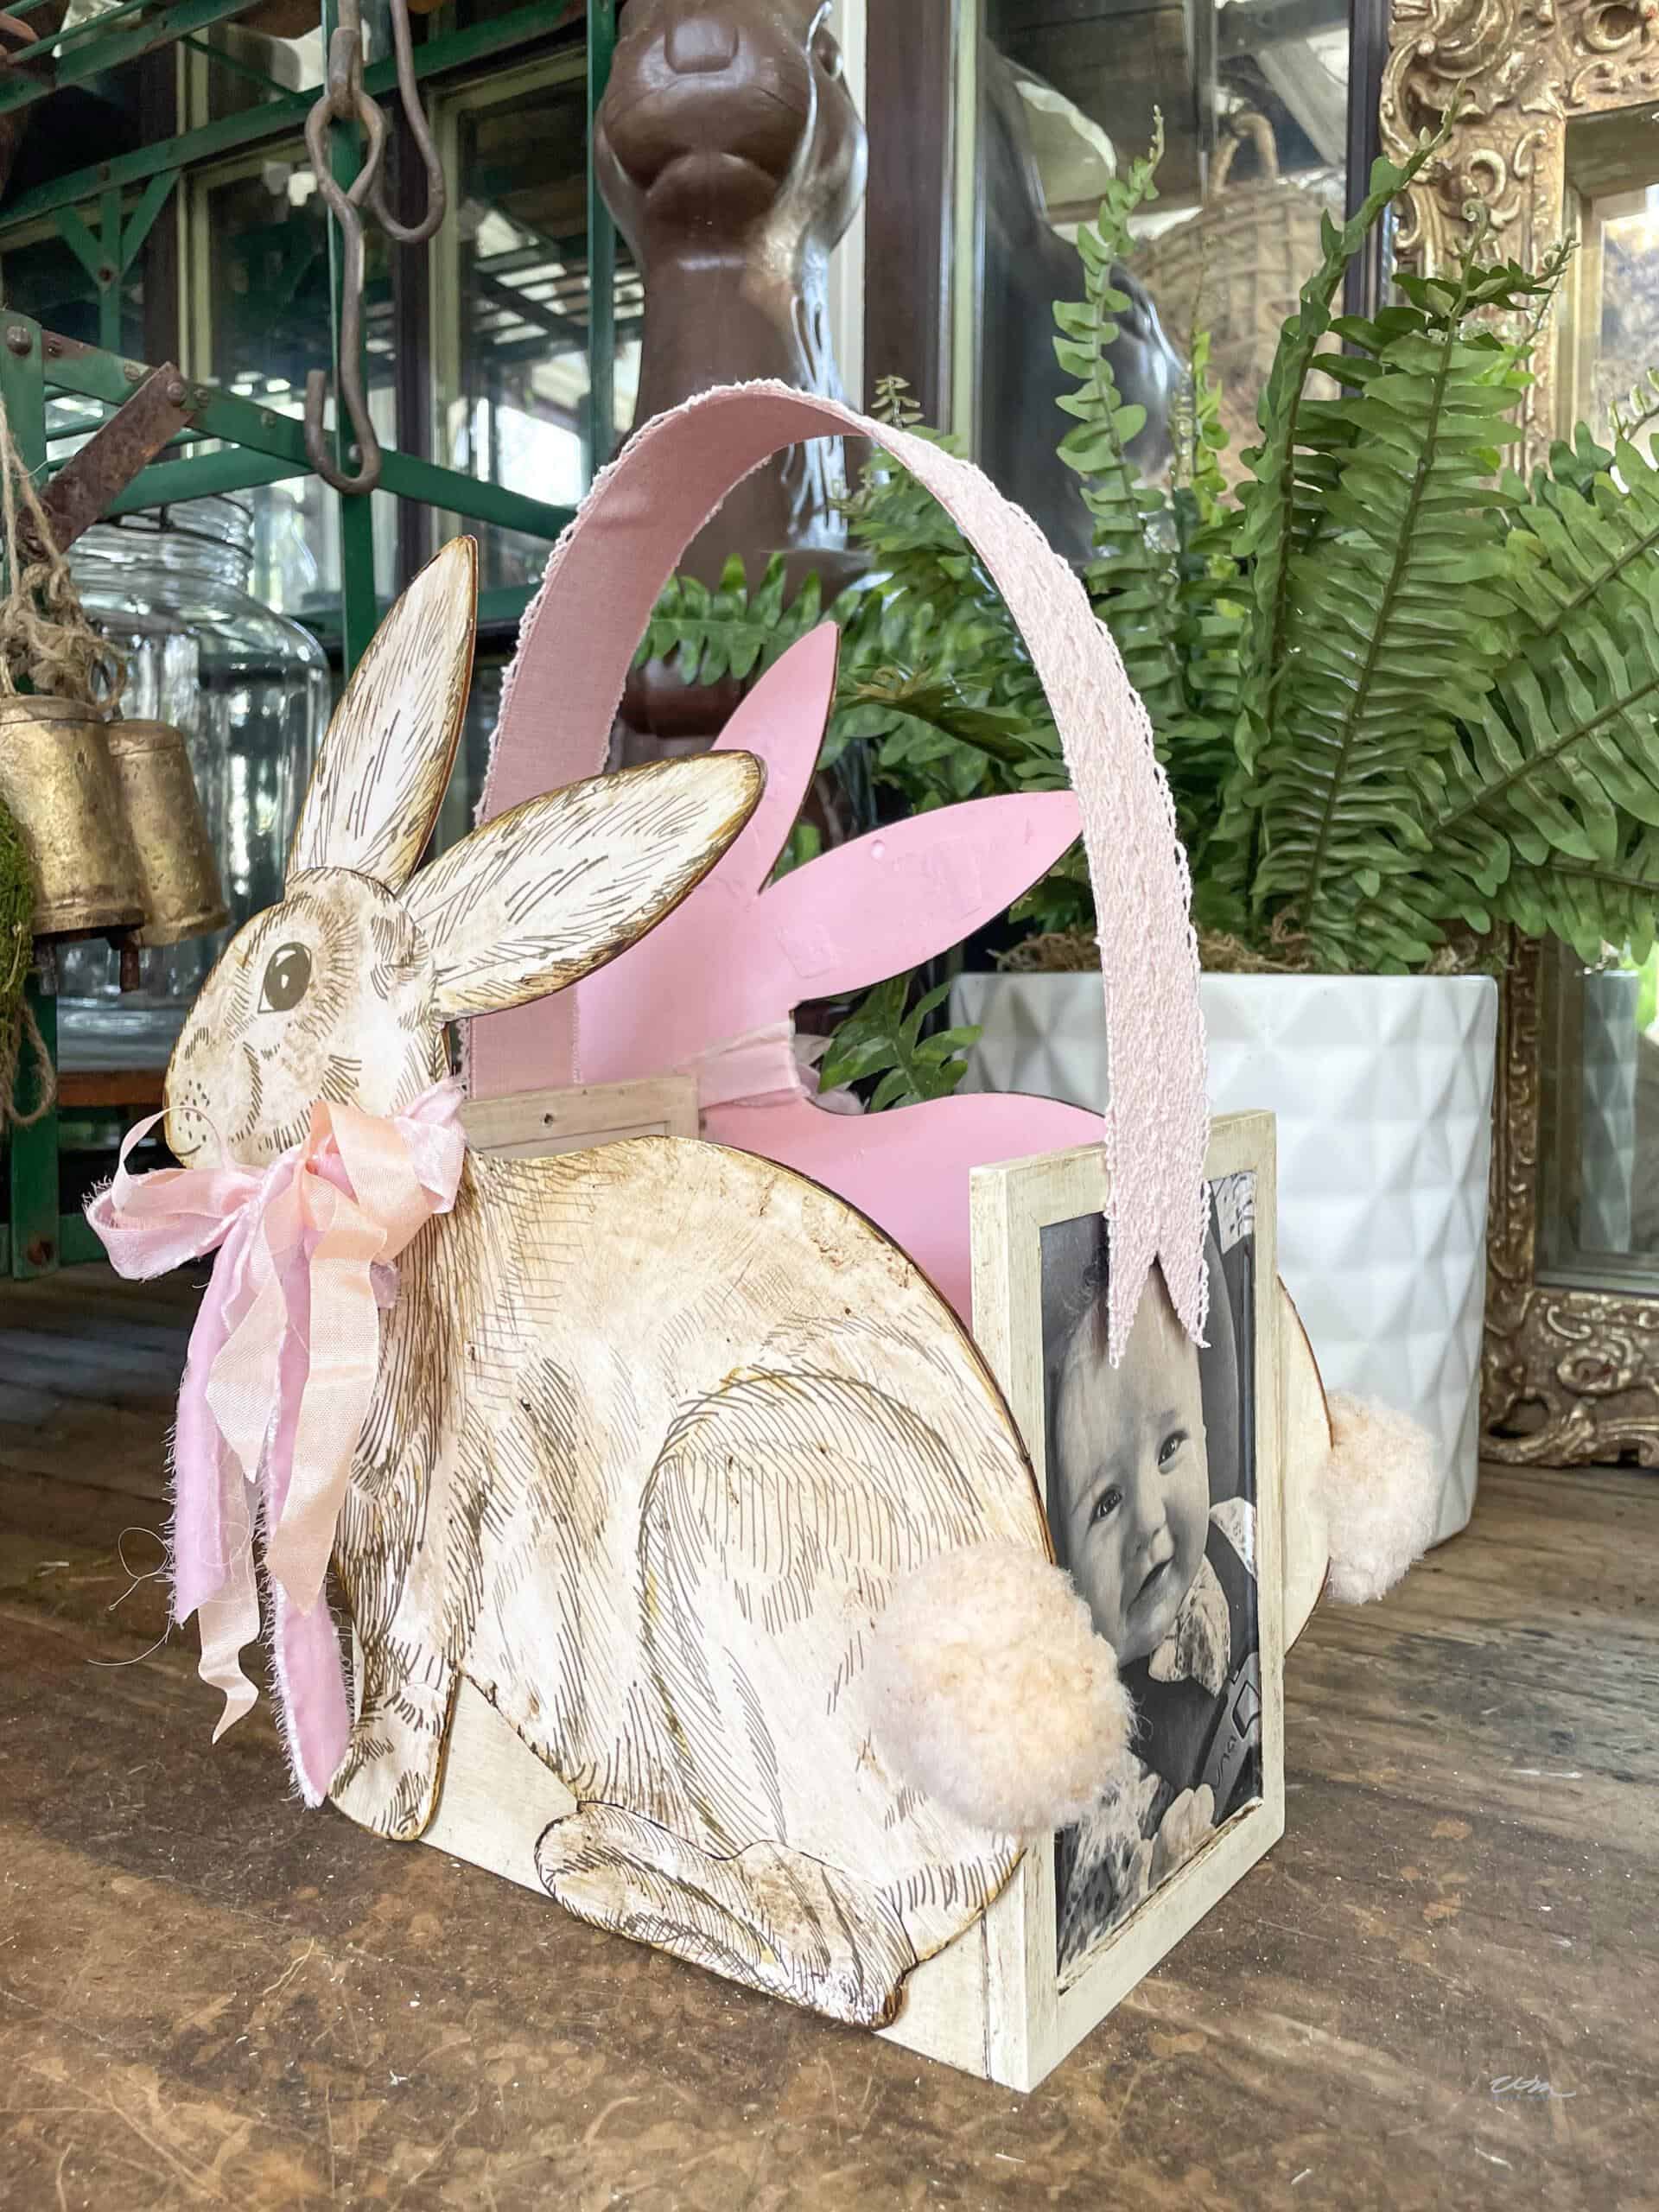
For a great addition, tie a bow around the rabbit’s neck or a bow tie for a boy.
Now that you have your personalized bunny finished, it’s time to add some shred or cheesecloth to your basket and fill it up.
I hope you feel inspired and try out this DIY Easter basket for one of your loved ones.
Until Next time!

SHOP SUPPLIES FOR EASTER BASKET
Shop Easter Basket Ideas for 1 year old
Wow Wendy, I am feeling so inspired. I am stunned, and love this project. This is the perfect time to create Easter baskets for your littles in your family. I still have my Easter basket from when I was a child, it was a hand-me-down, and was my mother’s when she was a child. I love this idea so much since it will stay with them long after the believing in the Easter bunny has passed. Thank you for sharing your inspiration with Whimsy Home Wednesday!
Thank you so much, Cara. I appreciate your sweet message. My apologies for being so late to respond, as I had a bit of an accident, but I am on the mend.
Wendy, this is the cutest little Easter Basket. I love this project and going to share it with my readers.
Thank you, sweet Tammy. I appreciate that so much. I look forward to seeing you in just a few weeks.
Omgosh, I love this, Wendy! It’s the most adorable Easter basket ever! Your creativity and talent blows me away! Looking forward to doing another blog hop with you!
Thank you, sweet girl! And a big thank you for blog hoping with me, I learn something everytime. Lets do it again.
You amaze me!! I love this basket so much! You’ve thought of every detail right down to the tea-dyed Pom Pom tail! Yes, a stroll through DT always inspires me. I often toss an item in the cart and wait for the ideas to roll in!
Thank you Ann, you are so sweet.
Maybe one day we can stroll the store together. It would be so fun to meet in person.