How to Easily Dye Easter Eggs with Old Silk Ties
Learn a fun and creative way to easily dye Easter eggs using those old silk ties sitting in your closet! Read my step-by-step guide and turn your plain white eggs into colorful masterpieces just in time for Easter!
On my blog WM Design House, I may sometimes use affiliate links, which means a small commission is earned if you purchase via the link. The price will be the same whether you use the affiliate link or go directly to the vendor’s website using a non-affiliate link. Read my full disclosure policy here.
Unique and Creative Ways to Dye Easter Eggs
There are many different methods to dye hard-boiled eggs for Easter, each with different colorful results.
You can use packets of Kool-Aid for bright and vibrant colored Easter eggs, or experiment with whipped cream or shaving cream to achieve a beautiful tie-dye effect.
Of course, there is the classic method of dying hard-boiled eggs using food coloring and vinegar or dye tablets from a store-bought kit.
If you prefer a more natural option, you can even use red cabbage to dye your Easter eggs.
But did you know that you can also dye your Easter eggs using old silk ties?
It is true!
I am excited to share this technique with you.
Keep reading to learn how to create your own colorful and unique dyed eggs for Easter.
Materials You Will Need to Dye Easter Eggs with Silk Ties
- Pure Silk Ties
- One Large Piece of White Fabric
- Fabric Scissors
- Rubberbands
- White Eggs (uncooked)
- Large Stock Pot with a Lid
- Baking Sheet
- Water (to hard-boil the eggs)
- 1/4-1/2 cups white vinegar
How to Dye Easter Eggs with Old Silk Ties
I first saw this process for dying Easter eggs on Pinterest and I thought it looked easy enough, so off I went to thrift myself some old silk ties.
If you do not know this about me, I love thrift stores, estate sales, and the thrill of the hunt.
So, naturally this Easter craft project was right up my alley.
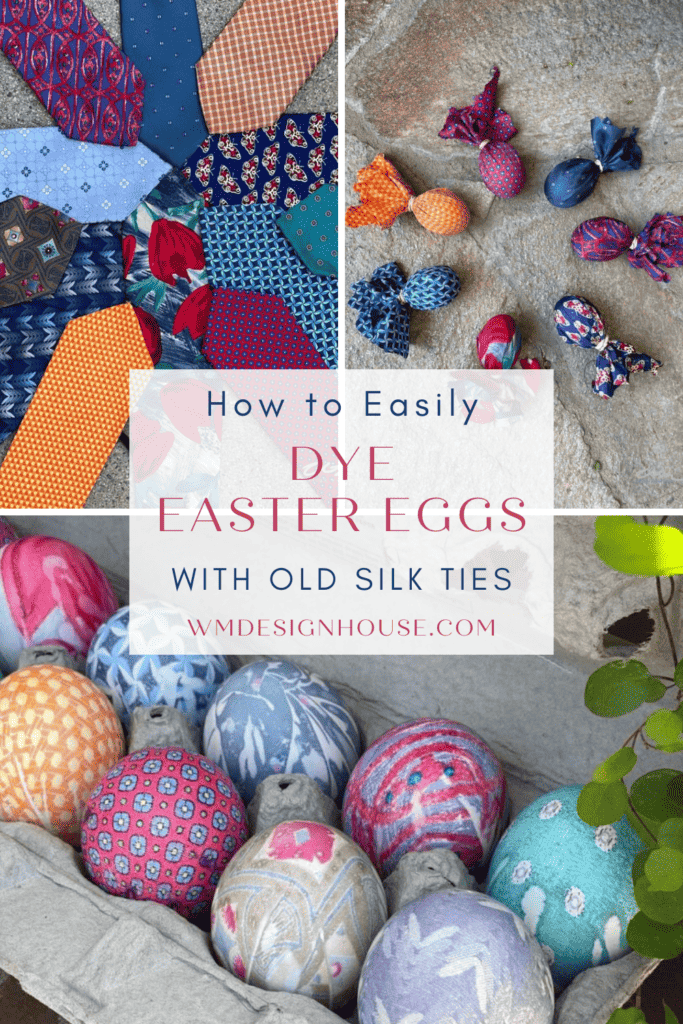
Step 1. Chose Your Silk Ties for Dyeing Easter Eggs
When I was hunting for silk ties to dye my Easter eggs, I tried to grab neckties with a mix of colors and patterns.

Here are some ties I picked up from my local thrift stores.
Usually, silk pieces with dark red, blue, and orange colors work the best for this egg dying method.
But keep an open mind!
It is fun to experiment with different colors and patterns to create beautiful and brightly colored Easter eggs.
Tip from wendy’s craft room:
If you can not find silk ties, you can also use other pure silk fabrics like a silk scarf, silk blouse, or even a piece of silk from the fabric store.
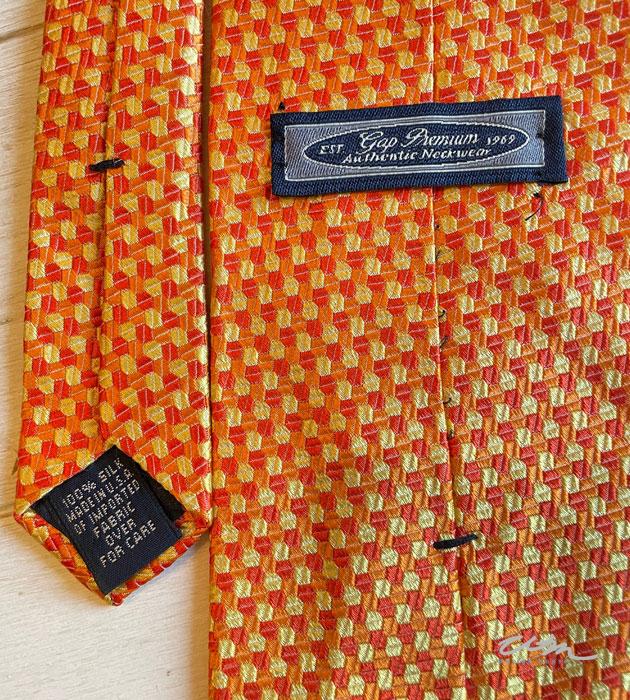
Step 2. Double-Check Your Silk Tie Materials
Funny enough, all my ties claimed to be 100% silk.
(I made sure to double-check the small tag on the back of the silk necktie to confirm what they were made of.)
But guess what?
Turns out, some of the ties weren’t silk after all—a discovery I made only after dyeing my Easter eggs.
The moral of the story?
Always ensure that the silk material you’re using, whether it’s a tie or anything else for dyeing Easter eggs, is definitely pure silk.
Tip from wendy’s craft room:
It is very important that the ties you use to dye your Easter eggs are 100% silk. Ties that include other man-made materials like polyester will not work since the colors from the fabric will not transfer to the egg during the dying process.
Step 3. Deconstruct the Silk Ties
Once you have your silk ties, it is time to deconstruct them.
To start, remove the inner lining and any labels that may be sewn to the back of the necktie.
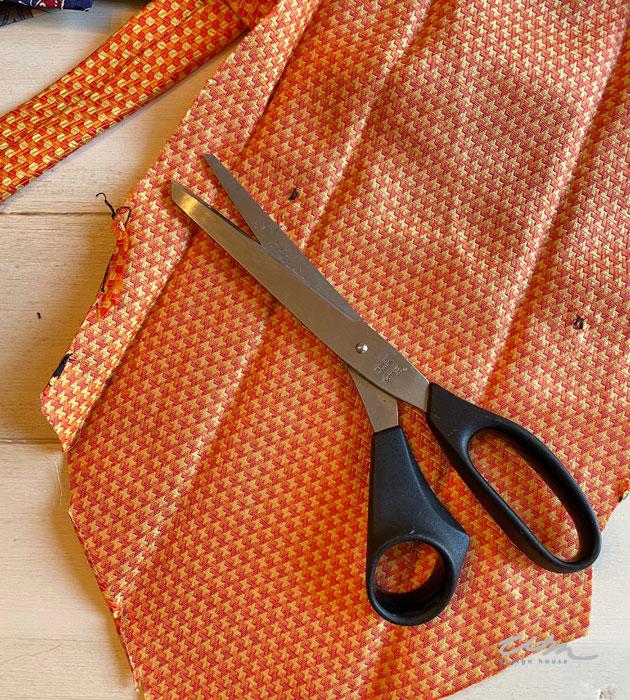
I recommend using a pair of fabric scissors to cut apart your silk ties, but if you do not have any, you can use a sharp pair of regular craft scissors.
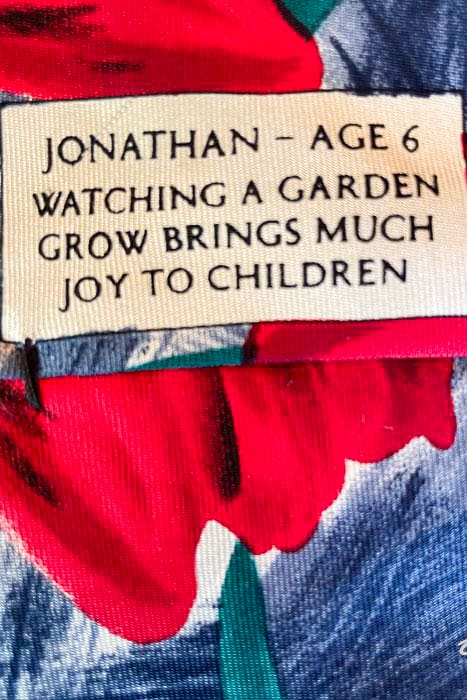
The lable on this sweet tie was part of the design.
It was created by a 6-year-old boy and must have been for a fundraiser.
(Side note: The pattern from this silk tie created one of my favorite dyed Easter eggs!)
Step 4. Wrap Uncooked Eggs with Silk Ties
Next, cut pieces of silk from your ties that are large enough to wrap around your eggs.
Use some rubberbands to carefully tie up the silk at the top of each one of the eggs.
Be sure not to wrap the silk pieces around the egg too tightly or the egg will break!
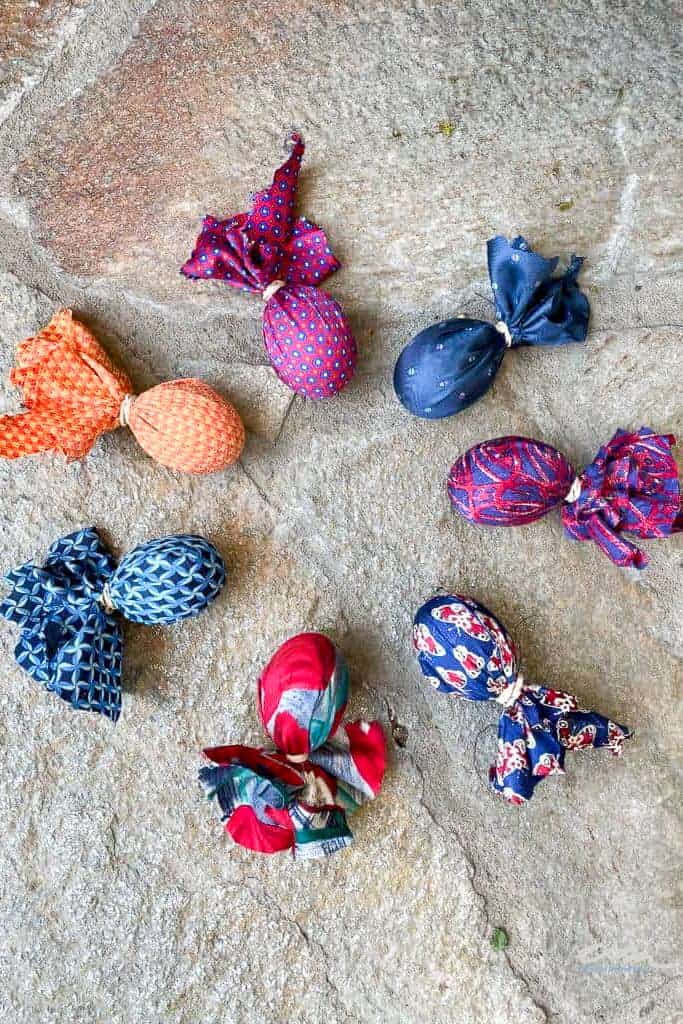
Since I knew I wanted to place them in egg cups, I tied my eggs at the narrow end.
This way the larger end of my Easter eggs would display the pattern from the dye of the silk ties more prominently.
If you want your pattern to be more on the side of your eggs, wrap the silk tie pieces around them horizontally instead of vertically.

Tip from wendy’s craft room:
Be sure that the right side of the silk is against the eggshell so the pattern transfers correctly. The more direct contact the silk has with the egg, the clearer the imprint of the pattern will be
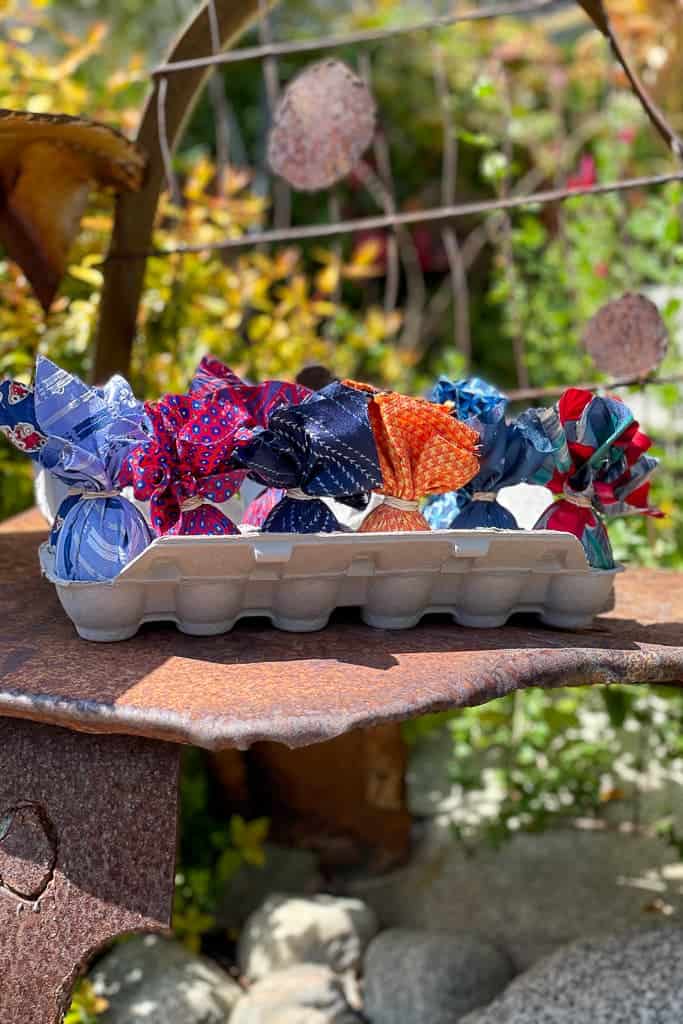
Step 5. Wrap the Eggs with White Fabric
After wrapping all your eggs in silk ties, it is time to wrap them in some white cotton fabric.
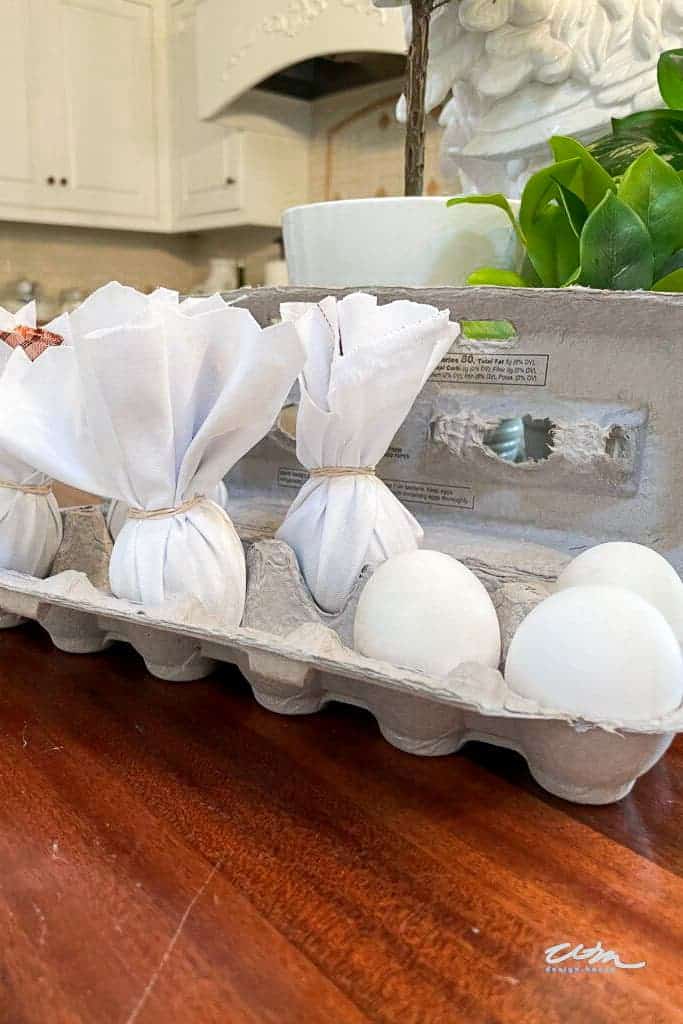
This will help prevent the dye from the silk ties from transferring to the other Easter eggs as you boil them.
Step 6. Hard-Boil and Dye Your Easter Eggs
Now put all your eggs in a large stock pot and cover them with water.
Then add 1/4 cup of white vinegar for every 8-10 eggs.
Once the water comes to a boil, cook your eggs for 20 minutes.
When they are done, use a slotted spoon to carefully remove your dyed Eater eggs from the boiling water.
Step 7. Cool Your Dyed Easter Eggs
Now is the hard part…you must let them cool before unveiling their beauty.
This is the hardest part for me, I like instant gratification!
Place your dyed eggs on a baking sheet on your kitchen counter and let them cool for about 20 minutes.
Once they are cool, remove the white fabric and silk ties to reveal the gorgeous results of your dyed Easter eggs.

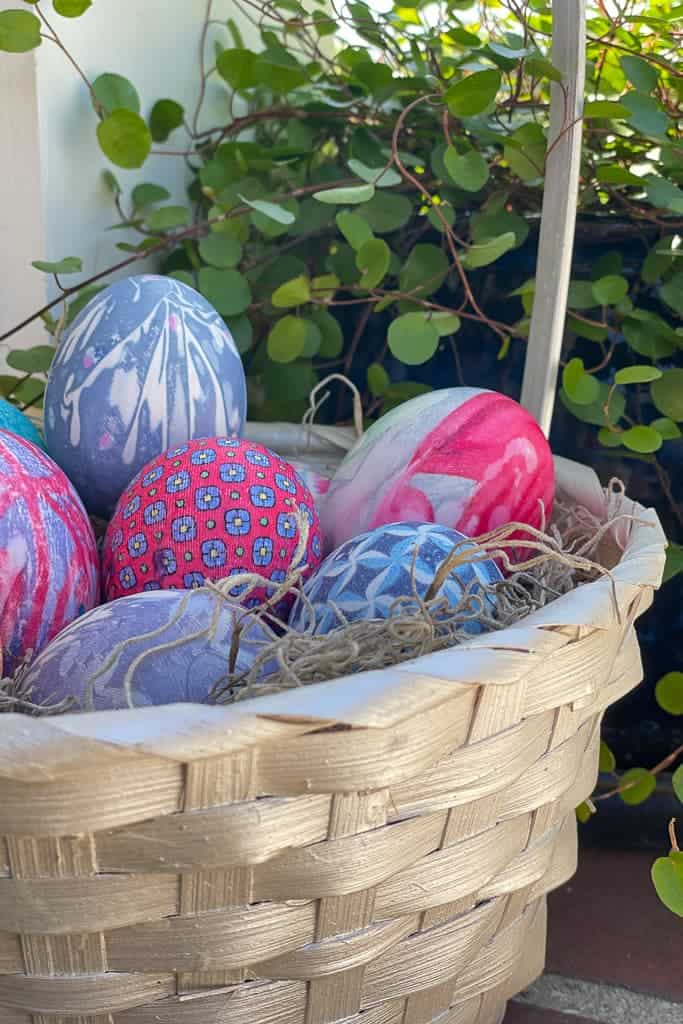
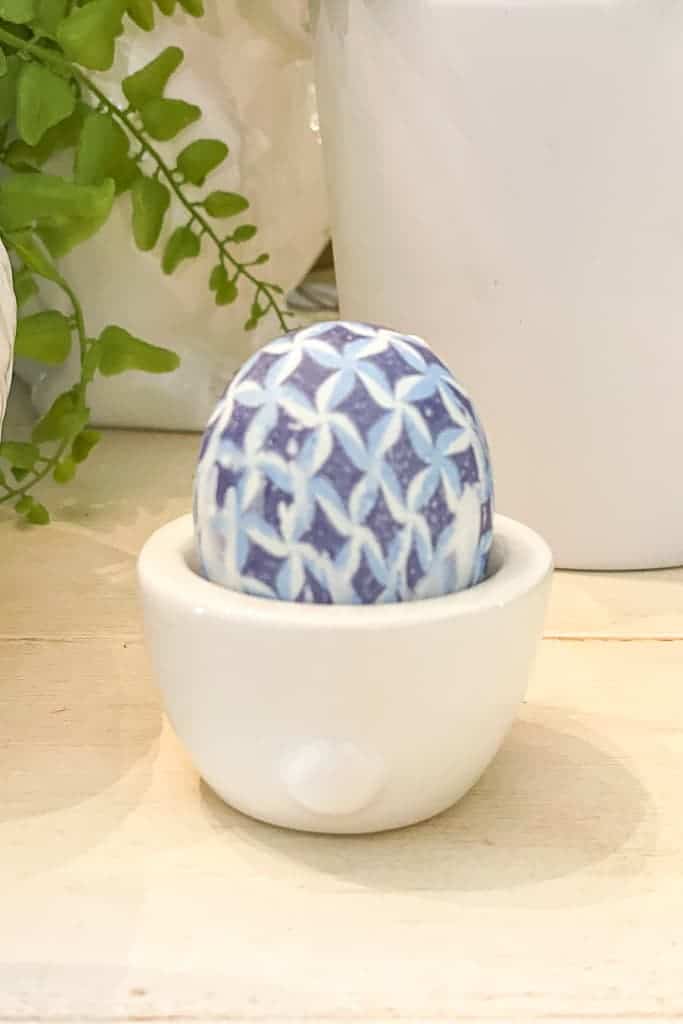
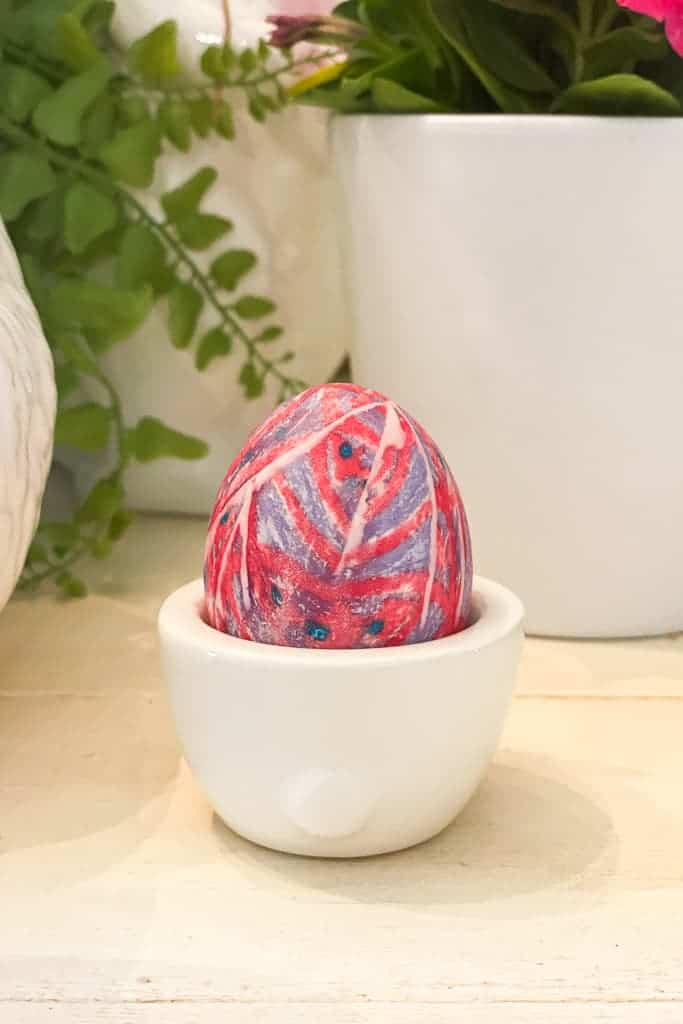
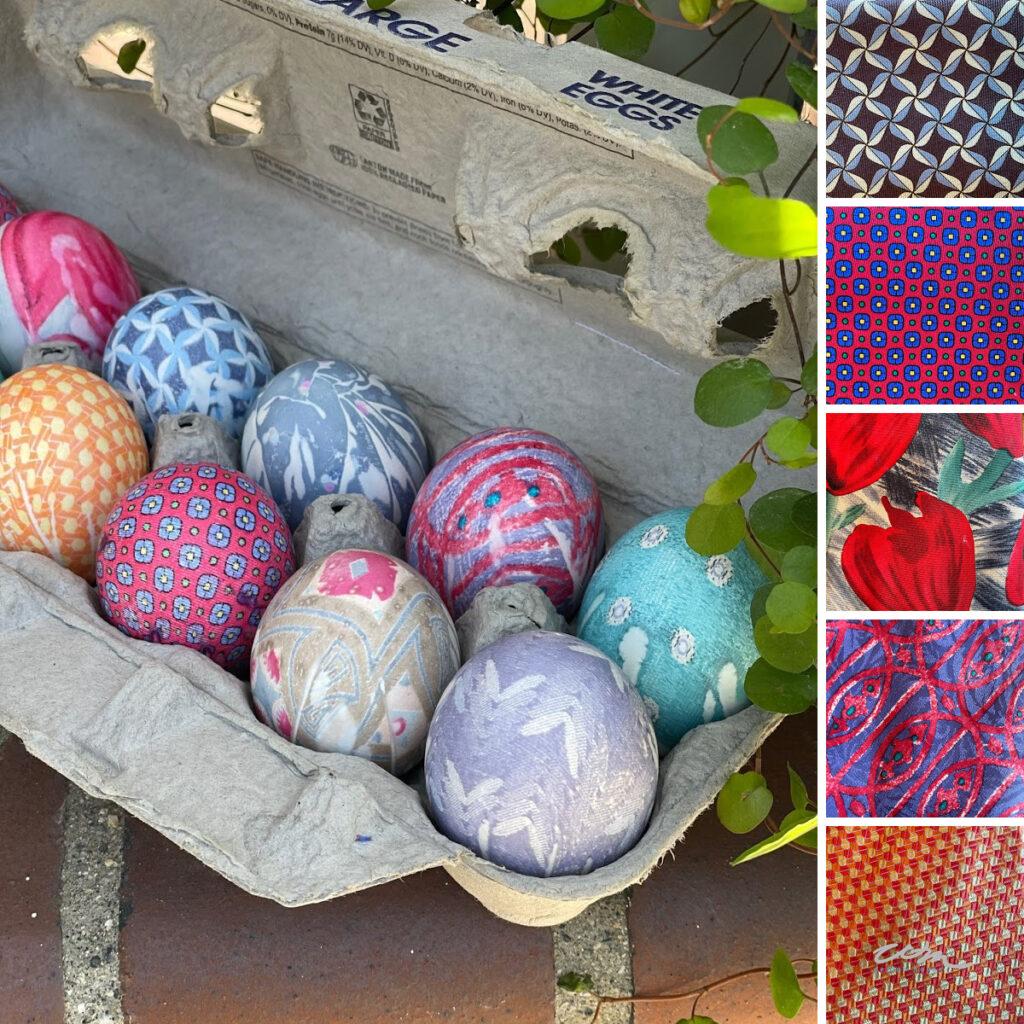
The End Result: How to Dye Easter Eggs with Silk Ties
There is nothing perfect about these Easter eggs, which gives them their beauty and individuality.
You will get a swirly watercolor effect or some white lines on some of the egg shells where there were folds in the silk fabric.
But, overall I love how they turned out and I would recommend using silk ties to dye Easter eggs to anyone!
These dyed Easter eggs are safe to eat, or, if you prefer to keep them for longer, you can carefully blowout the eggs to remove the yolks and whites before wrapping them with silk ties and dying them.

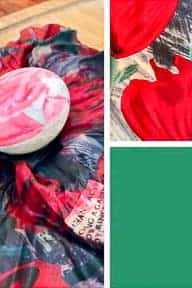
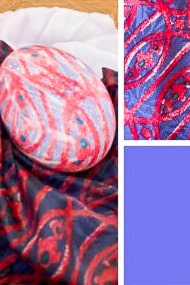
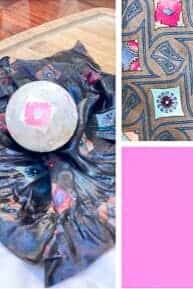
You can see how my dyed Easter eggs match up with the prints from the silk ties on the right.
It is quite exciting, I must say!
Other Easter Crafts from WM Design House
If you love these Easter eggs dyed with silk ties, you might also enjoy some of my other favorite Easter crafts:
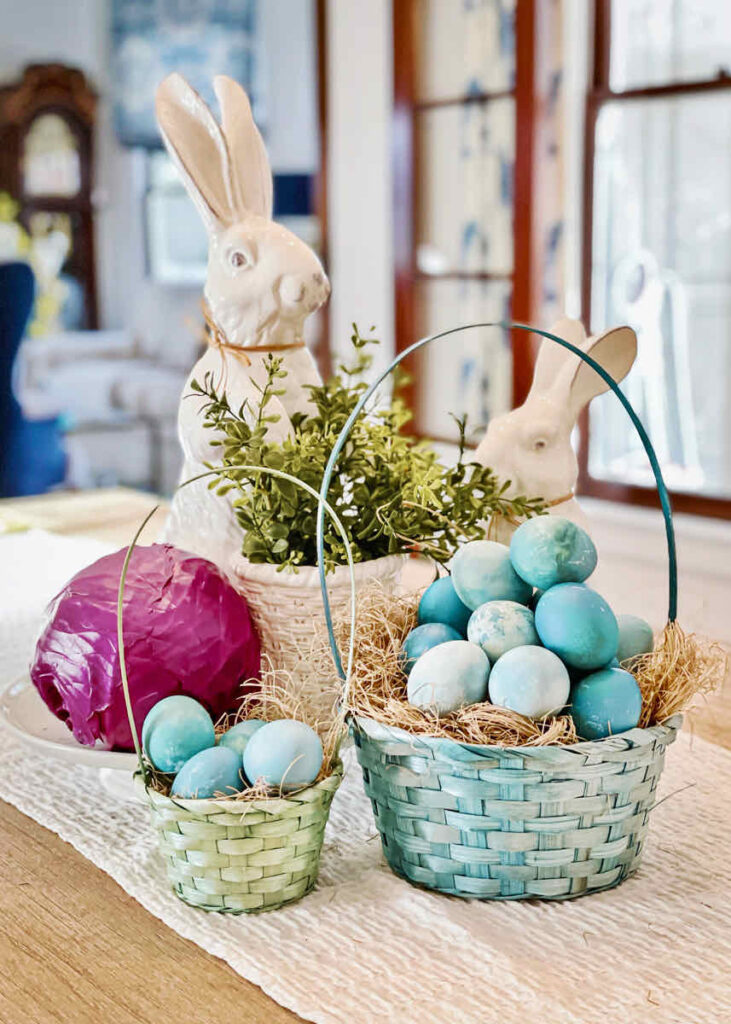
How to make Quick and Easy Red Cabbage Dyed Easter Eggs
Get creative this holiday and give your eggs a unique twist by dying them with red cabbage.
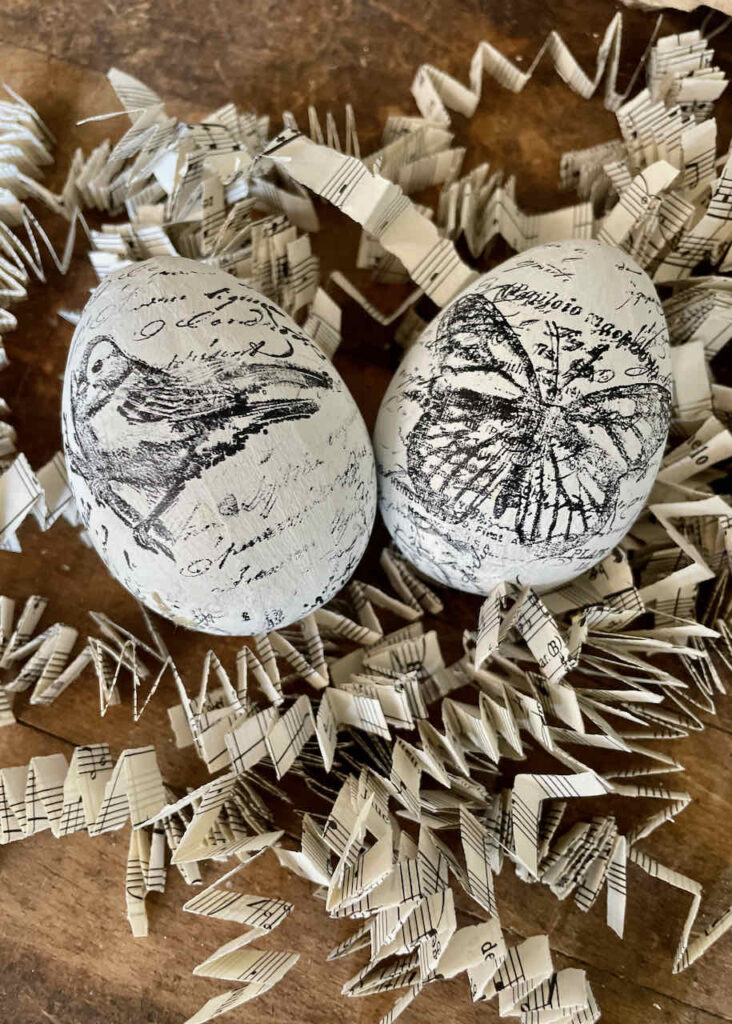
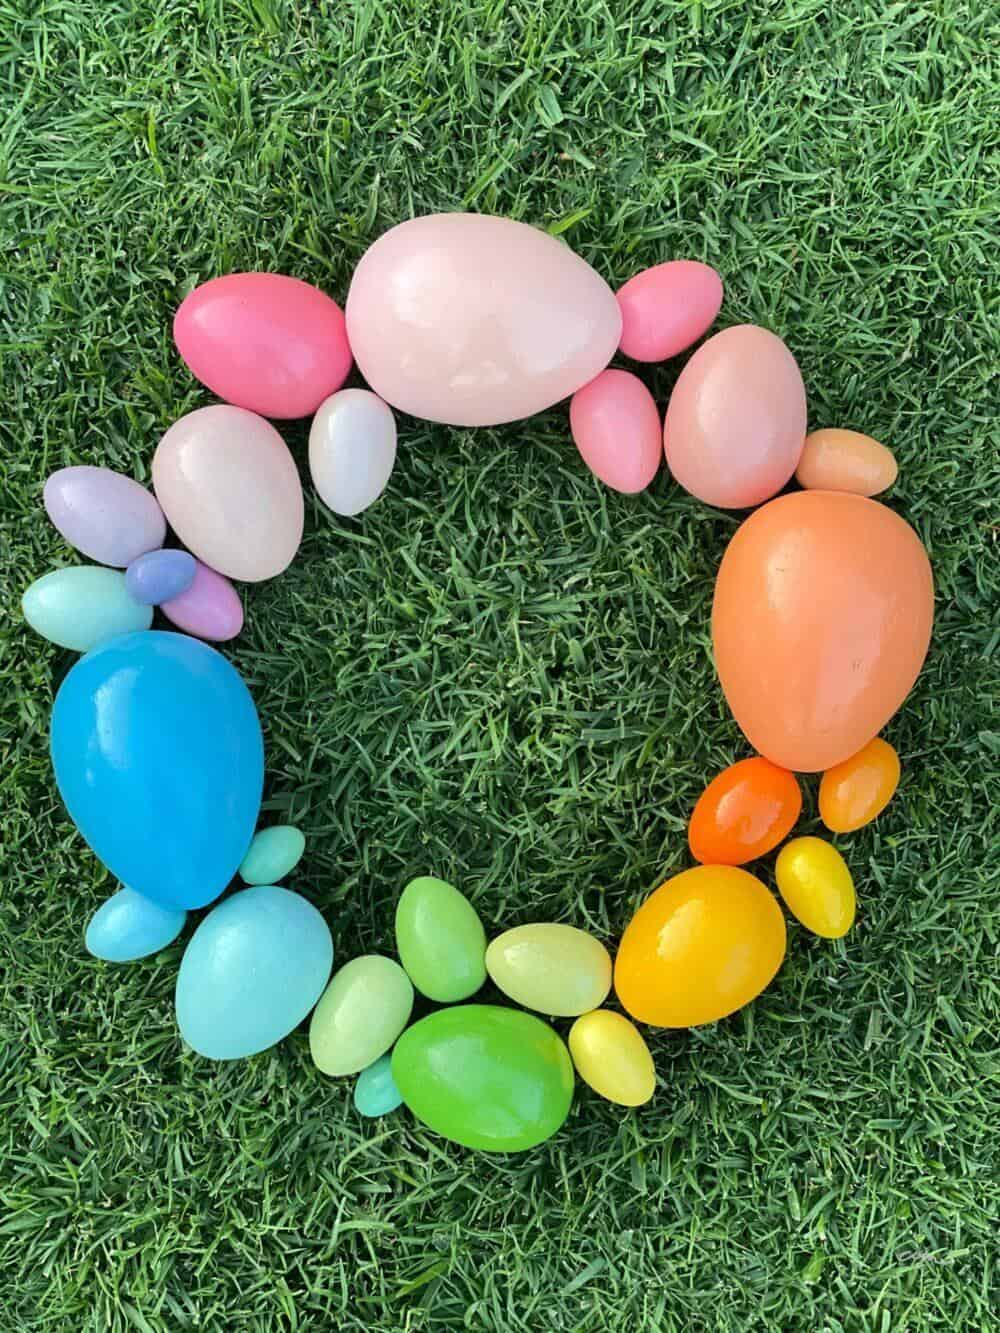
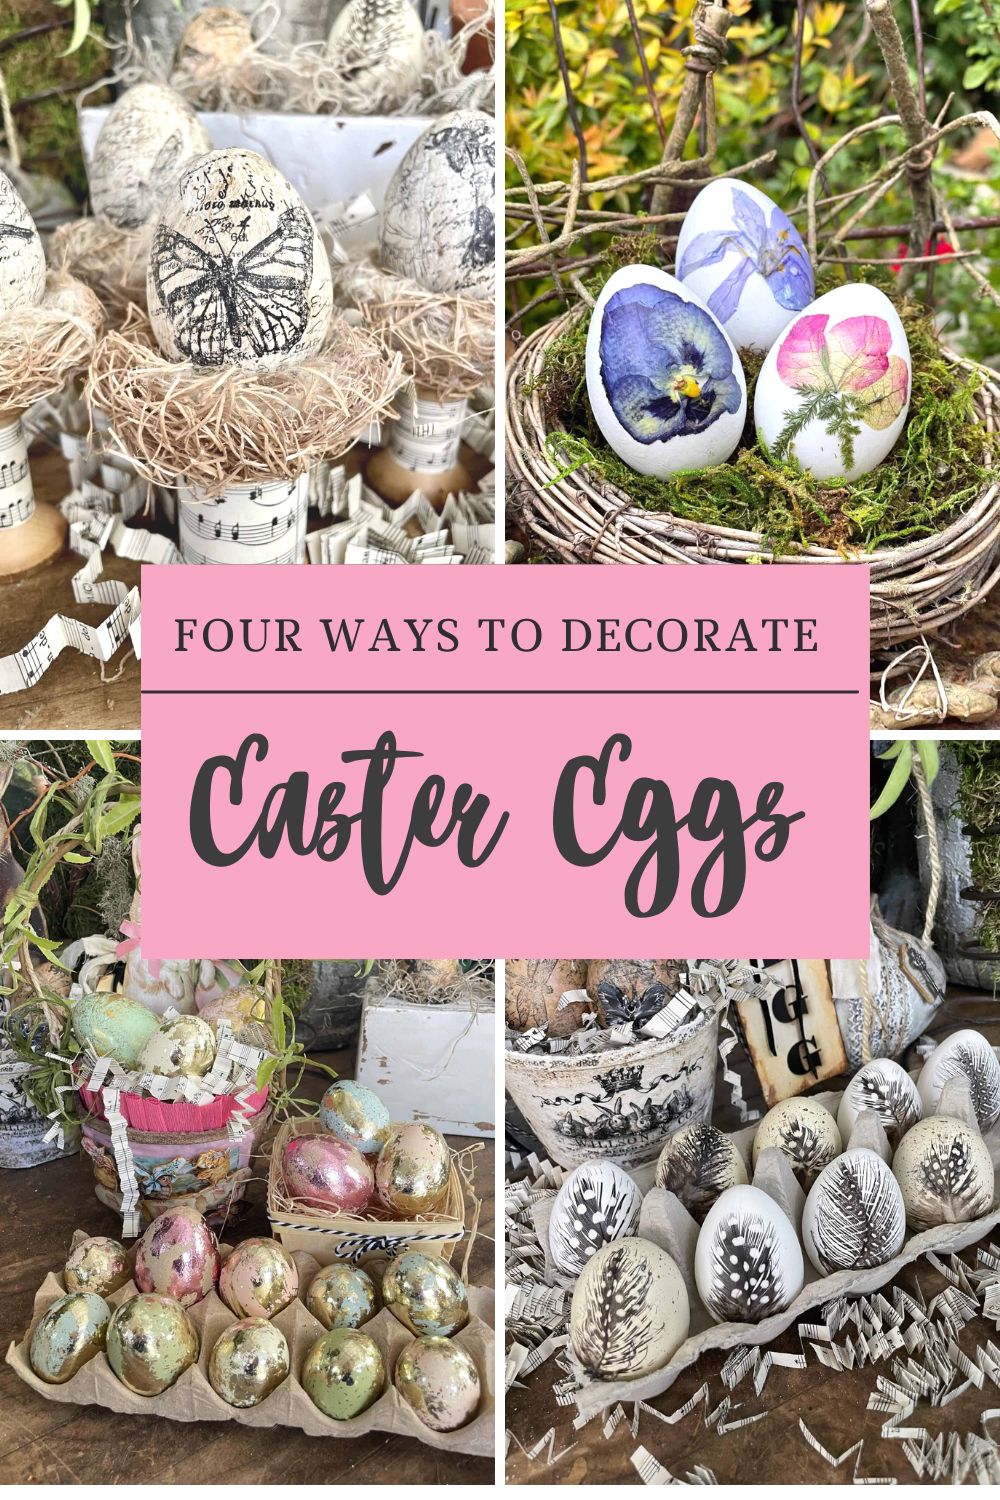
Four of the Easiest Ways to Decorate Eggs
I am sharing not one but four different ways you can decorate Easter eggs that doesn’t involve dying them.
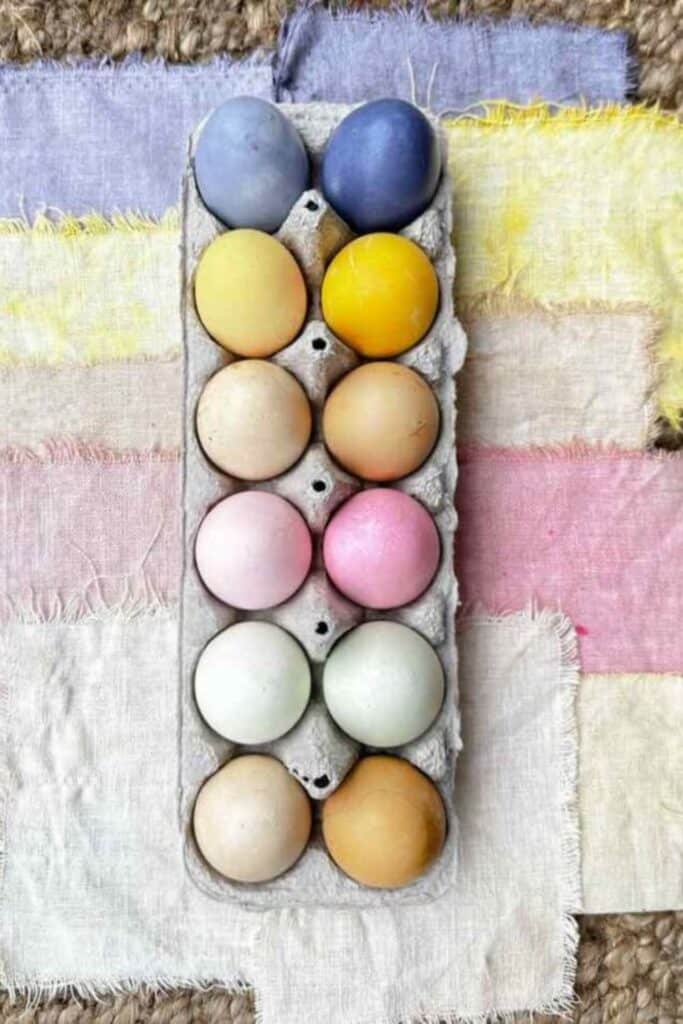
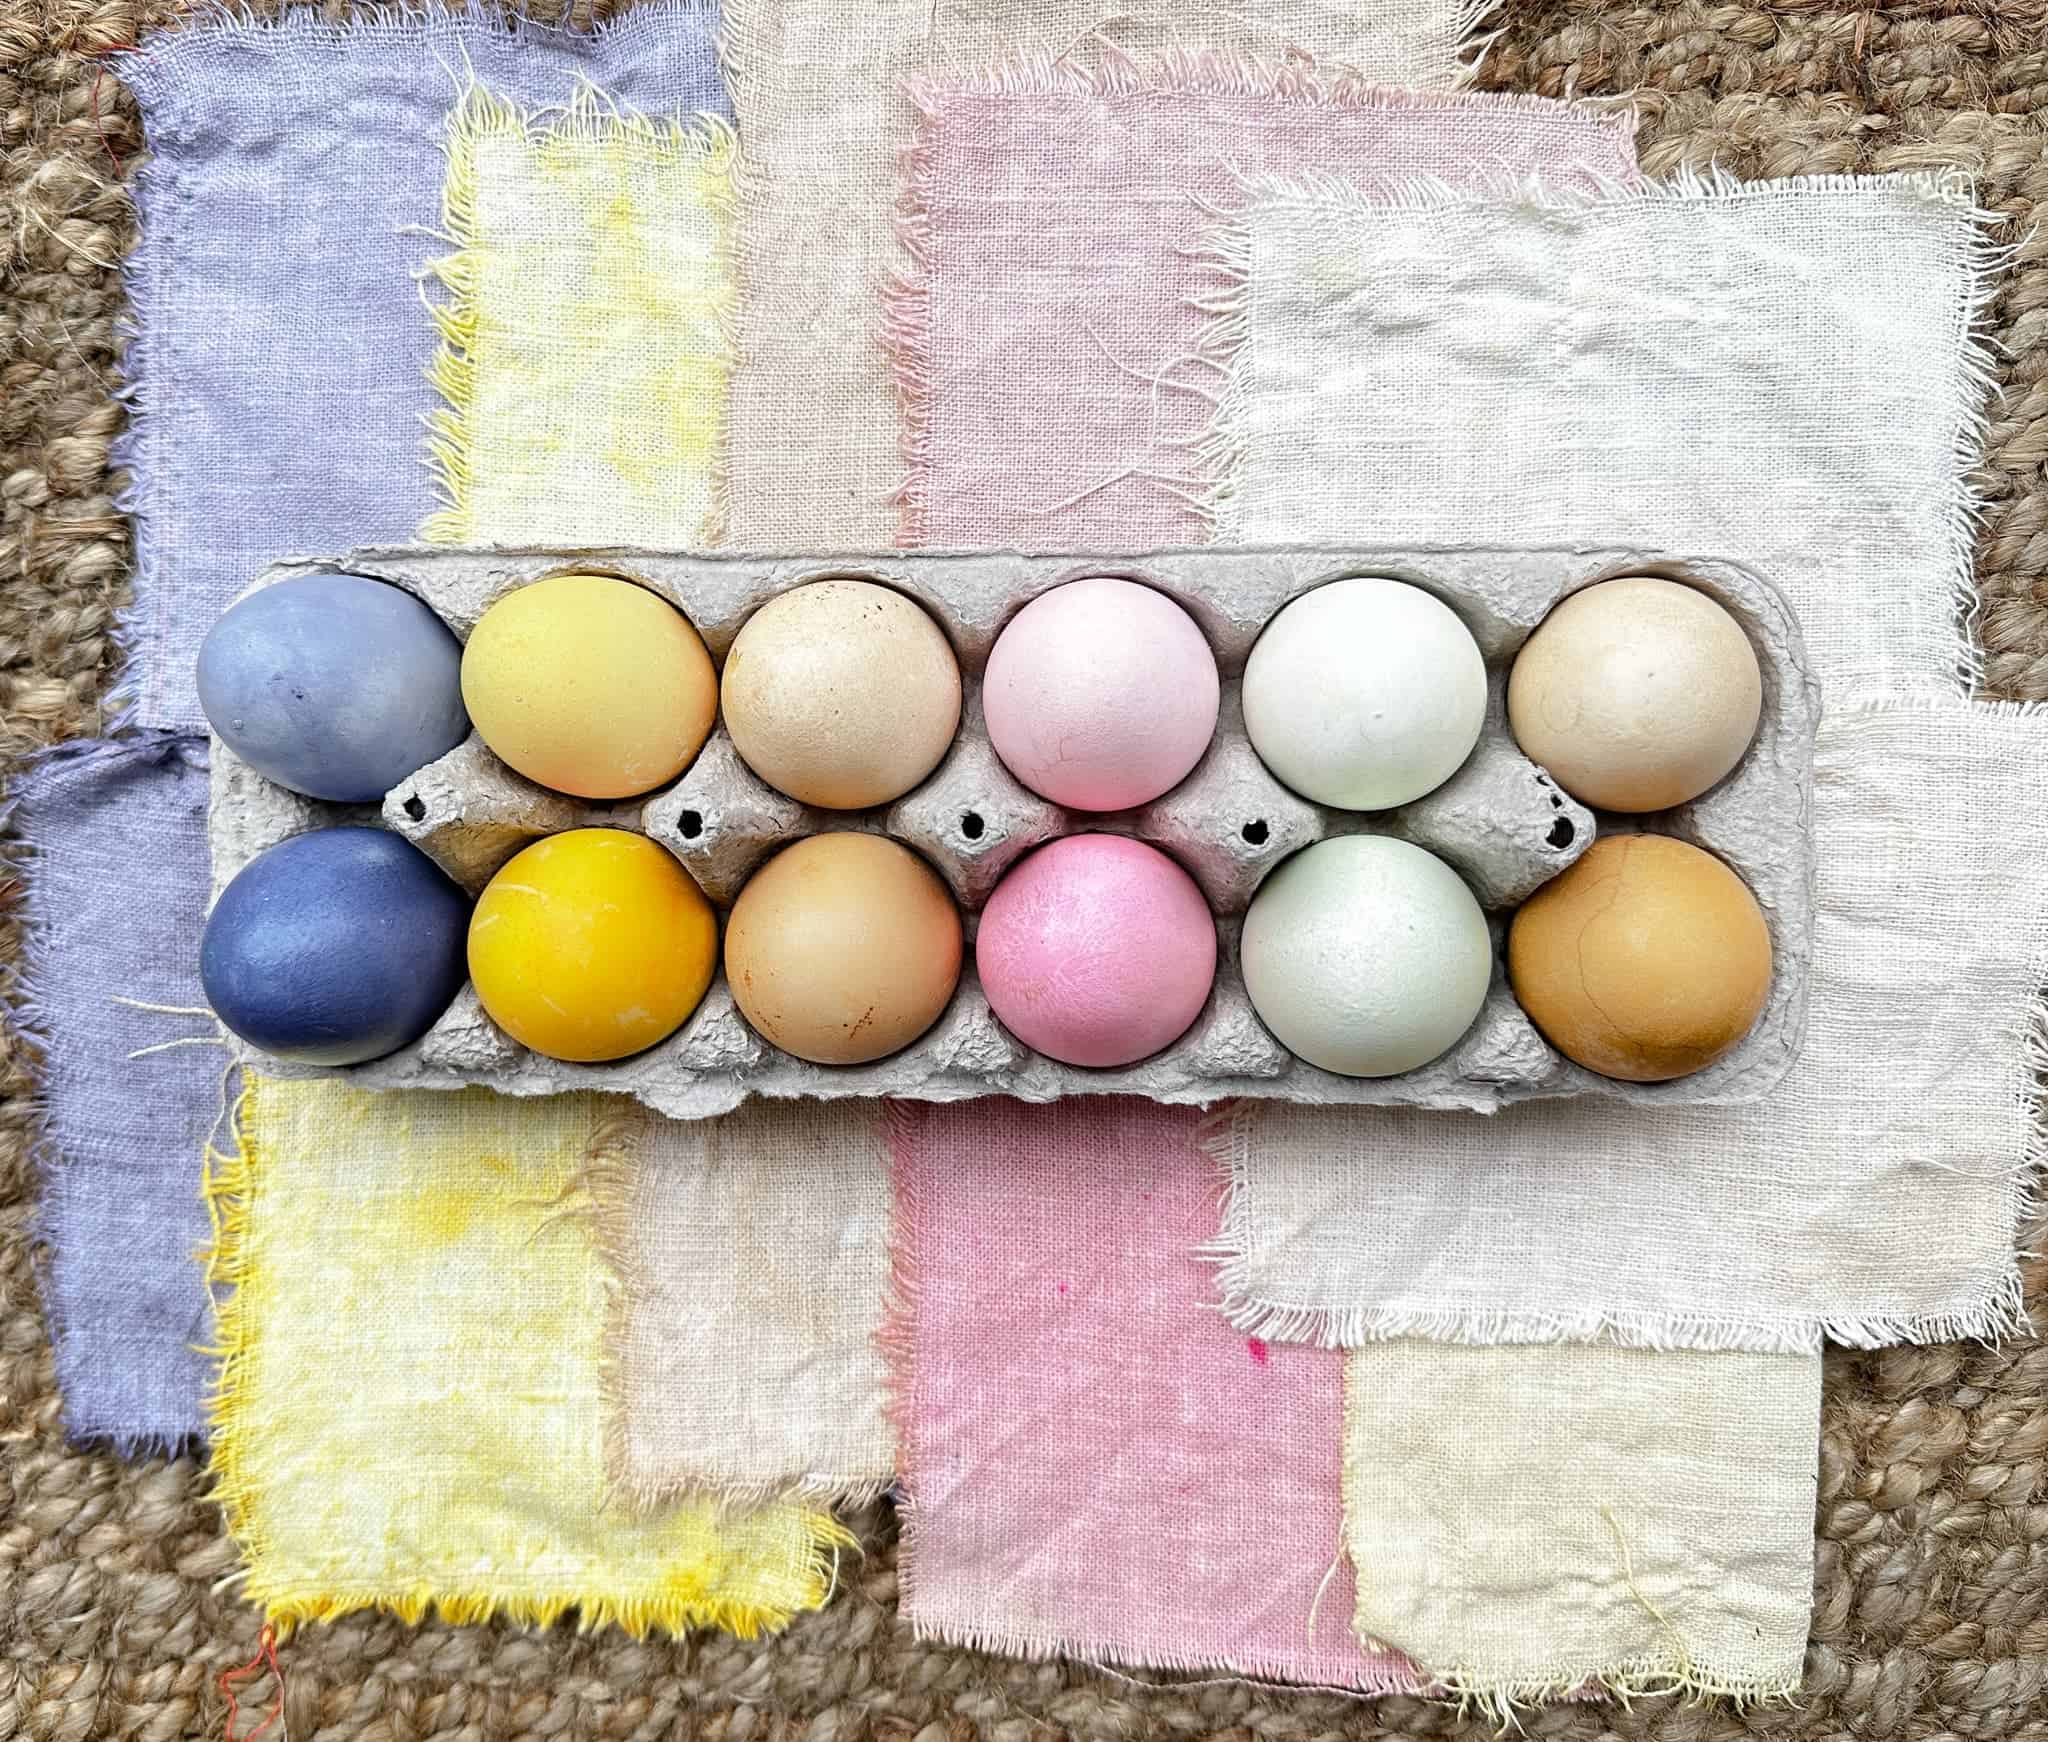
How to Make Natural Easter Egg Dye Using Vegetables and Spices
Learn how to make natural dye for your Easter eggs using vegetables and spices from the kitchen.
This Easter craft project ranks among my all-time favorites!
Do you love them as much as I do?
If you dye your Easter eggs using silk ties, be sure to share your photos!
I would love to see how your dyed eggs turn out.
Happy Creating!


Did you make this craft?
We would love to see what you have created, so mention us @wmdesignhouse or tag us using #wmdesignhouse so we can see your creations!
More about me!

Hello, I’m Wendy – a dedicated homemaker with a deep passion for decorating, gardening, cooking, and crafting. I find joy in harmonizing beautiful elements to fashion a space that is both comfortable and inspiring. I will help you create a beautiful home, one project at a time.

What a cool idea!! Love it! Chose it as a winner for my SSPS link party this week, feel free to check it out =) https://cookandcrumbs.com
Thank you, Taryn; what a treat to be featured for your link party. I can’t wait to stop by to visit.
Wendy, I have never heard of using silk ties to dye eggs but I love how they turned out! You are always so creative. Thanks for sharing.
Thank you Mary! They are so easy and the patterns are so fun. I hope you give it a try.
These are really outstanding! Do you think this would work with wooden craft eggs?
Thank you, Jillian. I have not tried this dying method with wooden eggs, but after doing some research I read where others tried it without much success.
I had forgotten about this method of coloring eggs Wendy! I am always fascinated to see it every time. I have never tried it myself, but your eggs look great, as usual. I am telling you, I think you could be the next Martha Stewart!
Ha! I don’t know about that, but I certainly appreciate the compliment. It’s such a fun way to dye eggs for Eater and the patterns are so gorgeous and unique!
Oh my goodness! What a clever and beautiful idea! I love this!
Thank you, Susan. Happy Easter!
This is amazing, Wendy! I wonder what else you could dye with these!!
Thank you, Chloe. I’ve wondered that too, but haven’t had a chance to try anything else.
They look beautiful Wendy.
Thank you, Elizabeth. Happy Easter!
SUCH an amazing craft, Wendy!! The patterns that the ties left on the eggs are so pretty! Pinned!
Thank you, Rachel. It’s really amazing, and I was surprised by which ones I loved the most. I was disappointed when some didn’t turn out, but overall it was a fun project to try!
One comments. If you don’t blow the inerds out of the eggs before dying, please don’t let children or anyone eat the eggs, that is why my family, along with myself, have been blowing the eggs before wrapping and then putting a plate on them to hold them under the water while boiling. We have a fun time doing it and enjoy each one as it is unwrapped.
Thank you Rhonda for the comment. I appreciate your input.
I LOVE the silk tie eggs! They produced some of the prettiest eggs I’ve seen!, well done! I may have to try this next year, thank you for sharing??????
Thank you so much Dee, they were a lot of fun to make.
The funny part was the ties that said they were 100% silk and
clearly they were not, somone was fibbing, LOL!
Wishing you a blessed Easter.