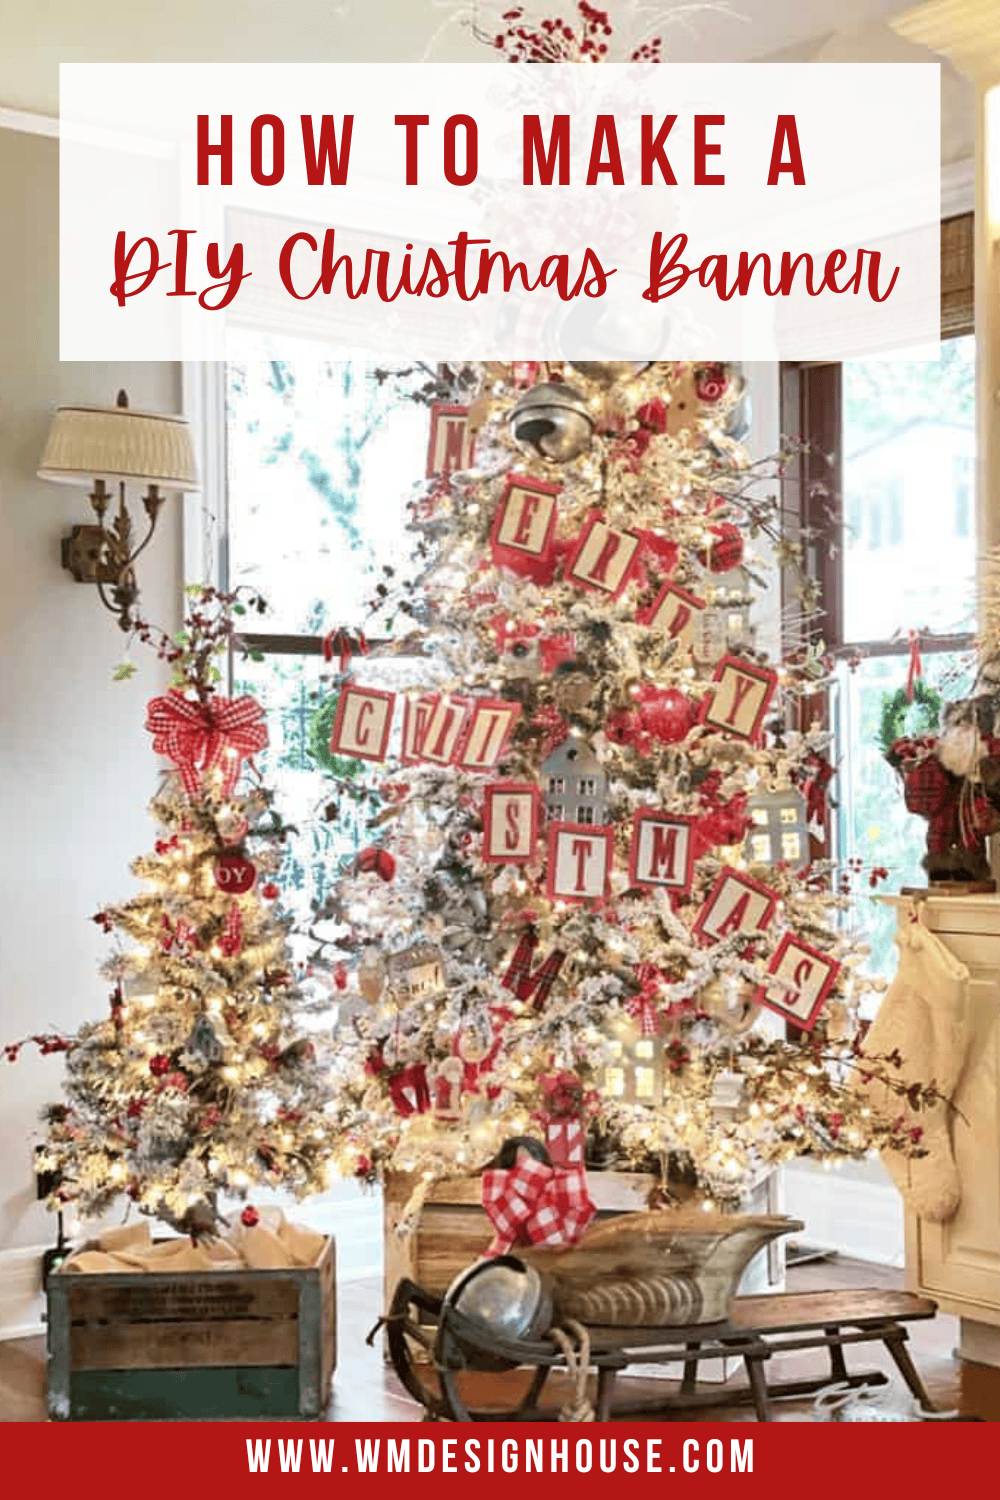
How to Make a Merry Christmas Banner
Why go with store-bought decorations when you can make this cute, festive “Merry Christmas” banner yourself? It’s the perfect way to add a personal touch to your tree and bring some extra holiday cheer to your decor.

On my blog WM Design House, I may sometimes use affiliate links, which means a small commission is earned if you purchase via the link. The price will be the same whether you use the affiliate link or go directly to the vendor’s website using a non-affiliate link. Read my full disclosure policy here.
Festive DIY Merry Christmas Banner
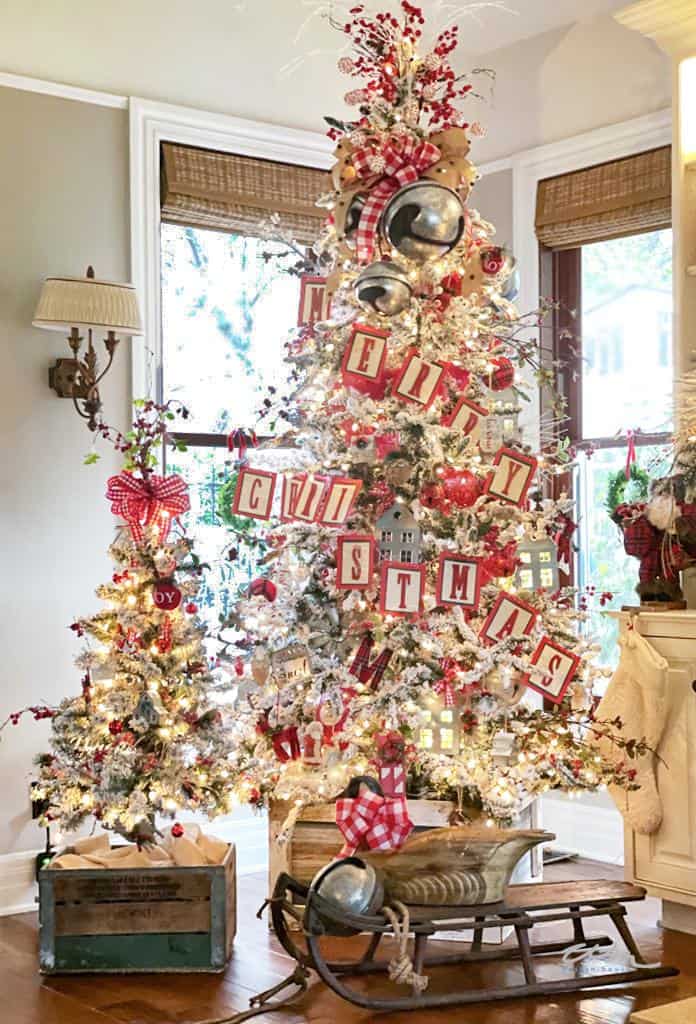
Do you love adding personal touches to your holiday decor? A “Merry Christmas” banner is a simple yet festive way to bring handmade charm into your space. I love using mine to add cheer to my Christmas tree (okay, one of my three trees!).
But this banner also works beautifully draped across a mantel, along a staircase, or even as part of a holiday tablescape. With just a few supplies—like red and green cardstock, wooden letters, and some paint—you can create a custom banner to suit any holiday theme or style.
So, grab your supplies, and let’s get crafting to make this Christmas extra merry and bright!
Materials You’ll Need to Make a Merry Christmas Banner
- Green and red cardstock
- Wooden letters
- Old book pages
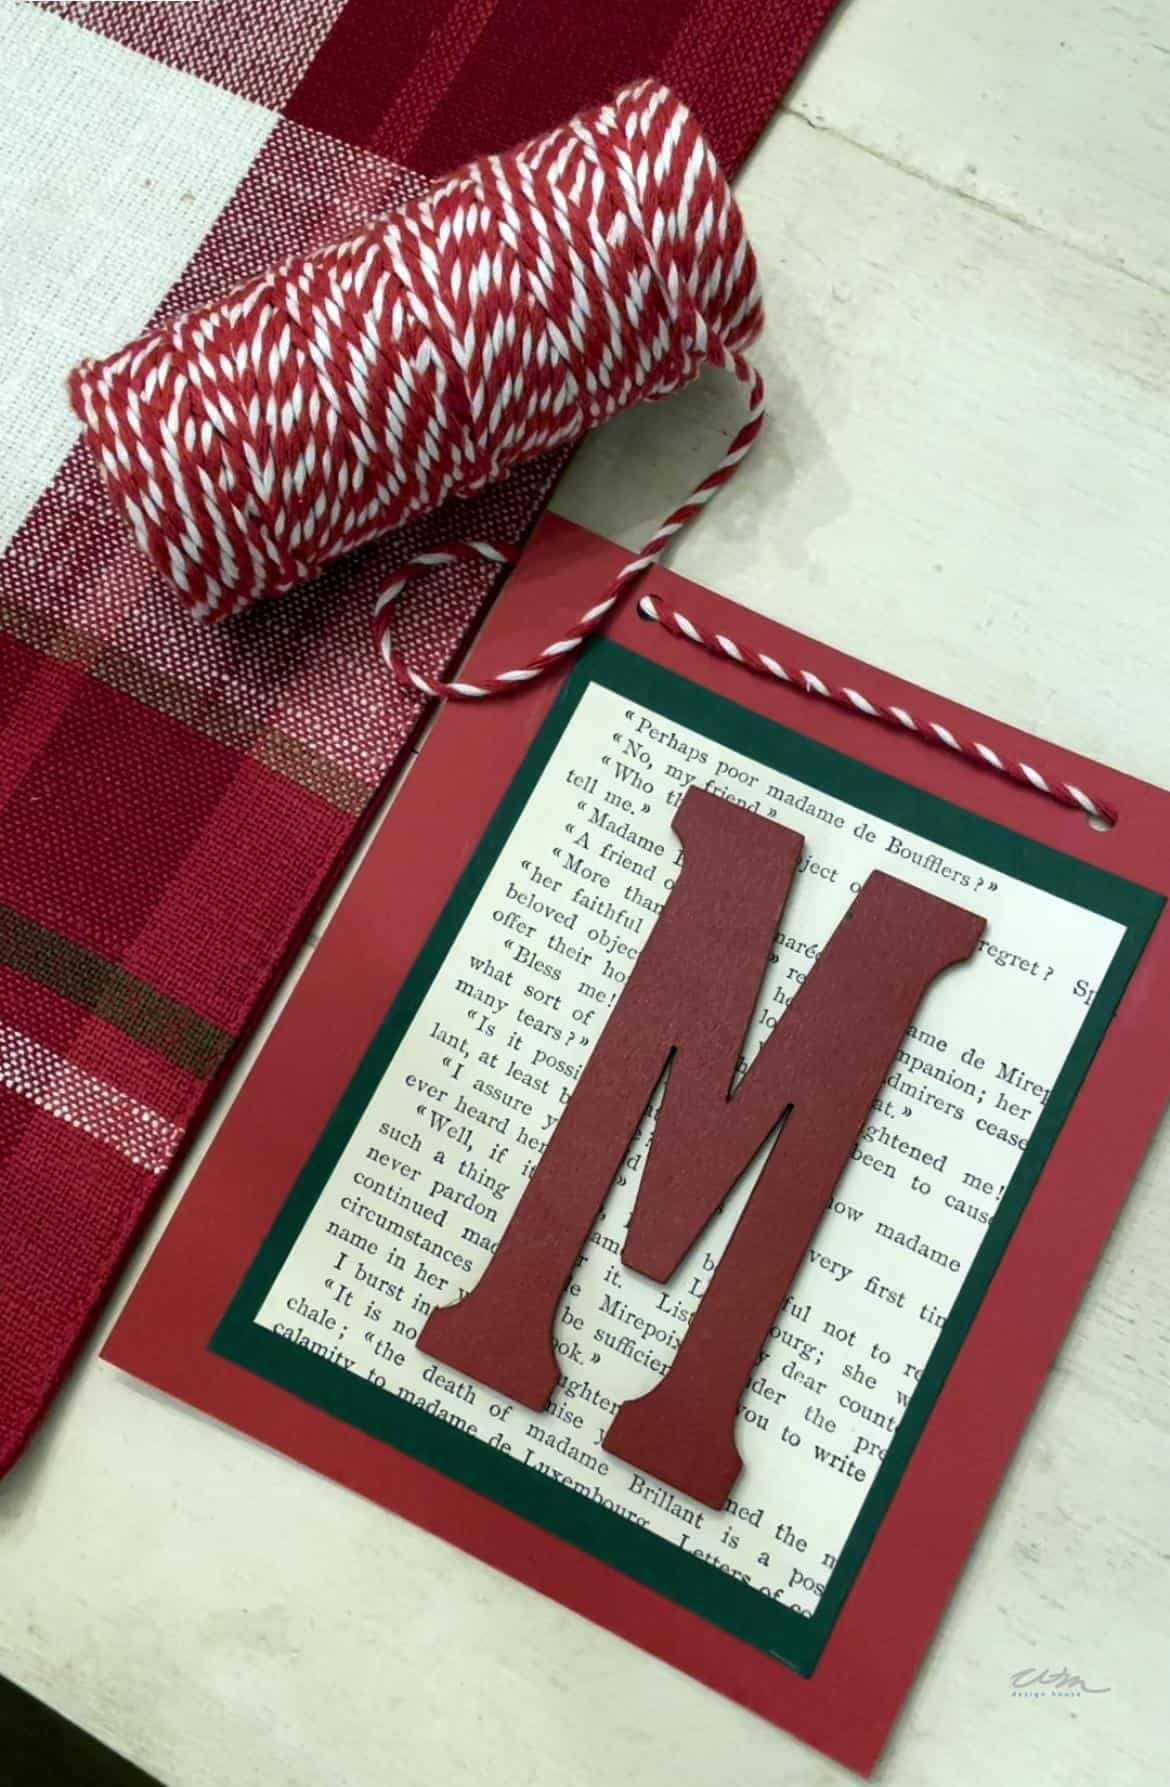
- Red and white craft twine
- Hot glue gun and glue sticks
- Regular glue stick
- Red spray paint
- Paper cutter or scissors
- Single whole punch
How to Make a DIY Christmas Banner
As you know, I love to craft and make many of my Christmas decorations. So, today, I am sharing how you can make your own merry and bright Christmas banner.
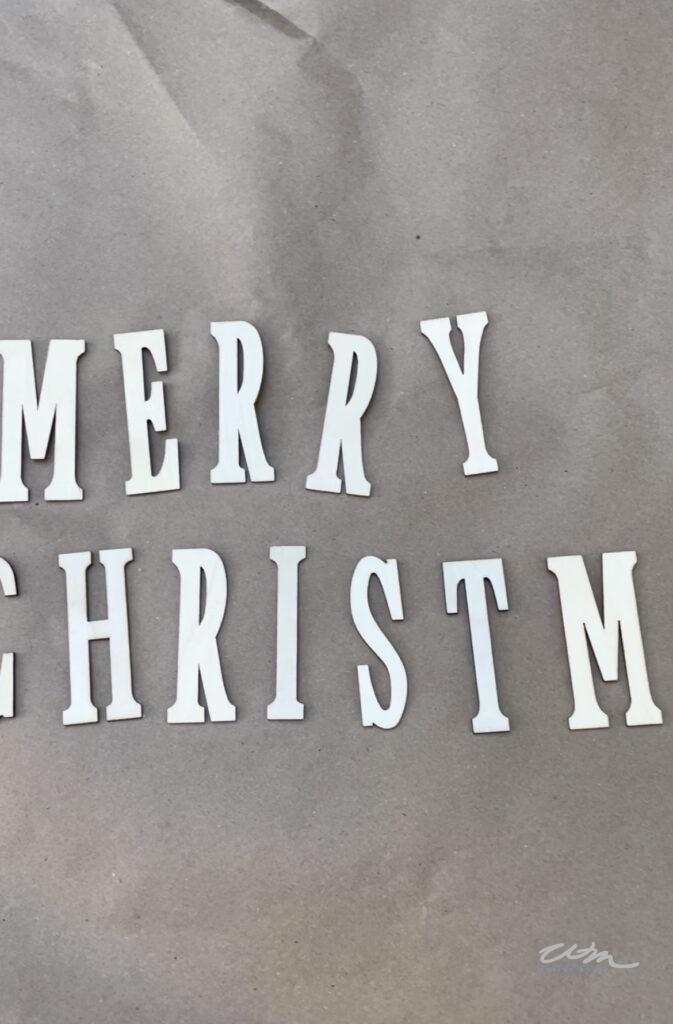
Step 1: Cut and Glue Your Banner Pieces
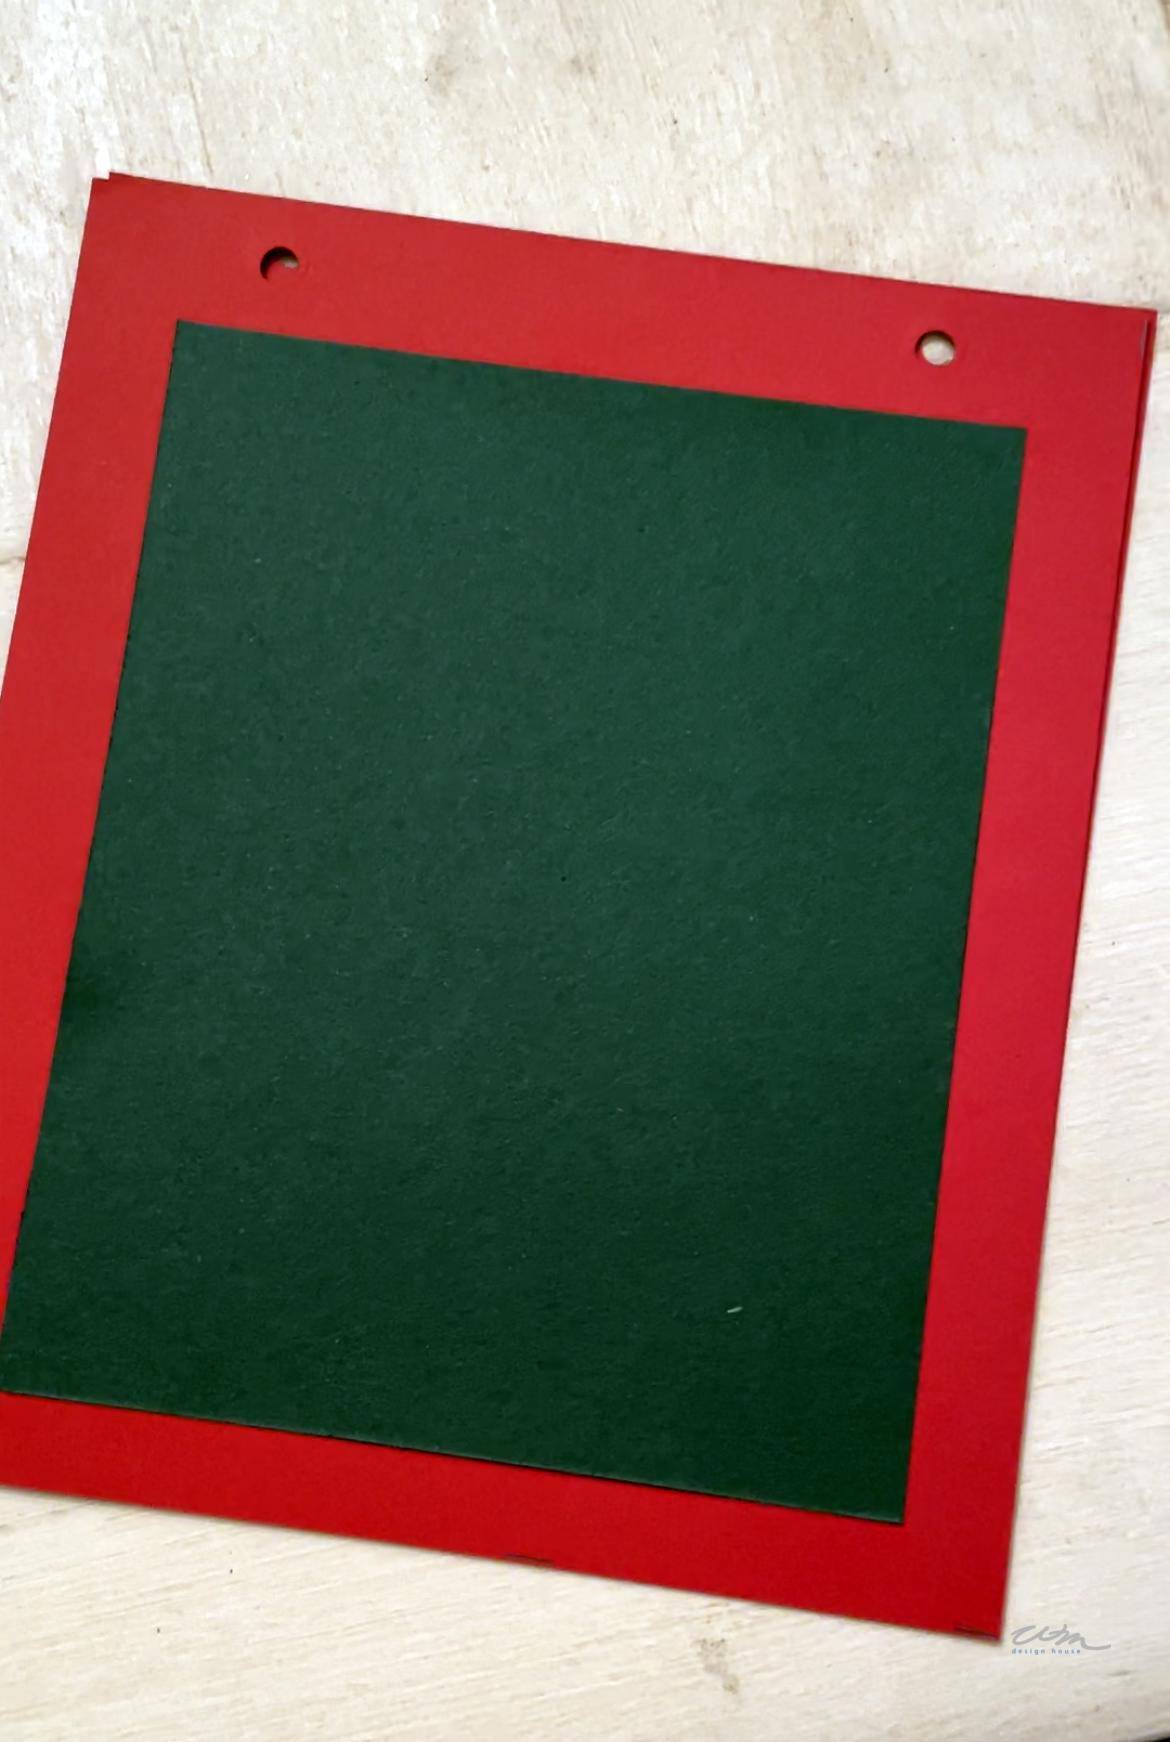
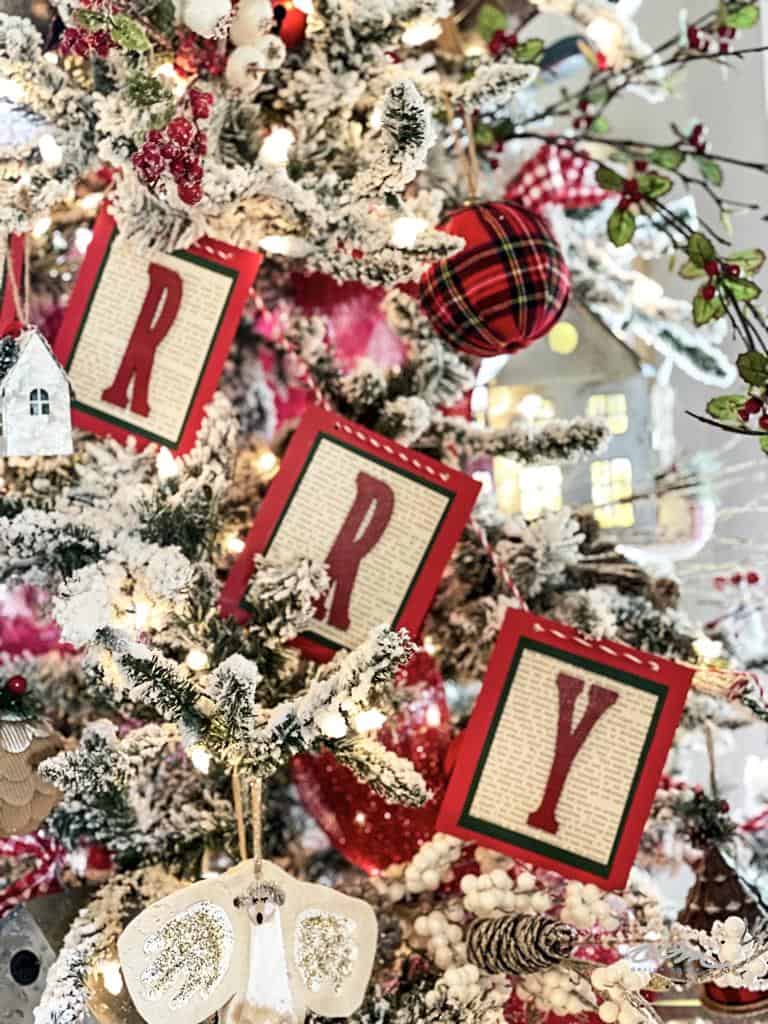
To get started on your DIY “Merry Christmas” banner, grab a few sheets of red and green cardstock. First, trim the green cardstock down to size using scissors or a paper cutter—no need to be perfect here!
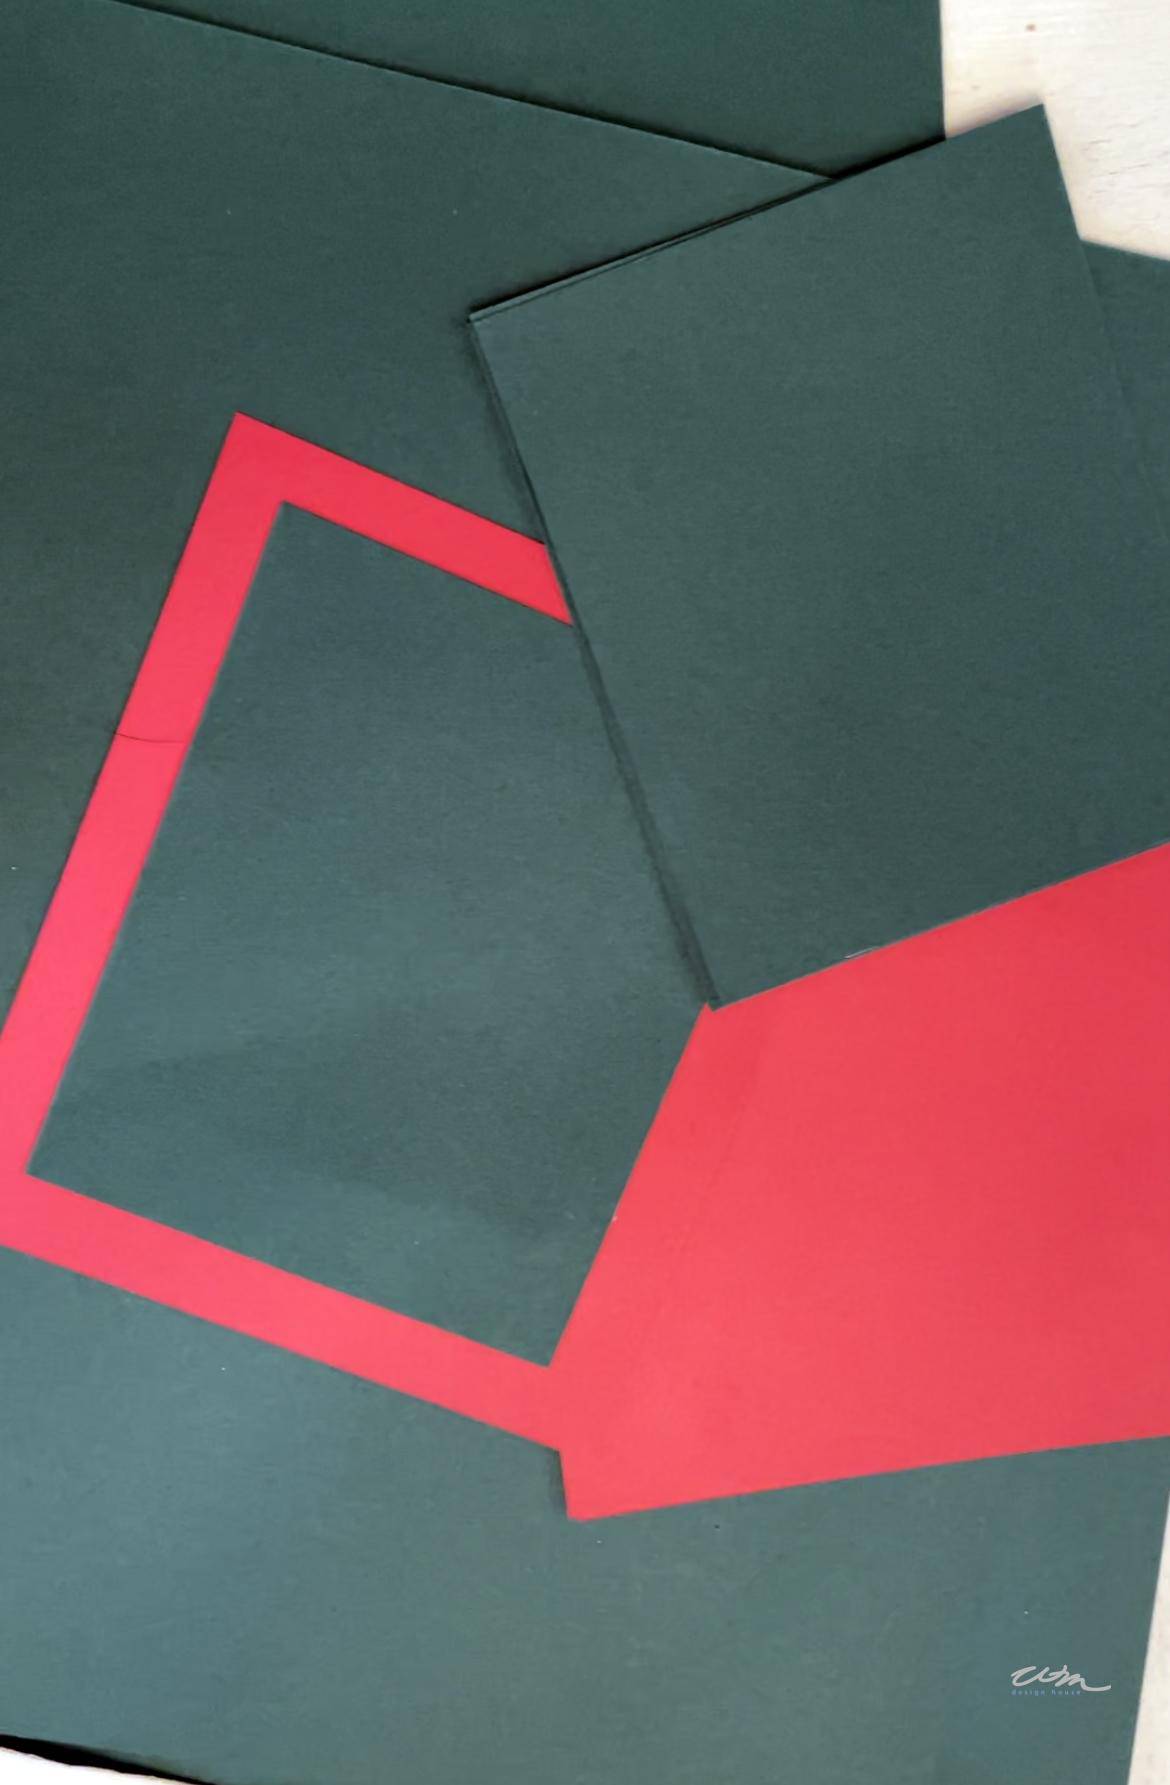
Next, use a glue stick to add some glue on the back of each green piece and center it on the red cardstock, creating a layered look.
Keep going until you have enough banner pieces to spell out “Merry Christmas.” Easy, right?
Then use a single hole punch to make two holes in the top of each piece of cardstock. This is where you’ll string the twine through when your banner is finished.
You can see from the picture above, all of your pages should look like this when you’re finished.
Tip from wendy’s craft room:
Here’s a simple tip for keeping those holes aligned! After you punch holes for your twine on the first piece of cardstock, stack a few more pieces underneath it. Use that first piece as a template by lining it up and carefully punching through the same spots on the rest of your banner pages. This way, all your holes will be perfectly aligned, making it much easier to string your banner together!
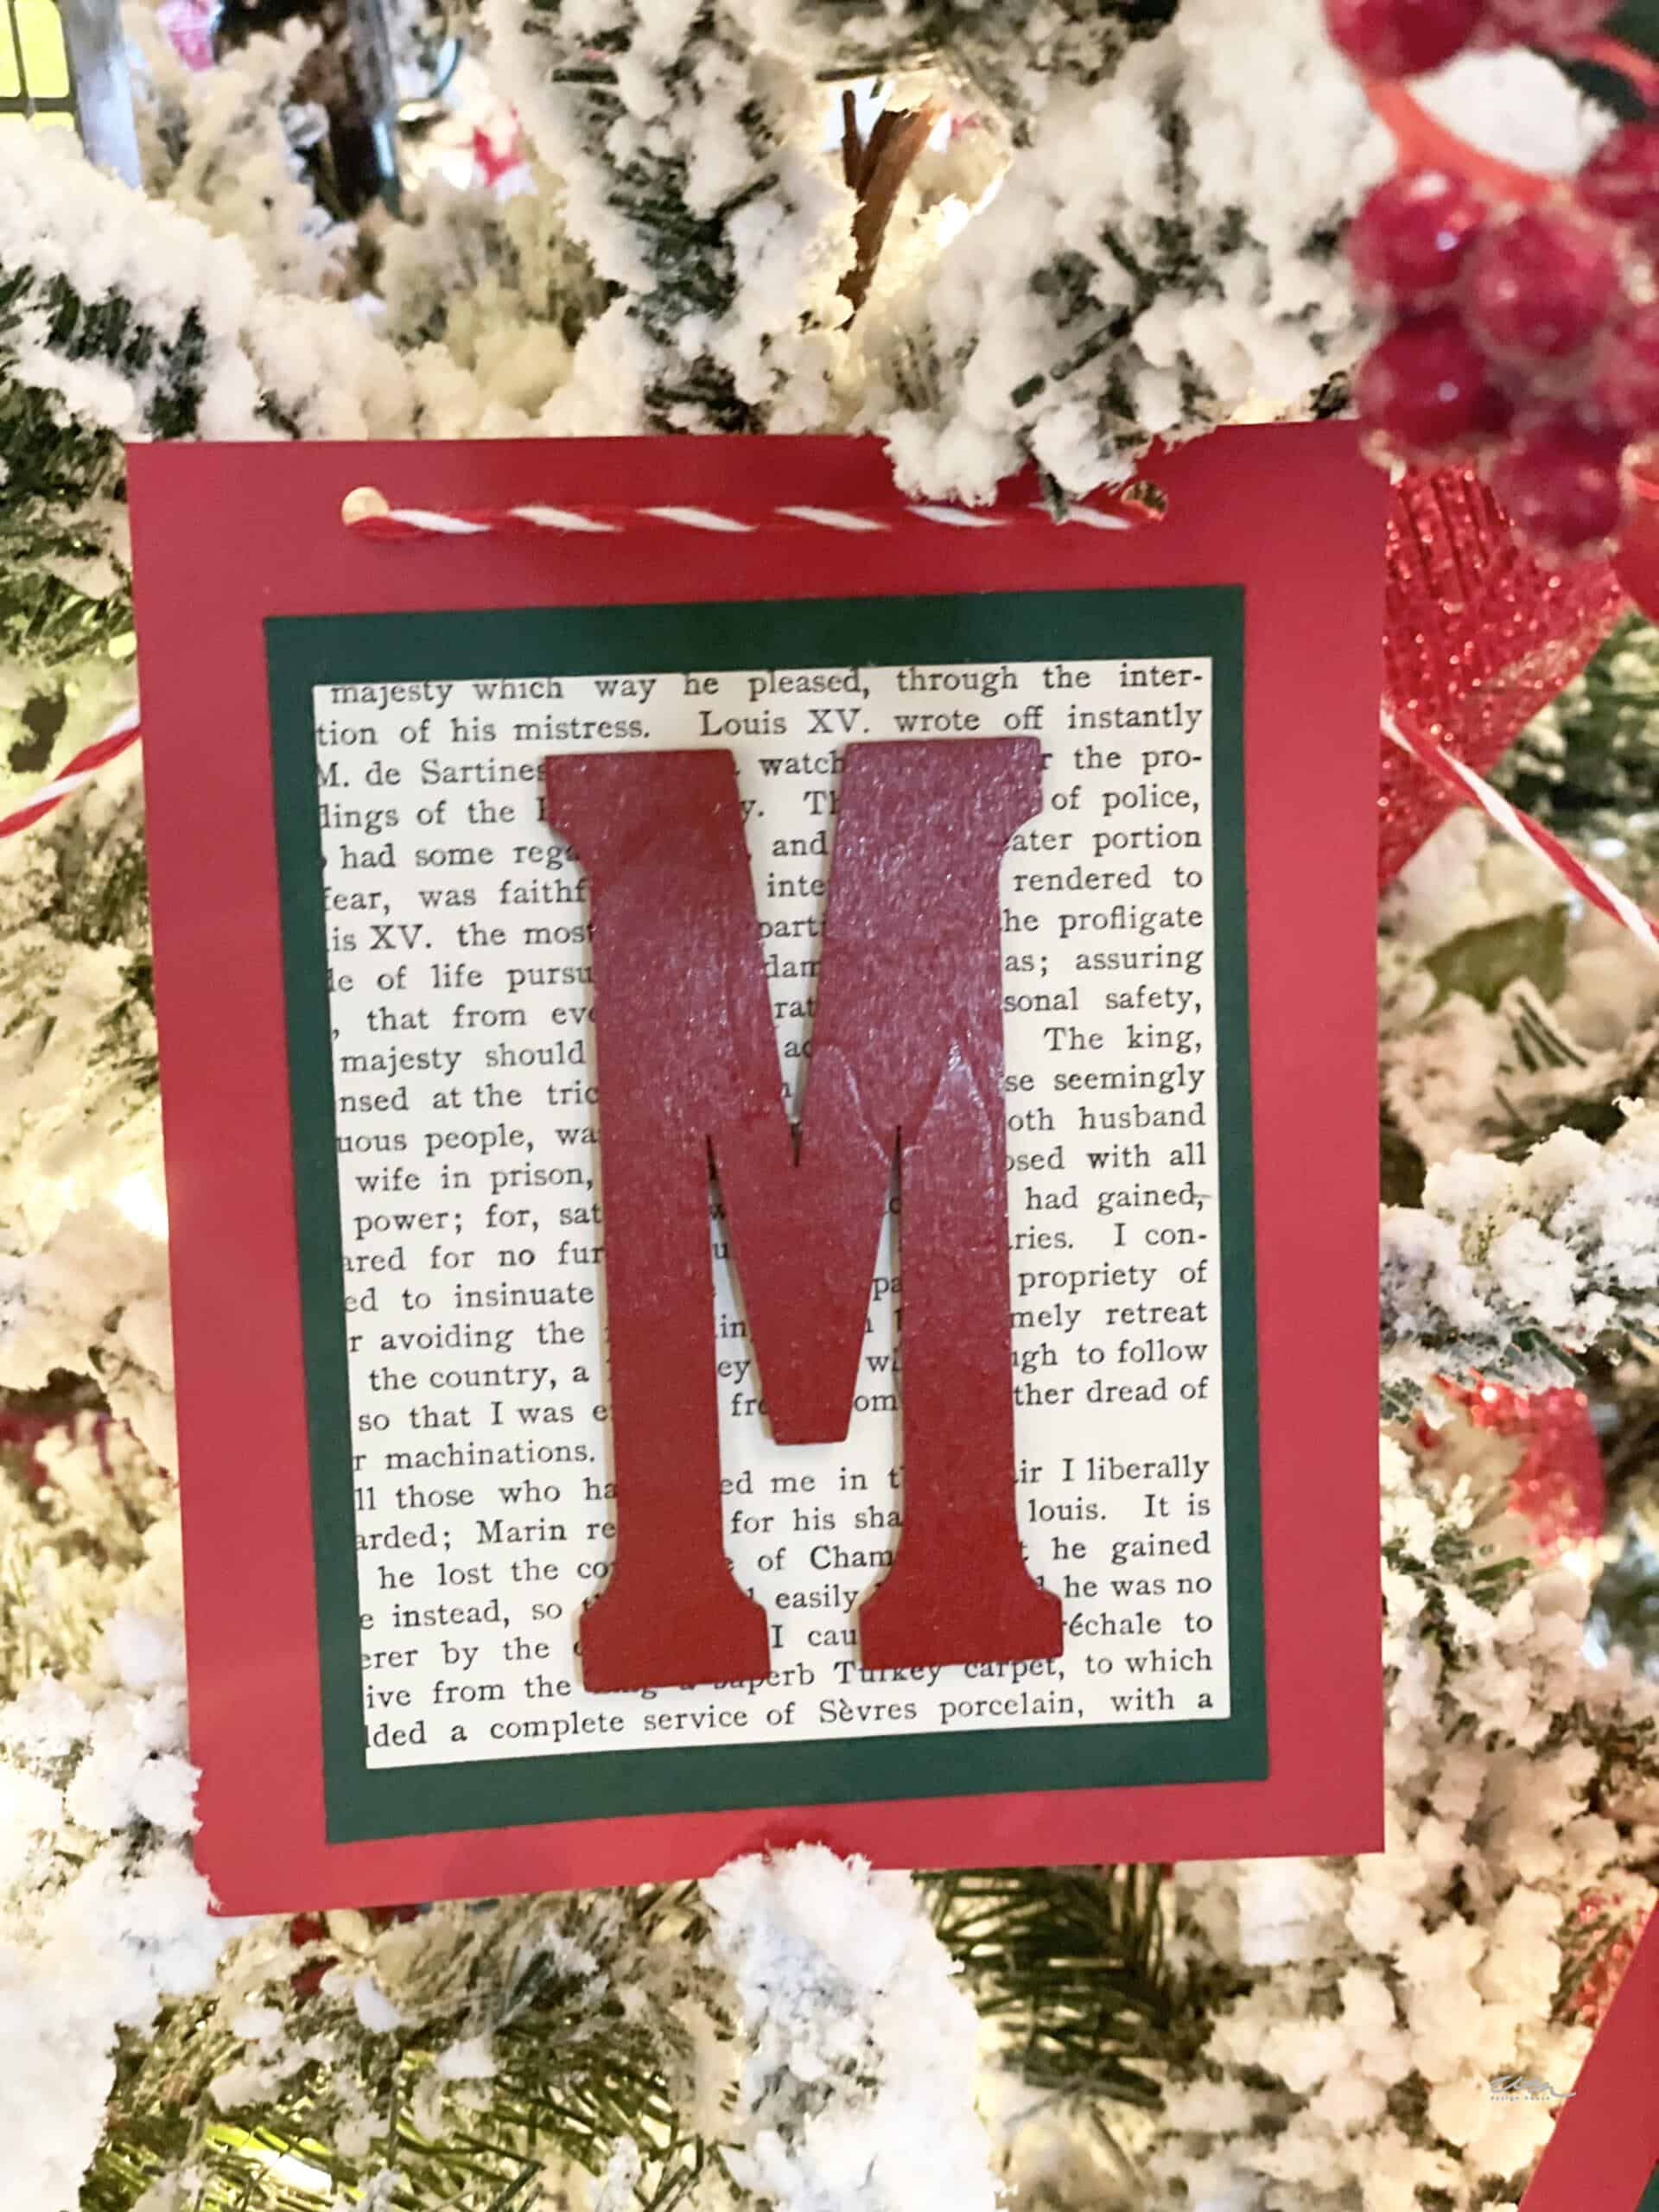
Step 2: Add Old Book Pages
Next, tear out a few pages from an old book—if you don’t have one lying around, thrift stores usually have plenty for just a few dollars! Old book pages are one of my favorite thrifted finds; they’re so versatile for DIYs.
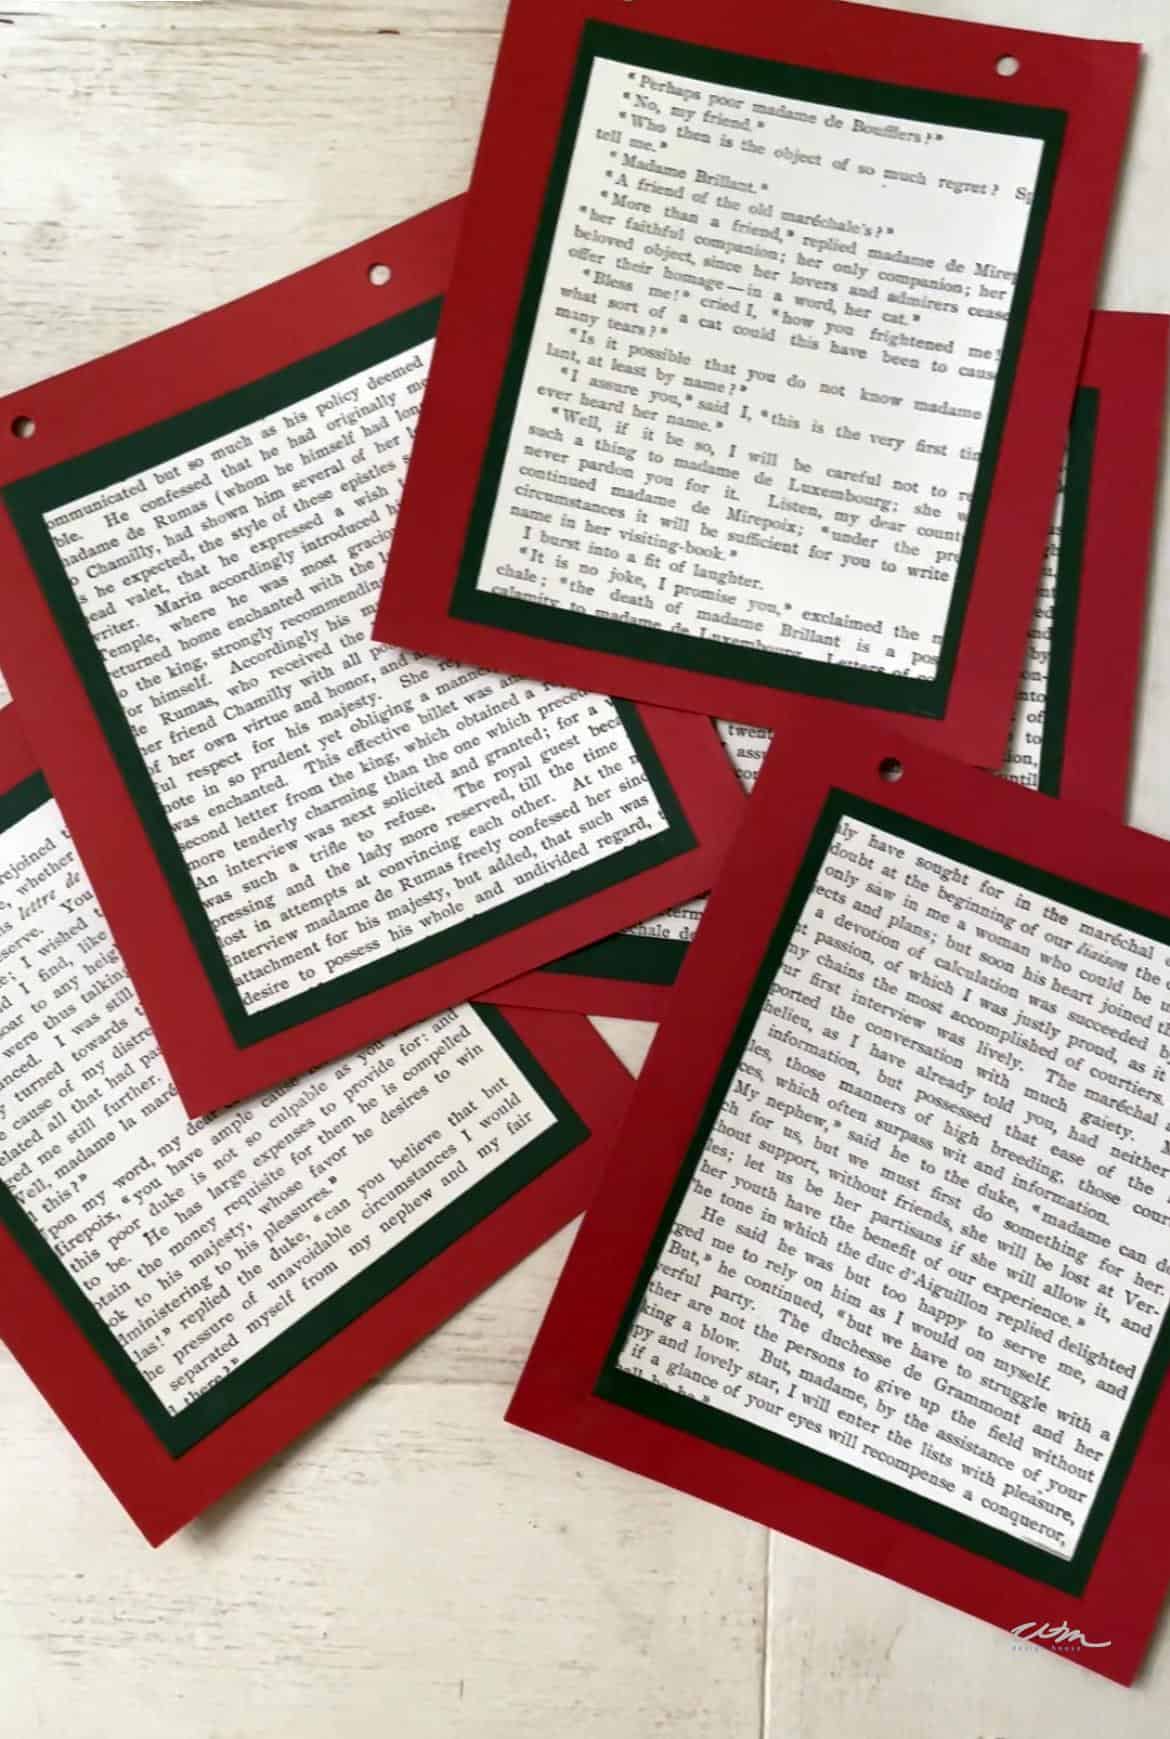
Grab your paper cutter again and trim the pages down to size. Just like with the green cardstock, place some glue in each corner, and carefully center it on your banner piece. Be careful to go light on the glue so it doesn’t bleed through the paper and show up on the front of your Christmas banner!
Tip from wendy’s craft room:
Want to give your book pages a more aged look? Just use some coffee! It’s a quick, easy way to get that vintage feel for your Merry Christmas banner. Check out my tutorial [here] to see how simple it is to age paper with coffee (tea works too!)
Step 3: Paint Your Wood Letters
Next, spray painting your wooden letters. I chose a classic red to go with my red and white Christmas tree theme, but feel free to pick any color that suits your style!
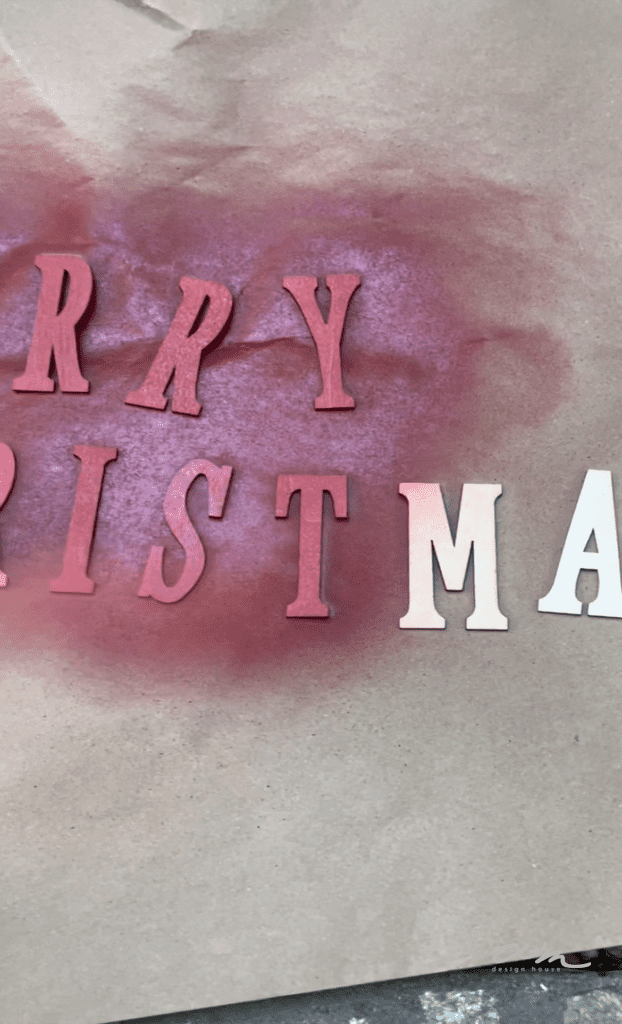
Looking for more Christmas banner ideas? You can easily personalize this project to fit your decor—try white or gold for a rustic touch, or go bold with a glitter finish. You can even change the wording to add a unique holiday message that feels just right for your space!
Step 4: Glue the Letters to Your Merry Christmas Banner
Once the letters are fully dry, it’s time to attach them to the cardstock. I used hot glue to secure each letter onto the center of each card.
No need for perfect measurements here—I just eyeballed it to get them centered, and it worked out great!
Tip from wendy’s craft room:
Try laying out all the cards in order before you start gluing; this way, you can see the full layout and adjust spacing as needed.
Step 5: String Your Banner
Lastly, once all the cards were ready, I strung the letters together to finish my “Merry Christmas” banner. I like to string each word on a separate piece of twine so you can hang them individually on the tree, mantel, or wherever you like.
This way, it’s easy to adjust each word and play around with the placement until it looks just right. It also gives you the flexibility to spread the words out or keep them closer together, depending on your space!
How to Decorate with your Merry Christmas Banner
Besides stringing the banner on your tree, there are so many other ways to display it! You can swag it across your Christmas fireplace mantel for a festive touch, hang it from a shelf to add some holiday cheer to any room, or drape it along your stair railing with garland and lights for an extra cozy vibe.
However you decide to display it, this banner adds a charming, handmade touch that’s perfect for the season!


Other Christmas DIYS from WM Design House
If you loved this festive and merry DIY Christmas banner, you might also enjoy some of these other holiday crafts.
Wrapping Up
I hope you enjoyed this post and feel inspired to create your own “Merry Christmas” banner! This DIY project is a simple yet special way to bring a personal touch to your holiday decor, whether you’re displaying it on your tree, mantel, stair railing, or any cozy spot in your home.
With so many ways to style this merry Christmas banner, it’s sure to become a favorite decoration for years to come.
Happy crafting, and here’s to a festive and joyful holiday season ahead!


Love your Christmas decor. More time for Jesus is the best reason for decorating early. Do you have dimensions for the paper for your garland. Red, green, book pages. I do like the 4 inch letters. Makes a statement. Happy Thanksgiving. Vicky
Wendy, your Christmas banner is so pretty. Love how your tree looks. I appreciate your creativity and I am happy to feature this beautiful Christmas banner at Love Your Creativity.
Wendy, I love your beautiful Christmas tree and Merry Christmas Banner! You’re always so creative and inspiring! I’m already working on on holiday garland for the fireplace mantel, but may have to add another one to the mix too! I love to change my Christmas decor theme from year to year, too…it keeps things fresh and exciting, I think! I’ll add new things (bought or DIY) to each year’s theme as needed, but most of the decor items I use on my trees and throughout my home have been around for awhile. I’m excited to see how you decorate for the holidays this year!
Thank you, Kristy. I am knee-deep in the trenches of Christmas and hope to come up for some air soon. Lol
It is quite a job, right? I know your home will be beautiful. I cannot wait to see what you do this year too.
Wendy, this is such a pretty banner.
Thank you Tammy, I love to create fun things like you to decorate with.
It’s never too early to plan! Thanks for the inspiration!
Thank you, Cindy. I have to agree with you. I am working hard to get it all done, so I can enjoy a bit.
This banner is adorable and adds a real wow to the tree. You continually amaze me with your crafts ?
Thank you, my friend! I am in Christmas wonderland creating this year. I cannot wait to see what you create this year.
So pretty! And easy to make! The tree looks gorgeous!
Thank you Christin. I hope you had a great Thanksgiving.
Wow Wendy! You never cease to amaze me with your projects!!! You are so gifted. It has been fun blog hopping along with you!
Thank you sweet Crystal. I am sorry I have not gotten to all of the blogs yet, I had a very crazy weekend.
YOu are so sweet, I sure hope you go to Haven this year.
this is such a great idea! thanks for sharing how to make it! I almost did a craft using old book pages too but I ran out of time! great hopping with you!
Your trees and look fabulous. Love the look of the banner on the tree! Happy hopping with you!
Lovely project, Wendy! The banner looks amazing on your tree. All your Christmas decor is so festive! I better get cracking and get more decorating done!
Thank you Marieza, Happy Decorating.
Simply gorgeous! Great holiday post!
Thank you so much Annemarie! I hope your holiday decorating is going well
Wendy, This is so festive and fun! Such a perfect way to “pop” a Christmas greeting from your tree. I love it! Thanks for the great tutorial. Well done, my friend! ~Missy
Thank you Missy, I appreciate your kind words, Happy decorating.