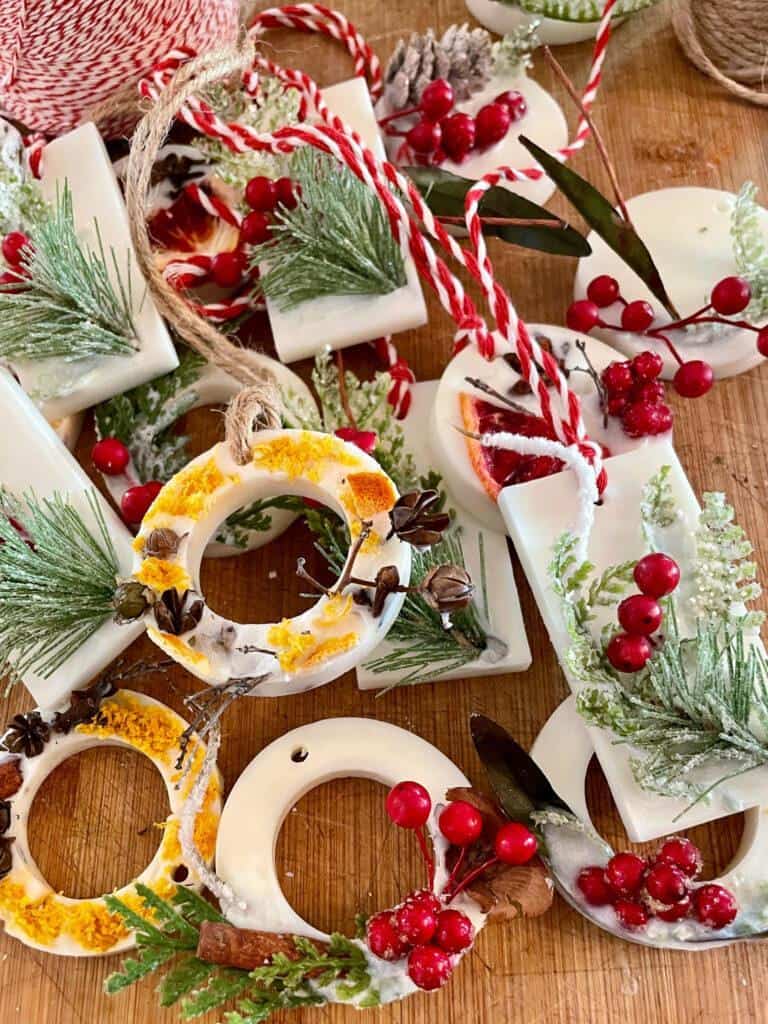
How to Make Scented Wax Sachets with Essential Oils
These easy-to-follow steps will show you how to make beautiful wax sachets, perfect for adding a touch of festive decoration to your gift-wrapping or adding as ornaments for a natural air freshener on your Christmas tree.
Creating a warm and cozy home for the holidays is a priority for me, and one way of doing that is by creating a pleasing aroma in the house.
The natural fragrance from the orange and the added essential oils of pine or cedar are a perfect alternative if you don’t have a real tree in the house.
On my blog WM Design House, I may sometimes use affiliate links, which means a small commission is earned if you purchase via the link. The price will be the same whether you use the affiliate link or go directly to the vendor’s website using a non-affiliate link.
Supplies to Make DIY Wax Sachets
- 1/2 lb. of Natural Soy Wax melts, paraffin wax, or beeswax. (Keep in mind that beeswax has a yellow tint to it).
- A silicone six-cavity rectangle silicone mold for making wax sachets
- Dried flowers or flower petals
- Faux greenery or dried botanicals
- Berries (holly, cranberries)
- Essential Oils of your choice ( some of my favorites are pine, rosemary, sweet orange, lemon, and frankincense)
- Dried fruit (especially dried orange slices or apple slices)
- Whole spices (cinnamon sticks, anise, peppercorns, cloves, etc)
- Dried herbs (they’re beautiful with a dried sprig of rosemary)
- Fresh sprigs of greenery
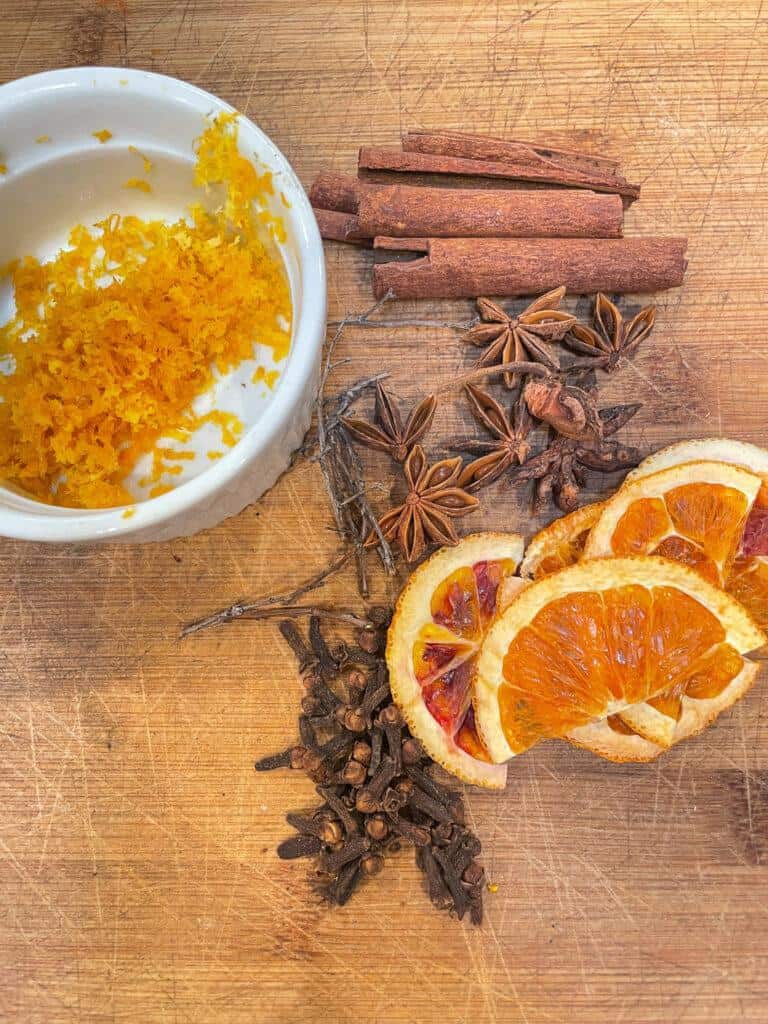
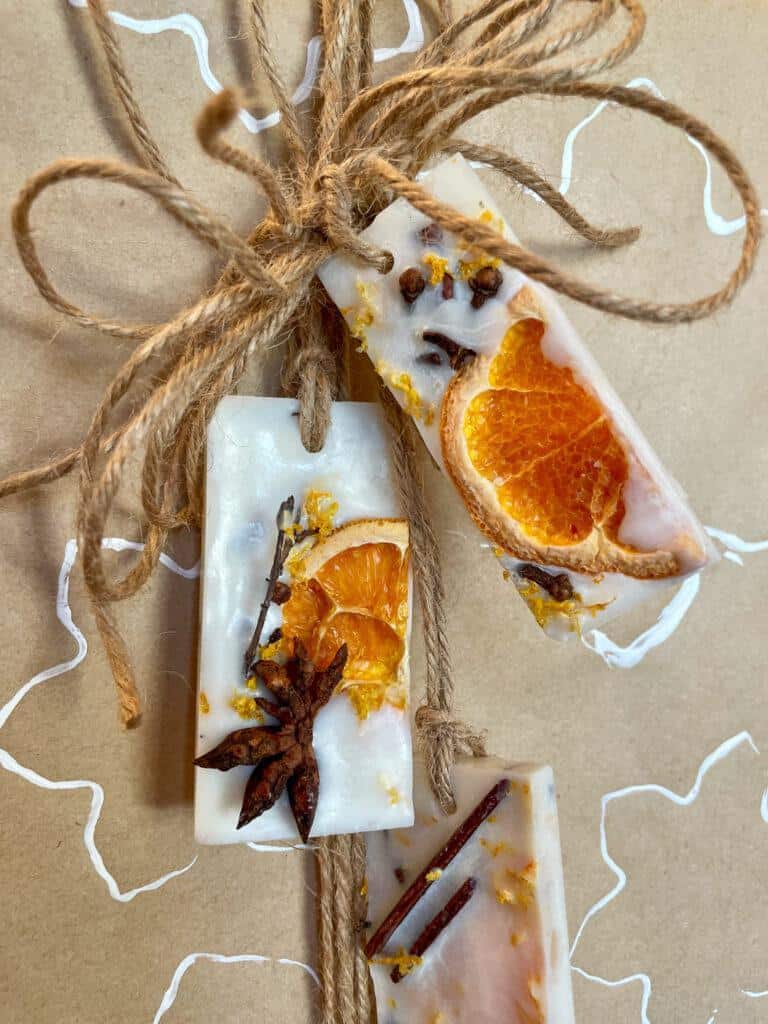
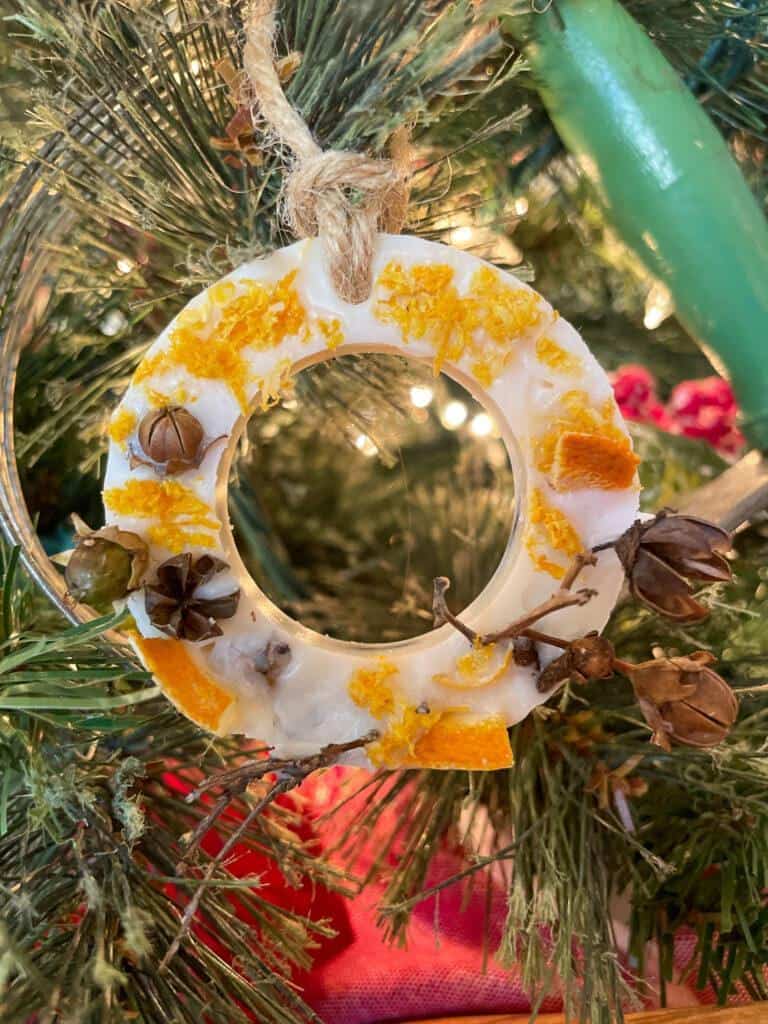
I like to use a dried orange slice or two in my wax sachets. You can read my blog post on how to best dry oranges here. Remember that your fruit must be dried to use in the wax sachets. You can also use faux berries or greenery for a special touch.
How to Make Wax Sachets: Step-by-Step Instructions
- Either employ a double boiler method or fill a glass measuring cup about 3/4 full with wax tablets or chips, then surround the cup with water. Be sure to pour water only about 2/3 of the way up the sides of the cup to prevent overflow.

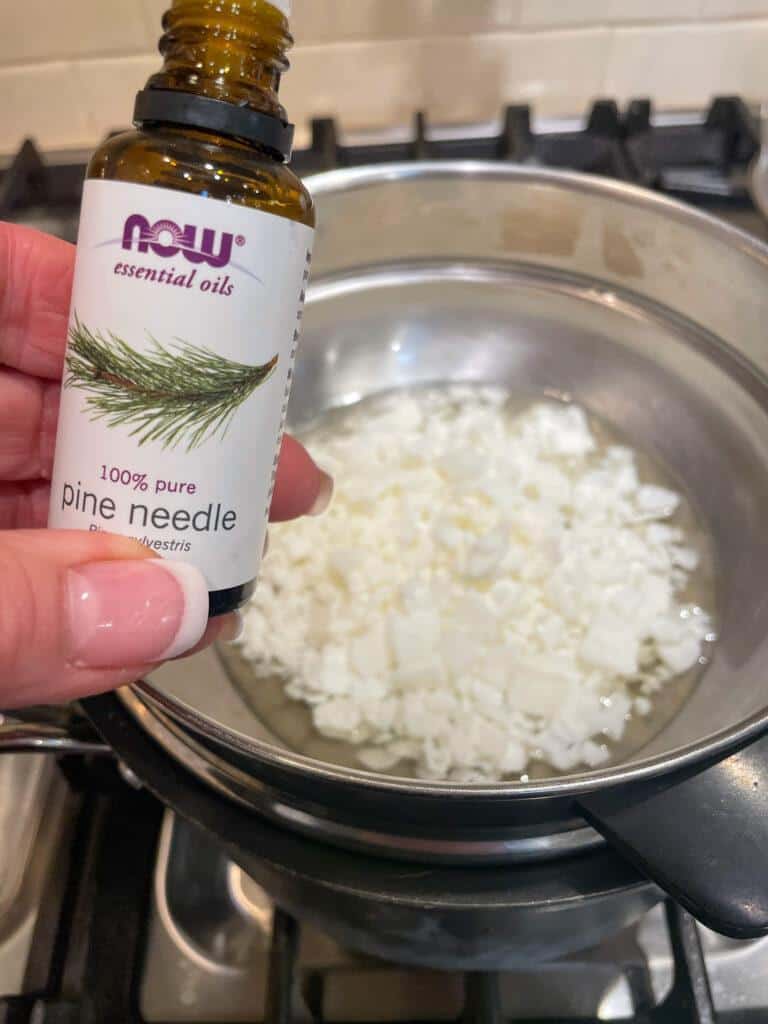
- Melt the wax until it is clear, then add your fragrance oils and stir well.
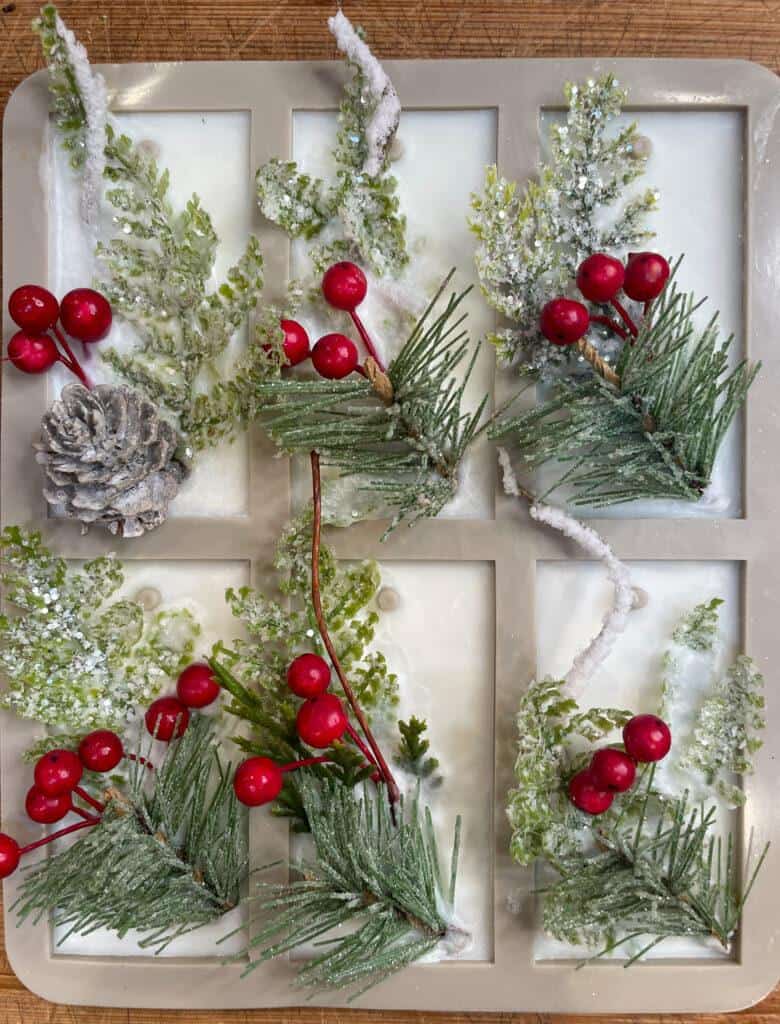
- Pour the melted wax into the molds and let it cool slightly.
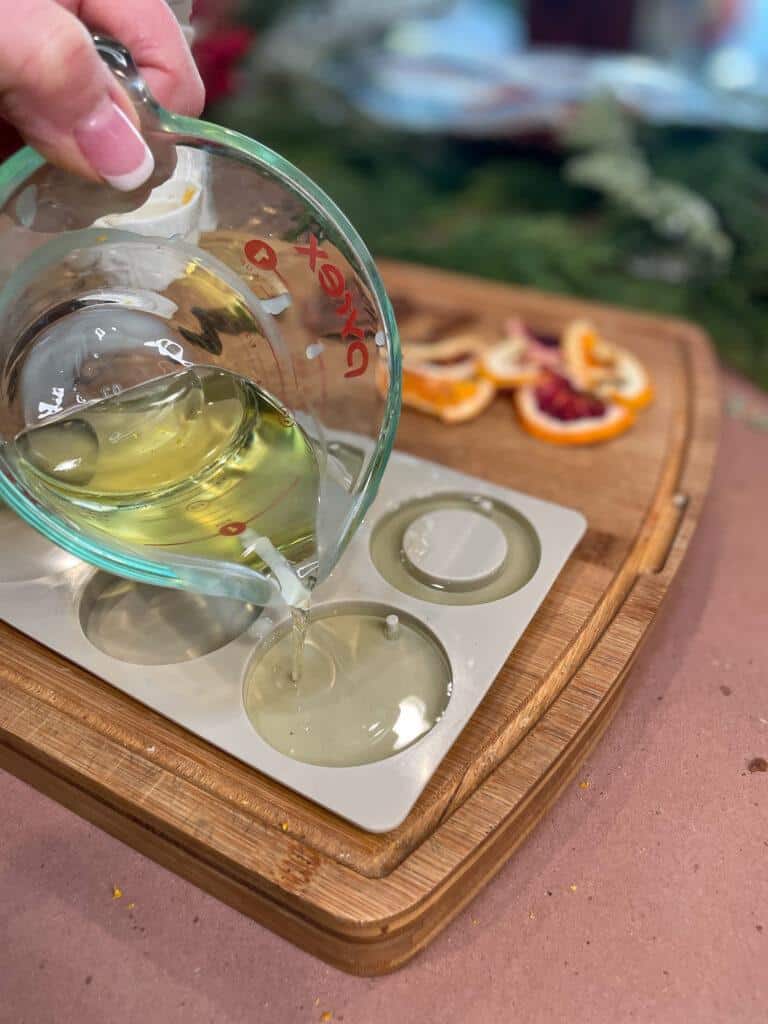
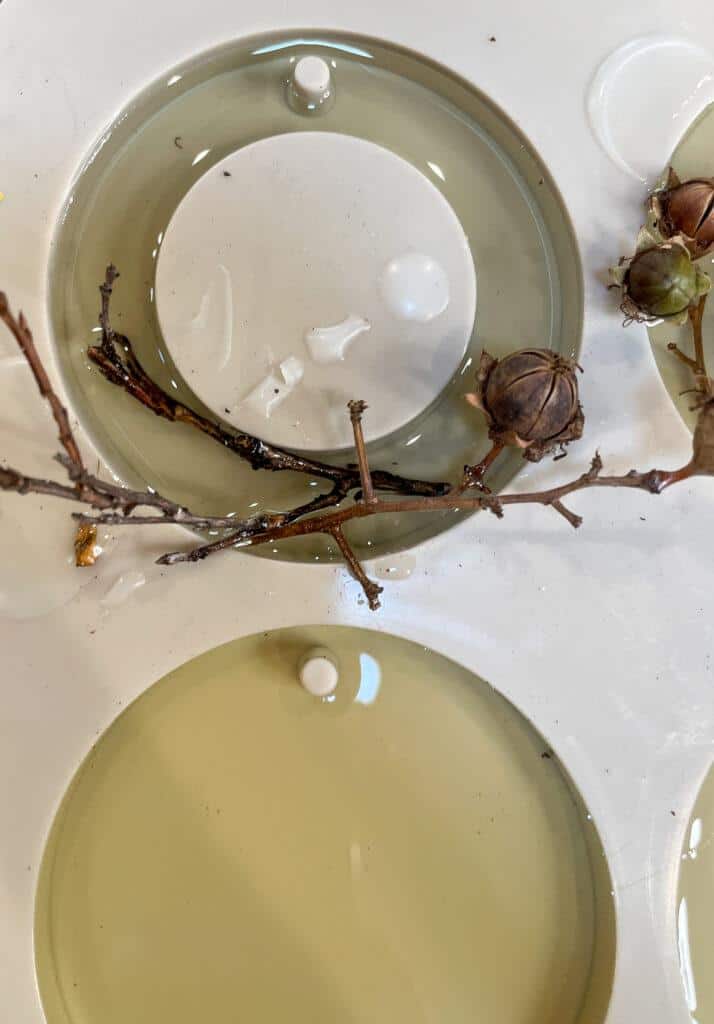
- Arrange your flowers, orange slices, berries, or greenery into the wax. (some people like to place their flowers into the wax first and pour over it) You can try both ways and see what works best for you. I prefer to add my decorations after the wax has been set up to expose the decorations. This way, they are not covered in wax completely.
- Remove your wax from the molds once they are completely dry.
- If your mold does not have a hole, you must place a hole by heating a sharp, pointed metal tool, like a pick, into the wax to create a hole. Be careful and take steps to keep from burning yourself. These molds have a hole in them, so it is much easier to work with, and I highly recommend them.
Place a piece of twine or ribbon through your hole to hang your wax sachet, or use it as a decoration for your gifts.
They solidify quickly, but if you prefer, you can place them in the refrigerator until they harden completely before removing them from the mold.
How to Package Homemade Wax Sachets
You have several options for packaging your scented wax sachets! They make a thoughtful gift on their own or as part of your gift wrapping. They look beautiful when bundled together with twine and adorned with a couple of greenery sprigs.
Here are a few different ways I have used my wax sachets.
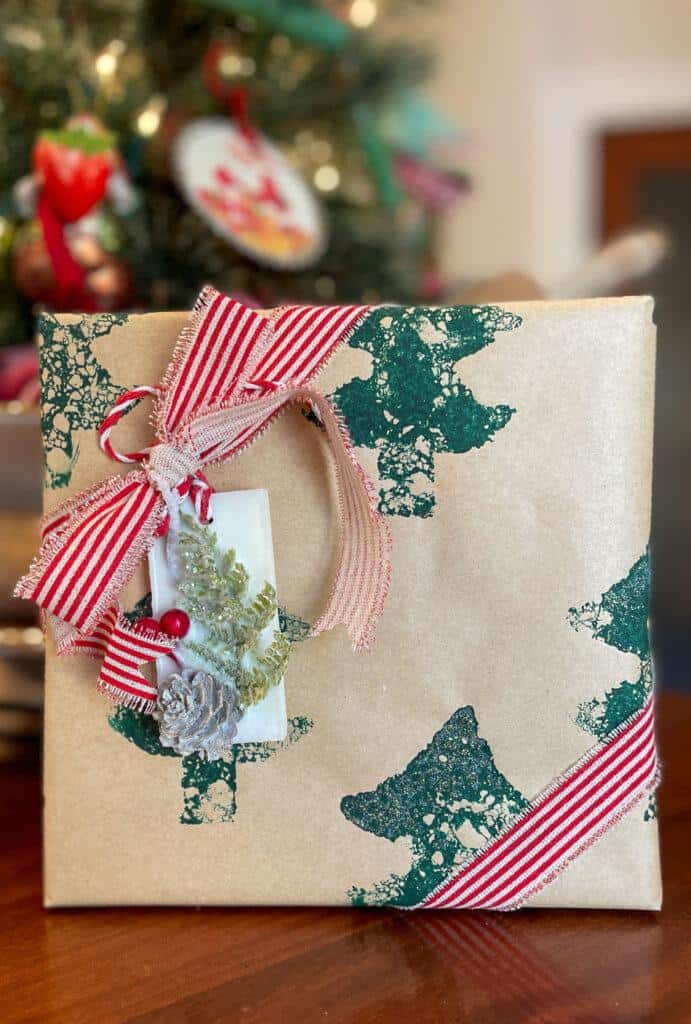
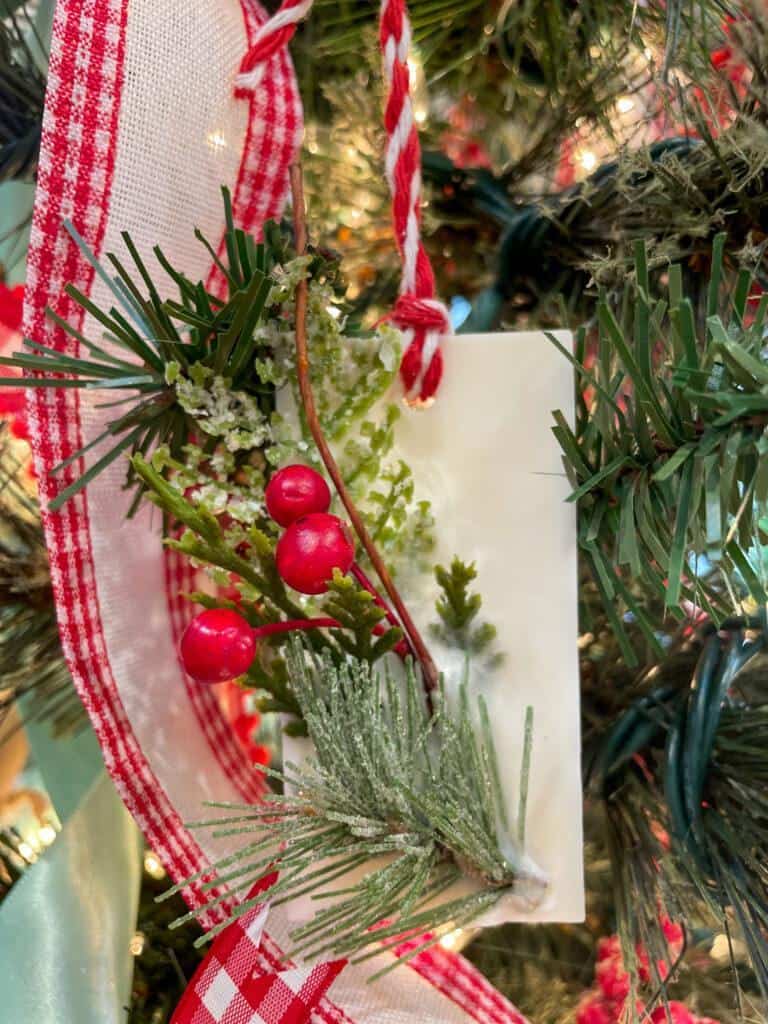
- Gift wrapping: This year, I plan to embellish my gifts for friends and family by placing the wax sachets on top of my packages. I created my wrapping paper using craft paper and a snowflake-shaped cookie cutter for imprinting. I used a kitchen sponge cut into a tree shape to make the green trees, dipped it in paint, and stamped the paper with this homemade stamp.
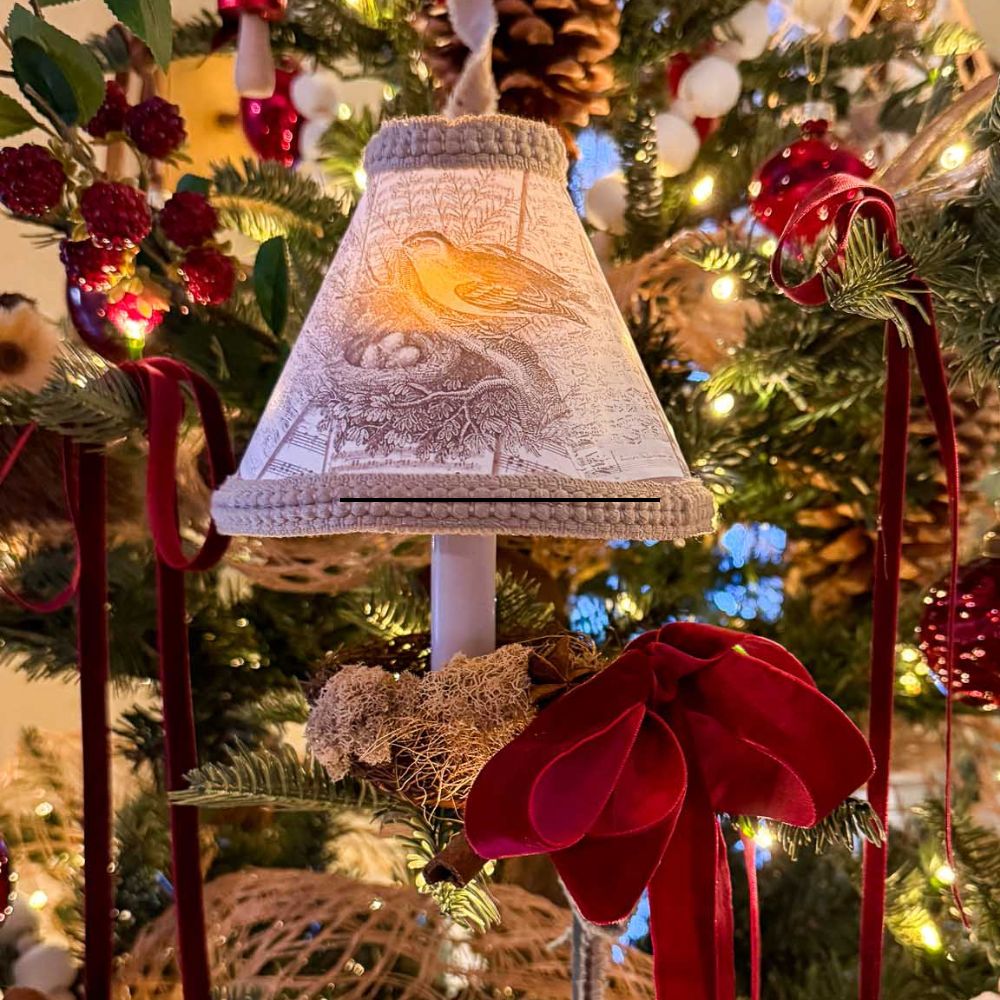
- Christmas tree ornaments: Hang your wax sachets on your Christmas tree for a fresh scent in the room.
- DIY air freshener: Hang your scented wax sachet in your bedroom or bathroom for a breath of fresh air.
- Store in a bag: Wrap them in a lovely linen bag, especially if you’re gifting something personal like pajamas. Consider placing one inside the box to infuse the pajamas with a delightful scent.
- Holiday gift basket: Include several in a gift basket and use them to tie up adorable kitchen towels.
- Handmade wedding favors: Although the ones I made are holiday-themed, you could make your custom sachets as a wedding favor! They look lovely with calendula flowers, lavender, and other pressed flowers or herbs from your herb garden.
Storing Wax Sachets
Place your wax sachets in a linen bag to allow the fragrance to permeate your lingerie drawer.

Alternatively, store them in an airtight plastic container for safekeeping.
As they’re made from wax, avoiding direct sunlight or high temperatures is advisable to prevent melting or becoming sticky. Opt for storage in a cool, dry place and keep them away from any open flame.
Tips
- Be sure to dry any flowers or botanicals thoroughly. Tie them up with twine and hang them upside down from a baker’s drying rack or in a cool place for them to dry. They should crumble between your fingers when they’re completely dry. If they are not fully dry, they’ll have moisture, and mold could grow.
- Get creative and use what you have: Craft these sachets using various decorations you have at home. For instance, consider creating delightful lavender wax sachets paired with fresh, dried rosemary. Experiment with a floral arrangement by combining dried calendula, marigold, and purple statice. Showcase dried baby’s breath alongside your preferred rose petals. Another thoughtful idea is to dry a wedding bouquet and incorporate the flowers.
- Add ribbon or twine: Thread a piece of ribbon or twine through the hole in your sachet and hang it as a Christmas tree ornament or as a pretty decoration in small spaces like the bathroom.
More Handmade Holiday Gifts
I love to receive a handmade gift. It feels extra special, and I know the person giving it to me took a lot of time to come up with a good idea and put it together.
I also enjoy giving homemade gifts; it is a beautiful way to show my appreciation for others and how much I love them.
Here are a few other ideas that are fun and easy to make.
- Handcrafted candles: Create personalized candles by melting down wax and adding scents or colors. You can hold the wax with mason jars, teacups, or other unique containers.
- Homemade bath bombs or bath salts: Make relaxing bath bombs or bath salts using Epsom salt, essential oils, and baking soda. Package them nicely in glass jars or decorative containers.
- Finger-knitted blankets: These blankets are warm and cozy and only take about 4-5 hours to complete.
-
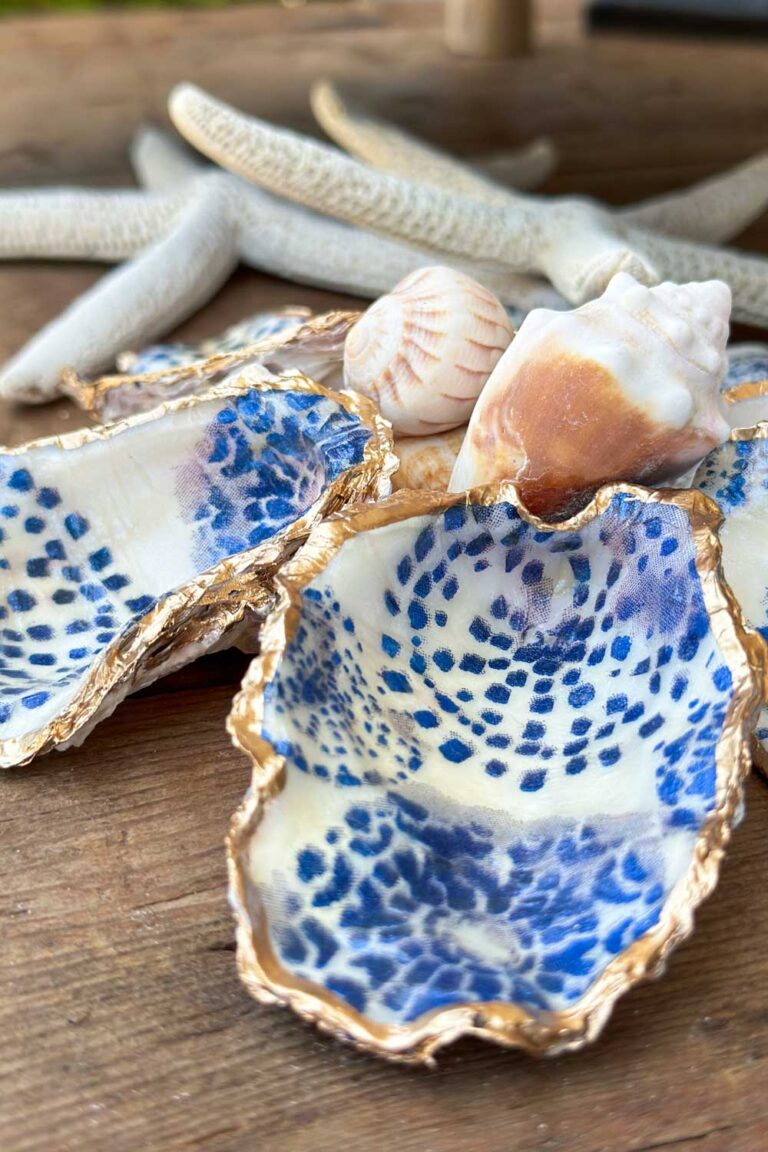
How to Make a Beautiful Oyster Shell Garland with Wood Beads
139 shares Facebook Pinterest Save Threads Looking for an easy way to add a touch of coastal charm to your decor? Learn how to make an oyster shell garland using wooden beads, decoupaged oyster shells, and jute twine. This DIY project is a beautiful way to add natural texture and coastal style to your home….
-
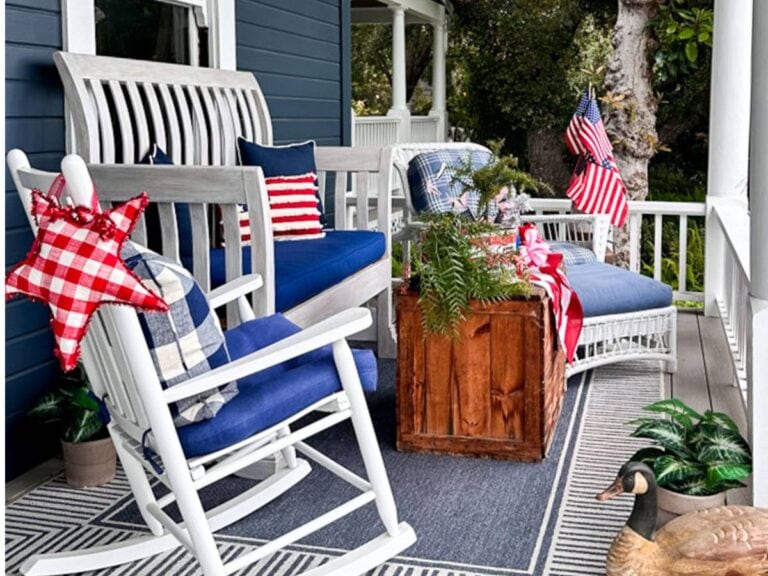
Easy 4th of July Front Porch Decorations for a Patriotic Welcome
Summer is here, and nothing welcomes the season like 4th of July front porch decorations in classic red, white, and blue.
-
Beautiful Arch Basket Decor for a Summer-Ready She Shed
Learn how to make a charming DIY basket arch for your she shed using thrifted baskets and faux greenery, an easy summer decor project.
-
10 Easy Summer Decorating Ideas to Refresh Your Home
Transition from spring to summer with 10 easy summer decorating ideas to refresh your home with light, breezy and budget-friendly style.
-
How To Make The Best Topiary: Step By Step
Learn how to easily make a beautiful diy topiary for your garden or porch with this step-by-step guide.
-
How to Make a Eucalyptus Wreath You Can Restyle for Every Season
If you have ever wondered how to make a fresh eucalyptus wreath you can use all year, this is the tutorial for you. With a grapevine base, two kinds of foraged eucalyptus, and a quiet afternoon, you can create one wreath that carries your front door through every season. There is something so calming about…


Oh my goodness Wendy, these are darling! I love them as gift tags, but as an ornament is the best idea ever! There are those ornaments I look forward to unwrapping each year and hanging on the tree, flooding my mind with Christmas’ past. Anyone you would gift one of these too, I am sure would feel the same way year after year. I cannot wait to get my craft room put together so I can actually find my supplies and get to creating more things this year. You reminded me of when I used to make lotion and give as gifts when I saw that double boiler and essential oils. I will have to search for my recipe book! Hope you had a happy Thanksgiving!
Thank you so much, Cara. I love to make homemade gifts, especially when they smell so good. I think it adds a special touch to
someone’s gift. I tell you, I think my craft room is pretty organized, and I still can’t find half of what I am looking for. So crazy. We keep accumulating more! YIKES
Wendy these are so pretty! I have never heard of a sachet before until I saw your post and it’s a fantastic idea! Thank you for sharing at my Weekly Wednesday Link Party and I am happy to be featuring you this week! Have a great day my friend.
Thank you, Nicolle. I had to laugh when I read you looked it up. You are too cute. Thank you so much for the feature.
Hi Jaclyn, unfortunately, you are not alone. I was on the phone with my web guy today, and we cannot figure the problem out. However, I am changing my theme and site on the 29th, so maybe the issue will be fixed when I do that. I can get in from my site and pin, but others are not able too. Very frustrating. I appreciate you letting me know. Happy Holidays.
I was trying to comment on your post today, but it won’t let me :(((((
These are beautiful, what a lovely idea. These will be a feature over at Handmade Monday this coming week.
Thank you Julie. I am so grateful for the share. Have a wonderful weekend.
Wendy, these are gorgeous!! What a fabulous gift idea! I’m sharing them this weekend in my Saturday roundup! Thanks so much for sharing, and have a lovely weekend!
Thank you so much, Kim. What a sweetheart you are. I so need to get back to my Saturday sharing…. ugh… December is kicking my butt! lol
Have a wonderful weekend, my friend.
I need the round molds. I love that look! Thanks for inviting me to be part of this series. 🙂
The round was fin. I like the wreath, however, they are a bit fragile.
Thank you so much Renae, they were so easy and they smell so good.
This is such a cool idea, Wendy!! I really love it!