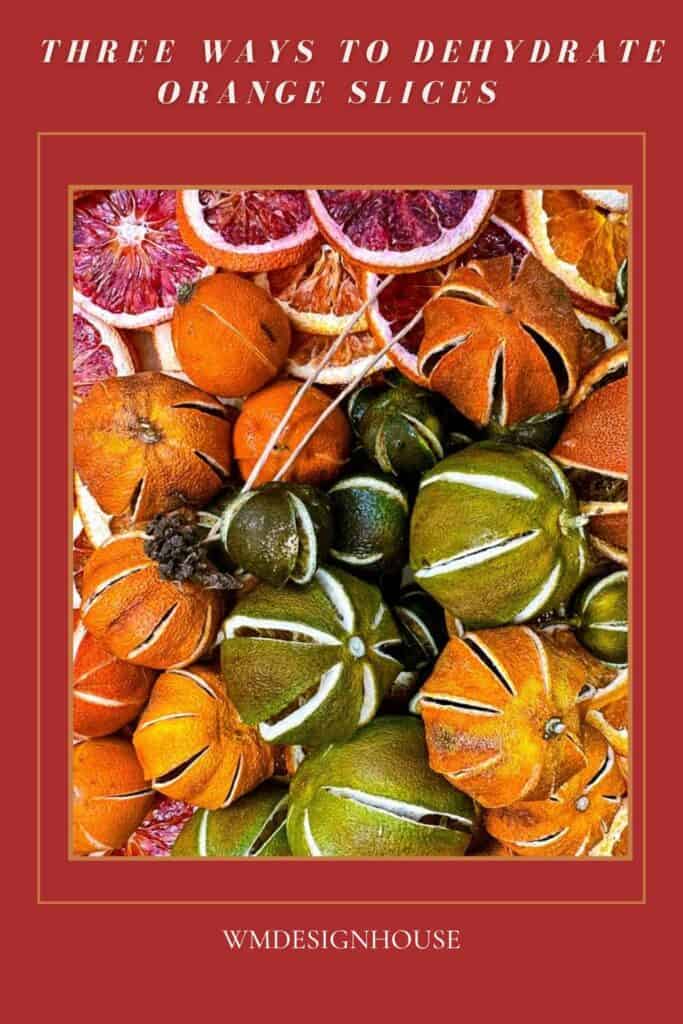
3 Easy Ways to Make Dehydrated Orange Slices
Learn how to make dehydrated orange slices using three easy methods.
And wait until you see what I made with them!
I’m excited to share with you three incredibly easy methods for making dehydrated orange slices. Whether you prefer the traditional oven method, the efficiency of a dehydrator, or the modern twist with an air fryer, I’ve got you covered. Join me as we explore each technique, step by step, unlocking the secrets to perfectly dehydrated orange slices.
On my blog WM Design House, I may sometimes use affiliate links, which means a small commission is earned if you purchase via the link. The price will be the same whether you use the affiliate link or go directly to the vendor’s website using a non-affiliate link.

Best Types of Oranges to Dry
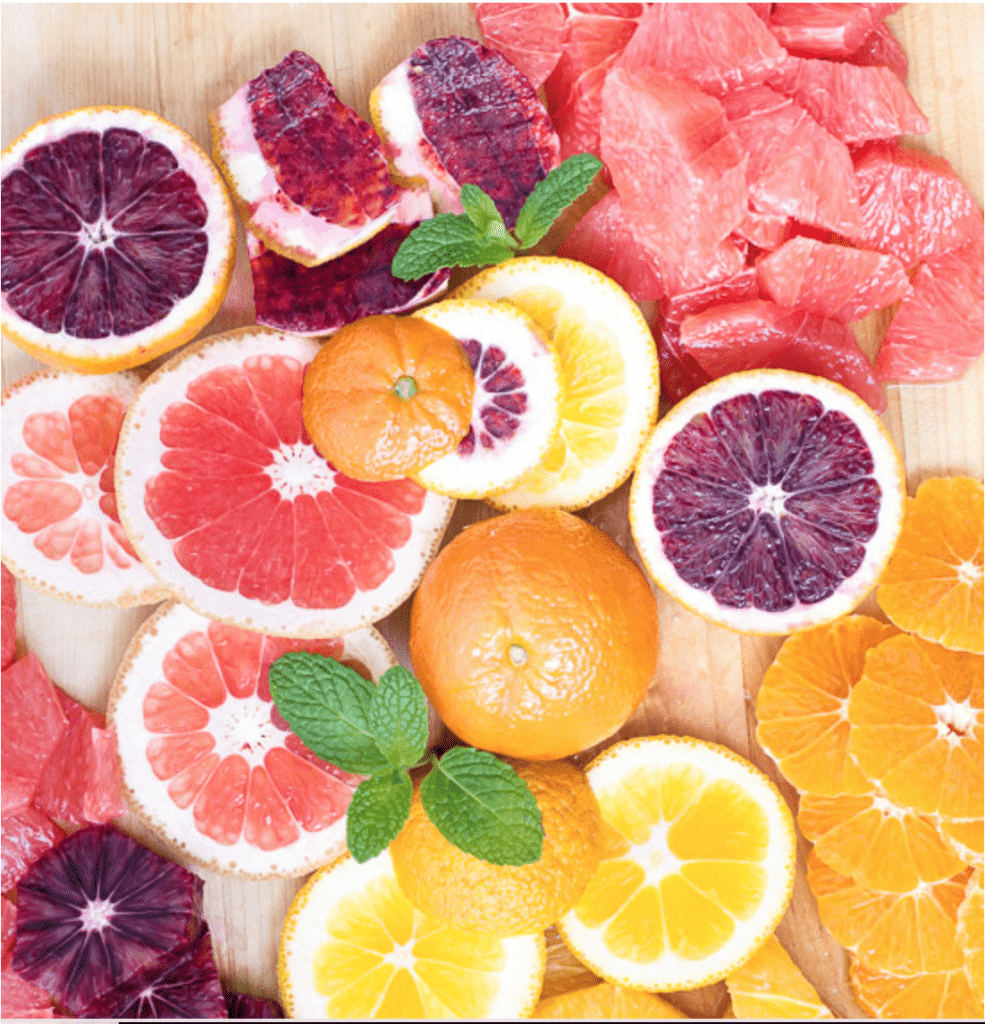
You can use a variety of different citrus fruits for this project, including grapefruit, lemons, and limes, but today we will focus on using fresh oranges.
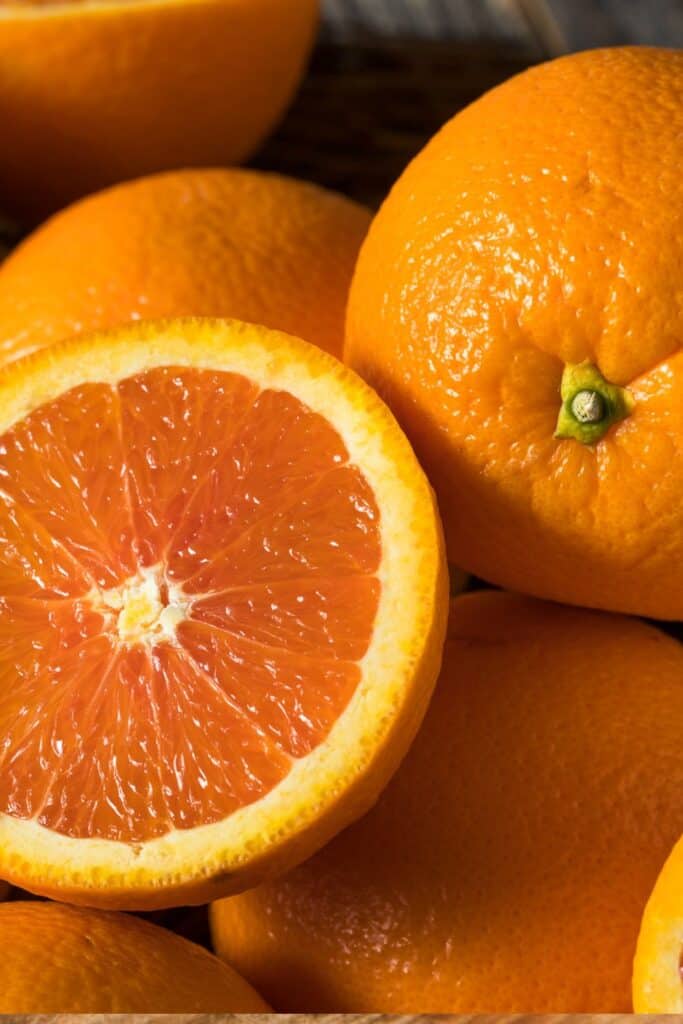
Classic Navel or Cara Cara oranges are my favorite type to dry. They are large, have a uniform round shape, and make the most beautiful, dried orange slices. You will find Navel oranges to be a lighter color and more on the yellow side. The Cara Cara is the most vibrant orange to dry, in my opinion. You also want to ensure your oranges have thick skin and are firm.
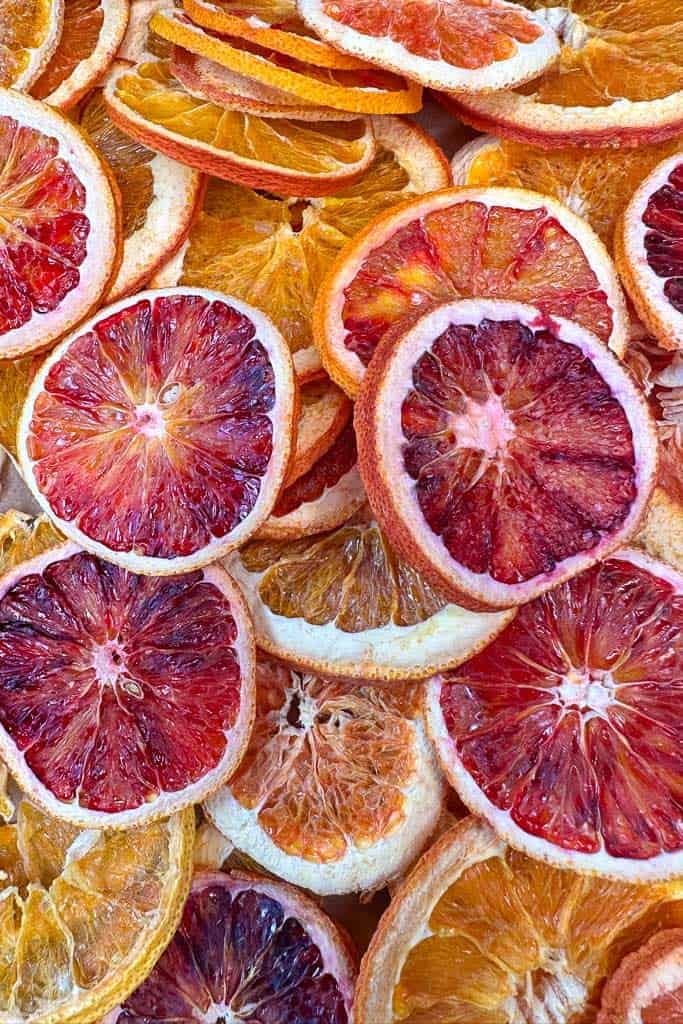
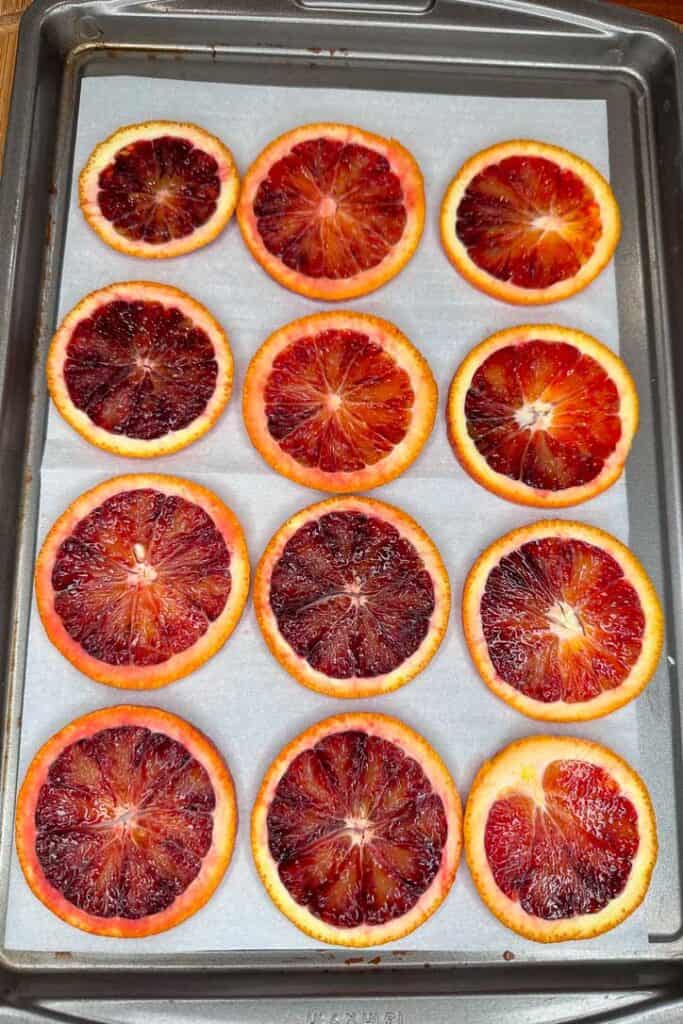
I have also used blood oranges to make dehydrated orange slices before. The color is stunning and looks so beautiful for decorating during the holidays. But because they are already darker in color, it’s essential to keep an eye on them as you dry them. If you accidentally overcook them, they can turn brown.
Supplies Needed to Dry Orange Slices
- A variety of oranges, Cara Cara, Navel, and Blood Oranges
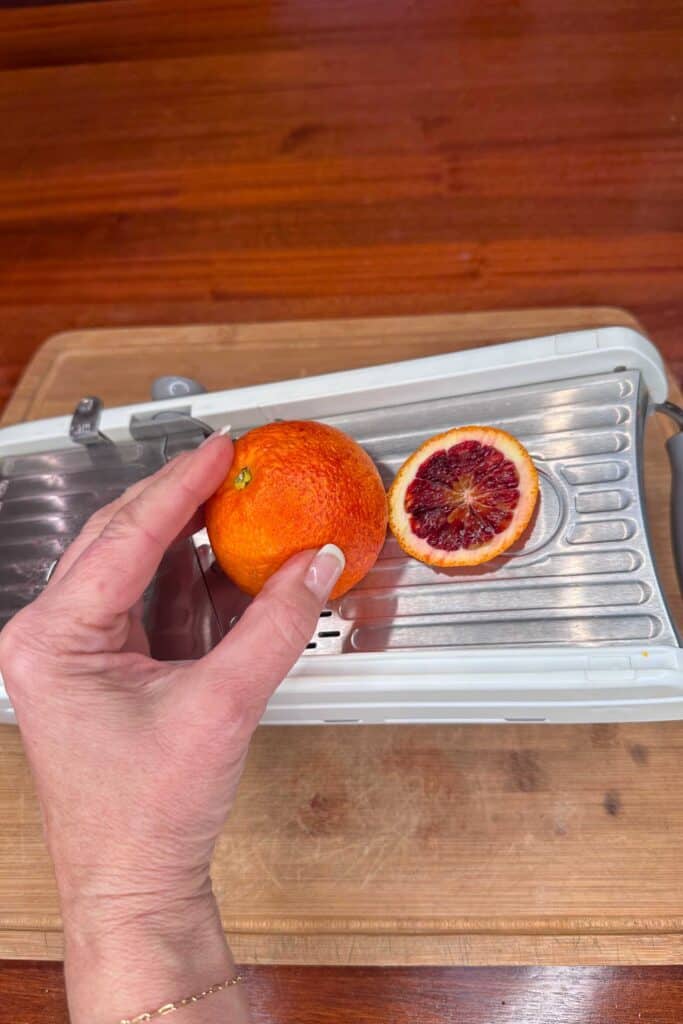
- A mandoline
- Parchment paper
- Food dehydrator, oven, or air fryer
- Cookie Sheet
- Parchment Paper
Getting Started
The initial steps are the same regardless of the method you choose for making dehydrated orange slices. Follow these detailed instructions to prepare your orange slices for drying.
1. Slice the Oranges
First, slice the oranges. I prefer a mandoline slicer as it gives you even slices you cannot get by hand slicing the oranges with a chef’s knife. Even slices are essential, so they all dry at the same rate. The thickness of the orange slices should be about 1/8 to 1/4 inch thick. Nice, thin slices will allow them to dry more quickly, but if they are too thin, they may be too fragile or not allow you to achieve the desired look.

2. Blot the Oranges
Before putting the orange slices onto trays, you should blot them first. Blotting removes excess orange juice which helps them to dry much faster and keeps them from sticking to the tray.
The easiest way to blot is to place your orange pieces on top of paper towels, then cover them up with another paper towel. Apply just enough pressure to soak up some juice. Don’t push too hard, or you may squish them. Nobody wants a squished orange to decorate with!
After completing these basic steps to prepare your orange slices, they are ready for the next stage. Directions will vary slightly from here, depending on your chosen method.
Making Dehydrated Orange Slices in the Oven
After slicing and blotting the orange slices, the next step is to lay them out on trays. For the oven method, use a baking sheet lined with parchment paper. Be sure to spread them out in a single layer, so they do not overlap.
Set the oven to a low temperature, about 200 degrees Fahrenheit. Note: every oven is different, so you may need to experiment to find what works best. The range could be anywhere from 175 to 225 degrees F.
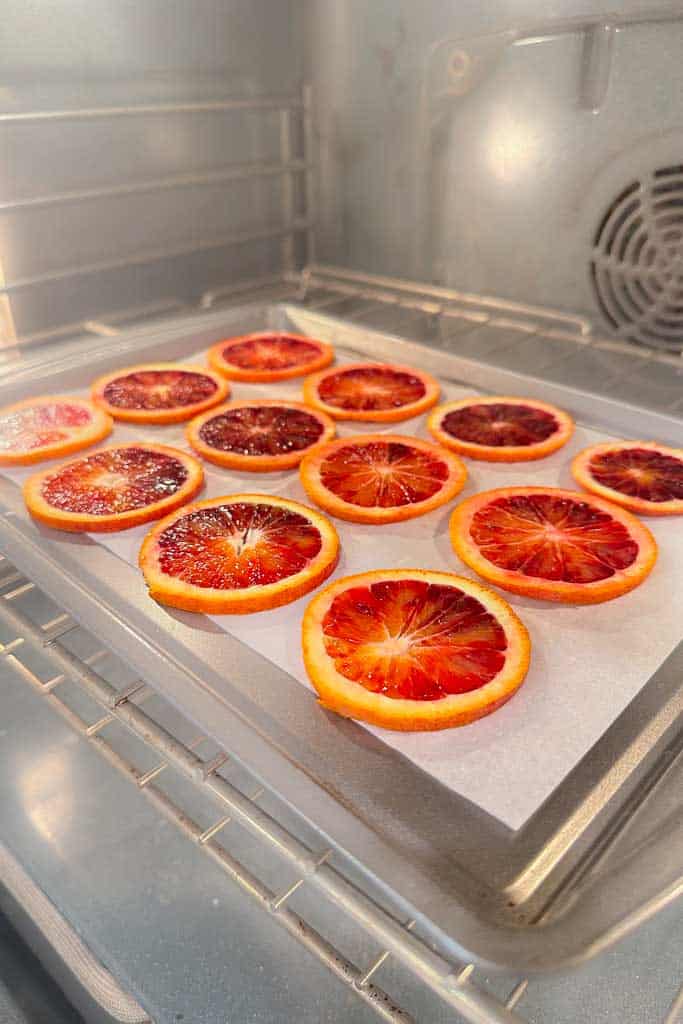
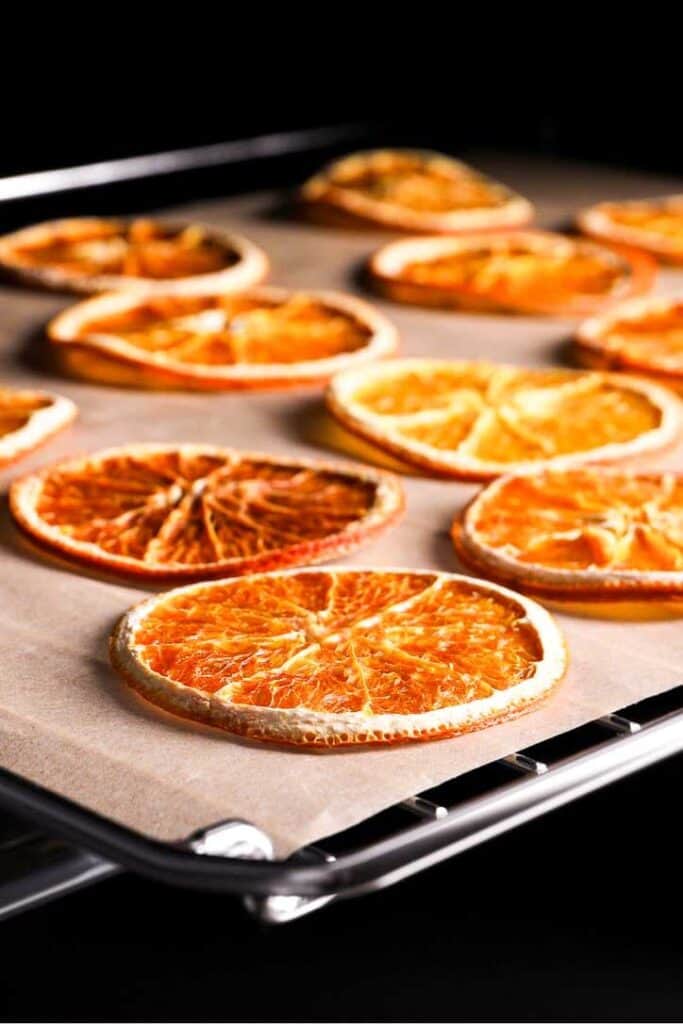
Check on them often and flip them once or twice every hour to allow them to dry evenly. Depending on the thickness of the slices, it will take 3 to 5 hours to dry completely. If the slices are not the same thickness, some may be done before others. Remove those to keep them from over-drying or turning a darker color.
The oven is the most likely method that will turn them brown. I highly suggest you invest in a dehydrator or an air fyer. They are not expensive and will give you excellent results. They are both under $100 and well worth the investment. I have had both for years and use them all the time.
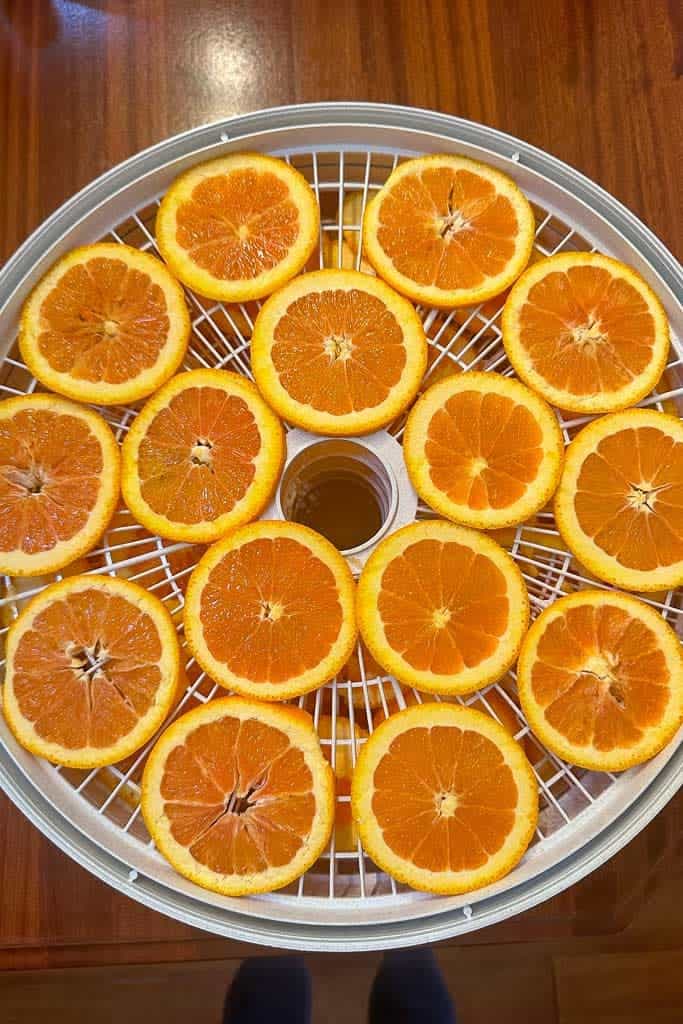
Making Dehydrated Orange Slices in a Dehydrator
To dry orange slices in a dehydrator, set the temperature to 135 degrees F. If your machine doesn’t have a precise thermometer, choose a “medium” or “fruit” setting if you have one.
Lay the slices evenly on the dehydrator trays. Be sure to spread them out in a single layer, so they do not overlap. I also cut a few stars out of some extra orange rind to use for my ornament-making.
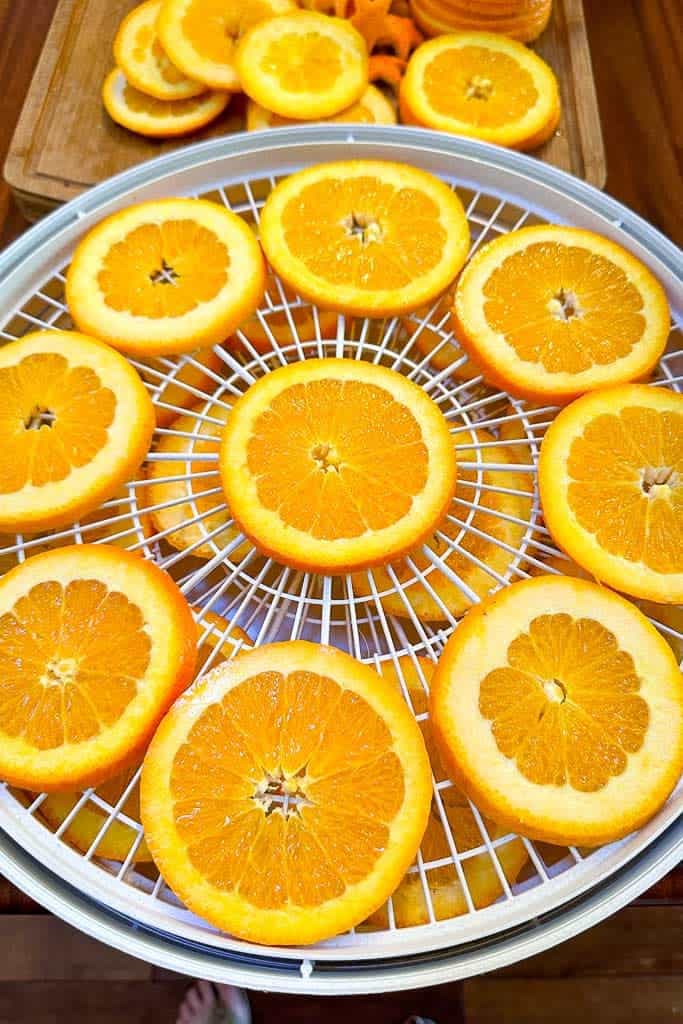
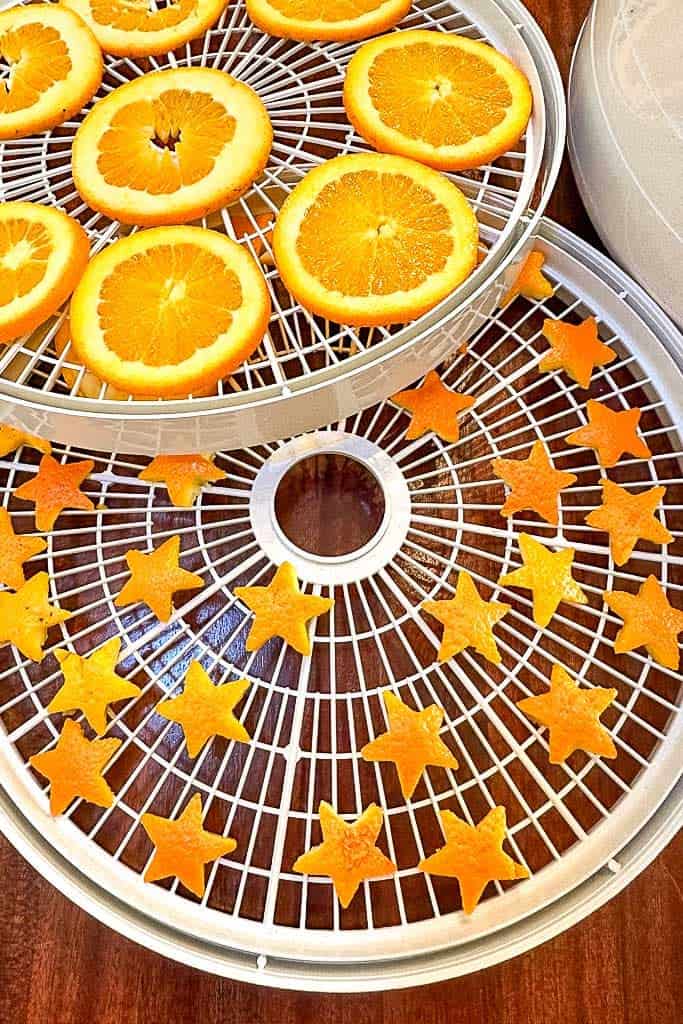
Depending on how thick your slices are, the time it takes to dry orange slices in a dehydrator is about 8 hours, give or take. With this method, you don’t have to keep checking in on them. Instead, you can just set it and forget it. You can even let it run overnight and wake up to perfectly dried orange slices.
Making Dehydrated Orange Slices in an Air Fryer
Now, let’s talk about using an air fryer for the drying process.
Lay out the orange slices in a single layer on the air fryer tray or in the basket. Avoid overcrowding to allow proper air circulation.

Preheat your air fryer to the lowest temperature setting (typically around 135-140 degrees Fahrenheit). Some of the newer air fryers also have a dehydrating setting.
Place the orange slices in the air fryer and set the timer for 2-3 hours. Keep in mind that the exact time may vary based on your air fryer model, so make sure to check them periodically.
Checking for Dryness
With all three drying methods, the trickiest part of drying orange slices is knowing when they are ready. It’s important to check the slices towards the end of the drying time to make sure they are dry enough but not overdone. They should be pliable but not sticky or wet. If needed, continue dehydrating in short increments until you achieve the desired texture.
When they finish drying, let them cool completely to room temperature. If using an oven, remove them from the oven and let them cool on the baking sheet for 10 minutes before transferring them to a cooling rack. Store them in an airtight container to preserve their freshness.
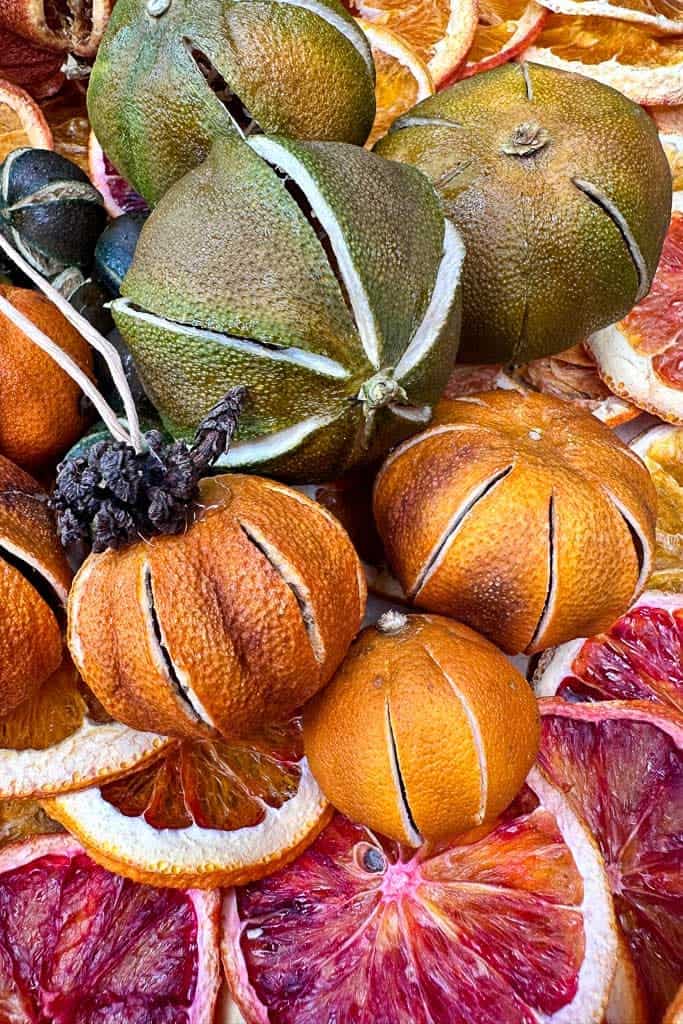
You can also dry whole fruit. For full details, you can read all about it in this article.
FAQ About Dehydrated Orange Slices
How long do dried oranges last?
Dried orange slices can last years if they are dried and stored correctly. They will look their best in the first couple of years, and then the color will start to fade, or they may start to turn brown. They are still usable even thought they are not as vibrant and pretty!
What is the best way to store dehydrated oranges?
There are a few different ways you can store dried orange slices. The key is keeping them in a cool, dry place where they will not get crushed. I layer them in a Tupperware and seal them tight. Or you can layer them in a glass jar, mason jar, or Ziploc bag and store them in a dark and cool place, such as in the back of your pantry.
Will my orange slices grow mold?
If you have dried your orange slices properly, they should not grow mold. However, if they are dried too slowly or not long enough, there may be enough excess moisture for mold to grow. Orange slices will continue to dry over time as they are hung out as decorations. Once fully dry, you should not have to worry about mold unless you live in a humid climate.
Can you air-dry orange slices?
Air-drying orange slices is not recommended. It is technically possible under perfect conditions but very difficult to achieve. Instead, use an oven, dehydrator, or air fryer for the best results.
How to use Dehydrated Orange Slices
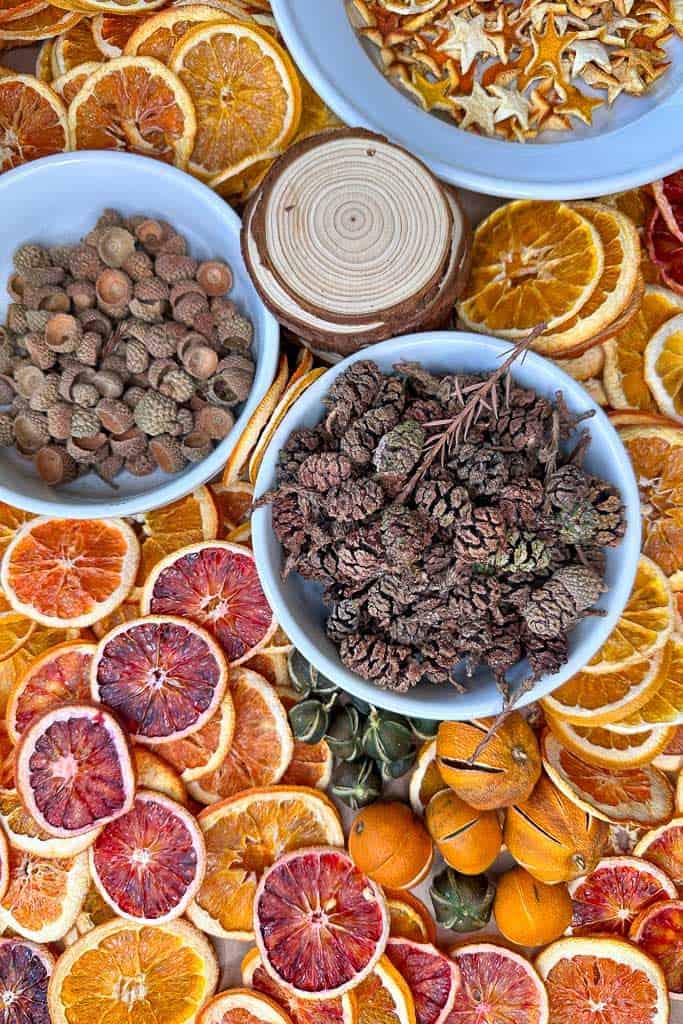
Now that you know how to make the best dehydrated orange slices, let’s talk about some fun ways to use them this holiday season as Christmas decor.
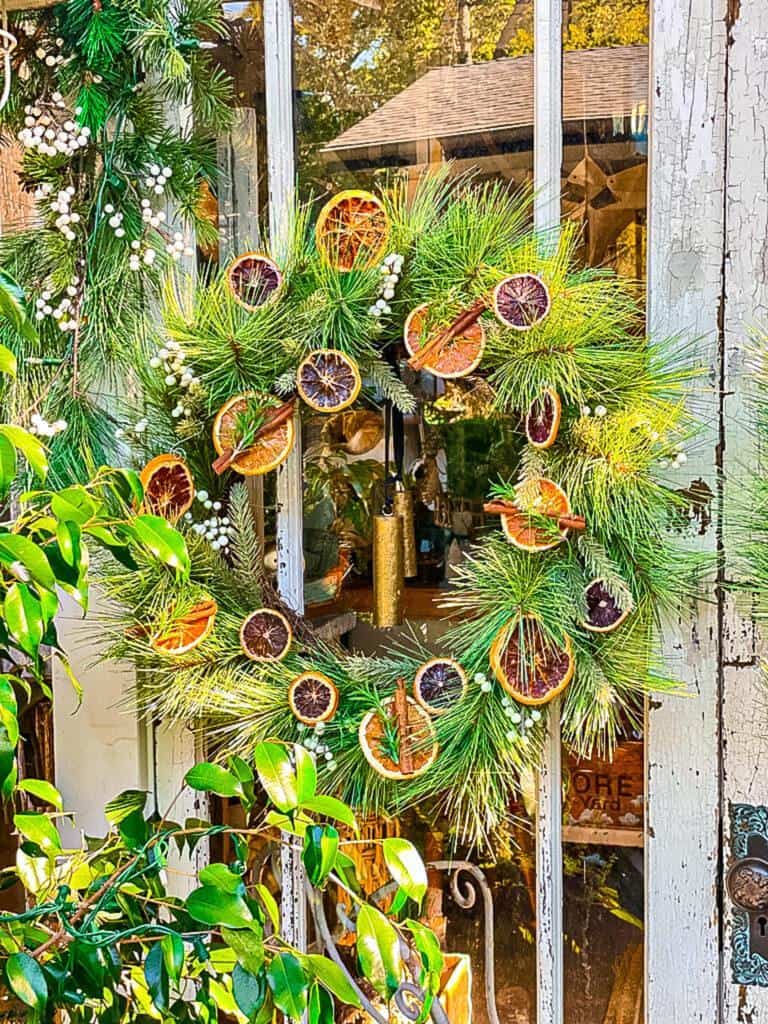
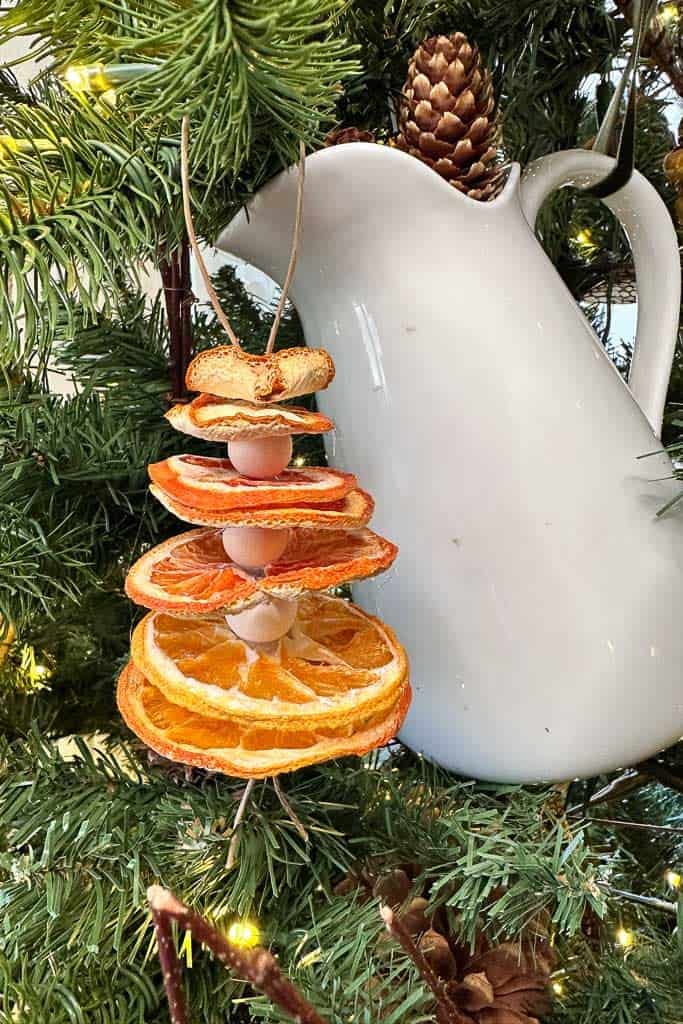
One of my favorite ways to use dried citrus slices is for holiday decorations. For example, you can turn them into beautiful Christmas ornaments or Christmas garlands to bring a bright and festive feel to your tree or wreath. Or you can create a centerpiece for your holiday table using fresh or faux greenery, pinecones, cinnamon sticks, and dehydrated orange slices.
Here are a few other ideas for making the most of your dried slices:
- Decorate a Christmas present with a dried orange slice ornament.
- You can use them as a holiday cocktail garnish.
- Add decoration to a holiday treat, such as a cake, bread, or charcuterie board.
- Hang in a window or in front of string lights. They look so pretty when lit up from behind!
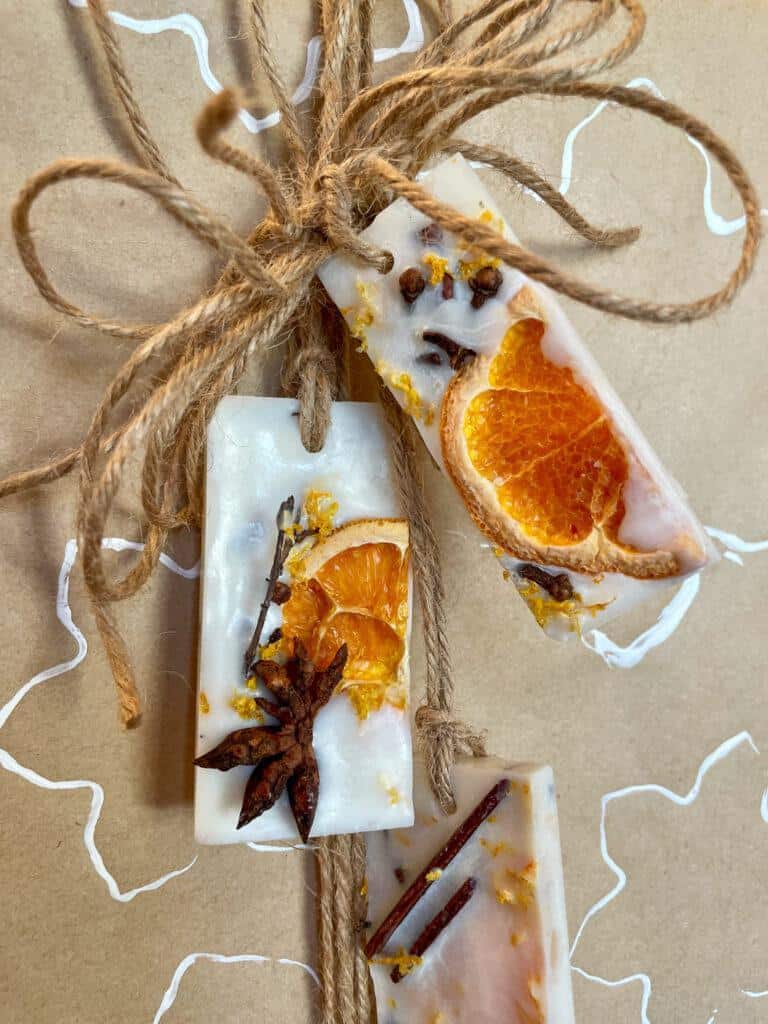
- Make wax sachets to adorn your gifts.

What are your favorite uses for dehydrated citrus?
I hope you enjoyed this adventure into making dehydrated orange slices! Before you go, mark your calendars and stay tuned for more exciting blog posts. I’ll be sharing creative ideas on crafting ornaments and making potpourri using these delightful, dehydrated wonders and offering tips on decorating your Christmas tree beautifully. Don’t miss out on the fun—subscribe and check back soon for more DIY projects.


-
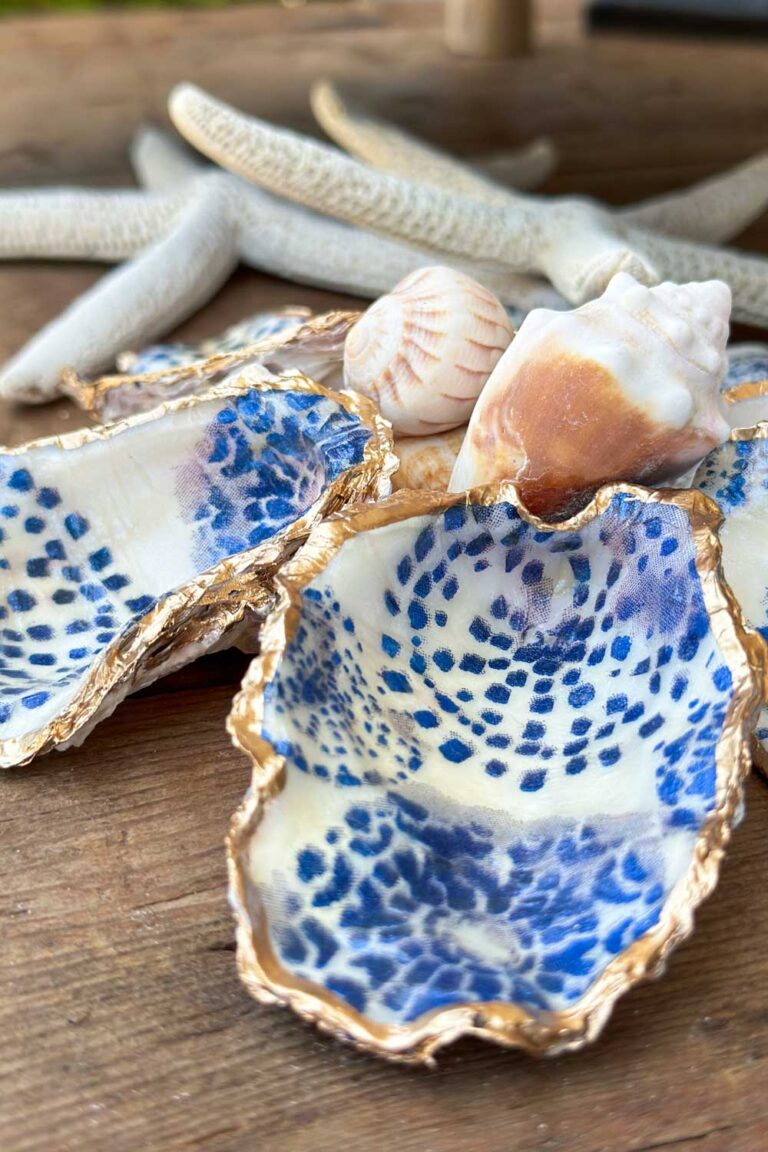
How to Make a Beautiful Oyster Shell Garland with Wood Beads
330 shares Facebook Pinterest Save Threads Looking for an easy way to add a touch of coastal charm to your decor? Learn how to make an oyster shell garland using wooden beads, decoupaged oyster shells, and jute twine. This DIY project is a beautiful way to add natural texture and coastal style to your home….
-
Easy 4th of July Front Porch Decorations for a Patriotic Welcome
Summer is here, and nothing welcomes the season like 4th of July front porch decorations in classic red, white, and blue.
-
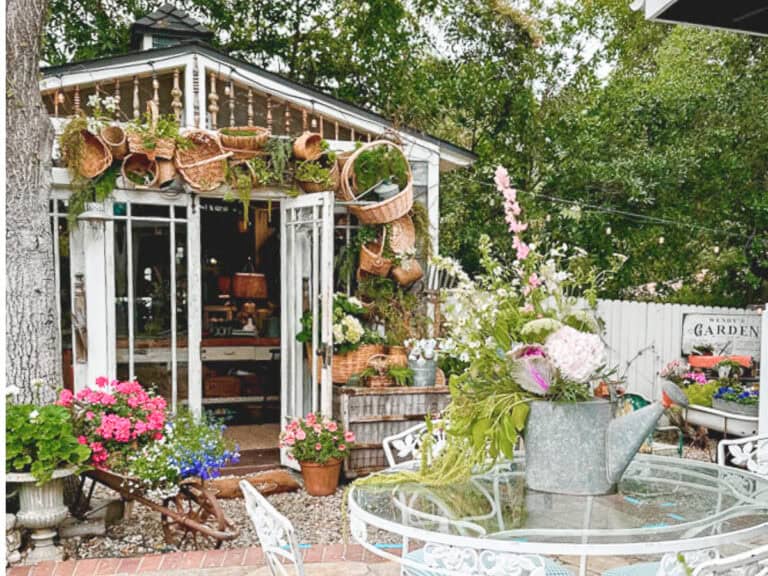
Beautiful Arch Basket Decor for a Summer-Ready She Shed
Learn how to make a charming DIY basket arch for your she shed using thrifted baskets and faux greenery, an easy summer decor project.


Thank you for sharing this Wendy. I tried drying oranges for the first time last year, and I see the reason why they did not turn out. I cut them by hand, and after 5 hours in the oven, they still were not dry, so I moved them over to dehydrate on our Ninja, and guess what? I overdried them! LOL. They turned dark, and I was embarrassed to use them for ornaments, so I hung on to them, and used them in a different way. Trial and error here, as always… I am loving the orange peel star ornaments, that is an adorable idea! They will add so much color to the tree. Hope you have a fantastic week!
Thank you so much Cara, it took me some time to master the perfect way to dry oranges. However, I love the air fryer drying method this year, so simple and easy. I hope you have a fabulous Thanksgiving with your family.
I look forward to making these every year and I have never thought to make them in the air fryer! I also have the same air fryer and isn’t it beautiful?
Yes, and it is so easy!
I love how you used different types of oranges in your wreath. Very nice.
Thank you Kristie. I enjoy drying lots of different varieties of oranges.
Beautiful and informative post, Wendy! I’ve never done this and think this is the year. Thanks for all the great tips!
Thank you, Lora. I can’t wait to see what you create with your oranges. Have a great weekend.
There are so many good tips in this post. I particularly liked the info on a dehydrator vs an oven. Also, the slicers you linked are helpful. The blood oranges look amazing when dried!
Thank you Anna. I am glad you found my tips helpful. I really find the dehydrator to be very helpful.
This is one of my favorite things to do each year. I love simple Christmas decorating. Thanks for your tips Wendy!
Thank you Cindy. I can’t wait to see what you do with them this year.
Wendy, happy Sunday!
I made these a few years ago and still have them in my Christmas box! I love the natural element and color! Not to mention they are so easy to make.
Thank you so much, Renae. I hope you are enjoying your weekend.
I have been drying oranges for several days and can’t wait to use them.
Oh, I cannot wait to see what you do with hem this year Rachel.
One of my favorite things to do at the holidays. I love how you used different colored oranges…great idea!!
Thank you, Jennifer. the pink grapefruit drys so lovely too. I cannot wait to see what you do with yours this year.