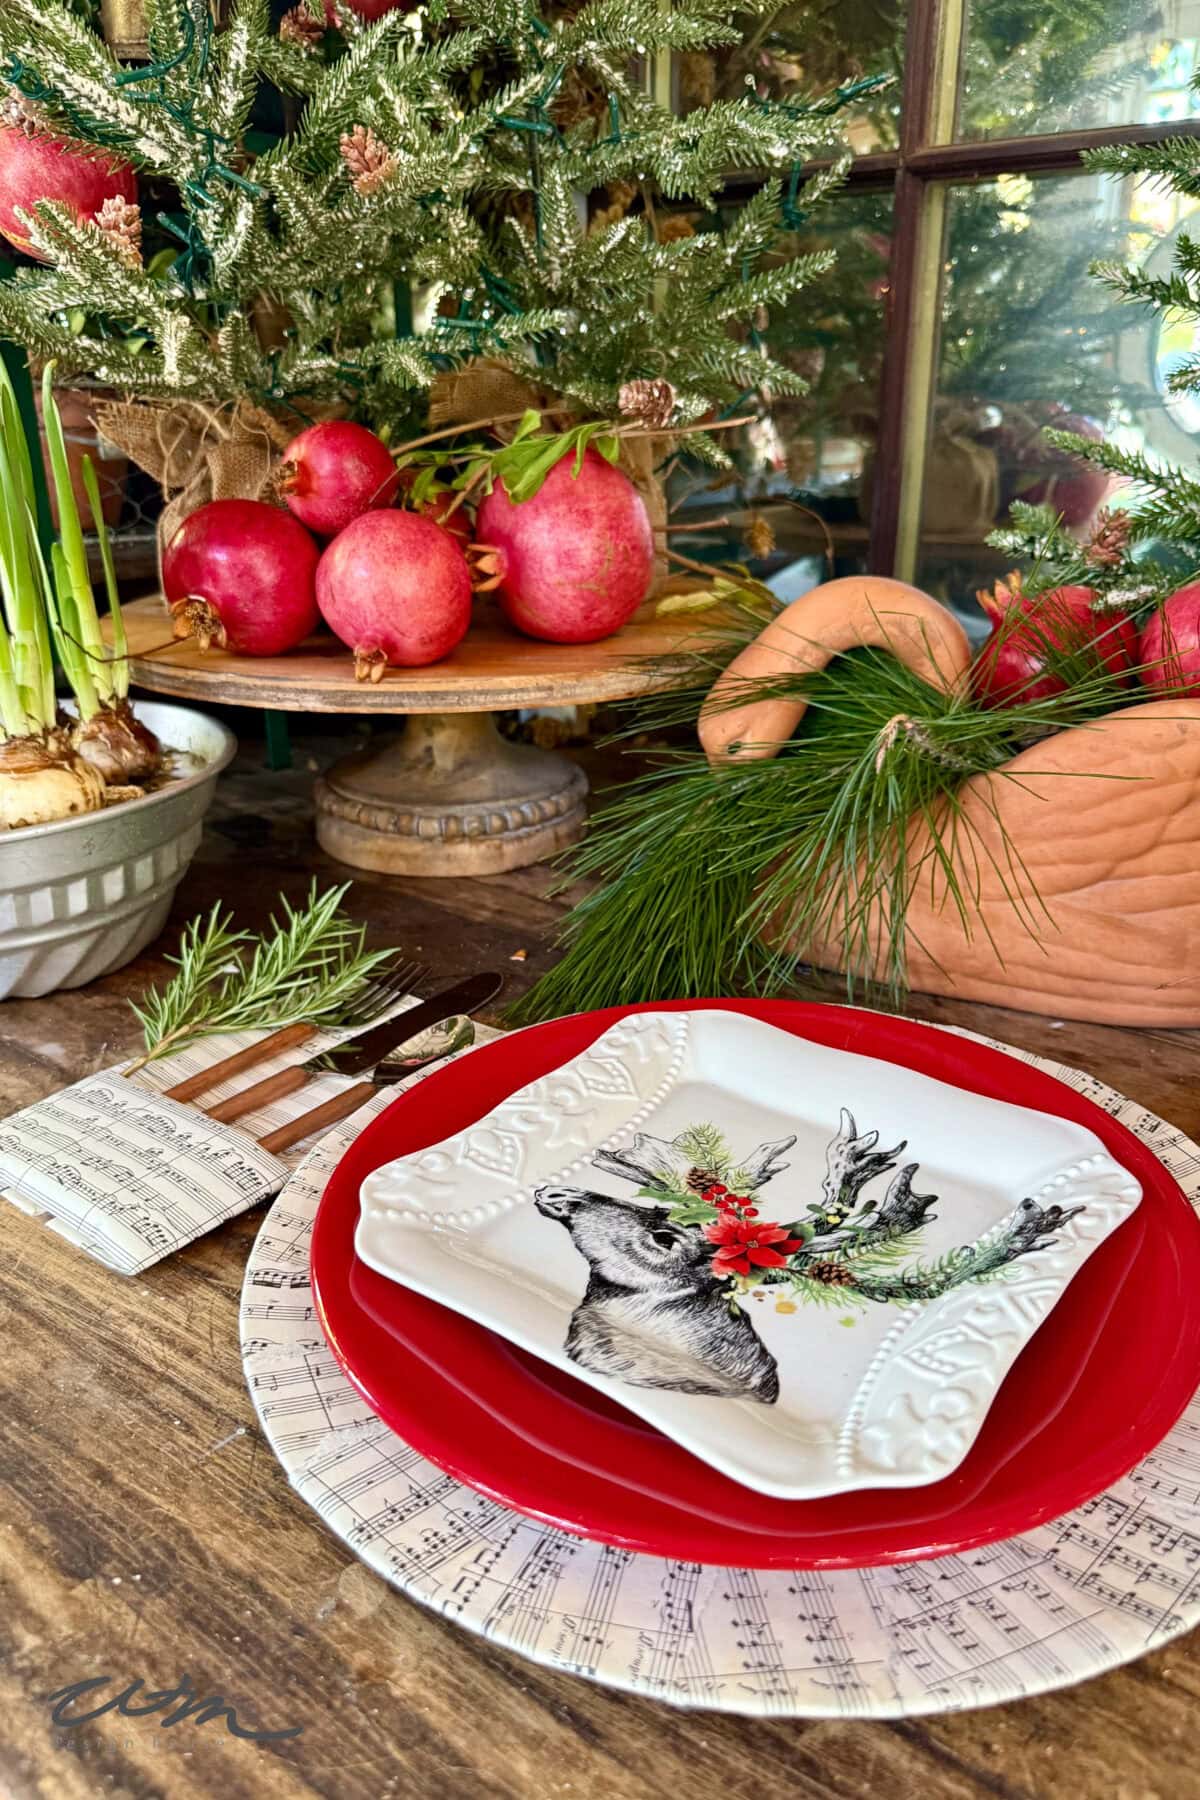
DIY Sheet Music Charger Plates – Bring a Melody to Your Table
This year, I wanted to create a holiday table that celebrates one of my favorite things — music. It fills our homes with warmth, joy, and connection. And since I’ve been collecting old sheet music and hymnals for years (I can never seem to leave an estate sale without a few!), I decided to use them in one of my favorite crafts — DIY sheet music charger plates.
These charming chargers became the inspiration for my entire table setting. I love giving old pieces new life, and this project added such a nostalgic, vintage touch to my holiday decor. The soft, aged pages and musical notes make each plate feel one of a kind — perfectly in tune with the season.

On my blog WM Design House, I may sometimes use affiliate links, which means a small commission is earned if you purchase via the link. The price will be the same whether you use the affiliate link or go directly to the vendor’s website using a non-affiliate link. Read my full disclosure policy here.
Handcrafted Society
Today marks the last installment of our HCS series for 2025, we have had so much fun sharing our creative ideas with you and want to wish you a wonderful holiday season.
For this month’s Handcrafted Society project, we’re getting creative with sheet music — a timeless touch that brings warmth and nostalgia to any holiday craft.

Tip from wendy’s craft room:
For a festive touch, try using Christmas carols or hymns.
Why This Project Hits All the Right Notes
- Upcycled and eco-friendly: Give old charger plates new life instead of tossing them.
- Timeless and vintage: Sheet music adds a classic, nostalgic feel that works for any season.
- Simple but striking: You only need a few supplies and a little time.
- Perfect for entertaining: The finished plates elevate any tablescape — especially for Christmas or holiday dinners.
Printable Instructions

DIY Charger Plates Using Sheet Music
Materials
- 1 can Spray glue
- 1 book Sheet music
- 1 pad Archival ink (Optional) Brown, sepia, or gray tones – To add texture, depth, and shadowing
- 1 can Mod Podge Matte or satin finish to seal and strengthen the plate
- 1 small chip brush
- 1 pair gloves
Instructions
DIY Sheet Music Charger Plates – Quick Steps
- Wipe plates clean; lightly sand glossy surfaces so the Mod Podge adheres.
- Tear sheet music into 2″ x 4″ pieces for the rim.
- Measure the center circle and cut a matching sheet music piece using a template.
- Spray the back of each piece with adhesive and layer them around the rim at a slight angle.
- Press down firmly, wrapping about ½ inch over the edge and onto the back.
- Spray and apply the circular piece to the center of the plate.
- (Optional) Distress edges with archival ink or dark wax for a vintage look.
- Once dry, seal with spray Mod Podge—apply several light coats for protection.
How to Make DIY Sheet Music Charger Plates
Ready to get started? This is such a fun and easy project — these DIY sheet music charger plates come together beautifully with just a few supplies.


Step 1: Prepare the plates
- Wipe your charger plates clean. If they have a slick or glossy surface, lightly sand them so the Mod Podge adheres better.
What Didn’t Work (Learn from My First Try!)
Before upcycling my old chargers, I actually tried this project using a cardboard pizza board. Unfortunately, when I adhered the sheet music, the board warped as it dried — wahhh! While they looked good at first, the moisture from the glue caused the cardboard to curl.
So, if you’re tempted to try this shortcut, I recommend sticking with old charger plates or using a sturdier base like wood or plastic. You’ll get a much smoother, more durable finish.

Step 2: Cut or tear the sheet music
- Tear your sheet music pages to create a soft, vintage edge. I tore mine into pieces about 2 inches wide by 4 inches long to fit neatly around the rim of the charger plate.
- Next, measure the center circle of your charger and make a simple paper template. Use that template to cut a circular piece of sheet music to fit the center of the plate.


Tip from wendy’s craft room:
I found another plate that matched the size of the inner circle and used it to trace my template.
Step 3: Apply Adhesive & Sheet Music
- Spray the back of each small piece of sheet music with adhesive, then layer them around the edge of the plate at a slight angle.
- Press each piece down firmly with your fingers, wrapping about half an inch over the rim and onto the back of the plate.
- Wear gloves while you do this to avoid messy hands.
- Lastly, spray the back of the center circle you cut out and apply it to the center of the plate.


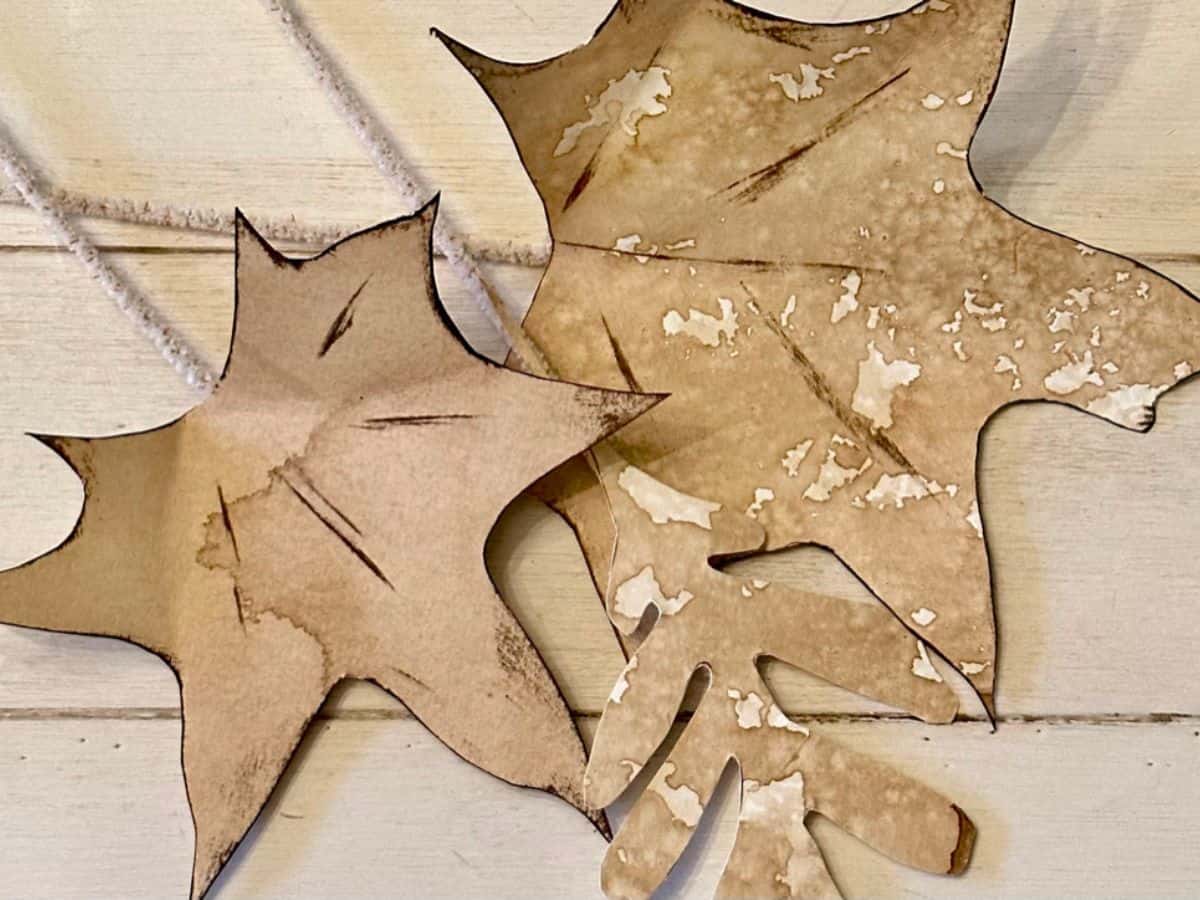
Step 4: Distress with Archival Ink (Optional)
For a truly vintage look, this method works beautifully.
- Lightly rub an archival ink pad around the edges of the plate.
- Blend the color onto the flat surface for a soft, aged effect.
- Use a damp paper towel to smooth and spread the ink evenly.
I may still experiment with a touch of dark wax on one to see what kind of effect it creates. Both versions are beautiful, but I was leaning toward a cleaner, whiter look for my table this time. You can decide which style you like best — I still can’t make up my mind!


Tip from wendy’s craft room:
Always test your finish before committing to the whole project! Whether you’re using archival ink, dark wax, or antiquing glaze, try it first on a small section or extra plate. The color and tone can shift once it dries — and sometimes, the unexpected results lead to a whole new idea!
Step 5: Seal and finish
- Once dry, apply a coat of spray Mod Podge over the top to seal your work. (Add a few coats for extra protection)

Tip from wendy’s craft room:
I found that using spray Mod Podge was much easier and helped prevent any bubbling. Just be sure to shake the can well and apply several light coats rather than one heavy layer for the best finish.
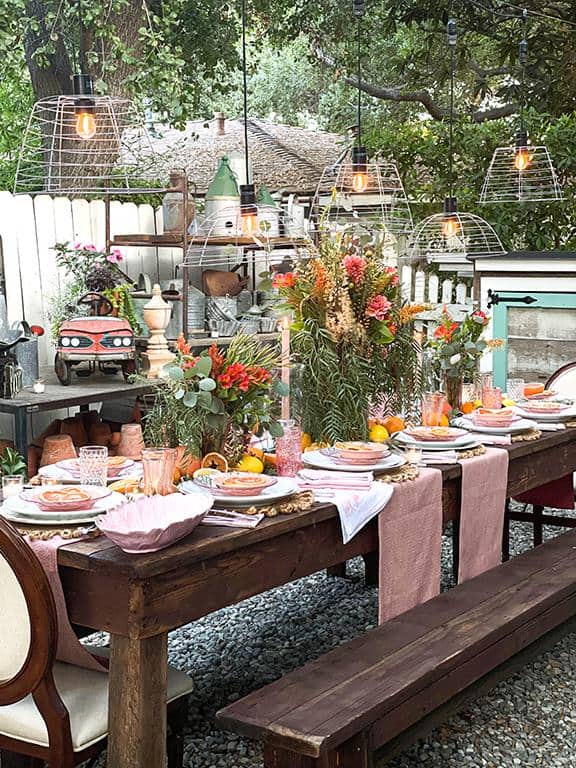
Styling Your DIY Sheet Music Charger Plates
Once your DIY sheet music charger plates are finished, the fun part begins — styling them!
- Layer them beneath simple white plates or holiday dishes (for a pop of color) and linen napkins for a clean, classic look.
- Add candlesticks, vintage ornaments, or brass accents to complete your holiday tablescape.
- Fold a simple sheet of music to create a pocket to hold your silverware. (see video below)
- These chargers work beautifully for Christmas dinners, music-themed parties, or even romantic date nights.
- They make such a lovely statement without being flashy—just soft, elegant, and full of history.


Tip from wendy’s craft room:
You can also use coffee or tea to distress your paper before applying it to your charger plate. I have been known to do this!
Silverware Pocket
This little silverware pocket was the perfect finishing touch for my table. Click here to watch the short video and see exactly how I made it.

Variations to try
As I finish preparing for my tablescape, I will also be adding a few other sheet music craft ideas, so keep your eyes out for them.
- Sheet music ornaments to match your chargers
- Decoupaged candles for the center of your table
- Music-themed gift tags or place cards for each guest
- Vintage hymnal Easter rabbits – a sweet springtime craft using hymnal pages

Wrapping up!
I love how these DIY sheet music charger plates turned out—they bring a soft melody of nostalgia to my holiday table. Projects like this remind me that beauty often comes from the simplest things: a few old pages, a bit of glue, and a spark of creativity.
And don’t forget to visit the other talented creators in this month’s Handcrafted Society hop for more beautiful sheet music inspiration!


Other Tutorials from WM Design House
If you love this DIY, you might also enjoy some of my other favorites.


Did you make this craft?
We would love to see what you have created, so mention us @wmdesignhouse or tag us using #wmdesignhouse so we can see your creations!
More about me!

Hello, I’m Wendy – a dedicated homemaker with a deep passion for decorating, gardening, cooking, and crafting. I find joy in harmonizing beautiful elements to fashion a space that is both comfortable and inspiring. I will help you create a beautiful home, one project at a time.


Hi Wendy-
I appreciate all the tips you offer. Especially regarding the use of a plastic charger. (As opposed to wood or cardboard). I also didn’t know mod podge made a sealer! These chargers would be perfect for a Christmas table setting. Of course, I love the little paper pocket too! Great ideas.
The plate chargers turned out fabulous, and I’m loving those utensil holders, so clever! I’ve used spray adhesive before, but I’ve never used spray ModPodge, and I’m excited to give it a try! Thank you for sharing your knowledge; I always learn something new from you! I’m looking forward to seeing more of your holiday decor and DIY projects!
Oh! I absolutely love this Wendy. I use sheet music all the time and I’m adding this for a future project. Thanks for the inspo. Your table setting is lovely. XO- MaryJo
Thank you MaryJo, I appreciate your kind words. I hope you are doing well. Happy Holidays!
Great idea Wendy! Keep those ideas coming, girl! 🥰
What a beautiful way to recycle old chargers! I love the extra bit of character you added by aging the sheet music! Your holiday tablescape is going to be so gorgeous! Pinning for inspiration!
Thank you Michelle! for a simple project, I had a few struggles along the way, but finally got her done!
These are amazing, Wendy! I know your tablescape is going to be gorgeous and I love that you added a silverware pocket too. I was going through my party pantry the other day thinking that I needed to donate some of the chargers I no longer use but now I realize I can give them a fresh feel. Can’t wait to try this and thanks so much for all you’ve done to put this hop together. It’s always fun to see what you guys are creating! Hugs, CoCo
Oh my! Another beauty. I did not know there was a “spray” Mod Podge. Thank you for sharing this beautiful craft!
Thank you Barb. Yes, the spray is so easy to work with! However, I tried to use it to attach the paper to the charger
and that did not work so well, the spray adhesive was much better.
What a great idea, Wendy. Your chargers turned out beautifully. I need to snag some Mod Podge Sealer for my projects. I have none in my craft room.
I love this idea, Wendy. It really elevates a charger for the holidays. And the utensil pocket – genius! And so simple.! As always, another beautiful tablescape idea –