How to Make A DIY Candle Chandelier with Fresh Greens
Elevate your outdoor space for the holidays with a gorgeous DIY candle chandelier. In this step-by-step tutorial, I’ll show you how to create this elegant lighted display using a few simple materials.
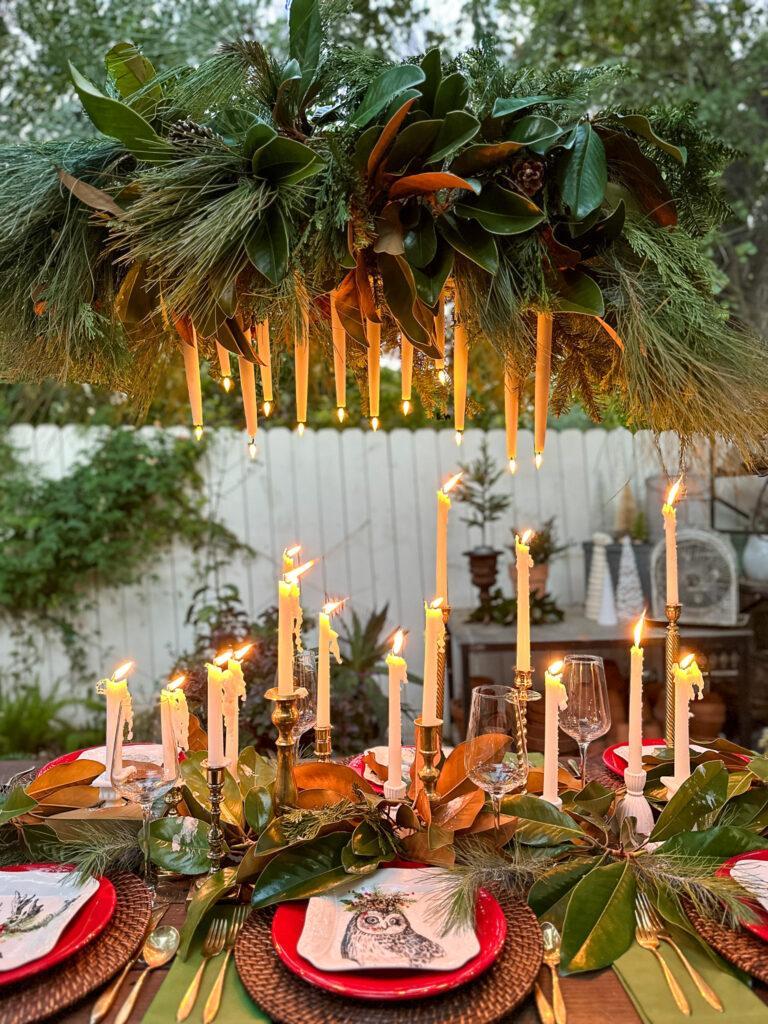
I recently hosted a wine and cheese gathering with the girls in my outdoor garden. For this special occasion, I was inspired to create this elegant candle chandelier to light up our evening. I absolutely adore the end result. The warm glow of the candlelight created a lovely ambiance, while the fresh greens made it a festive show piece.
Now, I’m sharing all the details about how I made this outdoor candle chandelier with you. While it may look complicated, it was actually relatively easy and inexpensive to make. Follow along to learn how to make your own DIY chandelier and add a touch of sophistication and charm to your celebrations this season.

On my blog WM Design House, I may sometimes use affiliate links, which means a small commission is earned if you purchase via the link. The price will be the same whether you use the affiliate link or go directly to the vendor’s website using a non-affiliate link.
DIY Candle Chandelier for an Outdoor Dining Space
Creating a beautiful setting for my guests is one of my favorite things to do, and I have this wonderful outdoor space that allows me to get creative for any occasion.
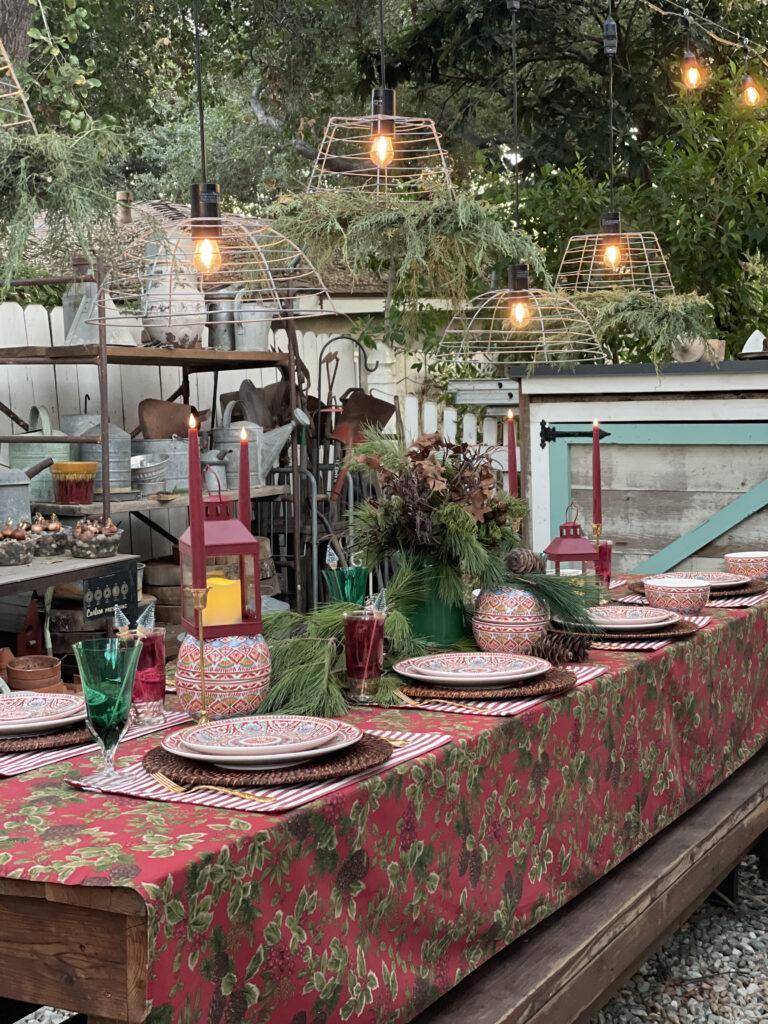
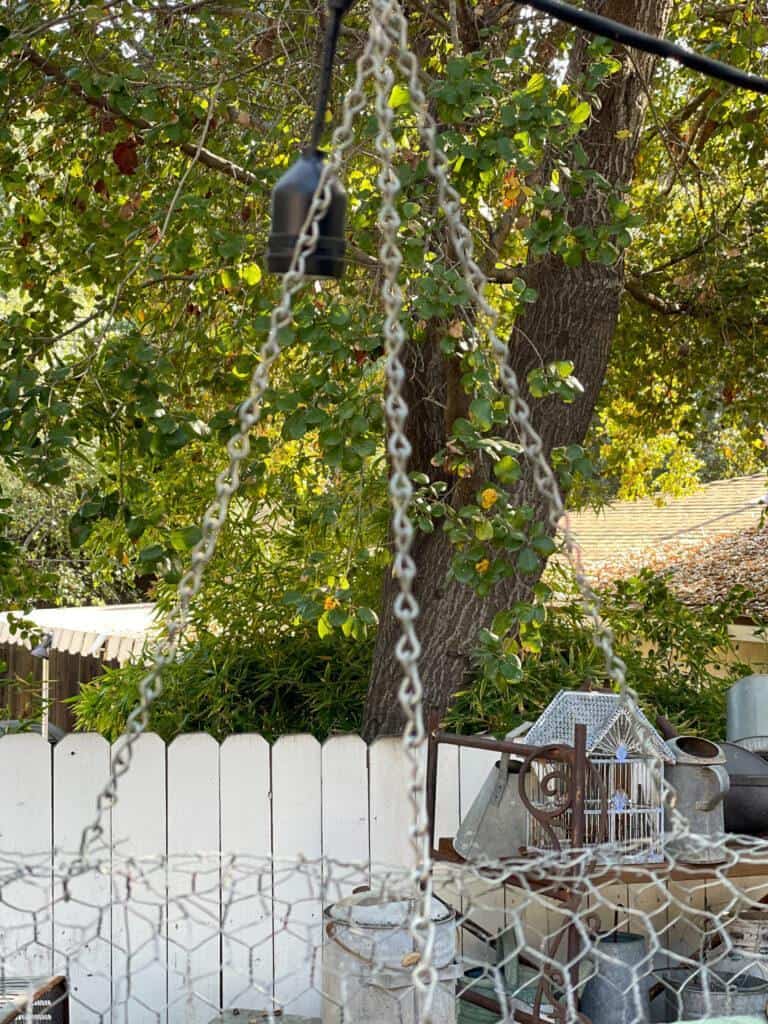
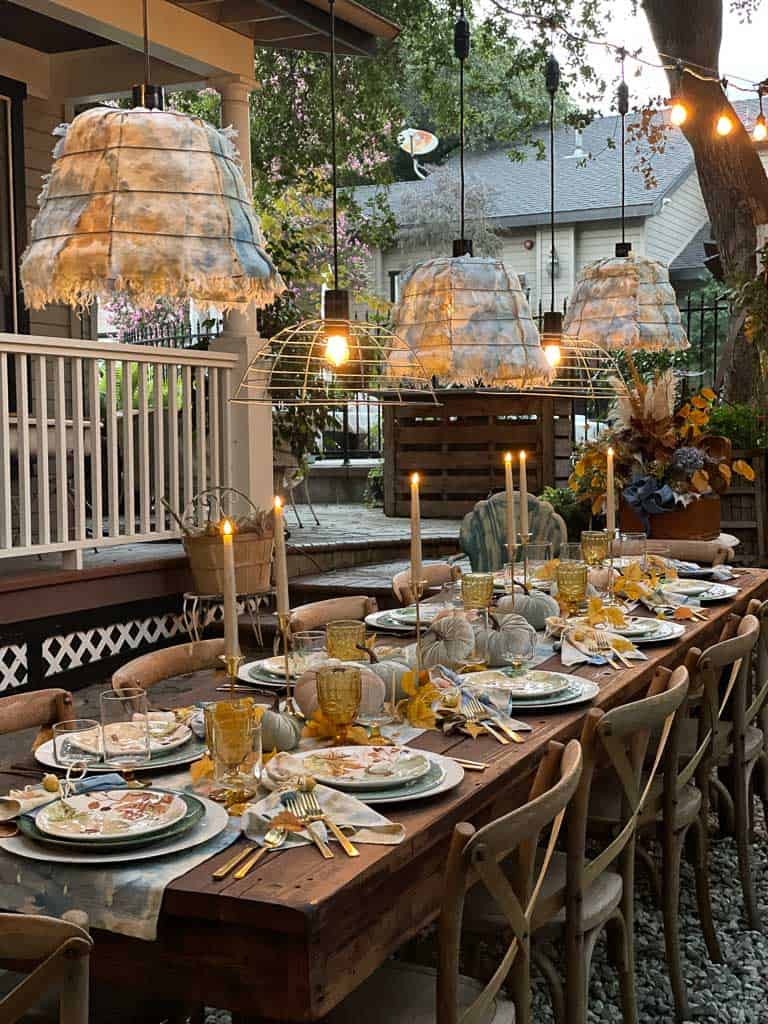
Above the dining table in my garden are these charming outdoor hanging lights. We crafted them from market string lights and repurposed wire garden baskets.
While I love their look on their own, they are also the perfect canvas for decorating. Updating old light fixtures with a new look is a great way to transform a space for different seasons, holidays, and occasions.
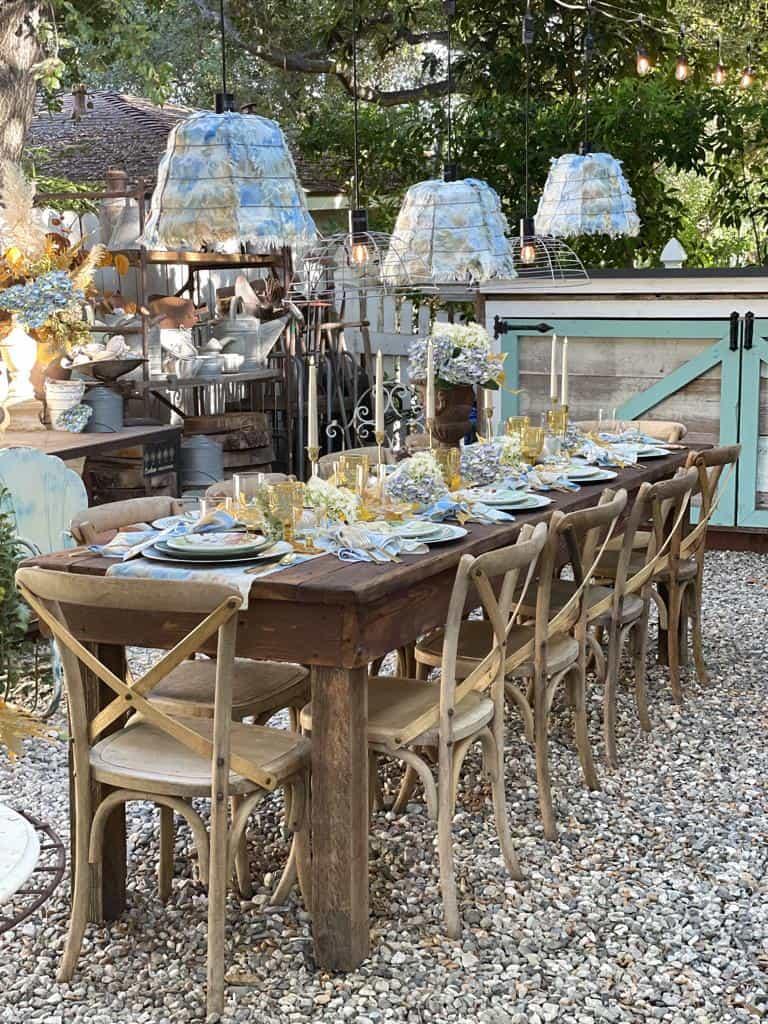
In the past, I have decorated these baskets in many different ways, whether trimming them with greenery for Christmas or weaving colorful fabric to create lamp shades for a spring upgrade.
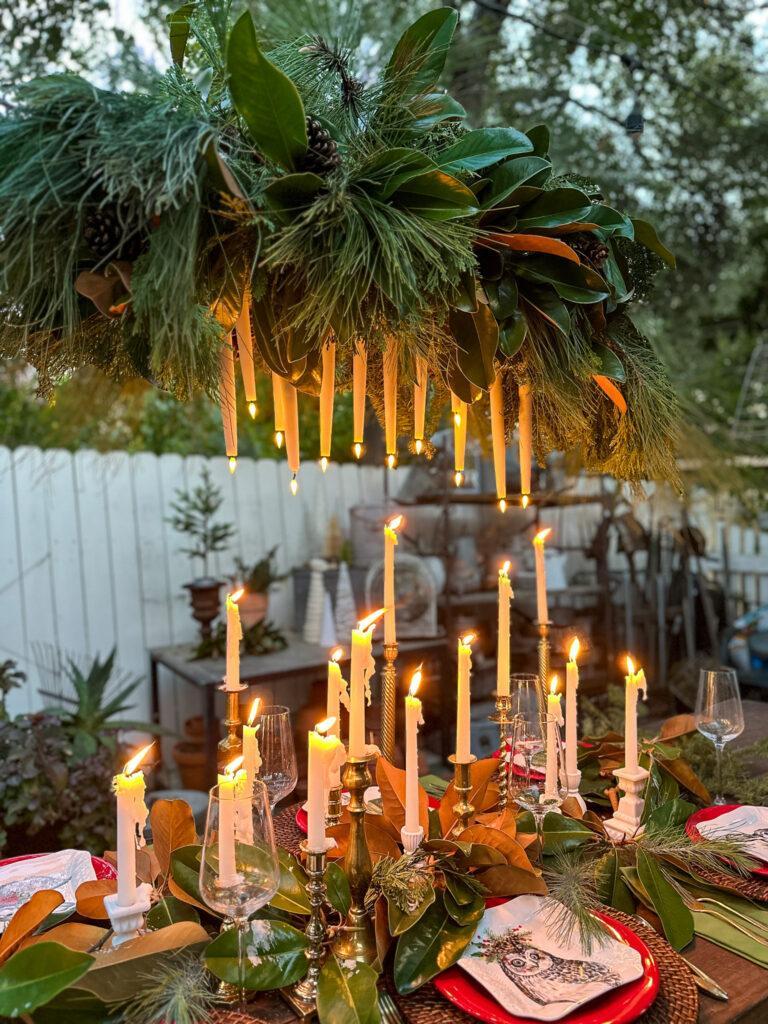
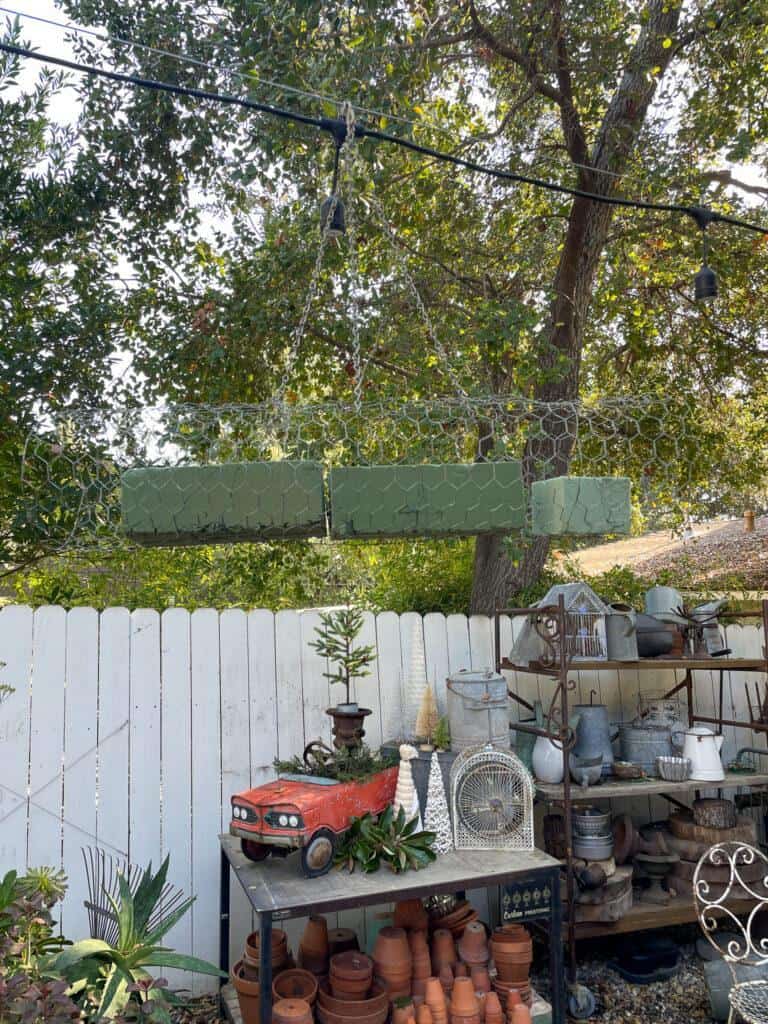
Today, I opted to remove the lights, and in their place, I created a beautiful chandelier using chicken wire, floral foam, fresh greenery, and battery-operated candles.
It might seem obvious, but I do need to mention that you DO NOT use real candles for this DIY candle chandelier. The best choices for this project are battery-powered candles or solar lights. These are not only safer and easier to use, but they also don’t require havening to disguise any cords or plugs.
Now, let’s get to the good stuff! Several steps went into this project. I’ll break down all my supplies and guide you through step-by-step instructions.
Supplies Needed
The first thing you need to do is gather your supplies. Be sure to shop your backyard or garage first; you probably already have some of the things you need on hand.
Here is a list of supplies you will need:
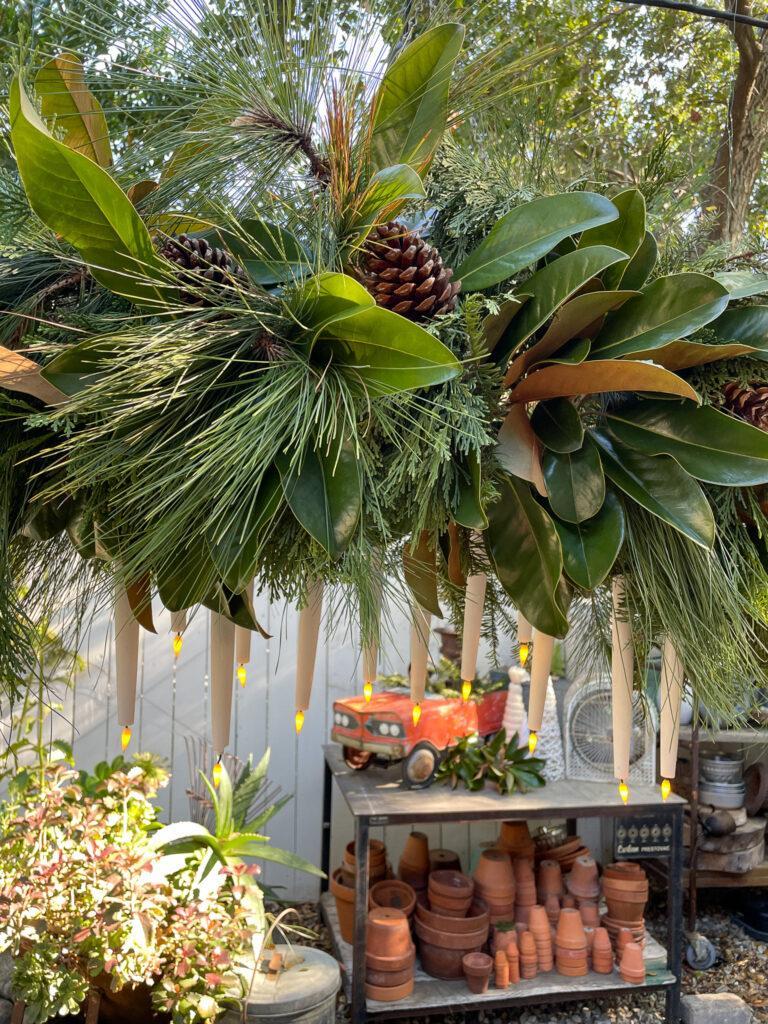
- An assortment of fresh greenery. I used cedar, pine, and magnolia. I foraged these greens, so I did not spend a dime.
- A piece of chicken wire, approximately 30″ wide x 18″ long
- Three pieces of dry floral foam
- A spool of wire
- Wire cutters
- Floral clippers
- Chain or wire to hang the outdoor chandelier with your fresh greens
- Battery operated candles
How to Make a DIY Candle Chandelier
Making this light fixture was simple and the result is stunning. The process can be broken down into a few easy steps. Then, I’ll share a video so you can see the whole thing come together before your eyes.
Prep the Wire Frame
The first step is creating a frame using chicken wire and adding floral foam.
- Cut your chicken wire so you can roll it into a round shape that is approximately 8-10 inches in circumference.
- Twist the wire ends together so the chicken wire is secure, creating a tube-like shape. This is the frame of your chandelier.
- Place the dry floral foam inside the tube and secure it to the bottom with wire.
- Repeat this process with all three pieces of floral foam, spacing them evenly inside the frame.

Hang the Frame
The next step is to hang the frame you’ve created. You can do this a few different ways, but here is how I did it.
5. I used chains from a hanging basket to attach my chicken wire frame to the market lights that I already had hanging above my dining table. To do this, I attached the three ends of the chain to the chicken wire and used an “S” hook to hang the frame onto the market lights.
6. I also used my wire spool to secure each end so the light fixture would not sway. You can do this by running the wire through the chicken wire frame over the market lights and tying the ends together. Do this a few times to add extra support.
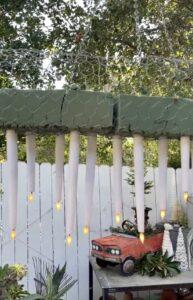
7. Insert your candles upside down into the foam. The candles I used are battery-operated, making it easy to turn them off and on by remote. The candles should stick well into the floral foam. If you’re concerned about them staying put, you can secure them with hot glue.
Important: Do not use real candles! They would be a terrible fire hazard.


DIY Candle Chandalier with Fresh Greenery
Equipment
- Wire clippers
- Gardening shears
Materials
- Assorted fresh greenery I used magnolia and pine
- Chicken wire
- Battery operated candles
- Dry foam
- Chain to hang the chandelier with S hooks
- Spool of wire
Instructions
- Create a round tube using chicken wire approximately 10" in diameter.
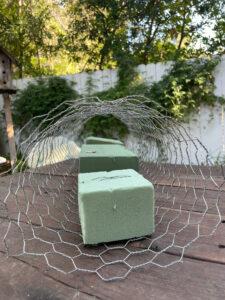
- Attach three bricks of dry foam on the inside of the tube using the spool of wire.
- Hang the tube using a chain and S hooks from a sturdy source to support the chandelier. I hung mine from a stand of market lights.

- Insert your battery-operated candles and upside down. I used candles on a remote, so turning them on and off is easy.
- Insert your greenery into the chicken wire until the entire chandelier is covered, and you cannot see the chicken wire anymore.

Arrange the Greenery
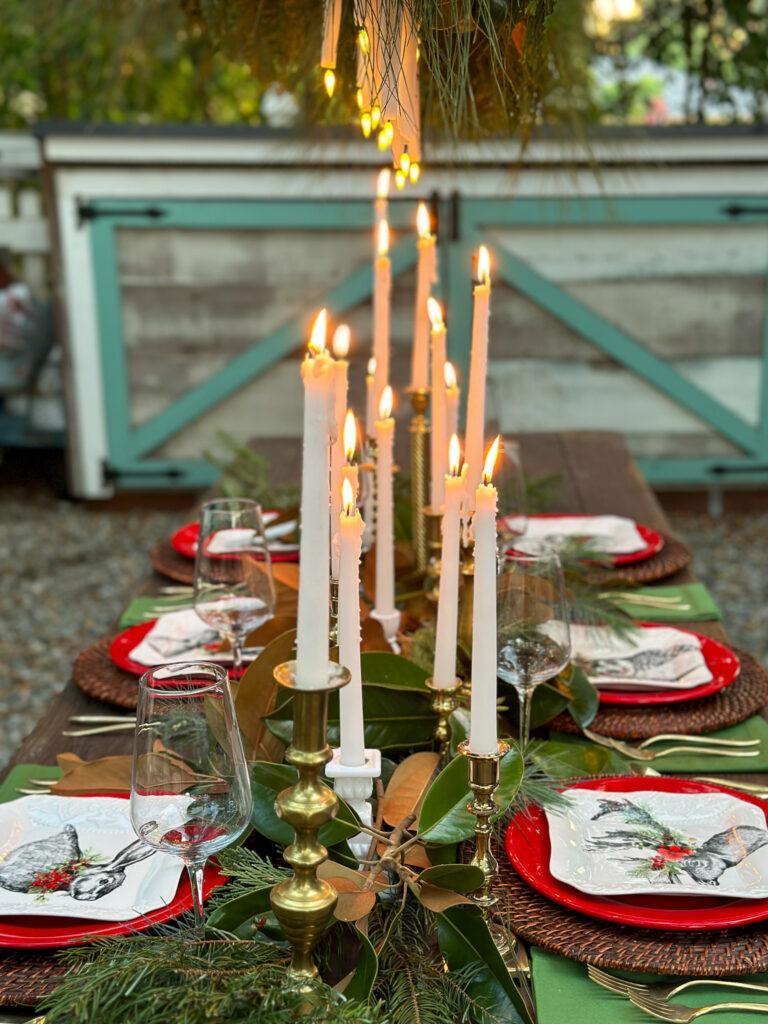
Lastly, add the finishing touch to your DIY candle chandelier – lush greenery!
8. When selecting greenery to adorn your chandelier, I recommend using a small variety to make a visually interesting display. Mix shades of leaves to bring different textures and colors to your centerpiece.
9. Weave the stems of your greenery into the chicken wire frame and poke them into the floral foam to secure them in place. Repeat this process until the entire frame is covered. This part only took about 5 minutes to complete and completely transformed my old lights.
Now it’s time to light up your candles, sit back, and enjoy. This is the best part!
Watch How Easily My DIY Candle Chandelier Came Together.
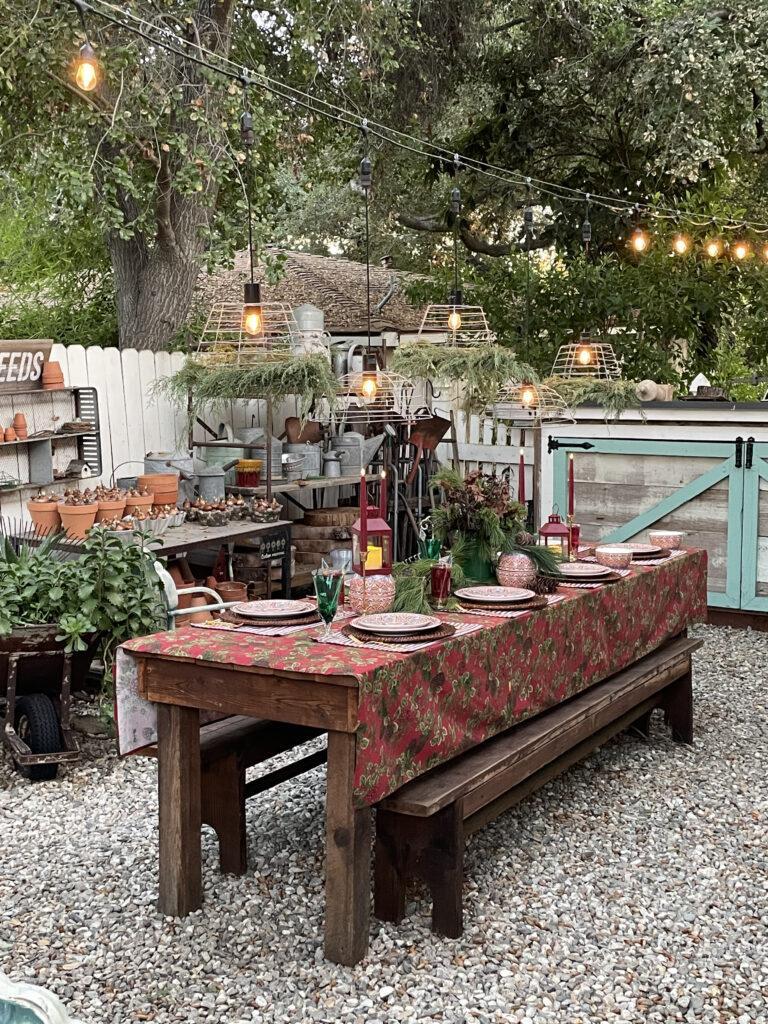
Decorating Your Outdoor Space
Once you’ve had a chance to admire your handiwork, you might be inspired to decorate the rest of your space to complement your DIY creation.
In my case, I needed to decorate my table for a holiday party under the stars. So, that meant adding warm and inviting seasonal elements to make my guests feel festive and cozy.
I kept the table decoration simple with candles, thrifted brass candlesticks, and more greenery to match my chandelier. I love how the table and chandelier mirror each other without being completely identical.
For the place settings, I used textured chargers out of rattan, red and green accents, and cute holiday plates.
What do you think of the final look? This arrangement was a big hit with my friends and was the perfect setting for our fun and festive girl’s night.
There are many ways to personalize your table to your style and occasion. Here are a few ideas:
- Incorporate additional natural elements such as pinecones or pods for extra texture and holiday charm.
- Use various metallic accents in your decor to make your table sparkle and shine in the candlelight.
- Keep your table settings sleek and simple with an all-white look. Paired with lush greens, white has a classic and timeless appeal.
- Add cozy elements like a knit table runner or faux fur blankets on the chairs to warm up a cool evening.
How to Hang an Outdoor Chandelier Without Trees
Part of what made this project so simple was that the string lights were already hanging above our dining table. If you don’t already have lights or trees to hang them from, don’t let that deter you. There are still several different ways to display your DIY candle chandelier.
If you want permanent outdoor lights, consider digging holes and installing sturdy posts to elegantly string lights throughout your yard. This is an excellent choice for homeowners committed to festive lighting. However, this may not be the most practical option for renters.
There are plenty of other options, too! Learn more about how to hang string lights without trees.
More DIY Outdoor Lighting Ideas
Are you looking for even more inspiration for outdoor lighting? DIY light fixture updates can be an easy and impactful way to transform your space.
Use a different light source.
If you like the look of this chandelier but don’t want to use candles, try using a different light source. For example, instead of inserting candles, you could weave fairy lights or string lights through the chicken wire frame and secure them with zip ties.
Repurpose an old chandelier.
Or, instead of a complete DIY, you can skip a few steps by repurposing an old chandelier. For an easy outdoor chandelier makeover, remove the outdated wiring, spray paint over the old finish, and insert new battery-operated pillar candles into the plugs. You’ll likely want to use a candle holder to keep them in place or at least secure them into the candle’s base. A little paint and some new bulbs can make a huge difference! You can also attach greenery using zip ties for a really enchanting look.
Make your own pendant lights.
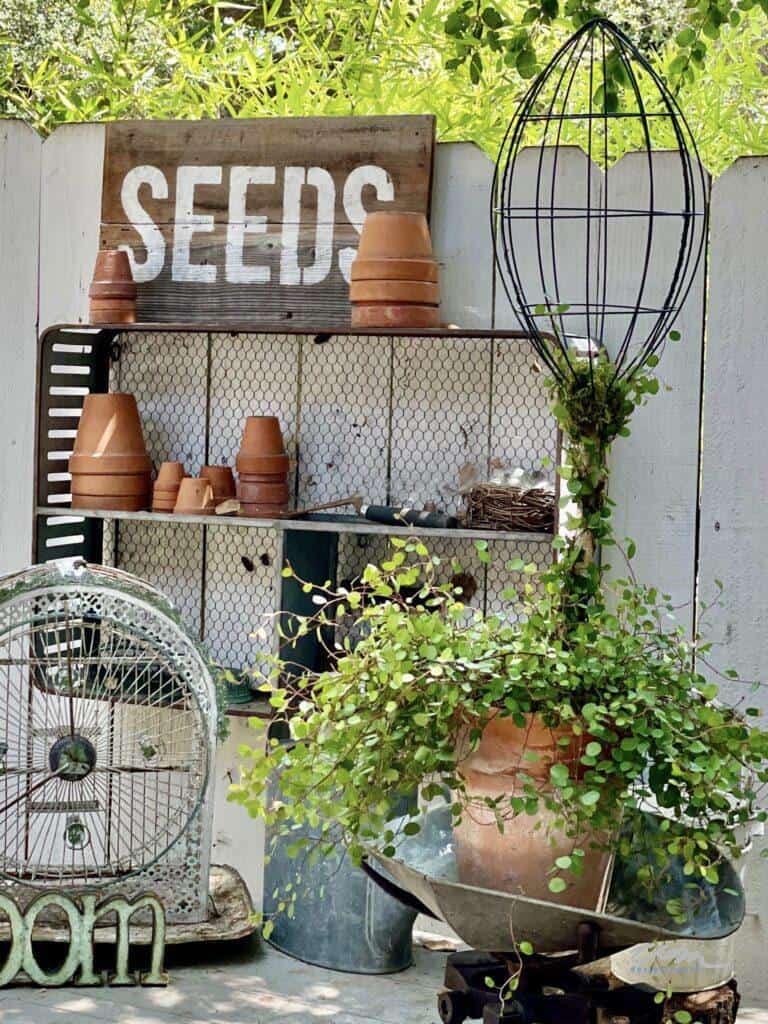
You can also make your own outdoor pendant lights by using old metal baskets and the existing light bulbs from a set of outdoor string lights. This is a fun little project, and you can hang your lamps anywhere you’d like! These smaller drum shades are perfect for hanging over an outdoor dining table, don’t you think? If you want to make a project like this, don’t worry about finding the exact same baskets I did. Check your thrift store or local flea market to see what you can find!
There are more ways to adapt this idea, too! You could stick the lights into baby food jars, mason jars, and more for unique candle lanterns that add so much charm to any space. The fun of DIY is that no two pieces are the same. You know you won’t find your gorgeous light fixture hanging in any other home on the block!
This DIY is for more than just outdoor spaces! It’s also an excellent project for your living room or dining room. Many dining room chandelier designs like this sell for lots of money at Restoration Hardware and other stores, but you can make your own for much less!
Wrapping Up
As you enjoy the warm glow of your newly crafted candle chandelier, take pride in the ambiance you’ve created for your outdoor space. Whether it’s a festive holiday gathering or a quiet evening under the stars, this DIY project adds a touch of magic to any occasion. Embrace the joy and beauty of crafting, knowing that you’ve added a personalized touch to your home. Cheers to the warmth, charm, and unforgettable moments your DIY candle chandelier will bring to your gatherings!


Shop the Post

If you enjoyed this post, you would also enjoy the following:
-
10 Easy Summer Decorating Ideas to Refresh Your Home
Transition from spring to summer with 10 easy summer decorating ideas to refresh your home with light, breezy and budget-friendly style.
-
How To Make The Best Topiary: Step By Step
Learn how to easily make a beautiful diy topiary for your garden or porch with this step-by-step guide.
-
How to Make a Eucalyptus Wreath You Can Restyle for Every Season
125 shares Facebook Pinterest Save Threads If you have ever wondered how to make a fresh eucalyptus wreath you can use all year, this is the tutorial for you. With a grapevine base, two kinds of foraged eucalyptus, and a quiet afternoon, you can create one wreath that carries your front door through every season….


I received a 404 error message when I tried the link to the tapers with remote. I have battery powered tapers that didn’t come with a remote and I can see that would be a necessity for this lovely chandelier.
Oh wow, Wendy. This is absolutely stunning!!
Thank you Jen, it was super fun to create. Merry Christmas to you and your family.
Wendy – So clever! I would have never thought to turn battery operated candles upside down. Your outdoor chandelier looks gorgeous.
Thank you, Anna. I hope you are doing better. I think of you so often. I pray the holidays will be good for you.
Wendy, this is so CLEVER! I would never have thought to do this. At first I thought they were real candles (they look authentic) and was wondering what you do with dripping wax! Ha! Great idea~so interesting!
Thank you so much Mary. You would not of been the first one to ask me about the dripping wax, LOL I hope your new year is off to a great start.
Fabulous look and attraction
Woo Hoo, why thank you!
Wendy
This is such a fun idea. Merry Christmas
Thank you Rachel. Merry Christmas to you too!