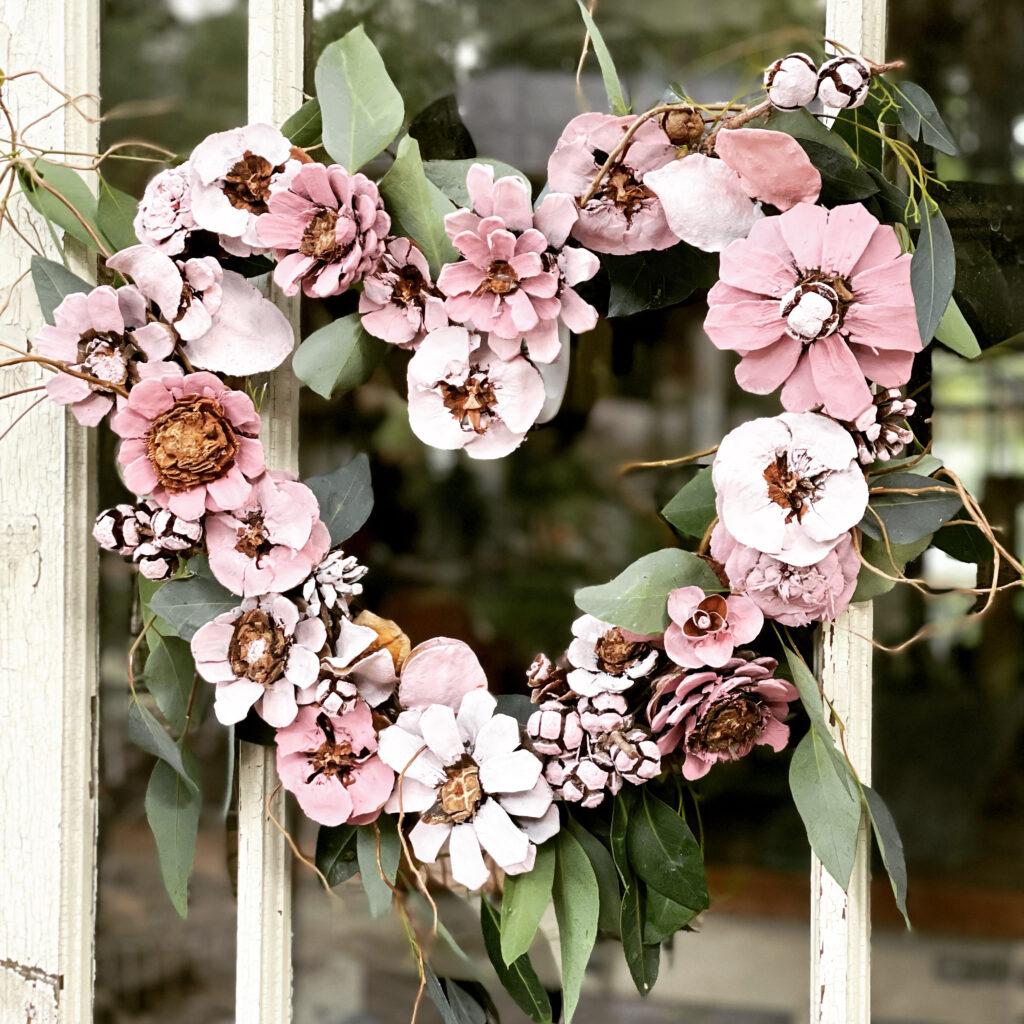
How to Make a Pink Heart Pine Cone Wreath
Learn how to easily make a DIY pine cone wreath in the shape of a heart for Valentine’s Day.
On my blog WM Design House, I may sometimes use affiliate links, which means a small commission is earned if you purchase via the link. The price will be the same whether you use the affiliate link or go directly to the vendor’s website using a non-affiliate link. Read my full disclosure policy here.
How to Make a Pink Heart Pine Cone Wreath for Valentine’s Day
Have you started to decorate for Valentine’s Day? Well, today, I have the perfect craft project for you! I am sharing a stunning pink heart pine cone wreath that will be the envy of all your neighbors.
With just a few supplies and a bit of patience, you can quickly put together this natural pine cone wreath that’s sure to add charm to your porch or entryway.
Supplies Needed to Make a Pink Heart Pine Cone Wreath
- Heart-shaped grapevine wreath ( you could also bend curly willow to make your wreath or use a wire frame)
- Assorted pine cones and pods
- Fresh eucalyptus
- Fresh curly willow
- Pink and white acrylic paint
- Paint brush
- Wire
- Glue gun and glue sticks
- Garden clippers
The Best Types of Pine Cones to Use for Your DIY Pine Cone Wreath
When you think of trees in Southern California, palm trees might be the first to come to mind. But did you know we have plenty of pine trees too? Especially in the mountains.
Using a variety of pine cones will give you a more interesting look for your pink heart wreath.
Since we so many different pine trees that means we’re also fortunate to have several varieties of pinecones.

These are just a few of the types of pinecones you’ll find here in California:
- Monterey Pine
- Bishop Pine
- Santa Cruz Island Pine
- White Bark Pine
- Limber Pine
- Beach Pine
- Lodgepole Pine
- Western White Pine
- Knobcone Pine
- Bristlecone Pine
- Foxtail Pine
- Four-Leaf Pinyon
Step-by-Step Instructions to Make a Pink Heart Pine Cone Wreath
Before starting your craft, it’s important to clean and bake your pine cones to ensure they’re free from dirt and pests. For a simple, step-by-step guide on how to do this, including soaking in a vinegar solution and baking, check out this post.
And, if you are looking for more pine cone wreaths to make, I have another great project for you. Take a look at how I made a beautiful snowflake wreath. It is a fun and creative project perfect for winter.
Once your pine cones are clean and dry, you’re ready to begin! So gather the rest of your supplies, and follow my easy tutorial on how to make a painted pine cone wreath.
Step 1: Wrap Your Wreath Form
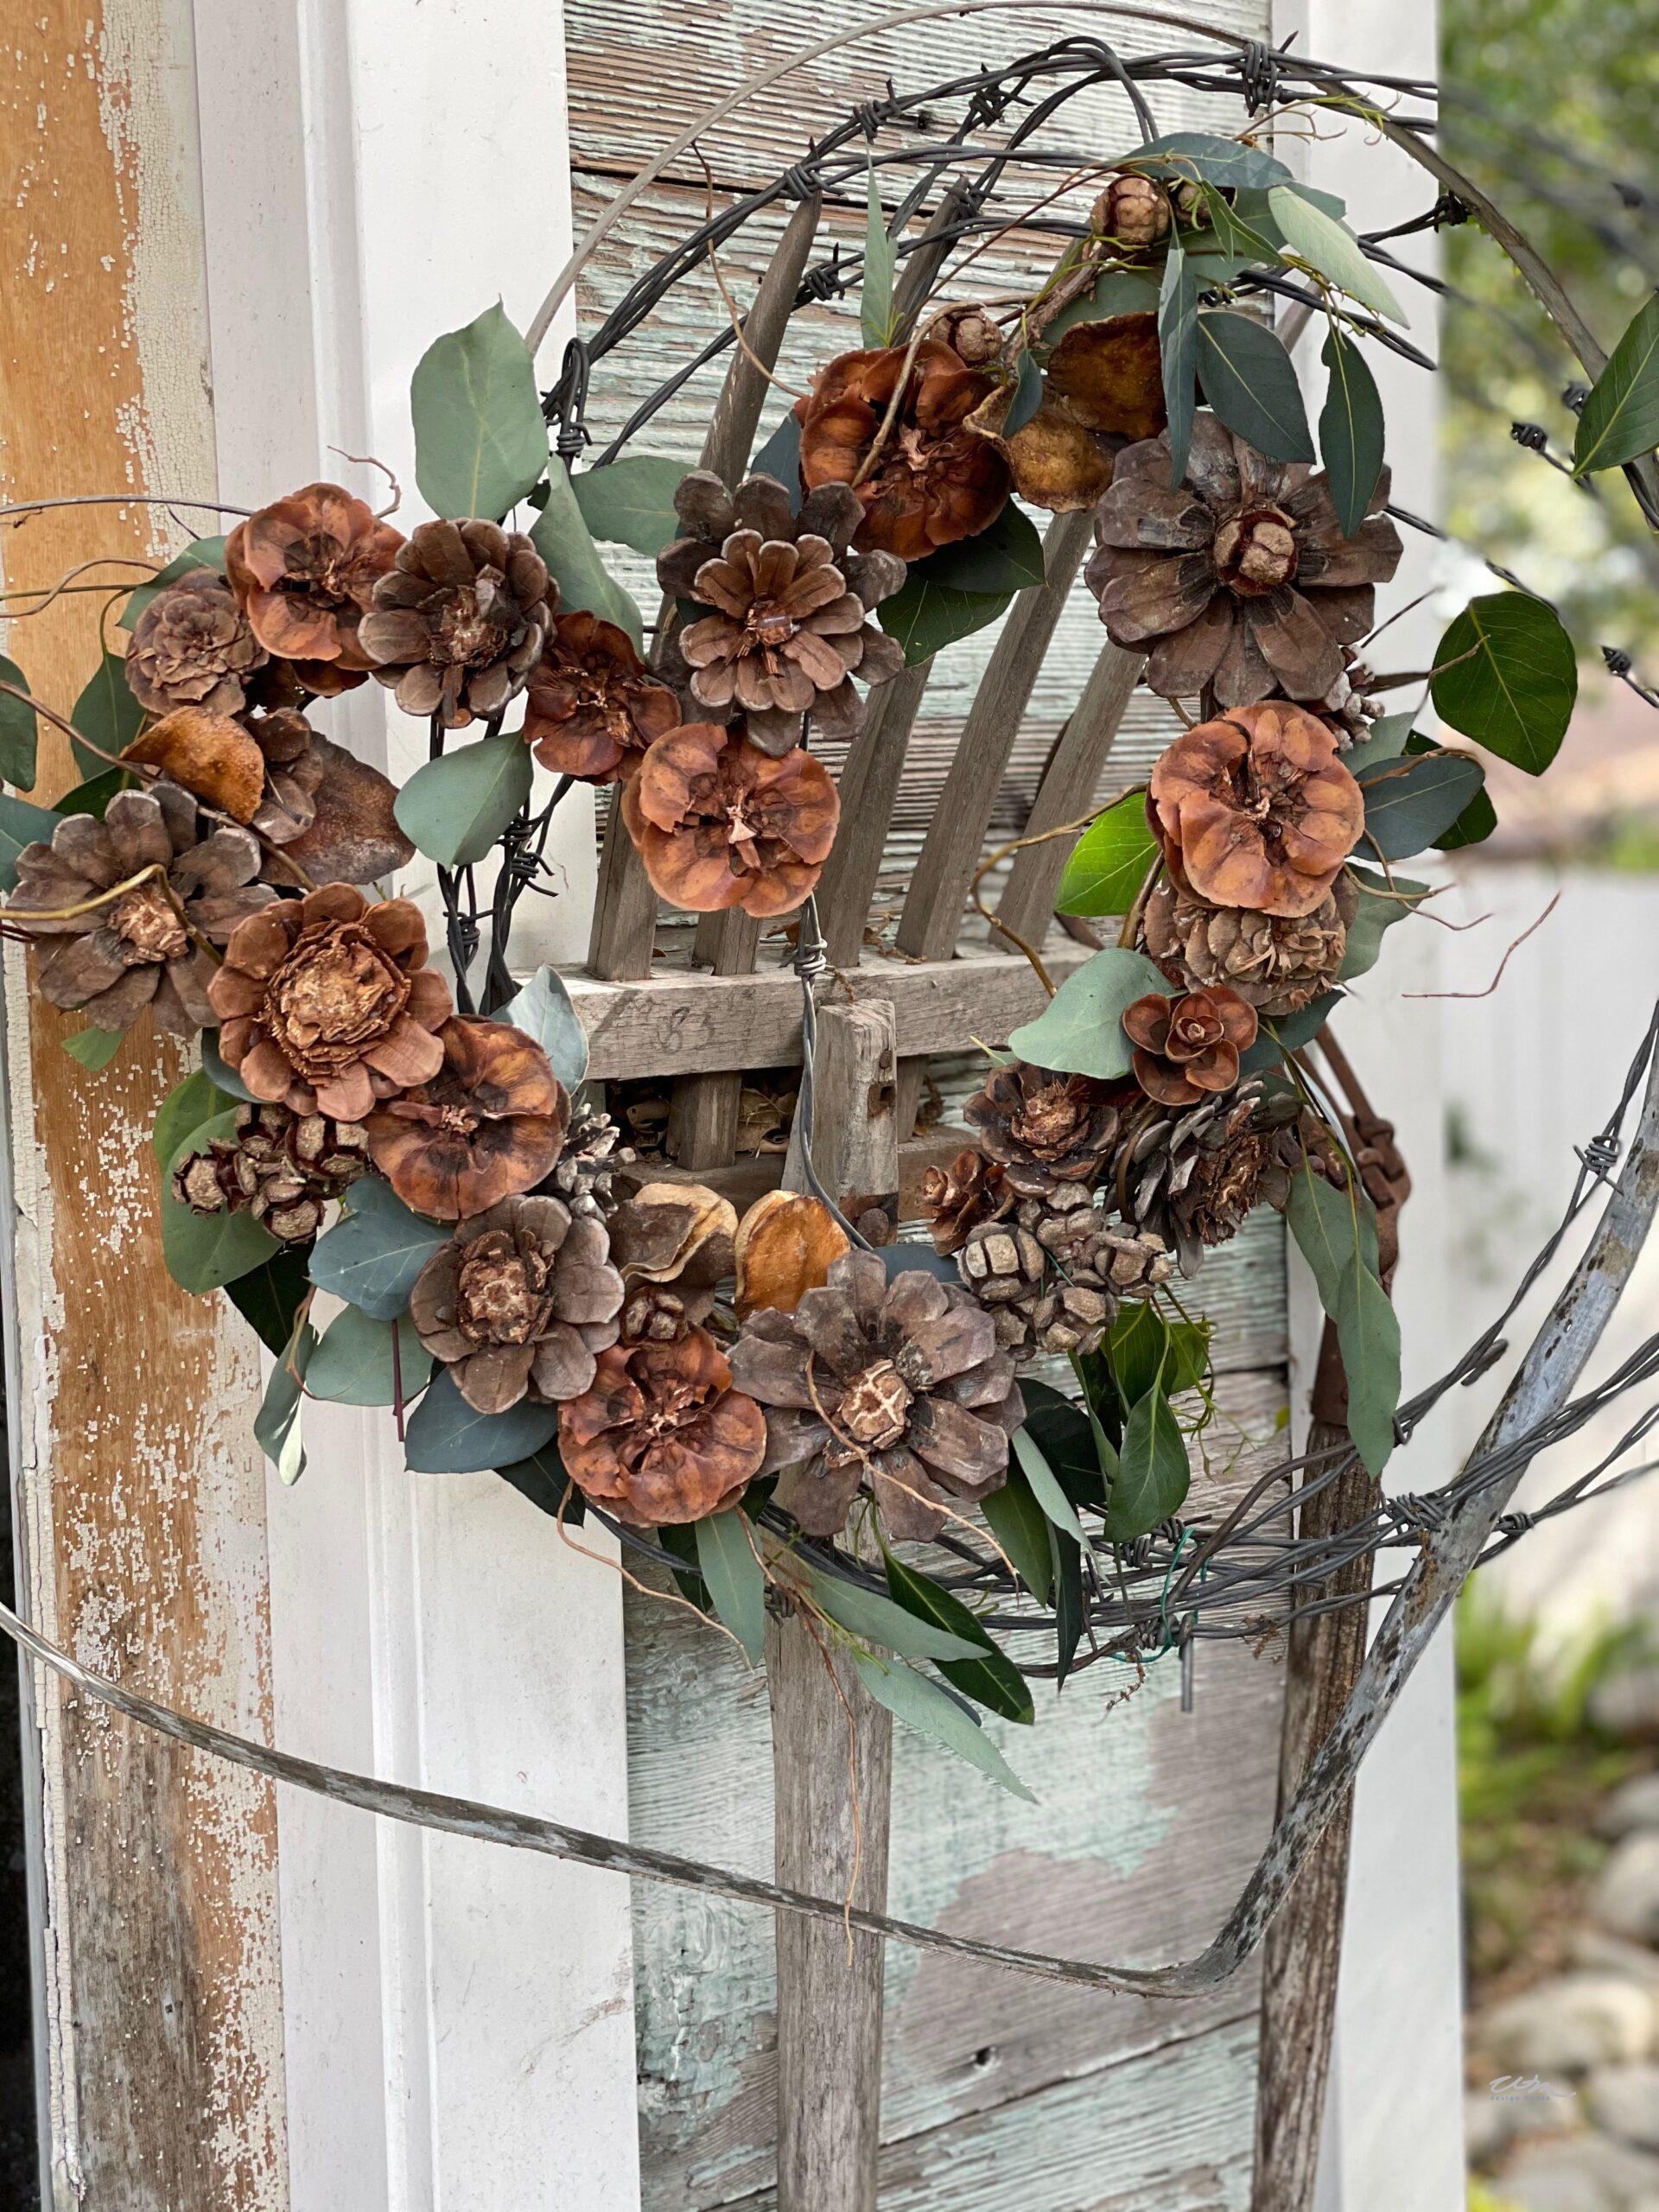
First, I attached some curly willow and eucalyptus to my grapevine heart wreath using wire and a hot glue gun.

Adding curly willow branches and eucalyptus to your wreath is optional, but they can give it a fun, whimsical look.

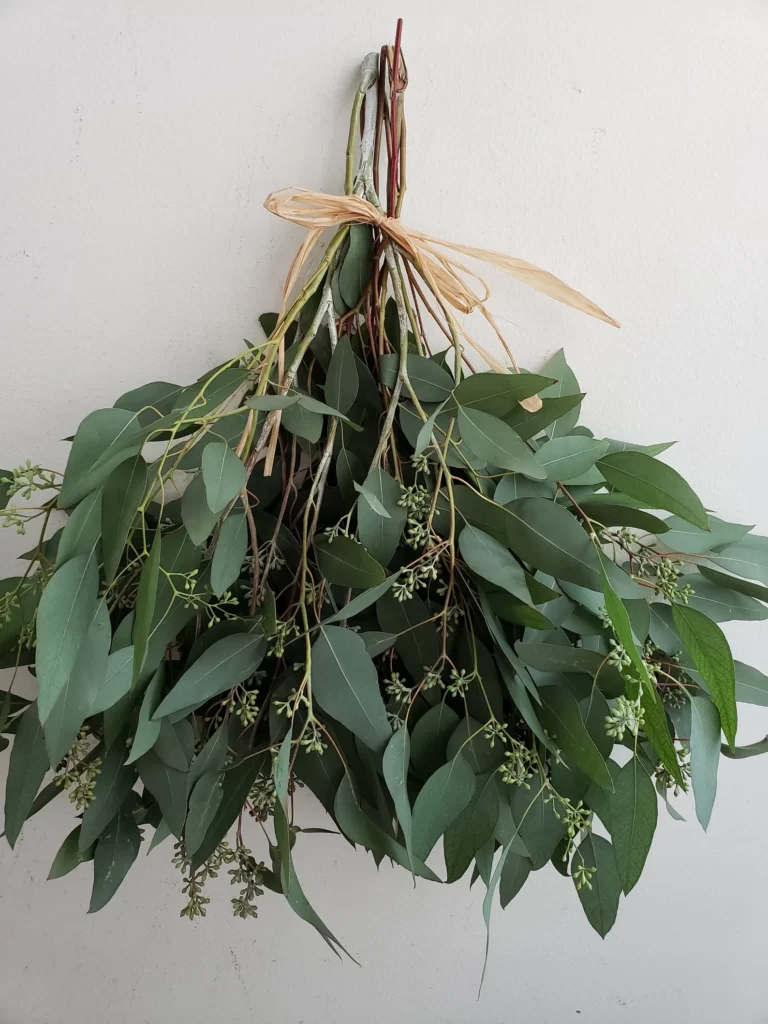
Their natural twists and turns add character, making your wreath more eye-catching. Plus, they help fill out your pine cone wreath, giving it a fuller look.
Step 2: Cut and Attach Your Pine Cones
Next, grab your clippers and get ready to turn your pine cones into beautiful, intricate flowers. It might take a little patience, but the results are worth it.
If any pieces fall off, a glue gun works perfectly to put them back in place. And don’t be afraid to ask for help if you need it. I enlisted my husband, and together we made it happen!
Tip from wendy’s craft room:
What are the best pinecones to use? In my experience, the best pine cones for a DIY wreath are tall, skinny ones from white pine trees. You can also use other varieties of pine cones, you may just need to experiment…and be sure you have sharp clippers!
Step 3: Wire the Pine Cones to Your Wreath Frame
Start by wrapping wire around your pine cone slice and twisting it tightly to hold it in place. Then, attach each pine cone flower to the wreath, one at a time, using the wire.
For extra security, add a dab of hot glue behind each flower to make sure everything stays firmly in place.
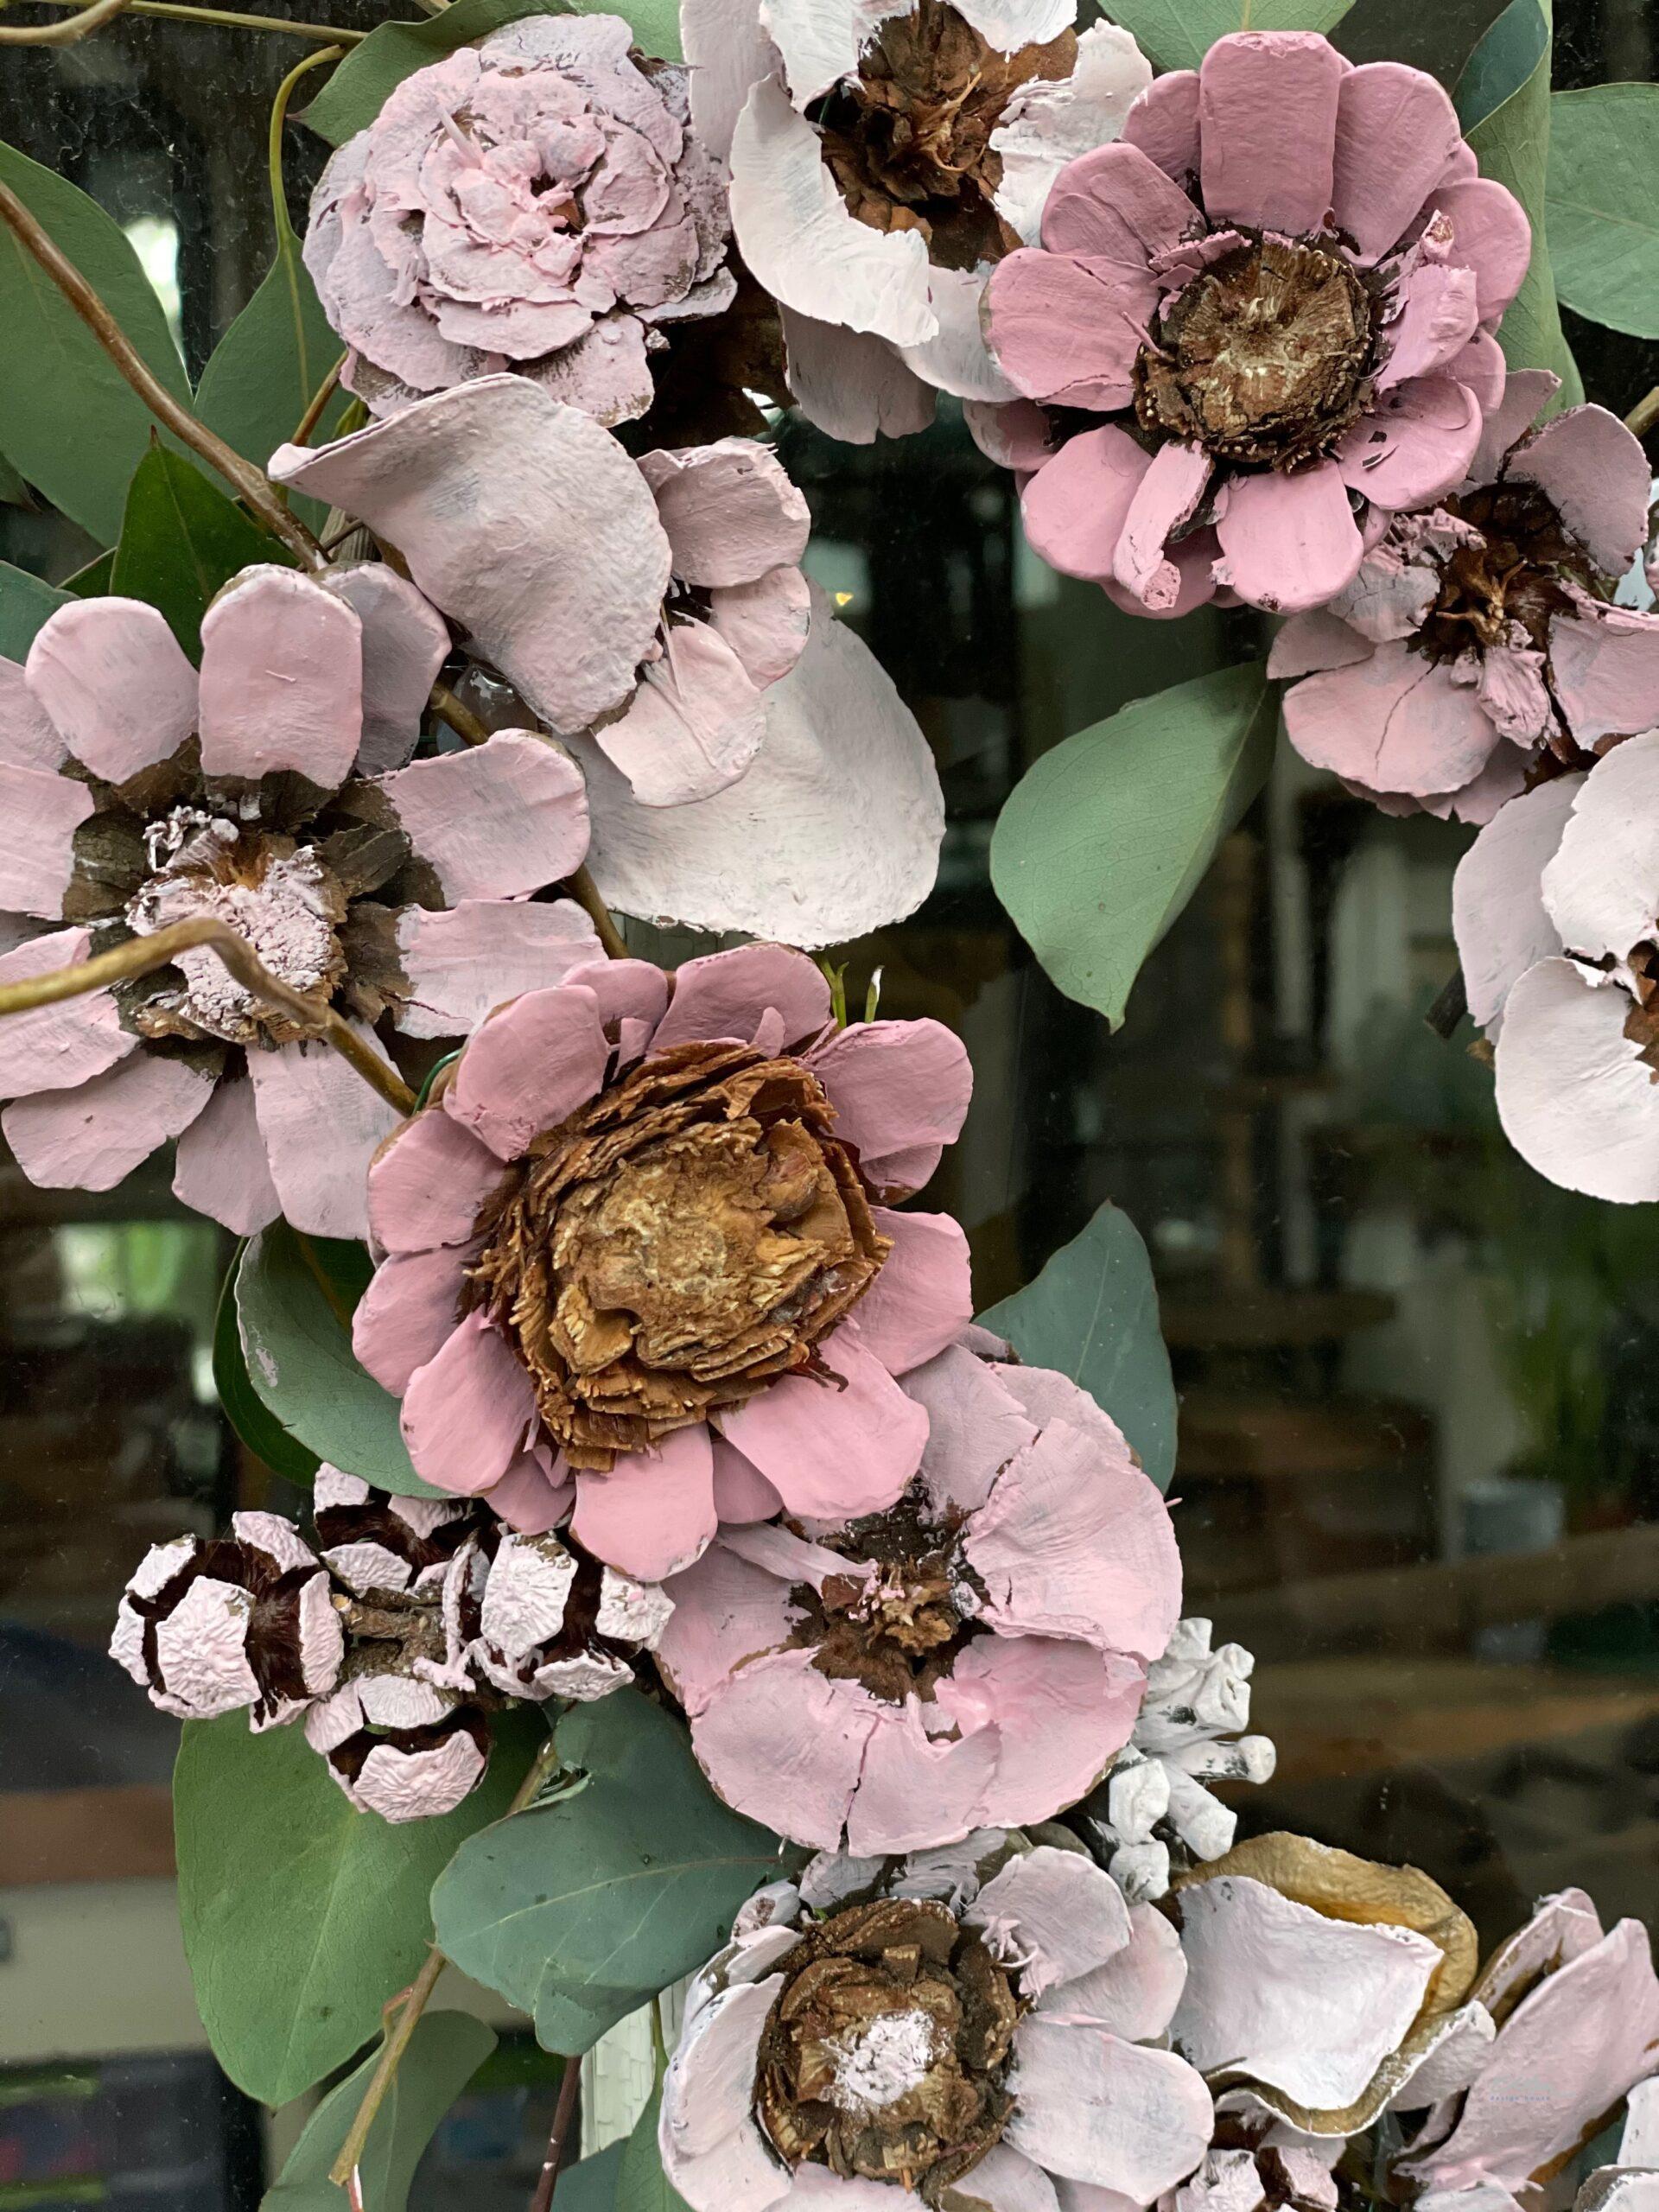
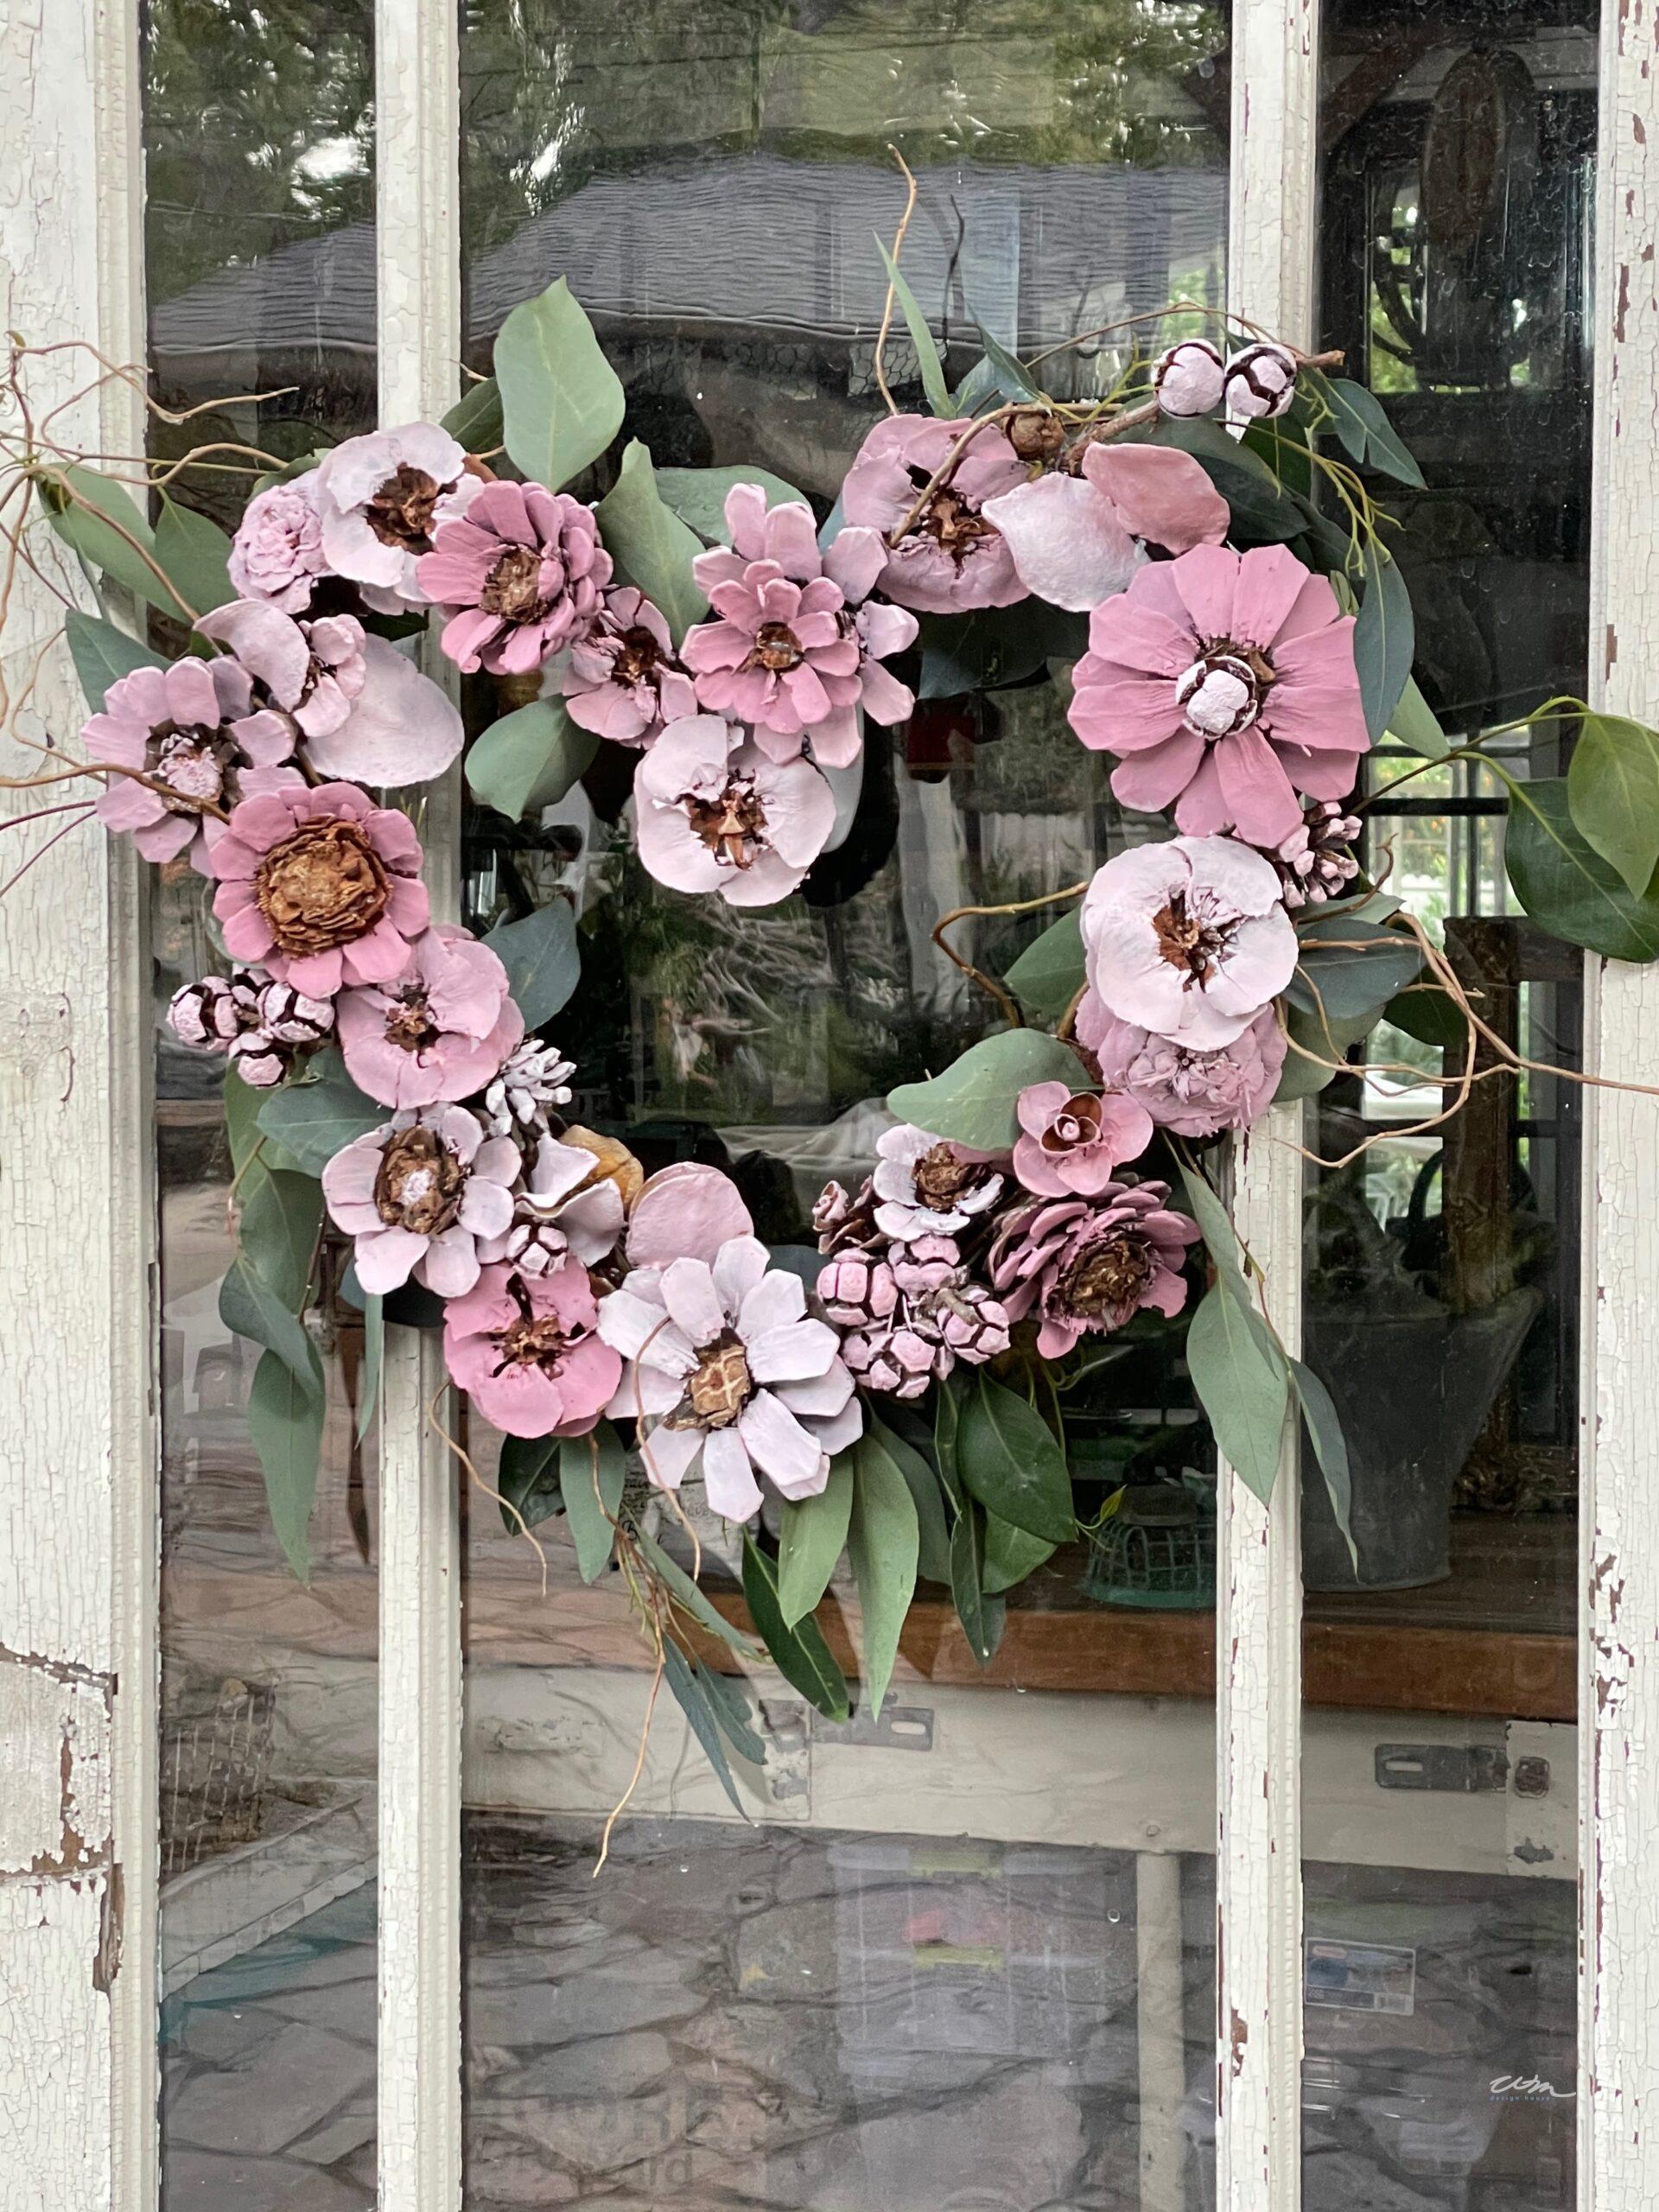
Step 4: Paint Your Pine Cones Pink
While the natural look was lovely, I wanted a pink heart to celebrate Valentine’s Day. This part is super easy, and it’s perfect for your pinecone wreath DIY project. All you need is pink and white acrylic paint from your craft stash.
Start by painting with the pink at full strength, then mix in a little white to create a softer shade.
The final result was exactly what I hoped for!
Tip from wendy’s craft room:
Want to cut your painting time in half? You can use spray paint instead of acrylics to make painting quick and easy. Just spray the pine cones after cutting them and before attaching them to the wreath form!
Pods to Add to Your Pink Painted Pine Cone Wreath
While working on your wreath, you can also add interesting pods to give it even more texture and charm.
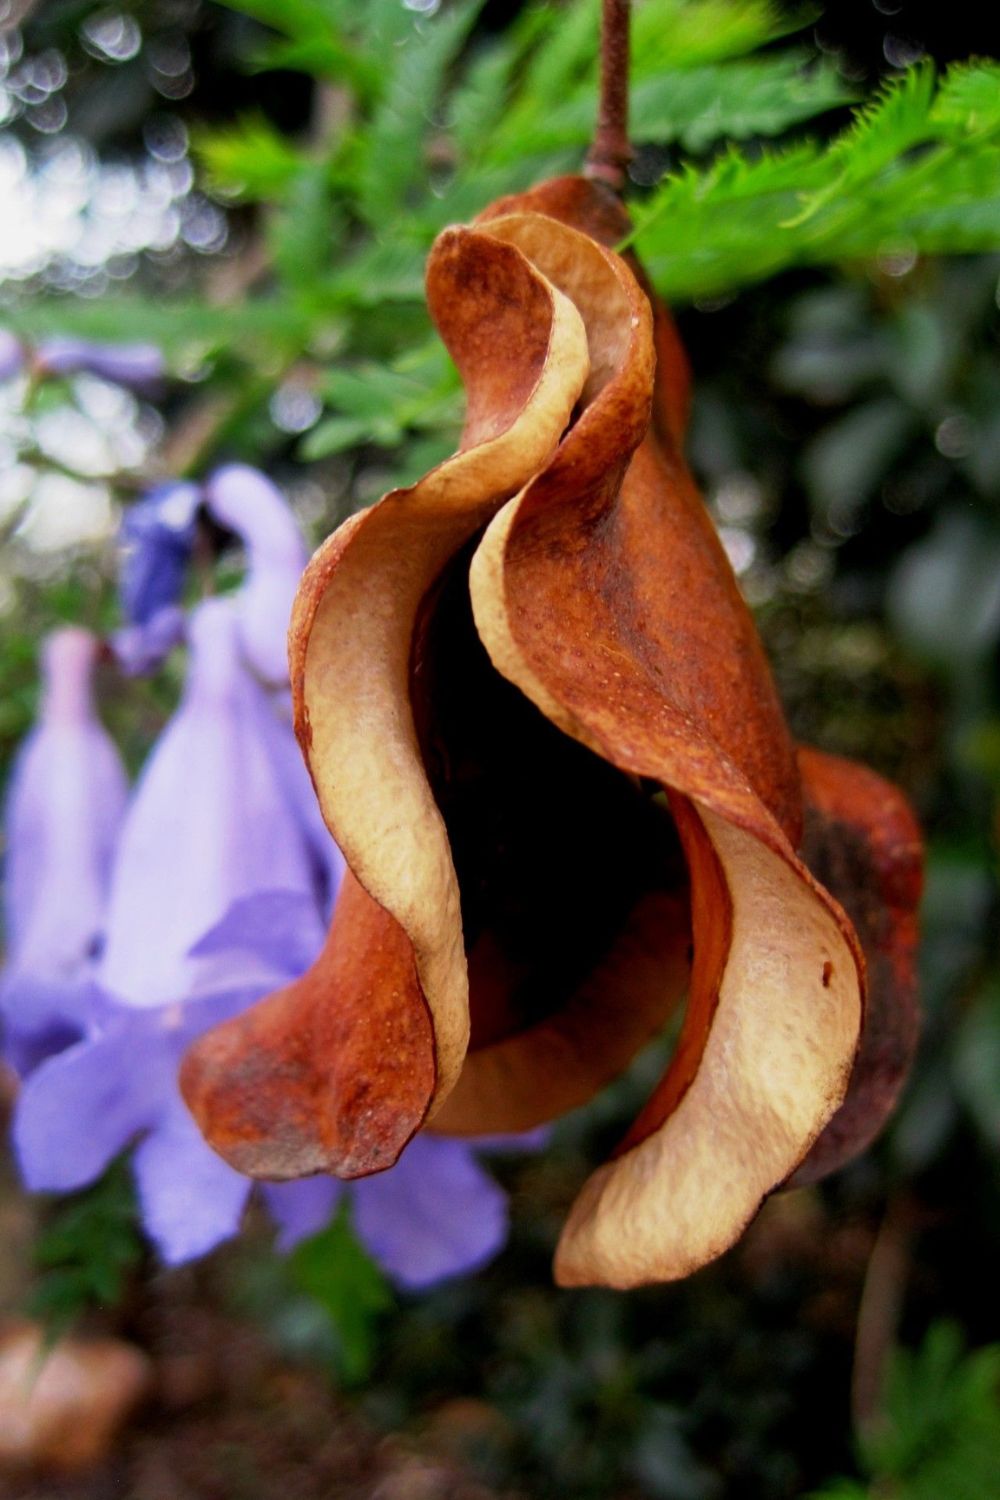
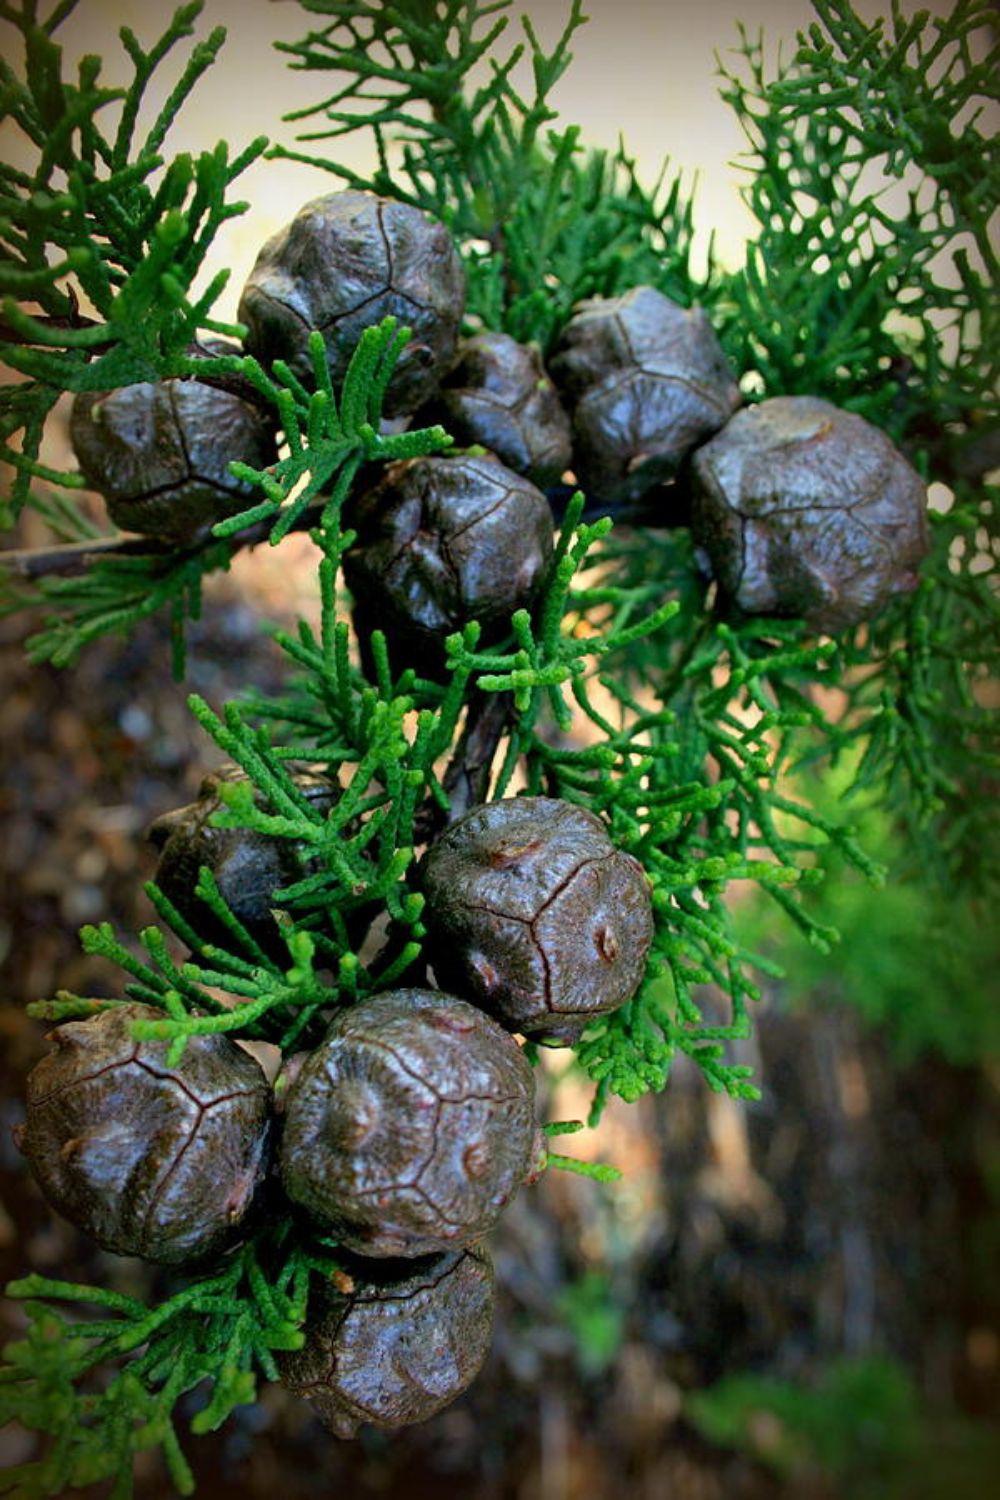
Here are some fun pine cone wreath ideas to try: On one of my daily walks, I picked up these pods. The ones on the left are jacaranda pods, which come from the stunning jacaranda trees that bloom with purple flowers in the summer.
On the right are cypress pods, which open up beautifully as they dry. These natural elements add unique shapes and variety to your wreath design!
How to Style Your Pine Cone Heart Wreath
Styling your pine cone wreath for Valentine’s Day is half the fun! I hung mine on the door of my She Shed, where it adds a charming and festive touch. You can also display your wreath on your front door to welcome guests with a pop of pink, or hang it above a mantel for a cozy, romantic look.
Try using it as part of a centerpiece by laying it flat on a Valentine’s Day tablescape with a few battery-operated candles or a winter floral arrangement in the middle. Whether inside or outside, this wreath adds a sweet, handcrafted touch to any space you decorate for Valentine’s Day.
Other DIY Valentine’s Day Crafts from WM Design House
If you love this easy pink pine cone heart wreath, you might also enjoy some of my other favorite Valentine’s Day DIY projects:

Simple DIY Valentine’s Day Tree
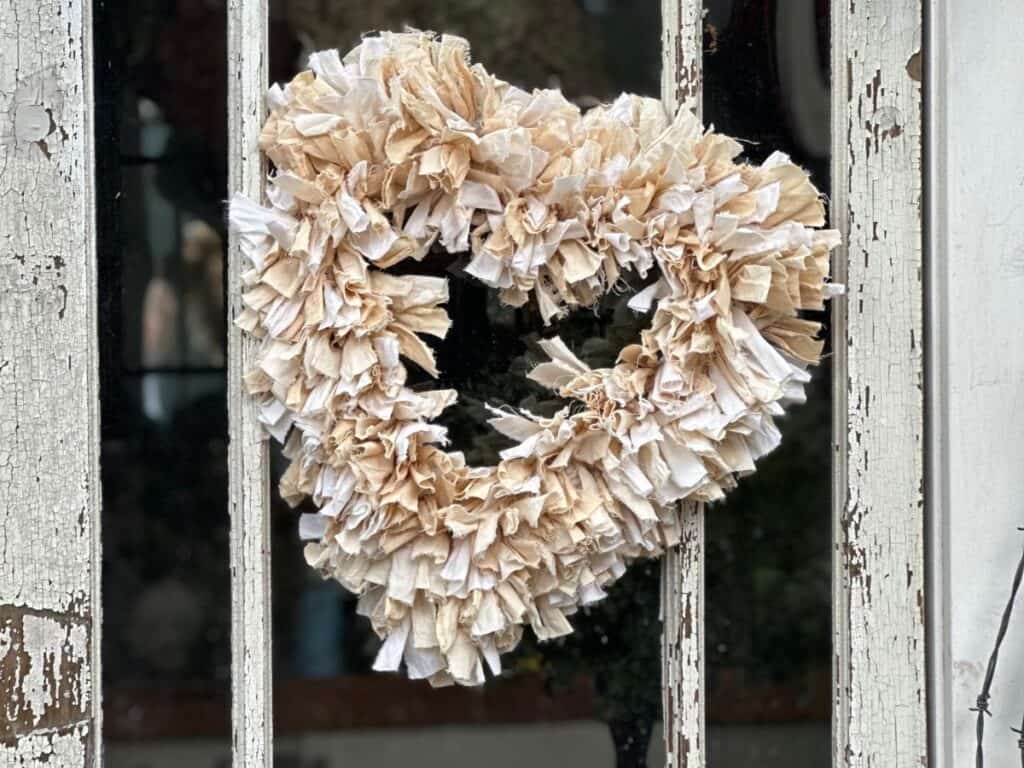
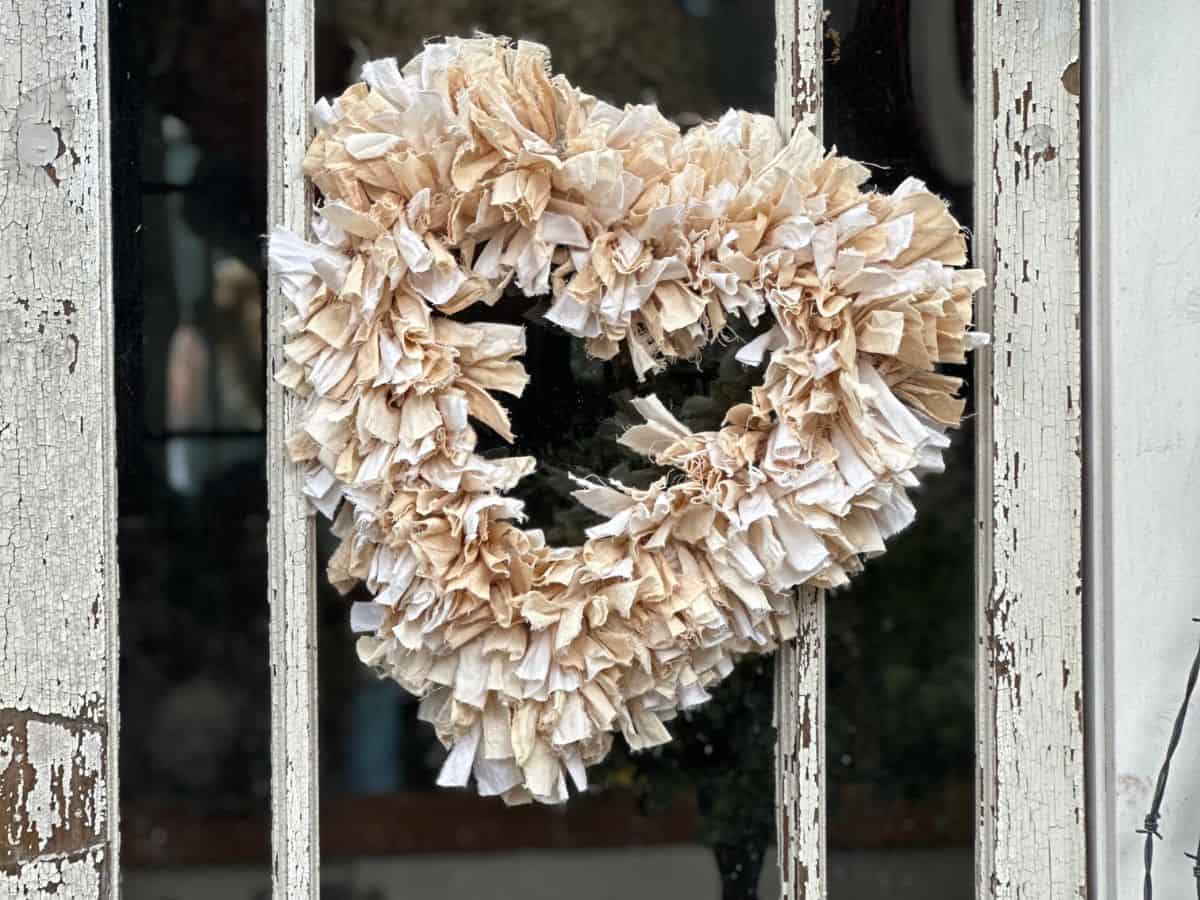
How to Make a DIY Neutral Heart Rag Wreath

Beautiful DIY Pink and Gold Foil Hearts

Wrapping Up
I hope you enjoyed this tutorial for how to make a DIY pine cone wreath for Valentine’s Day. If you try it, please send me a picture at [email protected]. I would enjoy seeing your wreath.
Happy Valentine’s Day!


Did you make this craft?
We would love to see what you have created, so mention us @wmdesignhouse or tag us using #wmdesignhouse so we can see your creations!
More about me!

Hello, I’m Wendy – a dedicated homemaker with a deep passion for decorating, gardening, cooking, and crafting. I find joy in harmonizing beautiful elements to fashion a space that is both comfortable and inspiring. I will help you create a beautiful home, one project at a time.
Connect with Wendy


This wreath is stunning Wendy!!
Oh, I love it! Good to know that long skinny pinecones are easier to cut! Can’t wait to try it!!
Hi Leslie, Happy New Year. I hope your year is off to a great start.
This is gorgeous! What a difference a little bit of paint can do.
Thank you so much! It was such a fun wreath to create.
This is a beautiful wreath, Wendy!! I love all of the natural elements that you used to make it. Eucalyptus is one of my favorite types of greenery to use year round!
What a fun idea to use pinecones…they look so pretty painted pink! Such a fun project for this season. Pinned!
Love it Wendy! I’ll be featuring your post on tomorrow’s Crafty Creators. Thanks for sharing, & I hope to see you there!
I still can’t stop thinking about your wreath Wendy!! I am so happy to be featuring you in my weekly link party!
https://www.ourtinynest.com/2023/02/01/weekly-link-party-333/
Have a great week <3
Thank you, sweet Nicole!!! I am so excited.
LOVE this stunning wreath, Wendy! We will be featuring you starting Wednesday at the Creative Crafts Linky Party! Pinned and shared!
Creatively, Beth
Thank you so much, Beth, I will be sure to look out for your post. Have a great evening.
My goodness, this is stunning! So clever and creative. This will be a feature over at Handmade Monday this week 🙂
Hi, Wendy! Your project is so wonderful! I was super inspired by your creativity. I would love to invite you to link up your project at Whimsy Home Wednesdays to inspire others and have a chance to be featured – find the party here -> https://fifthsparrownomore.com/whimsy-home-wednesday-blog-link-party-no-14/
Hi Kristin, thank you for reaching out. I have put your link party on my list, and will get linked up. Thank you for letting me know you had a party
That is beautiful! I love how you painted the pinecones and now they look like flowers.
Thank you so much, Joanne. I am glad you like it.
BRILLIANT tutorial, Wendy!
I’d love for you to join us over at the Creative Crafts Linky Party every Wednesday through Sunday
https://creativelybeth.com/creative-crafts-linky-party/
Followed and Pinned!
Creatively, Beth
Wendy, this is just gorgeous!!!
Thank you, Jennifer. However those pine cones are not so easy to cut, LOL
Thank you, sweet friend, so very kind of you. I saw your post before I saw this comment. :)))
Wendy I love your new website.. this pinecone wreath is so beautiful natural and all frilled up..enjoyed this post so much.. thanks for sharing❤️
Thank you Pam. I appreciate you stopping by and commenting. Have a beautiful day.
Wendy this is just beautiful! I can’t believe you made this out of pinecones! So pretty! Just pinned your DIY.
Thank you, sweet girl. I will say the pinecone cutting takes some effort, LOL!
This looks great Wendy. Love that you painted them, gave it a totally different look.
Thank you, Anita. It is a fun project, but those pinecones can be buggers to cut.
You make the BEST wreaths! I may need to share this one on my Saturday Meanderings. Love it!
Thank you so much Mary. I too am going to be sharing your bistro set next weekend. XO
Wendy
This is just the cutest! Love it.
Thank you so much, Rachel.
What a fun way to use and color pinecone Wendy! Anything pink I’m a fan of! Great post!