How to Make Coffee Paper the Easy Way: DIY Tutorial
In this DIY tutorial, let me show you how to make coffee paper in five easy ways. Whether you are an expert artist or a beginner wanting to try something new, this is an easy way to create a custom-aged look for your craft projects.
On my blog, WM Design House, I may sometimes use affiliate links, which means a small commission is earned if you purchase via the link. The price will be the same whether you use the affiliate link or go directly to the vendor’s website using a non-affiliate link.
What is Coffee Paper?

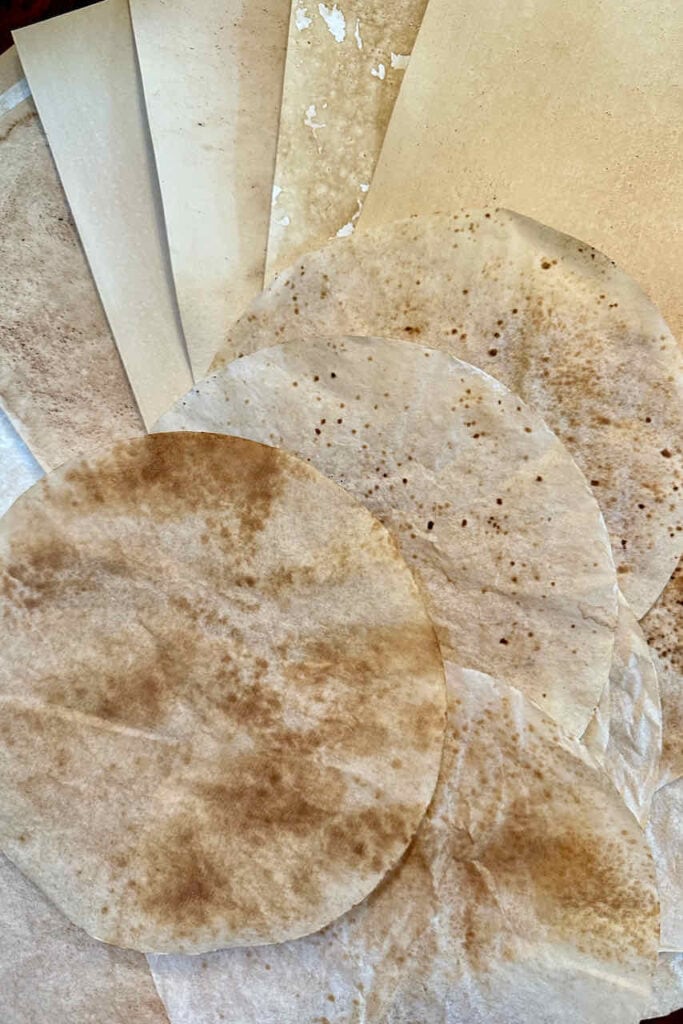
Coffee-stained paper refers to paper that has been intentionally stained or aged using coffee or coffee-related solutions.
This process gives the paper a vintage or antique appearance, often characterized by a light brown or sepia tone.
It’s a popular technique used in various crafts, art projects, journaling, and scrapbooking to create an aged look or weathered effect.
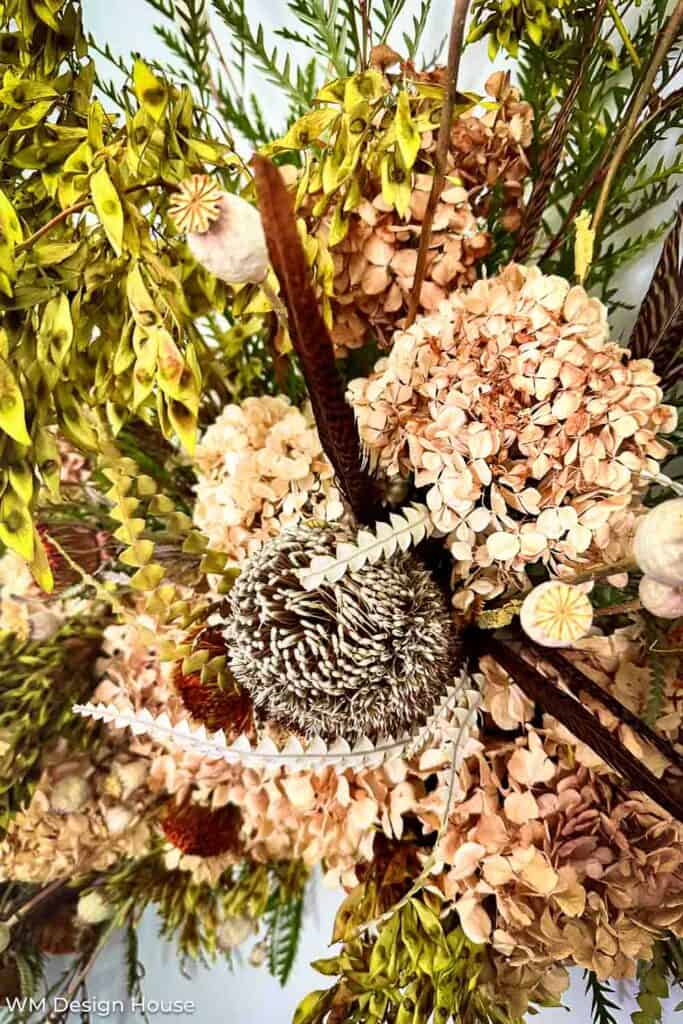
I enjoy making this paper and will use it for several of my fall crafting projects coming to the blog soon.

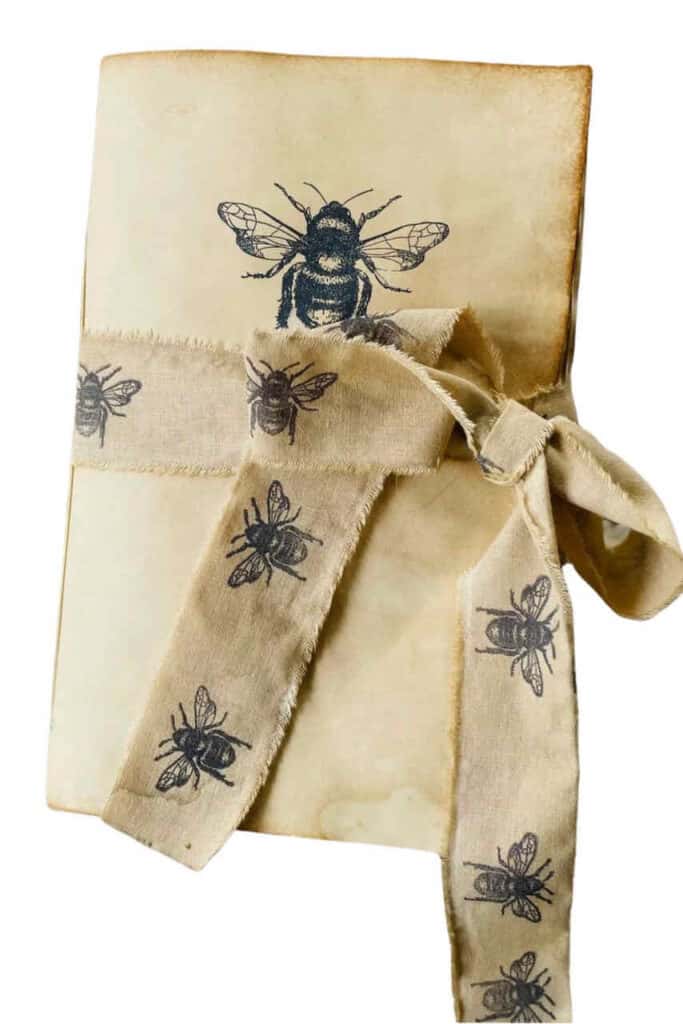
What can you make with coffee paper?
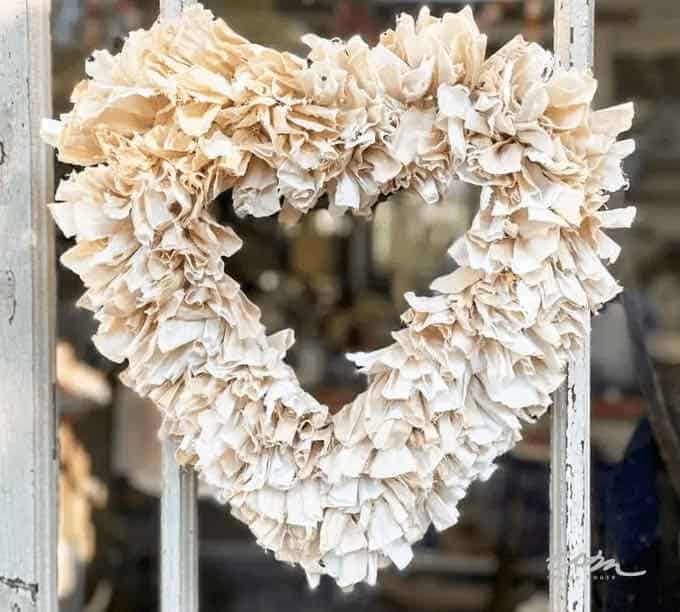
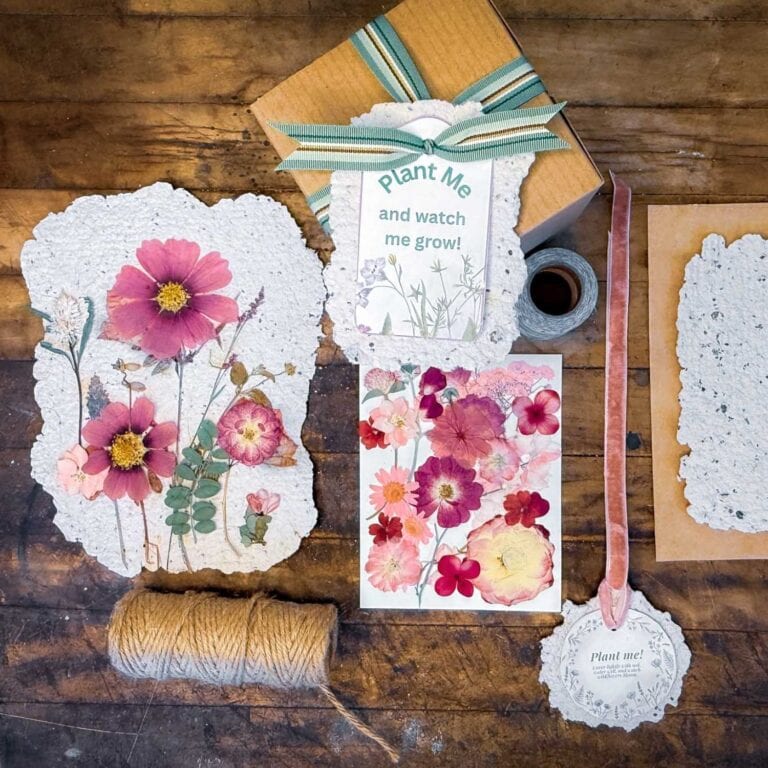
Homemade coffee-stained paper can be used in a variety of creative and artistic projects to add a vintage and rustic touch. Here are some ideas: I even used coffee and tea to dye fabric for a heart wreath.
- Scrapbooking: Use the stained paper as a backdrop for photos, journaling, and embellishments in your scrapbook layouts.
- Handmade Cards: Create unique greeting cards, invitations, or thank-you notes by incorporating coffee-stained paper as a base or decorative element.
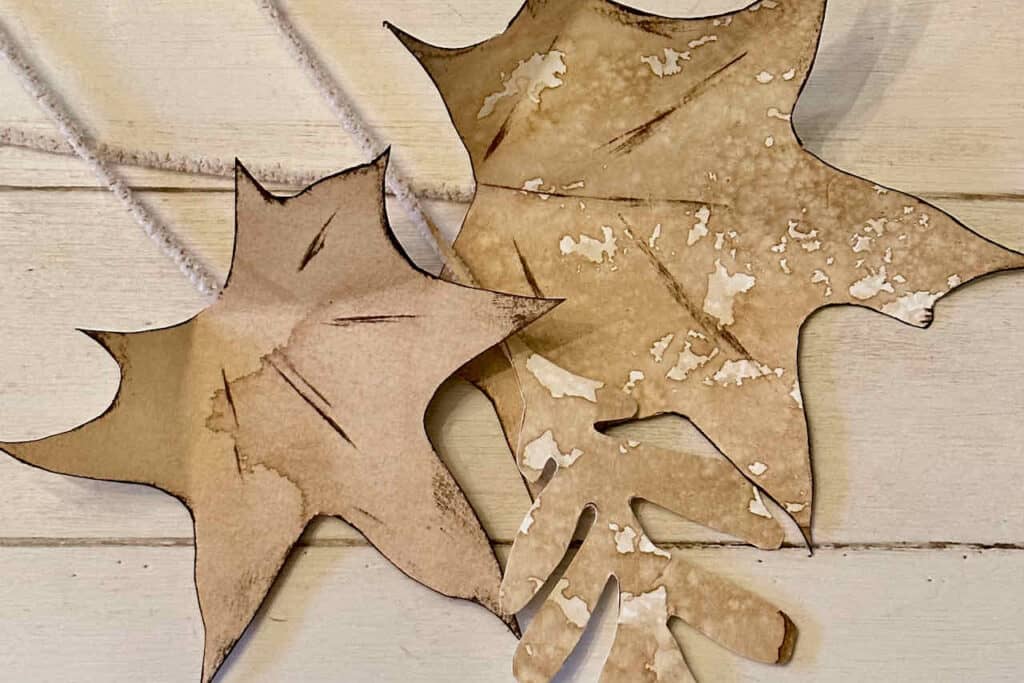
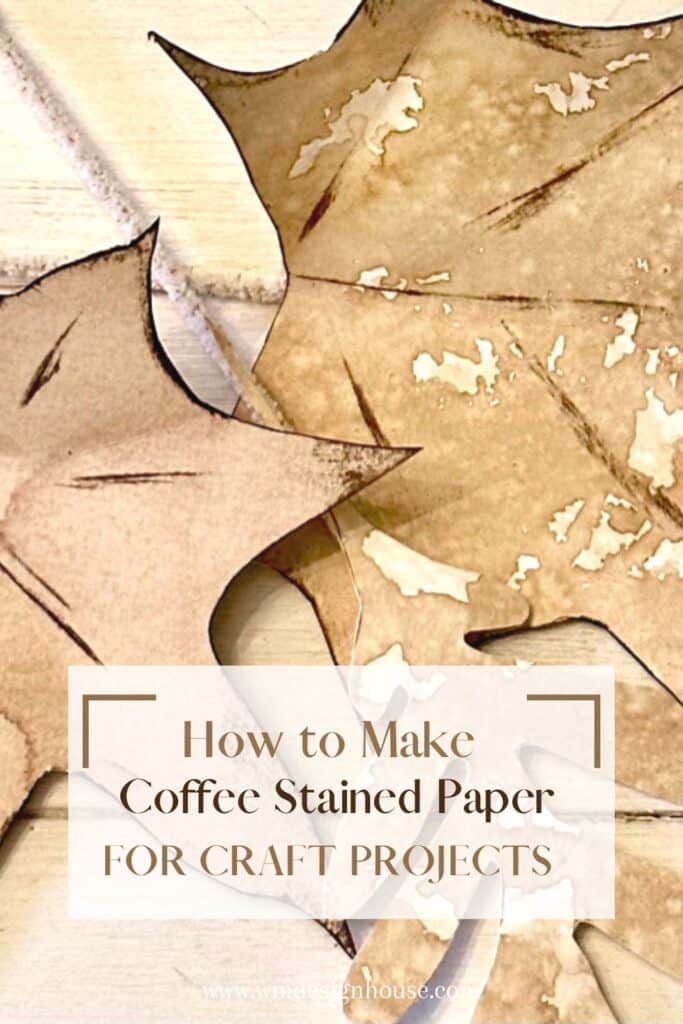
- Make fall leaves: Make a few leaves and add them to a garland.
- Art and Mixed Media: Incorporate the stained paper into your paintings, collages, and mixed media artworks for added texture and depth.
- Crafting and Collages: Cut or tear the stained paper into various shapes to use in collages, paper crafts, and decoupage projects.
- Bookmarks: Craft bookmarks with coffee-stained paper for a charming addition to your reading materials.
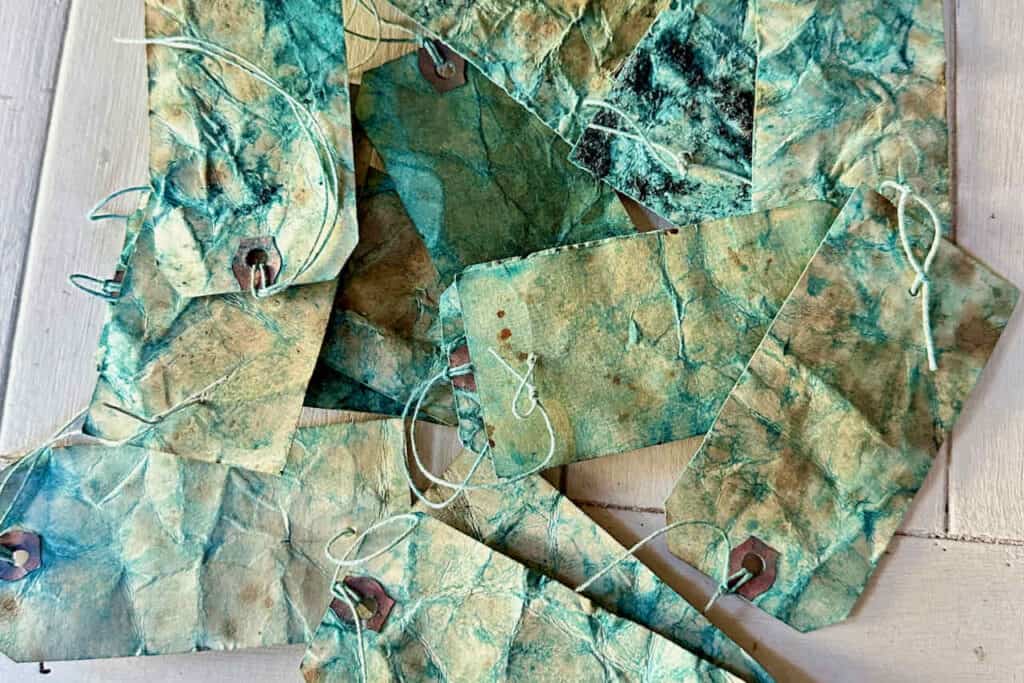
- Tags and Labels: Create labels, tags, and price tags for homemade products, gifts, or items at craft fairs.
- Wedding Decor: Add an antique feel to wedding invitations, place cards, and table numbers by using coffee-stained paper.
Benefits of making coffee paper at home
Making coffee-stained paper at home offers several benefits, particularly for creative and artistic endeavors. Here are some advantages:
- Customization: When you make coffee-stained paper at home, you have complete control over the staining process. You can adjust the coffee concentration, staining techniques, and drying times to achieve the desired look, whether a subtle aged effect or a more dramatic vintage appearance.
- Cost-Effective: Coffee-stained paper is created using simple and inexpensive materials, primarily coffee and paper. This makes achieving a unique and artistic result cost-effective without breaking the bank.
- Creativity: Making coffee-stained paper allows you to express your creativity. You can experiment with different staining techniques and layering methods and even incorporate other materials like inks, paints, or stamps to personalize your creations further.
- Environmentally Friendly: Using coffee to stain paper is a relatively eco-friendly process compared to some other aging techniques that might involve chemicals or dyes. Coffee is a natural and biodegradable material.
- Personal Projects: Coffee-stained paper adds a personal touch to various projects. It’s perfect for creating vintage-style greeting cards, scrapbook pages, journal entries, art pieces, and other crafts. The handmade and aged appearance can evoke nostalgia and emotion.
Materials for coffee paper making
Before diving into the fun techniques, collect the items you’ll need to begin your coffee paper adventure.
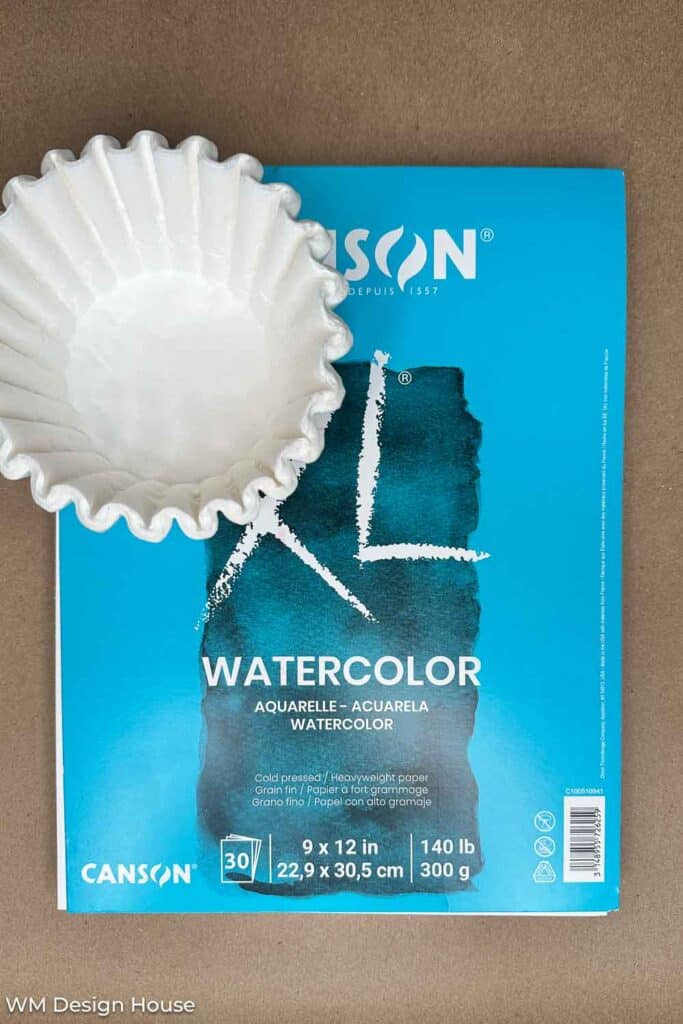
- Paper towel
- Paper filters (coffee filters)
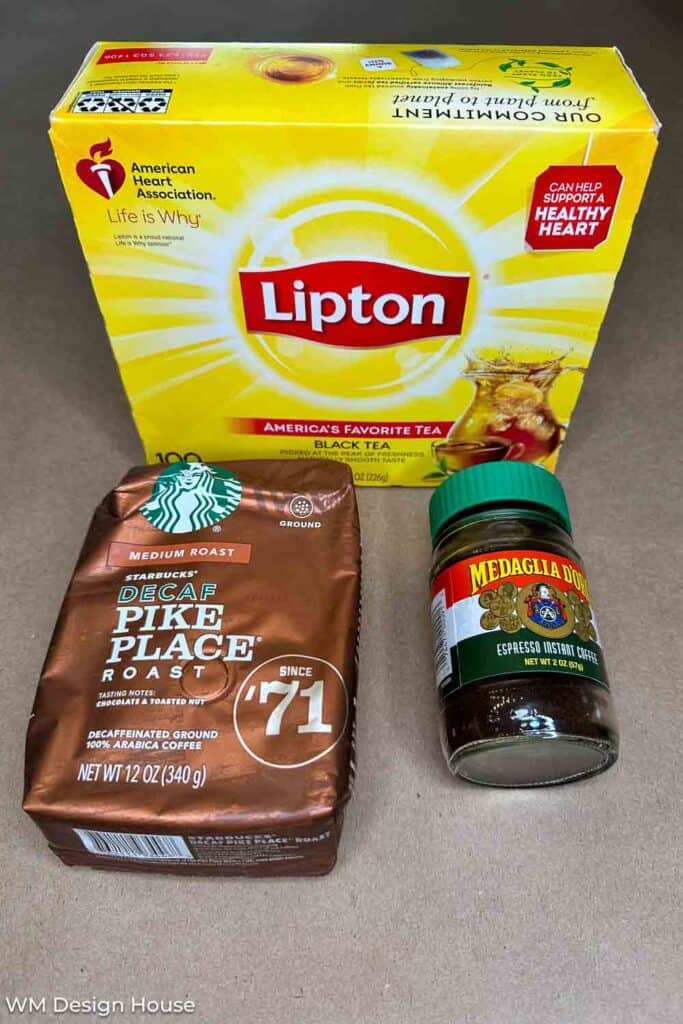
- Coffee
- Instant coffee grounds
- Different papers, watercolor paper, card stock, etc.
- Cinnamon
- Hot water
- Tea bags (optional)
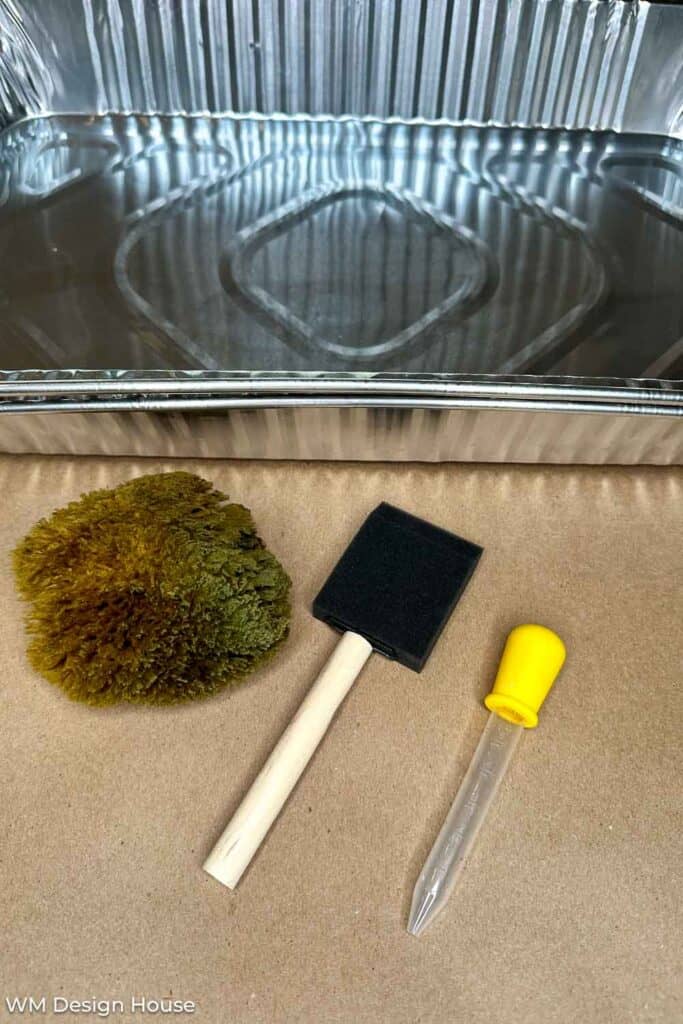
- Sponge paintbrush or regular paintbrush
- Blow dryer (optional)
- Paper bags
Simple Steps to Make Coffee Paper
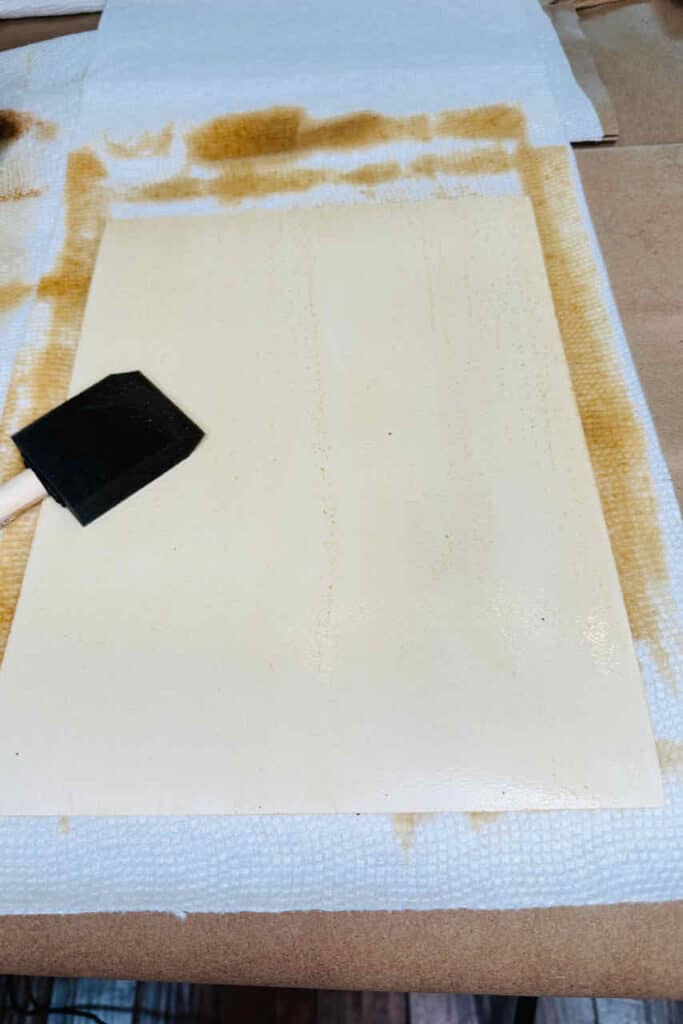
1: The Painting Method
- Step 1: Start with a delicious cup of coffee (espresso) using your preferred method. You can use a French press, coffee maker, or a simple pour-over.
- Step 2: Once your coffee is ready, let it cool down. In the meantime, lay a few sheets of paper towels over paper bags on a flat surface. (Place them on a baking sheet to catch any drips).
- Step 3: Place your paper of choice on top of the paper towels.
- Step 4: Dip your paint brush into the coffee and paint it onto the paper in one direction and then in the opposite direction.
- Step 5: Be sure to paint both sides of the paper.
- Step 6: Let the coffee-stained paper dry in a cool, dry place.
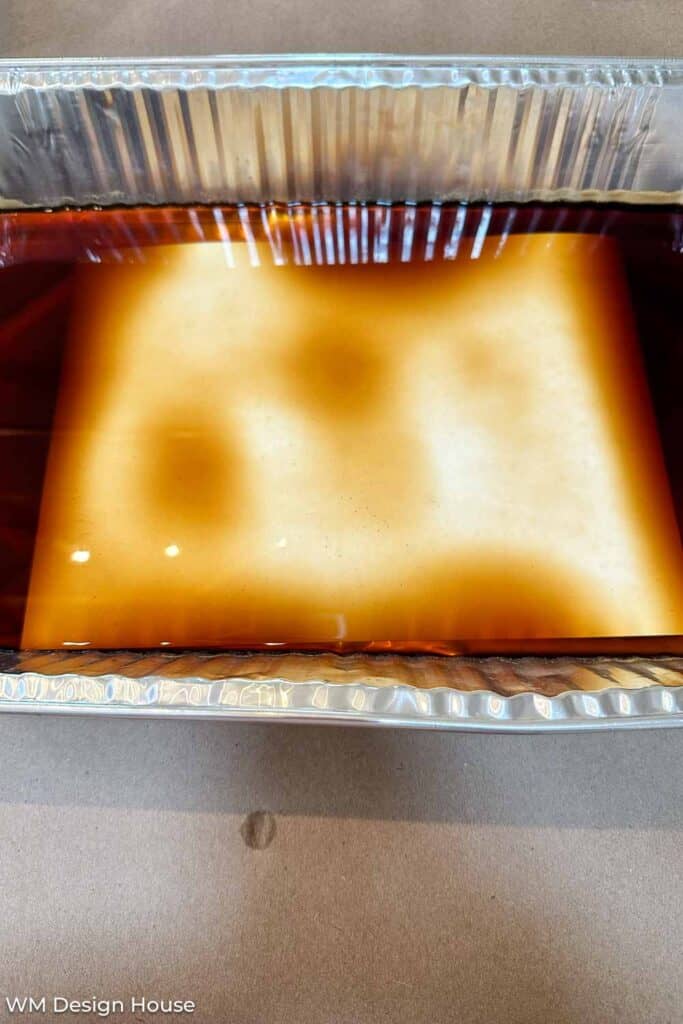
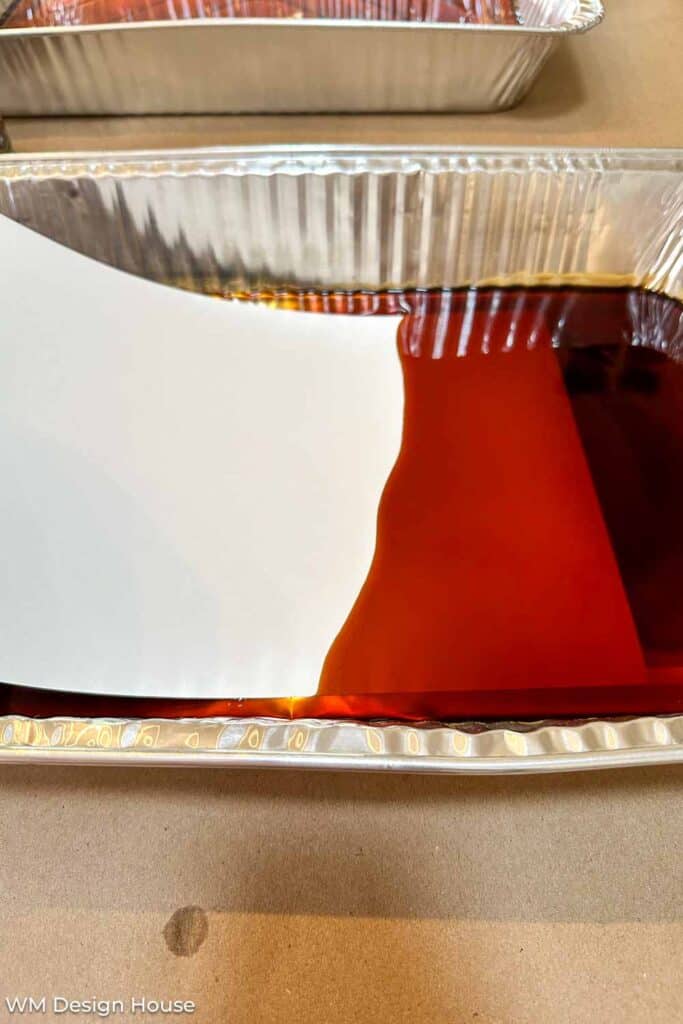
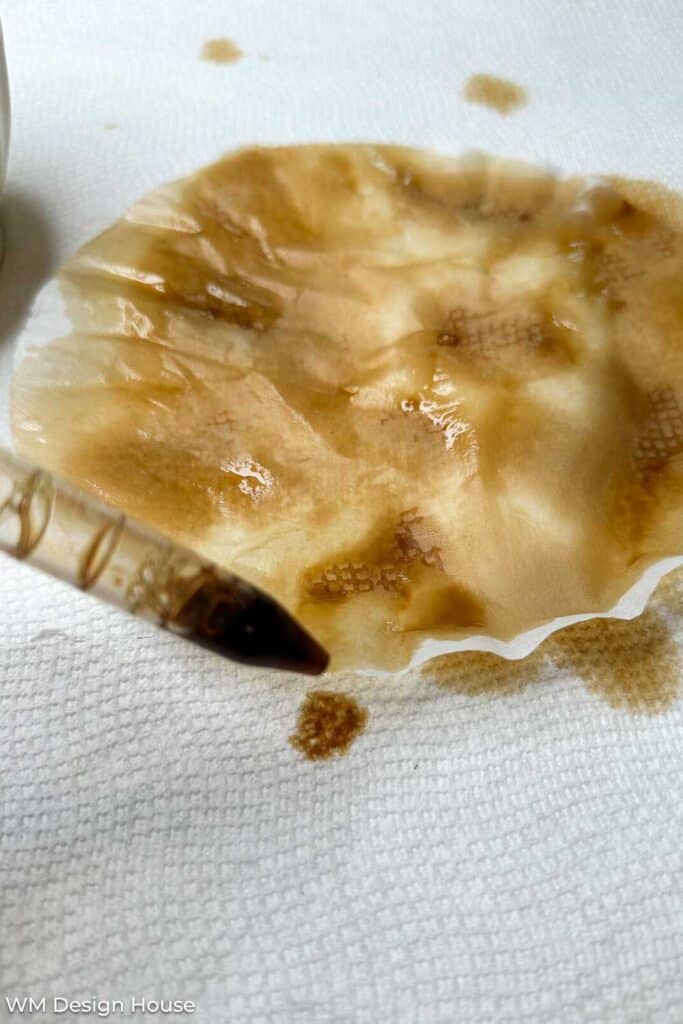
2: The Immersion Technique
- Step 1: Prepare your coffee mixture. You will need three to four cups of strong coffee.
- Step 2: Pour the brewed coffee or tea into a shallow container or tray.
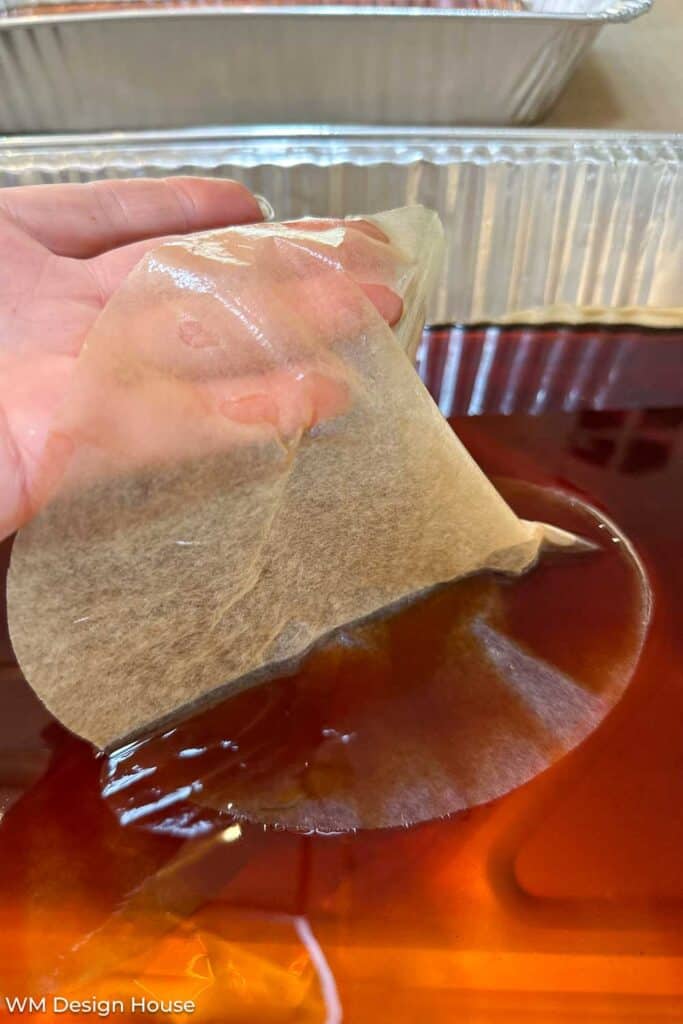
- Step 3: Dip the paper or coffee filters into the container, fully submerging it into the liquid.
- Step 4: Gently lift the paper from the liquid and drip off any excess coffee.
- Step 5: Place the soaked paper on a flat surface to dry. The coffee leaves unique and uneven stains as it dries, creating an aged paper look.
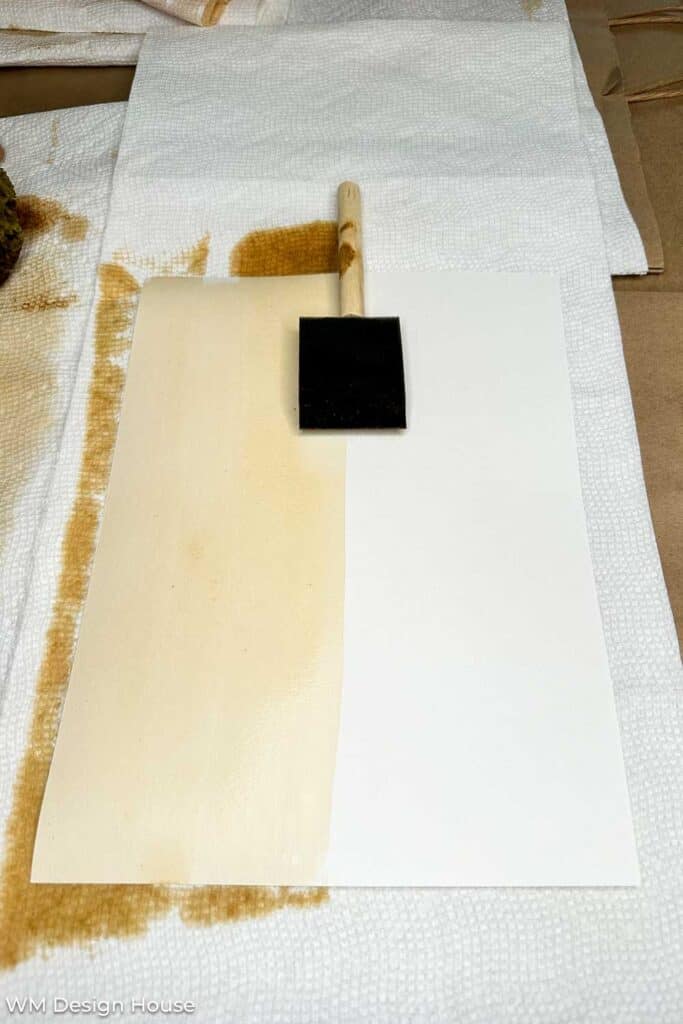
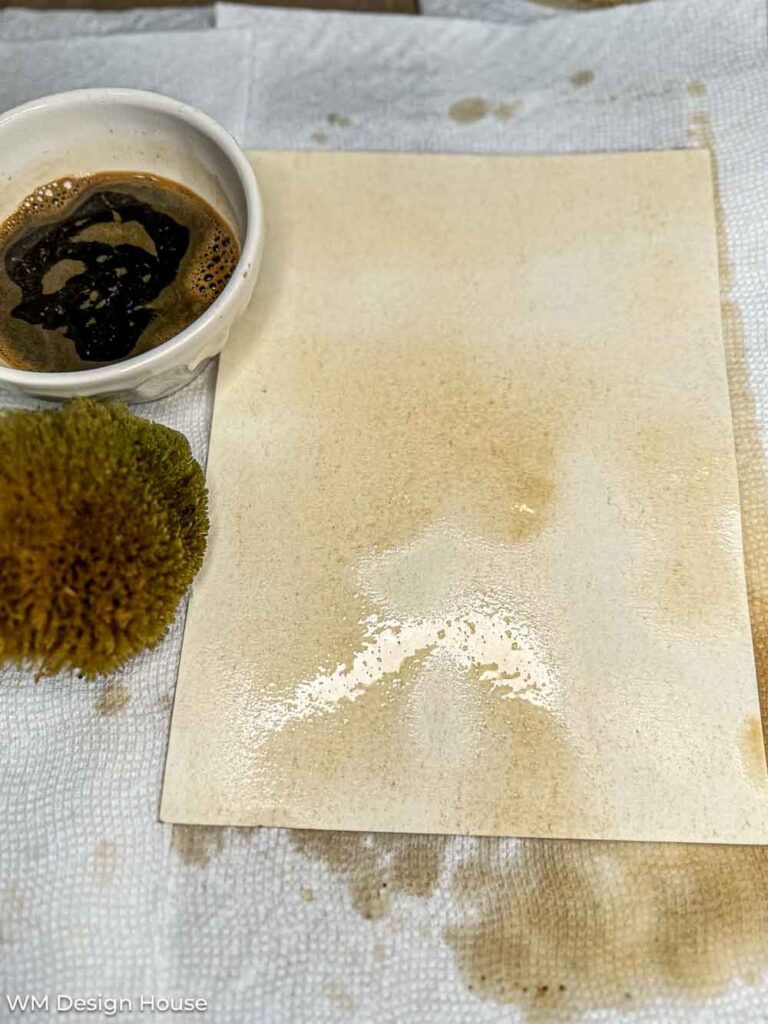
3: The Sea Sponge Method
- Step 1: Brew a strong cup of espresso coffee.
- Step 2: Pour the coffee into a small bowl.
- Step 3: Apply the coffee onto the paper using the sponge.
- Step 4: Apply the coffee to the back side using the same method.
- You can control the variation of color by the amount of coffee you apply to the paper.
- In addition, you can allow the first layer to dry and then apply a second layer.
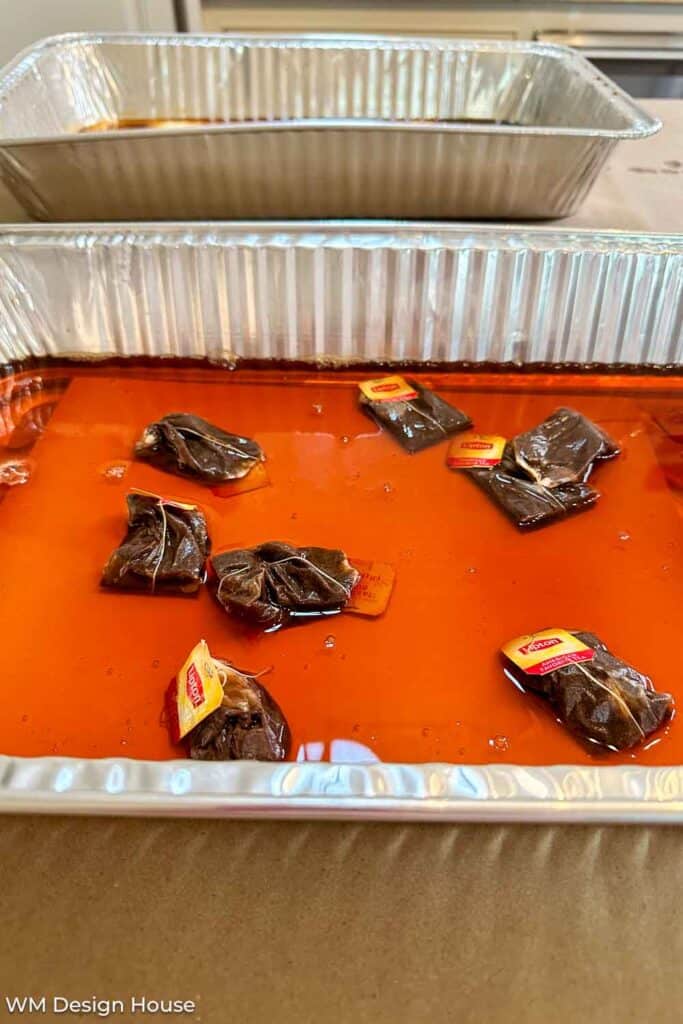
4: The Tea Bag Twist
- Step 1: Brew a strong pot of black tea using Lipton tea bags and hot water. (Black tea can provide a slightly different hue and effect than coffee staining).
- Step 2: Allow the tea to cool down and transfer it to a shallow container.
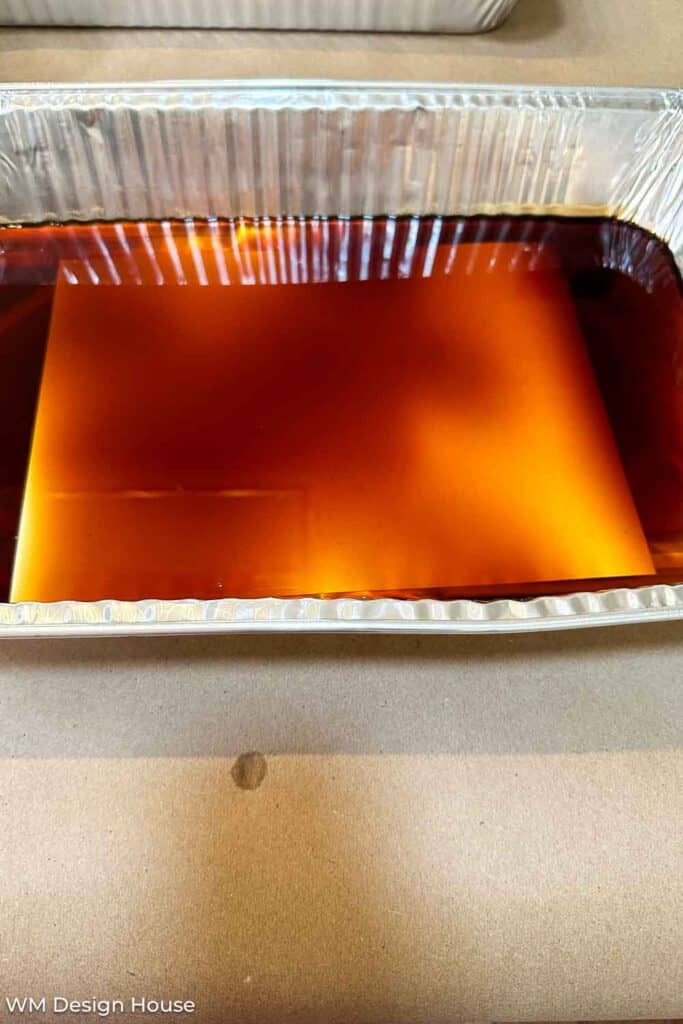
- Step 3: Submerge the watercolor or coffee filter papers into the tea, ensuring it’s thoroughly soaked.
- Step 4: Once the paper has reached the color you like, let the excess tea drip and lay it flat onto the paper towels to dry.
- Step 5: Use a sponge to create patterns on the wet paper. The tea will give a lighter color and a distinct vintage look.
- Step 6: Let the paper dry completely before using it for your craft projects.
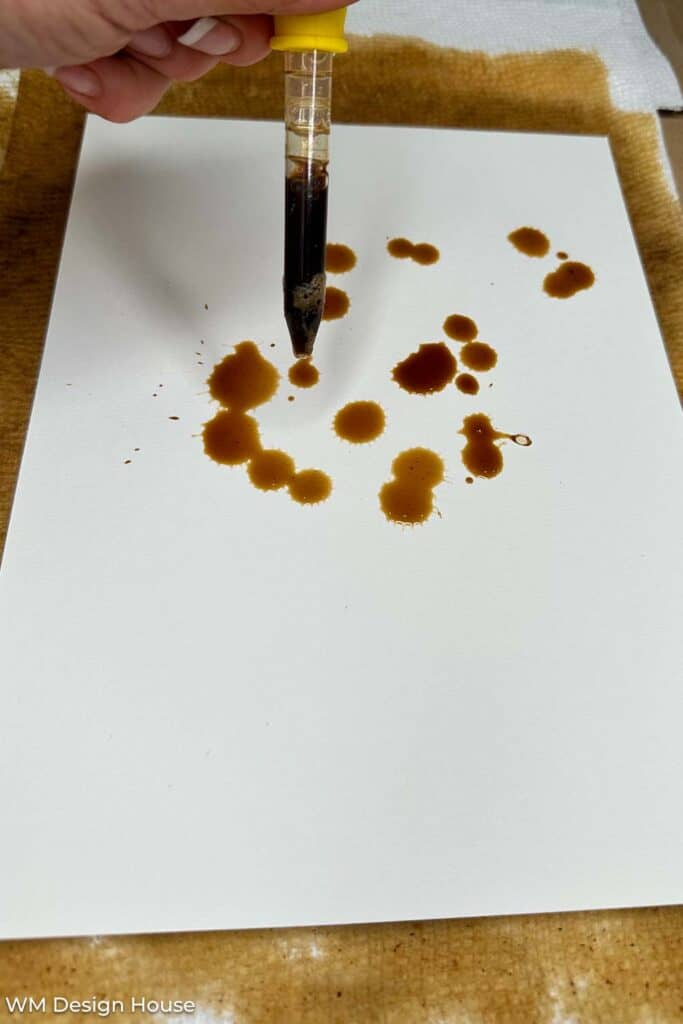
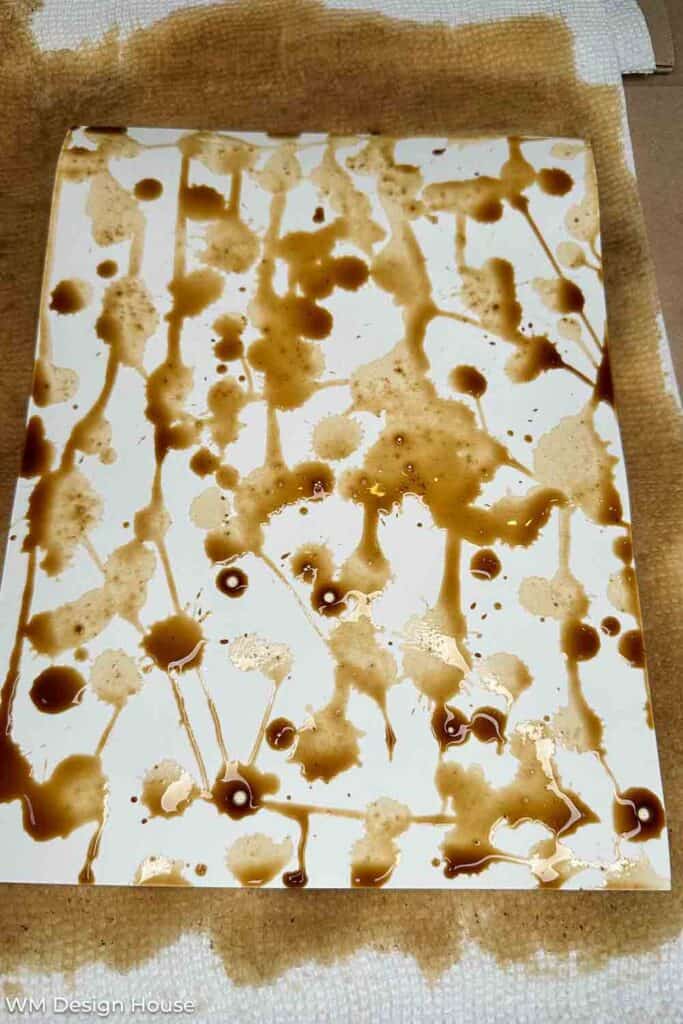
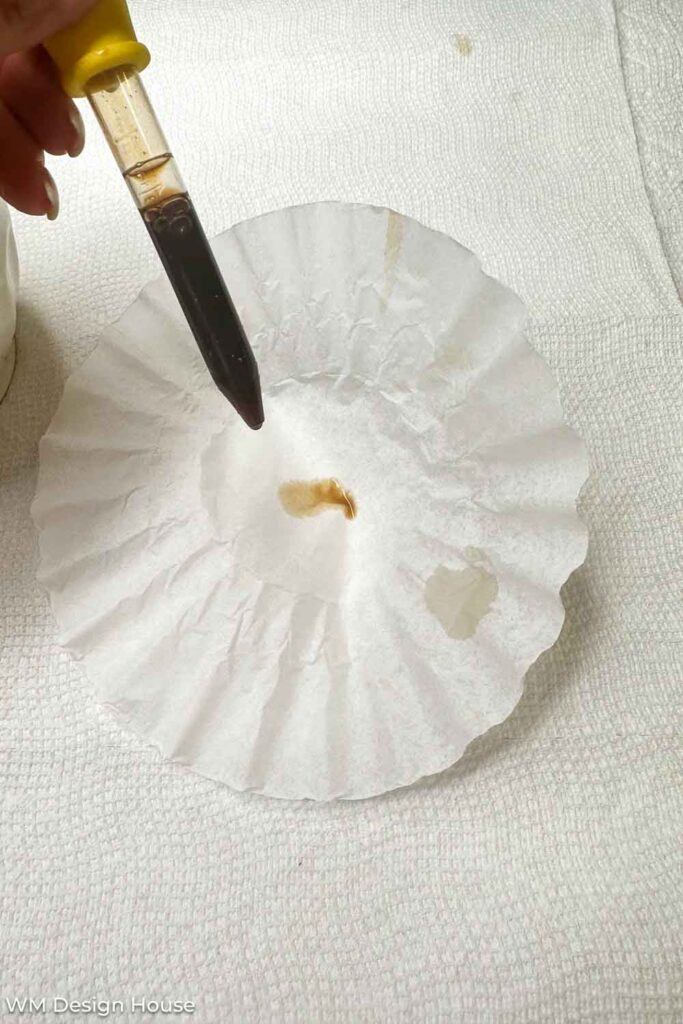
5: Eye Dropper Method
- Step 1: Prepare your coffee or tea per the instructions in the other methods.
- Step 2: Place your paper of choice on top of the paper towels.
- Step 3: Using an eyedropper, drop the coffee onto the paper in a random pattern. I like to leave some of the natural paper without any coffee stains.
- Step 4: Pick the paper up and allow the coffee to travel in different directions
- Step 5: Repeat step #4 until you have your final look.
- Step 6: Let the paper dry in a cool, dry place.
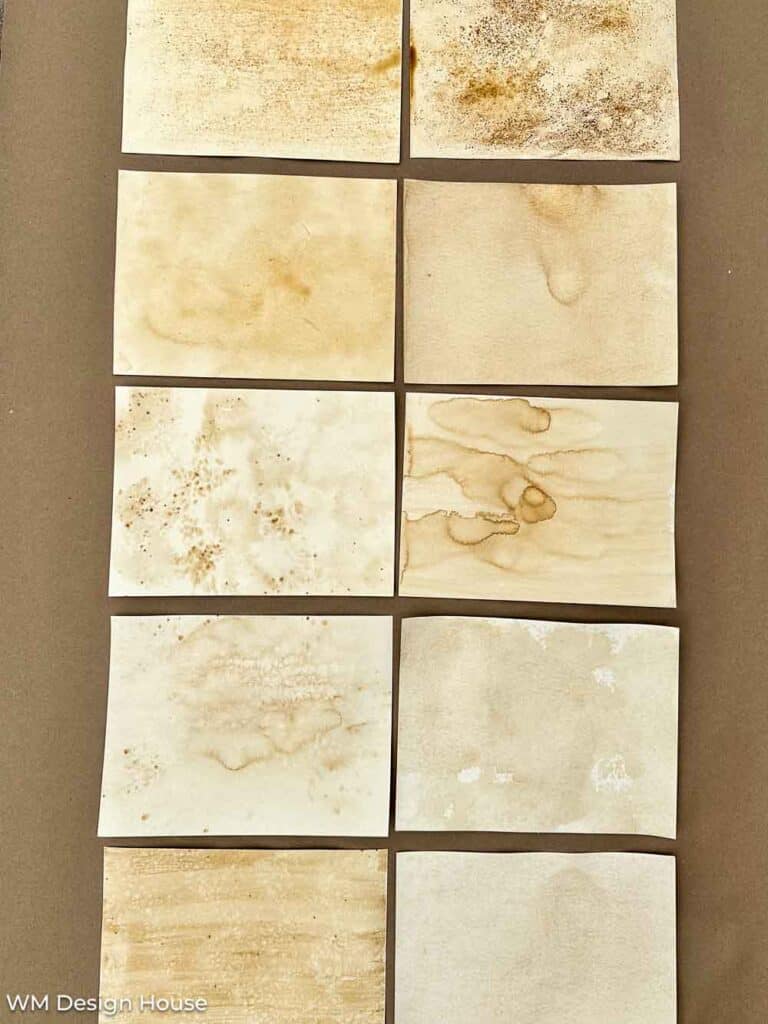
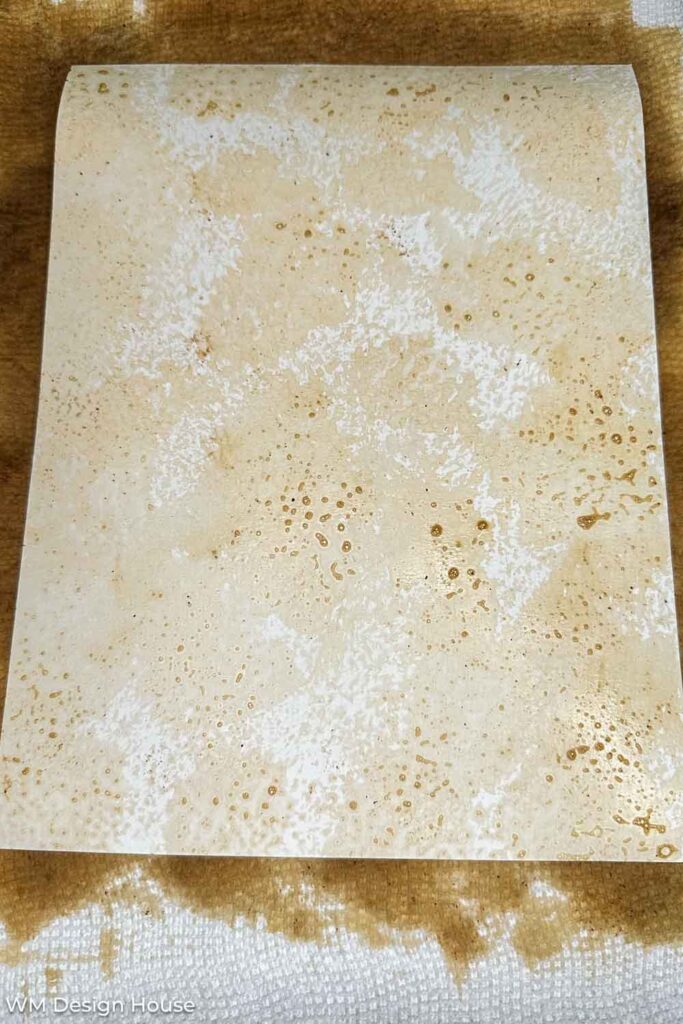
Creating different effects
You can use a couple of methods to get some darker stain effects.
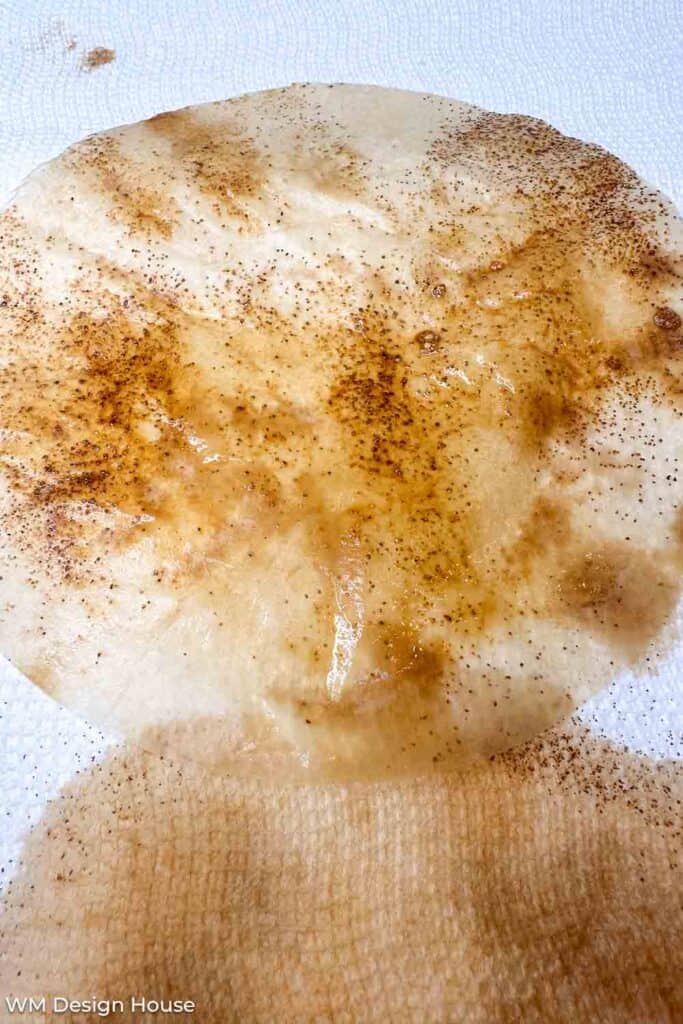
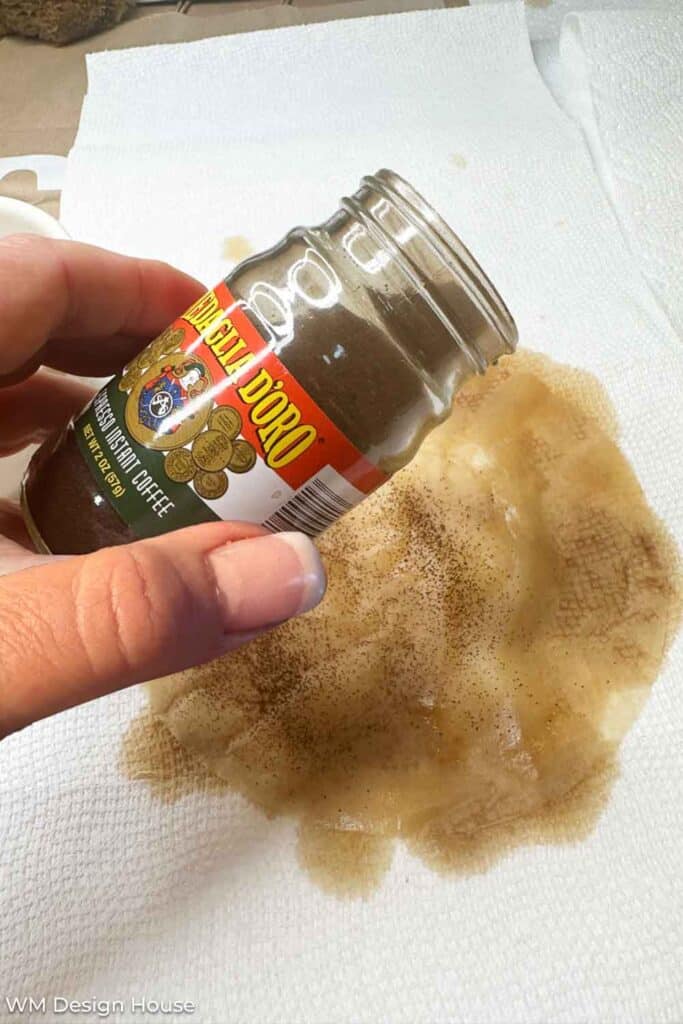
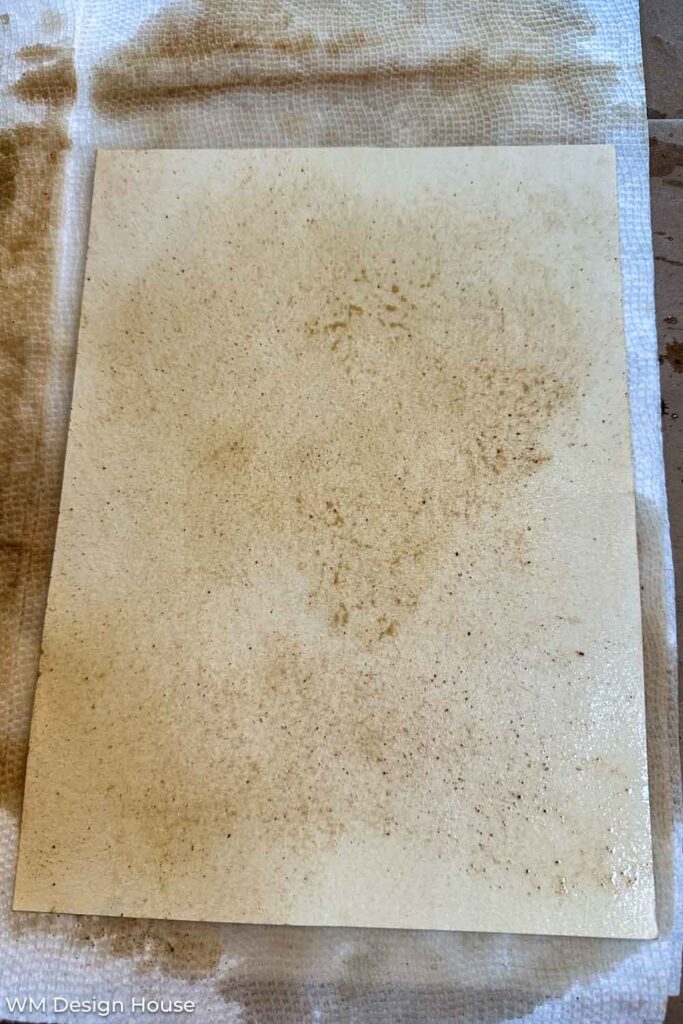
- 1. When the paper is wet, sprinkle some instant coffee grounds onto the paper. You can use your finger or a sponge brush to get them to absorb into the paper.
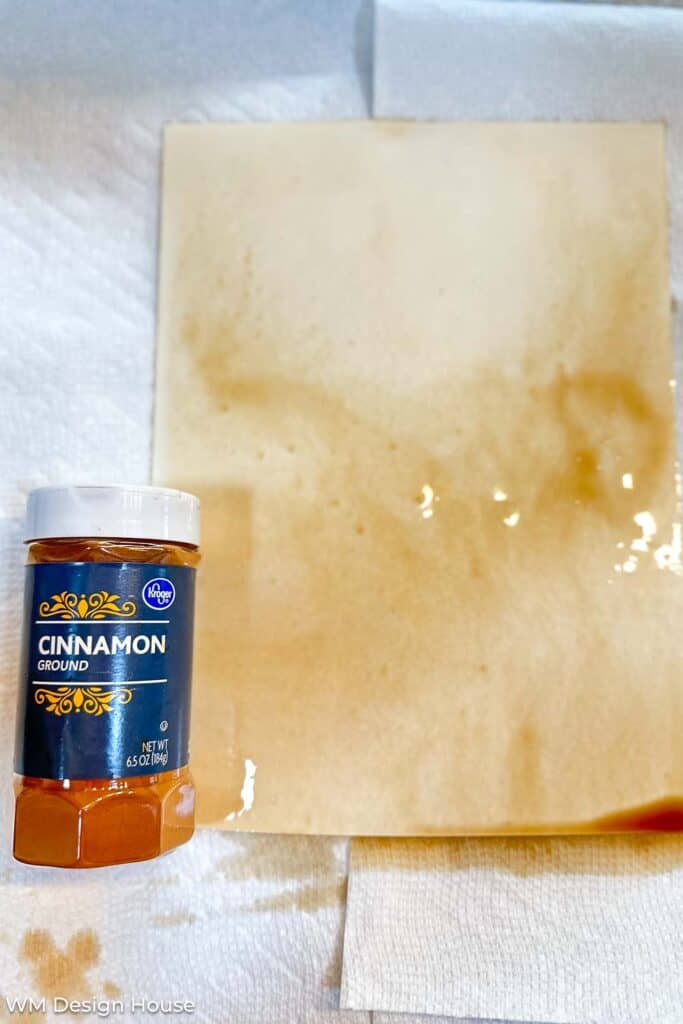
- 2. Sprinkle some cinnamon onto the paper and brush with a paintbrush or a sponge.
- (The coffee grounds will stain the paper, while the cinnamon stays on the paper’s surface).
- 3. You can use ink and drop it onto the paper with an eye dropper.
- 4. While your paper is still wet, dip it into a paint bath using acrylic paint. (75% water to 25% paint) This gives some color to your paper in addition to the coffee stain.
- Crumple your paper before staining it. The coffee will absorb more to the crinkled lines.
Coffee staining paper
Tips
- Choose the Right Coffee: Opt for regular coffee grounds, as flavored or instant coffees might yield inconsistent coloring.
- Select Paper or Filters: Regular paper, cardstock, parchment paper, watercolor paper, or coffee filters work well. Experiment with different materials to achieve the desired texture and color you prefer.
- Prepare the Coffee Solution:
- Brew a strong cup of coffee using a dark roast.
- Let the coffee cool to room temperature.
- You can adjust the concentration of the coffee solution to achieve lighter or darker stains.
- Protect Your Work Area: Cover your workspace with a plastic tablecloth, brown paper bags, or newspaper to prevent staining surfaces.
- Test on a Small Piece: Before staining the entire batch, test the coffee solution on a small piece of paper to see if it matches your desired shade.
- Try Different Methods to Dye Your Paper
- Dipping: Submerge the paper or filter in the coffee solution for a few seconds to a minute. The longer you soak, the darker the stain.
- Brushing: Use a brush to apply the coffee solution onto the paper. This gives you more control over the intensity of the stain.
- Drying:
- Allow the paper or filters to air dry completely. You can speed up the process with a hairdryer on a low setting.
- Enhancing Variability:
- Create depth by blotting certain areas more than others.
- Use crumpled paper for a textured effect; the creases will absorb more coffee.
- Sealing and Fixing the Stain:
- You can seal the stained paper with a clear acrylic sealer to prevent smudging once it’s dry.
- For crafts that might come into contact with moisture, like coasters, use a decoupage medium to lock in the stain.
- Experiment with Additives:
- Enhance the antiqued look by brushing on some paint or watercolors.
Conclusion
Creating coffee-stained paper is fun to bring some antique charm to your craft projects.
And the best part is that it only takes a few simple materials to achieve these various effects – subtle or bold patterns.
So gather your materials, pick a technique, and embark on a journey to transform plain paper into beautifully aged masterpieces.
Stay tuned, I will be sharing how to make a fall garland using these coffee paper leaves next Tuesday, you won’t want to miss it.


Fall DIY’s
Fall is just around the corner, so it’s time to start thinking about all the fun DIY crafts and decor projects you can make to get in the spirit. Whether you want something simple or elaborate, I am here to inspire you. Click the button to see all of my fall projects.


Thank yo so much for the great feature.
FUN tutorial, Wendy!
We will be featuring you starting Wednesday at the Creative Crafts Linky Party! Pinned and shared!
Creatively, Beth
Hi Beth, thank you so much. I appreciate the feature and will stop by to visit. I hope you have a great week.
Outstanding tutorial. Something I have never done as yet.
Thank you for sharing your links with us at #277 SSPS Linky. See you again next week.
Thank you so much! it is a fun project to make.
Love your pretty coffee-stained leaves, Wendy! I always learn so much from your creative ideas! Thanks so much for sharing!
Thank you, Kim. Coffee staining is one of my favorite crafting projects.
This is such a great DIY tutorial, Wendy! I can’t wait to share it on Sunday.
Thank you so much, Kim. I am so glad you enjoyed it. It is very kind of you to share it.