Easy & Beautiful DIY Wall Moldings for Instant Character
If you’ve ever stared at a flat wall and thought, “This needs something extra,” you’re in the right place! DIY wall moldings are the perfect way to add architectural flair—You can do this all on your own, or hire a little help like I did. I wanted this to be a joint project as we tackled the bedroom, adding crown molding, chair rail, and box molding to create a customized bedroom. The result? Instant character and elegance that elevated our entire bedroom, and now I feel like we sleep in a museum!
This is the first post in a 4-part series documenting our full bedroom update, and it all started with this beautiful trim work!
In this easy, beginner-friendly tutorial, I’ll walk you through planning, installation, spacing tips, design ideas for every room, and even the small mistakes to avoid. Whether you’re working on cheap DIY wall moldings for a hallway or decorative wall molding for your dining space, you’re going to love how these simple DIY wall panels can transform your space.
On my blog WM Design House, I may sometimes use affiliate links, which means a small commission is earned if you purchase via the link. The price will be the same whether you use the affiliate link or go directly to the vendor’s website using a non-affiliate link. Read my full disclosure policy here.
Why Choose DIY Wall Moldings?
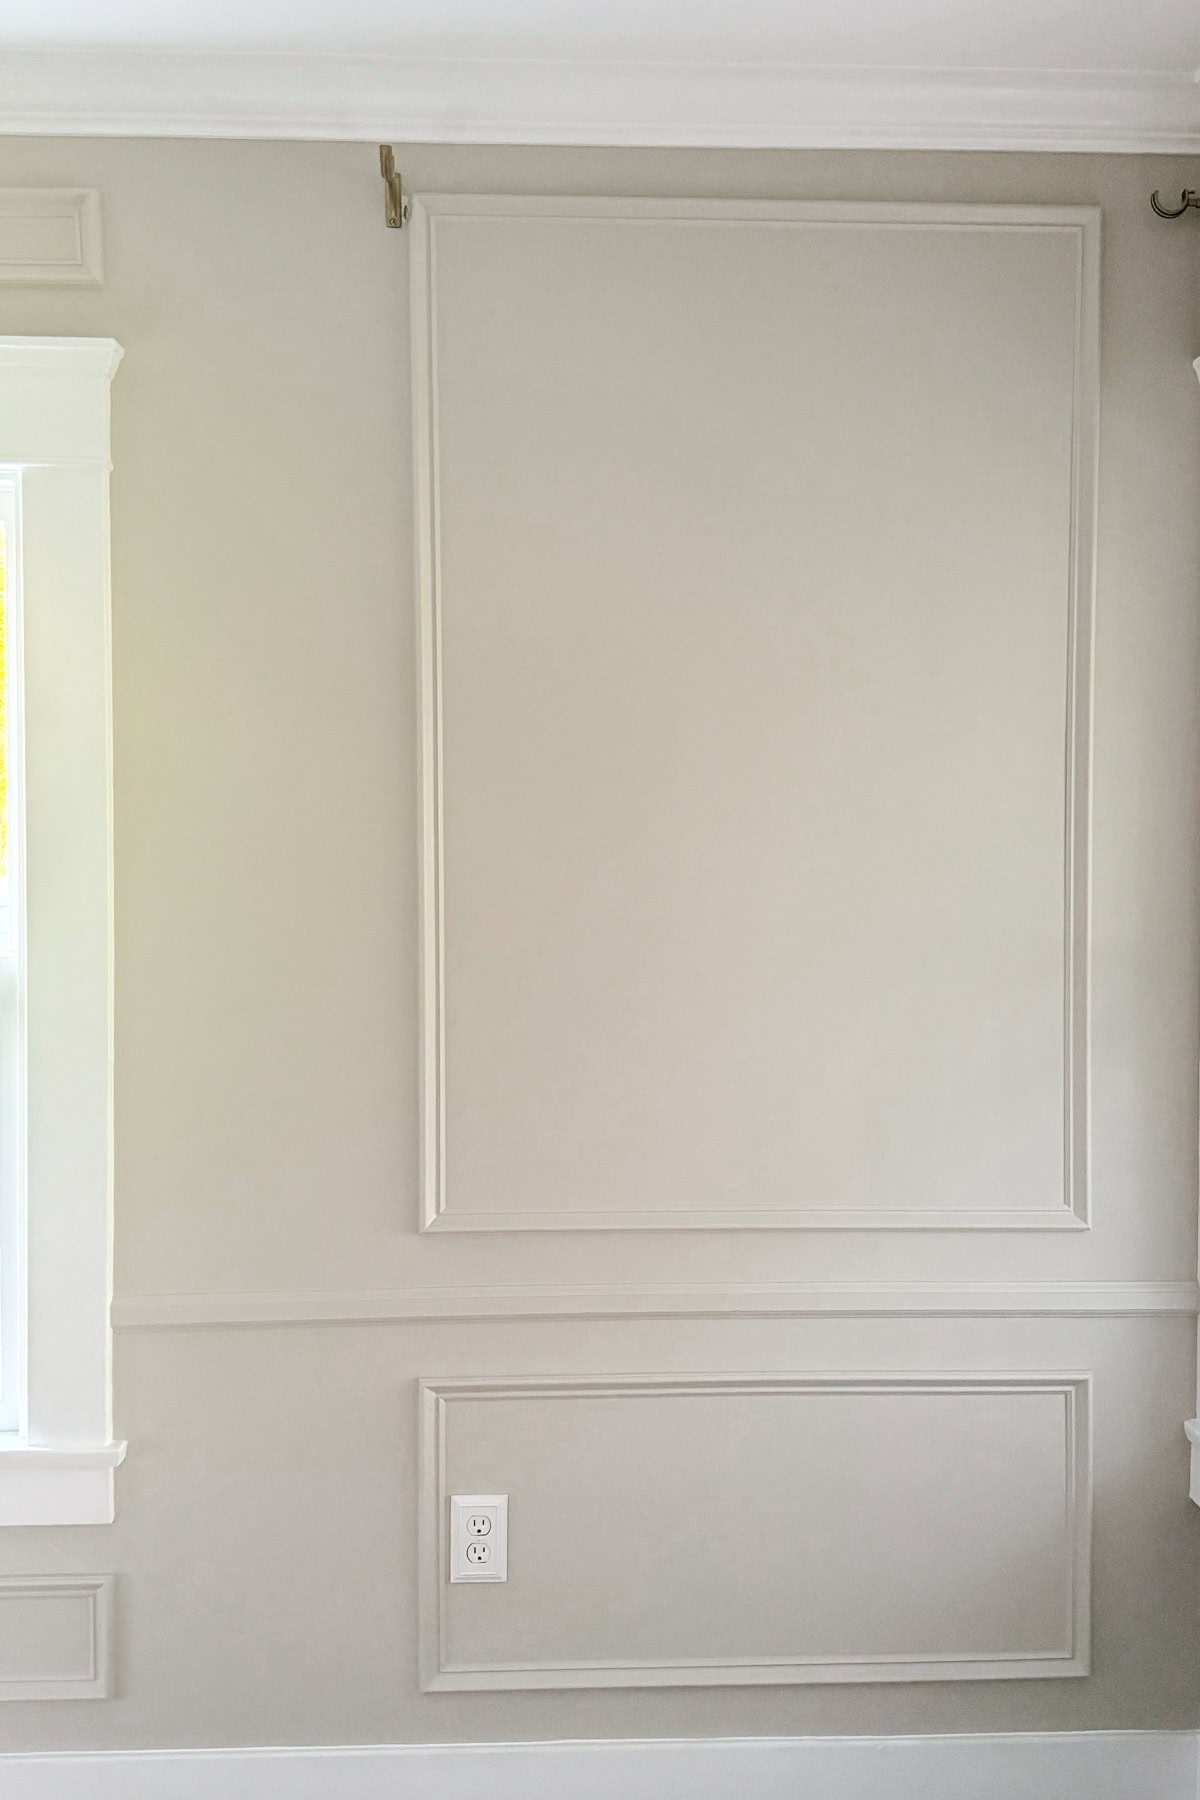
- Creates architectural interest: Decorative wall molding, like picture frame molding DIY or grid wall molding, transforms plain walls into a stylish backdrop.
- Budget-friendly upgrade: Using basic tools like a brad nailer or finishing nails, you can achieve a designer look without the high cost.
- Customizable for any room: Whether it’s DIY wall moldings for bathroom upgrades, DIY wall moldings for living room walls, or hallway paneling, you choose the style.
- DIY-friendly: With a tape measure, laser level, and some patience, you can install crown molding DIY, chair rail molding, and box trim like a pro.
Whether you’re adding simple DIY wall trim ideas or going all in with full decorative DIY wall panels, these upgrades deliver dramatic results with surprisingly little effort—and they can instantly elevate any space in your home.
Tools & Materials You’ll Need for DIY Wall Molding
- Tape measure
- Laser level or standard level
- Painter’s tape
- Miter saw or miter shears (for precise 45° cuts)
- Nail gun or brad nailer with brad nails or finishing nails
- Construction adhesive (optional)
- Wood filler (for filling nail holes)
- Caulk (for smooth seams)
- Sandpaper
- Paint & paint color ideas (trim and wall)
- Optional extras include crown molding DIY and chair rail molding if you want an even more layered, refined look. A wall moulding measurements calculator can help you determine exactly how much trim you’ll need for your space, however, I did it the old fashioned way… pen, paper and a calculater
Step-by-Step: How to Install Wall Moldings
Step 1: Measure & Sketch
- Start by grabbing a tape measure and laser level to measure the full dimensions of each wall. Make note of all existing architectural features—doors, windows, and trim—so you can design around them.
- Next, take a close look at your space. Consider anything that might affect the placement of your moldings, like outlets, furniture, or drapes. You’ll want to plan around these elements to ensure your layout feels balanced and nothing is obstructed.
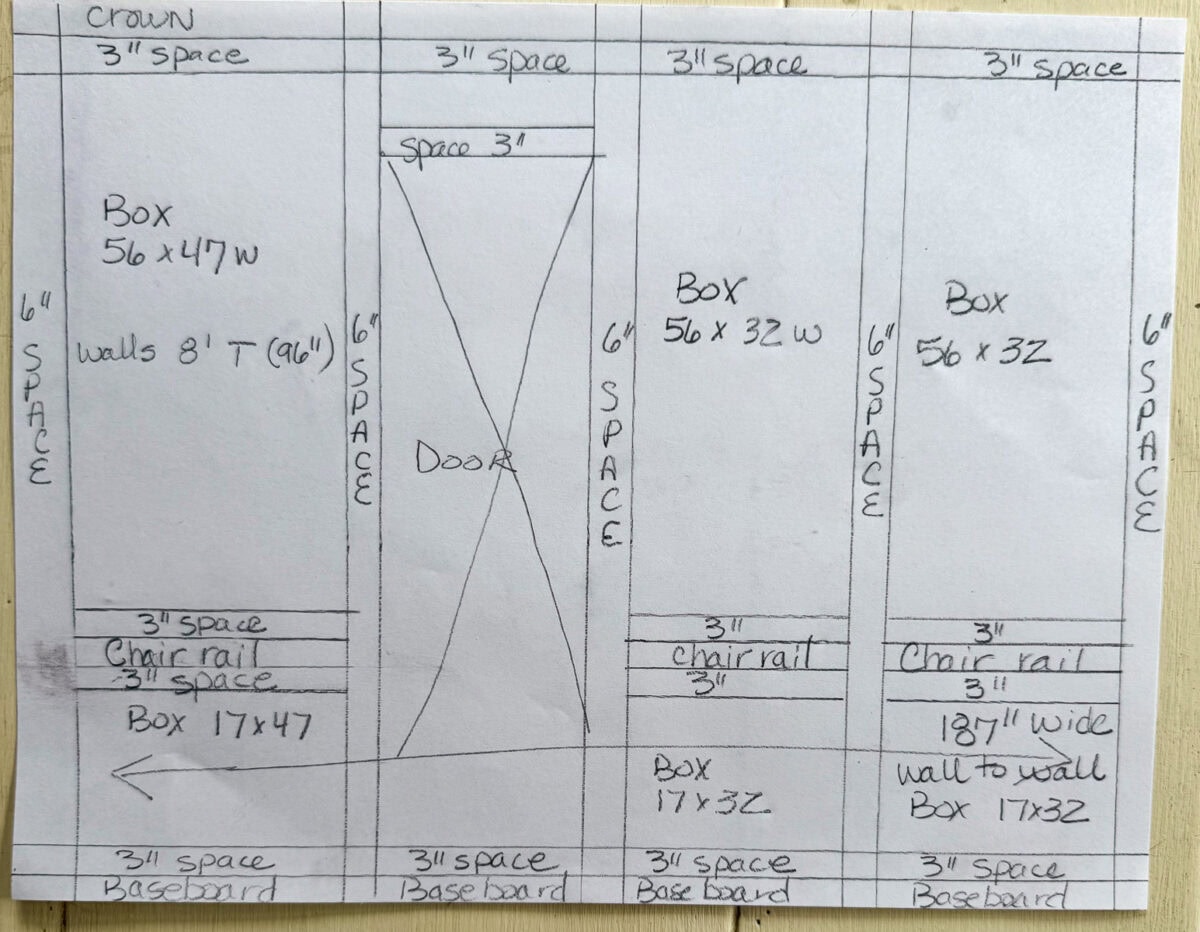
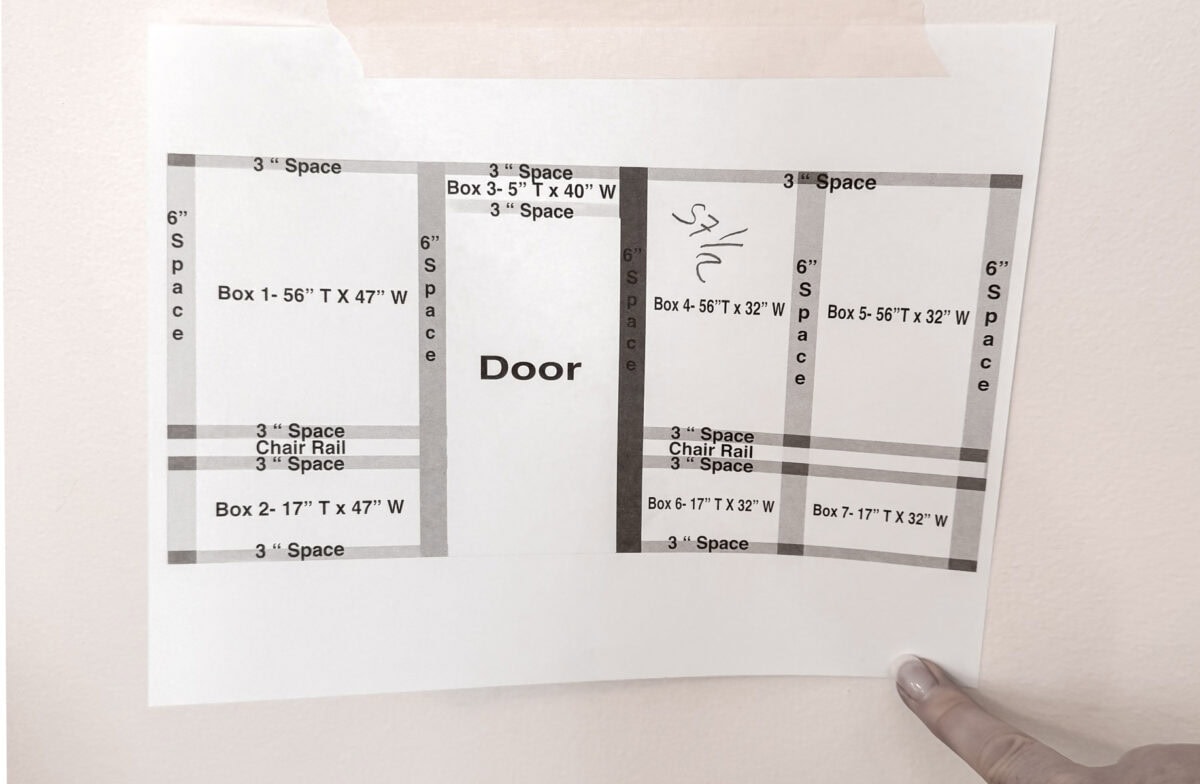
- Once you’ve gathered all your measurements, write them down clearly. I personally started by sketching the layout by hand on paper to get a feel for the spacing and sizing. Then I moved everything into the computer and printed out each wall with dimensions, so I had a clear guide when it came time to install. This extra planning step really helped me get it just right.
Step 2: Plan Your Layout
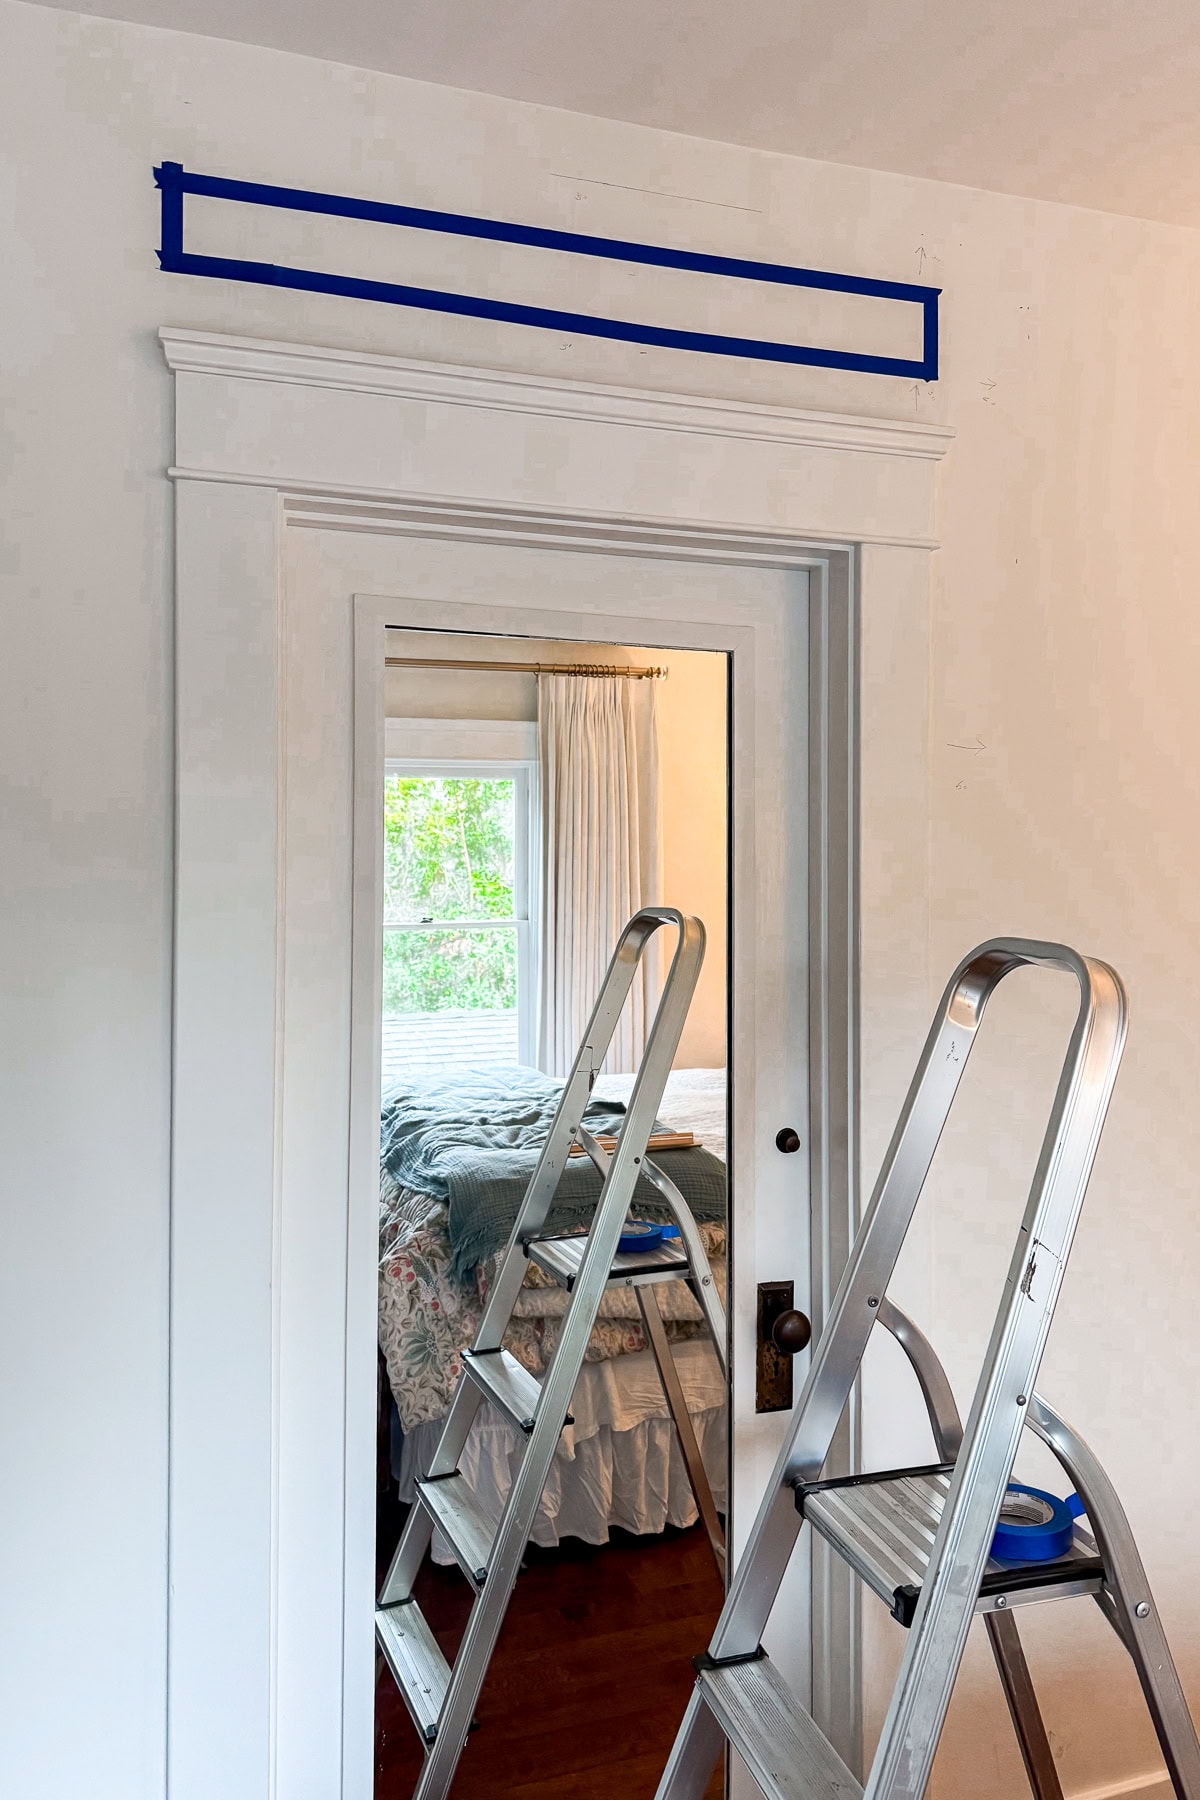
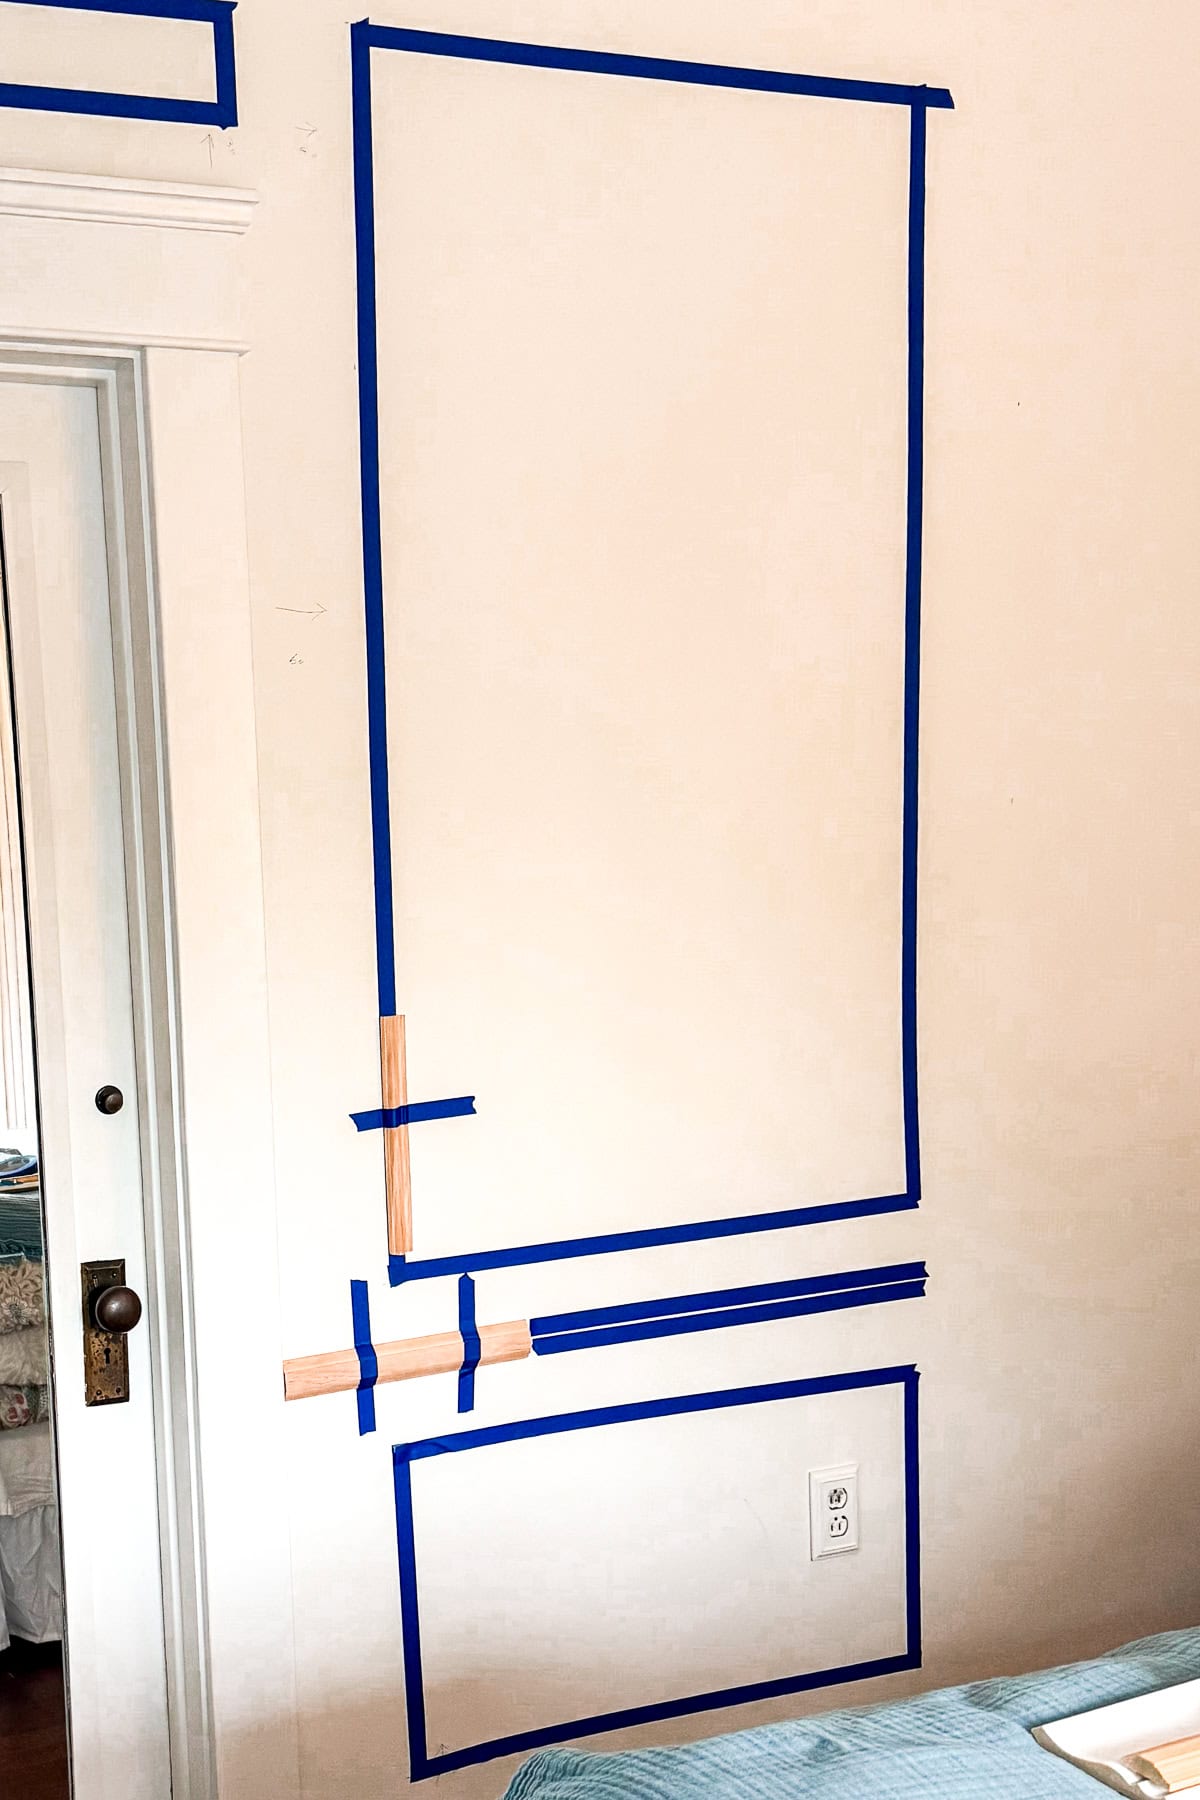
- Use painter’s tape to mock up your wall molding boxes.
- Tape a piece of chair rail molding in place to preview the look.
- Maintain consistent spacing: I used 3″ horizontal spacing between boxes and 6″ vertical spacing from chair rail, ceiling, and baseboards. These simple measurements create visual harmony.
- Reference online wall moulding ideas you see online to get inspiration for styles and proportions.
Tip from wendy:
Take note of any electrical outlets on your walls. Make sure each outlet falls either completely inside one of your molding boxes or well outside the box edges—this will help maintain clean lines and avoid awkward overlaps.
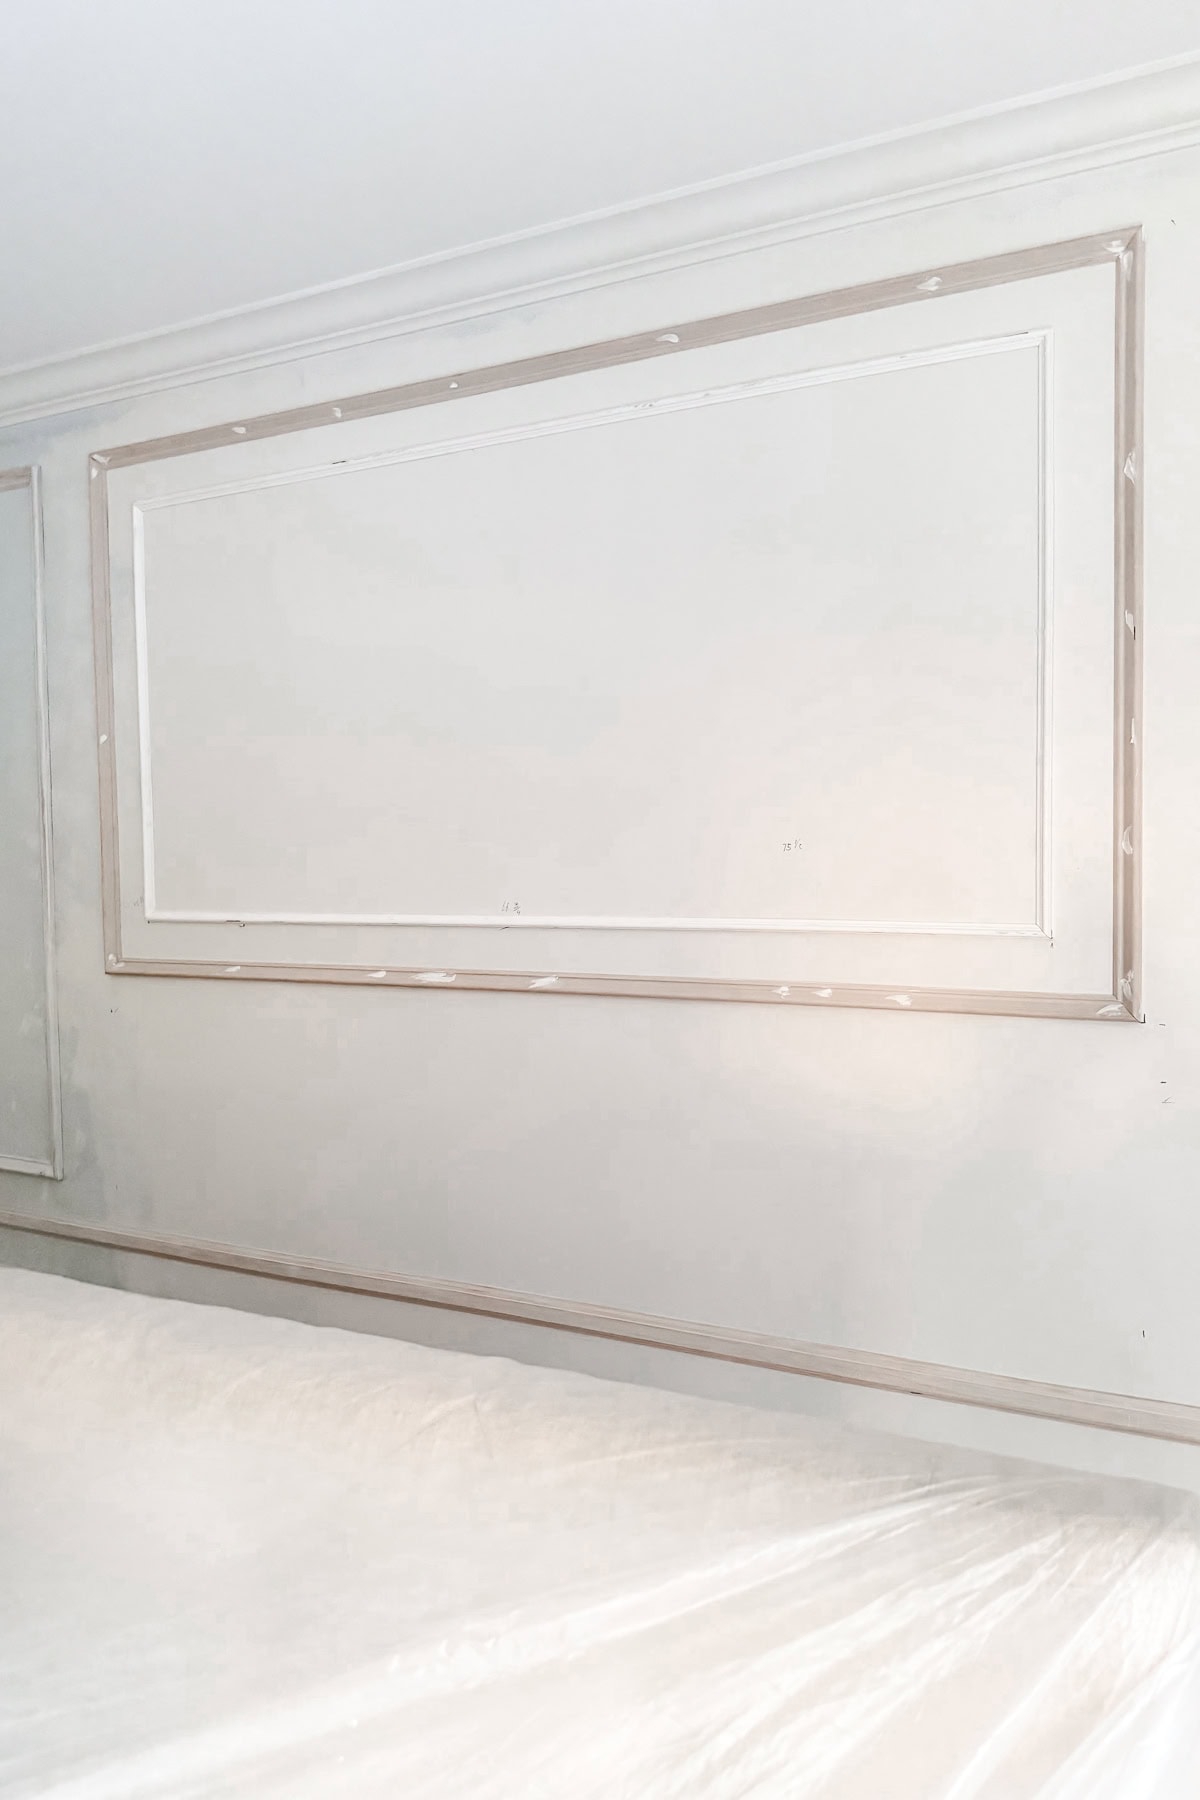
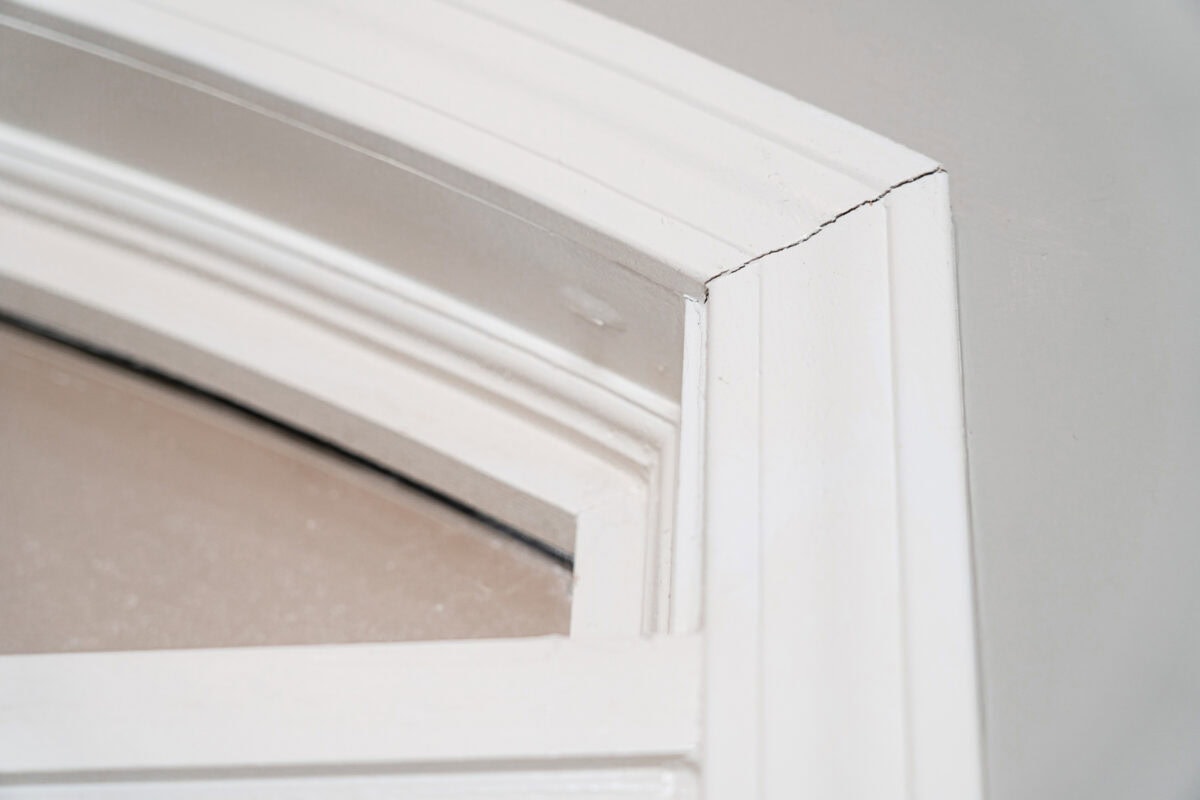
Step 3: Cut at a 45° Degree Angle
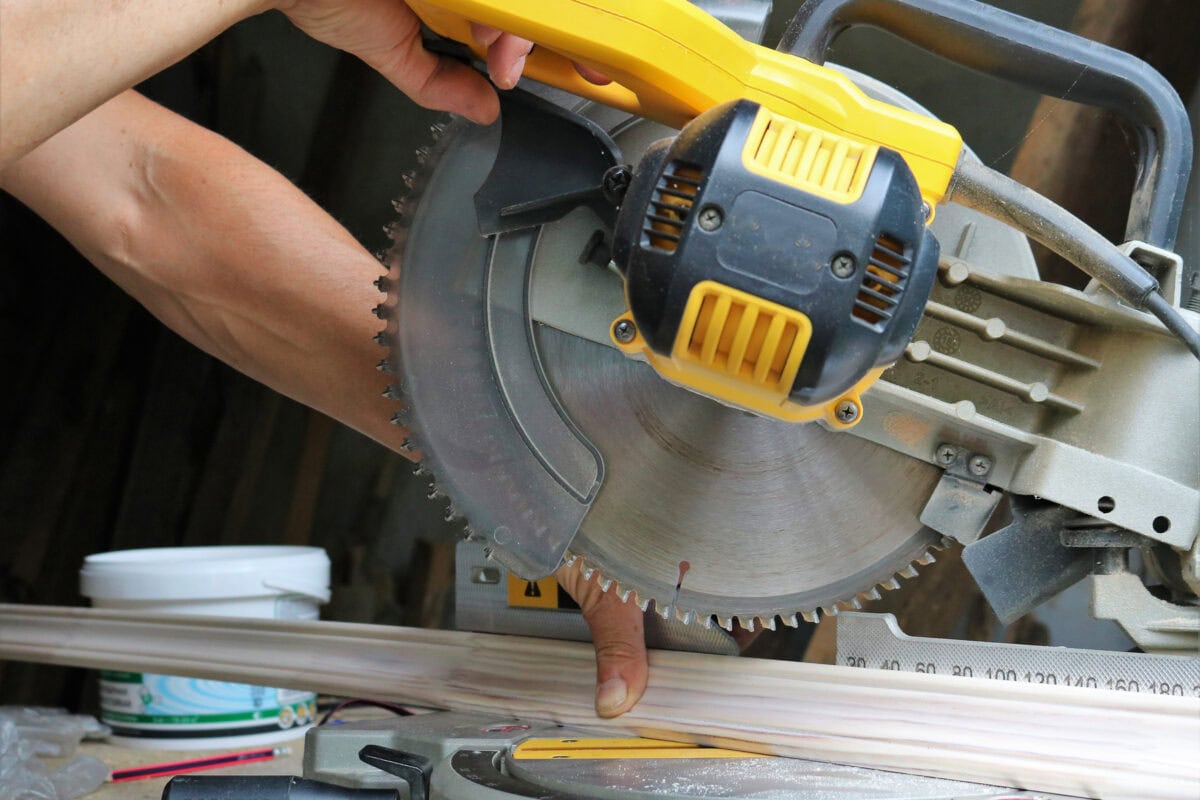
- Use a miter saw or miter shears to cut box trim pieces at clean 45° angles.
- Practice on scrap wood first to perfect your cuts.
- You’re aiming to build perfect picture frame molding boxes—cuts must be crisp.
Tip from wendy:
Be sure to practice your cuts on a few pieces of scrap wood first—this helps ensure your 45° angles are clean and accurate before working on your actual trim.
Step 4: Install Box Molding
- Optional: Apply construction adhesive to the back of each piece.
- Position the first piece along your taped guideline.
- Secure with a nail gun or brad nailer using brad nails or finishing nails for a clean, fast installation. Have someone hold longer top pieces in place.
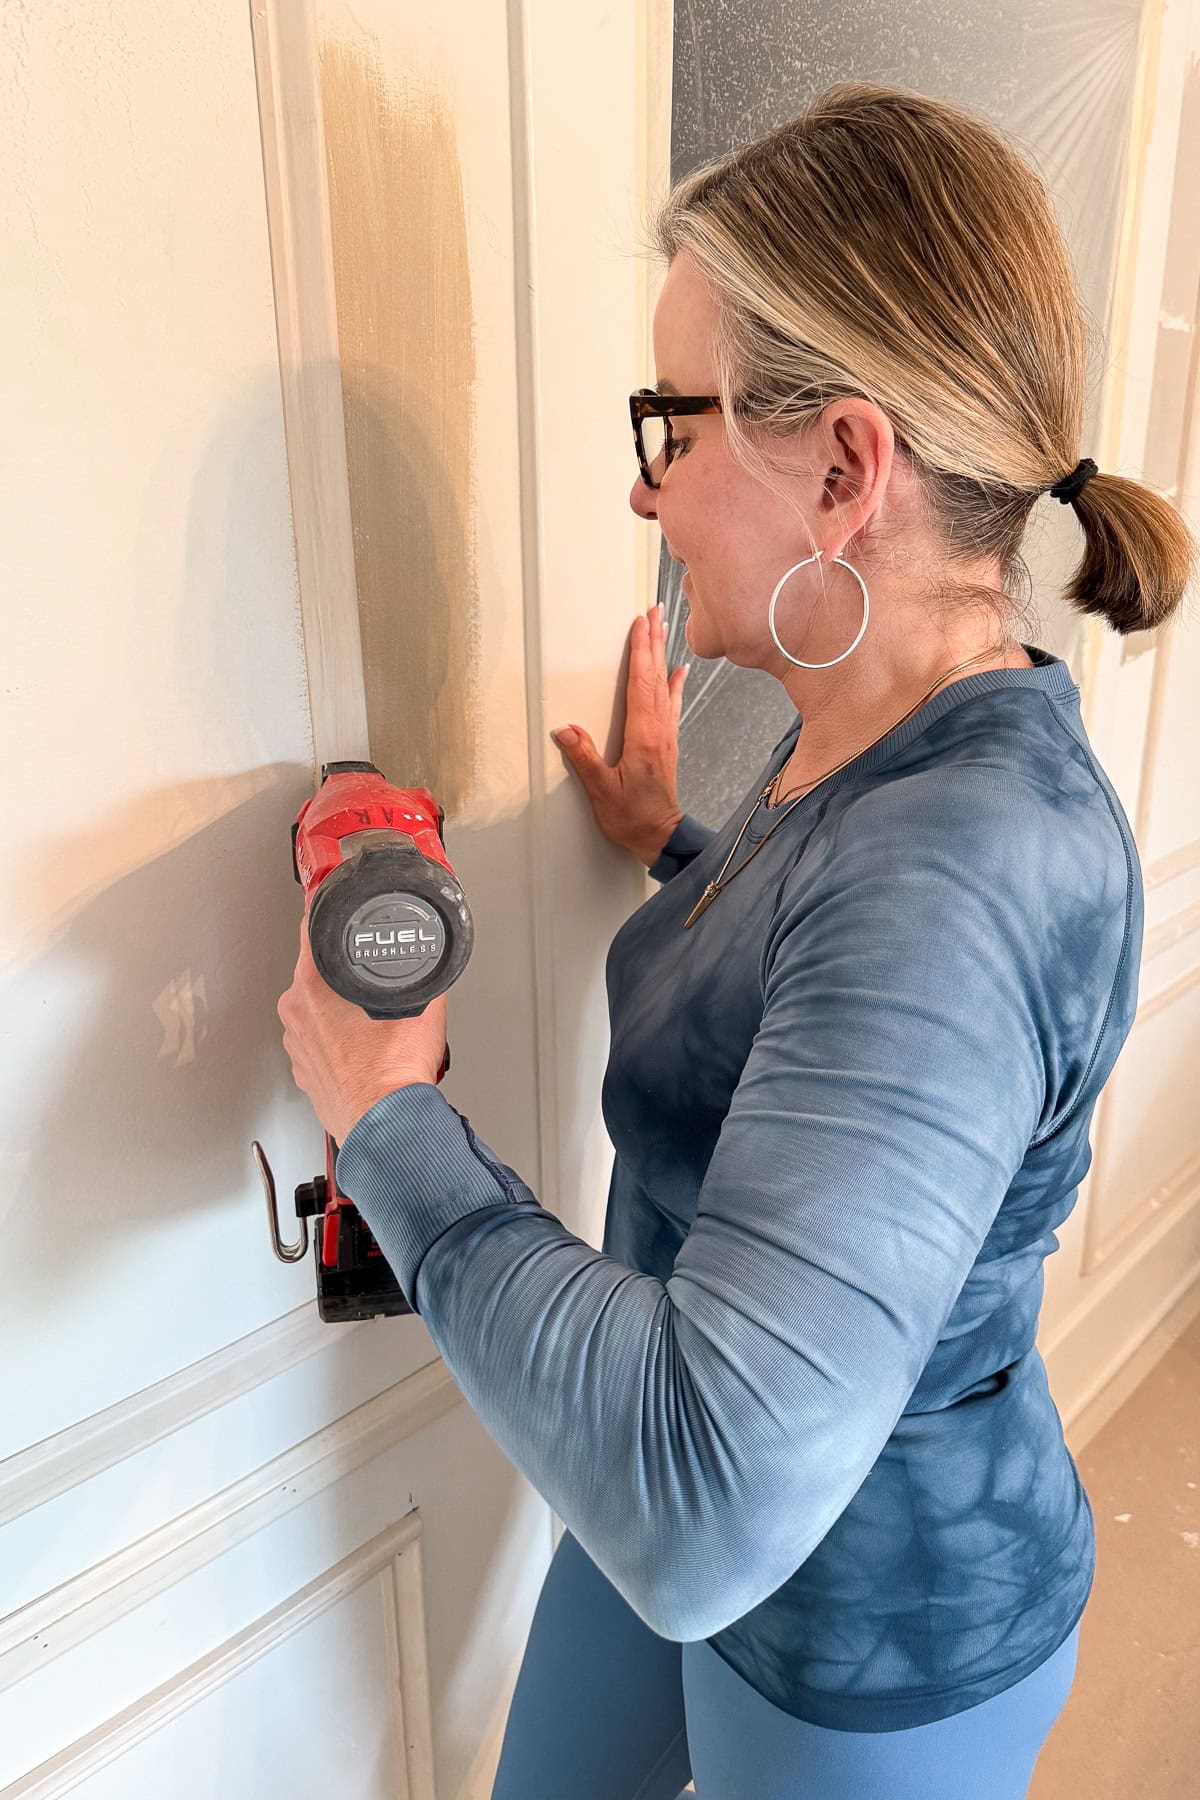
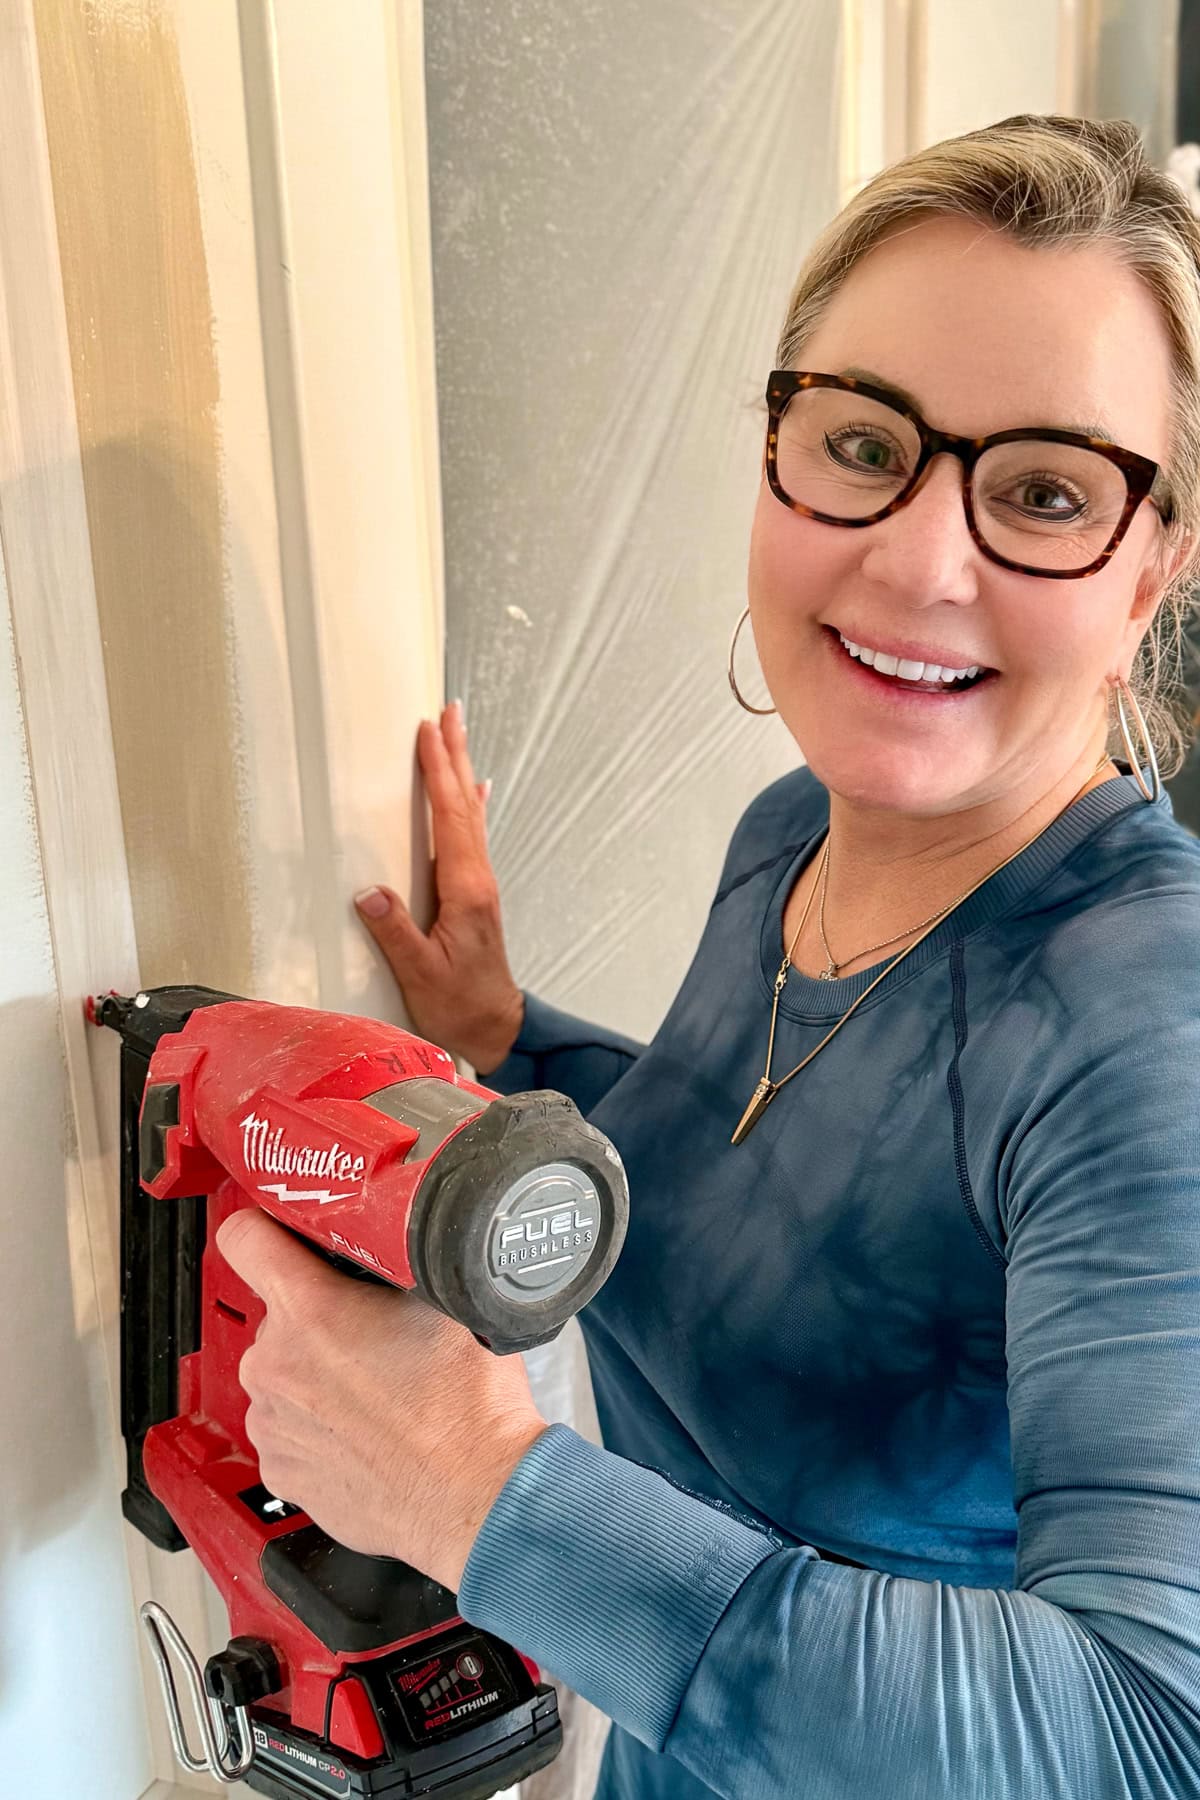
Tip from wendy:
I highly recommend using wood glue along the back of each molding piece before securing it with nails. It helps keep everything firmly in place and provides extra holding strength over time.
Step 5: Fill, Caulk & Sand
- Fill all nail holes and seams with wood filler.
- Once dry, use caulk to seal edges for a seamless finish.
- Sand lightly to prep for painting.
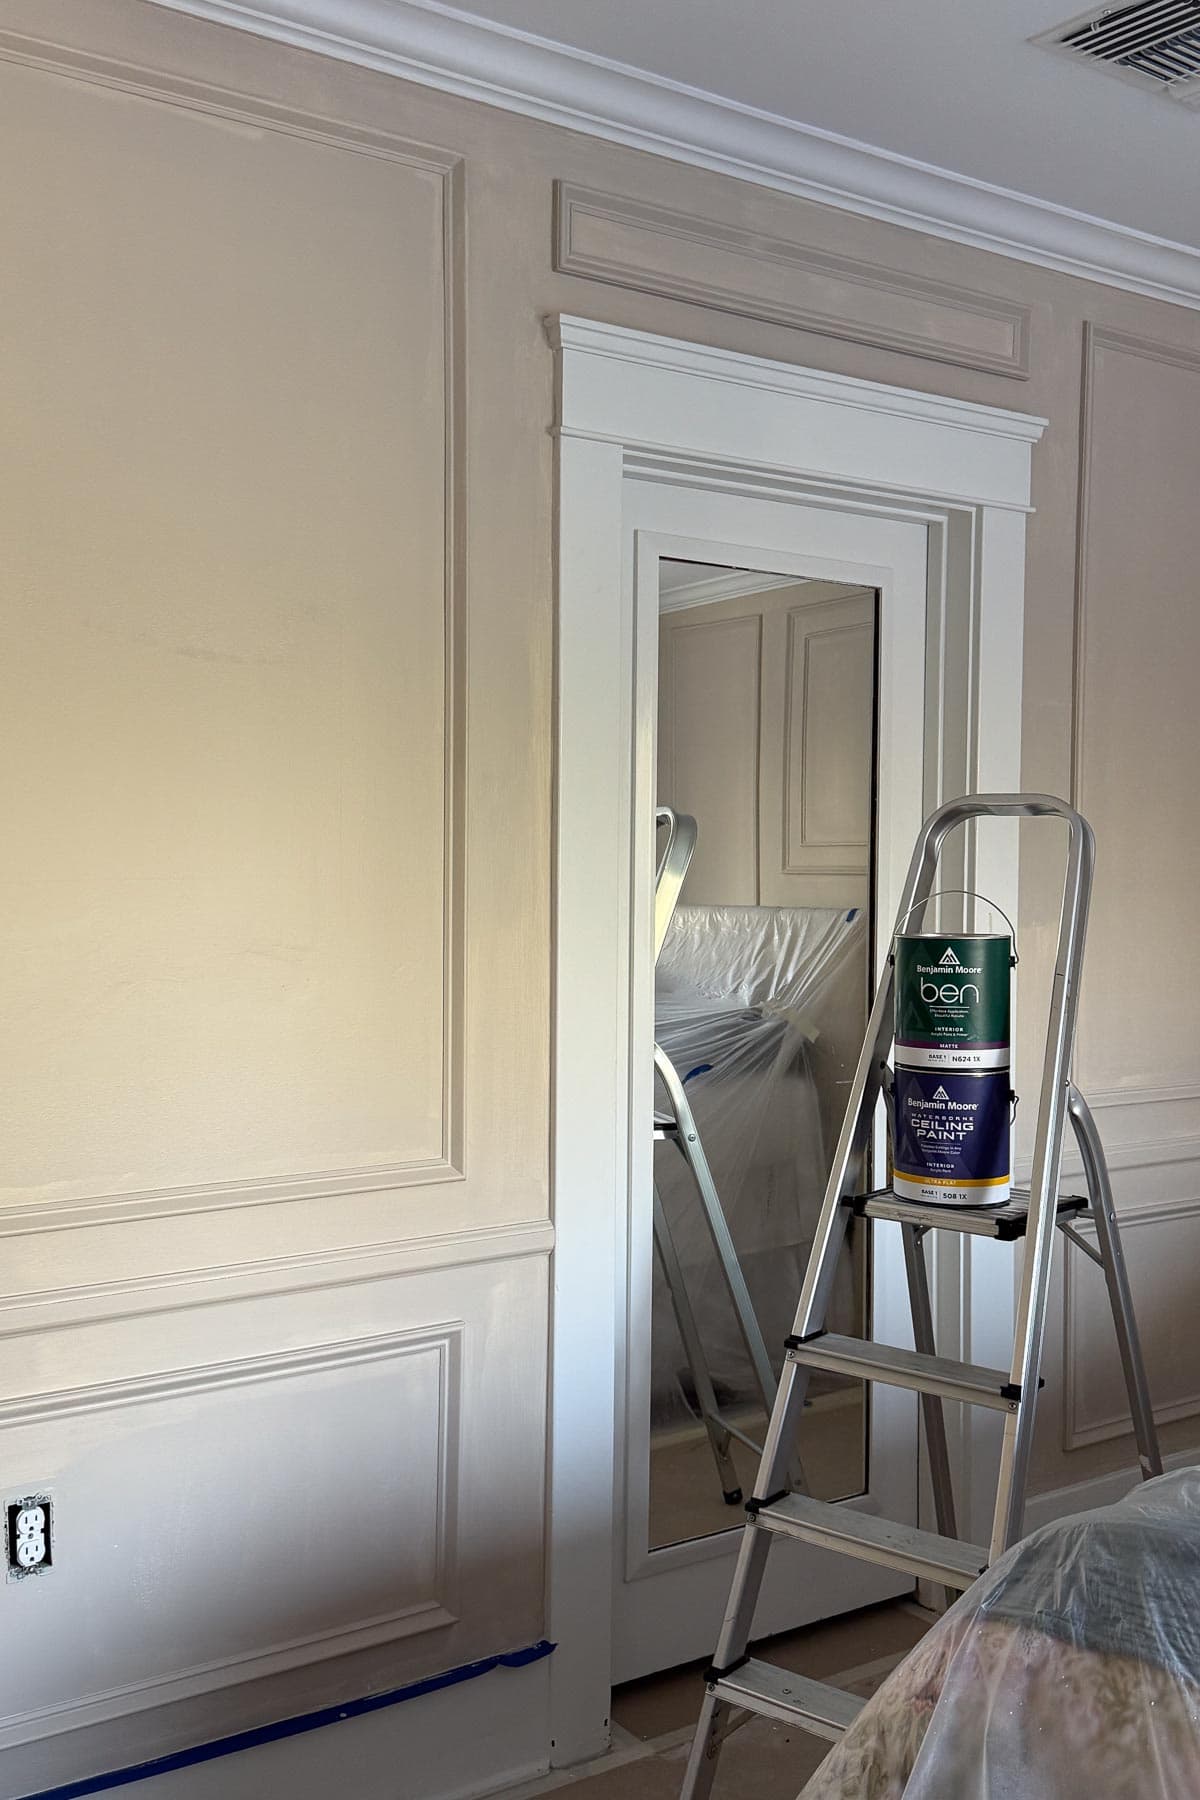
Step 6: Paint & Admire
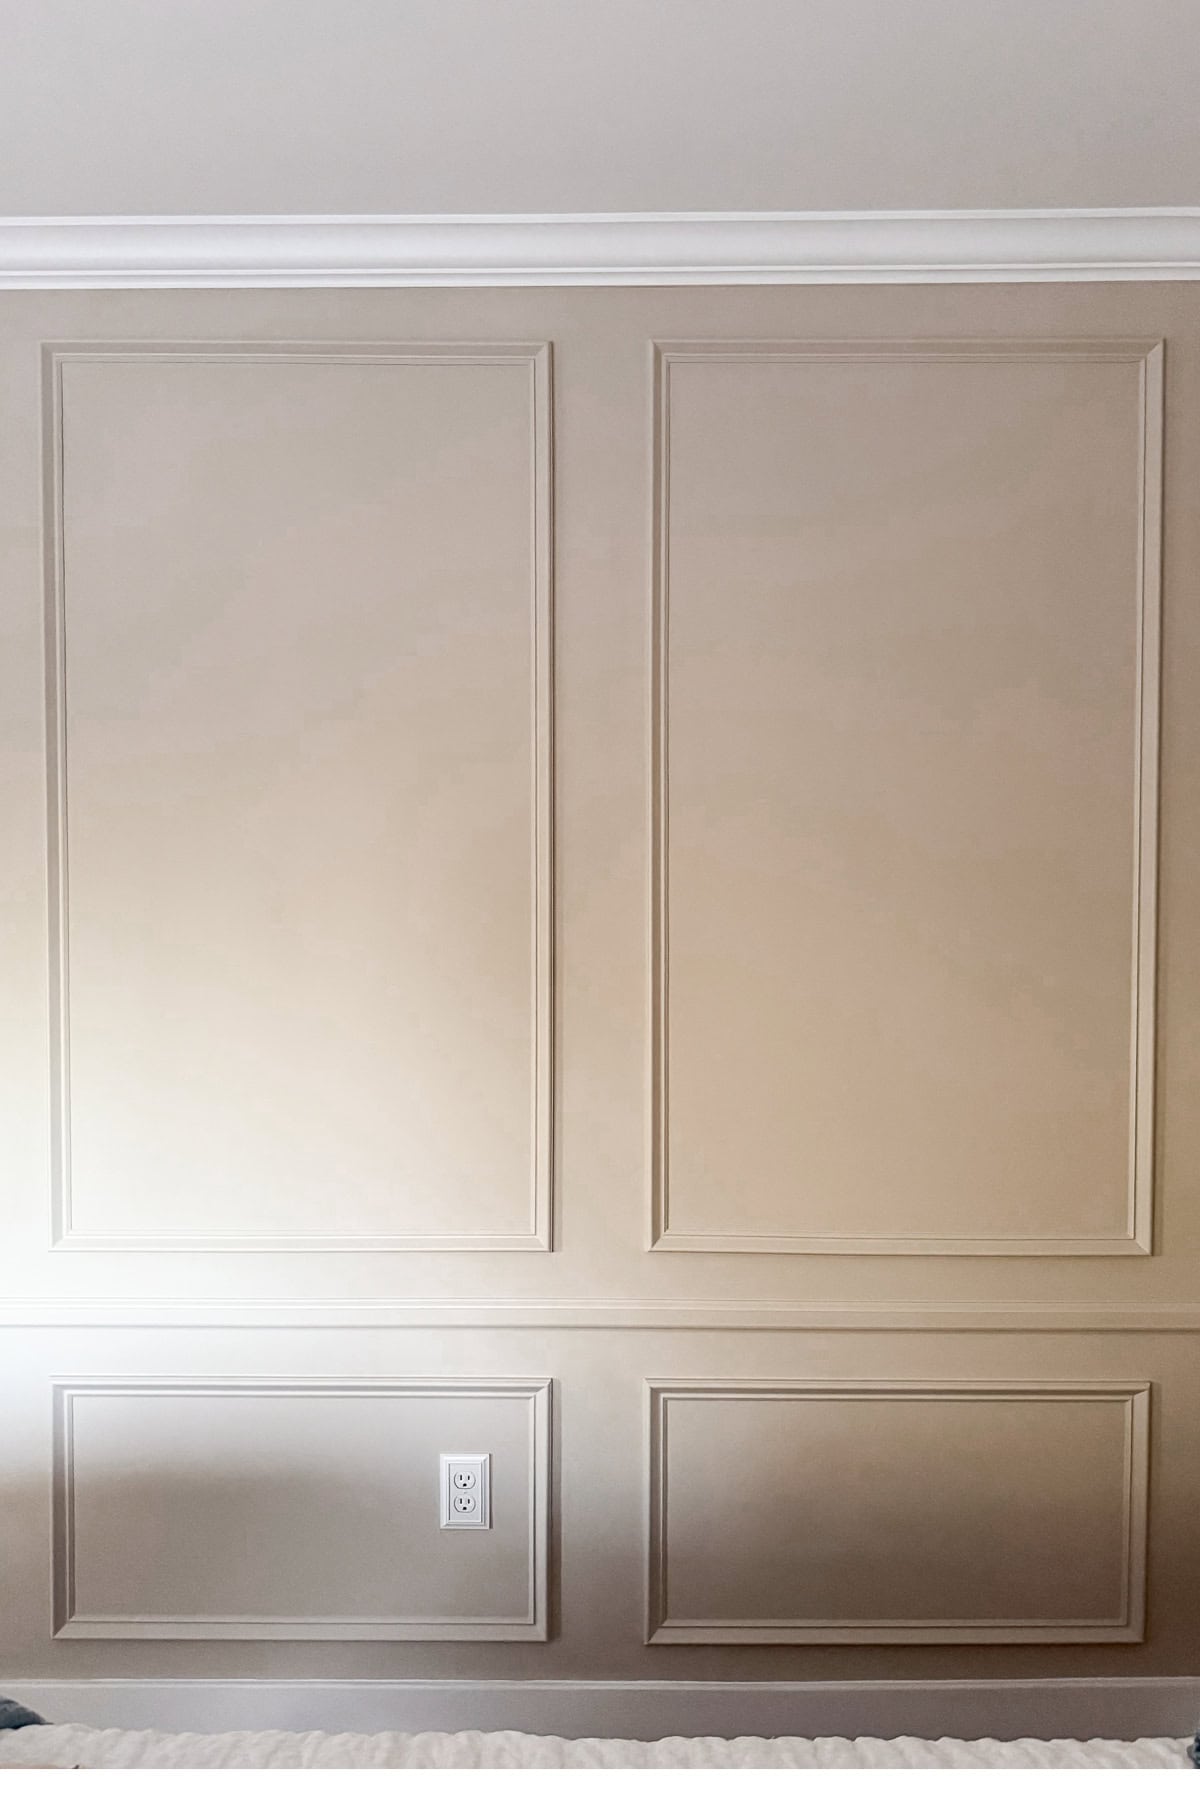
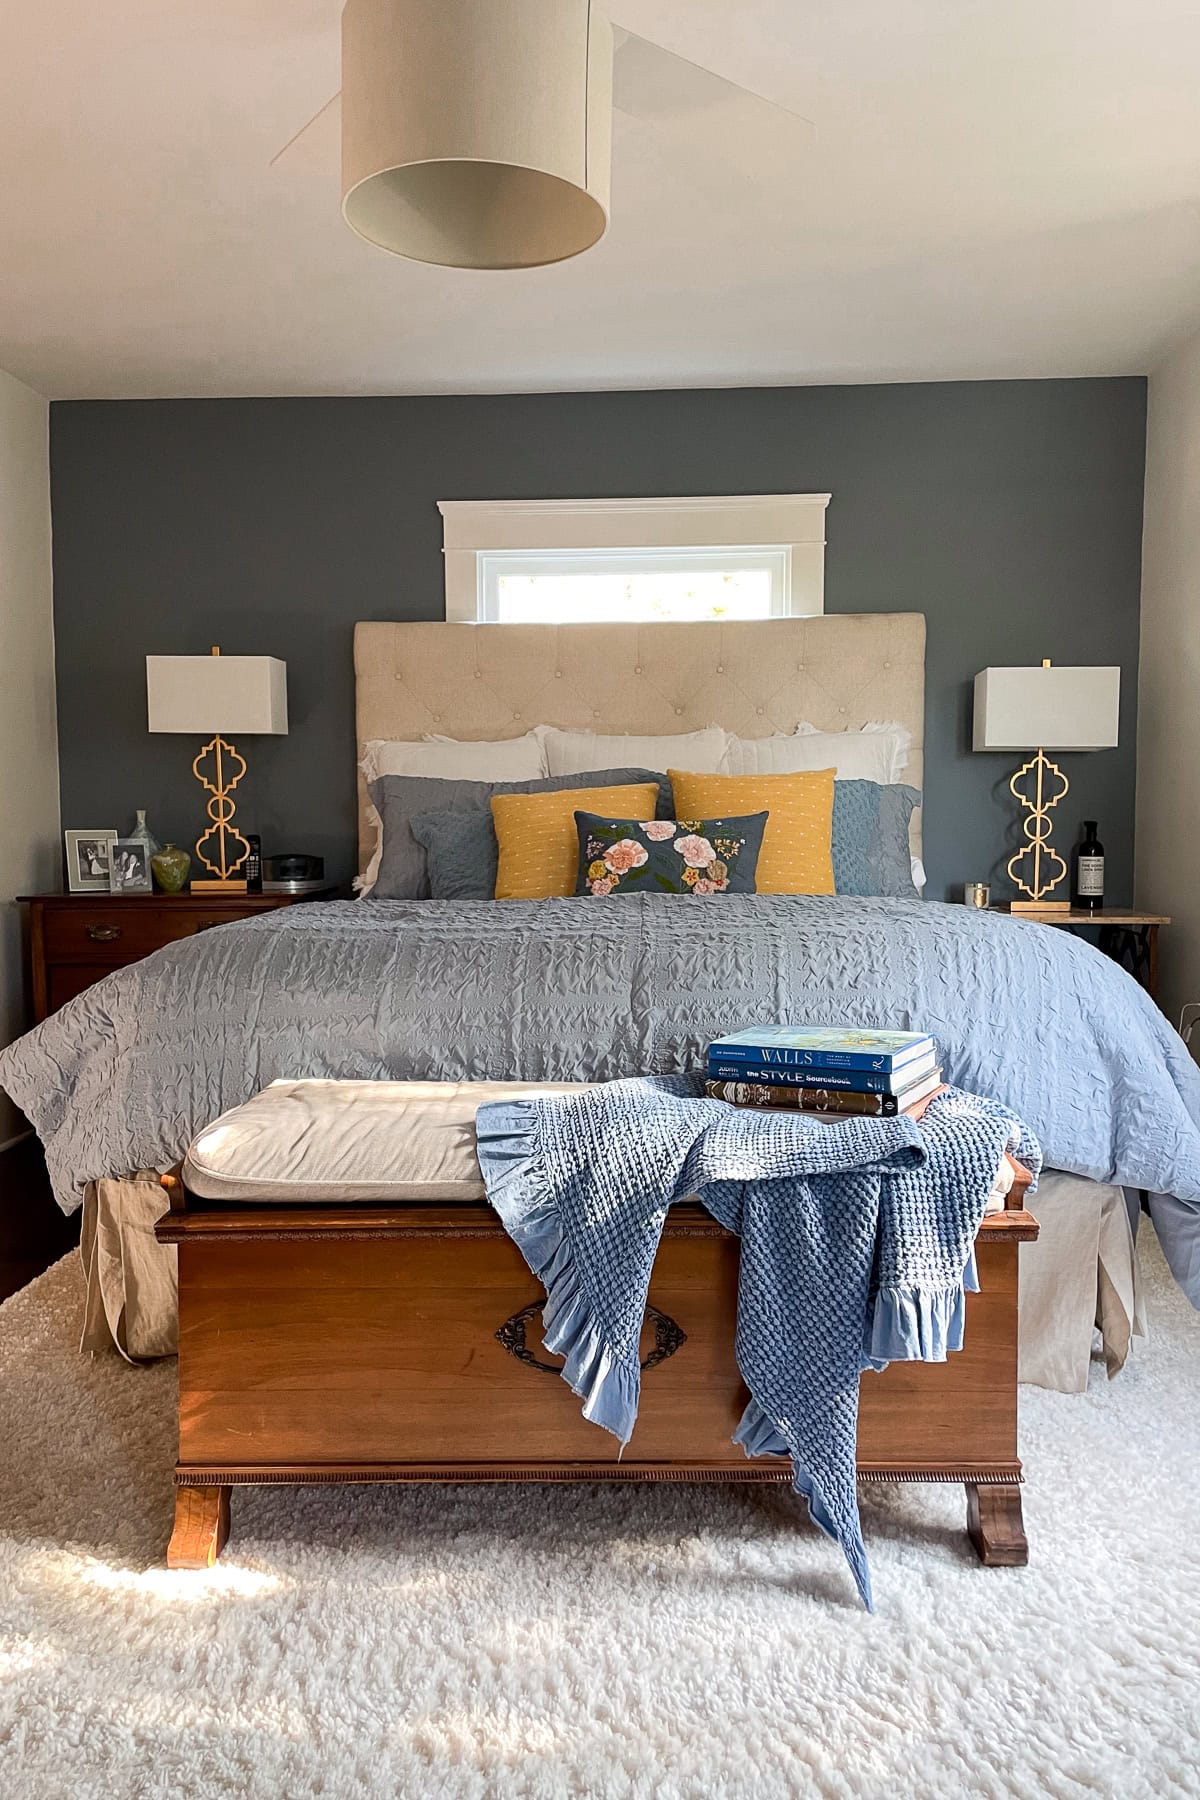
- Choose a paint color that complements the overall style and mood of your room. For a timeless and classic contrast, you might pair Smokey Taupe with crisp white trim, like I did in our bedroom. This creates a clean, elegant frame around the walls. Alternatively, for a softer, more cohesive look, consider painting both the trim and walls in the same taupe shade. This approach can make the space feel calm, seamless, and more contemporary.
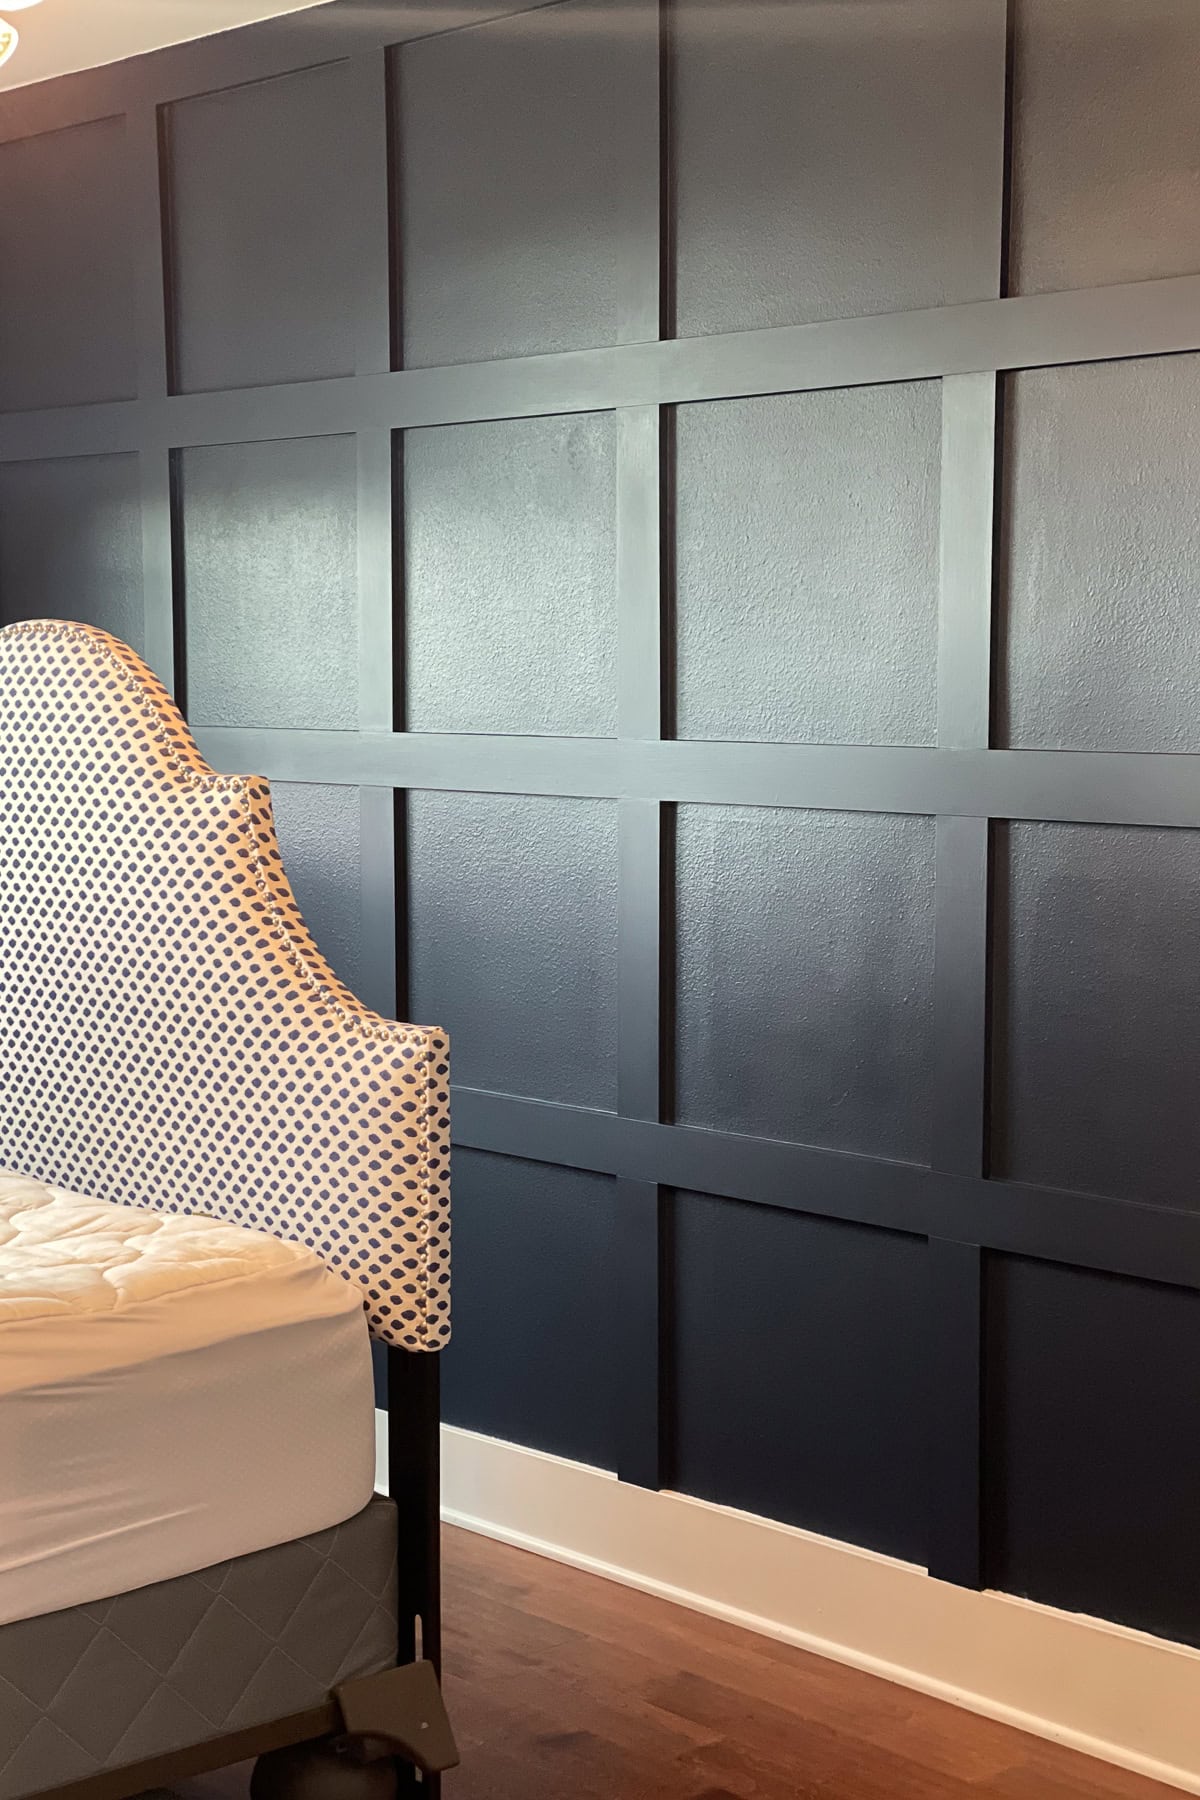
- If you want to highlight the grid moldings, go with a contrasting color to make them stand out beautifully.
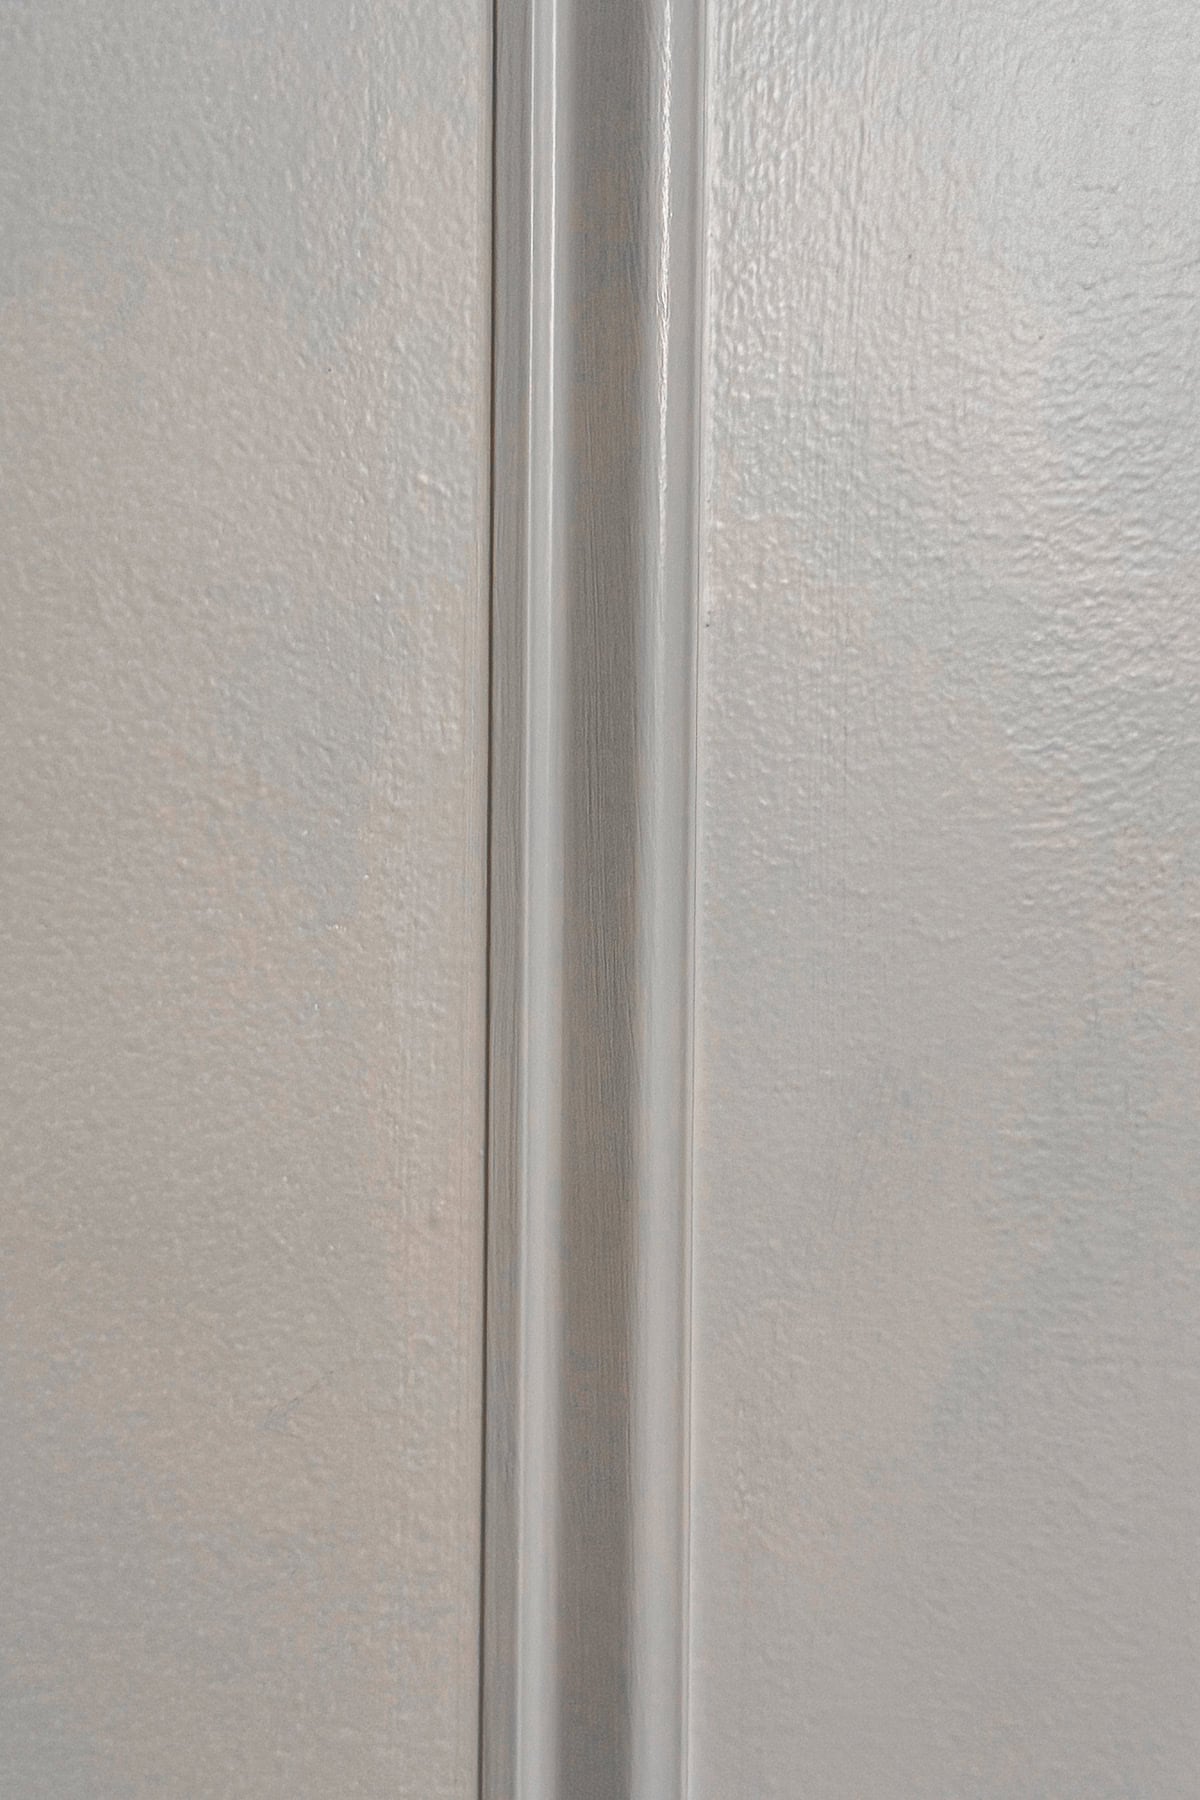
- You can absolutely use the same color on both the walls and the trim—just vary the finishes for added dimension. That’s exactly what I did: a soft velvet finish on the walls paired with a satin finish on the trim. It’s a small detail that makes a big difference.
- Now, step back and admire your work—your updated wall is full of charm and character!

Common Mistakes to Avoid
- Skipping layout and measurement: Accurate planning is non-negotiable—avoid mis-cutting.
- Incorrect 45° angle: Always test your miter cuts.
- Rushing filler and caulk: Drying time is essential for a smooth finish.
- Painting too soon: Wait until all filler and caulk are completely dry to avoid smudges.
Tip from wendy:
Take your time when choosing your paint colors. This is something you have to live with for quite some time and you want to make sure it is exactly what you want.
Room-Specific Design Ideas
- DIY wall moldings for living room: A grid wall molding accent behind the couch offers subtle elegance.
- DIY wall moldings for bathroom: Use small box molding below a chair rail for a clean, spa-like touch.
- Dining room wall moldings: Install chair rail molding with thin box molding underneath for classic charm.
- DIY hallway ideas: Add a trim wall with evenly spaced boxes for instant sophistication in a narrow space.
Each idea uses the same core steps but adapts spacing and scale for different spaces.


Shop the Look

FAQs
Can you install wall moldings on textured walls?
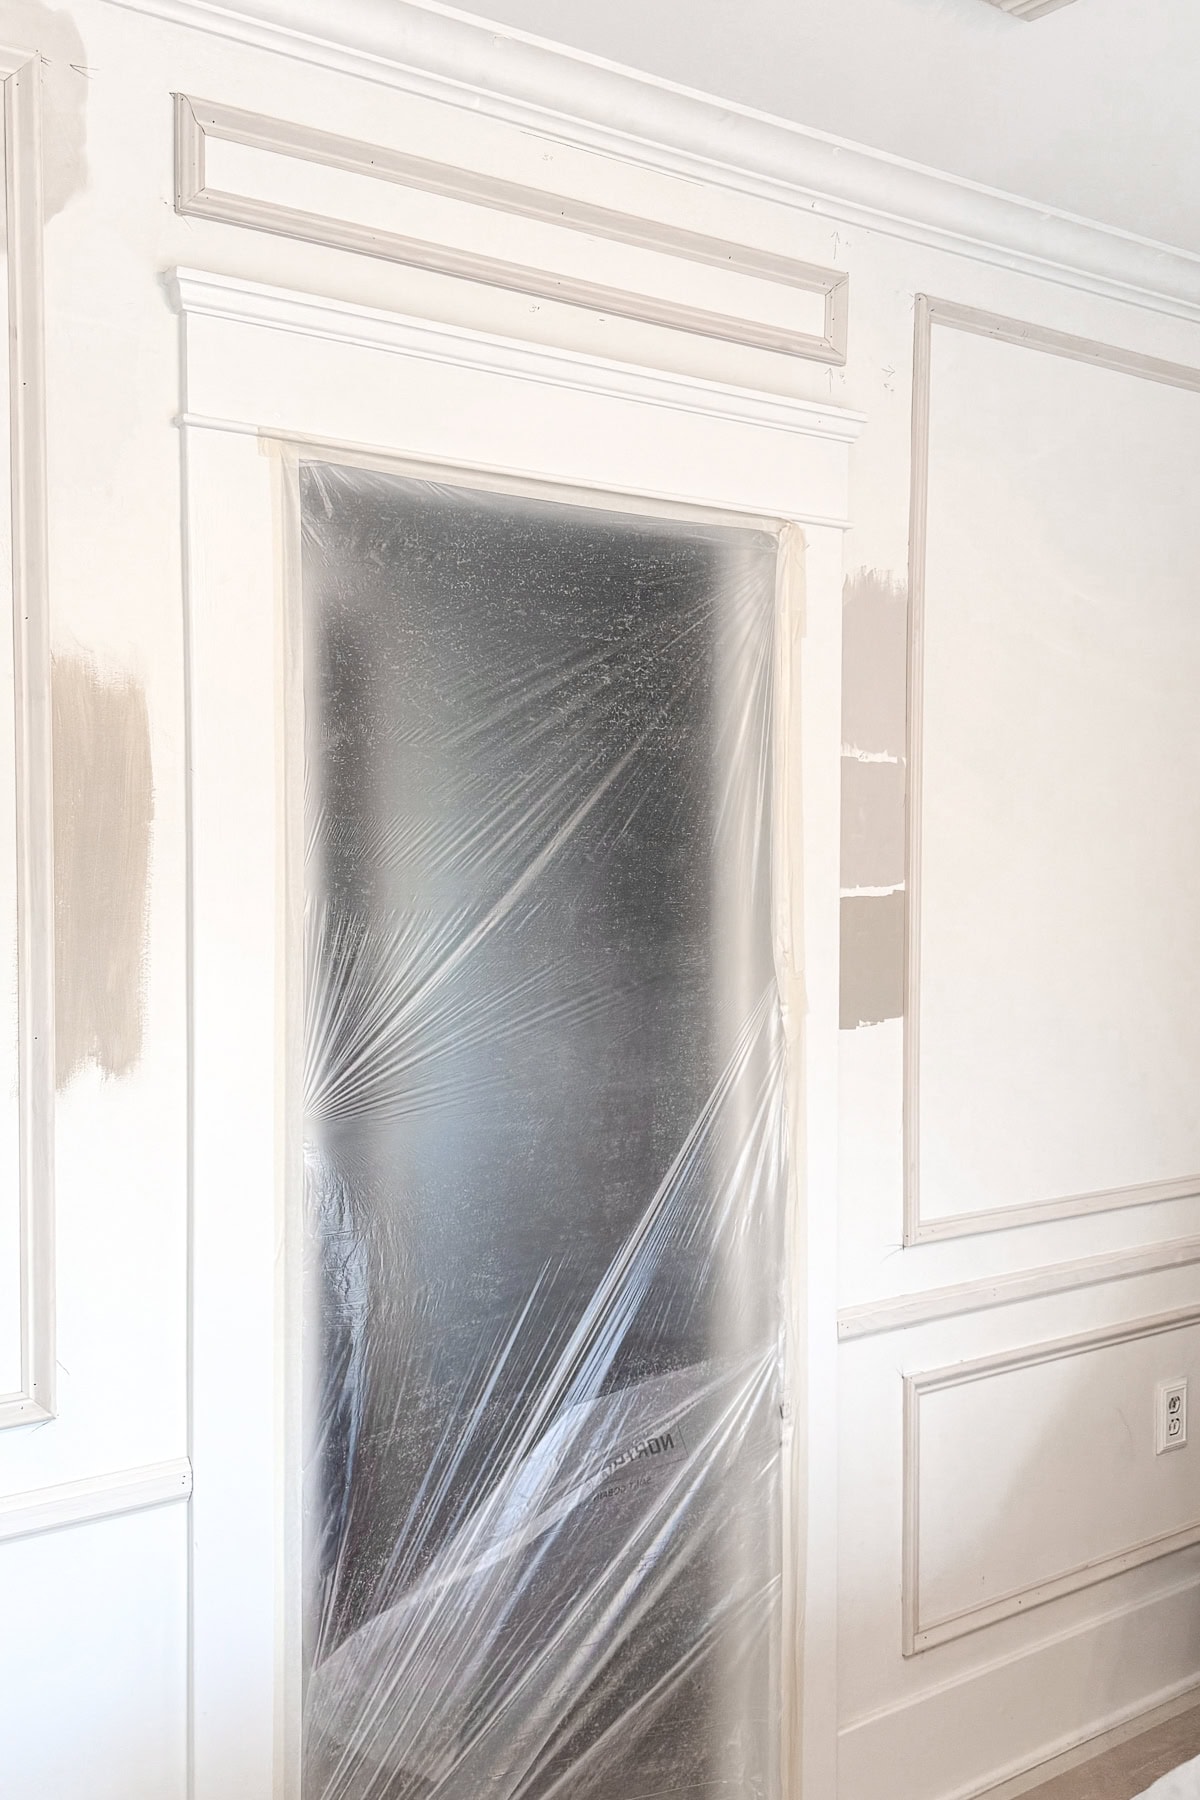
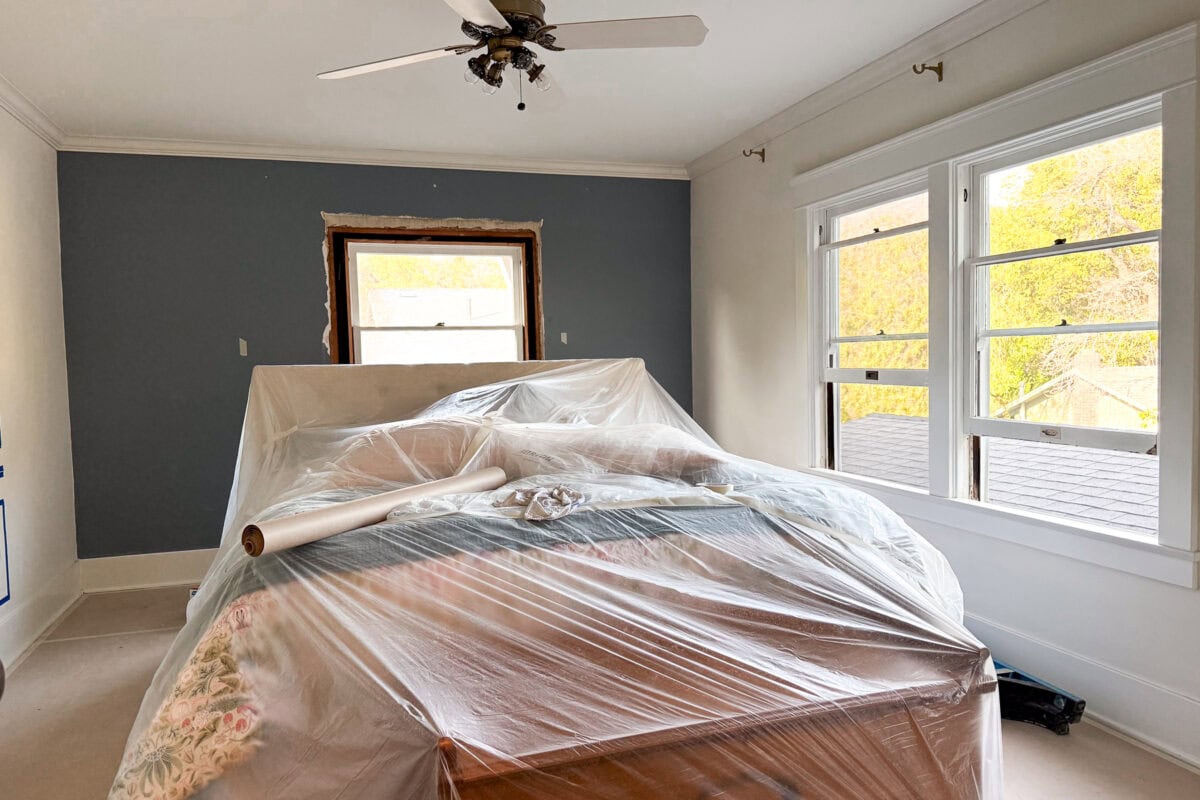
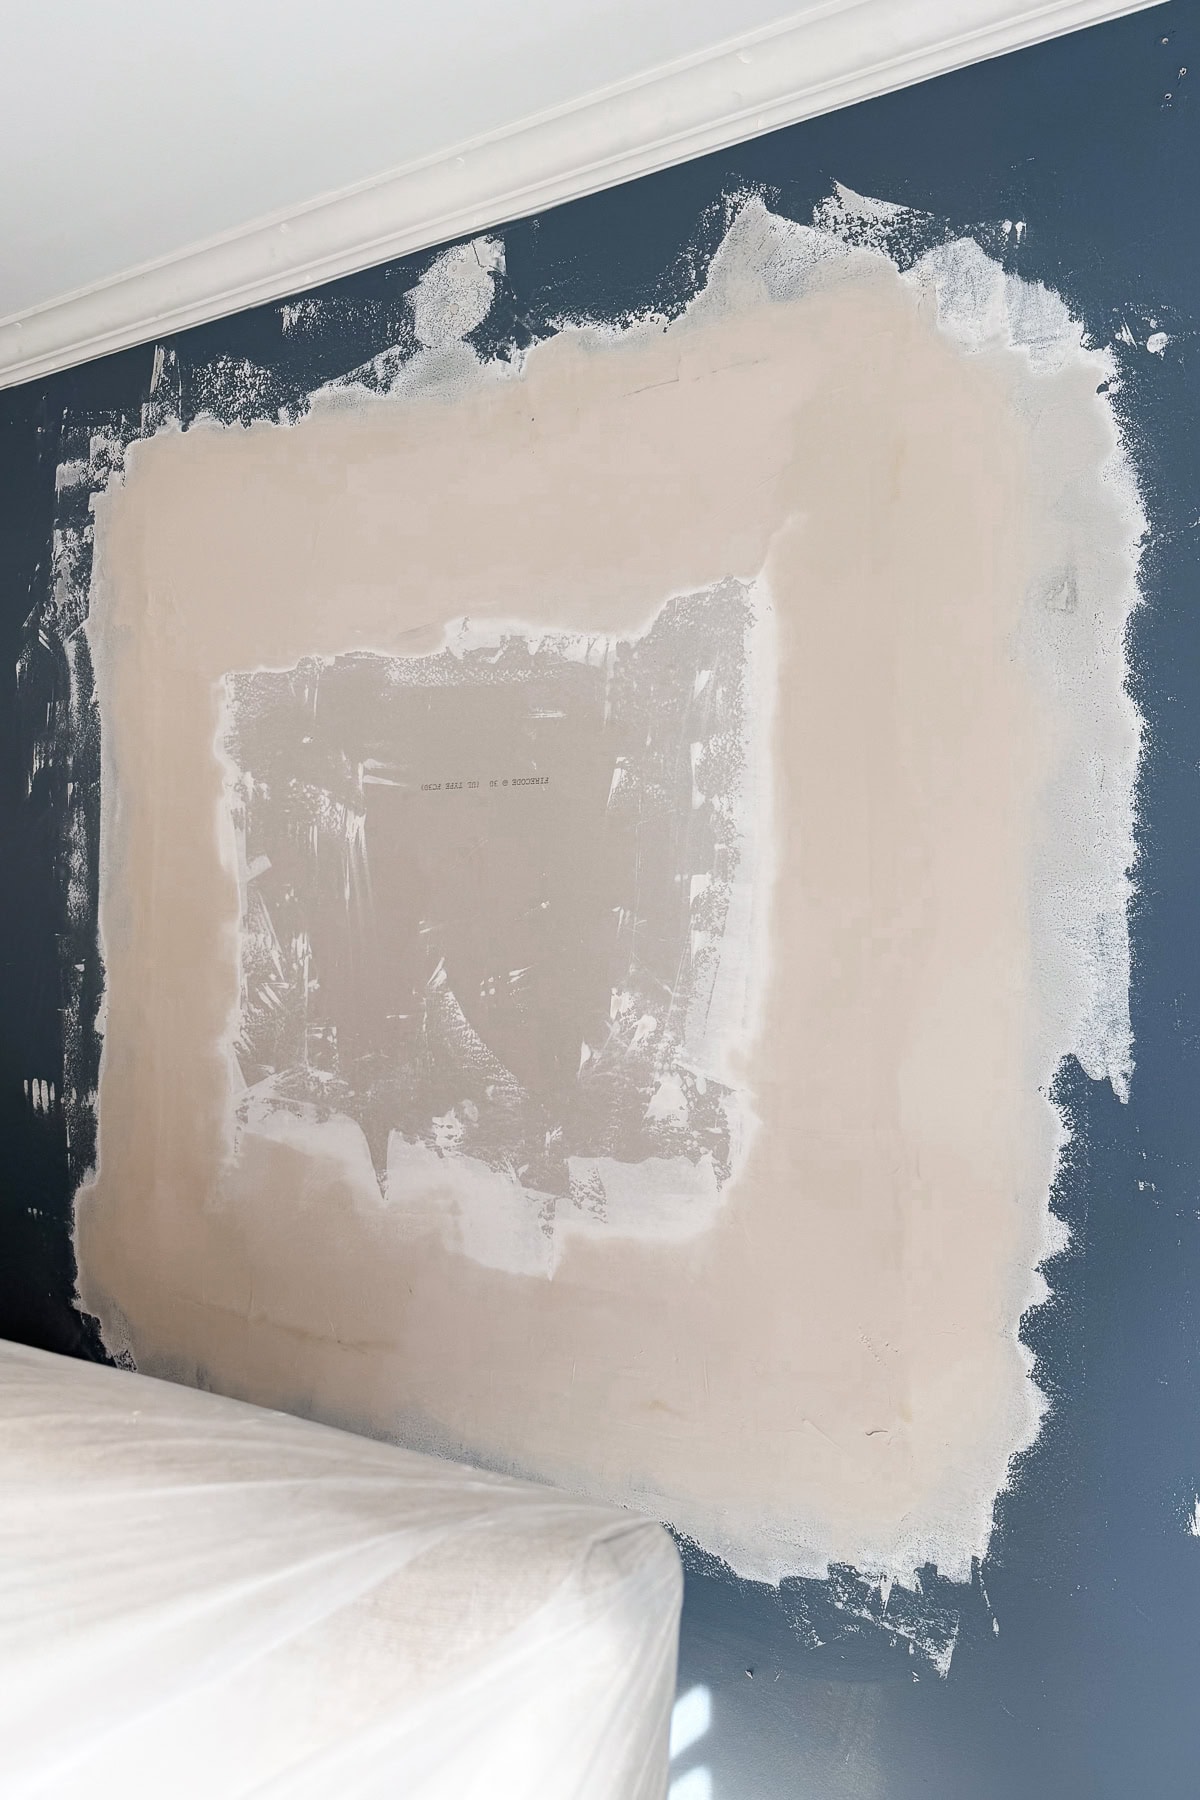
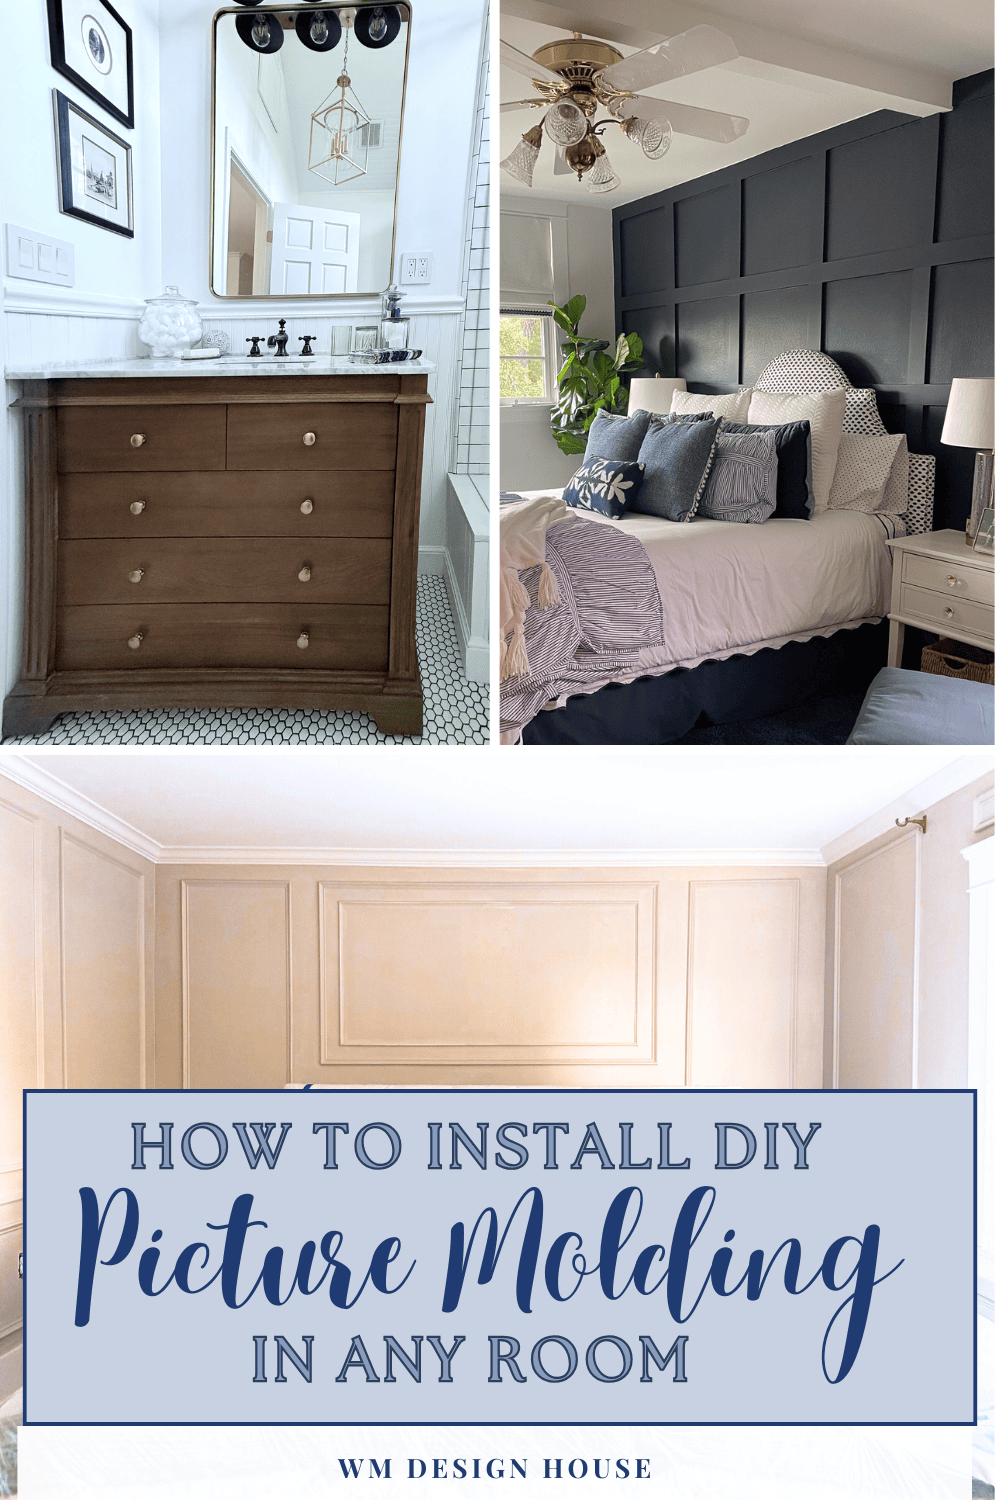
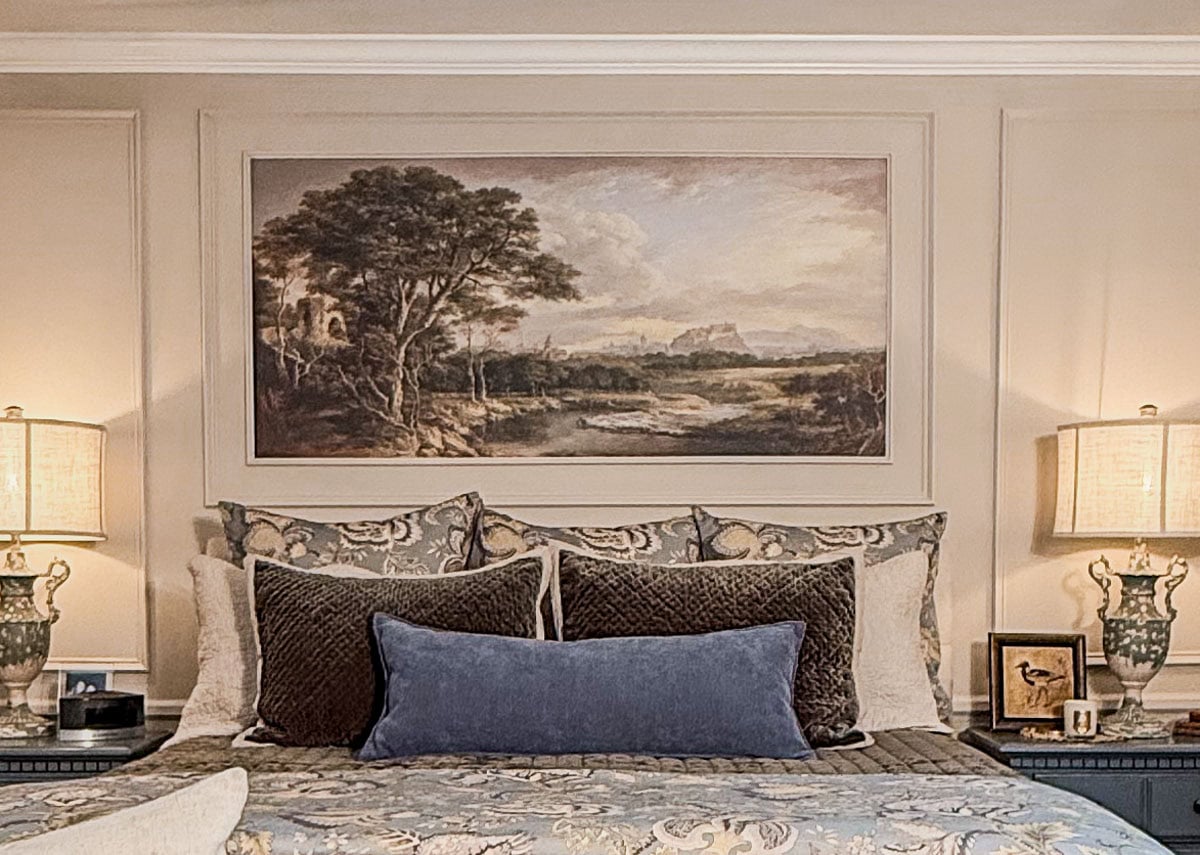
Yes—just lightly sand or use extra caulk for a flush finish. If you look carefully on the image above with the navy blue wall you can see the walls are textured.
Do I need a nail gun?
No, finishing nails work too, but a nail gun or brad nailer makes the job faster and cleaner.
How long does it take?
For a single wall with box moldings and chair rail, expect 4–6 hours from planning to paint.
Can I DIY crown molding?
Absolutely! With ceiling molding, you’ll follow the same 45° angle cuts and fastening methods.
My Personal Before & After Story
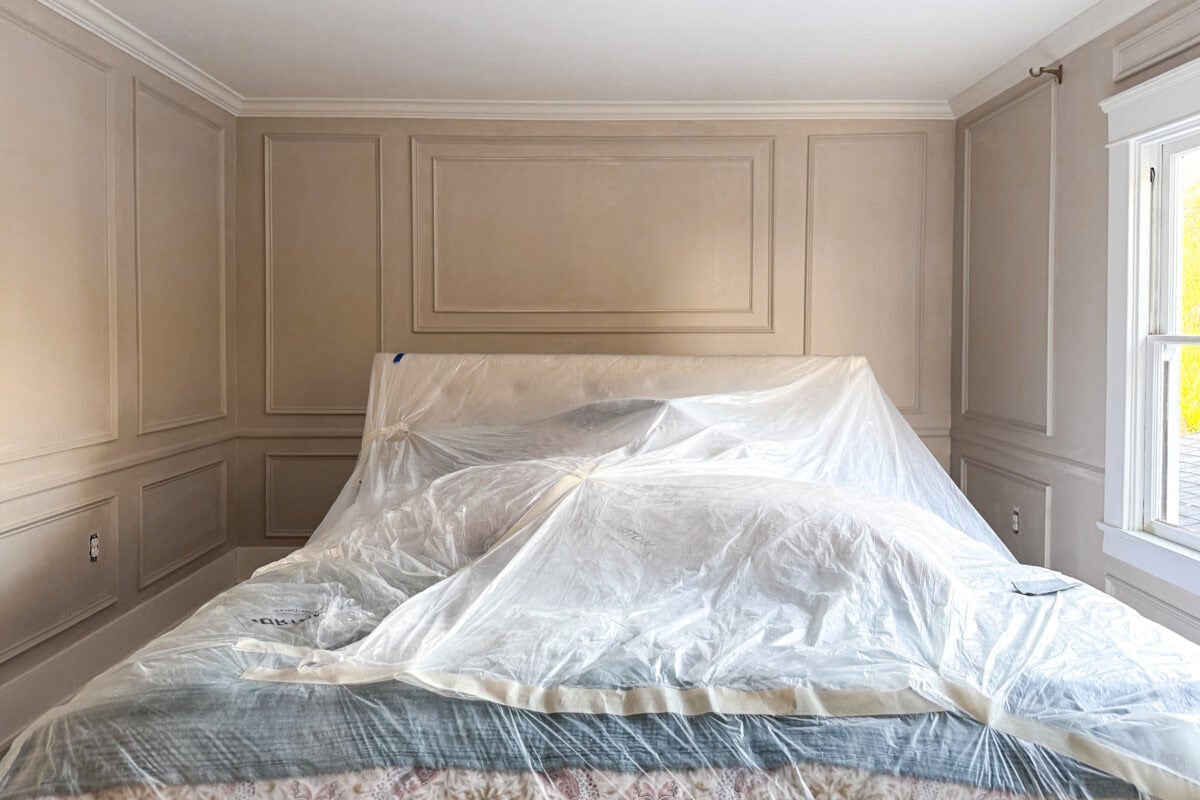
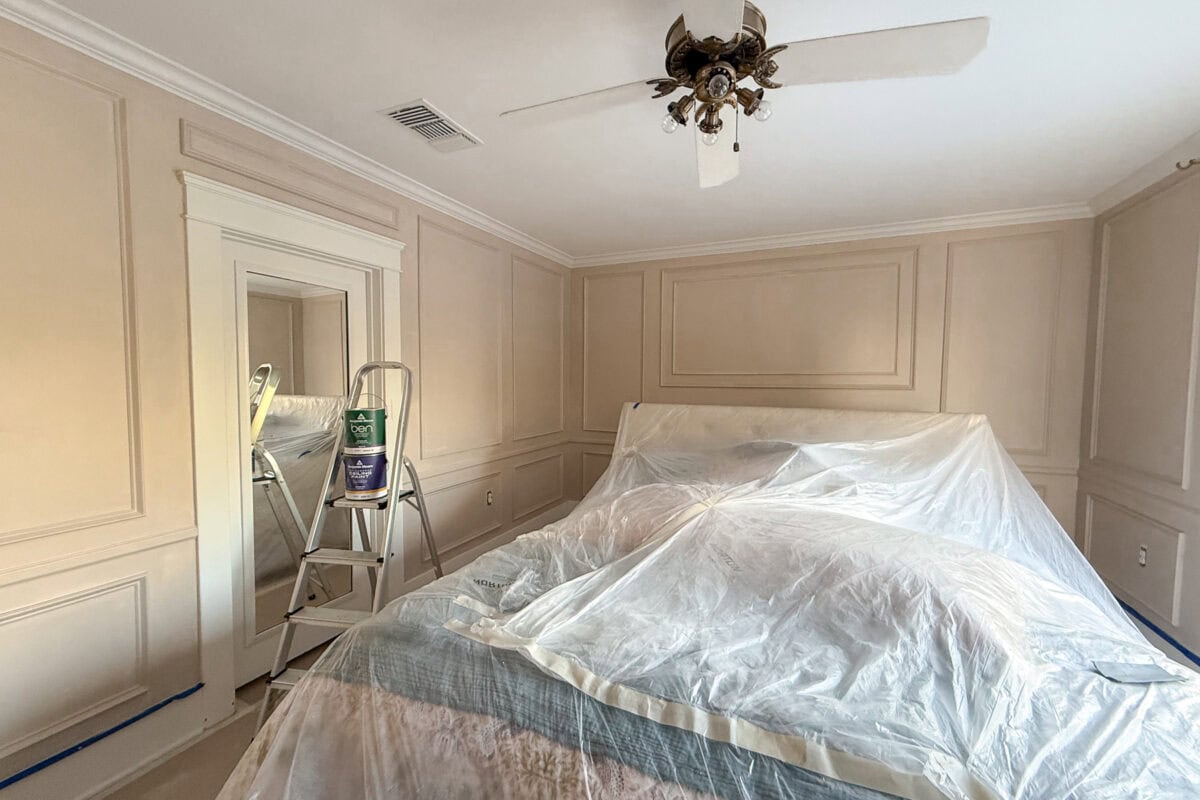
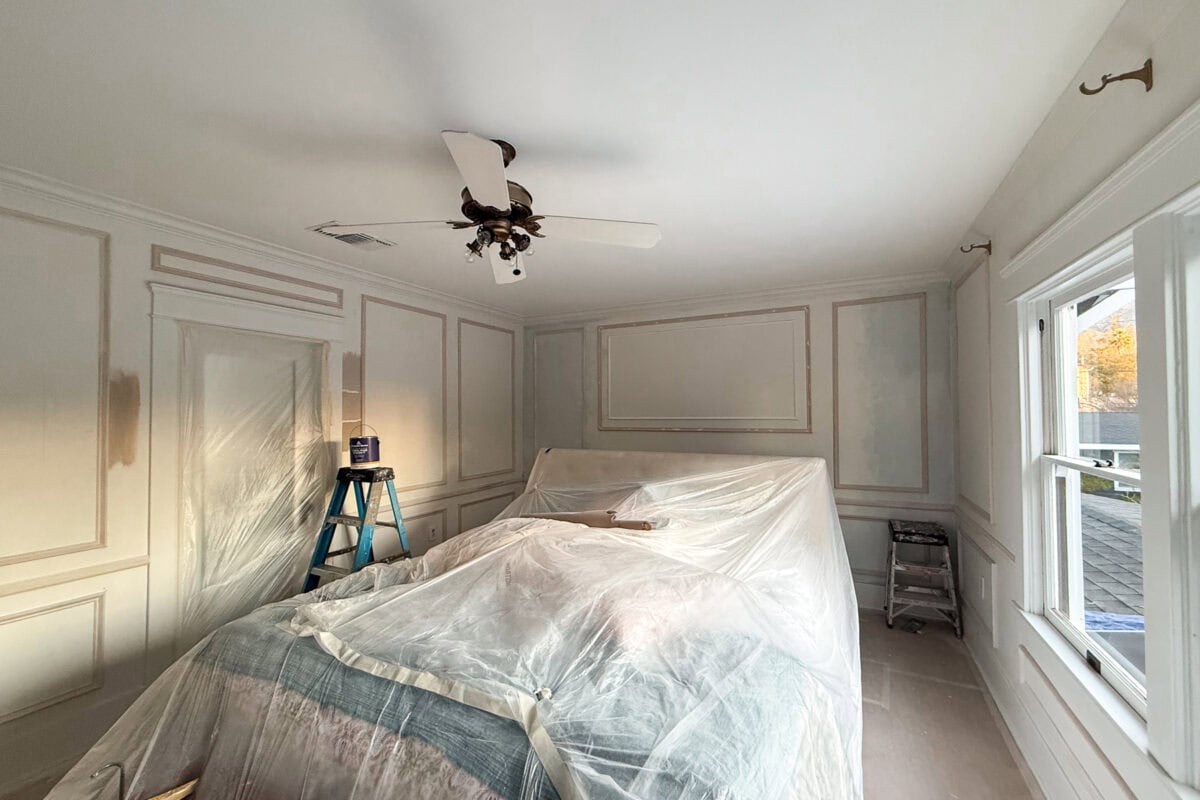
This room had me stumped for over 30 years—yes, it really took that long to figure it out! With windows and doors on every single wall, I could never decide where the bed should go or how to decorate the space. It always felt like something was off. So finally, I decided to dive in and make some bold changes to transform the layout and give the room the attention it deserved.
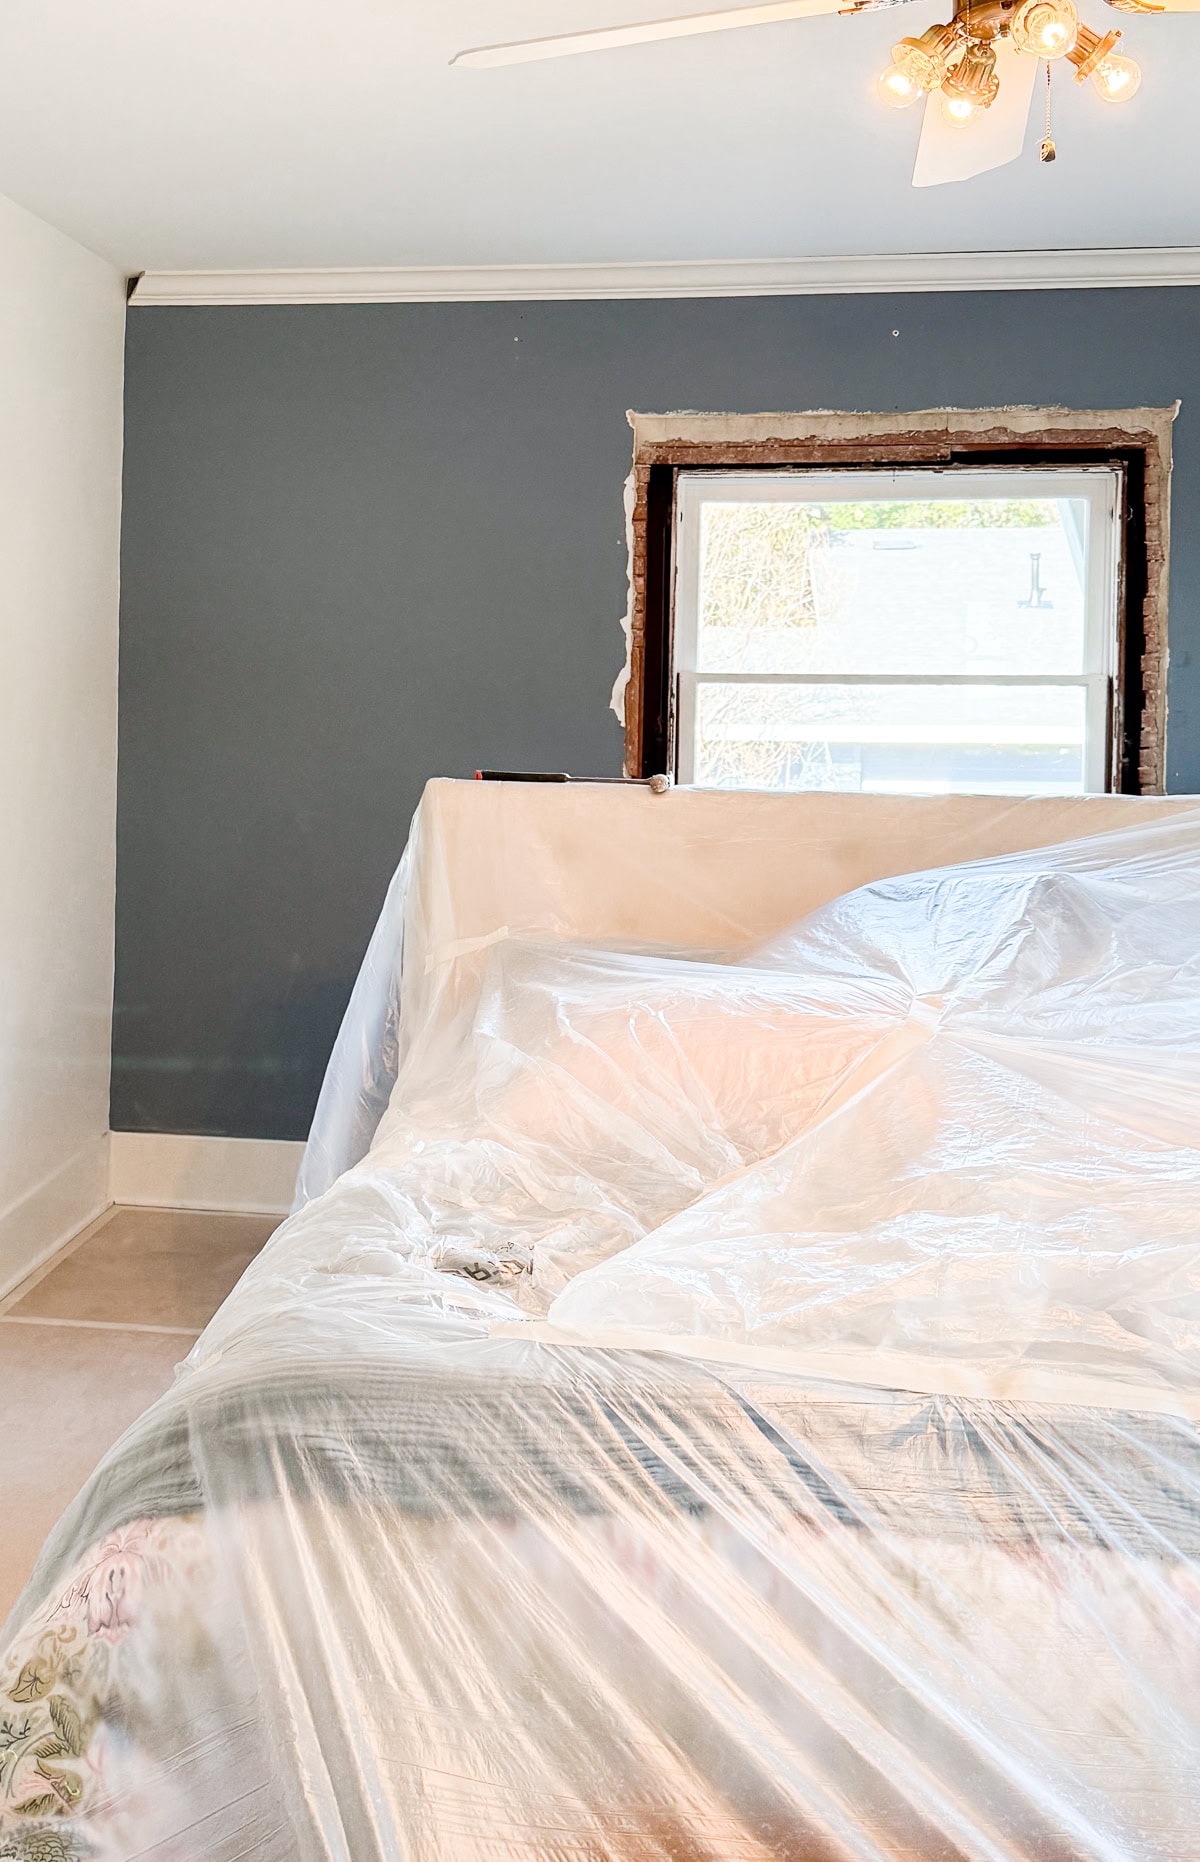
After a lot of thought (and a little hesitation), we made the big decision to remove the window behind the bed and lower the headboard. It felt like a bold move at the time, but it opened up the space and gave us the perfect blank canvas for this DIY wall molding project.
I had been dreaming of creating a feature wall behind our bed for years, but there was a window right in the middle of the space. I finally decided to go for it and remove the window—and honestly, I wasn’t sure how it would feel without it at first.
But adding crown molding, a classic chair rail, and picture frame molding completely transformed the room. The trim brought balance and structure to the wall, and suddenly it felt like it had always been that way. I used a laser level to keep everything straight, wood filler to hide every nail hole, and finished it off with a soft dove gray paint. It was a weekend project that made a huge difference—no contractor, no major budget—just a little vision and a whole lot of satisfaction!
Other Home Renovation Projects You’ll Love

Wrapping Up
DIY wall moldings offer huge impact, minimal cost, and design flexibility—whether you’re creating box moldings on one wall or updating multiple rooms. From living room wall molding to dining room elegance, a little planning with painter’s tape, a laser level, and finishing nails goes a long way. Take your time, embrace the process, and enjoy the beautiful transformation.
Stay tuned for part two next week!


More about me!

Hello, I’m Wendy – a dedicated homemaker with a deep passion for decorating, gardening, cooking, and crafting. I find joy in harmonizing beautiful elements to fashion a space that is both comfortable and inspiring. I will help you create a beautiful home, one project at a time.

Looks amazing, Wendy! I love molding in any space.
Looks stunning Wendy, as always. I sometimes wonder why they thought so many windows and doors was a good idea in older homes. We have that problem, but our house still feels dark. I’ve learned to live with it.
Simply stunning Wendy! Can’t wait to see the rest — and to see it in person!!!
Wendy it looks fabulous!
We have a bedroom that has windows, doors, and on one wall windows and French doors. After a tree fell on the house last year we made the move to close up the windows on the only wall that you could place a bed. It has been a transformation! I would love to add molding but the room has cathedral ceilings so the molding feels off.
Have a wonderful weekend Wendy!