How to Hang a Wallpaper Mural: “The Easy Way”
Learn how to hang a wallpaper mural with this easy step-by-step guide. Create a bedroom accent wall with minimal tools and zero experience.

This post is sponsored by Prints Emporium Studio, but as always, all thoughts and opinions are completely my own. I only share products I truly love and think you’ll enjoy too.
This is the third installment in my 4-part series all about our full bedroom makeover, and now I’m revealing the star of our updated master bedroom. A stunning new wallpaper mural!
After installing classic picture frame wall moldings and painting the walls the perfect neutral, Benjamin Moore Smokey Taupe, our room was still missing a bold, beautiful focal point. This mural completely transformed the room and gave it the personality it was craving.
If you’ve been thinking about adding a mural to your space, too, I’m showing you exactly how to do it with this simple step-by-step guide. You can create a beautiful bedroom accent wall with just a few tools and no prior experience.
On my blog WM Design House, I may sometimes use affiliate links, which means a small commission is earned if you purchase via the link. The price will be the same whether you use the affiliate link or go directly to the vendor’s website using a non-affiliate link. Read my full disclosure policy here.
Why Choose a Wallpaper Mural?
I had always dreamed of having a headboard wall behind our bed; unfortunately, every wall in the room had either a window or a door. After a little brainstorming (and a bit of convincing my husband), I decided not to let that stop me.

If you’ve been following along since the beginning of this series, you may remember that we made the decision to remove one of the windows, and I have to say, I haven’t missed it for a second. With three other windows, we still get plenty of natural light.

Once we drywalled over the window, I excitedly started looking for inspiration for our feature wall. Because our home is a registered historical landmark, I wanted something that felt timeless and elegant, with a romantic nod to the French countryside, and this mural from Prints Emporium Studio delivered just that.
Prints Emporium Studio has dozens of gorgeous, high-quality murals to choose from, and ordering online is easy. They offer a variety of sizes, and the wall murals are available in different materials, including non-woven wallpaper and self-adhesive fabric.
If you’re looking to add some one-of-a-kind artwork to a room in your home, here are a few reasons why a wallpaper mural is a great choice:
- Instant impact: A wallpaper mural creates instant impact and can stand in beautifully as artwork. I used our DIY wall moldings to frame ours, and it looks just like a custom oil painting, at a fraction of the cost!
- Perfect for tricky layouts: It’s a stylish way to add a feature wall in rooms with tricky layouts or limited wall space.
- Beginner-friendly installation: Peel-and-stick murals make it easy to get a professional look without any special tools or experience.
Tools & Materials You’ll Need for a Large Wall Mural
- Pre-measured wallpaper mural panels (You can order from Prints Emporium Studio directly on Etsy!)
- Smoothing tool or wallpaper brush
- Level or plumb line
- Tape measure
- Utility knife or razor blades
- Step stool or ladder
- Wallpaper paste if your paper is not pre pasted
- Foam paint roller or wallpaper pasting brush

Tip from wendy:
The most important tools aren’t in your toolbox. Patience and proper lighting are your secret weapons when it comes to hanging a wallpaper mural. Trust me, they make all the difference.
How to Hang a Wallpaper Mural for an Accent Wall
If you’re ready to transform your space and create a feature wall with a wallpaper mural, here is a simple step-by-step guide to walk you through the entire process. Don’t worry, it’s easier than you might think, and I’ll share all my tips along the way!
Step 1: Prep Your Wall
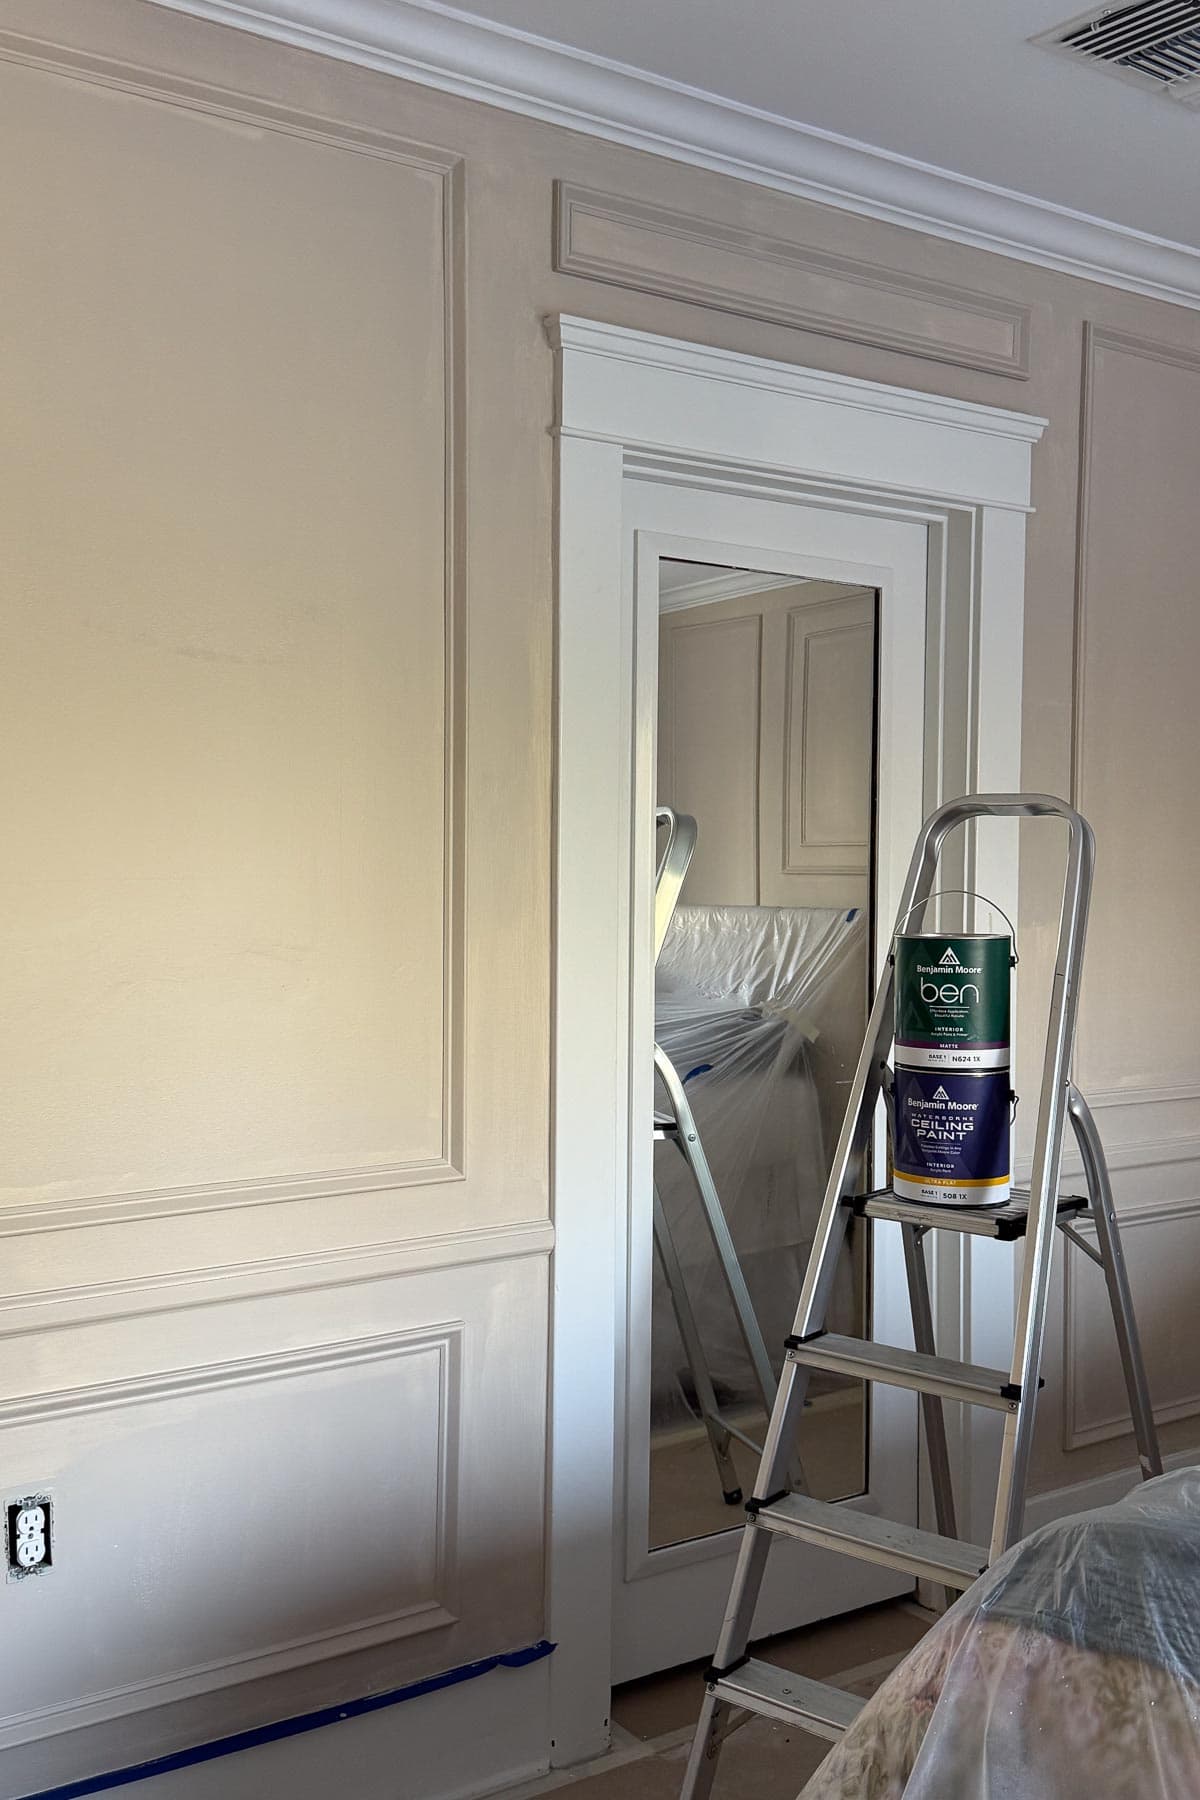
Make sure the wall is clean, dry, and smooth. If you’ve added moldings and fresh paint (like we did!), allow everything to fully cure.
This gives your mural the best surface to adhere to and helps prevent peeling or bubbling later on. A little prep work goes a long way in making sure your mural looks flawless and lasts.
Step 2: Mark a Straight Starting Line
Next, use a level or plumb line to mark where your first panel should go. This ensures your mural stays straight, even if your ceiling isn’t.
My mural came in one piece because I was creating more of an art piece rather than covering the entire wall. Full wall murals usually come in multiple panels, so having just one made the installation process a lot easier and more manageable.
Step 3: Apply Your First Panel
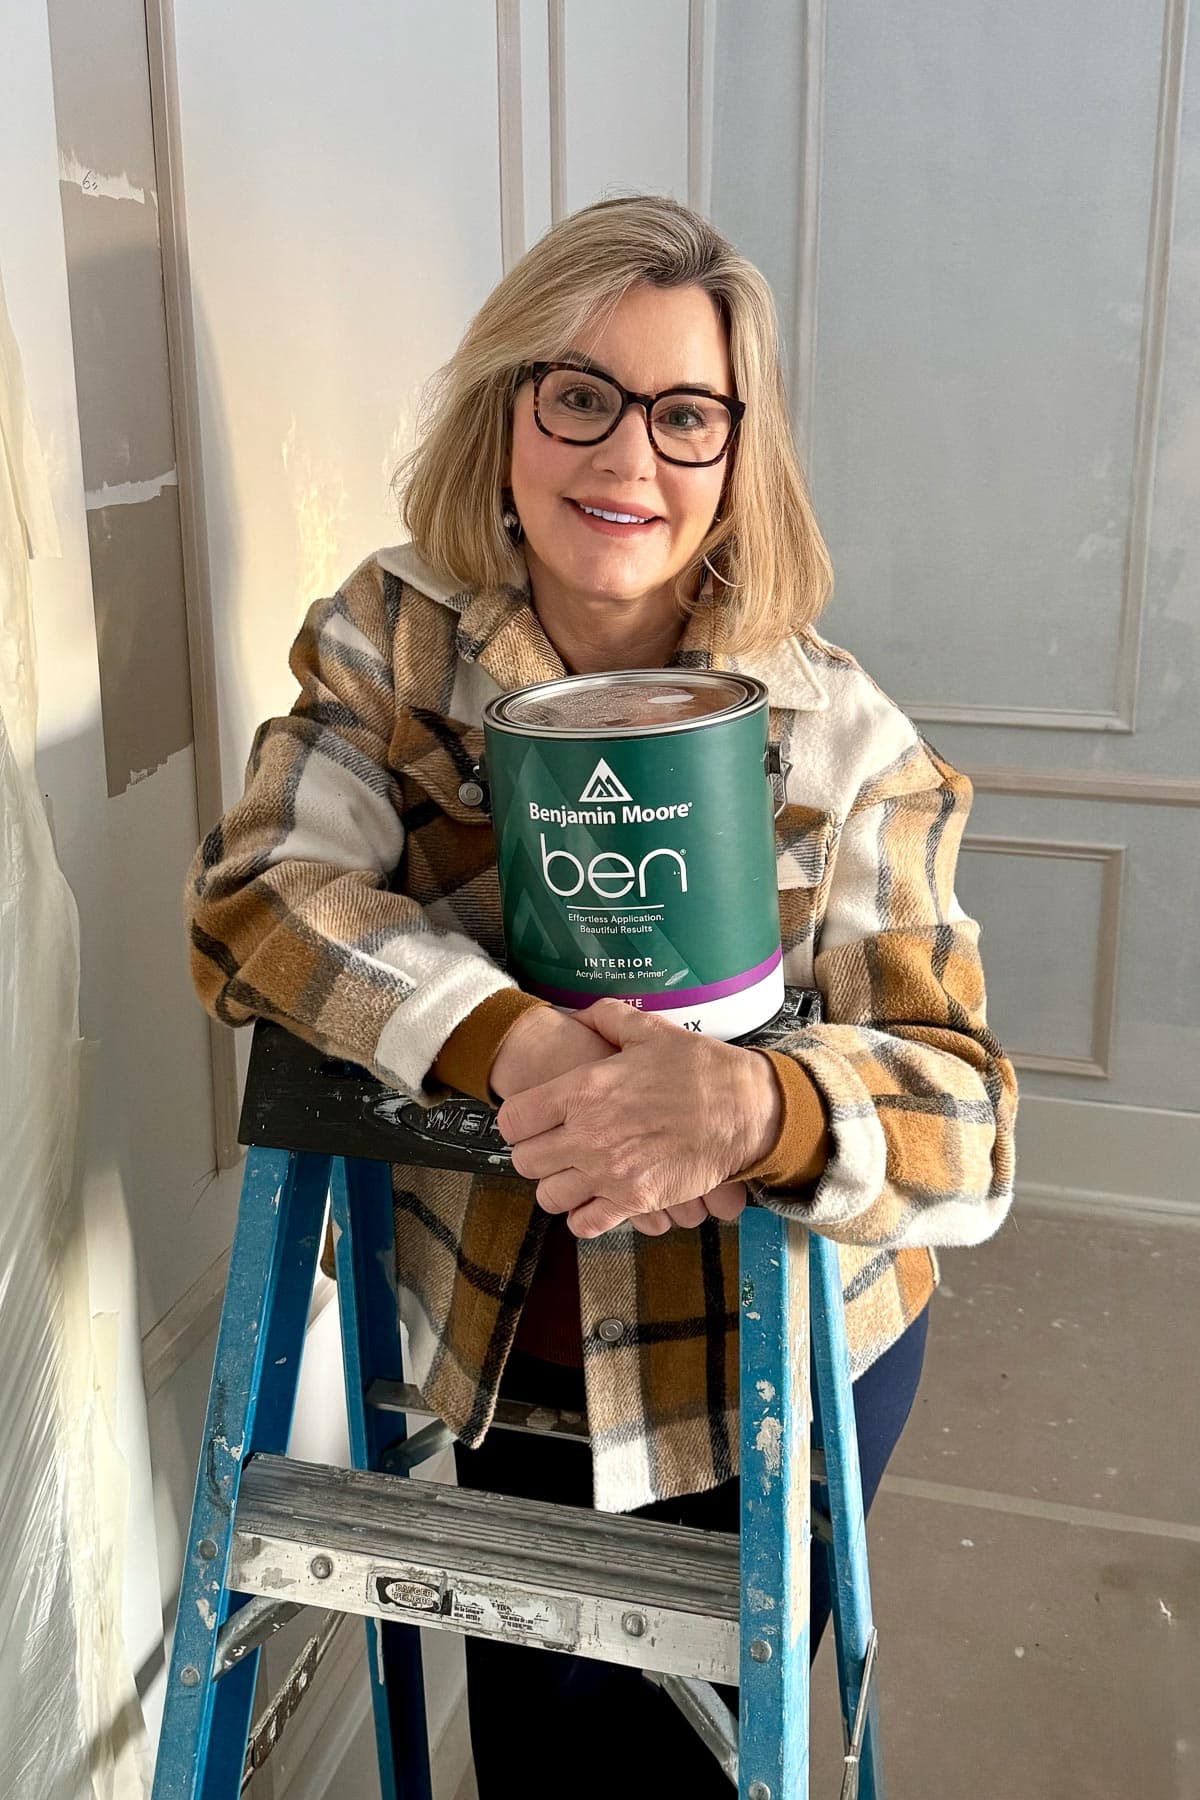
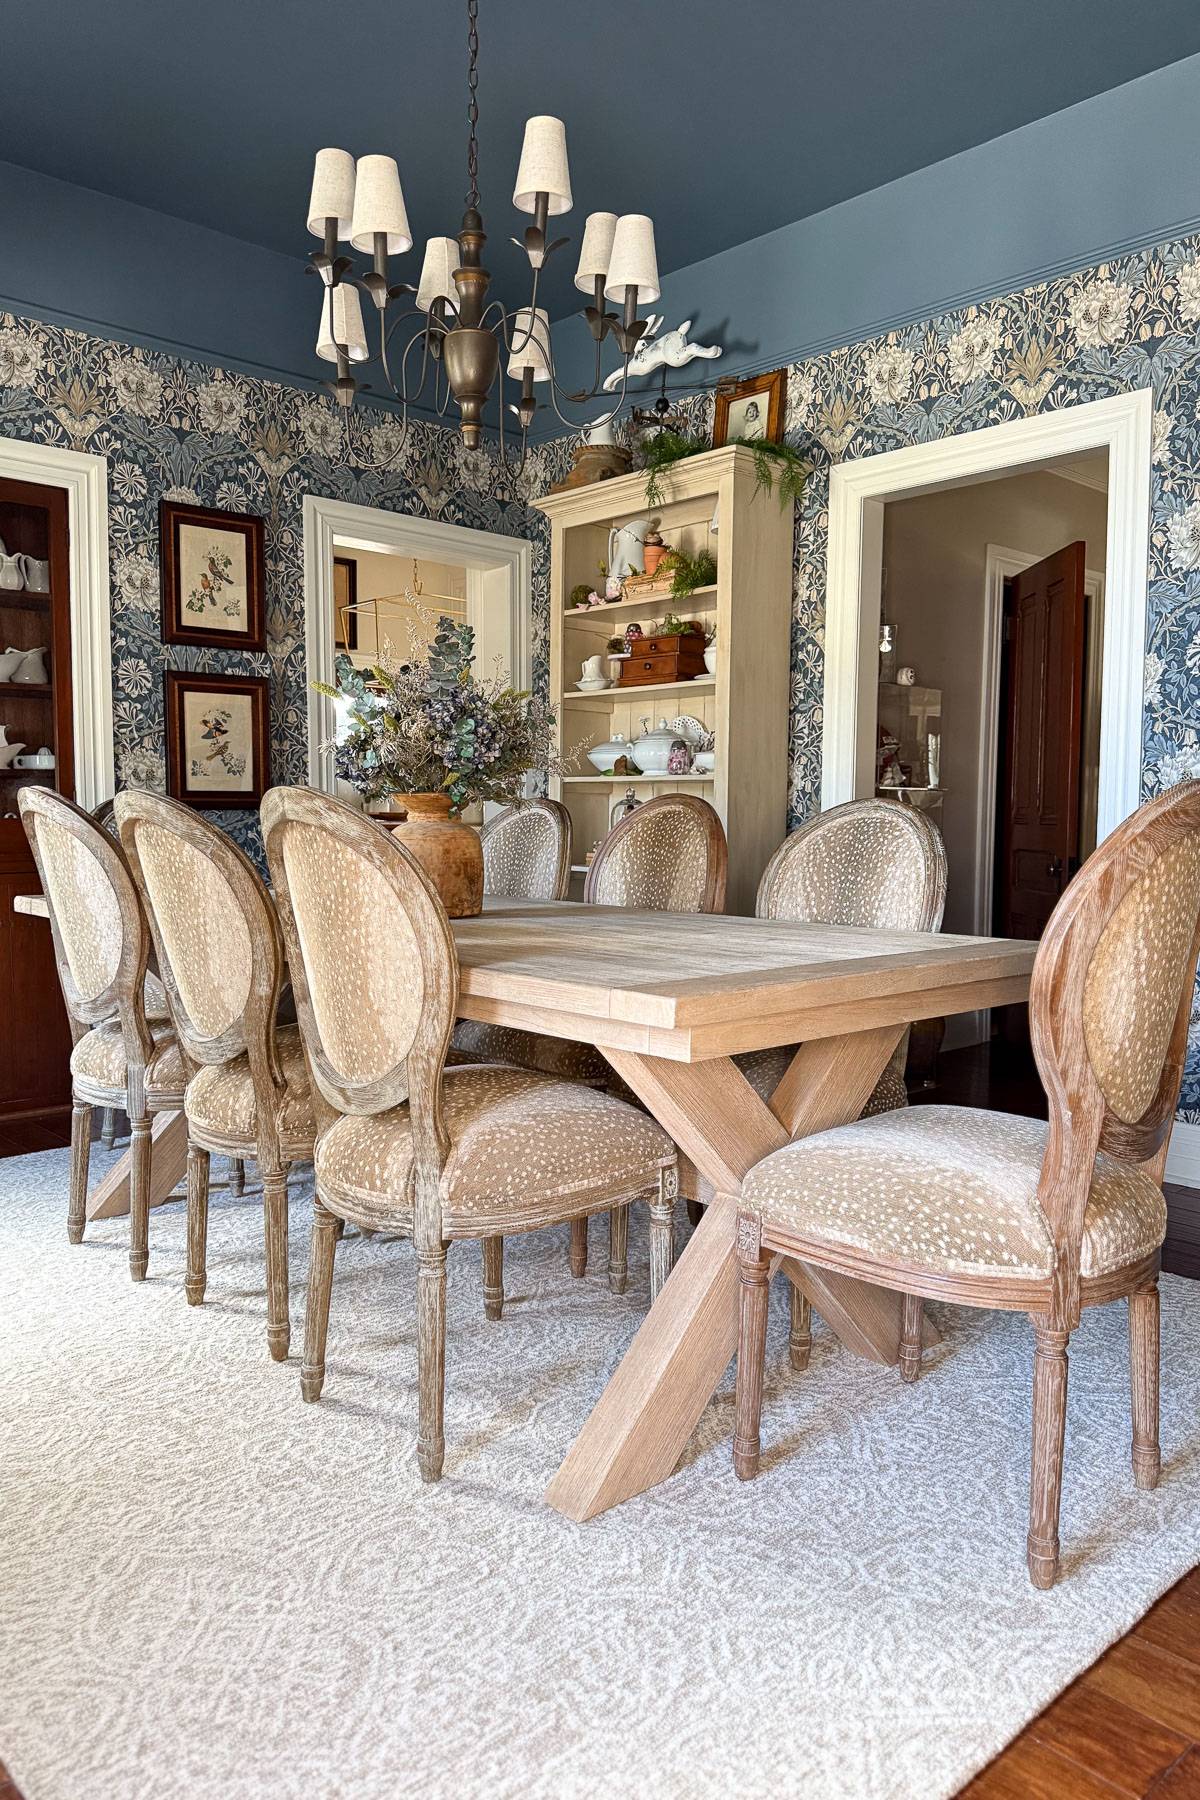
The installation method will depend on the type of wallpaper you’re using. This wasn’t my first time hanging wallpaper. We recently chose a beautiful floral pattern to update our formal dining room, so I was already familiar with the process.
However, this was my first time working with a mural, and I must admit, I was a bit nervous at first. Thankfully, it turned out to be much easier than I expected, and the result was absolutely worth it.
How to Install a Peel and Stick Mural
If you are using peel-and-stick wallpaper or self-adhesive murals, simply peel off the backing and carefully smooth the paper onto the wall, starting at the top and working your way down.


Use a plastic smoothing tool to press out any air bubbles as you go.
How to Install a wall Mural with Non-Pre-Pasted paper
The mural I chose wasn’t pre-pasted. If you’re using traditional wallpaper like I did, you’ll need to apply wallpaper paste directly to the wall before hanging your mural.
I used a paintbrush to get into the corners and around the moulding. Then I used a foam roller for the larger areas, which made the process quick and helped to ensure the paste was applied evenly.


After I applied the paste, I carefully laid the mural onto the wall. Then I used the plastic tool included in my mural kit from Prints Emporium Studio to smooth it out.
I started at the top, smoothing from the center outward and working my way down. This helped press out any air bubbles and kept the mural flat and even as I worked. Since my mural was designed to fit within our wall moldings like a framed art piece, I took extra care to line it up evenly inside the trim.
Tip from wendy:
If your wallpaper does not come with a smoothing tool, you can easily find wallpaper supplies at any home improvement store like The Home Depot, Lowe’s, or you can order online as well!
Step 4: Align Your Remaining Panels
If your mural comes in multiple panels, take your time lining up each one carefully. Start on the left side of the wall and work your way to the right, matching the pattern edge to edge for a seamless look.


Use a smoothing tool to press each panel down as you go, paying close attention to the seams to avoid bubbles or misalignment. This step is key to getting a seamless, professional look.

Be sure to step back every so often to make sure everything is staying straight and aligned.
Step 5: Trim the Edges
To finish hanging your wallpaper mural, use a sharp utility knife or razor blade to trim away any excess paper around the baseboards, moldings, or corners.


For the cleanest results, make sure your blade is fresh and hold it at a slight angle as you cut. A metal ruler or a straight edge can help you guide your blade so you get smooth, even cuts for a crisp, professional-looking finish.

Tip from wendy:
Take your time! Slow, steady cuts will give you the most professional-looking finish, especially around moldings or corners.
Tips for Success
Even though this wasn’t my first time wallpapering, I picked up a few helpful tips during our bedroom wall transformation.
If you’re planning a project like this, here are some of my top takeaways for how to put up a wall mural.
- Take your time: Don’t rush the alignment. Step back and double-check your placement before smoothing the mural onto the wall.
- Easy repositioning: If you’re using peel-and-stick wallpaper, adjusting the placement is much easier, so don’t stress if it’s not perfect on the first try.
- Creative framing: If your wall has picture frame molding, you can hang the mural inside the trim for a classic, framed look or go right over it for a bold, dramatic statement.
- Smooth it out: Use a plastic smoothing tool or clean cloth to press out bubbles and creases as you go. Start from the center and work your way outward for the best results.
- Use good lighting: Make sure the room is well-lit while you’re working. Good lighting helps you catch air bubbles, misalignment, or wrinkles before they set in.
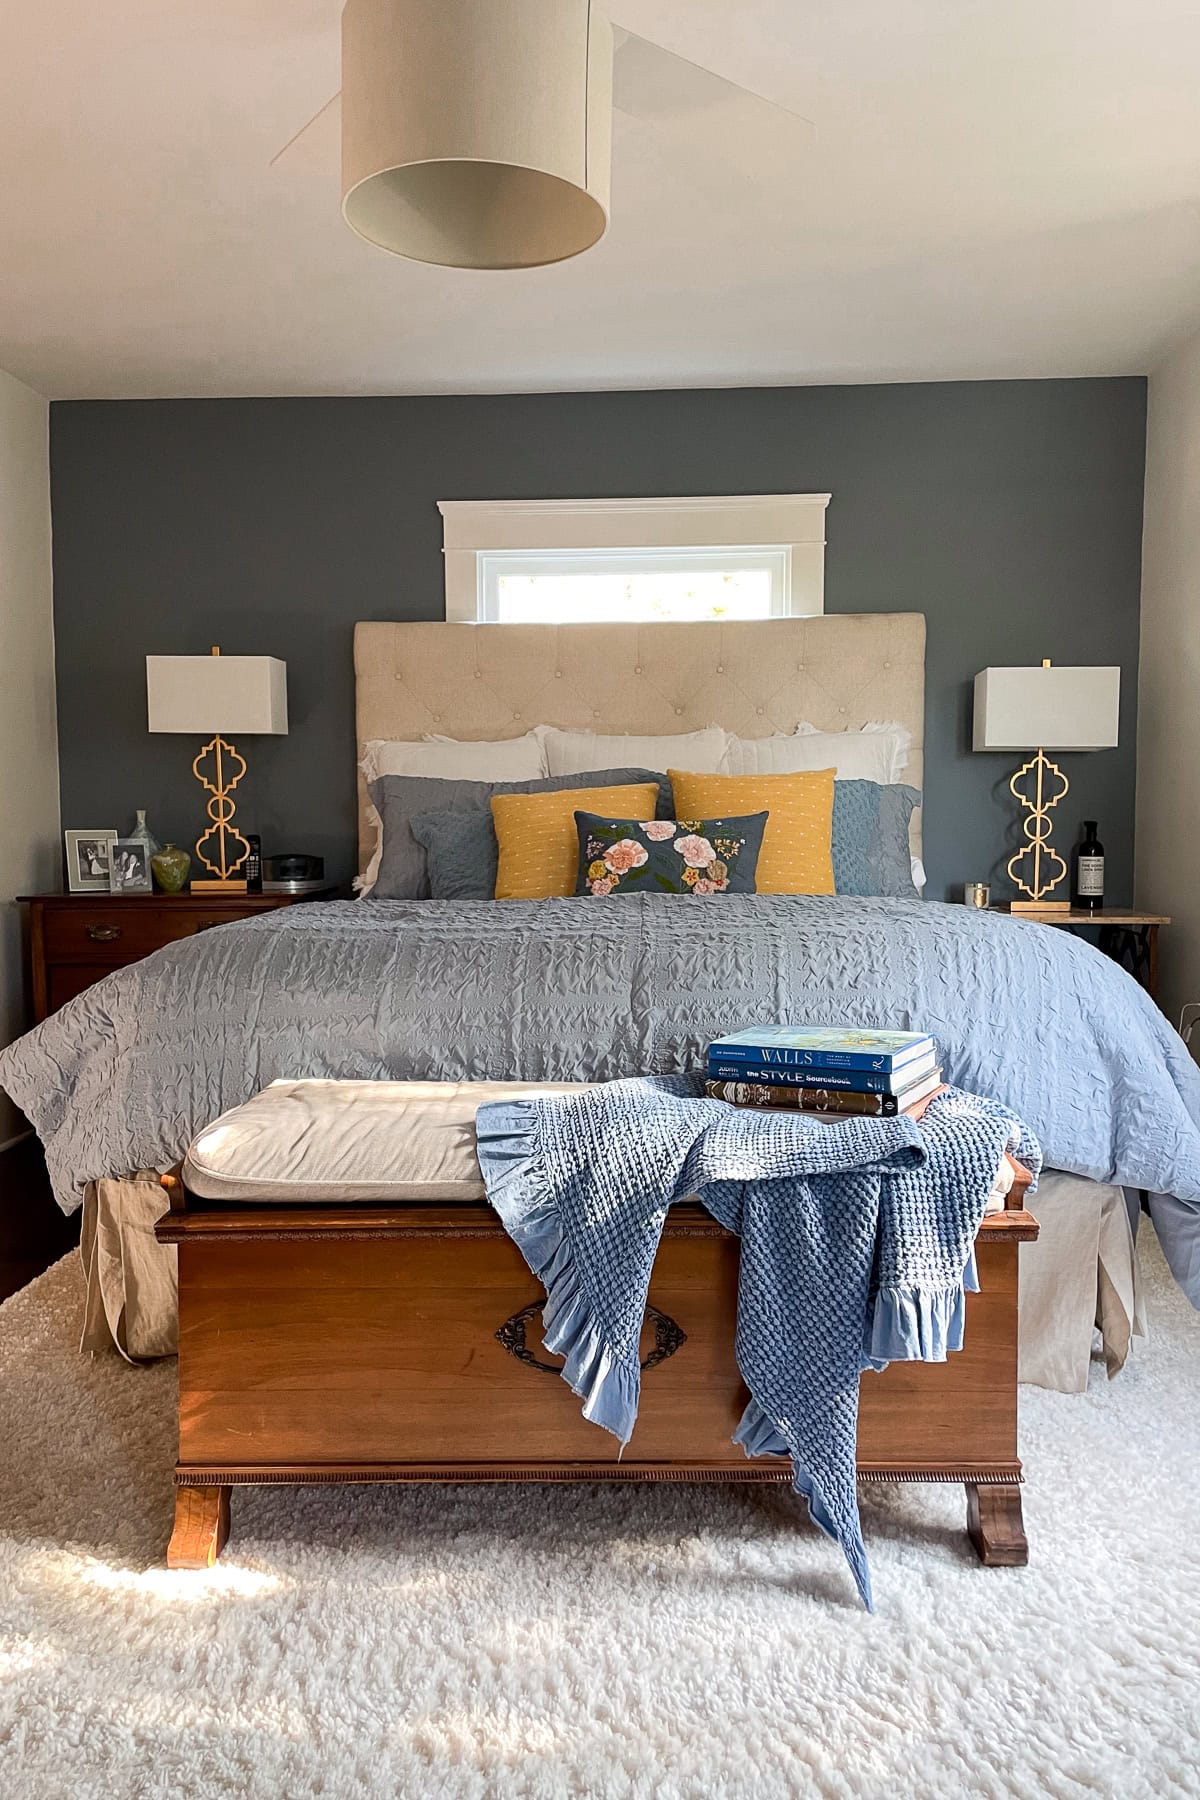
How to Hang a Wallpaper Mural: Our Bedroom Before and After
In case you forgot, here’s what our bedroom looked like before.
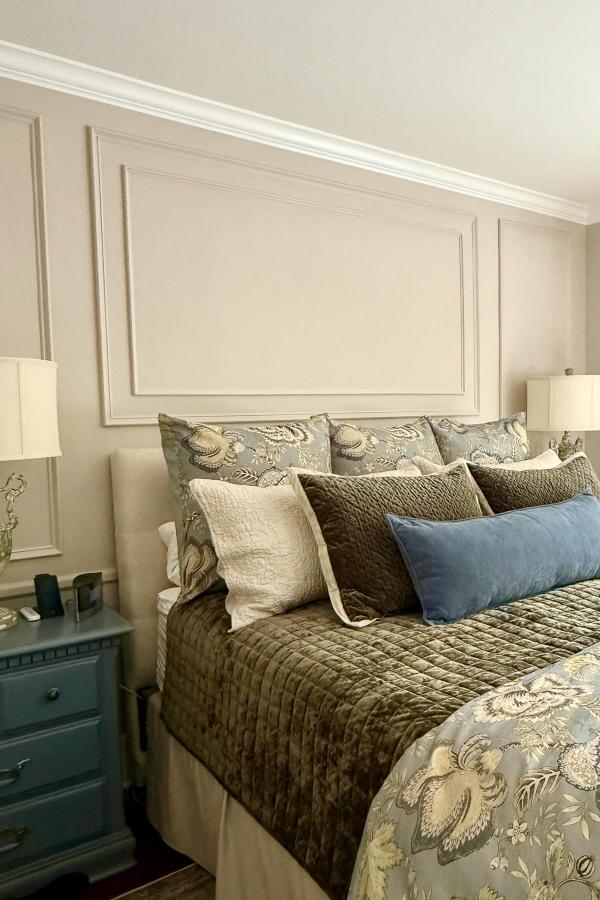
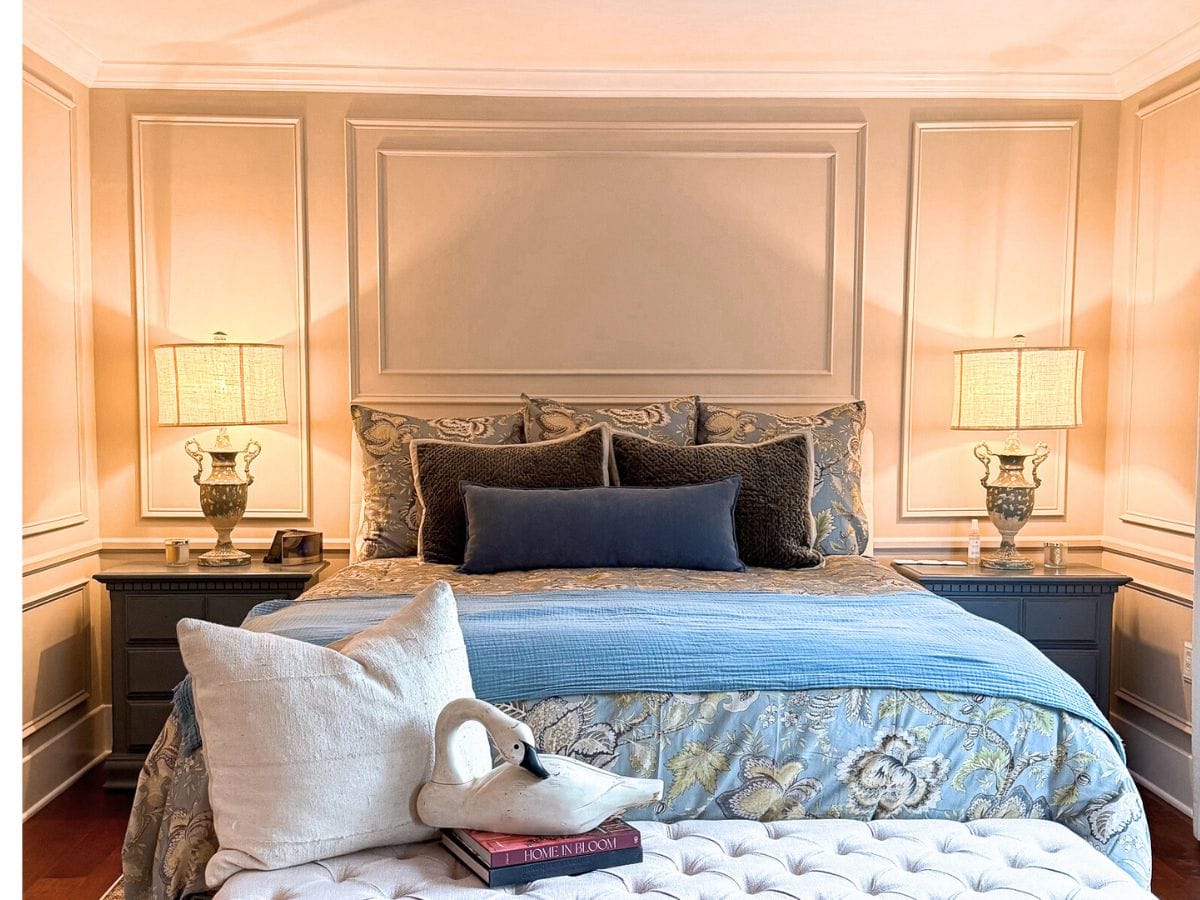
And now… just look at the after!

The difference is night and day. Adding a wallpaper mural from Prints Emporium gave the space the personality it was missing.
I love how it ties in with the
Benjamin Moore Smokey Taupe walls and the classic wall moldings we added earlier in the makeover.

The mural feels like a piece of art, and it truly transformed the entire room. It was also easier to install than I expected, which makes me love it even more.
It’s amazing how one design choice can completely shift the feel of a space. Now, instead of a blank wall behind the bed, we have a beautiful focal point that draws your eye in and makes the whole room feel intentional and cozy. I find myself stopping to admire it every time I walk by.

If you’re thinking about updating a room in your home, I can’t recommend a mural wall hanging enough. It’s such a simple way to create a high-end, designer look without a lot of fuss.
Want to bring this look into your own home? Shop the mural and other bedroom sources below.
Shop the Look

FAQs
Q: Can I hang a wallpaper mural by myself?
A: Yes! Especially peel-and-stick murals. It’s totally doable with a little planning.
Q: What if I mess up a panel? Are wall murals removable?
A: Most murals allow repositioning. Just peel back and try again. If it’s traditional pasted paper, take it slow and have an extra set of hands.

Other Home Renovation Posts You’ll Love
Final Thoughts on How to Hang a Wallpaper Mural
If you’ve been hesitant to try wallpaper murals, I hope this post inspires you to go for it. This feature wall was the finishing touch that made our bedroom feel polished, intentional, and uniquely ours.
Stay tuned for the final part of our makeover series—coming soon!
Until next time,


More about me!

Hello, I’m Wendy – a dedicated homemaker with a deep passion for decorating, gardening, cooking, and crafting. I find joy in harmonizing beautiful elements to fashion a space that is both comfortable and inspiring. I will help you create a beautiful home, one project at a time.


I love this project, Wendy. It turned out beautiful!
What a creative solution! It is beautiful!