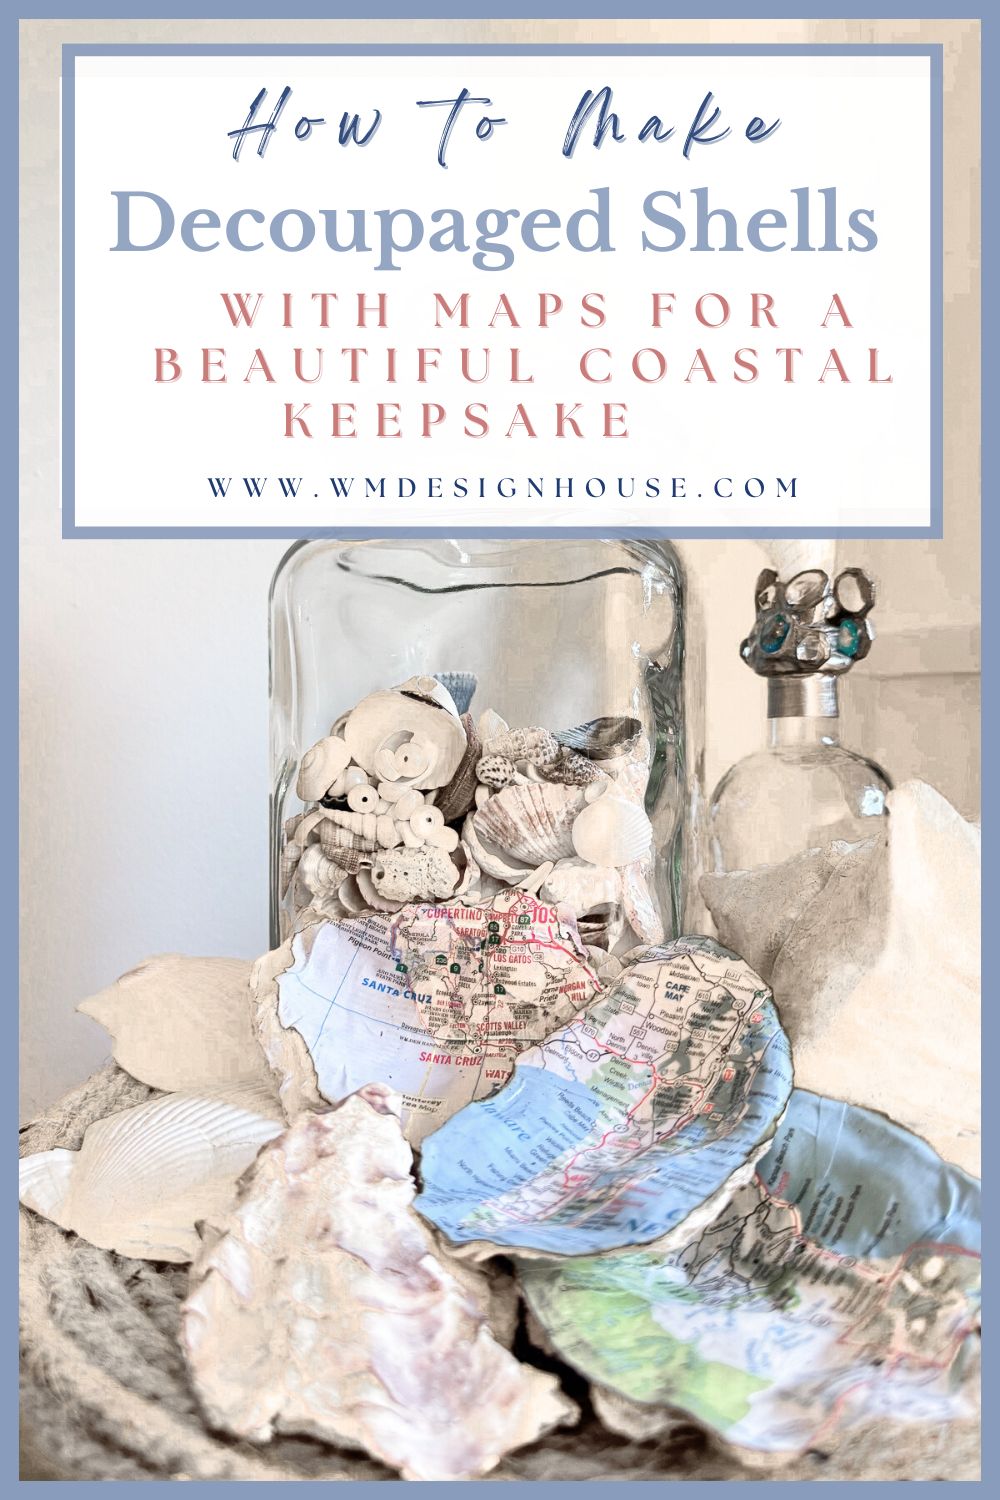
Decoupage Shells with Maps: A Creative Project
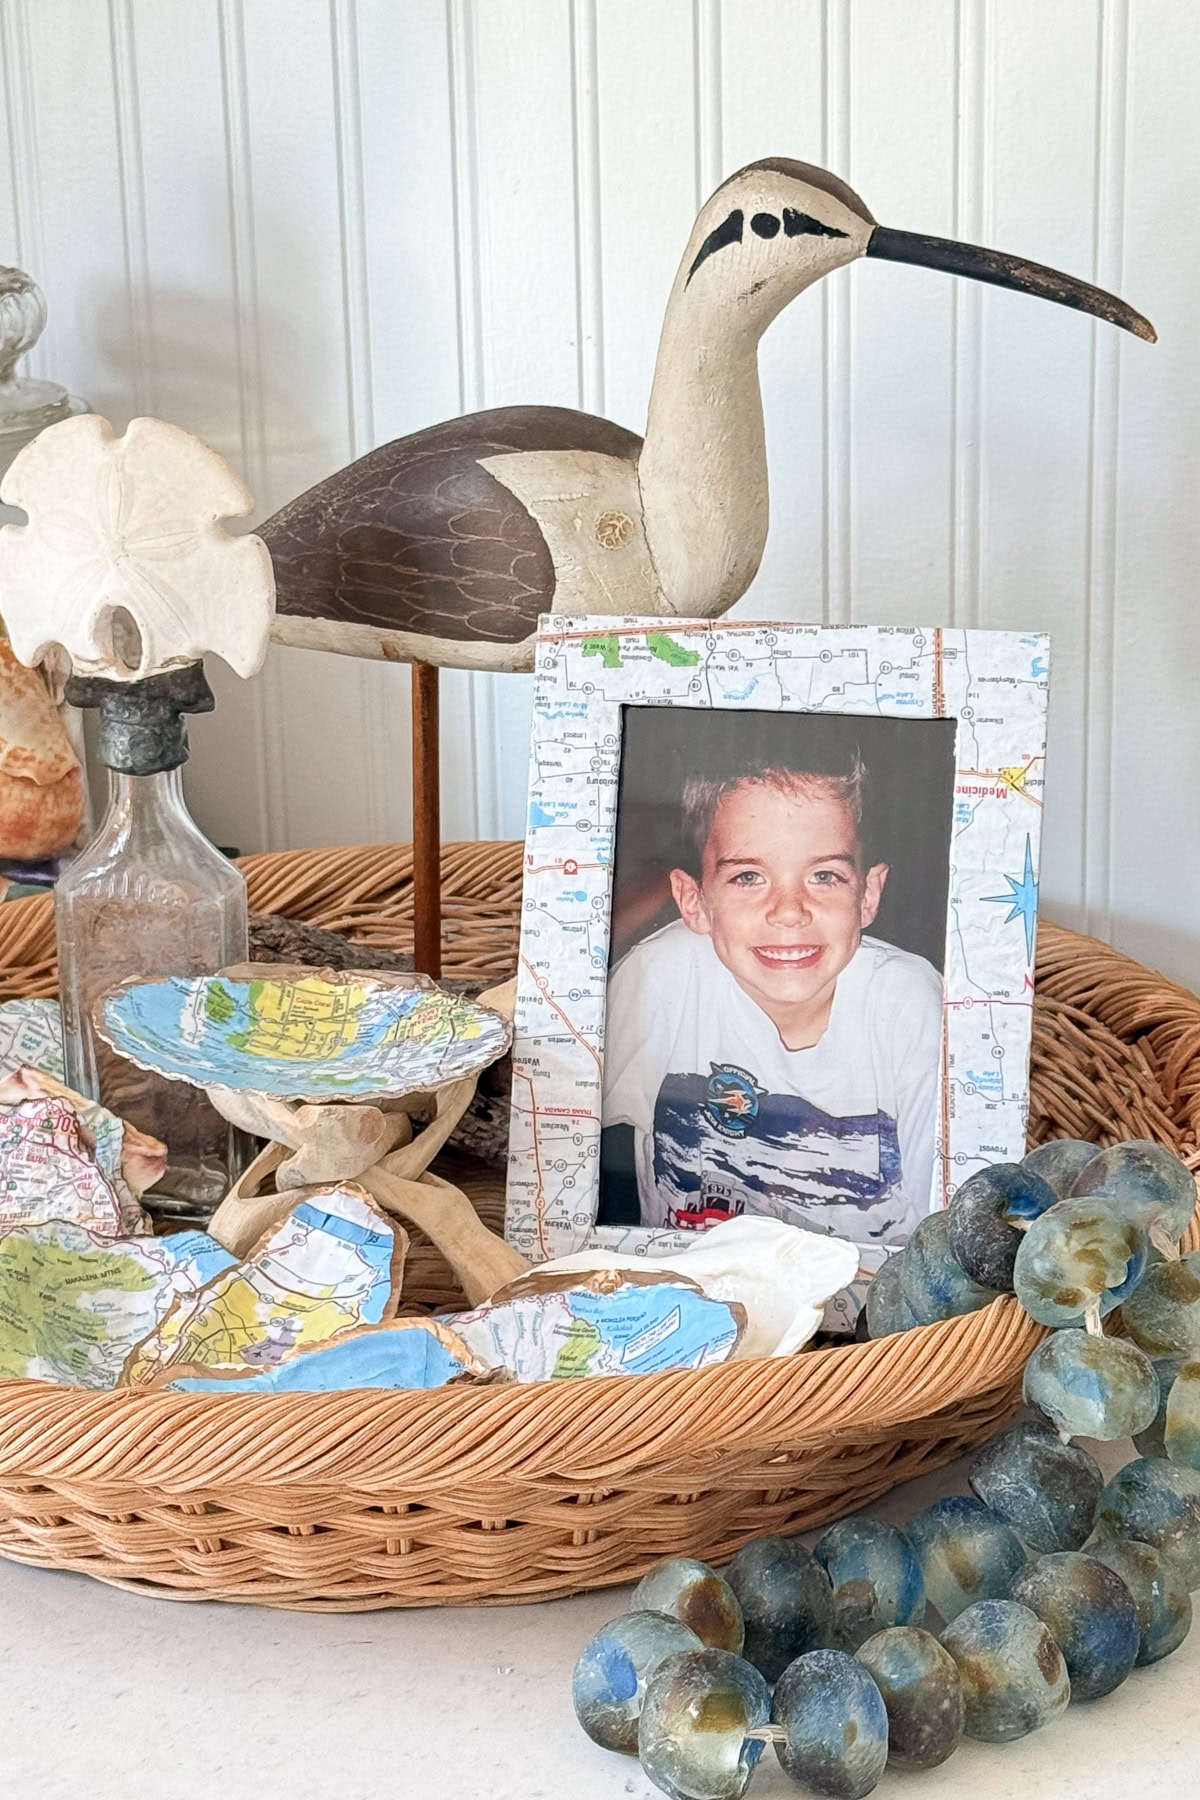
Have you ever returned from a beach walk with a handful of seashells—unsure what to do with them, but not quite ready to let go of their charm? One of my favorite memories is scouring the shoreline with my son when he was little, searching for the perfect shells to add to our growing collection. Now that he’s older and has his own beach cottage (right in our backyard), I wanted to turn some of those treasured finds into a keepsake he can display and enjoy. This creative DIY shows you how to decoupage shells with maps, transforming simple seaside treasures into heartfelt mementos filled with love and memories.
On my blog WM Design House, I may sometimes use affiliate links, which means a small commission is earned if you purchase via the link. The price will be the same whether you use the affiliate link or go directly to the vendor’s website using a non-affiliate link. Read my full disclosure policy here.
Decoupage Shells with Maps: A Meaningful Keepsake
We typically vacation during the summer months—June, July, and August—and always manage to bring home a plentiful collection of beautiful shells.
In today’s project, I’m sharing how to decoupage shells with maps—a beautiful blend of coastal decor and meaningful memories. While most tutorials use paper napkins or tissue paper (and I’ve done those too—they can be so pretty!), this version takes a more personal twist. By using vintage maps or pages from old atlases, you can turn simple shells into tiny keepsakes that reflect the places you’ve been or dream of visiting.
Let’s dive into this inspiring (and surprisingly simple) DIY!
🛠️ Handcrafted Society
Today marks another exciting installment of our Handcrafted Society series, where a group of creative bloggers comes together to craft projects centered around a common theme.
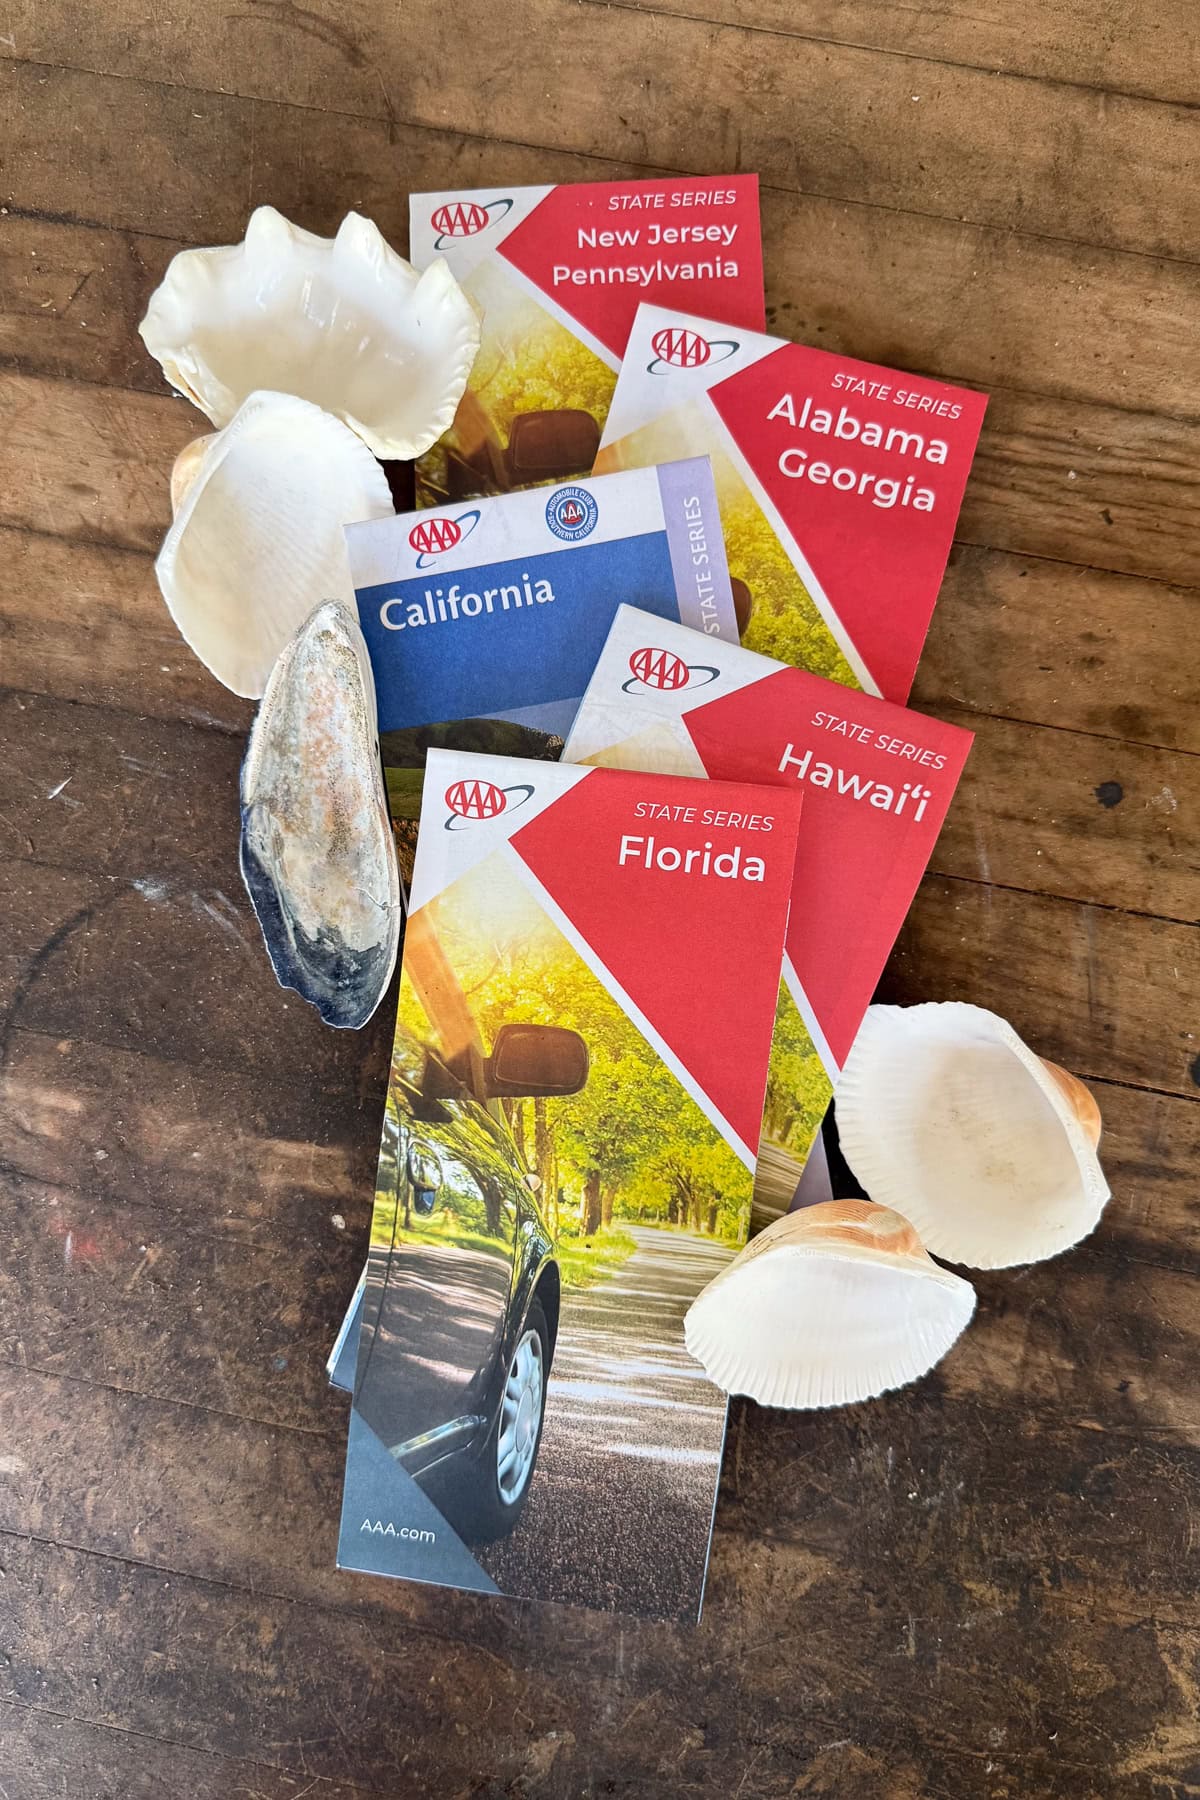
This month, we’re all about maps — “Oh, the places we’ve gone!” Do you remember the good old days of paper maps? I wasn’t even sure if “AAA” still handed them out, but it turns out they do! And who could forget the trusty Thomas Guide? These classic mapping tools guided us long before GPS became the norm.
So, grab something cool to drink and join us as we showcase our latest DIY creations. You’re sure to find inspiration for your next crafting adventure!
Don’t forget to check out the links to all the bloggers’ projects at the end of this post.
Why You’ll Love This Project
Creative and meaningful – When my children were younger, we loved collecting shells together—and it’s something we all still enjoy decorating with to this day. For this project, I used maps of the beaches where we gathered our shells, and I’ll be giving each of my children a few to add to their own collections as a meaningful keepsake.
Budget-friendly – This is an inexpensive craft to make, just a few supplies, most of which you may already have on hand.
Great for gifts or decor – These make lovely trinket dishes, wedding favors, or coastal coffee table accents.
🐚 How to Make Decoupaged Seashells
Ready to get started? Here’s how to decoupage shells with maps using just a few simple supplies and a bit of creativity.
How to Make DIY Sweater Pears
Materials
- Thrifted sweaters knits work best in cozy fall colors
- Fabric scissors
- Needle and embroidery thread
- Polyester fiberfill or pillow stuffing
- Twigs pumpkin stems or cinnamon sticks (for stems)
- Felt fabric scraps, or dried leaves (for leaves)
- Jute twine or ribbon optional, for embellishments
Instructions
- Cut sweater fabric into a pear-shaped piece (any size you like).
- Stitch or hot glue the edges, leaving the top open.
- Turn fabric right side out and fill with stuffing.
- Gather and secure the top with thread or twine.
- Add a twig, natural stem or cinnamon stick for the stem.
- Glue on a felt or dried leaf for detail.
- Embellish with ribbon, twine, or buttons if desired.
- Style pears in clusters for a natural, cozy look.
Decoupage Your Memories on Shells
✨ Expanded Step-by-Step Guide with Creative Tips
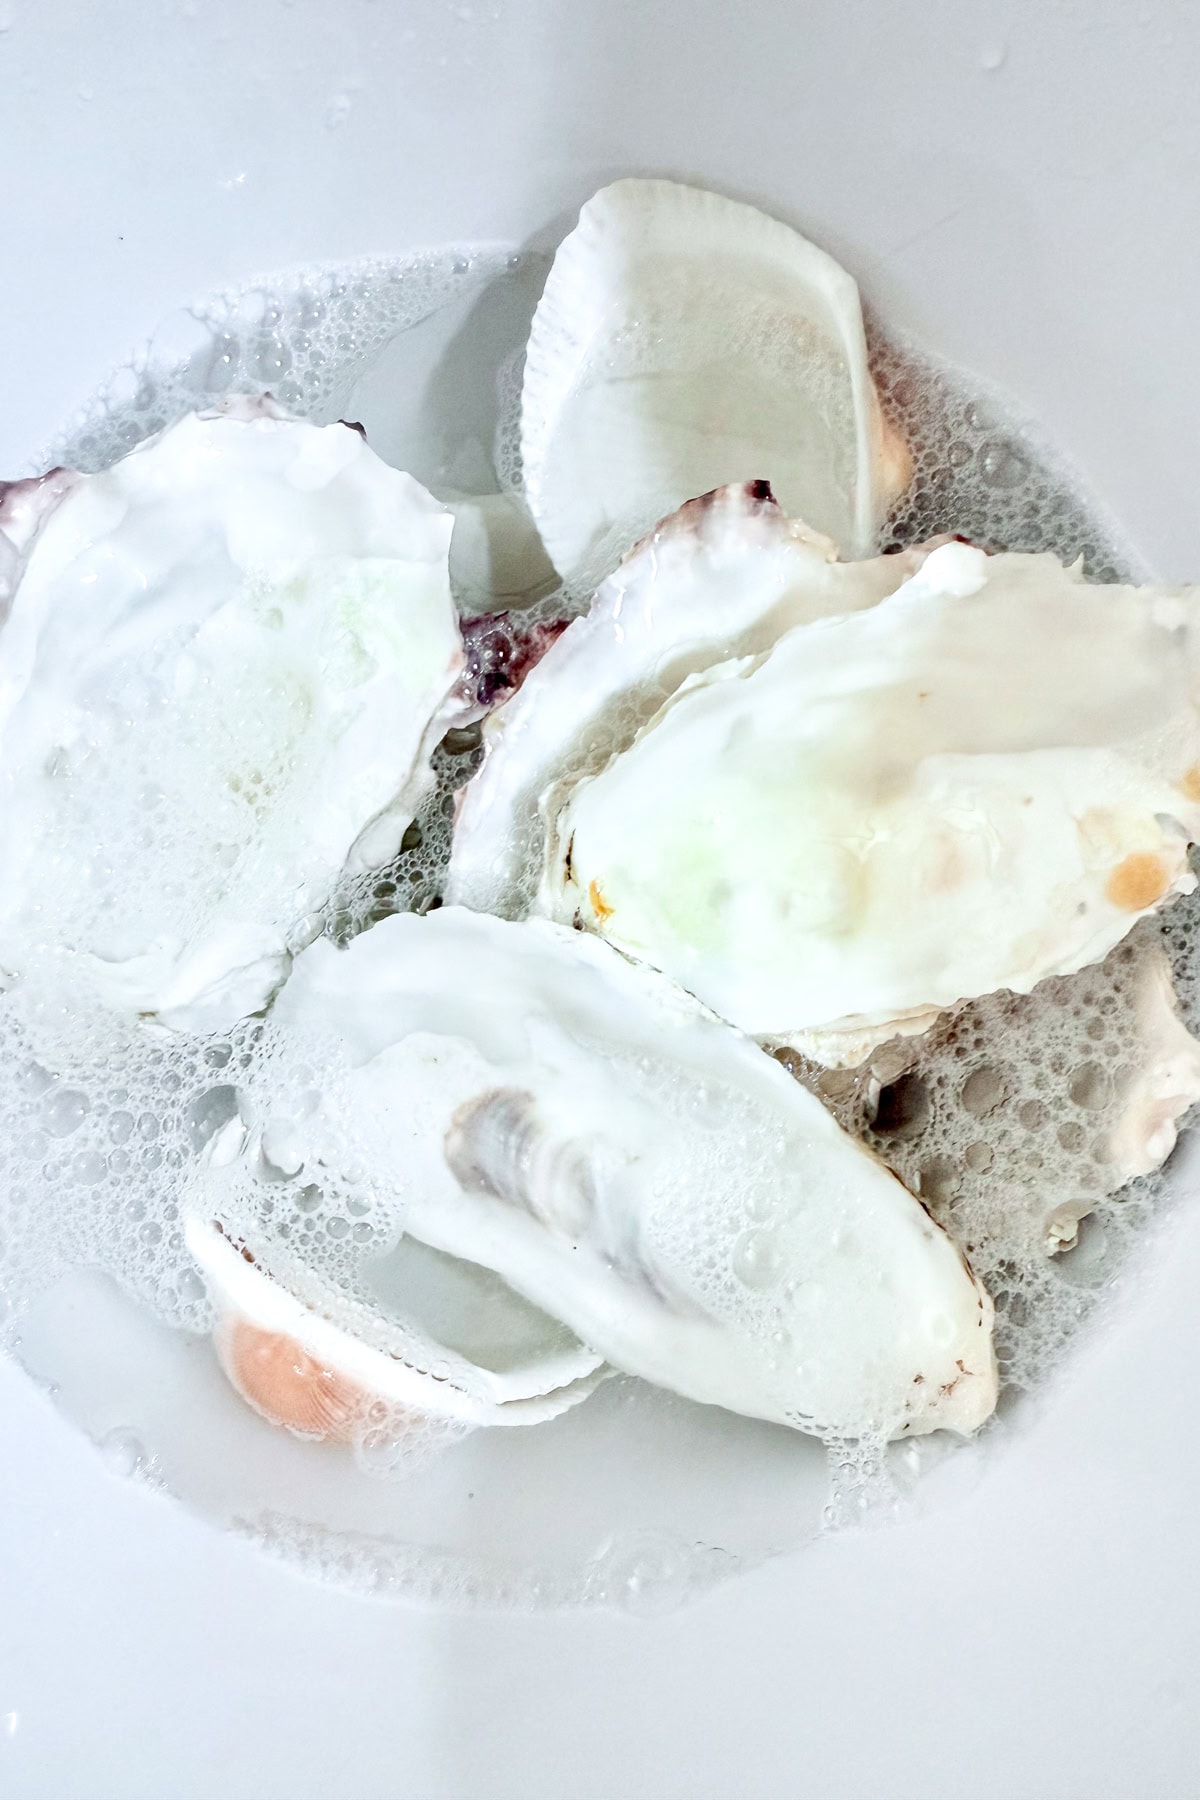
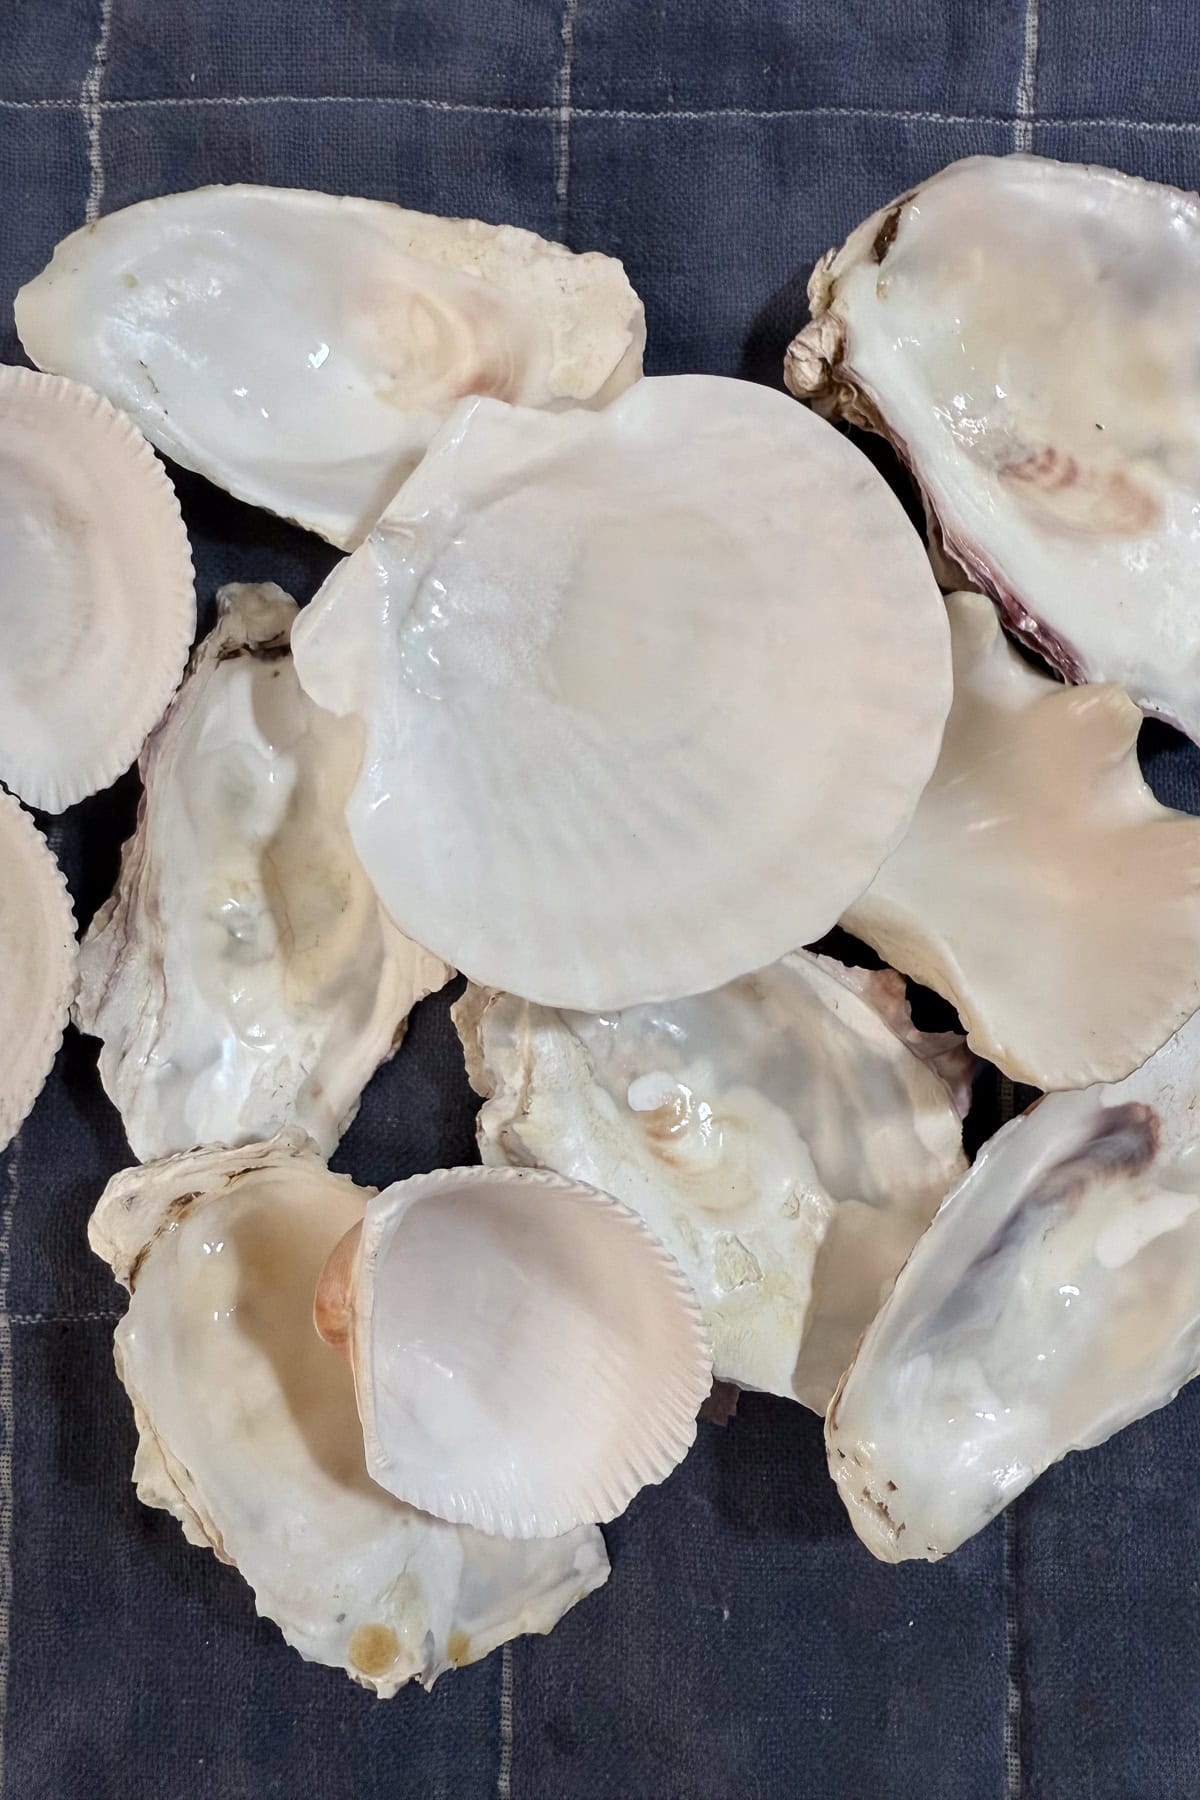
Step 1: Clean and Prep Your Shells
Gently scrub away any sand or residue with a soft brush and mild soap. Let them air-dry completely.
Tip from wendy’s craft room:
For a smoother base, lightly sand the interior if it’s rough or uneven.
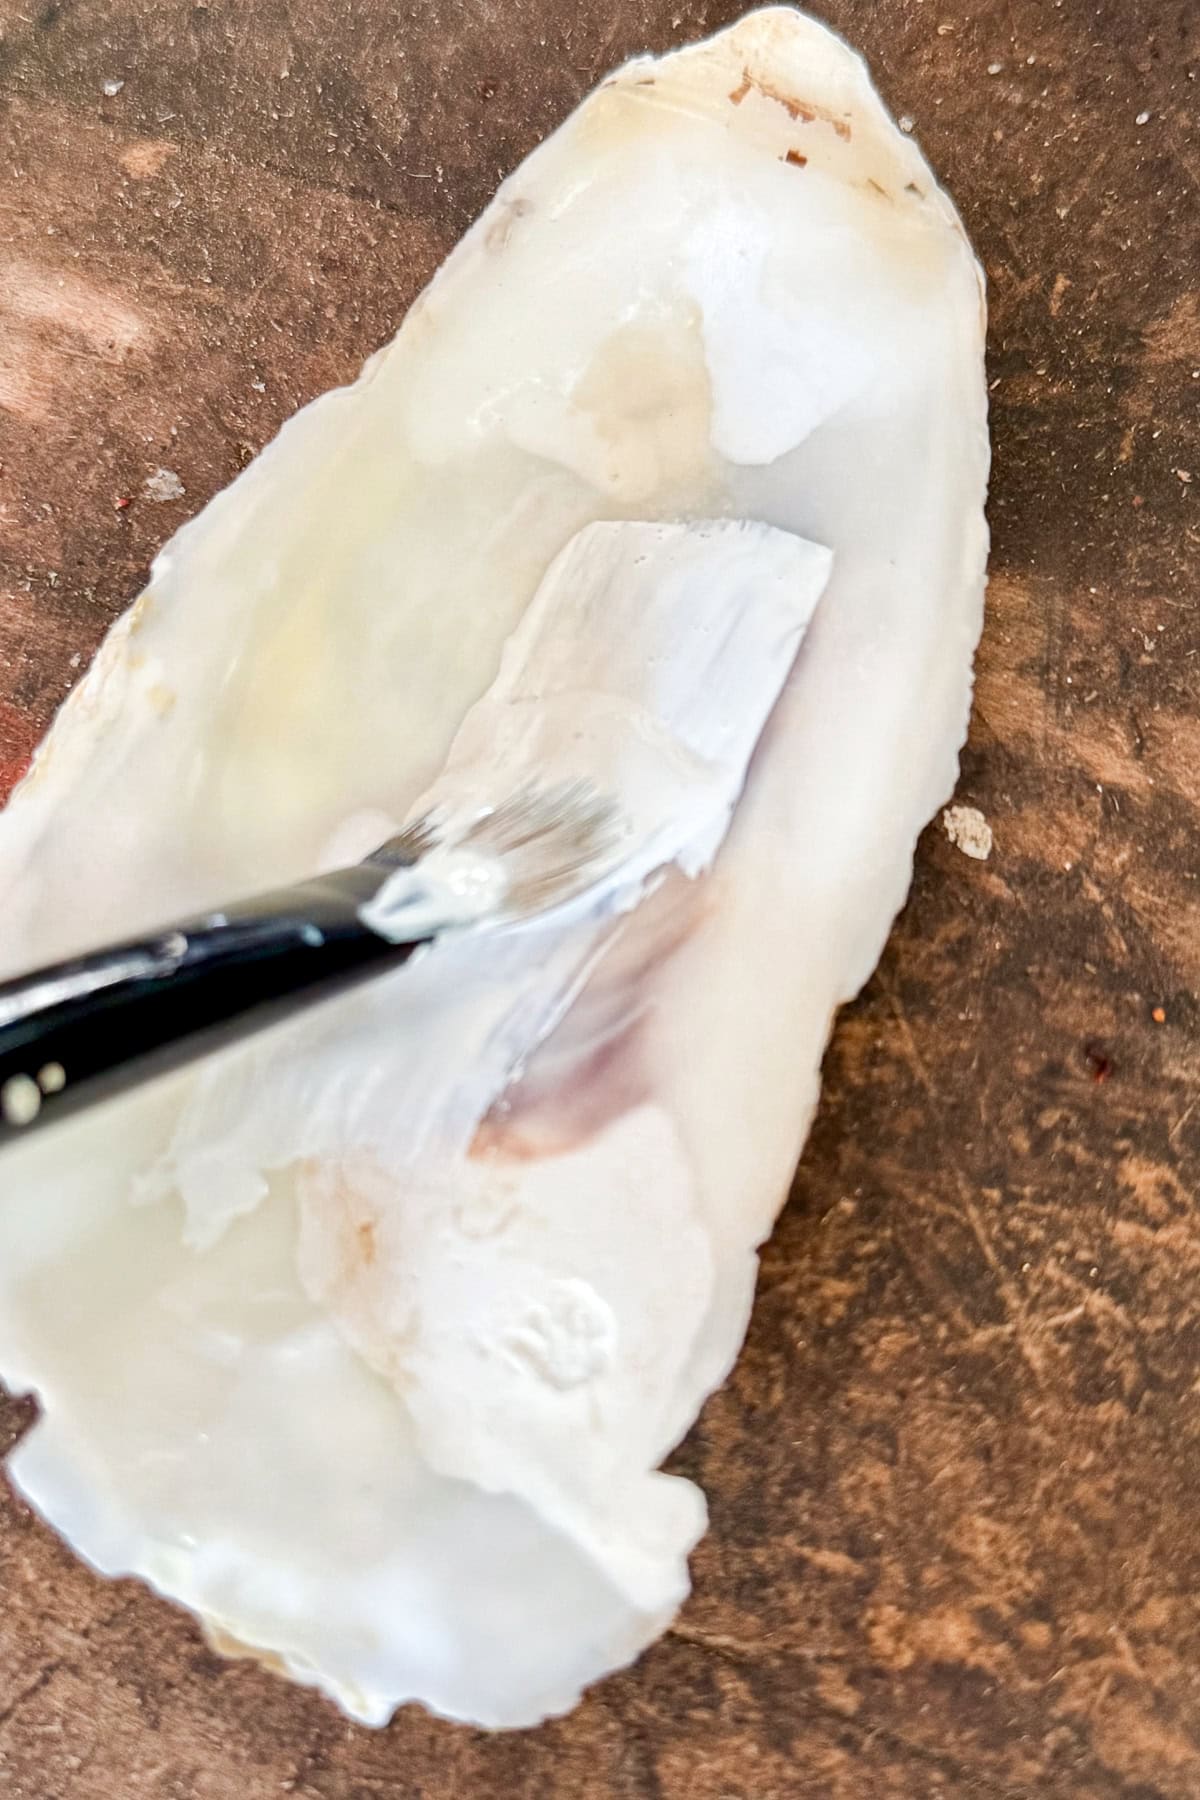
Step 2: Add a White Base Coat (Optional)
A coat of white acrylic paint helps the map design pop—especially on darker shells.

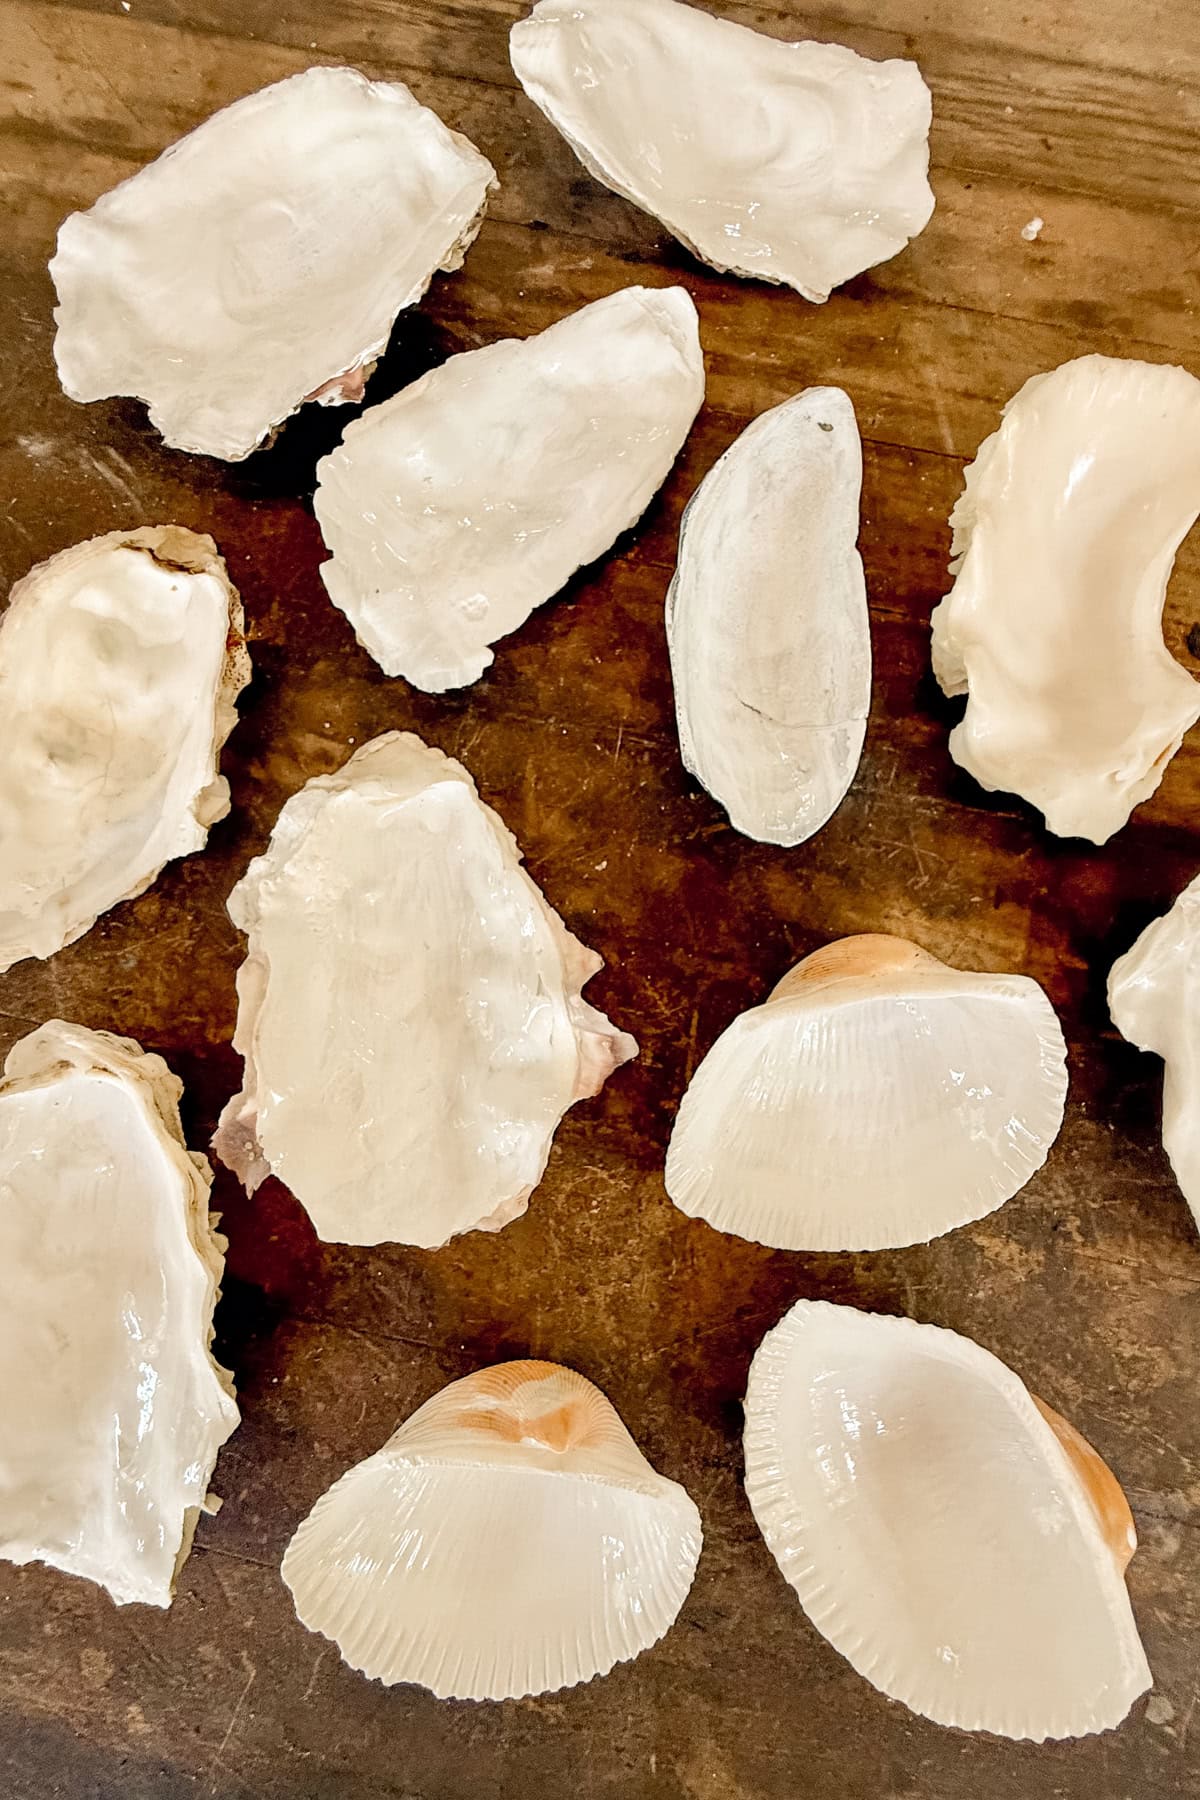
Tip from wendy’s craft room:
Gesso also works well for a matte, textured base.
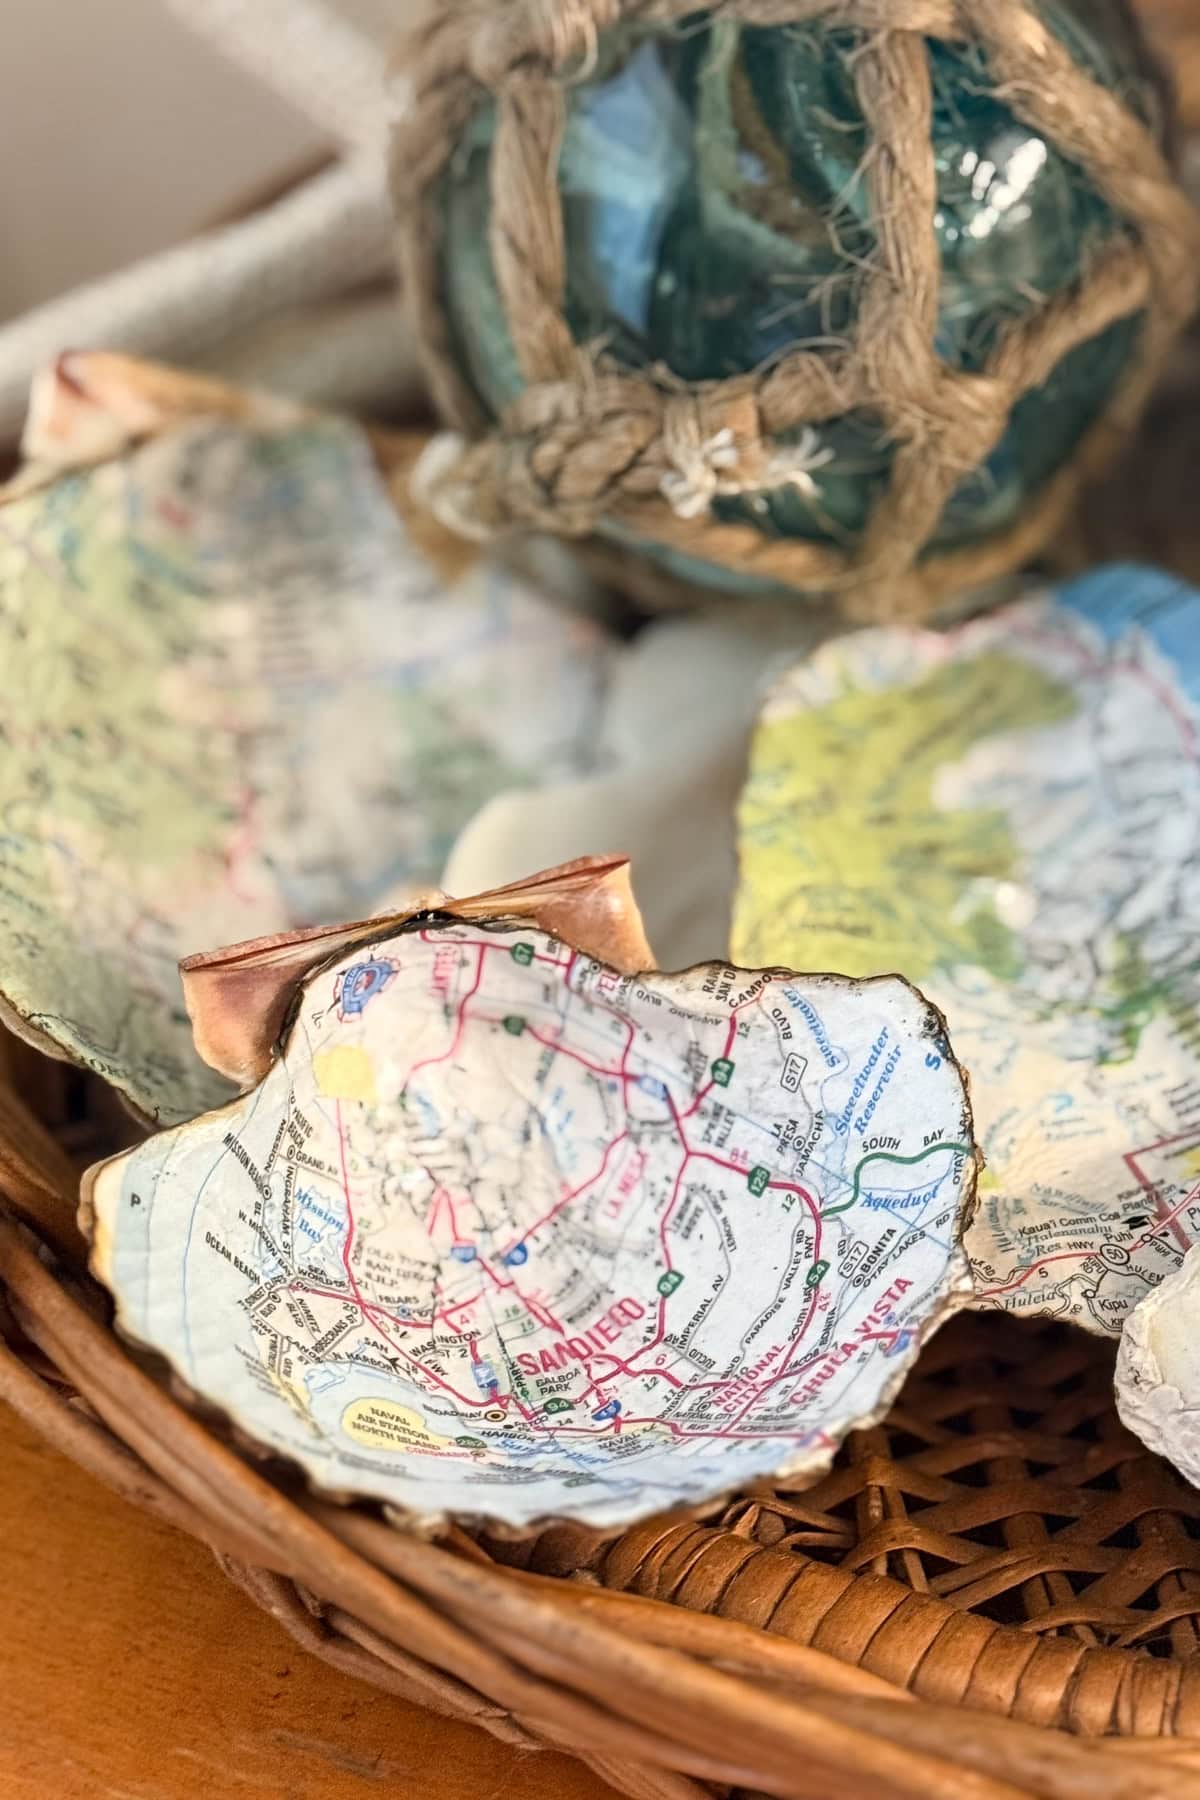
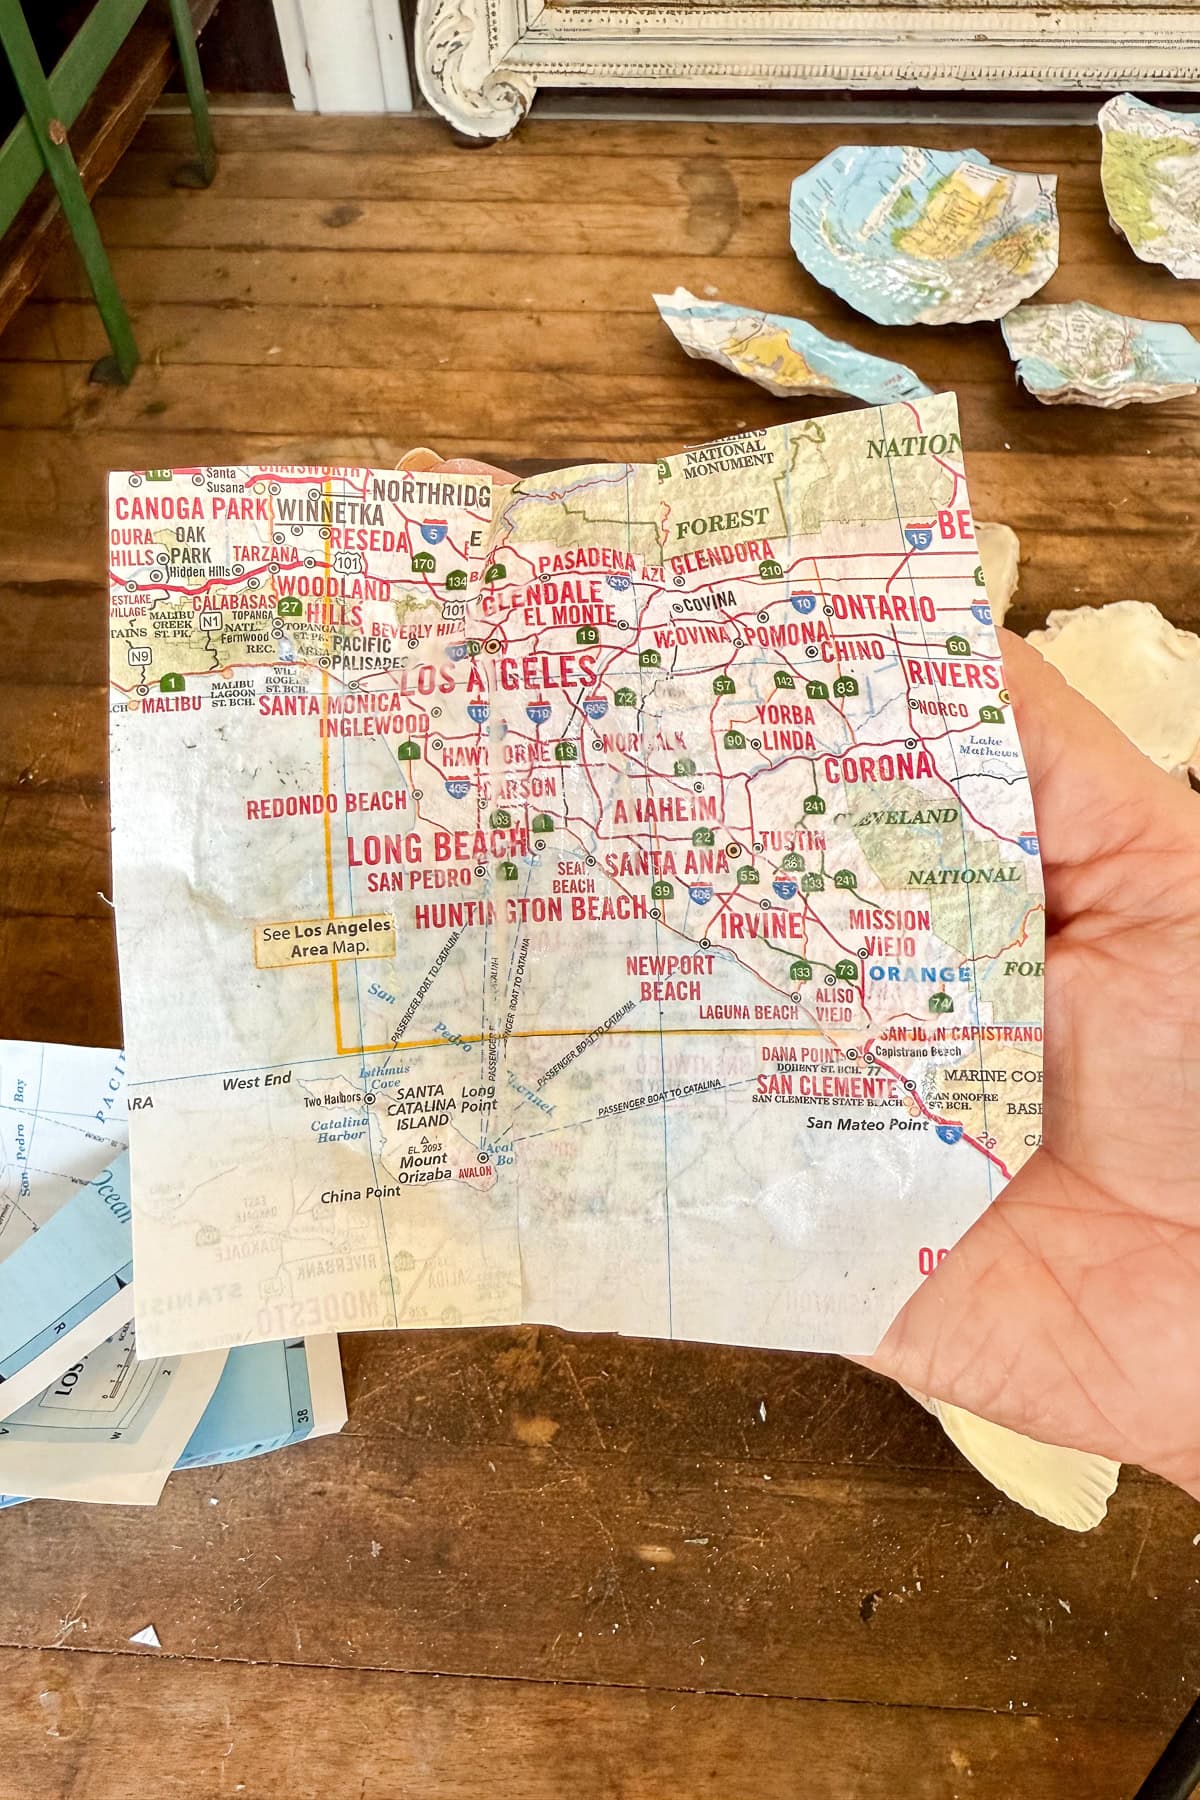
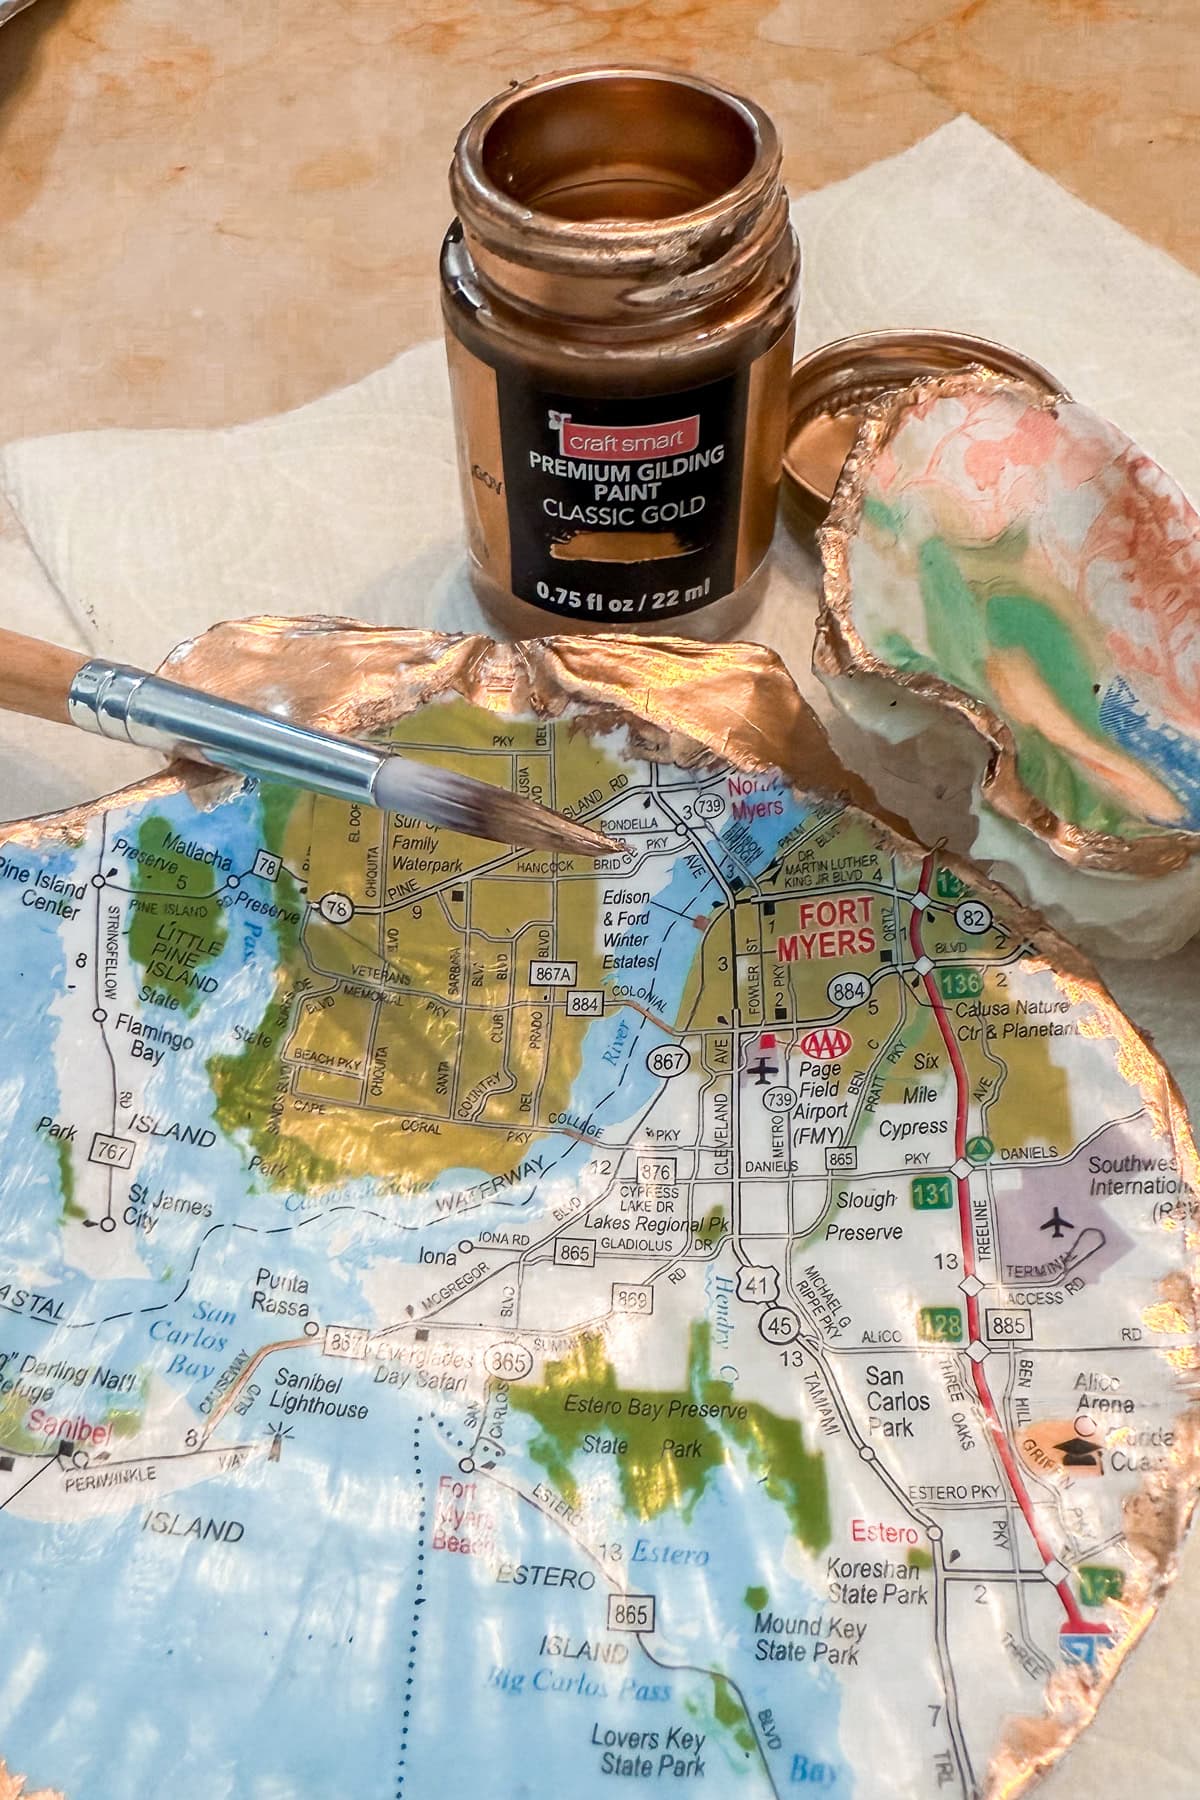
Step 3: Choose and Cut Your Map
Select a map section that holds meaning—maybe a favorite beach, a hometown, or a dream destination. Trim to fit the shell shape.
Tip from wendy’s craft room:
Use thin paper. If using glossy or thick paper, lightly mist with water to soften before gluing.
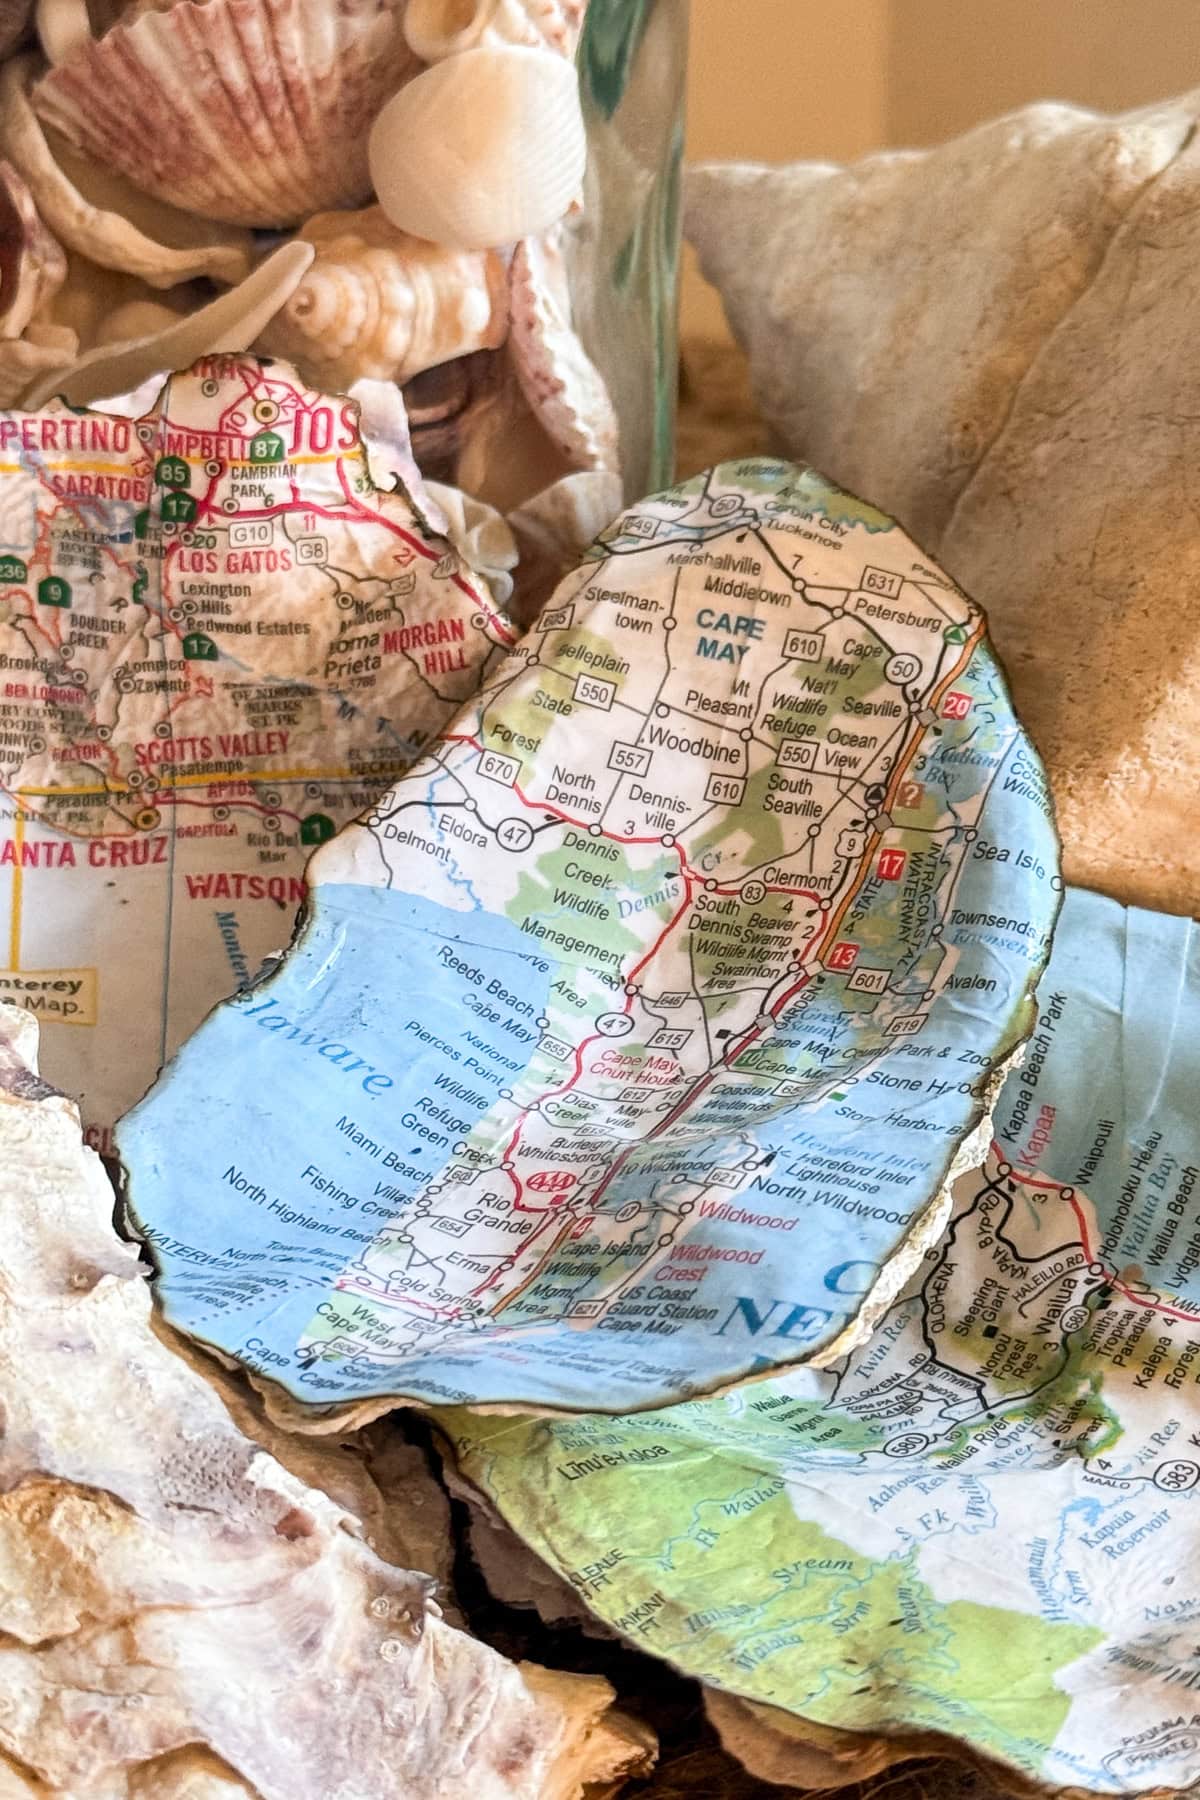
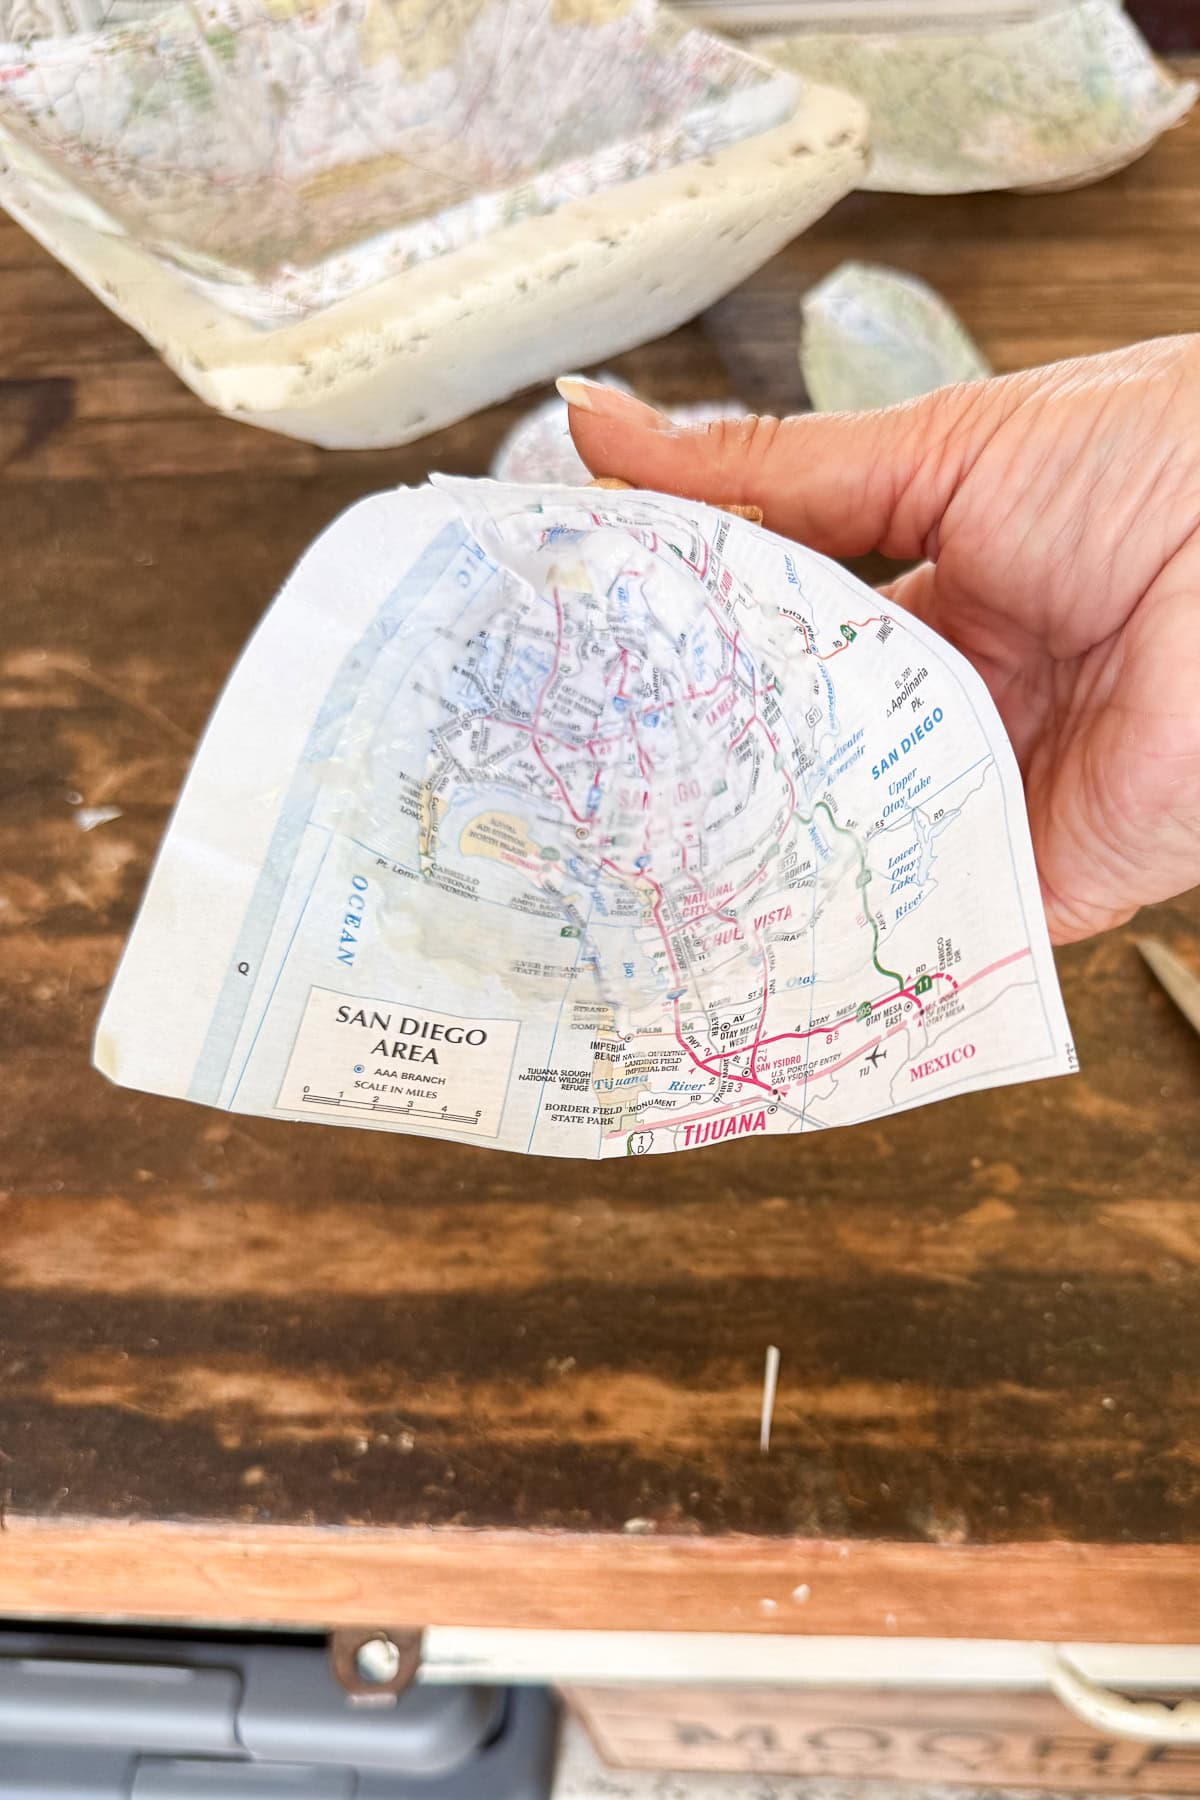
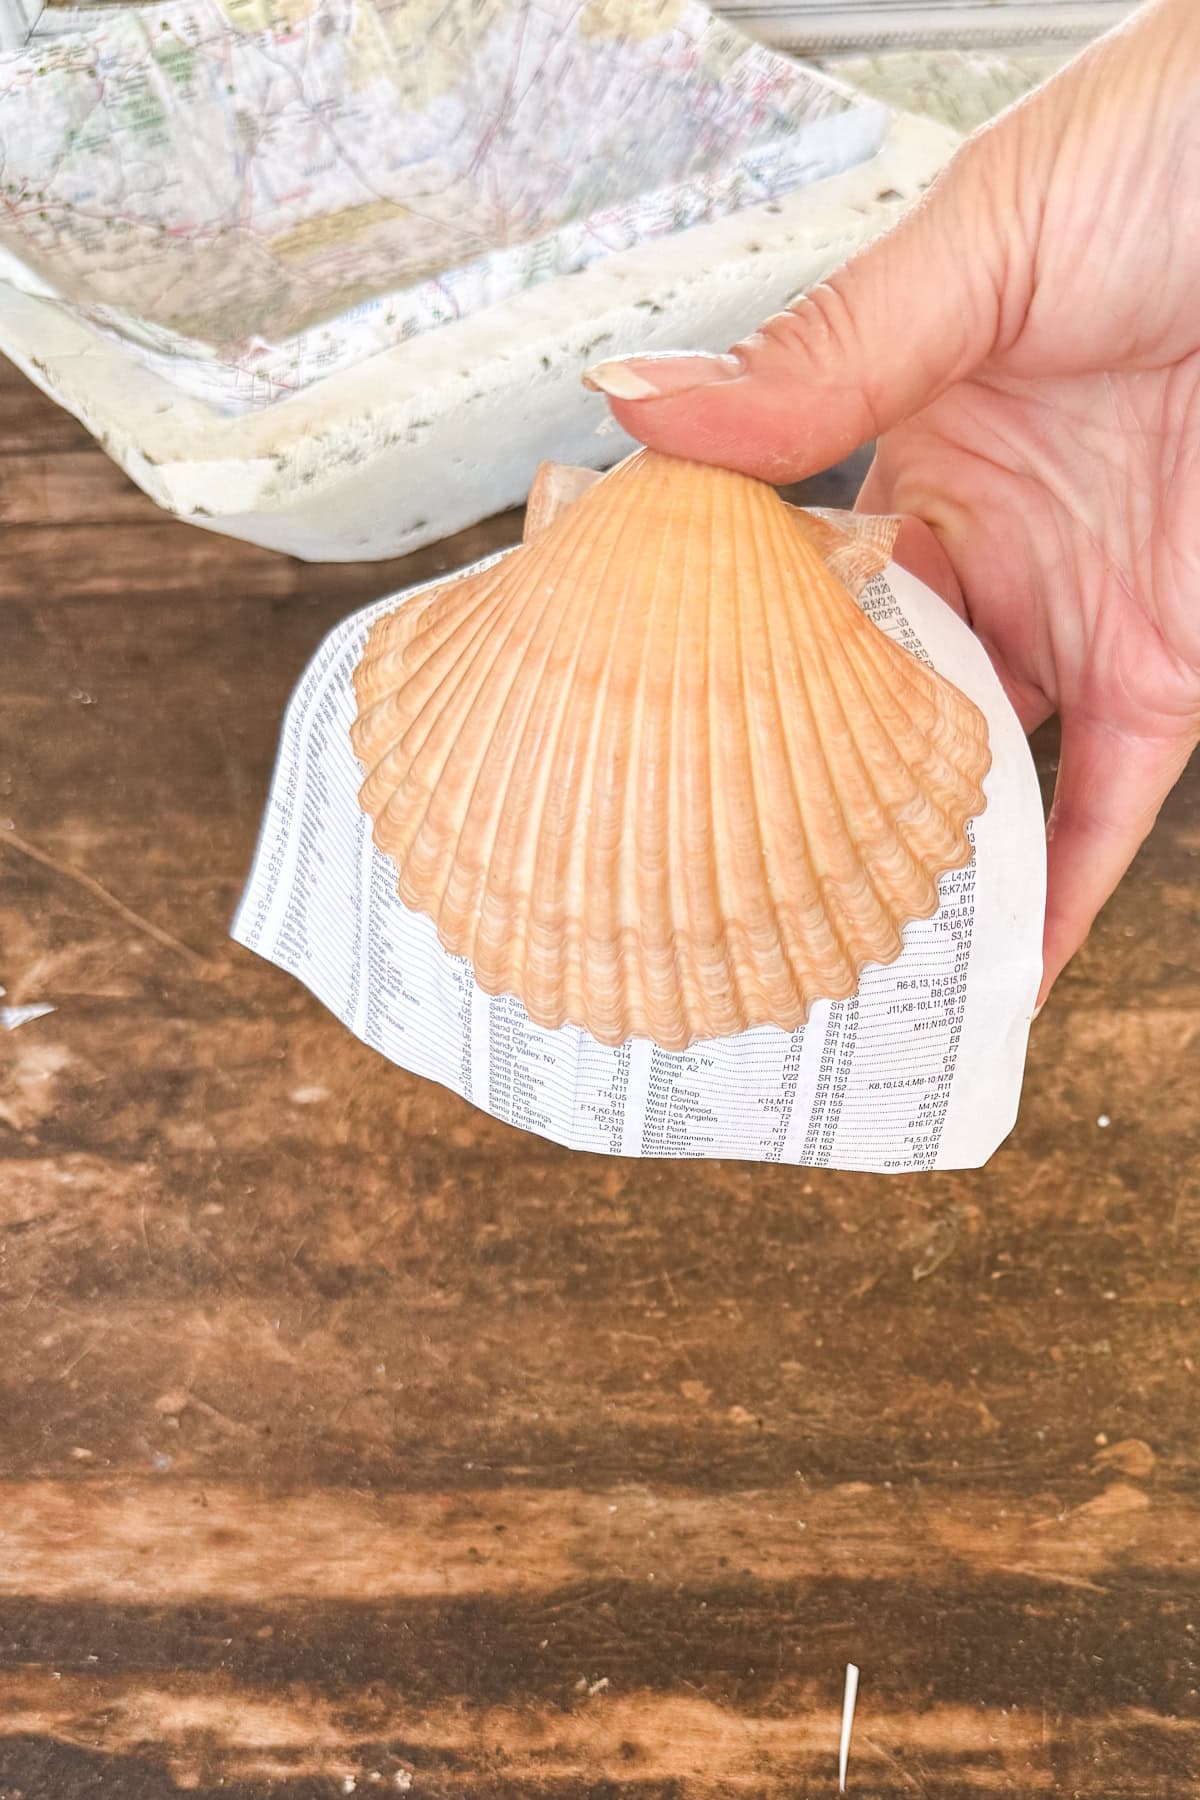
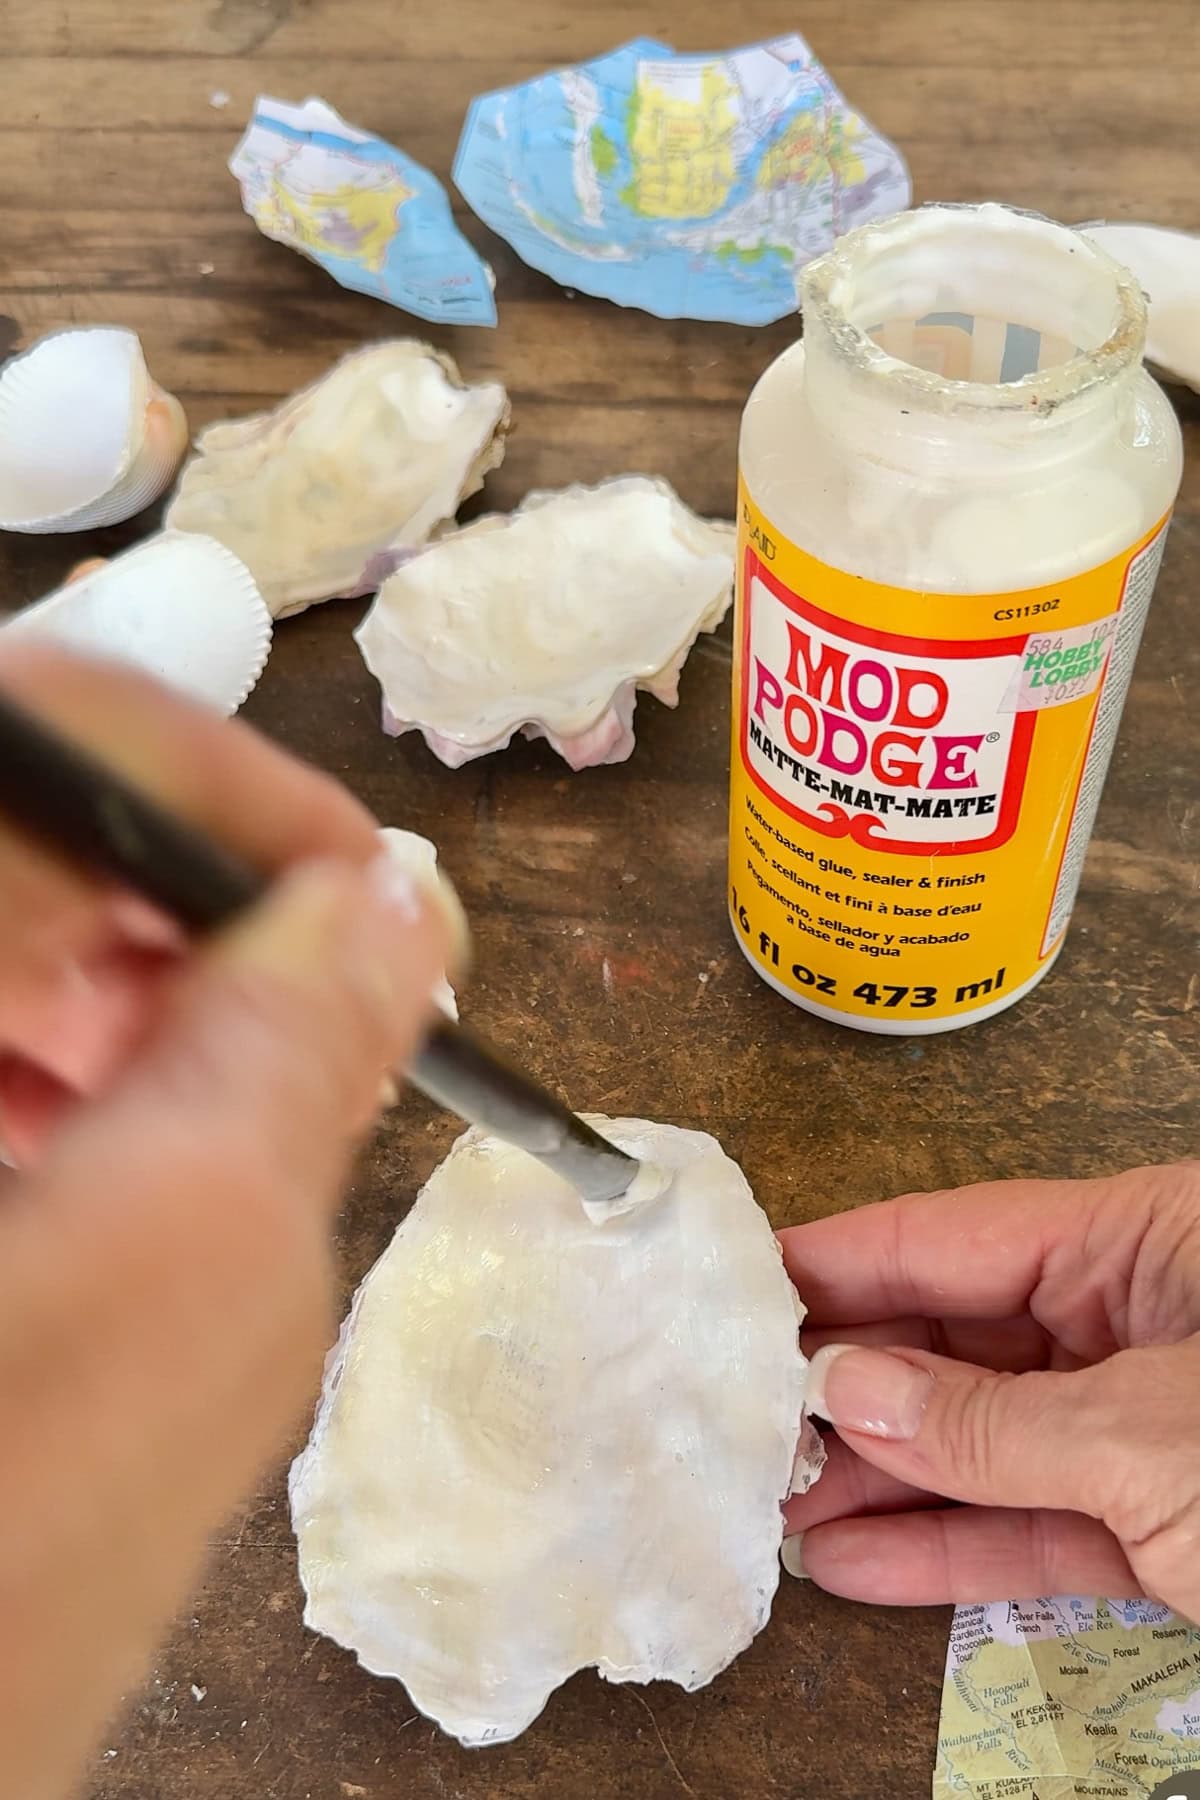
Step 4: Apply the Map
Brush a thin layer of Mod Podge onto the inside of the shell, then press the map piece in place, smoothing it gently from the center outward.
Use a clean finger or the back of your brush to smooth out any bubbles and prevent tearing.
Once the paper is adhered, apply a thin layer of Mod Podge over the top of the map to seal and secure it in place.
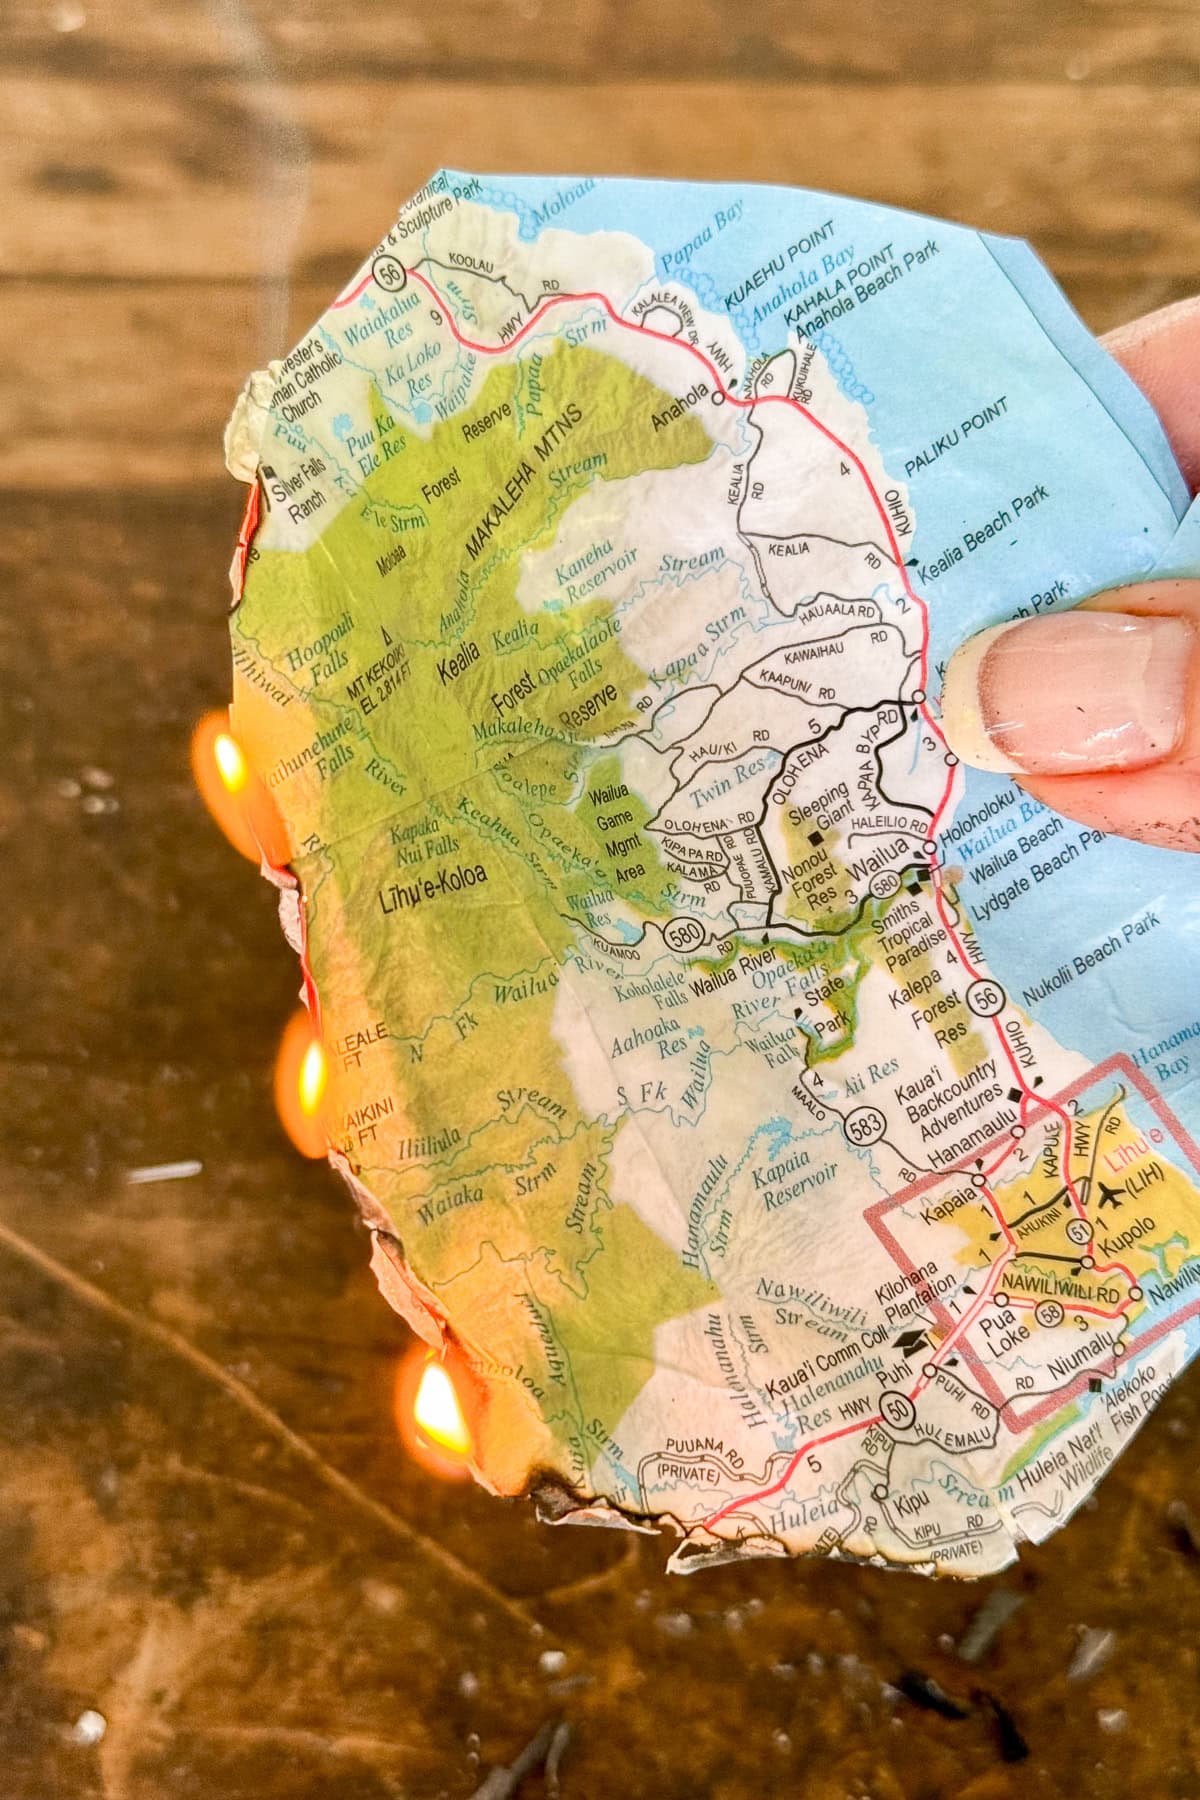
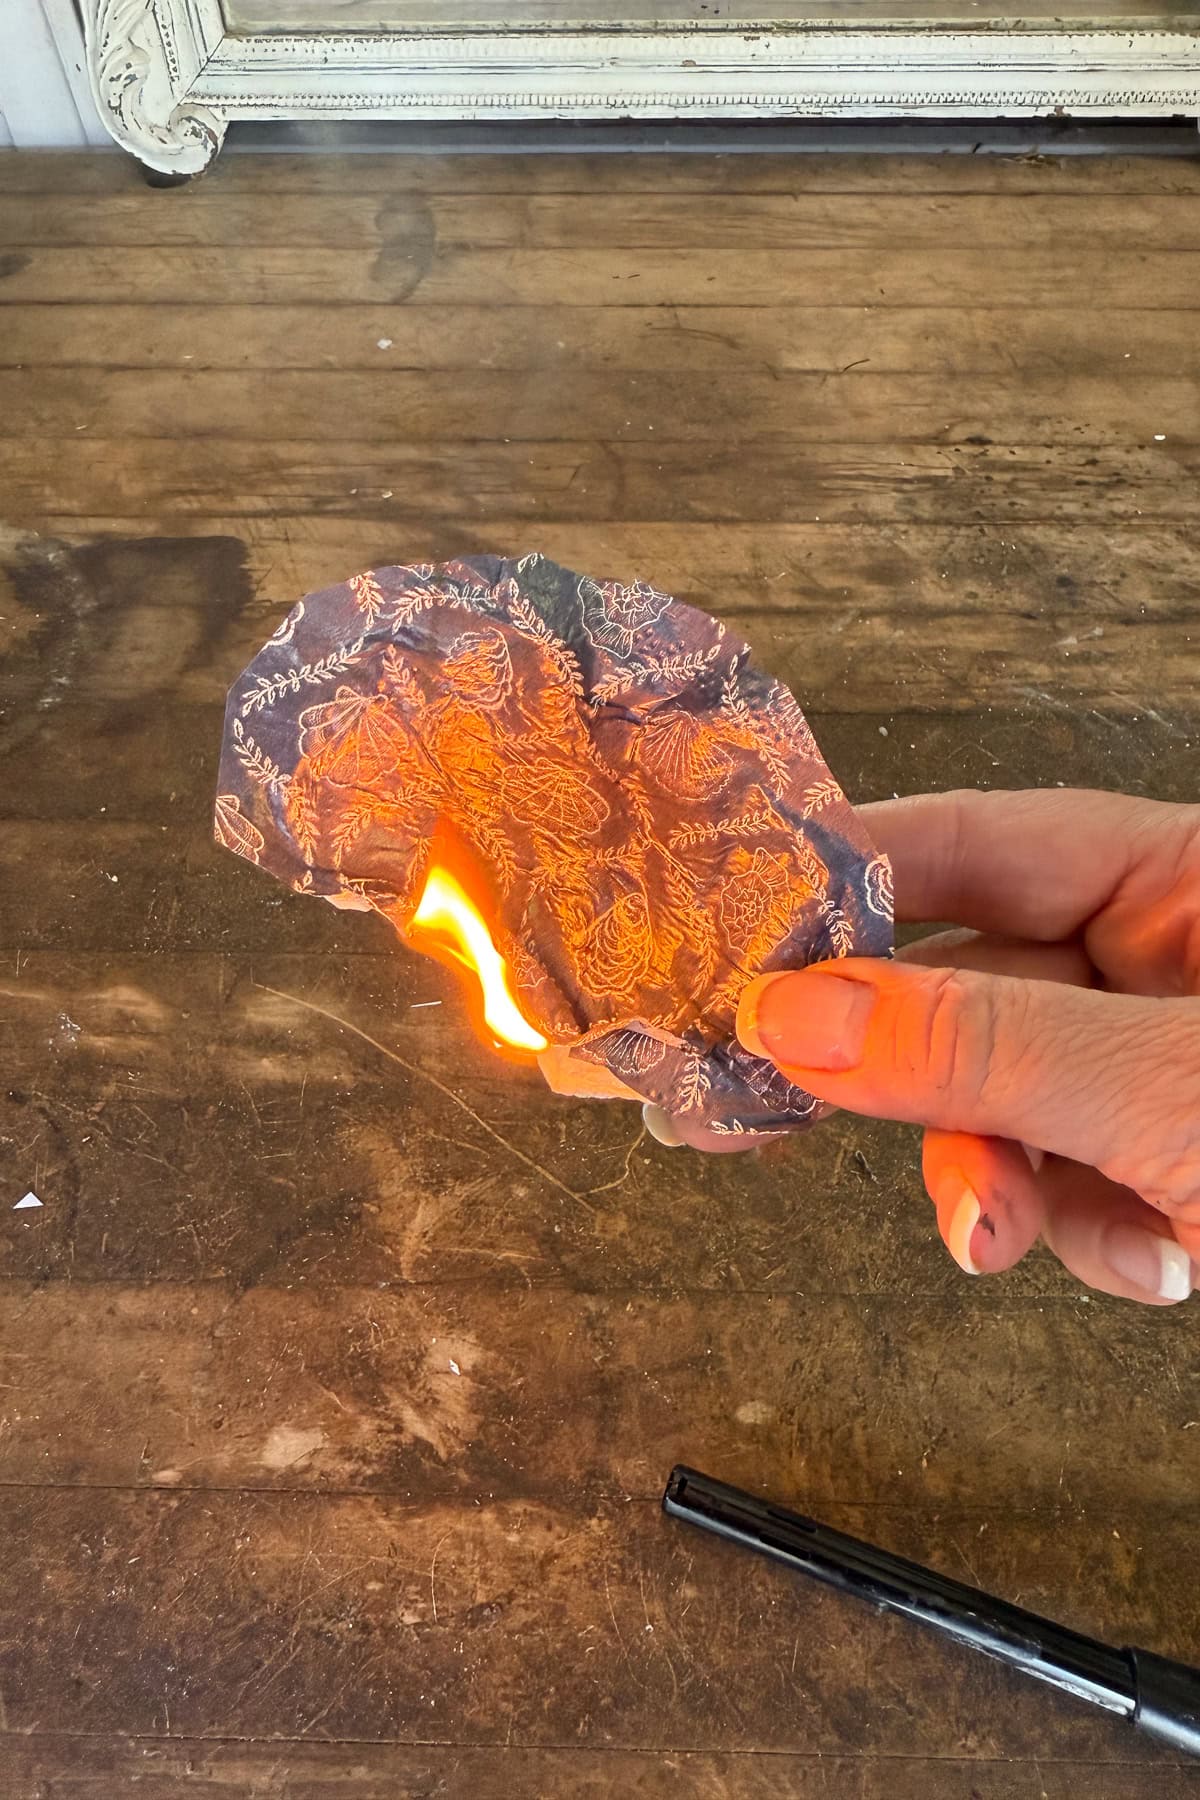
Step 5: Finishing the Edges
There are a few ways to trim the edges.
- You can use small scissors and simply trim around the edge of the shell.
- Carefully burn the edge of the paper—it will naturally stop at the edge of the shell, creating a smooth, custom fit with a subtle, decorative charred finish.

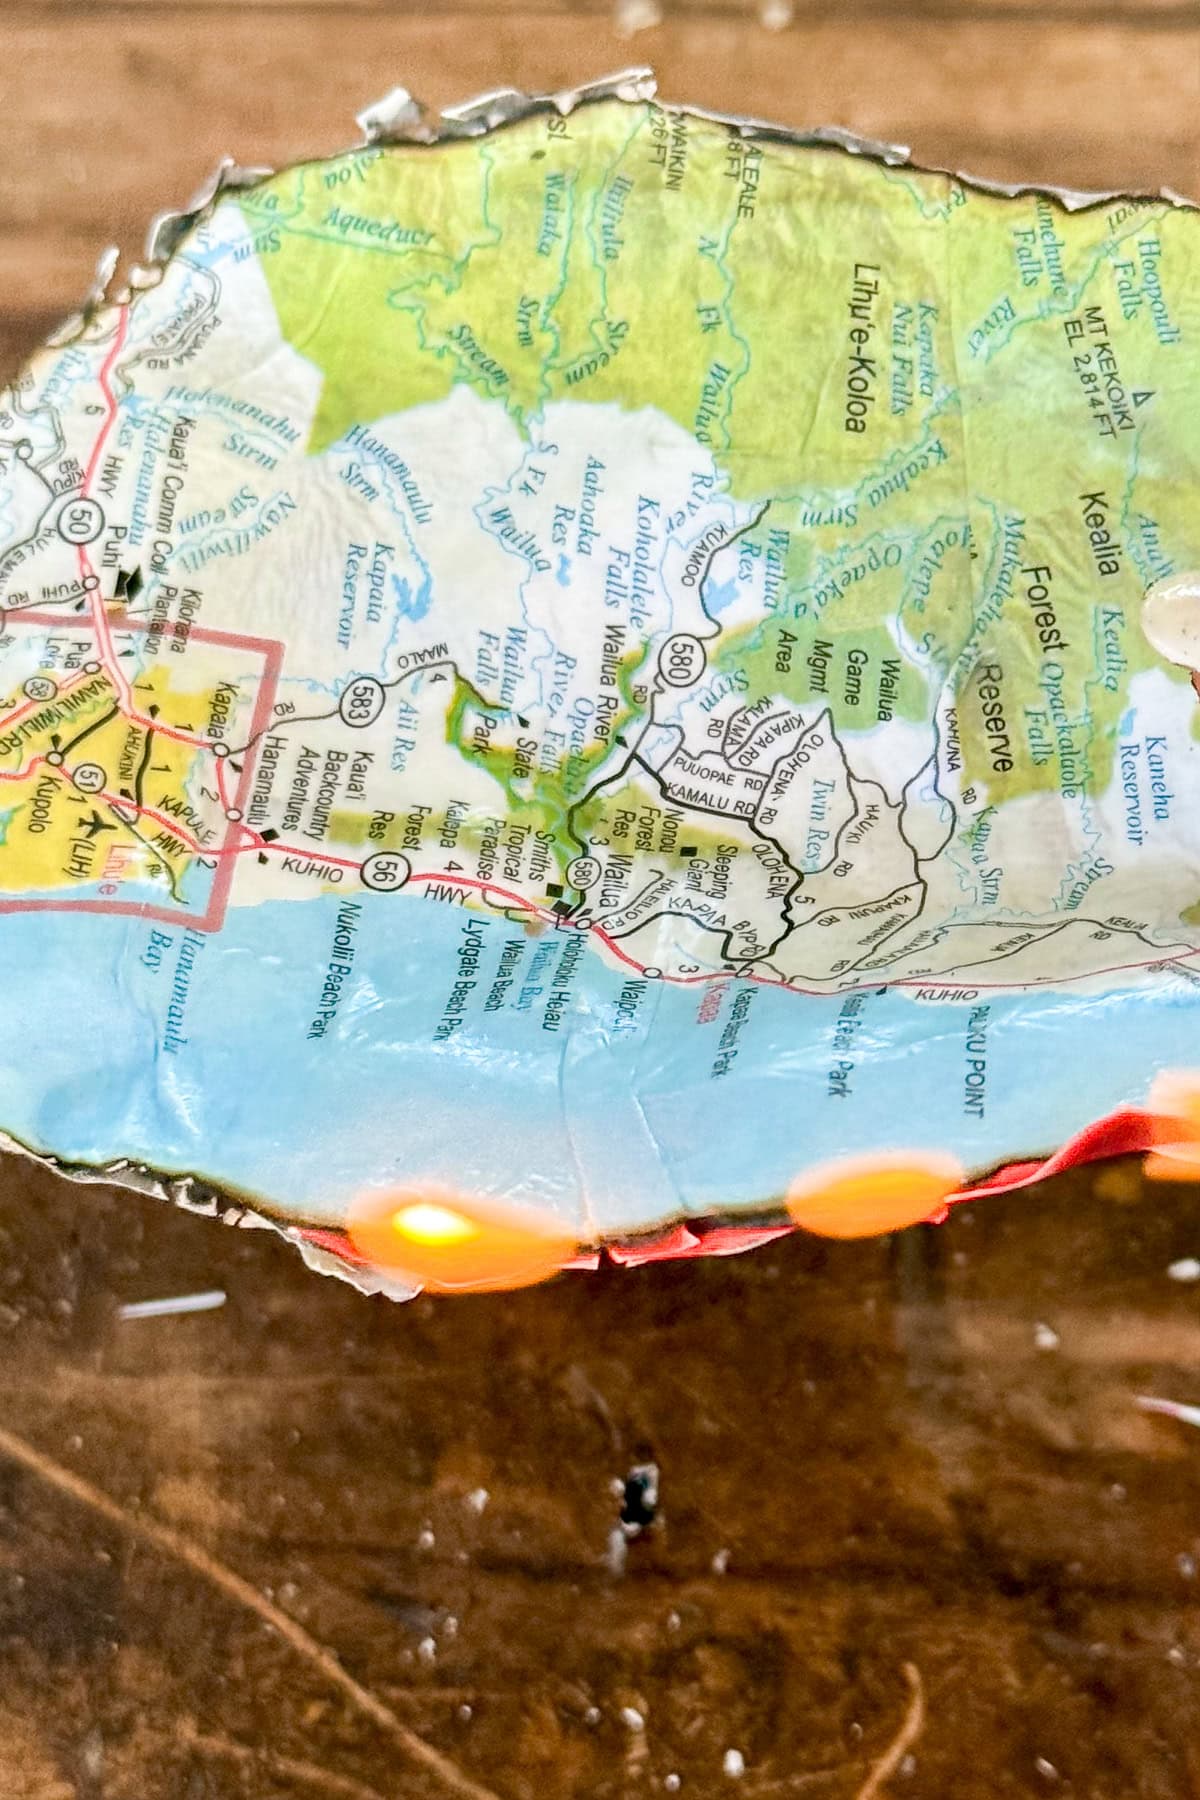
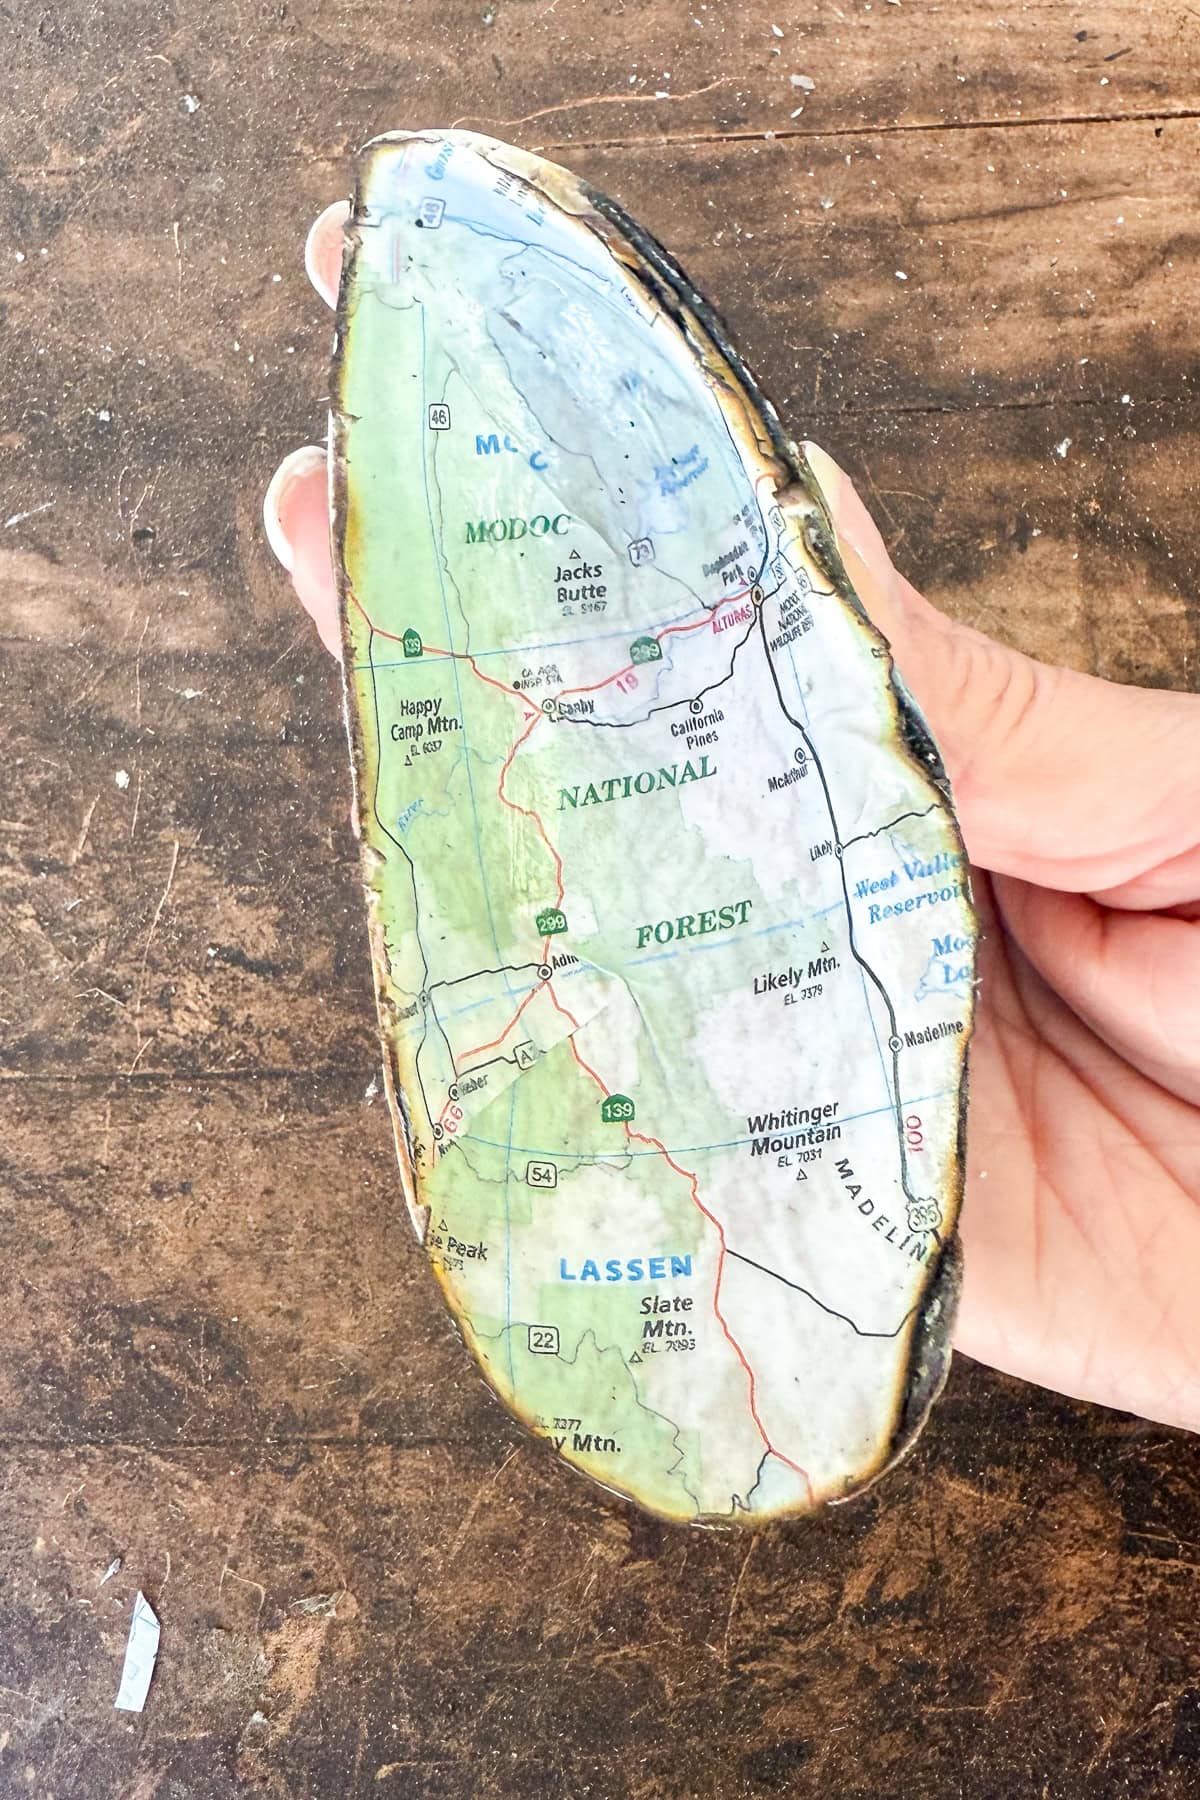

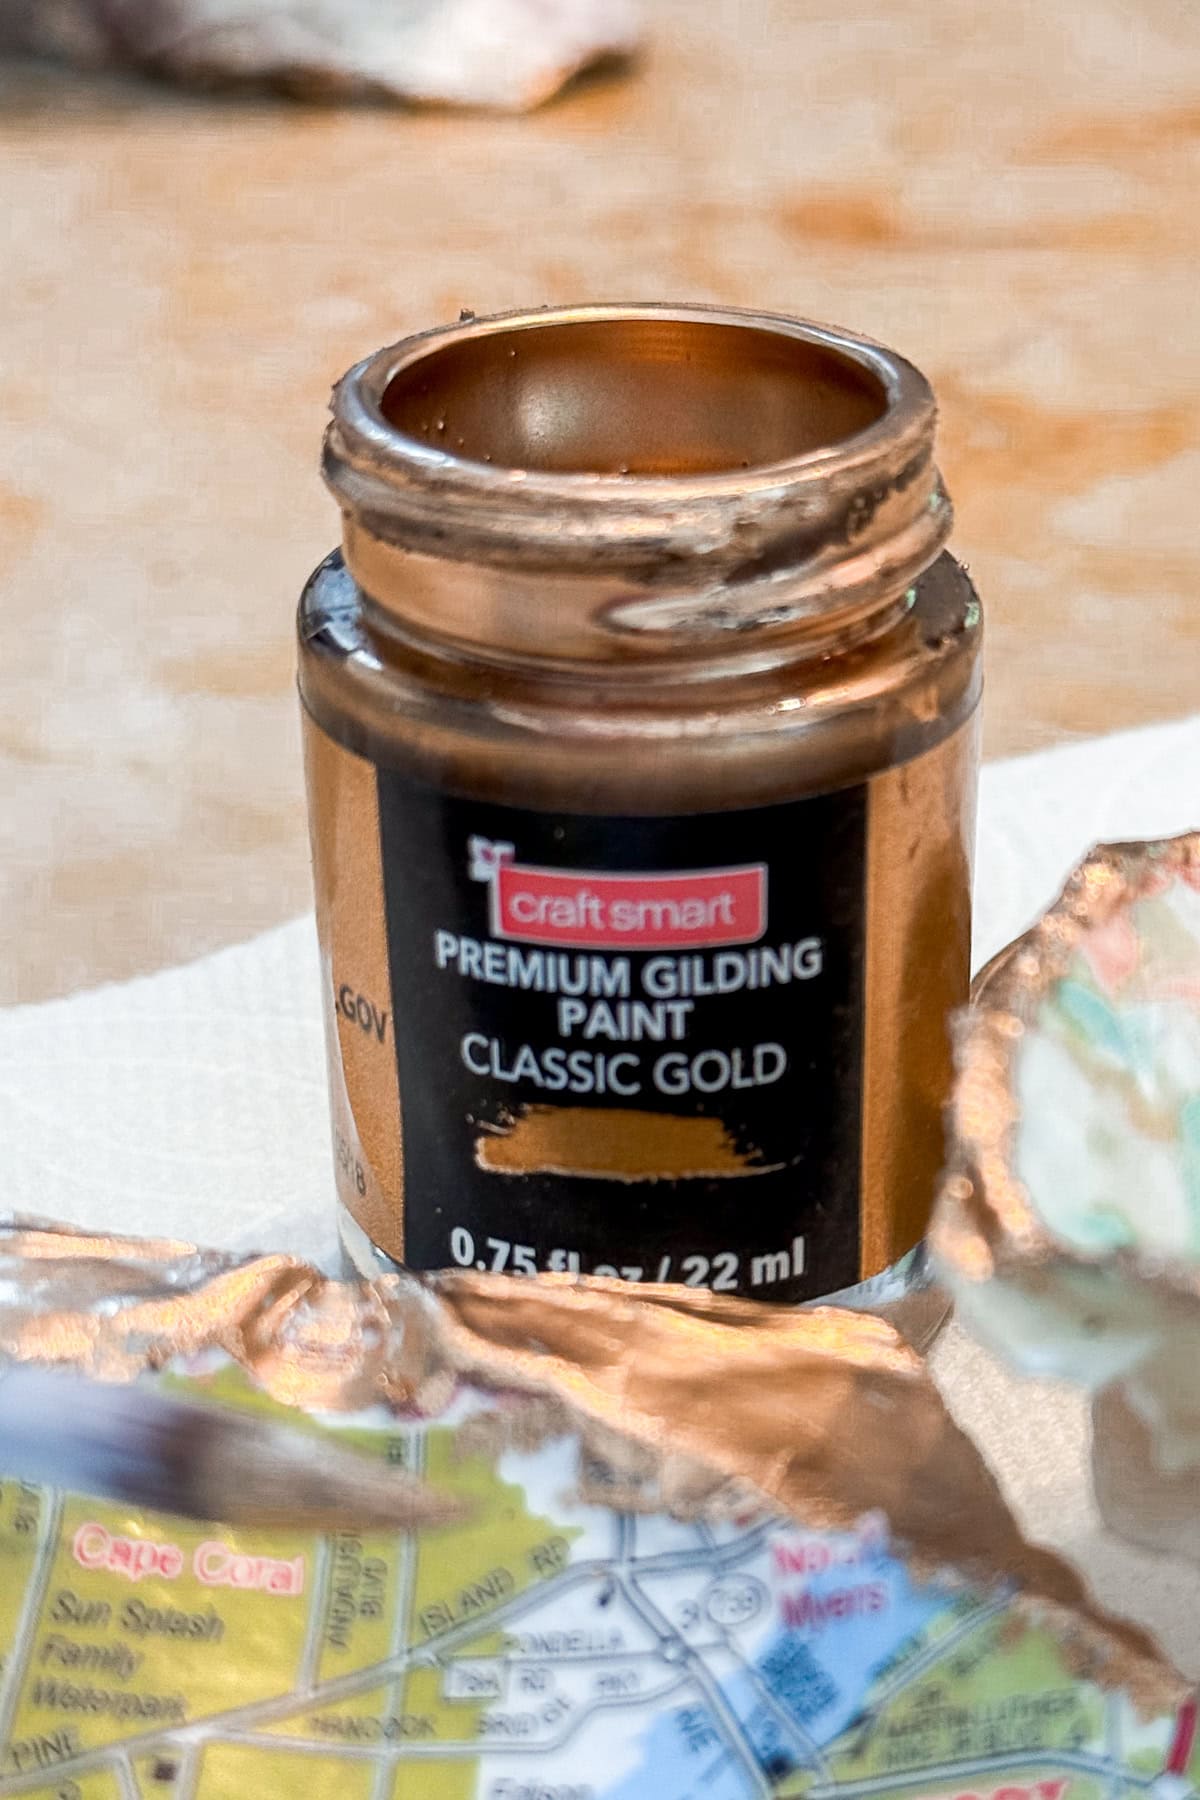
Step 7: Adding a Touch of Gold Foil
If you have burned your edges, you can leave them with this rustic look.
If you prefer something a bit more polished, you can add a simple edge of liquid gold foil using a small paintbrush
Step 8: Applying a Top Coat
To finish your piece, you can apply an additional coat of Mod Podge for a durable seal, or use a clear acrylic spray for a smoother, more professional-looking topcoat.
Choose matte if you prefer a soft, natural finish that lets the map details shine subtly, or opt for gloss if you want a polished, high-shine look that gives the shell a glazed appearance.
Just make sure everything is fully dry before sealing, and allow your topcoat to cure completely for the best results.

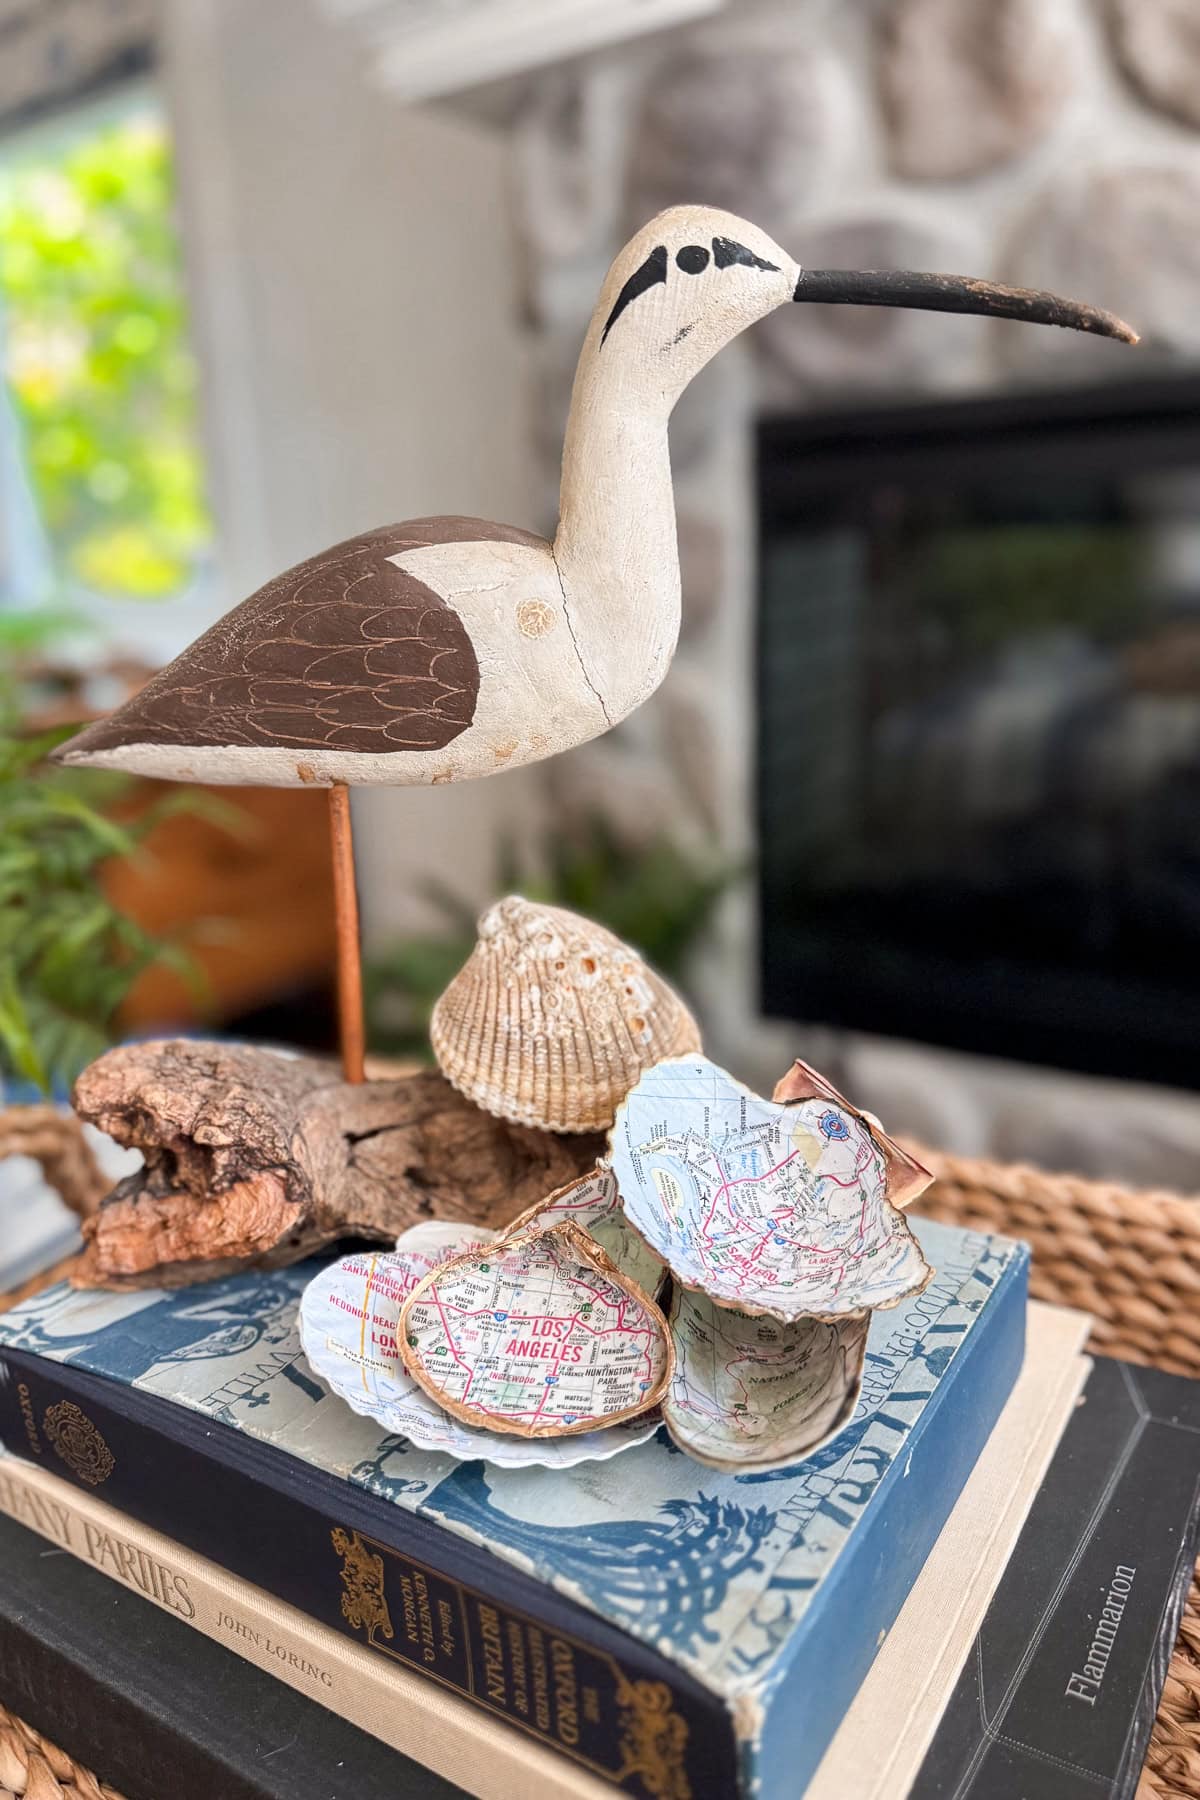
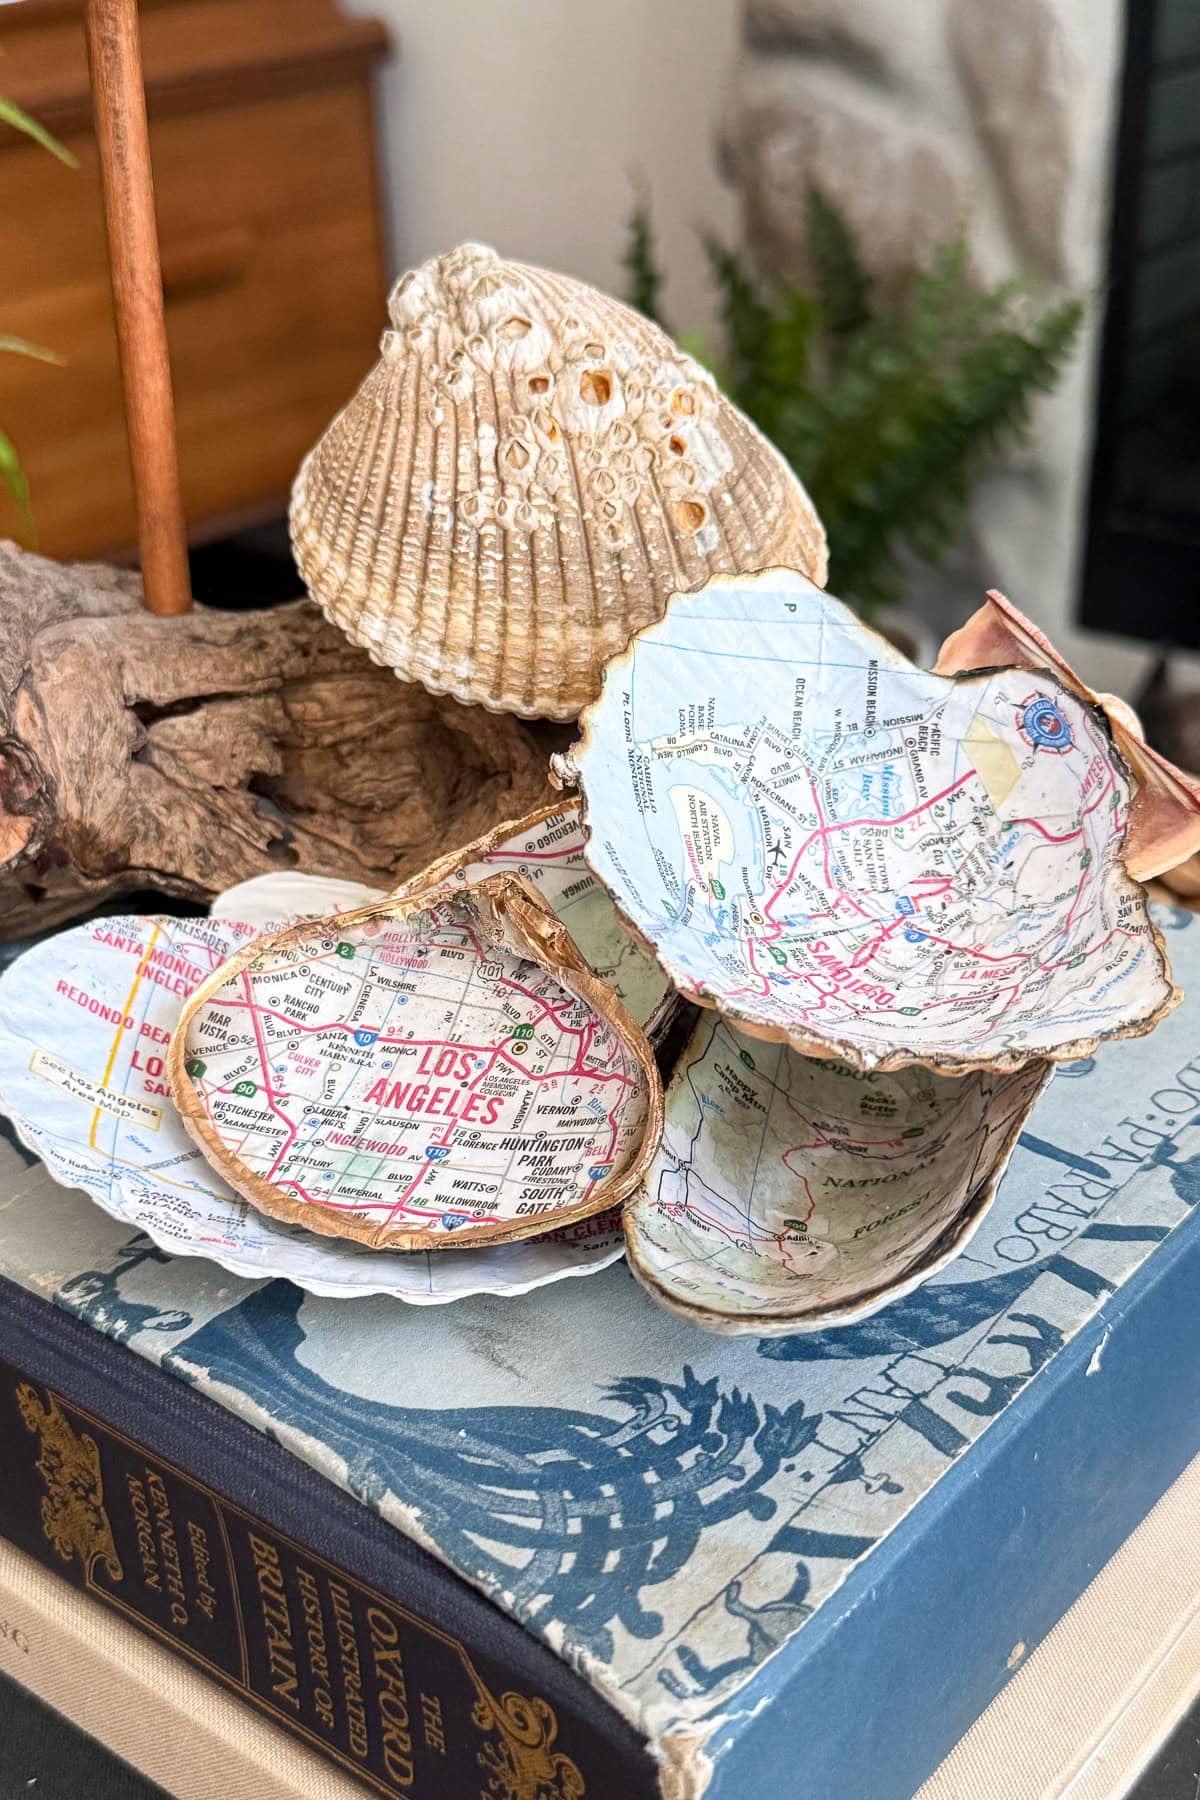
🌍 Creative Ways to Use Your Map-Decoupaged Shells
- Place cards for coastal-themed dinners or weddings
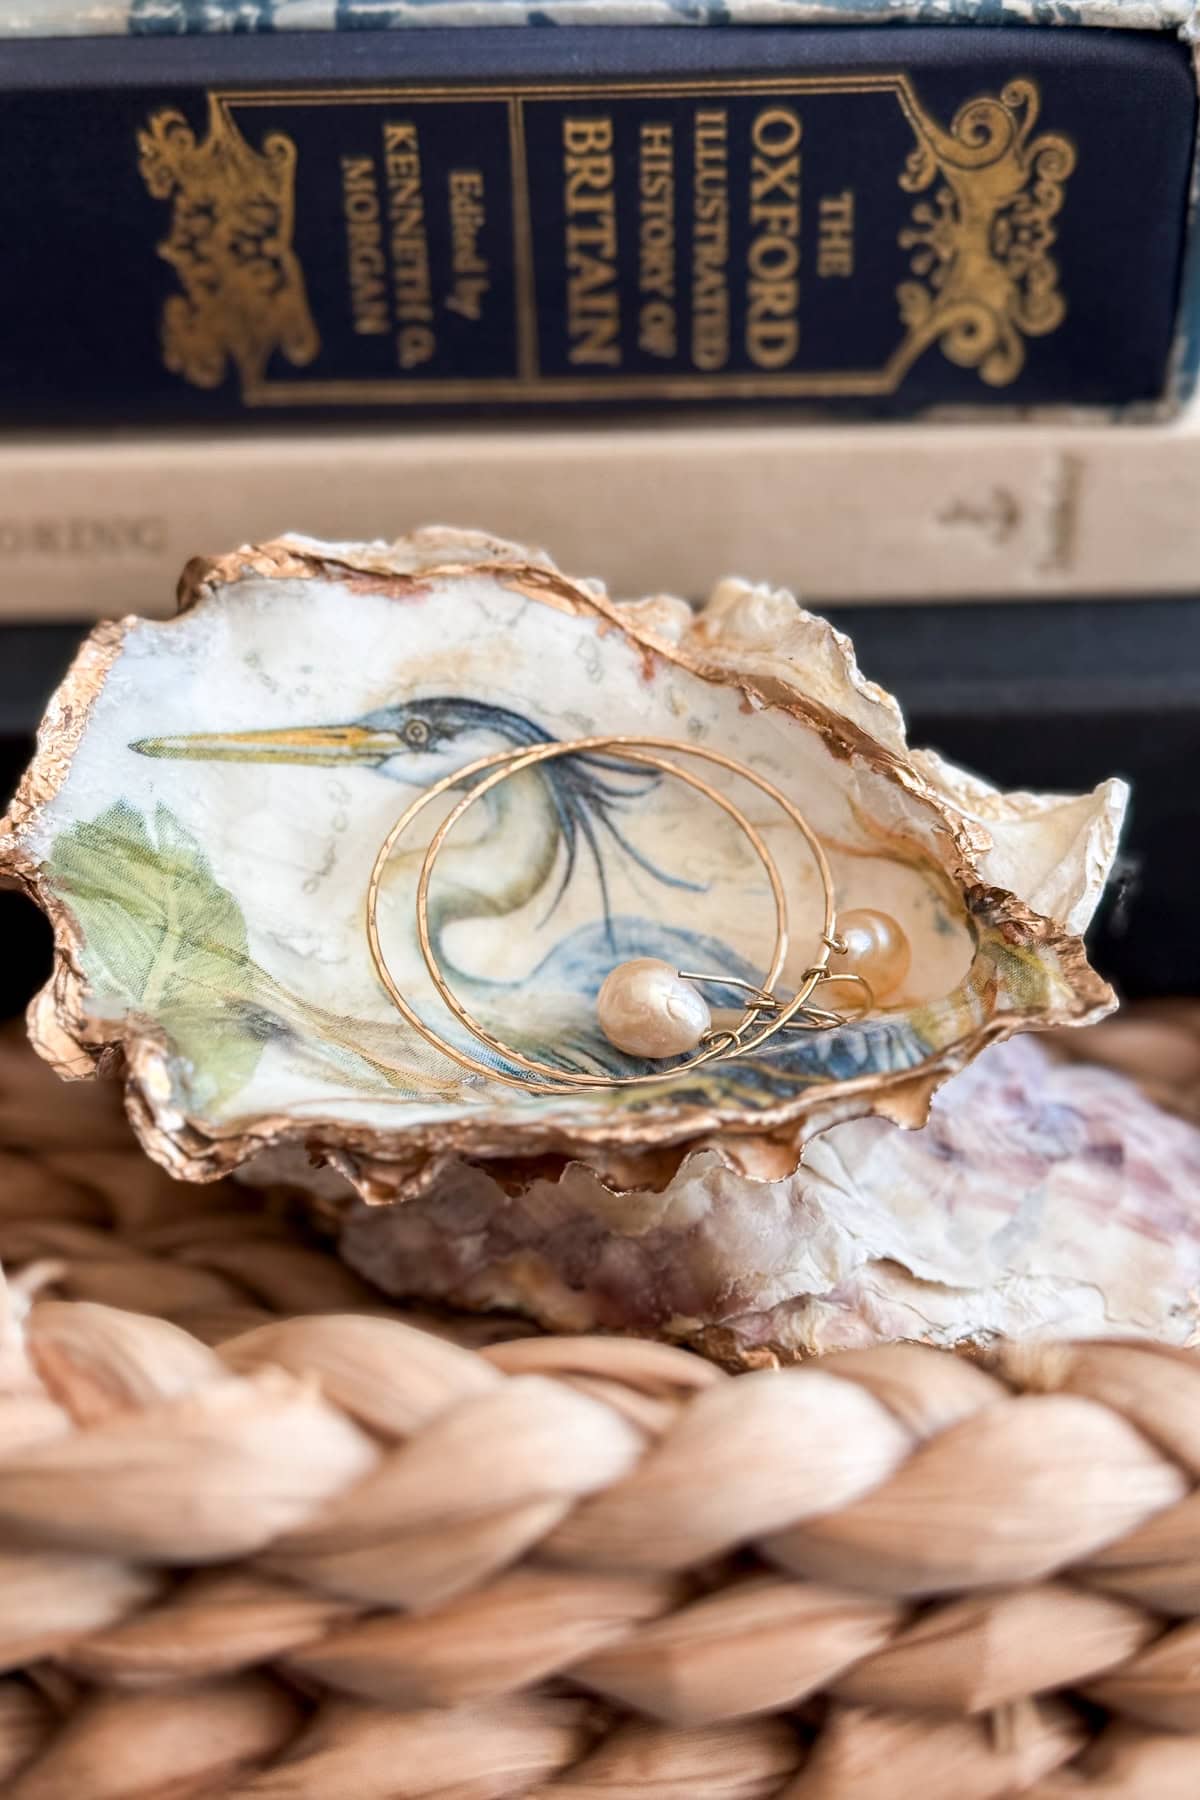
- Jewelry or ring holders on a vanity
- Meaningful gifts tied with ribbon and a note
- Ornaments or magnets for a travel-inspired holiday
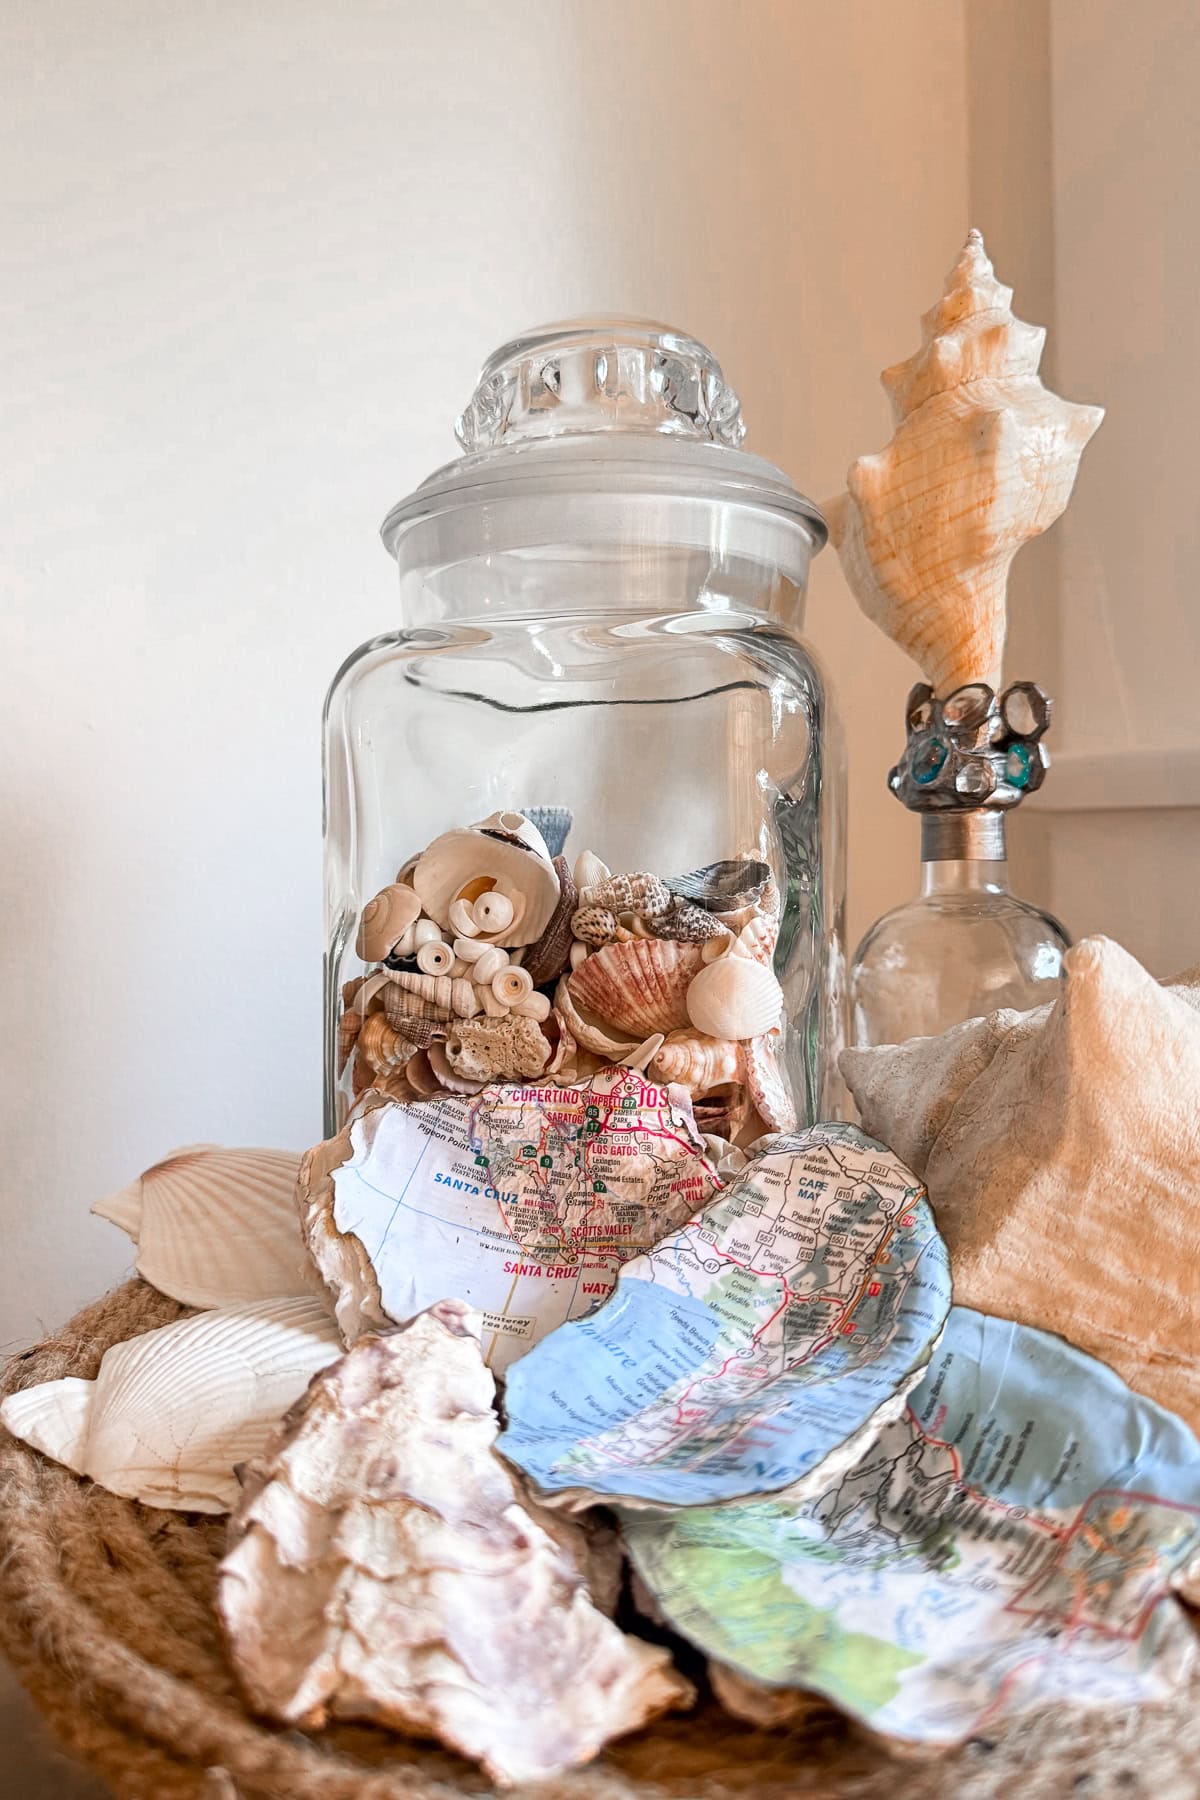
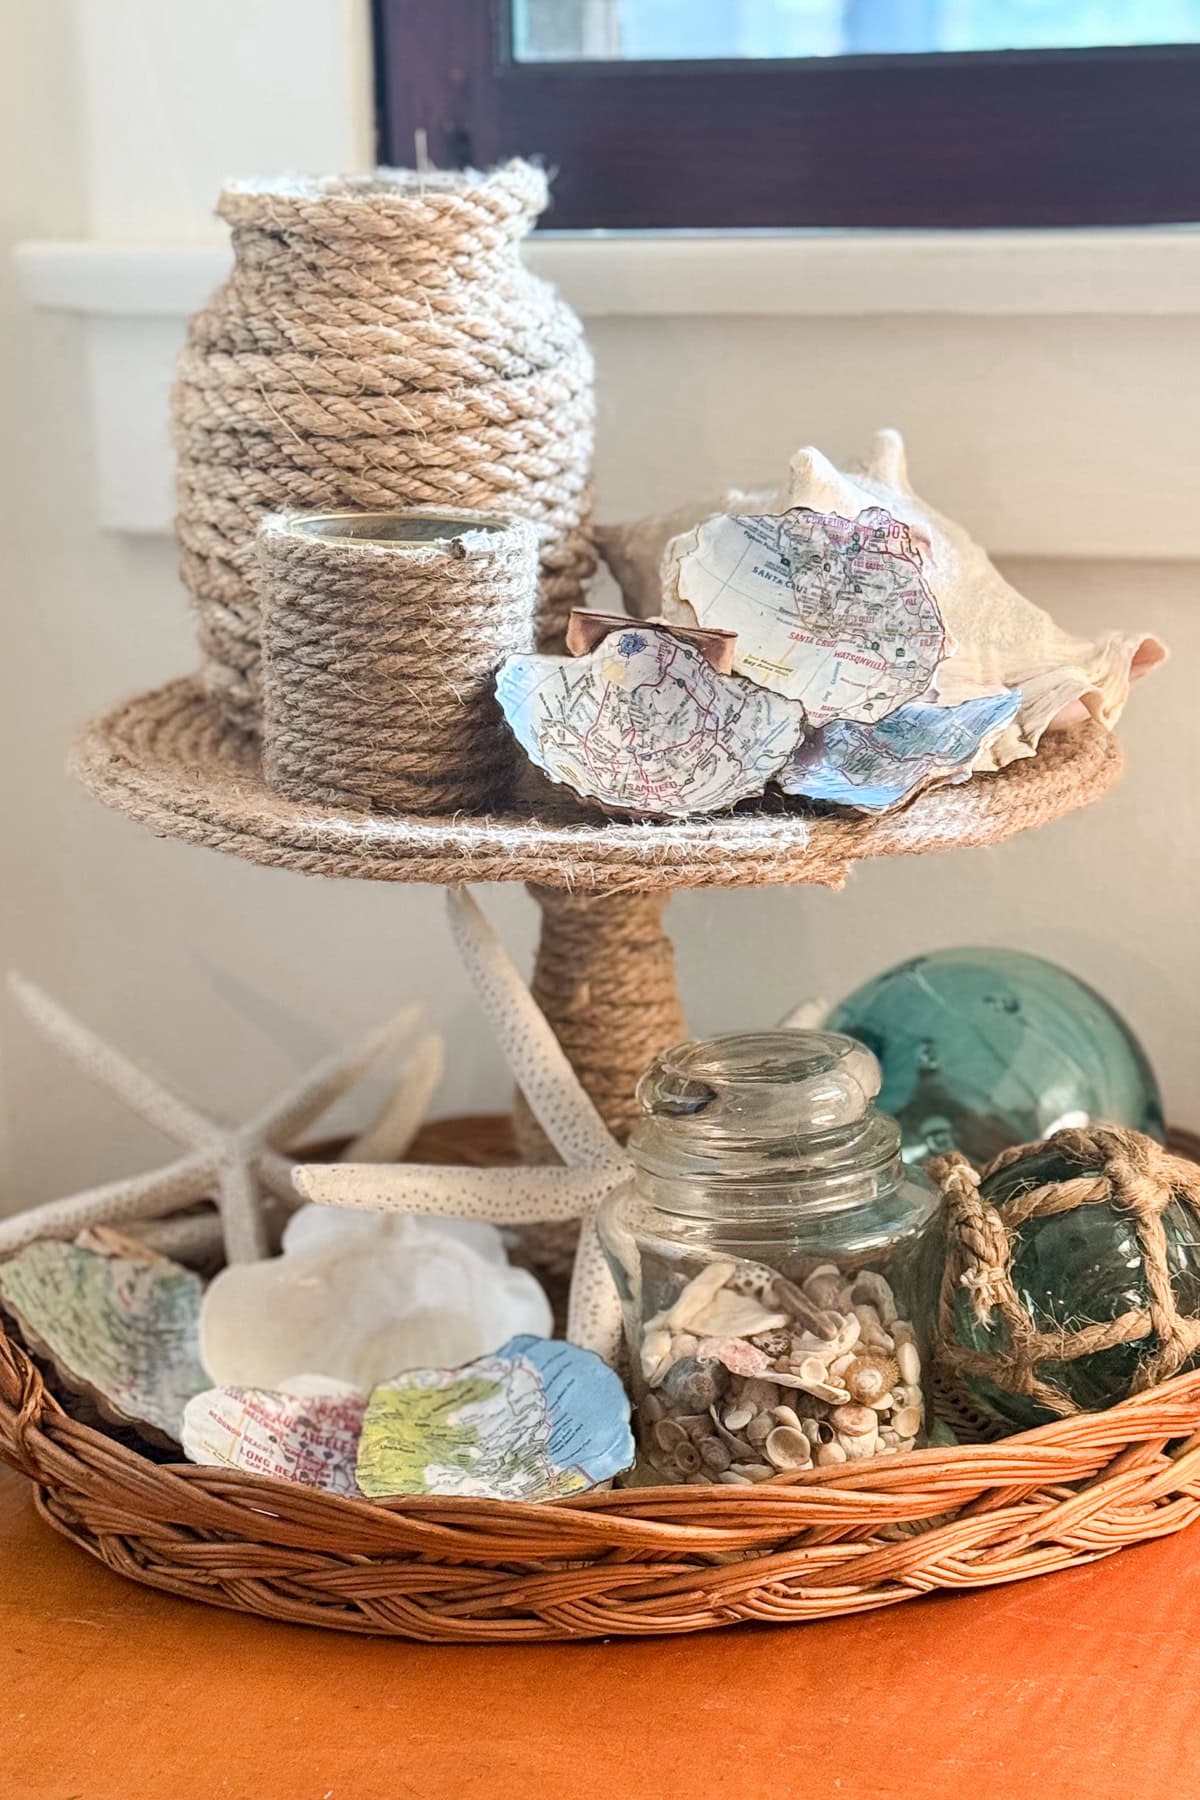
- Display your shells in a jar or on a tray for a nice coastal touch


🌀 Other Decoupage Shell Ideas
If you love this look, there are so many creative ways to personalize your decoupaged shells:
- Try decoupaging shells with fabric for a cozy, cottage-style finish like I did with these fun wall art picture frames. Lightweight cotton or linen works beautifully and adds soft texture to your design.
- Use napkins in florals or vintage patterns to decoupage seashells and create romantic, delicate accents—perfect for use as jewelry trinket holders or thoughtful gifts.
- Make a wood bead garland featuring decoupaged shells for a meaningful keepsake. You can use shells decorated with maps, fabric, or quotes to add a sentimental touch to your home decor.
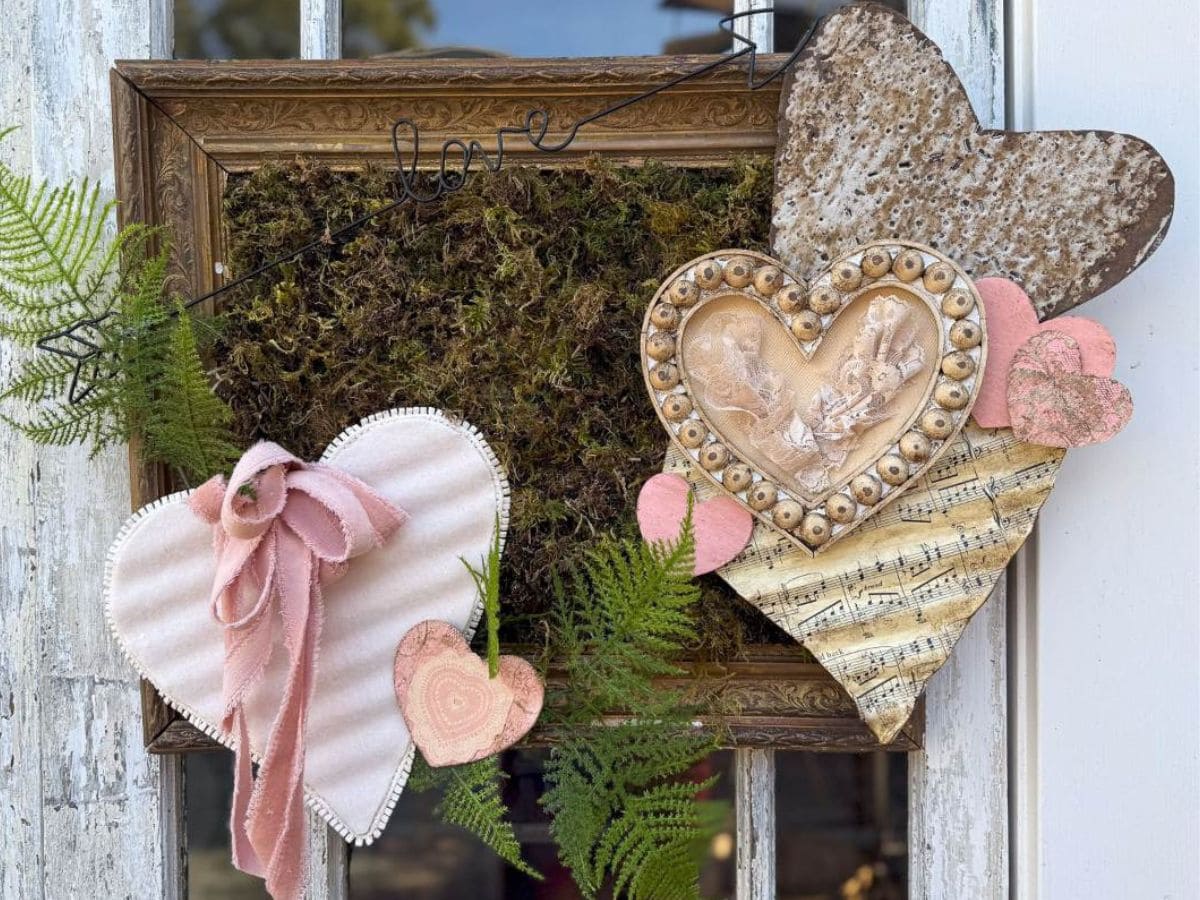
- Experiment with paper scraps, book pages, or old postcards Try experimenting with paper scraps, vintage book pages, or even old postcards for a unique and personal touch. Whether it’s a passage from a favorite novel or a handwritten note, the result is always meaningful and beautiful. Honestly, you can decoupage just about anything with Mod Podge—like this sweet little rabbit I covered in sheet music scraps!

❓ FAQs
Can I use laser or inkjet printed maps?
Yes! Inkjet prints work great. Just let the ink dry completely to avoid smudging when applying Mod Podge.
What if my shell is uneven or bumpy?
You can try to sand the inside of the shell down until it is smooth.
Use thinner paper and lightly mist it with water before applying. This helps it mold to curved surfaces more easily.
Can I use napkins or tissue paper instead of maps?
Absolutely! The process is the same, and napkins with map prints or coastal designs work beautifully.
Which shells are best for decoupage?
Oyster, scallop, and clam shells are all great options. Their wide, curved interiors make them perfect for layering paper.
Other Summer Tutorials from WM Design House
If you love this project, you might also enjoy some of my other favorites.
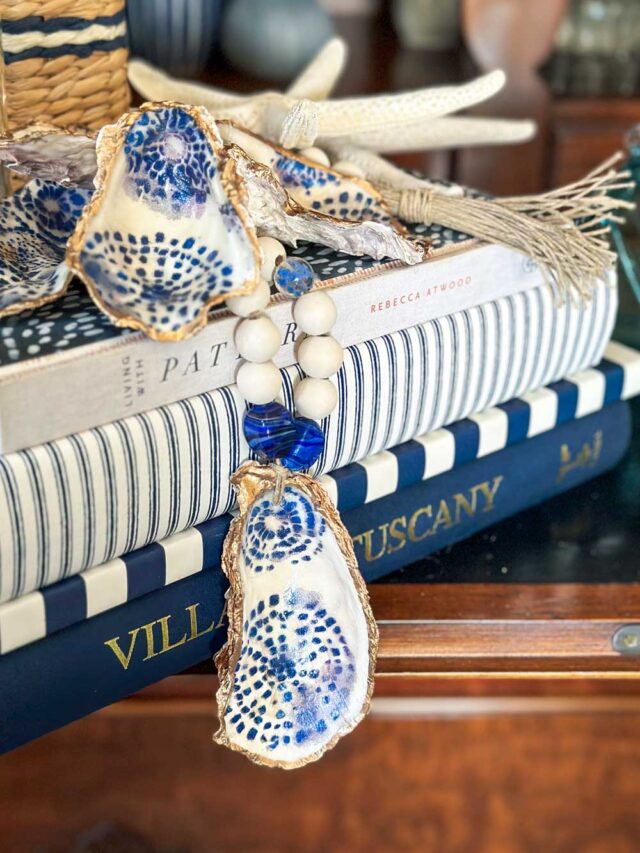
How to Make a Beautiful Wood Beaded Garland with Oyster Shells
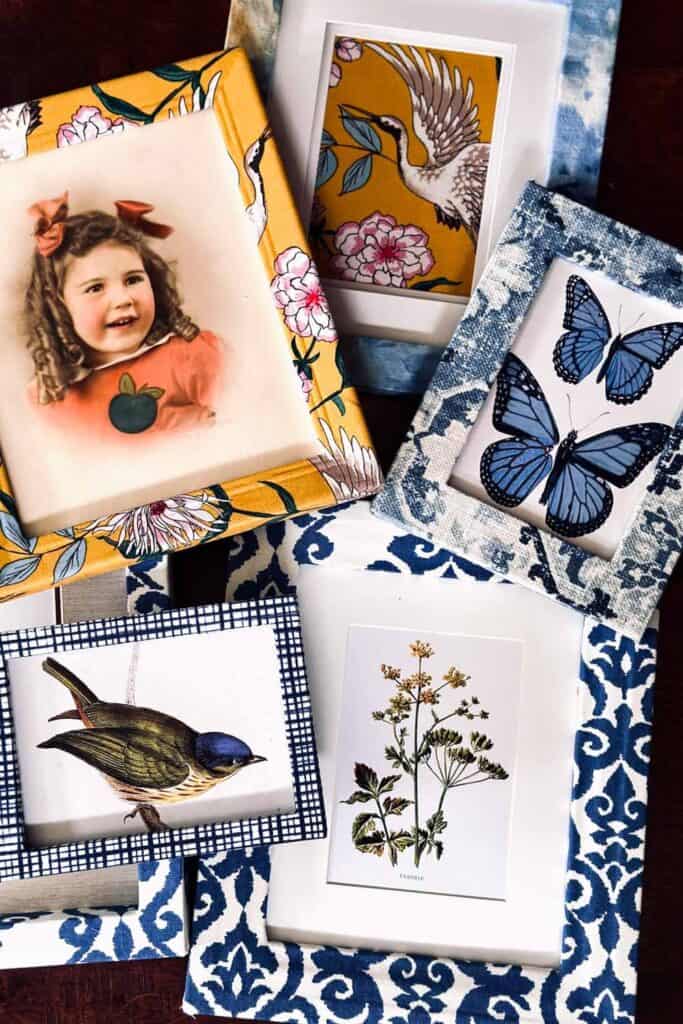
How to Make Easy DIY Fabric Wall Art for Your Home
Spring Decor at its best: (Sharing over 20 DIY ideas)
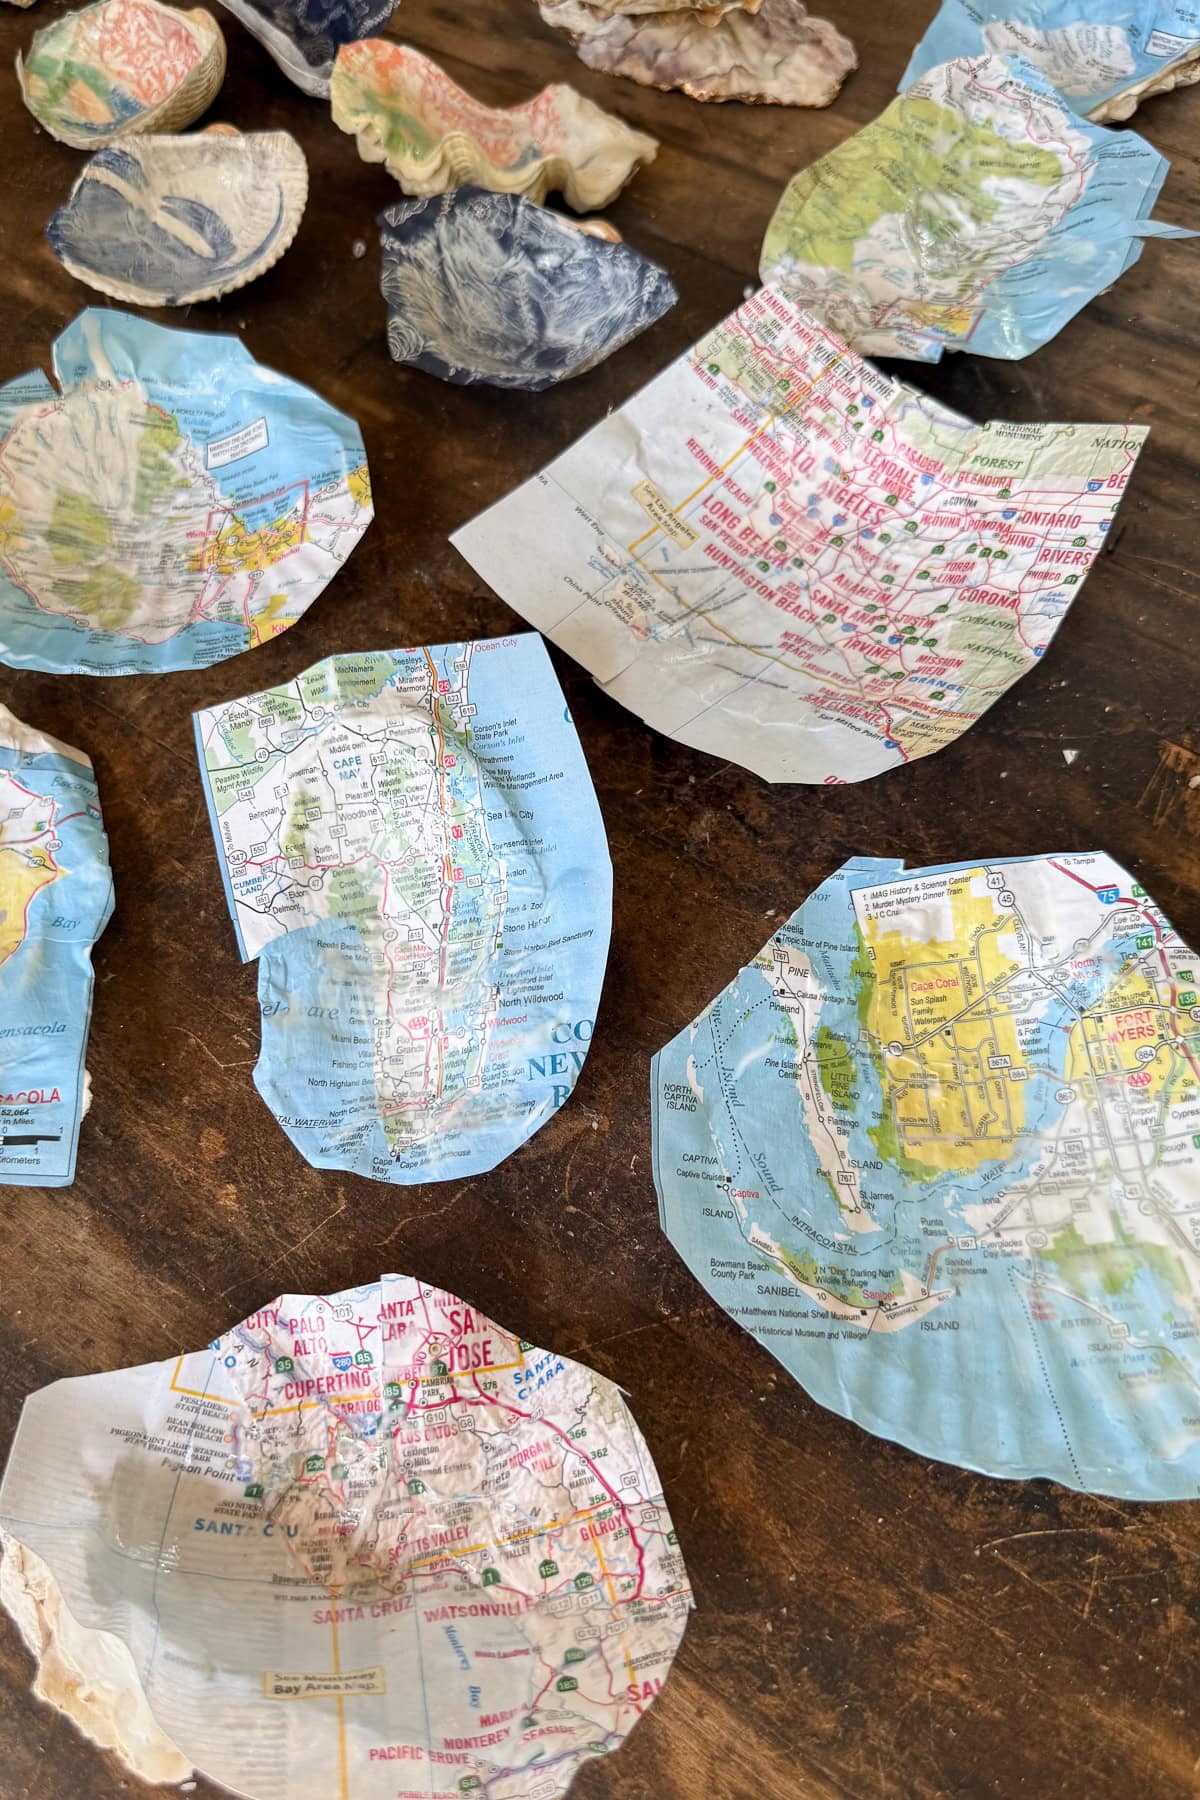
Don’t miss the amazing map-inspired creations from the rest of the Handcrafted Society! Click through to see the beautiful and creative projects these talented bloggers have dreamed up—you’re sure to be inspired.


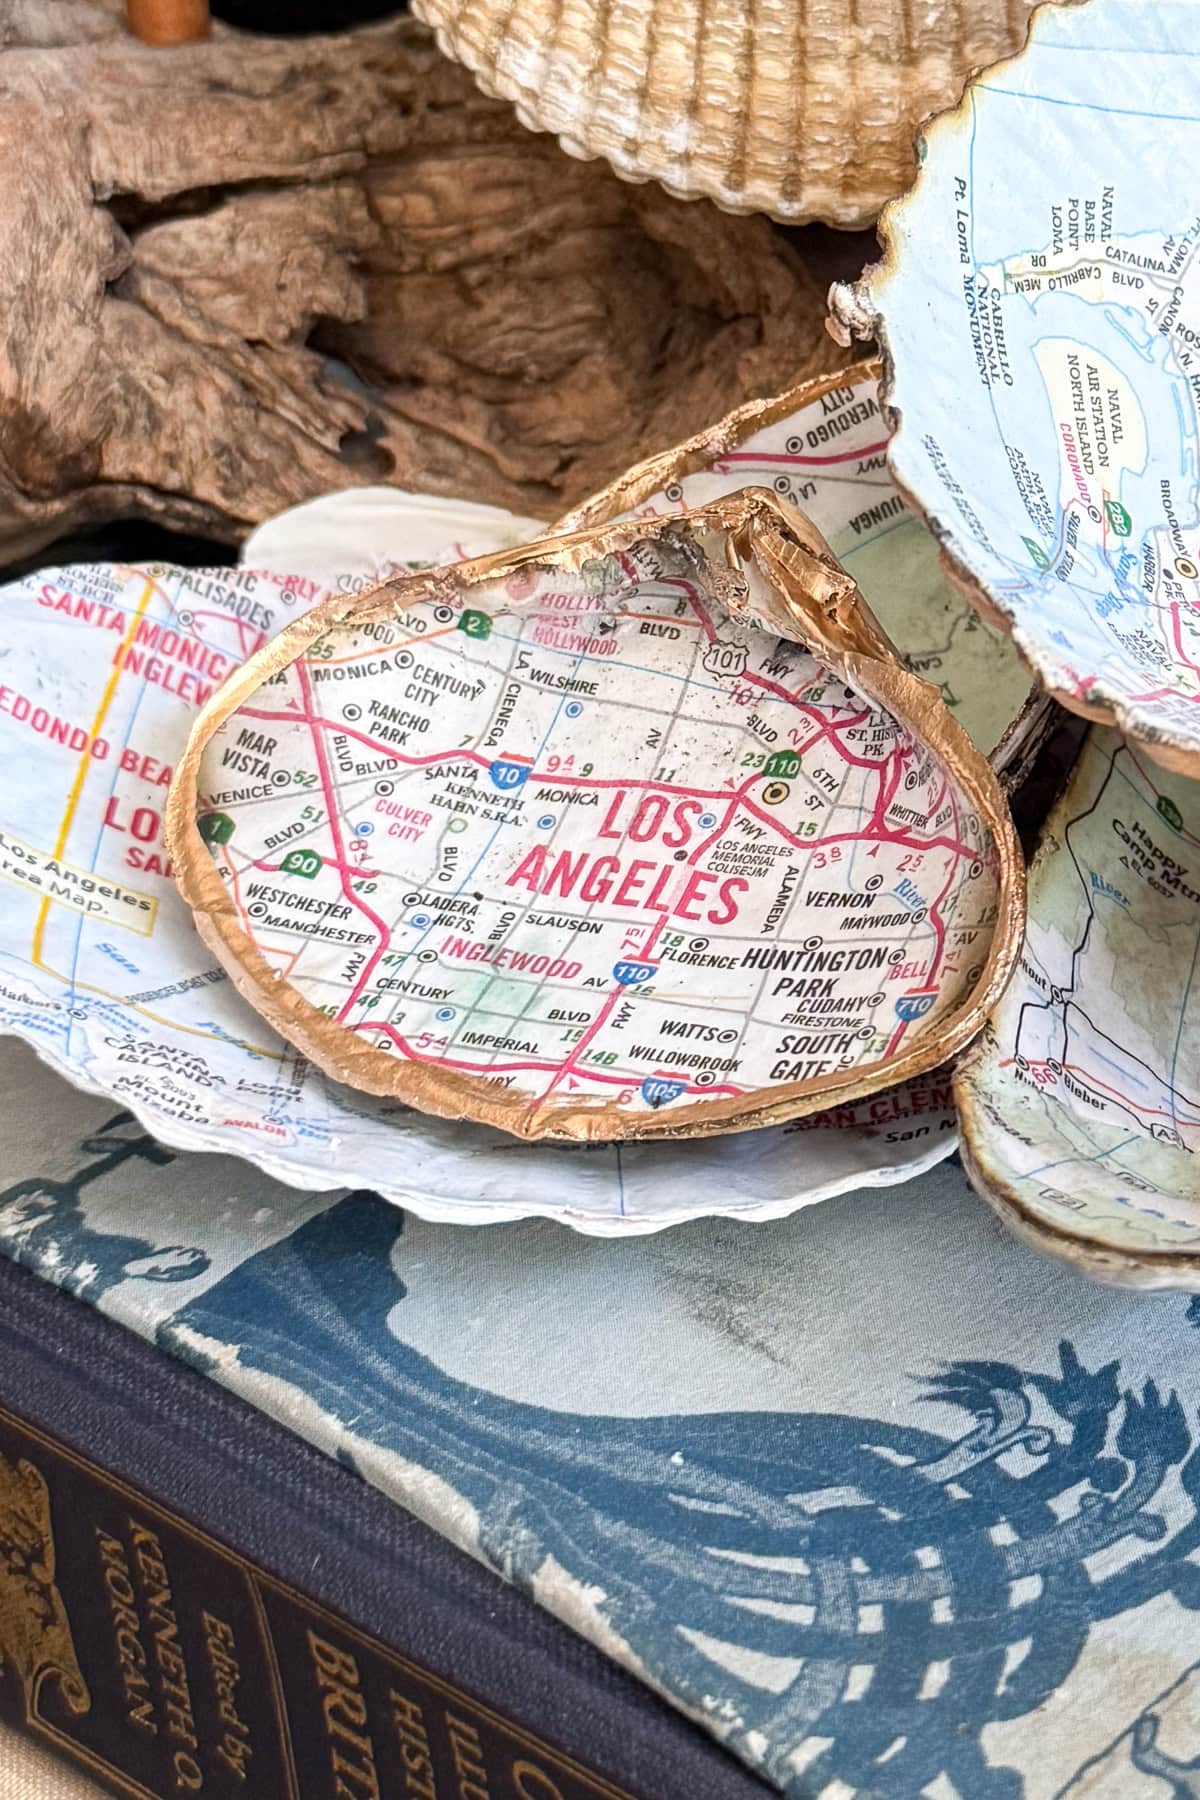
There’s something truly special about turning everyday objects into keepsakes. These map decoupage shells are not only beautiful—they’re full of heart, memory, and meaning. Whether displayed in a bowl, gifted to a loved one, or simply tucked away as a reminder of your favorite adventures, they’re sure to bring a little joy wherever they go.


Did you make this craft?
We would love to see what you have created, so mention us @wmdesignhouse or tag us using #wmdesignhouse so we can see your creations!
More about me!

Hello, I’m Wendy – a dedicated homemaker with a deep passion for decorating, gardening, cooking, and crafting. I find joy in harmonizing beautiful elements to fashion a space that is both comfortable and inspiring. I will help you create a beautiful home, one project at a time.

Wendy, these are DARLING! I have a bunch of shells waiting for me to decoupage. I am inspired and will be sharing this on my Saturday Meandering’s post tomorrow. I seem to have dropped off your distribution list, so I will sign up again. Not sure how that happened but I miss getting your posts, you creative doll!
Hi Wendy – I love your decoupaged shells. They are a great way to create a meaningful summer memory keepsake. I particularly liked how you suggest putting a meaningful place from the map on each shell. (Like a favorite beach). Always fun participating in the HCS with you.!
Wendy
Such a cute idea. I love decoupage and may have to try this for my beach cottage. I’ll also share a link on my DRA next Sunday.
These are lovely Wendy. The idea to use maps full of memories is a great choice to decoupage shells. Thanks for the inspo friend. XO- MaryJo
I already have oyster shells so I’m ready to jump into this project! So glad to know about burning the edges, which is so smart! Wendy, your shells are absolutely gorgeous on display!
SO cool, Wendy!! LOVE the little map snippets inside the found shells. What a pretty piece of decor!
Hi Wendy! This is a truly creative and fun way to make keepsakes from places you’ve traveled! I enjoyed seeing all the pretty ways you displayed them!
Such a cute idea Wendy!
Gorgeous as always!!! Move over napkins, maps are taking over.
Wendy, love these. Sweet and full of memories.
What a great way to decorate with the memories of travel! These would be make such great gifts and are a charming addition to any room’s decor. Pinned!
Wendy, love some decoupage shells. These shells with the maps decoupage in them are beautiful.