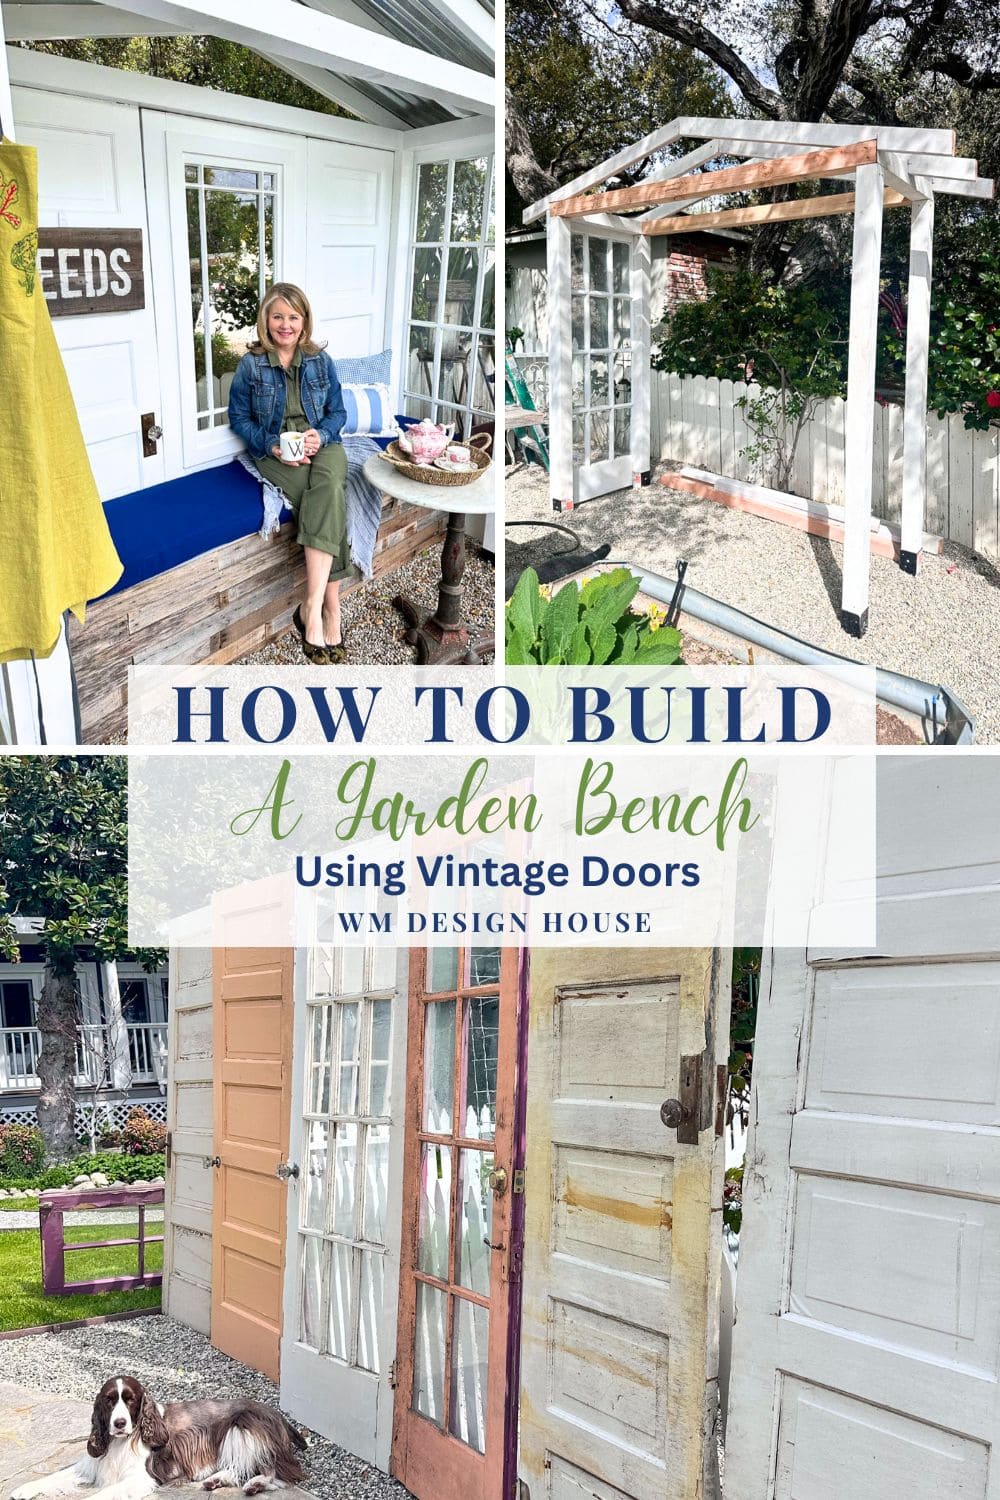
How to Build a DIY Garden Bench With Old Doors
This step-by-step guide teaches you how to transform old doors and a few additional materials into a beautiful DIY garden bench.

On my blog WM Design House, I may sometimes use affiliate links, which means a small commission is earned if you purchase via the link. The price will be the same whether you use the affiliate link or go directly to the vendor’s website using a non-affiliate link. Read my full disclosure policy here.
A DIY Garden Bench made with Old Doors
Crafting a DIY garden bench from vintage wooden doors is the perfect project if you want to infuse your garden with character while staying on budget. This approach gives new life to old materials, making it an eco-friendly choice and allowing you to create a one-of-a-kind piece that reflects your style.
In this post, I’ll show you how to transform old wooden doors into a stunning garden bench. Along the way, I’ll share essential tips and tricks to help you achieve a beautiful and functional result. Let’s dive in and create a stylish, sustainable addition to your outdoor space!
Materials You’ll Need to Make A Garden Bench with Old Doors


Power Tools Needed
Tools
Step 1: Designate the Area in which the DIY Garden Bench will be constructed
Choosing the right spot for your DIY garden bench is key to making it both functional and inviting. Consider the light and shade the area receives—whether you prefer a sunny spot or a cool, shaded retreat. Ensure there’s enough space around the bench for easy access and movement, especially if it’s near other garden features.
Tip from Wendy: Choose an ideal location for your bench where you can relax and fully appreciate the beauty of your garden.
Step 2: Chalk Out the Designated Work Space
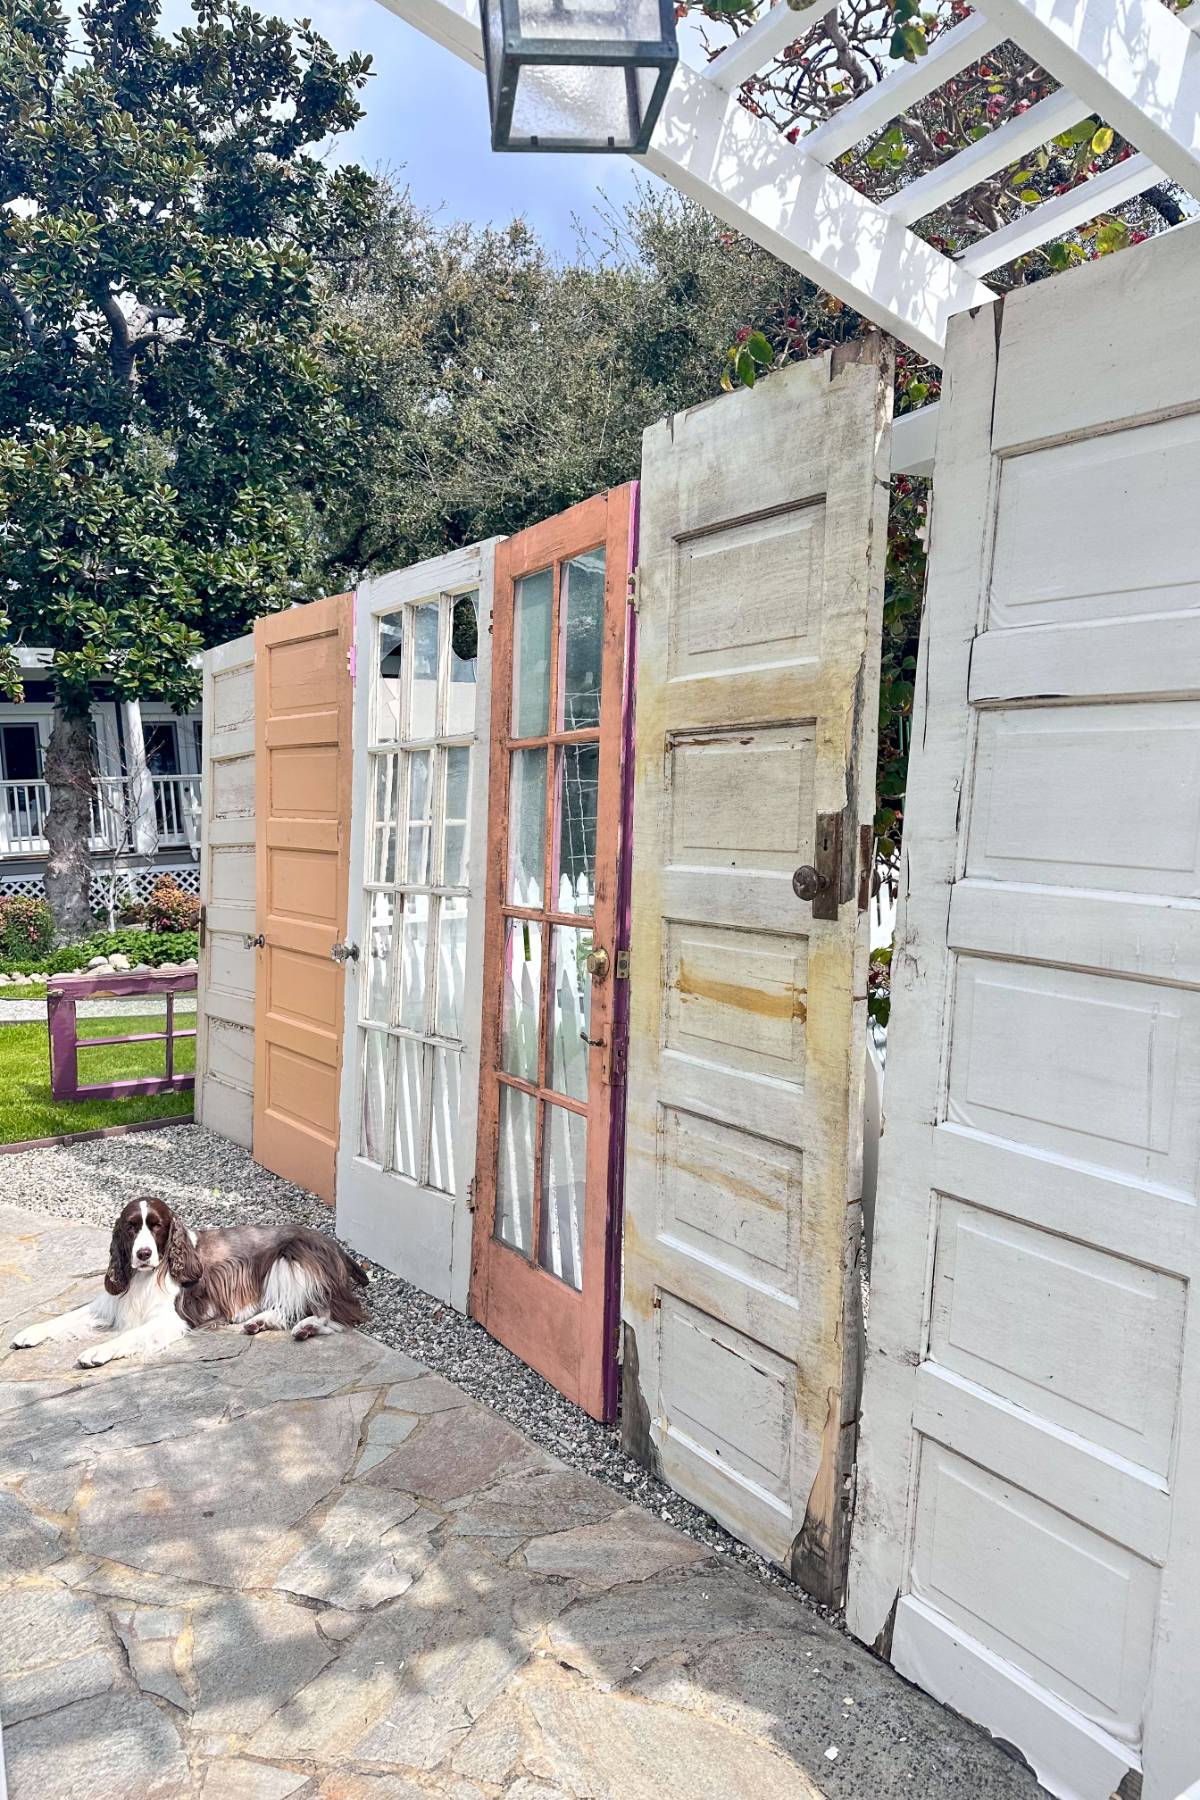
Use snap lines to outline the dimensions of your garden bench. If you’re using five doors, as we did—one for each side and three across the back—the bench should measure 39 inches deep by 103 inches wide, including the width of the 4×4 posts
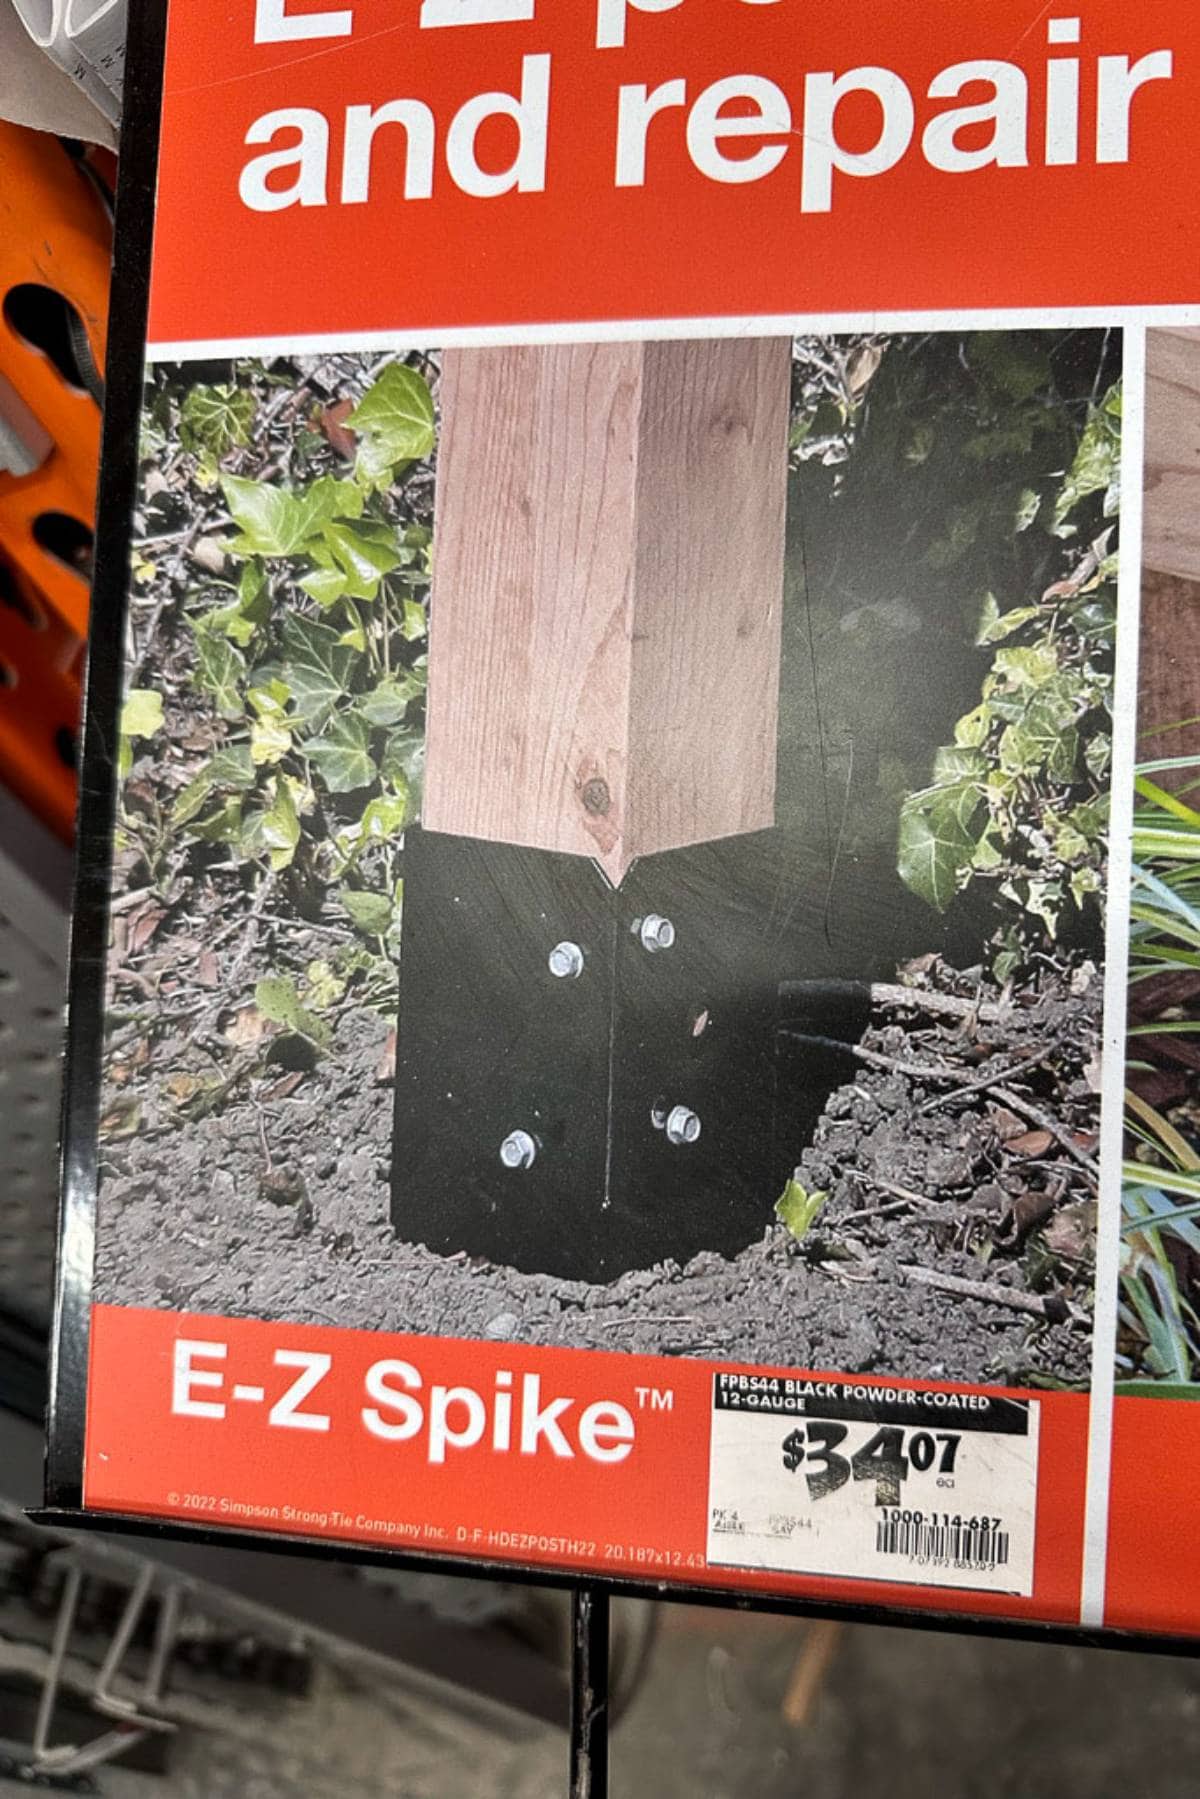
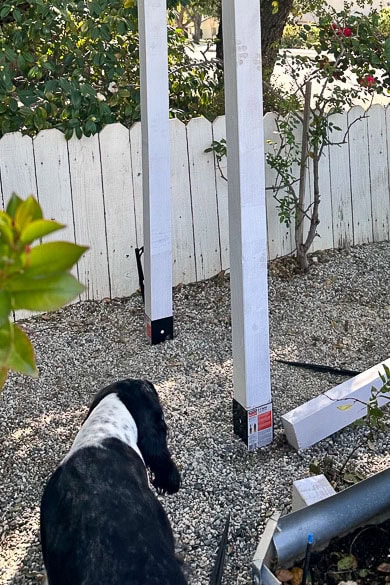
Step 3: Set the EZ- Spikes and Posts
Using the post-hole digger. create a small hole in each corner. Place the end of the EZ spike into the hole, Using the heavy duty mallet, hammer the spike all the way into the ground until firmly set.
Place the 4 x4 posts that have been sanded, primed, and painted into the EZ spike. Repeat this on each corner.
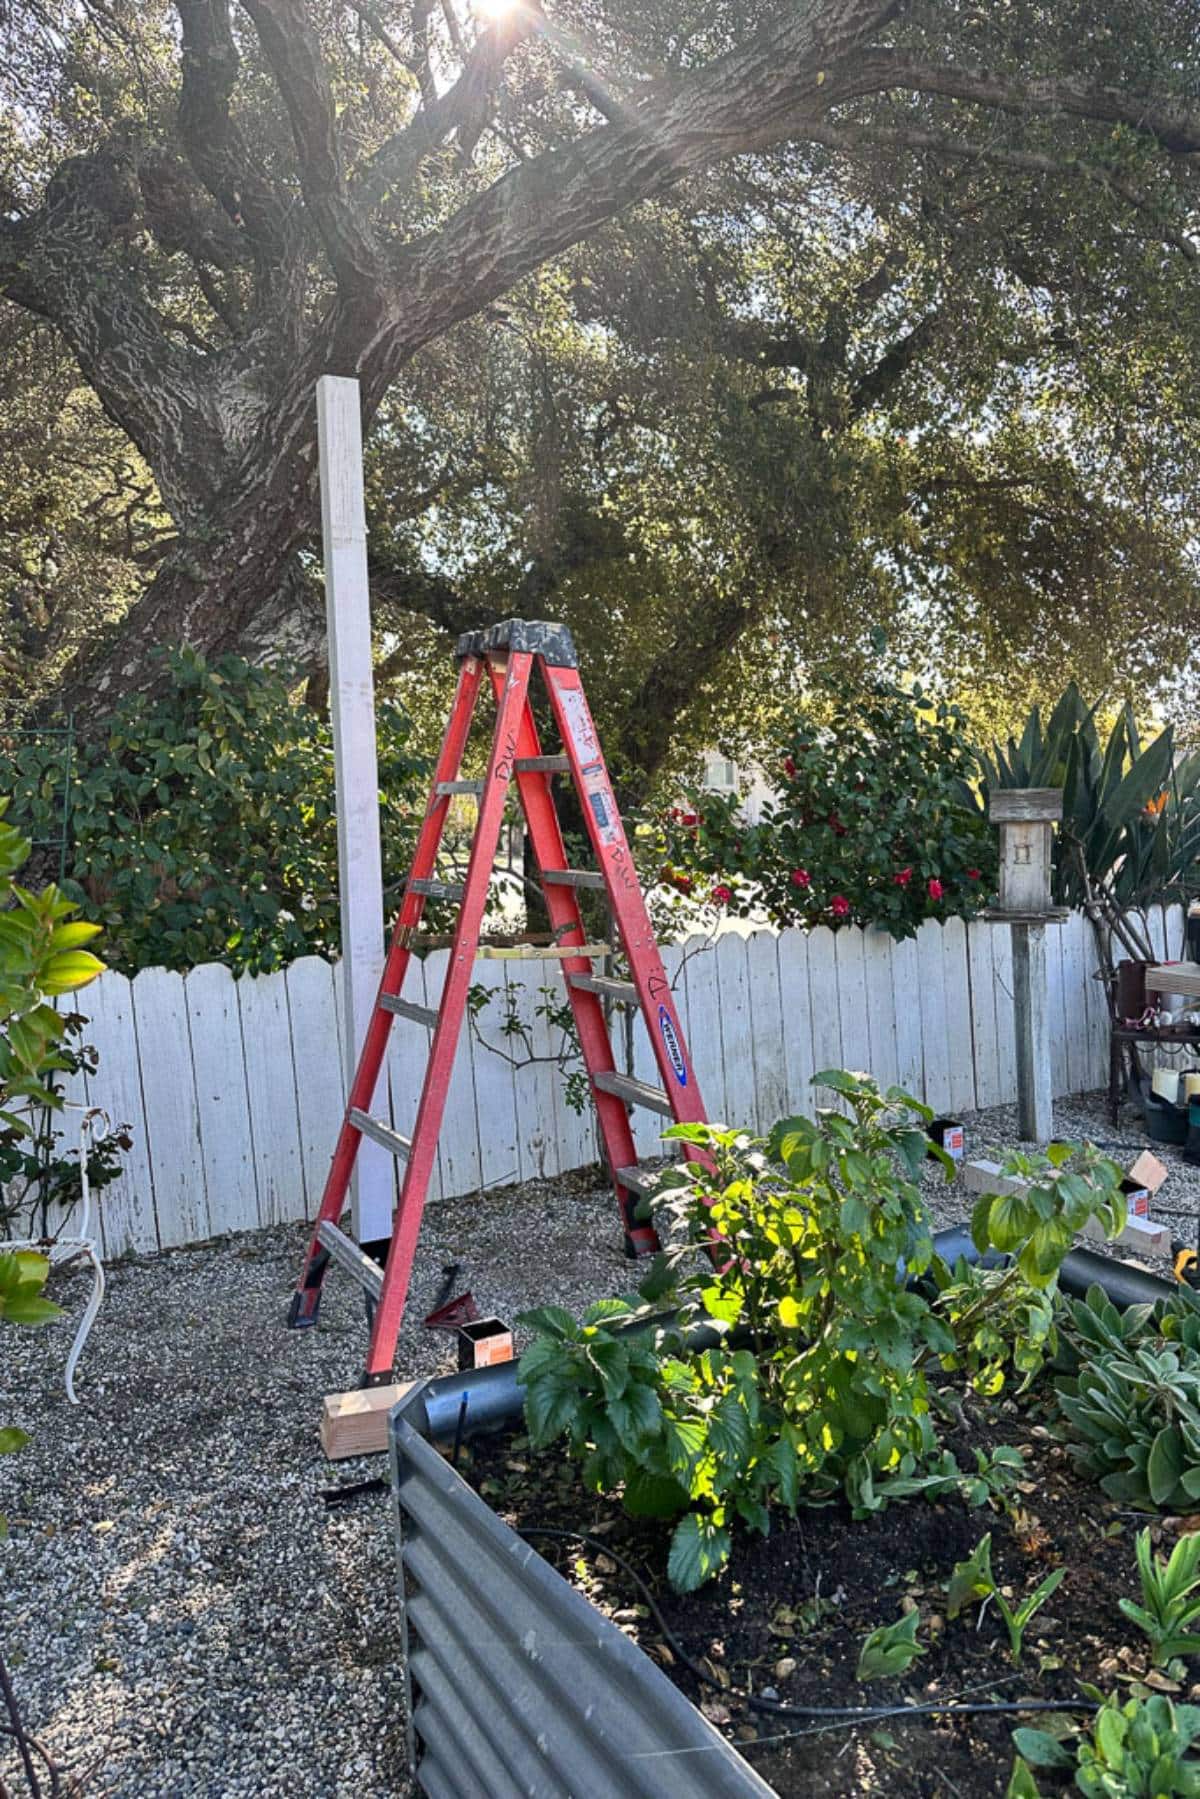
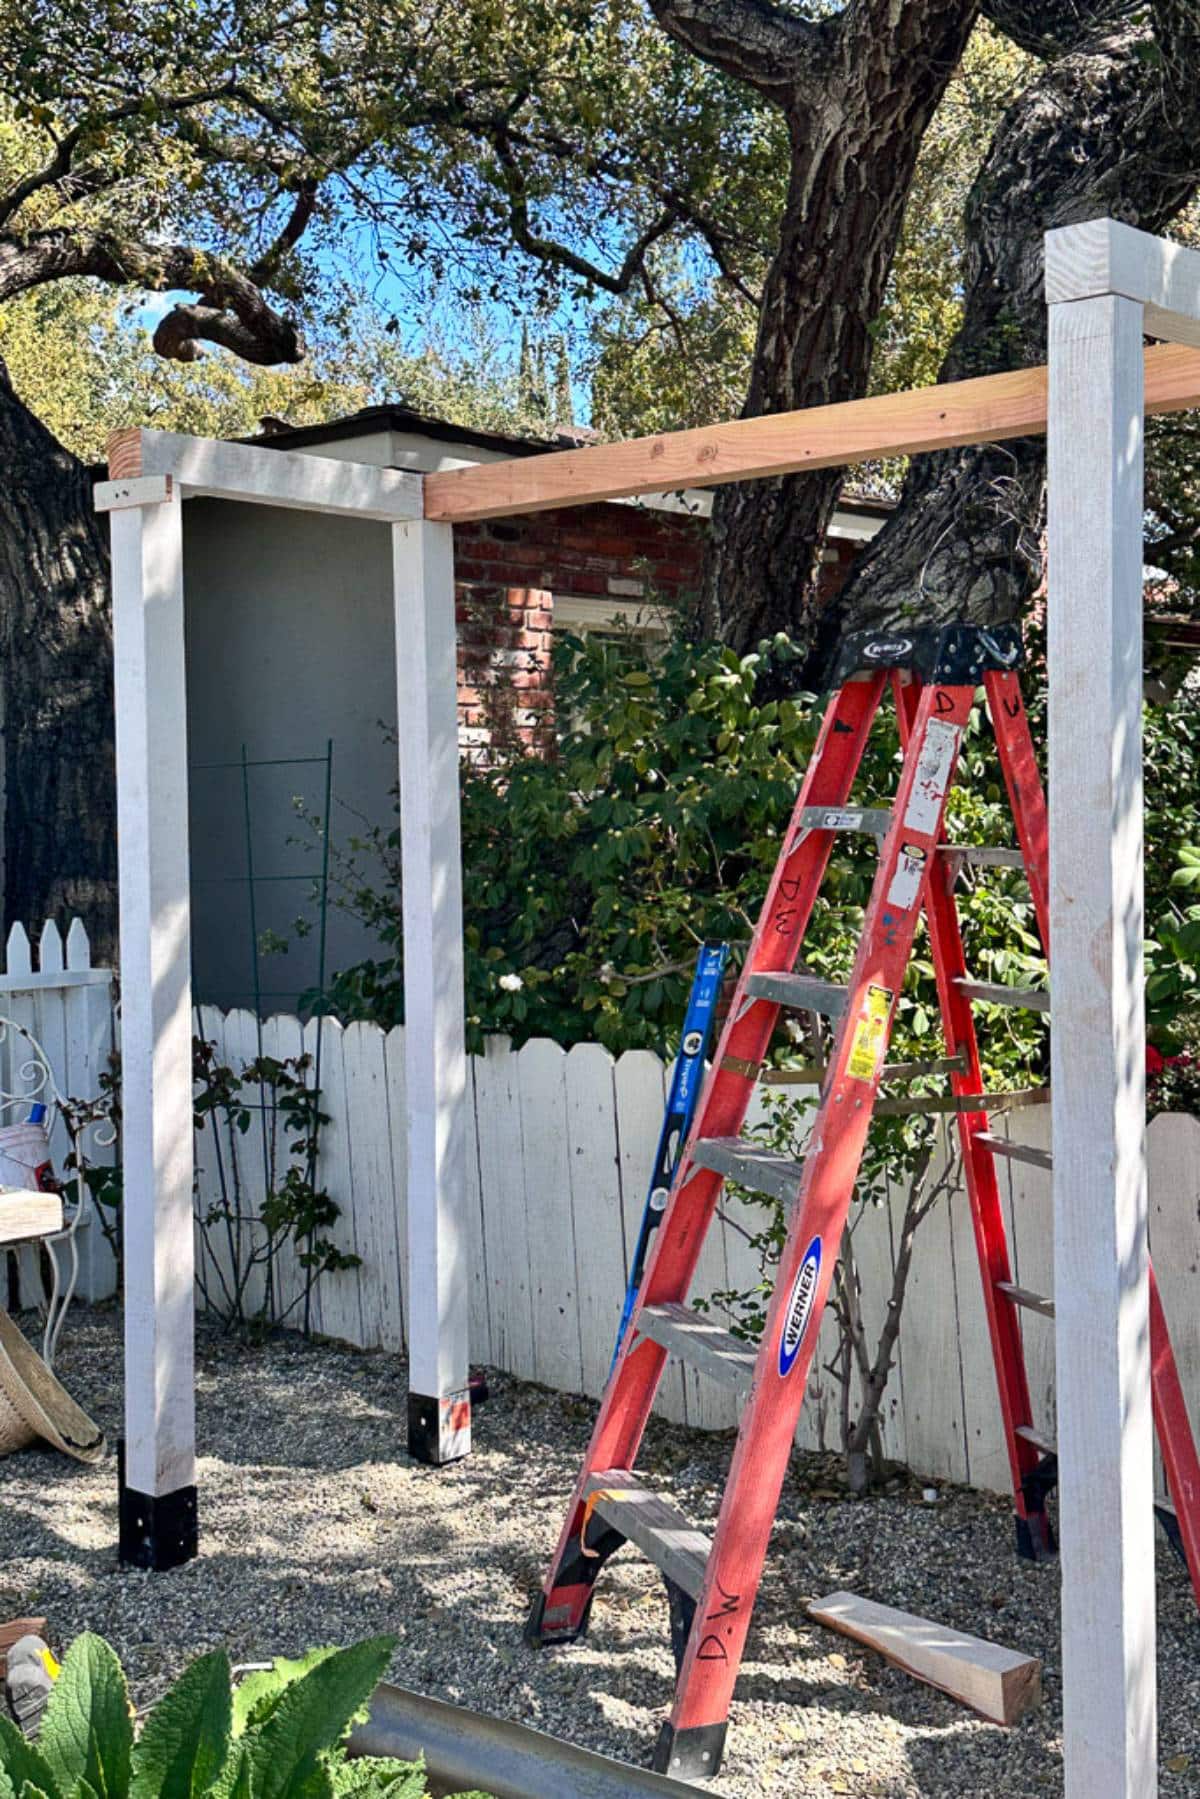
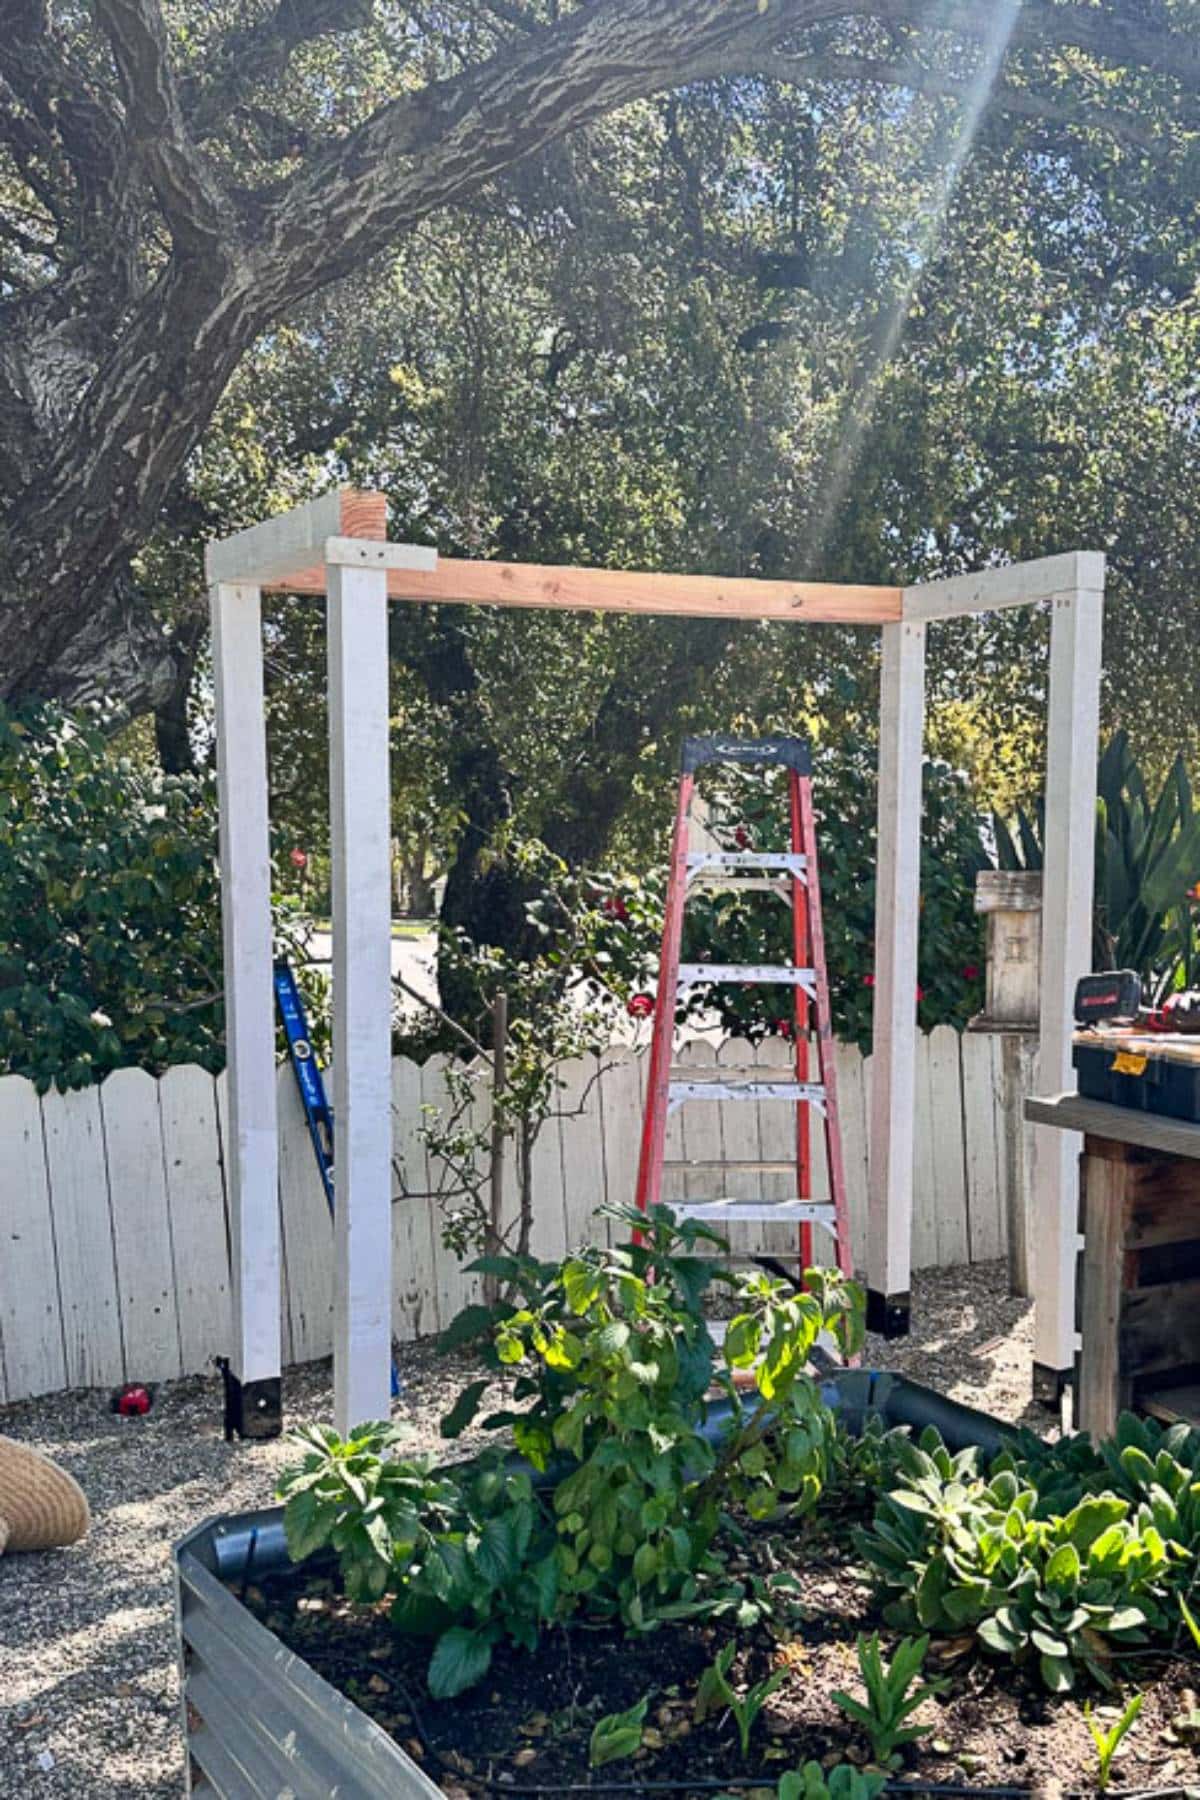
Step 4: Framing Doors and Roofline
Using 2x4s that have been sanded, primed, and painted, start framing the vertical and horizontal sections to prepare for setting the doors and constructing the roofline.
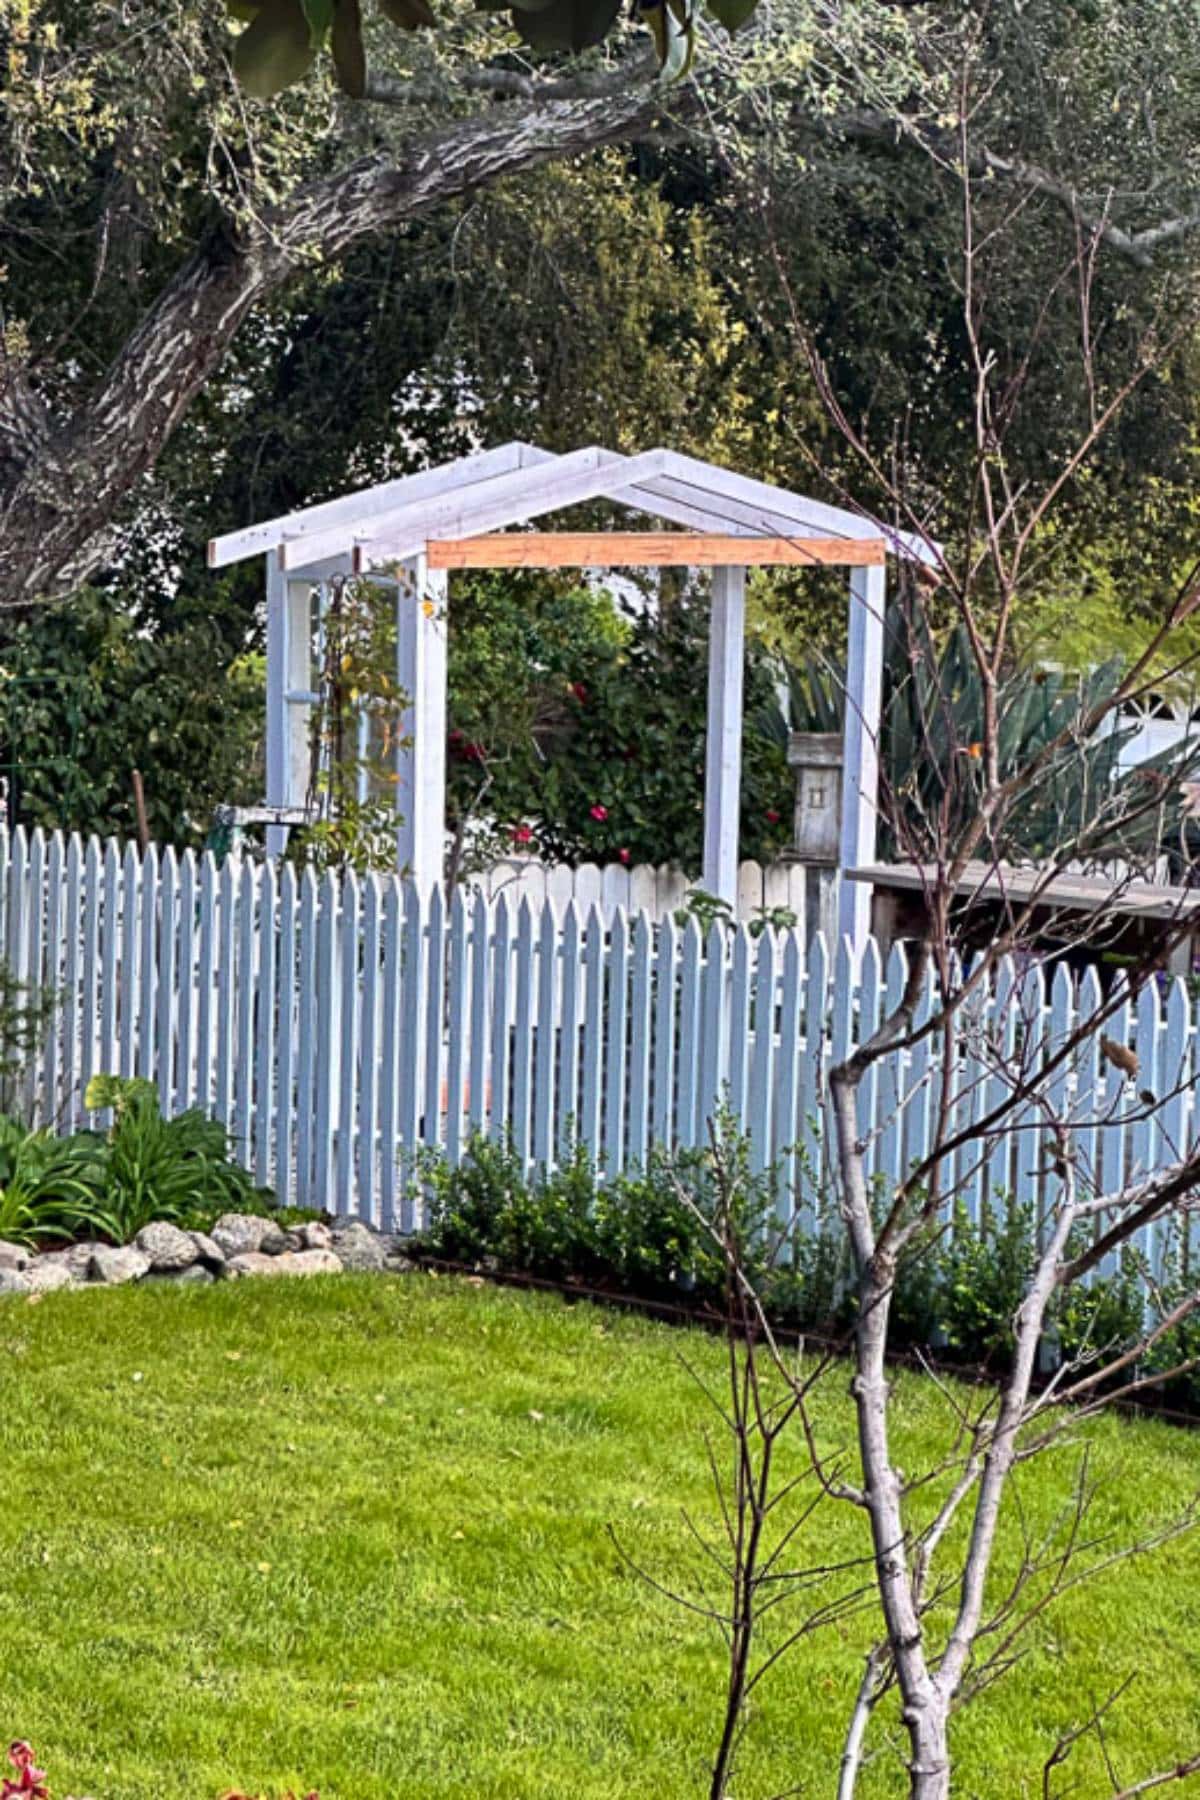
Step 5: Adding the Roof
Once the structure is framed with 2x4s that have been prepped, primed, and painted, it’s time to attach the corrugated galvanized metal sheets to the roof. Secure the metal sheets in place by fastening them with wood screws and washers. After that, attach the flashing roof cap to the peak of the roof using 1.5-inch wood screws and metal washers to ensure a sturdy and weatherproof finish.
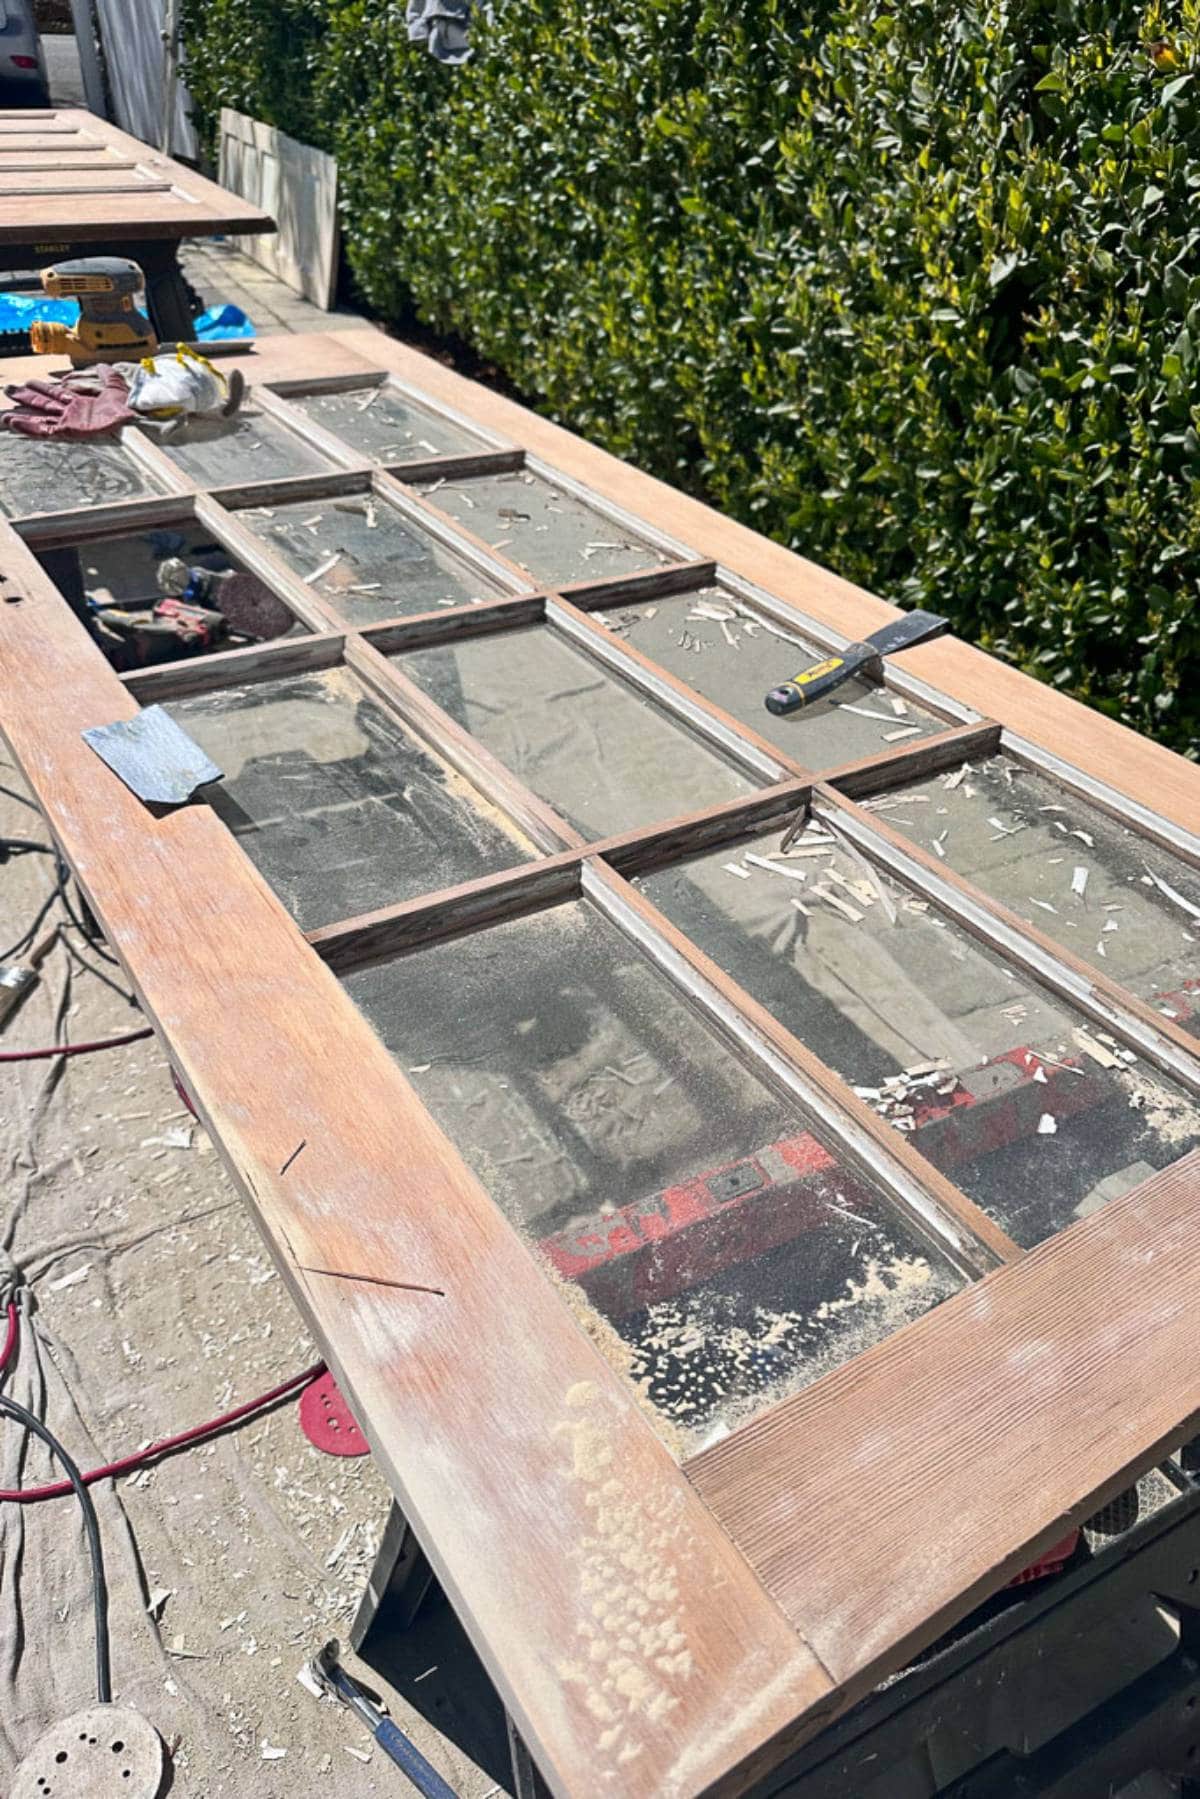
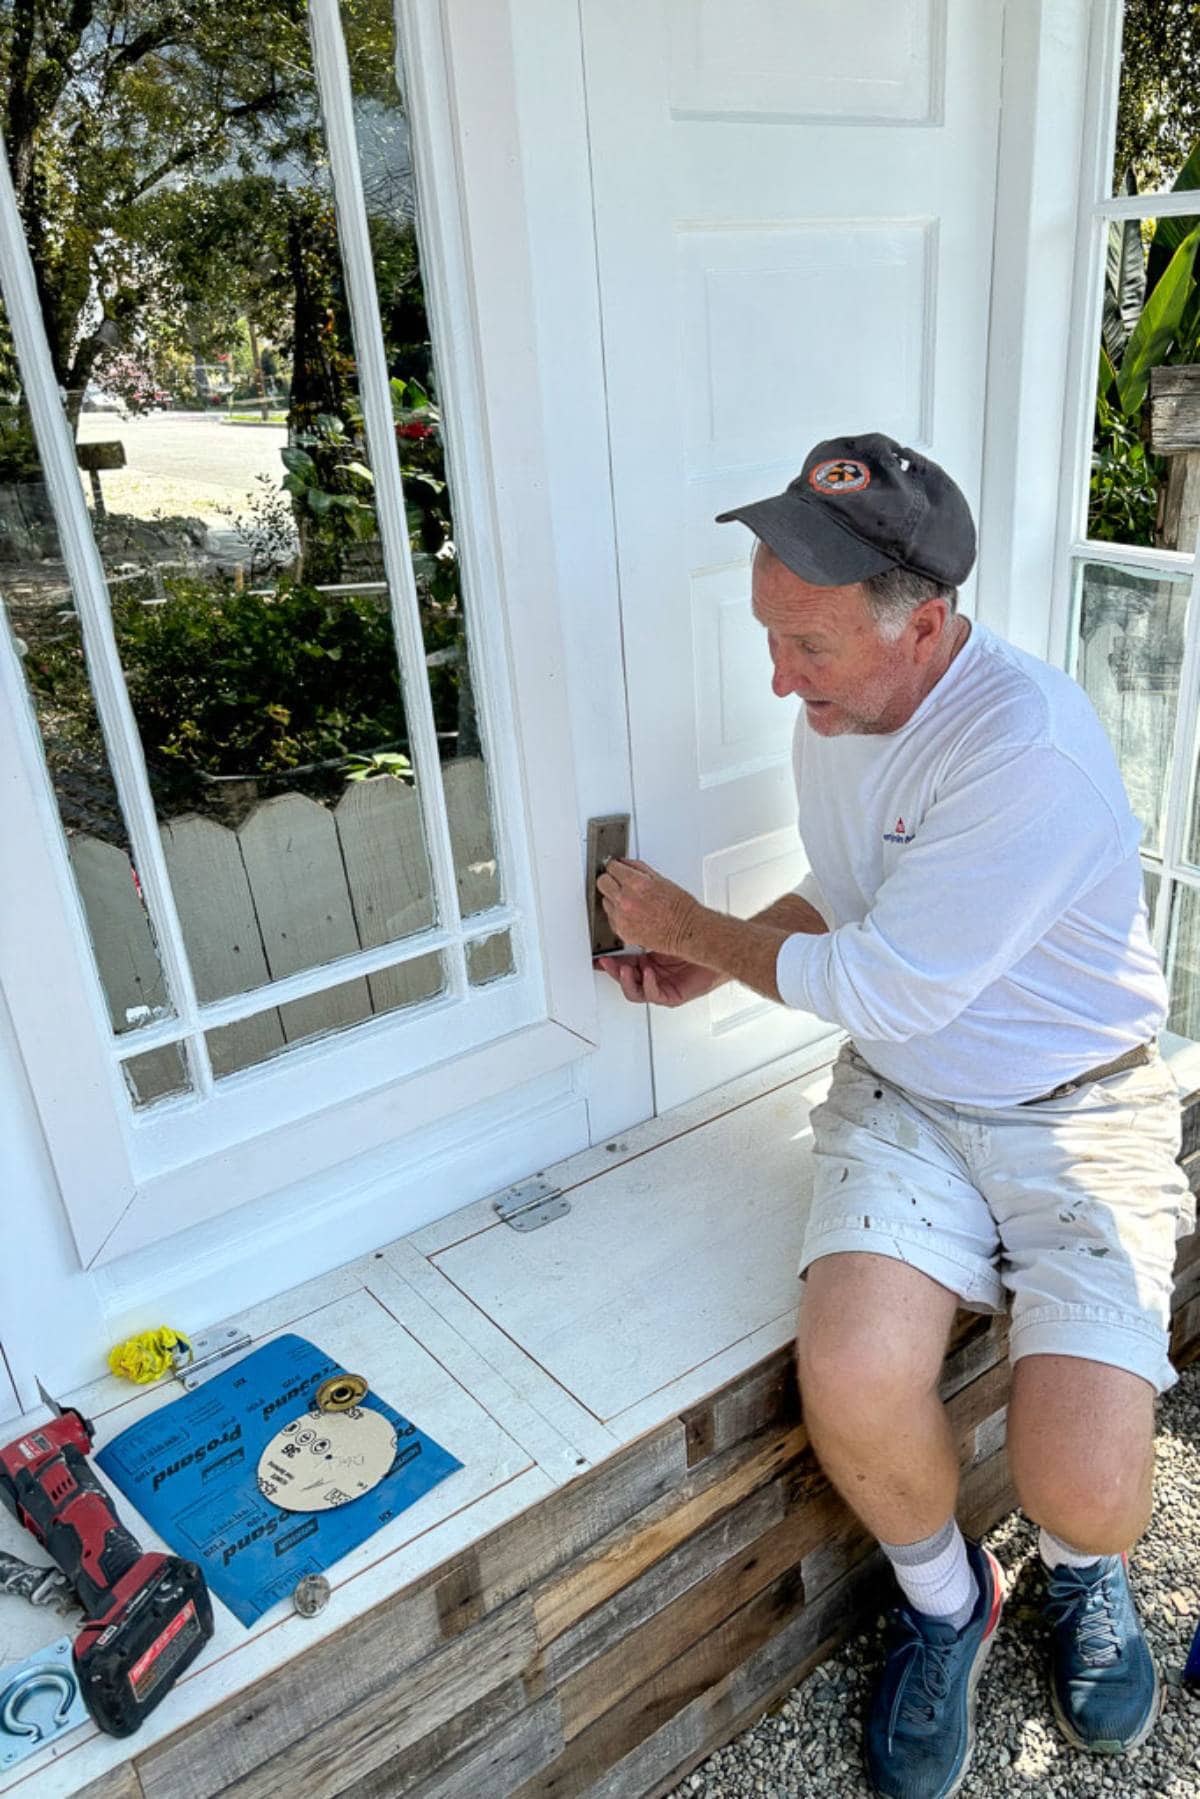
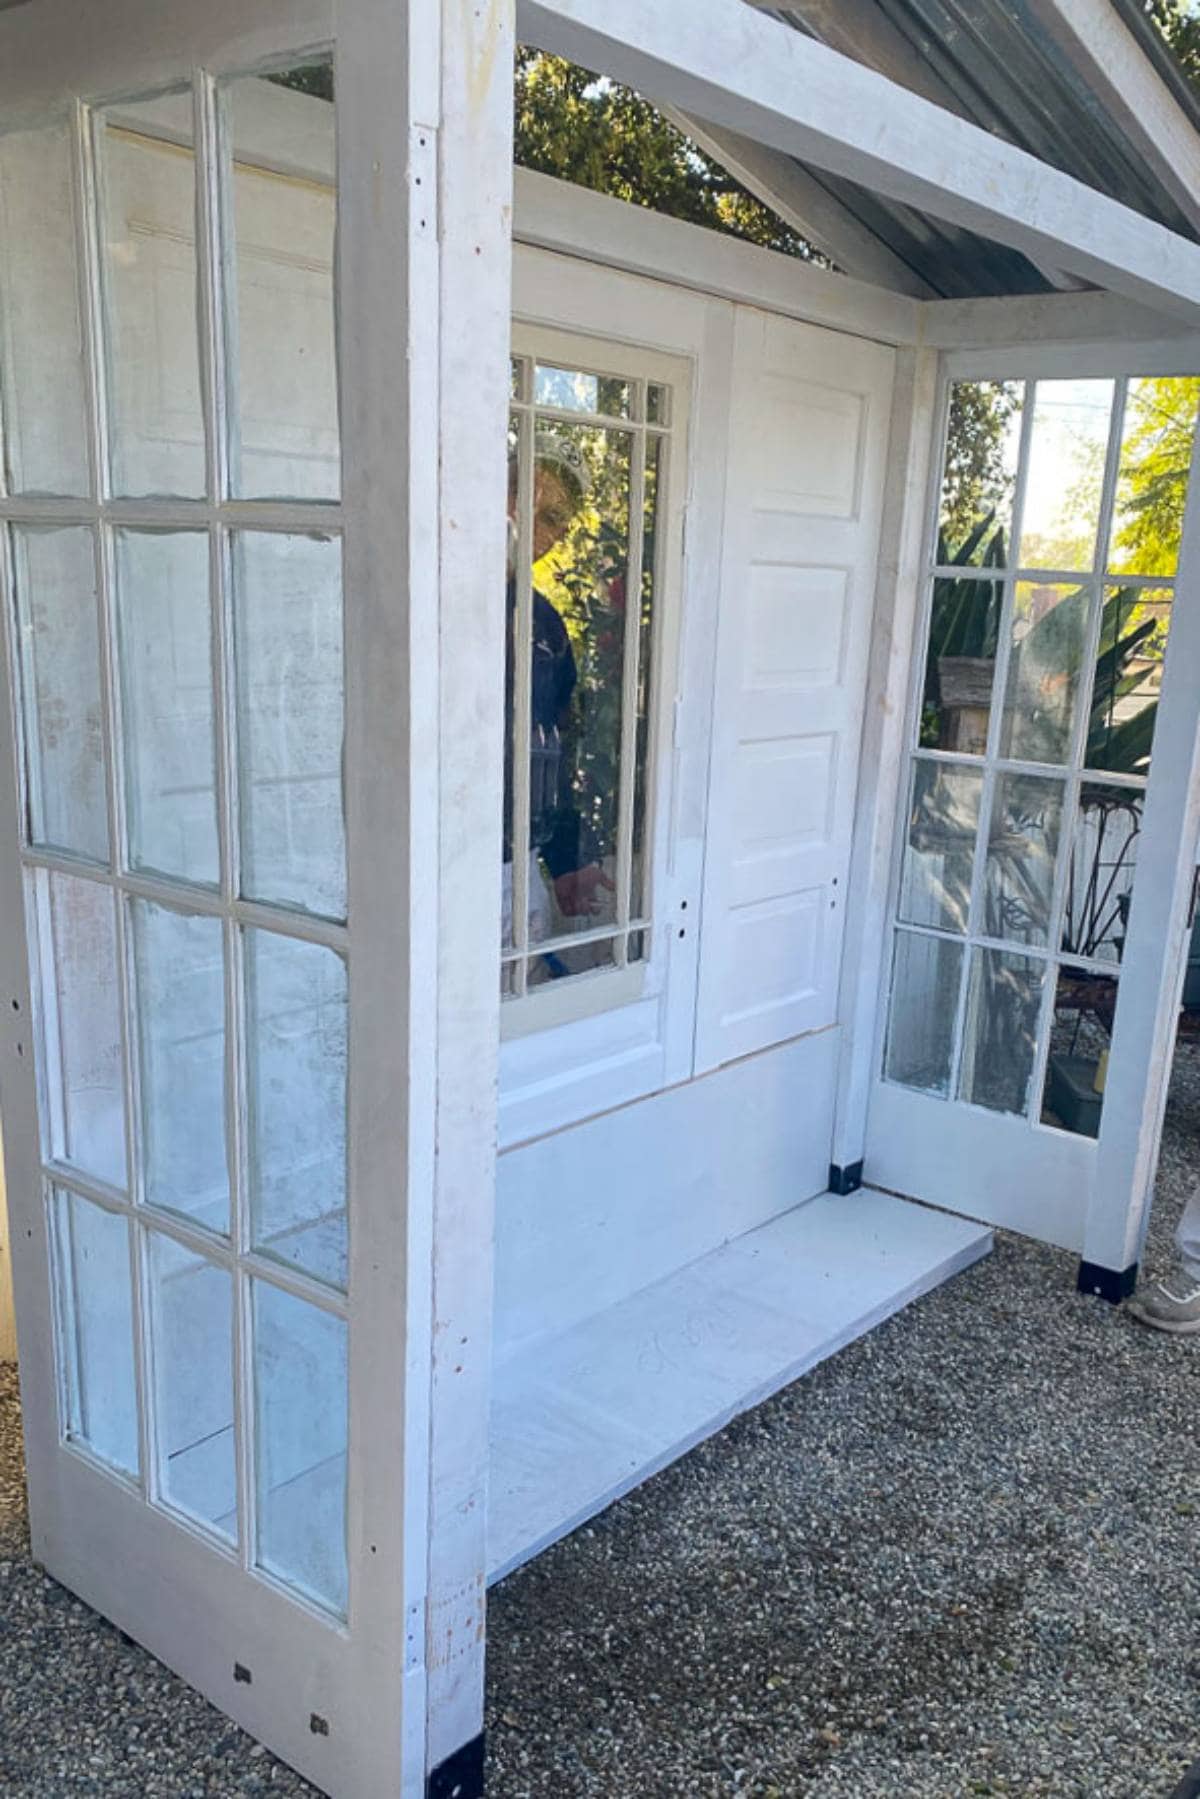
Step 6: Attaching the Doors and Windows
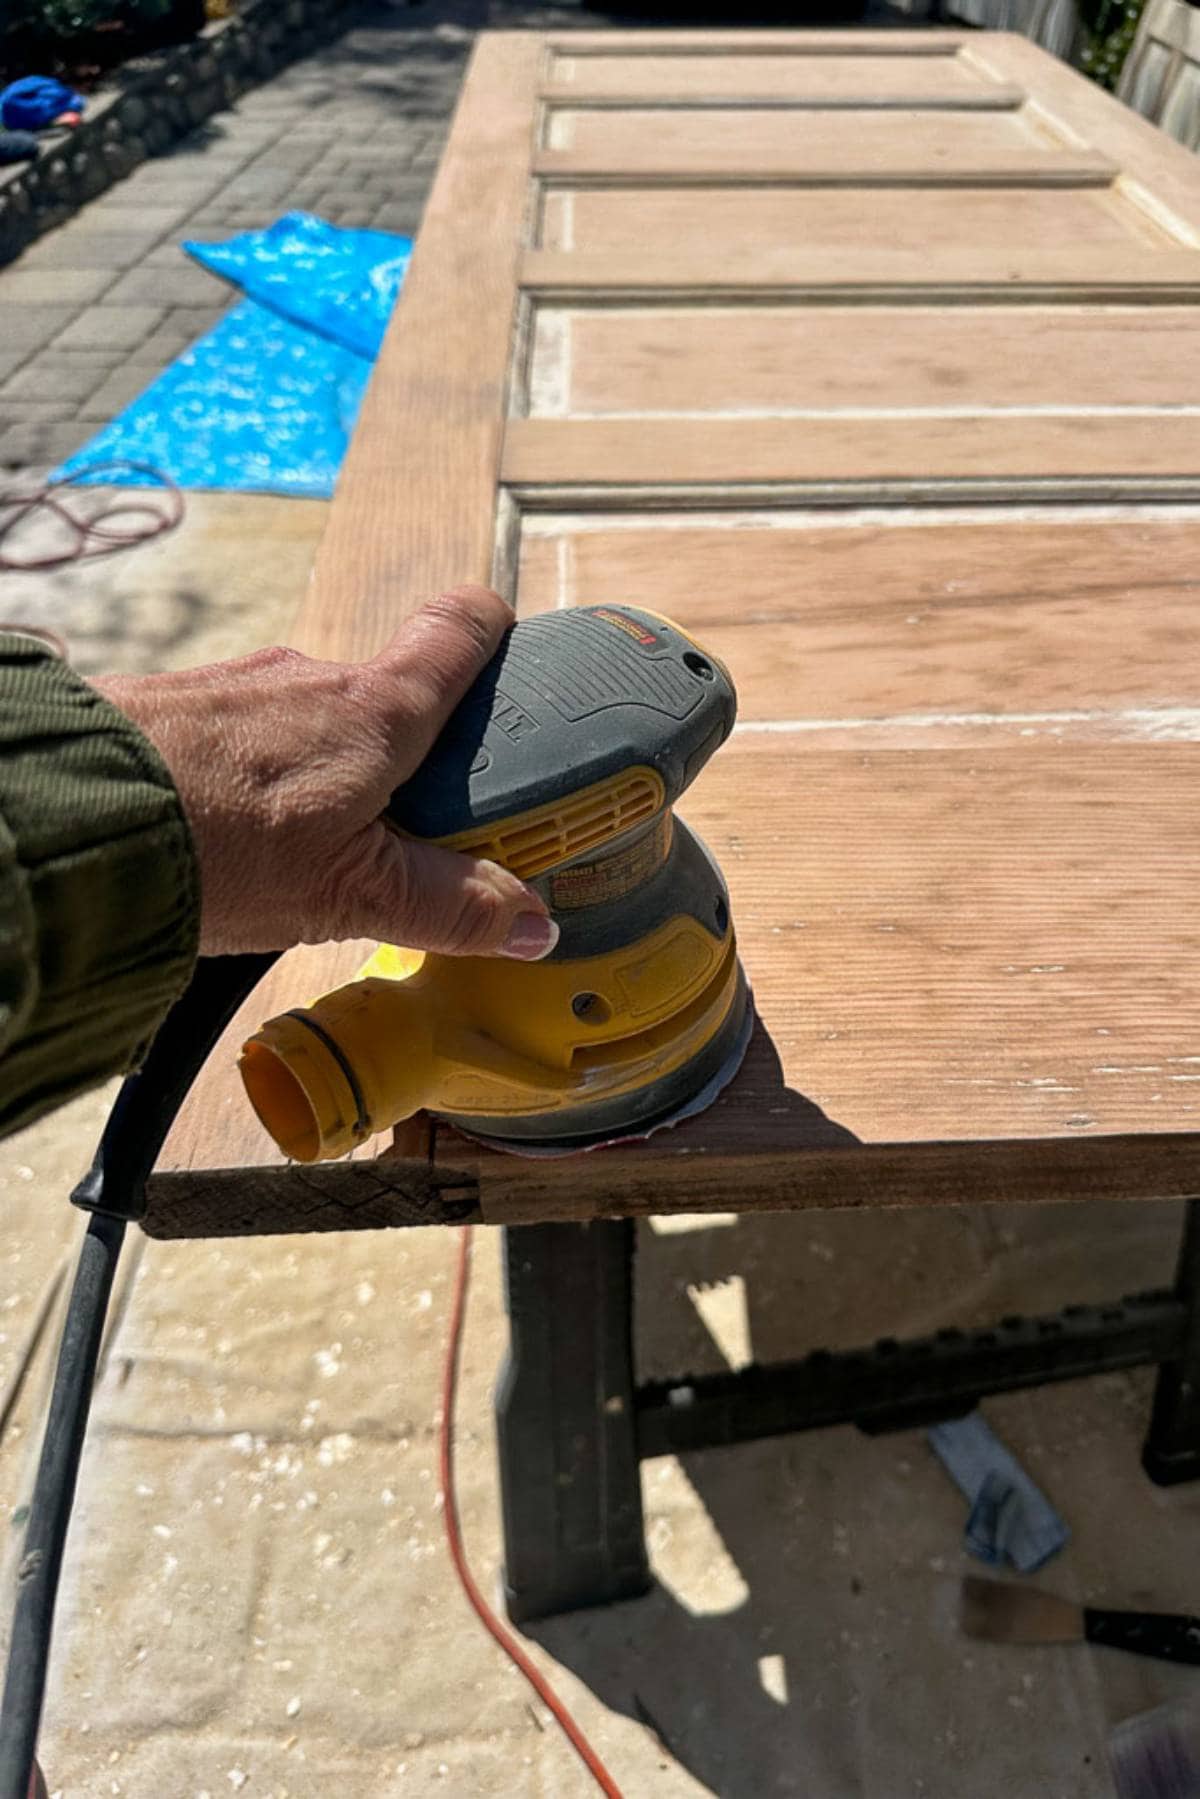
Each door was sanded, primed, and painted white before attaching to the structure.
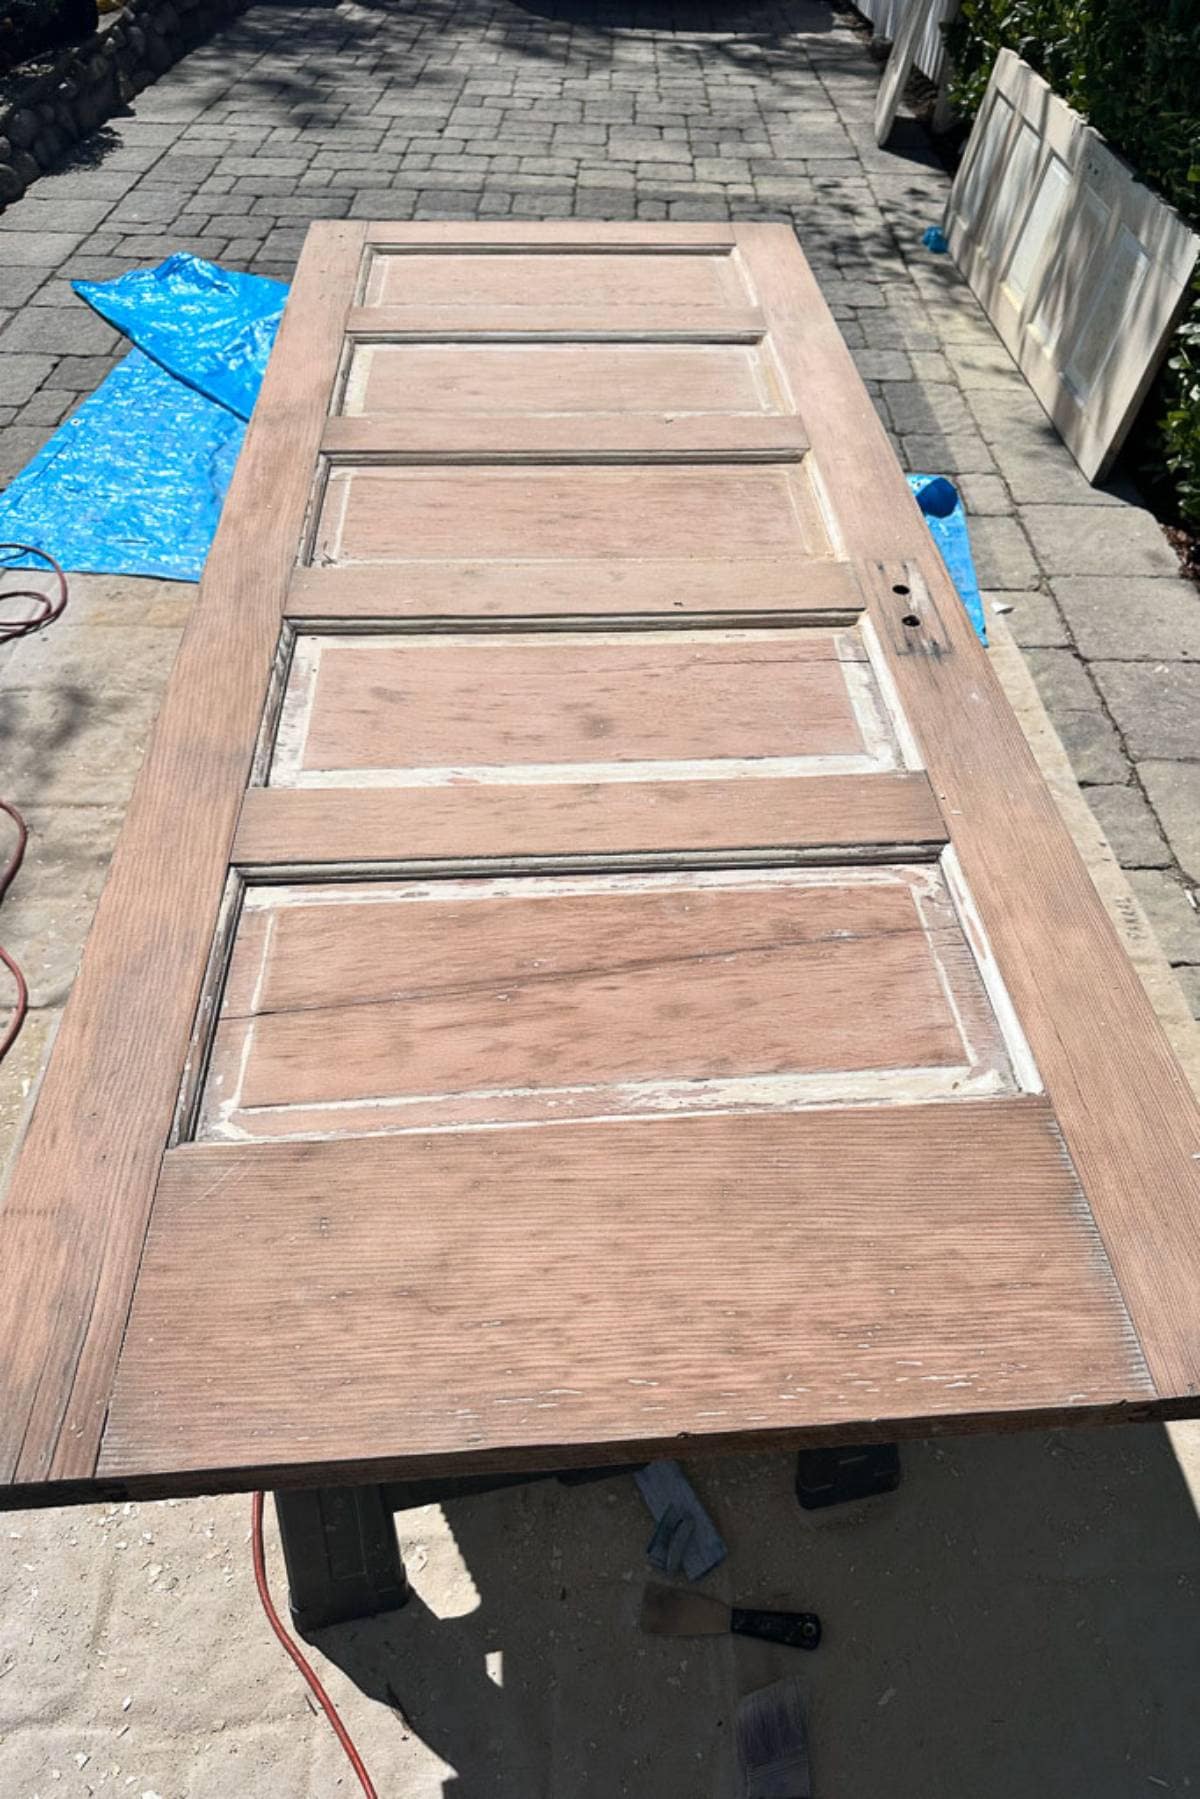
Each door was carefully positioned by hand. Four holes were drilled and countersunk on each side of every door, allowing for wood screws to securely fasten the doors in place.
Apply heavy duty sandable wood filler in all wooden screw holes.
Begin caulking all gaps around doors and framing.
Allow all fillers and caulking to dry overnight.
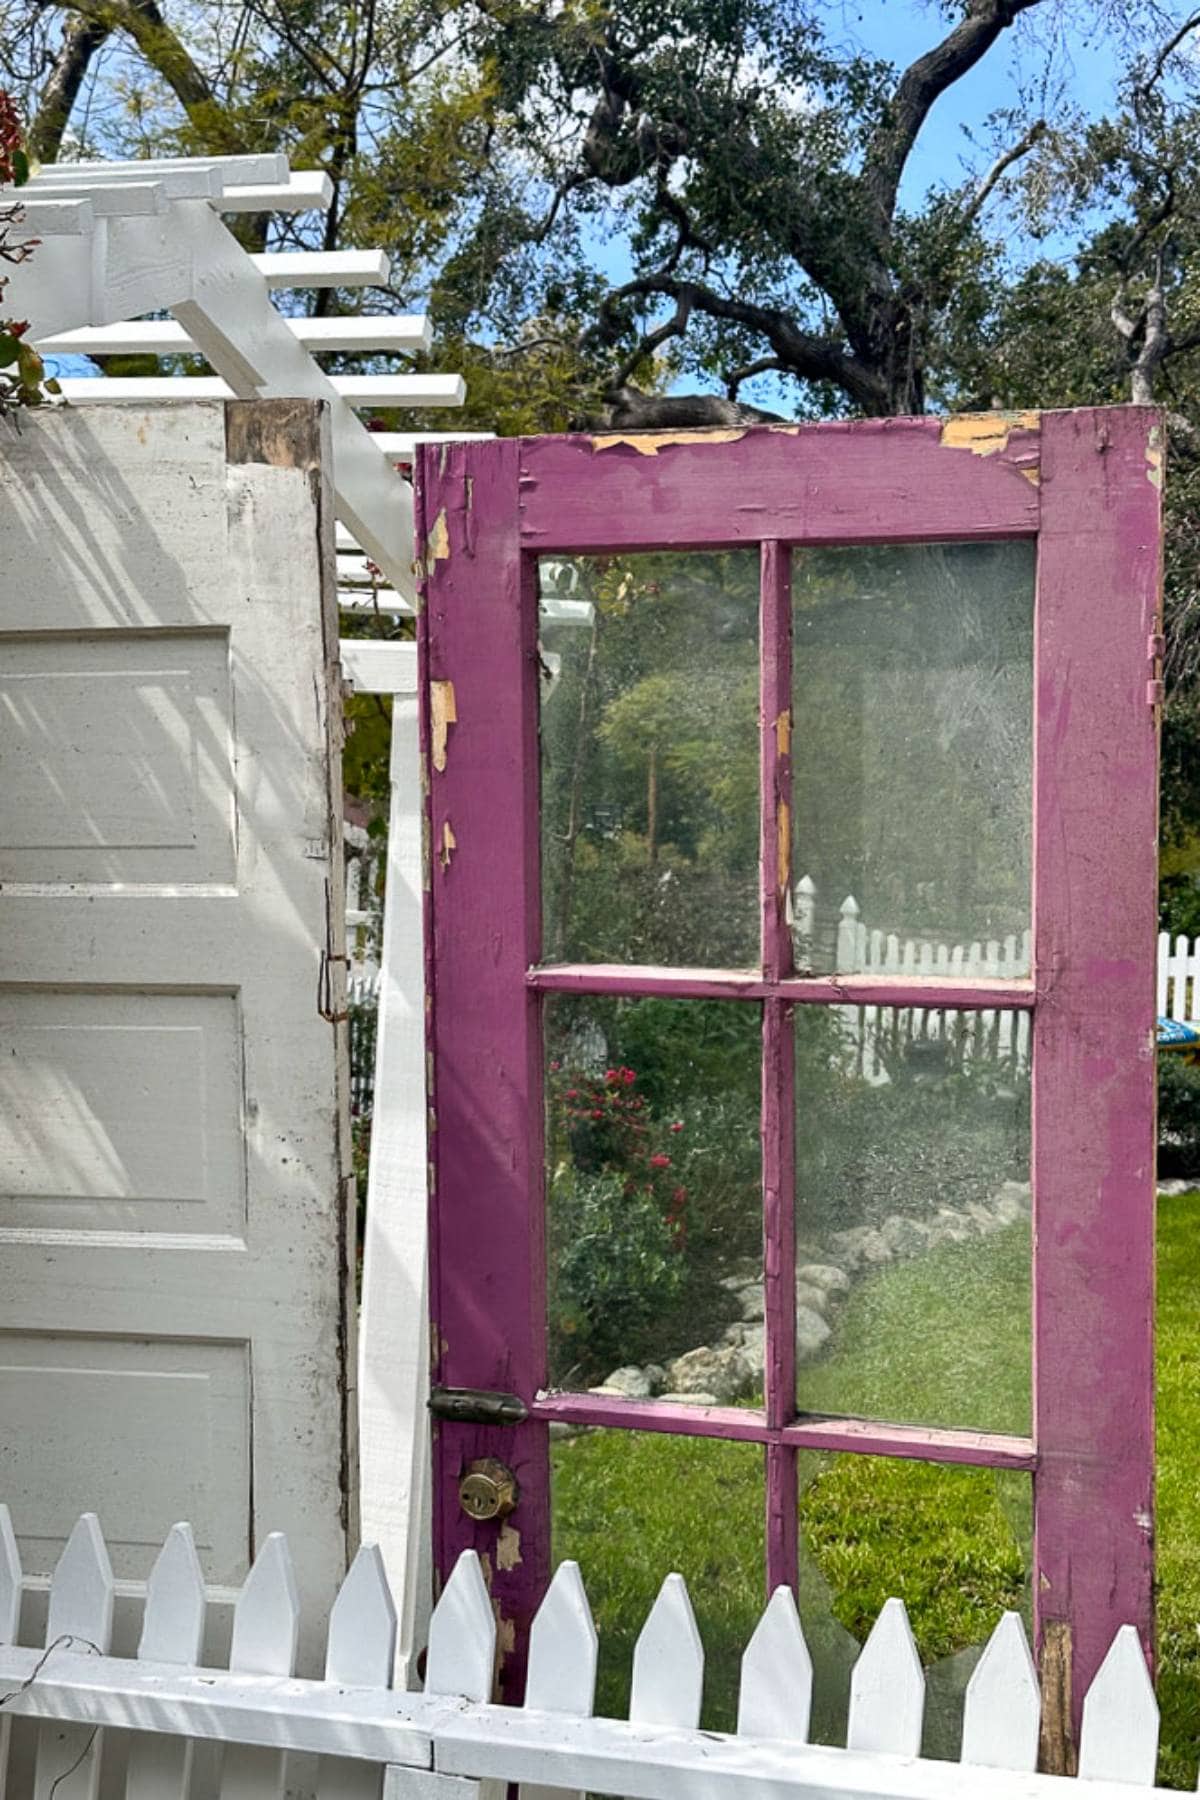
If you’re adding a window, cut an opening in the center door to fit the window in place.
Set the window in place with wood screws and patch, caulk and allow to dry.
Add any trim of your choose around the window.
Step 7: Building and Installing the Bench
Establish the height and with of the desired bench.
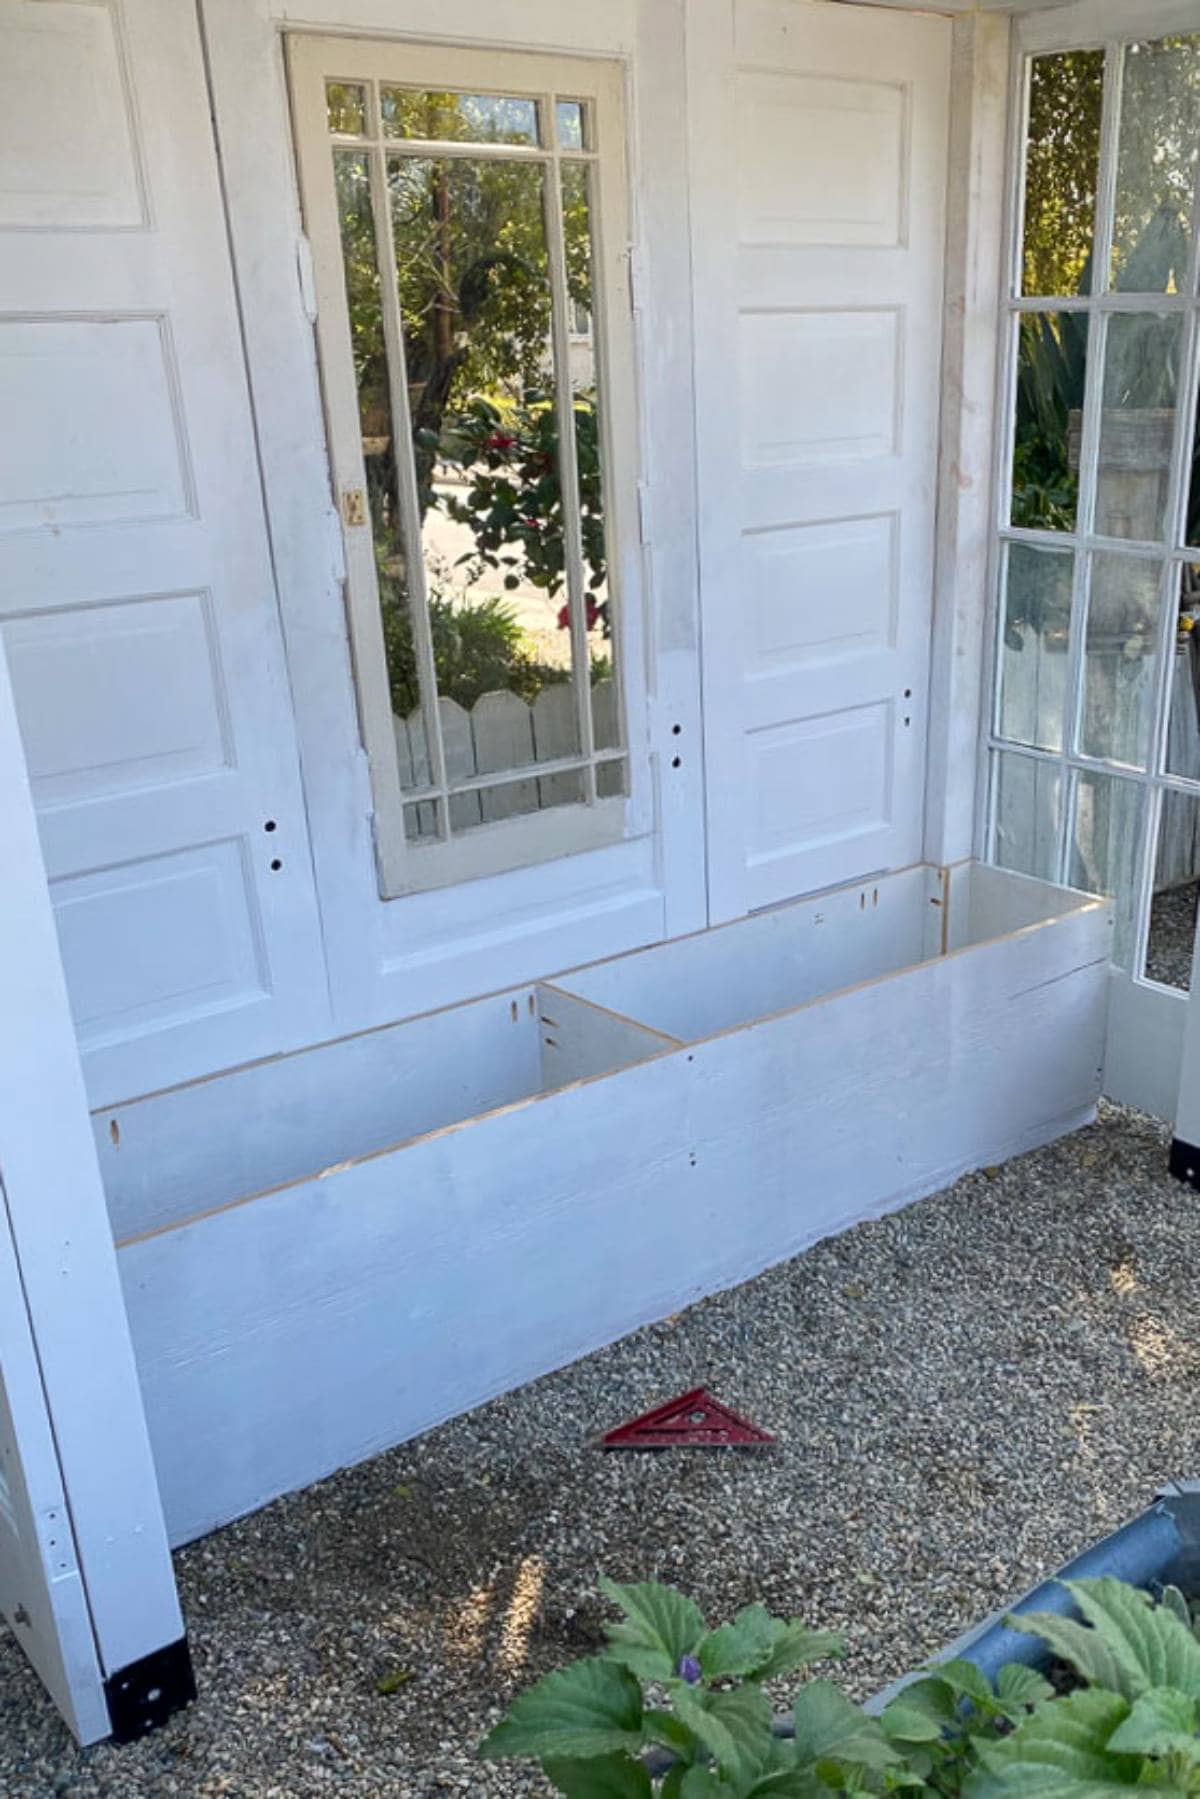
Cut your plywood using the table saw to create the parameters of the box to create the framework of the bench. (bottom, and sides)
Prep, prime and paint all sides and edges of your plywood pieces.
Plywood is attached by drilling holes and countersinking in all corners.
Add a center partition to the center of the box.
Using the remaining plywood, create the top of the box to size and scale.
Two doors are cut from the top piece of plywood.
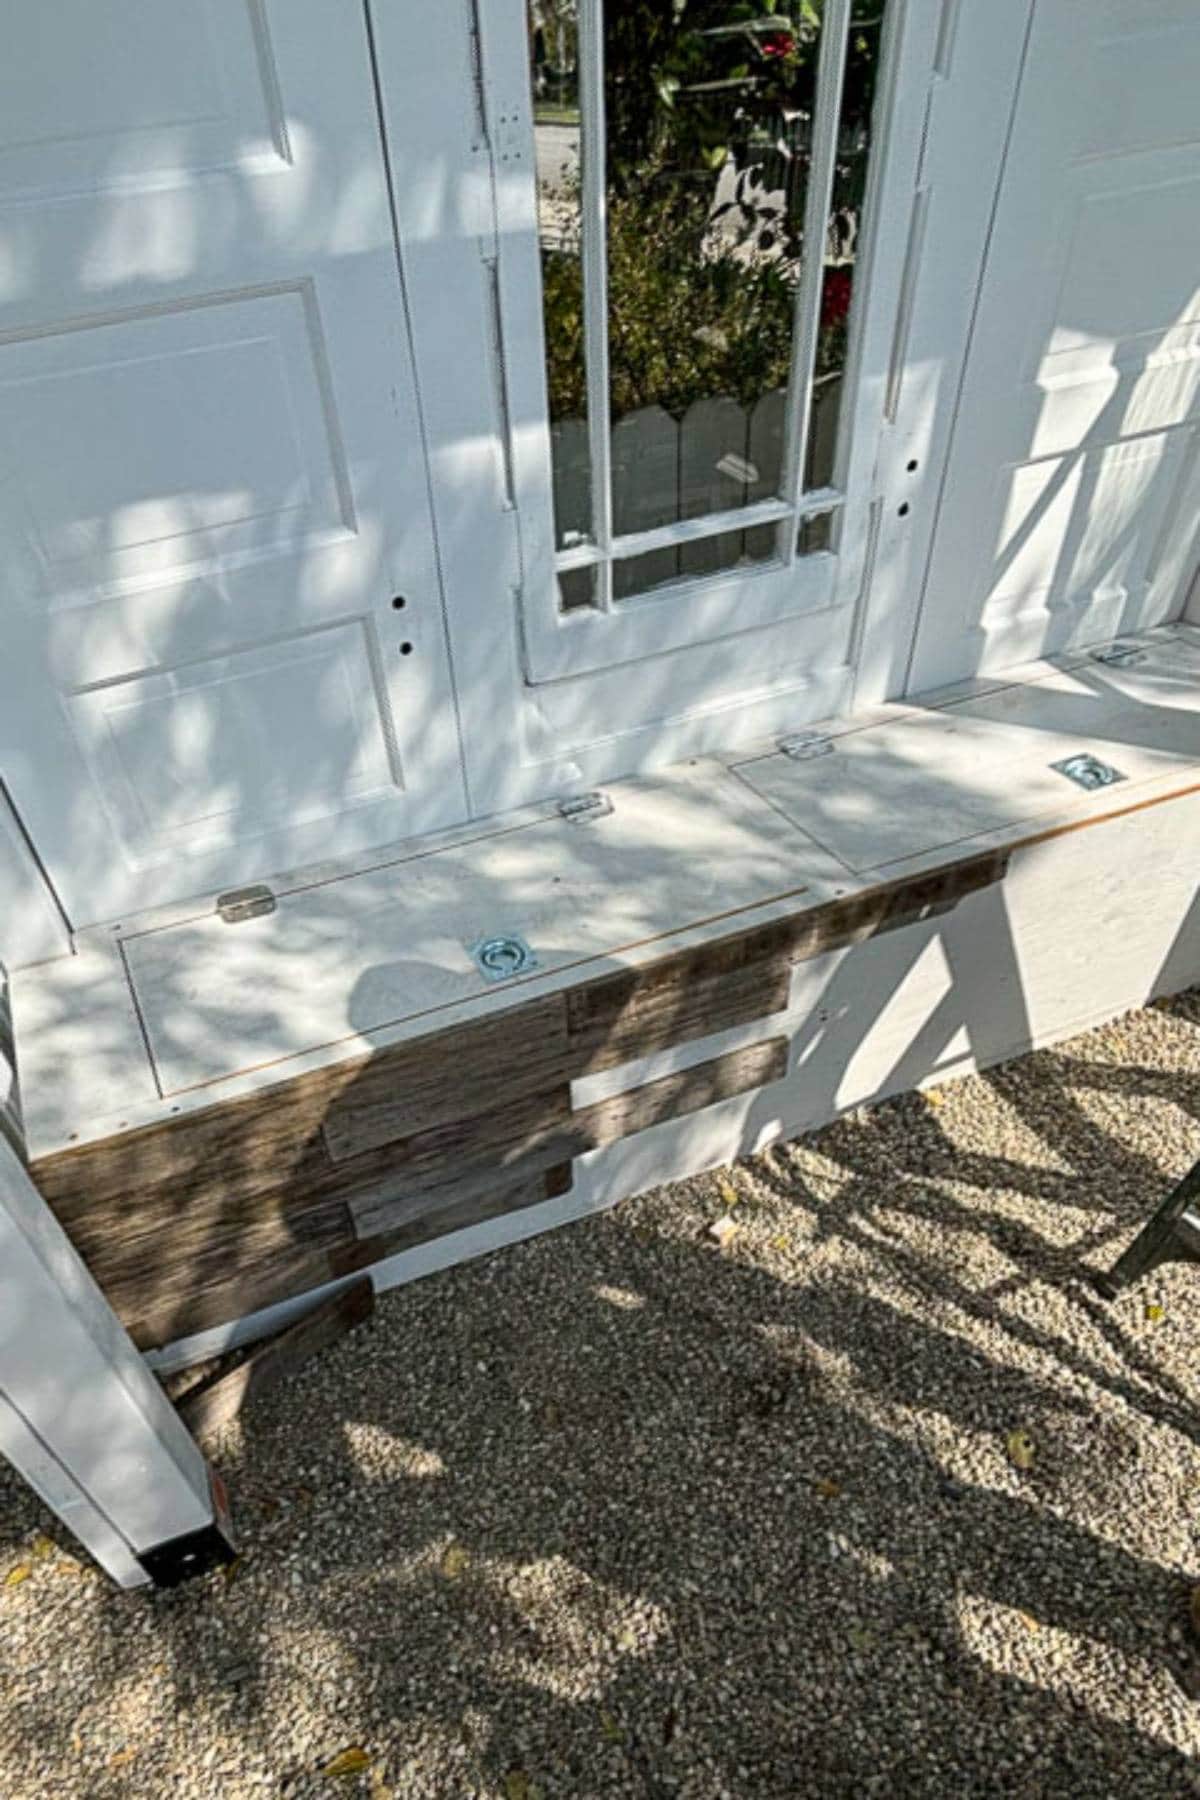
Each door is set in place with two hinges and receives a countersunk pull handle so you can fully operate the doors for storage.

Step 8: Fine Tuning and Completion
Now that the your garden bench is complete and set in place. A few important steps remain.
- Double check all caulking, patching, and fillers.
- Lightly sand any and all areas where the wood grain has risen.
- Spot primer any raw wood areas.
- Apply one final even finish coat of paint to the entire structure.
- Allow to dry overnight.
- Carefully install dismantled wood from a vintage farm crate piece by piece. Attach the wood pieces along the lower elevation of the garden bench using a nail gun to create a rustic touch.
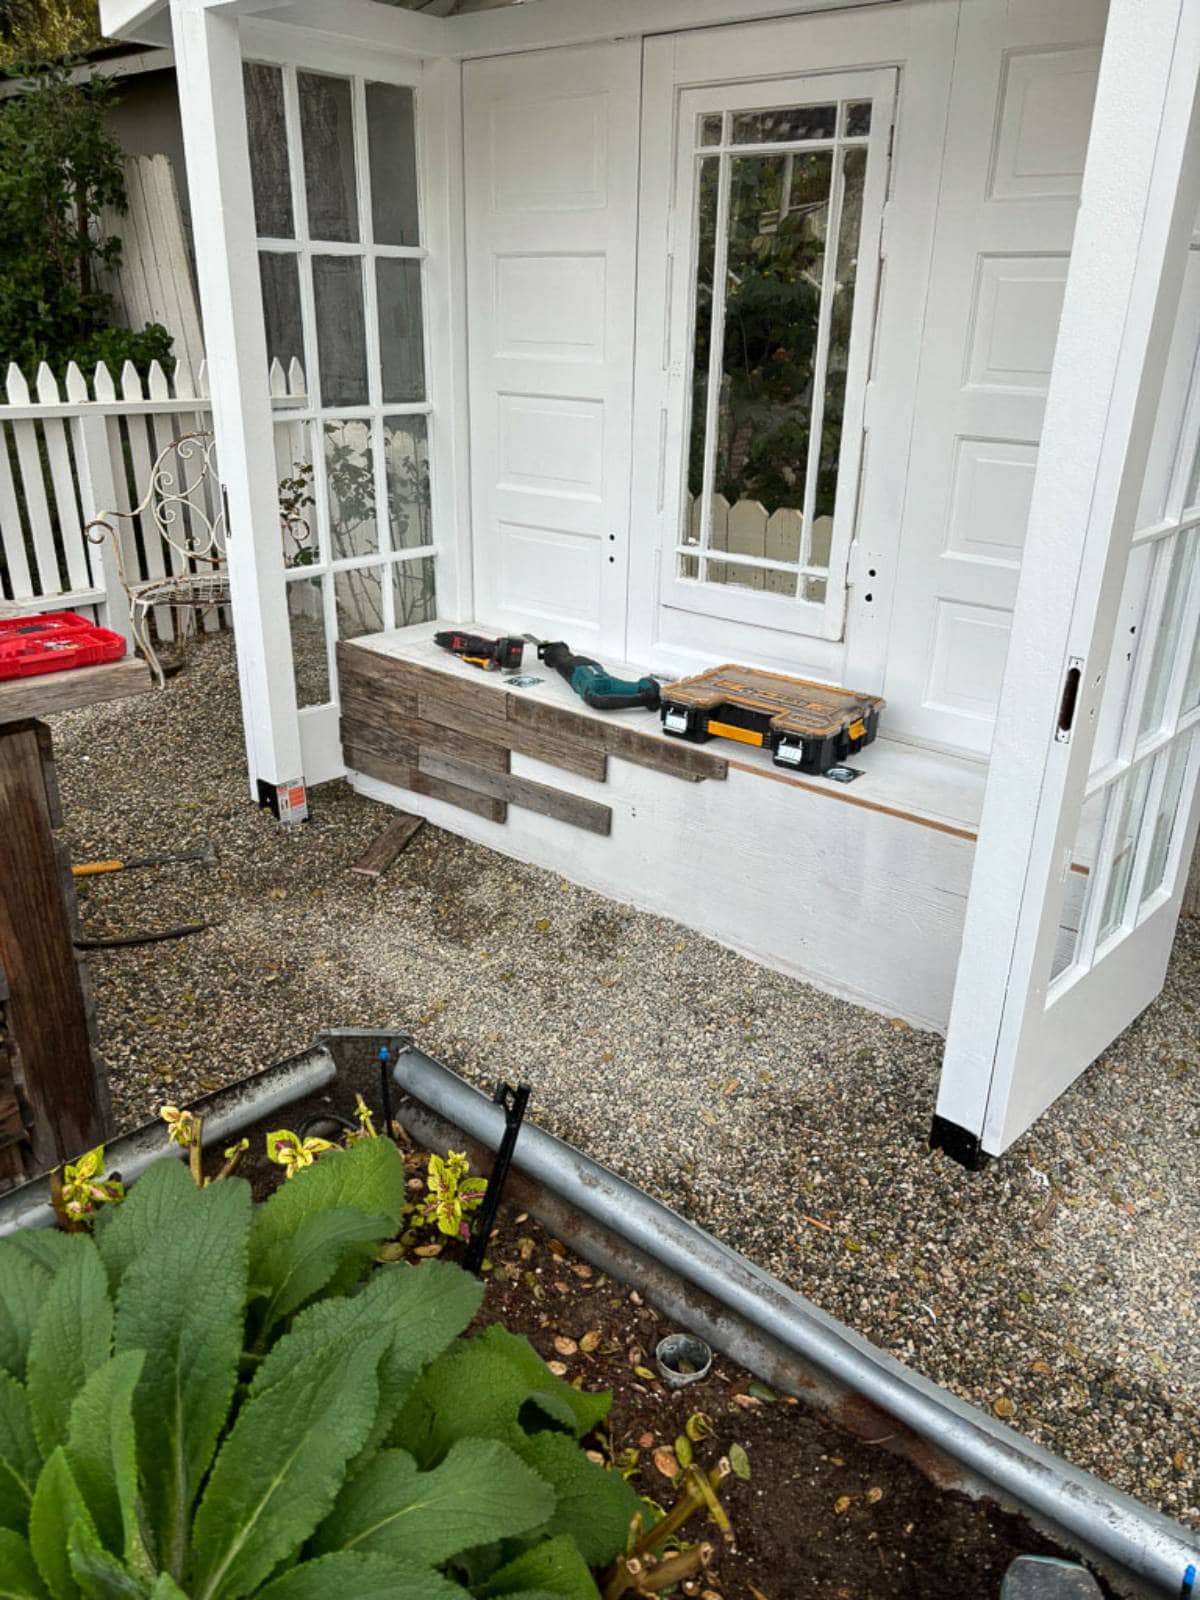
Tip from Wendy: Get creative with your bench’s front design by adding a decorative touch. Consider using beadboard, shiplap, or even reclaimed wood, as I did, to give your bench a unique and personalized look.
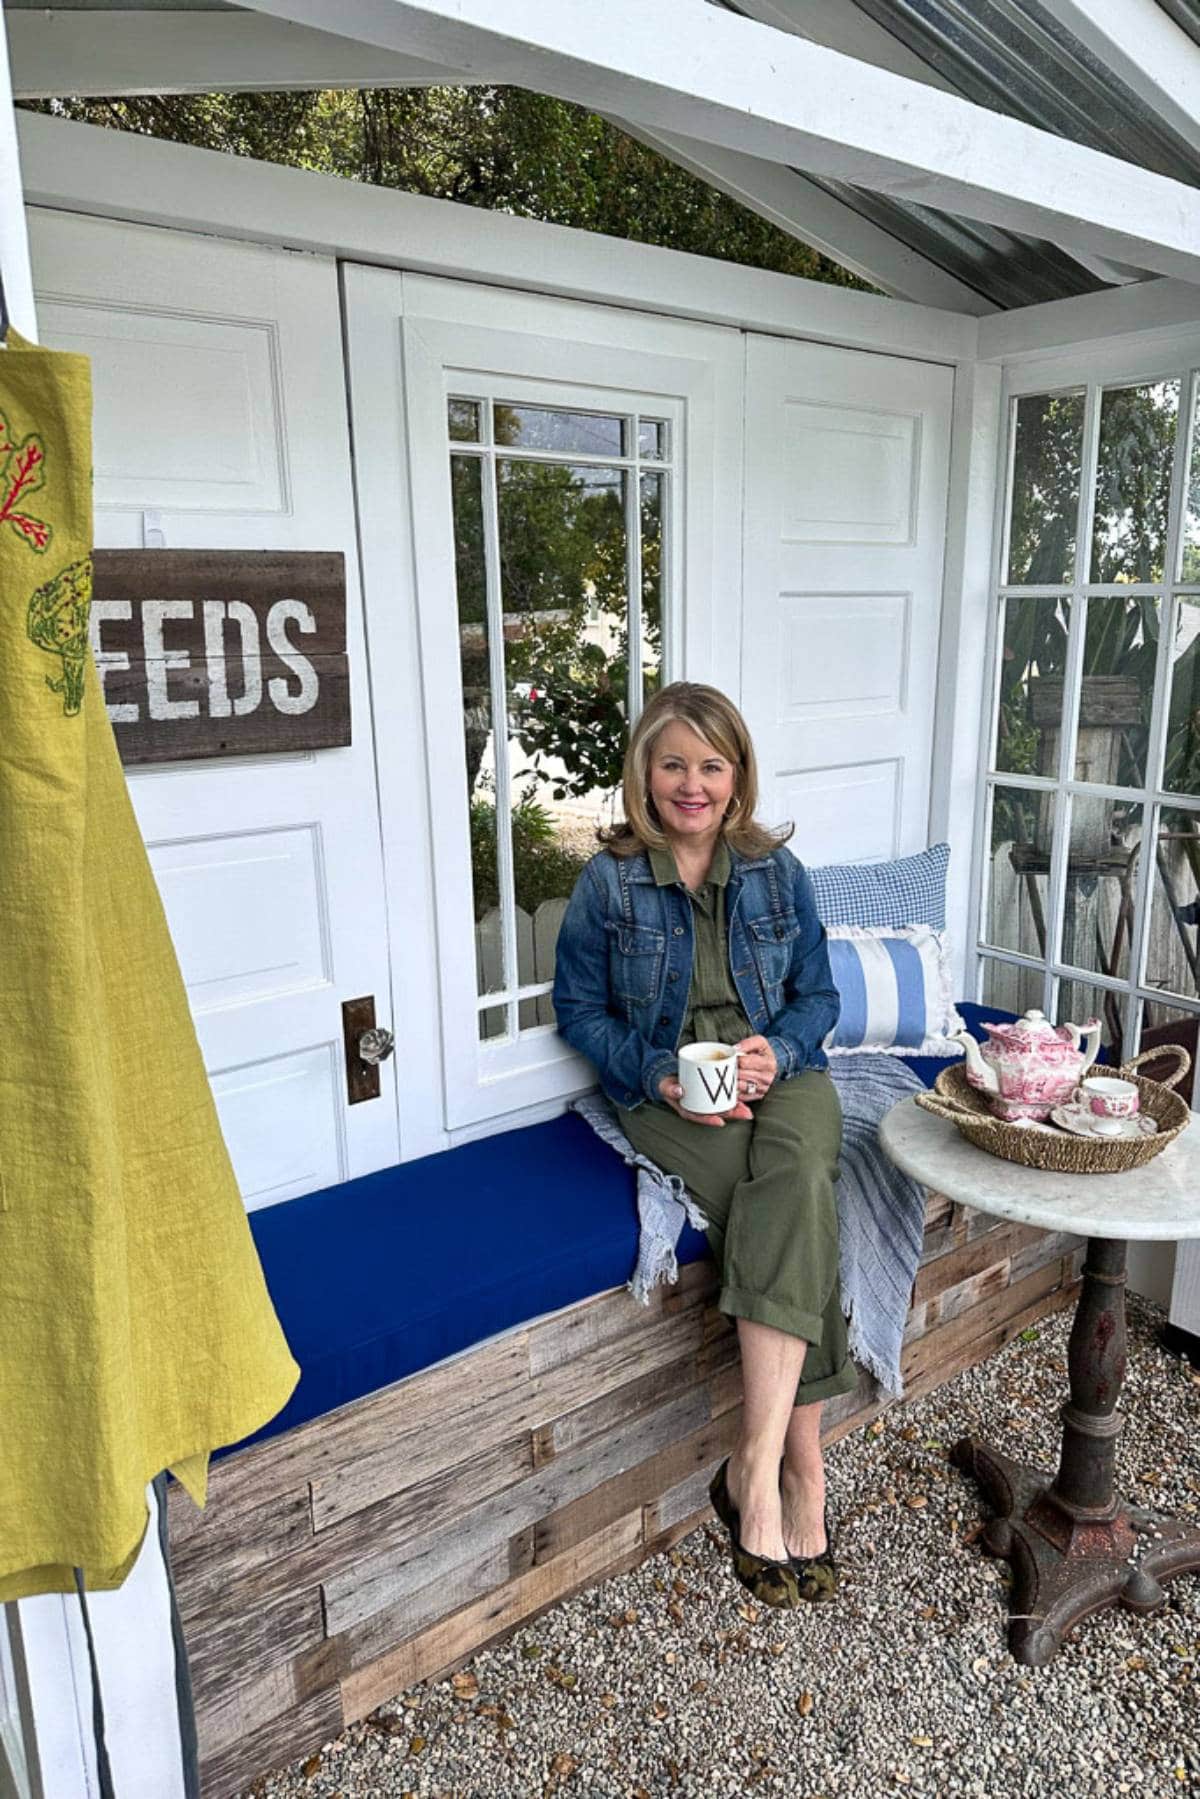
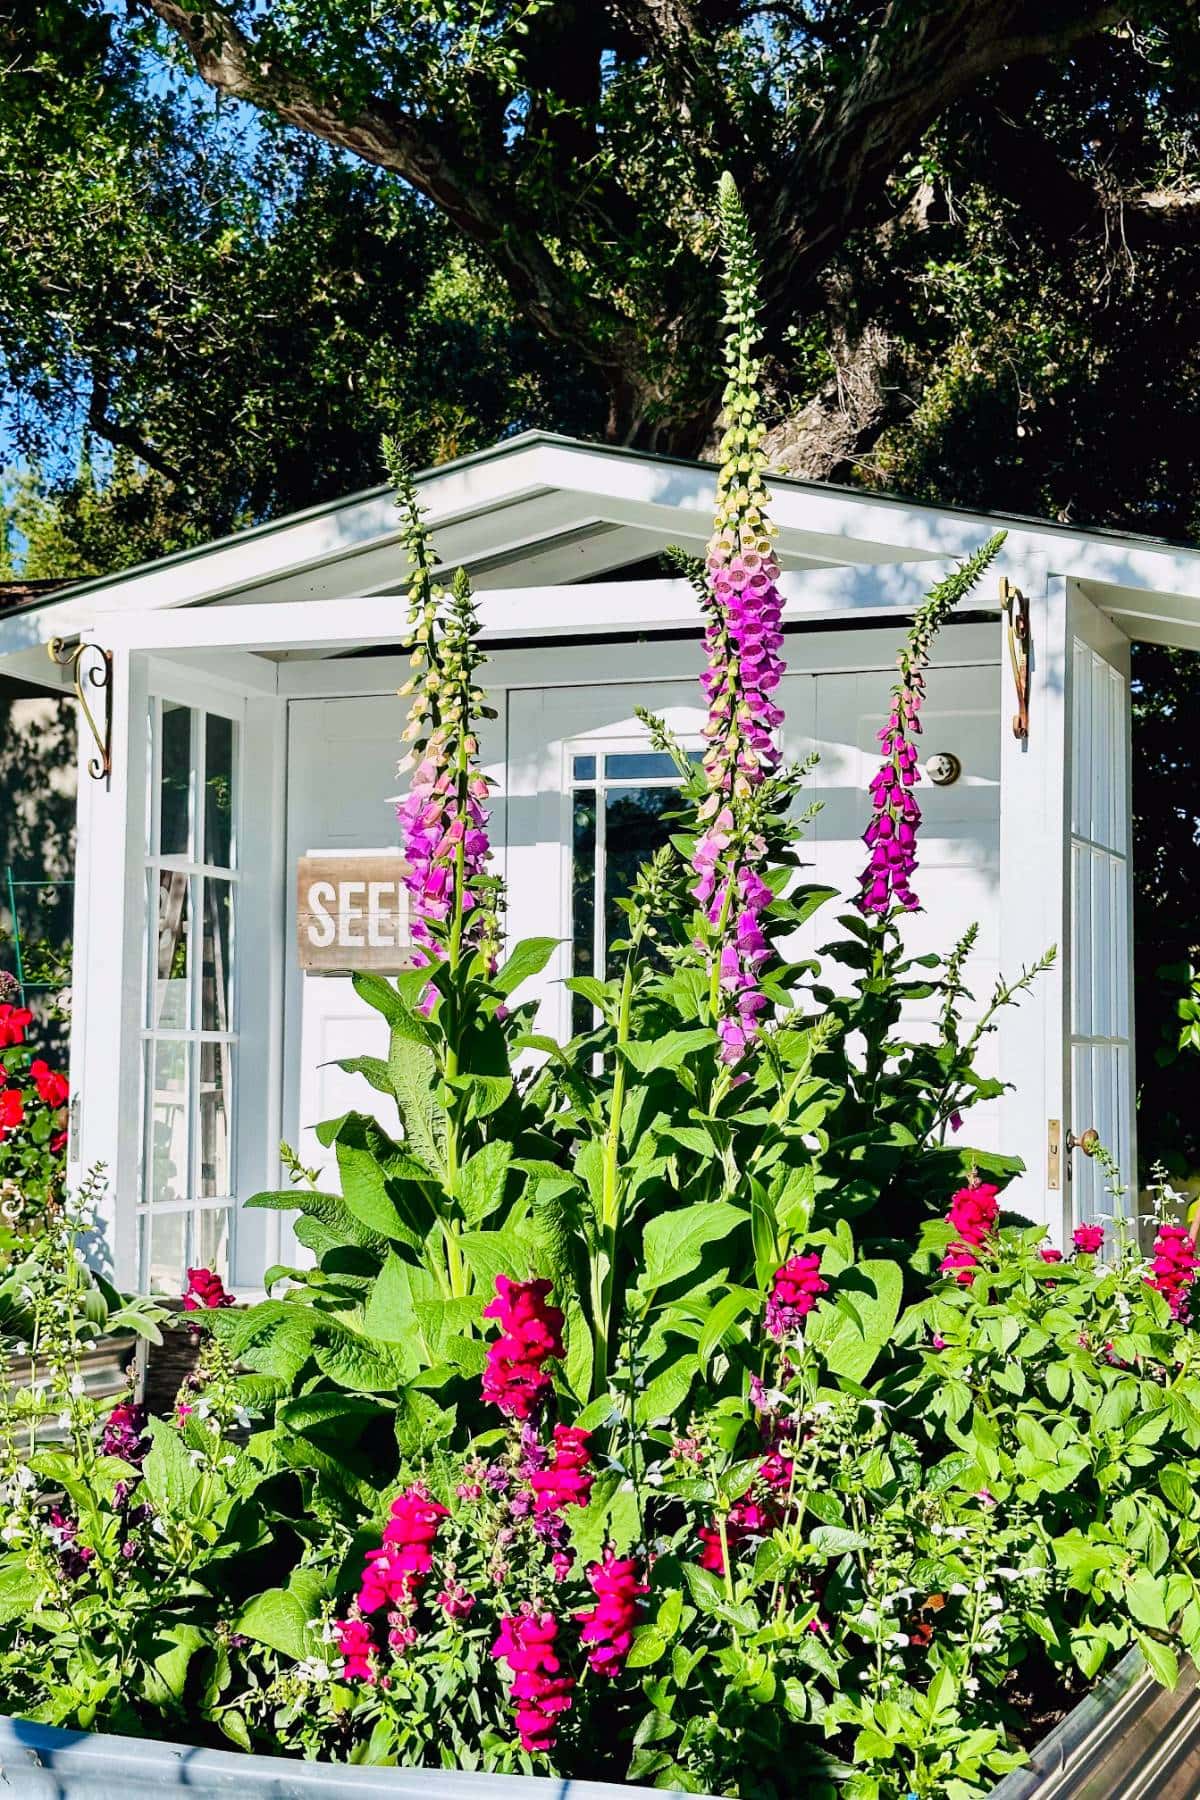
The DIY Garden Bench Completed
Now that my DIY garden bench made from old doors is complete, it has become my favorite spot to relax and enjoy a cup of coffee while soaking in the beauty of the garden. The bench not only adds charm to the space but also offers practical storage for my garden supplies, making it both a stylish and functional addition to my outdoor oasis. It’s amazing how something as simple as repurposing old doors can create a cozy, inviting spot that I now cherish every day.
Other Tutorials from WM Design House
If you love this DIY garden bench, you might also enjoy some of my other favorite posts:
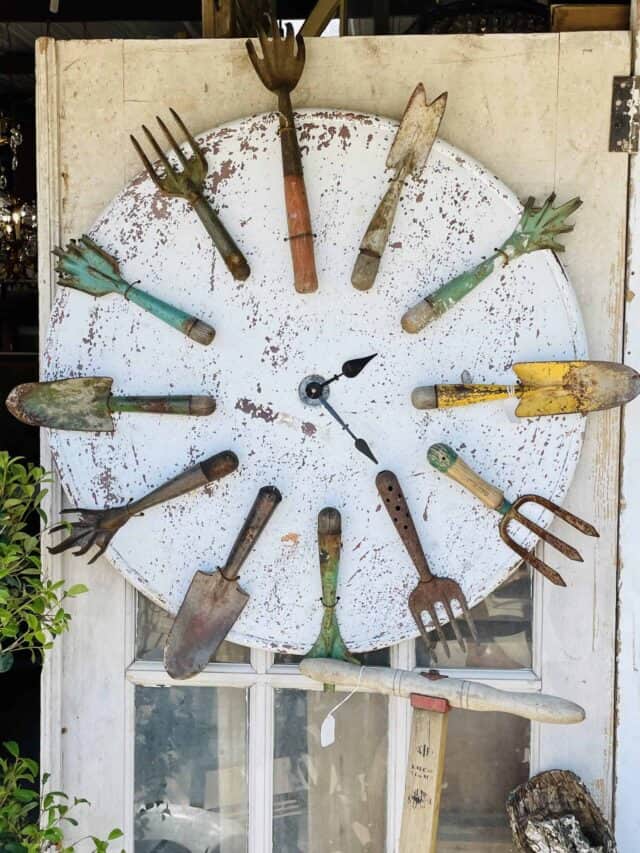
How to Make a Garden Clock out of Vintage Garden Tools
Learn how easy it is to make a garden clock with a collection of old garden tools.
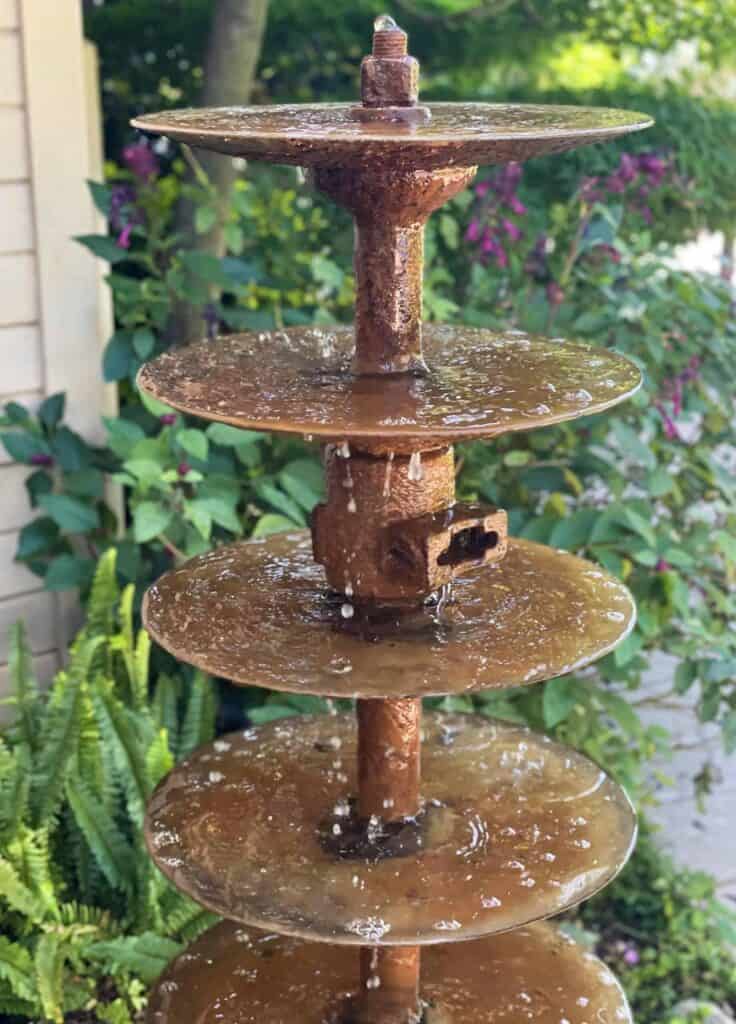
How to make a Small Outdoor Fountain from a Tractor Disc
Create a unique fountain in your yard to enjoy the sound of the water.
35 Best Zone 10A Perennials to Grow in Full Sun
Learn what are the best perennials to grow in Southern California.


Did you build a garden bench?
We would love to see what you have created, so mention us @wmdesignhouse or tag us using #wmdesignhouse so we can see your creations!
More about me!

Hello, I’m Wendy – a dedicated homemaker with a deep passion for decorating, gardening, cooking, and crafting. I find joy in harmonizing beautiful elements to fashion a space that is both comfortable and inspiring. I will help you create a beautiful home, one project at a time.


Thank you for sharing this with us on Farmhouse Friday 364. I’ve featured it today and hope you link up again soon. pinned
Wendy, this is such a fabulous project! It’s so much more than a garden bench — the perfect architectural addition to your garden!
Wendy
This turned out fantastic. It’s perfect in your space.
I am blown away by this bench and your creativity! Your helper is a keeper too! You bench looks perfect in your garden and I can see it as a place for peaceful enjoyment all year round. Seriously beautiful. pinned
I can see why you would want to sit and drink your morning coffee here Wendy. I love old doors and what they can become. You did these old gals justice!
Thank you so much, Cara. I’m so happy with how this project came together.
This could also be made as a bbq pergola, minus the bench. Now you’ve got me thinking!
Ohh…now that sounds like an amazing idea!
That is absolutely adorable Wendy. Love it!!!
That is an excellent bench. You are talented. I am admiring your metal raised beds…did you also make these and is there a post of this? Here in Colorado our “soil” is mostly clay and the sun at altitude is a little harsh. I think a few raised beds in a moderate location would be a good idea. Thanks!
Oh my goodness! You are so creative and talented! I love this cute project!
Wow, Wendy!! What an AMAZING way to put those old doors to use!! Such a nice, relaxing spot to have a cup of coffee and take in the views. Super creative!!