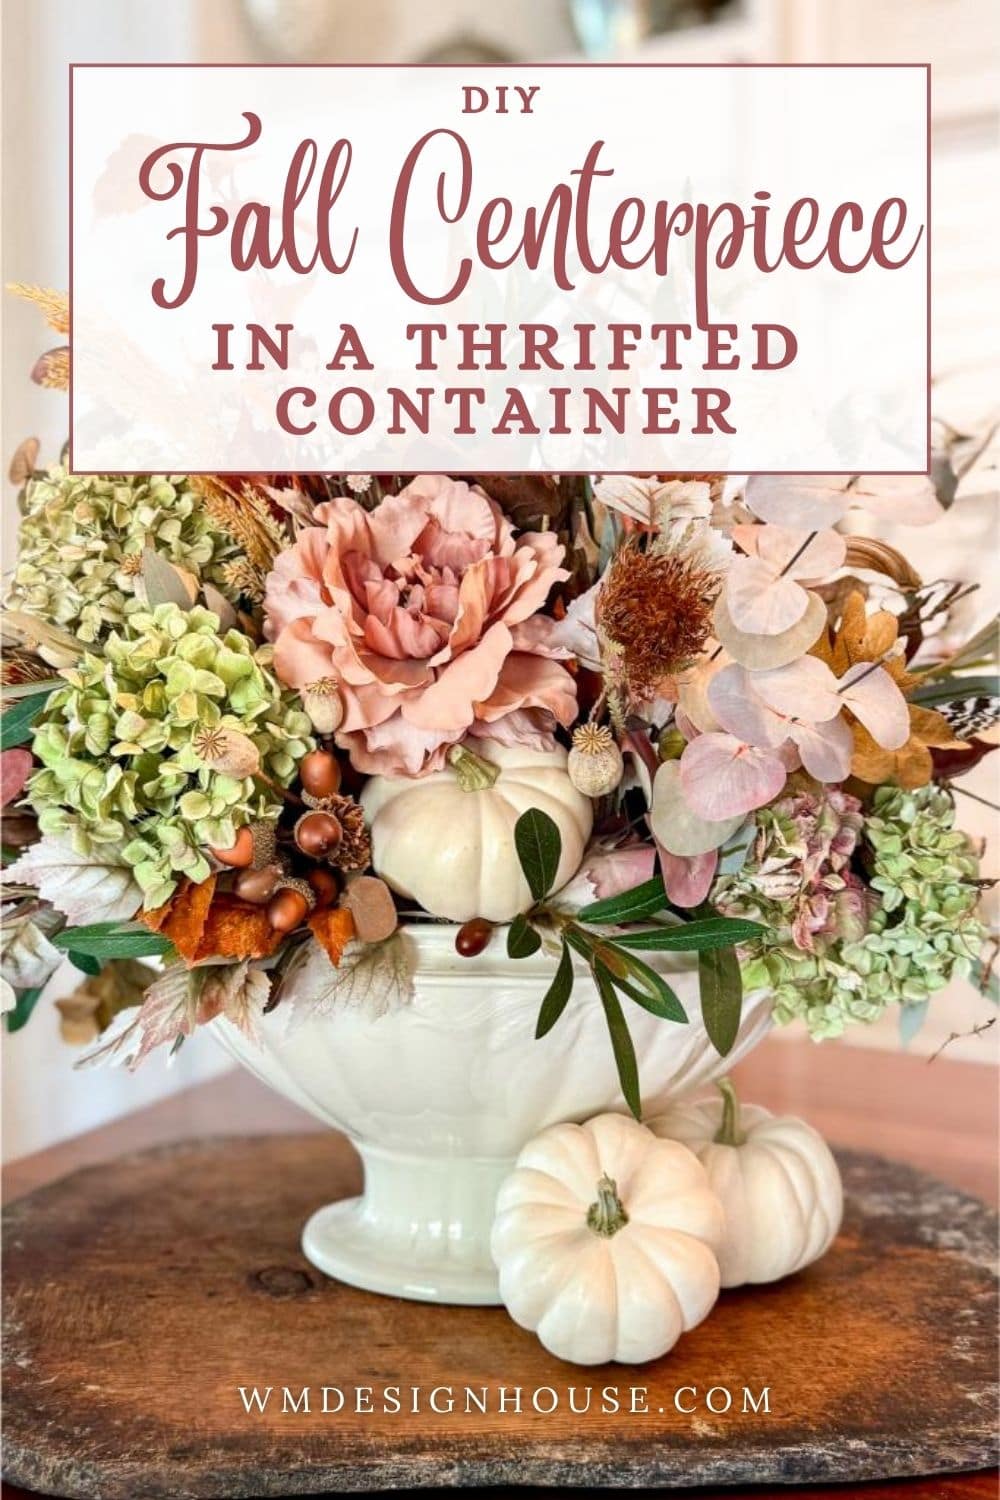
Charming DIY Fall Centerpiece with Thrifted Container
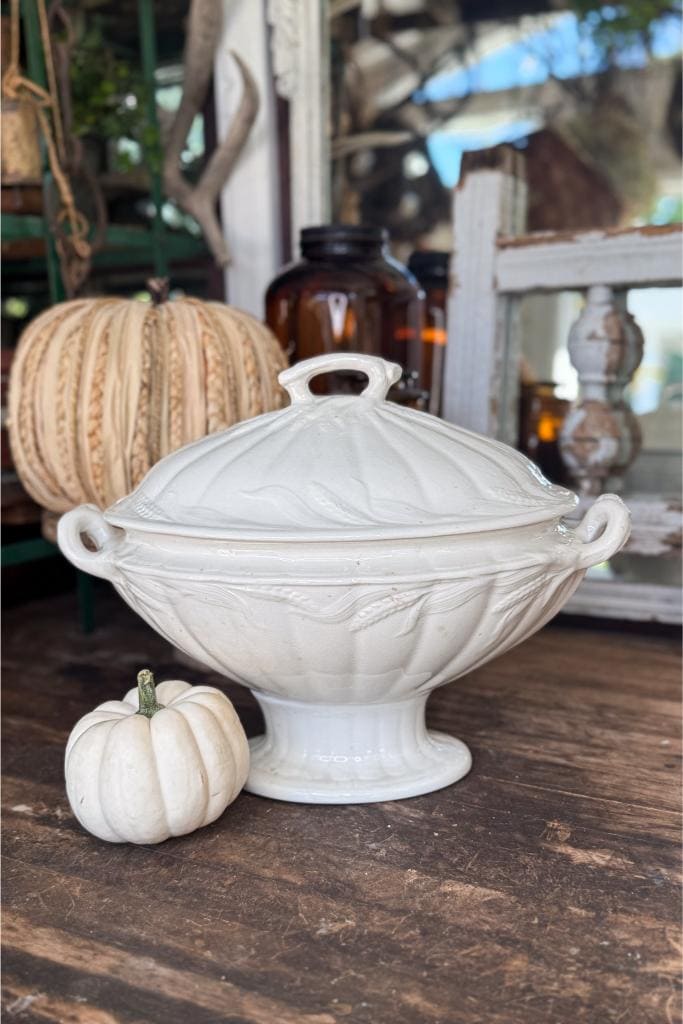
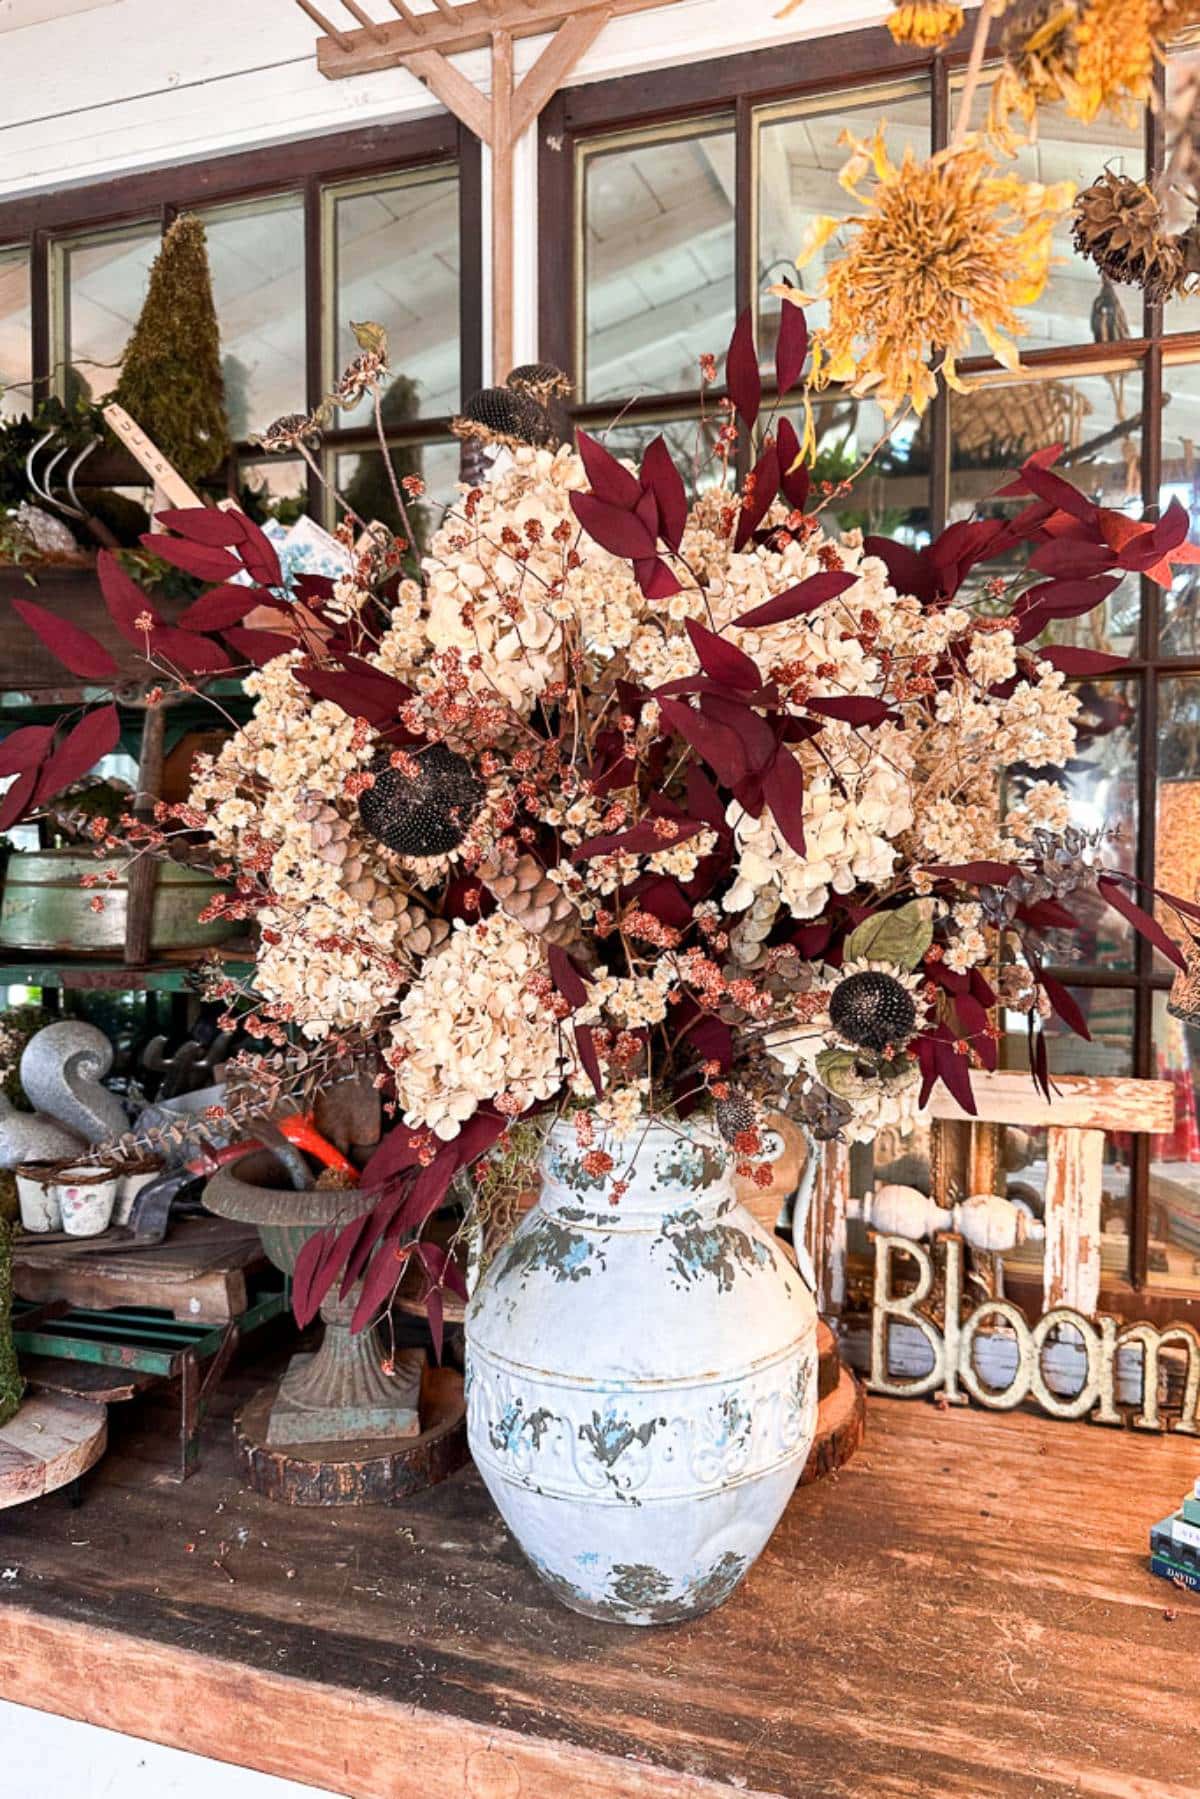
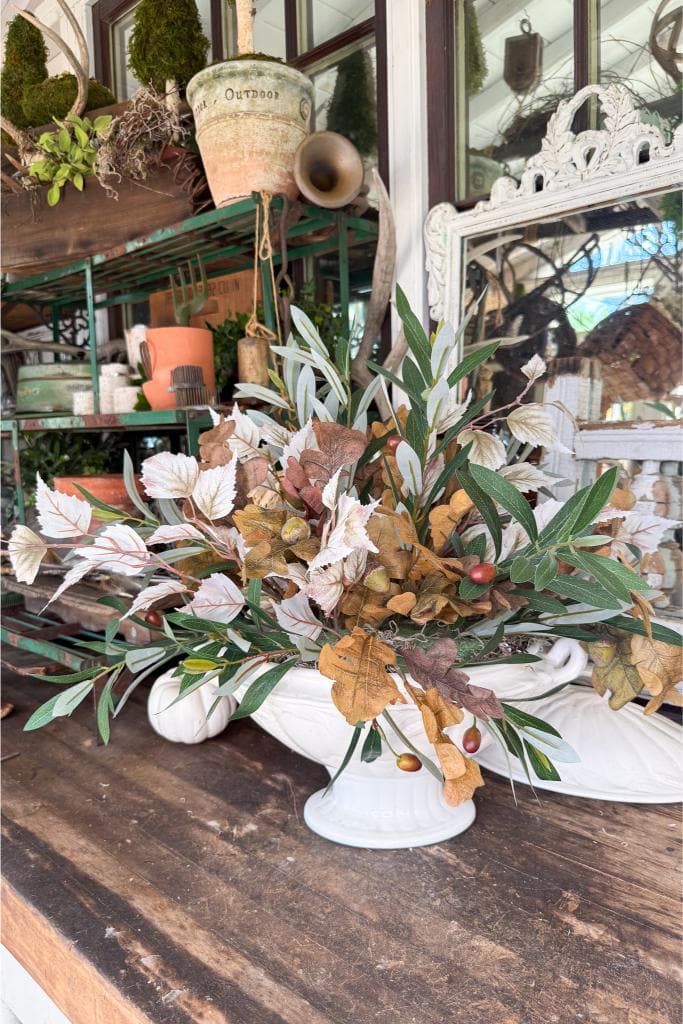
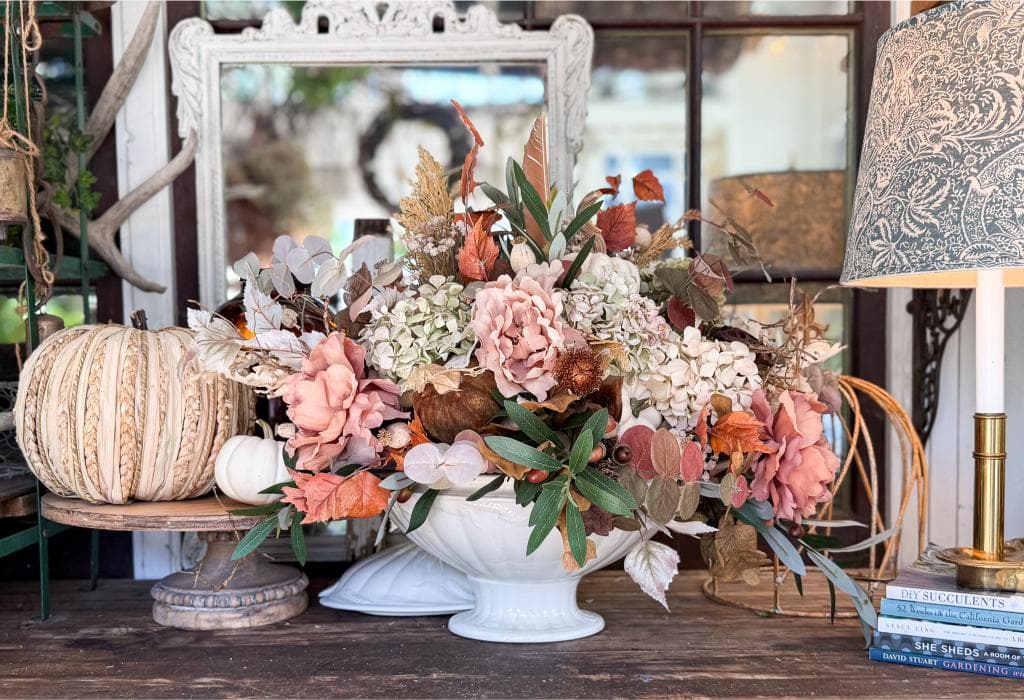
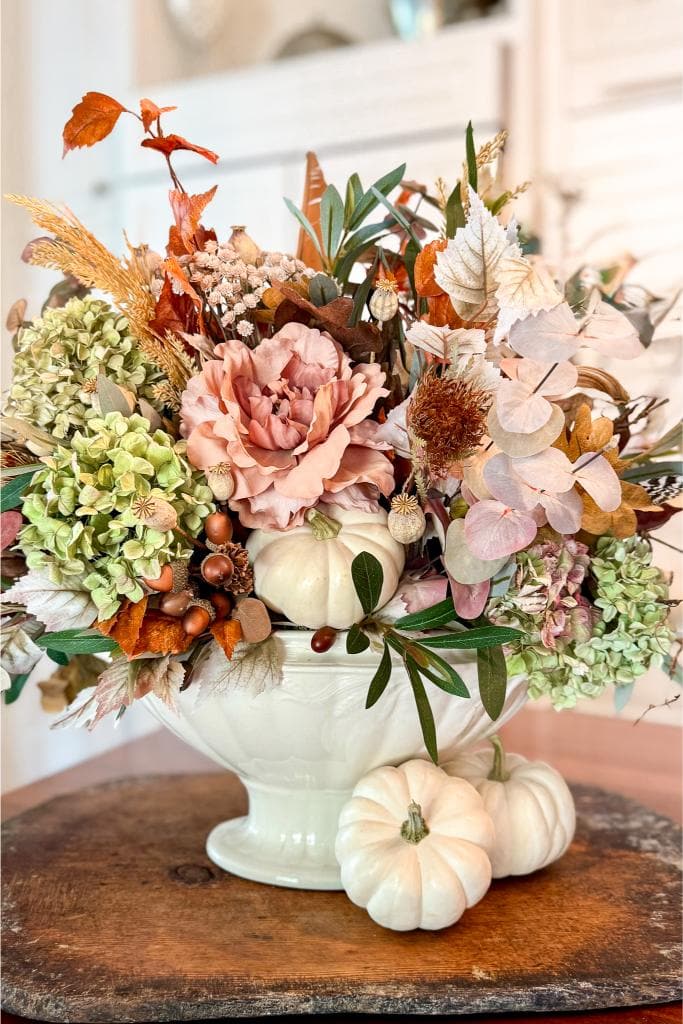
Tuesday is the day—my favorite day of the week! It’s when my little thrift store restocks its shelves, and I never know what treasure might be hiding behind a stack of mismatched dishes or tucked under a pile of baskets. A few weeks ago, I spotted the most charming old soup tureen—a little worn, with just the right wheat pattern—and I knew instantly it had “fall centerpiece” written all over it. And it was only $9.00. That thrifted find became the starting point for my DIY fall centerpiece with a thrifted container, and today I’m excited to show you how you can create one too.
On my blog WM Design House, I may sometimes use affiliate links, which means a small commission is earned if you purchase via the link. The price will be the same whether you use the affiliate link or go directly to the vendor’s website using a non-affiliate link. Read my full disclosure policy here.
Why a Thrifted Container Makes the Perfect DIY Fall Centerpiece
Thrifted containers have a kind of magic that store-bought décor just can’t match. Each piece tells a story, and when you give it new life, your home gains a layer of warmth and character.
- Budget-friendly – Most containers cost just a few dollars.
- Sustainable – Repurposing instead of buying new keeps things eco-friendly.
- Unique – Your centerpiece won’t look like anyone else’s.
- Versatile – Many times you can use the same container for all four seasons.
If you love decorating with secondhand treasures, you’ll also enjoy my tips for budget-friendly fall shelf styling with thrifted decor.


Tip from wendy’s she shed: When out thrifting, look for soup tureens, dough bowls. rustic baskets, silver trophies, enamel buckets- all of them make beautiful foundations for a fall arrangement.

DIY Fall Centerpiece Using a Thrifted Container
Equipment
- 1 Pair of clippers
- 1 Glue gun and glue sticks
Materials
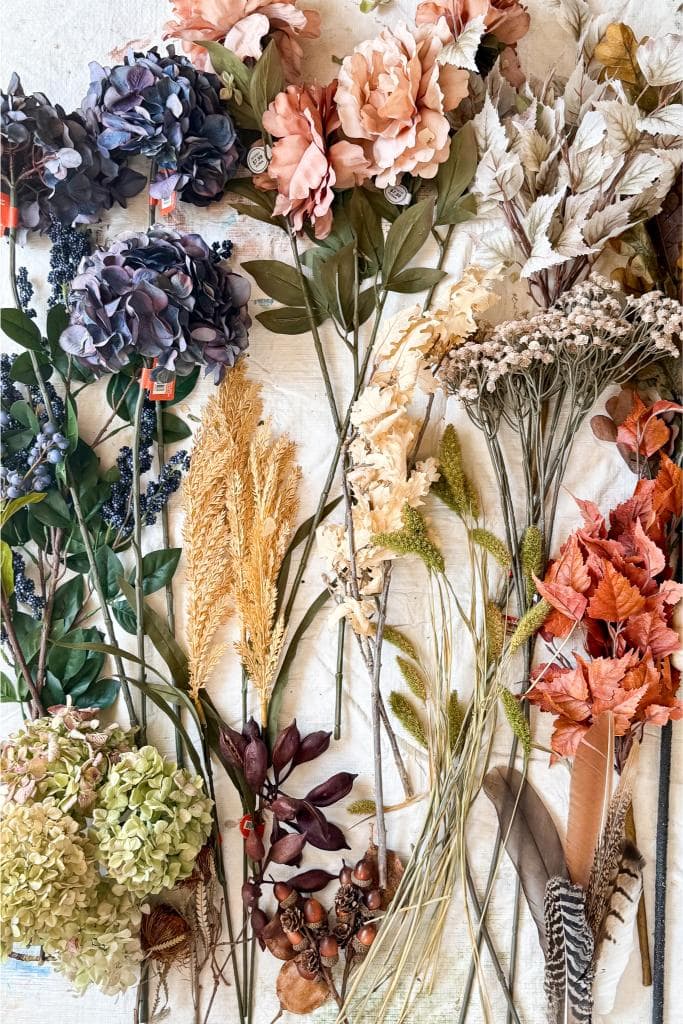
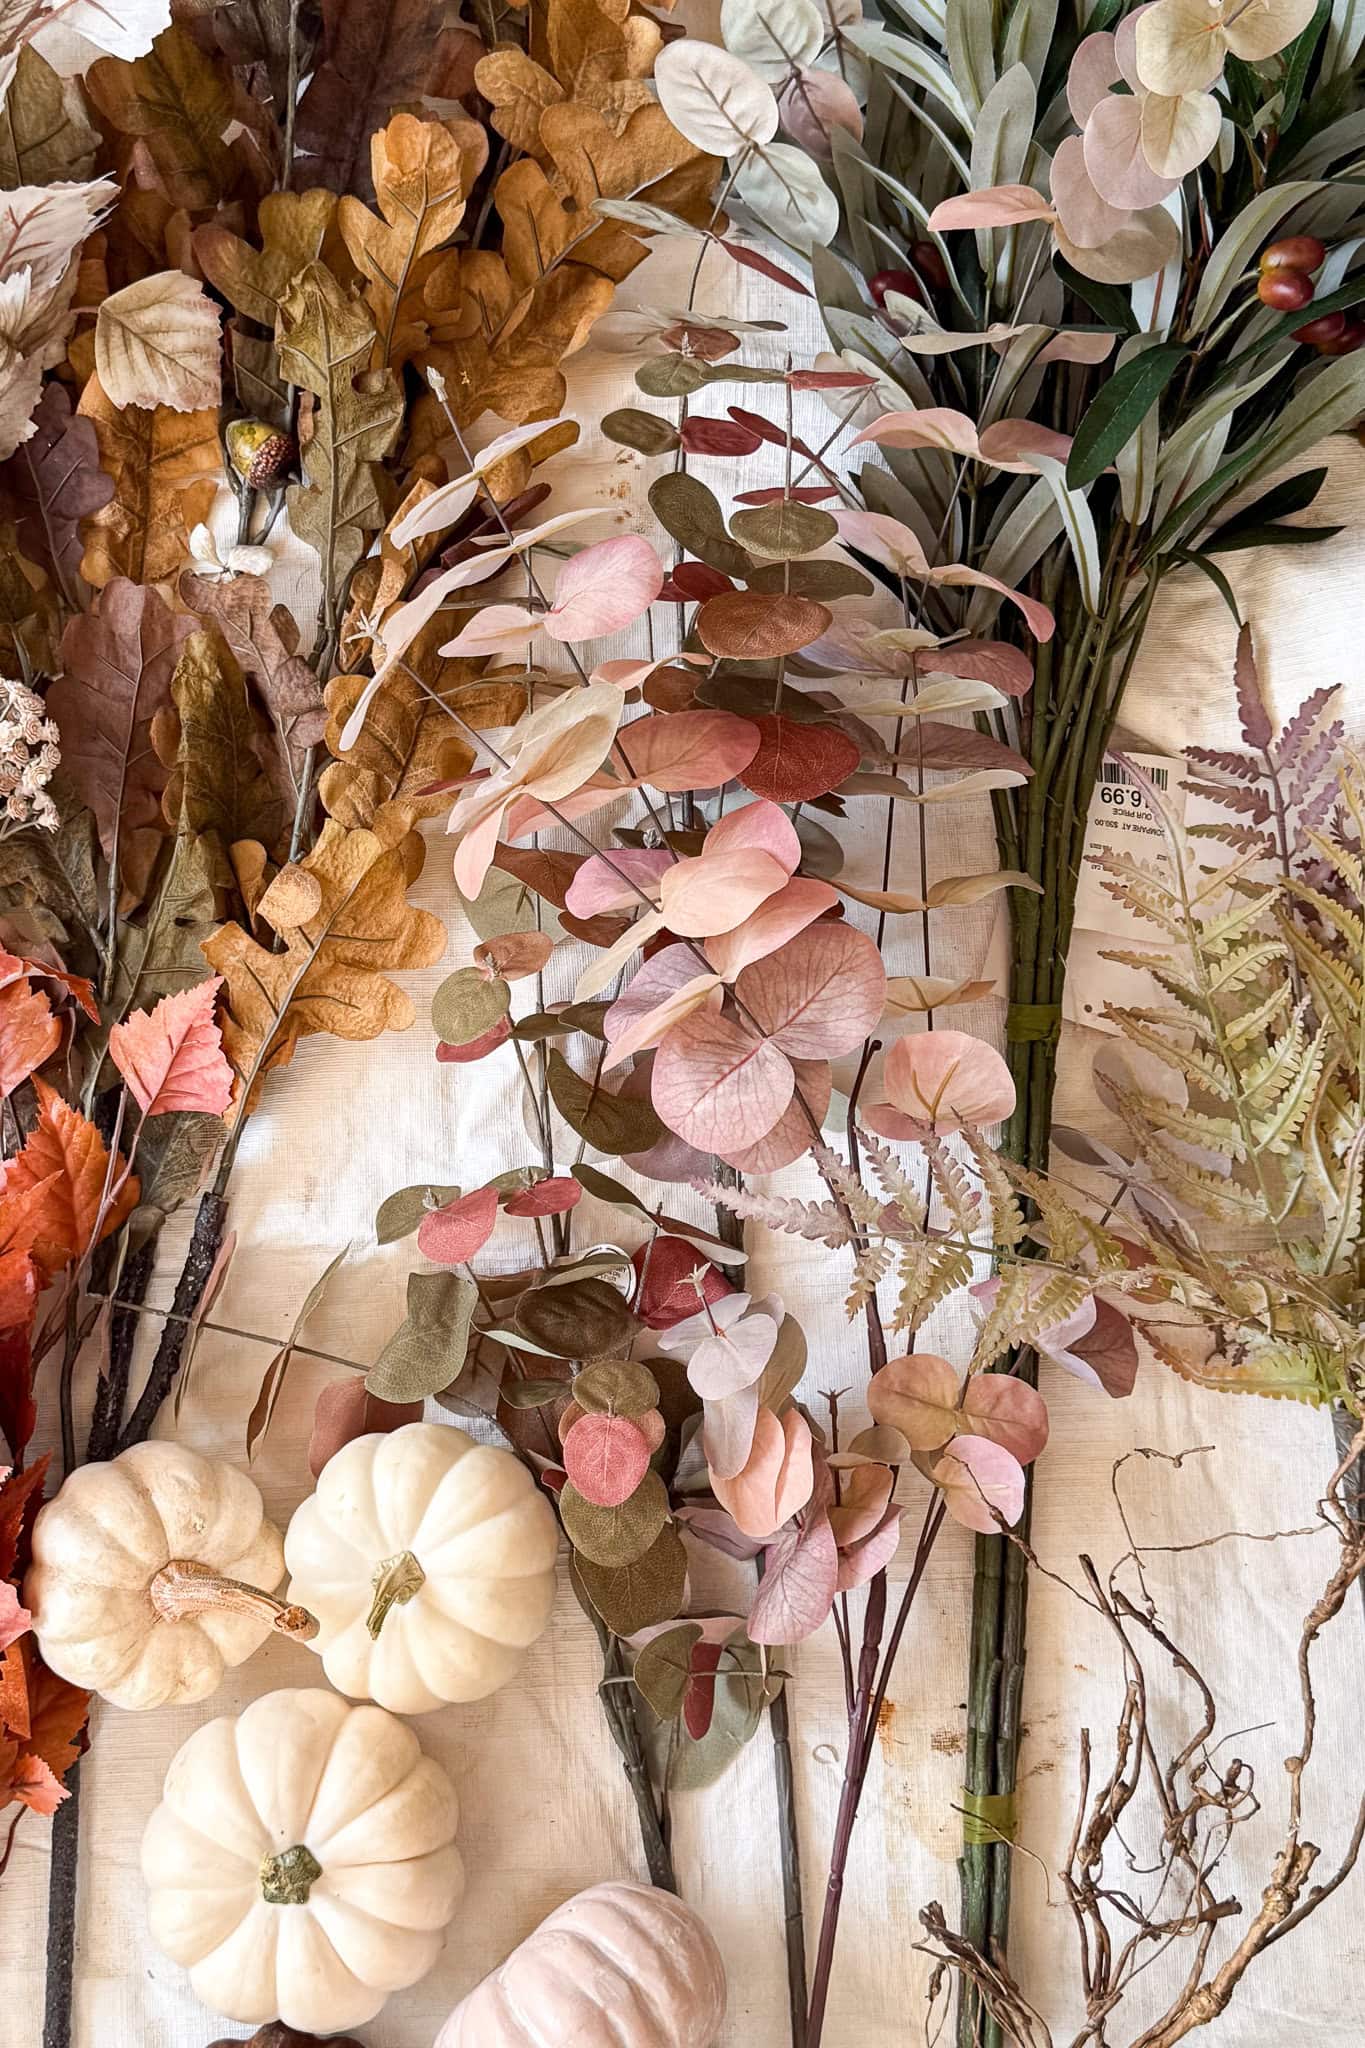
- 1 Thrifted container- soup tureen, crate, bowl, urn, or basket
- 3-4 stems Greenery base – faux eucalyptus magnolia, or foraged clippings
- 4-6 Seasonal accents – mini pumpkins gourds, pinecones, or dried hydrangeas
- 1 block Floral foam or styrofoam – to help anchor everything
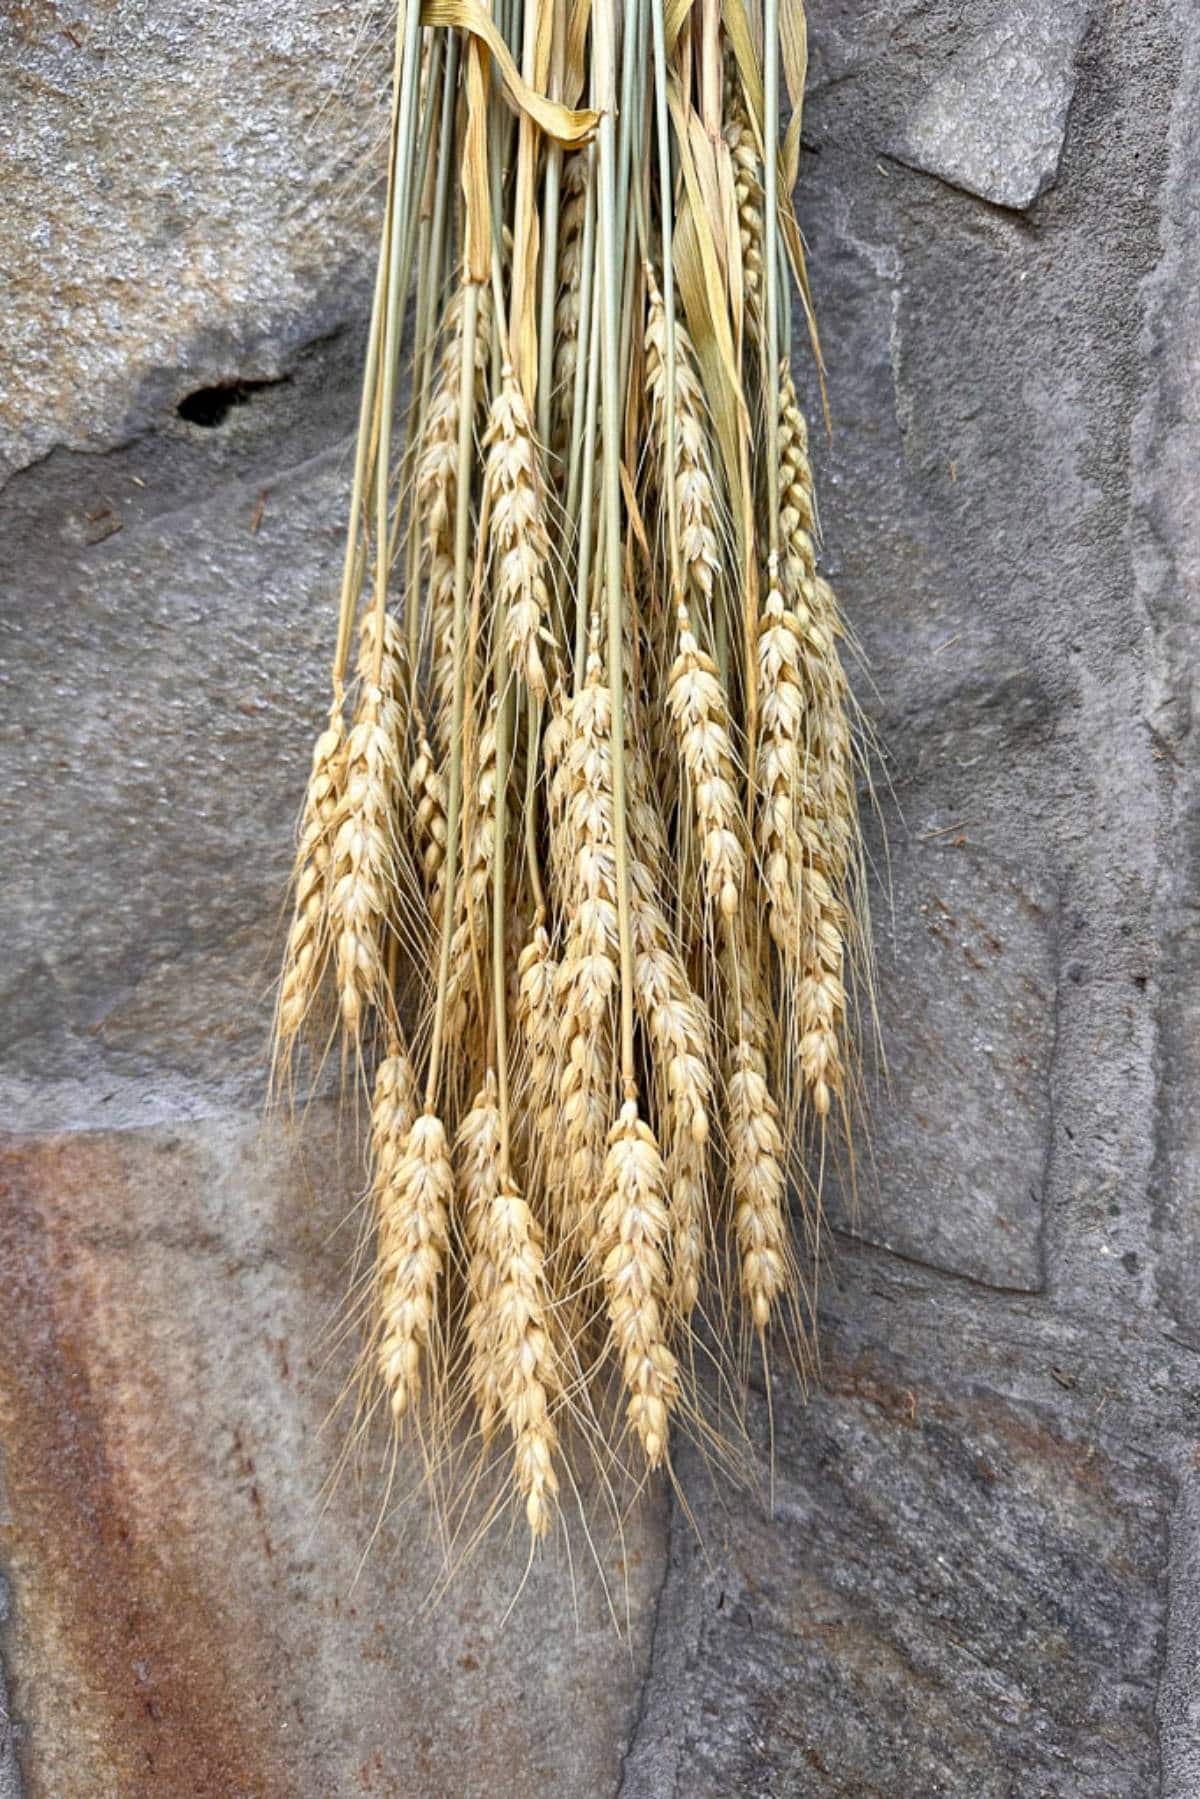
- 3-4 stems Texture elements – wheat stalks feathers, berry sprigs

Step-by-Step: How to Create a DIY Fall Centerpiece with a Thrifted Container
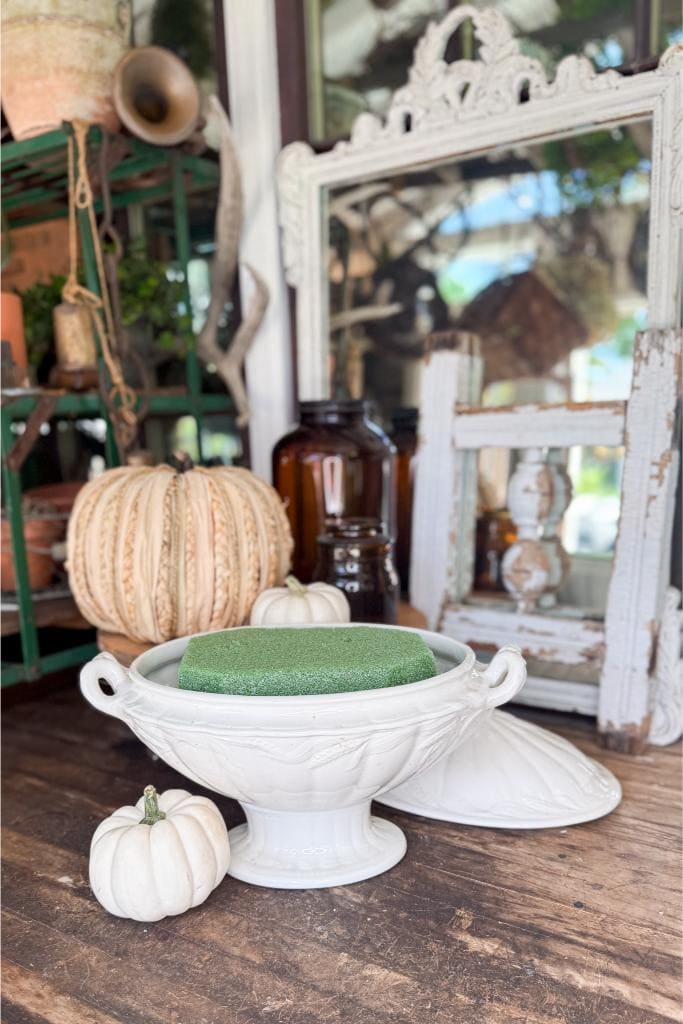
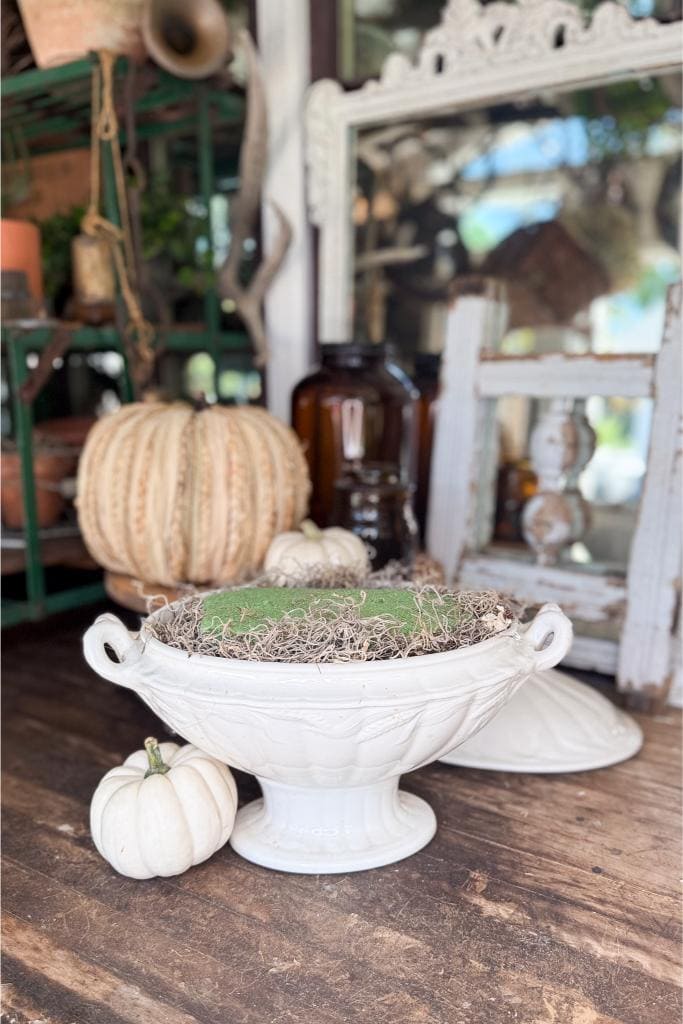
Step 1:Prep Your Thrifted Container for a DIY Fall Centerpiece
Give your thrifted container a quick clean so it’s ready for your DIY fall centerpiece. Since we’re working with faux and dried and real natural materials, there’s no need for liners—just make sure your container is sturdy and dust-free.
I used two blocks of dry foam to hold the greenery and flowers in place. I then surrounded the foam with Spanish moss to hold the foam tightly in place.
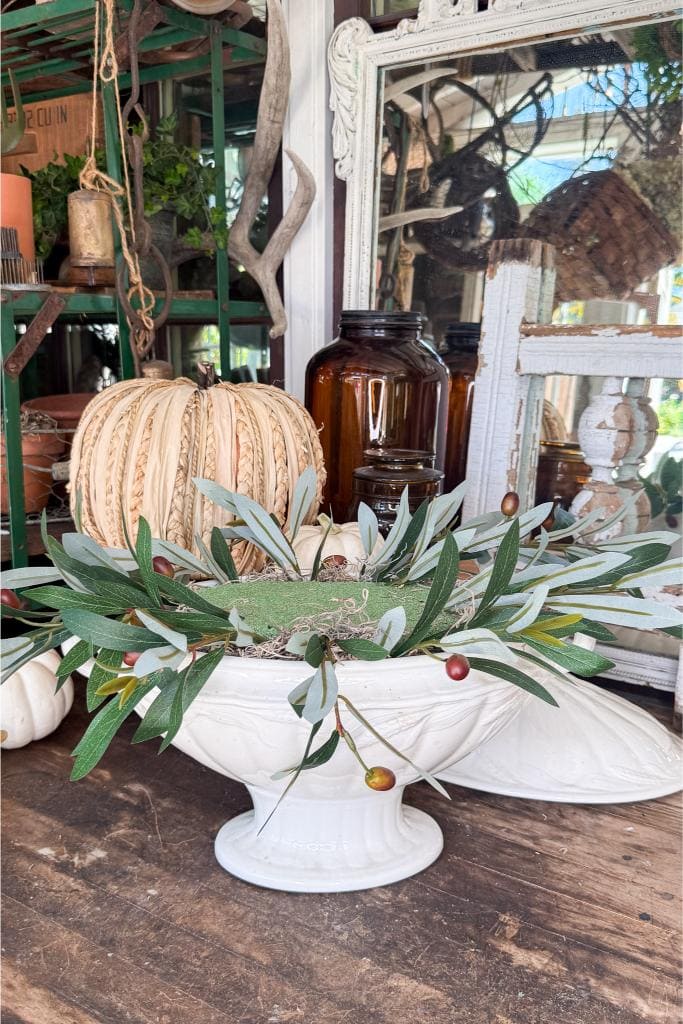
Step 2: Add a Base Layer of Greenery
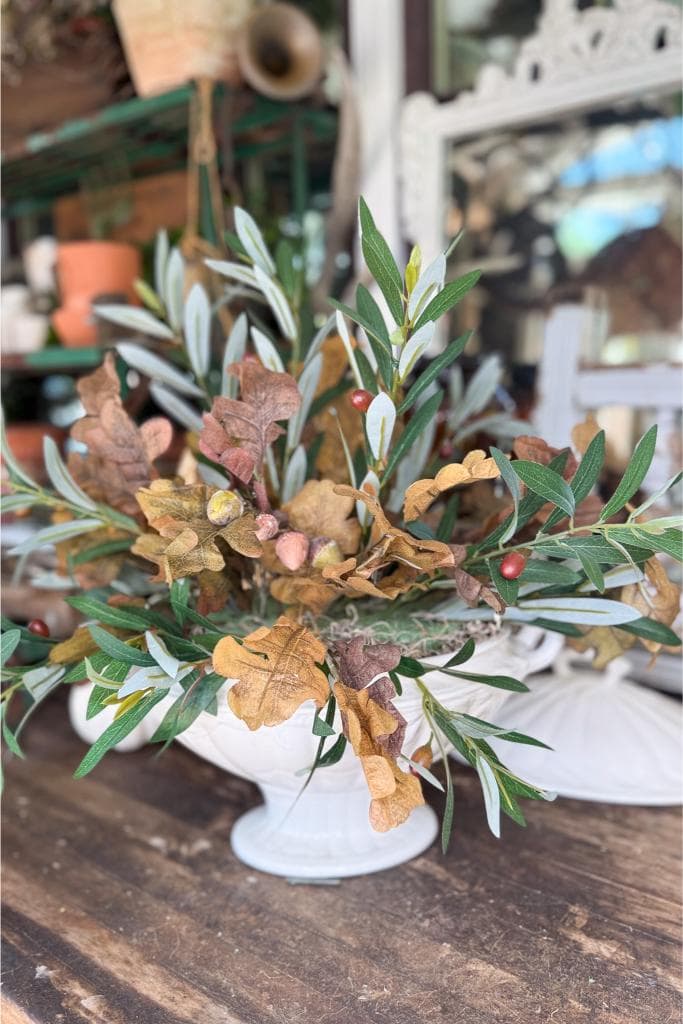
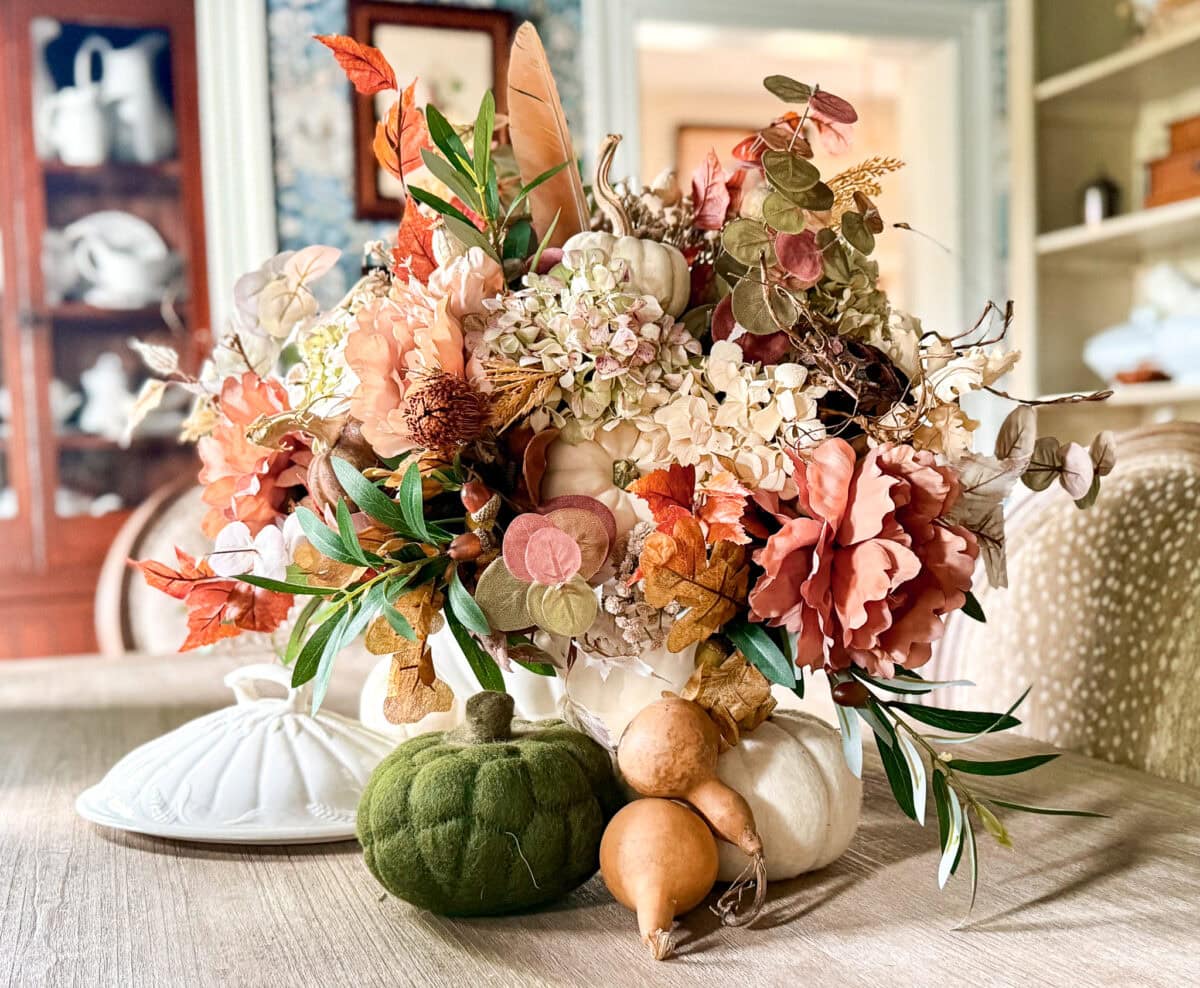
Start by tucking faux greenery or dried leaves around the rim of your container, letting some spill gracefully over the edges to soften the look. I began with olive branches, then layered in golden oak leaves and a few white birch leaves for contrast. Add a couple of taller stems in the center, and continue filling in greenery all the way around. Vary the lengths so some stems drape lower while others sit closer in, and criss-cross pieces to cover any gaps. This creates a natural “nest” that will hold your pumpkins and florals in place.
Tip from wendy’s she shed:
Angle some of your larger elements slightly to the side instead of straight up—this adds movement and a more organic feel.
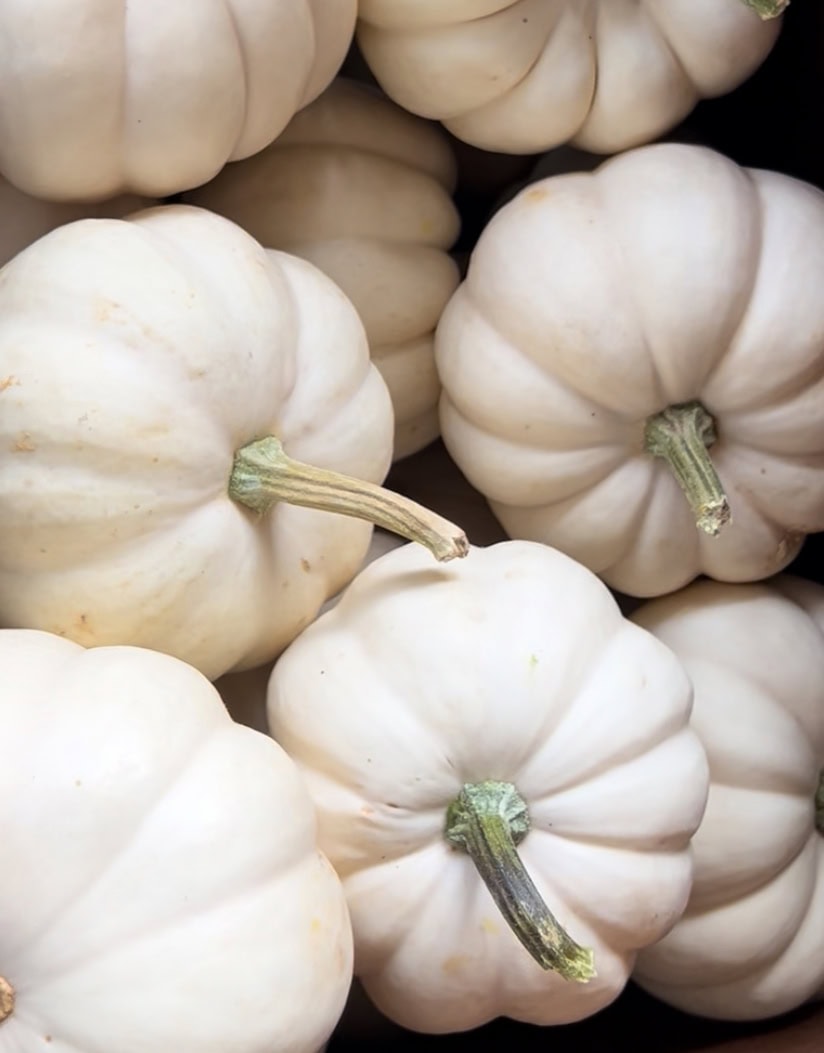
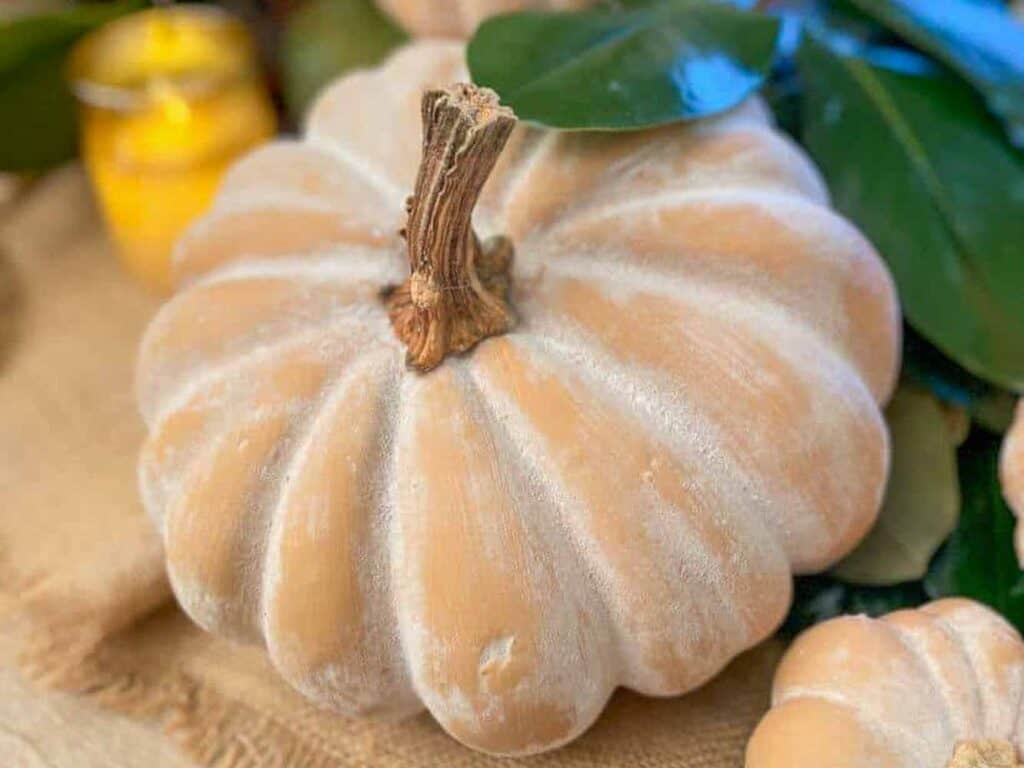
Step 3: Anchor Pumpkins and Gourds in Your DIY Fall Centerpiece
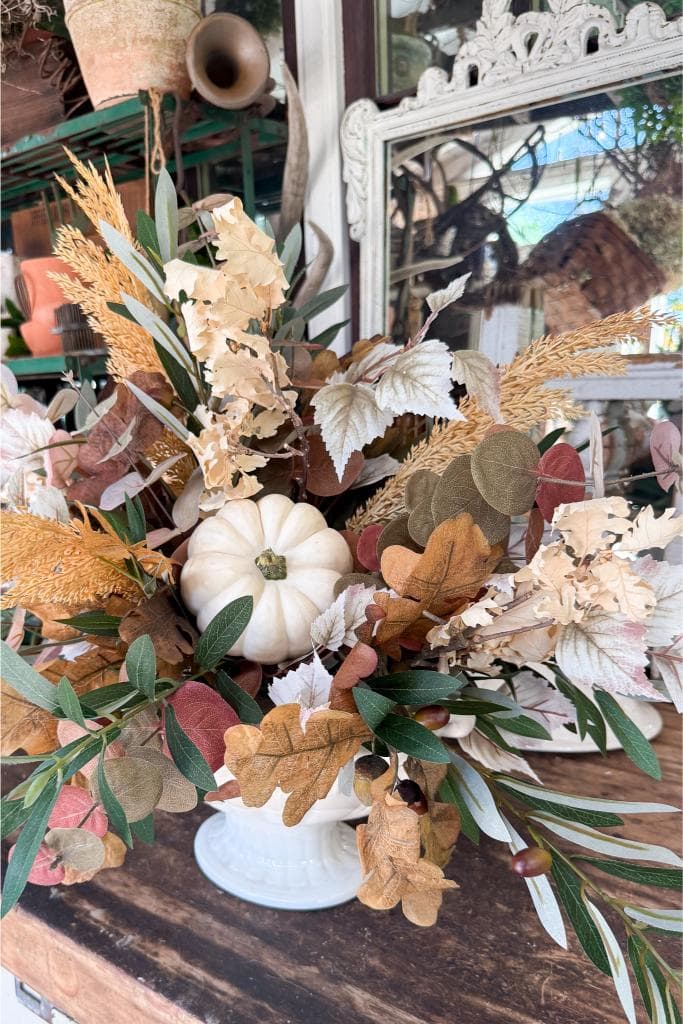
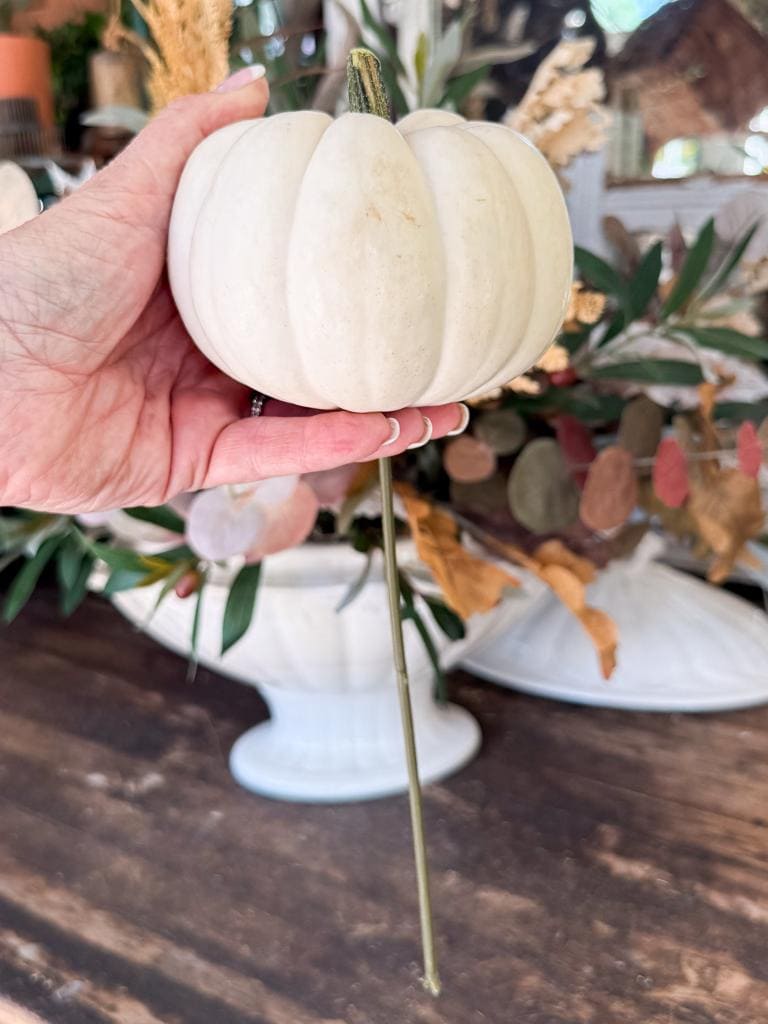

Pumpkins and gourds are perfect anchors in a DIY fall centerpiece with a thrifted container. To keep them secure, insert a wooden skewer, or even a sturdy floral pick into the bottom of each pumpkin or pinecone before tucking it into the arrangement
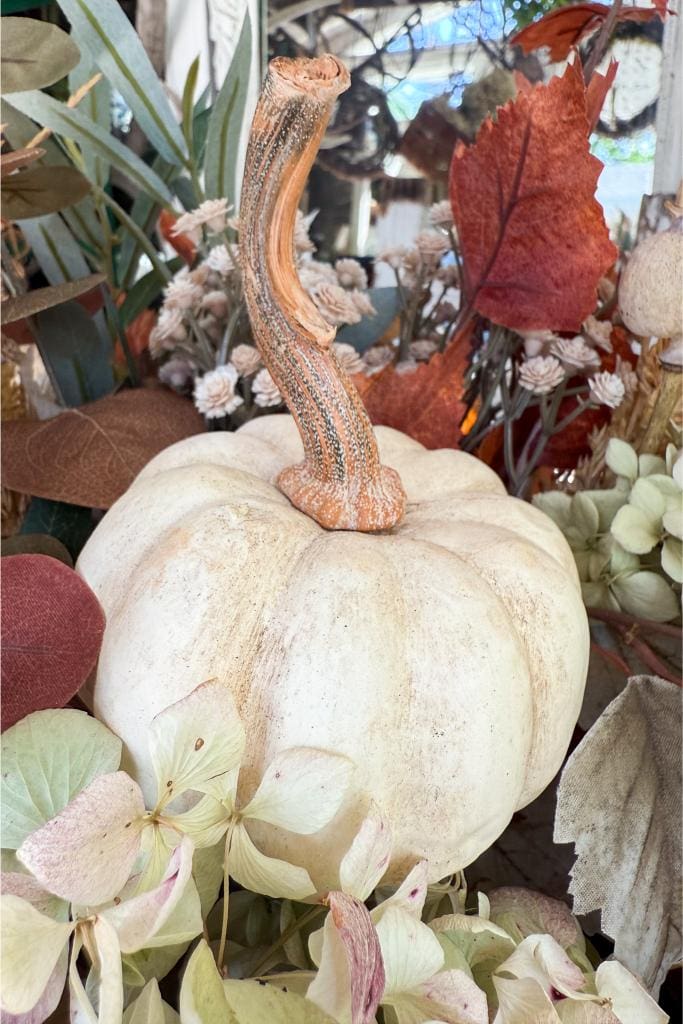
I used an assortment of real pumpkins, some of my DIY terra cotta pumpkins and a rustic metal patina pumpkin I made.
This makes it easy to position them exactly where you want and prevents them from rolling around. Spread the larger pieces out for balance, but don’t worry about perfect symmetry—nature is always a little uneven, and that’s what makes the arrangement feel natural.
Tip from wendy’s she shed:
If you’re using real pumpkins, give them a quick vinegar bath first to help them last longer indoors.
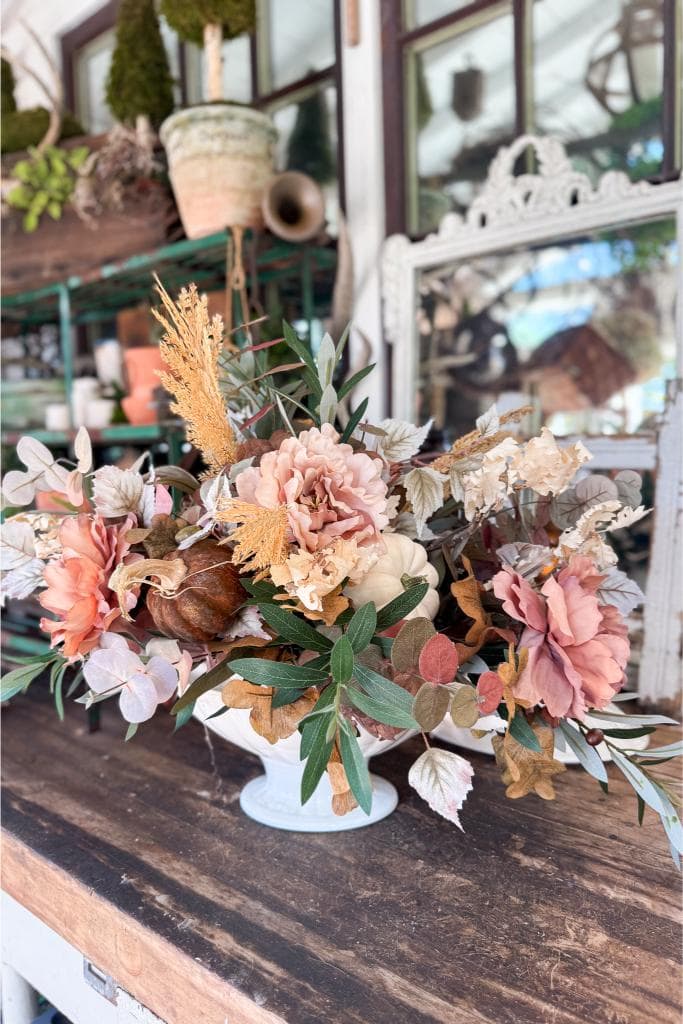
Step 4: Fill with Florals and Texture
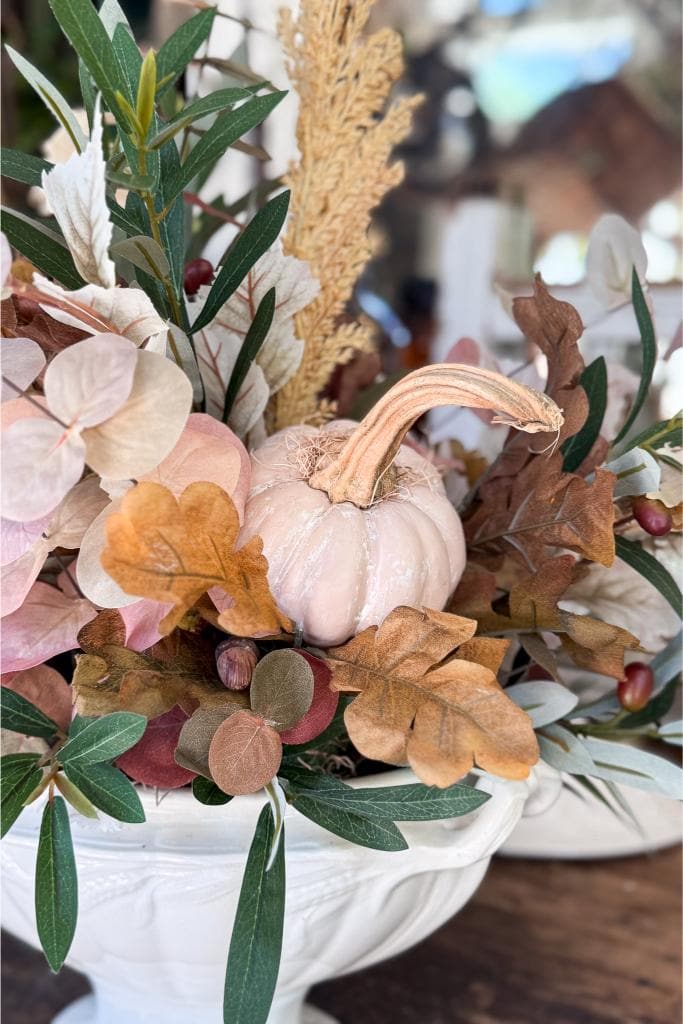
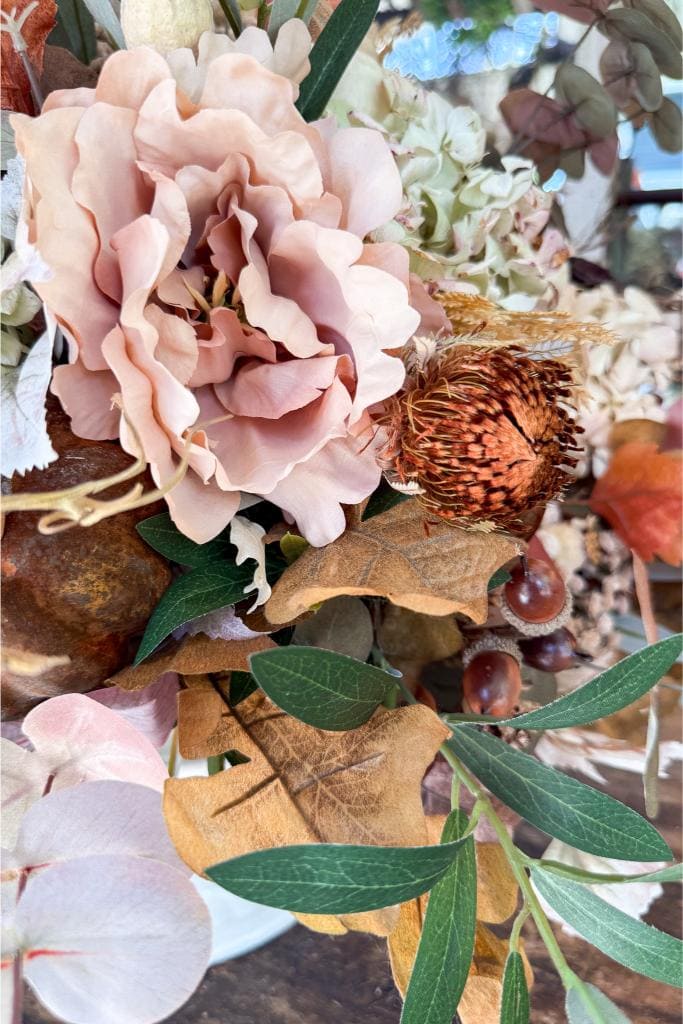
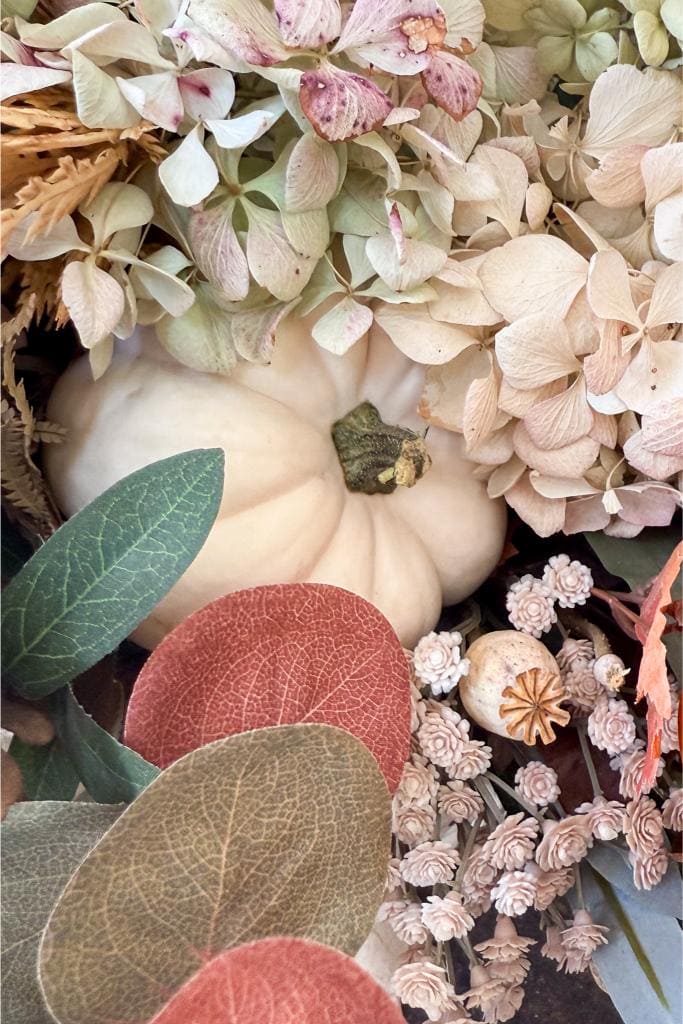
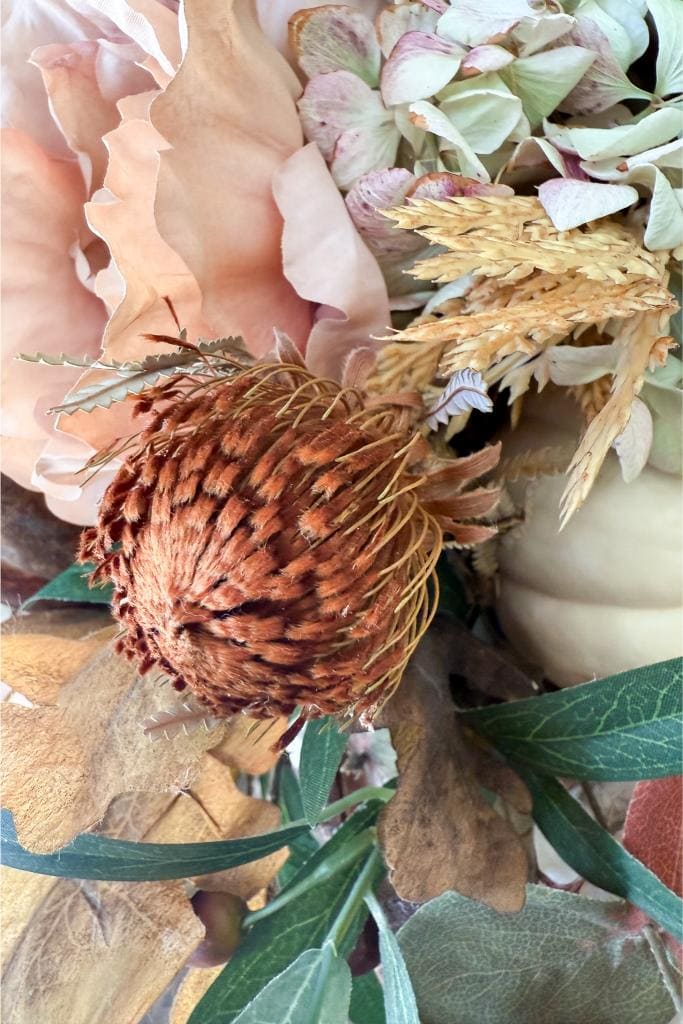
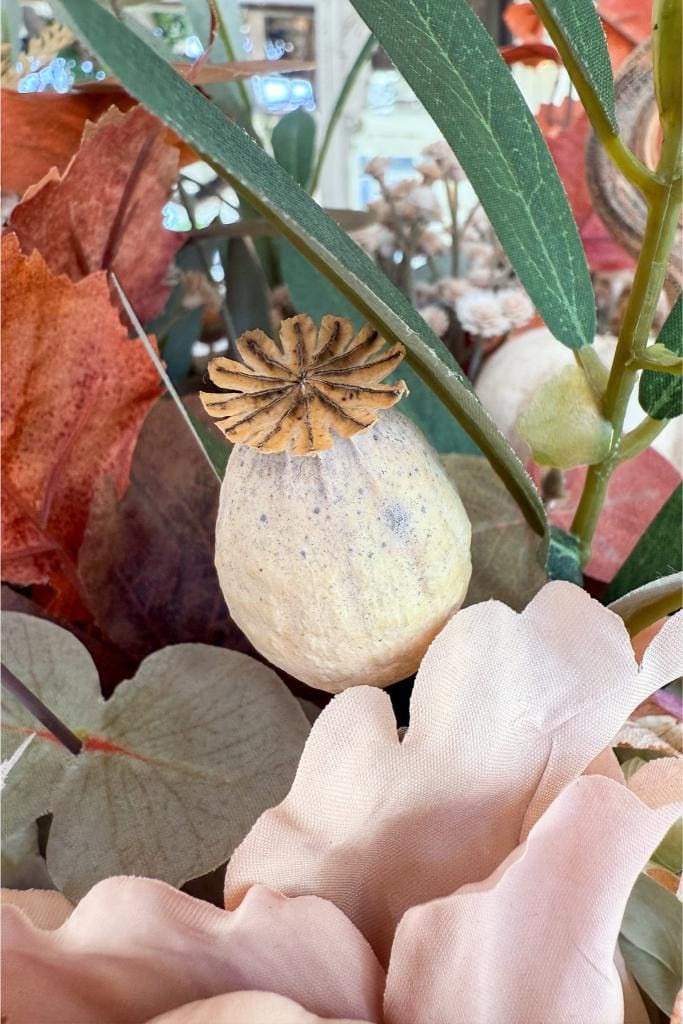
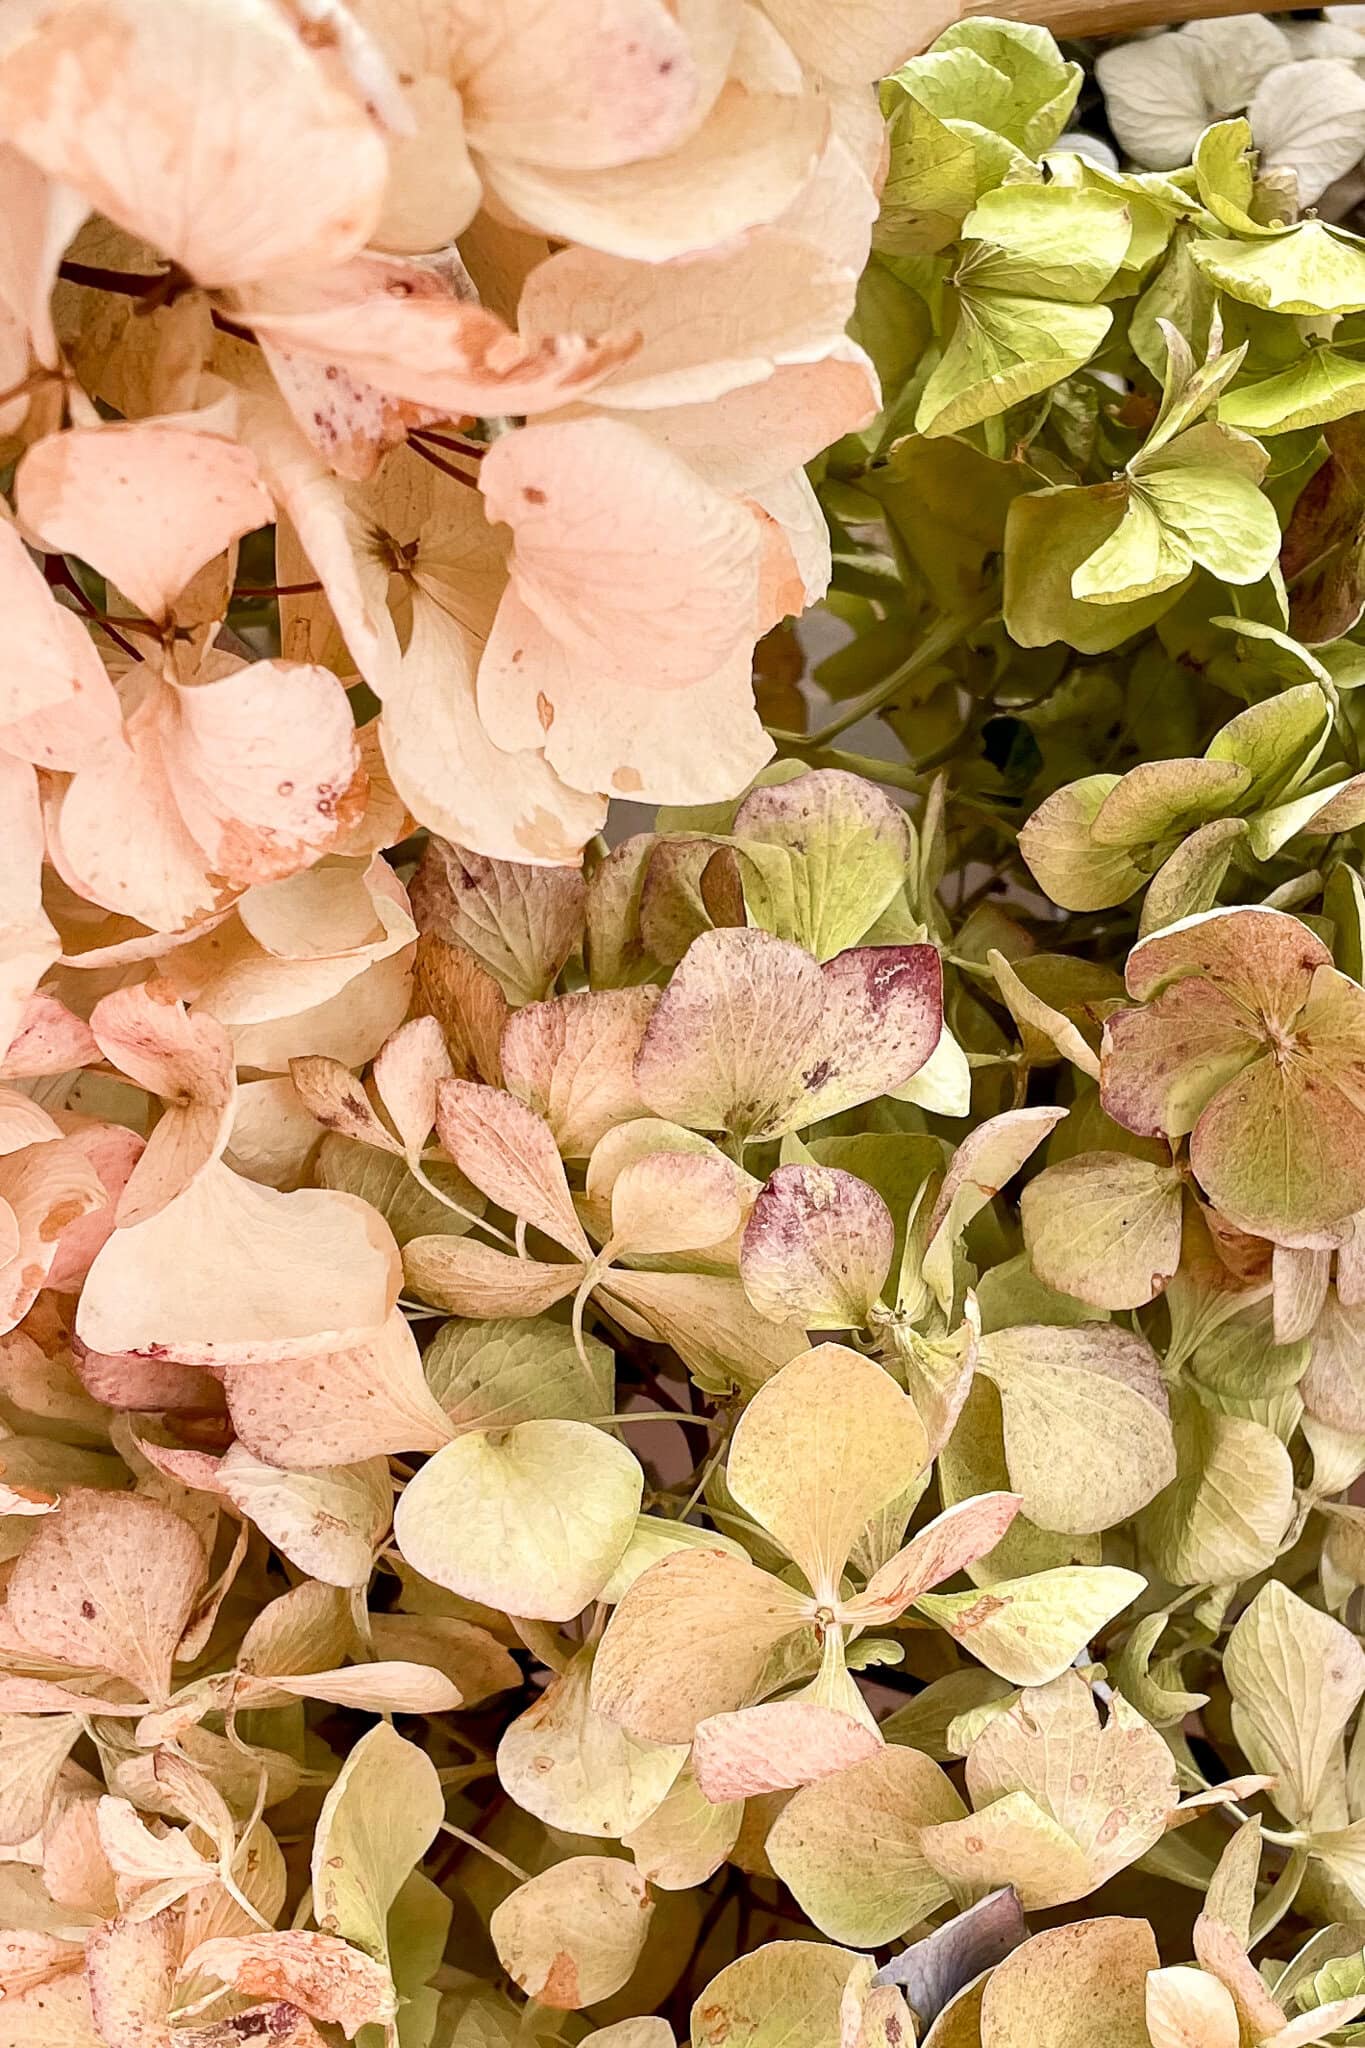
Layer in dried hydrangeas, faux peonies, or wheat stalks for color and depth. The combination of faux and dried gives dimension and ensures your arrangement lasts all season.
Shop the Post
Step 5: Add Finishing Touches
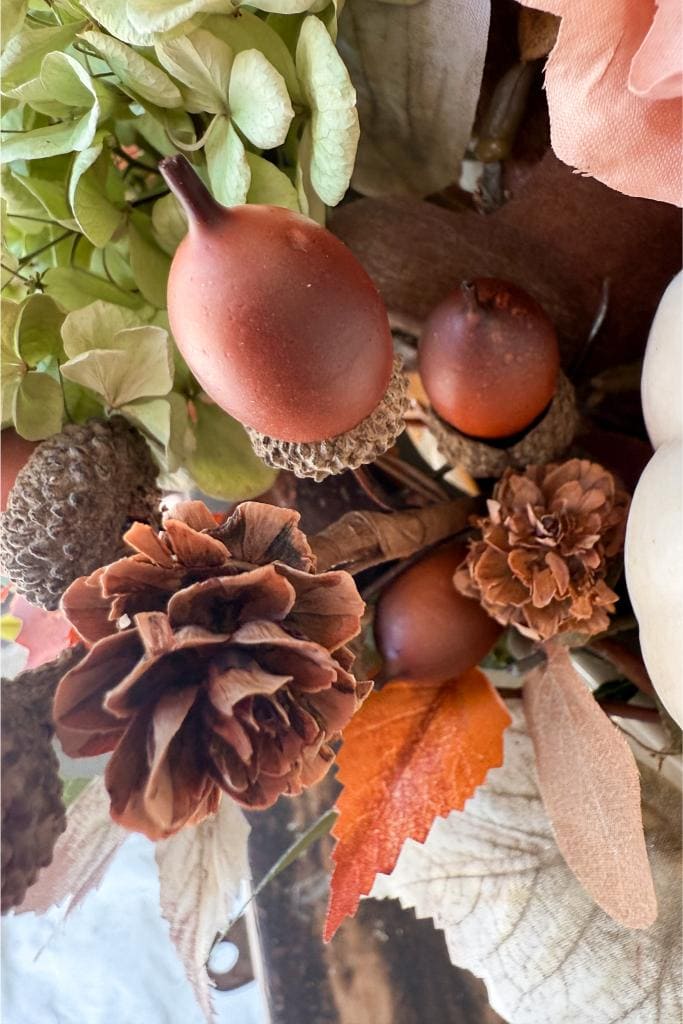
Take a step back and look at your arrangement from every angle. If you notice any gaps, tuck in a few smaller accents like seed pods, feathers, or berries. These little details are the “icing on the cake” that bring your centerpiece to life.

Why Mixing Real, Faux, and Dried Elements Creates a Unique DIY Fall Centerpiece
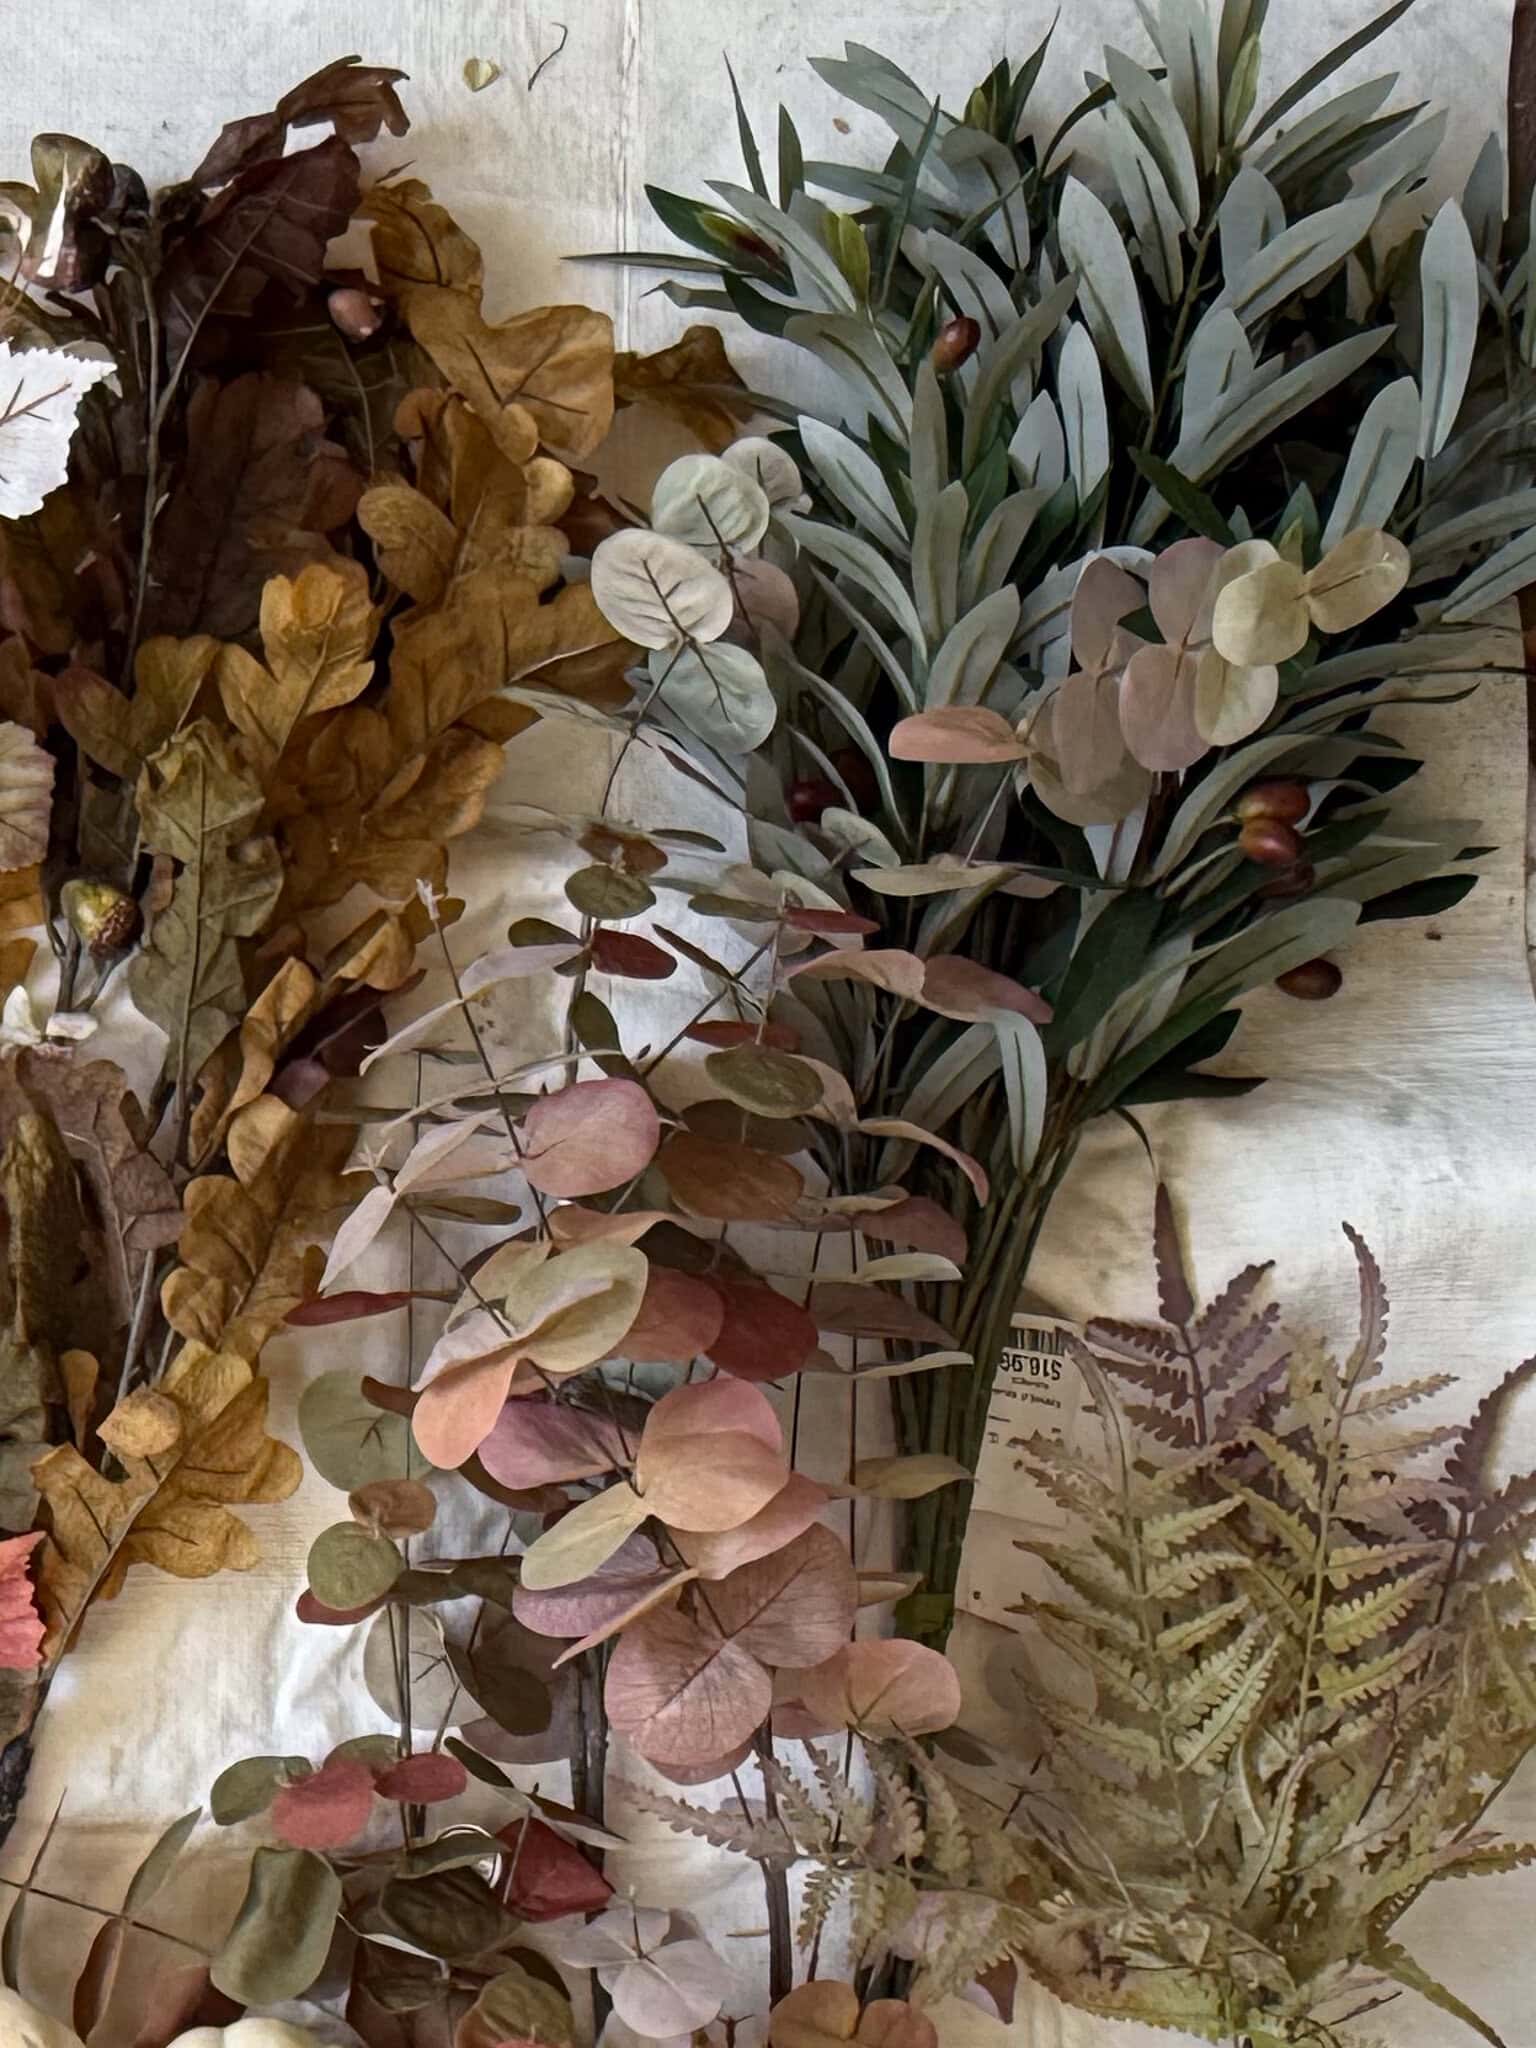
One of my favorite ways to make a centerpiece feel rich and layered is to combine real, faux, and dried pieces. Each one brings something special to the arrangement:
- Faux greenery adds fullness and structure, and you can reuse it year after year.
- Dried flowers or leaves (like hydrangeas, pods, or wheat) bring natural texture and soft, muted colors.
- Real accents—tiny pumpkins, gourds, or fresh clippings from the yard—add authenticity and that “fresh from the garden” charm.
When you mix all three together, you get a centerpiece that feels lush and organic, but still practical and long-lasting. Plus, it keeps the arrangement from looking too “perfect” or store-bought.
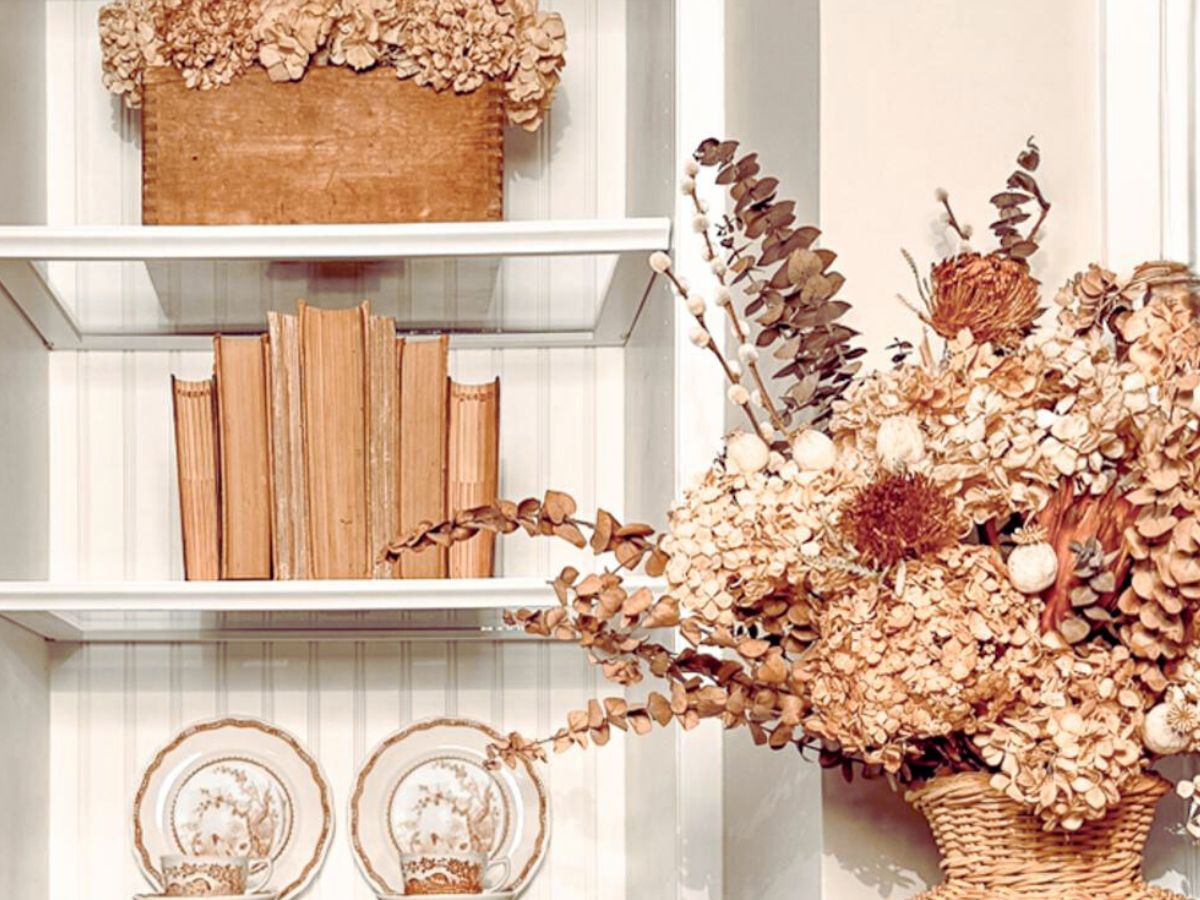
Budget-Friendly Fall Decor to Pair with a DIY Centerpiece
These budget-friendly items are perfect to pair with a DIY fall centerpiece, whether you’re using a soup tureen, basket, or silver bowl.
- Brass or glass candlesticks – usually just a few dollars at the thrift store, and they add instant warmth.
- Vintage books – stack them under or next to your container for height and character.
- Wooden cutting boards or trays – the perfect budget-friendly base that frames your arrangement.
- Plaid scarf or linen napkin – drape one underneath instead of buying a new table runner.
- Seasonal ribbon or fabric scraps – tie around handles or tuck into the display for a soft finishing touch.
I love pairing these items not only with a DIY fall centerpiece, but also when styling shelves. You can see how I used similar thrifted finds in my fall shelf styling tutorial.
Tip from wendy’s sheshed: Shop your home first! Many of the best styling pieces—like old cookbooks, baskets, or bread boards—are already sitting in your closets and cabinets.
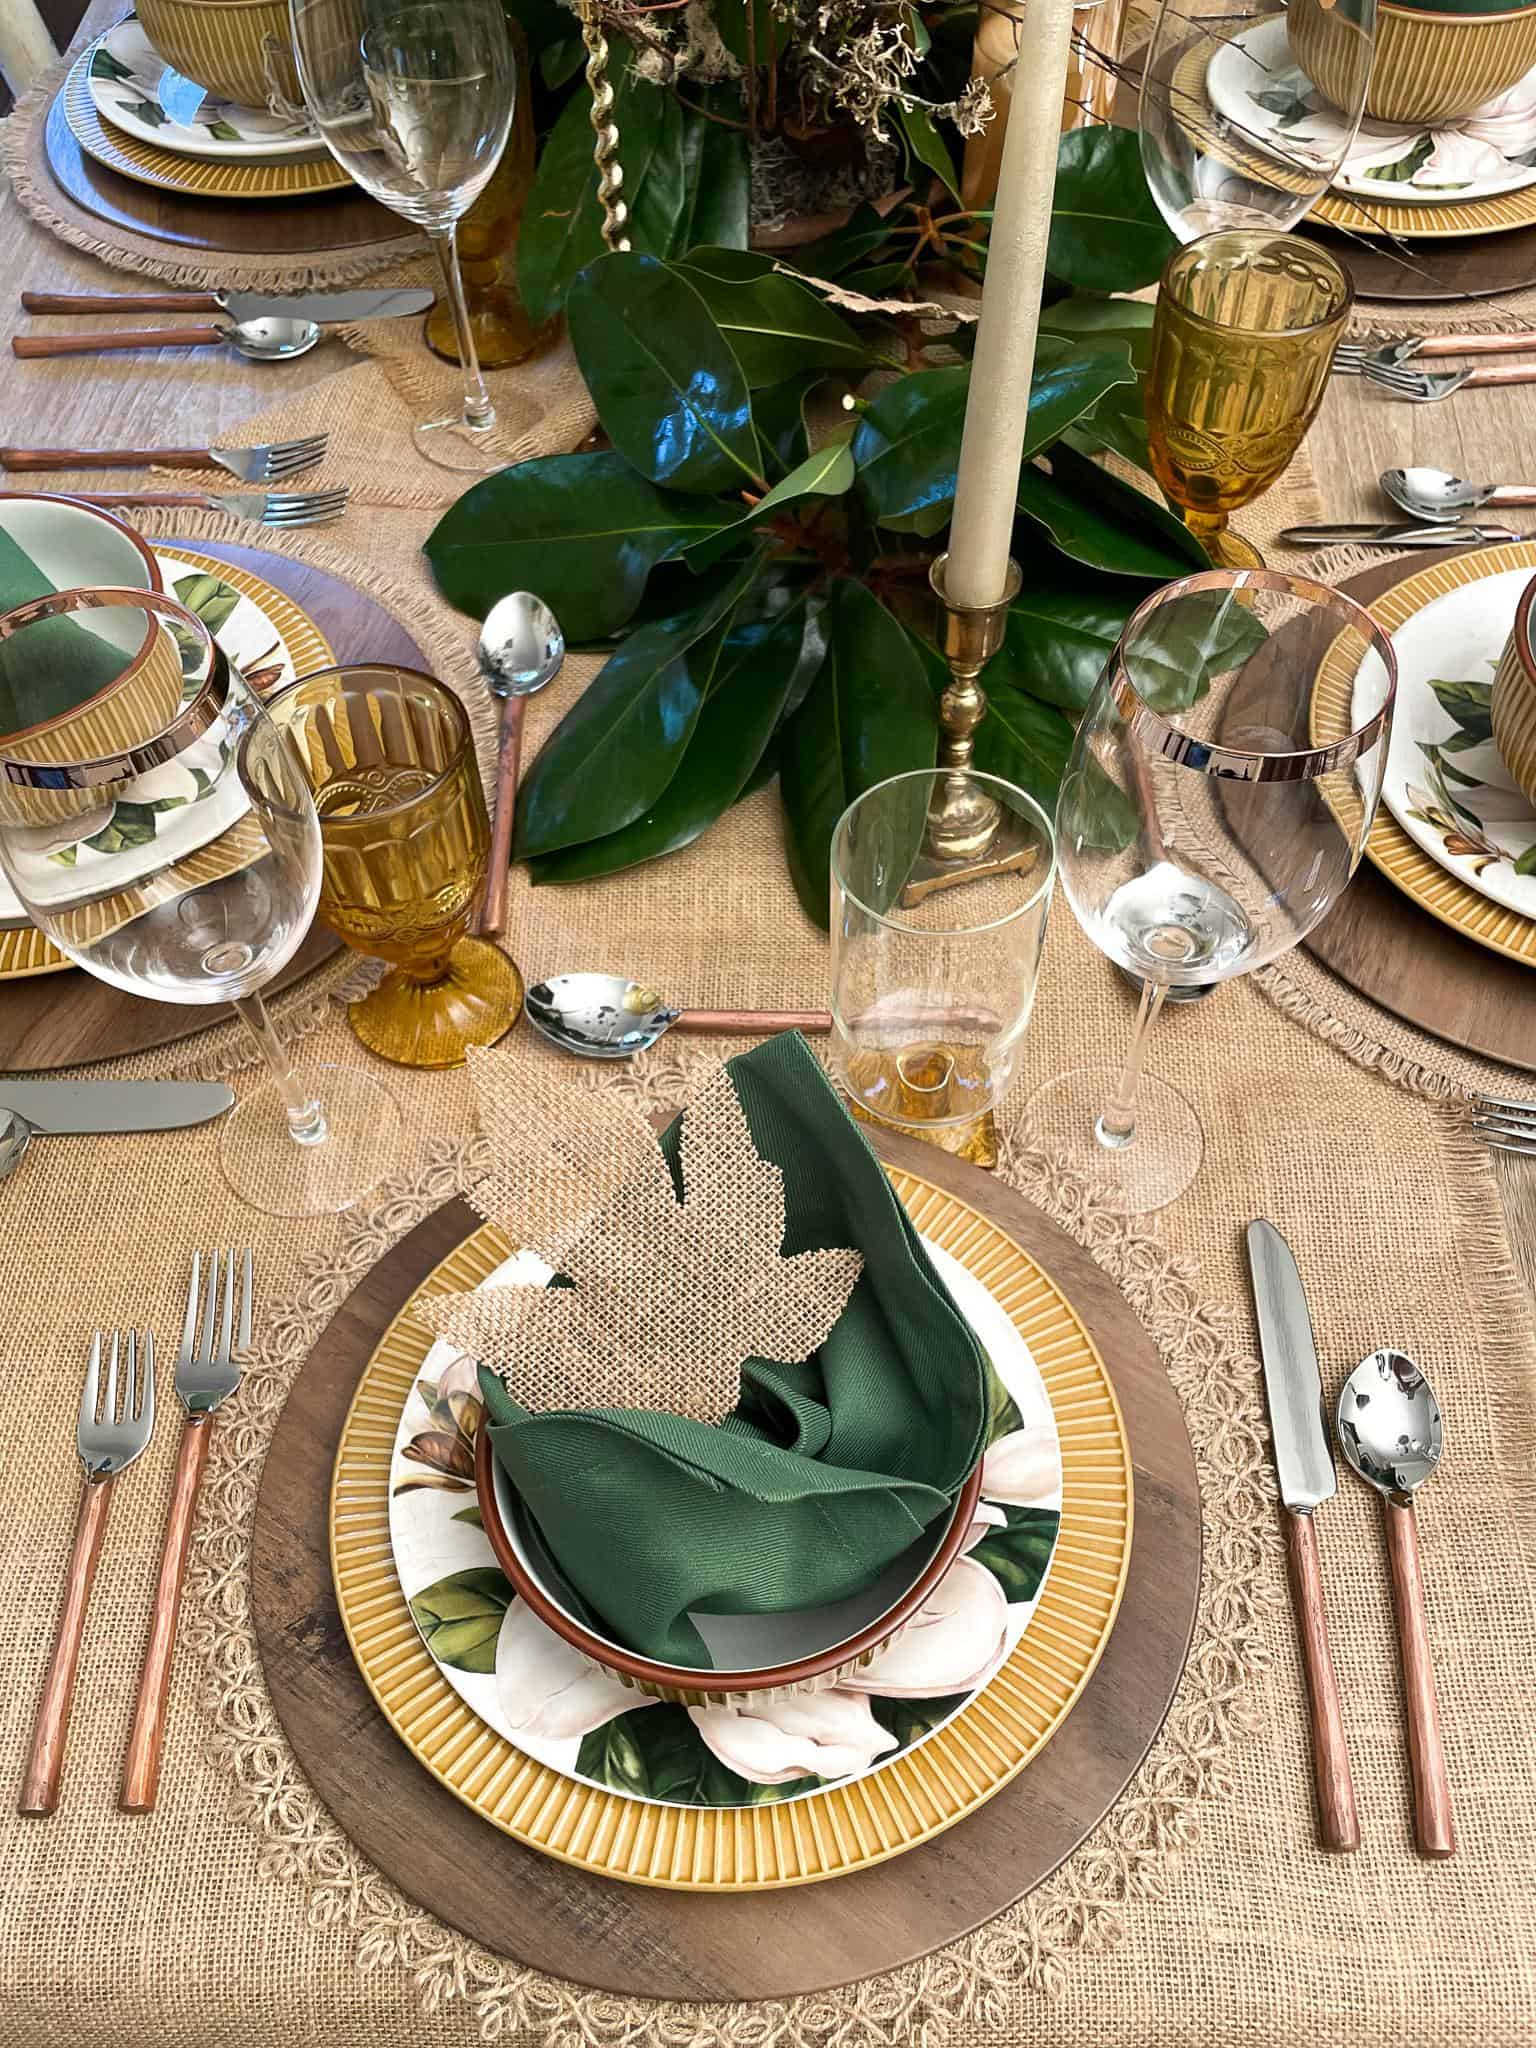
Where to Display Your Thrifted Fall Decor
Dining Table – the star of your Thanksgiving gathering.
Kitchen Island – instant warmth where everyone gathers.
Mantel– – Add your newly designed arrangement to your mantel as a focal point.
Coffee Table – styled with candles and vintage books.
Other Tutorials from WM Design House
If you love this thrifted Container arrangement, you might also enjoy some of my other favorite fall projects:
DIY Terra Cotta Pumpkin Dupe: Pottery Barn Pumpkins

DIY Rope Wreath for the Fall Season
11 Beautiful Budget Friendly Fall Shelf Decor Ideas with Thrifted Decor
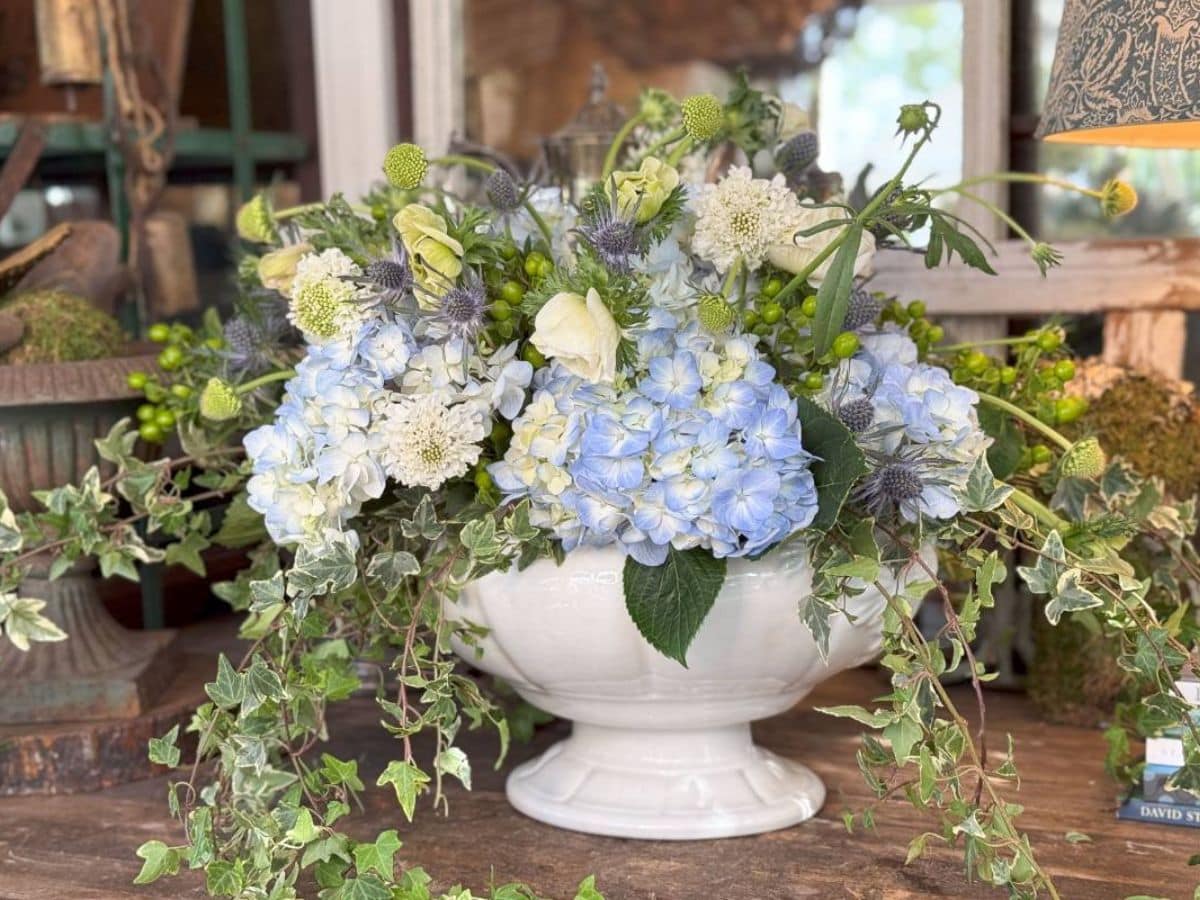
Creating a DIY fall centerpiece with a thrifted container is about more than decorating—it’s about storytelling. That little soup tureen I found for just a few dollars became the heart of my autumn table, layered with dried blooms from the garden and tiny pumpkins from the market and my craft room. It’s proof that you don’t need a big budget to create a warm, welcoming home.
So next time you wander through your favorite thrift store, keep an eye out for that container with a little extra charm. With a dash of imagination, it might just become the highlight of your fall décor.


Did you make this craft?
We would love to see what you have created, so mention us @wmdesignhouse or tag us using #wmdesignhouse so we can see your creations!
More about me!

Hello, I’m Wendy – a dedicated homemaker with a deep passion for decorating, gardening, cooking, and crafting. I find joy in harmonizing beautiful elements to fashion a space that is both comfortable and inspiring. I will help you create a beautiful home, one project at a time.

LOVE this, Wendy!! What an amazing find! The mix of the real and faux looks SO beautiful. Such a beautiful fall decor piece!