DIY Book Page Wreath: Vintage Charm from Old Pages
If you know me, you know I have a soft spot for old books. Whenever I wander through an estate sale, the book table is the very first place I go. They just don’t make them like they used to — the worn leather covers, gold-edged pages, and delicate embossing are simply irresistible. So when I decided to create a book page wreath, it felt like the perfect way to give those vintage pages a second life while adding a touch of timeless charm to my home decor.
But what I love most are the stories they hold beyond the words inside — little handwritten notes, dates, or sweet inscriptions from one loved one to another. One of my favorite finds even dates back to the early 1800s!
On my blog WM Design House, I may sometimes use affiliate links, which means a small commission is earned if you purchase via the link. The price will be the same whether you use the affiliate link or go directly to the vendor’s website using a non-affiliate link. Read my full disclosure policy here.
Why You’ll Love This DIY Book Wreath
I often use these vintage treasures in my home decor, stacking them on shelves or styling them under vases. But every once in a while, I like to give them new life through a creative project. Today’s craft — a DIY book page wreath — combines my love for timeless stories, aged textures, and handmade charm into one beautiful decoration.
- Combines natural twigs and vintage paper for timeless charm
- Uses recycled materials — an eco-friendly, budget-friendly craft
- Comes together in under an hour with simple tools
- The archival ink and Mod Podge combo gives your leaves realistic depth and durability so they hold up for years.
Handcrafted Society
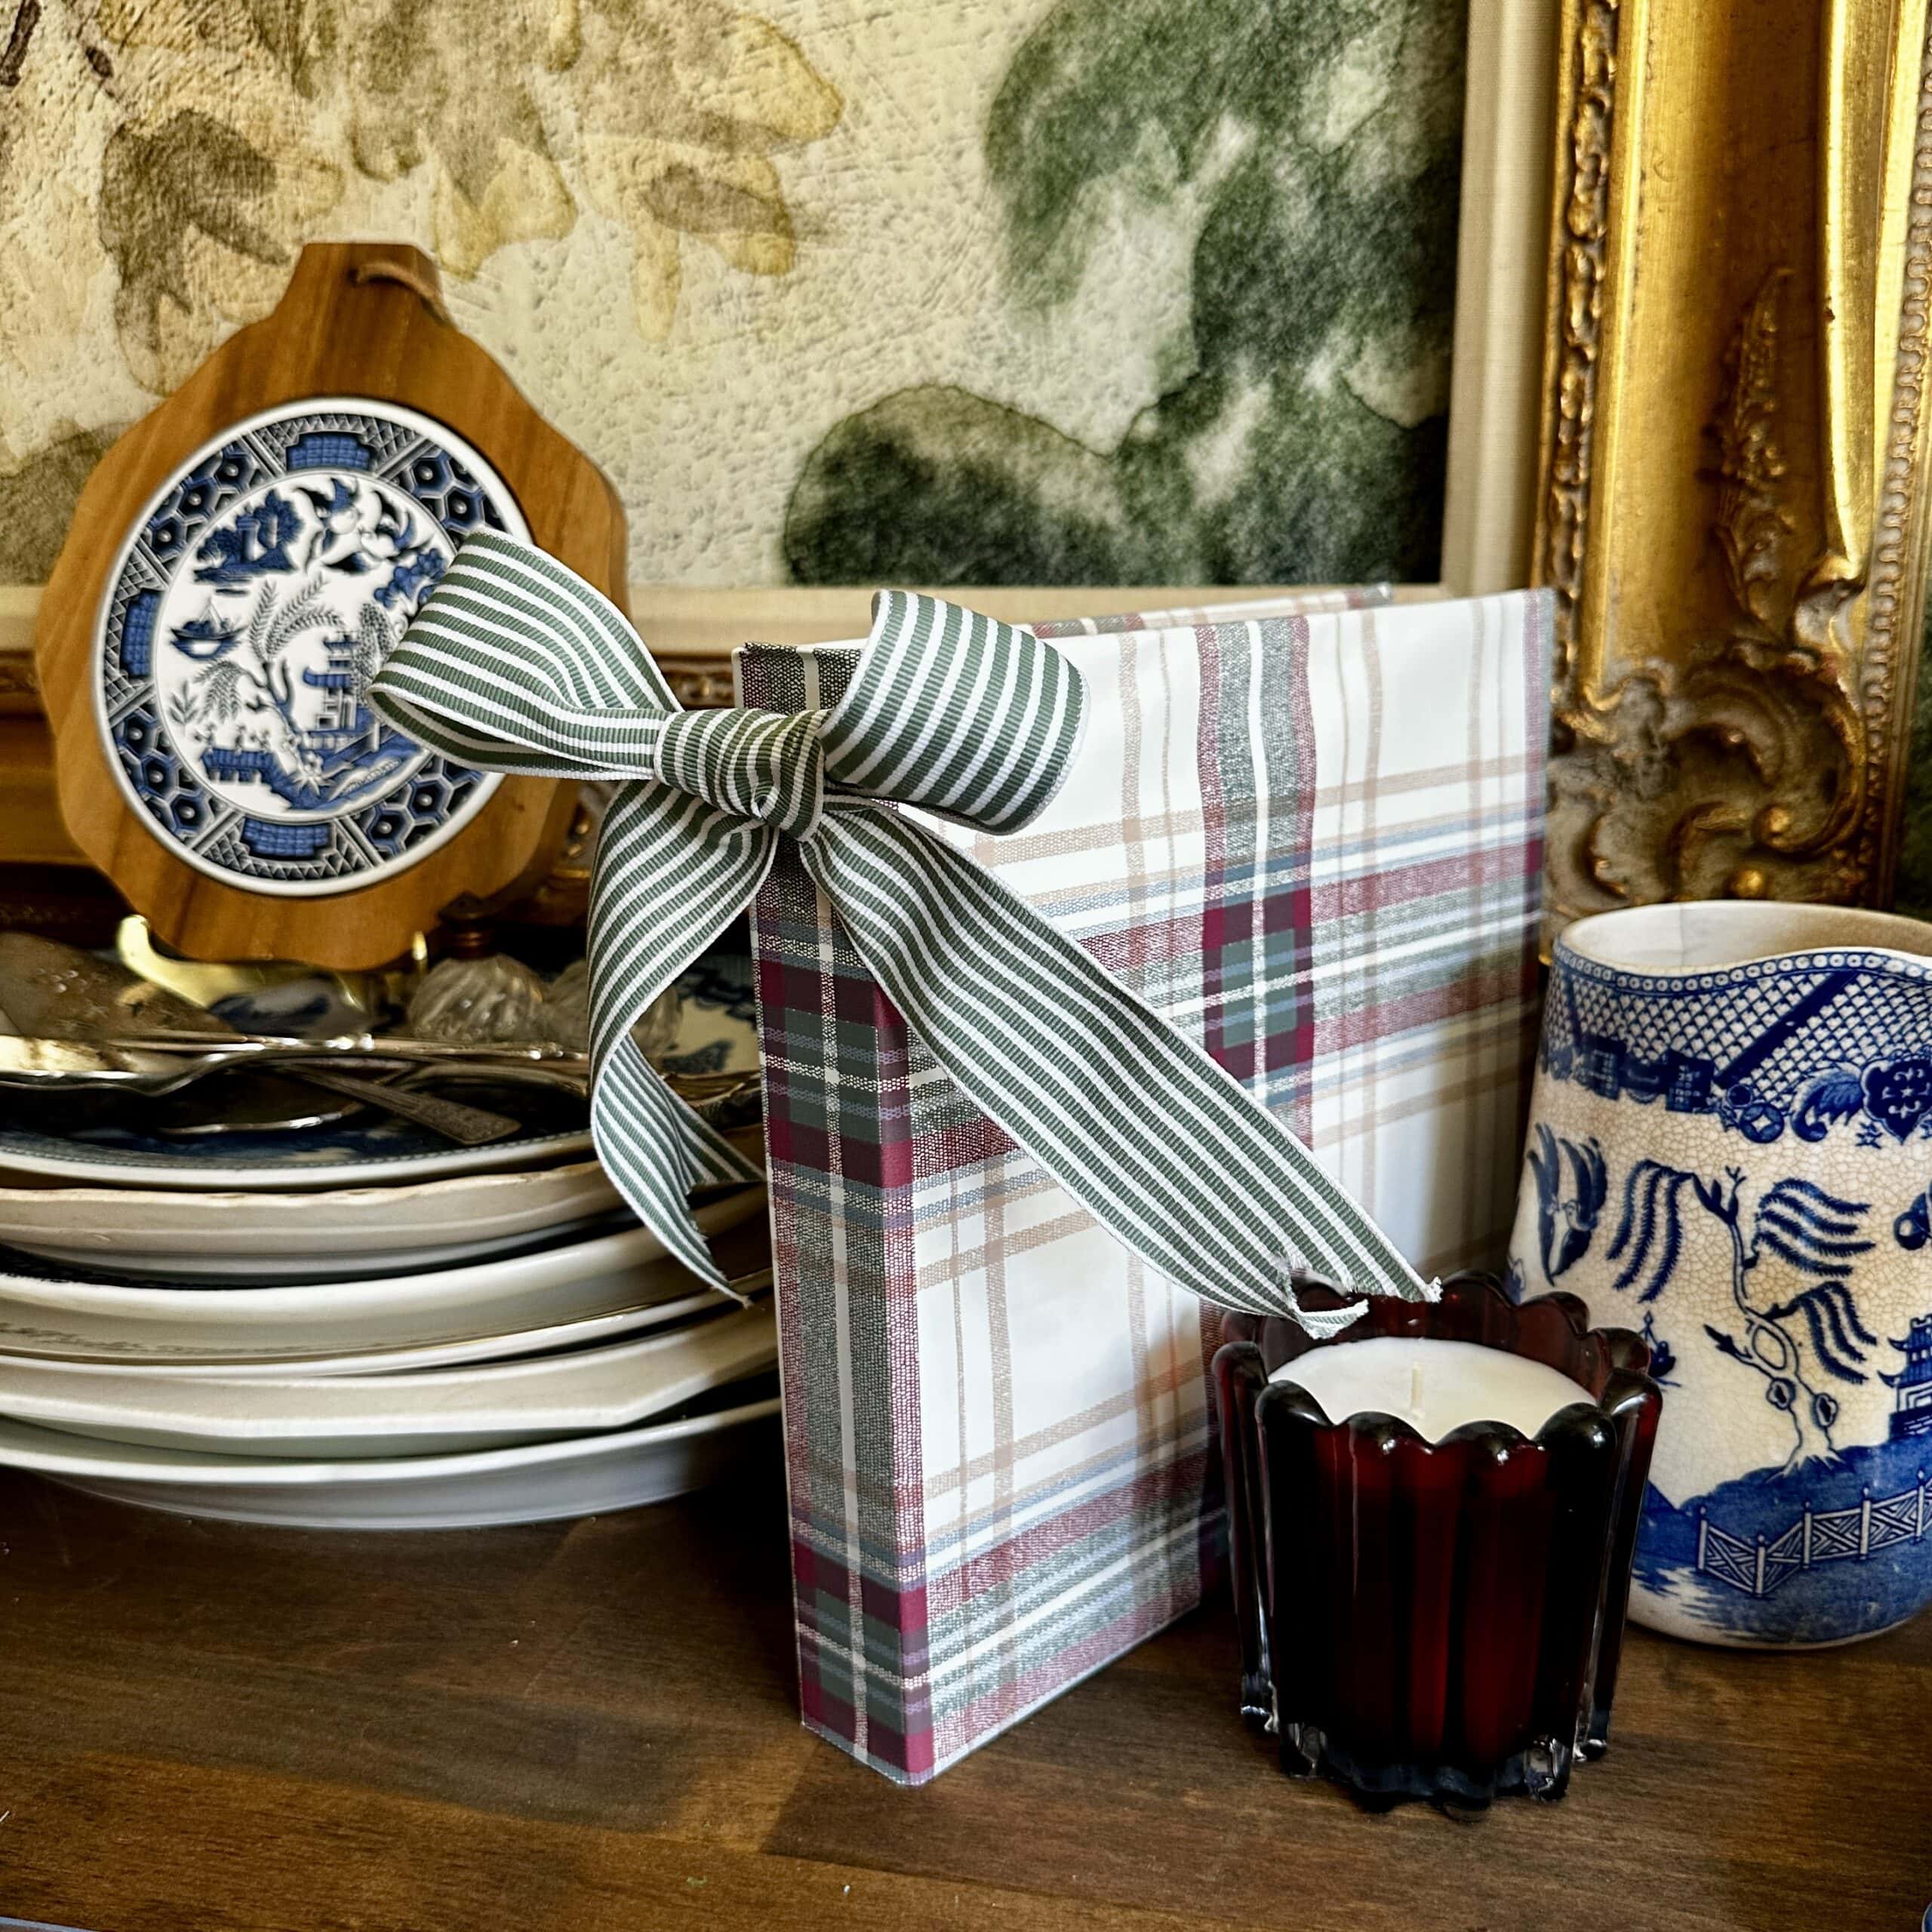
Today marks another exciting installment of our HCS series, where a group of creative bloggers comes together to craft projects centered around a common theme.
With fall upon is, our thoughts naturally turn to the holidays. This month, we thought it would be fun to center our projects around books—one of my favorites. Coming up with projects that stretch my creativity beyond the typical craft is one of my favorite challenges.


DIY Charger Plates Using Sheet Music
Materials
- 1 can Spray glue
- 1 book Sheet music
- 1 pad Archival ink (Optional) Brown, sepia, or gray tones – To add texture, depth, and shadowing
- 1 can Mod Podge Matte or satin finish to seal and strengthen the plate
- 1 small chip brush
- 1 pair gloves
Instructions
DIY Sheet Music Charger Plates – Quick Steps
- Wipe plates clean; lightly sand glossy surfaces so the Mod Podge adheres.
- Tear sheet music into 2″ x 4″ pieces for the rim.
- Measure the center circle and cut a matching sheet music piece using a template.
- Spray the back of each piece with adhesive and layer them around the rim at a slight angle.
- Press down firmly, wrapping about ½ inch over the edge and onto the back.
- Spray and apply the circular piece to the center of the plate.
- (Optional) Distress edges with archival ink or dark wax for a vintage look.
- Once dry, seal with spray Mod Podge—apply several light coats for protection.
Step-by-Step Tutorial
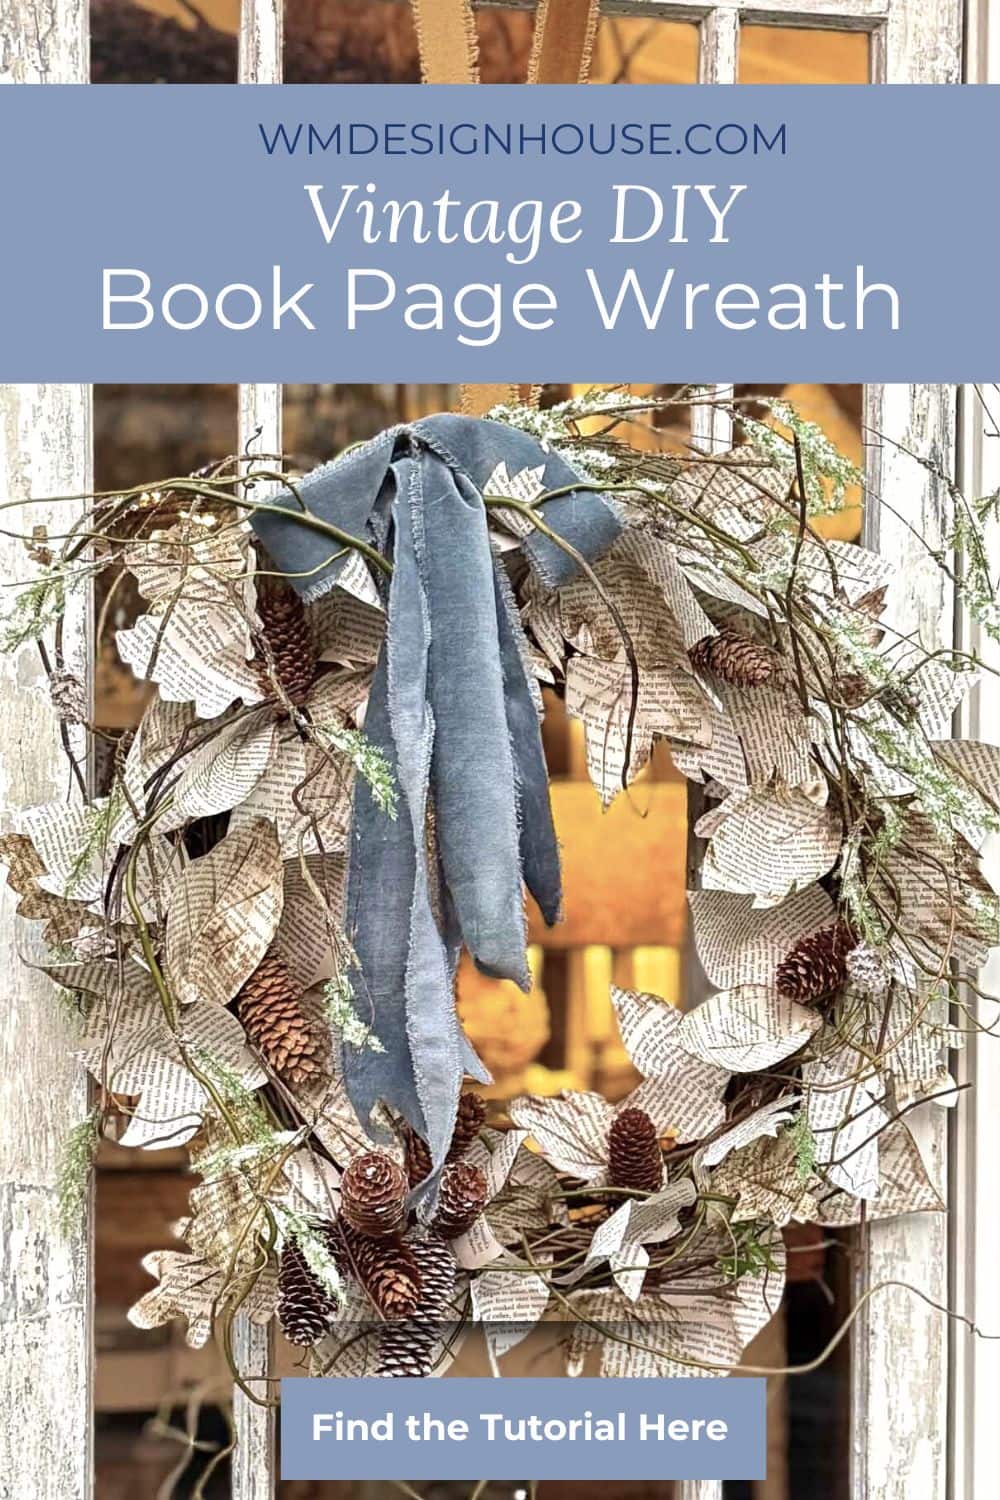
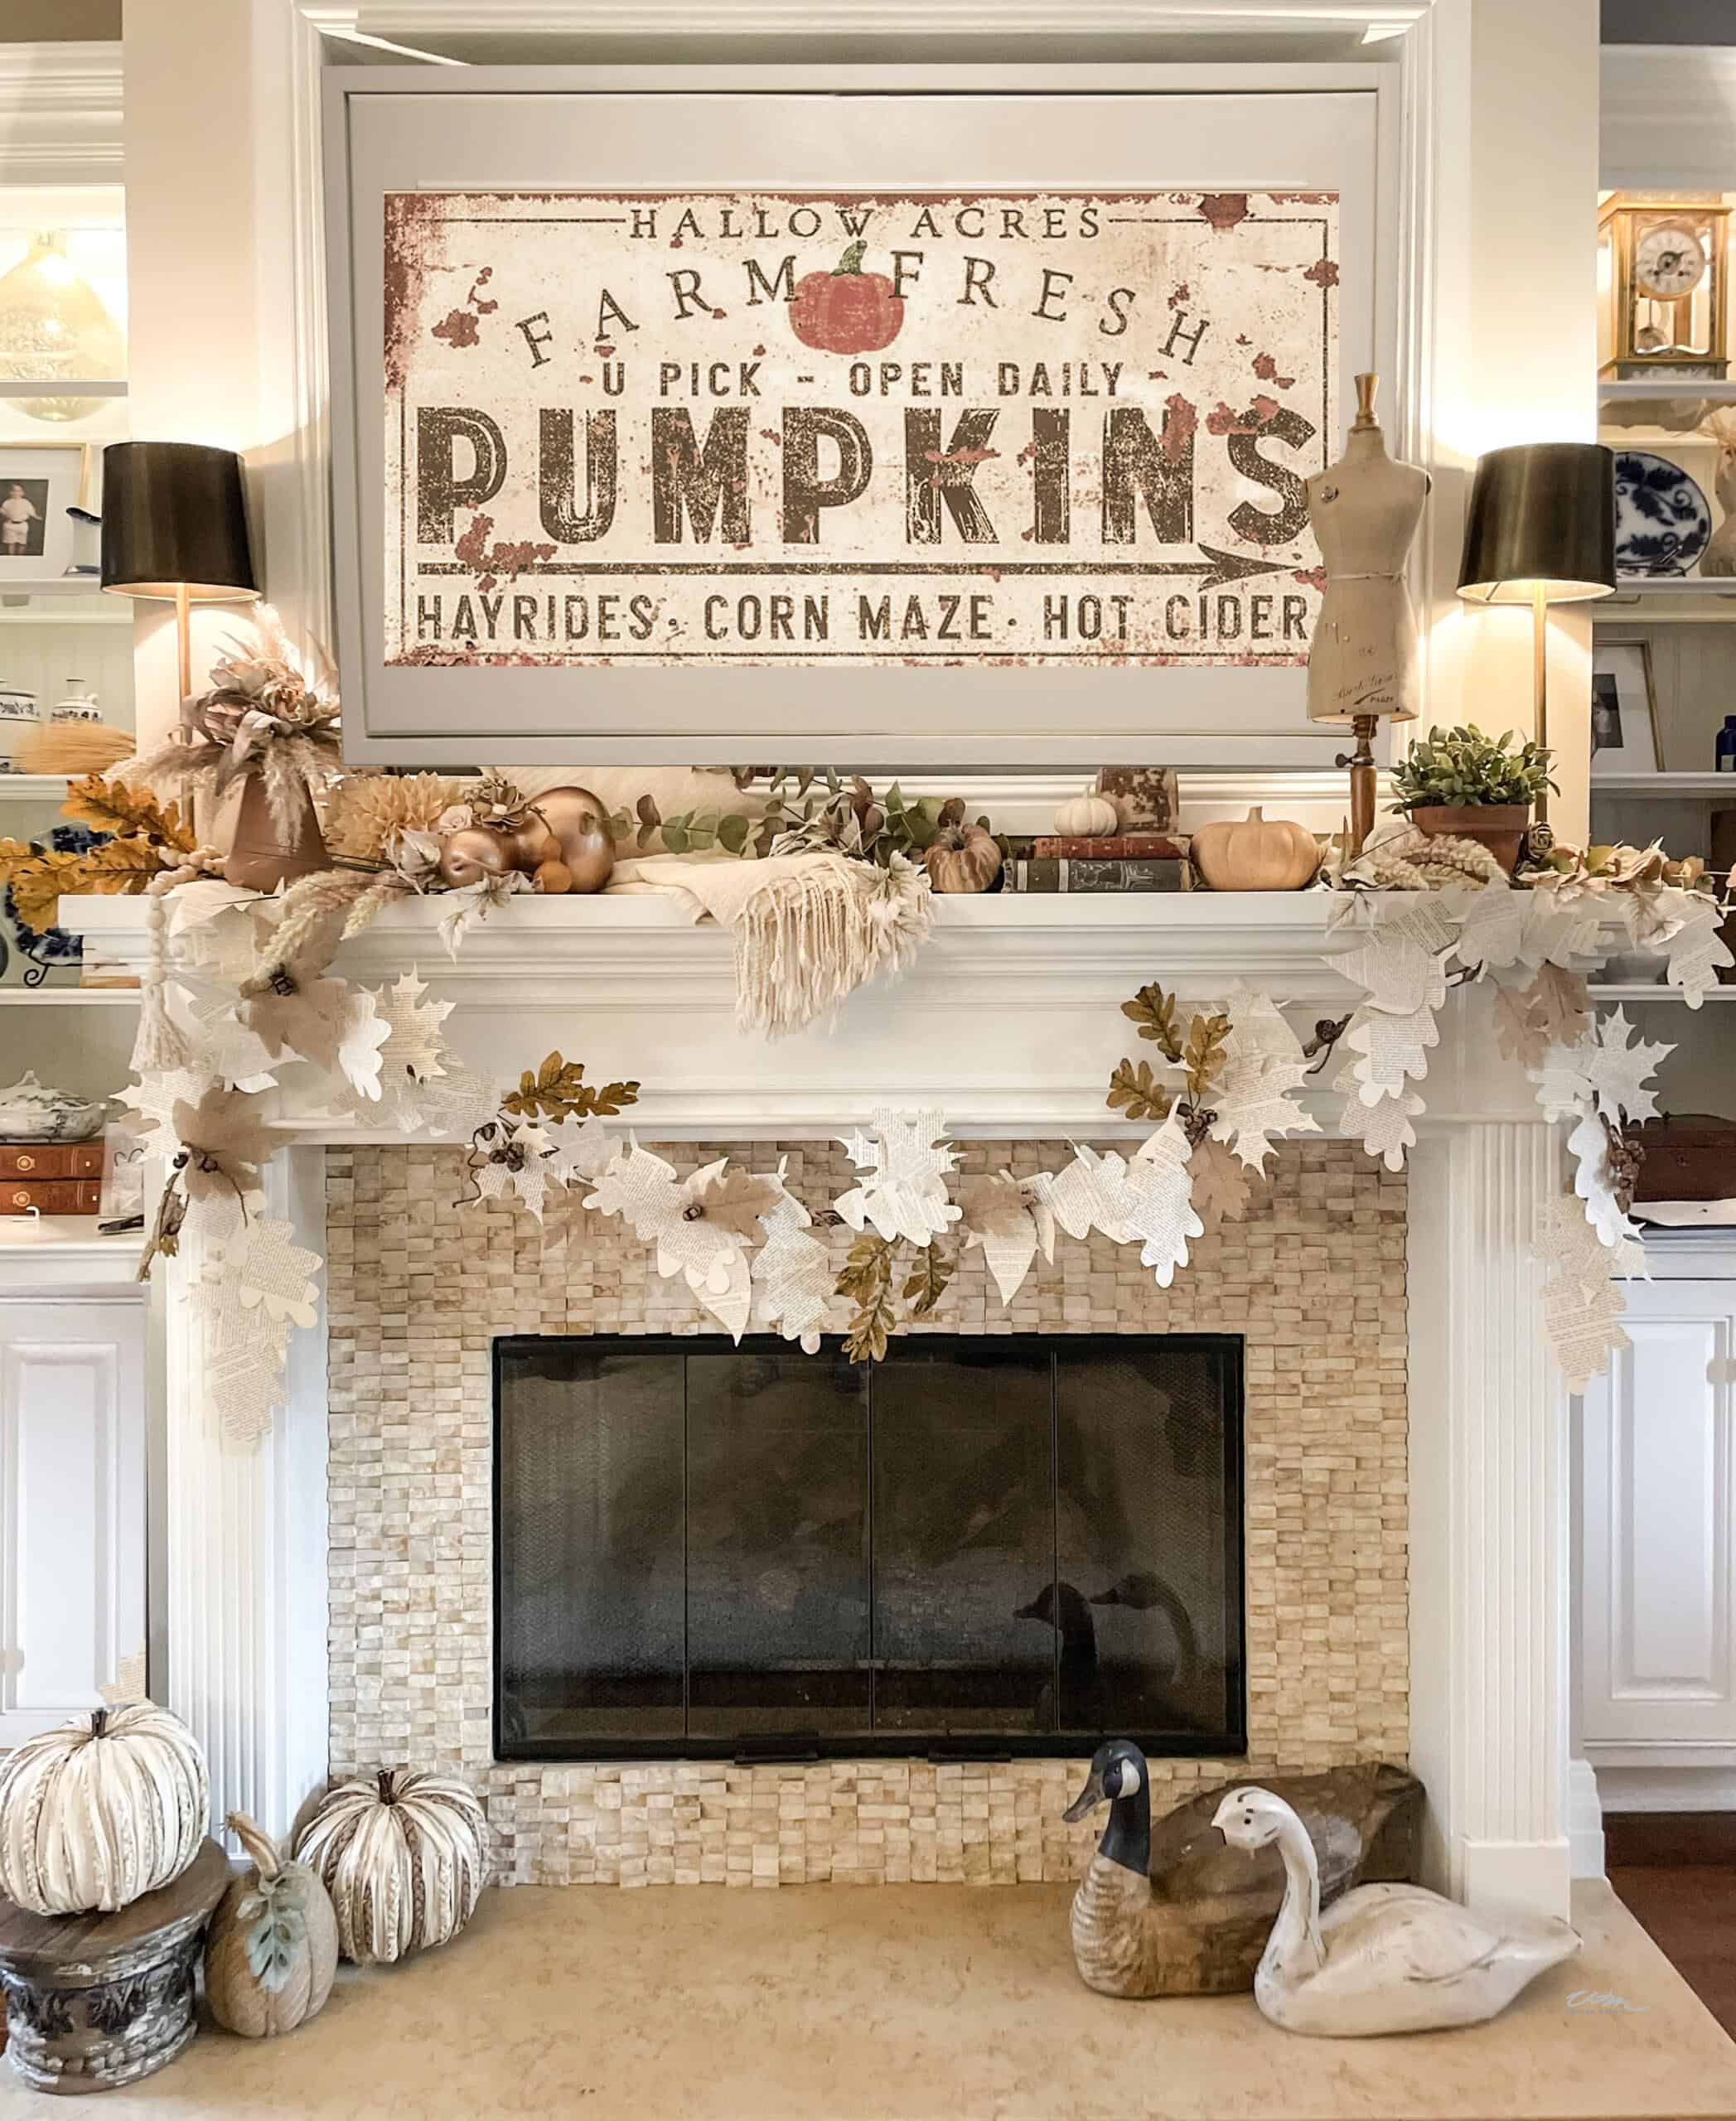
Ready to get started? This beautiful book page wreath offers endless possibilities. You can keep it simple and neutral for an elegant, everyday look, add a few dried fall flowers for an autumn vibe, or tuck in pinecones, greenery and some berries to give it a festive touch for Christmas.
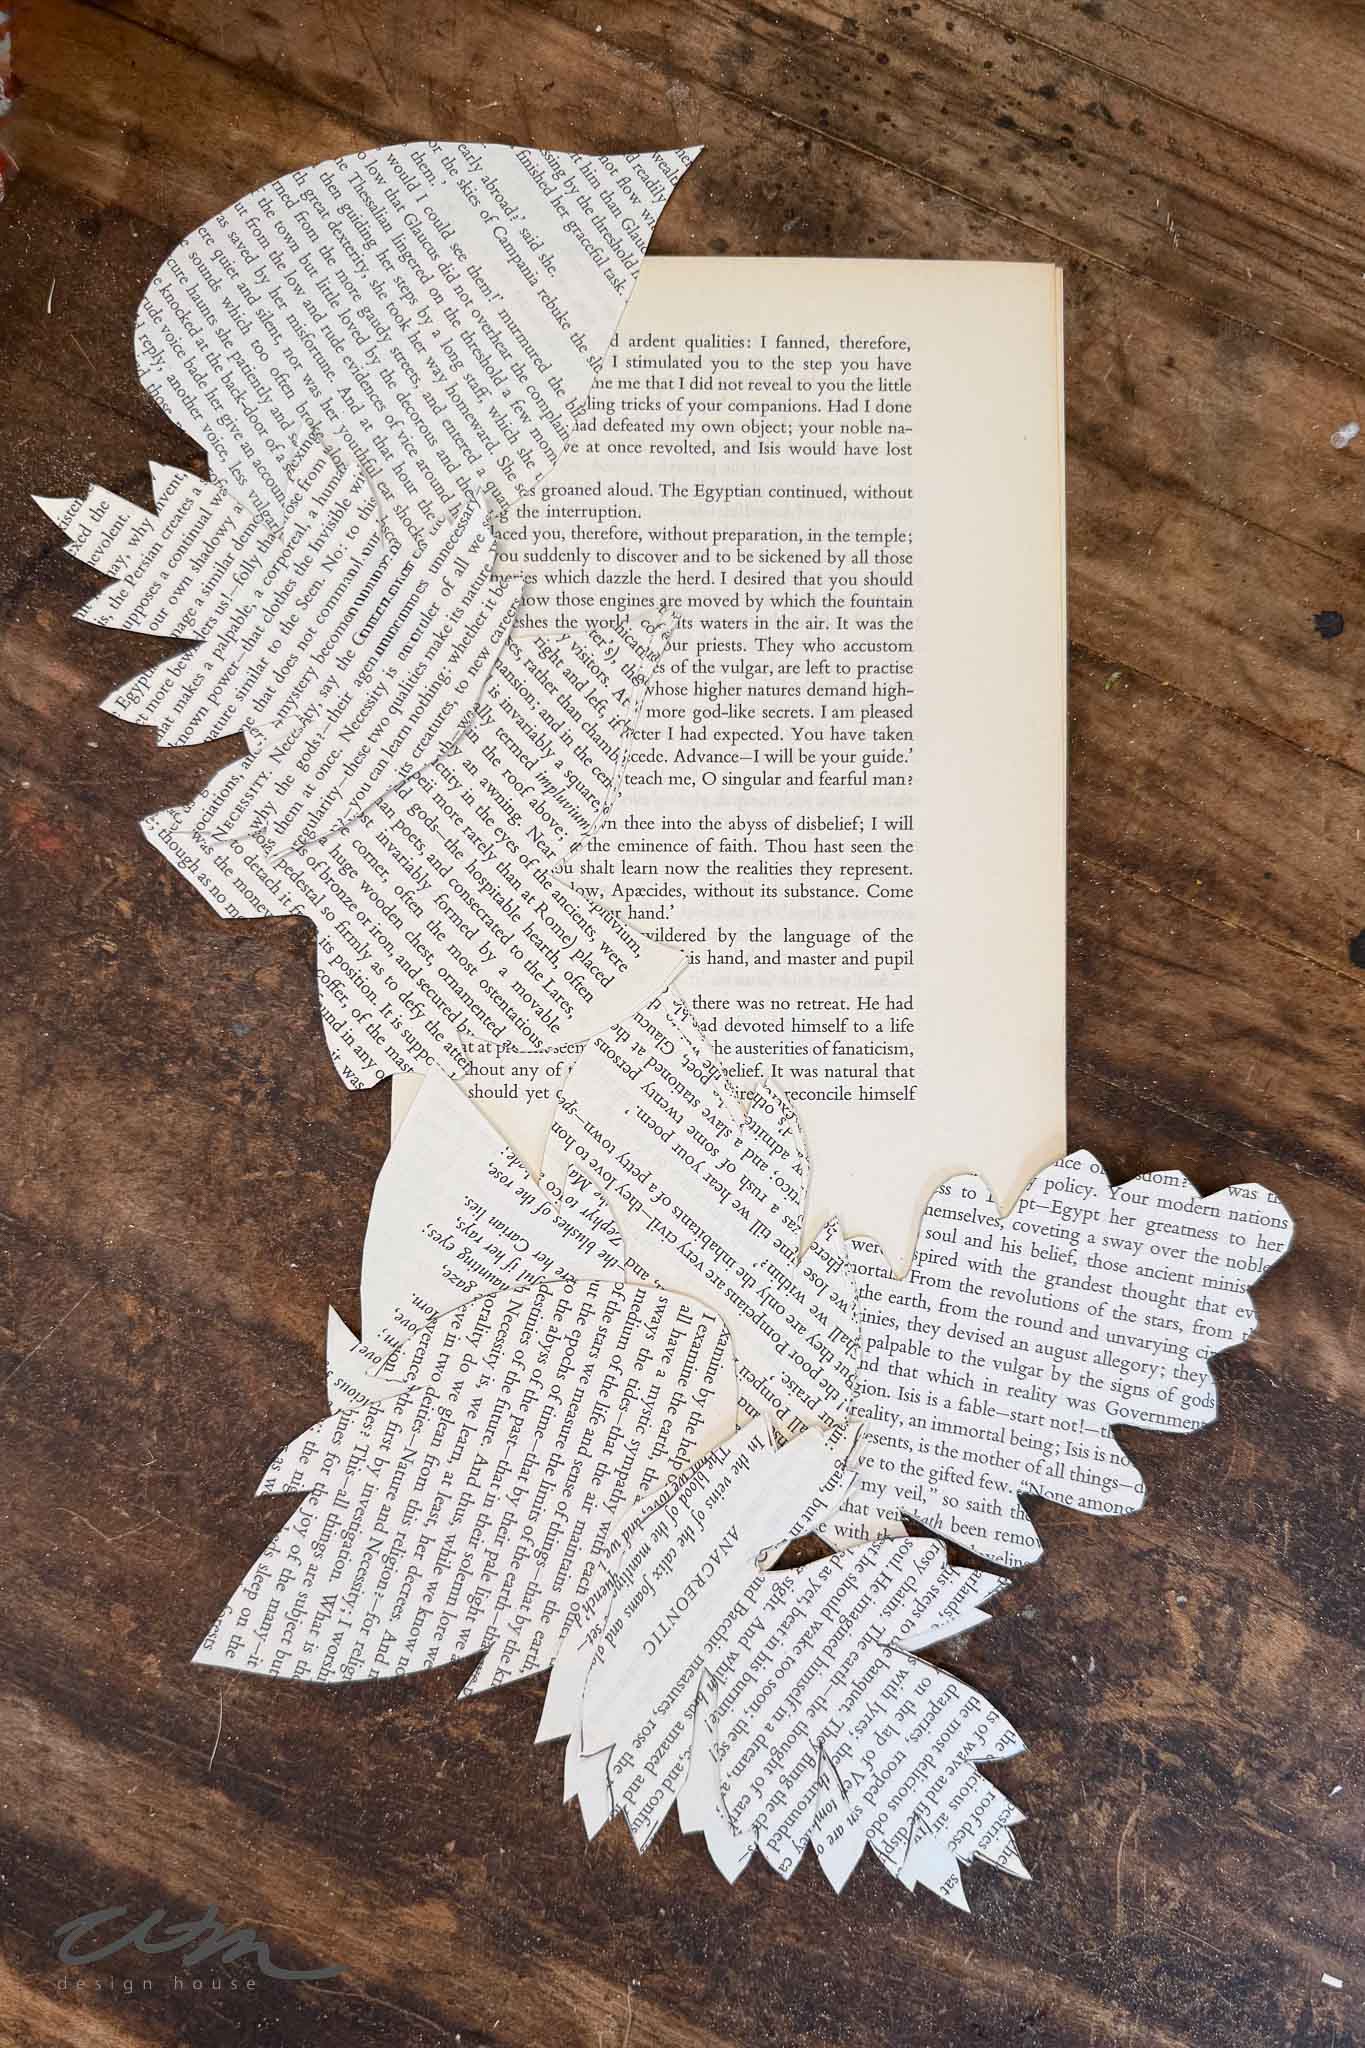
Step 1: Prepare the Book Pages
- Tear several pages from your old book — you’ll need about 25–40 leaves, depending on the wreath size and how full you want it to look.
Tip from wendy’s craft room:
Use an old book with pages that have naturally yellowed or aged — the soft discoloration adds beautiful character and vintage charm to your wreath.


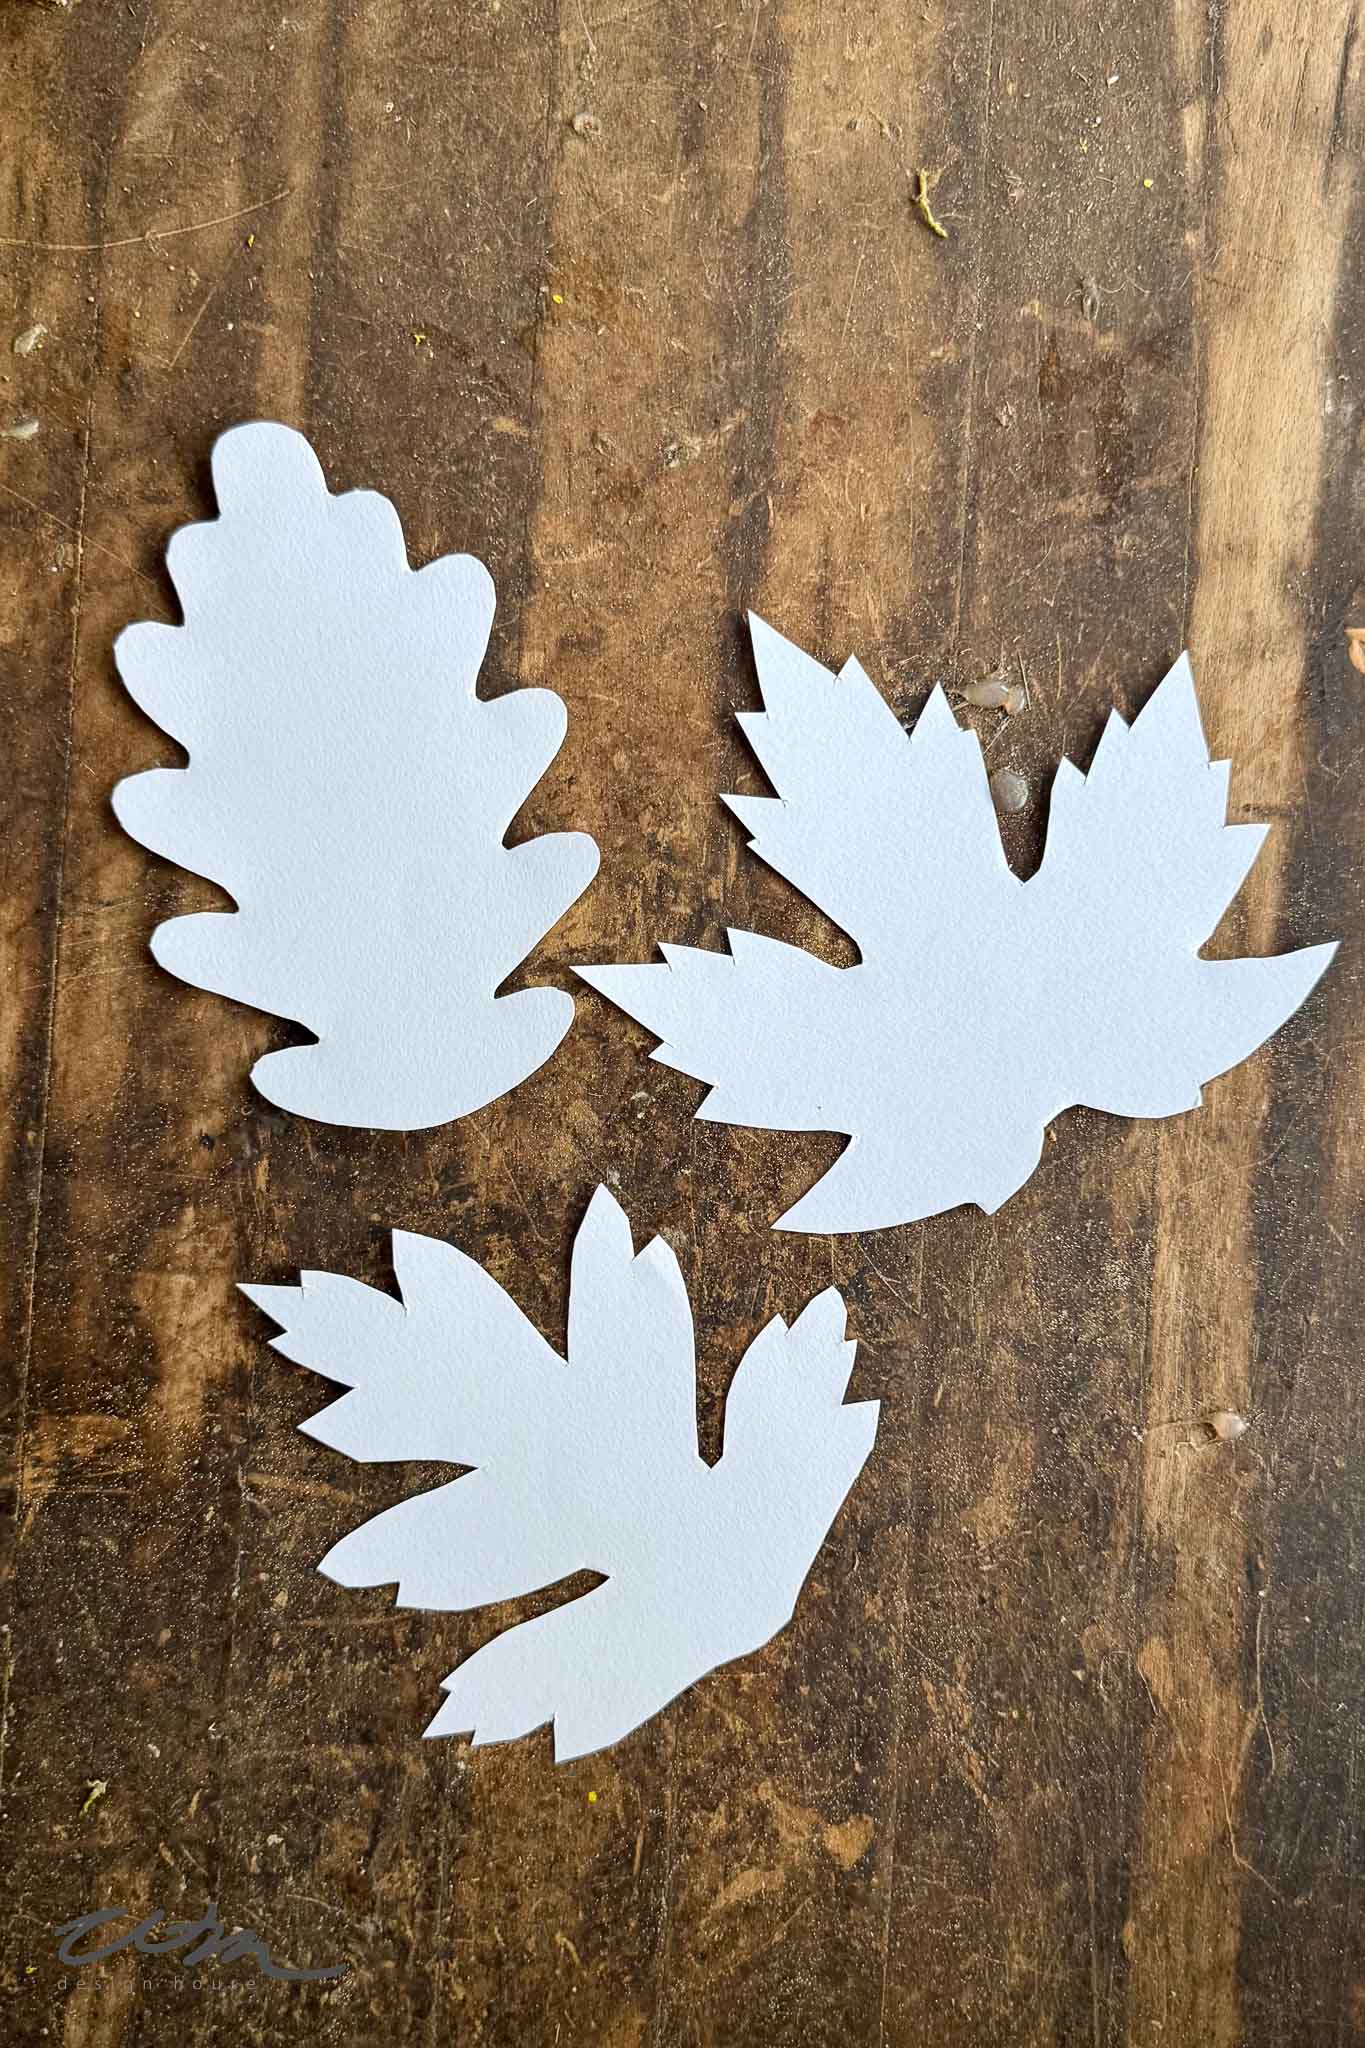
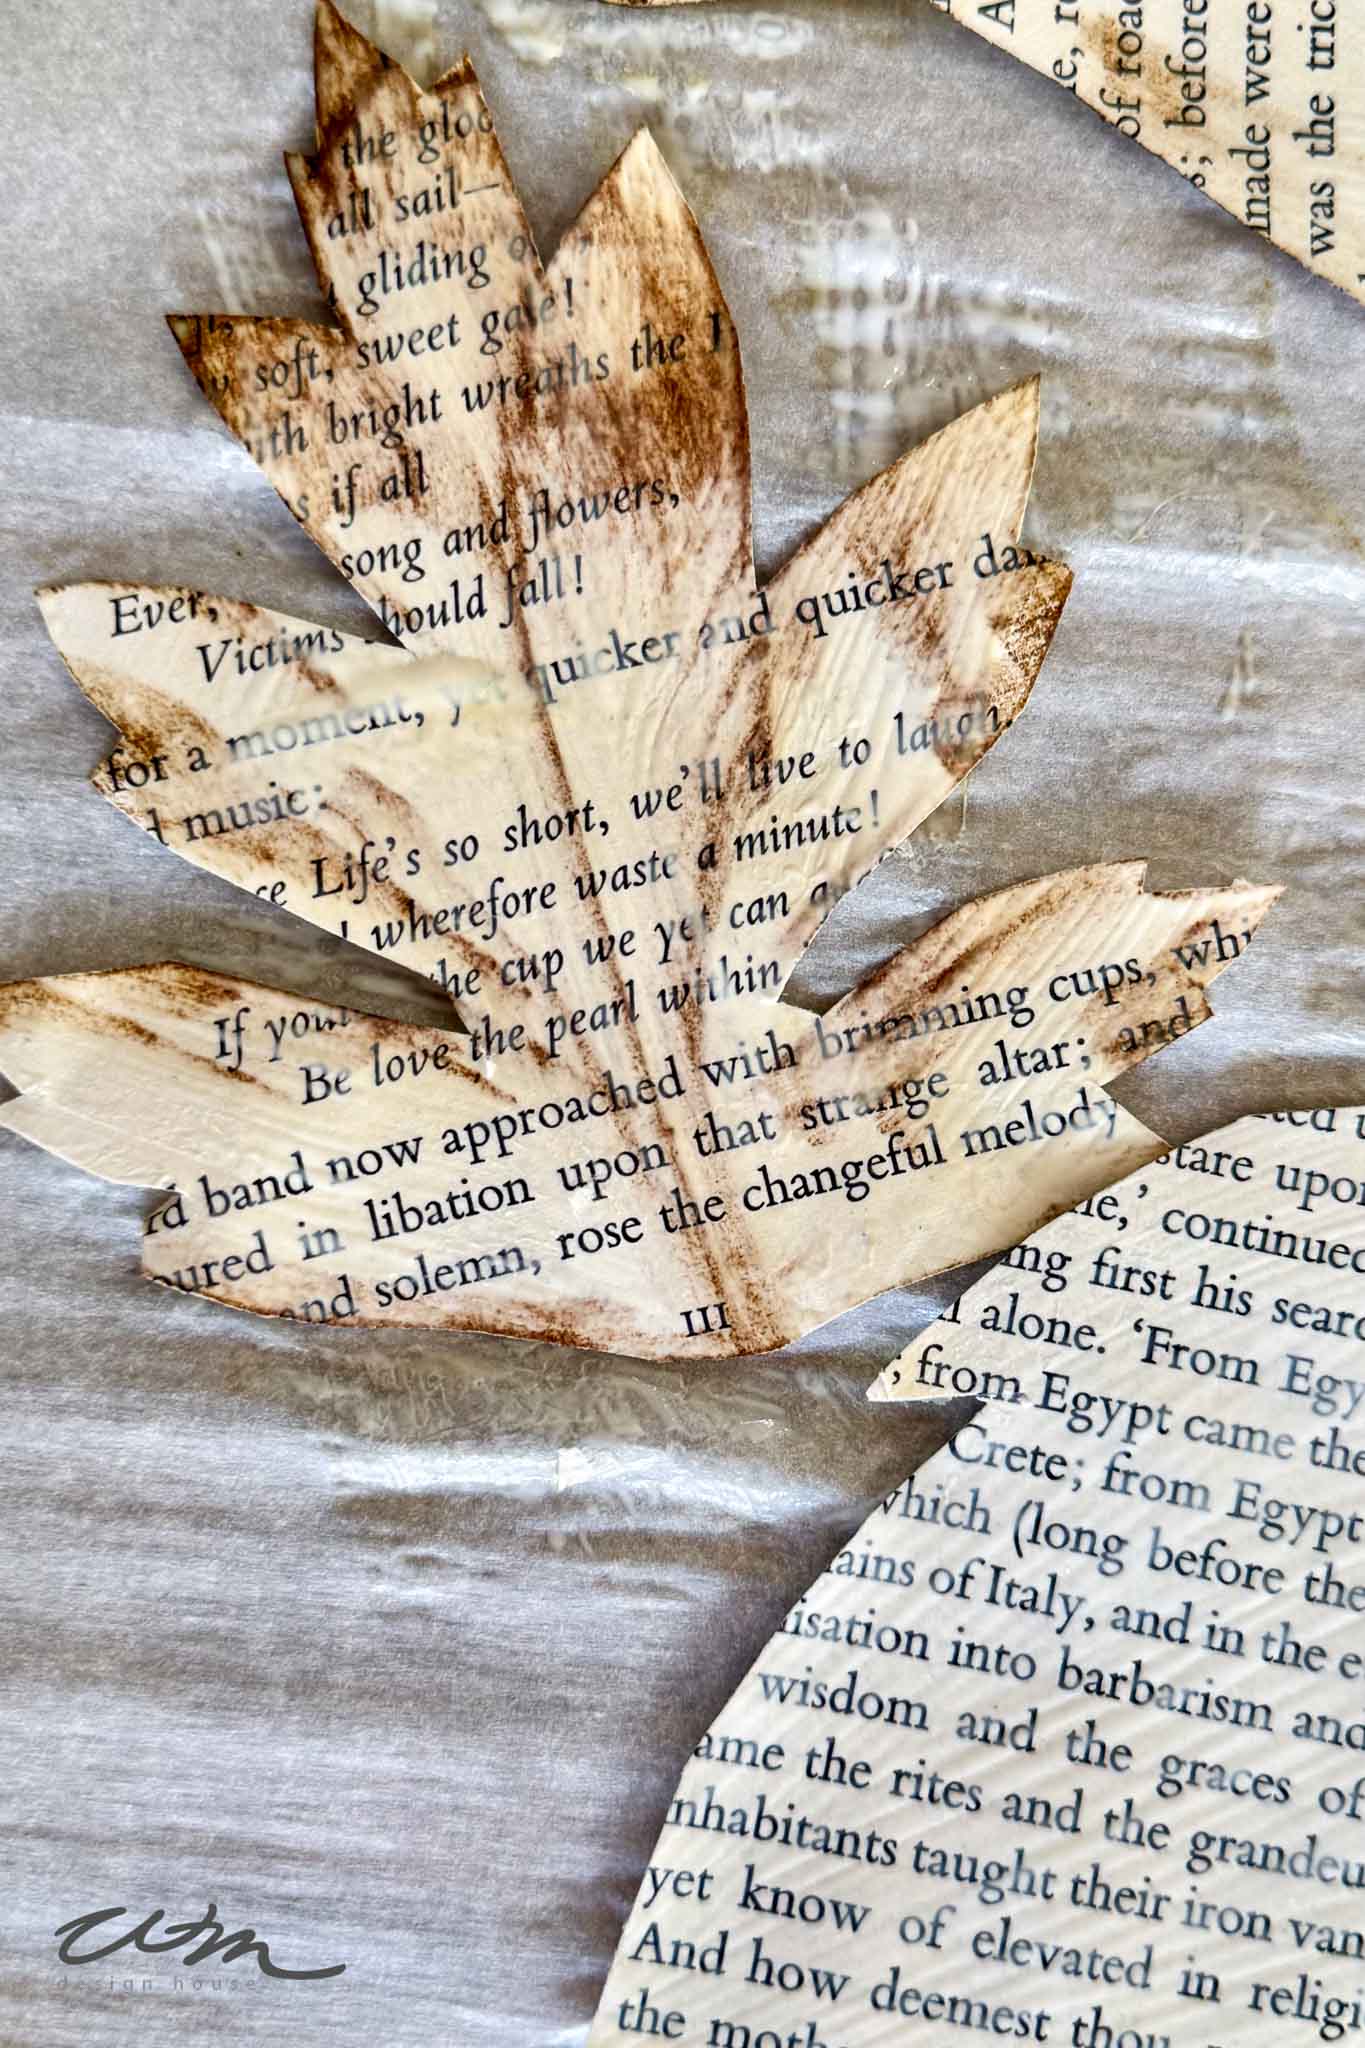
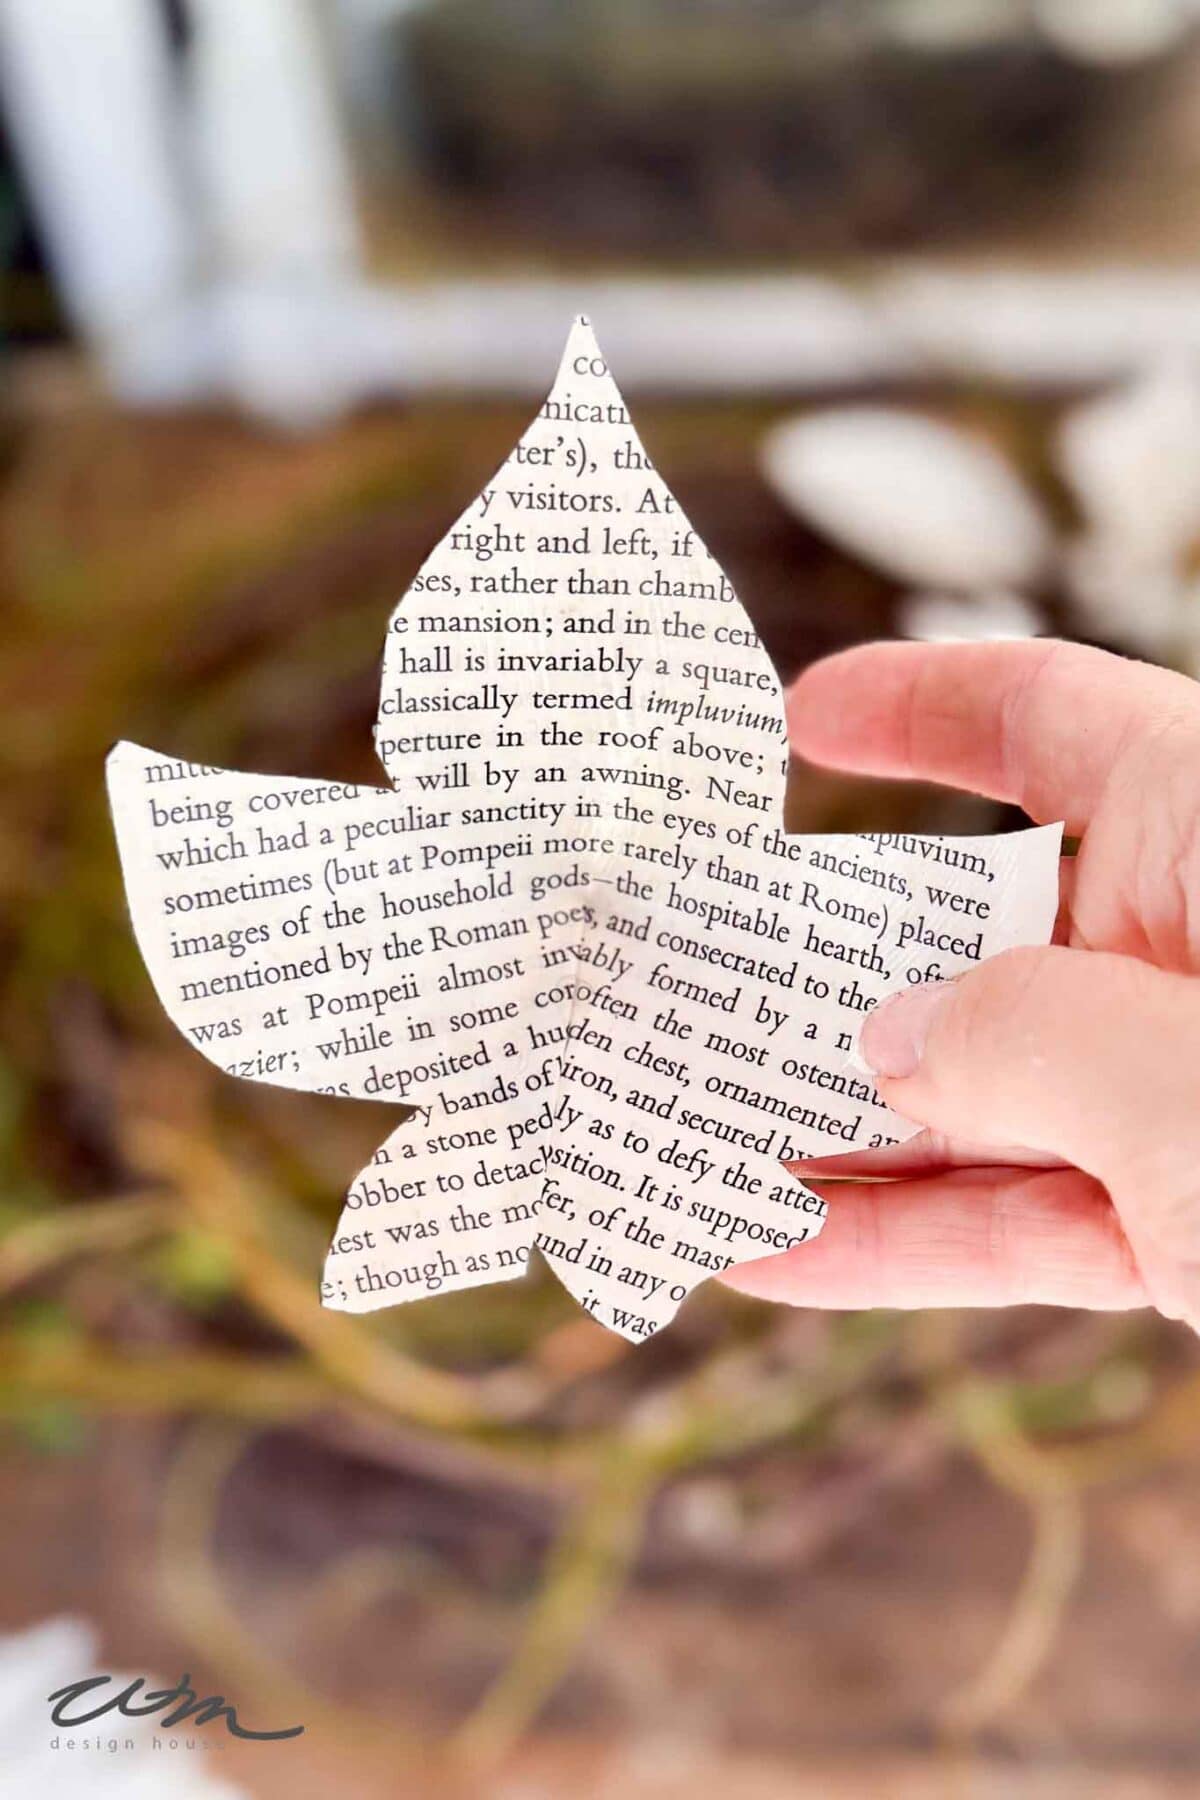
Step 2: Cut out the leaves
- Trace the leaf shapes from my free template or trace a few leaves from the garden.
- Cut them out with scissors, using the two sizes of leaves for a more natural, organic look.
Tip from wendy’s craft room:
Make your leaf template from thick cardstock — it’s durable enough to reuse again and again, and you’ll love having it handy for future wreaths or paper crafts
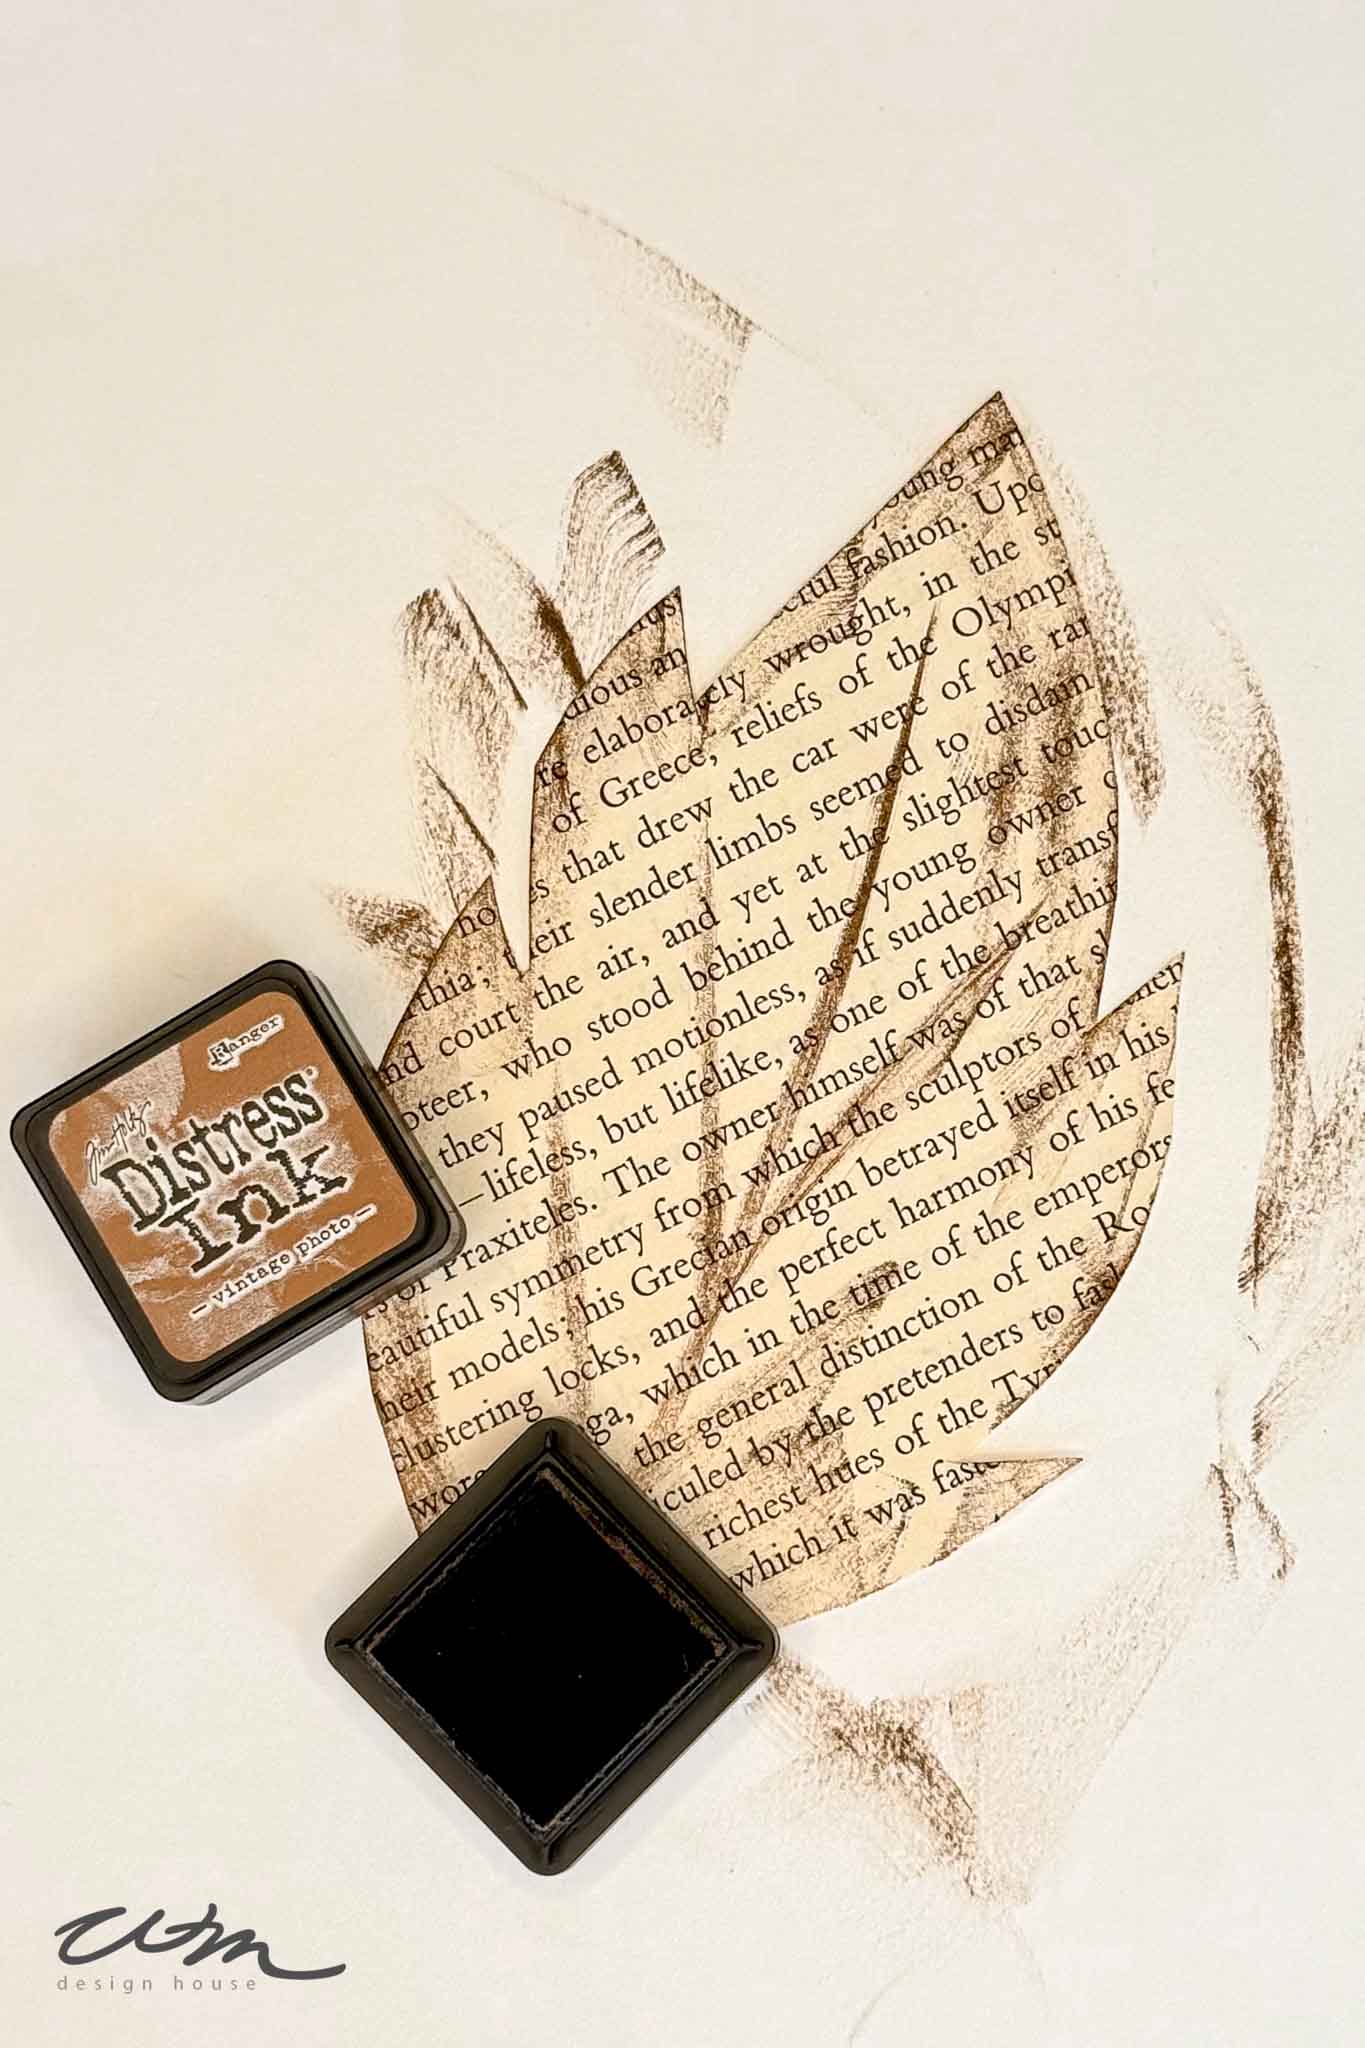
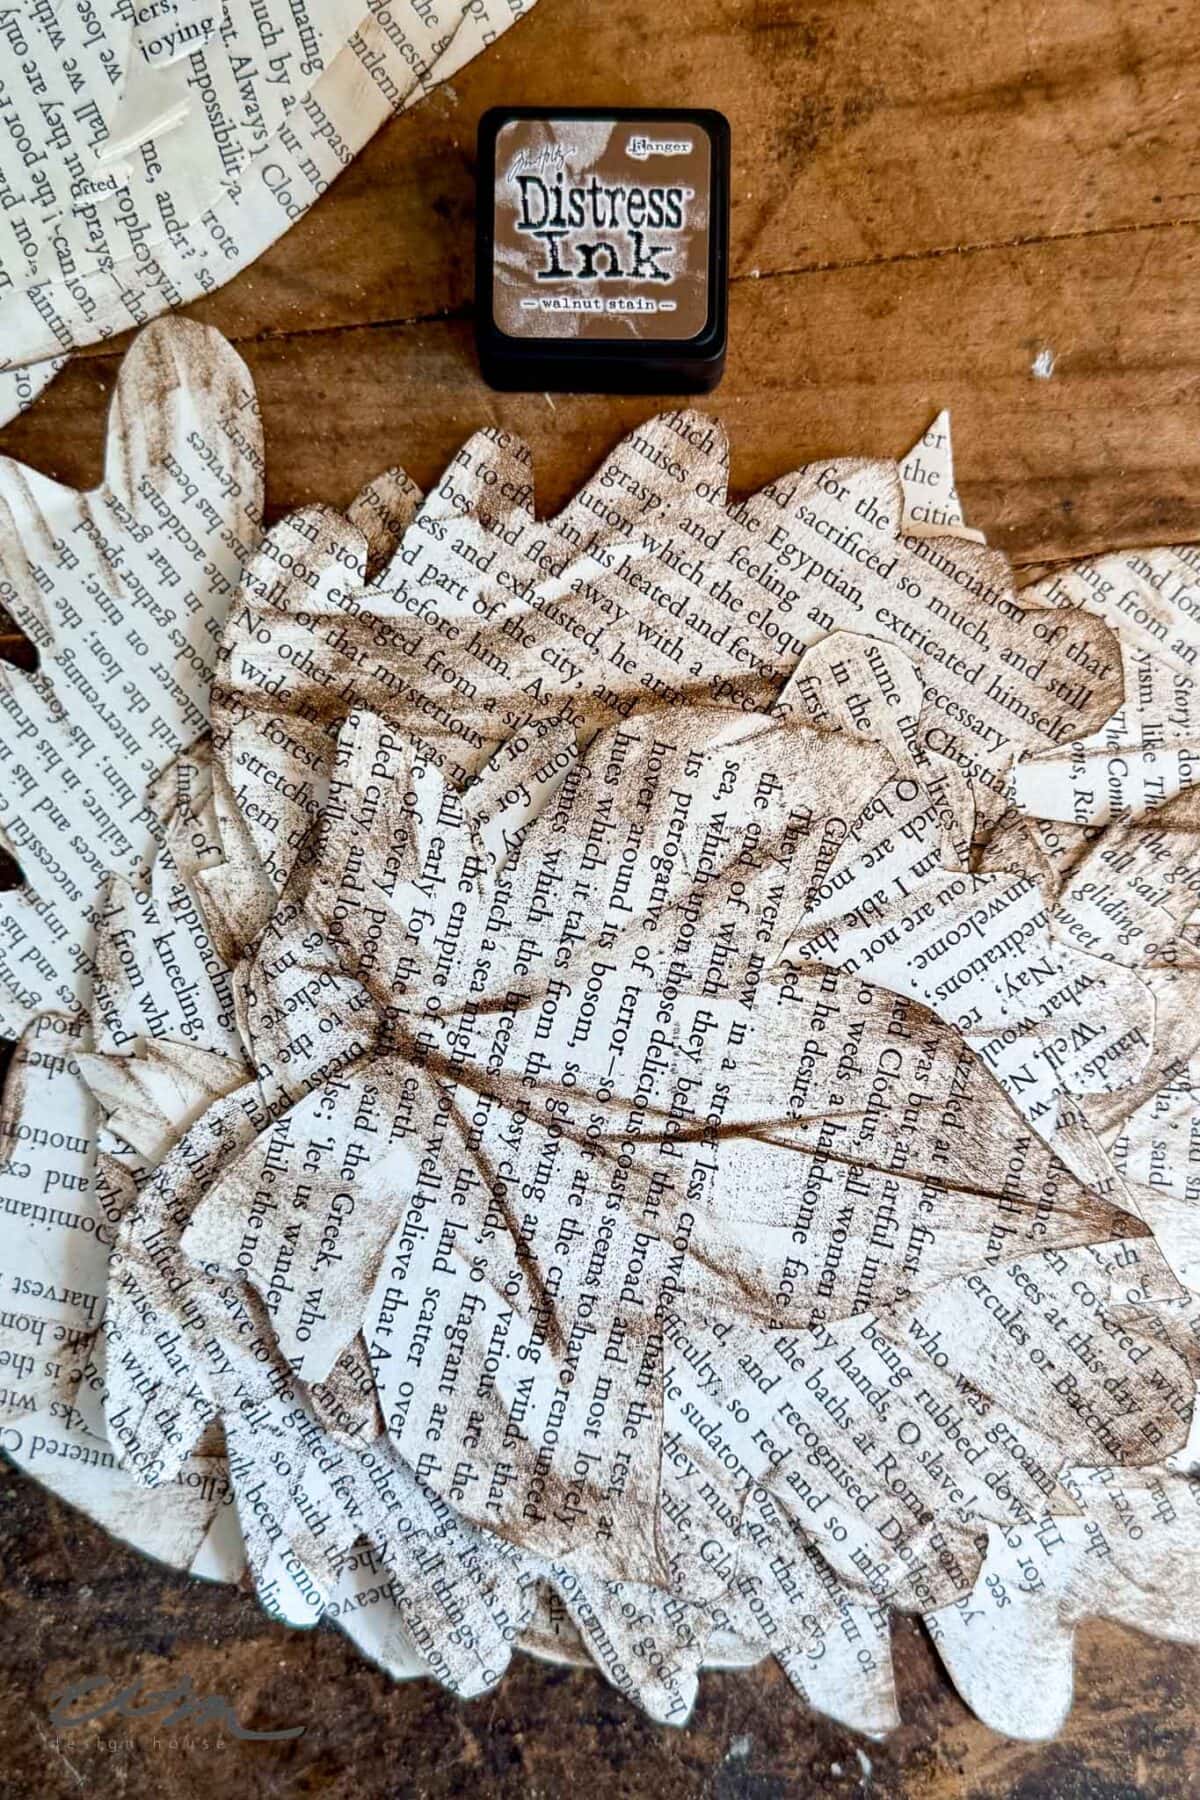
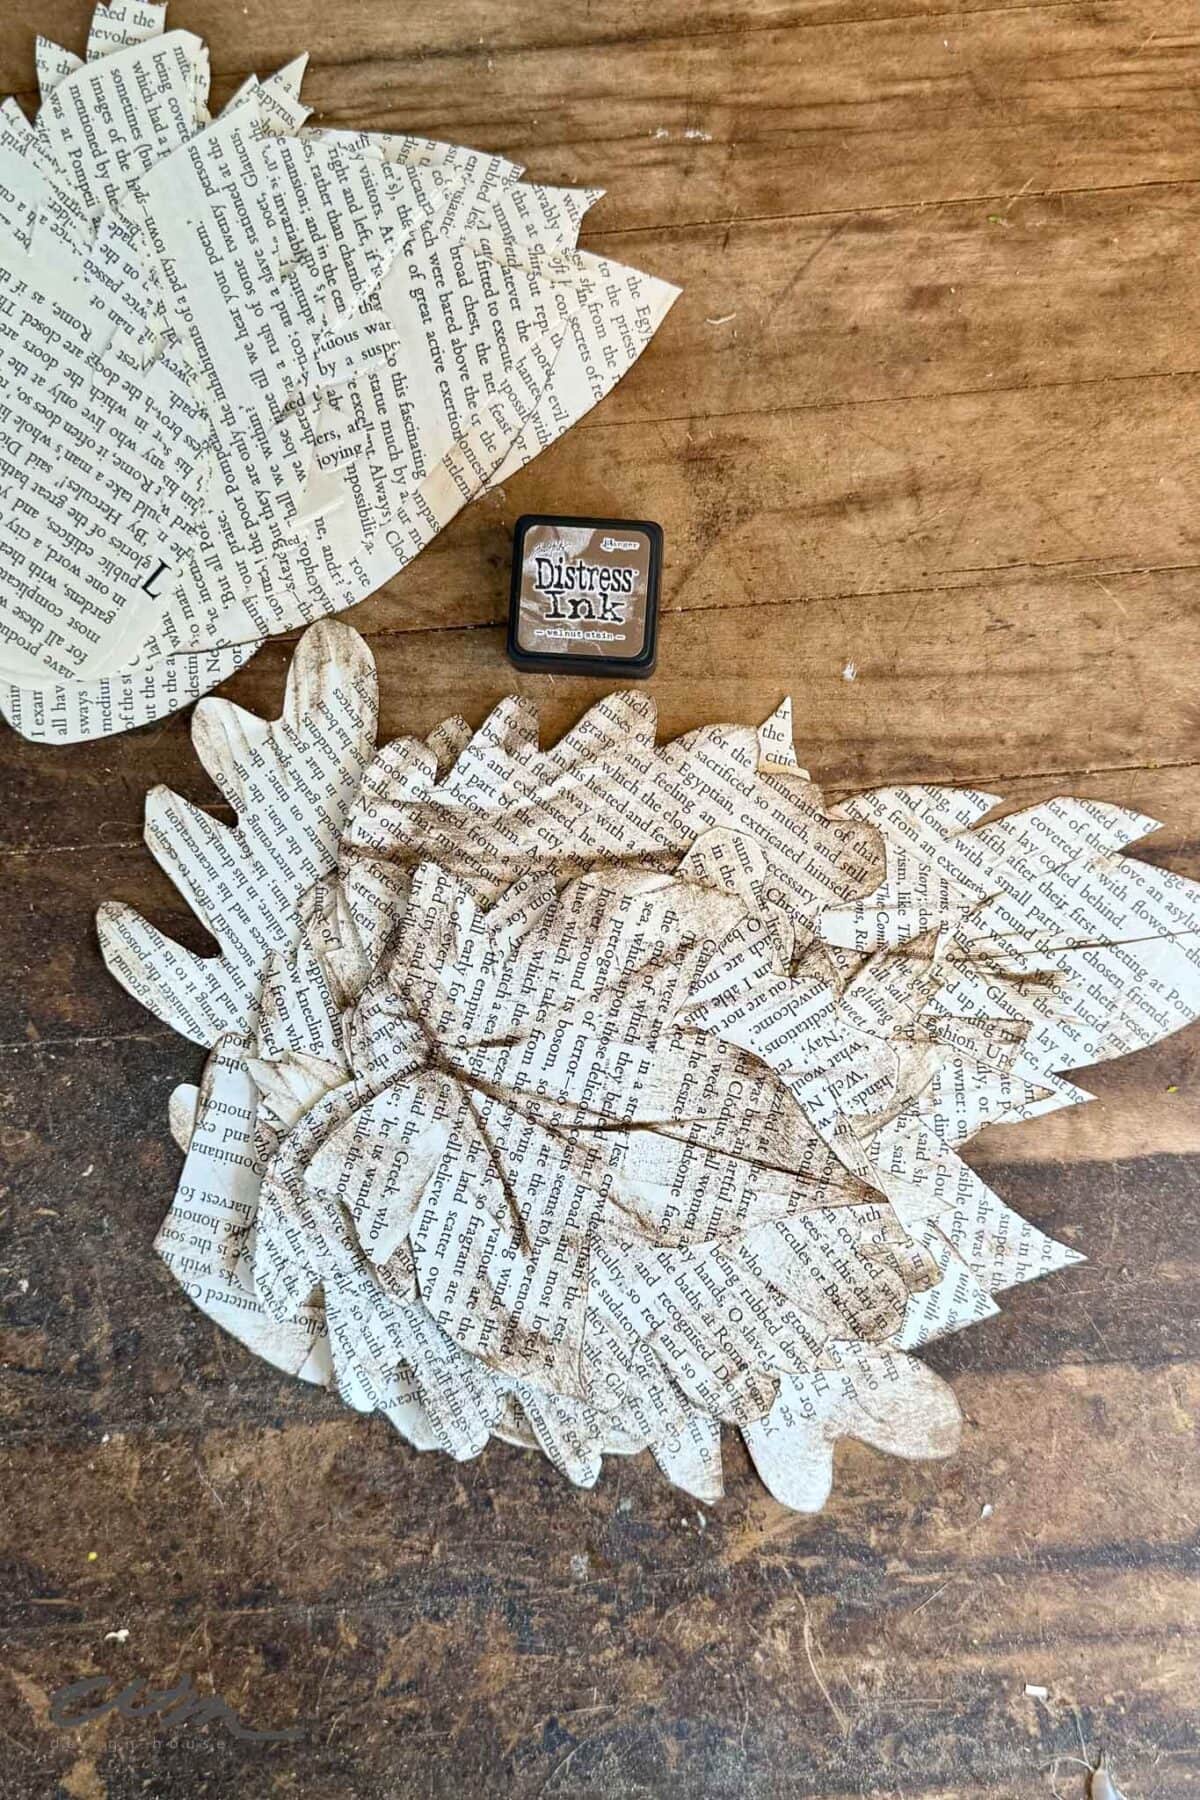
Step 3: Add Texture and Shadows with Archival Ink
This is where your leaves come to life. I like to us a mix of some plain leaves and some with the Archival ink effect.
- Choose an ink pad in a warm neutral tone such as sepia, walnut, or soft gray.
- Using a small ink pad, blending brush, or sponge, lightly sweep ink along the edges and creases of each paper leaf.
- Build up color gradually — darker near the edges or veins, lighter toward the center.
- Continue until the leaves look softly aged with natural depth and contrast.
- Let the leaves dry for 10–15 minutes before sealing them with Mod Podge.

Tip from wendy’s craft room:
Practice on a scrap page first — archival ink dries fast and gives subtle, natural-looking shadows.
Step 4: Sealing the Leaves with Mod Podge
- Once the ink is completely dry, place your leaves on wax paper or parchment paper.
- Using a small brush, apply a thin, even coat of Mod Podge to one side of each leaf.
- Allow them to dry for about 30–40 minutes, then flip and coat the other side.
- Let the second side dry completely before handling.
- The Mod Podge will strengthen the paper, add a soft sheen, and help the leaves hold up beautifully to humidity and shaping.

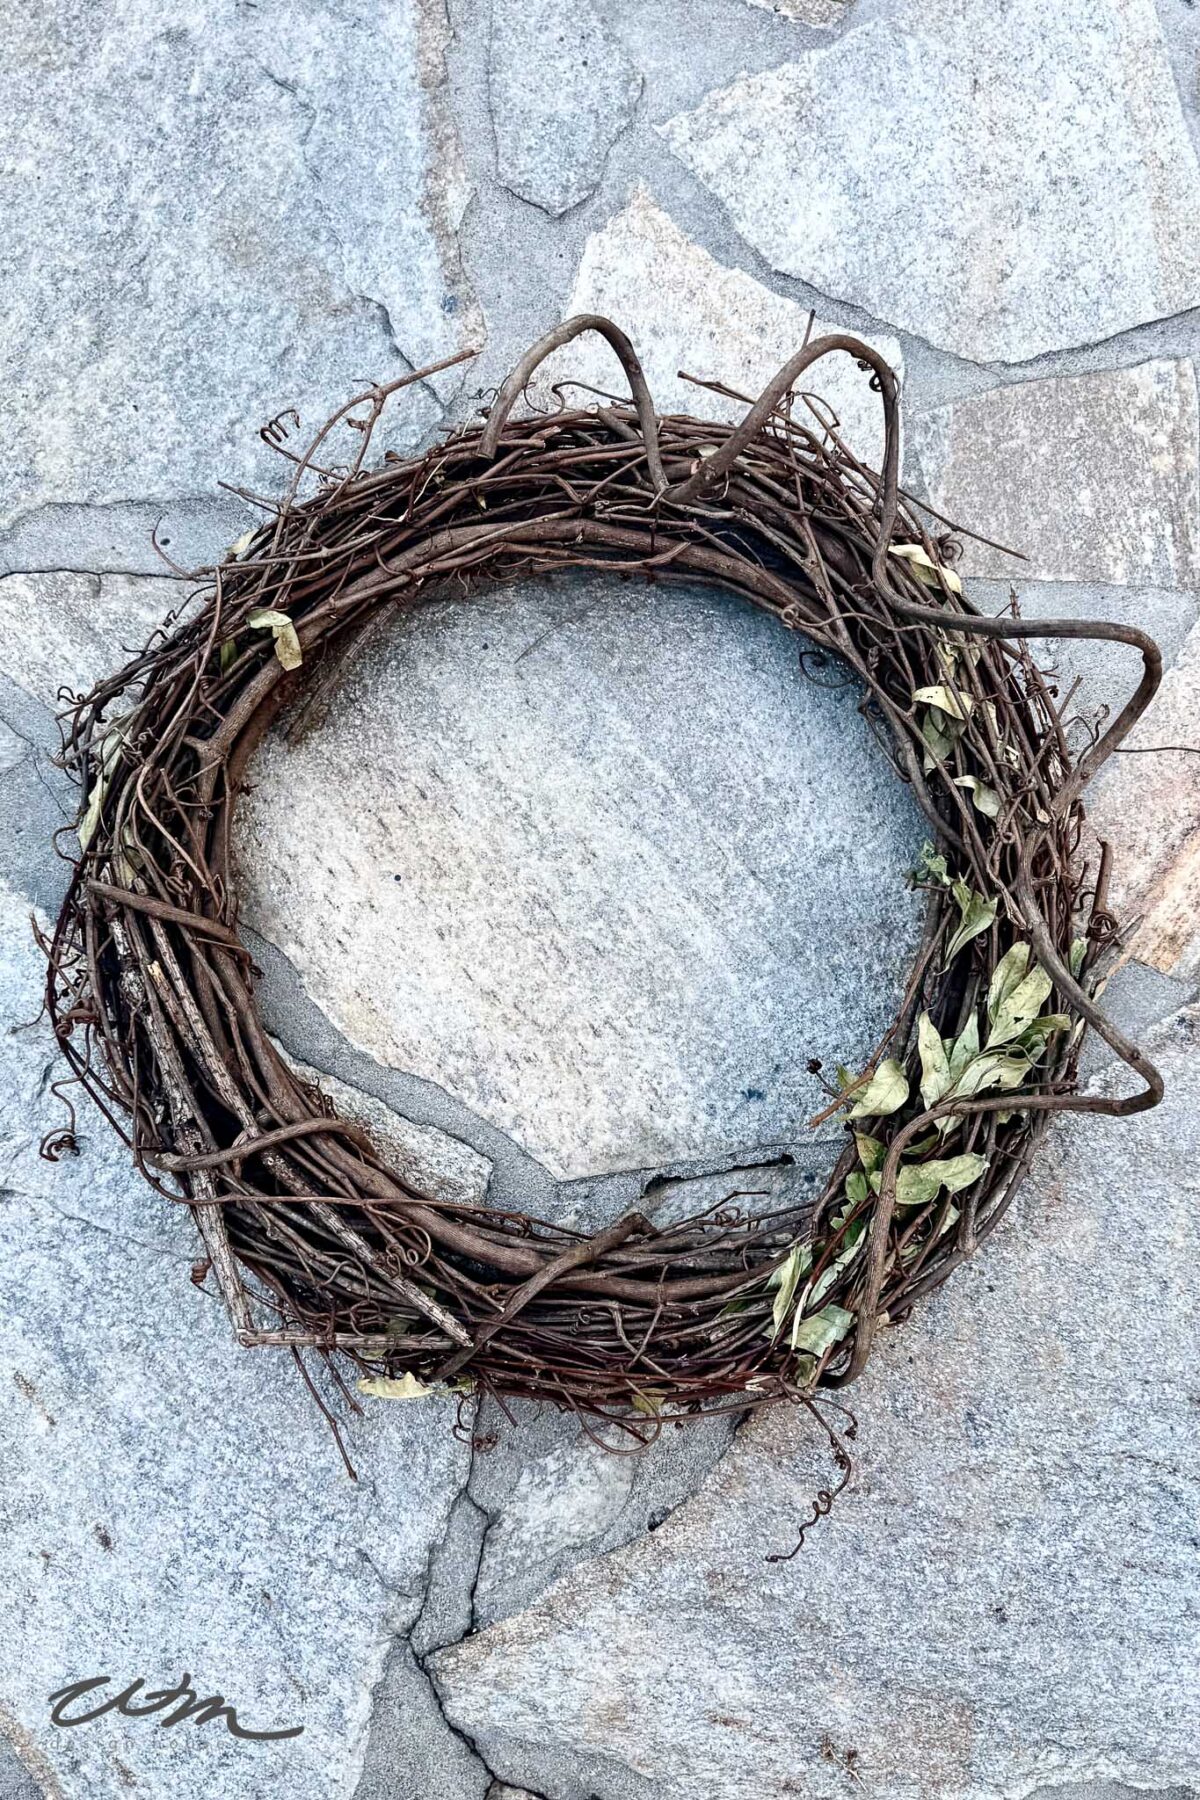
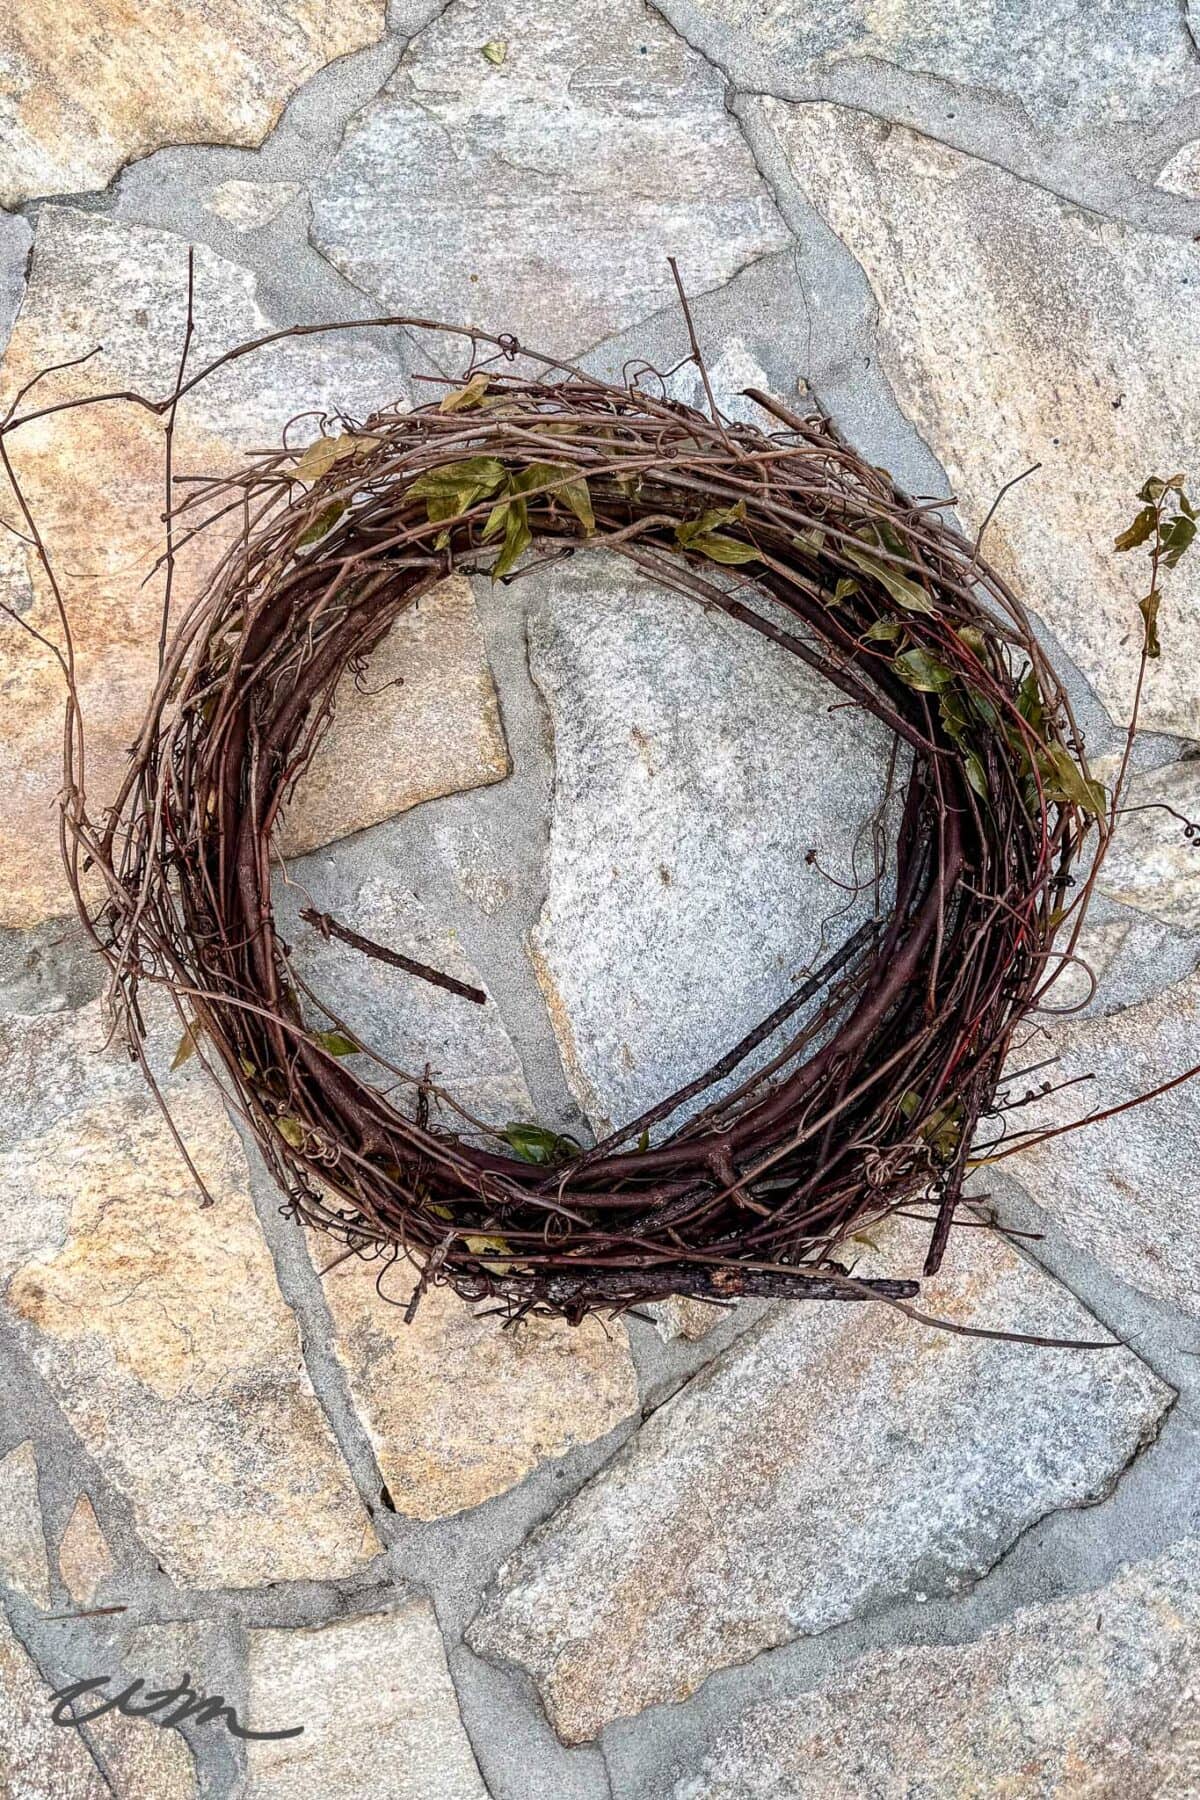
Step 5: Prepare the Wreath
- Start with a grapevine wreath as your base.
- Soak the wreath in water overnight to soften the branches.
- Gently remove the wire or branch that holds it together.
- Loosen and reshape the wreath slightly so it feels more open and organic.
- Weave in a few fresh curly willow branches for added texture and a natural, foraged look.

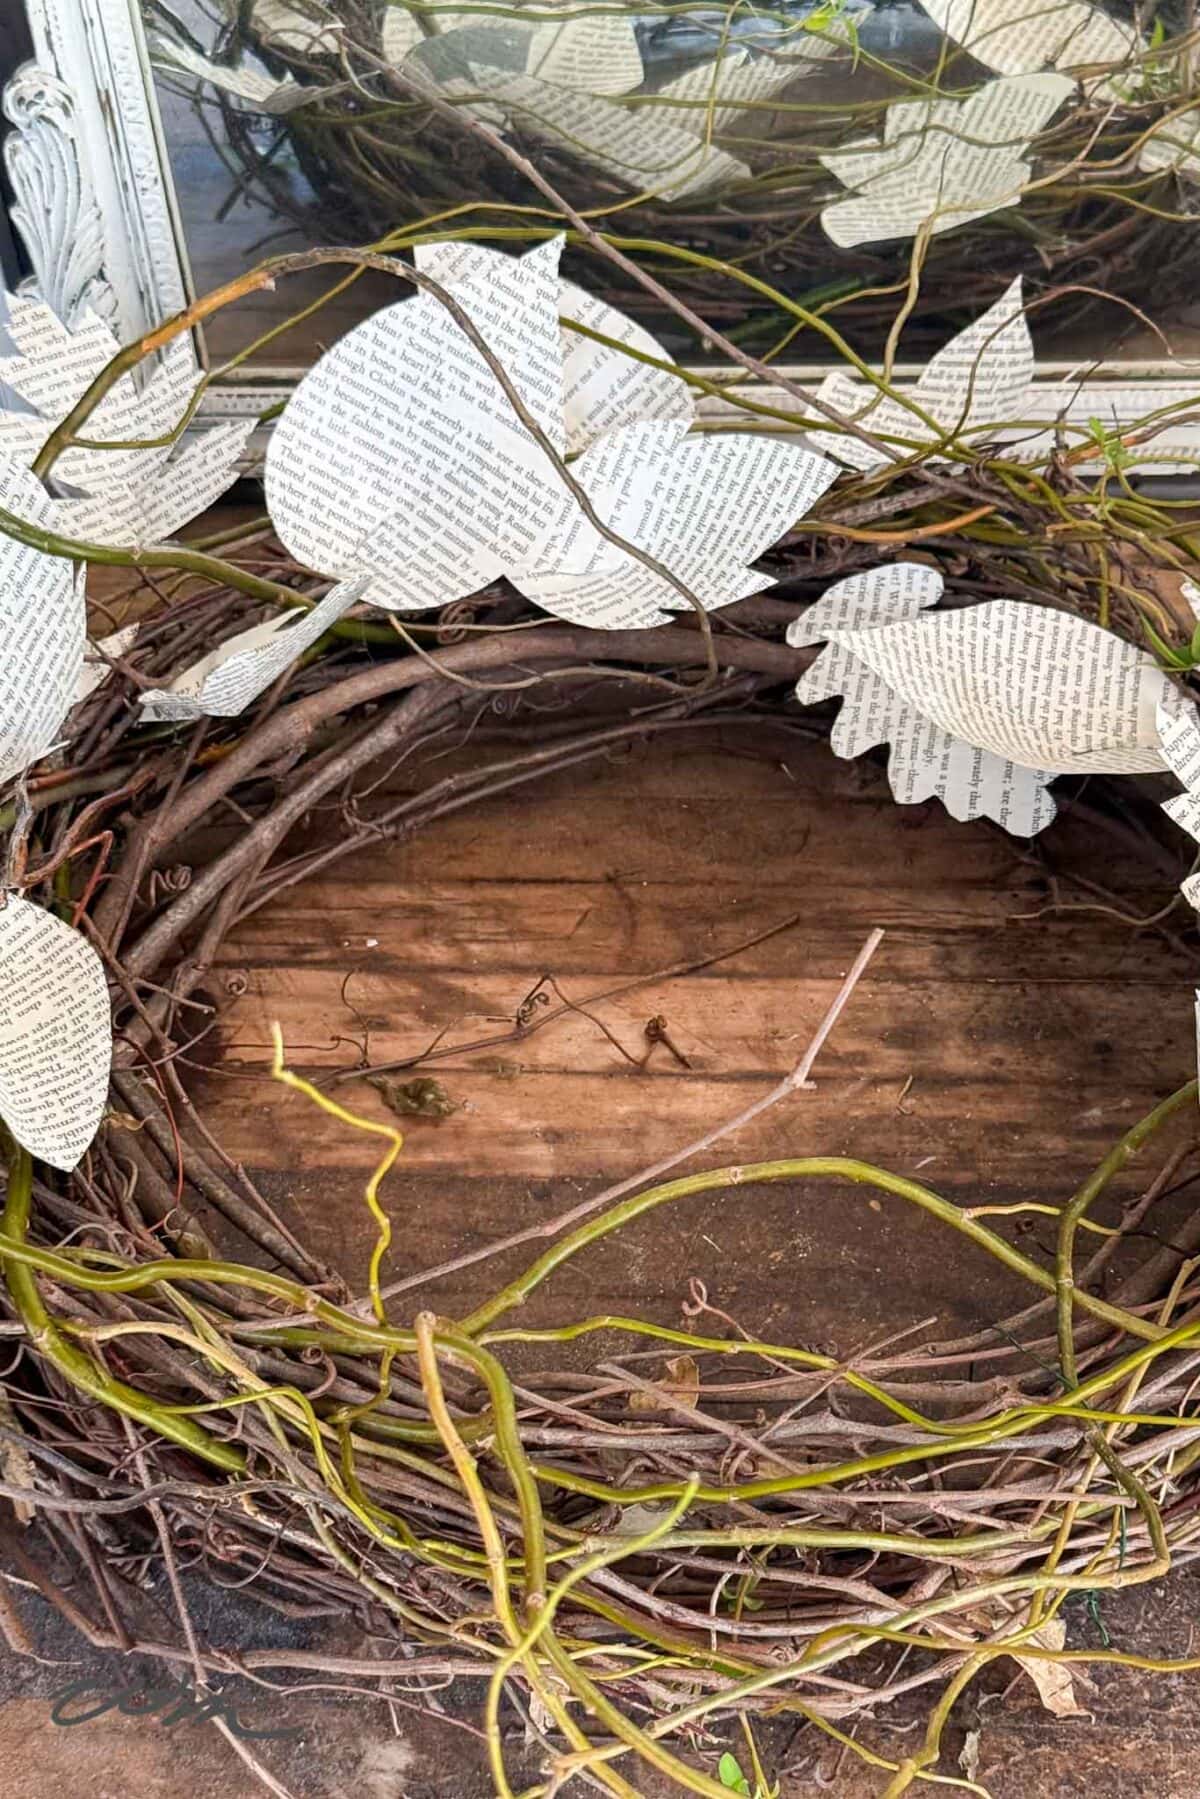
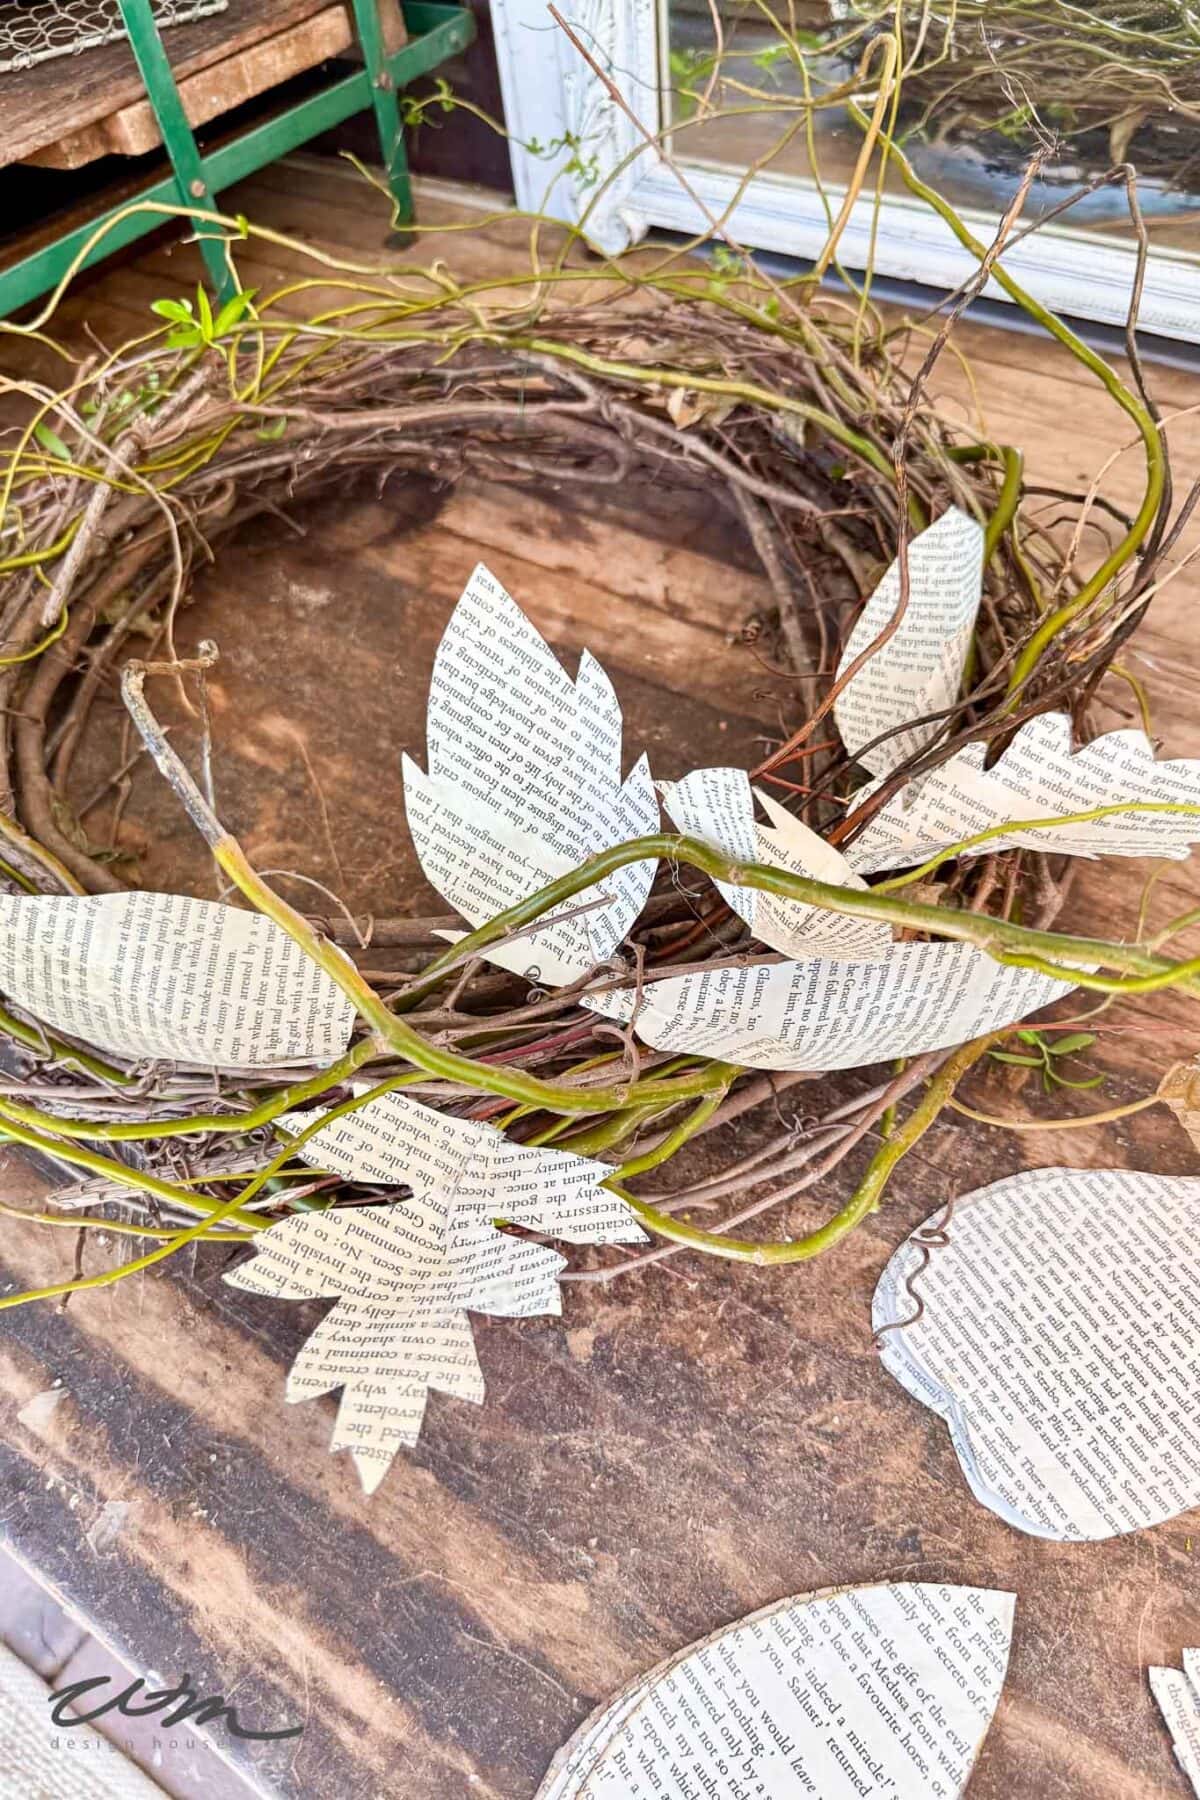
Step 6: Arrange the Paper Leaves on the Twig Wreath Base
- Lay your twig wreath flat on your work surface.
- Before gluing, arrange your leaves around the wreath, tucking some between twigs and layering others for fullness.
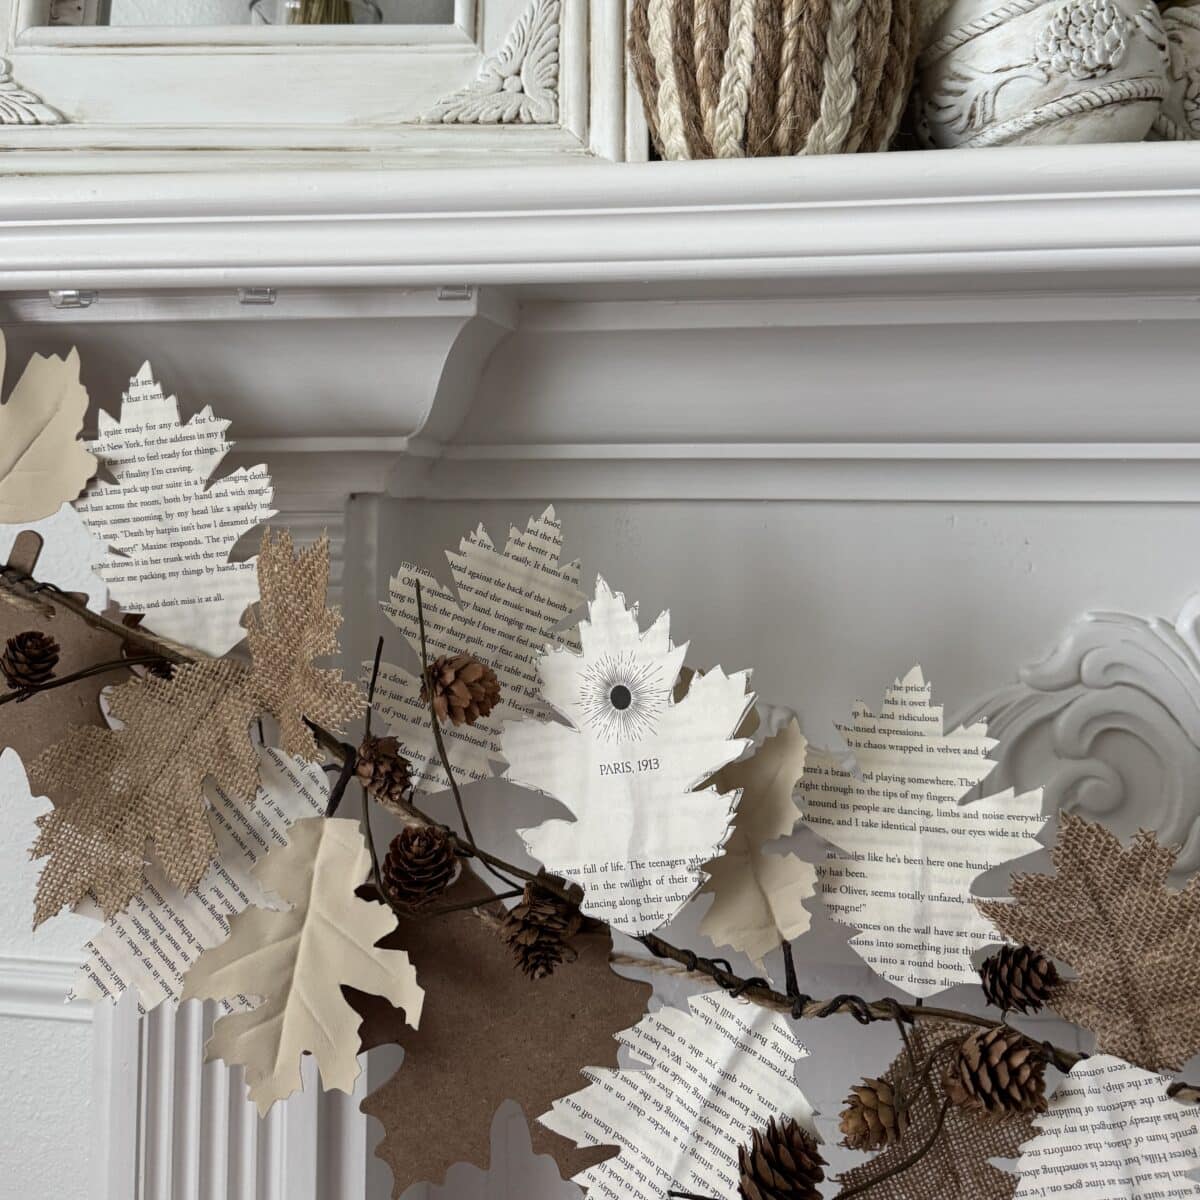
- This balance of natural twigs and aged paper leaves gives your wreath its beautiful, foraged look.
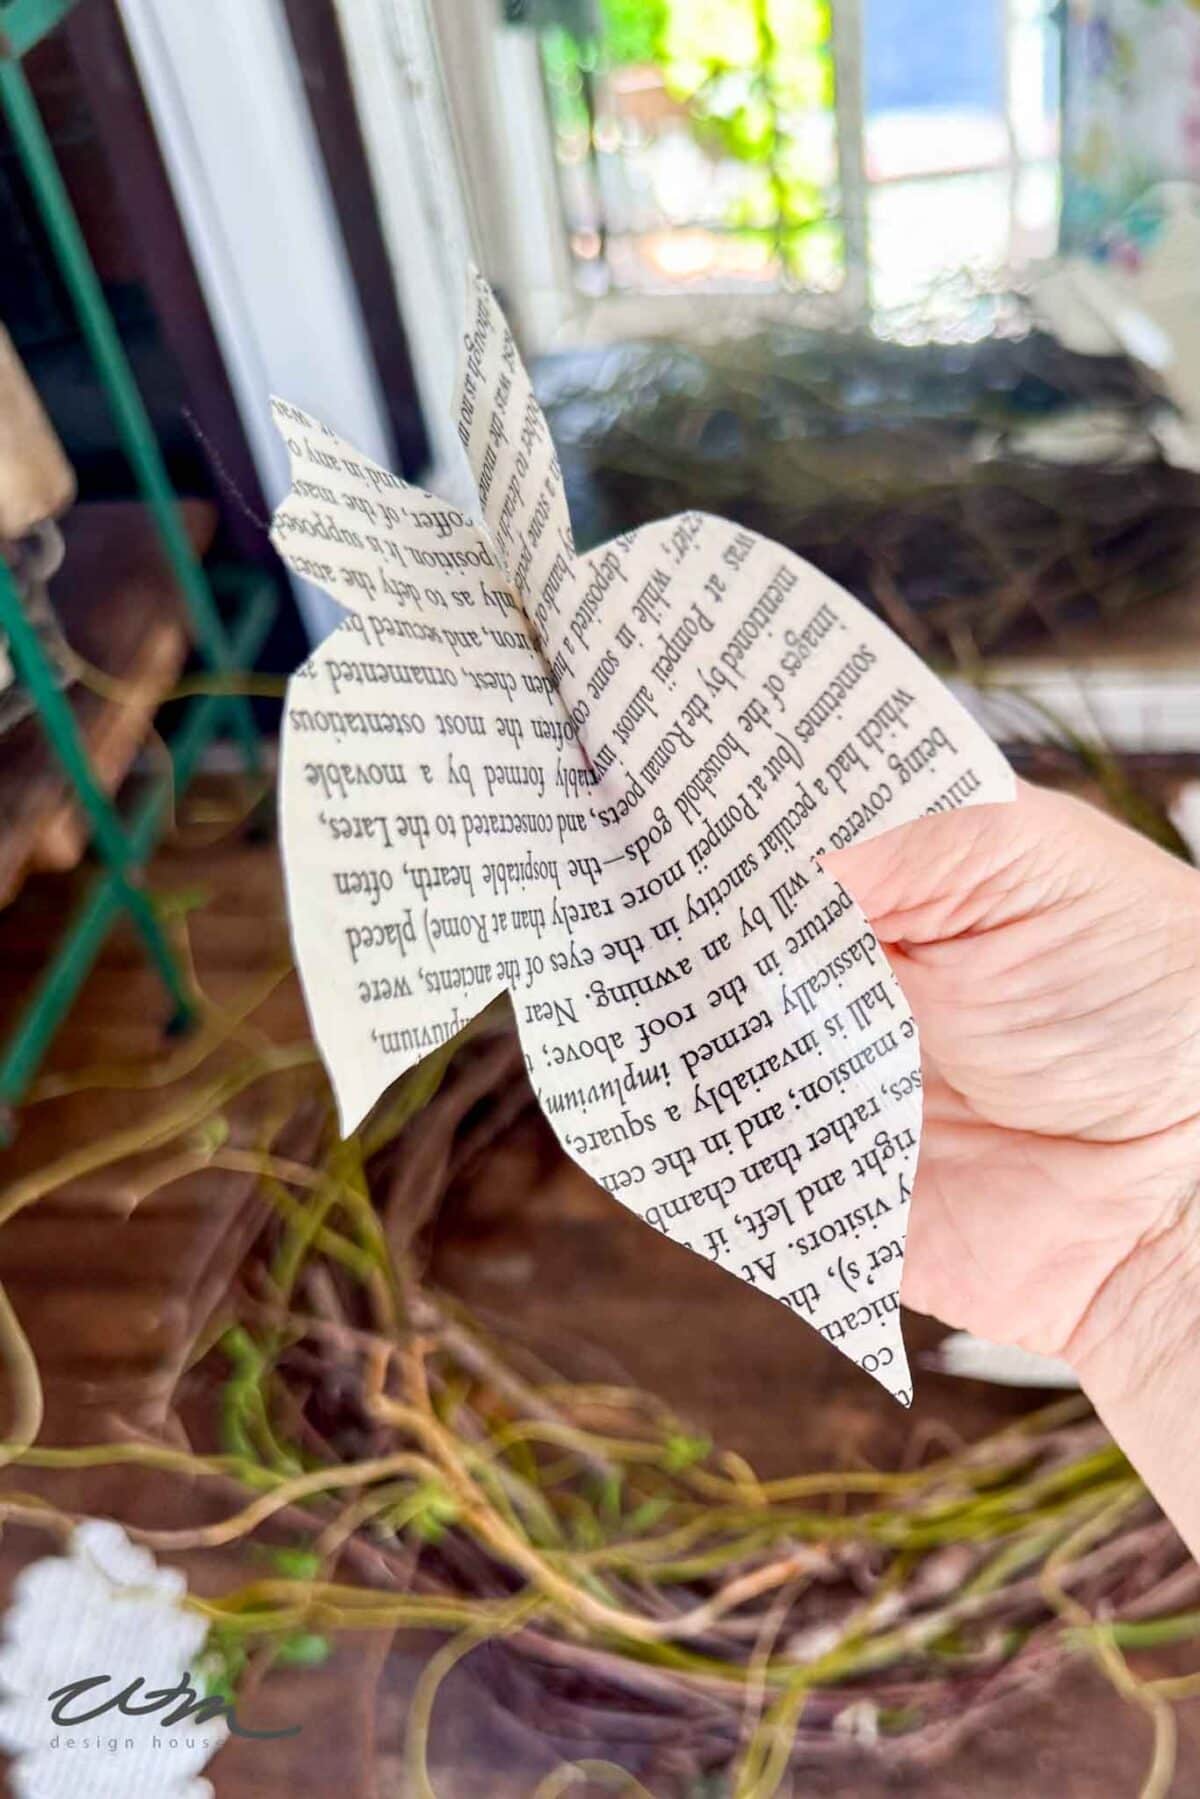
Step 7: Glue the Leaves to Build Your Paper Leaf Wreath
- Add a tiny drop of hot glue to the bottom center of each leaf.
- Fold the leaf lightly in half.
- Pinch the center to create a gentle curve.
- This step gives each leaf a more realistic shape and added dimension.
- Work in small sections around the wreath.
- Add a small dab of hot glue to each leaf and press it gently into place.
- Overlap the leaves slightly and alternate their direction to create depth and natural movement.
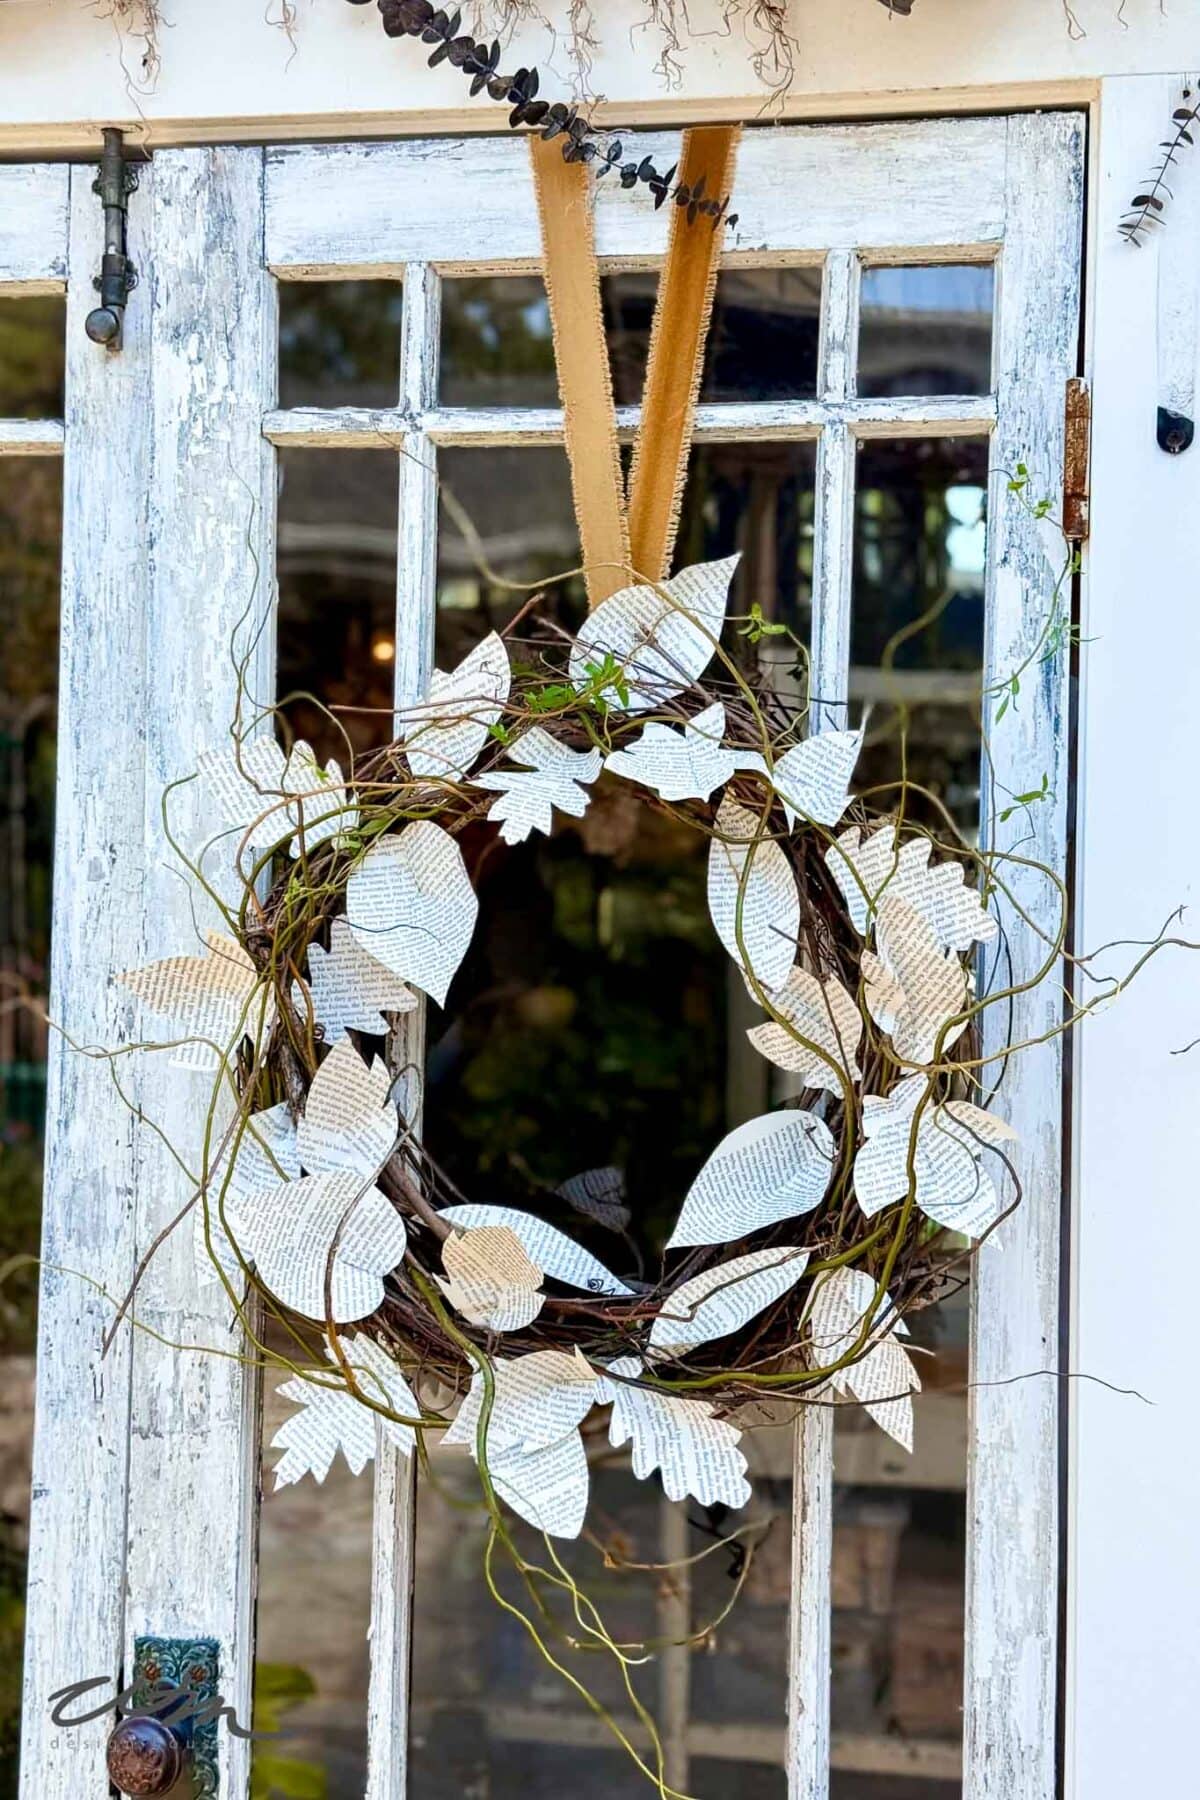
- Start by attaching all of the plain leaves first to form your base layer.
- Even without embellishments, these simple leaves create a beautiful, everyday wreath on their own.
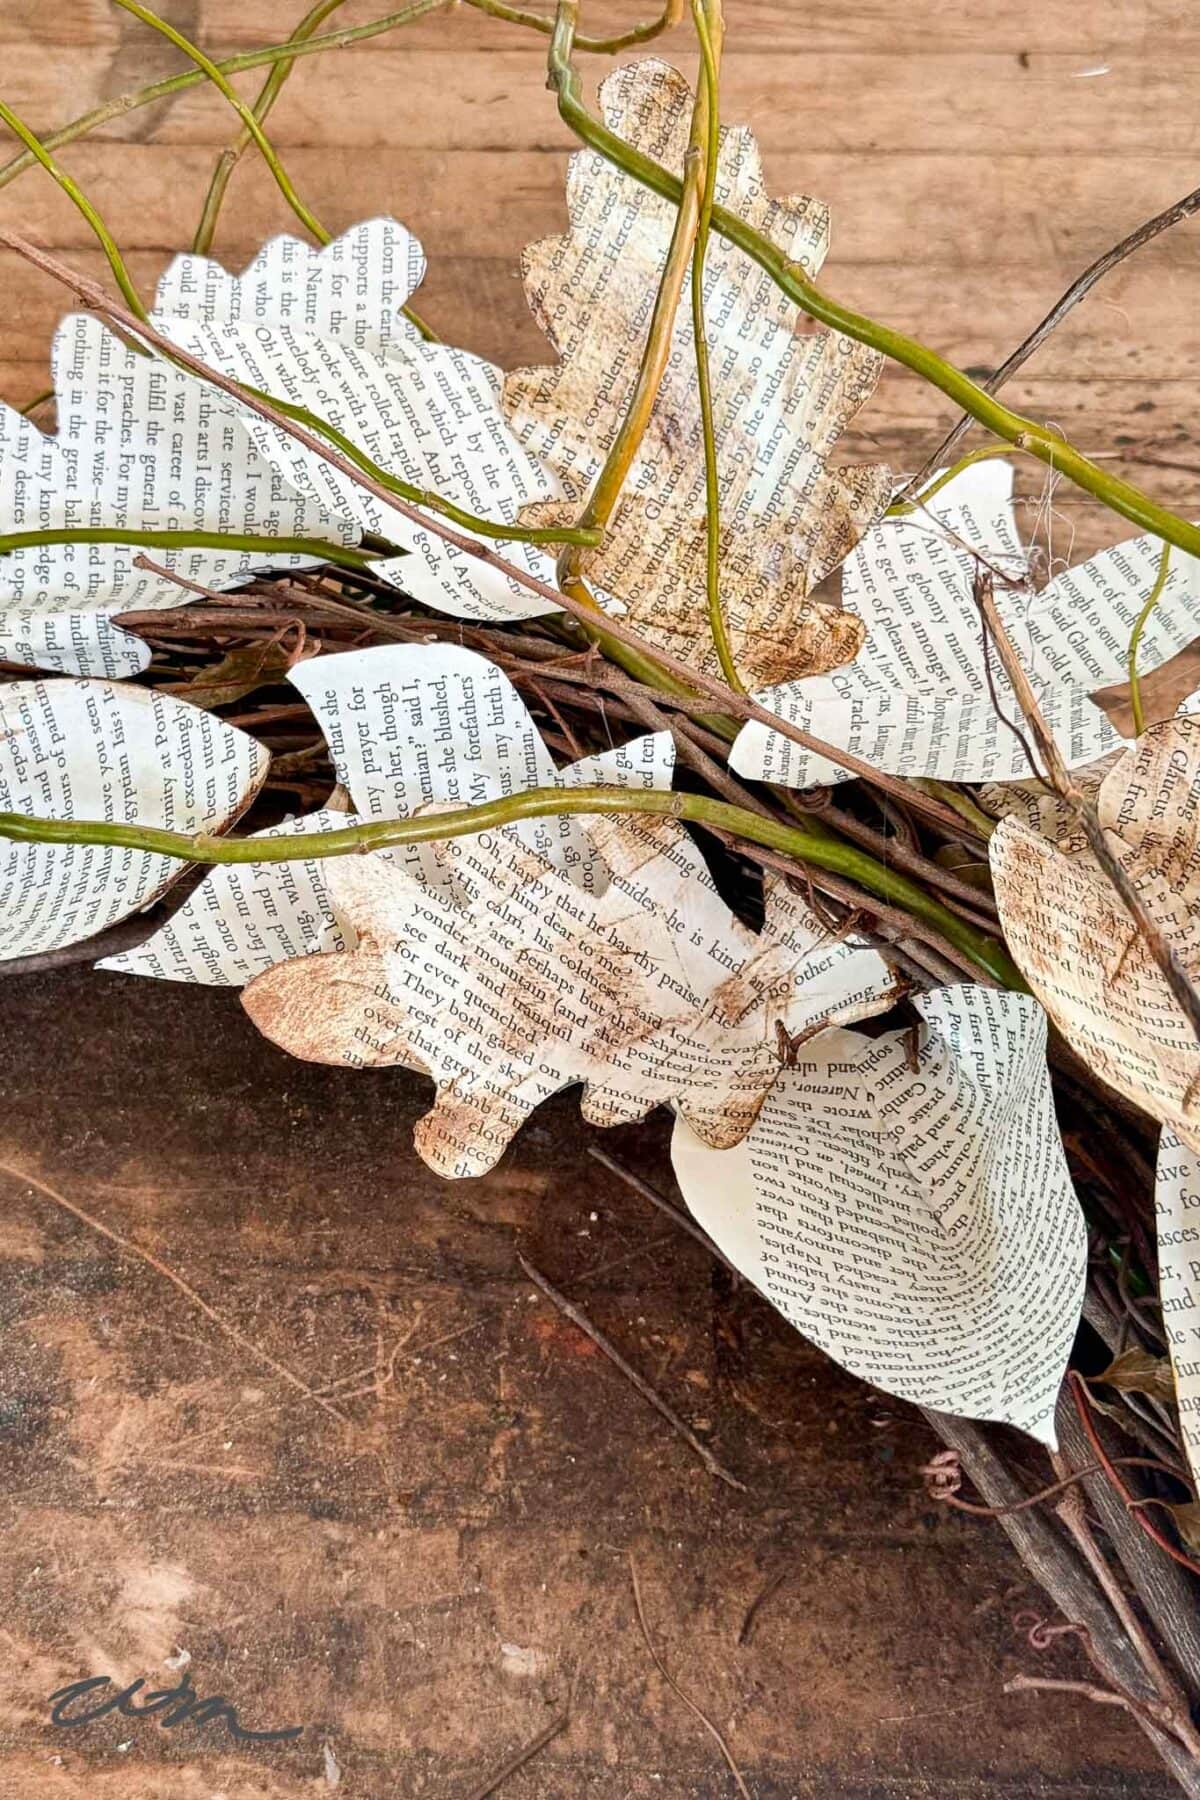
Step 8: Adding the Inked Leaves
- Begin layering in the leaves that have been shaded with archival ink.
- Use small dabs of hot glue to attach them securely.
- Tuck a few leaves behind the twigs to create a soft, naturally layered look.
- The warm tones and subtle shading add beautiful depth, making this wreath perfect for fall decorating.
Step 9: Add Finishing Touches and Embellishments
Once your leaves are secured:
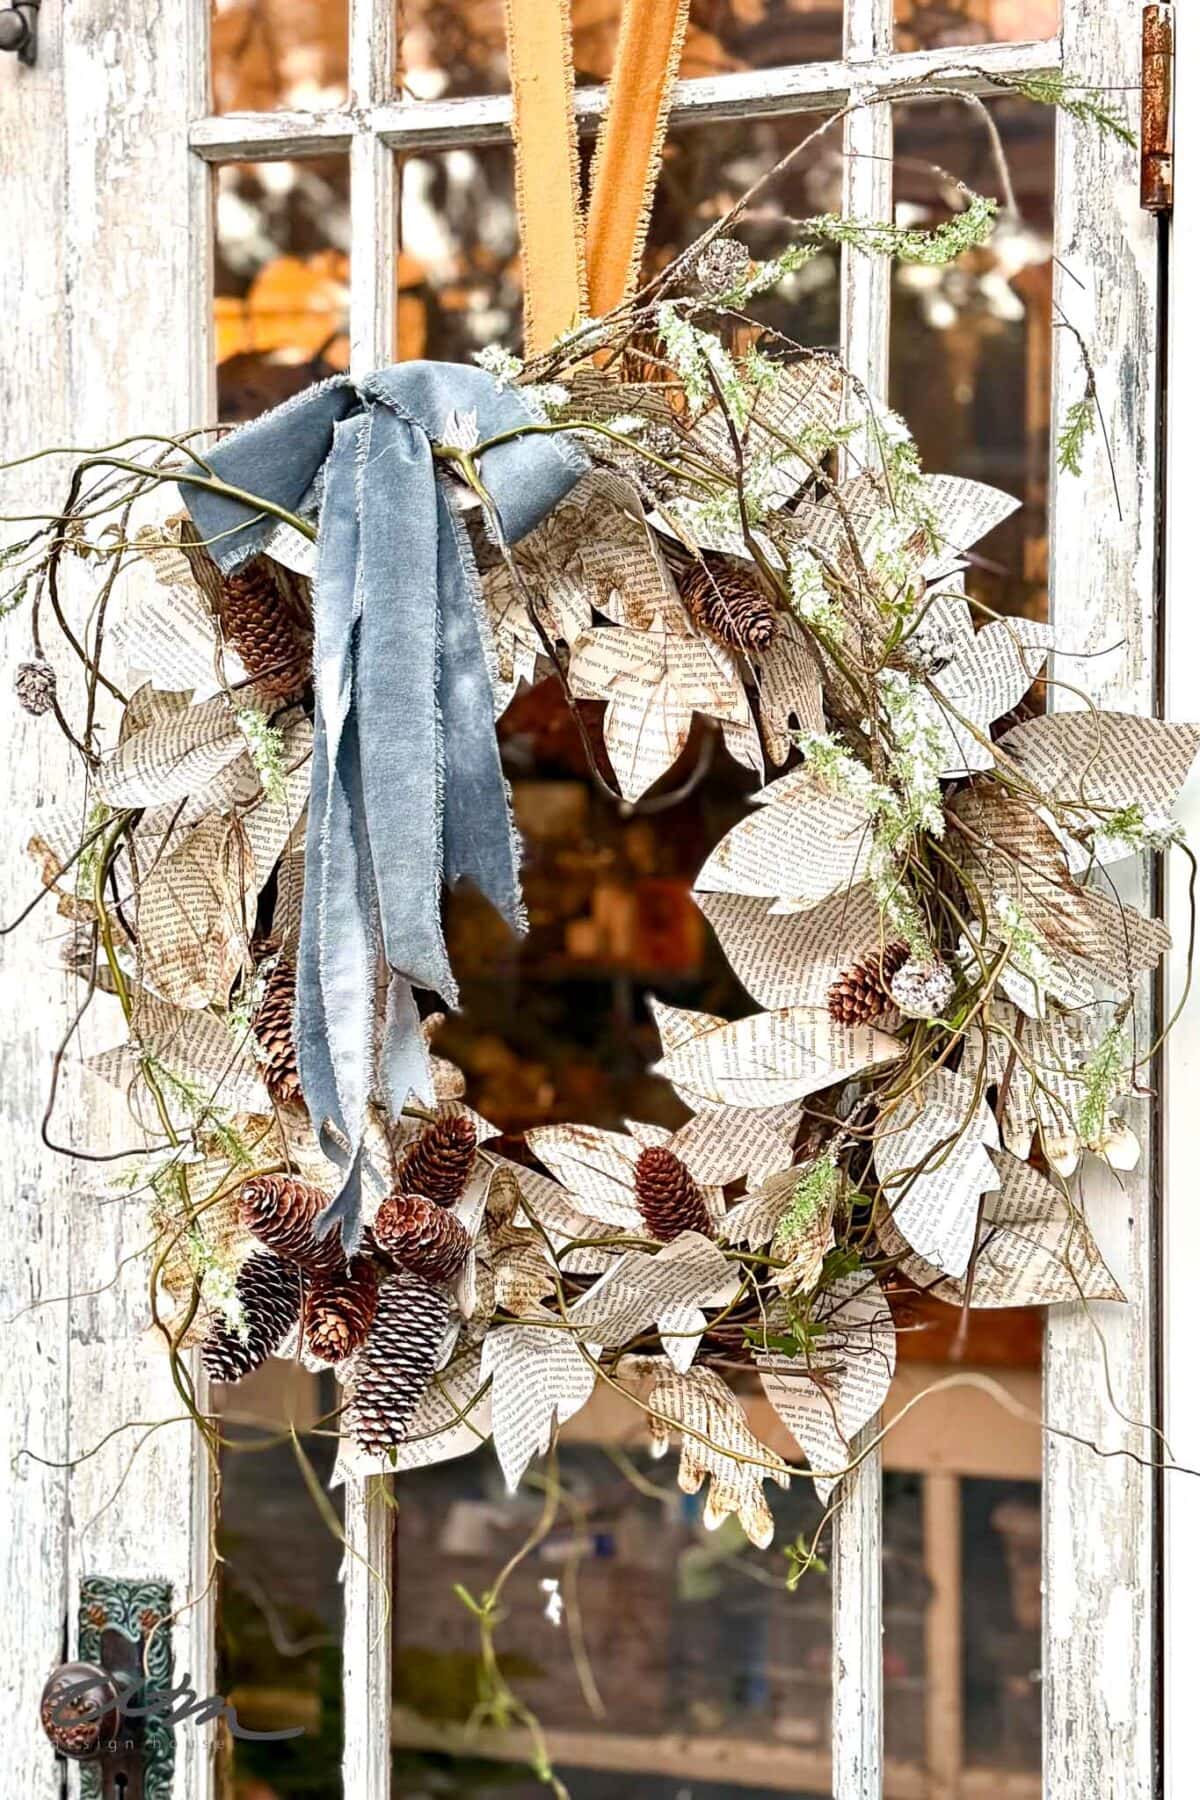
- Tie on a velvet or burlap ribbon for a seasonal accent
- Add dried flowers, acorns, or small pinecones for texture
- Optionally, brush the leaf edges with a hint of metallic paint for a soft, luminous detail


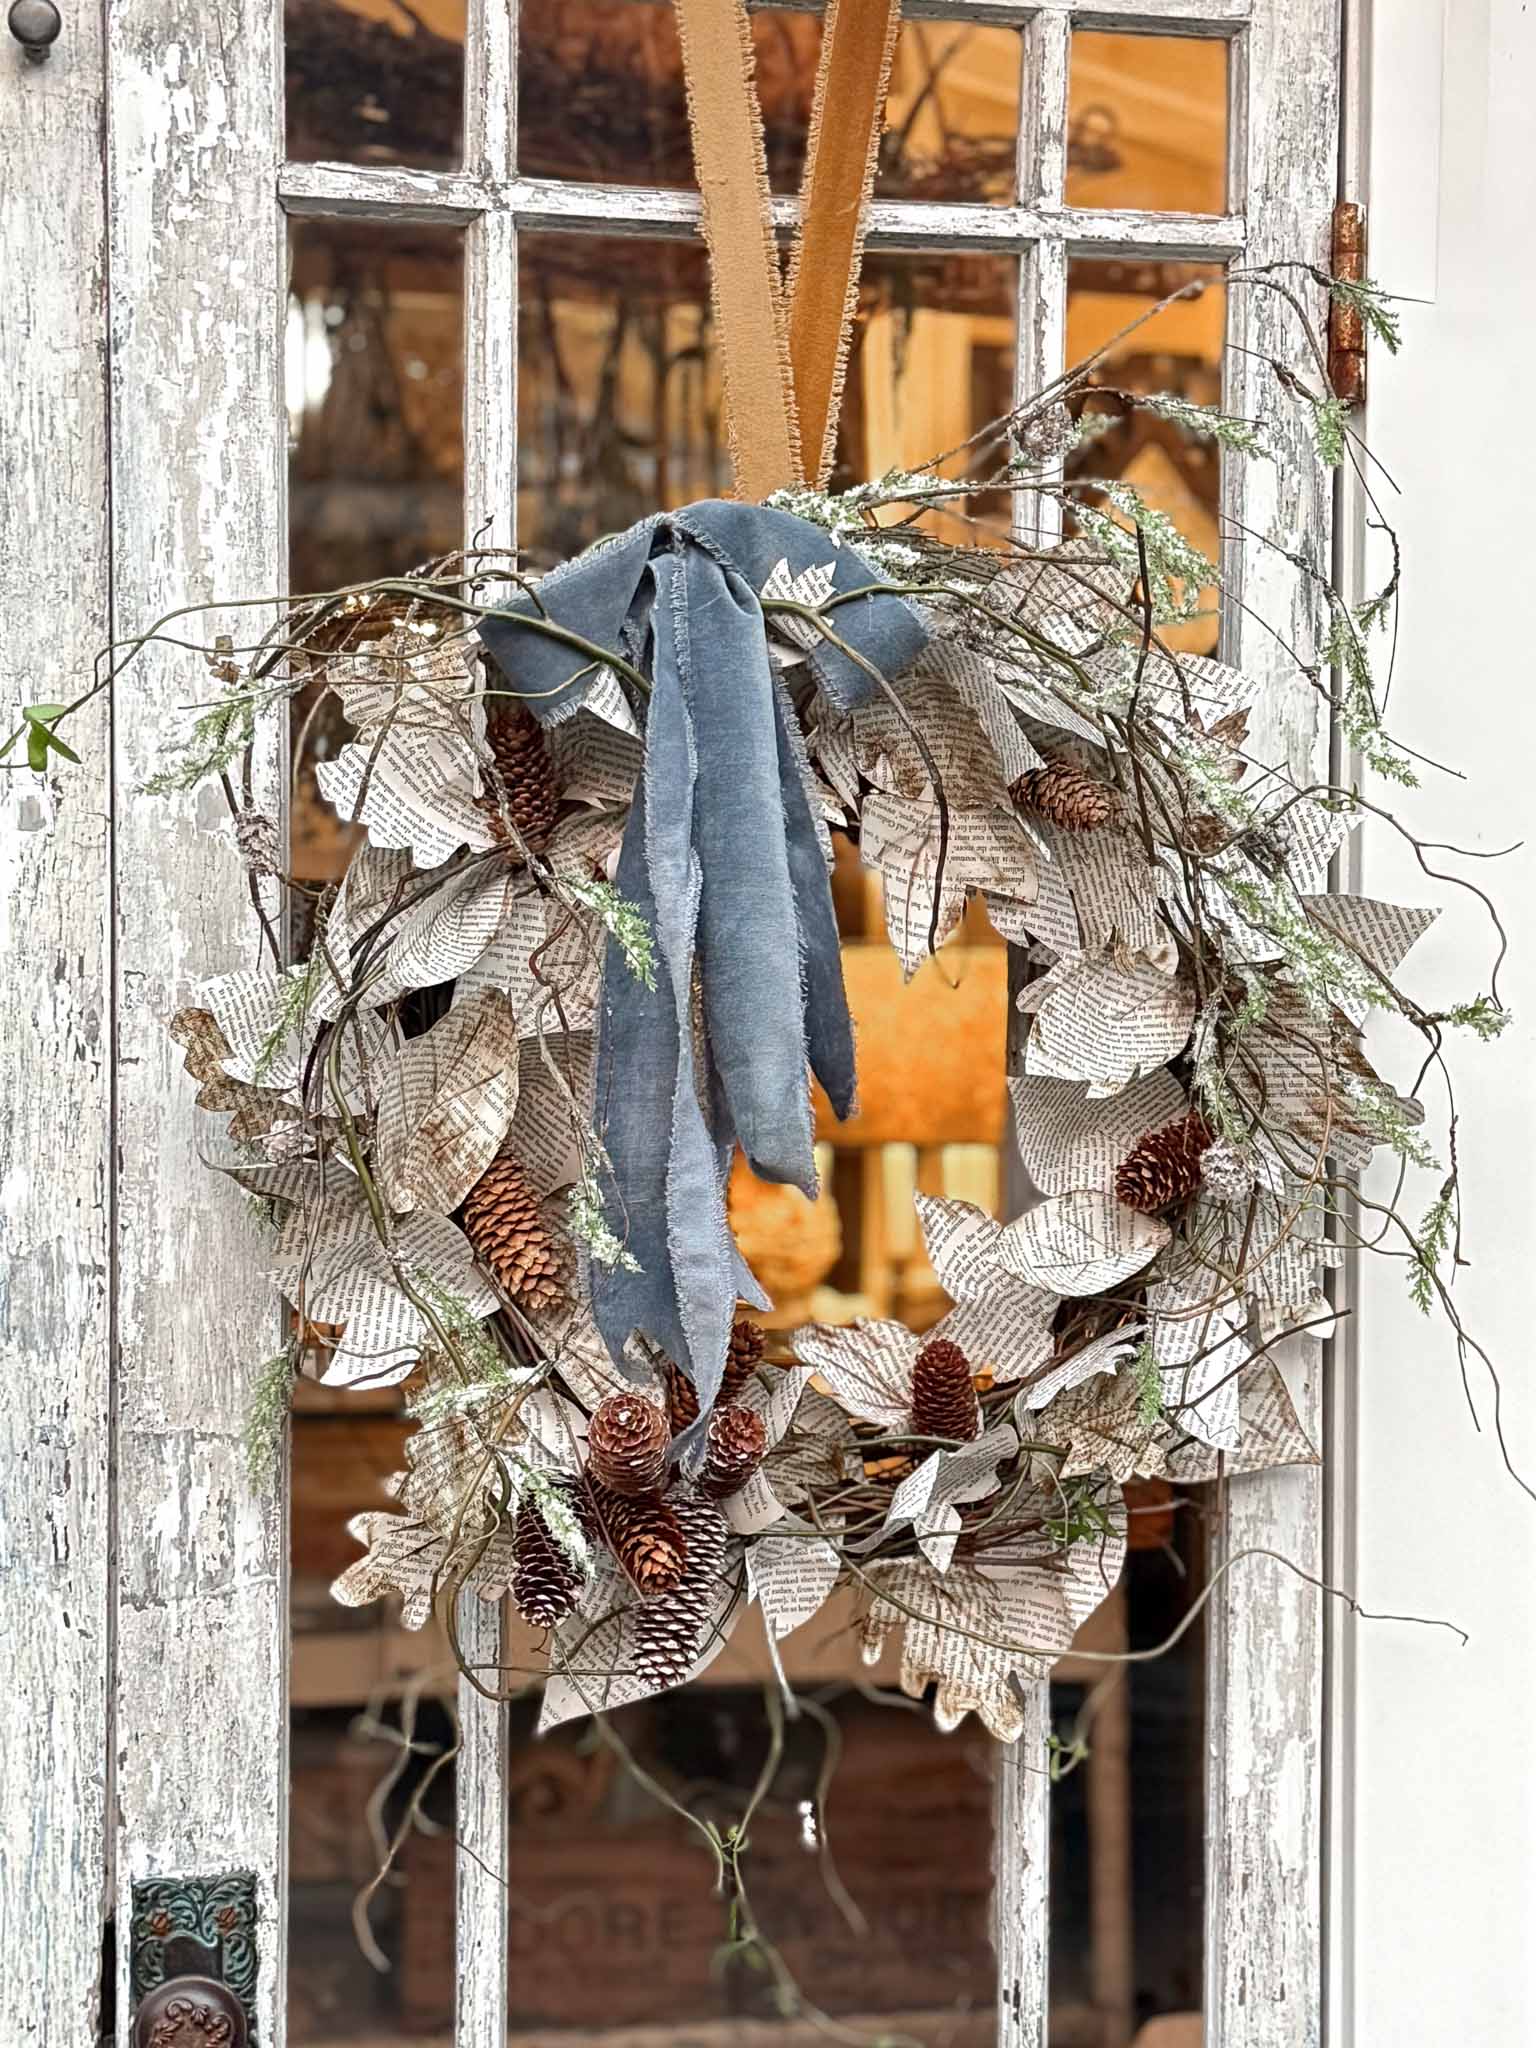
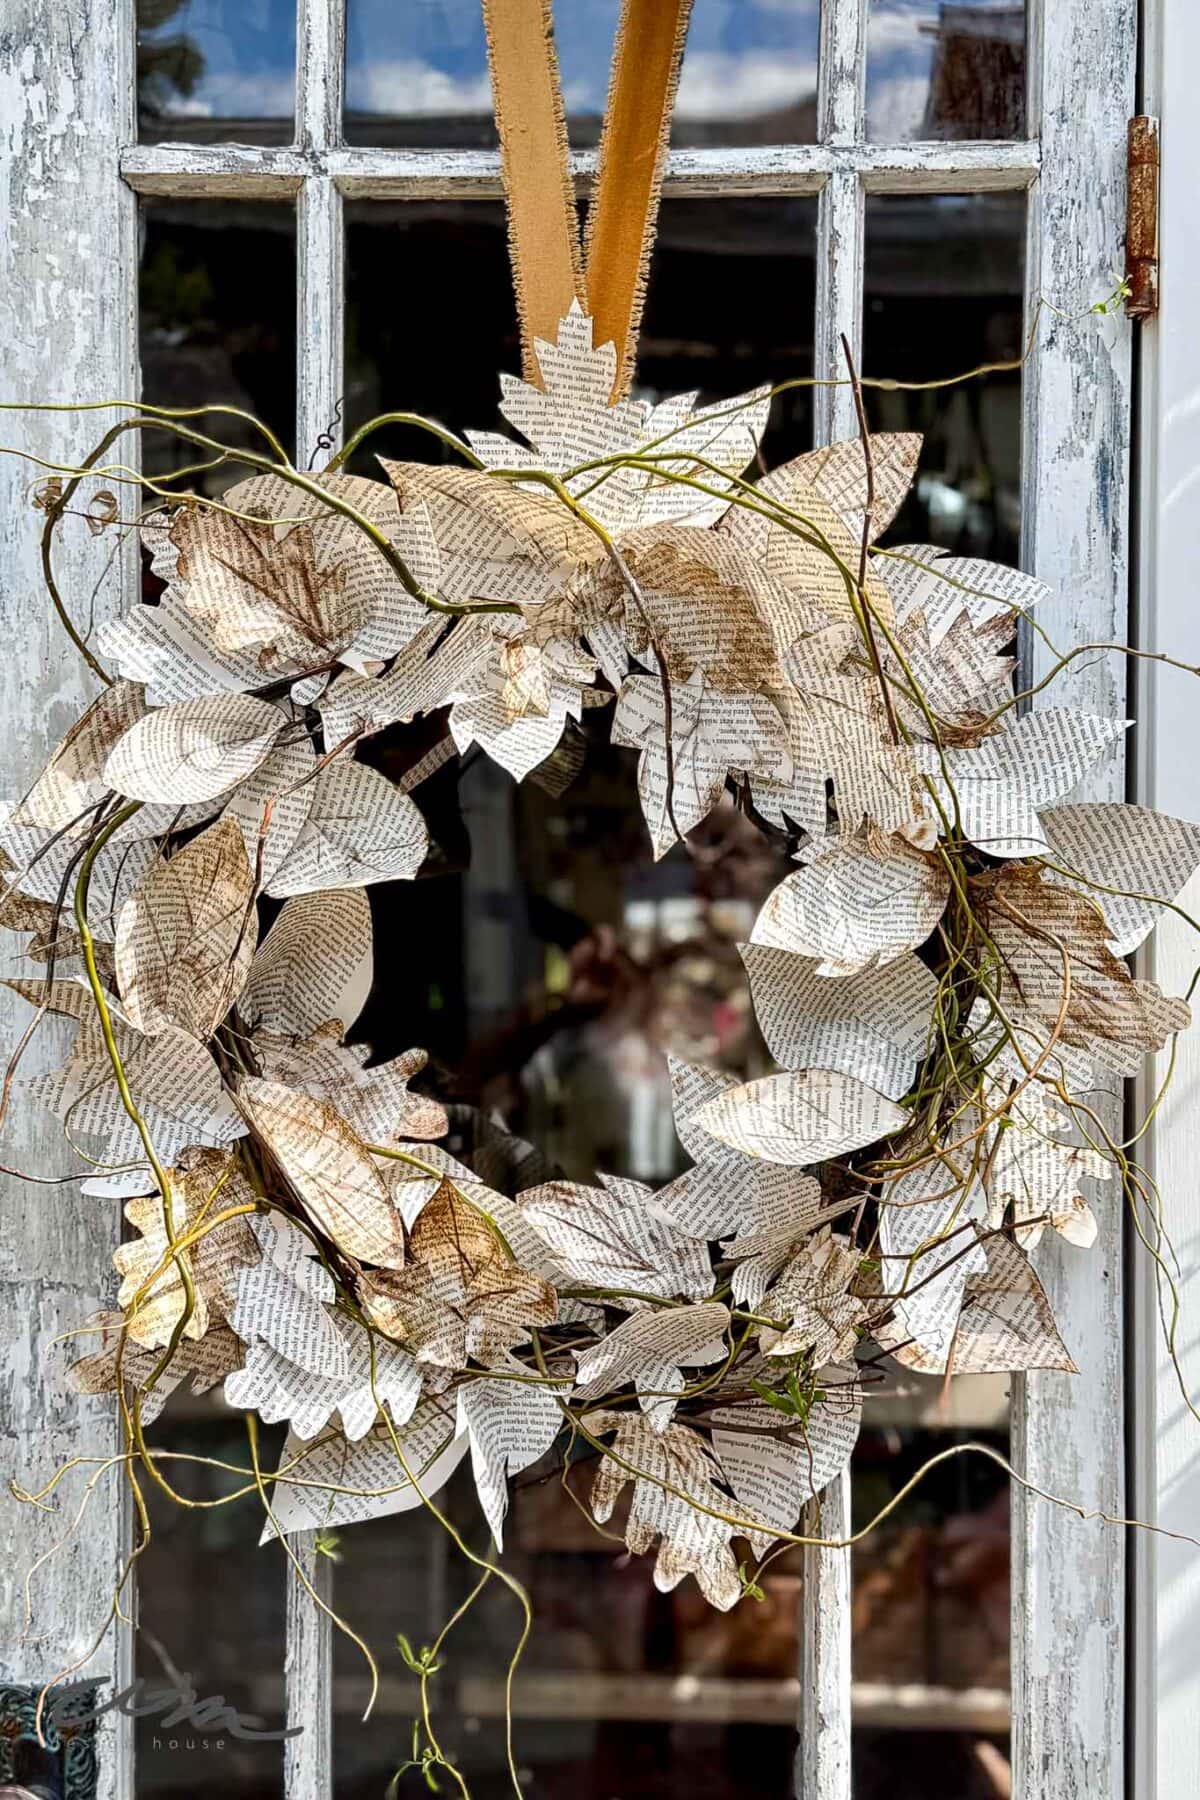
Step 10: Hang and Style Your Paper Leaf Wreath
Attach a twine or ribbon loop to hang your wreath.
Display it:
- On your front door (under a covered porch)
- Over your mantel layered with vintage books or candles
- In your She Shed for a cozy creative touch

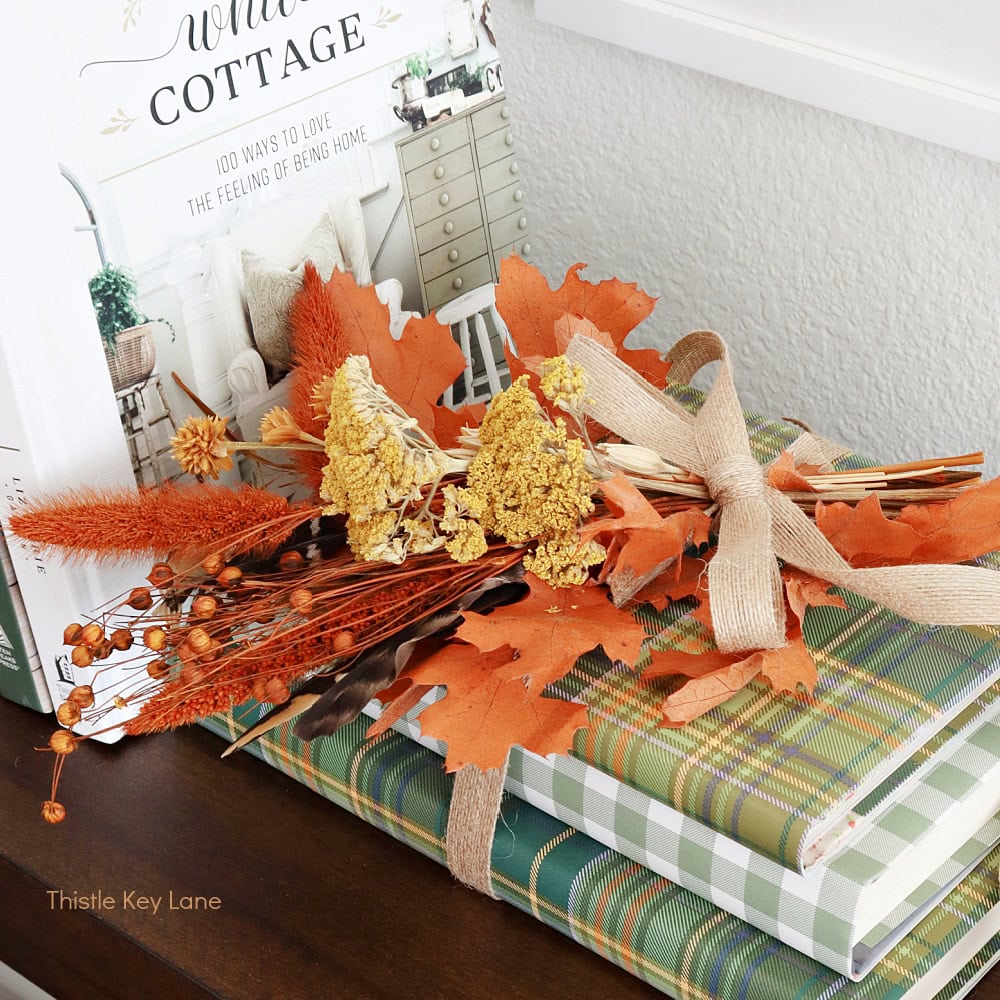
Style Variations for Your Book Page Wreath
Fall wreath
For autumn, layer in a few dried botanicals or muted fall florals. The warm tones pair beautifully with the aged book pages, creating a cozy, foraged look that feels perfectly seasonal.
Christmas wreath
For a winter touch, tuck in sprigs of frosted evergreen and a few pinecones. Finish with a neutral velvet bow. The soft colors and simple ribbon give your wreath timeless holiday charm.

Everyday wreath
Keep it beautifully simple with just twigs and aged paper. Its neutral tones and natural texture make it an elegant piece you can enjoy all year long.
Wrapping Up
There’s something magical about giving old pages new life. This paper leaf wreath is a sweet reminder that beauty often comes from the stories and materials we already have.
And the creativity doesn’t stop here — my friends from the Handcrafted Society have dreamed up their own charming book-inspired projects. Be sure to click through and gather even more inspiration for your next craft!


Other Tutorials from WM Design House
If you love this wreath, you might also enjoy some of my other favorites.

How to Make a DIY Rope Wreath
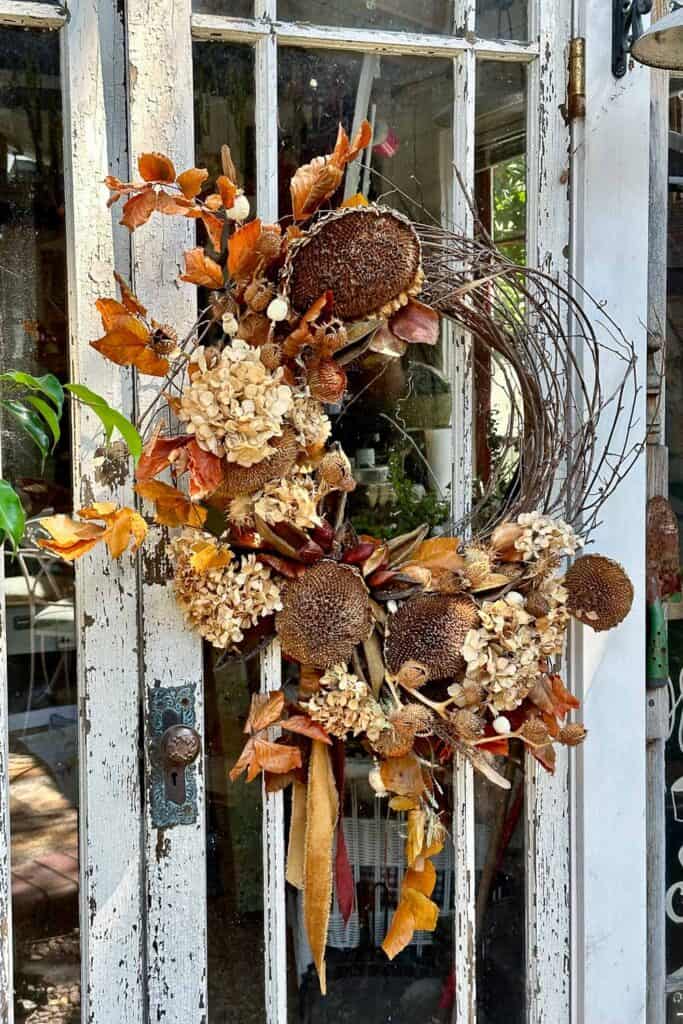
How to Make a Foraged Fall Wreath with Natural Materials
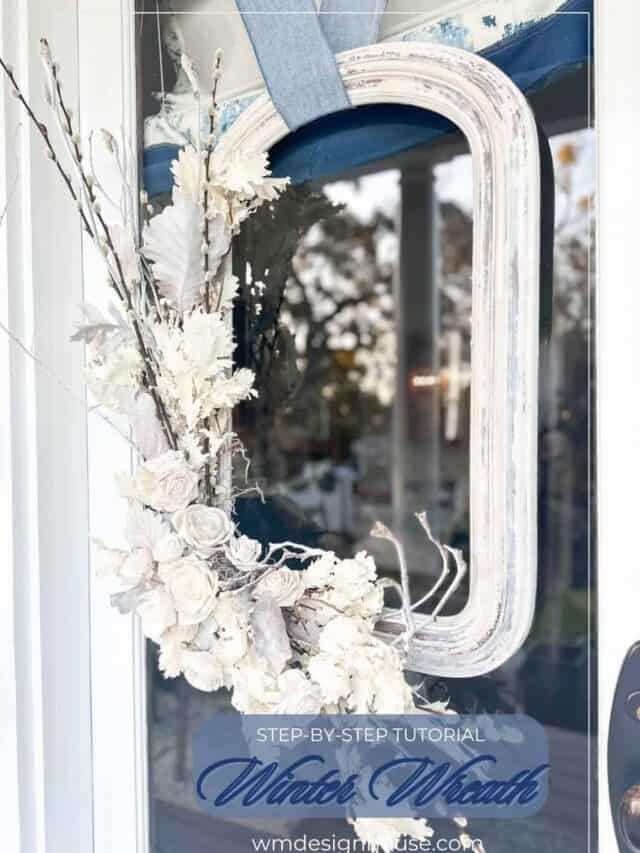
DIY Winter Wreath with Wood Flowers and Rustic Charm

Did you make this craft?
We would love to see what you have created, so mention us @wmdesignhouse or tag us using #wmdesignhouse so we can see your creations!
More about me!

Hello, I’m Wendy – a dedicated homemaker with a deep passion for decorating, gardening, cooking, and crafting. I find joy in harmonizing beautiful elements to fashion a space that is both comfortable and inspiring. I will help you create a beautiful home, one project at a time.
Connect with Wendy


Beautiful! I appreciate the free templates for the leaves! So helpful to make this project an easy one to recreate.
Wow! What a great idea! I love the way the book page leaves look. Thanks for sharing. I came over from HomeTalk where I started following you. Be well.
Hi Wendy – First, I love that you added natural elements to this wreath. The willow branches and pine cones are the perfect compliment to the paper leaves. It creates a sense of natural abundance. Second, I love the ribbon you added. Especially the blue color. Your project turned out beautifully!
Beautiful! I have such a hard time using old books…when I saw your antiquing…I think I might could use that technique with copied pages…thanks for the inspiration!
What a beautiful wreath Wendy, and to think you can do so much with book page leaves! The extra details with the ink stamp looks amazing, and I’m loving the overall whimsical feel of the vines! Pinning!
Your wreath is so pretty, Wendy! I adore how you aged the leaves and then applied Mod Podge to them! It’s the perfect way to add fall decor to your home!
This is so beautiful, Wendy! I love how you used the stamp to give a bit of age and patina to the book page leaves too. Plus, I love how you added the pinecones and softened the branches of the grapevine wreath to create a whimsical feel. It’s fabulous! Hope you’re fall season has been all that you’ve needed it to be, CoCo
This is absolutely gorgeous, Wendy! I love it so much.