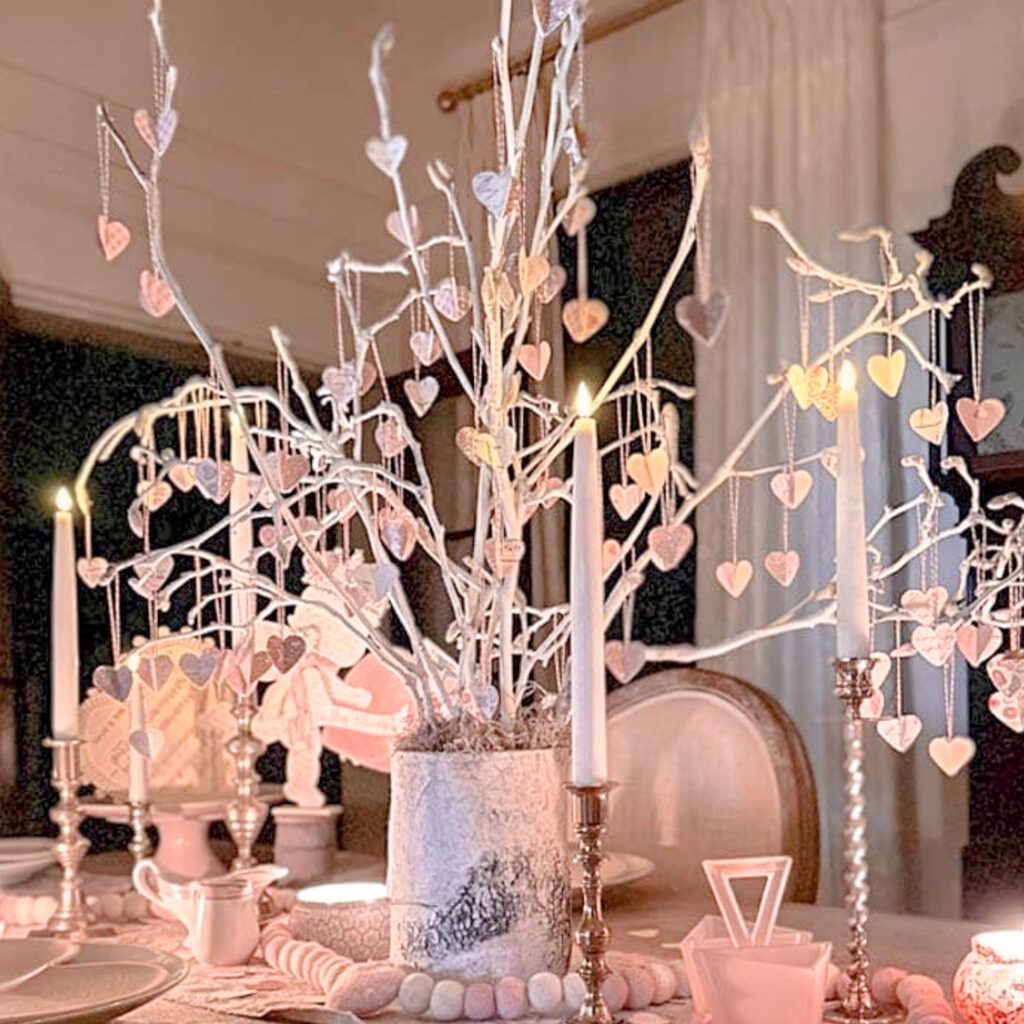
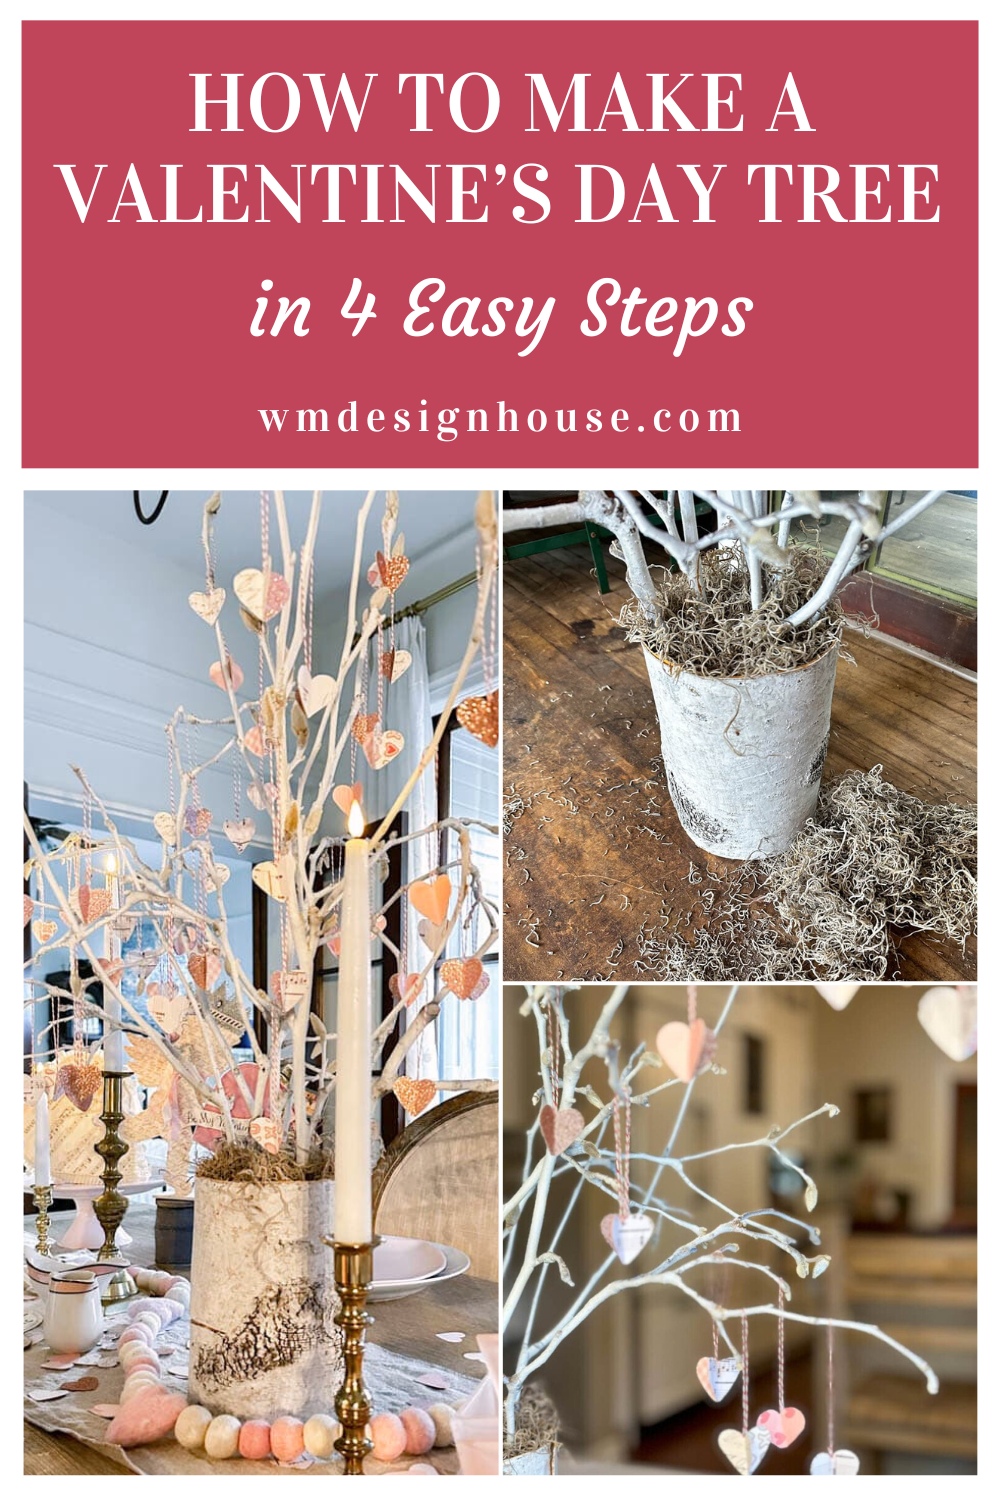
How to Make a Valentine’s Day Tree in 4 Easy Steps
This tutorial is a fun way to make a one-of-a-kind Valentine’s Day tree in just 4 easy steps. It’s the perfect addition to your home for the holiday of love.
On my blog WM Design House, I may sometimes use affiliate links, which means a small commission is earned if you make a purchase via the link. The price will be the same whether you use the affiliate link or go directly to the vendor’s website using a non-affiliate link.
Now that your Christmas decorations are down, it’s time to find a creative way to add a romantic touch to your home for Valentine’s Day.
And today, I’m showing you how do just that with an easy step-by-step tutorial for making a beautiful and unique Valentine’s Day tree adorned with handmade 3D hearts.
I’m also joining a few blogging friends from the Handcrafted Society to bring you even more Valentine’s Day inspiration. I’m always amazed by the incredible creations from the talented ladies in our group, and this challenge is no exception.
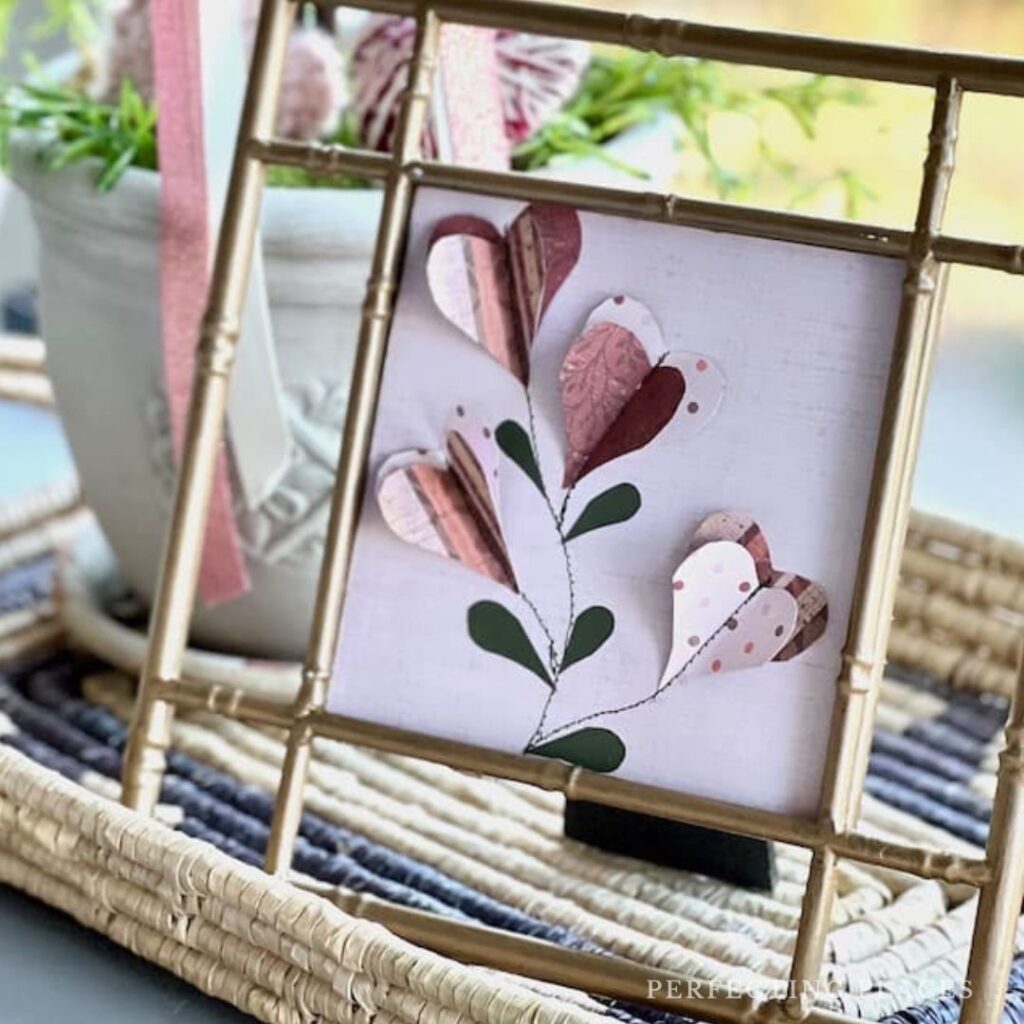
If you are coming over from Kim’s @perfectingplaces I am sure you loved her sweet hearts sewn and framed so beautifully.
Be sure to check out all of the Valentine’s Day ideas from each of my friends, linked below.

Why You’ll Love this DIY Valentine’s Day Tree
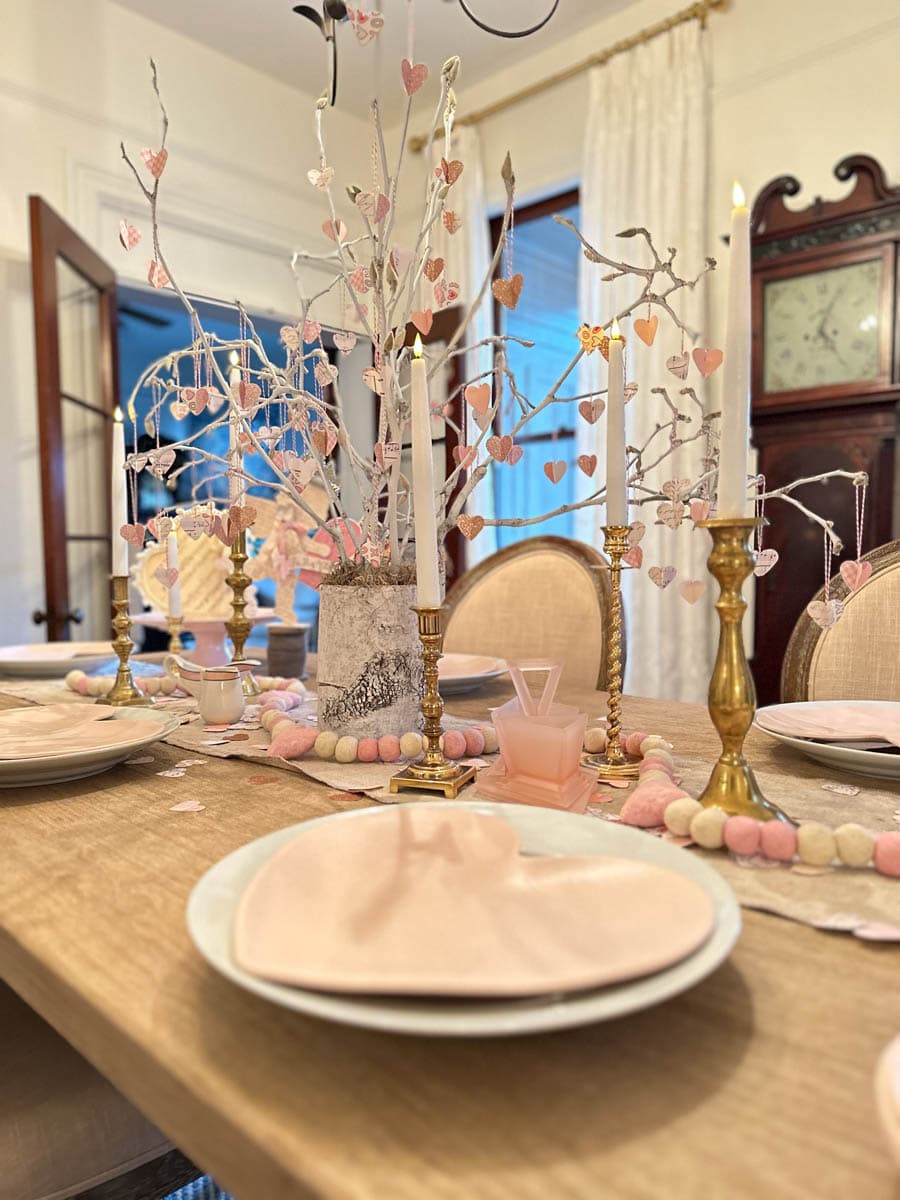
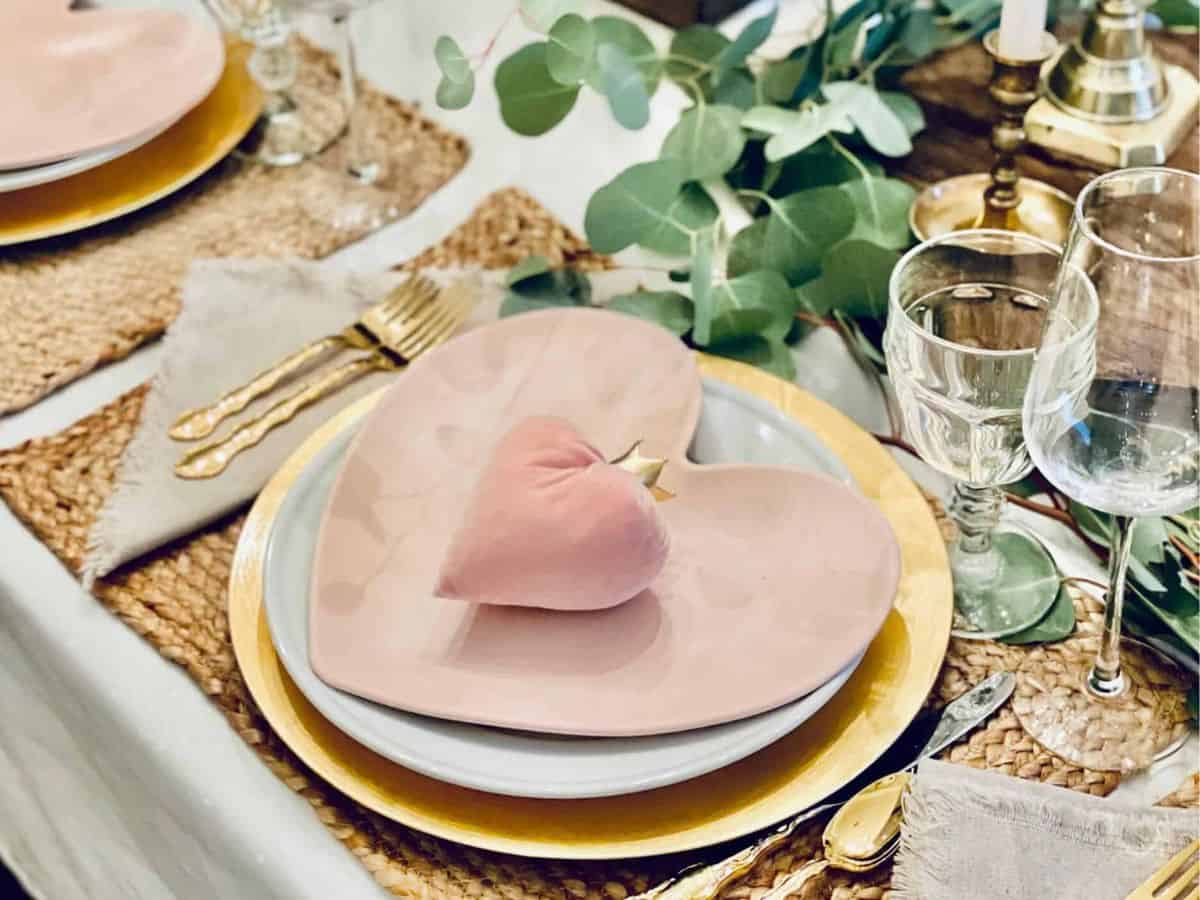
If you love decorating for every holiday but don’t want to spend a fortune, this DIY Valentine’s tree is just the thing for you! It’s simple, affordable, and comes together with just a few supplies—plus a whole lot of love.
In this post, I’ll show you how to create a charming Valentine’s tree that will add a festive touch to your home, whether as a centerpiece for your living room table or a heartfelt gift for someone special.
The best part? You can customize it to match your style, using colors, ribbons, and little accents that make it uniquely yours.
So, grab your crafting supplies, and let’s make something beautiful for Valentine’s Day!
Tools and Supplies Needed to Make Valentine’s Day Tree
For your convenience, I’ve linked all the supplies you need to make your Valentine’s Day tree below, or you may be able to find everything at your local Dollar Tree or Hobby Lobby.
- Tree Branches
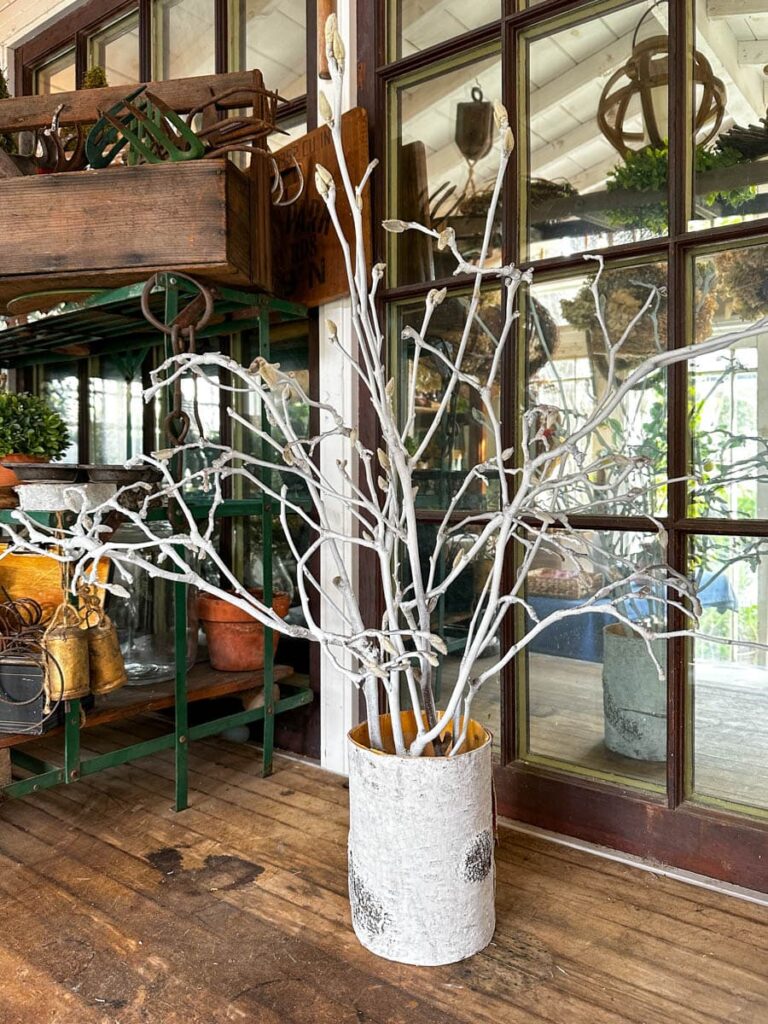
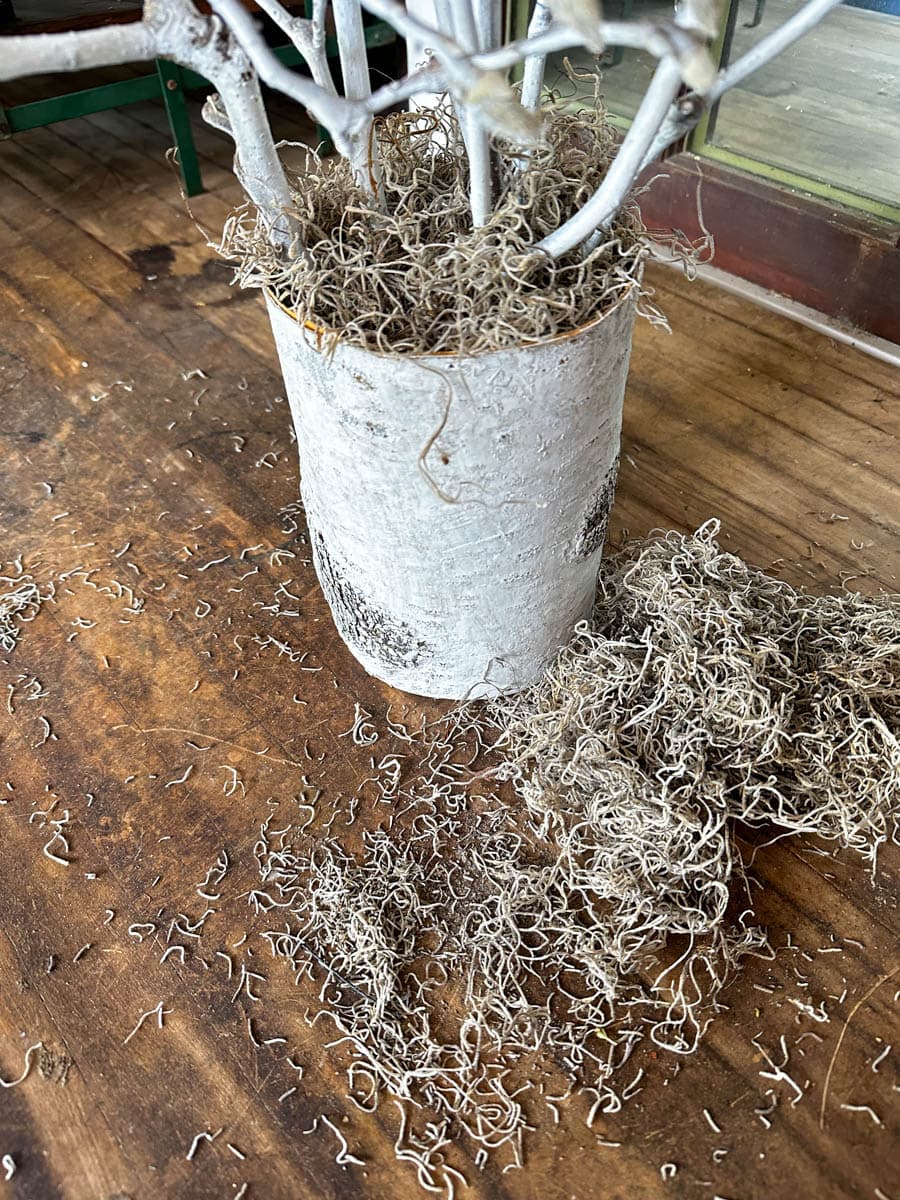
- Container to put your tree in (I used a birch bark vase)
- Matte white spray paint
- Assortment of Valentine’s Day papers or cardstock
- Heart lever punch
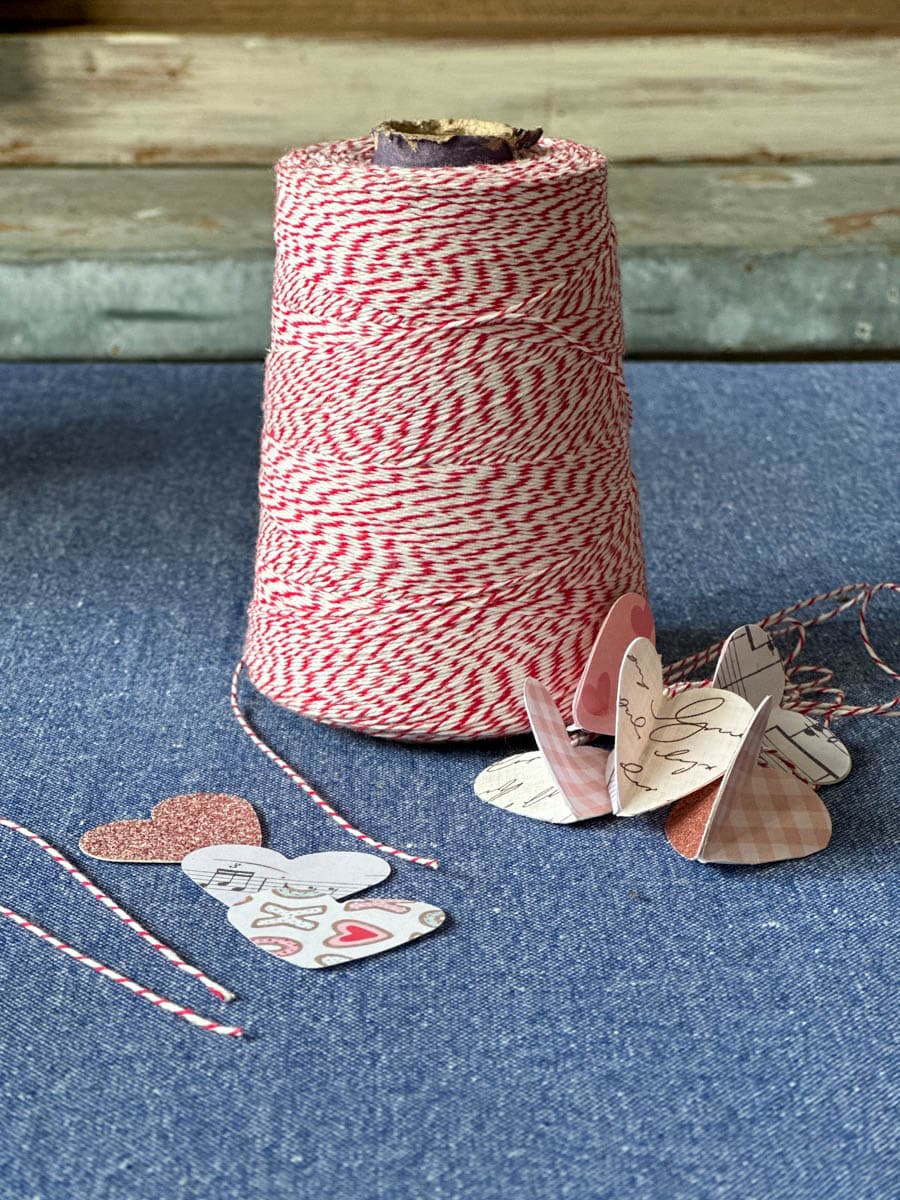
- Baker’s twine
- Scissors
- Spanish moss
- Block of styrofoam
How to Make a Sweet Valentine’s Day Tree
Step 1: Choose Your Tree
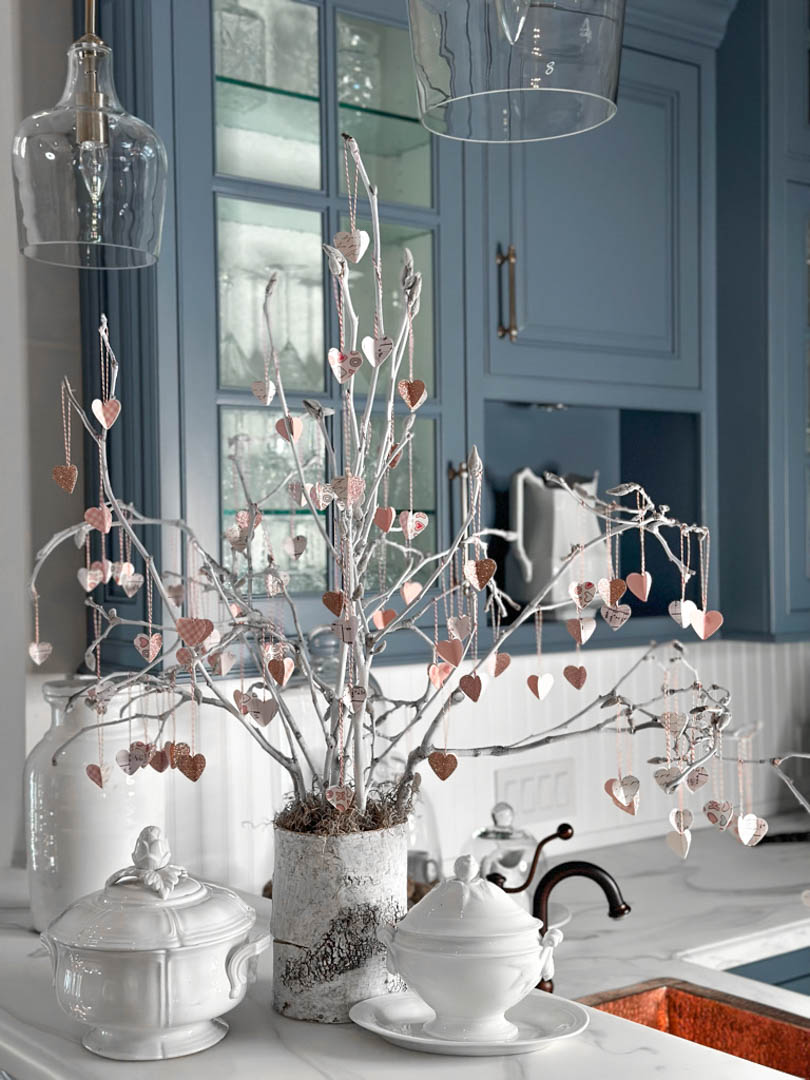
The first step is deciding what kind of tree you want to use. You have a few options! The first option is you can create your own tree, just like I did, using branches and twigs.
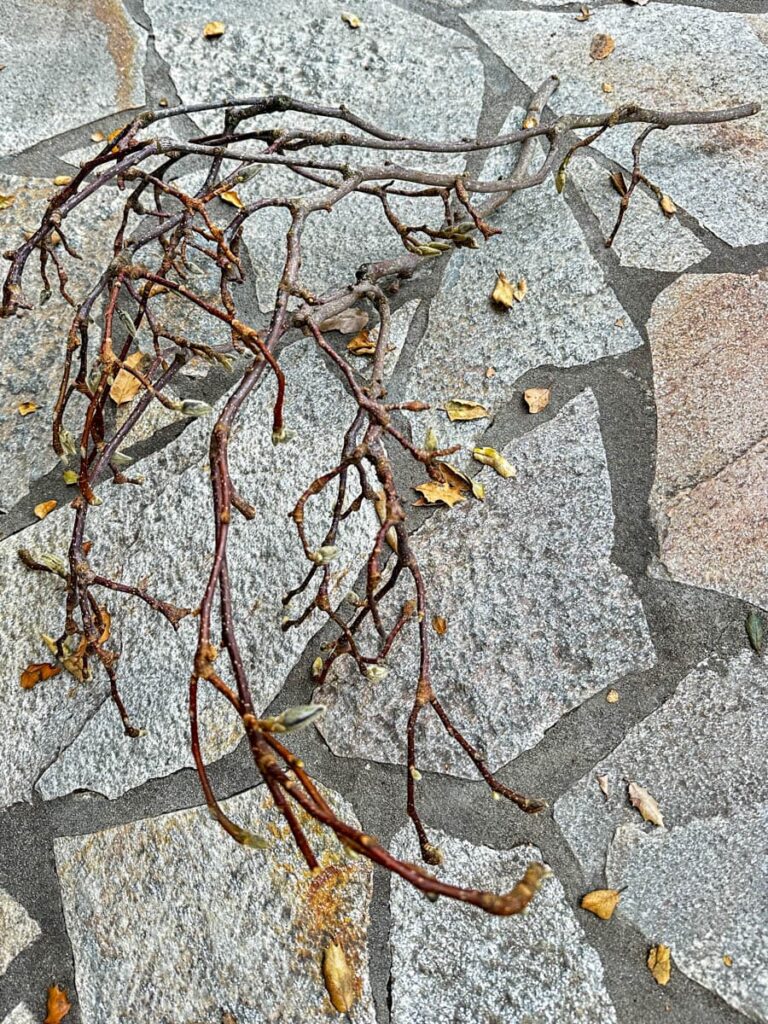
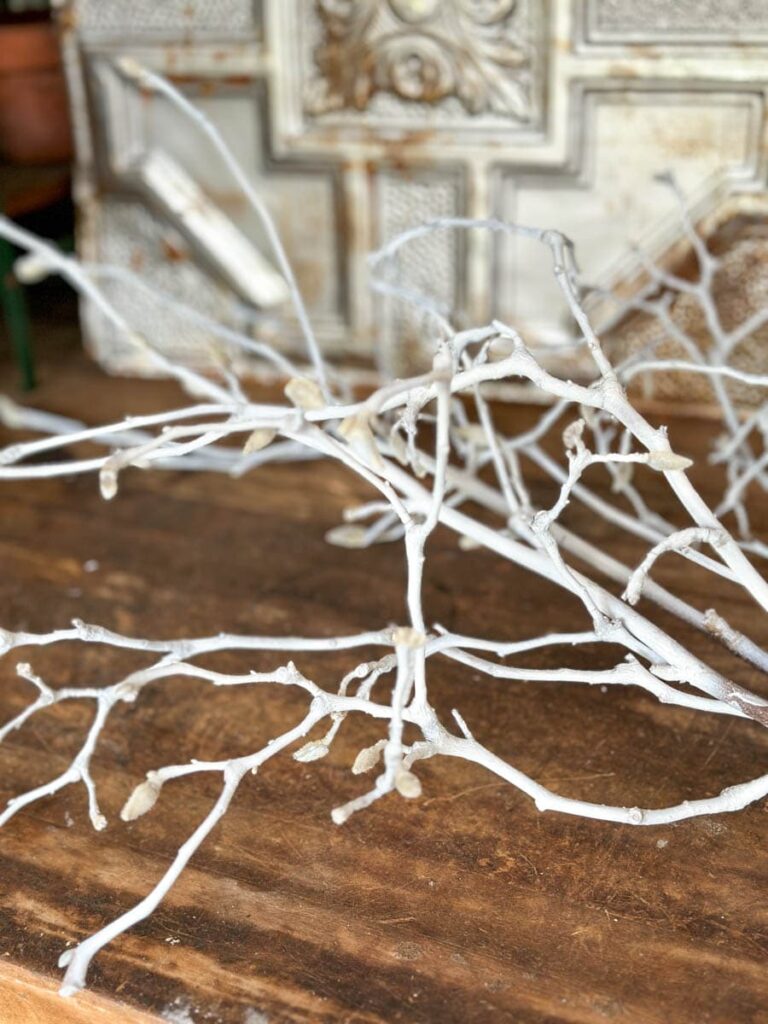
This gives it a natural and whimsical look, and you can either leave the branches as they are or paint them white for a softer, more romantic feel.
If you prefer something smaller and a bit more structured, you can repurpose one of your small artificial Christmas trees. These work beautifully for a Valentine’s Day tree, giving it that festive touch.
Another great option is picking up a cute little pink tinsel tree, which is perfect for this Valentine’s Day project.
Step 2: Choose the Base for your Valentine’s Day Tree
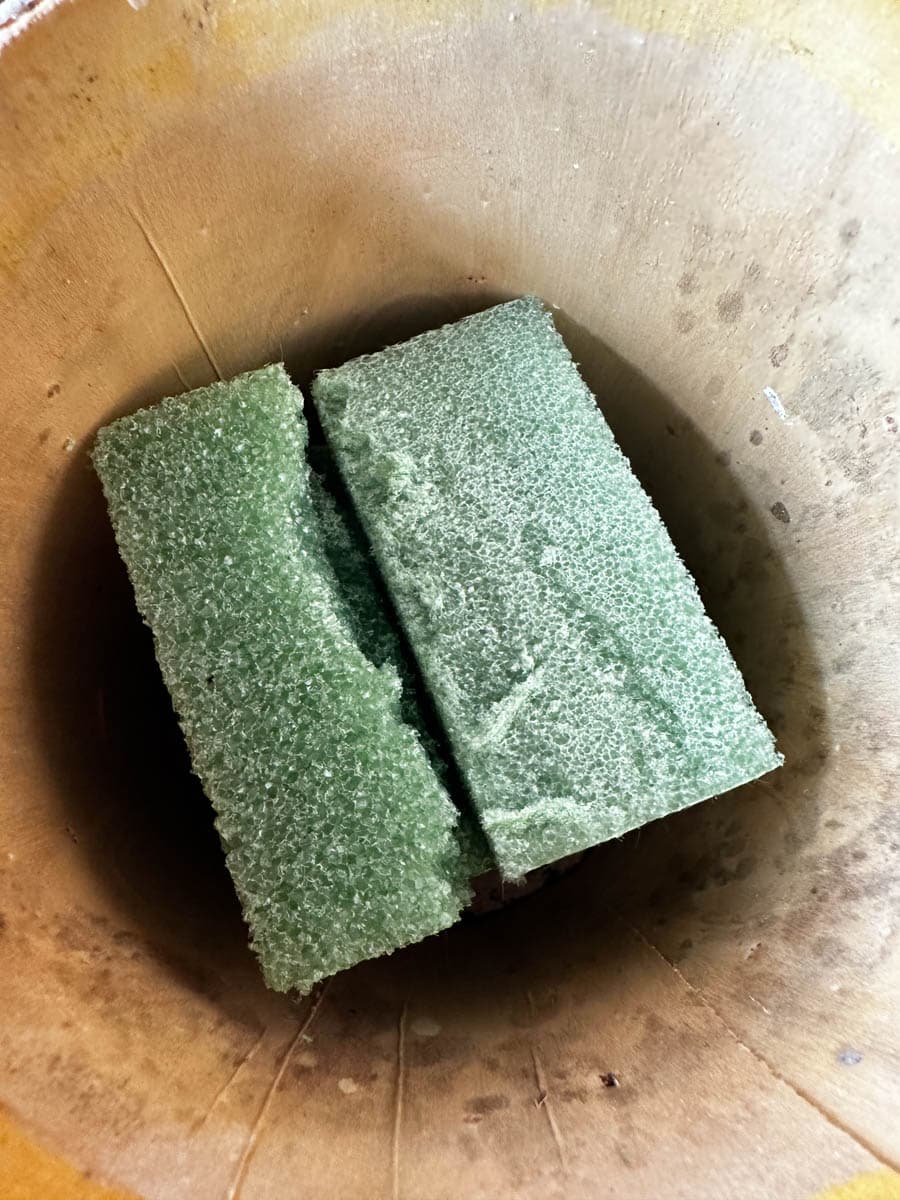
Now it’s time to build the base for your Valentine’s tree! Start by cutting your styrofoam into smaller blocks so they fit nicely into your container.
Stack them up and secure them with hot glue. If you don’t have styrofoam on hand, check your local dollar store. You can usually find it for a great price!
Once your base is ready, go ahead and insert your branches into the styrofoam to start shaping your tree. If you’re using an artificial tree or a small Christmas tree, just remove the stand and place the trunk directly into the styrofoam.
For extra stability, add a little hot glue around the base of the branches or tree trunk to keep everything nice and secure.
Then, to give it a finished look, tuck some Spanish moss around the bottom to cover up the styrofoam. It’s a simple touch that makes a big difference!
Step 3: Punch out Hearts to Make Ornaments for Your Tree
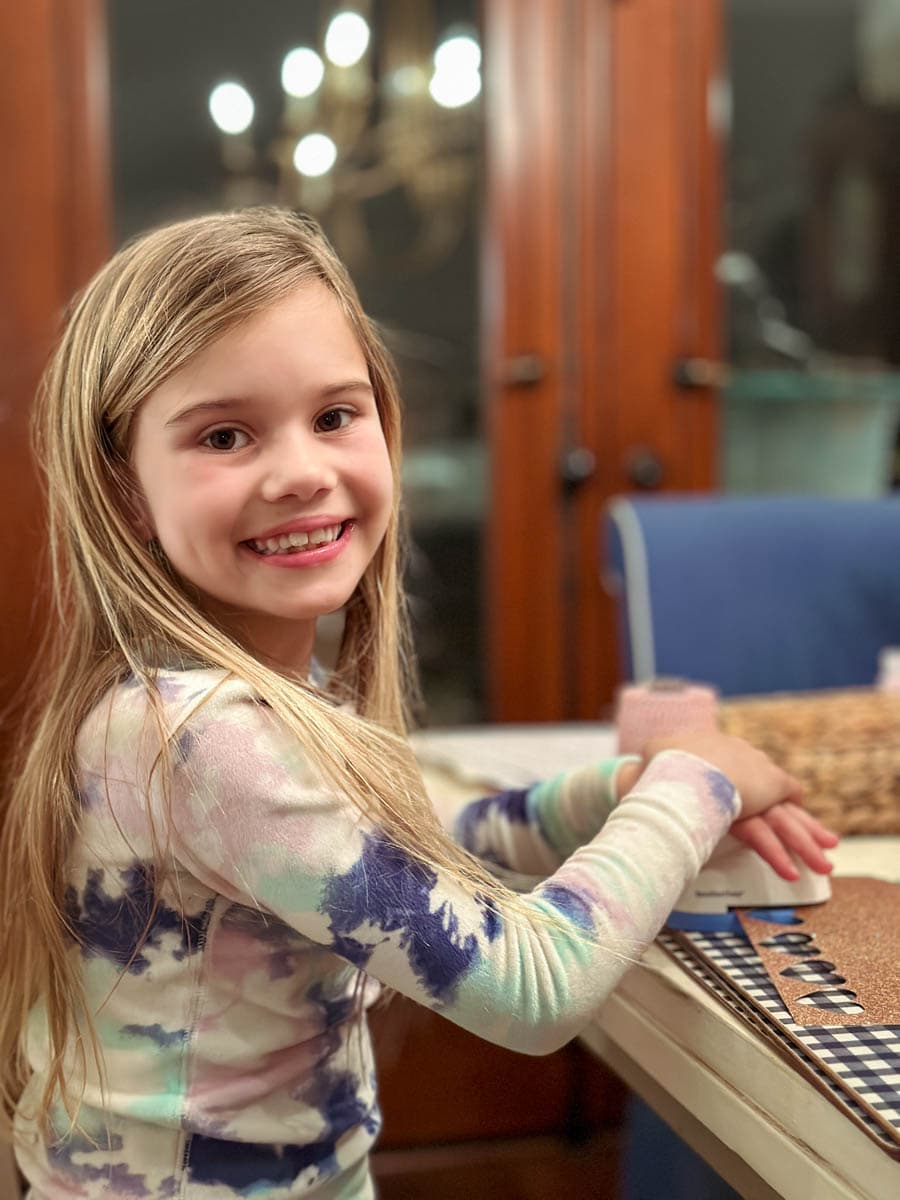
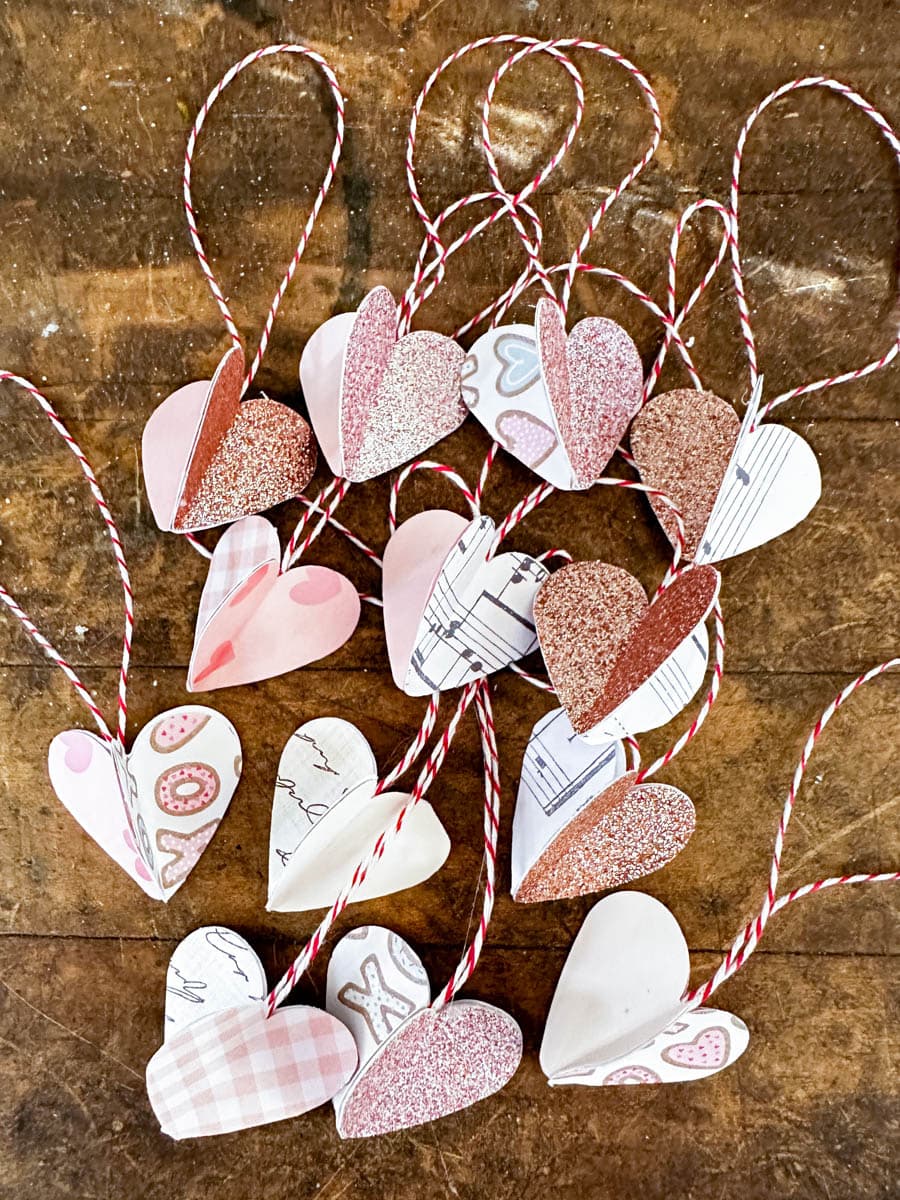
For the heart decorations, I used a die-cut paper punch to create my heart shapes from paper and cardstock. I even had the cutest little assistant helping me!

We went with soft pinks and neutral tones for a delicate, romantic look, but you can choose whatever colors match your style. Whether you love classic red, crisp white, or something totally unique, the choice is yours!
Step 4: Assemble Your Heart Ornaments
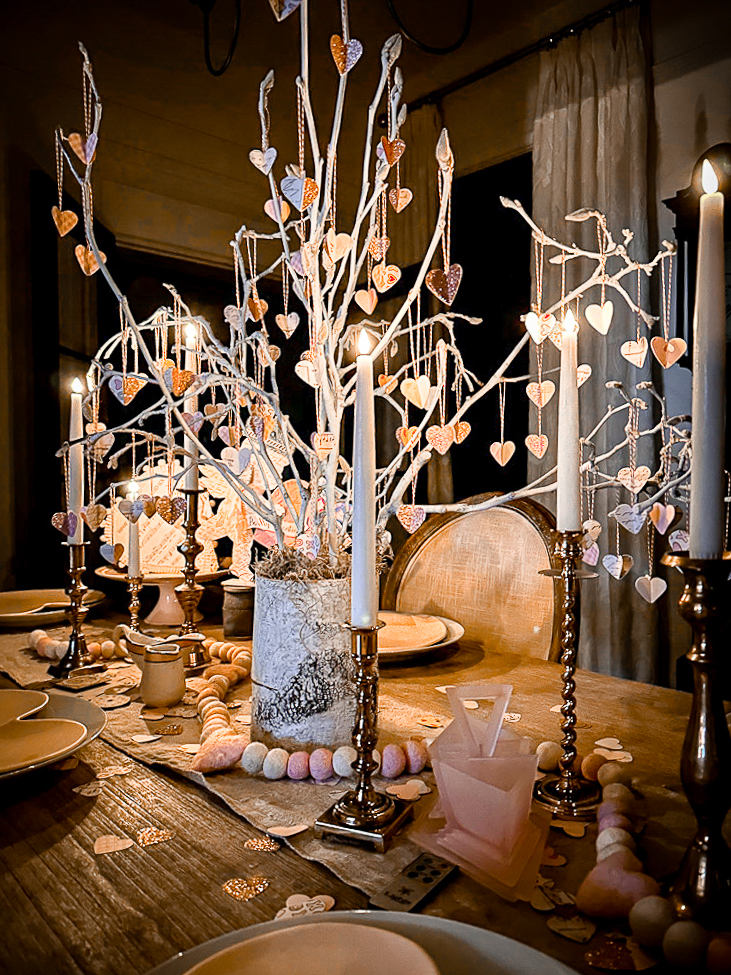
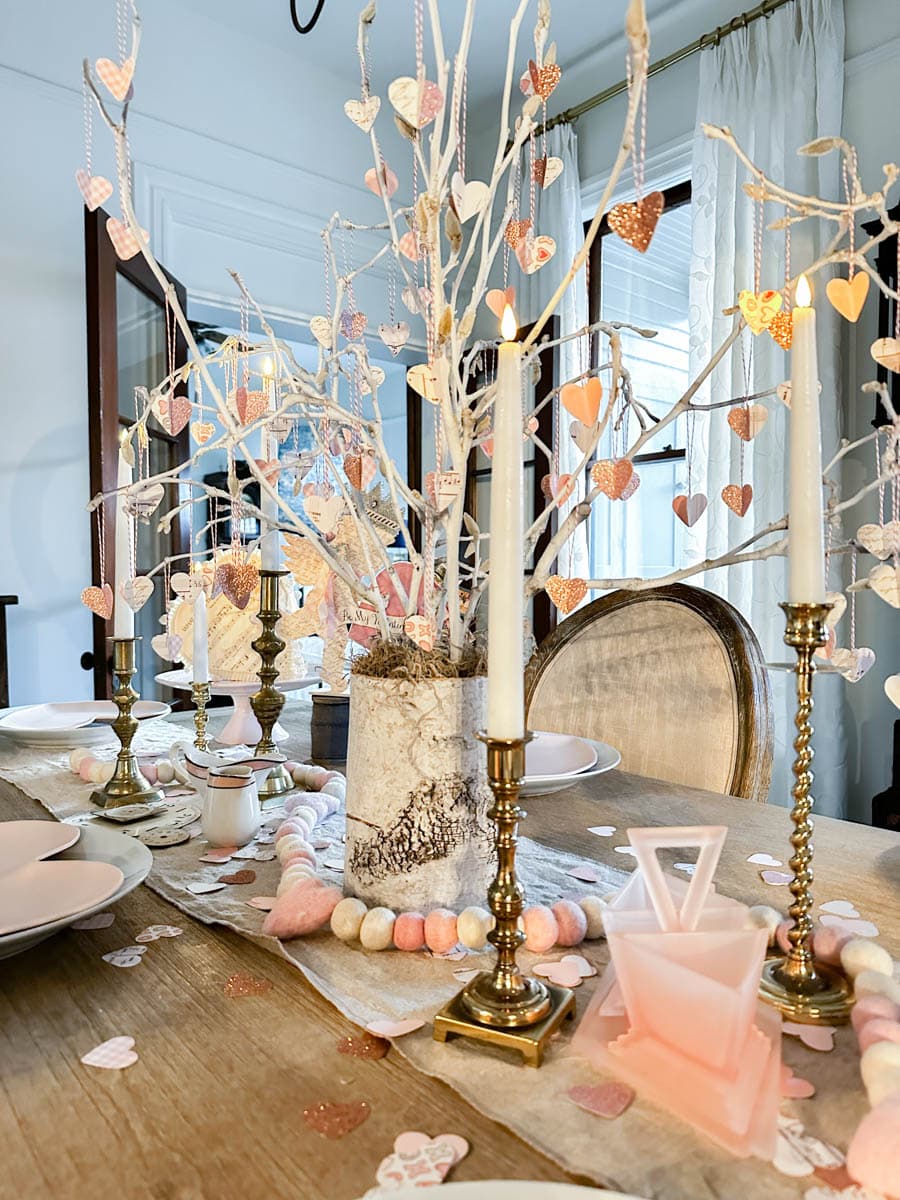
To give the tree a full, layered look, I made my heart ornaments 3 dimensional. Each 3D paper heart ornament takes three paper hearts to make.
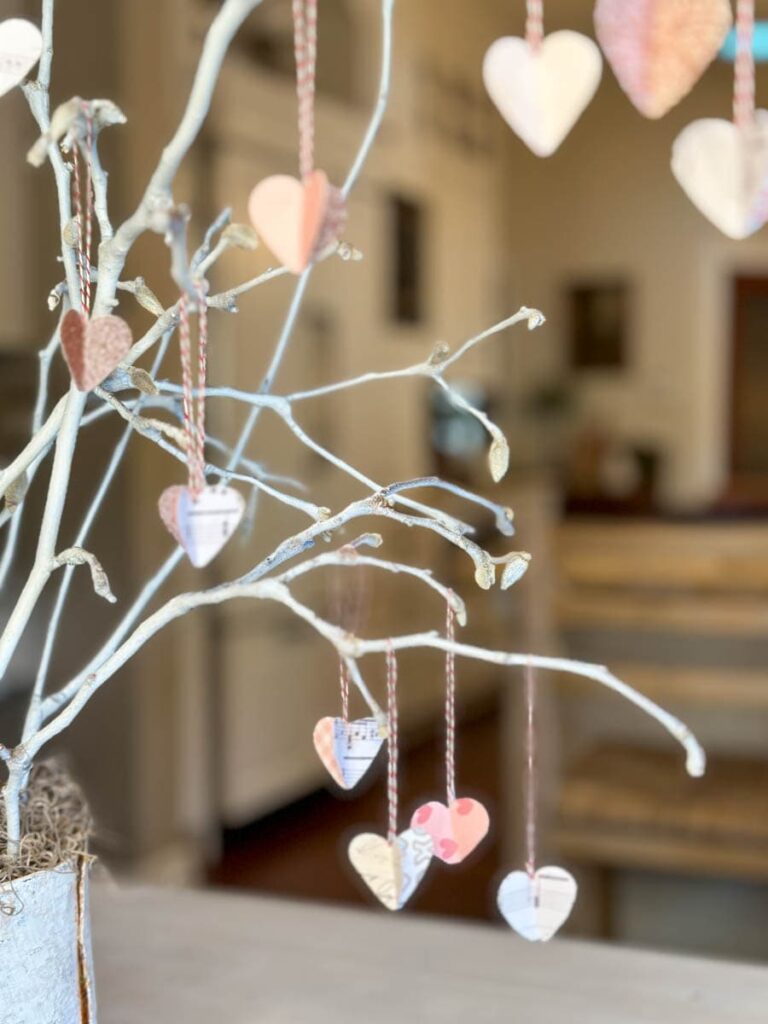
For my tree, I wanted a nice, full look, so I ended up making 60 finished 3D hearts, which meant punching out a total of 180 hearts! It sounds like a lot, but trust me, it’s totally worth it.
The number of hearts you’ll need for your Valentine’s tree will depend on the size of your tree and how full you want it to look.
If you’re going for a more minimal style, you can use fewer hearts, or if you love a full, layered look, you might want even more. Just have fun with it and create a tree that feels perfect for your space!
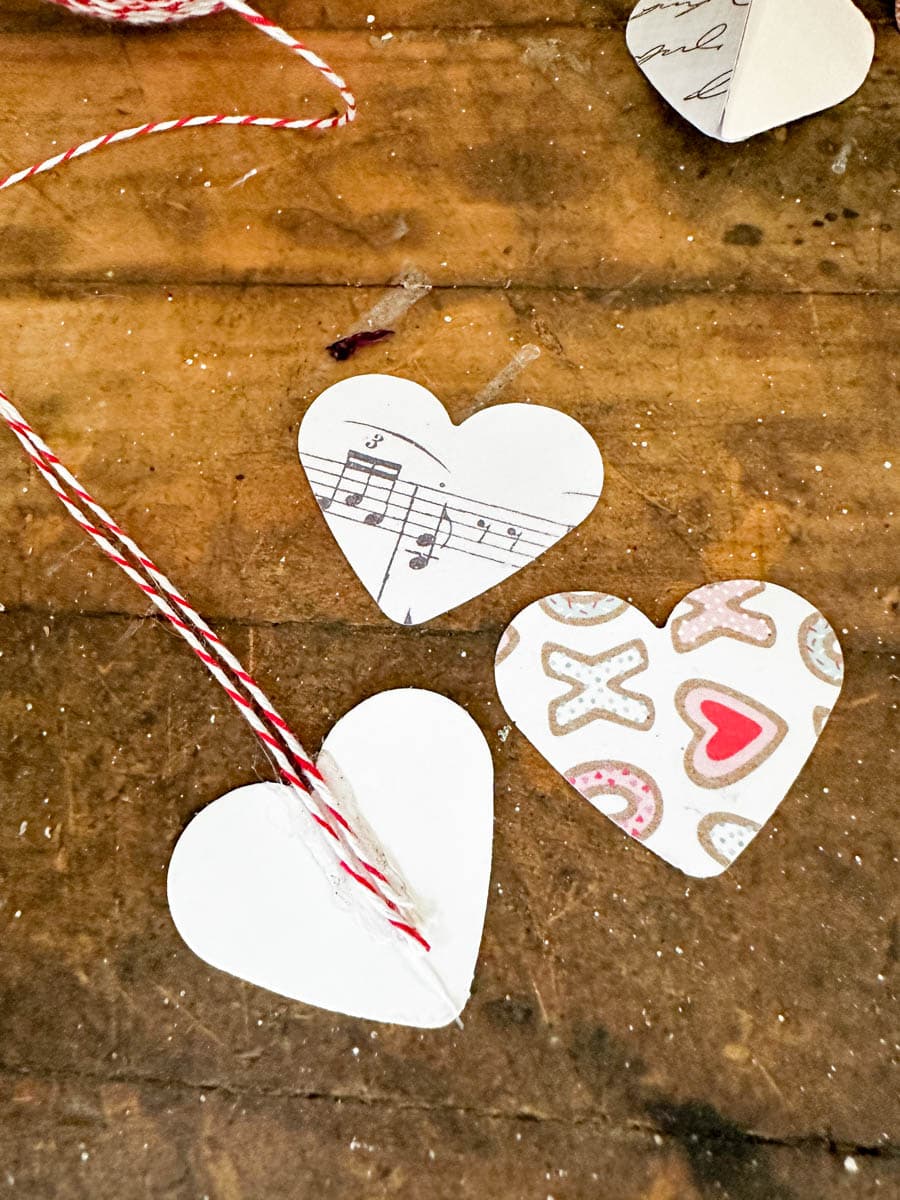
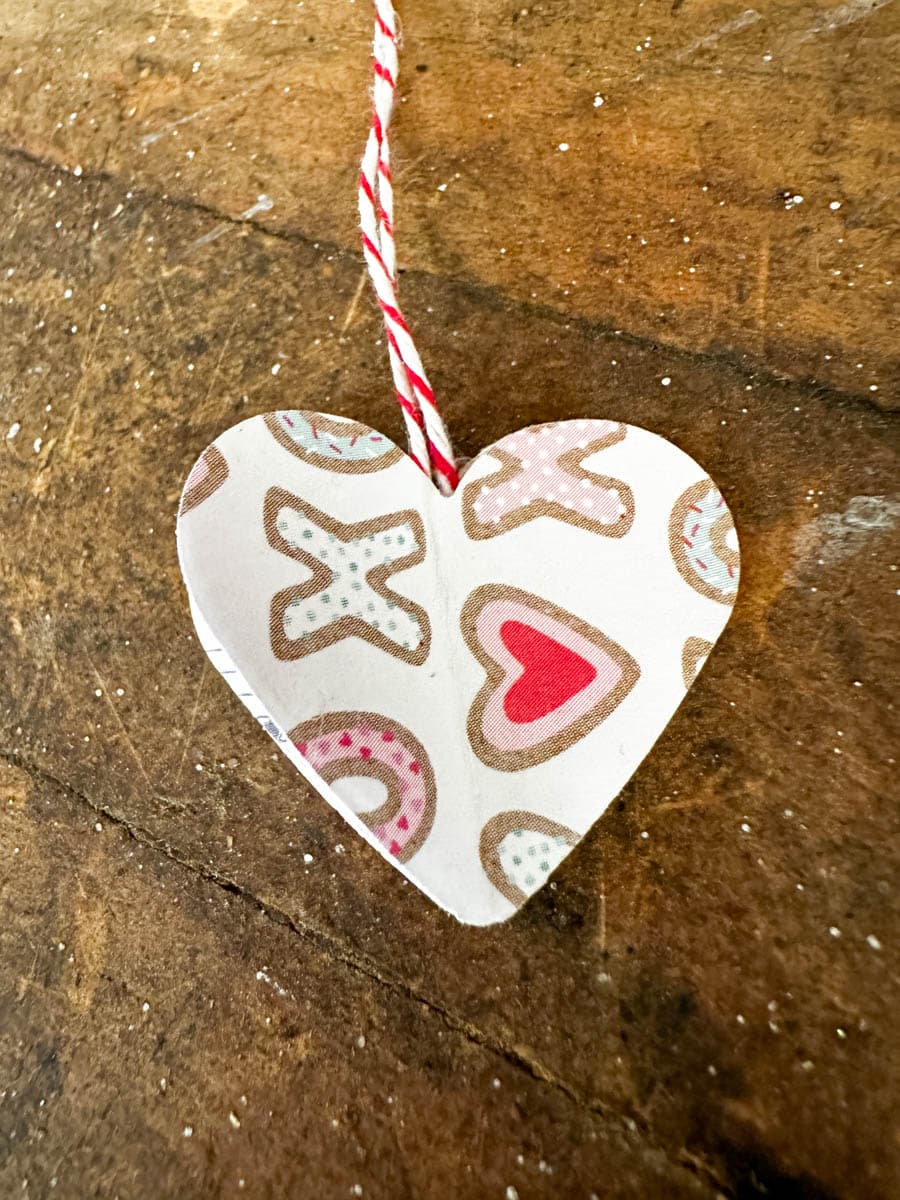
To make your ornaments, grab three paper hearts to start.
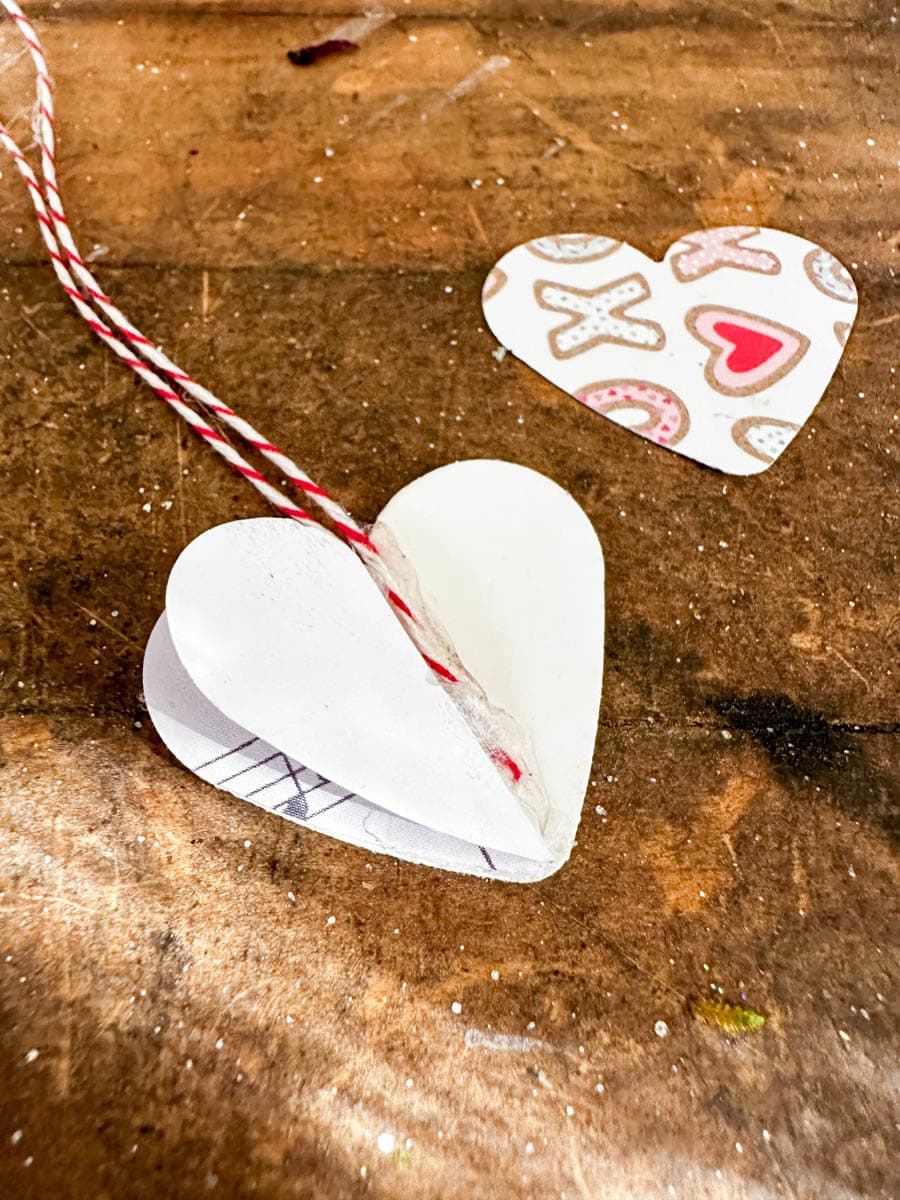
Once you have your hearts ready, cut a piece of twine about eight inches.
Then, glue both ends of your twine to the center of one heart. This will be your hanger and this little detail adds a sweet, rustic touch to your Valentine’s tree!
Next, take your second heart and glue its left half onto the left side of the first heart. Then, fold the right side back over so it starts taking shape.
Finally, glue the back of the third heart onto the first two, and just like that, you’ve got a cute 3D heart ready to hang on your tree!
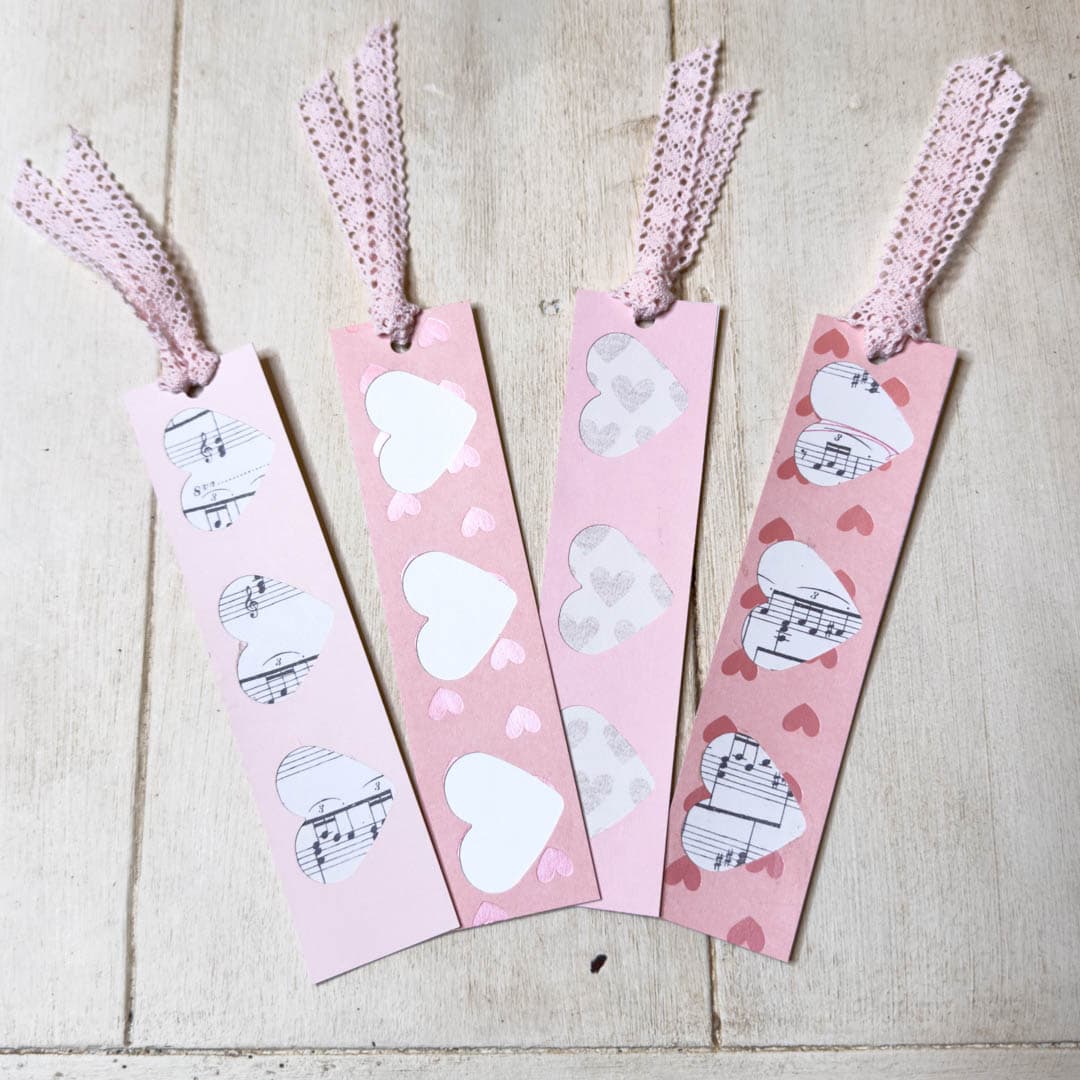
Tip from wendy’s craft room:
Don’t let that scrap paper go to waste! We used the cutout heart strips to create some custom Valentine’s Day bookmarks. Simply glue another piece of paper behind the open hearts, and trim using a paper cutter. Then punch a hole in the top and add some ribbon.

Hanging Your Valentine’s Day Tree Decorations
Now is the fun part, where you can get creative. You can place these sweet hearts on your tree and call it a day like I did.
Or, you can add some cute additions. Maybe try some wooden hearts, a metal heart ornament, or even some pink ornaments.
Whatever you decide, I am sure it will be beautiful.
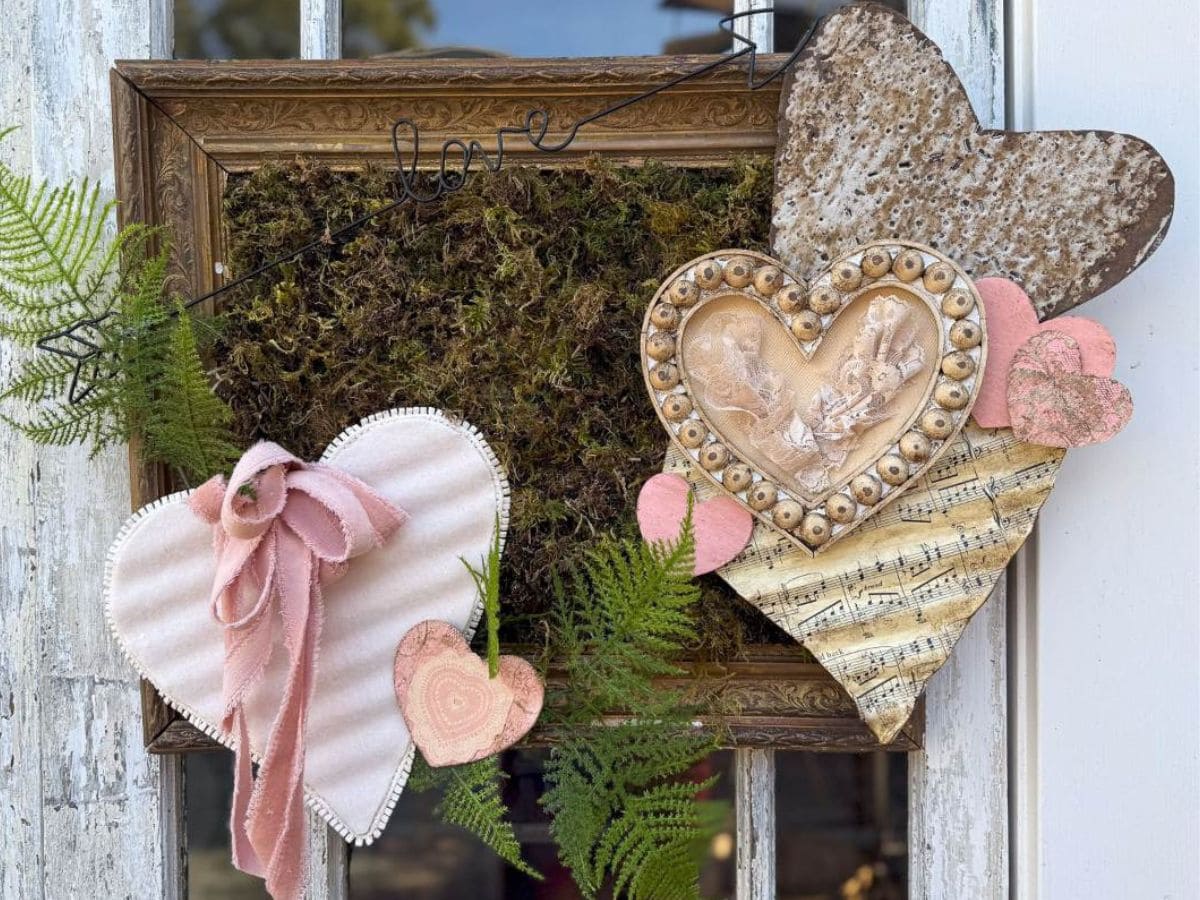
Other DIY Valentine’s Day Crafts from WM Design House
If you love this easy Valentine’s Day tree, you might also enjoy some of my other favorite Valentine’s Day DIY projects:
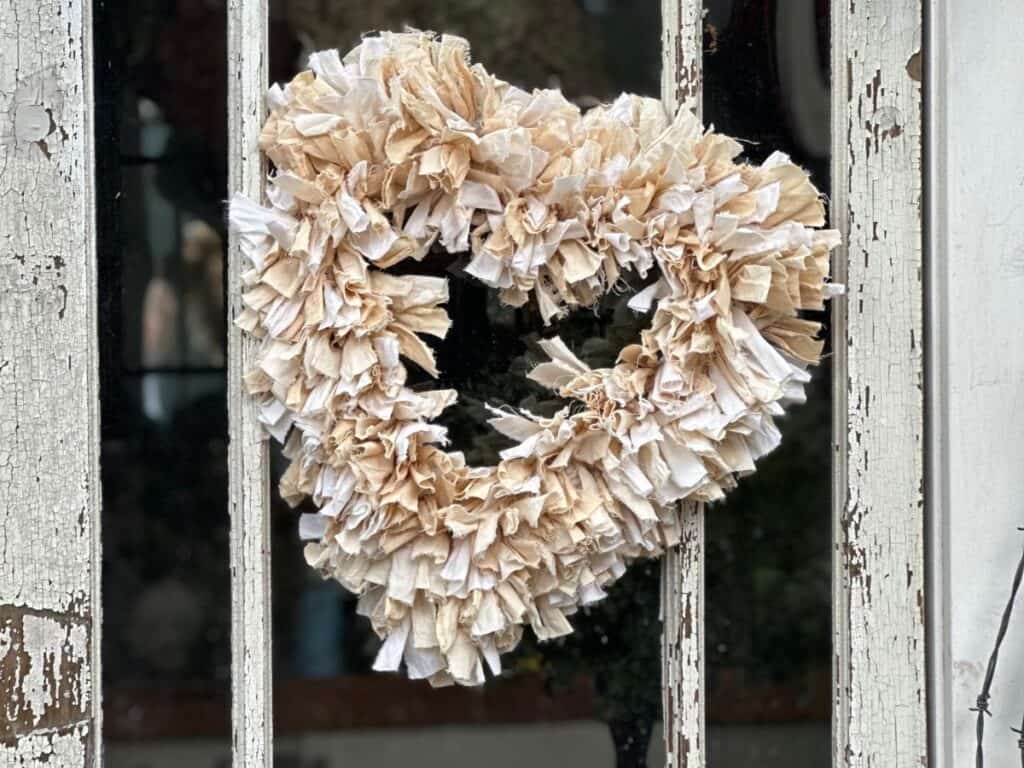
DIY Valentine’s Day Rag Wreath
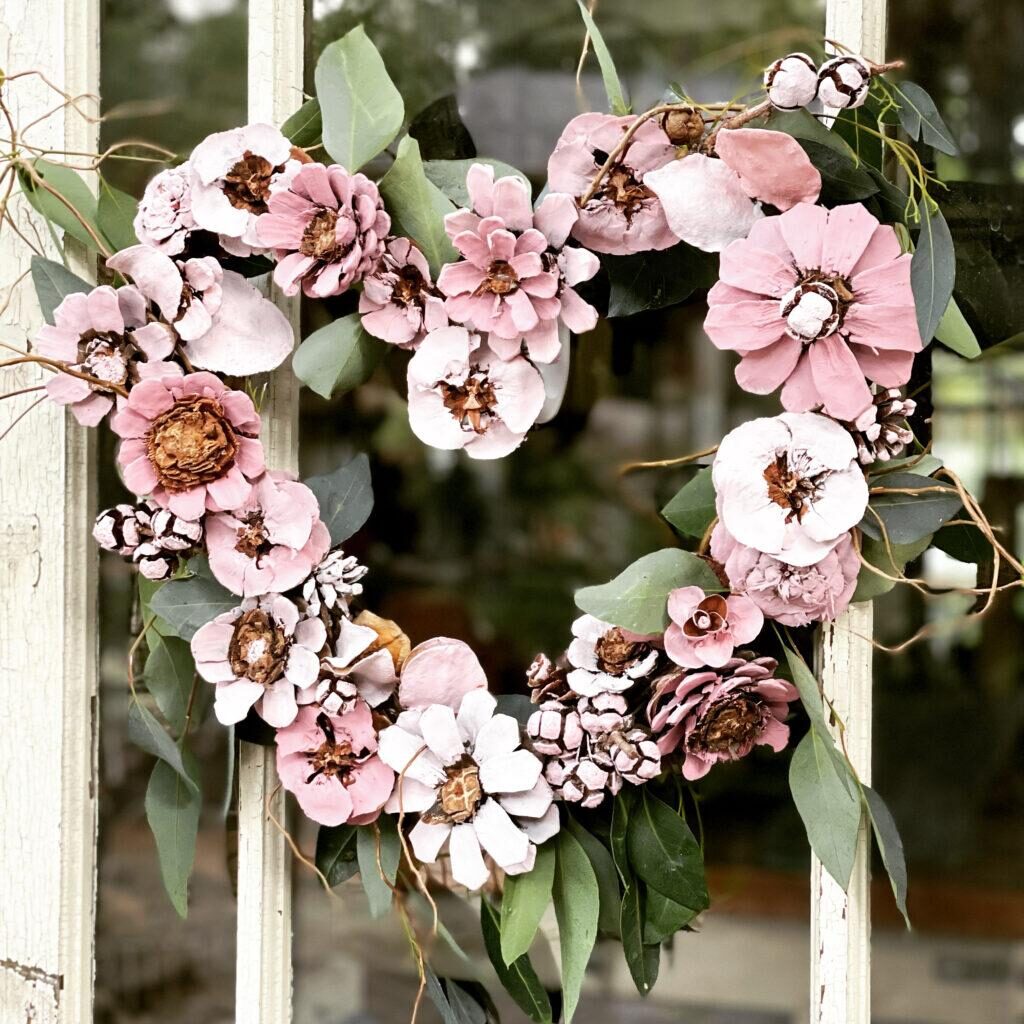
DIY Pink Heart Pinecone Wreath
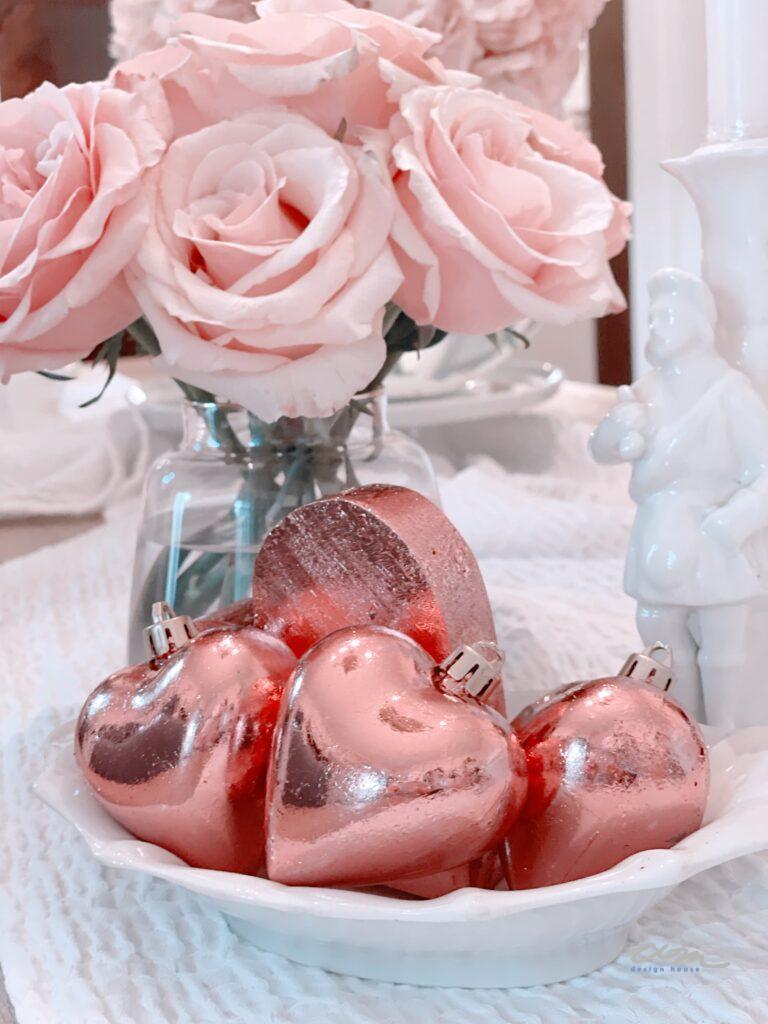
Beautiful DIY Pink and Gold Foil Hearts
Wrapping Up
That wraps up this fun and easy Valentine’s Day tree DIY! With just a few simple supplies, you can create a beautiful, festive decoration that adds a touch of love to your home or makes a thoughtful gift. I hope this inspires you to get creative and make a tree that fits your style!
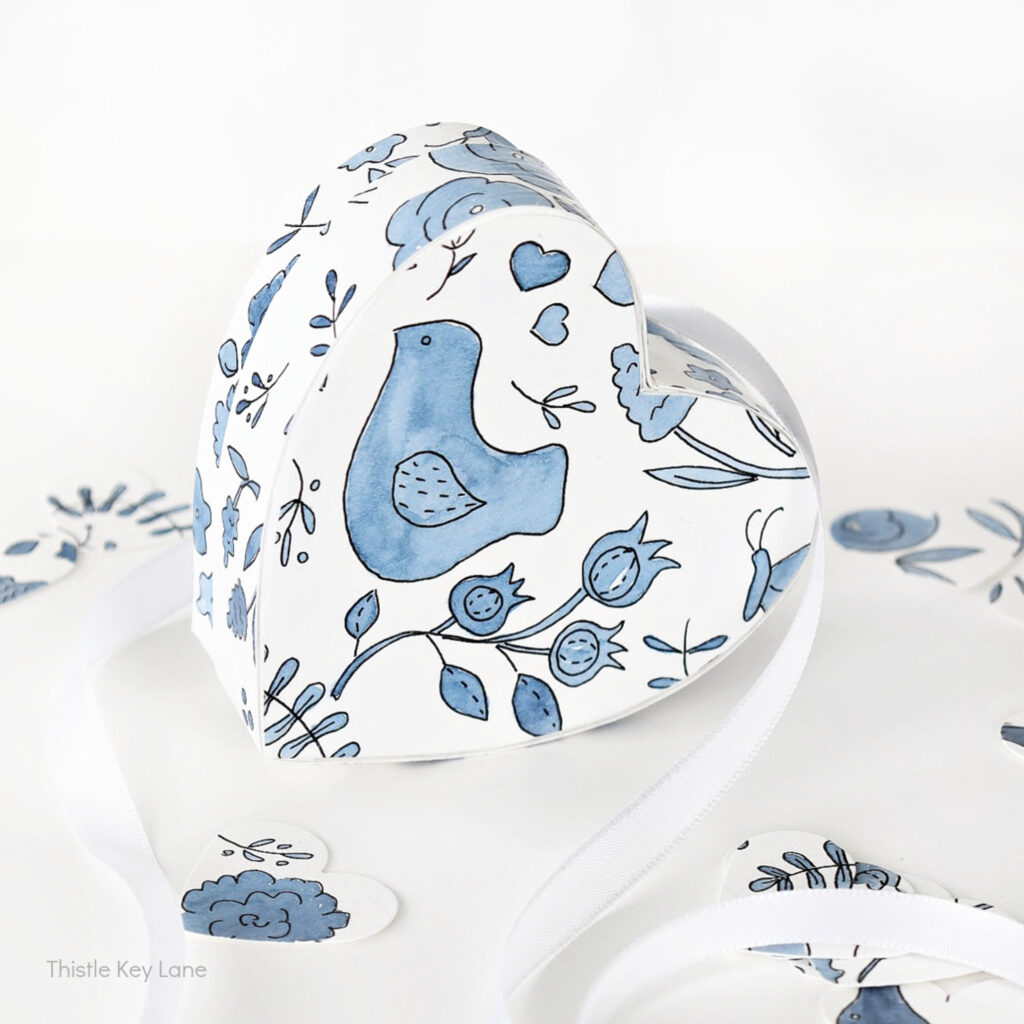
But the fun doesn’t stop here! My friend Michelle over at @thistlekeylane has crafted the most adorable chinoiserie heart box. It’s absolutely gorgeous and would fit perfectly in my home! Be sure to check out her project and see how she’s bringing the heart and paper theme to life. You won’t want to miss it!
As always, I am so grateful that you took the time to stop by.

P.s. Don’t forget to click on the links below to check out the other blogger’s posts. They have all worked so hard and have such great projects to share with you all.


Did you make this craft?
We would love to see what you have created, so mention us @wmdesignhouse or tag us using #wmdesignhouse so we can see your creations!
More about me!

Hello, I’m Wendy – a dedicated homemaker with a deep passion for decorating, gardening, cooking, and crafting. I find joy in harmonizing beautiful elements to fashion a space that is both comfortable and inspiring. I will help you create a beautiful home, one project at a time.


What a fun tree Wendy, I especially love it in the kitchen. Very clever, you could do this for most any holiday. I need to add this to the list. Thank you for sharing with Whimsy Home Wednesday.
Thank you, Cara, Yes, I agree you can change the hearts out for almost any decoration for another holiday, I think I will be needing some Easter eggs soon.
This is the CUTEST heart tree ever!! I love it…what a beautiful and elegant decor piece for this season!! Pinned!
What a fun Valentine’s Tree! And I bet you had a great time with your sweet assistant! Pinned 🙂
I sure did! Thank you.
OK…I can’t remember if I commented already or not!!! One of those days!!
LOl, I am in the same boat as you today… do much going on and not the ideal day to go on vacation!
So fu to share not one, but two blog hops with you today!
Brilliant, Wendy! The 3-D hearts really bring the tree to life. And, so beautiful by candlelight! Thanks so much for organizing the Handcrafted Society! I think we are off to a great start! Pinned!
Thank you Missy. I thought I would never be done with these little heats, LOL. I don’t do little well.
I agree, I think it was a great start for our first venture. I cant wait for next month.
Wendy, your Valentine tree centerpiece is just gorgeous, and I love how it looks on the counter too! The 3D hearts look so fun to make. I need a cute helper like yours!
Thank you Michelle, it was a fun project. I have a few more of those little helpers, I am sure I can share…. I have 4 granddaughters and another due in April. They love to craft with me, it is so fun.
Such a cute idea!! Everyone has such pretty heart projects today!!
I so agree, everyone did an amazing job… so fun to see what everyone did.
Such an adorable idea, Wendy. I love it! The hearts are so cute and perfect for Valentine’s Day.
Thank you Jen, it was a very fun project to do with my granddaughters.
Such a sweet idea. I love it.
Oh my goodness, Wendy. I am obsessed with your tree. It’s gorgeous!! I pinned it to my valentine board to share. This is so fun!
xoxo
I see we were both on the same page. I too loved your sweet tree… Thank you so much for joining in on the fun today.
Your tree is gorgeous! Love it on your table with the candle lighting. Every one of you gals did so great — and all with paper and hearts!!! Great team..
Thank you, Diane, it was such a fun project….
Love your Valentines Tree! Can’t wait to see all the things your Society does!
Thank you, Lynn, it should be a fun year.
This is fabulous and so beautiful, Wendy. Looks like it walked out of an Anthropologie display. I love the 3D hearts and have to make some myself at some point. Pinning this whole post!!
Thank you Debra, you are so sweet. I am glad you enjoyed the post so m uch.
Wendy, your Valentine tree is just fabulous — the perfect centerpiece for your pretty table! Thank you so much for inviting me to join in the fun of The Handcrafted Society’s inaugural blog hop!! I love all of the creative ideas, and it’s been so much fun!
Thank you, Kim. I am so glad you joined in on the fun, you will have to come back again to join us.
So beautiful, festive, and clever!
Thank you so much Miche, I appreciate you stopping by to visit today.