Paperwhites on the Rocks: The Holiday Guide to Perfect Stems
Learn how to force paperwhites indoors for beautiful winter blooms! This easy method brings fresh greenery and sweet fragrance to your home all season long—and I’ll share the surprising vodka trick that keeps your paperwhites short, strong, and standing tall.
On my blog WM Design House, I may sometimes use affiliate links, which means a small commission is earned if you purchase via the link. The price will be the same whether you use the affiliate link or go directly to the vendor’s website using a non-affiliate link. Read my full disclosure policy here.
I love Christmas. It is truly my favorite time of year! Gathering with family, cooking delicious food, decorating our homes, and yes, even doing a little winter gardening in my she-shed.
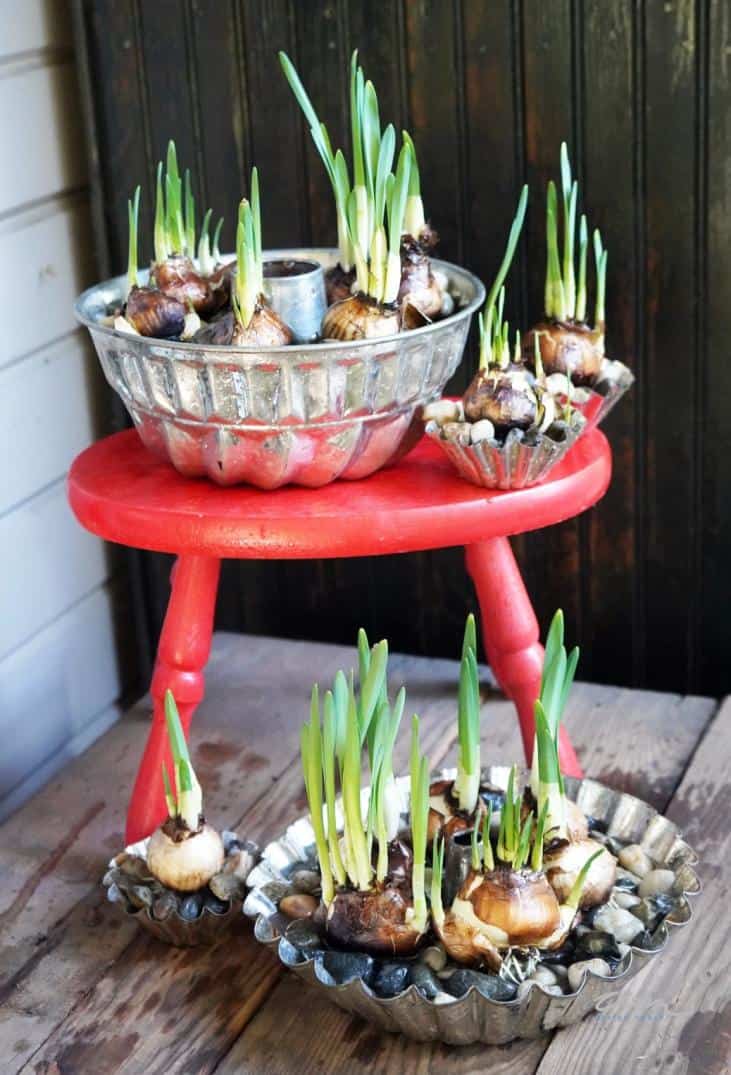
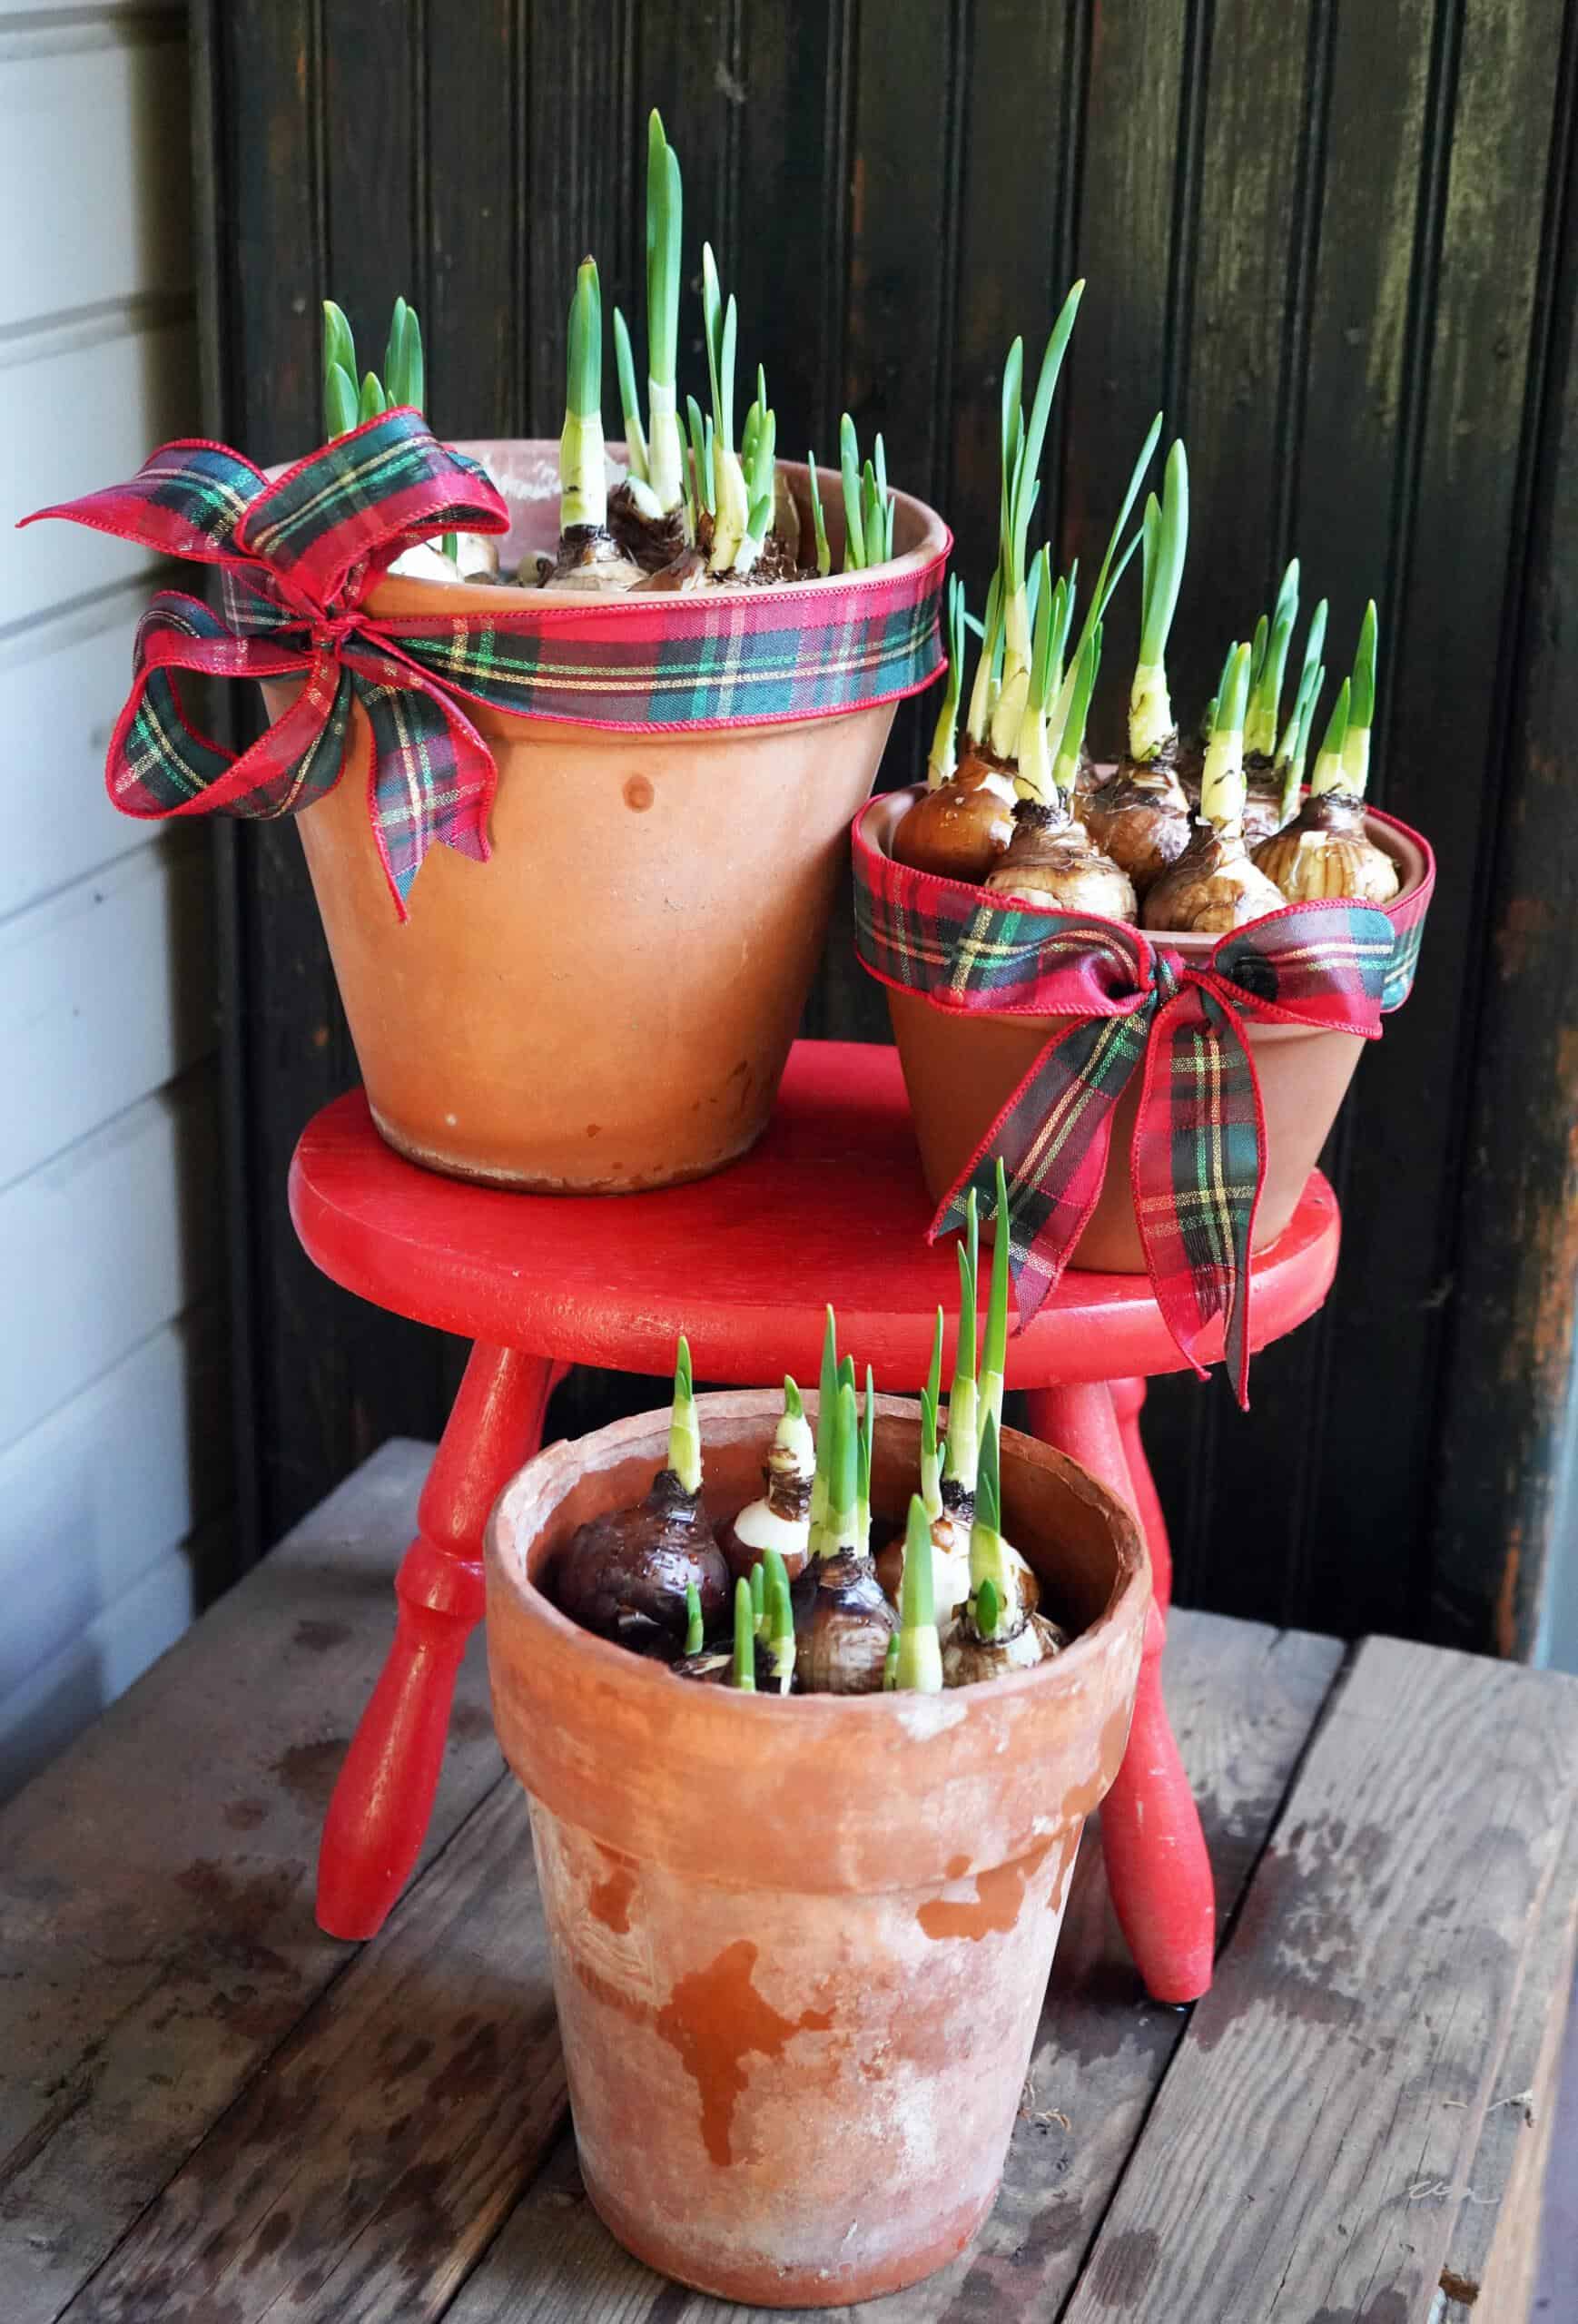
And if you’ve been here a while, you already know I love forcing narcissus bulbs indoors. Their delicate blooms and sweet fragrance bring the prettiest touch of nature indoors during the holidays. I plant paperwhites in all kinds of containers, from vintage jello molds to aged terra-cotta pots and my favorite white ironstone pieces.

If you love them too (or are about to!), here’s how to get started forcing paperwhites indoors just in time for the holidays.
Paperwhite narcissus are one of the easiest flower bulbs to grow inside, and they bring such fresh beauty to your house during the holiday season.
I’m also sharing my simple little trick that keeps them from growing too tall and flopping… and it really works! (Hint: it involves something from your bar cart.)
So grab some supplies and join me as I show you how to easily force paperwhite bulbs.
Why You’ll Love Forcing Paperwhites Indoors
If you have ever wanted to try forcing paperwhites or planting narcissus bulbs indoors, you are in the right place! Growing paperwhite bulbs indoors is easy, fast, and perfect for the holidays.
Here are a few other reasons why you’ll love this simple winter gardening project:
Beginner-friendly – Paperwhites are incredibly easy to grow and don’t require any garden experience at all. Even if you don’t consider yourself a green thumb, you’ll have beautiful blooms in no time.
Perfect centerpiece – These elegant white blooms make the most beautiful natural centerpiece for holiday gatherings. Whether you style them in a Christmas tablescape or add a festive touch to your Christmas coffee table decor.
Beautiful for gifting – Pot up a few bulbs in a charming container, tie on a ribbon, and you have a heartfelt and thoughtful handmade gift that friends, neighbors, and hosts will absolutely adore.
Tip from wendy’s craft room:
You can find paperwhite bulbs for sale online or at garden centers during fall and winter. You can even find them at retailers like Amazon!
Supplies Needed to Force Paperwhite Bulbs
Before you get started, gather a few simple supplies:
Tip from wendy’s craft room:
You only need a few inches of stones for support! No soil required unless you prefer to plant them that way!
When to Plant Paperwhites Indoors for Holiday Blooms
Timing makes all the difference when you want paperwhites blooming right when you need them.

The good news is they grow quickly, usually in 4 to 6 weeks, so you can plan ahead for the holidays or enjoy fresh blooms all winter long.
If you are planting paperwhites for Christmas, start them in mid to late November. If you want continuous blooms throughout the season, plant a new batch every week or two so you always have fresh flowers coming up.
Tip from wendy’s craft room:
You can also plant paperwhites in early winter for pretty January and February blooms. They are such a lovely pick-me-up after the holidays.
How to Force Paperwhite Bulbs Indoors
Step 1: Prepare Your Container
First, add about 2 inches of small pebbles or gravel to the bottom of your planter.
(If you prefer soil, fill the container halfway instead.)

I have tried soil, but I always come back to rocks and water. My paperwhites grow so much better when their roots sit in pebbles with a little water at the base.


If you prefer forcing paperwhites in soil, simply fill your pot halfway with fresh potting mix and plant as you would any other flower bulb.
Tip from wendy’s craft room:
I prefer to use containers without drainage holes, but if you fall in love with a pot or planter that has holes, just pop a small plastic liner inside to prevent water from leaking onto your countertop or table.
Step 2: Place Your Bulbs
To force your paperwhites, start by gently placing your bulbs on top of the pebbles, pointy end up.

Nestle them close together and add a bit more gravel around the sides to help support them.
Be sure to keep the tops uncovered!
Tip from wendy’s craft room:
For a fuller look, cluster your bulbs close together. I usually use around six bulbs per pot, depending on the size of the container. You can use as few as one or as many as twelve!
Step 3: Add Water


Next, pour in water until it just touches the base of the bulbs.
You want the roots to reach the water, but the bulbs themselves should stay dry to prevent rot.
Step 4: Find the Perfect Spot for Your Planter
Once your paperwhite bulbs are planted, place your container in a cool, bright location with indirect sunlight. You can even add a bit of Spanish moss on top for a decorative touch.


You’ll see roots and green shoots appear quickly, sometimes within just a few days!
Step 5: Watch the Water Level
Check on your paperwhites daily to ensure they stay moist and keep the water level right at the base of the bulbs. (If using soil, keep it lightly moist — never soggy.)
Step 6: Rotate Your Planter for Even Growth
Turn your planter every few days so the stems grow straight and don’t lean toward the light.
It would help if you forced them at the right time. For example, I like to plant mine six weeks before I want them to bloom.
The Vodka Trick: How to Keep Paperwhites from Falling Over
Yes…Your paperwhites get a cocktail! Here is a little gardening secret that always makes people smile.

Paperwhites can get tall and dramatic, so to keep them short and sturdy, try giving them a tiny “cocktail.”
I know, it sounds funny, but it works like magic.
When to Use It
Start using the alcohol mixture once the green shoots are about 2 inches tall. Continue with it every time you add water until your paperwhites finish blooming. You will see they stay compact and upright without needing stakes or ties.
Mix Up Their Signature Drink
Use a clear spirit such as vodka, or any 40-percent distilled alcohol.
Cocktail Recipe for Paperwhites
Stir together:
- 1 part alcohol
- 7 parts water
If you are using rubbing alcohol, dilute it a little more:
- 1 part rubbing alcohol
- 10–12 parts water
Watch it on You Tube

Tip from wendy’s craft room:
If your bottle says “80 proof,” that means 40 percent alcohol. Just divide the proof in half.
Then simply use this mix instead of plain water each time you refill. This gently slows the growth so your paperwhites stay short, strong, and beautiful without affecting the blooms at all.
Continue their “cocktail hour” until they bloom, then just enjoy the show.
How to Care for Paperwhites While They Grow
Once your paperwhites are planted, they practically take care of themselves. Here are a few simple tips to help them grow strong and healthy.
Keep the Water Just Right
Make sure the water level stays right at the base of the bulbs so the roots can reach it.


If the bulbs sit in too much water, they can rot, so a little goes a long way.
Give Them Bright, Indirect Light
Paperwhites do best in a bright spot that does not get direct hot sun. A windowsill with filtered light or a sunny room works perfectly.

Rotate Your Planter
Turn your pot every few days so the stems grow straight and do not lean toward the light. This helps keep them balanced and sturdy.

Switch to the Alcohol Solution
Once the shoots reach about 2 inches tall, start using your alcohol mixture instead of plain water. This helps keep them short, strong, and upright.
How to Decorate With Paperwhites
Paperwhites are one of the best bulbs for forcing indoors, and as I’ve shared, one of my favorites to plant.
Not only are they easy to grow, but forced paperwhite bulbs add such an elegant touch to your home during the holidays and winter months.

Here are some of my favorite ways to decorate with them:
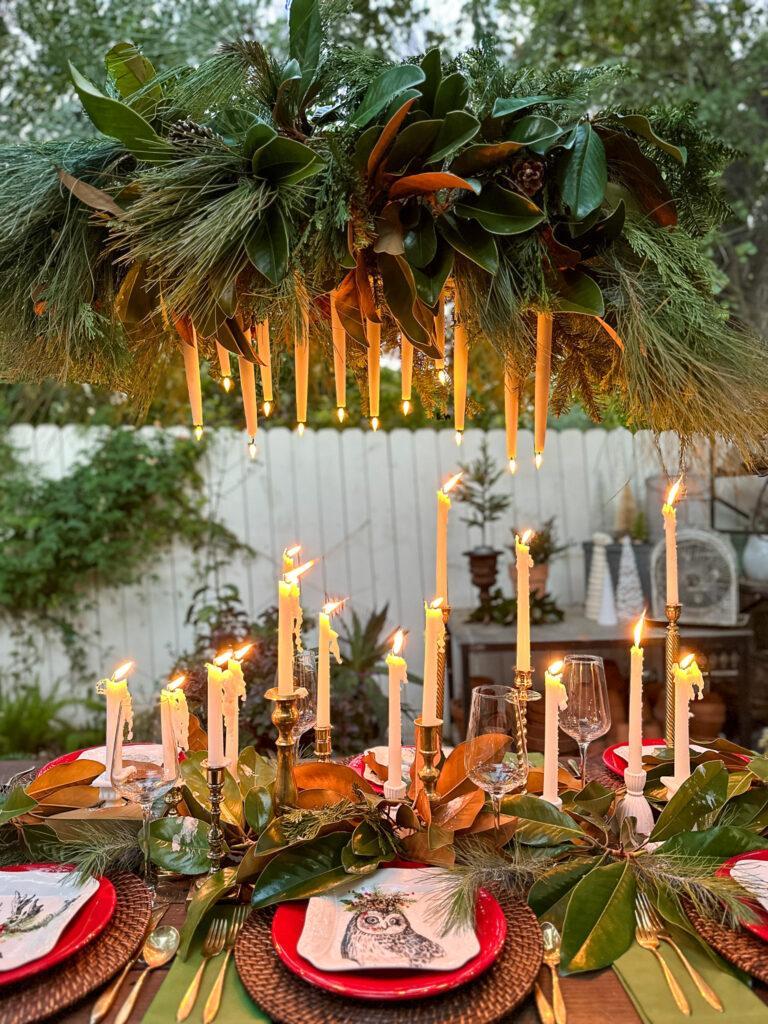
Create a Holiday Centerpiece
Group a few containers together down the center of your table for a soft, natural centerpiece. Add fresh greenery, pinecones, or a few ornaments for a festive look.
Style Them on a Coffee Table
A simple pot of paperwhites looks so lovely on a coffee table. I like to place mine on a tray with candles, stacked books, or a pretty little bowl for a warm and welcoming display.
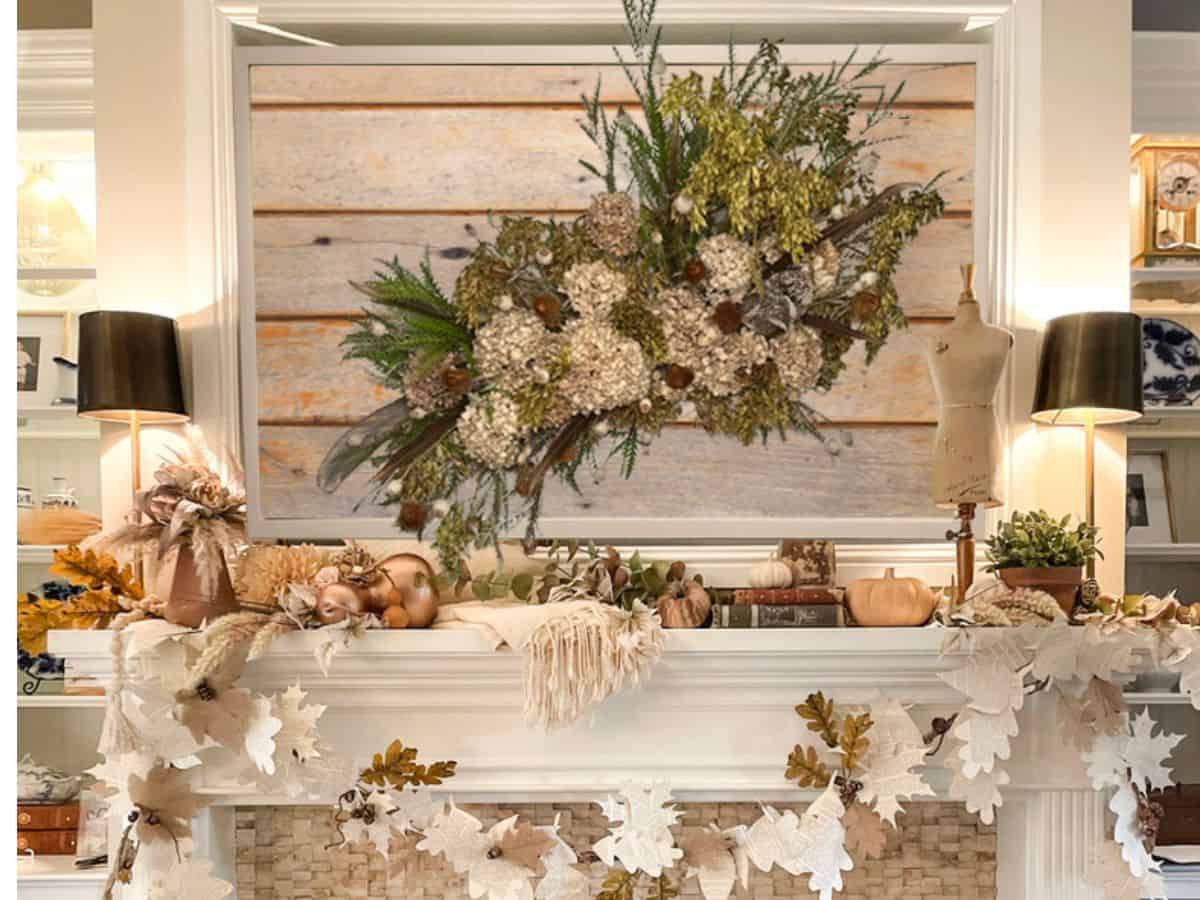
Add Them to Your Mantel
Paperwhites are beautiful tucked into your mantel styling. Mix them in with garland, candles, and maybe a few brass or vintage pieces for an elegant winter scene.
Brighten Your Kitchen
Brighten your kitchen by placing a small arrangement near the sink, on a kitchen shelf, or in the center of your island. It adds such a cheerful touch to the space where we all spend so much time this time of year.
How to Gift Paperwhites
Paperwhites make such a thoughtful gift during the holiday season. They feel personal and homemade in the sweetest way, and they are perfect for friends, neighbors, teachers, or as a hostess gift.

Here are a few simple gifting ideas:
Pot Them in a Pretty Container
Use a small bowl, mug, or vintage vessel and plant a few bulbs inside. It looks beautiful and feels so special and intentional.
Wrap the Base with Kraft Paper
Once planted, wrap the bottom of your pot with kraft paper or a bit of fabric, then tie it with twine or ribbon for a cozy, handmade touch.
Add a Cute Gift Tag
Tie on a holiday gift tag and some festive ribbon for an extra thoughtful detail. You can even include a little note that explains how to care for them.
Create Mini Favors
Plant single bulbs in small pots or teacups to give as holiday table favors or little surprise gifts for friends and family.
Frequently Asked Questions About Forcing Paperwhite bulbs
Are paperwhites easy to grow indoors?
Yes, they are one of the easiest bulbs to grow inside. You do not need soil or a garden, and they grow quickly with just water, pebbles, and bright light.
How long does it take for paperwhites to bloom?
Paperwhites usually bloom in 4 to 6 weeks after planting. Sometimes they grow even faster, which makes them so fun to watch. If you are forcing paperwhites for Christmas, remember to start your bulbs early so they bloom in time for the holidays!
Do paperwhites bloom every year?
Paperwhites can bloom again, but they do not always rebloom reliably indoors. If you want to try, let the leaves die back naturally after blooming and then store the bulbs in a cool, dry place until fall.
Can paperwhites be planted outside?
Yes. If you live in a warm climate, you can plant paperwhite bulbs outdoors and they may come back each spring. Plant them in the ground anytime from fall through spring and let the foliage die back naturally so the bulbs can store energy for next year. In colder climates, paperwhites are best enjoyed indoors since they will not survive freezing temperatures.
Why are my paperwhites falling over?
Paperwhites naturally grow tall and can get leggy. If they start leaning, try the alcohol trick in this post. It helps keep the stems shorter and sturdier so they stand up without support.
Are paperwhites fragrant?
Yes, paperwhites have a strong scent. Many people love it, but if you prefer something softer, plant them in a well-ventilated area or try a variety called ‘Inbal’, which has a gentler fragrance.
Are paperwhites toxic to pets?
Yes. Like most bulbs, paperwhites are toxic if eaten. Keep them out of reach of pets who like to nibble on plants.

Watch it on YouTube
Watch this quick tutorial for my in-depth details on how to make your force your own paperwhite bulbs indoors this holiday season.
What to Do After Paperwhites Bloom
Once your paperwhites are finished blooming, you have a few options.
Let the Foliage Die Back Naturally
Allow the leaves to yellow and dry out on their own. This helps feed the bulb so it can store energy.
How to Store Paperwhite Bulbs
When the foliage has dried, remove it and place the bulbs in a cool, dry spot where they will not freeze. A garage or basement works well.
Replant Next Season
Once your paperwhites have finished blooming and the foliage has yellowed, turn the pot on its side and store it in a cool place that will not freeze, such as a garage or basement. Leave it just like that until fall.
When fall arrives, turn the pot upright, place it in bright light, and water thoroughly. Keep watering lightly, and your paperwhites should begin growing again. They tend to bloom in spring when treated this way.
More Christmas Inspiration
If you loved this easy holiday gardening project, you might enjoy a few of my other favorite Christmas crafts and festive ideas, too. There’s plenty of inspiration to keep the creativity going.


A Little Garden Joy for the Season
Forcing paperwhite bulbs is such a simple and rewarding way to bring life and beauty indoors during the winter months. Whether you tuck them into your holiday centerpiece, display them in your kitchen, or gift them to a friend, they add the loveliest touch of fresh charm.
I hope you give this project a try. It is truly beginner-friendly, and the results are so magical. If you do, I would love to see how yours turn out. Feel free to tag me on Instagram or send me a photo. It always makes my day.
And if you are planning holiday projects, be sure to save this post so you can come back to it anytime.
Happy planting and happy decorating.

Printable Instructions Card for How to Force Paperwhite Bulbs Indoors

The trick nobody tells you to forcing paper white indoors
Materials
- Paperwhite Narcissus bulbs
- A container or vessel (bowls vases, jars, or your favorite vintage finds
- Small pebbles gravel, or decorative stones
- Water
- Vodka
- Plastic liner (Optional if your container has drainage holes
- Ribbon or twine for gifting or styling Optional
Instructions
How to Plant Your Paperwhite Bulbs
- Fill your container with about 2 inches of pebbles.
- Nestle bulbs on top, pointy end up, and tuck pebbles around them to keep them in place.
- Add water until it just touches the base of the bulbs. (Do not fully submerge.
- Place in bright, indirect light and keep the water level at the base of the bulbs as they grow.
How to Make the Vodka Water Mixture
- Mix 1 part vodka with 7 parts water.
- Once the shoots reach about 2 inches tall, start using your alcohol mixture instead of plain water. This helps keep your paperwhites short, strong, and upright.
Did you make this craft?
We would love to see what you have created, so mention us @wmdesignhouse or tag us using #wmdesignhouse so we can see your creations!


More about me!

Hello, I’m Wendy – a dedicated homemaker with a deep passion for decorating, gardening, cooking, and crafting. I find joy in harmonizing beautiful elements to fashion a space that is both comfortable and inspiring. I will help you create a beautiful home, one project at a time.

Definitely inspiring and truly a thoughtful, beautiful idea and gift. Thank you for this great post. I didn’t know you could keep the bulbs, which makes it even more special – “bringing it back” year to year. Do you know if this would work with Amaryllis bulbs, as well? Thank you , again!
Great tips, Wendy. I’m feeling inspired to plant some paper whites this week! I love yours styled in the clay pots with plaid ribbon. I’d love to share in my Saturday roundup this week!
Thank you so much Kim. So sweet of you to share.
I have never tried this but you have inspired me to give it a try! Thanks, Wendy! ~Missy
They are really easy and make such a beautiful display for Christmas.
You will love them.
Wendy
You are so inspiring and you motivate me to try new things! You have introduced me to so many beautiful things for my home. I am having fun and looking forward to what you will inspire me to do for Christmas!
Thank you so much Kathy, I really enjoy sharing with others. I can;t wait to knit with you again. XO
Hi Wendy, this looks great!