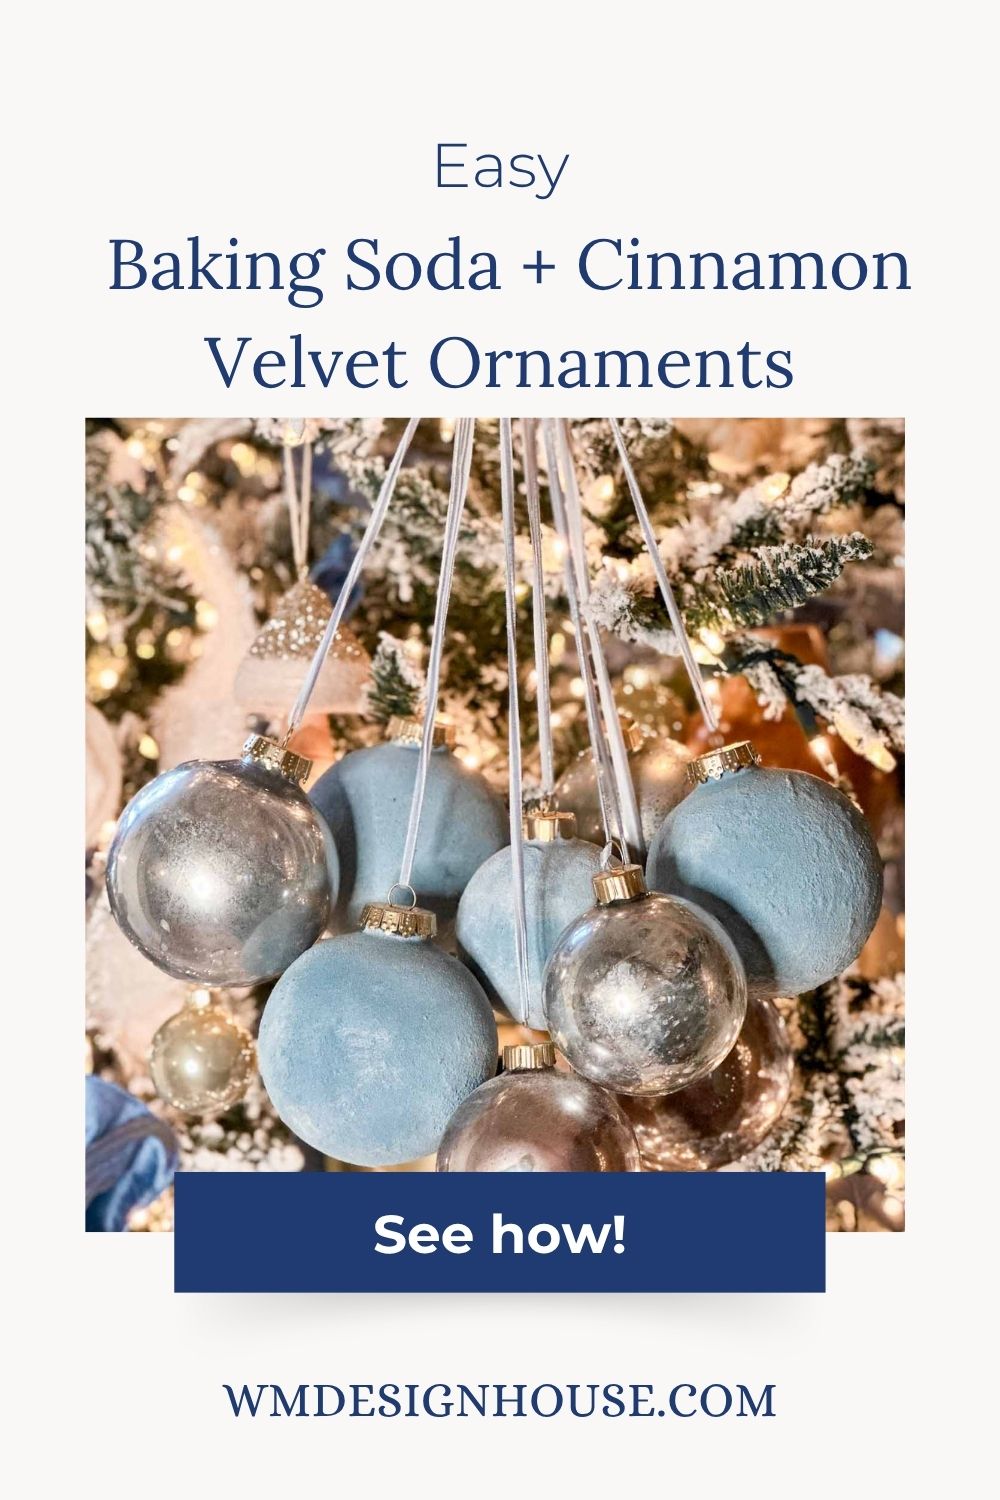
DIY Velvet Ornaments: 2 Easy Ways for an Elegant Holiday Look
There’s something magical about the soft, velvety texture of DIY velvet ornaments—they add instant elegance, warmth, and cozy winter charm to any Christmas tree.
Over the next several weeks, I’ll be sharing more than a dozen DIY ornaments you can make for your holiday tree. Each one will feature a unique style, material, or finish—so by the end, you’ll have a beautiful handmade collection to treasure or gift this season.
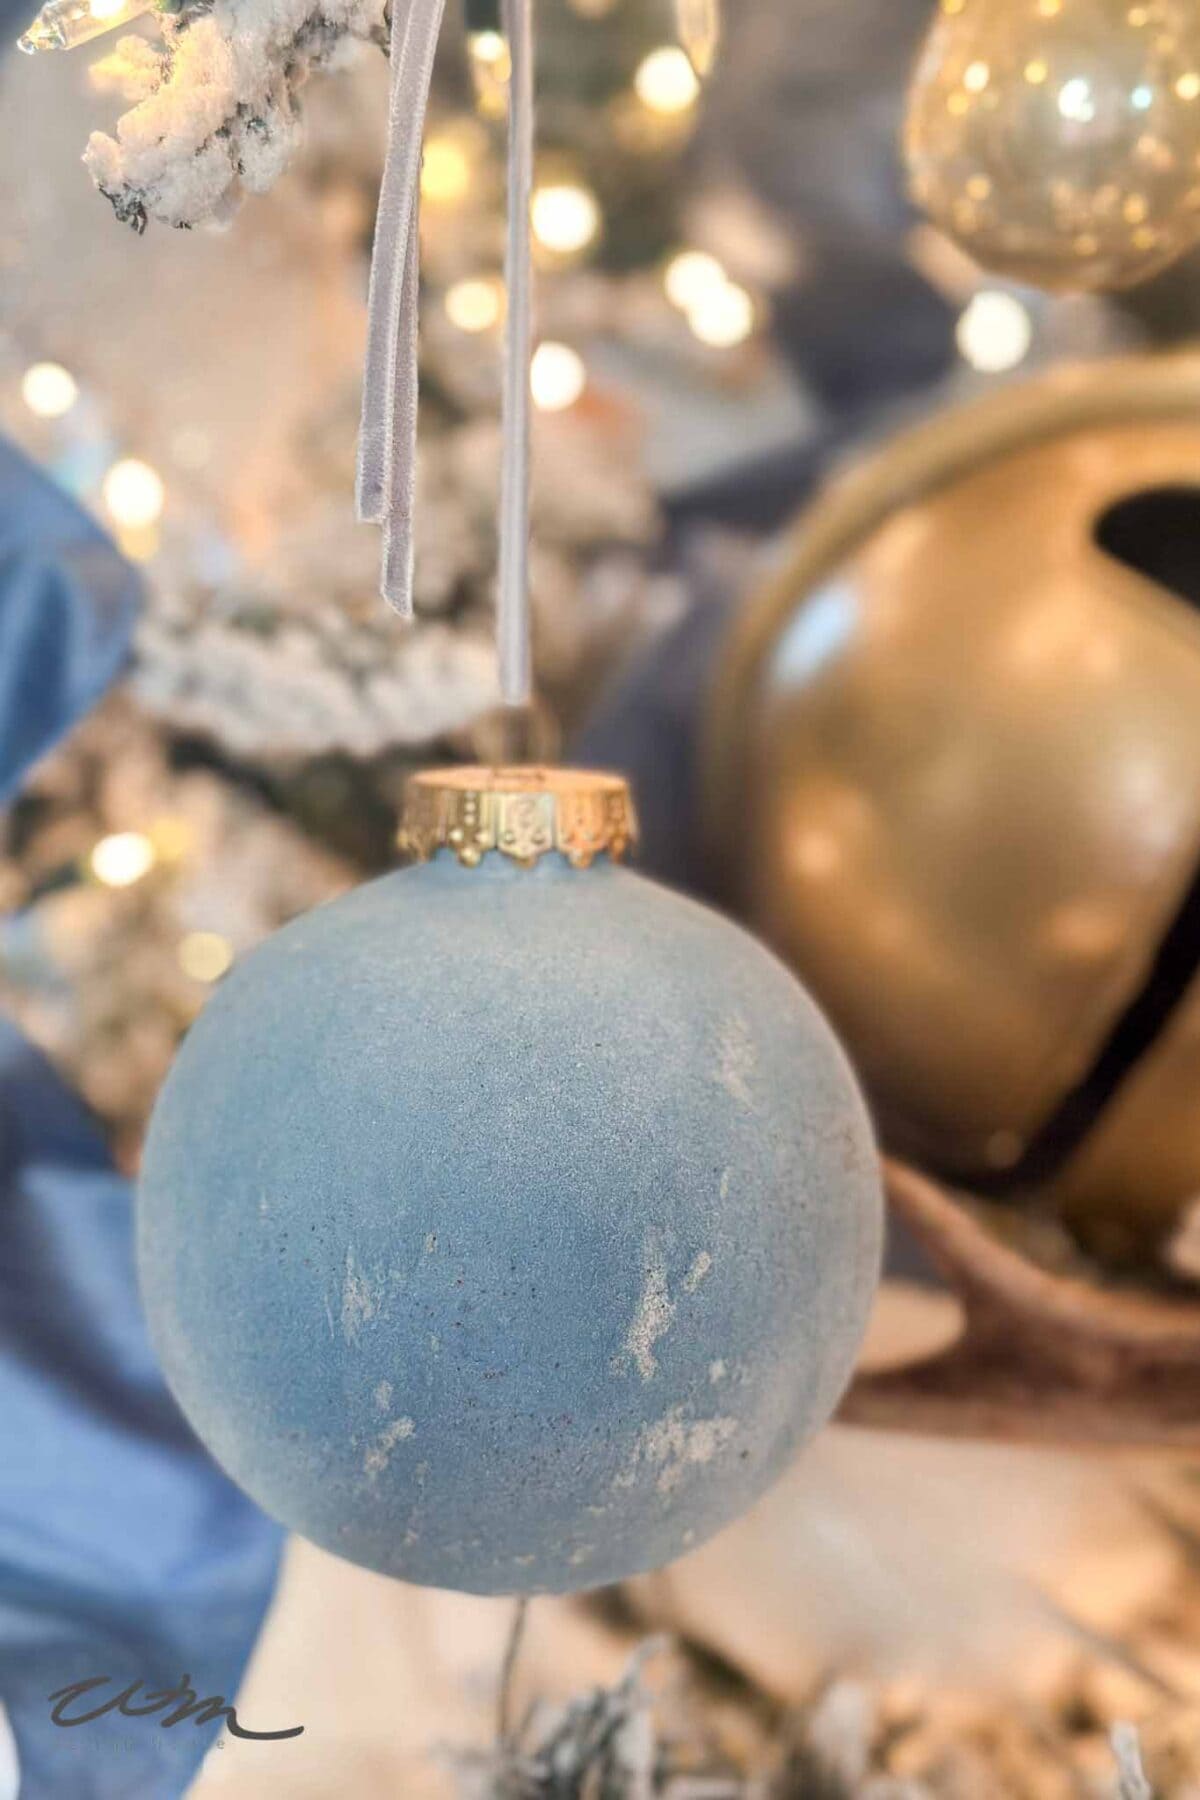
To start, we’re making one of my favorites: DIY velvet ornaments. In this tutorial, you’ll learn two easy ways to create that soft, luxurious velvet look—plus how to embellish them with dried hydrangeas and shimmering gold foil accents for a touch of holiday luxury.
Whether you love soft neutrals or a hint of festive sparkle, these DIY velvet Christmas ornaments will bring timeless, handmade elegance to your tree.
On my blog WM Design House, I may sometimes use affiliate links, which means a small commission is earned if you purchase via the link. The price will be the same whether you use the affiliate link or go directly to the vendor’s website using a non-affiliate link. Read my full disclosure policy here.
Why You’ll Love These DIY Flocked Ornaments
- Two simple methods, both beginner-friendly
- A soft, high-end finish that looks store-bought
- Customizable with color, texture, and embellishments
- Perfect for neutral, vintage, or modern holiday themes
Supply List
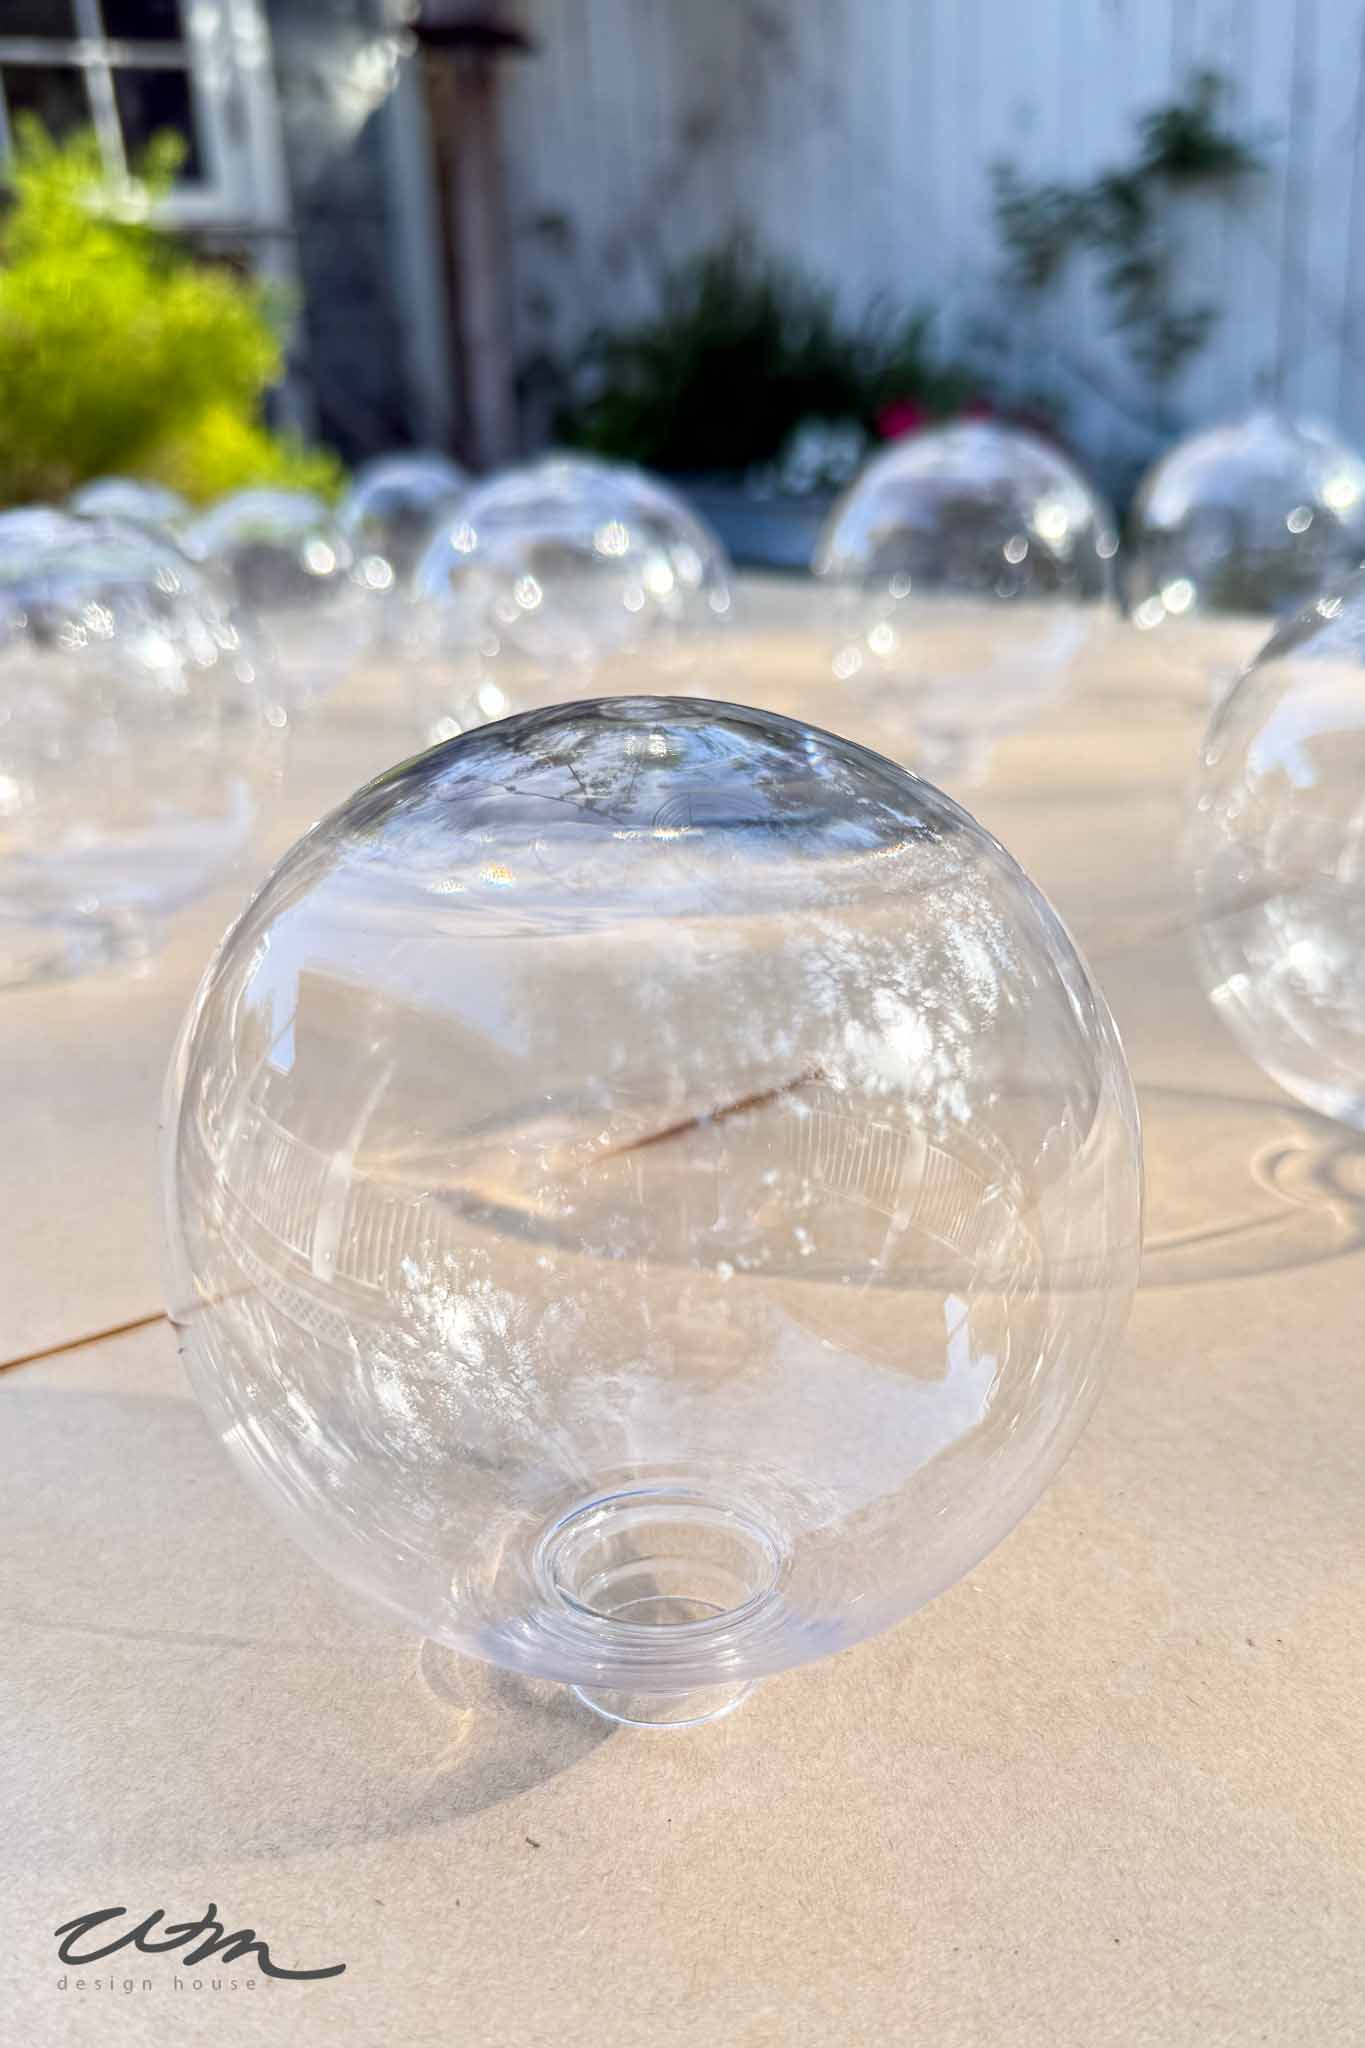
- Clear plastic or glass ornaments
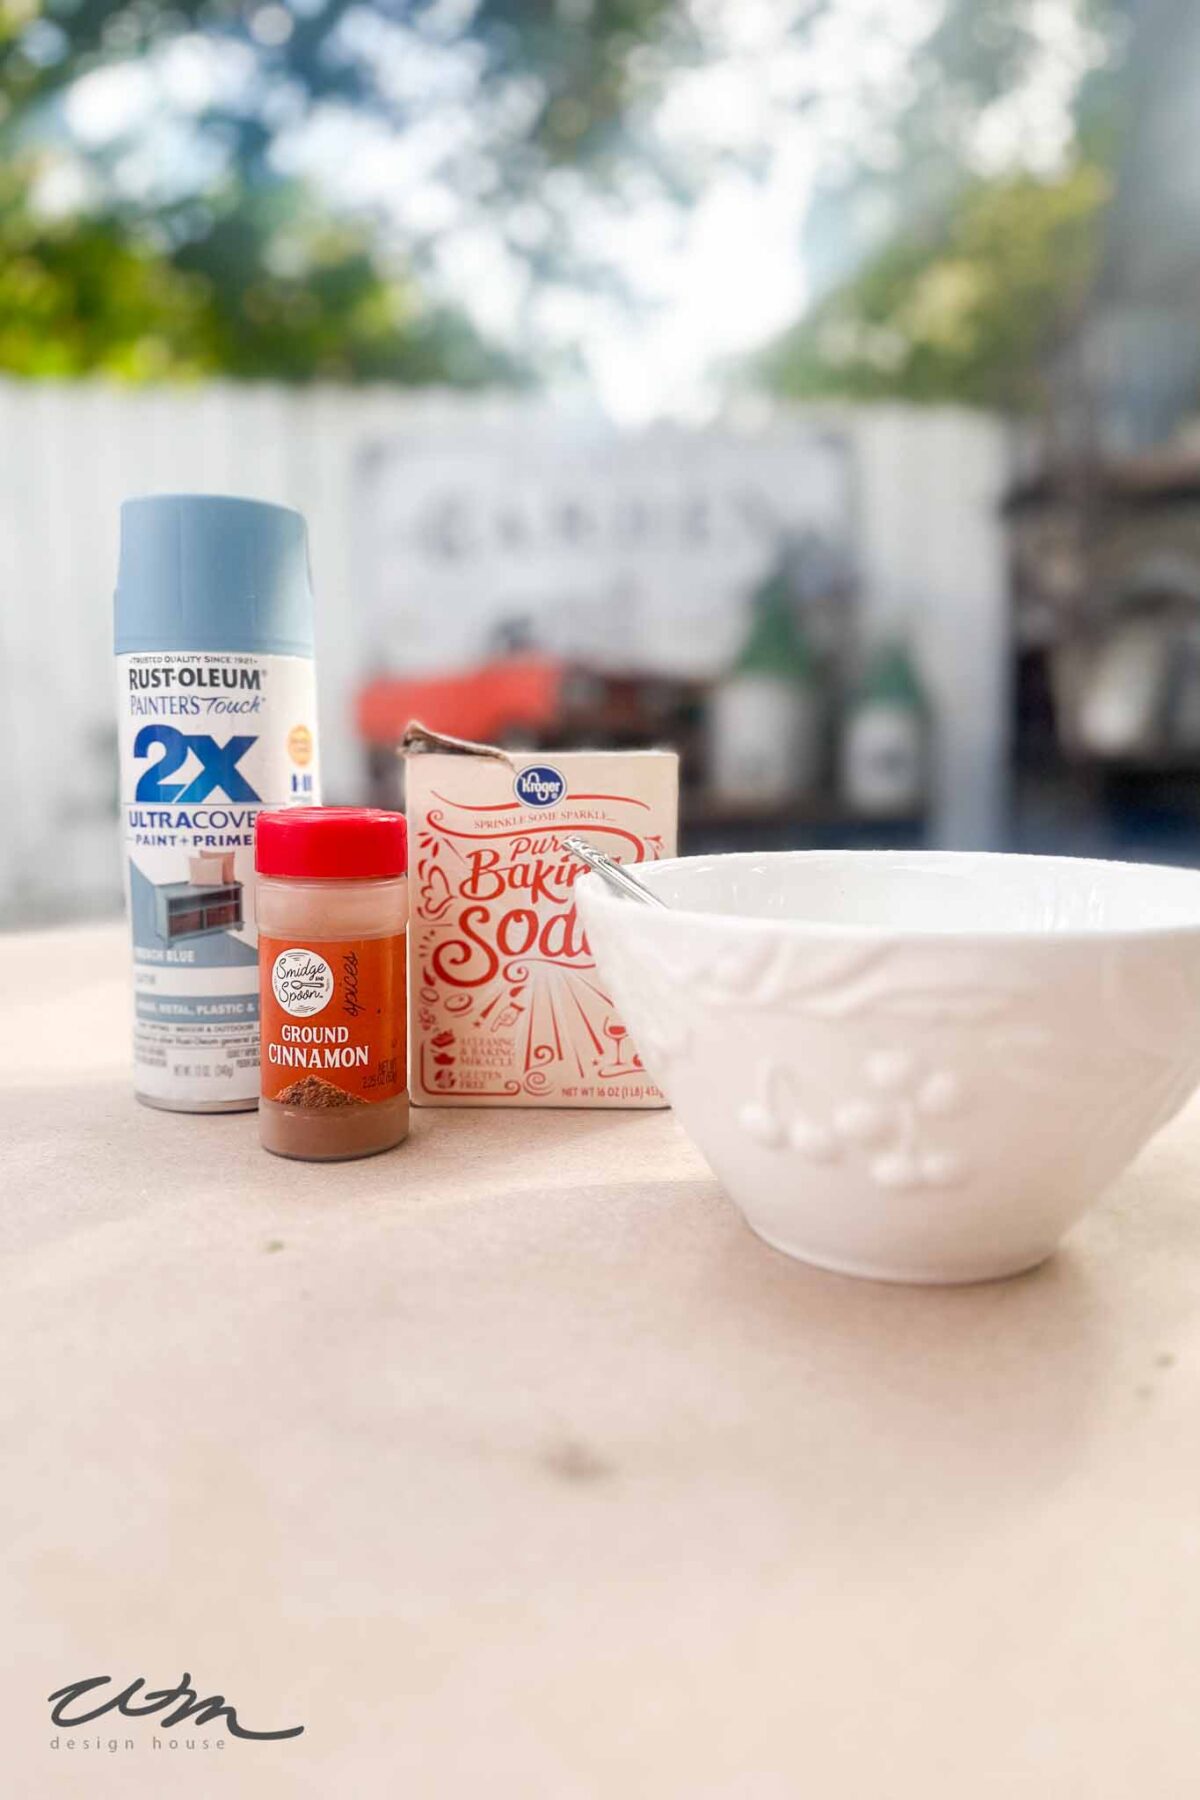
- Acrylic paint
- Baking soda
- Ground cinnamon (optional)
- Wood skewers or pencils
- Masking tape
- Chip paint brushes
- Flocking powder in your preferred colors
- Mod Podge or spray adhesive
- Gold spray paint
- 3/8″ velvet ribbon or velvet fabric
- Gold or copper leaf sheets + gilding adhesive
- Clear acrylic sealer (optional)
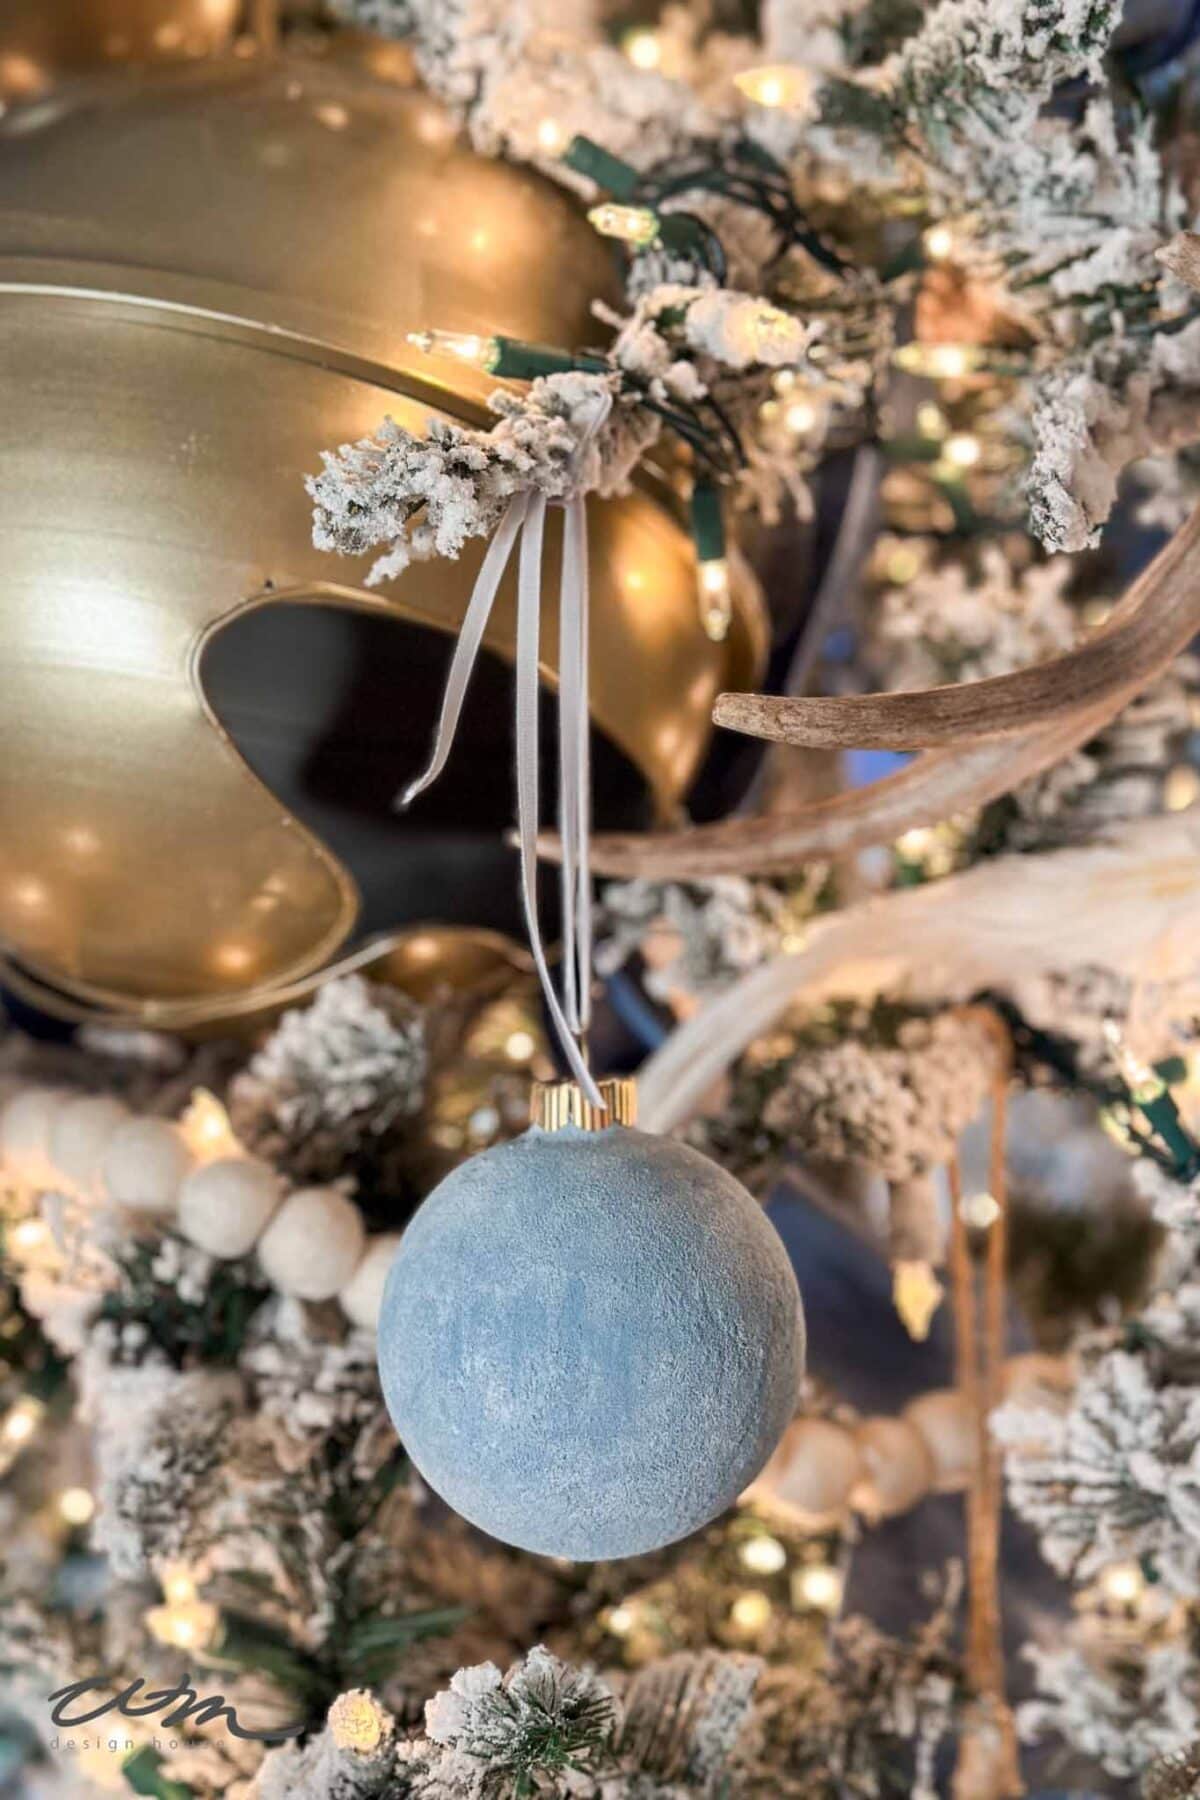
Method 1: Painted Velvet Ornaments (Baking Soda + Cinnamon Finish)
This first method gives your ornaments a soft, textured, velvety look using simple craft supplies. The baking soda adds a matte, suede-like finish, while a pinch of cinnamon deepens the color for a warm, vintage tone.
Step 1: Paint the Ornaments
Remove the metal ornament cap, then insert a pencil or wooden skewer into the opening. Secure it in place with masking tape at the base to hold the ornament steady while you work.
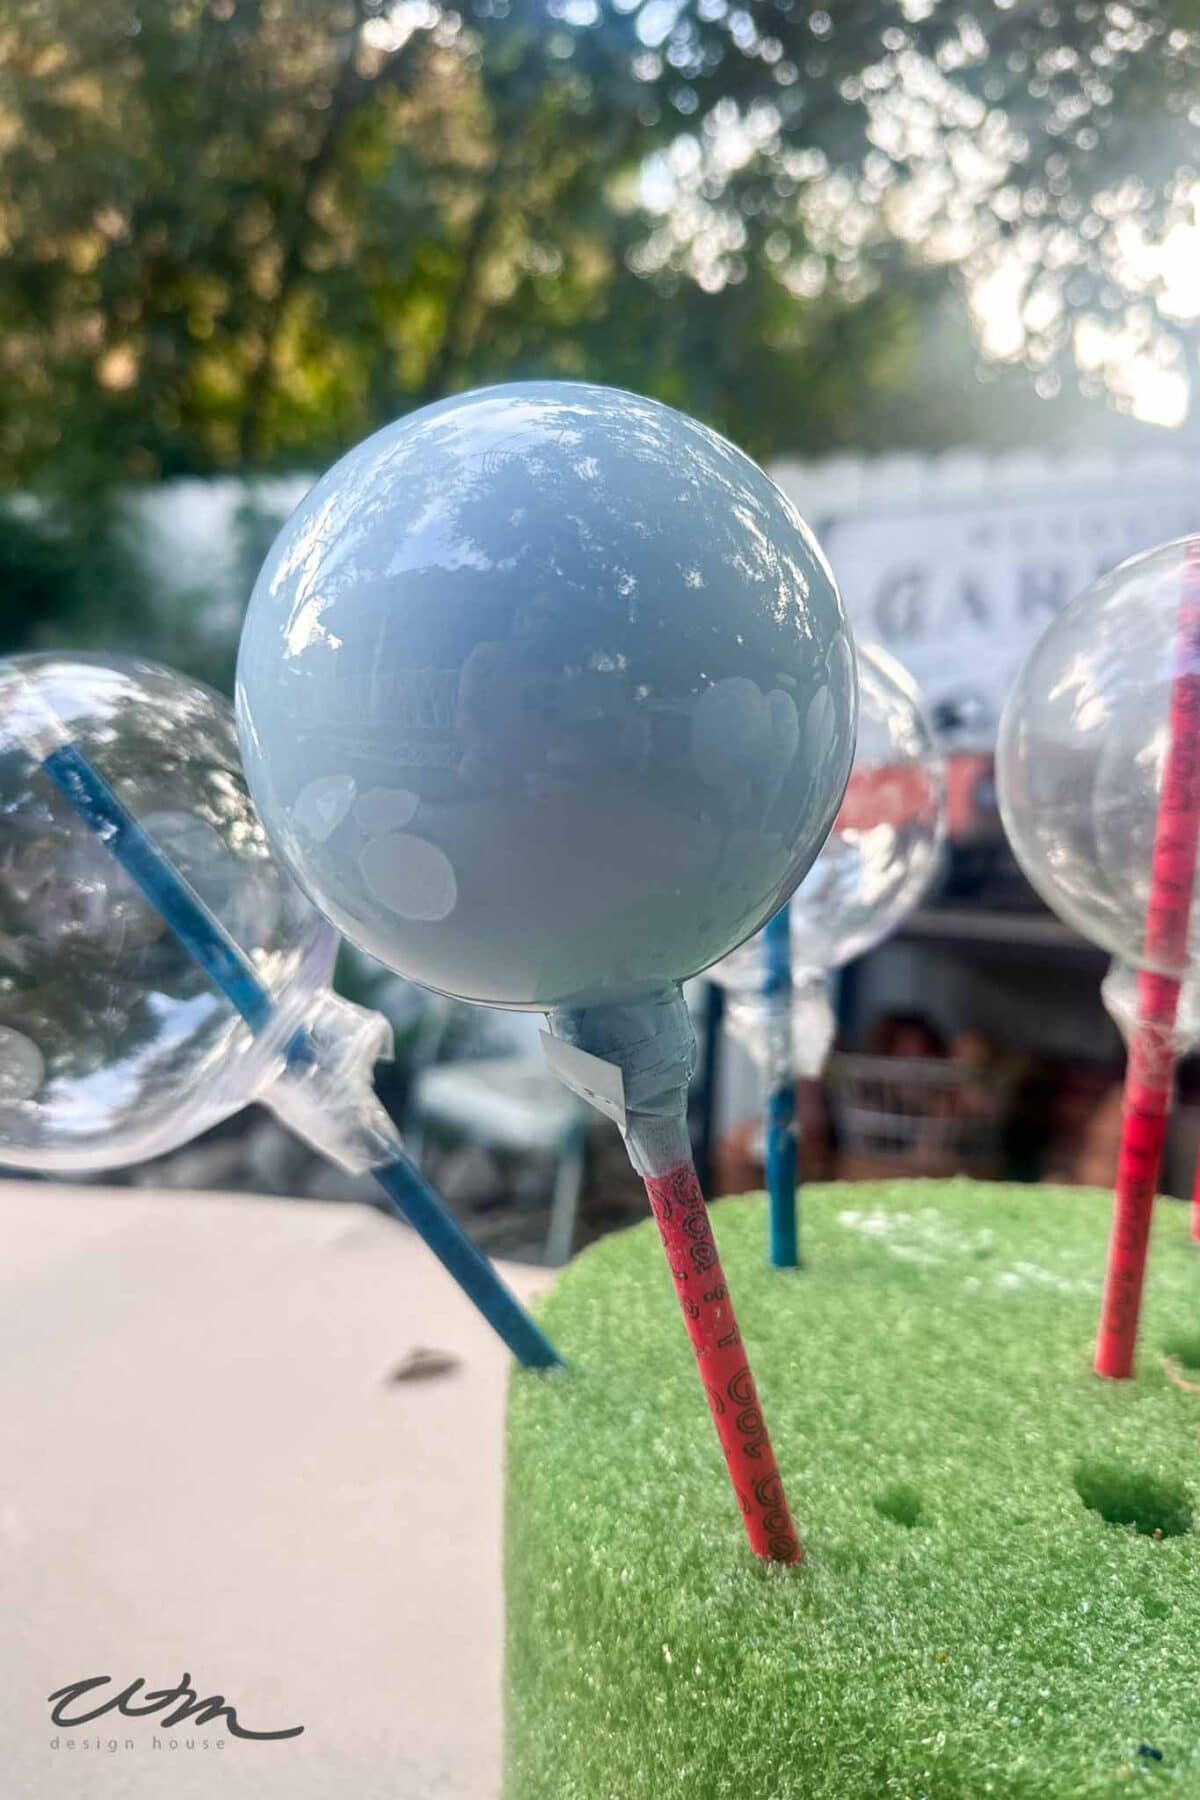
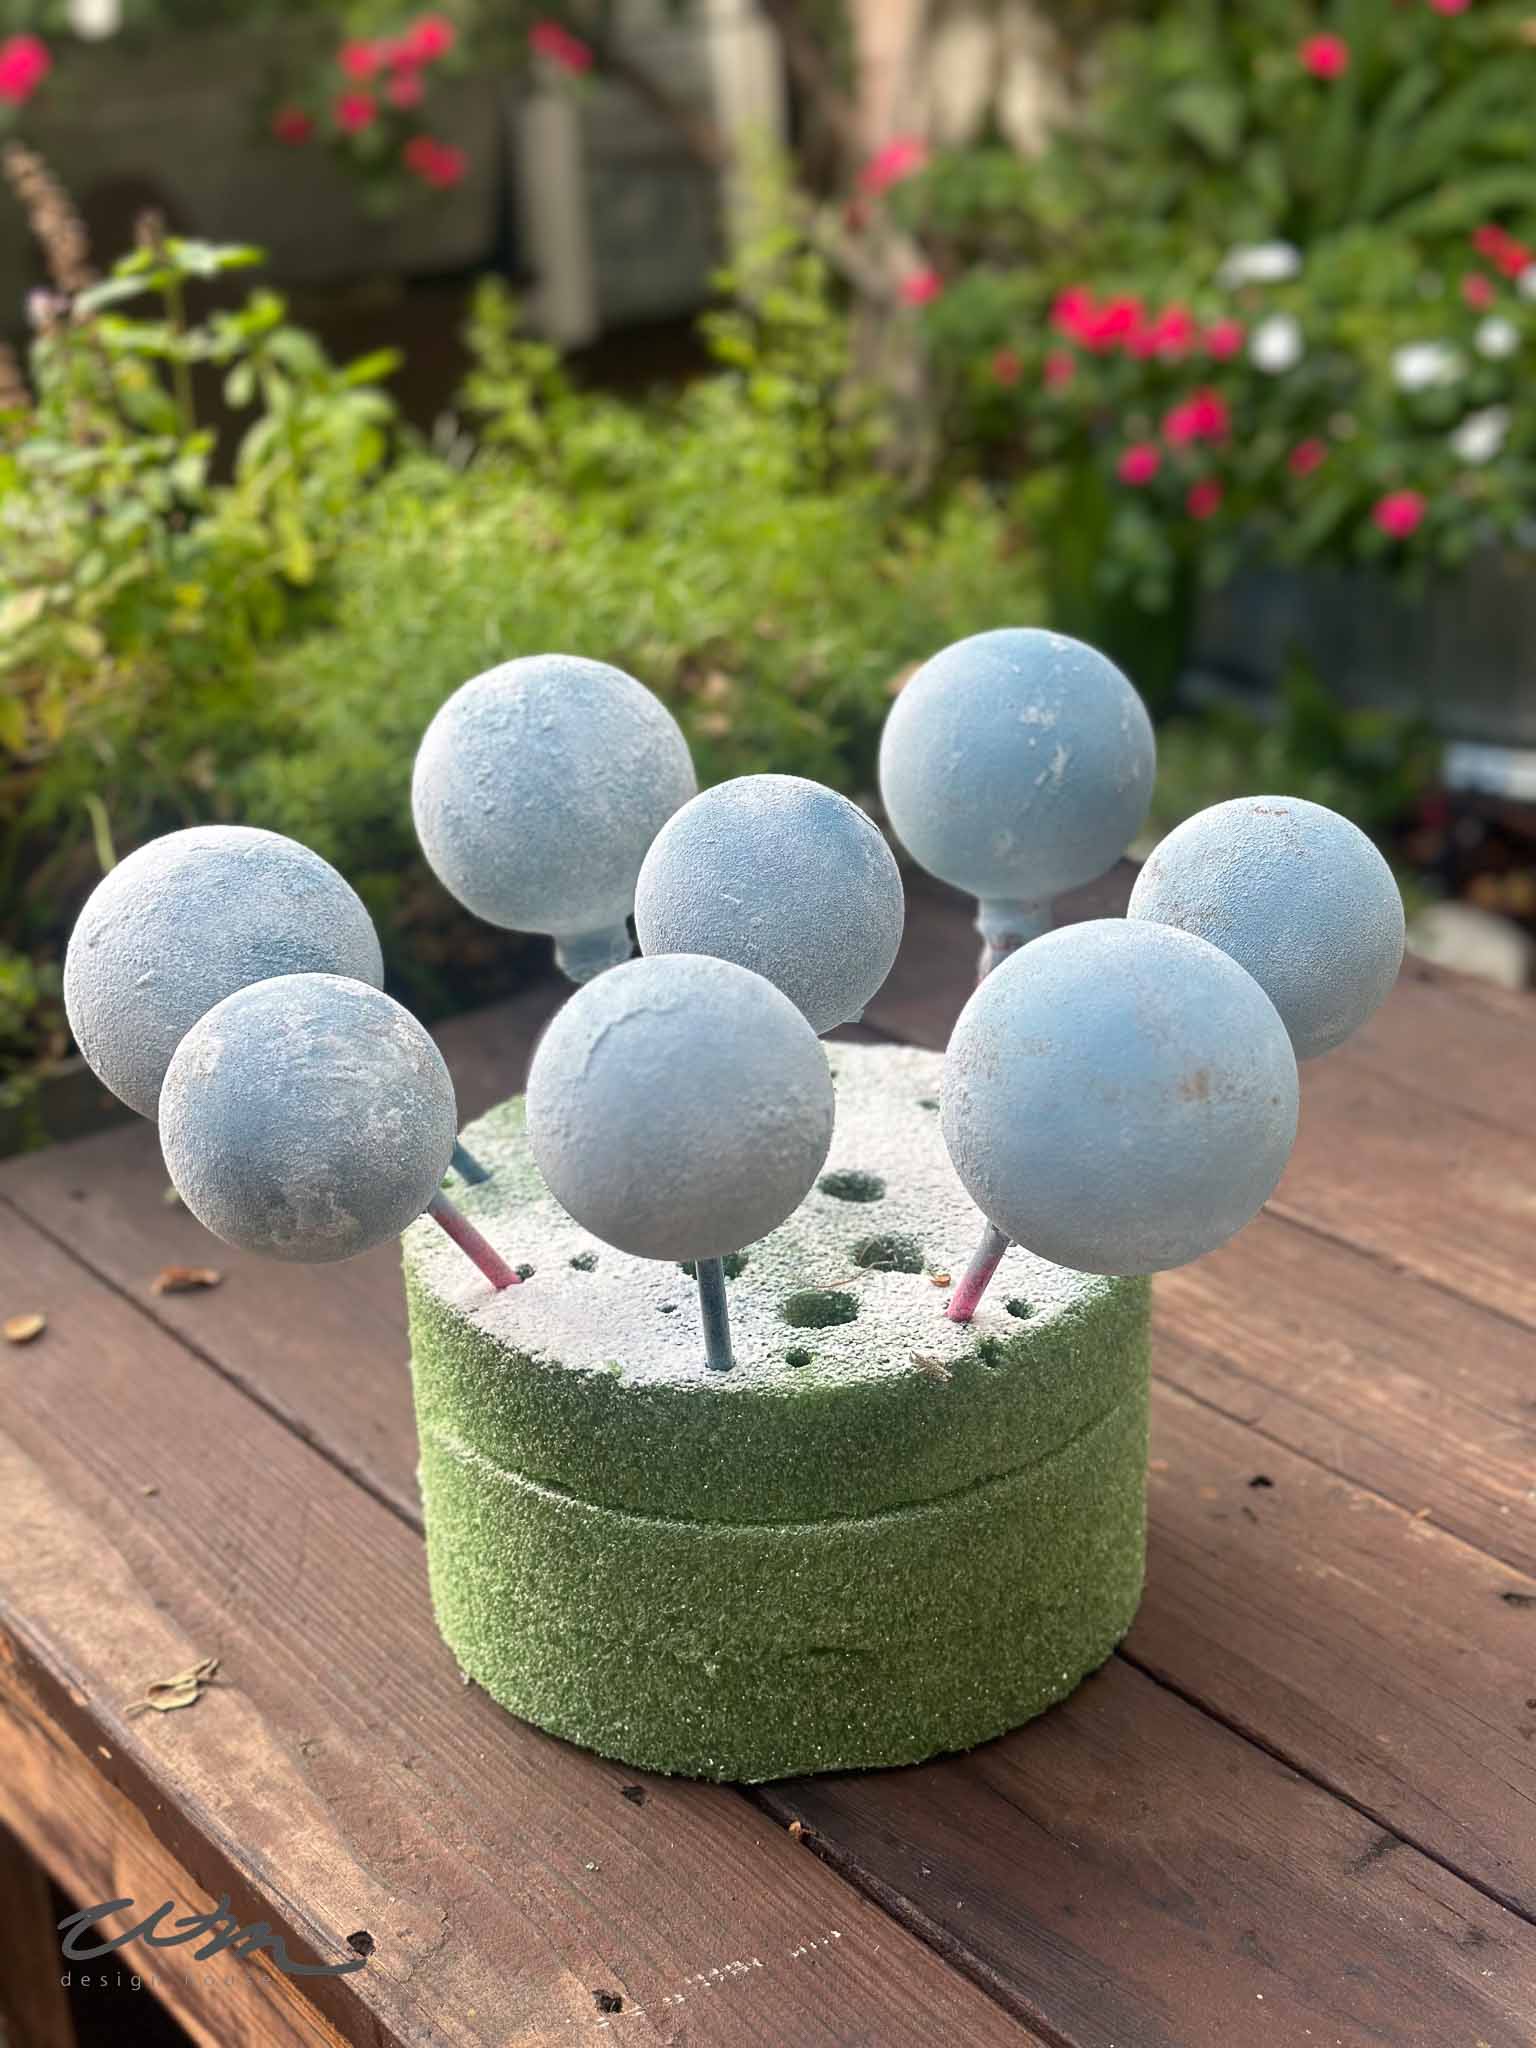
Place your skewers or pencils into a piece of Styrofoam or a cardboard box to hold the ornaments upright while they dry.
Tip from wendy’s craft room:
I love using spray paint for this project—it applies so smoothly and leaves the prettiest, even finish every time.
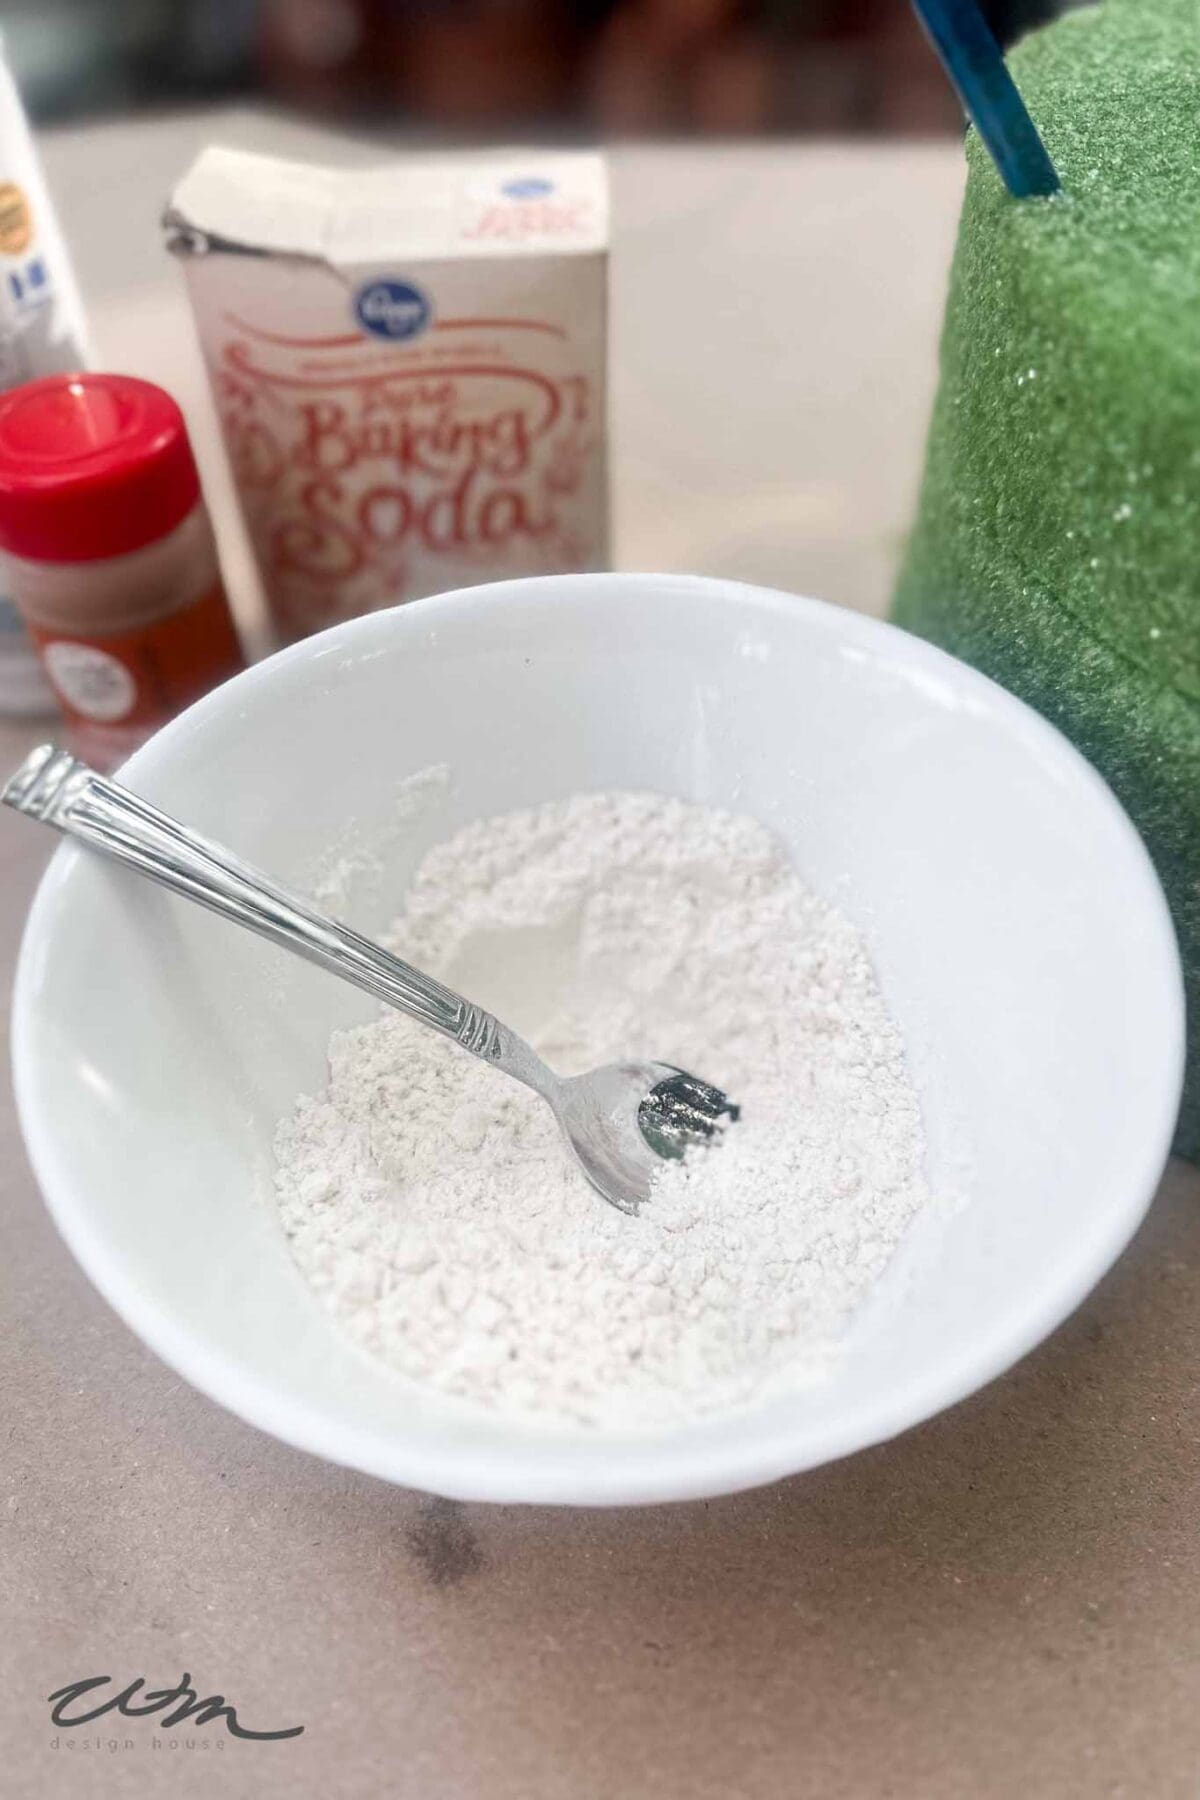
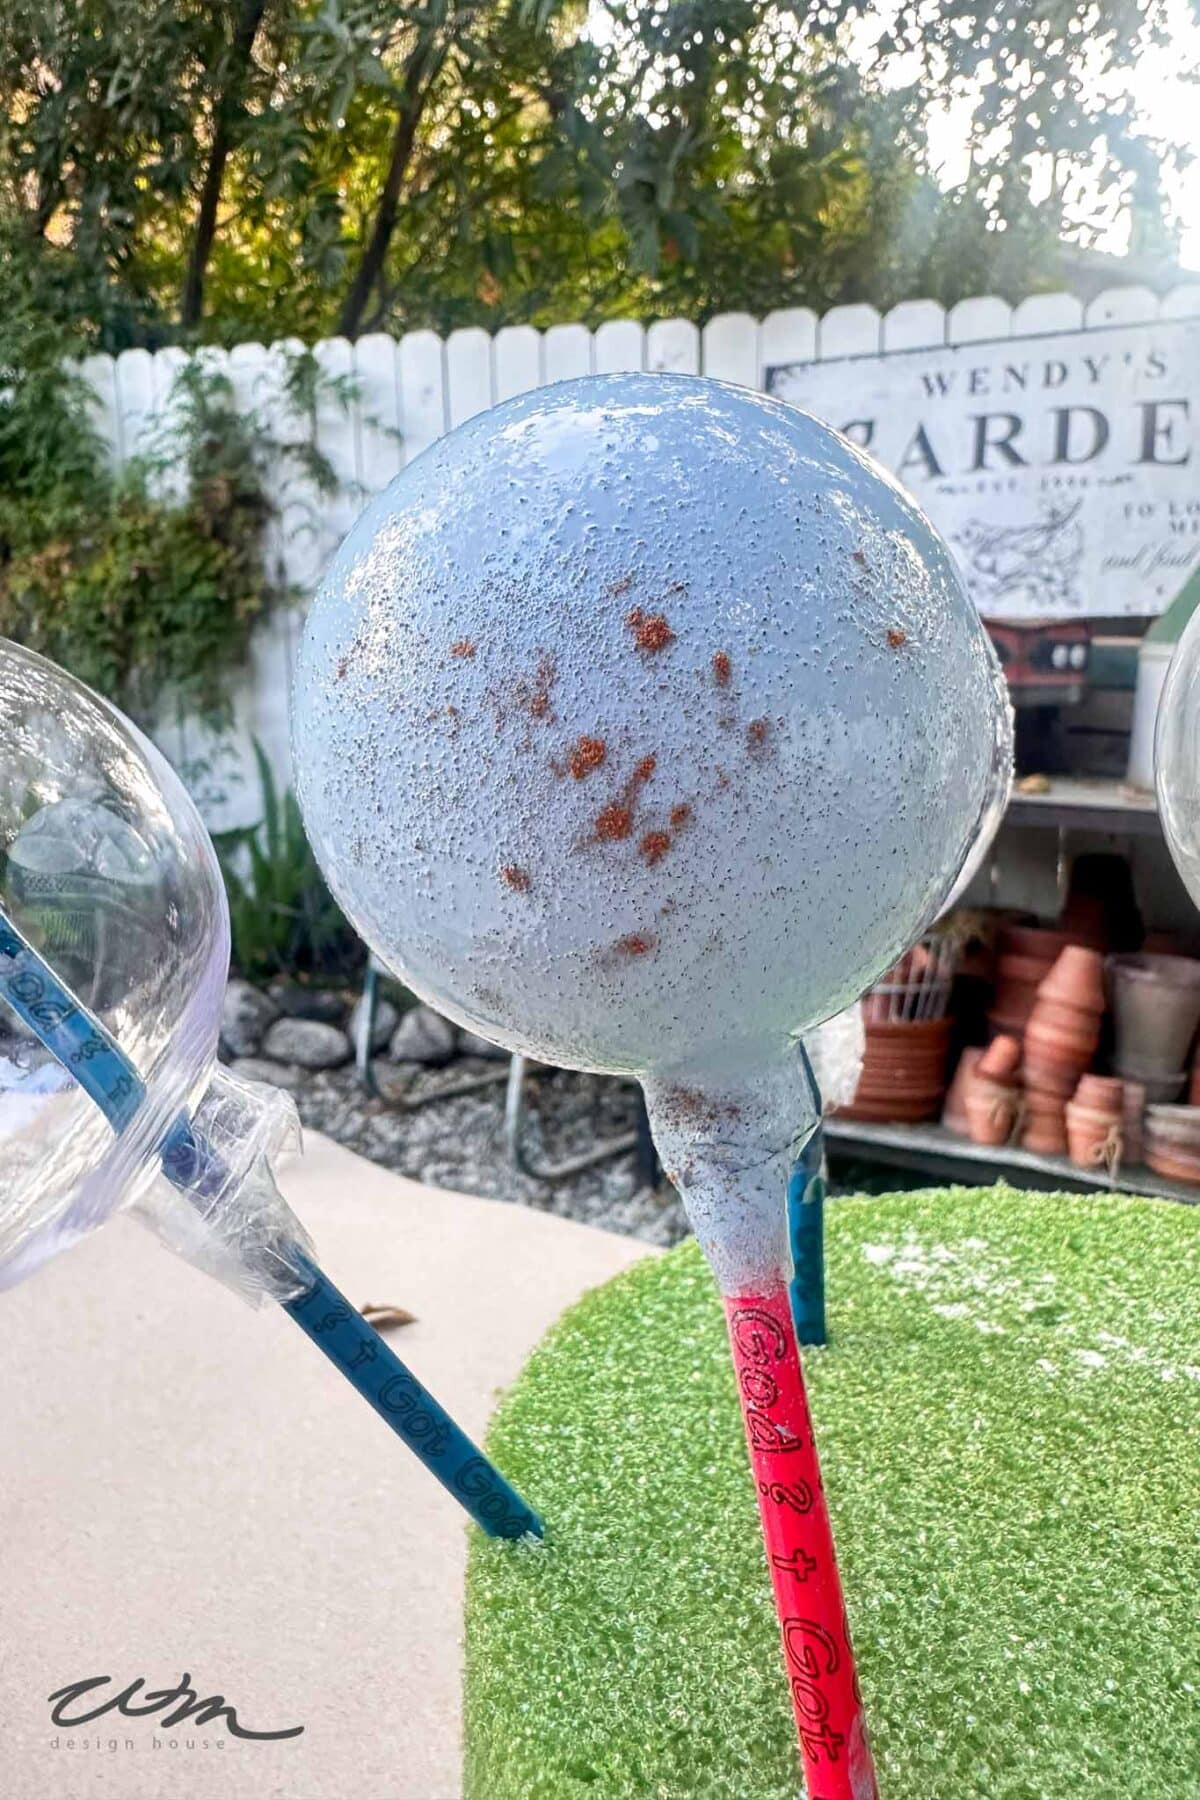
Step 2: Add Baking Soda and Cinnamon
While the paint is still wet, sprinkle a tiny bit of cinnamon onto your ornament, then evenly sprinkle baking soda over the entire surface. Rotate the ornament as you go so all sides are covered.
Tip from wendy’s craft room:
The cinnamon is optional, but I like that it gives the ornaments some texture and a bit of a distressed look.
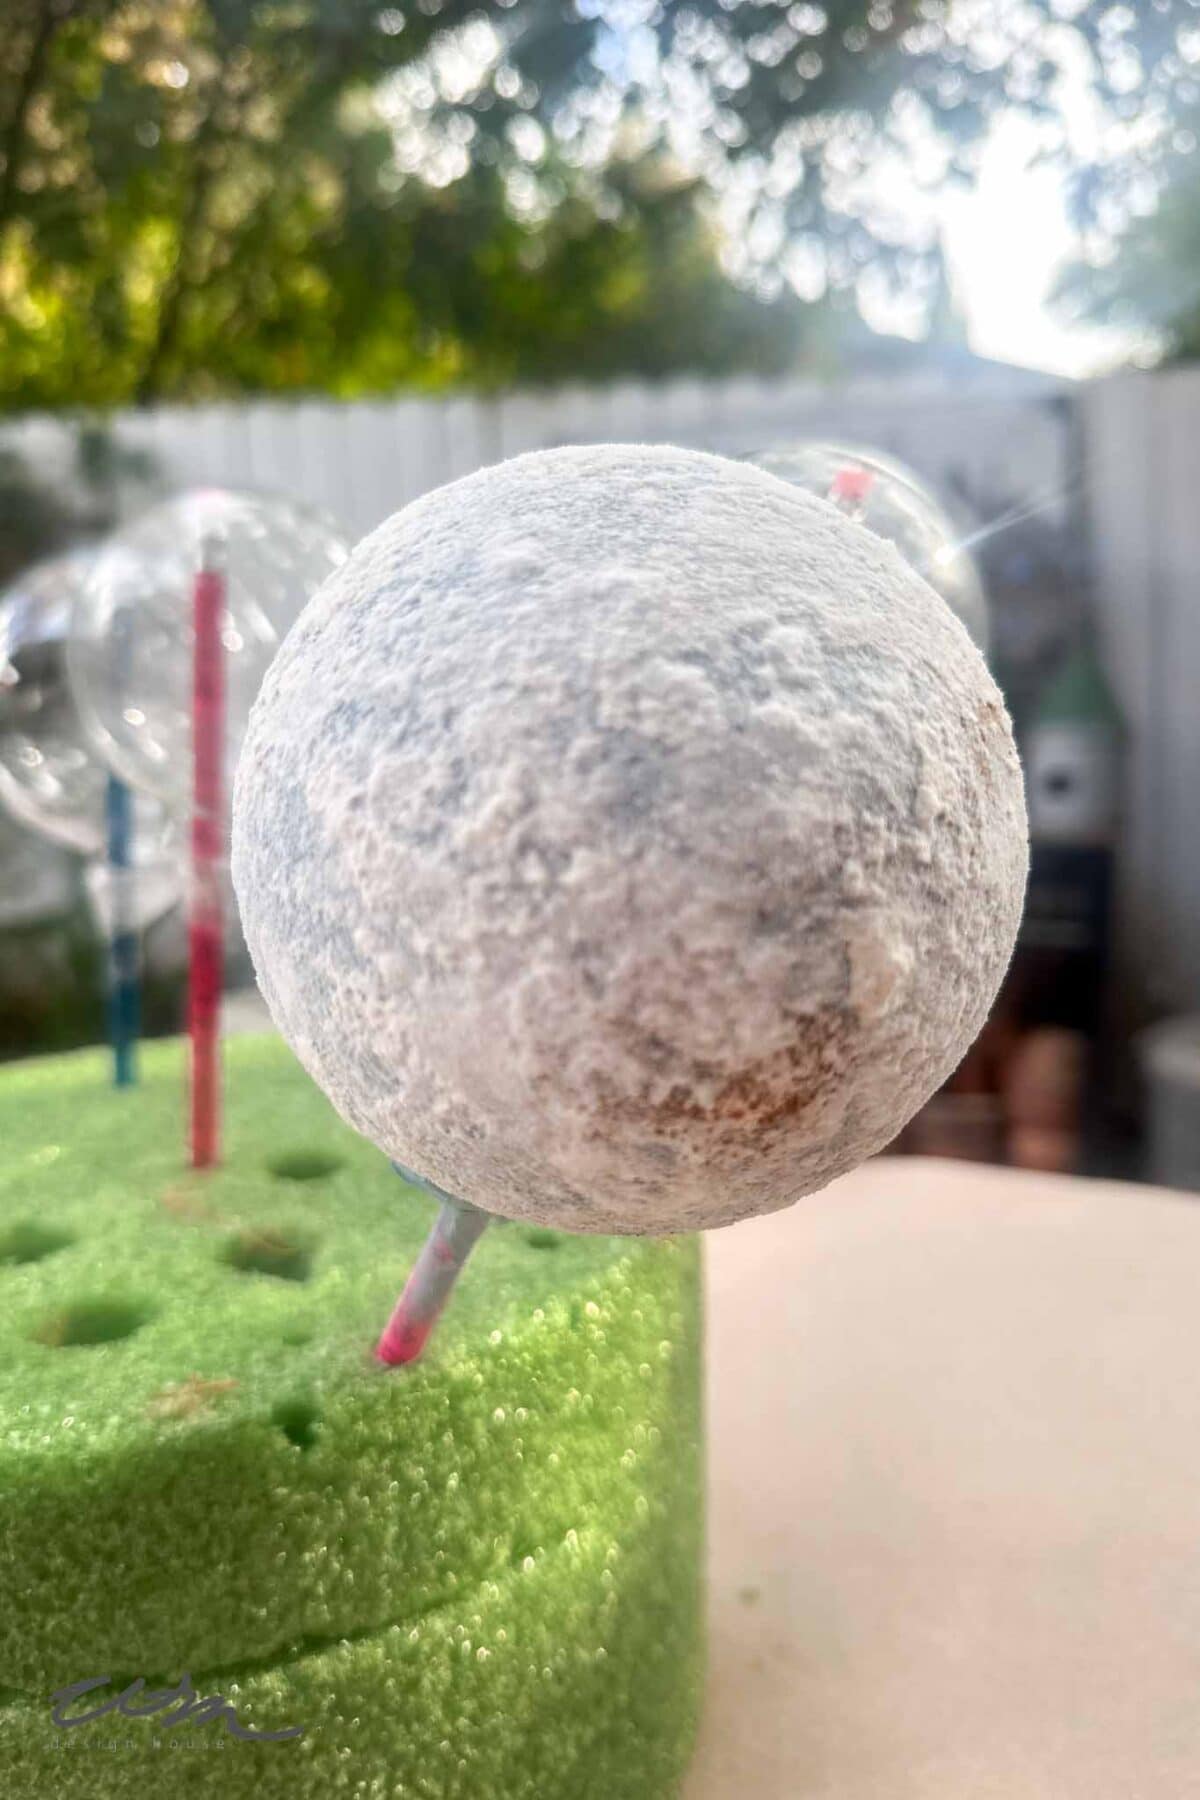
Step 3: Let Dry Completely
Allow ornaments to dry for 2–4 hours.
Step 4: Brush off the Excess
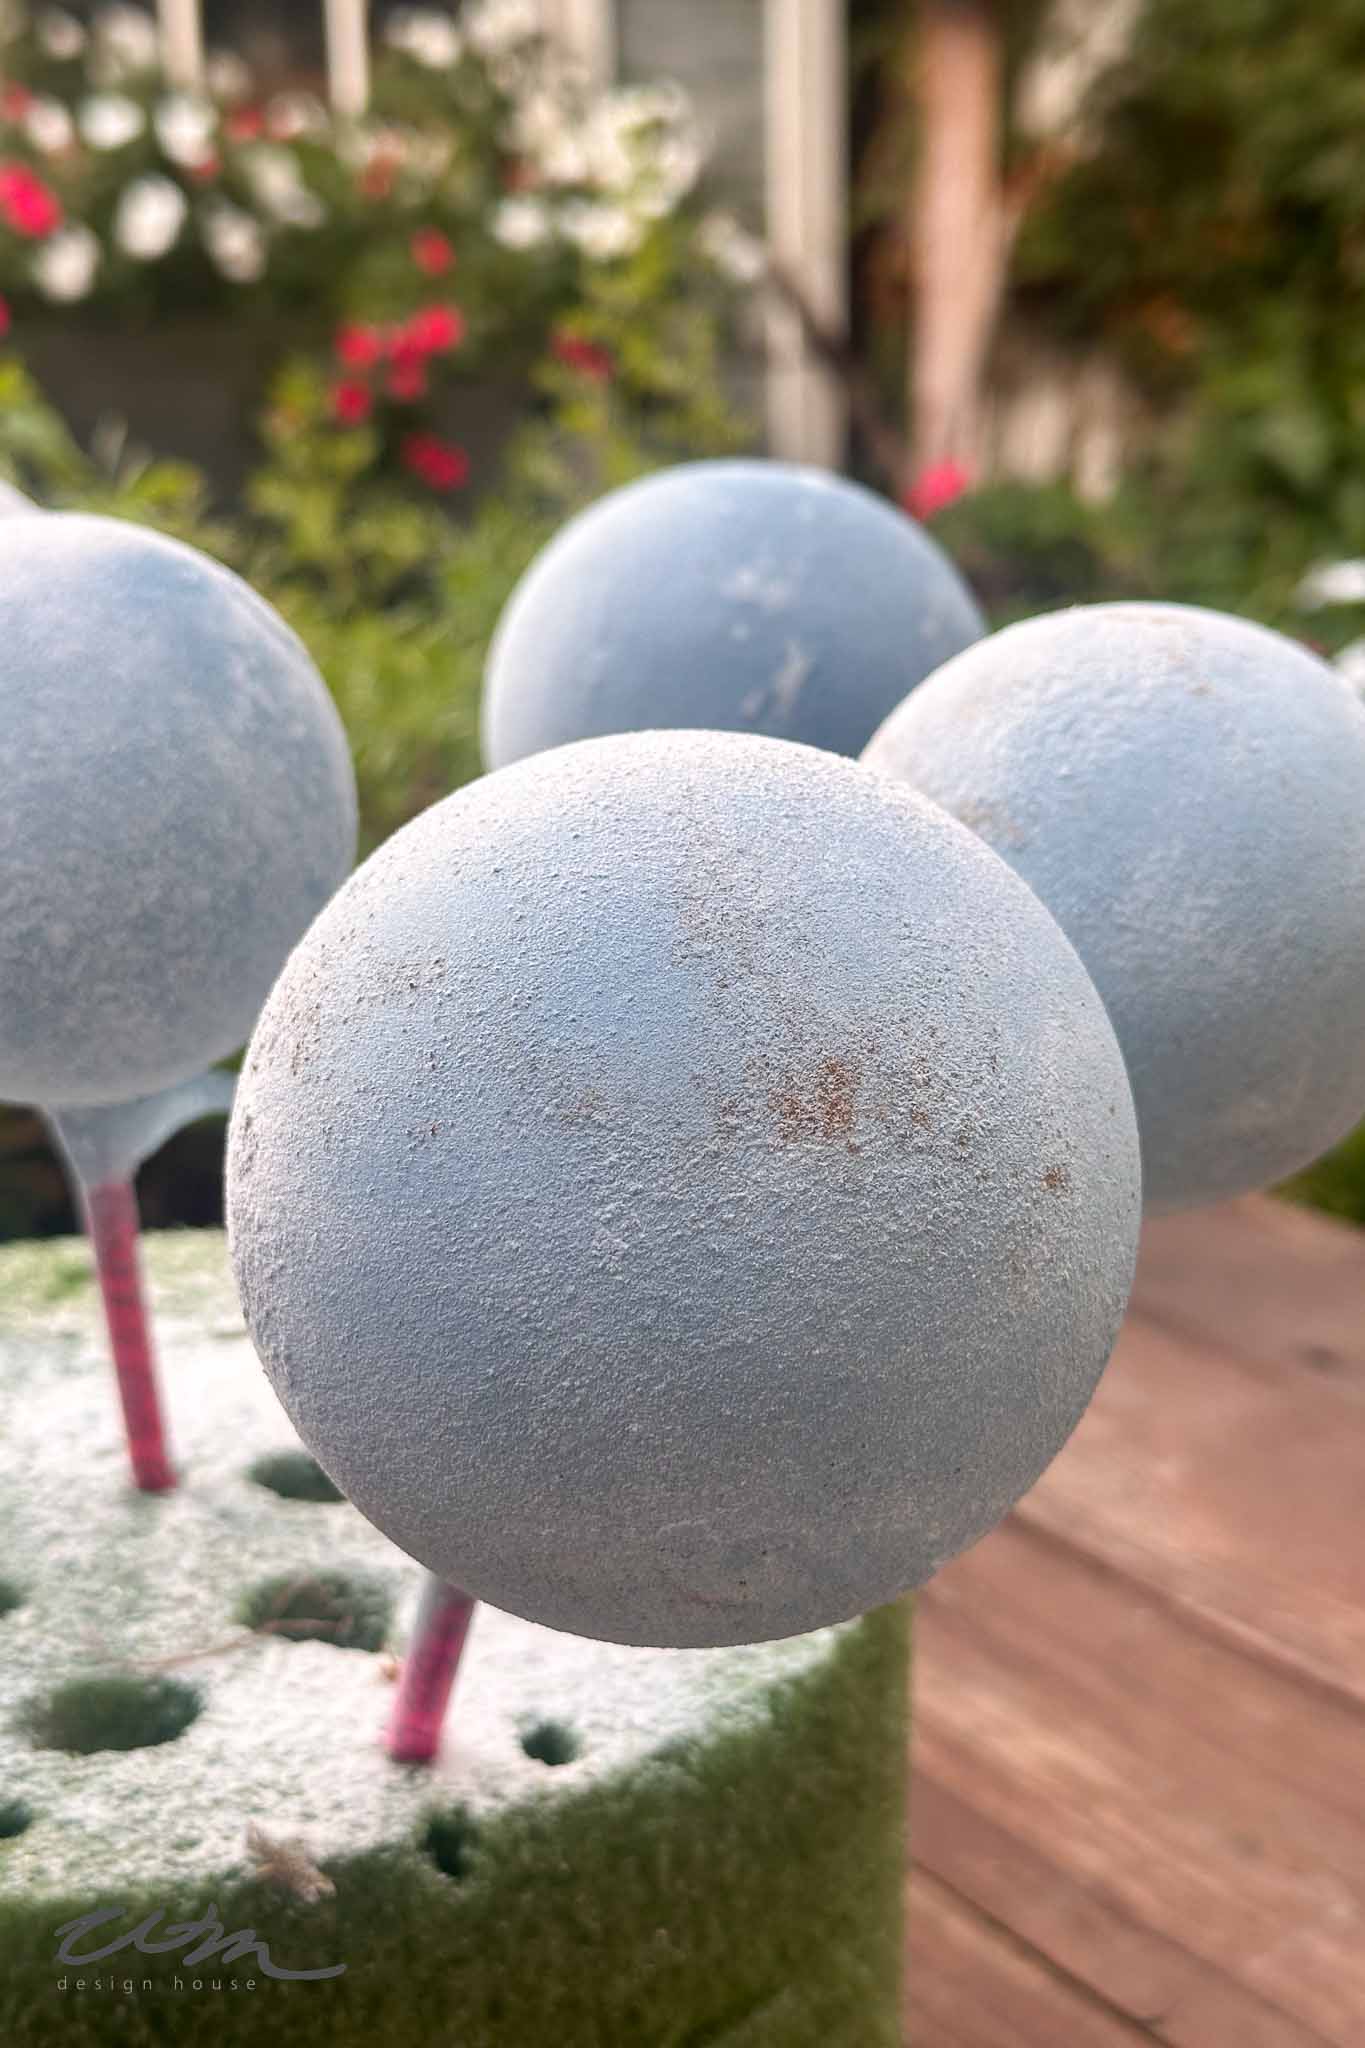
Once dry, gently brush away any loose powder with a soft, dry paintbrush. The finish will feel velvety and matte—just like real fabric.
Step 5: Optional Seal
If you want a little more durability, mist lightly with a matte clear sealer.
This simple method is budget-friendly and creates a beautiful, organic texture that looks handcrafted and high-end.
Method 2: Faux Velvet Ornaments (Flocking Powder Finish)
For an even softer, touchable texture, try using flocking powder. It gives a plush, velvety appearance that looks like it came straight from a boutique.
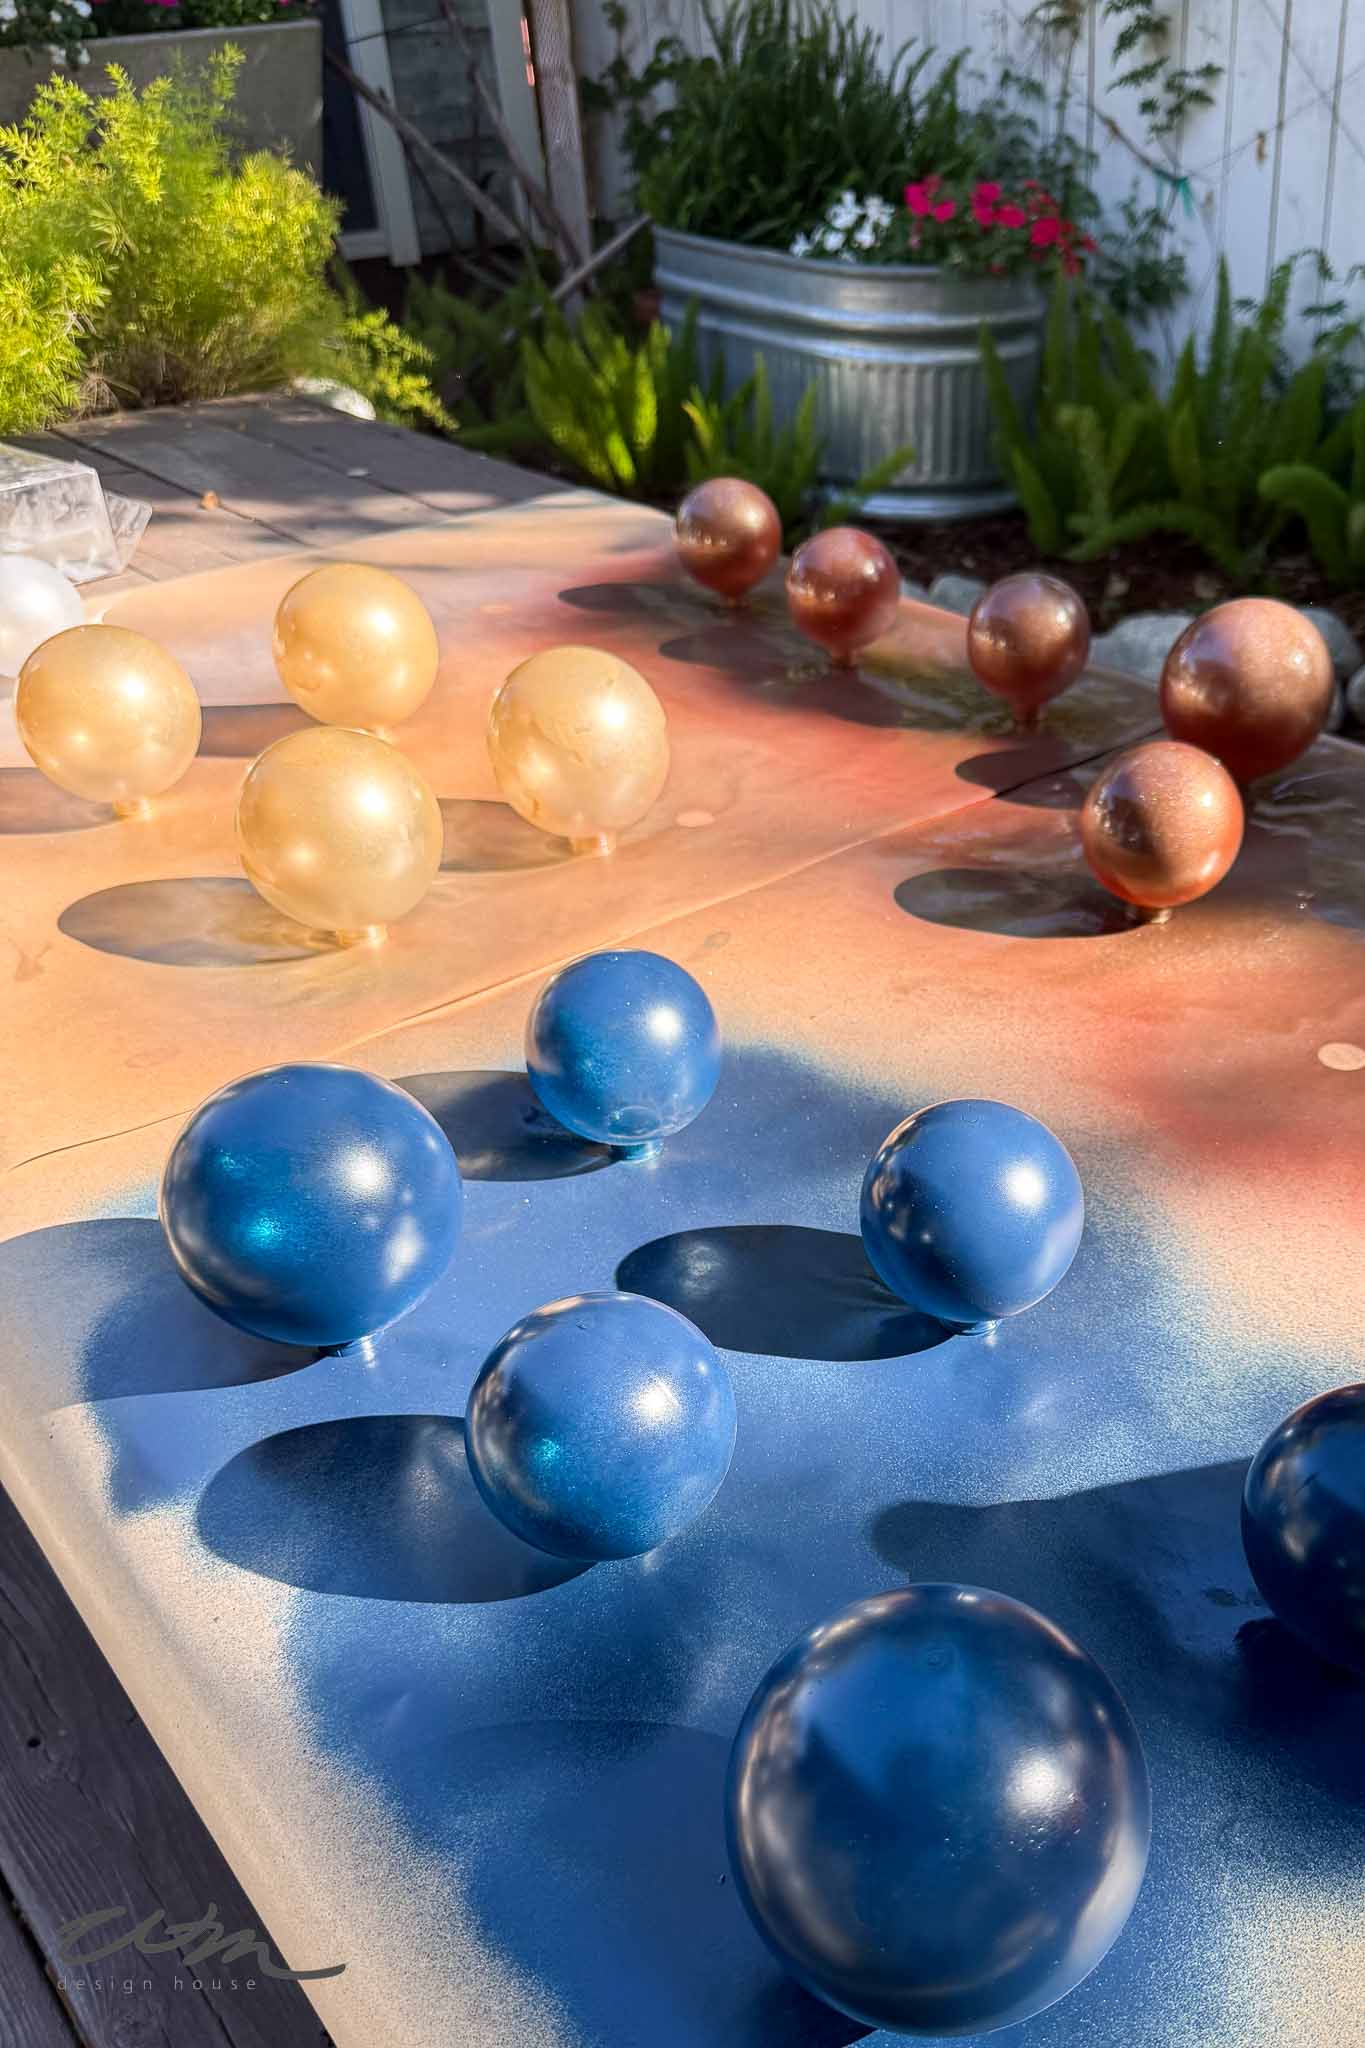
Step 1: Spray Paint the Ornaments
Before flocking, spray paint your ornaments in a color similar to your flocking. This ensures even coverage and prevents any clear spots from showing through if the flocking doesn’t fully cover the surface.
Allow them to dry for a few hours.
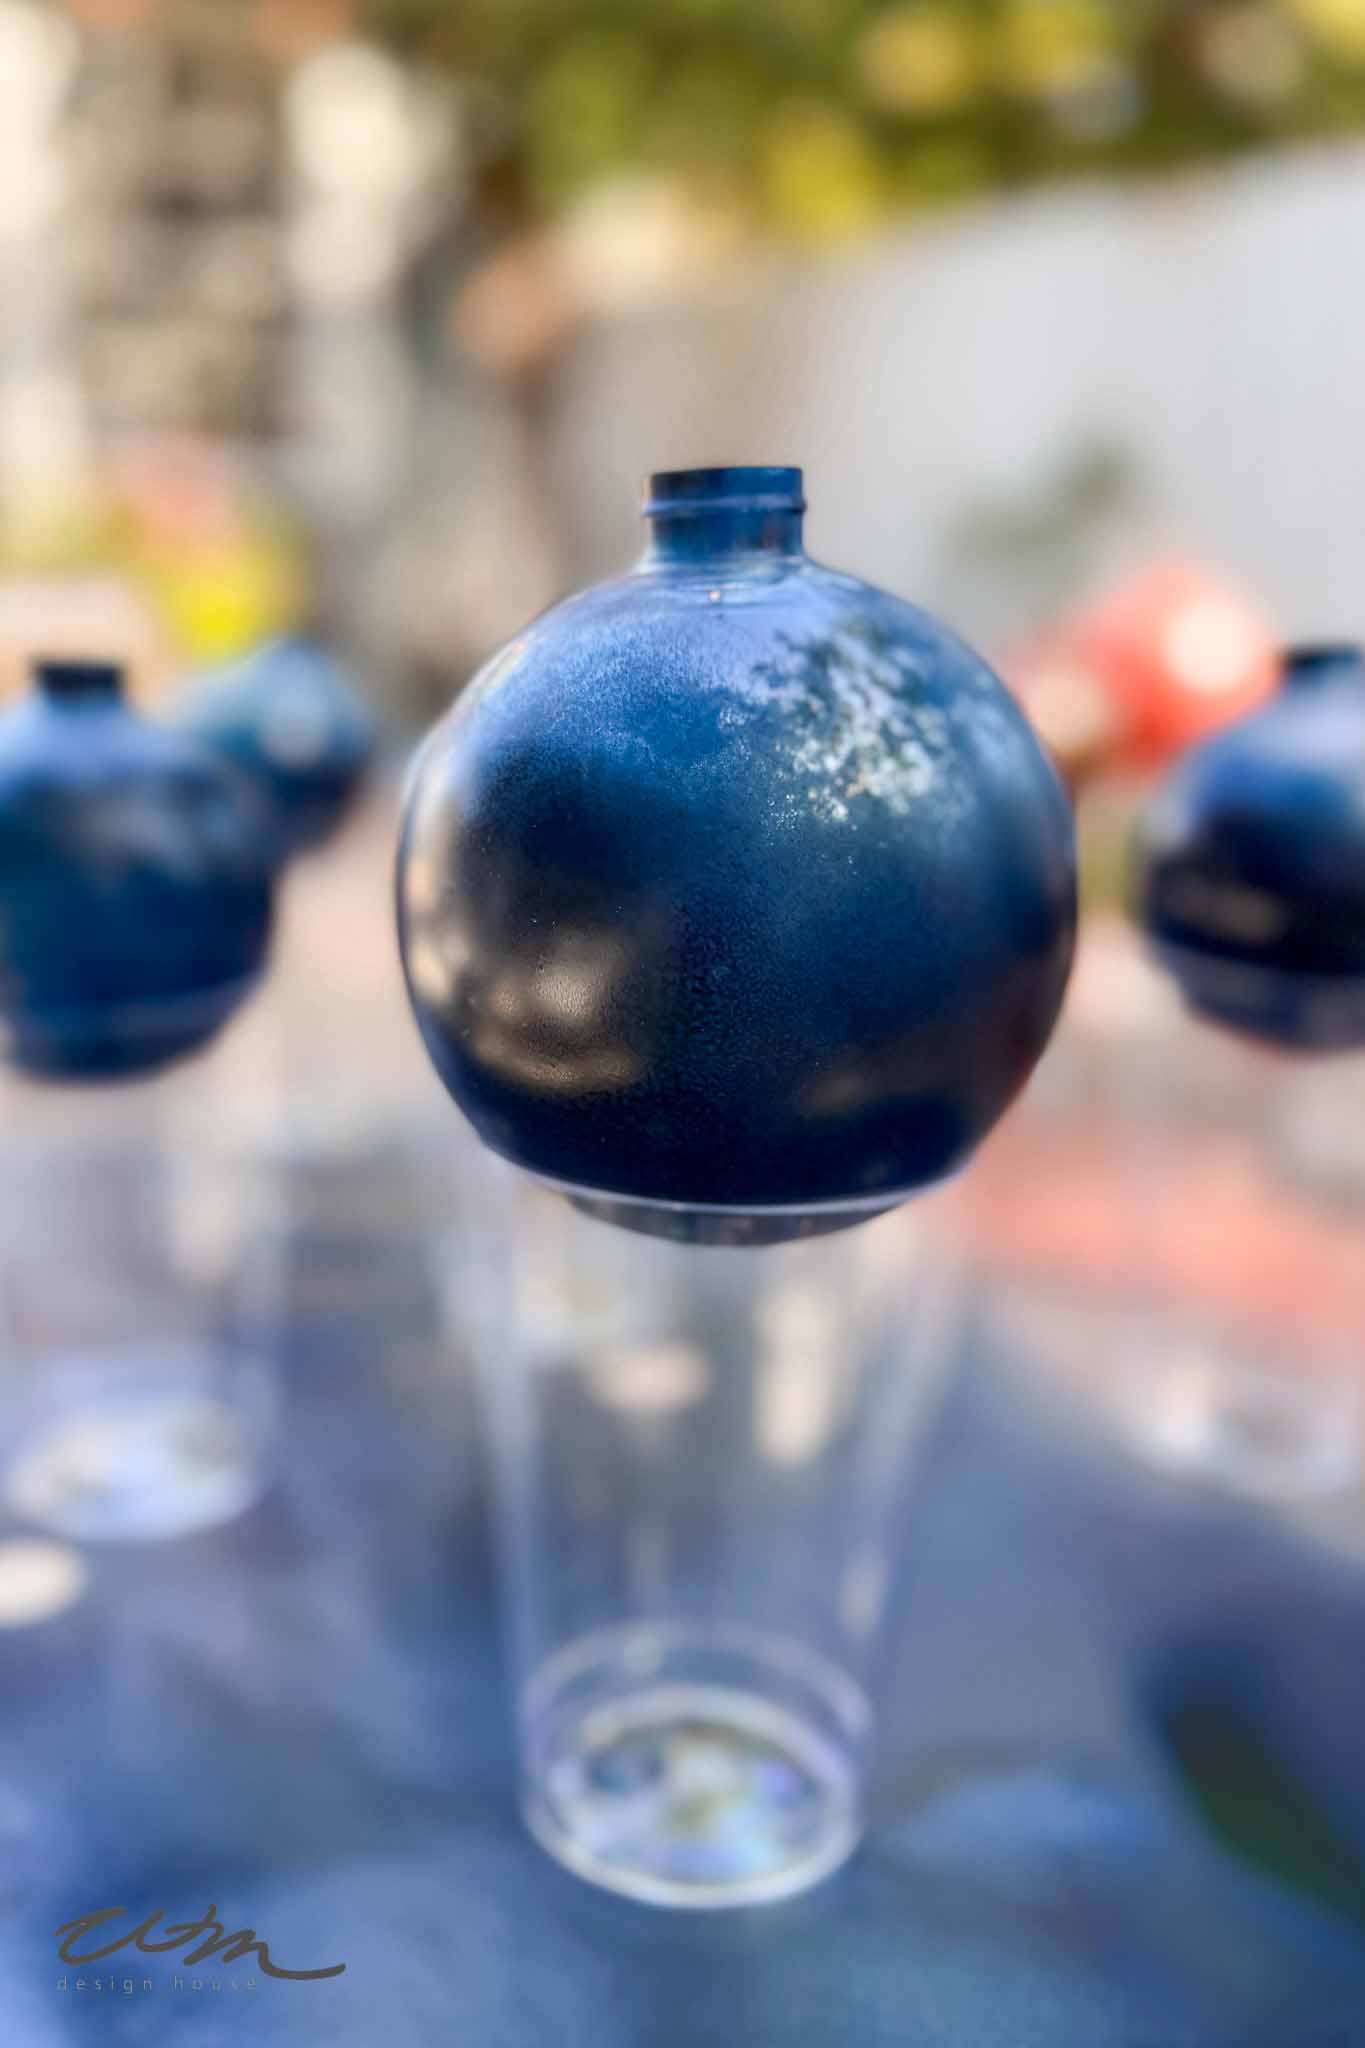
Tip from wendy’s craft room:
Here’s an alternative way to spray paint your ornaments before adding the dowel. Start by spraying them facedown, then place them on plastic cups to hold them steady while you paint the other side. This keeps your hands clean and gives you a smooth, even finish all around.
Step 2: Attach the Dowel and Apply Adhesive
Once dry, attach the skewer or dowel using masking tape.
Next, apply adhesive. You can use either Mod Podge or spray adhesive, depending on what you have on hand.
If you’re using Mod Podge, apply a thin, even coat with a soft or foam brush. For spray adhesive, hold the can about 6–8 inches away and mist the ornament lightly for full coverage.
Make sure the surface is sticky but not dripping—this helps the flocking powder adhere evenly and gives that beautiful, velvety finish.


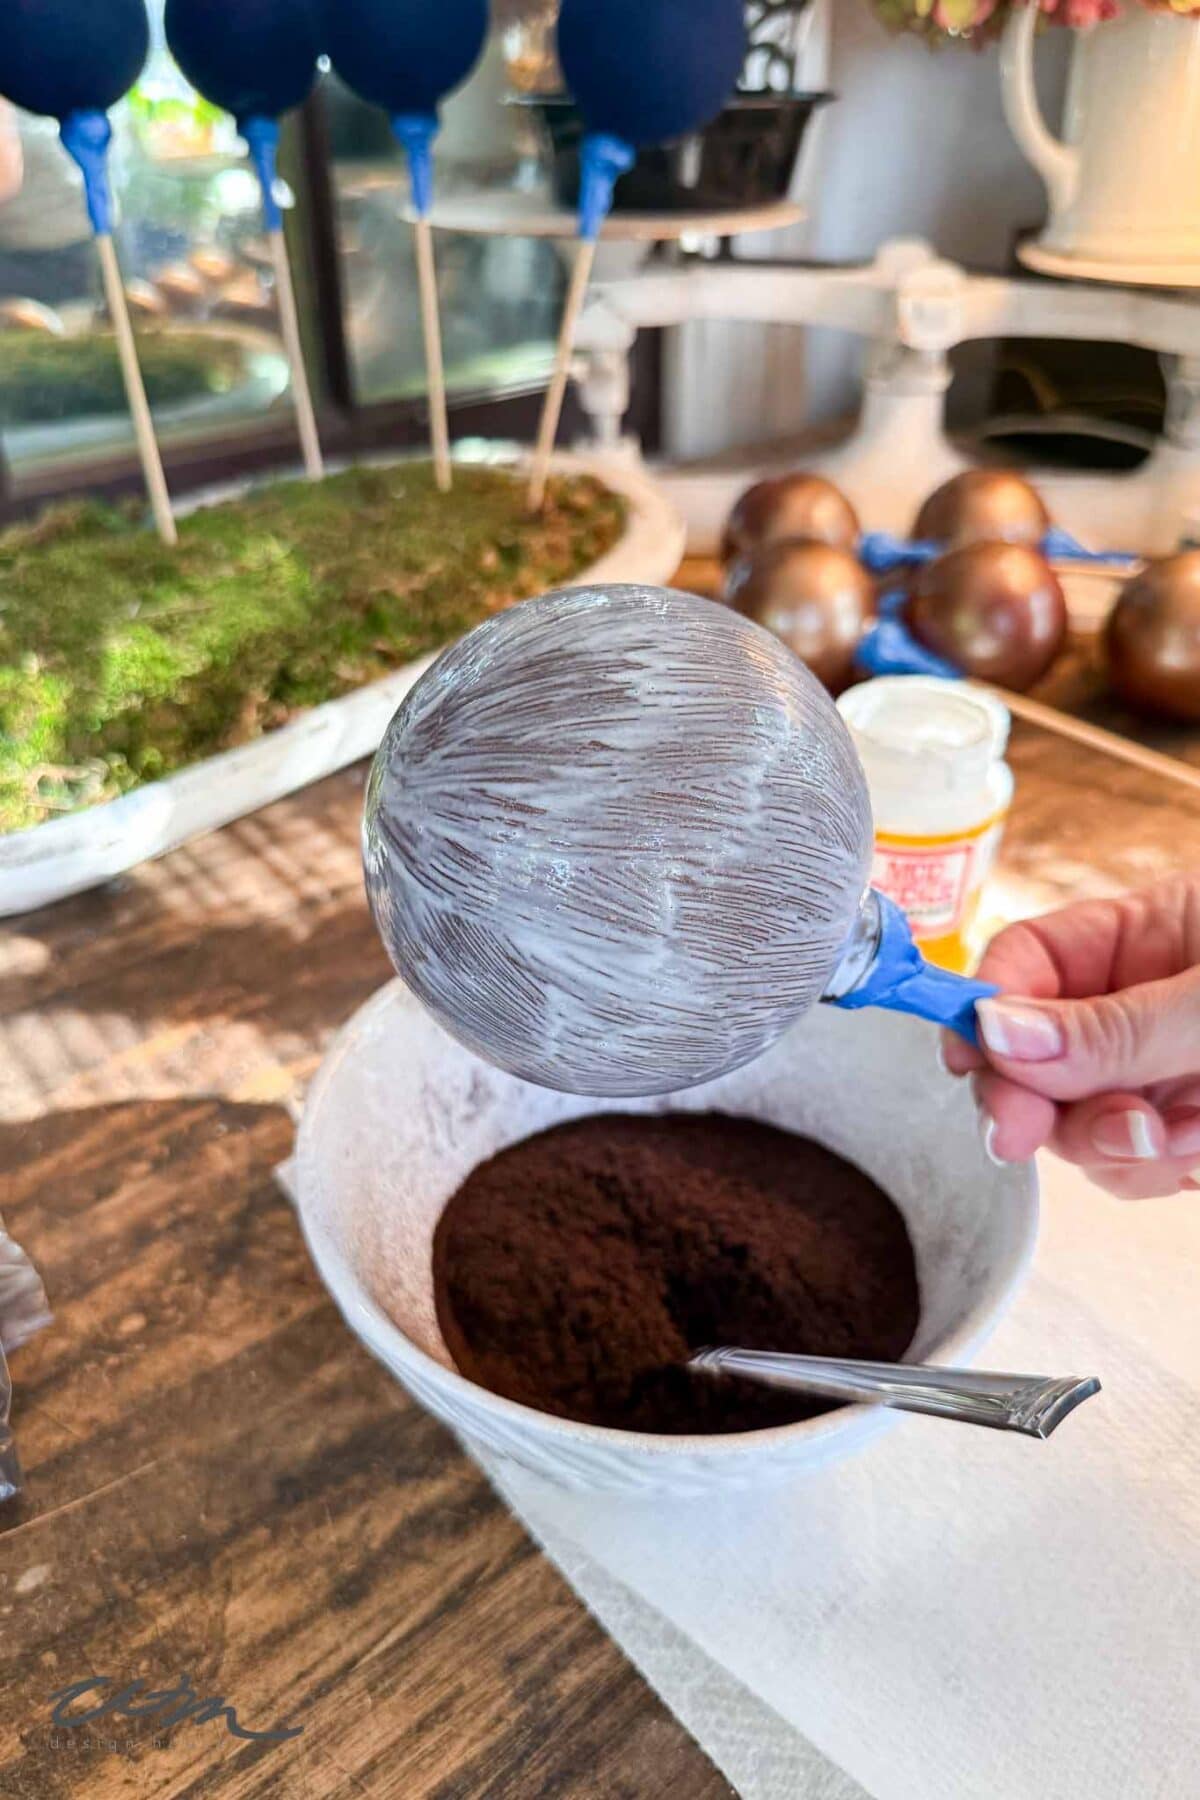
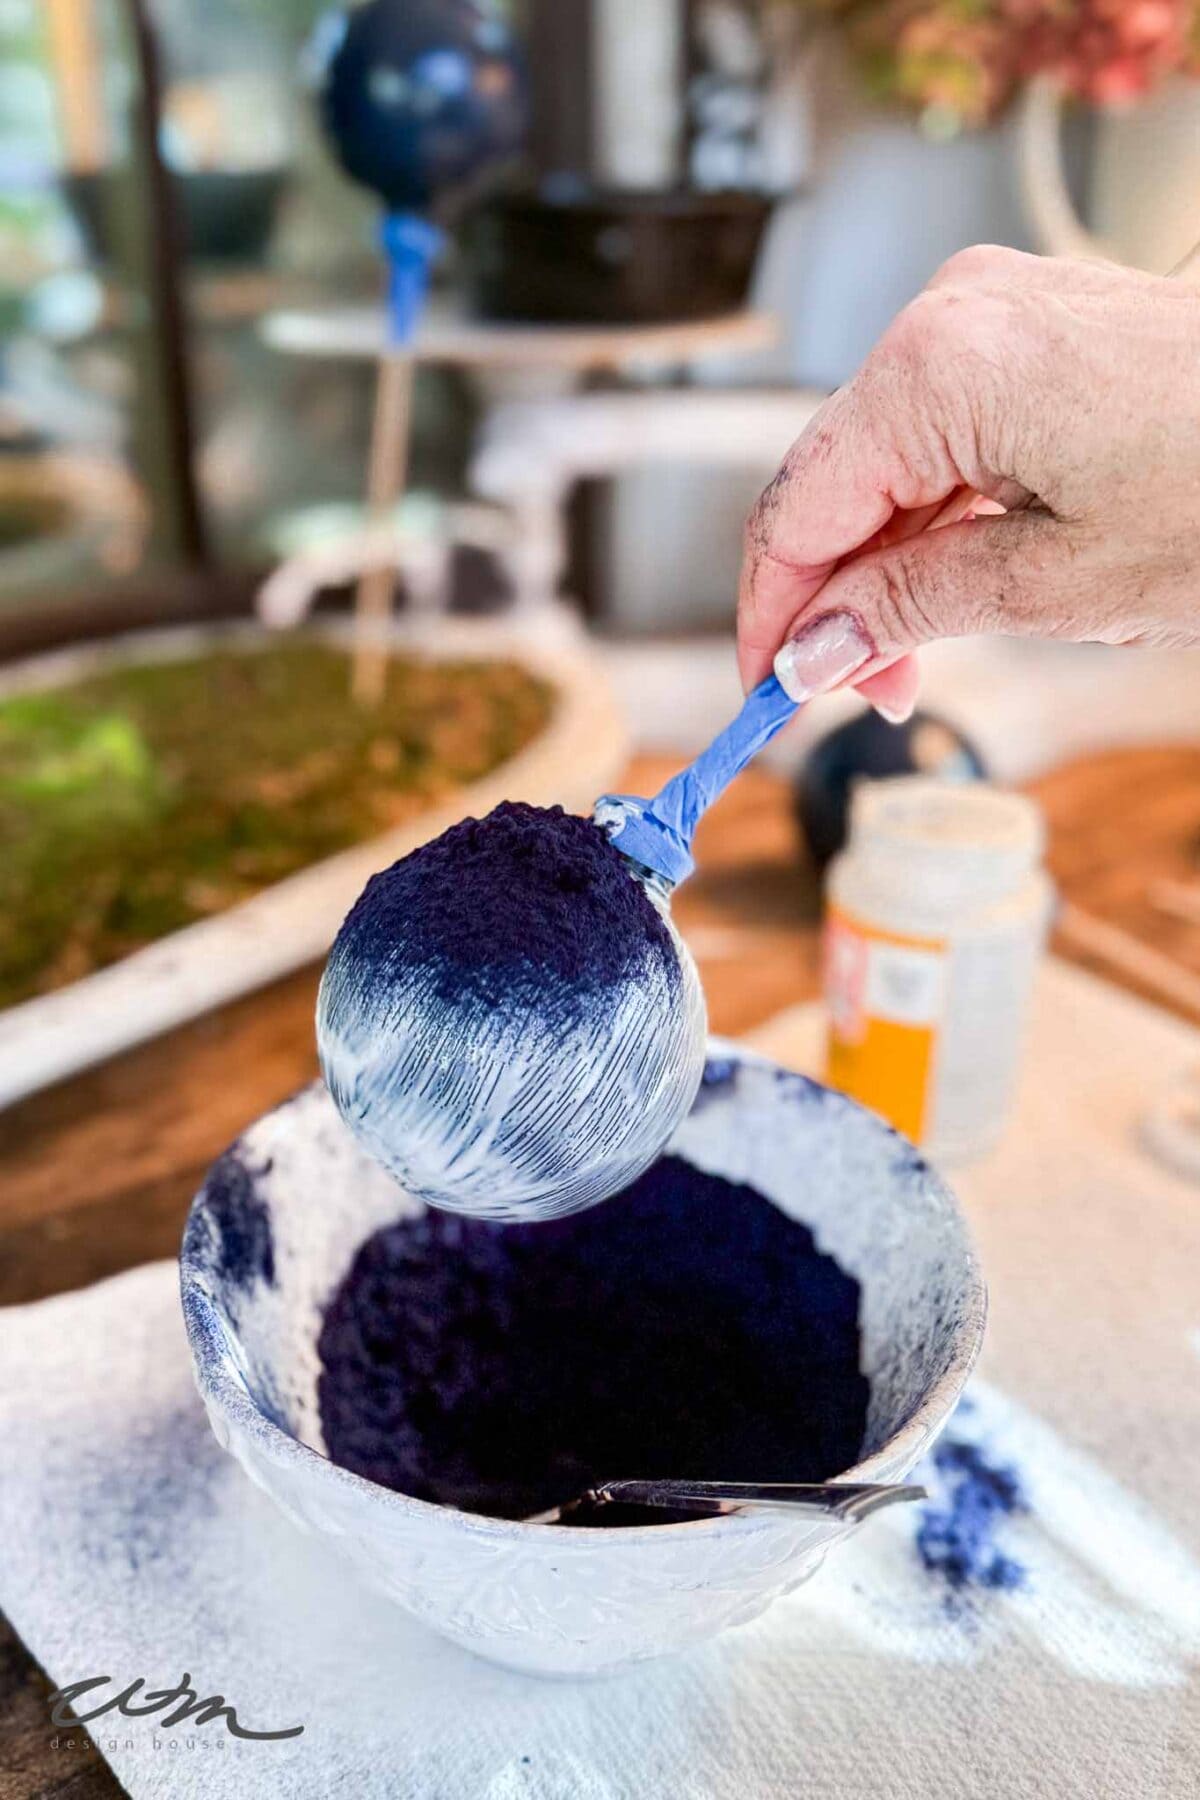
Step 3: Add the Flocking Powder to Velvet Ornaments
While the adhesive is still tacky, sprinkle flocking powder generously over the ornament. Place it over a shallow bowl or paper plate to catch the excess and reuse it later.
Use your fingers or the back of a spoon to gently press the flocking into the glue as you rotate the ornament. Continue coating until it looks fully covered and fluffy. Don’t worry if it looks uneven at first—the texture will even out as it dries.
Tip from wendy’s craft room:
I like to pour the excess flocking powder back into the container and give the ornament one final dusting while it’s still tacky for the fullest coverage.


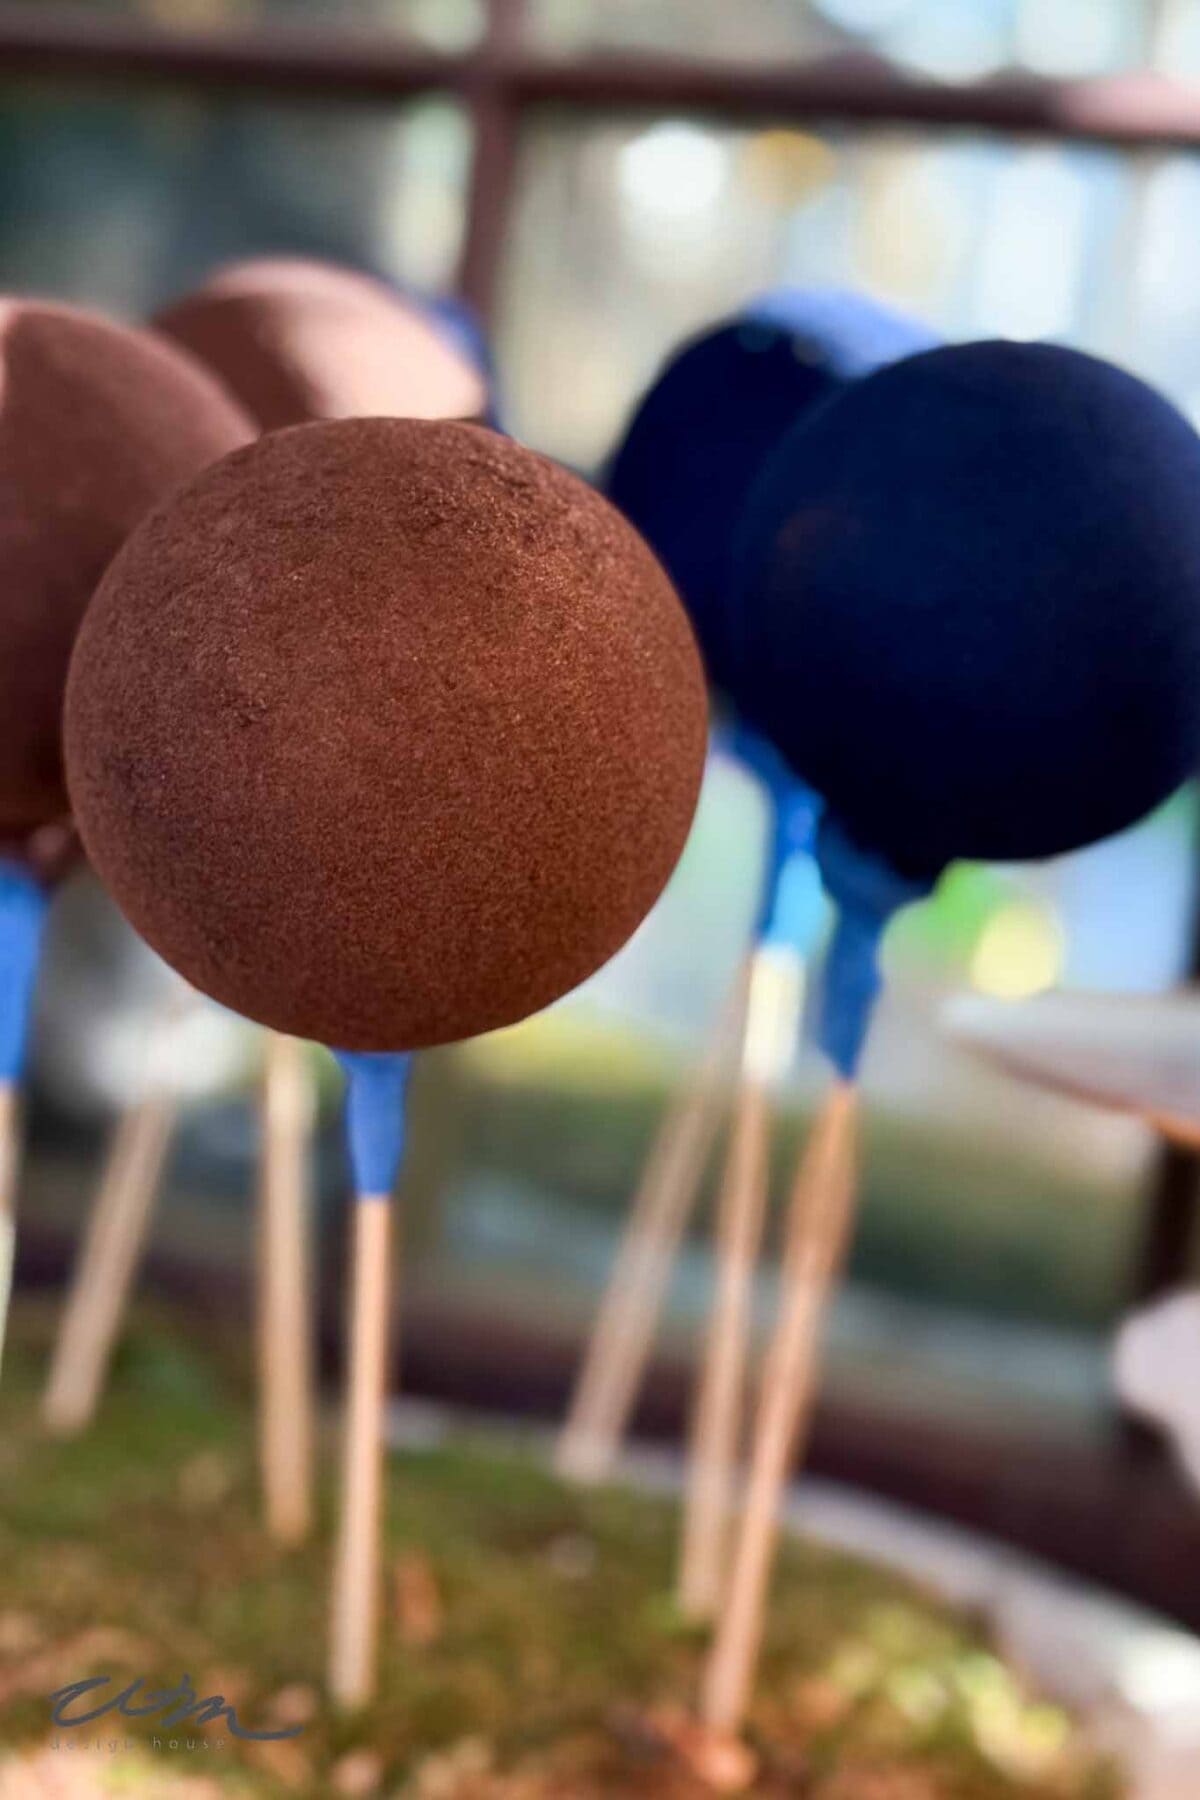
Step 4: Let Dry and Remove Excess
Set the ornaments aside to dry completely for several hours or overnight. Once dry, gently tap or shake each one to remove loose flocking.
If needed, use a soft paintbrush to lightly dust off extra powder—this helps reveal that perfectly smooth, velvet-like surface underneath.
Replace the metal cap at the top and add a velvet ribbon for hanging.

Replace the metal cap at the top, making sure it fits snugly over the flocked surface and add a velvet ribbon to hang the ornaments.
Step 5: Embellishing Your Velvet Ornaments
Now comes the fun part—adding those beautiful details that make your ornaments truly one of a kind.
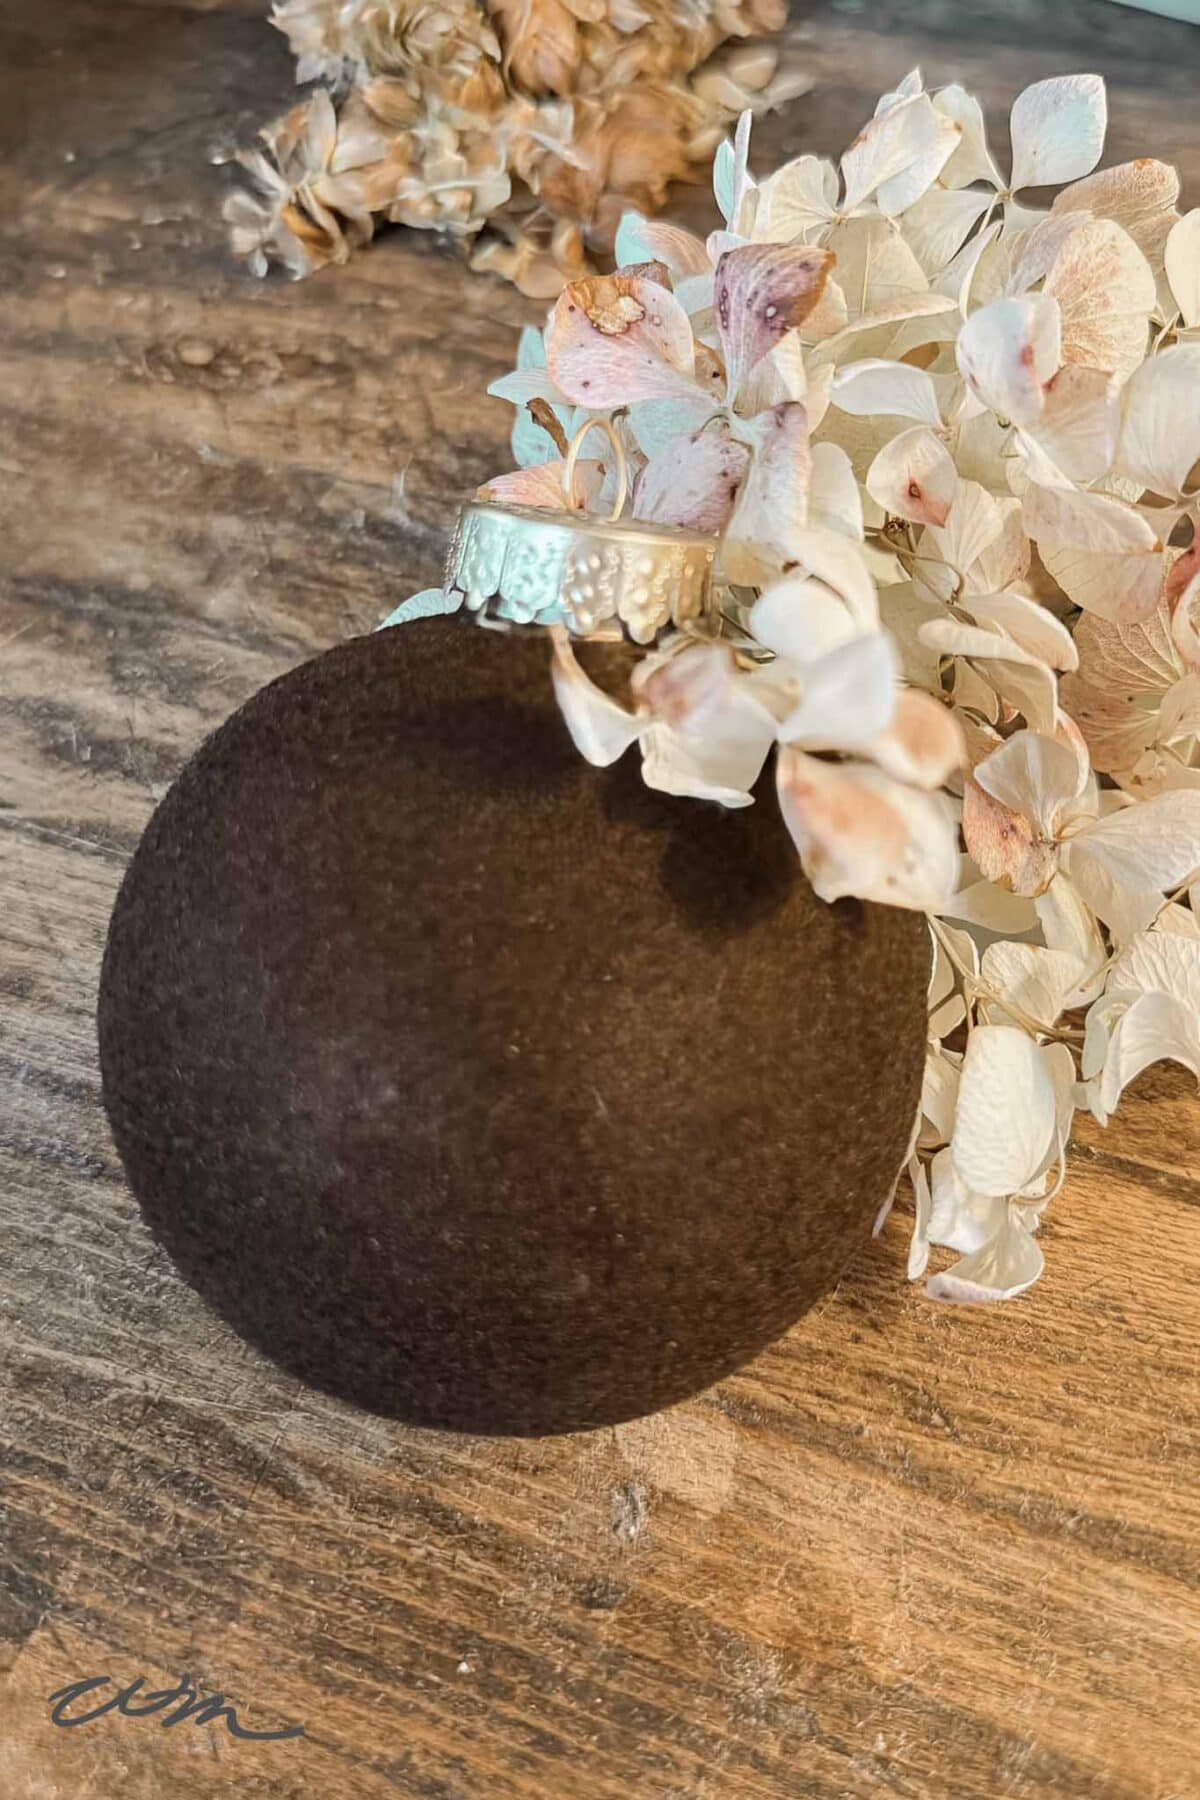
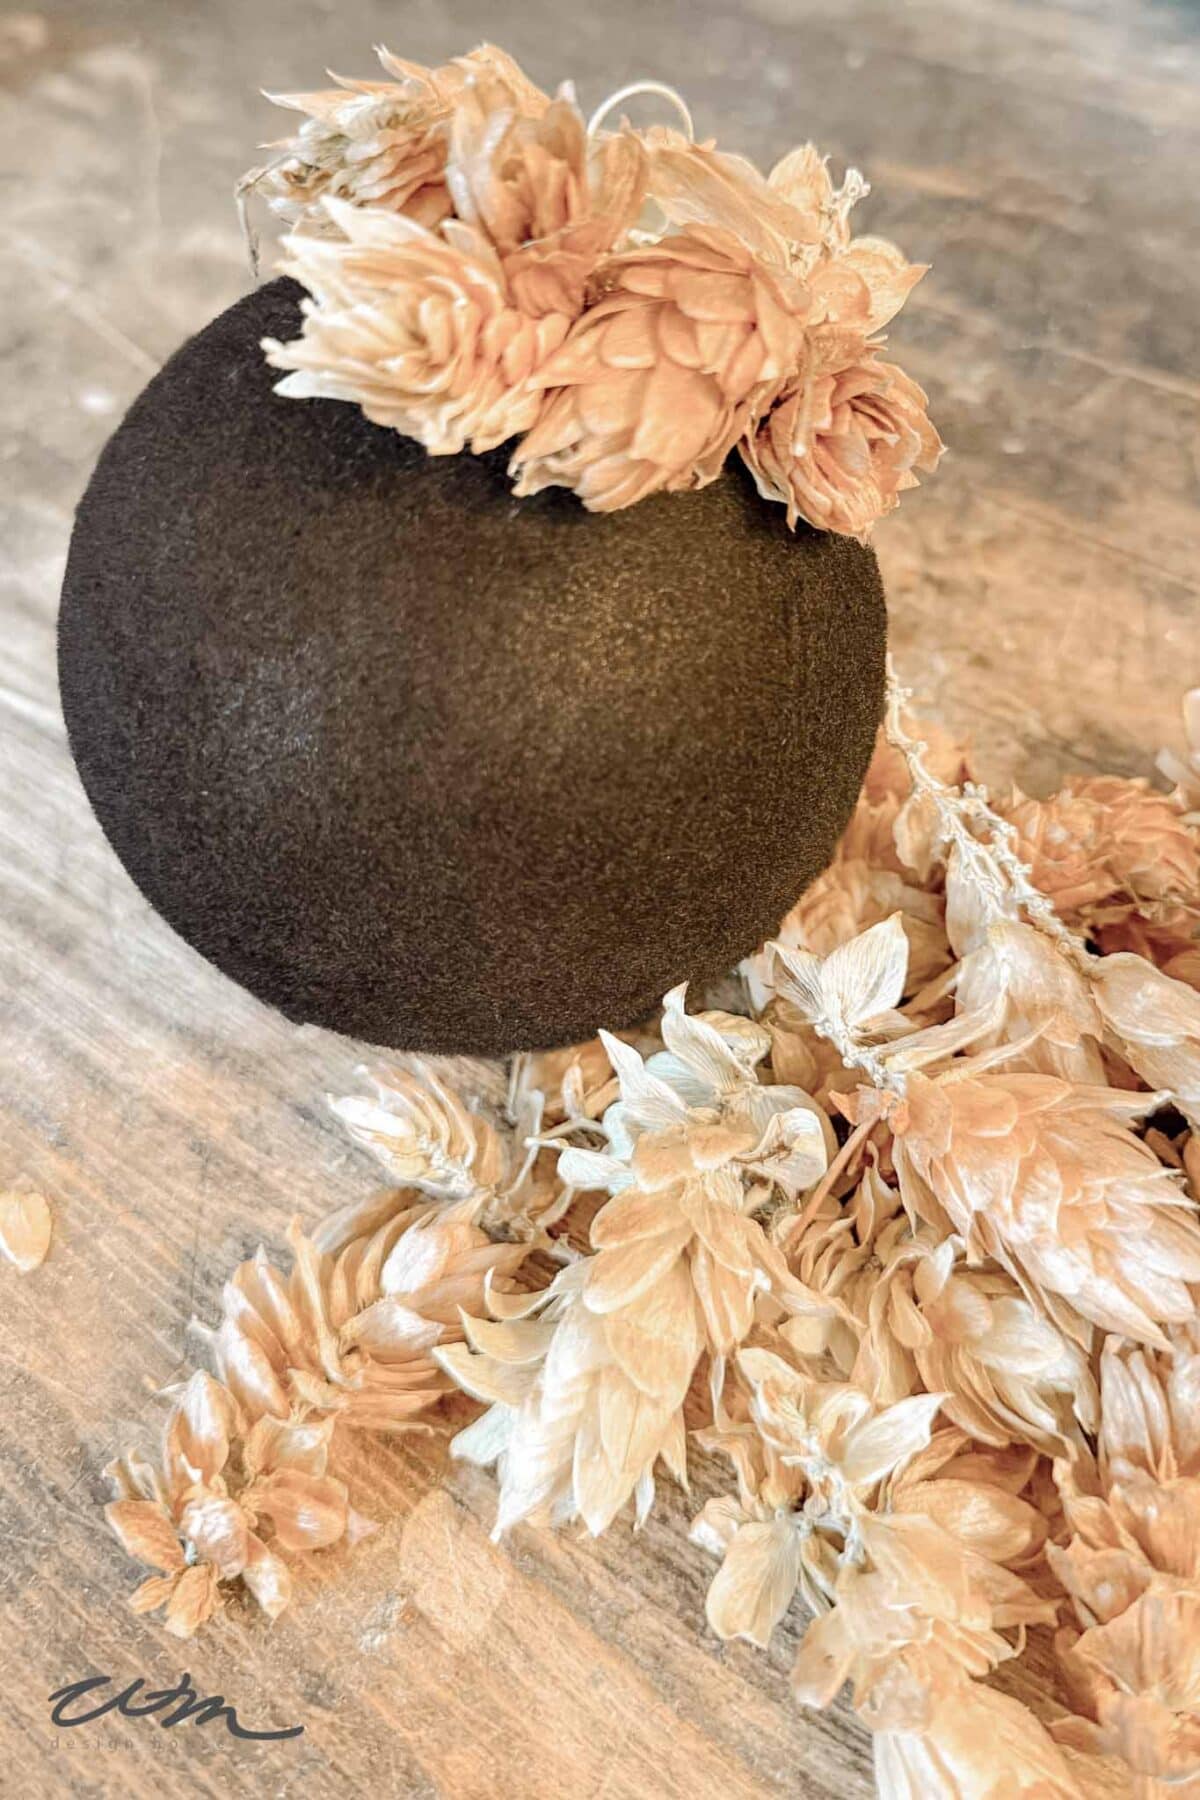
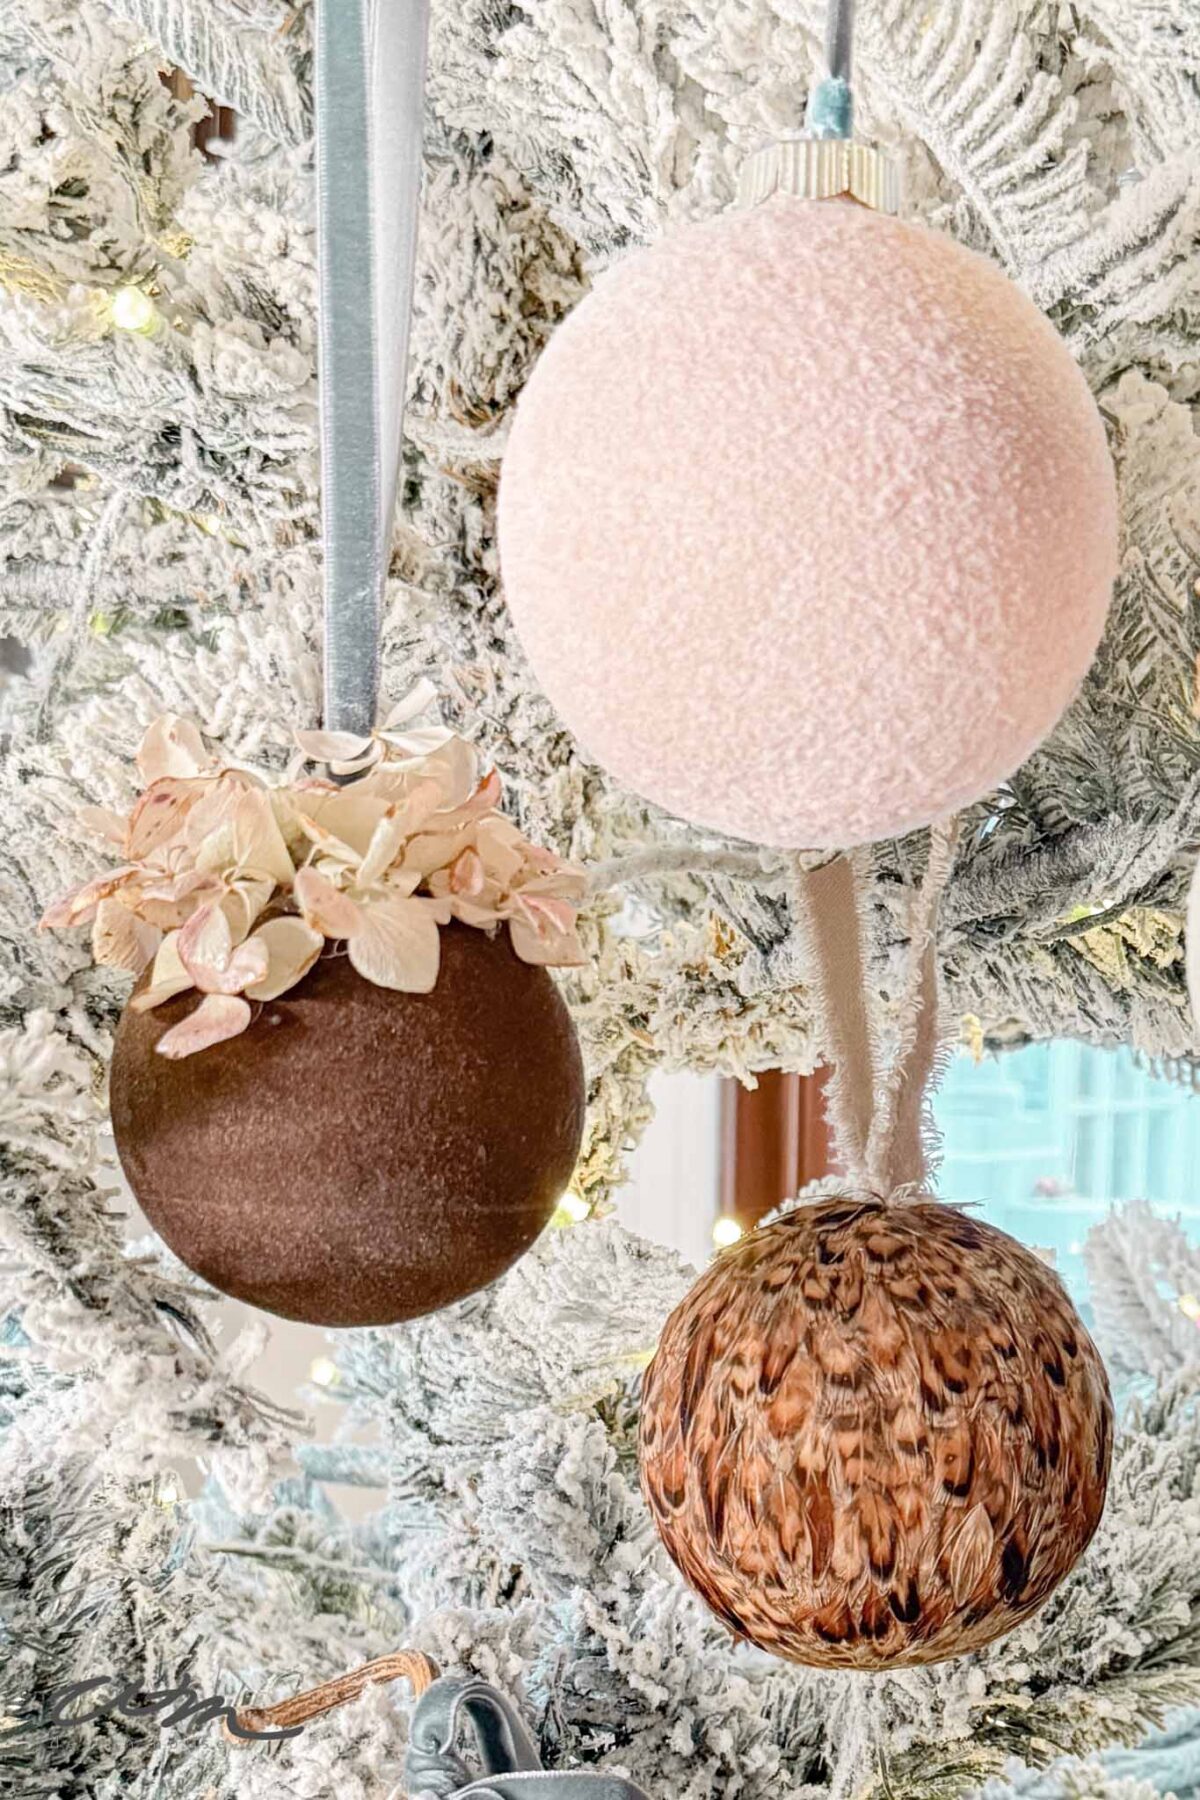
1. Add Dried Hydrangeas or Hops
For a soft, romantic touch, glue small clusters of dried hydrangea petals or hops around the top of each ornament. Their faded hues and delicate texture pair perfectly with the rich, velvety finish.
Choose colors that complement your palette—blush, cream, or muted green tones look stunning against white, taupe, or moss-colored flocking.

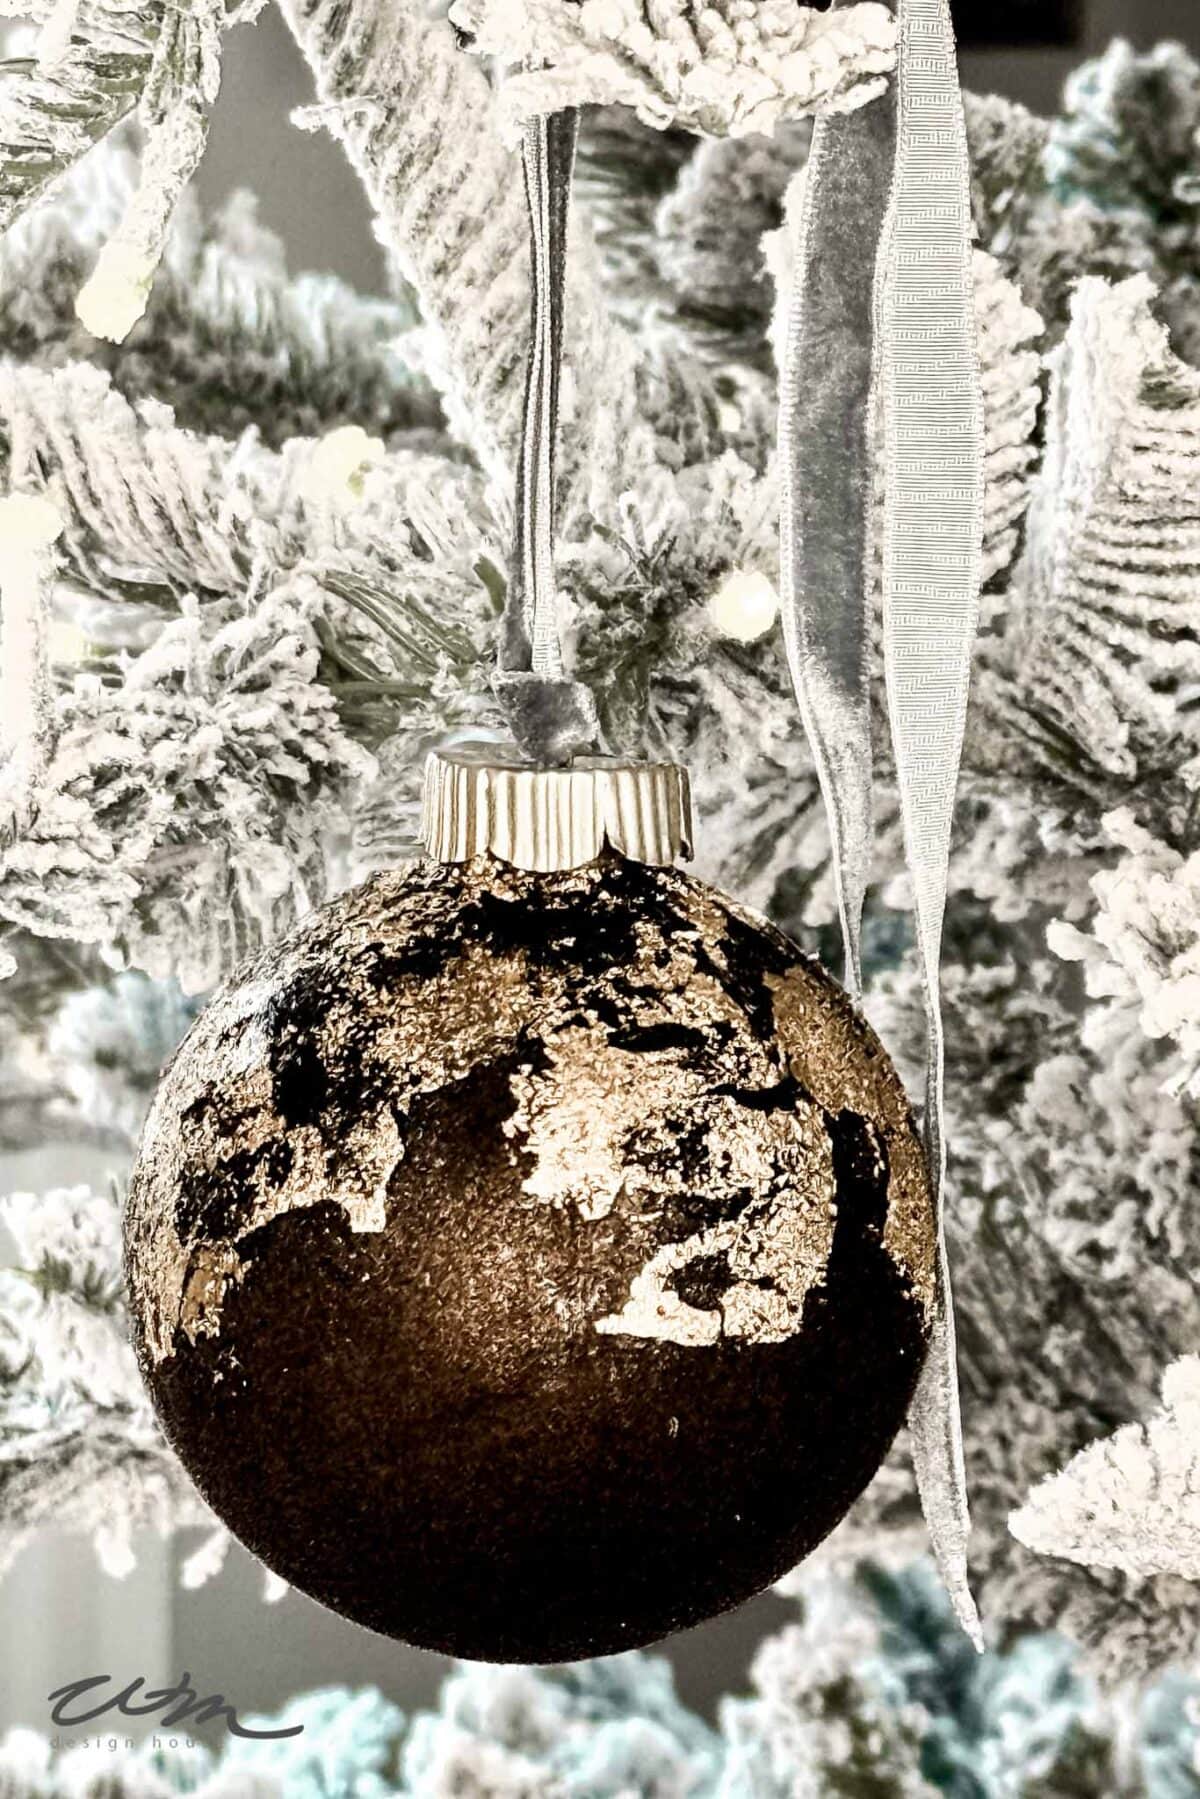
2. Add a Touch of Gold Foil
Gold leaf adds just the right amount of shimmer to your DIY velvet ornaments.
Brush on gilding adhesive where you’d like the metallic accent—around the base, in a stripe, or in random organic patches.
Let it sit for 10–15 minutes until tacky, then gently press small sheets of gold or copper leaf onto the surface. Use a soft brush to remove the excess, revealing a subtle, distressed shine.


Optional: Lightly mist with a clear sealer for added durability.

Styling Ideas with your DIY Velvet Ornaments
Now you’re ready to style your ornaments!
- Decorate your tree with a mix of velvet, gold, faux mercury glass and feathered ornaments for a layered, designer look.
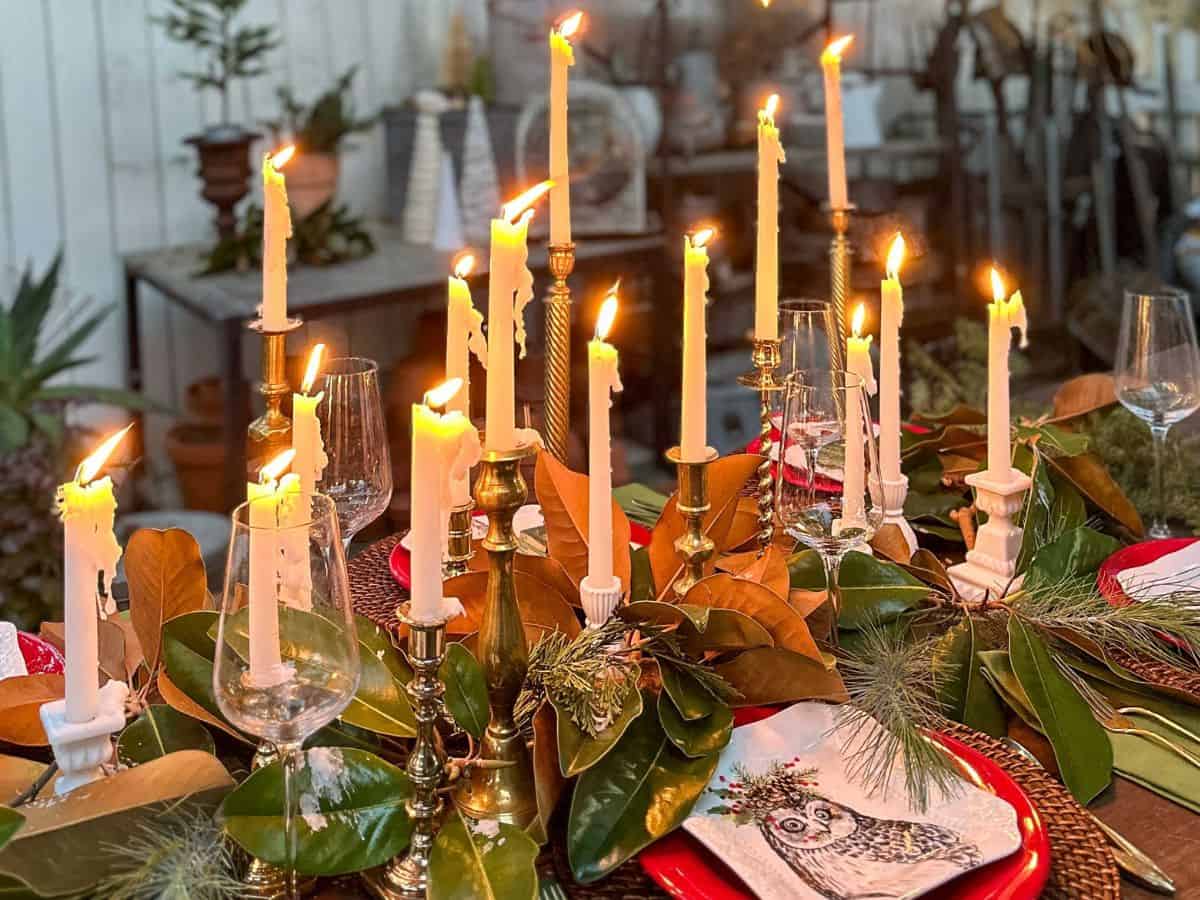
- Combine your DIY velvet ornaments with natural elements—pinecones, dried flowers, and greenery—for a soft, organic holiday style.

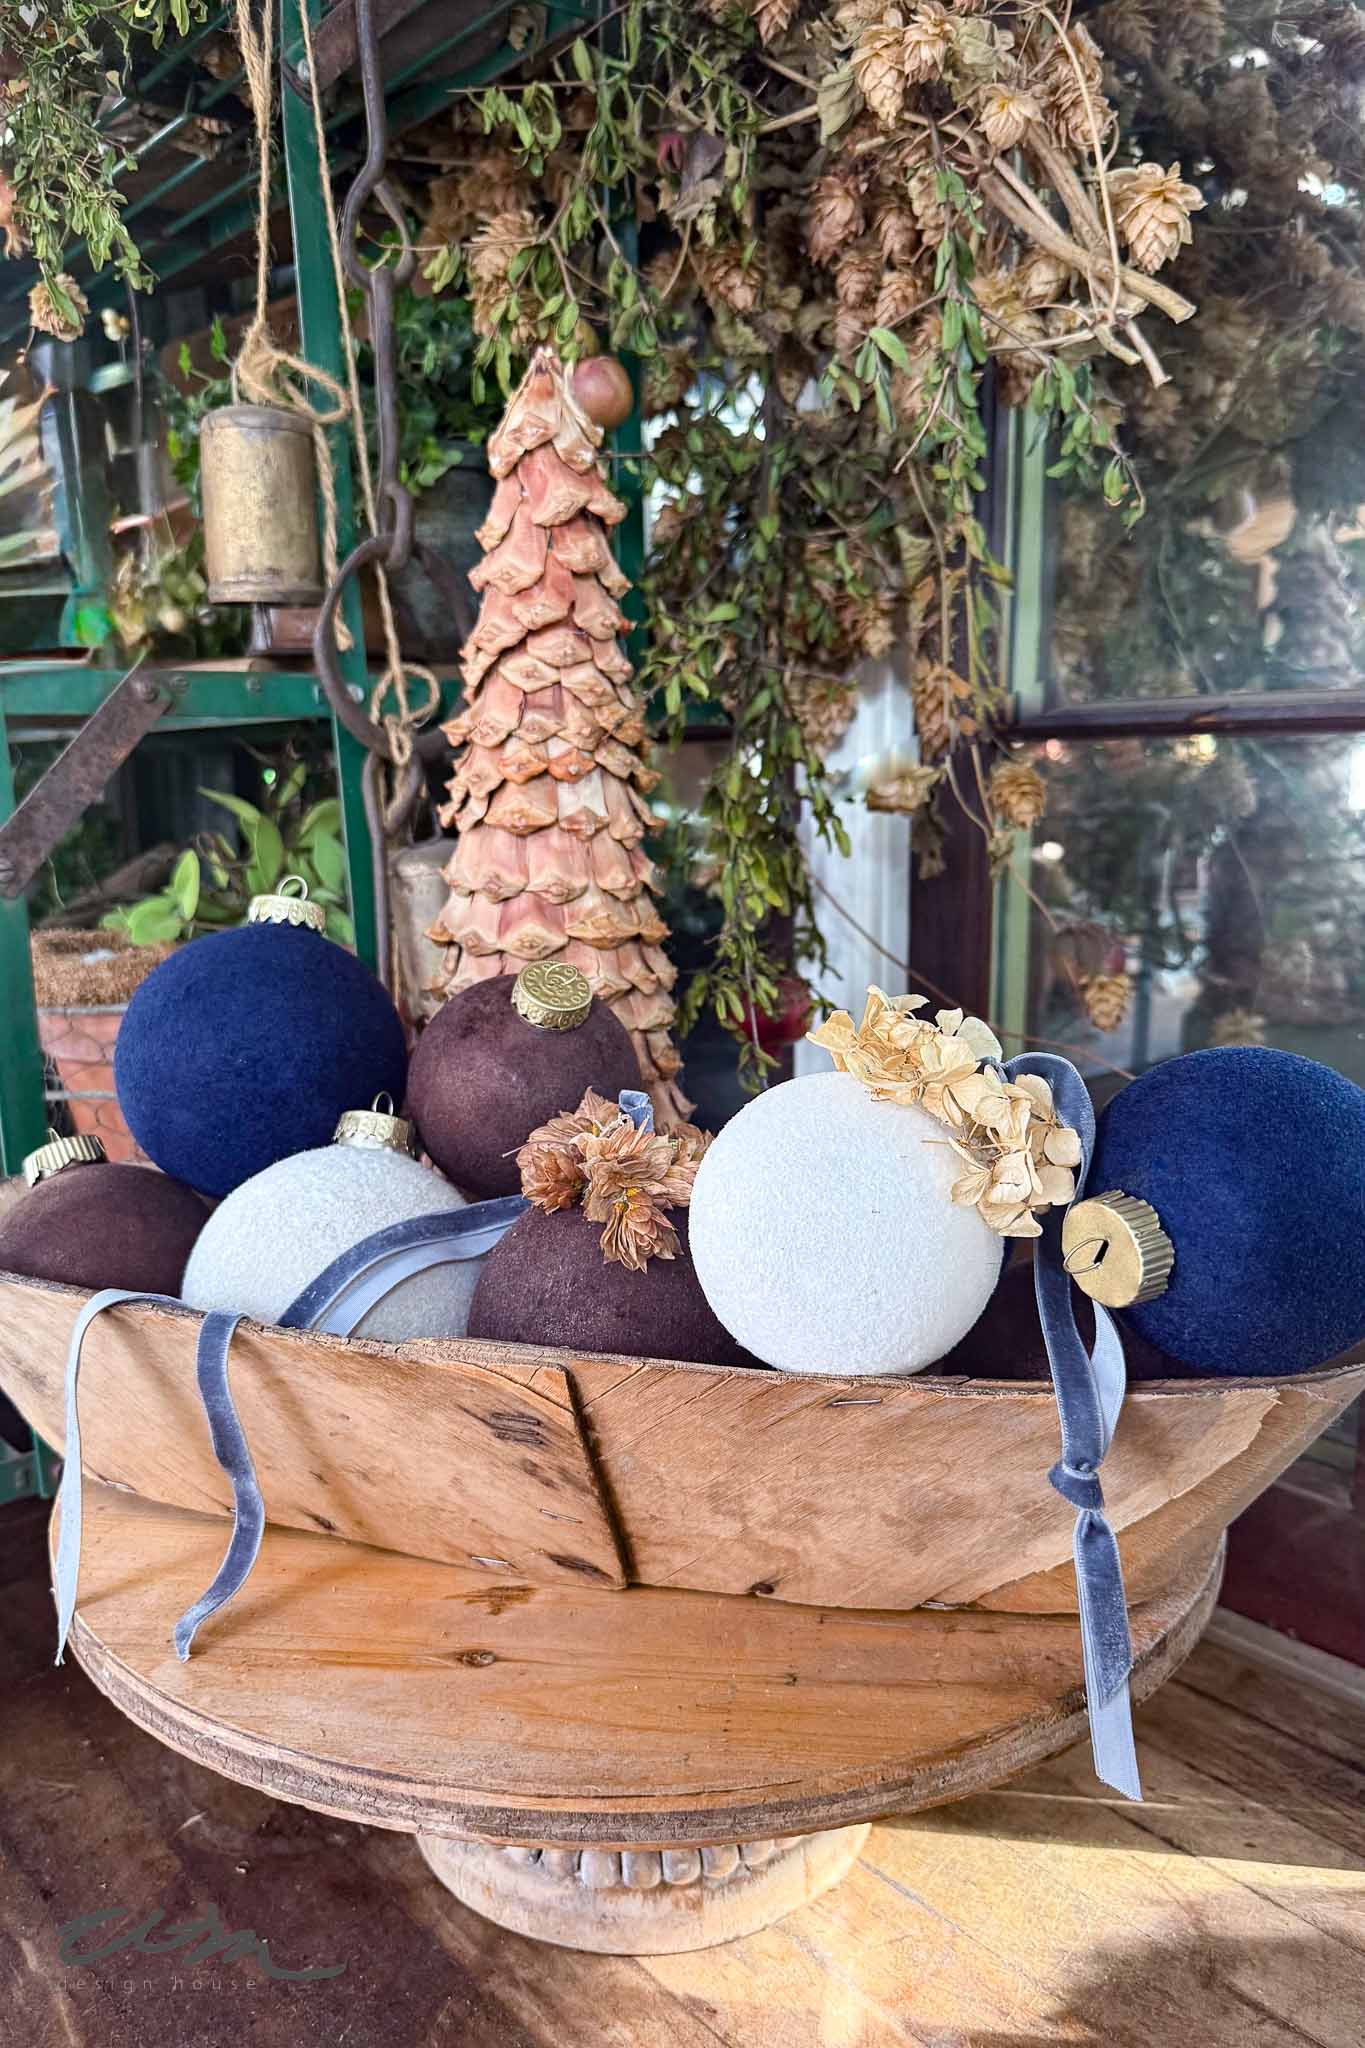
Hang them from garlands, wreaths, or even your mantel for a cohesive and elegant display.
Wrapping Up
DIY velvet ornaments are the perfect blend of simple, elegant, and luxurious. Whether you use the paint and baking soda method for a warm, vintage finish or the flocking powder technique for a soft, plush texture, each ornament brings timeless charm to your holiday décor.
Add delicate details—like dried hydrangeas or gold foil—and you’ll have handmade pieces that look like they came straight from a boutique.
Stay tuned—this is just the beginning of my 12 Days of Ornaments series! I can’t wait to share even more creative ways to craft, decorate, and personalize your Christmas tree this season.

Printable Instructions Card for a DIY Velvet Ornaments

How to Make a DIY Velvet Ornaments
Equipment
- 1 Hot glue gun
- 1 Pair of clippers
Materials
- Clear plastic or glass ornaments
- Acrylic paint
- Baking soda
- Wood skewers
- Masking tape
- Chip paint brushes
- Flocking powder in colors of your choice
- Mod podge
- Gold spray paint
- 3/8 ” velvet ribbon
- 1 bunch dried flowers or hops
Instructions
DIY Velvet Ornaments — Method 1: Baking Soda + Cinnamon
- Remove ornament cap and insert skewer or pencil; secure with masking tape.
- Spray paint the ornament in your chosen color.
- While the paint is still wet, sprinkle lightly with cinnamon, then baking soda.
- Rotate to cover evenly and let dry 2–4 hours.
- Gently brush off excess powder for a smooth, velvety finish.
- Optional: Seal lightly with a matte clear sealer.
DIY Velvet Ornaments — Method 2: Flocking Powder
- Spray paint ornaments in a color similar to your flocking; let dry completely.
- Attach a skewer or dowel to each ornament using masking tape.
- Apply Mod Podge or spray adhesive evenly over the surface.
- While tacky, sprinkle flocking powder generously over the ornament.
- Gently press the flocking in and let dry overnight.
- Tap or brush off excess powder for a soft, velvet-like texture.
- Replace the ornament cap and tie with velvet ribbon.


Did you make this craft?
We would love to see what you have created, so mention us @wmdesignhouse or tag us using #wmdesignhouse so we can see your creations!
More about me!

Hello, I’m Wendy – a dedicated homemaker with a passion for decorating, gardening, cooking, and crafting. I find joy in harmonizing beautiful elements to fashion a space that is both comfortable and inspiring. Let me help you create a beautiful home, one project at a time.


These ornaments are beautiful! Thank you for the easy to follow instructions. I noticed the flocking powder is available in 4 oz. packages. Can you please tell me approximately how many ornaments a package will make? I am looking forward to the other projects in this ornament series!
Hi Barb. these ornaments do not take much flocking at all. I bought way too much, I think you could get several out of the 4 oz. bottle. I will say that the darker colors worked better and I decided to add a second layer to the lighter colored ones. I hope that helps.
Happy crafting!
I love these ornaments! I noticed the flocking powder comes in a 4 oz. package. Can you please tell me approximately how many ornaments you made from one pkg.? I’m looking forward to your future diy ornaments in this series! Thank you!
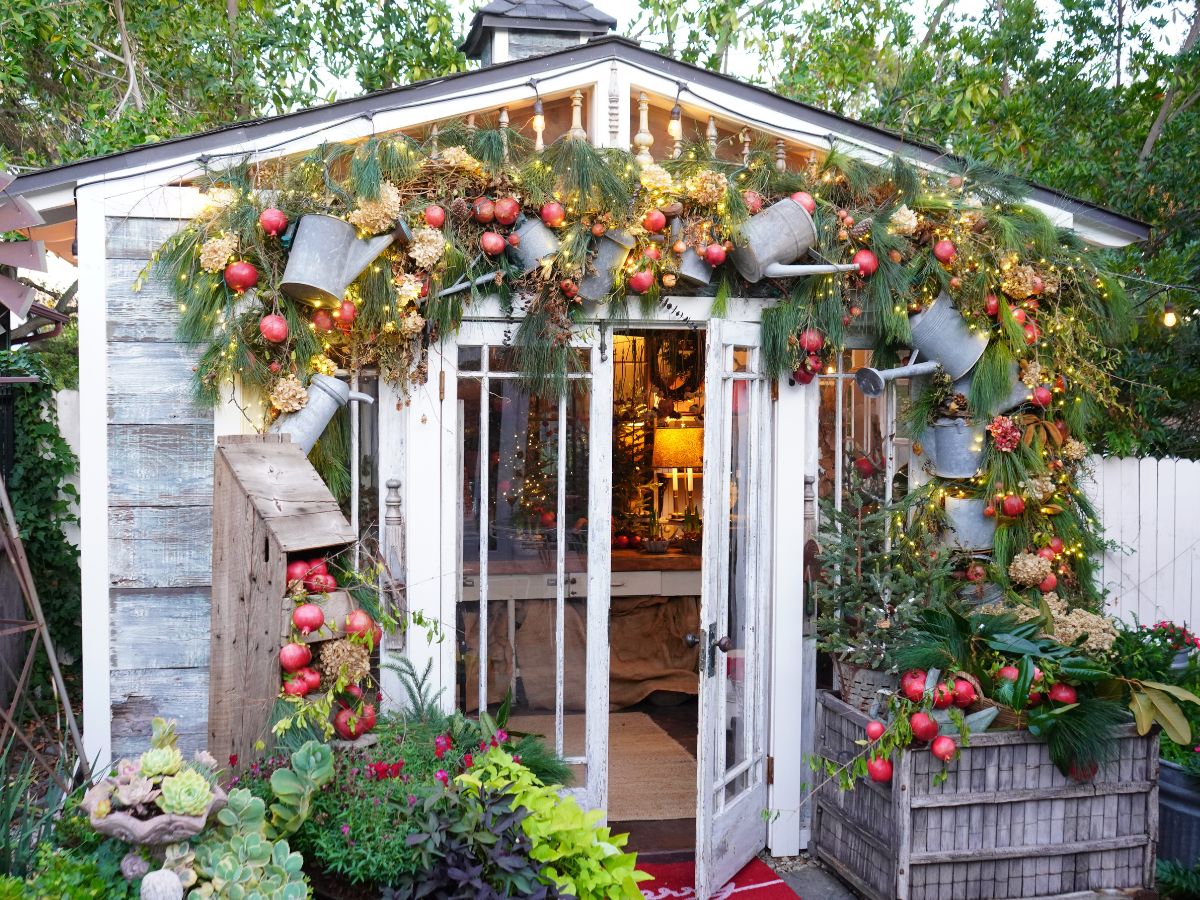
I’m definitely trying this for my Christmas tree in the she shed! Thanks for sharing!
Thanks Susan, they are really fun and easy to make!