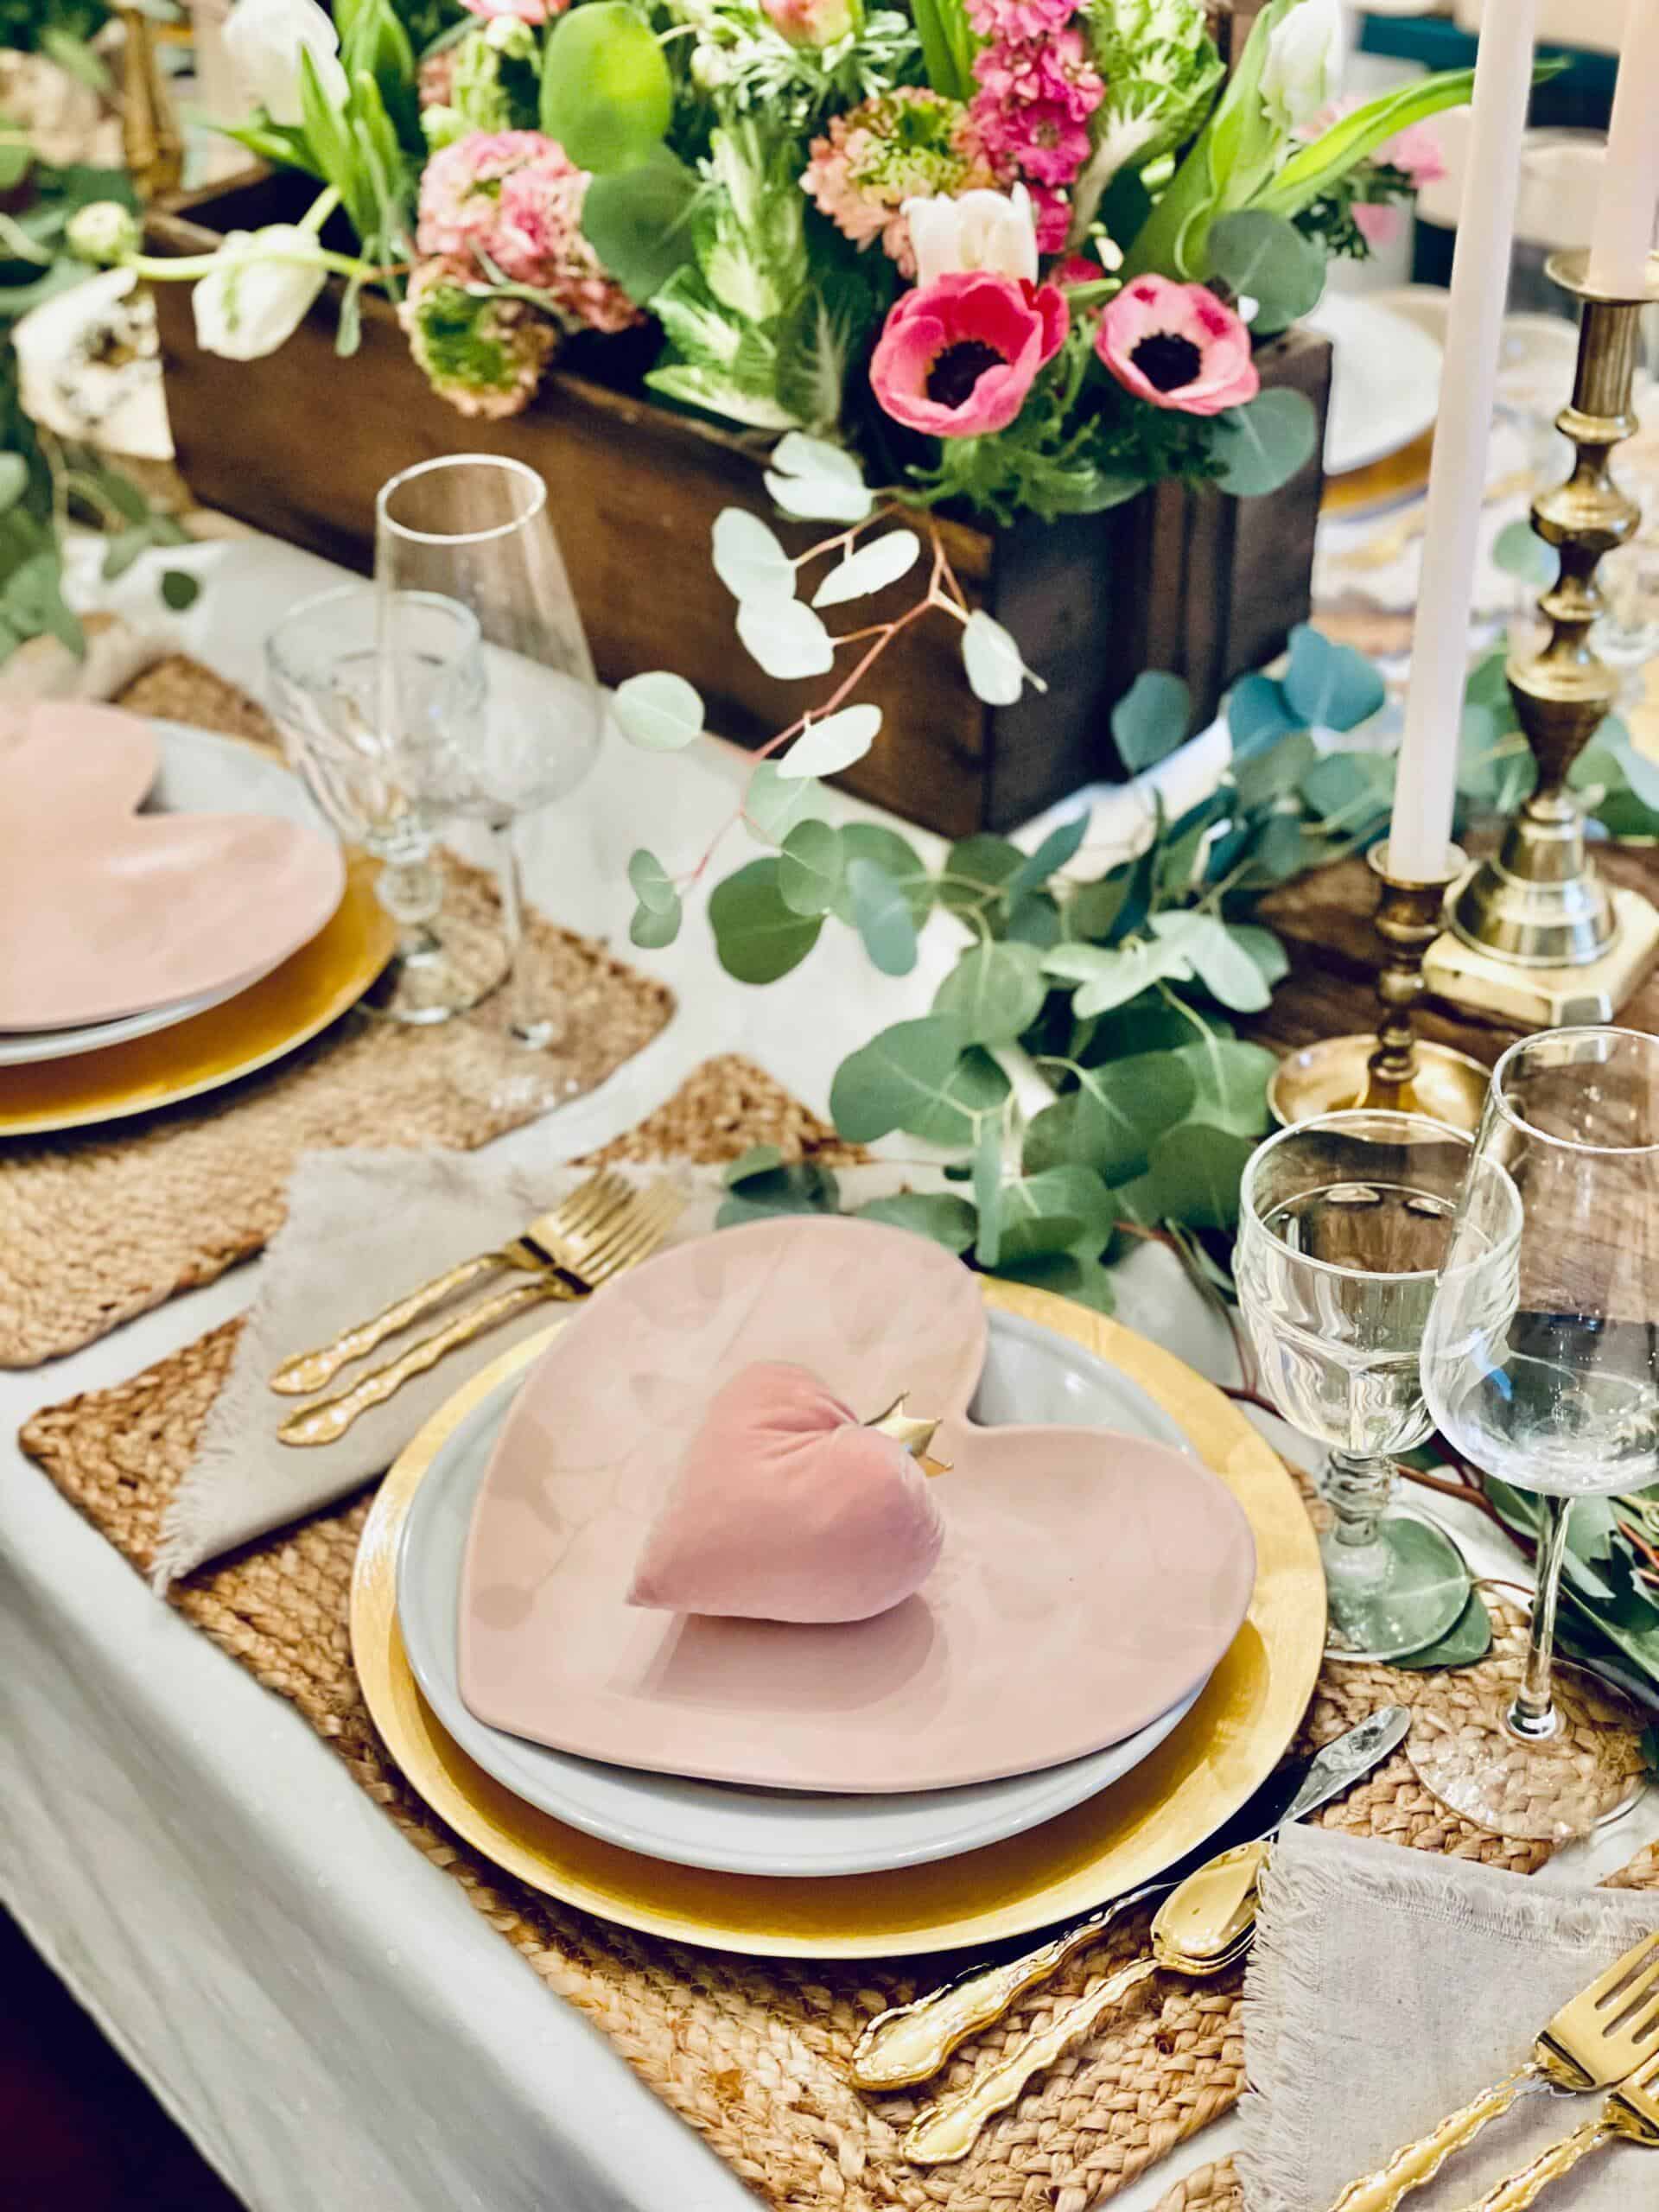
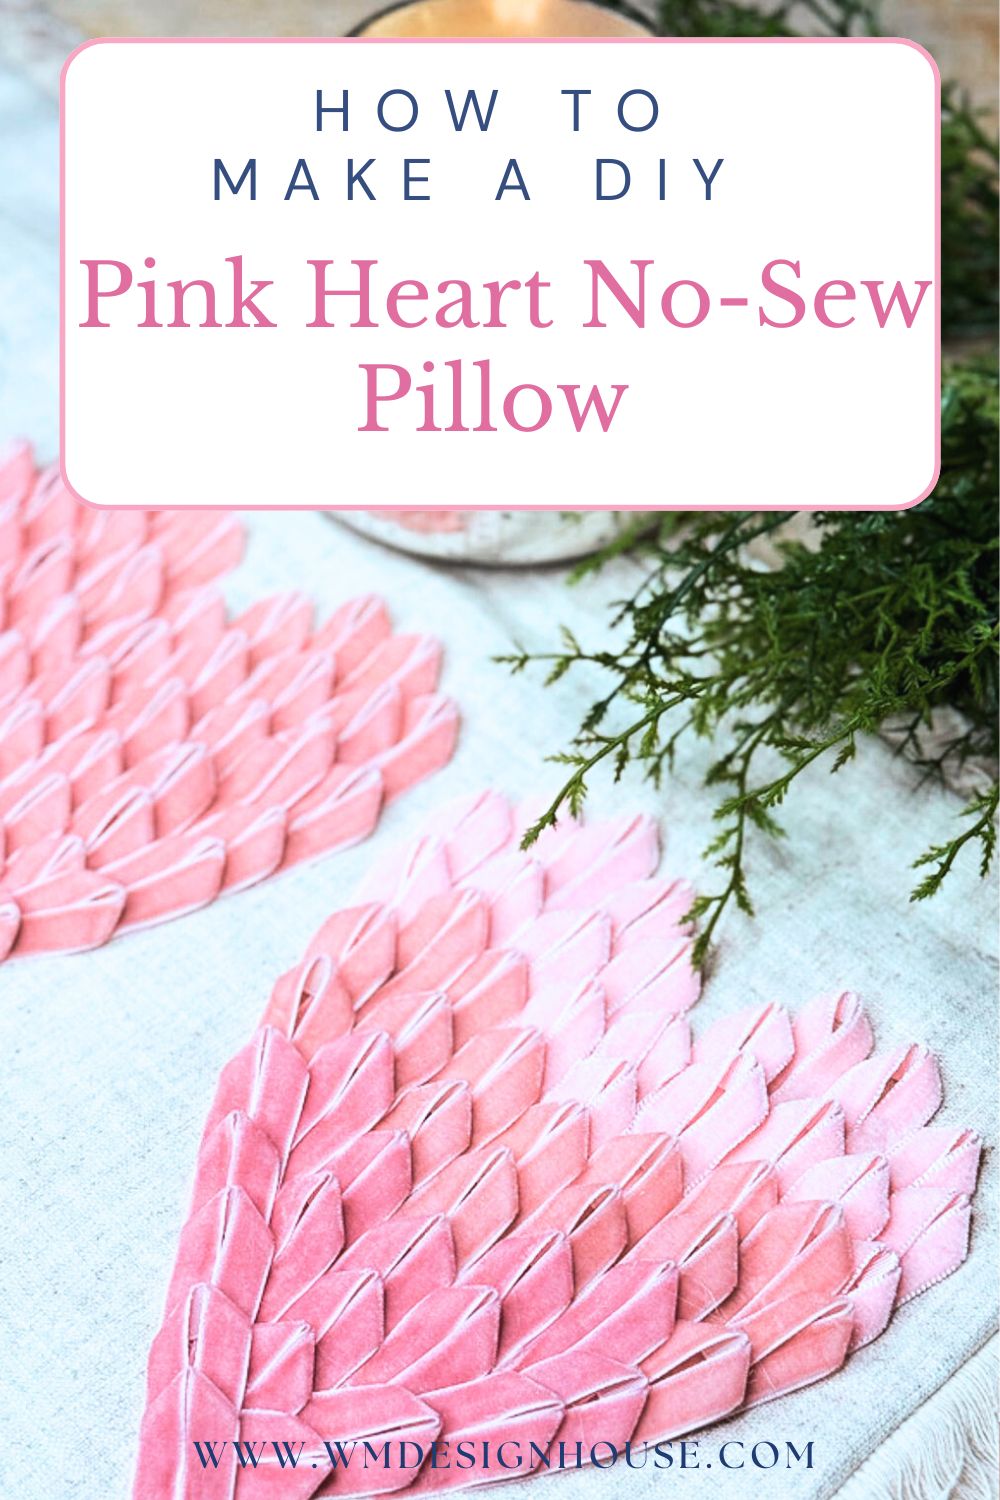
DIY Pink Heart Pillow No-Sew Cover
Creating your own DIY pink heart pillow is a fun way to add a cute, handmade touch to your home for Valentine’s Day. It’s the perfect cozy accent for your living room or give it as a sweet gift to someone you love.

On my blog WM Design House, I may sometimes use affiliate links, which means a small commission is earned if you purchase via the link. The price will be the same whether you use the affiliate link or go directly to the vendor’s website using a non-affiliate link. Read my full disclosure policy here.
DIY pink heart pillow without sewing
If you’re like me, you love switching out your pillow covers for different seasons and holidays. But let’s be honest, it can get pricey!
Do you want to know my secret for saving a bundle of money? I make my own DIY pillows! Over the years, I’ve made several kinds of handmade pillows, from painting on pillows for the fall to more recently, creating a DIY Christmas tree pillow with velvet ribbons.
Today, I’m excited to share an easy and affordable way to create a beautiful DIY pink heart pillow. And the best part is that there’s no sewing required!
Whether you’re looking for a cozy addition to your living room or a thoughtful handmade gift, this project is perfect for adding a touch of seasonal charm on budget.

Why You’ll Love this Project
If you love crafting but don’t want to spend a fortune, this DIY pink heart pillow is the perfect solution. Not only is it incredibly easy and budget-friendly, but you won’t need a sewing machine or any advanced skills to make it.
You can make this beautiful no-sew heart pillow in under 30 minutes, adding a touch of festive sophistication to your home without breaking the bank.
Supplies Needed to Make DIY Pink Heart Pillows
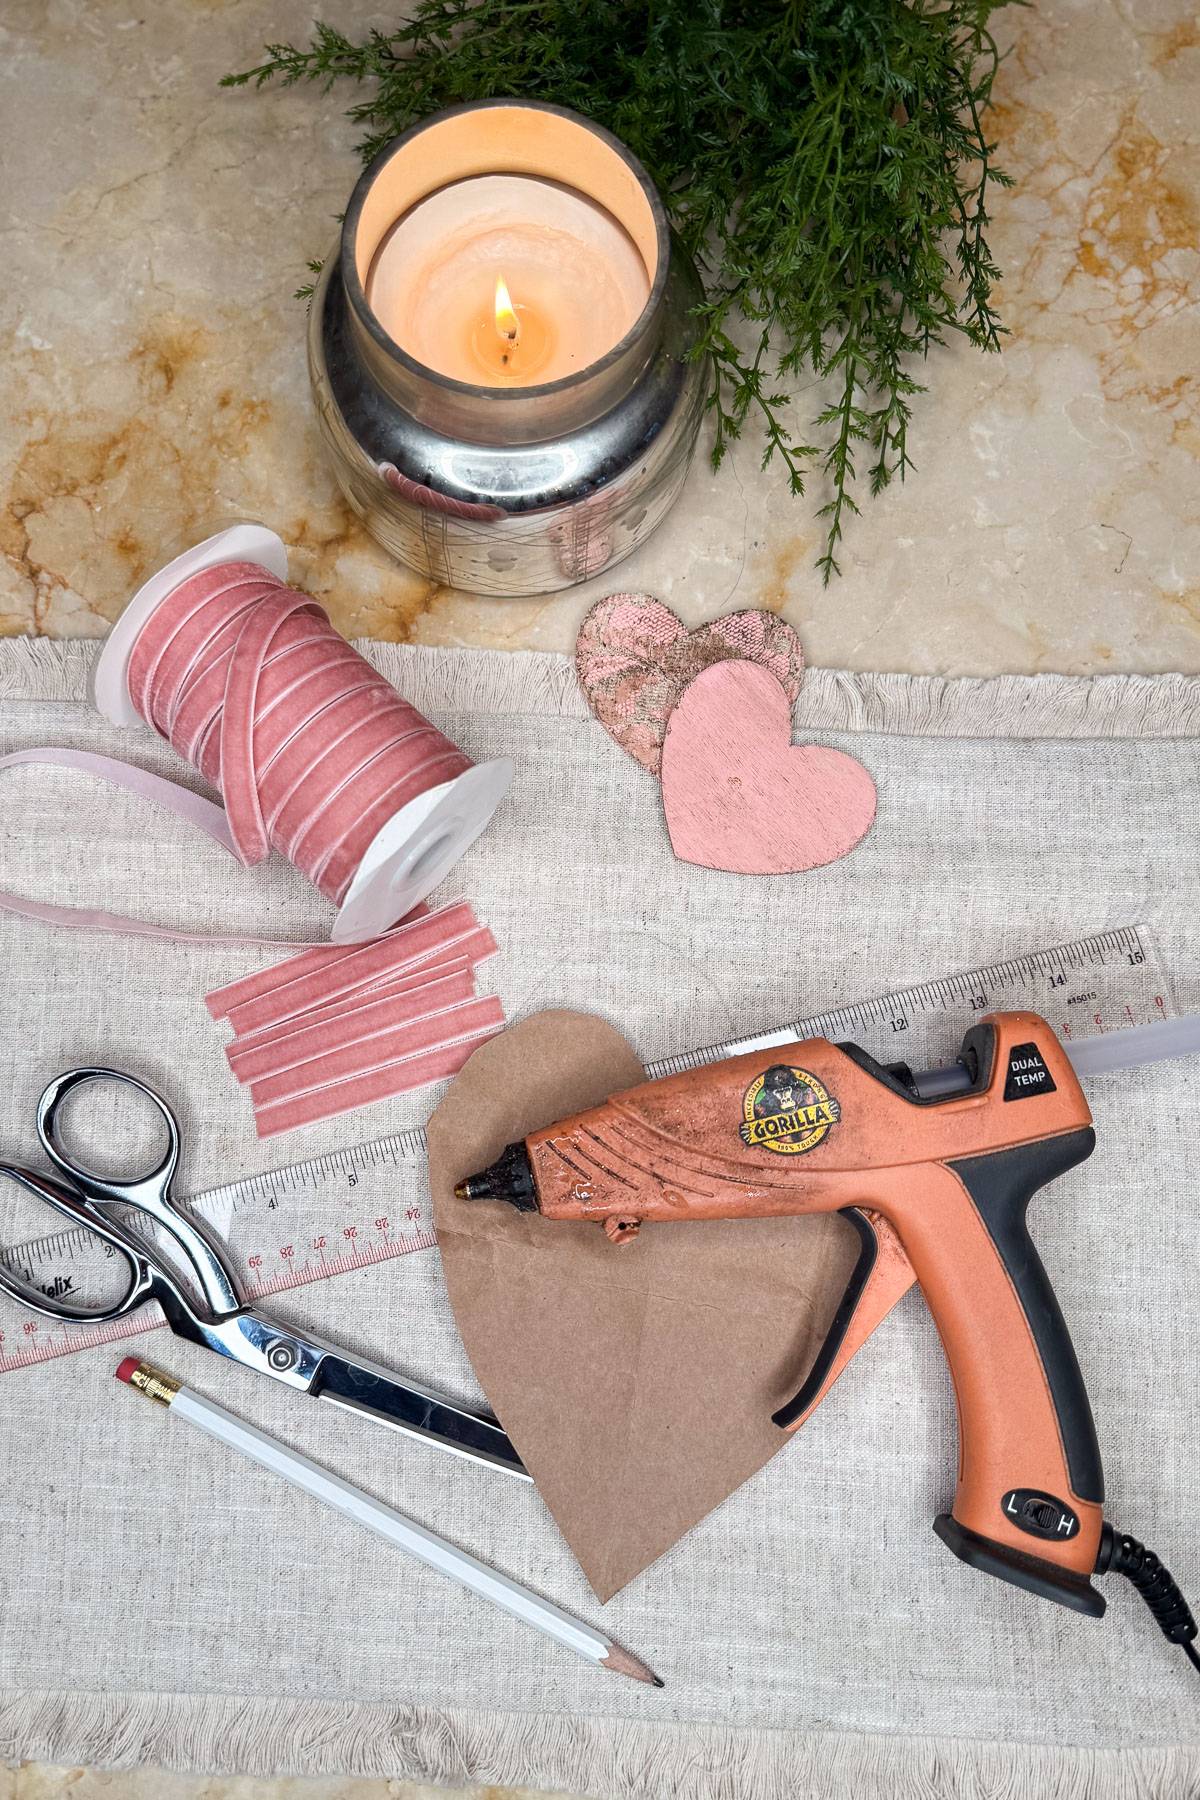
Additional Tools You’ll Need
Step-by-Step Instructions to Make a DIY Heart Pillow Cover
This easy DIY pink heart pillow is so much fun to make.
Step 1: Preparing Your Supplies for a DIY Pink Heart Pillow No Sew
First, remove your pillowcases from the packaging and use a small fine toothed comb to comb the fringe on the edges gently.
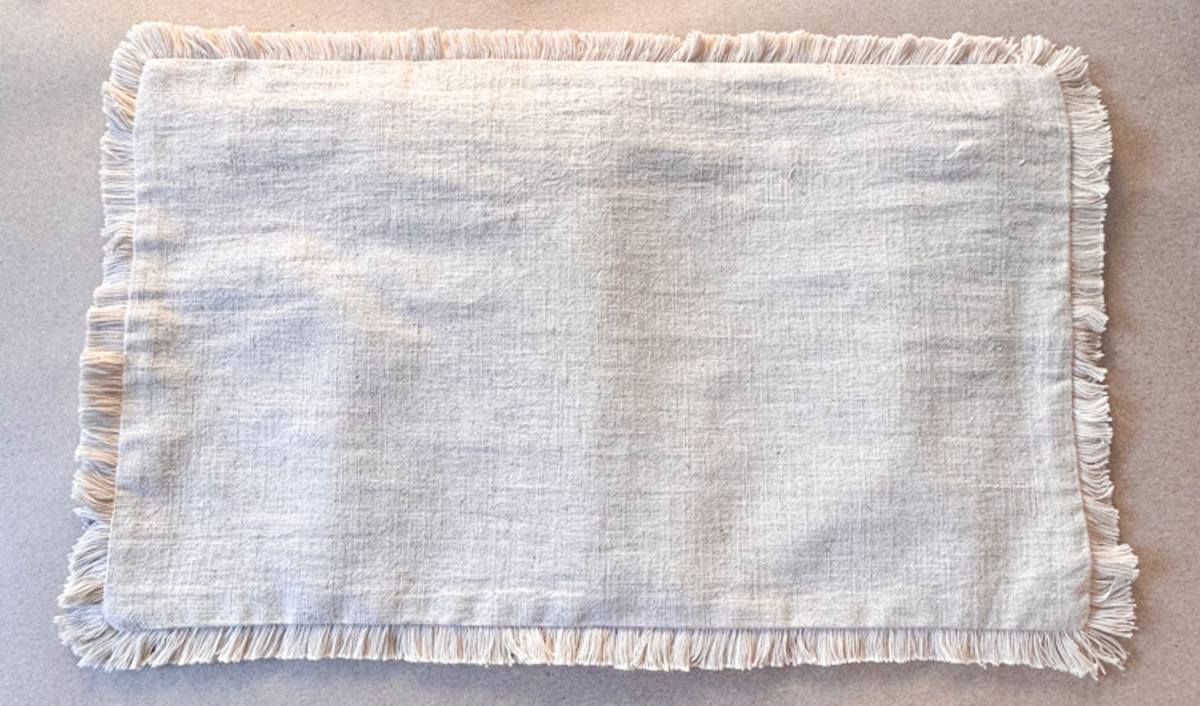
Then, gently iron the entire pillowcase to remove any wrinkles from the material. This will make tracing your heart patterns much easier and making the heart shape with your ribbons.
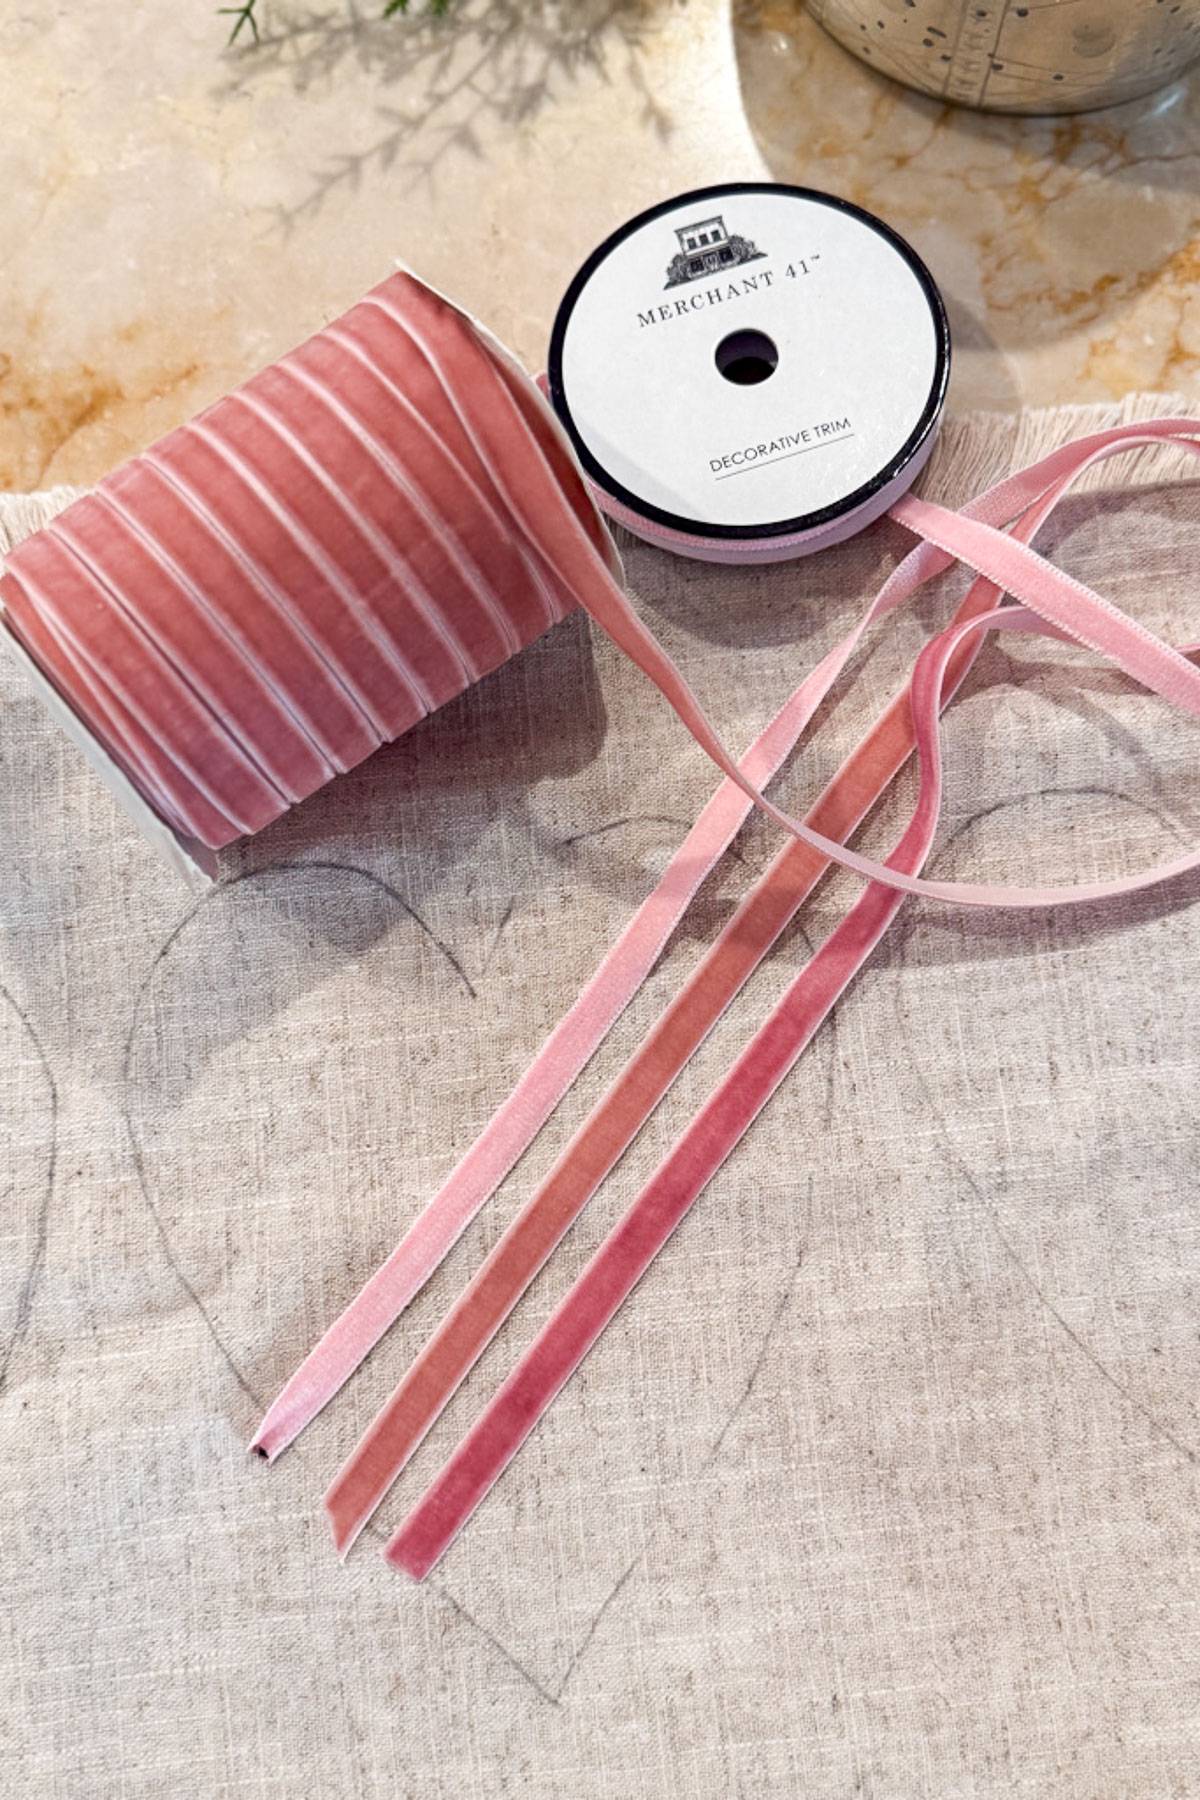
Cut the Ribbon
For the solid color heart, you will need 54- 3″ pieces of ribbon.
For the tri-colored heart, you will need the following:
- Light pink- 20 pieces of ribbon that are 3″ long
- Medium pink- 16 pieces of ribbon that are 3″ long
- Dark pink- 18 pieces of ribbon that are 3″ long
Step 2: Prepare Your Heart Template- Paper Pattern
Cut the Paper
- Start with a piece of paper measuring 9 inches tall by 7 inches wide.
Fold the Paper
- Fold the paper in half vertically (so that the folded edge is on the left, making it 9 inches tall and 3.5 inches wide when folded).
Mark the Measurements
- From the top edge, measure down 3 inches and make a small mark.
- From the top edge again, measure down 8.25 inches and make another mark.
Draw the Half-Heart Shape
- Starting at the top mark (3 inches down), draw a curved half-heart shape that extends outward to the right and then curves back in, ending at the bottom mark (8.25 inches down).
Cut and Unfold
- Carefully cut along the drawn line while keeping the paper folded.
- Unfold the paper to reveal a symmetrical heart shape.
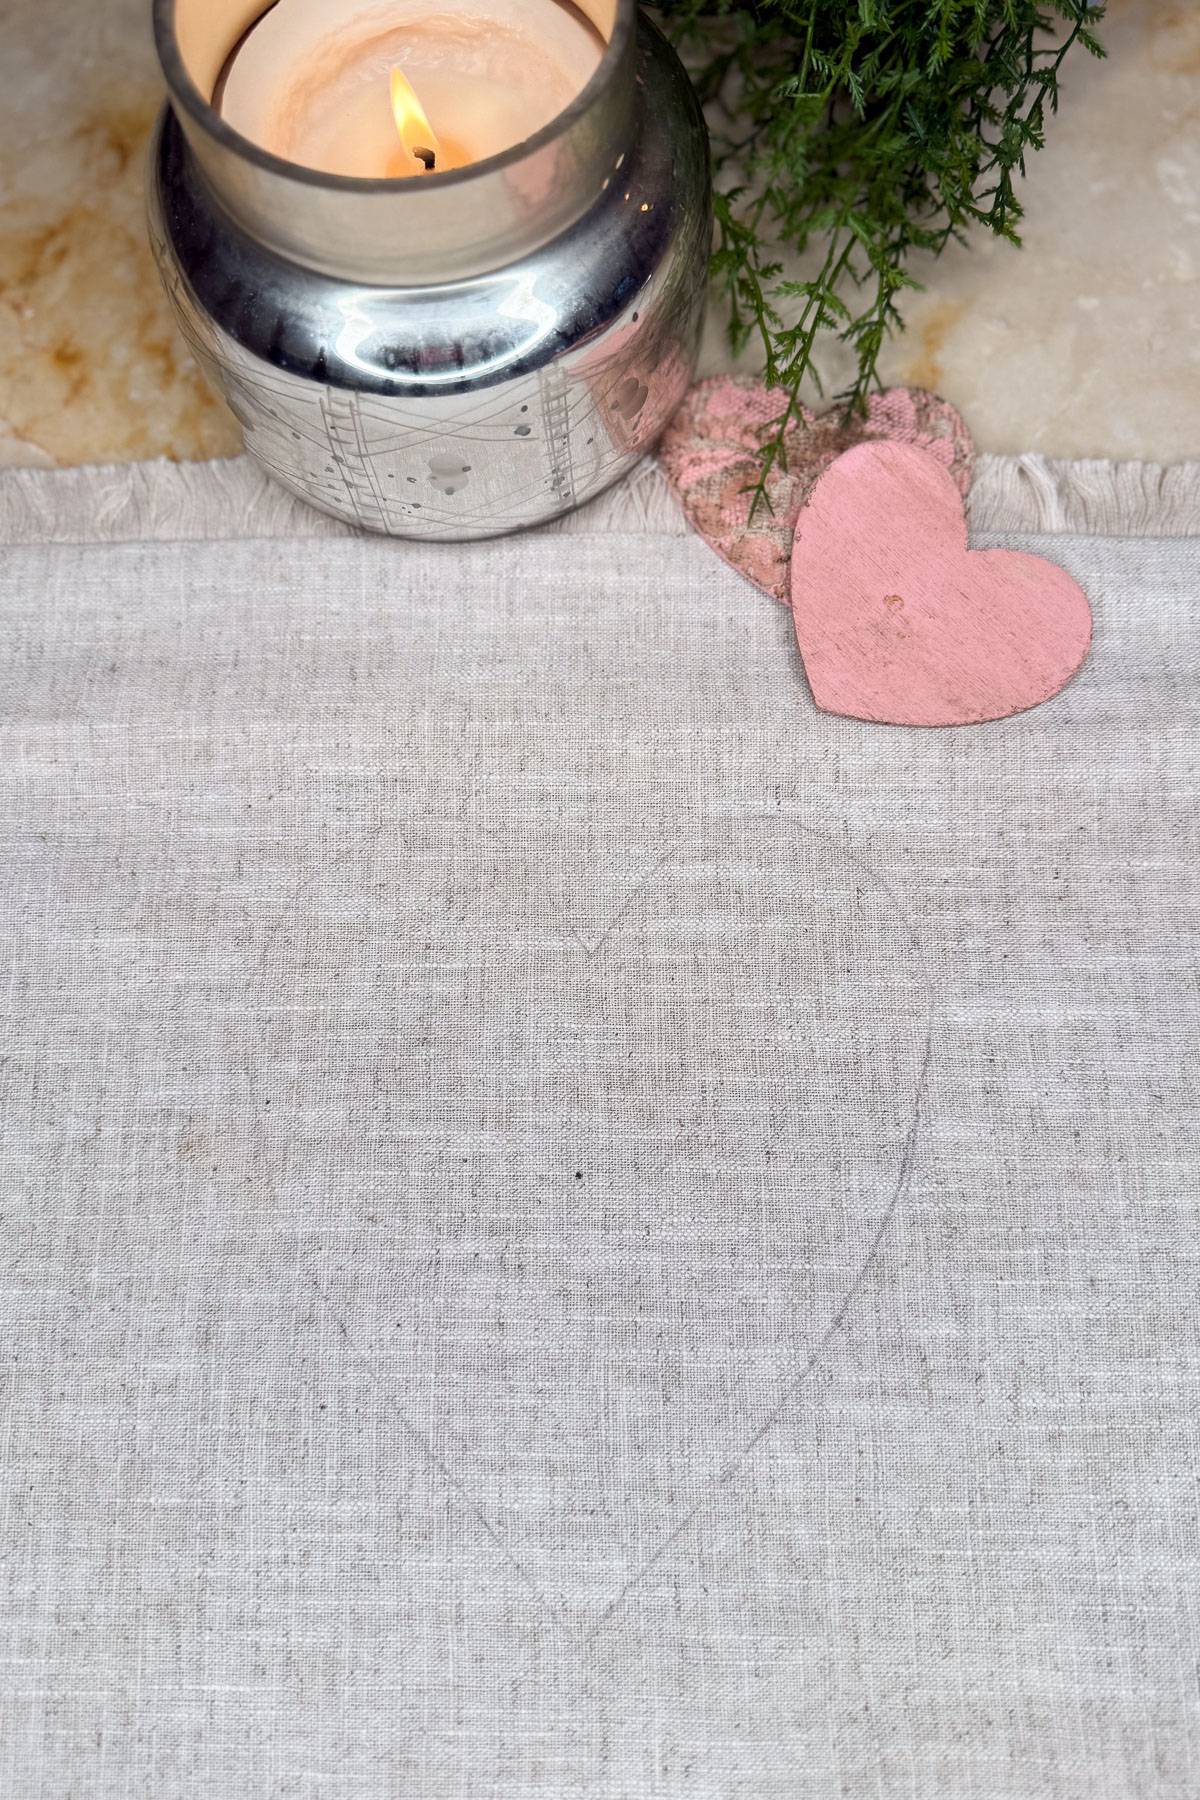
Step 3: Trace the Center Heart onto the Pillowcases
Insert Cardboard
- Place a piece of cardboard inside the pillowcase to prevent any markings or paint from bleeding through to the back.
Find the Center
- Lay the pillowcase flat and locate the center of the front side.
- Make a small dot in the center using a pencil or fabric marker.
Prepare the Heart Template
- Fold your heart template in half vertically (along the middle).
- Mark the midpoint of the folded edge with a small line—this will help with alignment.
Align the Template
- Place the folded edge of the heart template on the dot you marked in the center of the pillowcase.
- Make sure the heart is positioned evenly before proceeding.
Trace the Heart
- Using a pencil or fabric marker, trace around the heart template onto the pillowcase for the center heart.

Step 4: Tracing the Side Hearts
Measure the Space for the Side Hearts
- After tracing the center heart, measure the remaining space on both the left and right sides of it.
- This space should be about 7 inches wide on each side.
Mark the Center of Each Space
- Find the midpoint of each 7-inch section (which is 3.5 inches from the edge of the center heart).
- Place a small dot at this midpoint on both the left and right sides.
Align the Heart Template
- Just like before, fold your heart template in half and mark its midpoint.
- Line up the midpoint of the heart template with the dot you just marked on one side.
Trace the Side Hearts
- Position the heart evenly, making sure it matches the placement of the center heart.
- Trace around the heart template with a pencil or fabric marker.
- Repeat the same steps for the other side heart.
Step 5: Creating the Tri-Colored Pink Ribbon Heart for Your Valentines pillows
Attaching the light pink ribbon
- The top row (lightest pink) will require 11 ribbons:
- 1 in the center
- 5 on each side of the center
- Form the Ribbon Loops
- Start with the lightest pink ribbon for the top row.
- Fold one ribbon in half so that both ends are flat and aligned.
- Pinch the folded top end to create a slight curve.
- Glue the Ribbon
- Flip the ribbon over so the back is facing up.
- Apply a small amount of hot glue to both ends on the backside of the ribbon.
- Attach the First Ribbon
- Place the first ribbon in the center top of the heart shape on your pillow.
- Add More Ribbons to the First Row
- Repeat the folding, gluing, and attaching process for each ribbon.
- Place the next ribbons on the left and right sides of the center ribbon, following the outline of the heart shape.
- Continue adding ribbons outward until you have 5 on each side, making a total of 11 ribbons for the top row.
- Make sure the ribbons overlap slightly and cover the heart outline so it won’t be visible when finished.
- Create the Second Row
- Move to the second row and repeat the same process.
- Start with the middle ribbon, then add 4 ribbons on each side, for a total of 9 ribbons in this row.
- Follow the curve of the heart shape to maintain symmetry.

Tip from wendy’s craft room:
Avoid ironing your ribbon, as the natural texture enhances the look of the heart.
Adding the Medium Pink Ribbon Layer
- Prepare Your Ribbons
- For this layer, you will need 16 pieces of ribbon, each 3 inches long.
- Attach the First Row
- Start with one ribbon in the center.
- Add four ribbons on each side, following the curve of the heart.
- Attach the ribbons one at a time, starting with the center ribbon and then placing the others evenly on both sides.
- Attach the Second Row
- Begin with one ribbon in the center.
- Add three ribbons on each side, keeping the shape of the heart.
- Continue to follow the curve, making sure the ribbons overlap slightly to cover the outline.
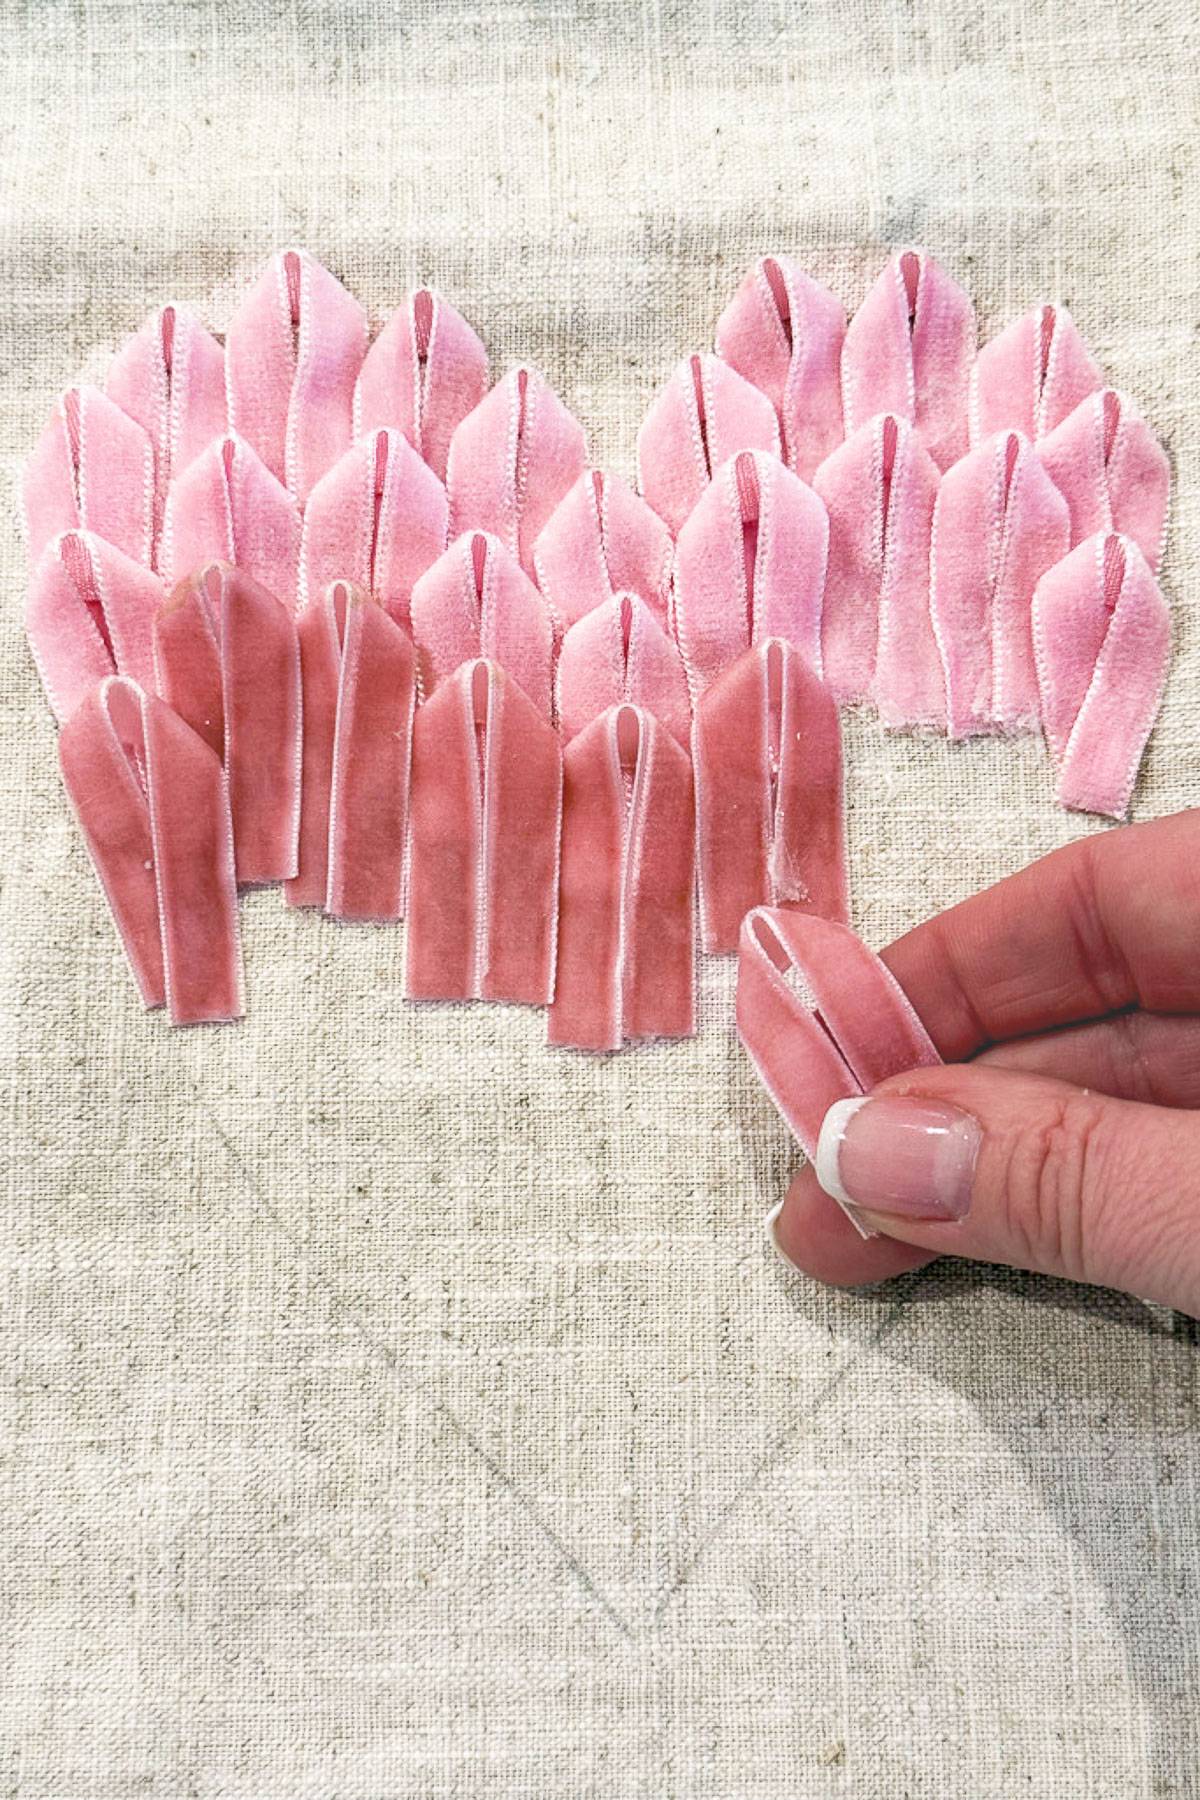
Adding the Dark Pink Ribbon
First Row
- Start with one ribbon in the center.
- Add three ribbons on each side, following the curve of the heart.
Second Row
- Place one ribbon in the center.
- Add two ribbons on each side, keeping the shape of the heart.
Third Row
- Place one ribbon in the center.
- Add one ribbon on each side, following the heart outline.
Fourth Row
- This row does not have a center ribbon.
- Add one ribbon on each side only.
Attach the Final Row
- Place one ribbon on the left side only to complete the design.
Tip from wendy’s craft room:
Keep it Symmetrical: Make sure your loops are even and symmetrical as you alternate sides for a polished appearance.
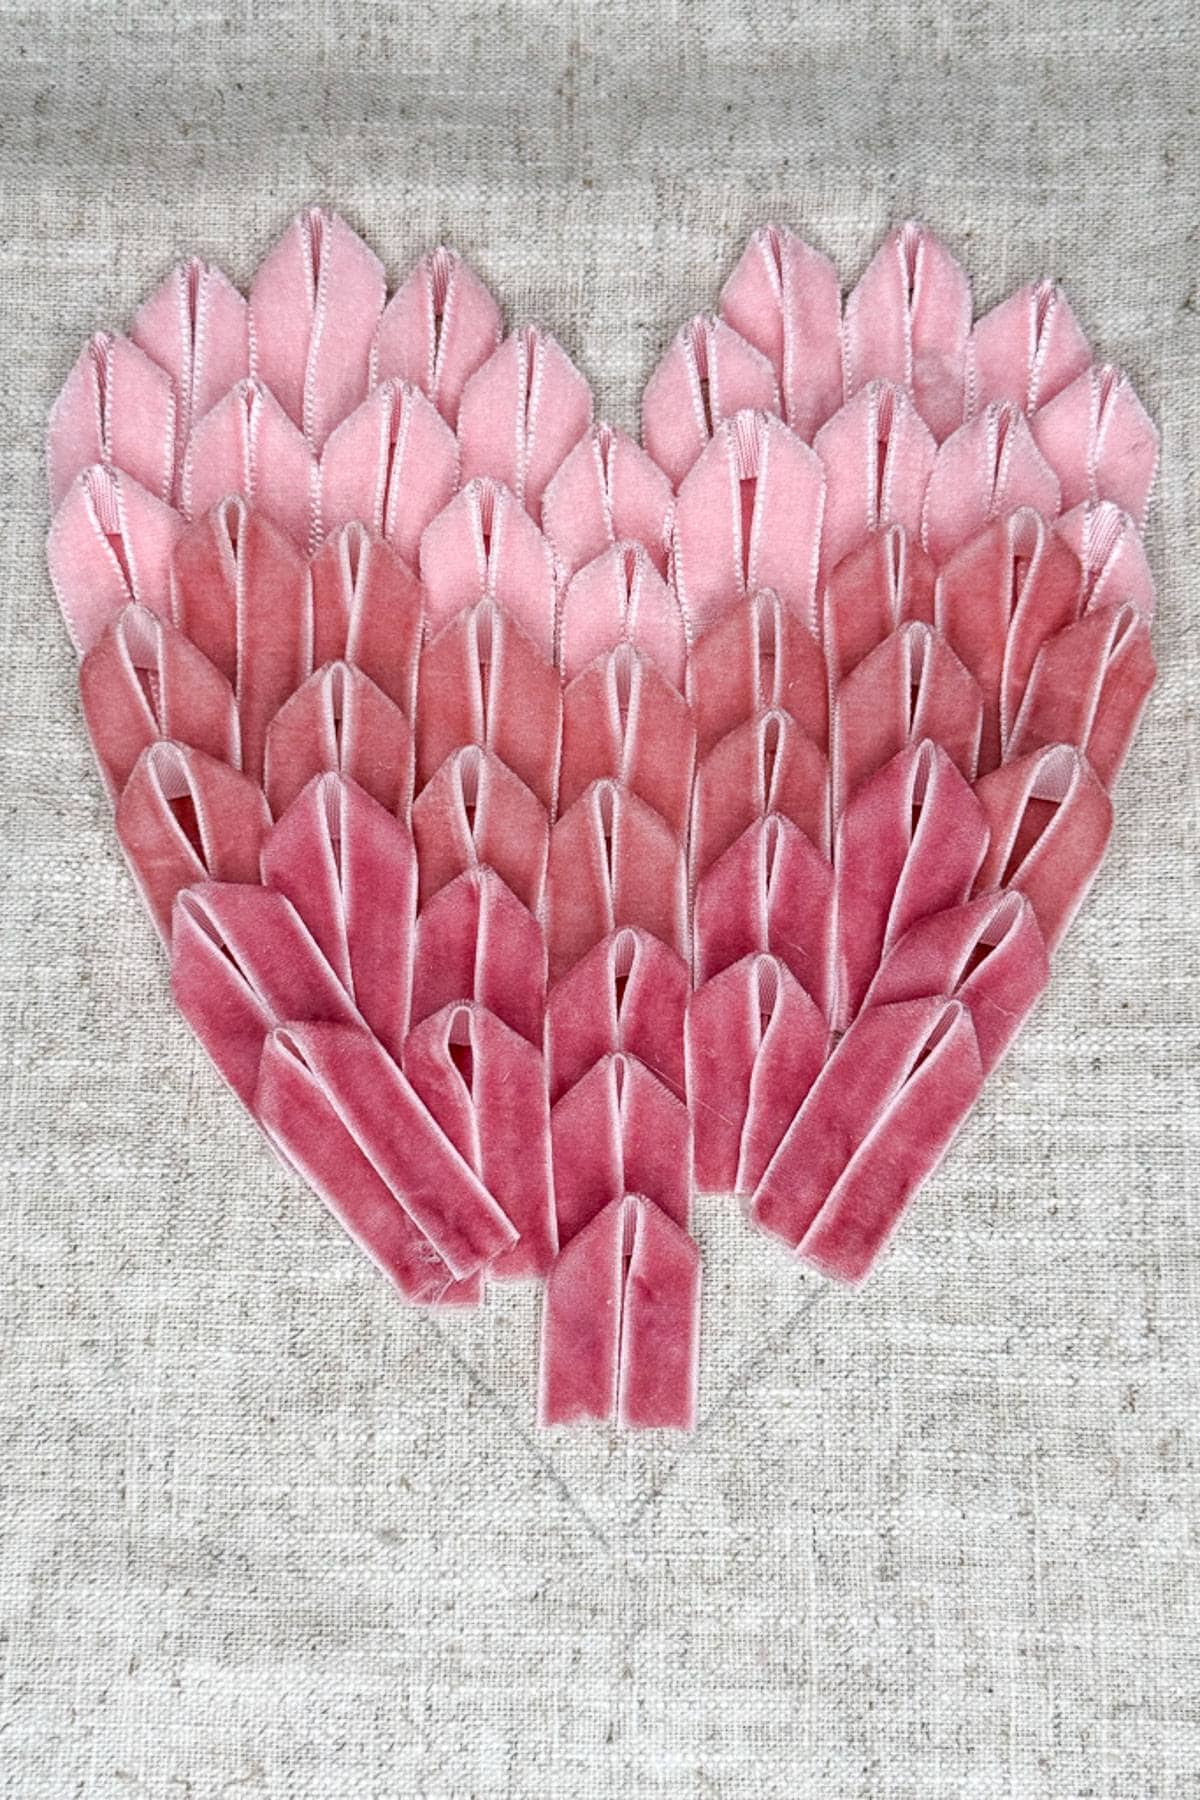

Repeat the steps above to complete all three trees on your Christmas pillow covers. Once finished, insert the pillow form, and you’ll have beautiful, brand-new Christmas decorations to enjoy for years. The best part? You don’t need a sewing machine, and the entire project takes 30 minutes to complete your new throw pillows.
How to Make a DIY Pink Heart Pillow No-Sew

Creating a beautiful DIY pink heart pillow is an easy and affordable way to add a charming touch to your home for Valentine's Day.
Materials
- Two linen pillow cover
- 2 pillow inserts
- Light pink velvet ribbon 3/8"
- Medium pink velvet ribbon 3/8"
- Dark pink velvet ribbon 3/8"
- Paper bag to make your heart template
Tools
- Scissors
- Hot Glue Gun
- Iron
- Ruler
- Pencil
Instructions
Step 1: Preparing Your Supplies for a diy pink heart pillow no sew
- First, remove your pillowcases from the packaging and use a small fine toothed comb to comb the fringe on the edges gently.
- Then gently iron the entire pillowcase to remove any wrinkles from the material. This will make it much easier to trace on your heart patterns and make the heart shape with your ribbons.
Cut the Ribbon
- For the solid color heart, you will need 54- 3" pieces of ribbon
- For the tri-colored heart, you will need the following:
- Light pink- 20 pieces of ribbon that are 3" long
- Medium pink- 16 pieces of ribbon that are 3" long
- Dark pink- 18 pieces of ribbon that are 3" long
Step 2: Prepare Your Heart Template- Paper Pattern
Cut the Paper
- Start with a piece of paper measuring 9 inches tall by 7 inches wide.
Fold the Paper
- Fold the paper in half vertically (so that the folded edge is on the left, making it 9 inches tall and 3.5 inches wide when folded).
Mark the Measurements
- From the top edge, measure down 3 inches and make a small mark.
- From the top edge again, measure down 8.25 inches and make another mark.
Draw the Half-Heart Shape
- Starting at the top mark (3 inches down), draw a curved half-heart shape that extends outward to the right and then curves back in, ending at the bottom mark (8.25 inches down).
Cut and Unfold
- Carefully cut along the drawn line while keeping the paper folded.
- Unfold the paper to reveal a symmetrical heart shape.
Step 3: Trace the Center Heart onto the Pillowcases
Insert Cardboard
- Place a piece of cardboard inside the pillowcase to prevent any markings or paint from bleeding to the back.
Find the Center
- Lay the pillowcase flat and locate the center of the front side.
- Make a small dot in the center using a pencil or fabric marker.
Prepare the Heart Template
- Fold your heart template in half vertically (along the middle).
- Mark the midpoint of the folded edge with a small line—this will help with alignment.
Align the Template
- Place the folded edge of the heart template on the dot you marked in the center of the pillowcase.
- Make sure the heart is positioned evenly before proceeding.
Trace the Heart
- Using a pencil or fabric marker, trace around the heart template onto the pillowcase for the center heart.
Step 5: Tracing the Side Hearts
Measure the Space for the Side Hearts
- After tracing the center heart, measure the remaining space on both the left and right sides of it.
- This space should be about 7 inches wide on each side.
Mark the Center of Each Space
- Find the midpoint of each 7-inch section (which is 3.5 inches from the edge of the center heart).
- Place a small dot at this midpoint on both the left and right sides.
Align the Heart Template
- Just like before, fold your heart template in half and mark its midpoint.
- Line up the midpoint of the heart template with the dot you just marked on one side.
Trace the Side Hearts
- Position the heart evenly, ensuring it matches the center heart's placement.
- Trace around the heart template with a pencil or fabric marker.
- Repeat the same steps for the other side of the heart.
Step 6: Creating the Tri-Colored Pink Ribbon Heart for Your Valentine's Pillows
Attaching the light pink ribbon
- The top row (lightest pink) will require 11 ribbons:
- 1 in the center
- 5 on each side of the center
- Form the Ribbon Loops
- Start with the lightest pink ribbon for the top row.
- Fold one ribbon in half so that both ends are flat and aligned.
- Pinch the folded top end to create a slight curve.
- Glue the Ribbon
- Flip the ribbon over so the back is facing up.
- Apply a small amount of hot glue to both ends on the backside of the ribbon.
- Attach the First Ribbon
- Place the first ribbon in the center top of the heart shape on your pillow.
- Add More Ribbons to the First Row
- Repeat the folding, gluing, and attaching process for each ribbon.
- Place the next ribbons on the left and right sides of the center ribbon, following the outline of the heart shape.
- Continue adding ribbons outward until you have 5 on each side, making a total of 11 ribbons for the top row.
- Make sure the ribbons overlap slightly and cover the heart outline so it won’t be visible when finished.
- Create the Second Row
- Move to the second row and repeat the same process.
- Start with the middle ribbon, then add 4 ribbons on each side, for a total of 9 ribbons in this row.
- Follow the curve of the heart shape to maintain symmetry.
Adding the Medium Pink Ribbon Layer
- Prepare Your Ribbons
- For this layer, you will need 16 pieces of ribbon, each 3 inches long.
- Attach the First Row
- Start with one ribbon in the center.
- Add four ribbons on each side, following the curve of the heart.
- Attach the ribbons one at a time, starting with the center ribbon and then placing the others evenly on both sides.
- Attach the Second Row
- Begin with one ribbon in the center.
- Add three ribbons on each side, keeping the shape of the heart.
- Continue to follow the curve, making sure the ribbons overlap slightly to cover the outline.
- Adding the Dark Pink Ribbon
First Row
- Start with one ribbon in the center.
- Add three ribbons on each side, following the curve of the heart.
Second Row
- Place one ribbon in the center.
- Add two ribbons on each side, keeping the shape of the heart.
Third Row
- Place one ribbon in the center.
- Add one ribbon on each side, following the heart outline.
Fourth Row
- This row does not have a center ribbon.
- Add one ribbon on each side only.
Attach the Final Row
- Place one ribbon on the left side only to complete the design.
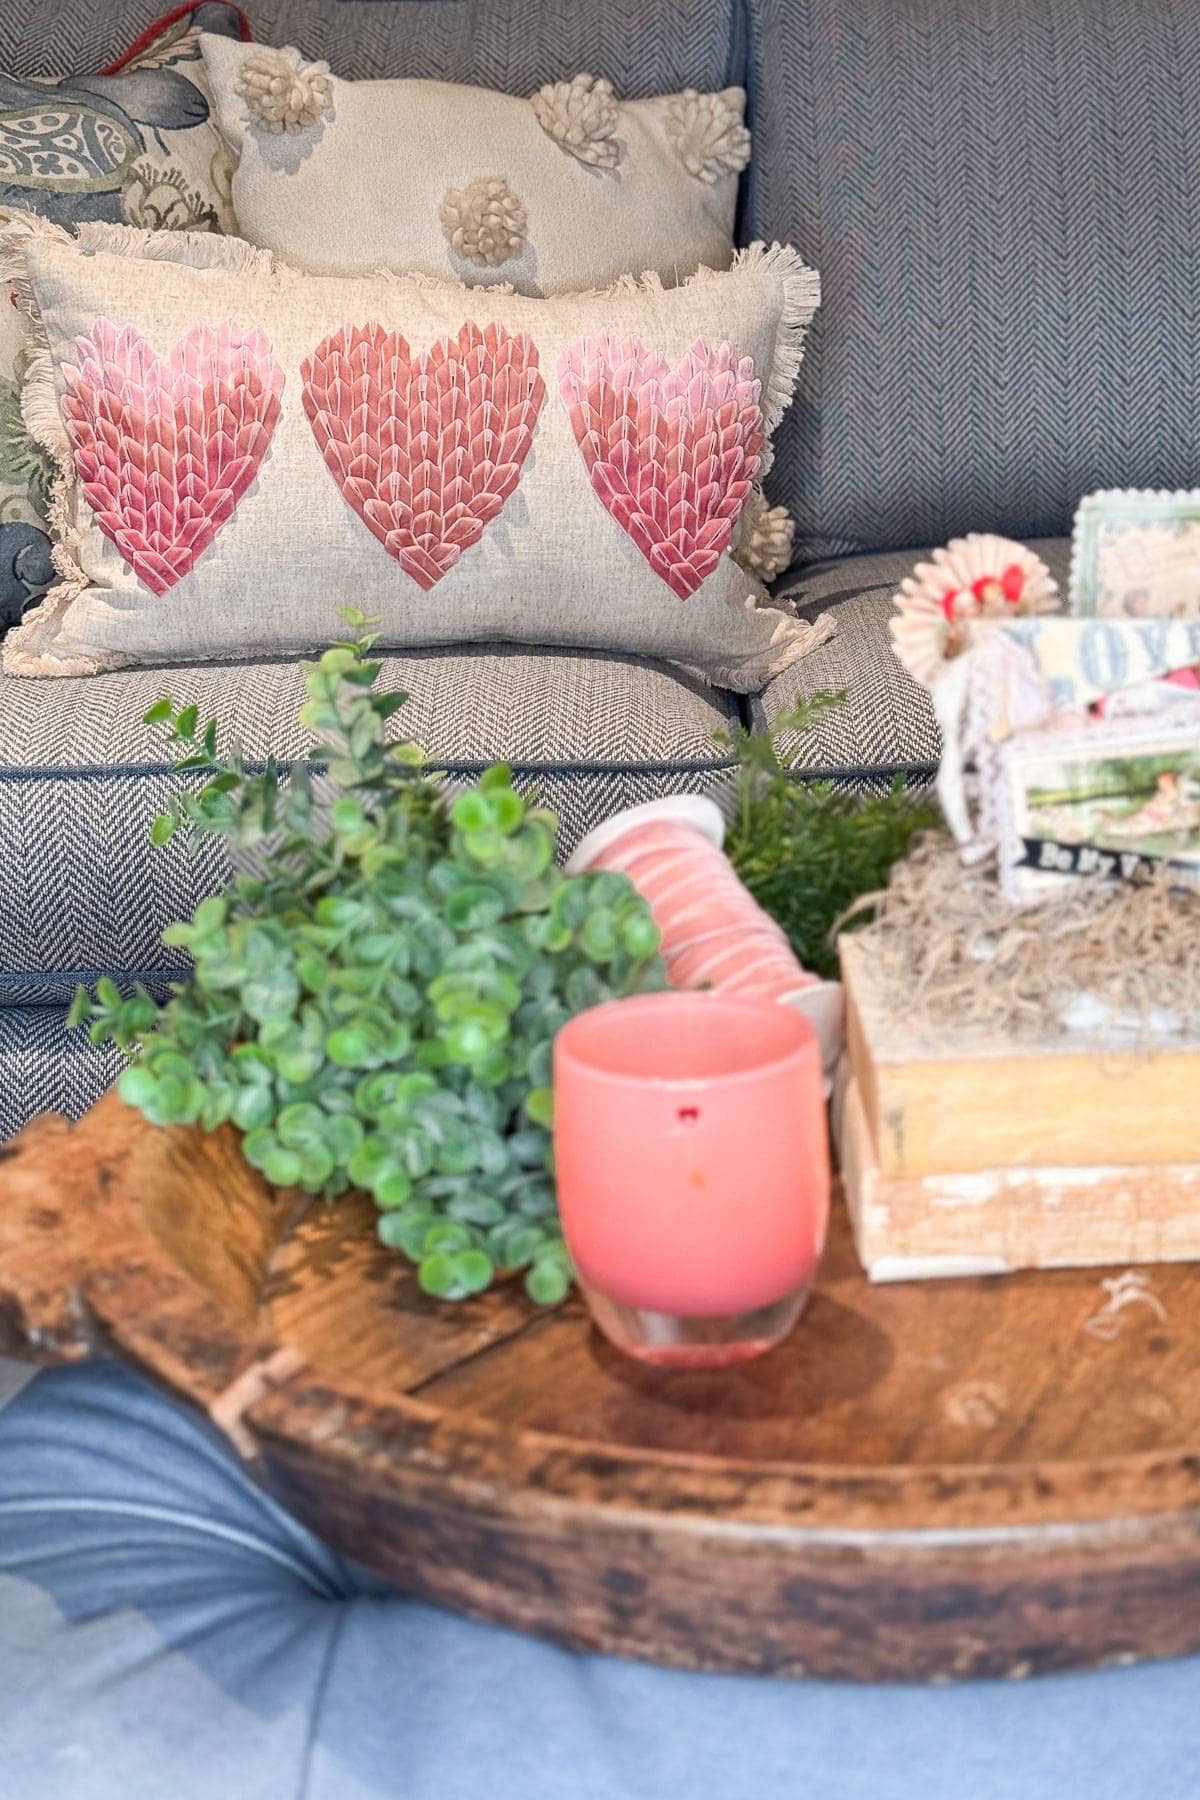
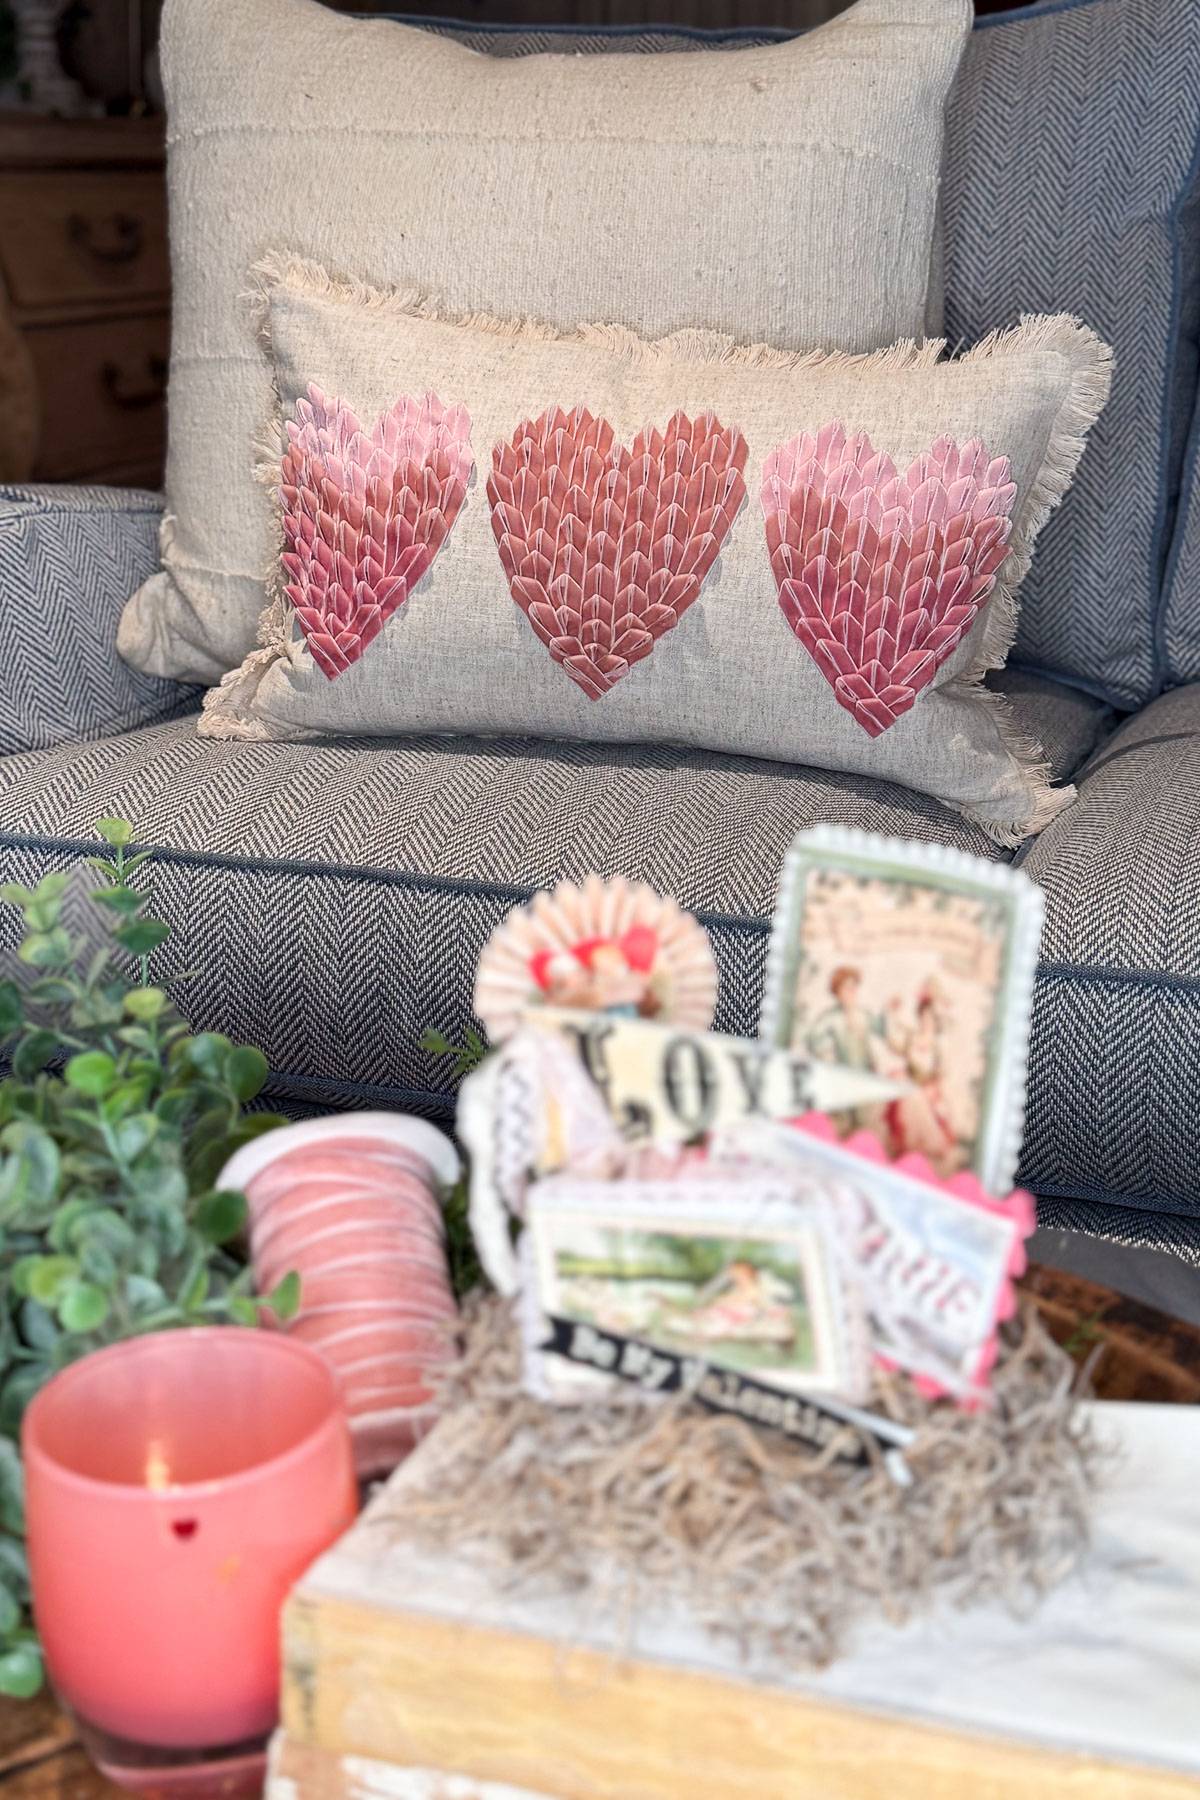
How to Style Your DIY Pink Heart Pillow
Adding a DIY pink heart pillow to your home is a simple way to bring a sweet and cozy feel to your space. Try styling it together with soft, neutral throw blankets on your couch for a subtle romantic touch.
Or you can layer it with solid-colored cushions, other heart shaped pillows, or mix and match patterns like florals, polka dots, or pillows with lace for a charming vintage feel.
Whether displayed on a chair, couch, or even a bed, this pillow is a versatile and stylish addition to your Valentine’s Day decor.
Other DIY Valentine’s Day Crafts from WM Design House
If you love this easy DIY pink heart pillow, you might also enjoy some of my other favorite Valentine’s Day DIY projects:
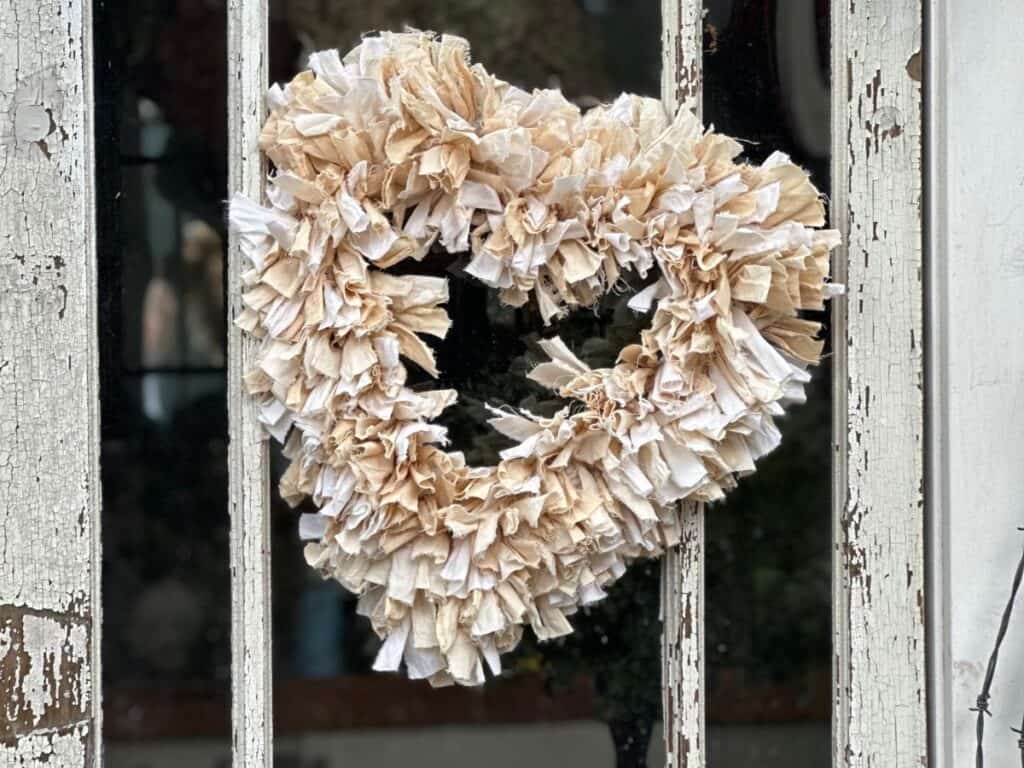
DIY Valentine’s Day Rag Wreath
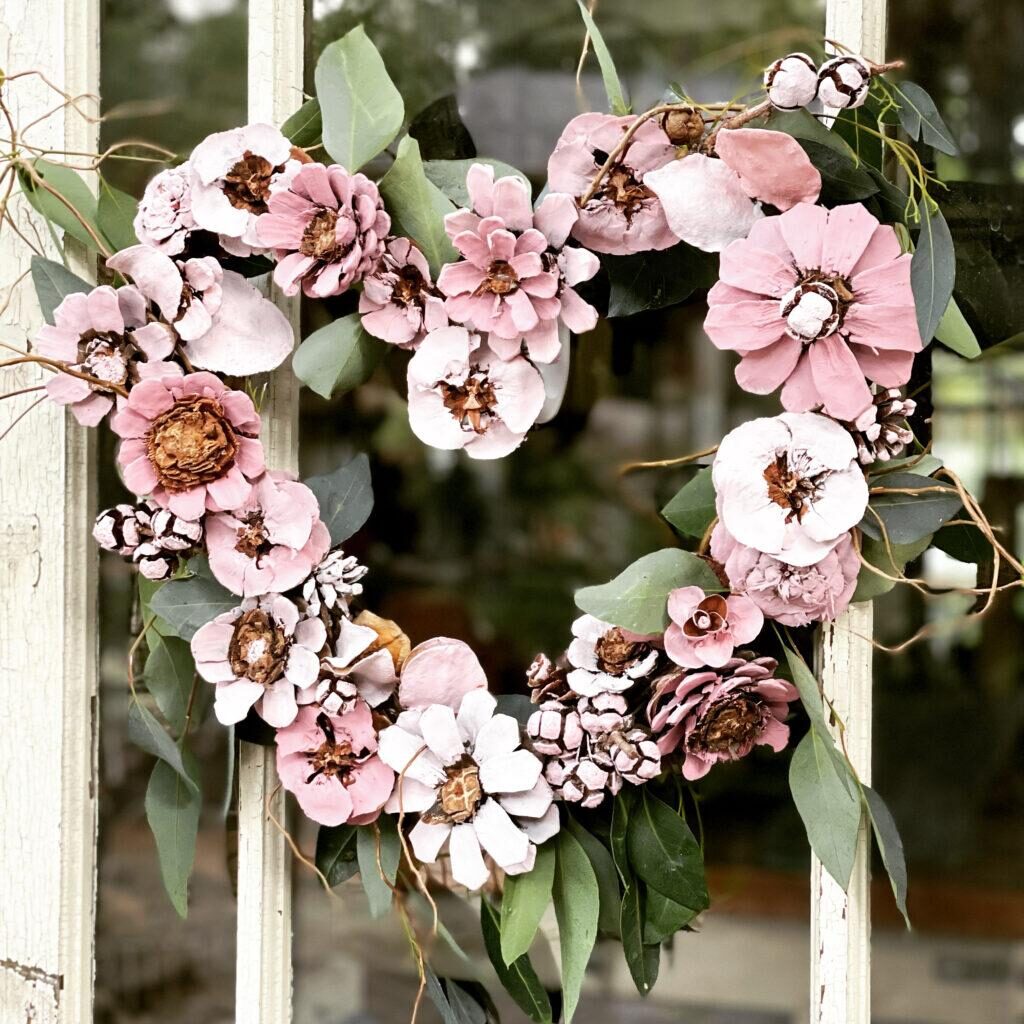
DIY Pink Heart Pinecone Wreath
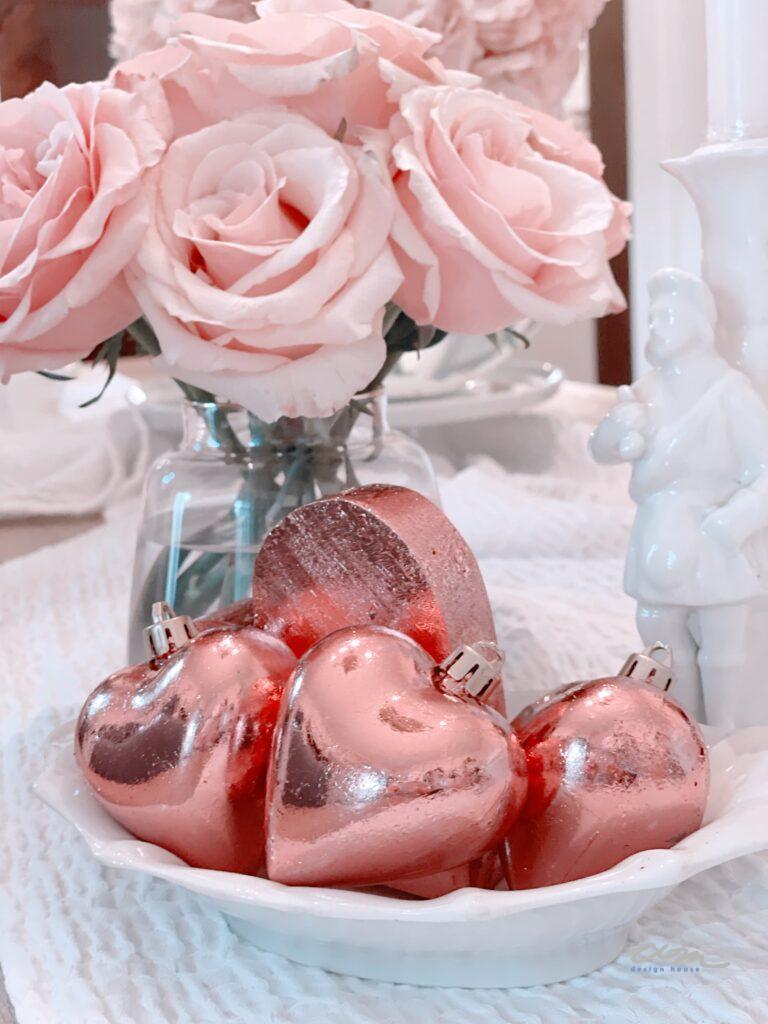
Beautiful DIY Pink and Gold Foil Hearts
Wrapping Up
I love how something as simple as this adorable DIY pink heart pillow can completely transform a room and make it feel extra special.
Whether you’re decorating for Valentine’s Day, adding a little extra love to your home, or making a heartfelt gift, this project is an easy and budget-friendly way to get creative.
I hope this easy tutorial encourages you to give it a try and make your own Valentine pillows.
Happy crafting!


Did you make this craft?
We would love to see what you have created, so mention us @wmdesignhouse or tag us using #wmdesignhouse so we can see your creations!
More about me!

Hello, I’m Wendy – a dedicated homemaker with a deep passion for decorating, gardening, cooking, and crafting. I find joy in harmonizing beautiful elements to fashion a space that is both comfortable and inspiring. I will help you create a beautiful home, one project at a time.