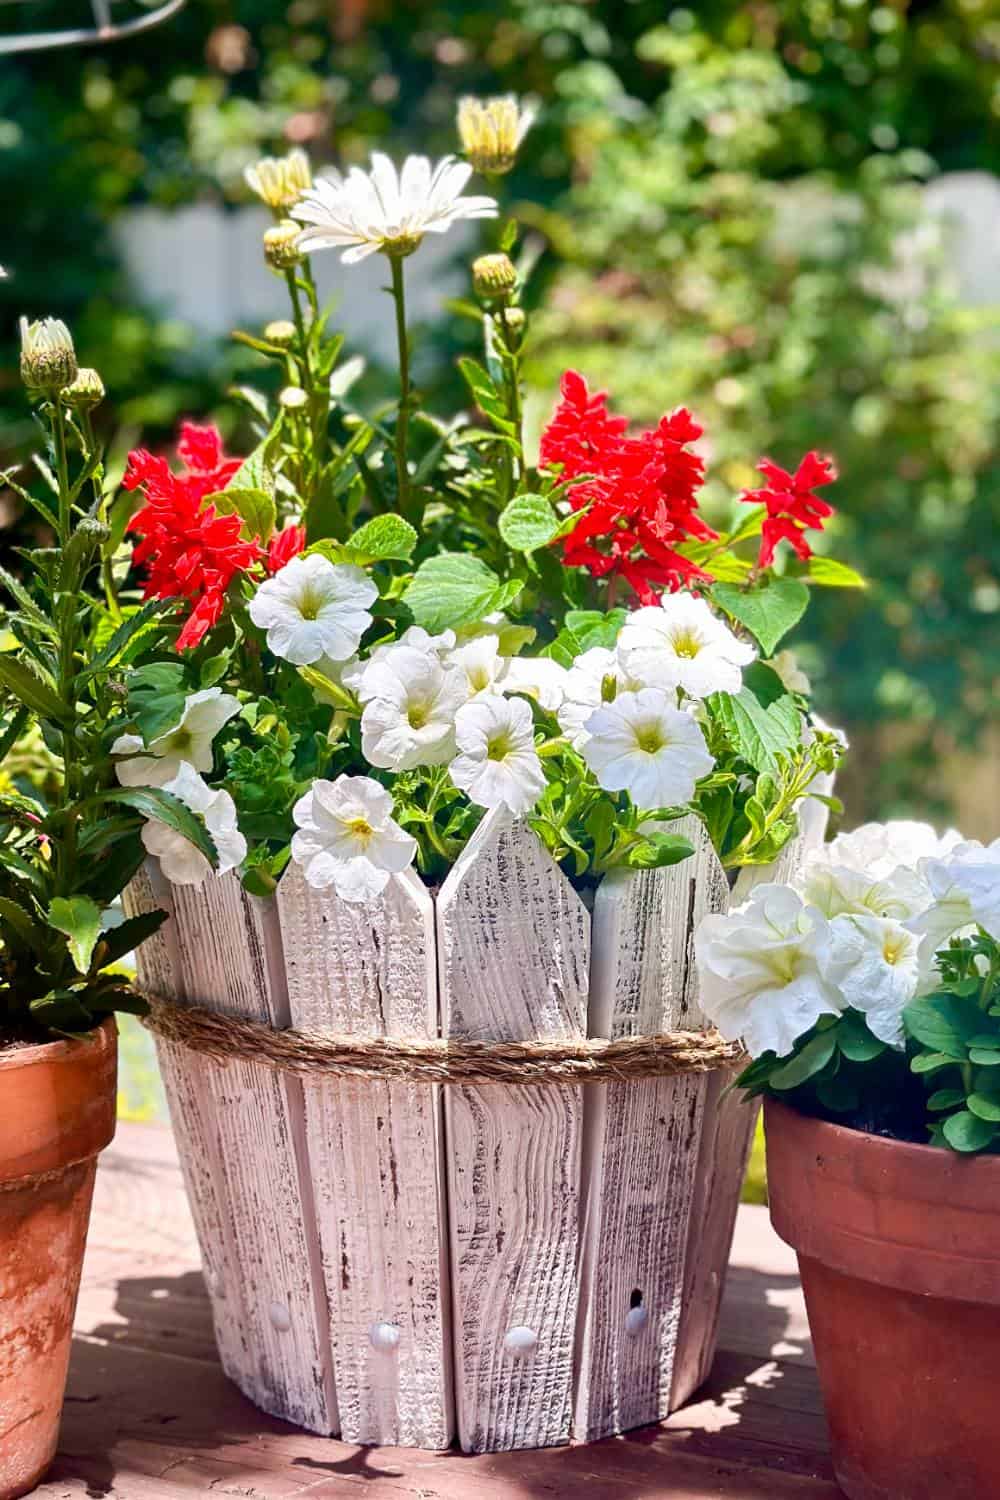
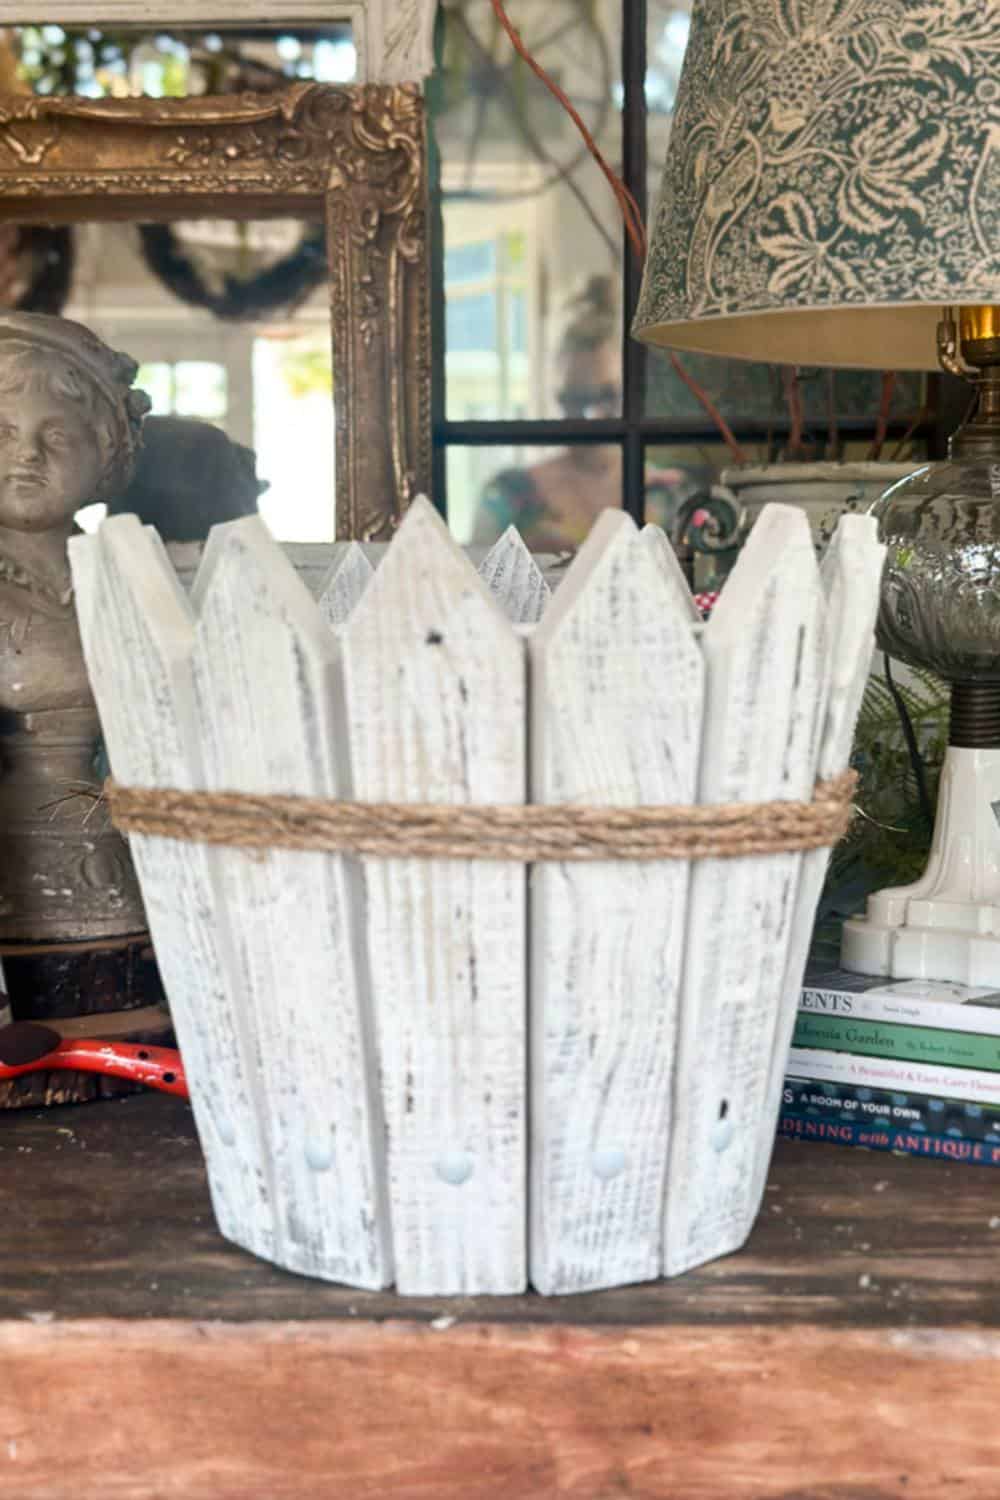
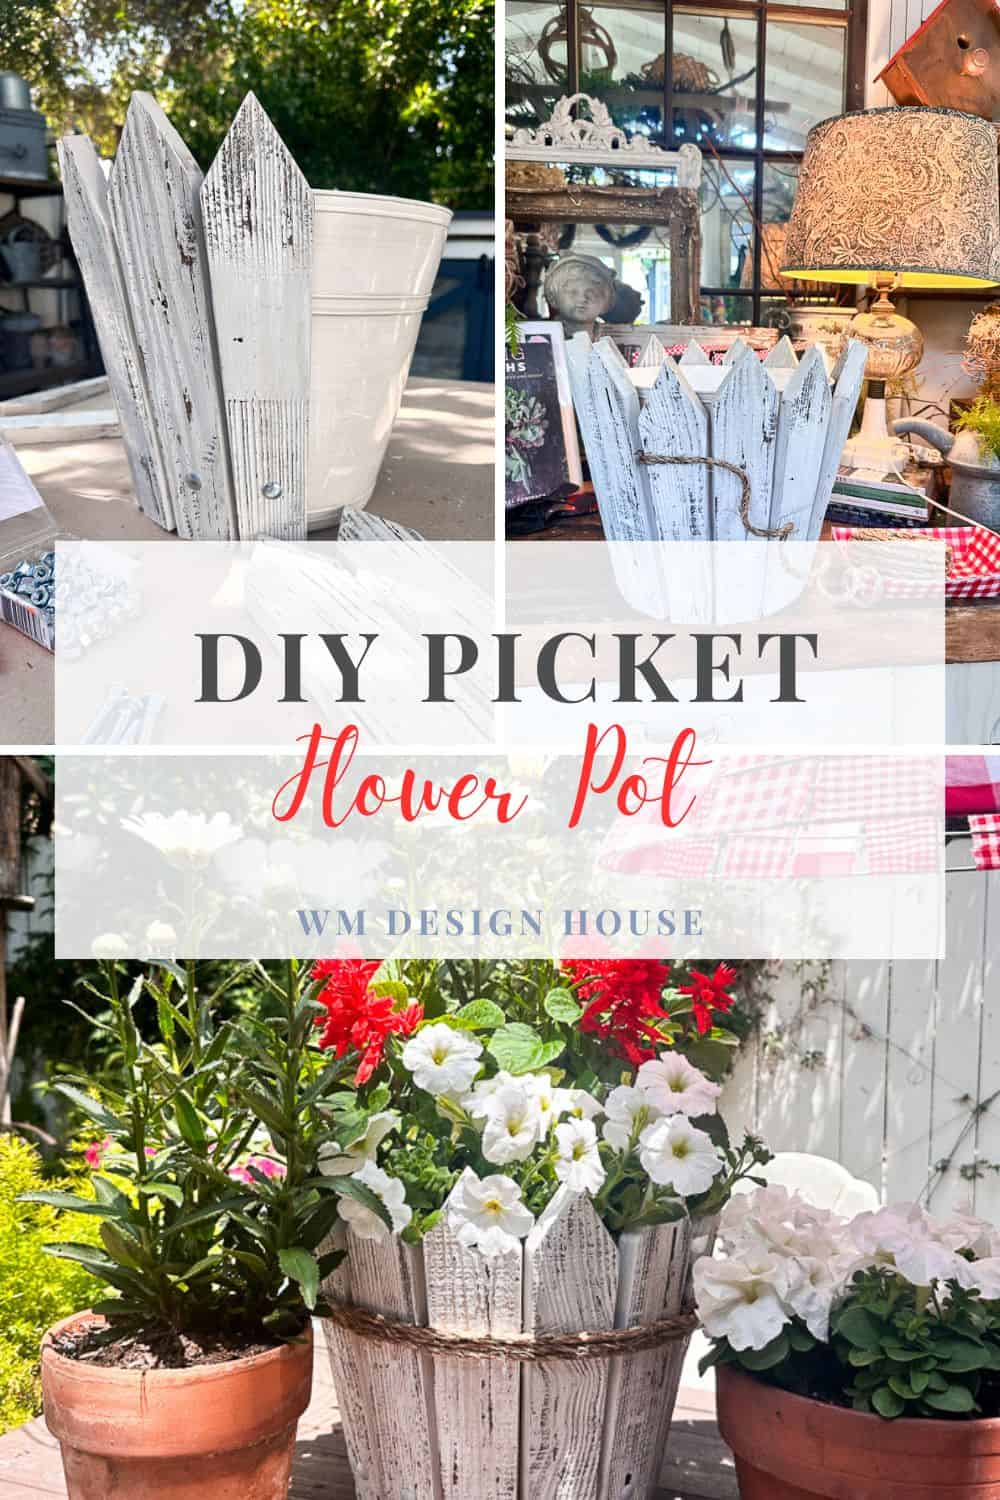
DIY Picket Fence Flower Pot
This DIY picket fence flower pot is an easy project that you can put together in just a few hours.
On my blog WM Design House, I may sometimes use affiliate links, which means a small commission is earned if you purchase via the link. The price will be the same whether you use the affiliate link or go directly to the vendor’s website using a non-affiliate link. Read my full disclosure policy here.
Today is our Handcrafted Society post, and we were all challenged to use either pickets or wood spindles in our projects. As you know I have an obsession with old fences and find them so charming, so this was so easy for me.
Don’t forget to check out all of the girl’s projects at the end of this post. There are so many amazing things the girls have created.
The Beauty of Picket Fences
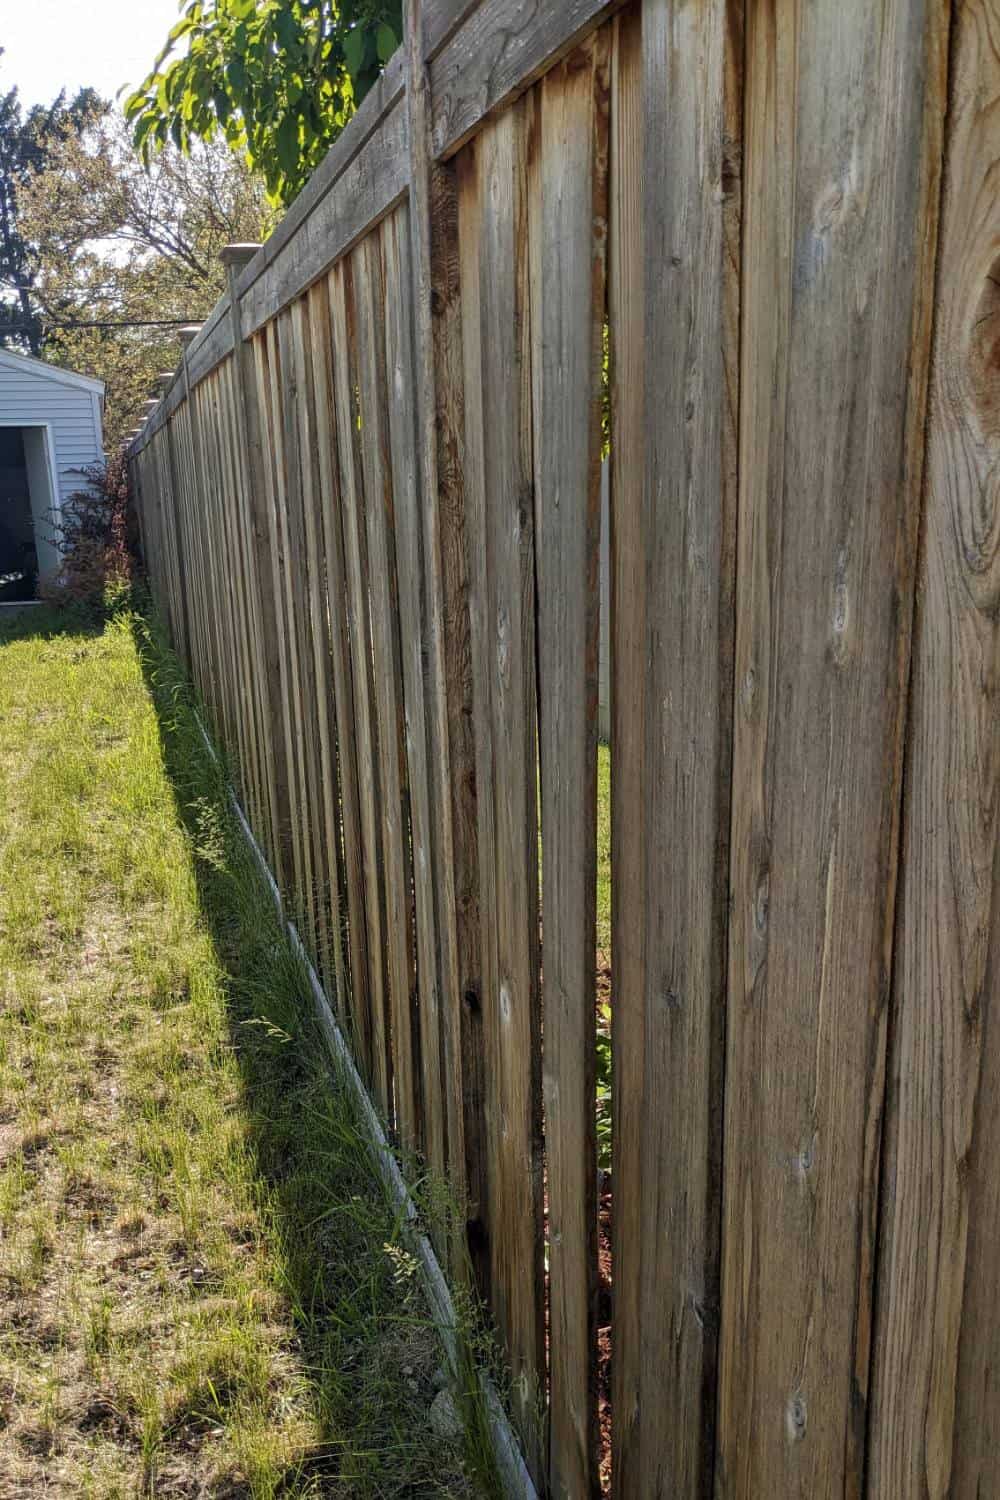
There’s something undeniably charming about a cedar picket fence. Whether it conjures images of quaint cottages, lush gardens, or the classic American dream, the picket fence symbolizes beauty and simplicity, and it creates beautiful curb appeal. Imagine bringing a touch of this timeless charm into your garden or patio in a fun and creative way. That’s where the joy of DIY projects comes in. Crafting your own picket fence flower pot not only adds a rustic, picturesque element to your outdoor space but also provides a rewarding experience that lets your creativity flourish. With a few materials and a bit of effort, you can create a beautiful and functional piece that embodies the essence of handmade charm.
I have made a few projects out of old fence pickets in the past; one of my favorites is this easel I created out of an entire section of an old fence.
Materials Needed to Make a Picket Fence Planter
Additional Tools You’ll Need
How to Make A DIY Picket Fence Flower Pot
Follow these easy steps to build your own picket fence flower pot.
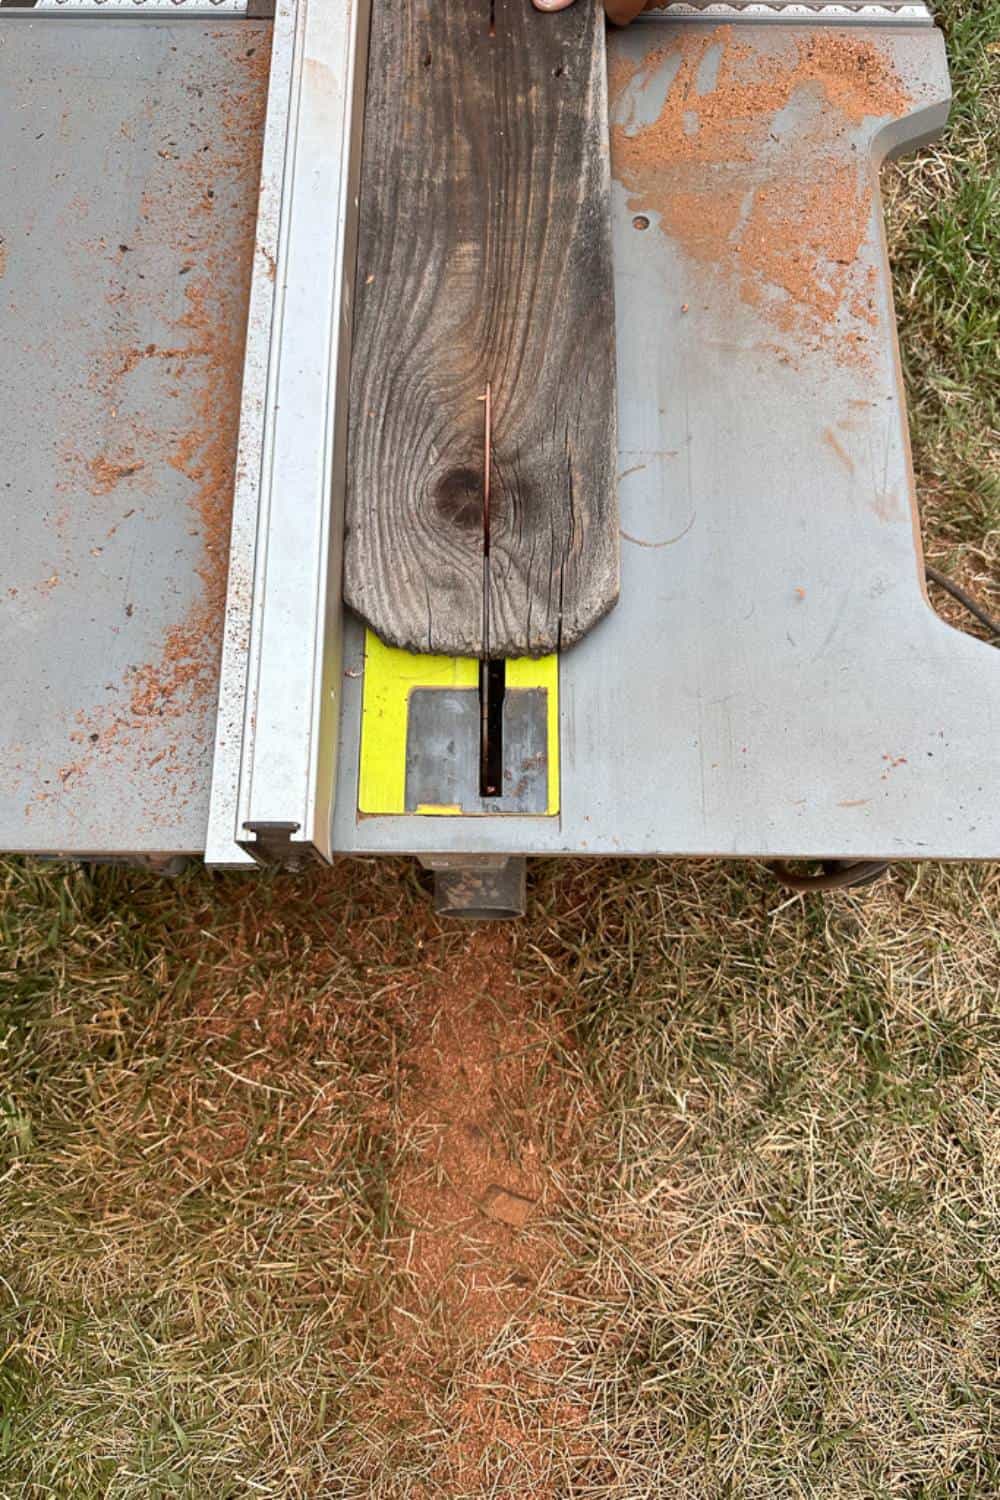
Step 1: Cutting the pickets
I used old pickets because I love their weathered look and charm. You can typically find them for free, but you can always purchase new pickets that are already cut to size, and you’ll only need to adjust the length and width.
Here’s how we did it:
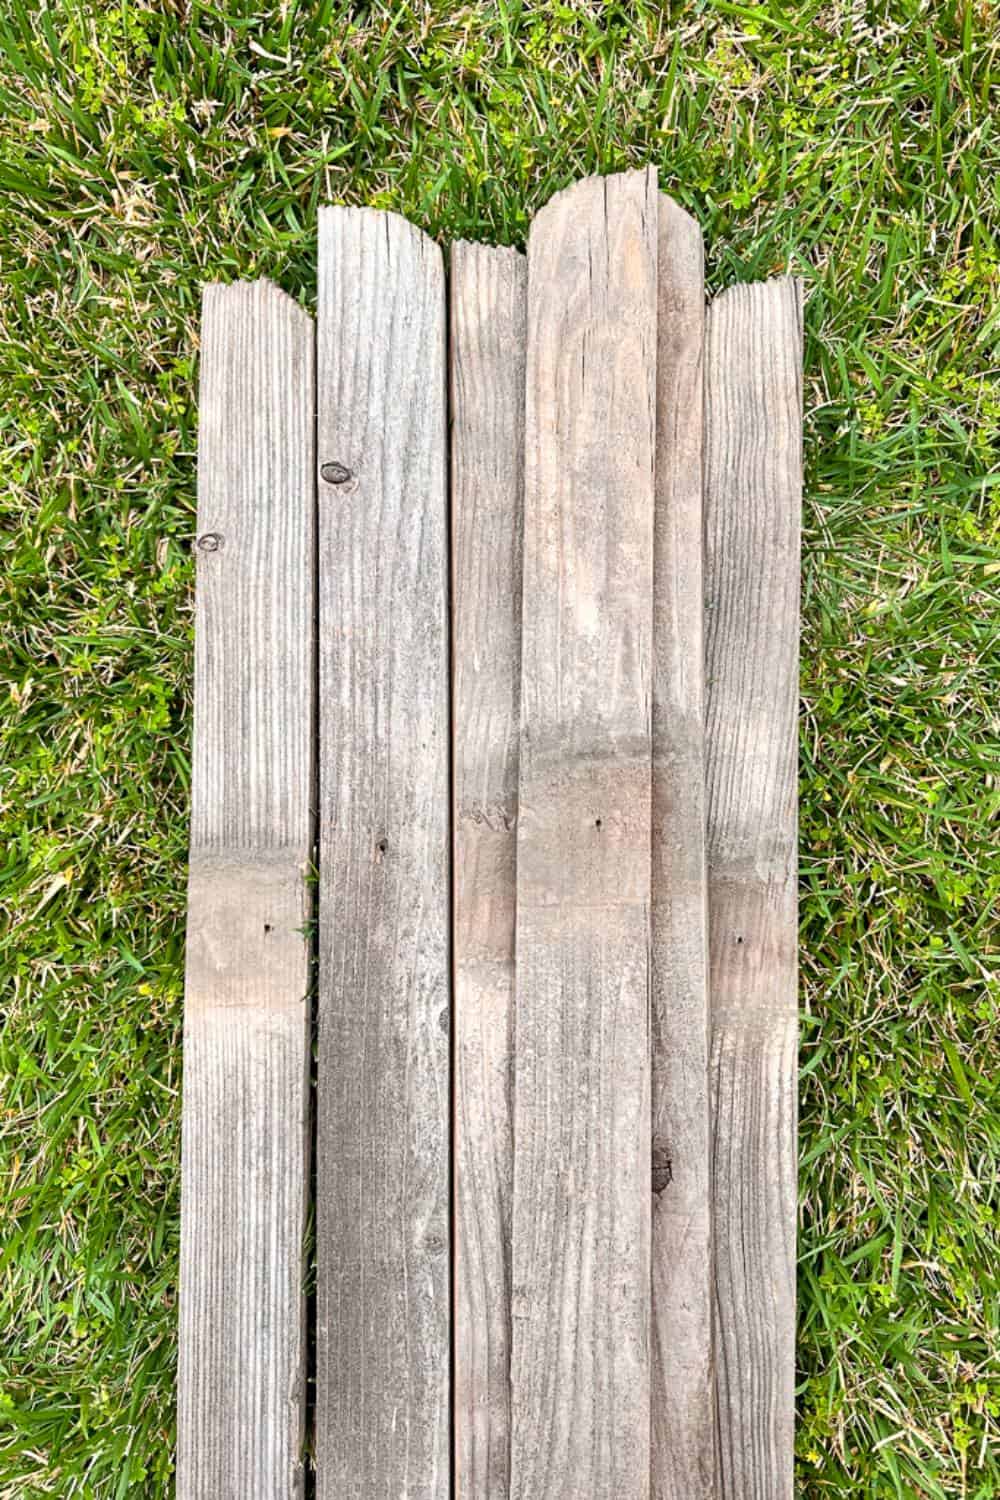
- Starting Materials: We began with full-size dog ear fence boards 8 feet tall and 6 inches wide that we salvaged from an old fence.
- Cutting Individual Pickets: I cut these boards to make individual pickets since that was what I could find. The boards were 6 inches wide, so we split them down the middle at 3 inches and then cut them into 12-inch lengths.
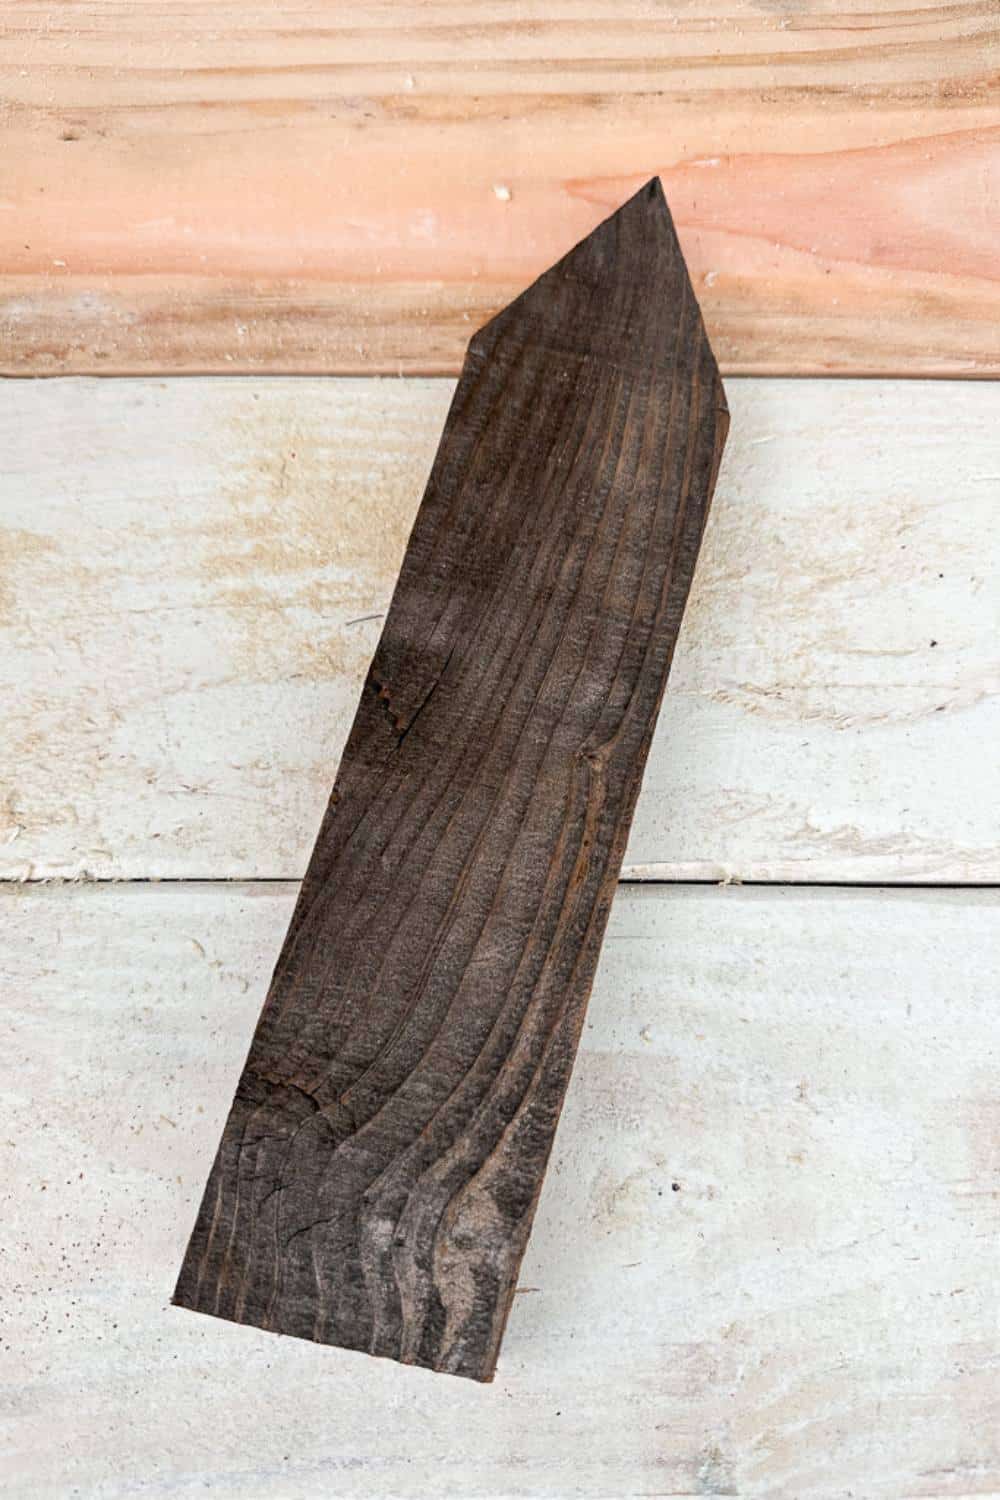
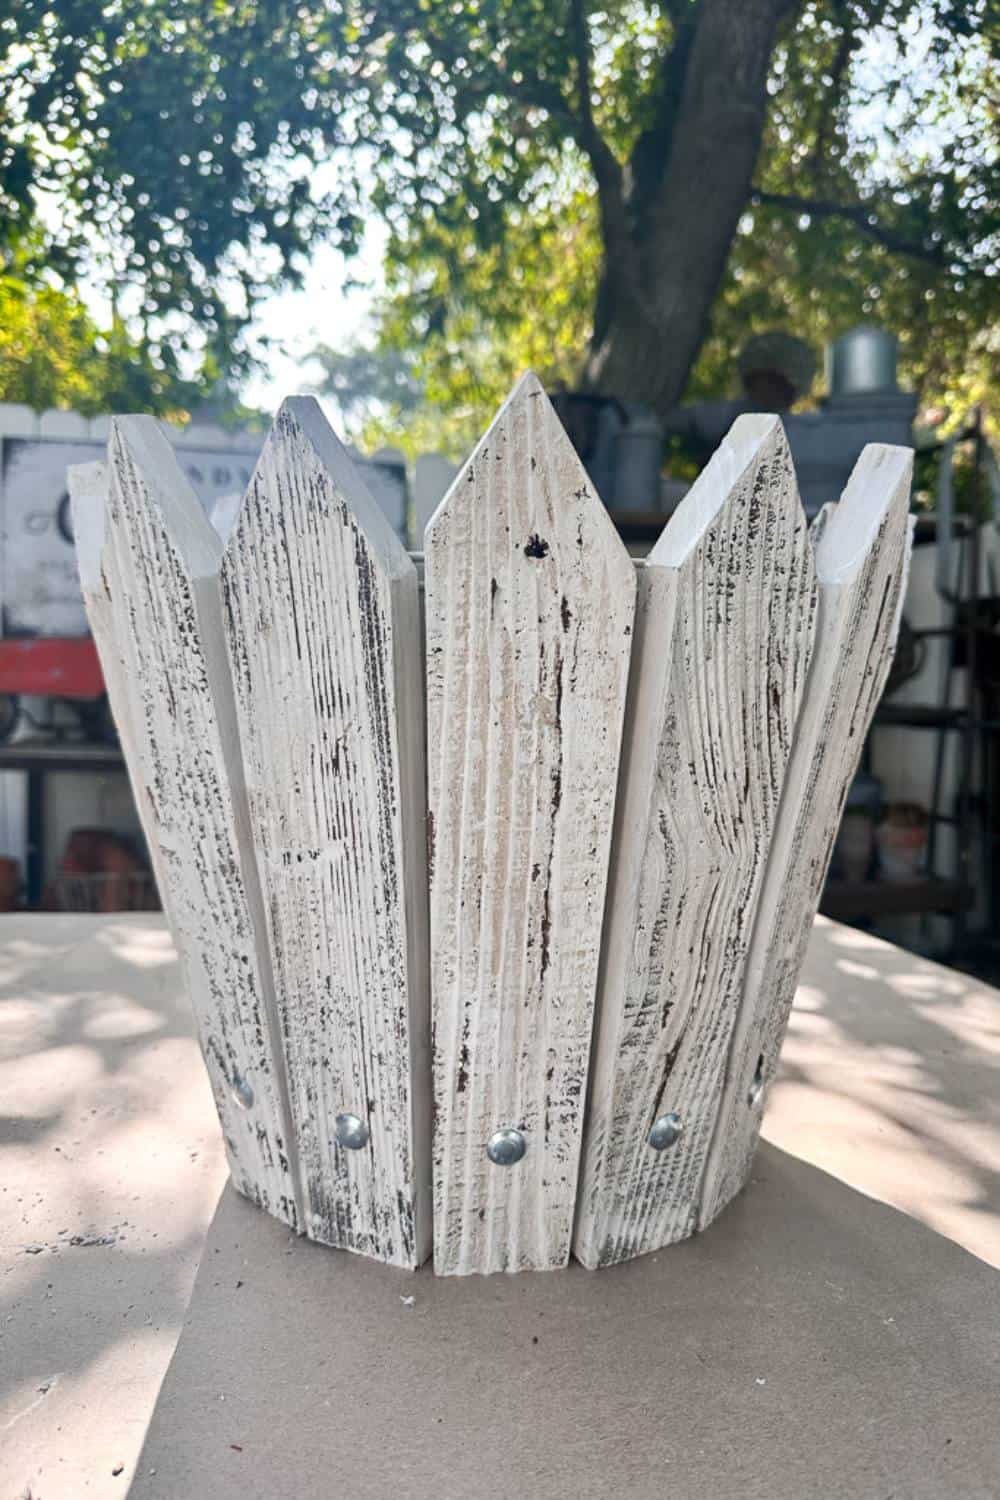
- Shaping the Pickets: Next, create a point at the top by trimming off a triangle on both sides, approximately 2.5 inches down on each side.
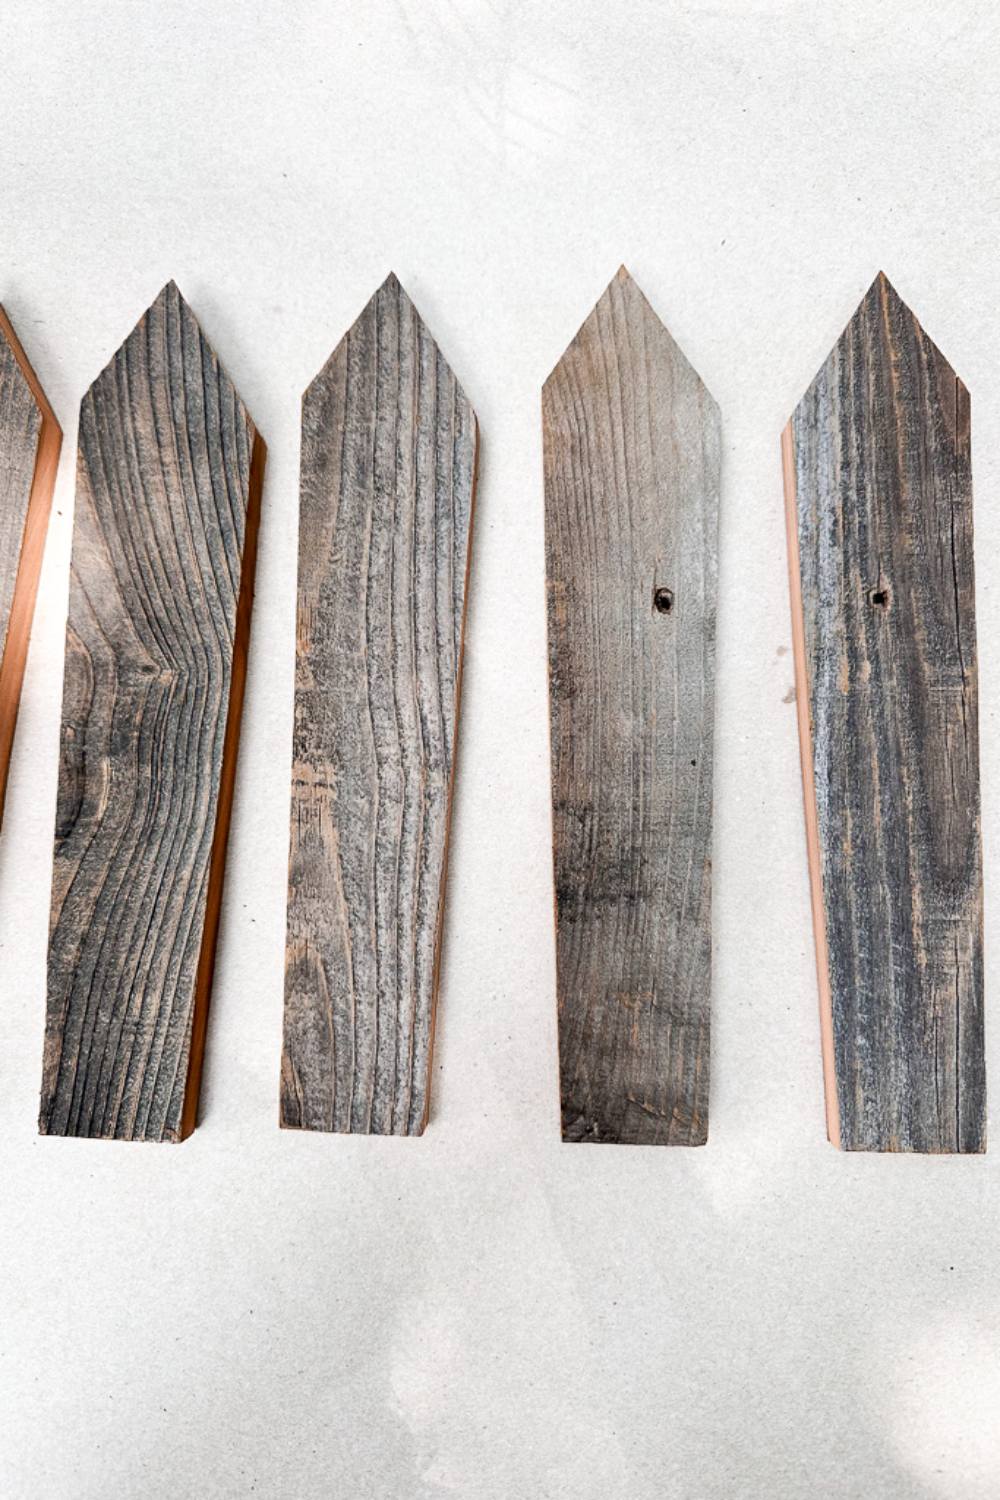
- Adjusting Picket Height: Adjust the height of your pickets to match the height of your pot. Since I used an angled flower pot, the pickets needed to be slimmer at the bottom and wider at the top.
- Fine-tuning with a Jig: My son-in-law helped by making a jig to trim off 3/8 inches from both sides at an angle.
Following these steps, you’ll create charming pickets that perfectly fit your flower pot.
Tip from wendy’s craft room:
Starting with old fence boards will give your project more character if you are looking for a rustic look.
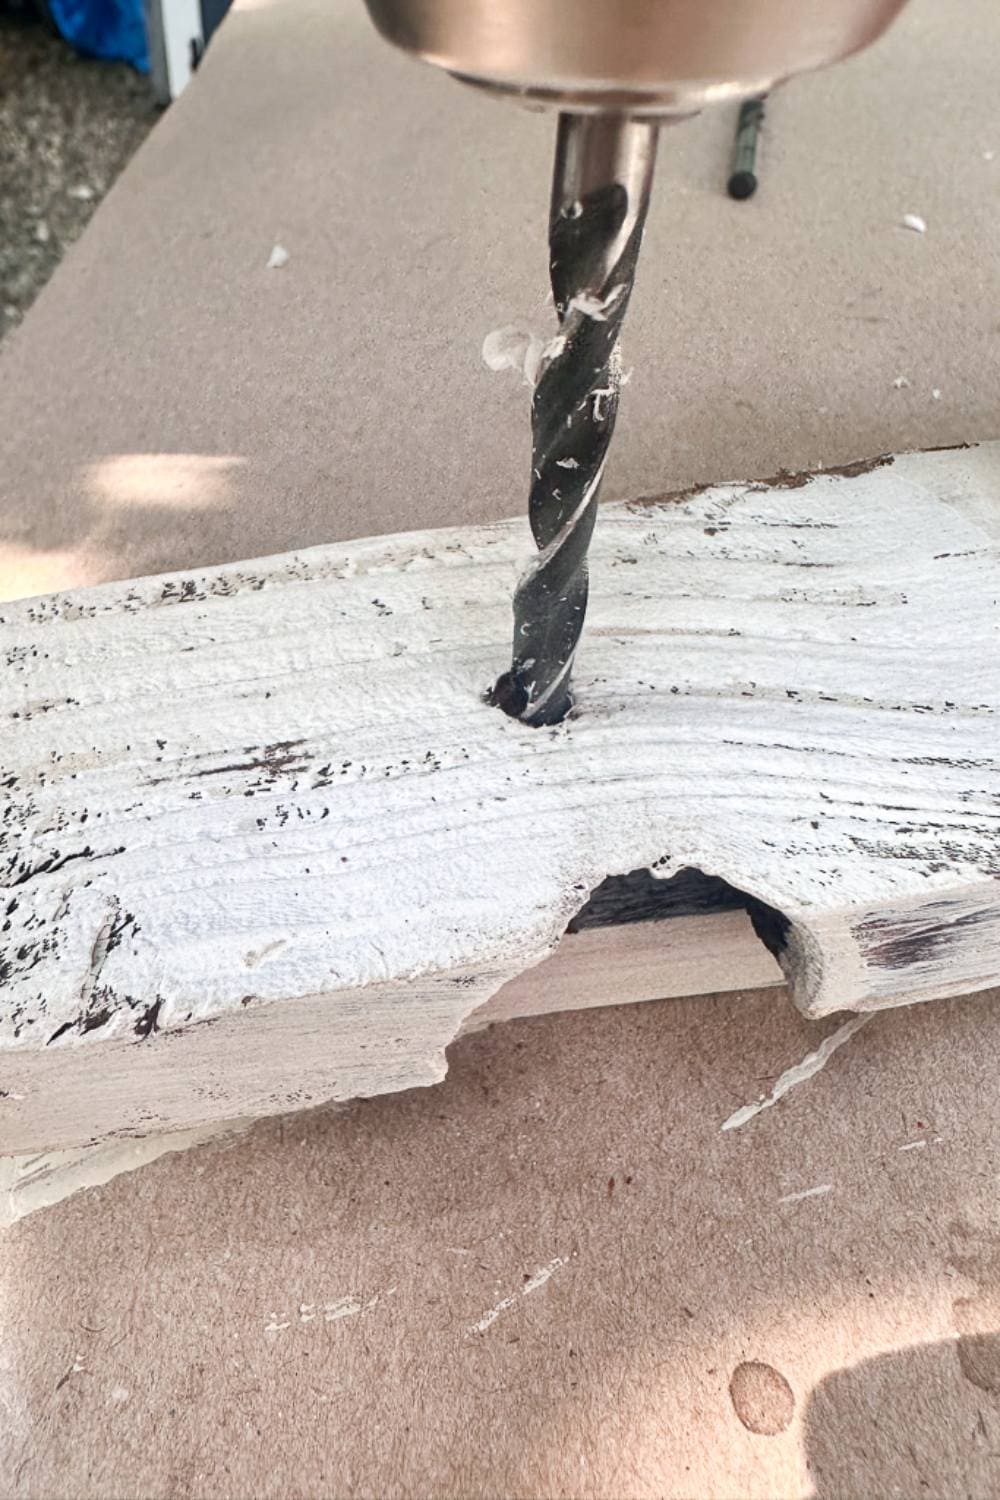
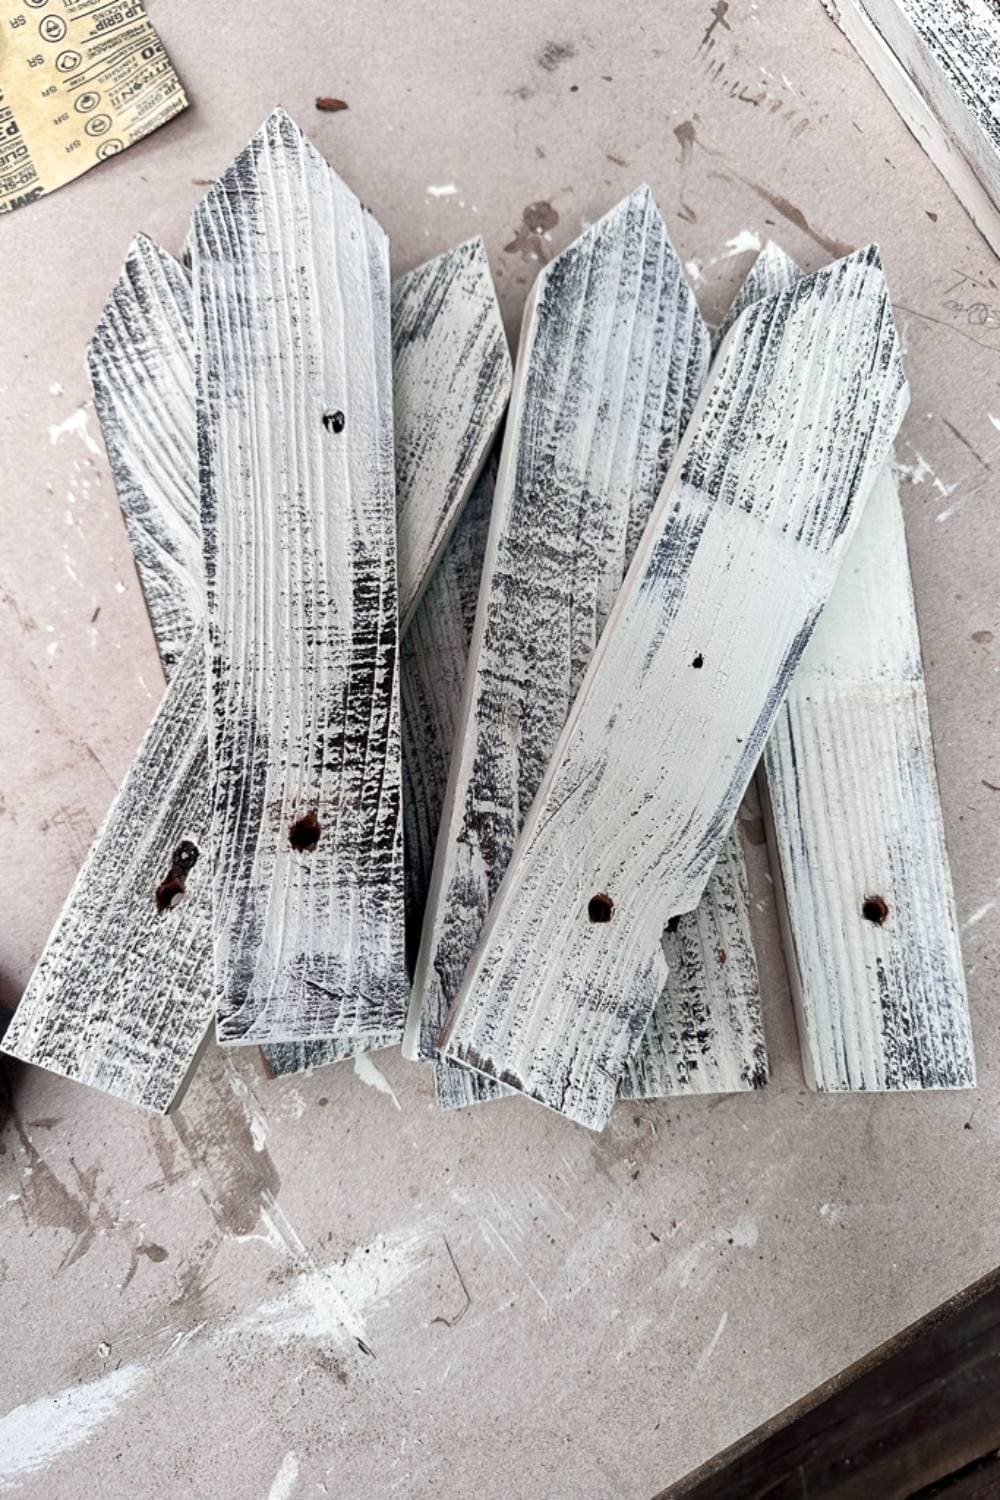
Step 2: Preparing the Pickets
- Sand off any rough edges.
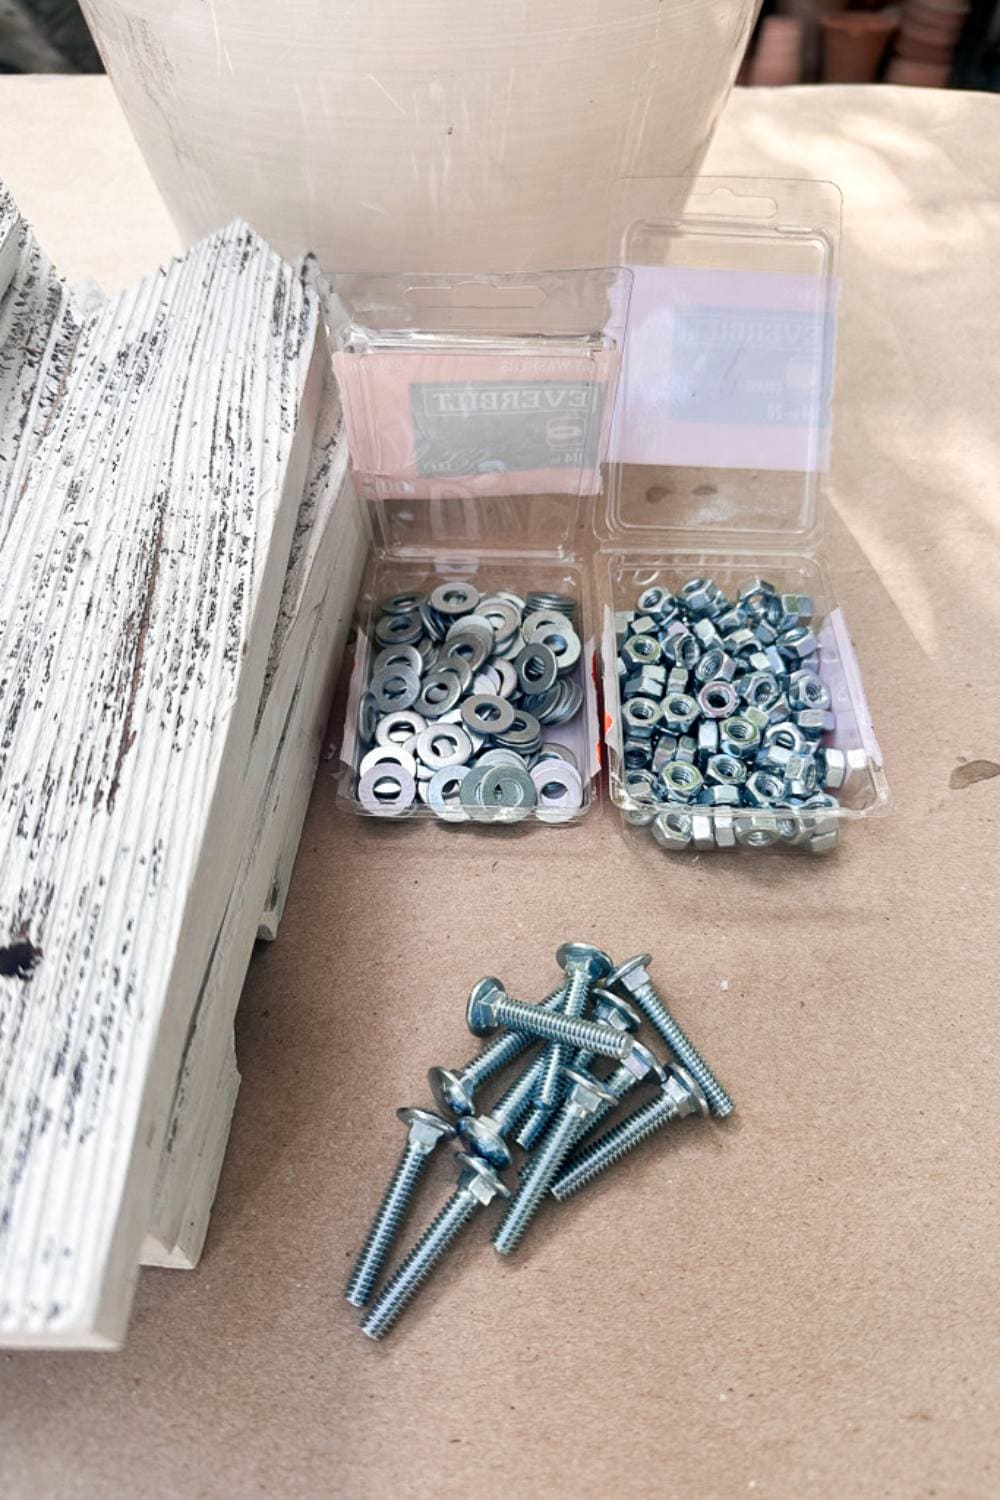
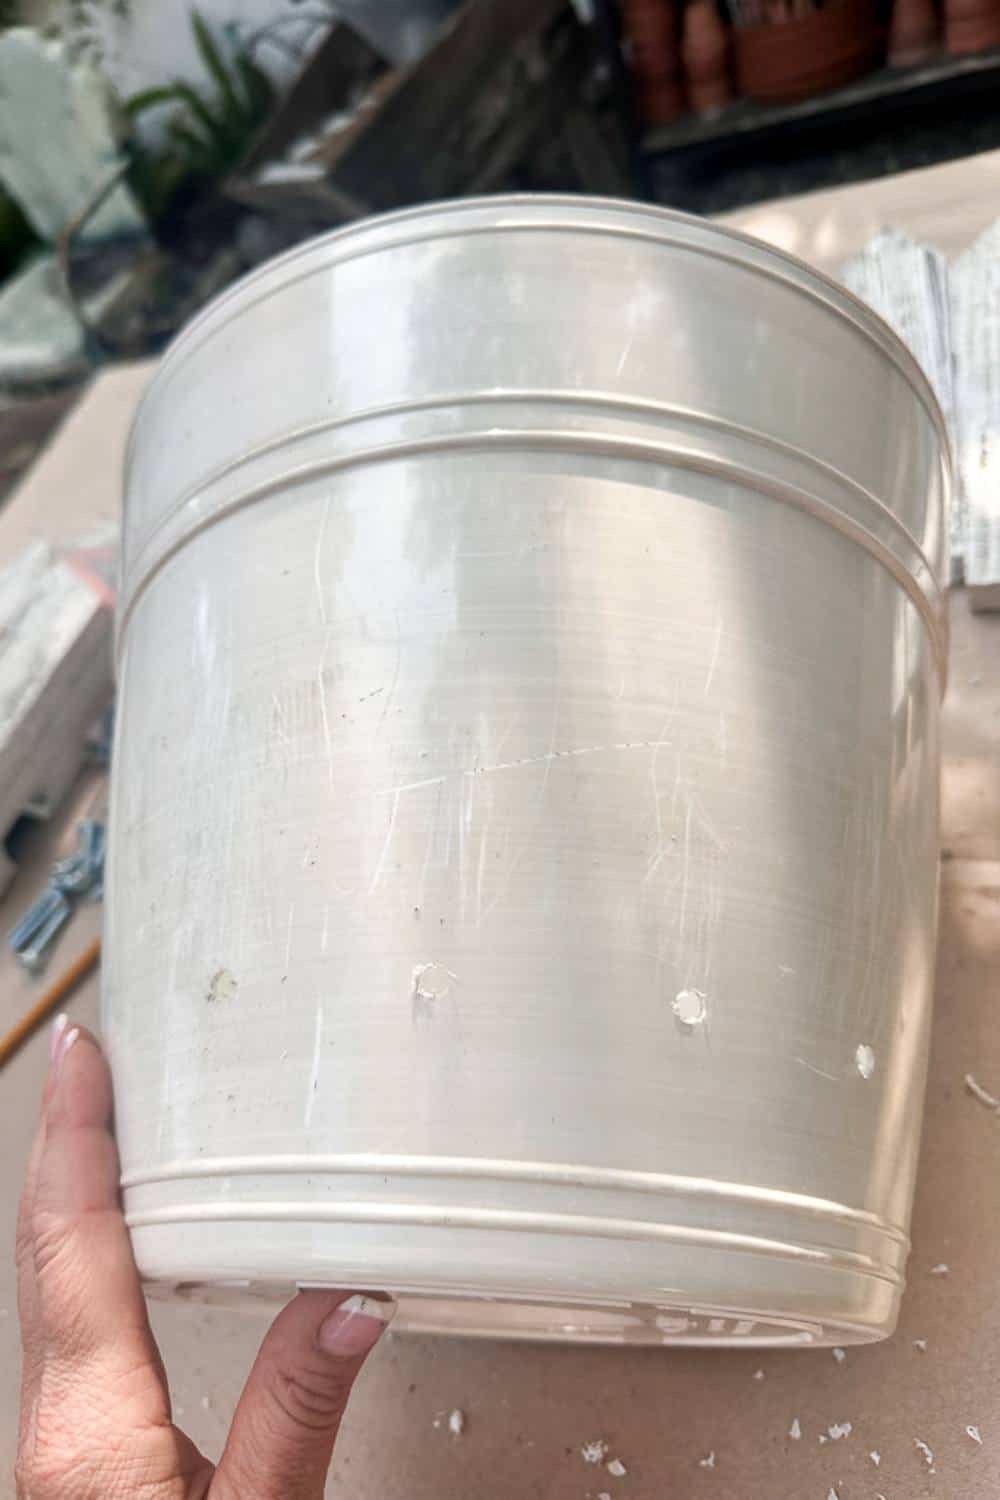
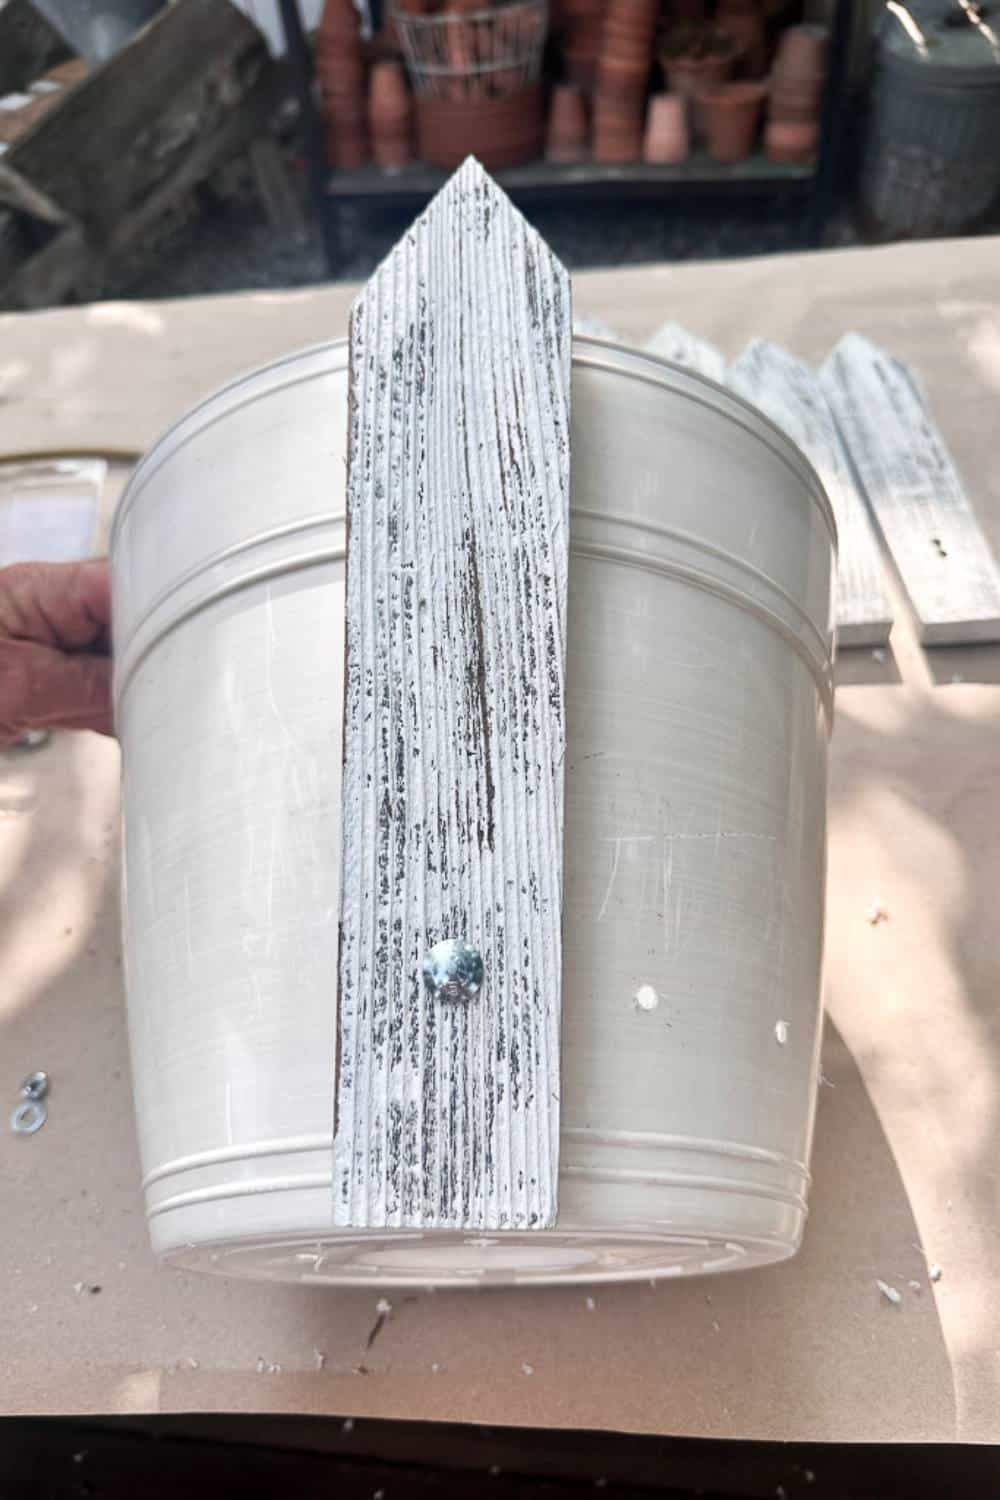
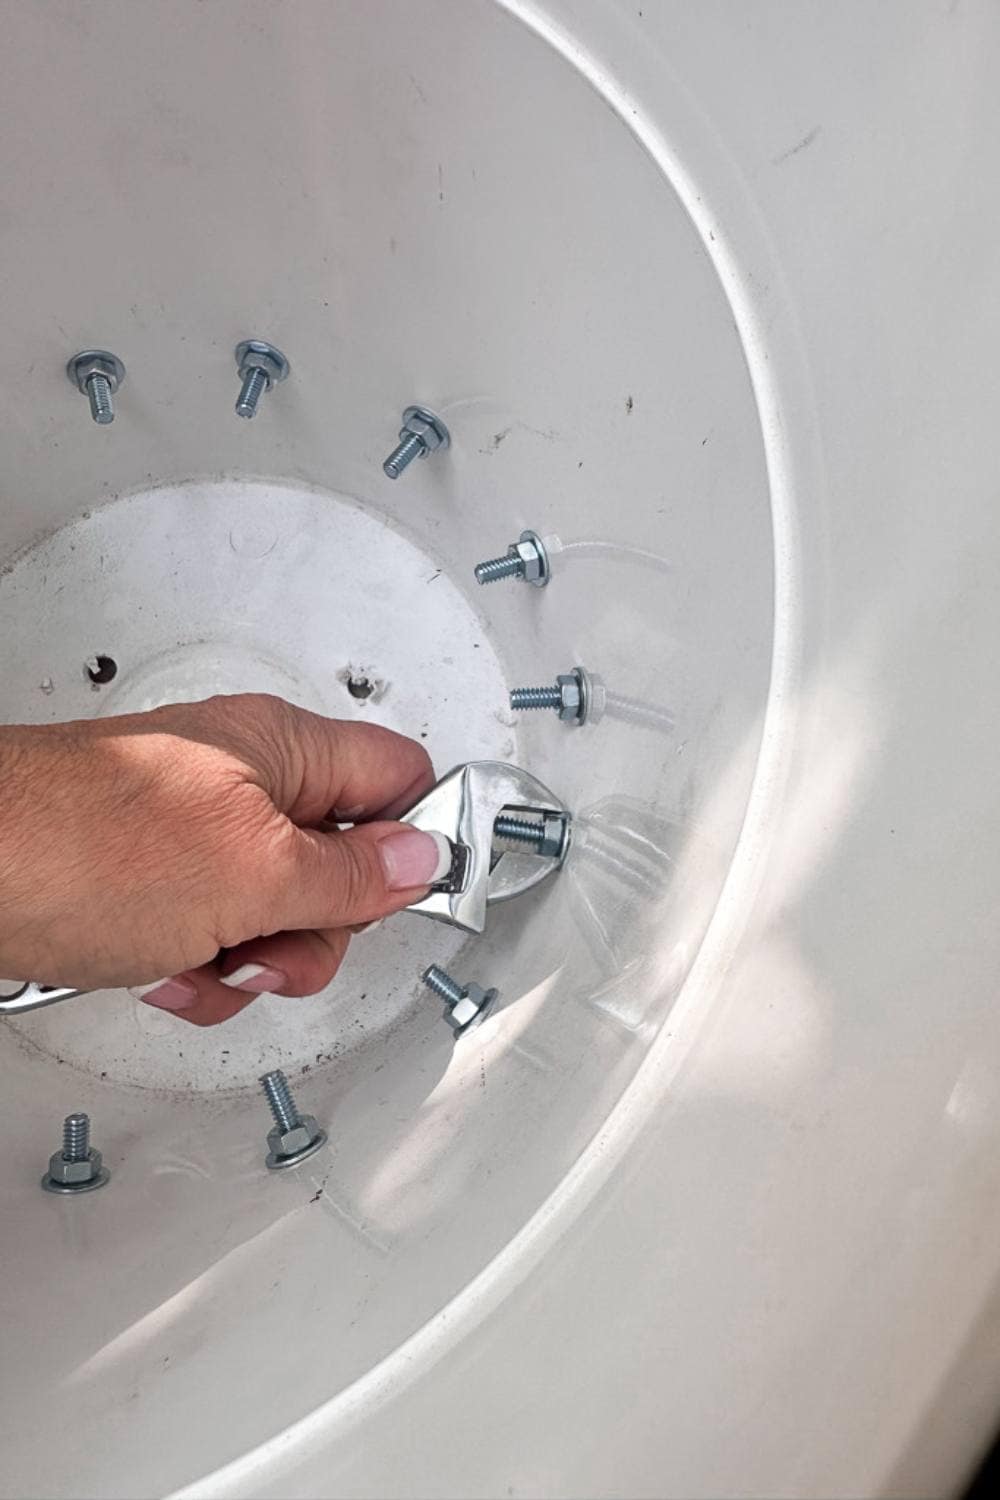
- Drill a hole large enough for the 1.5″ bolt approximately 2″ up from the bottom in the middle of the picket.
- Seal the pickets with a clear sealer.
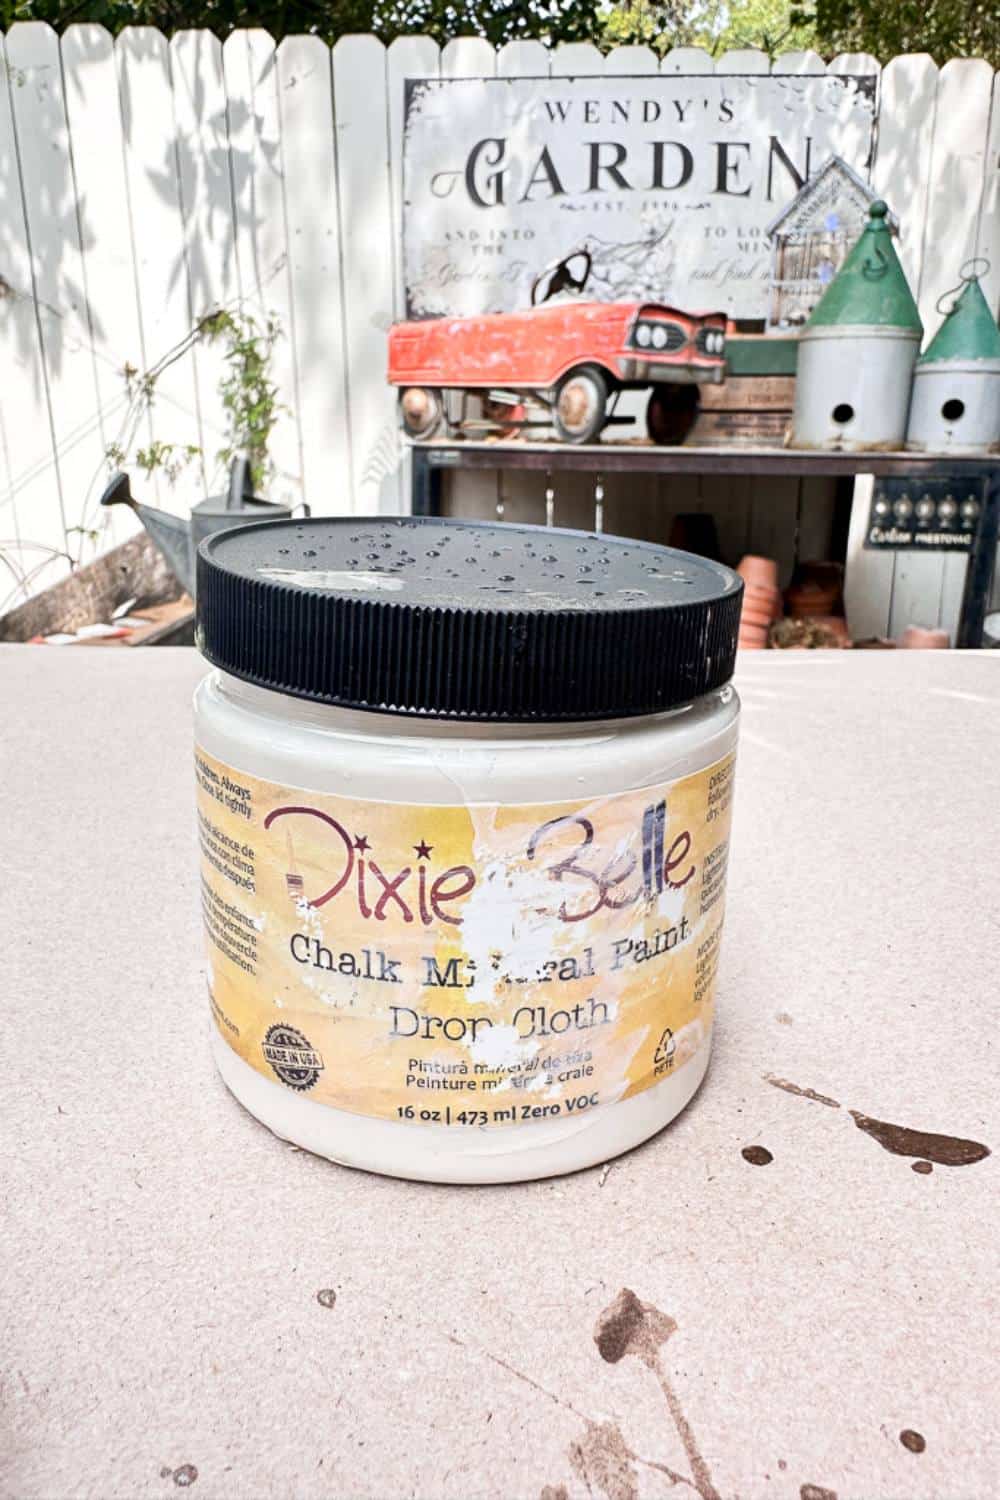
Step 3: Painting The Pickets
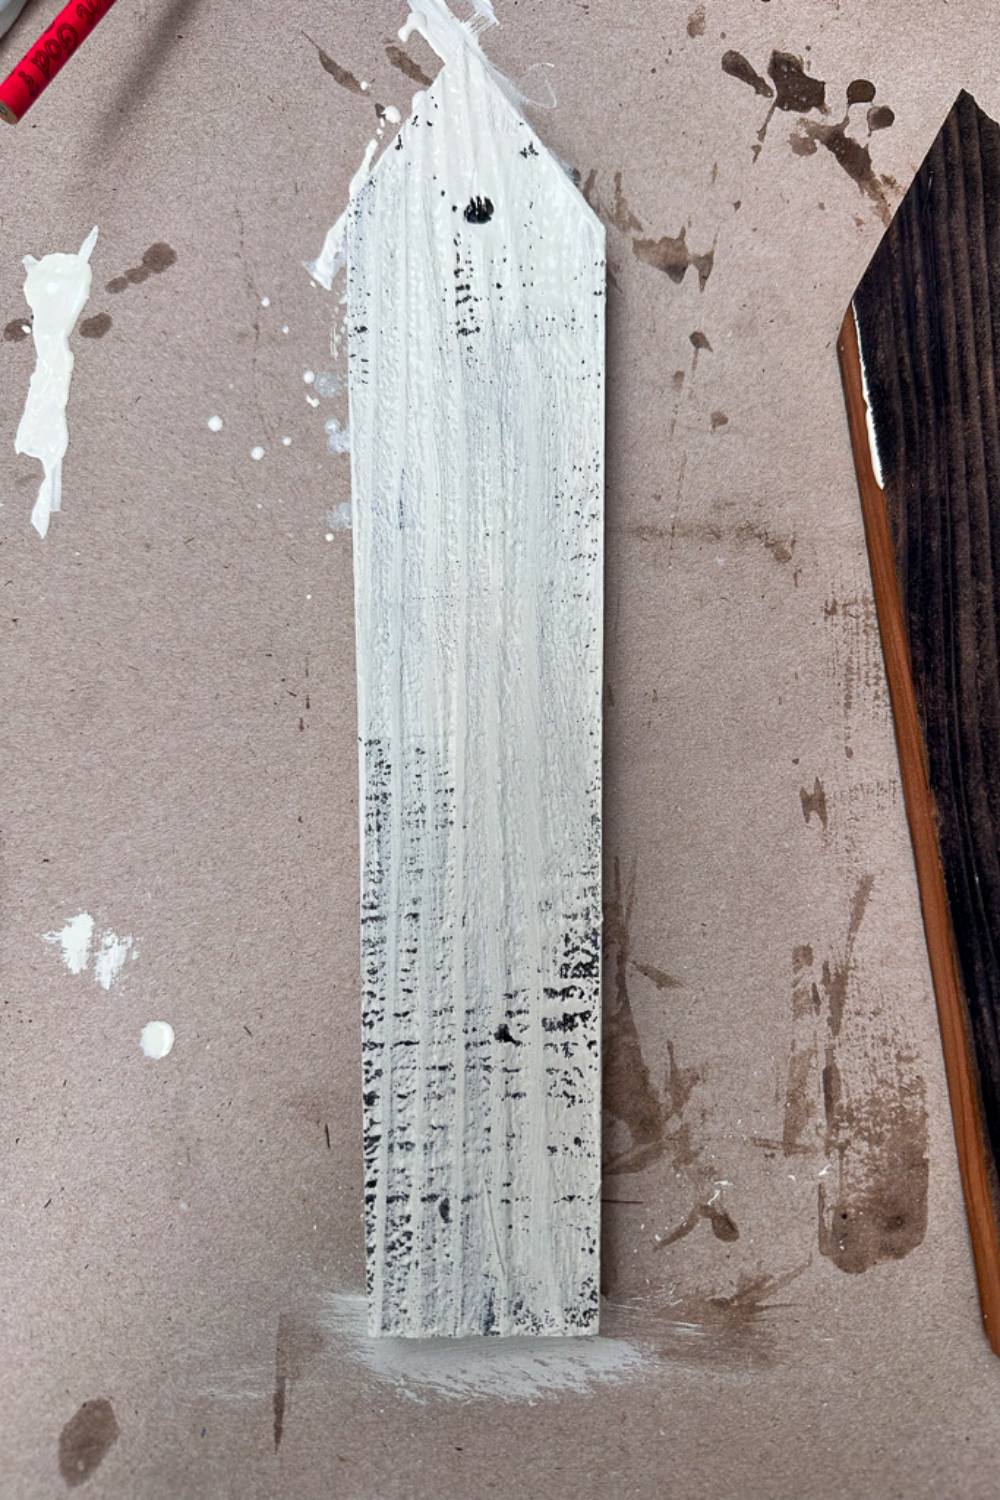
Tip from wendy’s craft room:
For a charming chippy paint finish on wood pickets, start by applying a coat of a base color and letting it dry completely. Then, rub a wax candle along the edges and areas where you want the paint to chip. Apply a top coat of a contrasting color over the waxed areas. Once the top coat is dry, use a putty knife or sandpaper to gently scrape away the top layer, revealing the base color underneath and creating a naturally weathered, chippy effect.
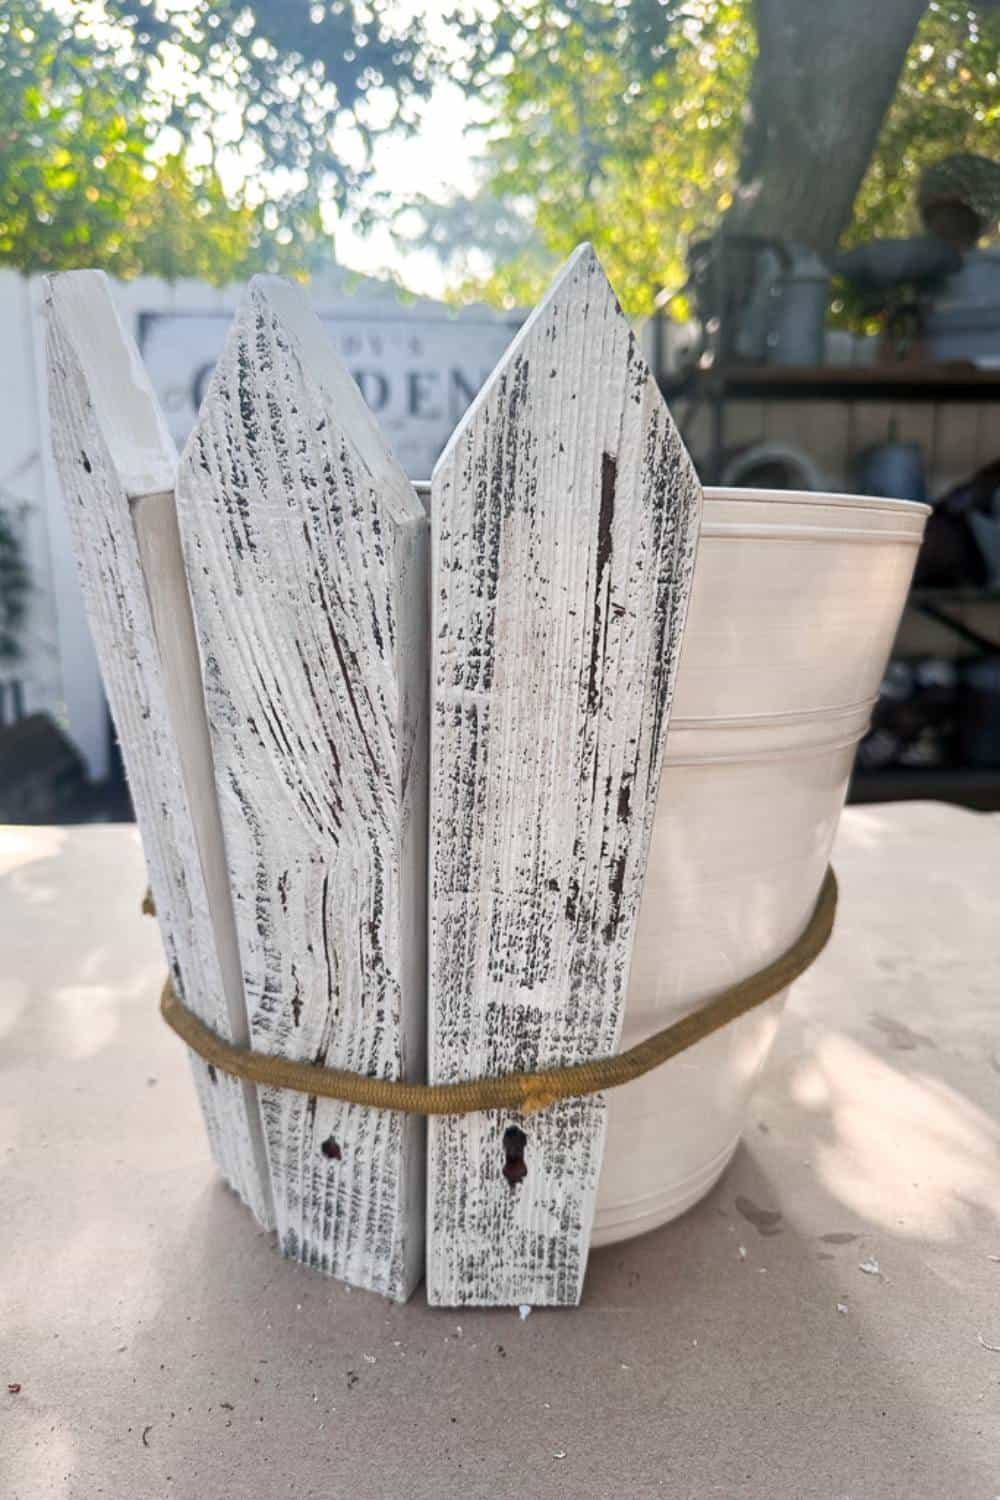
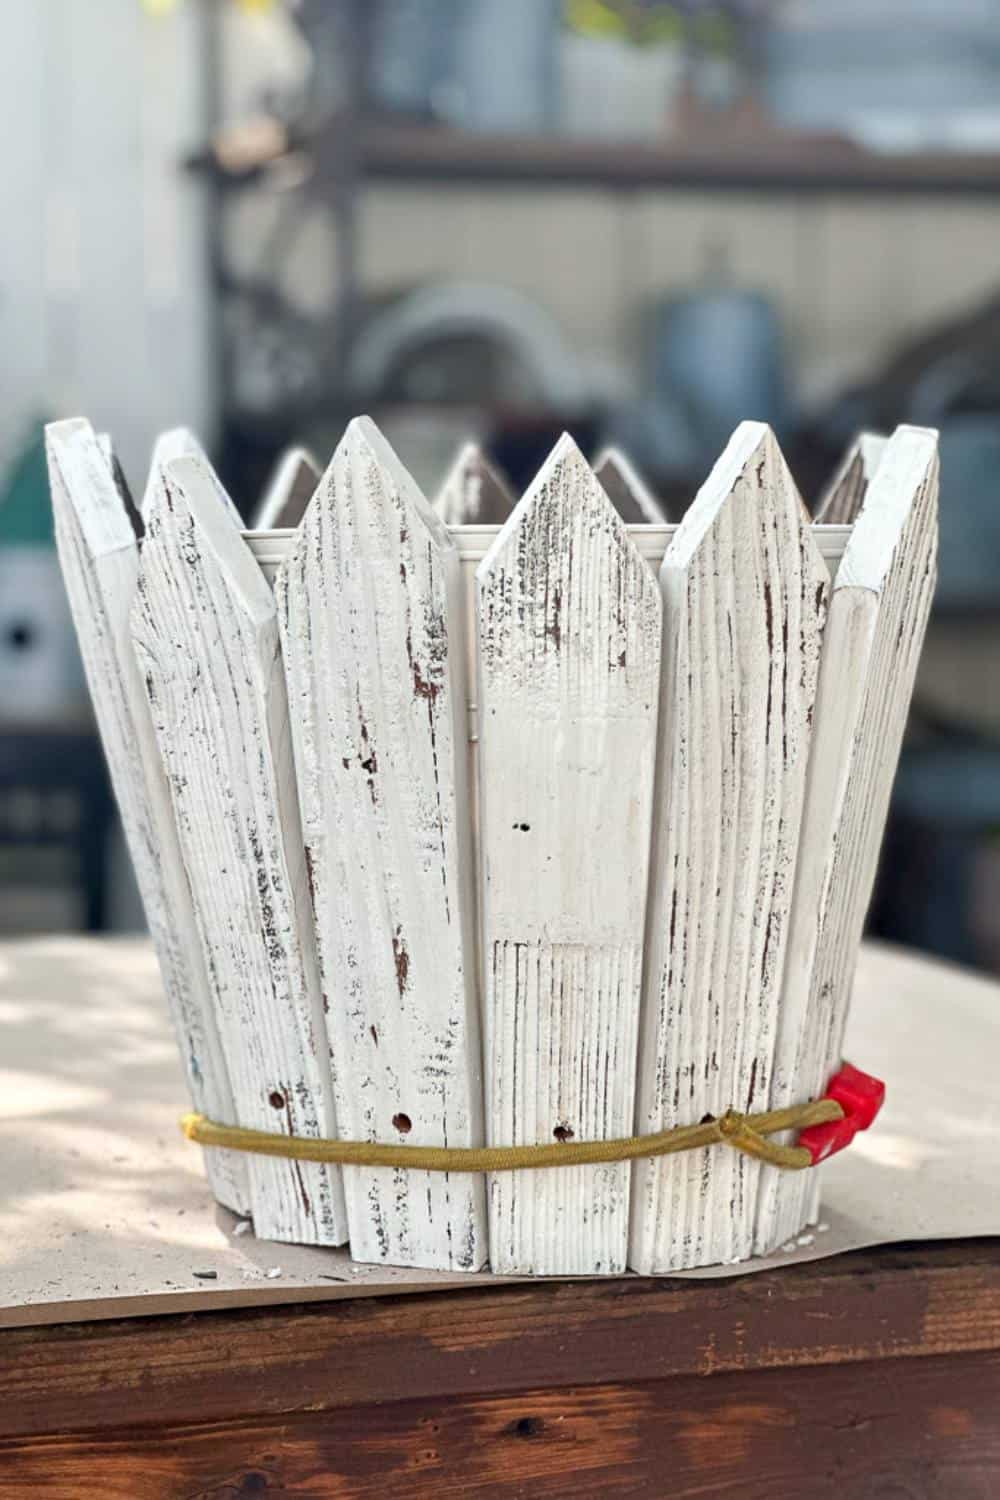
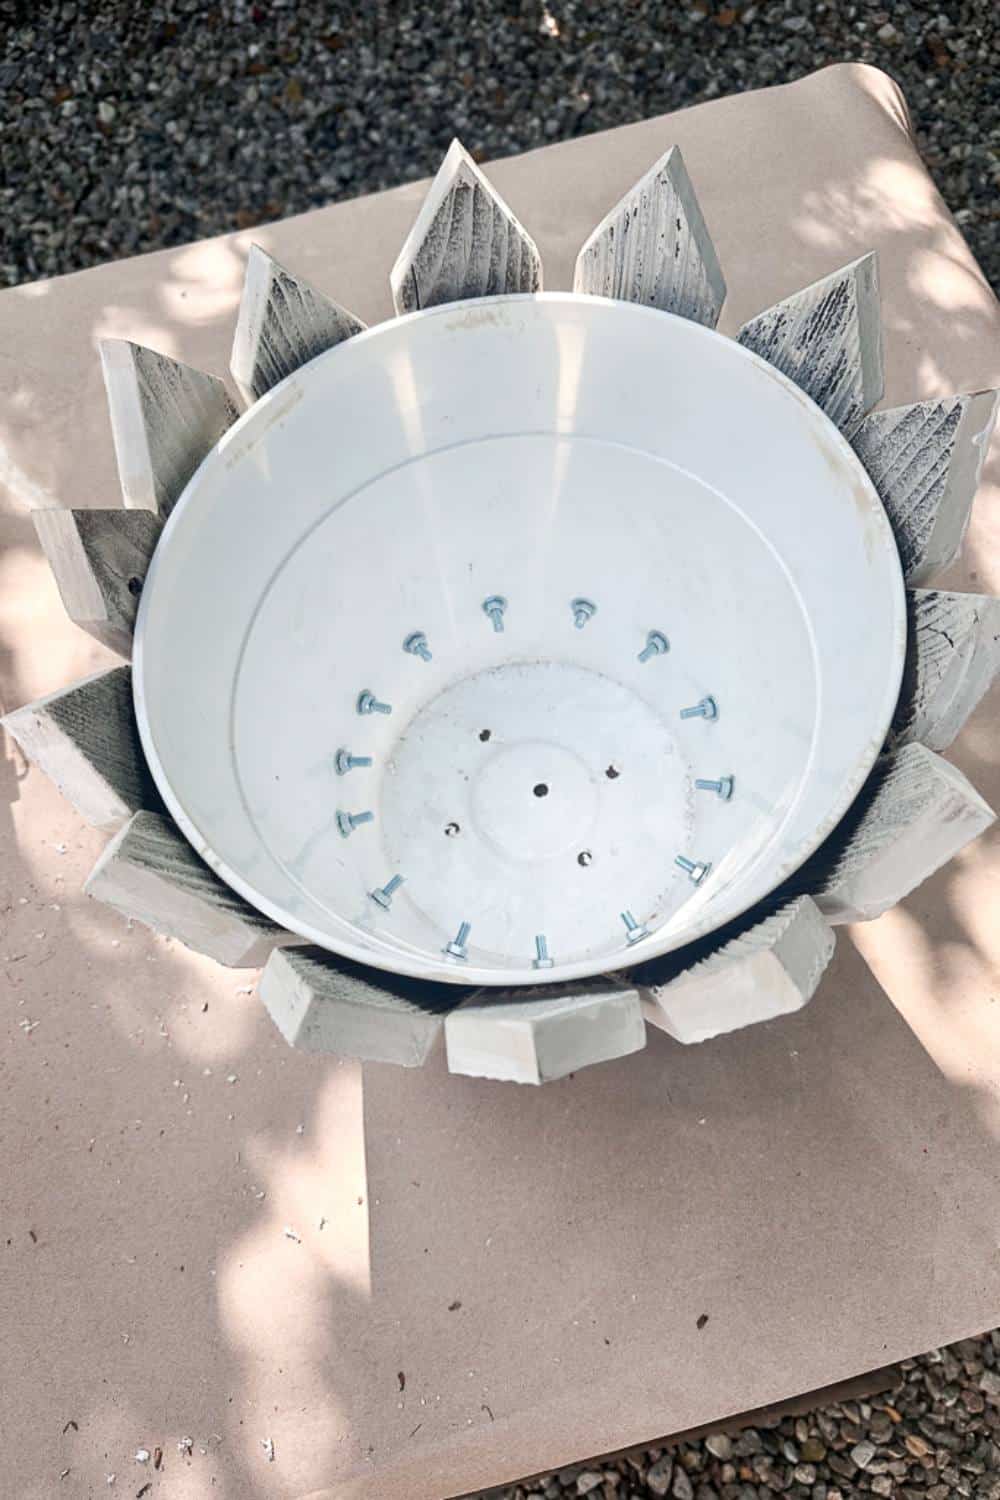
Step 4: Attaching the Pickets to the Flower Pot
- Use a large bungee cord and place it around the pot.
- Place the pickets in the bungee cord around the entire pot.
- Mark where the holes are on the flower pot using a pencil.
- Remove the pickets and drill the pilot holes in the flower pot while leaning the flower pot on a flat surface.
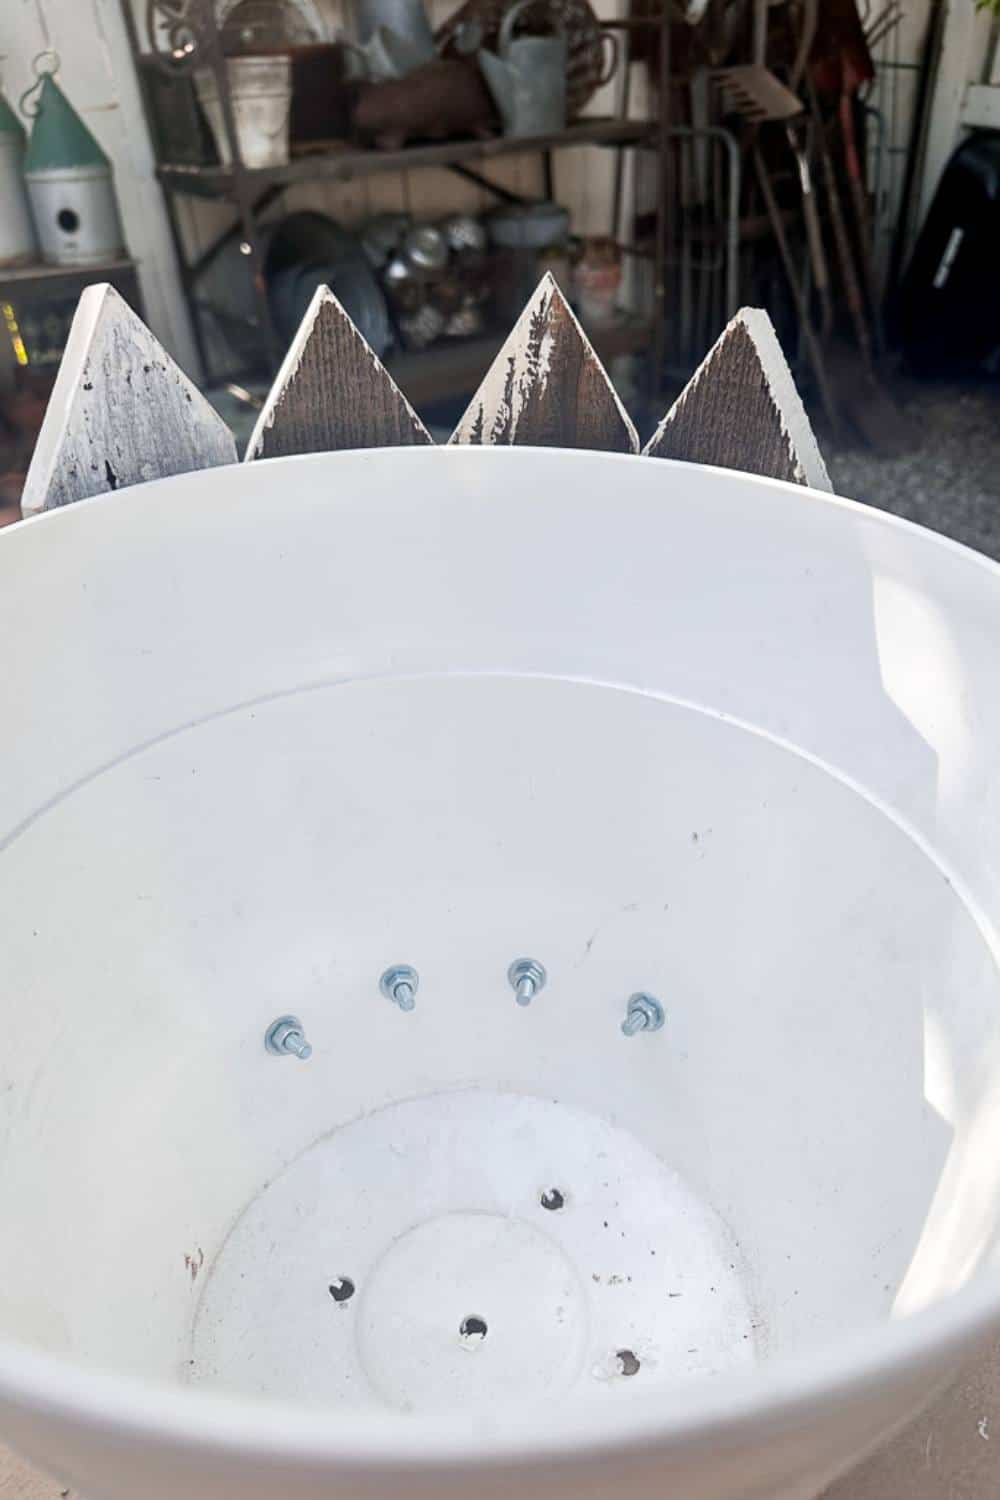
- Place a bolt through the hole attach a washer and nut on the inside of the pot, and tighten.
- Continue this process until all of the pickets are attached to the flower pot or planter boxes.
Tip from wendy’s craft room:
Drill and attach a few pickets at a time, when you have finished attaching all of the pickets, then tighten all of the bolts.
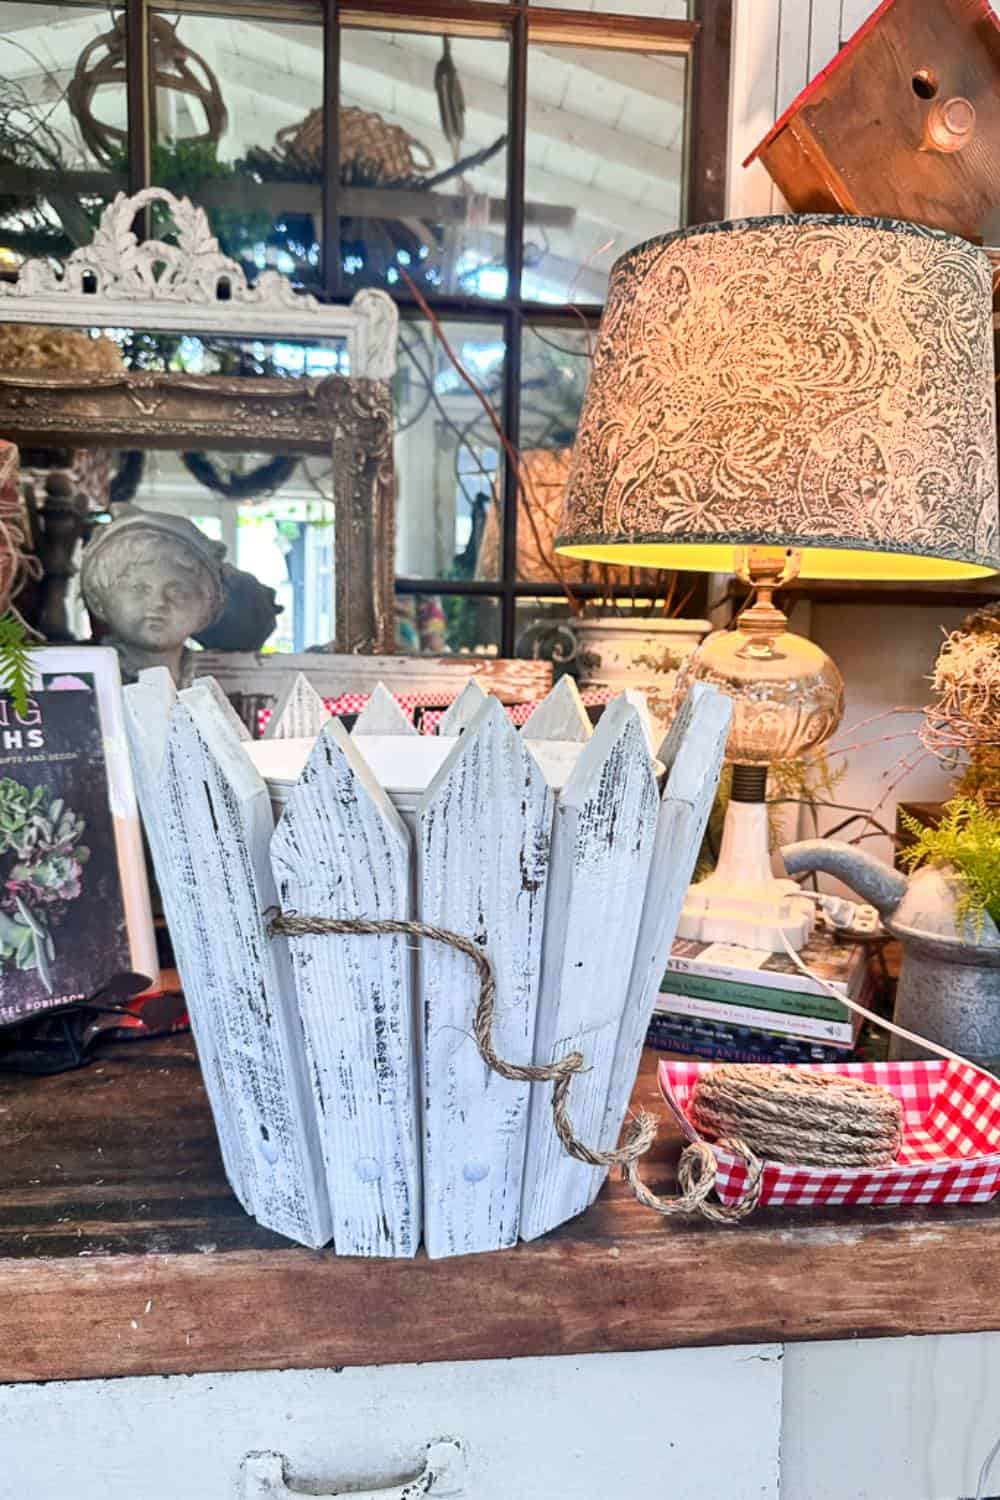
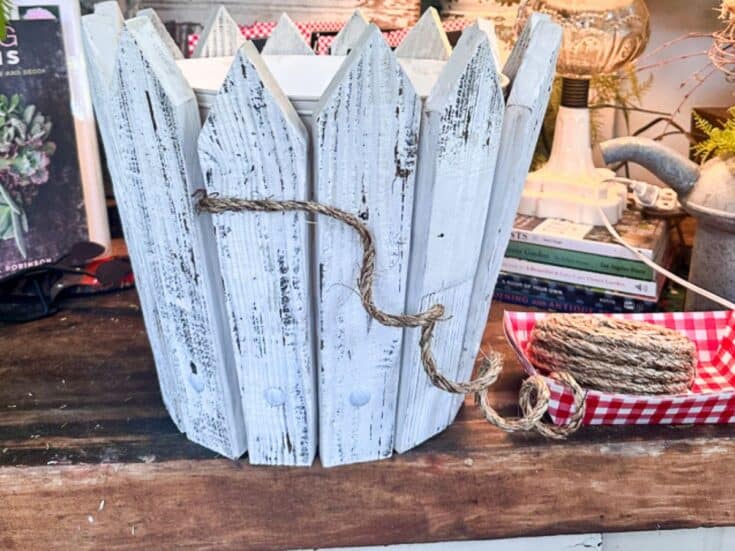
Step 5: Adding Rope Around the Pickets
Adding a bit of rope helps keep the pickets tight against the flower pot and creates visual interest.
Use a hot glue gun to attach one end of the rope to the back of the flower pot, wrap the rope around the pot several times, and hot glue the end to the pieces of wood.
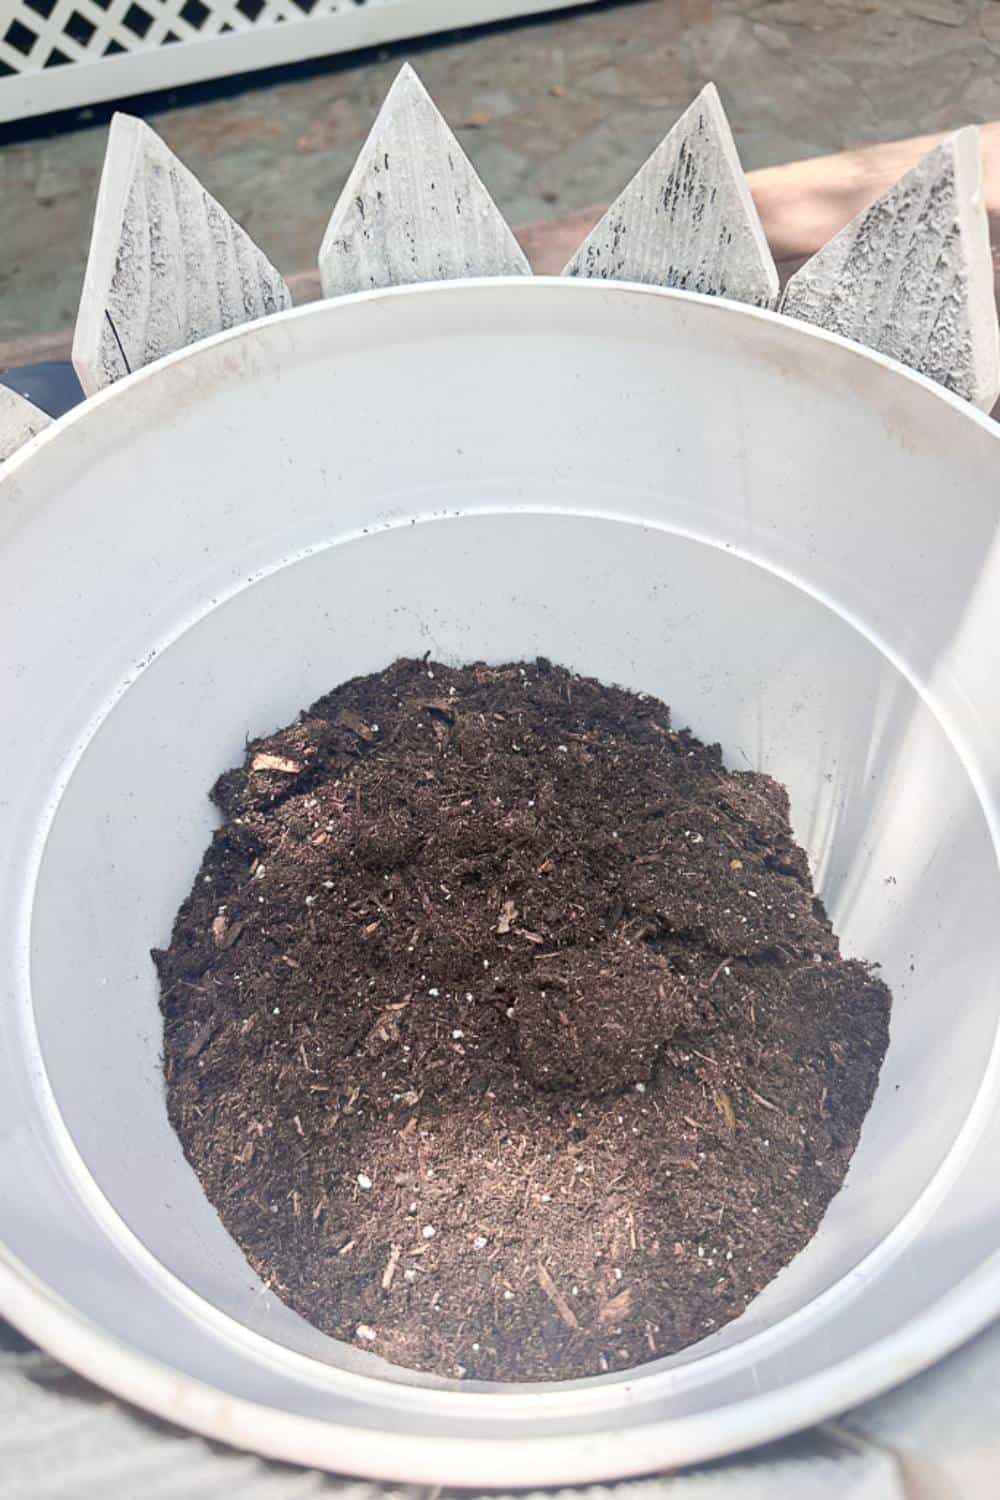
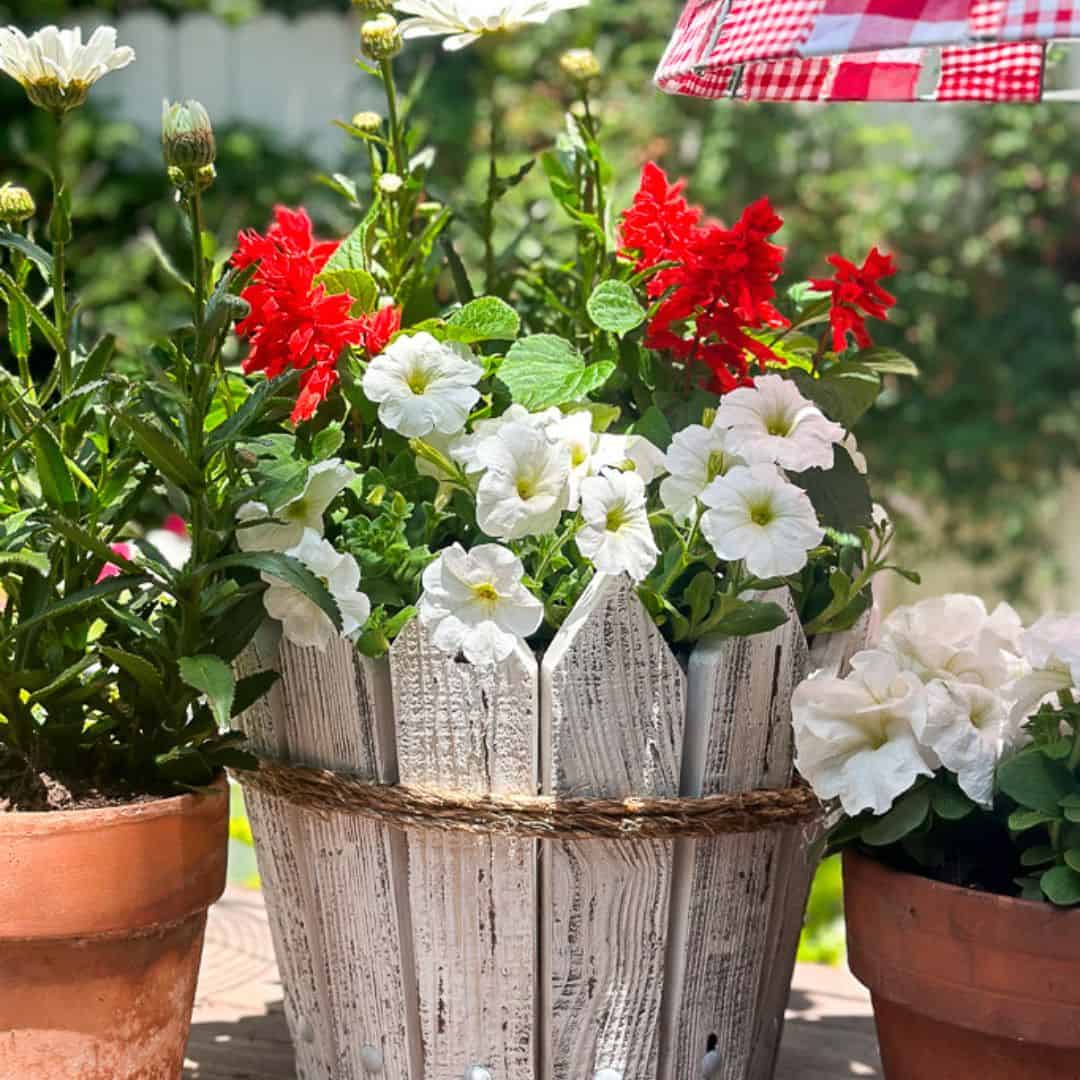
Step 6: Planting Your DIY Picket Fence Flower Pot
There are so many different ways you could plant your new flower pot.
1. Drill a few drainage holes into the bottom of the flower pot.
2. Add some gravel or styrofoam for drainage.
3. Add potting soil.
4. Next step: add a variety of plants into the pot. I used a large shasta daisy, a few white petunias, and some scarlet sage.


Tip from wendy’s craft room:
Choose plants that work with your planting zone and for the season you are in.

DIY Picket Flower Pot
This DIY picket fence flower pot is an easy project that you can put together in just a few hours.
Materials
- Wooden cedar fence pickets, I prefer to use old, but if you can't find them, you can buy new ones at Home Depot.
- Plastic pot
- Chalk paint or any leftover house paint
- Paint brush
- Nuts and bolts 1.5" long with a washer
- Sandpaper
- Soil and flowers/plants of choice
- Sisel rope
Tools
- Drill
- Drill bit
- Table saw
Instructions
- Starting Materials: We began with full-size dog ear fence boards 8 feet tall and 6 inches wide that we salvaged from an old fence.
- Cutting Individual Pickets: I cut these boards to make individual pickets since that was what I could find. The boards were 6 inches wide, so we split them down the middle at 3 inches and then cut them into 12-inch lengths.
- Shaping the Pickets: Next, create a point at the top by trimming off a triangle on both sides, approximately 2.5 inches down on each side.
- Adjusting Picket Height: Adjust the height of your pickets to match the height of your pot. Since I used an angled flower pot, the pickets needed to be slimmer at the bottom and wider at the top.
- Fine-tuning with a Jig: My son-in-law helped by making a jig to trim off 3/8 inches from both sides at an angle.
- Sand off any rough edges.
- Drill a hole large enough for the 1.5" bolt approximately 2" up from the bottom in the middle of the picket.
- Seal the pickets with a clear sealer.
- Use a large bungee cord and place it around the pot.
- Place the pickets in the bungee cord around the entire pot.
- Mark where the holes are on the flower pot using a pencil.
- Remove the pickets and drill the pilot holes in the flower pot while leaning the flower pot on a flat surface.
- Place a bolt through the hole attach a washer and nut on the inside of the pot, and tighten.
- Continue this process until all of the pickets are attached to the flower pot or planter boxes.
- Adding a bit of rope helps keep the pickets tight against the flower pot and creates visual interest.
- Use a hot glue gun to attach one end of the rope to the back of the flower pot, wrap the rope around the pot several times, and hot glue the end to the pieces of wood.
- Drill a few drainage holes into the bottom of the flower pot.
- Add some gravel or styrofoam for drainage.
- Add potting soil.
- Next step: add a variety of plants into the pot. I used a large shasta daisy, a few white petunias, and some scarlet sage.
Aha! Moments with Wendy
Have you ever had those ‘aha’ moments mid-project and thought, “I wish I knew that before I started”?
Me too!
Below are a few tips and tricks that worked for me while making my picket flower pot.
Whether you’re a crafting newbie or a seasoned pro, I hope these tips and tricks take some of the guesswork out of creating your own projects.

Expert Crafting Tips and Tricks
Pre-drill Holes for the Bolts: To prevent the wood from splitting and ensure a cleaner finish, always pre-drill holes before inserting the bolts. This step will make assembly easier and give your flower pot a more polished look.
Use Outdoor-Grade Materials: Since your flower pot will be exposed to the elements, opt for outdoor-grade paint, sealants, and hardware. This will enhance the durability of your flower pot, ensuring it withstands various weather conditions and maintains its beauty over time.
I hope you enjoyed this fun summer project. Whether you’re using weathered, reclaimed wood or fresh, new pickets, the end result will be a unique and personal addition to your home. Happy crafting, and enjoy the beauty and character that your handmade picket fence flower pot brings to your garden!
Don’t forget to check out all of the other bloggers posts below. There are some amazing projects that you might like to try.


Other DIY Projects from WM Design House
If you love this DIY Picket flower pot, you might also enjoy some of my other favorite posts:
How to Make A DIY Vintage Chair Planter for the Garden
Get creative in the garden this year and plant an old chair
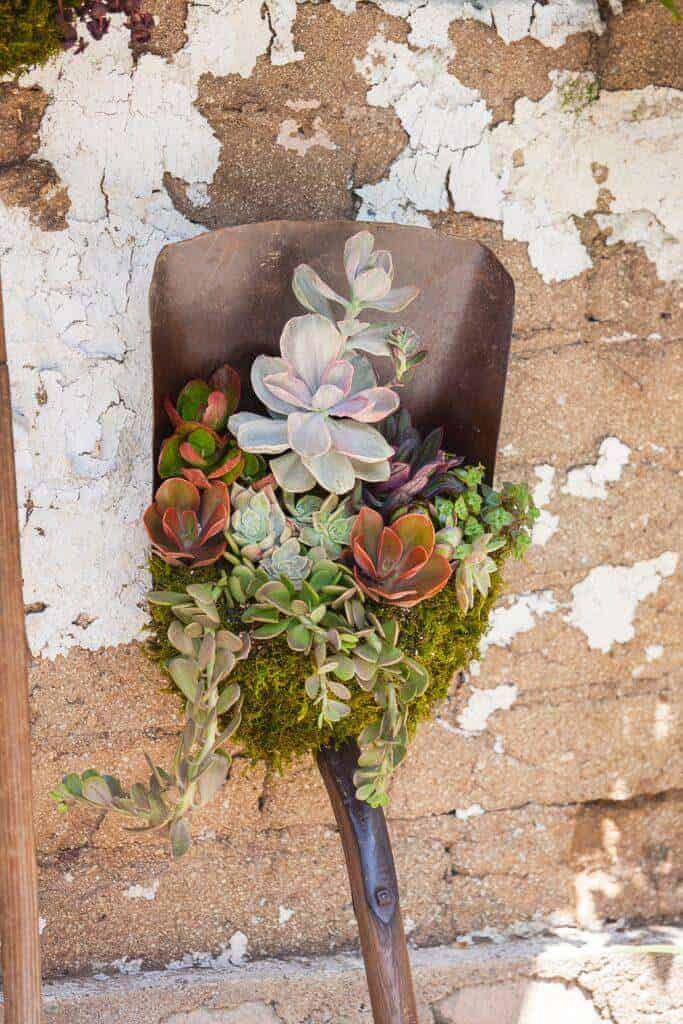
How to Repurpose Old Tools into Succulent Planters
Learn how to turn old garden tools into the most beautiful planters
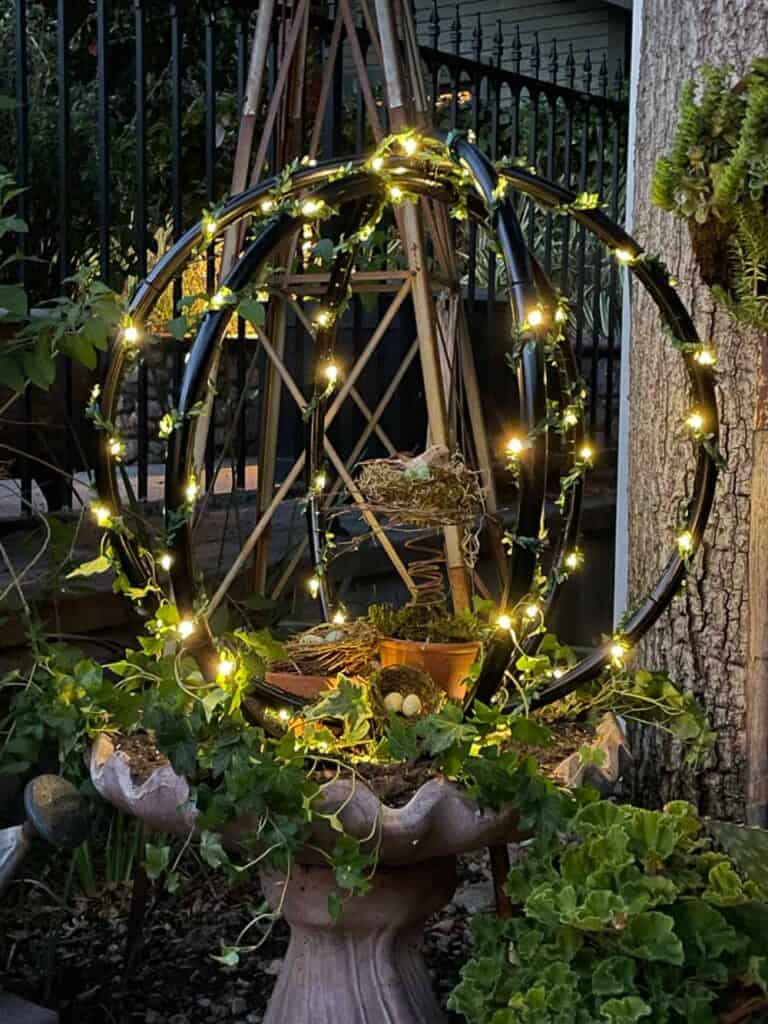
How to Make Lighted Garden Spheres Out of Hula Hoops
Create beautiful lighted garden art out of hula hoops.

Did you make this craft?
We would love to see what you have created, so mention us @wmdesignhouse or tag us using #wmdesignhouse so we can see your creations!
More about me!

Hello, I’m Wendy – a dedicated homemaker with a deep passion for decorating, gardening, cooking, and crafting. I find joy in harmonizing beautiful elements to fashion a space that is both comfortable and inspiring. I will help you create a beautiful home and garden, one project at a time.

Wendy,
Wow, I love that picket fence planter. Great job. Congratulations, you are being featured on Thursday Favorite Things. https://www.eclecticredbarn.com/2024/06/gardens-of-flowers-on-tft.html
Hugs,
Bev
Thank you so much Bev. I appreciate it!
Oh my goodness Wendy, I got so excited when I saw this! We recently found old stockade fence in the top of our garage, and I have been pondering how I can use it. I am finding some unique items there left over from when our home was built, and from the previous owner. The really old items have me pretty excited to see what I can come up with. 75 years is a long time to be hanging out in the rafters.
Oh how fun! It sounds like you have what you need to make your own! I can’t wait to see it!
p.s. Pinned!
Wendy – I love your idea on how to use the fence pickets. These old fences pieces are something I frequently come across in my hunt for vintage and antique items. Thanks for the tip to pre-drill the holes for the bolts.
Thanks Anna. It was such a fun and easy project!
Wendy I can’t get over how cute this turned out. I love it! Now I need some picket fence pieces so I can make one too. It would look perfect styled on the little bistro set on our back patio.
I can’t wait to share your post in my weekly recap tomorrow!
Thanks Jen! I appreciate it!
Such a creative use of pickets! Your flower pot has so much character! I love seeing all of the creative projects!
Thank you Missy!
This is so cute and creative Wendy!! Love it!
Thank you Michele!
Hi Wendy! It’s such a great way to take a basic plastic pot from drab to fab.
Thank you so much Kelly!
So adorable!!
Thanks Susan!
Fantastic flower pot project Wendy! I love how it all came together. The bolts, and rope trim give it such a professional look! If I were to see this at a nursery I would buy it on the spot!
That’s so sweet of you. I am so happy with how it turned out. I’m glad you love it as much as I do!
Wendy
I love this idea. So clever. I’ll share a link on Sunday DRA.
Thanks Rachel. I appreciate it!
What a fabulous idea to dress up plain flower pots with pickets! It will add so much charm to any porch or patio! Pinning now!
Thank you Donna!
Adorable, Wendy!! Picket fences remind me of small towns and quaint streets. Such a fun idea to put old pickets to good use like this! Hope you are well!
Thanks Rachel. I agree. There is something so charming and quaint about white picket fences.
Wendy, what an adorable planter. Love it!
Thank you Tammy
That has to be the cutest bucket planter ever!!! How clever.
Thanks so much Diane. I love it too!