How to Make A DIY Vintage Chair Planter for the Garden
Discover how to give an old chair a new lease on life as a charming chair planter. We’ll walk you through selecting the perfect chair and converting it into a unique garden feature, blending the allure of antique furniture with the vibrant beauty of plants.
Whether you’re a DIY enthusiast or a gardening aficionado looking for a whimsical addition to your outdoor space, our step-by-step guide will help you create a captivating and eco-friendly garden highlight.
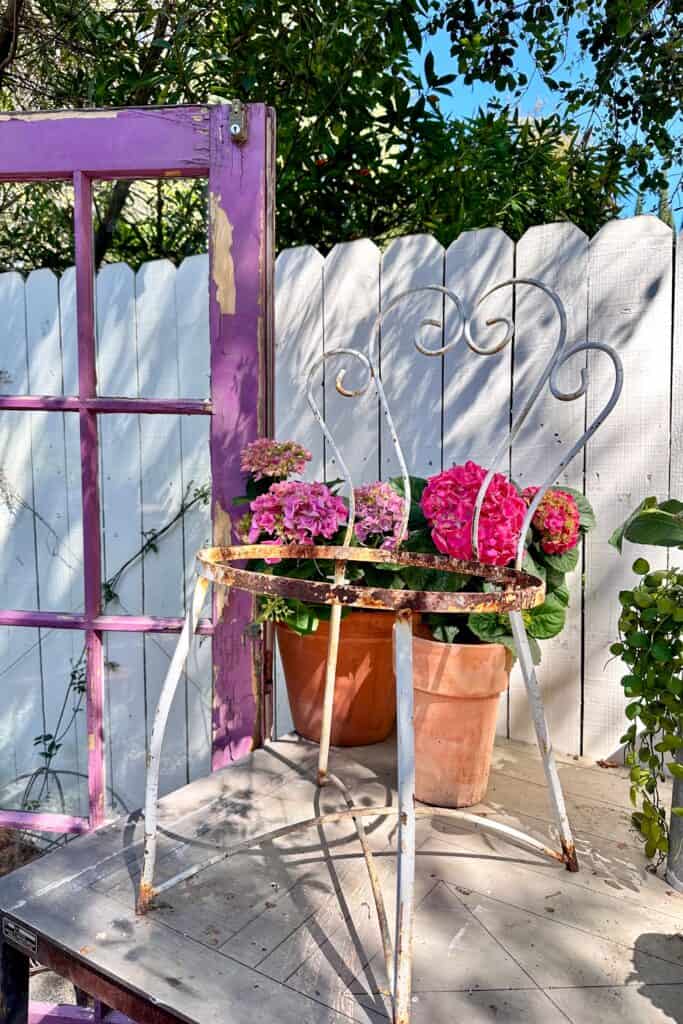
You can create a beautiful, lasting focal point in your garden using vintage metal chairs and chicken wire.
On my blog WM Design House, I may sometimes use affiliate links, which means a small commission is earned if you purchase via the link. The price will be the same whether you use the affiliate link or go directly to the vendor’s website using a non-affiliate link. Read my full disclosure policy here.
Pinterest Challenge
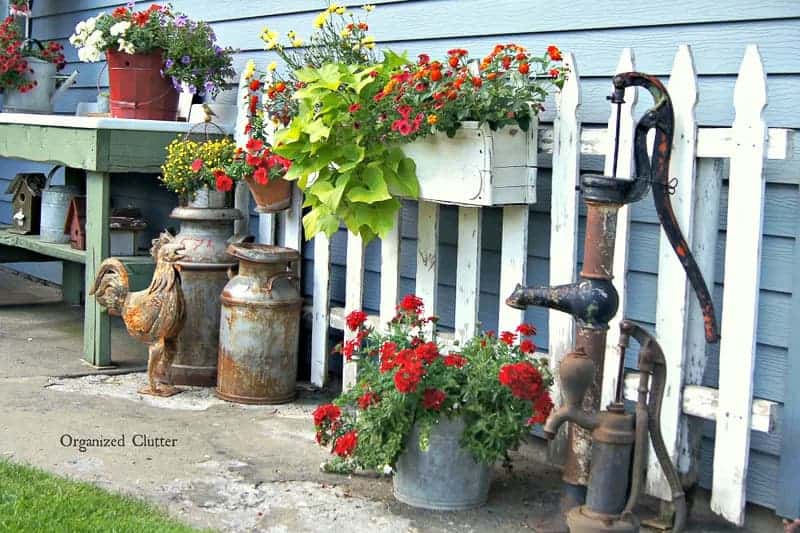
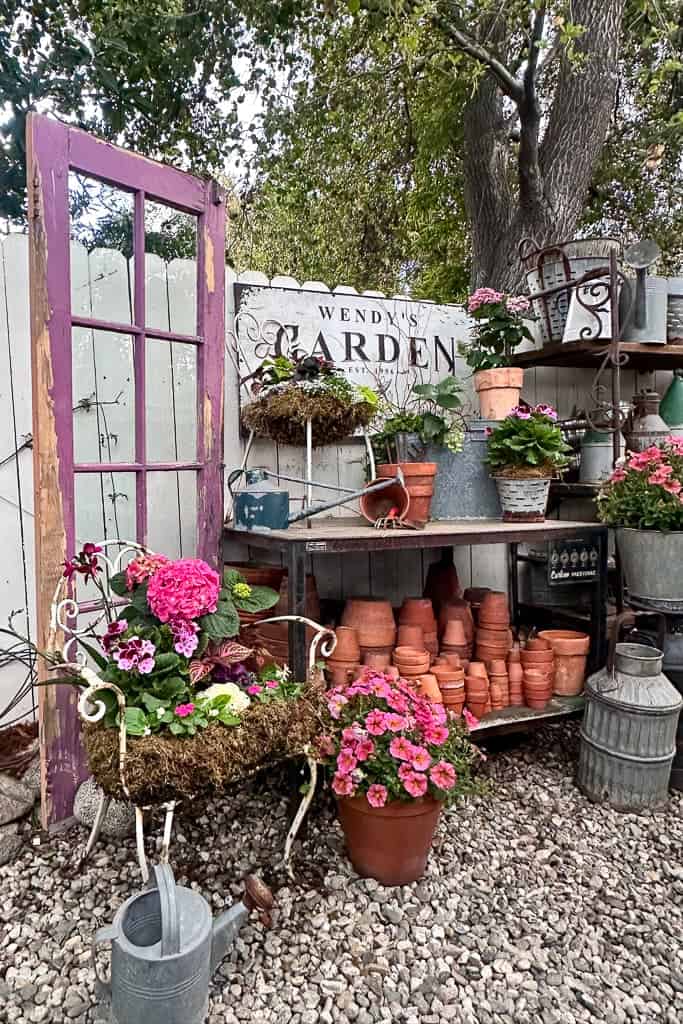
Today is the Pinterest Challenge dedicated to outdoor container gardening. If you are not familiar with this challenge. Several of us bloggers get together and are given an image from our friend Cindy @countyroad407 to inspire us, and we are to recreate our version to share with you all.
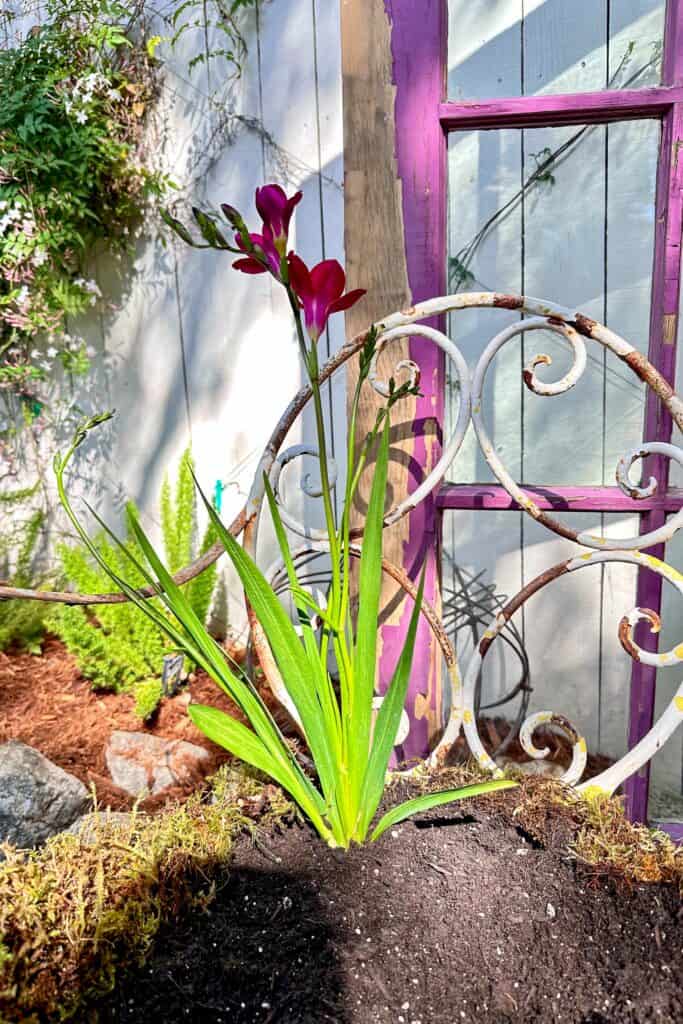
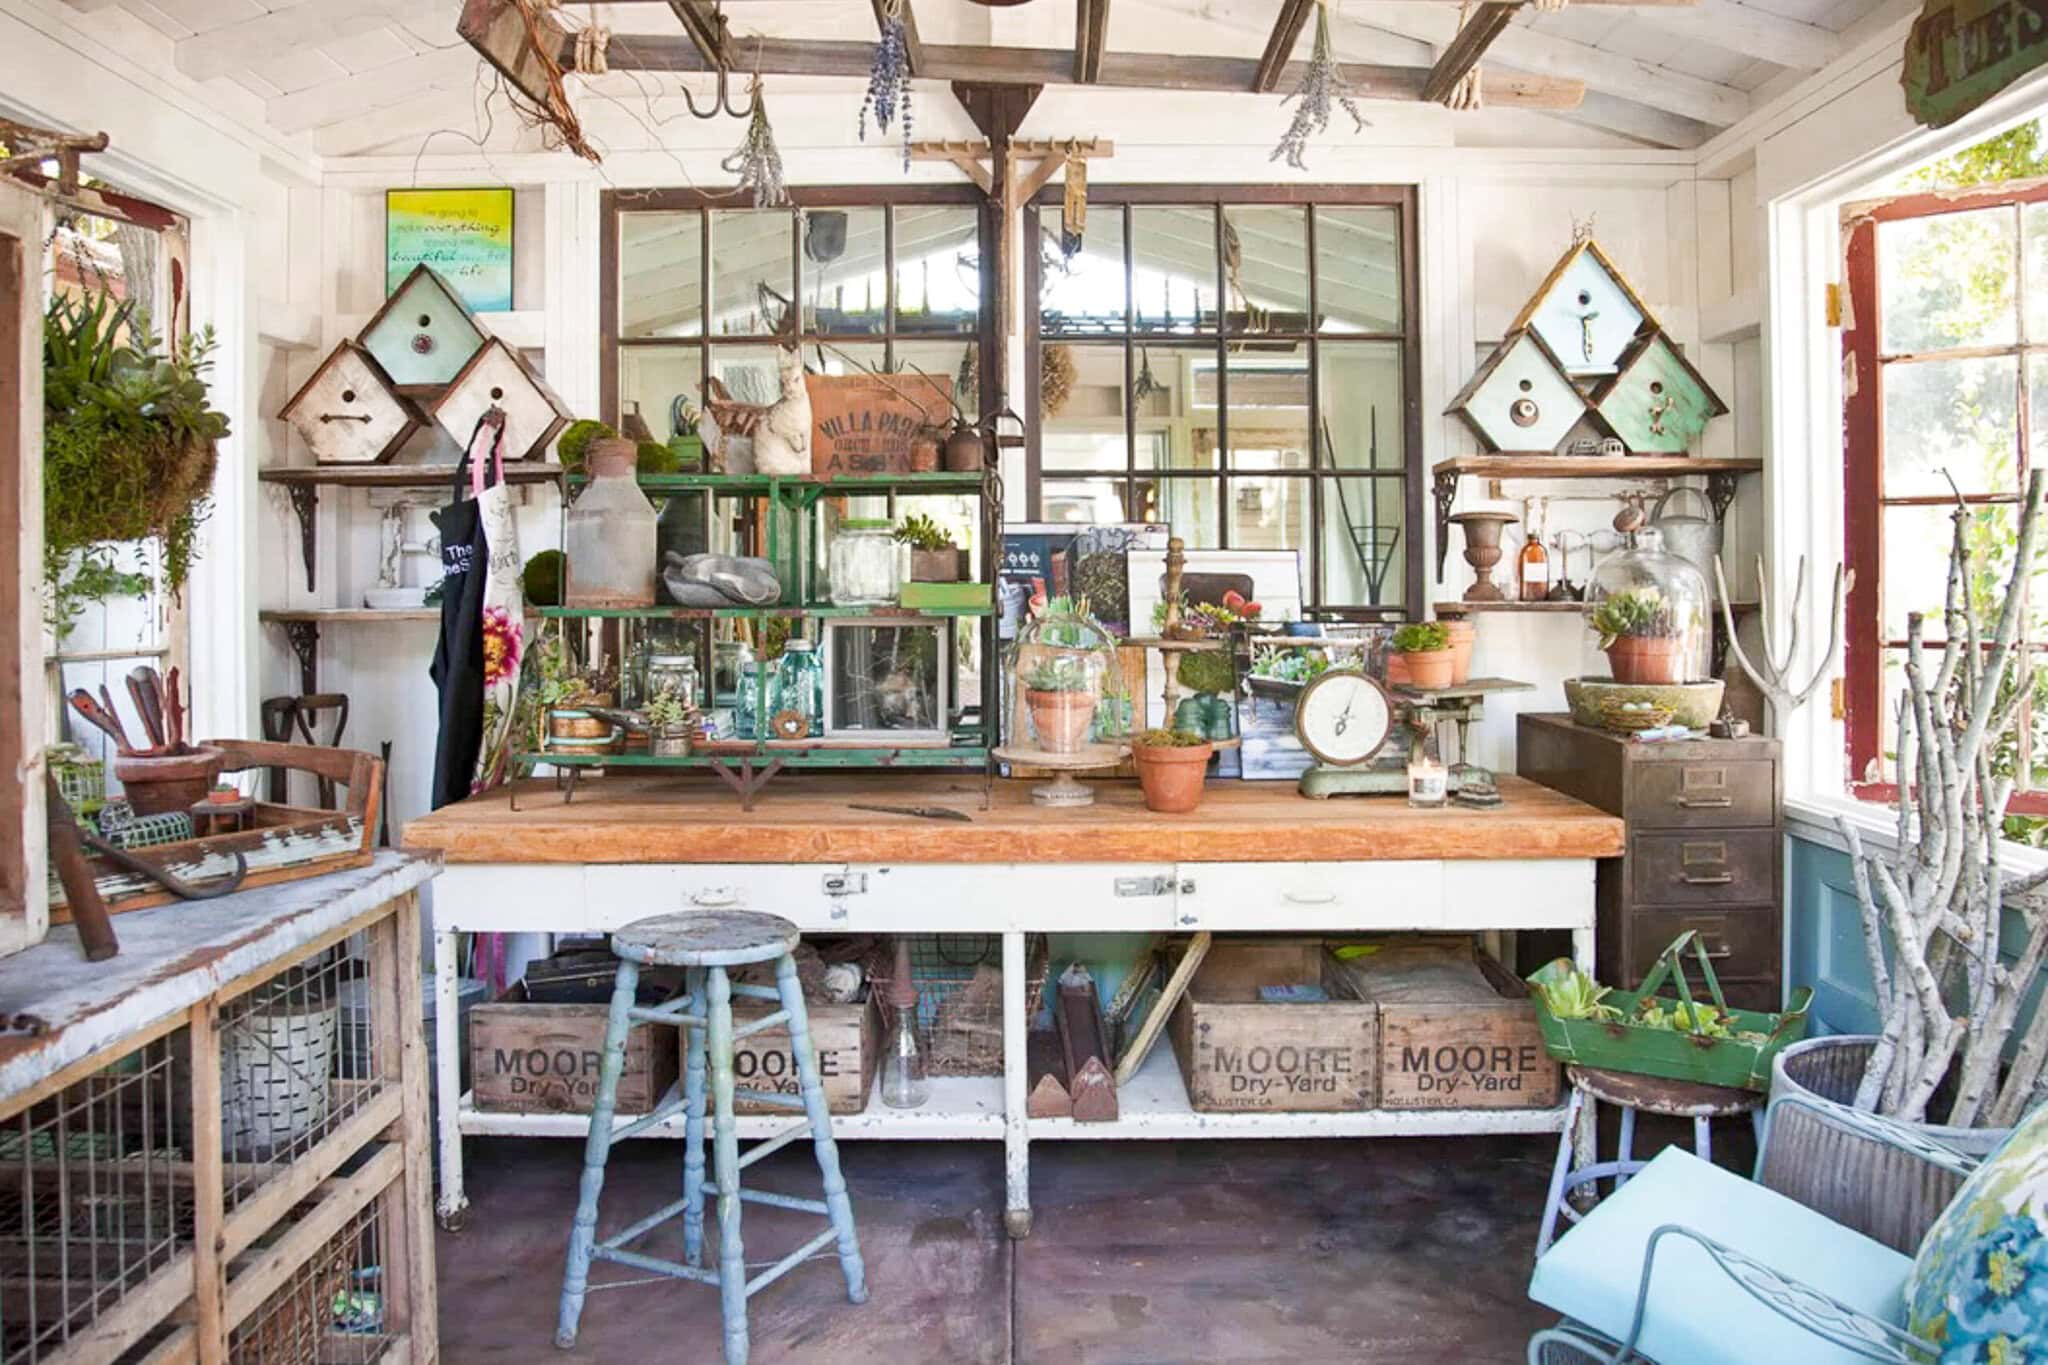
This month, our image is from organized clutter. Don’t you love her eclectic garden full of thrifted treasures.
If you have come over from my friend Michelle’s post, Welcome. I’m sure you loved her herb fence garden as much as I did.
This look is right up my alley, and I had the perfect spot to create my chair planters to add to my garden vignette.

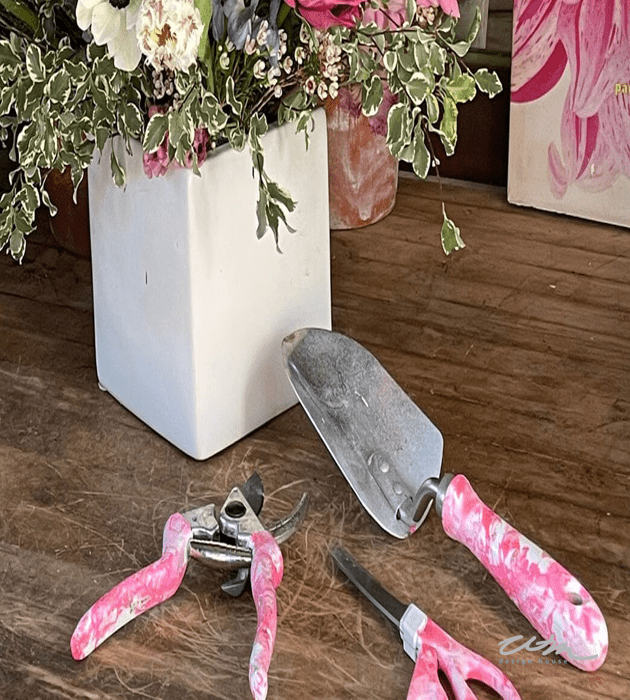
What do you Need to Make a Chair Planter Project?
Additional Tools You’ll Need
Where to Find a Vintage Chair
Finding the perfect vintage chair for your planter project can be an exciting treasure hunt. Here are some of the best places to start your search:
- Thrift Stores and Second-hand Shops: These are gold mines for discovering unique vintage furniture at affordable prices. Inventory changes frequently, so it’s worth visiting regularly.
- Antique Stores: While prices might be higher, antique stores often curate a selection of high-quality vintage items, including chairs with the character you’re looking for.
- Estate Sales and Garage Sales: These can be fantastic places to find vintage chairs, often from households looking to clear out old furniture. You might stumble upon a rare piece at a bargain price.
- Flea Market: Flea markets are bustling with vendors offering everything from antiques to retro finds. They’re ideal for finding vintage chairs with a story.
- Yard Sale: Yard sales are a great place to find bargain-priced old chairs.
How Do You Make A Chair Planter?
Step 1: Preparing the Chair
- You want to remove any existing fabric or material on the chair.
- If there is a cushion on the chair seat, remove it. Be sure to remove any rusty metal rings or staples.
- Clean the metal chair well with 409 and a scrub brush.
Tip from wendy’s garden:
As much as I love a vintage wood chair in the garden, use a metal chair if you can. They hold up much longer in the elements.
Step 2: Selecting Plants
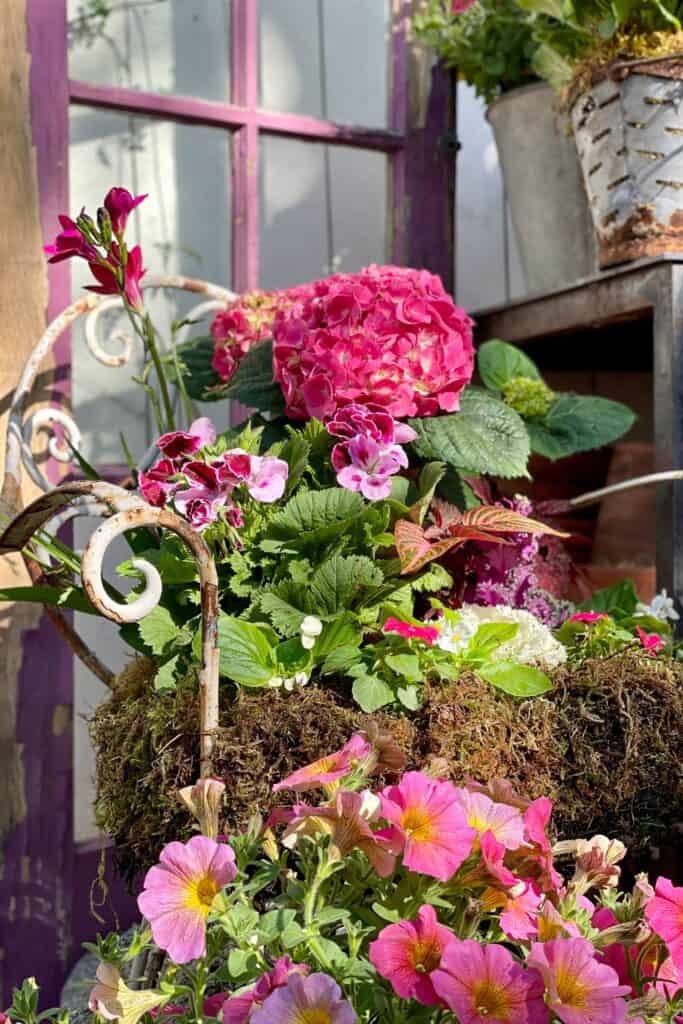
Choose plants based on the sunlight, watering requirements, and growth patterns where they need to thrive. Opt for varieties that suit the location of your chair. Incorporate a mix of green hues and floral colors for depth. Select taller specimens for the rear and one or two trailing species for the front to create a balanced display.
If you like to choose a color scheme, keep that in mind when choosing your plants.
Tip from wendy’s garden:
Take notes of what grows well in your zone. Matching your plants to the chair’s environment not only guarantees a healthier growth but also enhances the visual appeal of your unique planter.
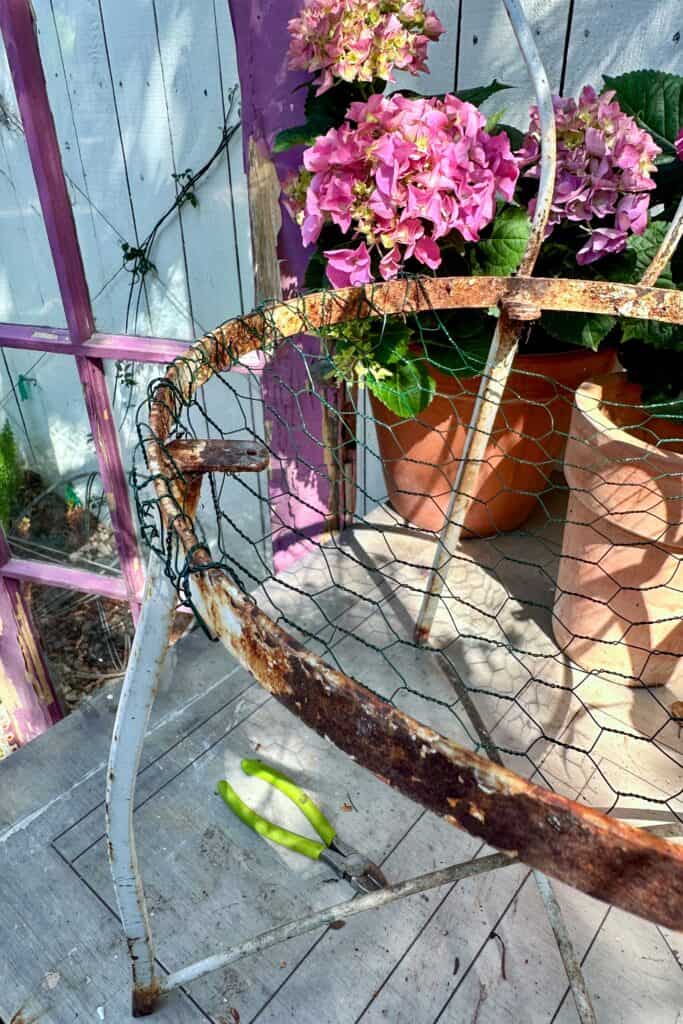
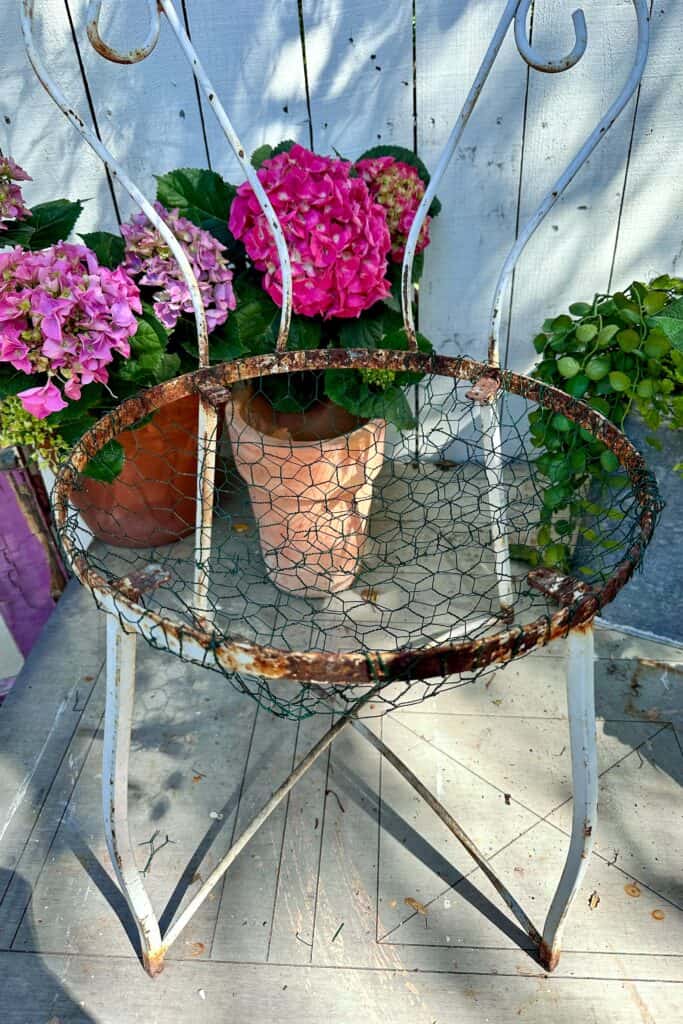
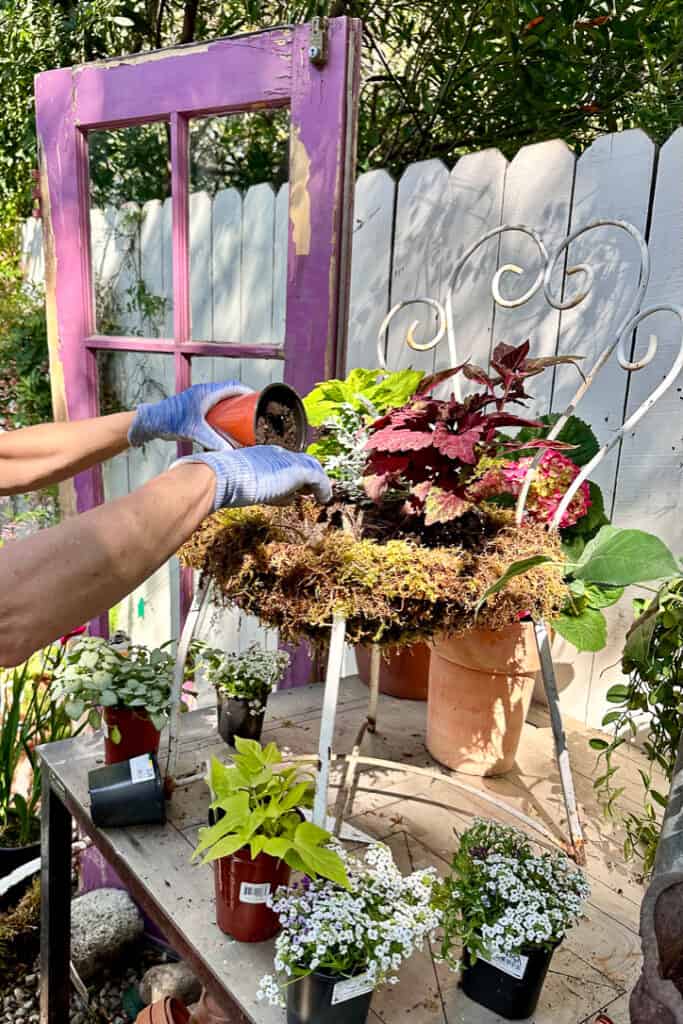
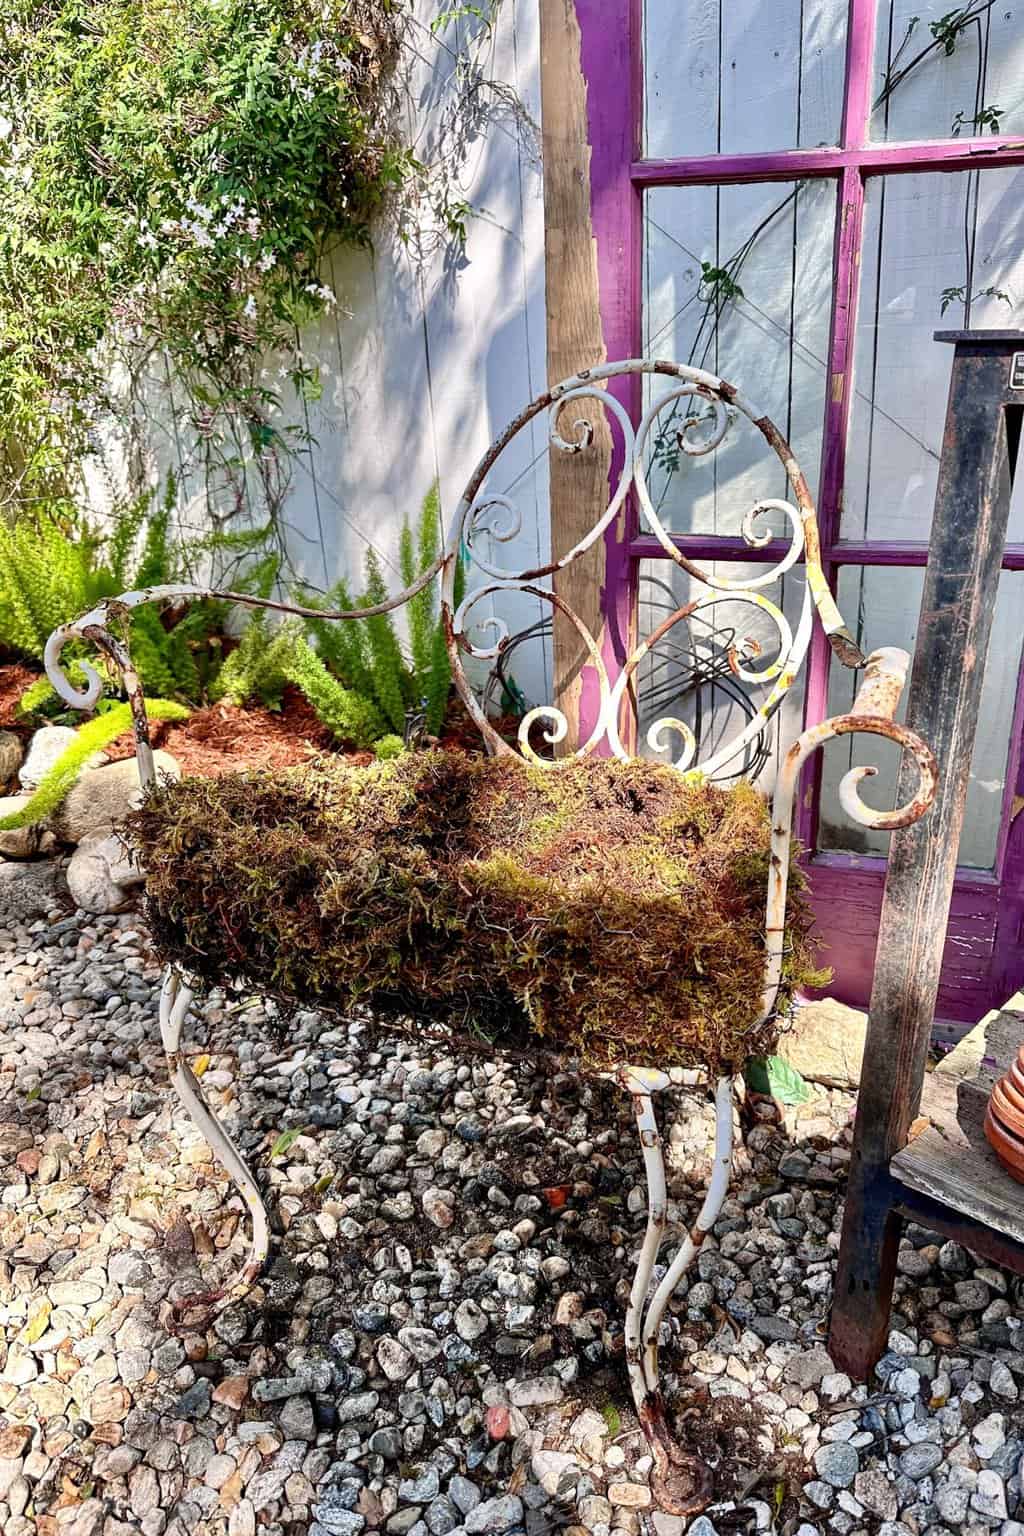
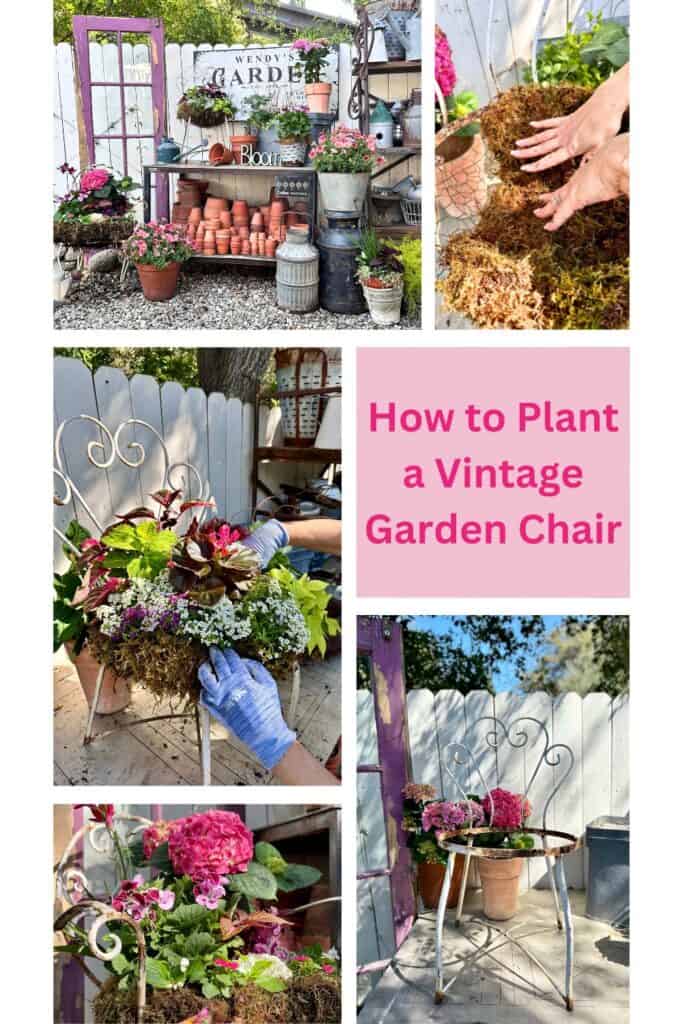
Step 3: Creating a Metal Basket in The Chair Seat
- Cut a piece of floral chicken wire and allow for a basket approximately 4-6 inches deep.
- Wrap the edges of the chicken wire around the metal frame of the seat on one side of the chair.
- Mold the wire into a basket shape and wire the opposite side to the chair’s seat area.
- Take a second piece of chicken wire, go the opposite direction, and wire it onto the frame of the chair seat to complete the basket. Be sure to trim off any excess chicken wire.

Tip from wendy’s garden:
I prefer to use this floral chicken wire as it is softer than the usual chicken wire you buy at Home Depot. Also, be sure to wear gloves when working with this wire to avoid cutting yourself.
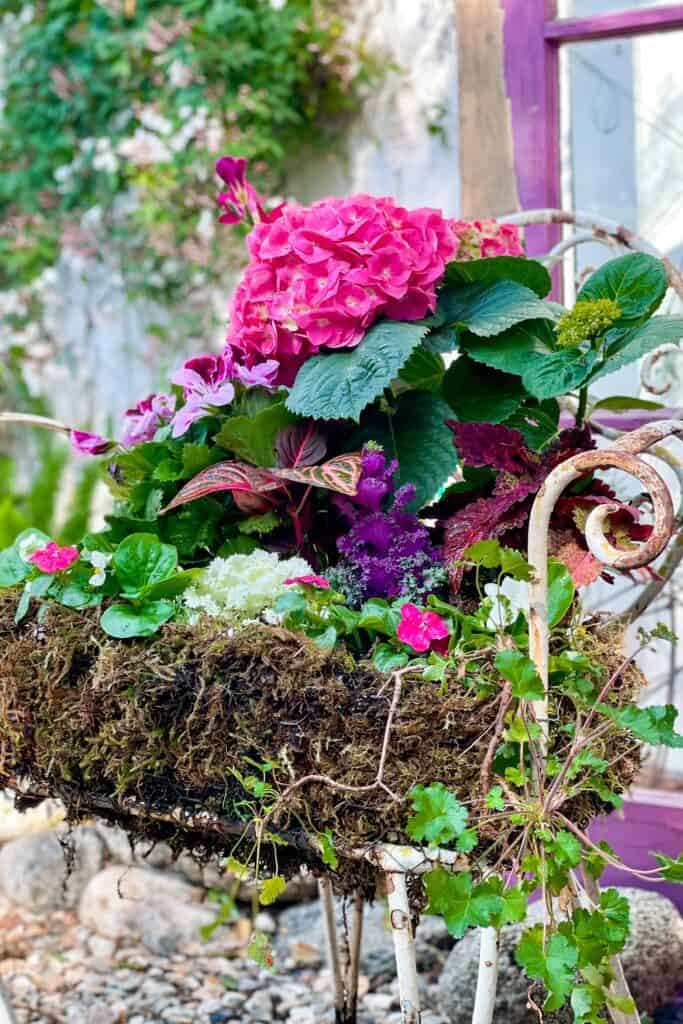
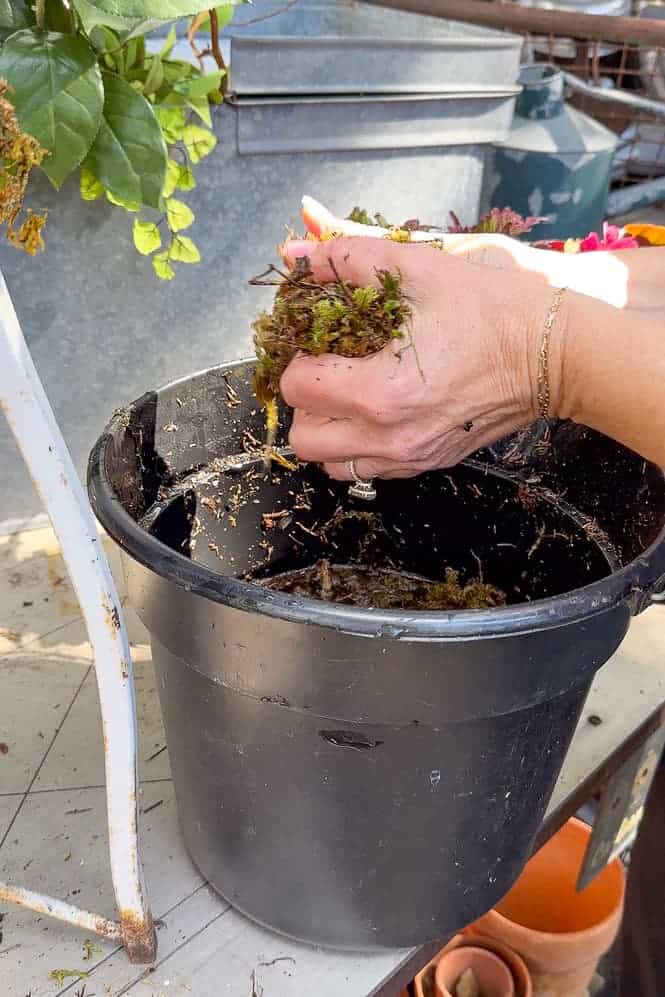
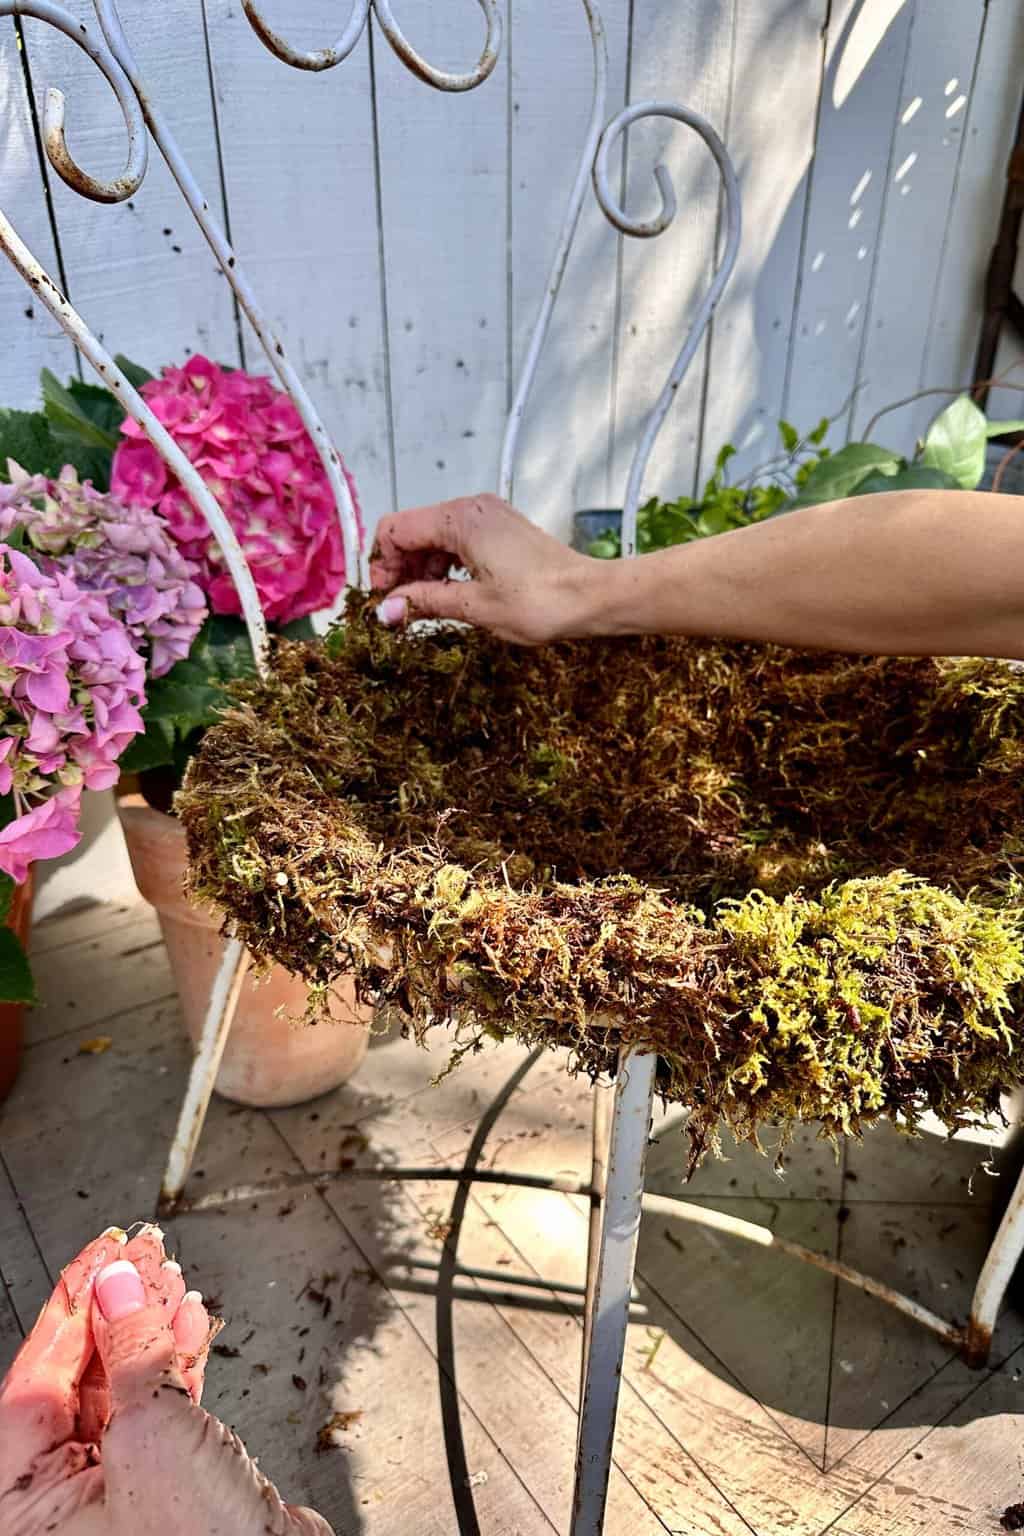
Step 4: Mossing The Chair Seat
- Fill a small bucket with water.
- Submerge some dried moss into the water and get it good and wet.
- Add a thick layer of moss inside the chicken wire basket.
- Wrap a small amount of moss over the edge of the basket to cover any rough edges.

Tip from wendy’s garden:
Ensure the moss is thoroughly soaked. This will help anchor it firmly within the chicken wire, guaranteeing it stays in place when it dries.
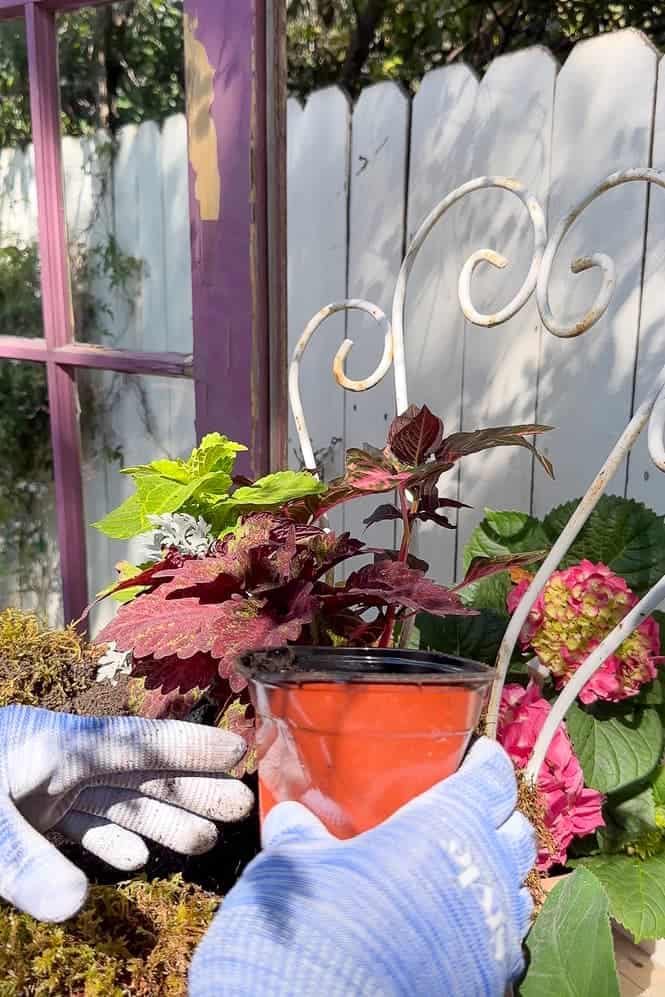
Step 5: Planting The Chair
Arrange Your Plants
- Before planting, arrange the plants on top of the moss while they are still in their pots to get a sense of how they’ll look together.
- Start with the taller plants at the back or center, depending on the chair’s placement. Then, place the shorter plants around them, and finally, add the trailing plants near the edges.
Planting
- Once you’re satisfied with the arrangement, start by placing a small amount of soil in the moss basket.
- Gently remove each plant from its pot, tease out the roots if they are pot-bound, and place them where you want them one at a time. (start in the back and work your way forward)
- Fill in gaps with extra soil (you do not need a lot of soil), ensuring the plants are secure and the soil is level.
- Cover the soil around the plants with moss to keep the soil in place when watering.
Water Thoroughly
- After planting, water the planted chair thoroughly to settle the soil around the plant’s roots.
- If you’ve used moss around the edges, make sure it’s moistened as well to keep it in place and help retain soil moisture.
Care and Maintenance of a Chair Planter
- Place the chair in its selected spot, considering the plants’ needs for sunlight.
- Water regularly, keeping the soil moist but not waterlogged. The frequency will depend on the weather and the moisture retention of your soil and moss.
- If you’d like, please apply a slow-release fertilizer at planting time or use a water-soluble fertilizer according to the package instructions to encourage growth.

Tip from wendy’s garden:
Be careful not to overwater. Test the soil with your finger before watering. If it is damp, let it be another day before you water again.

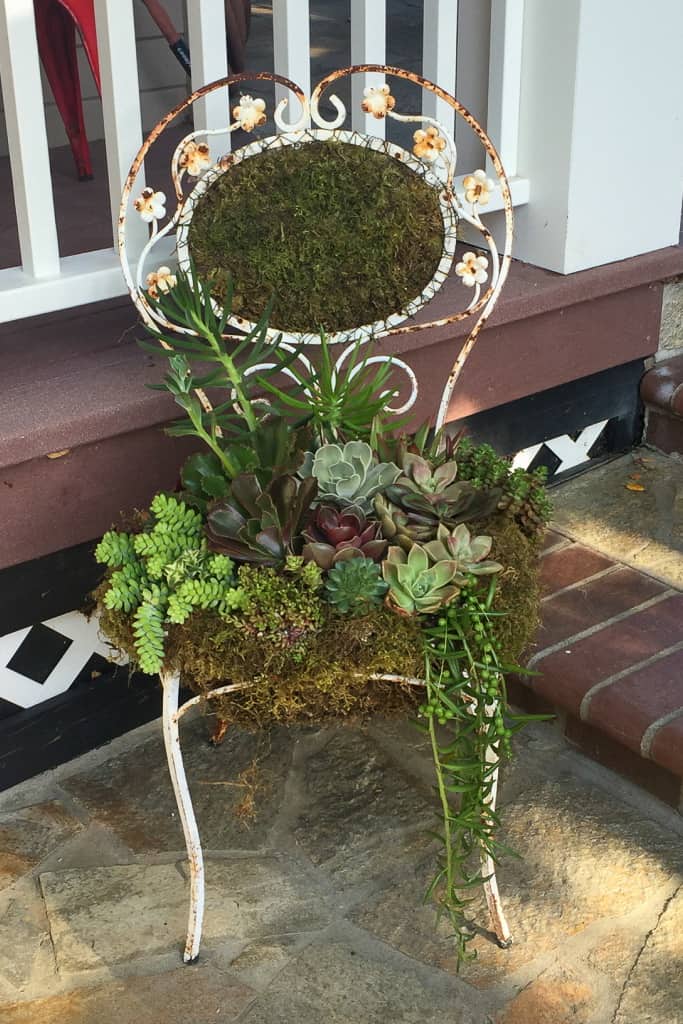
How do you plant succulents in a chair?
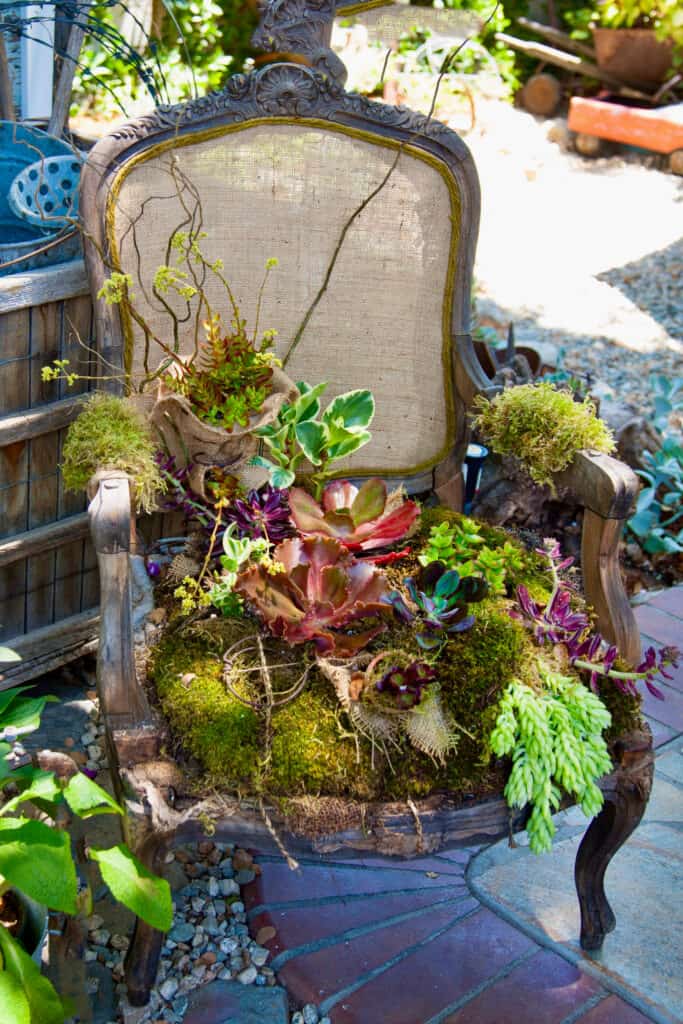
Planting a succulent chair can create a striking and low-maintenance garden feature. If you’re considering this approach, follow the guidelines mentioned previously with a few critical adjustments for succulents.
Soil Preparation
Swap out regular potting mix for a cactus or succulent soil mix. This soil type offers better drainage, which is crucial for succulent health. Fill the moss-lined chair seat with this mix, leaving some space at the top.
Selecting Your Succulents
Choose a variety of succulents that complement each other in color, texture, and size. Consider including trailing varieties like String of Pearls for the edges to create an interesting visual flow.
How Often to Water Succulents
- Indoors: Water indoor succulents every 2-4 weeks, depending on the humidity and temperature of your home. The soil should be completely dry before you water again.
- Outdoors: Outdoor succulents might need watering once a week during hot, dry periods and less frequently during cooler, wetter seasons. Adjust based on rainfall and temperature.
How to Water Succulents
- Check the Soil: Before watering, ensure the soil is completely dry. You can check by sticking your finger about an inch deep into the soil; if it’s dry, it’s time to water.
- Water Deeply and Infrequently: When you water, do so thoroughly, allowing water to run out of the drainage holes at the bottom of the pot. This encourages deep root growth. Avoid light sprinklings, which can lead to shallow roots and weak plants.
- Avoid Wetting the Leaves: Water the soil directly, if possible, to prevent water from settling on the leaves, which can cause rot and fungal diseases, especially in rosette-type succulents.
- Morning Watering: If possible, water in the morning. This gives the soil time to absorb the water and excess moisture to evaporate before the cooler evening temperatures, reducing the risk of root rot and fungal diseases.
- Adjust for Seasons: Succulents need more water during their active growing season (usually spring and summer) and less during their dormant period (fall and winter).
Aha! Moments with Wendy
Have you ever had those ‘aha’ moments mid-project and thought, “I wish I knew that before I started”?
Me too! Below are a few tips and tricks that worked for me while planting my chairs.
Whether you’re a gardening newbie or a seasoned pro, I hope these tips and tricks help you eliminate some of the guesswork when creating your own garden chairs.

Expert Gardening Tips
Tip 1
Choose the Right Plants for Your Environment
Select plants that are well-suited to the amount of sunlight and exposure the chair will receive. For sunny spots, drought-tolerant plants like succulents or certain annuals are perfect, while shade-tolerant ferns or begonias are great for less sunny locations. This consideration ensures your plants thrive and reduces the amount of maintenance required.
Tip 2
Prepare the Chair Properly
Ensure the chair is ready to become a planter by making it as durable and water-resistant as possible. If the chair is made of wood or a material susceptible to decay, consider treating it with a waterproof sealant. Additionally, creating a proper drainage system within the chair seat, such as lining it with moss or a breathable landscape fabric before adding soil, prevents water accumulation and root rot.

Tip 3
Meticulous Watering and Care
Given the unique container you’re using, watering needs might differ from standard garden beds or pots. Monitor the moisture level of your soil regularly, keeping in mind that the amount of soil in a chair may dry out faster than in a traditional garden setting, especially in warm, sunny locations. However, succulents or plants adapted to dry conditions might appreciate this setup. Adjust your watering schedule based on the chair’s material, the soil’s moisture retention, and the plants’ needs, always erring on the side of under watering for plants like succulents.
Other Tutorials from WM Design House
If you love this garden chair planter, you might also enjoy some of my other favorite gardening projects :
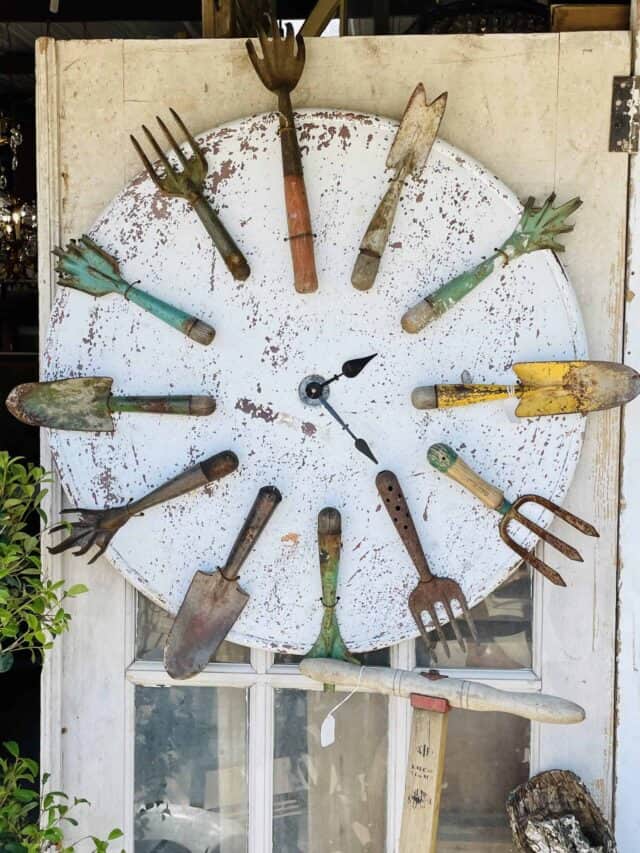
How to Make a Garden Clock out of Vintage Garden Tools
Learn how easy it is to make a garden clock with a collection of old garden tools.
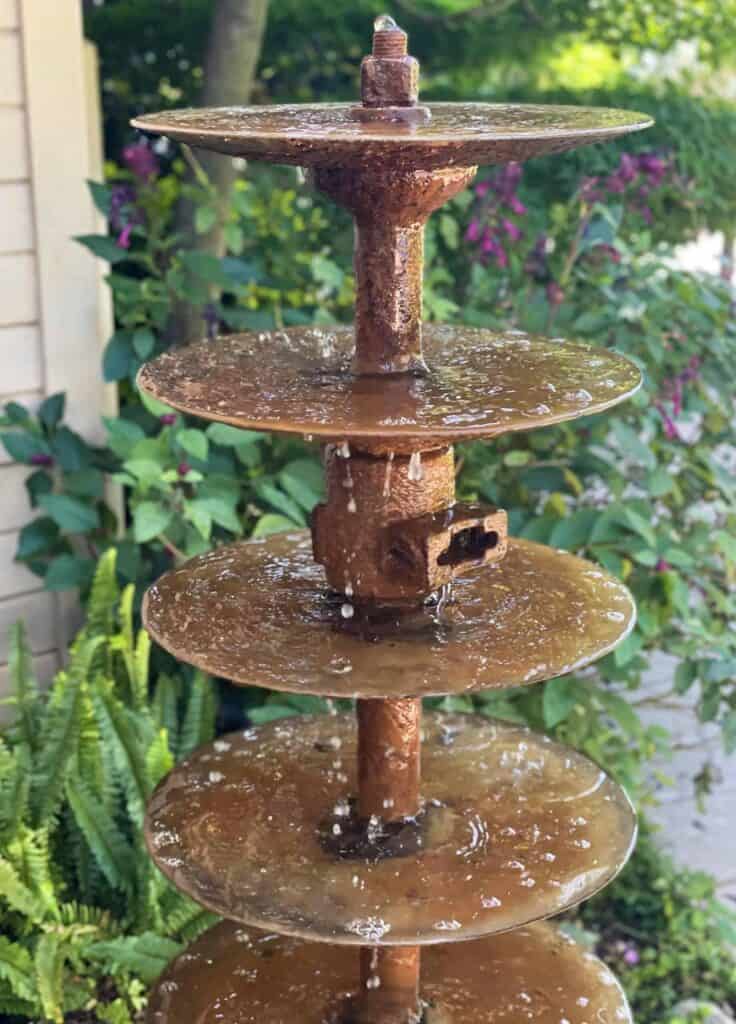
How to make a Small Outdoor Fountain from a Tractor Disc
Create a unique fountain in your yard to enjoy the sound of the water.
35 Best Zone 10A Perennials to Grow in Full Sun
Learn what are the best perennials to grow in Southern California.
Wrapping Up
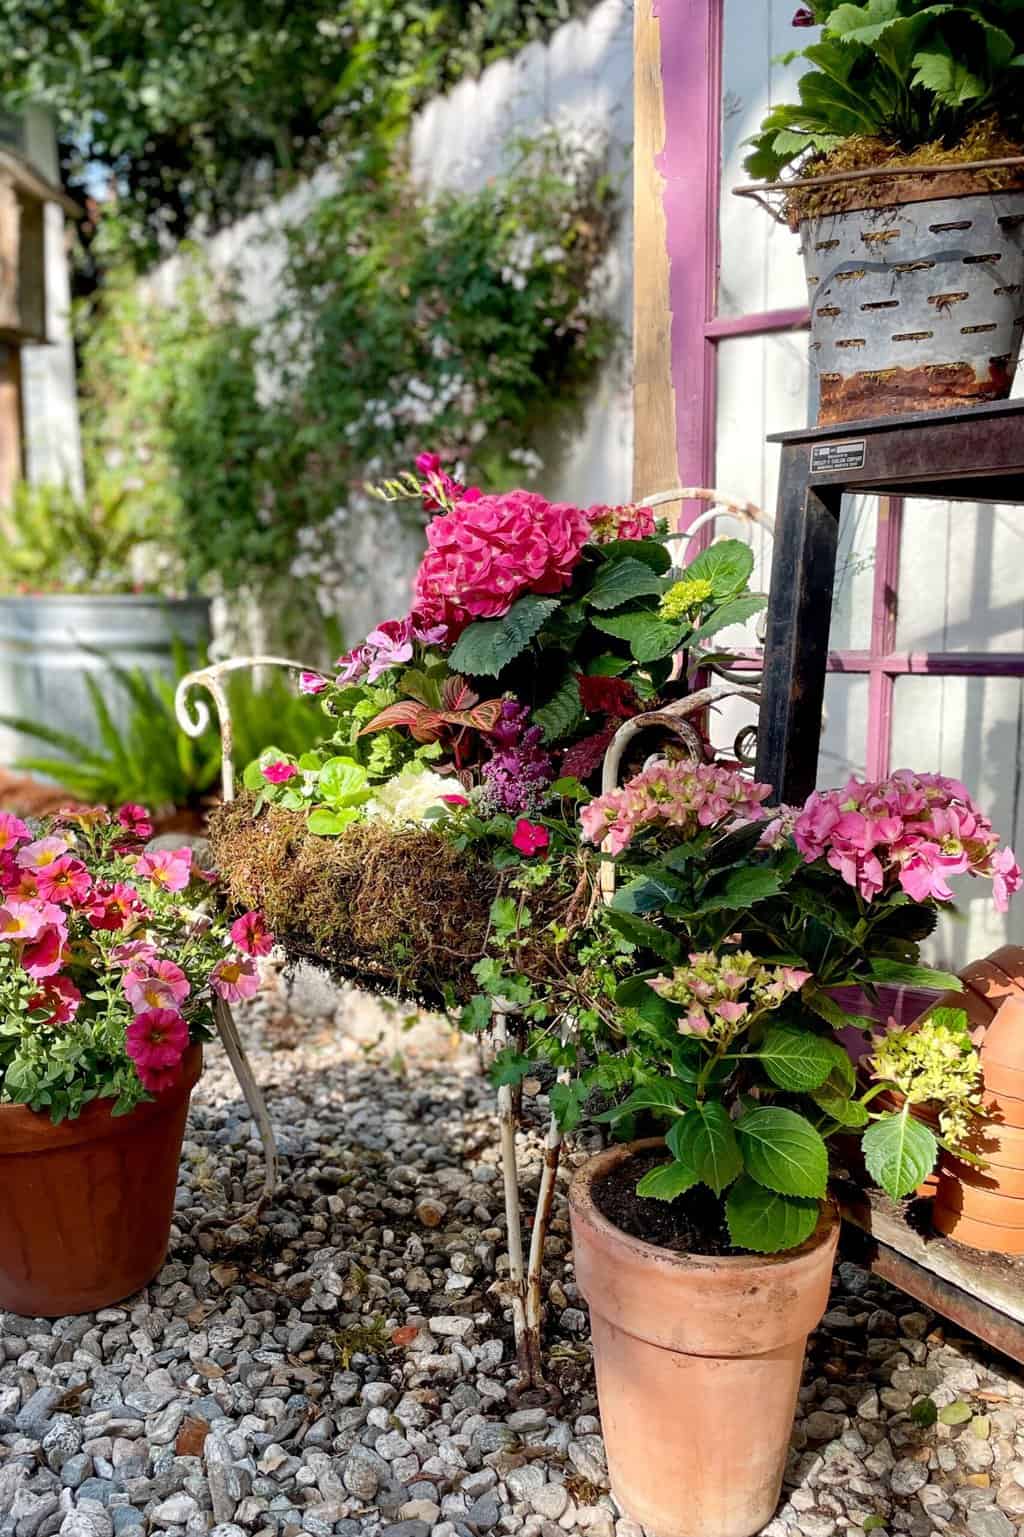
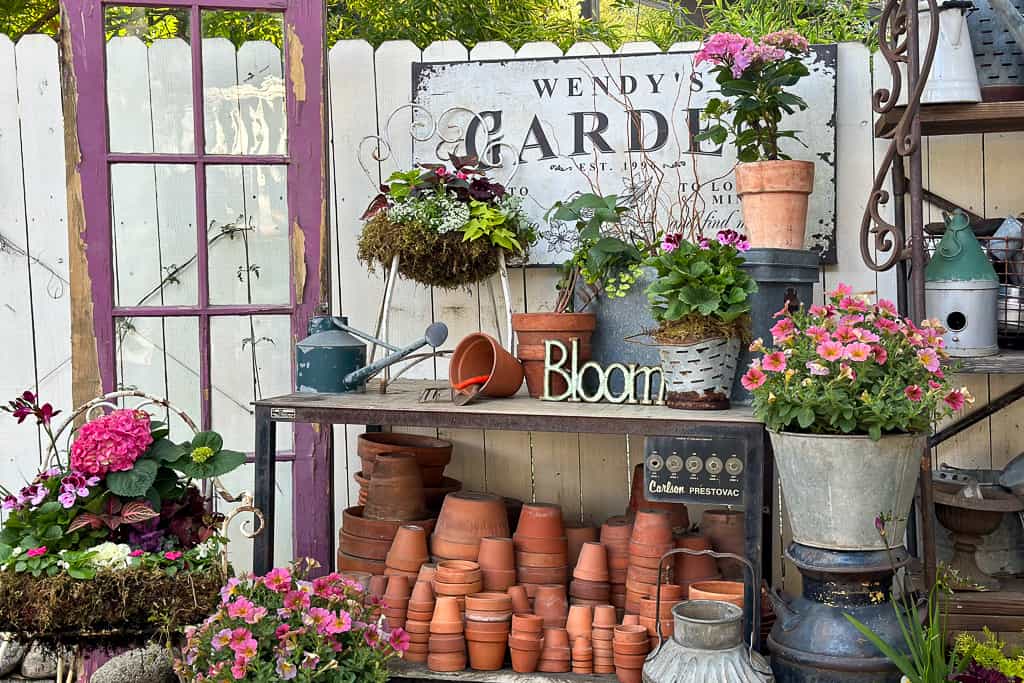
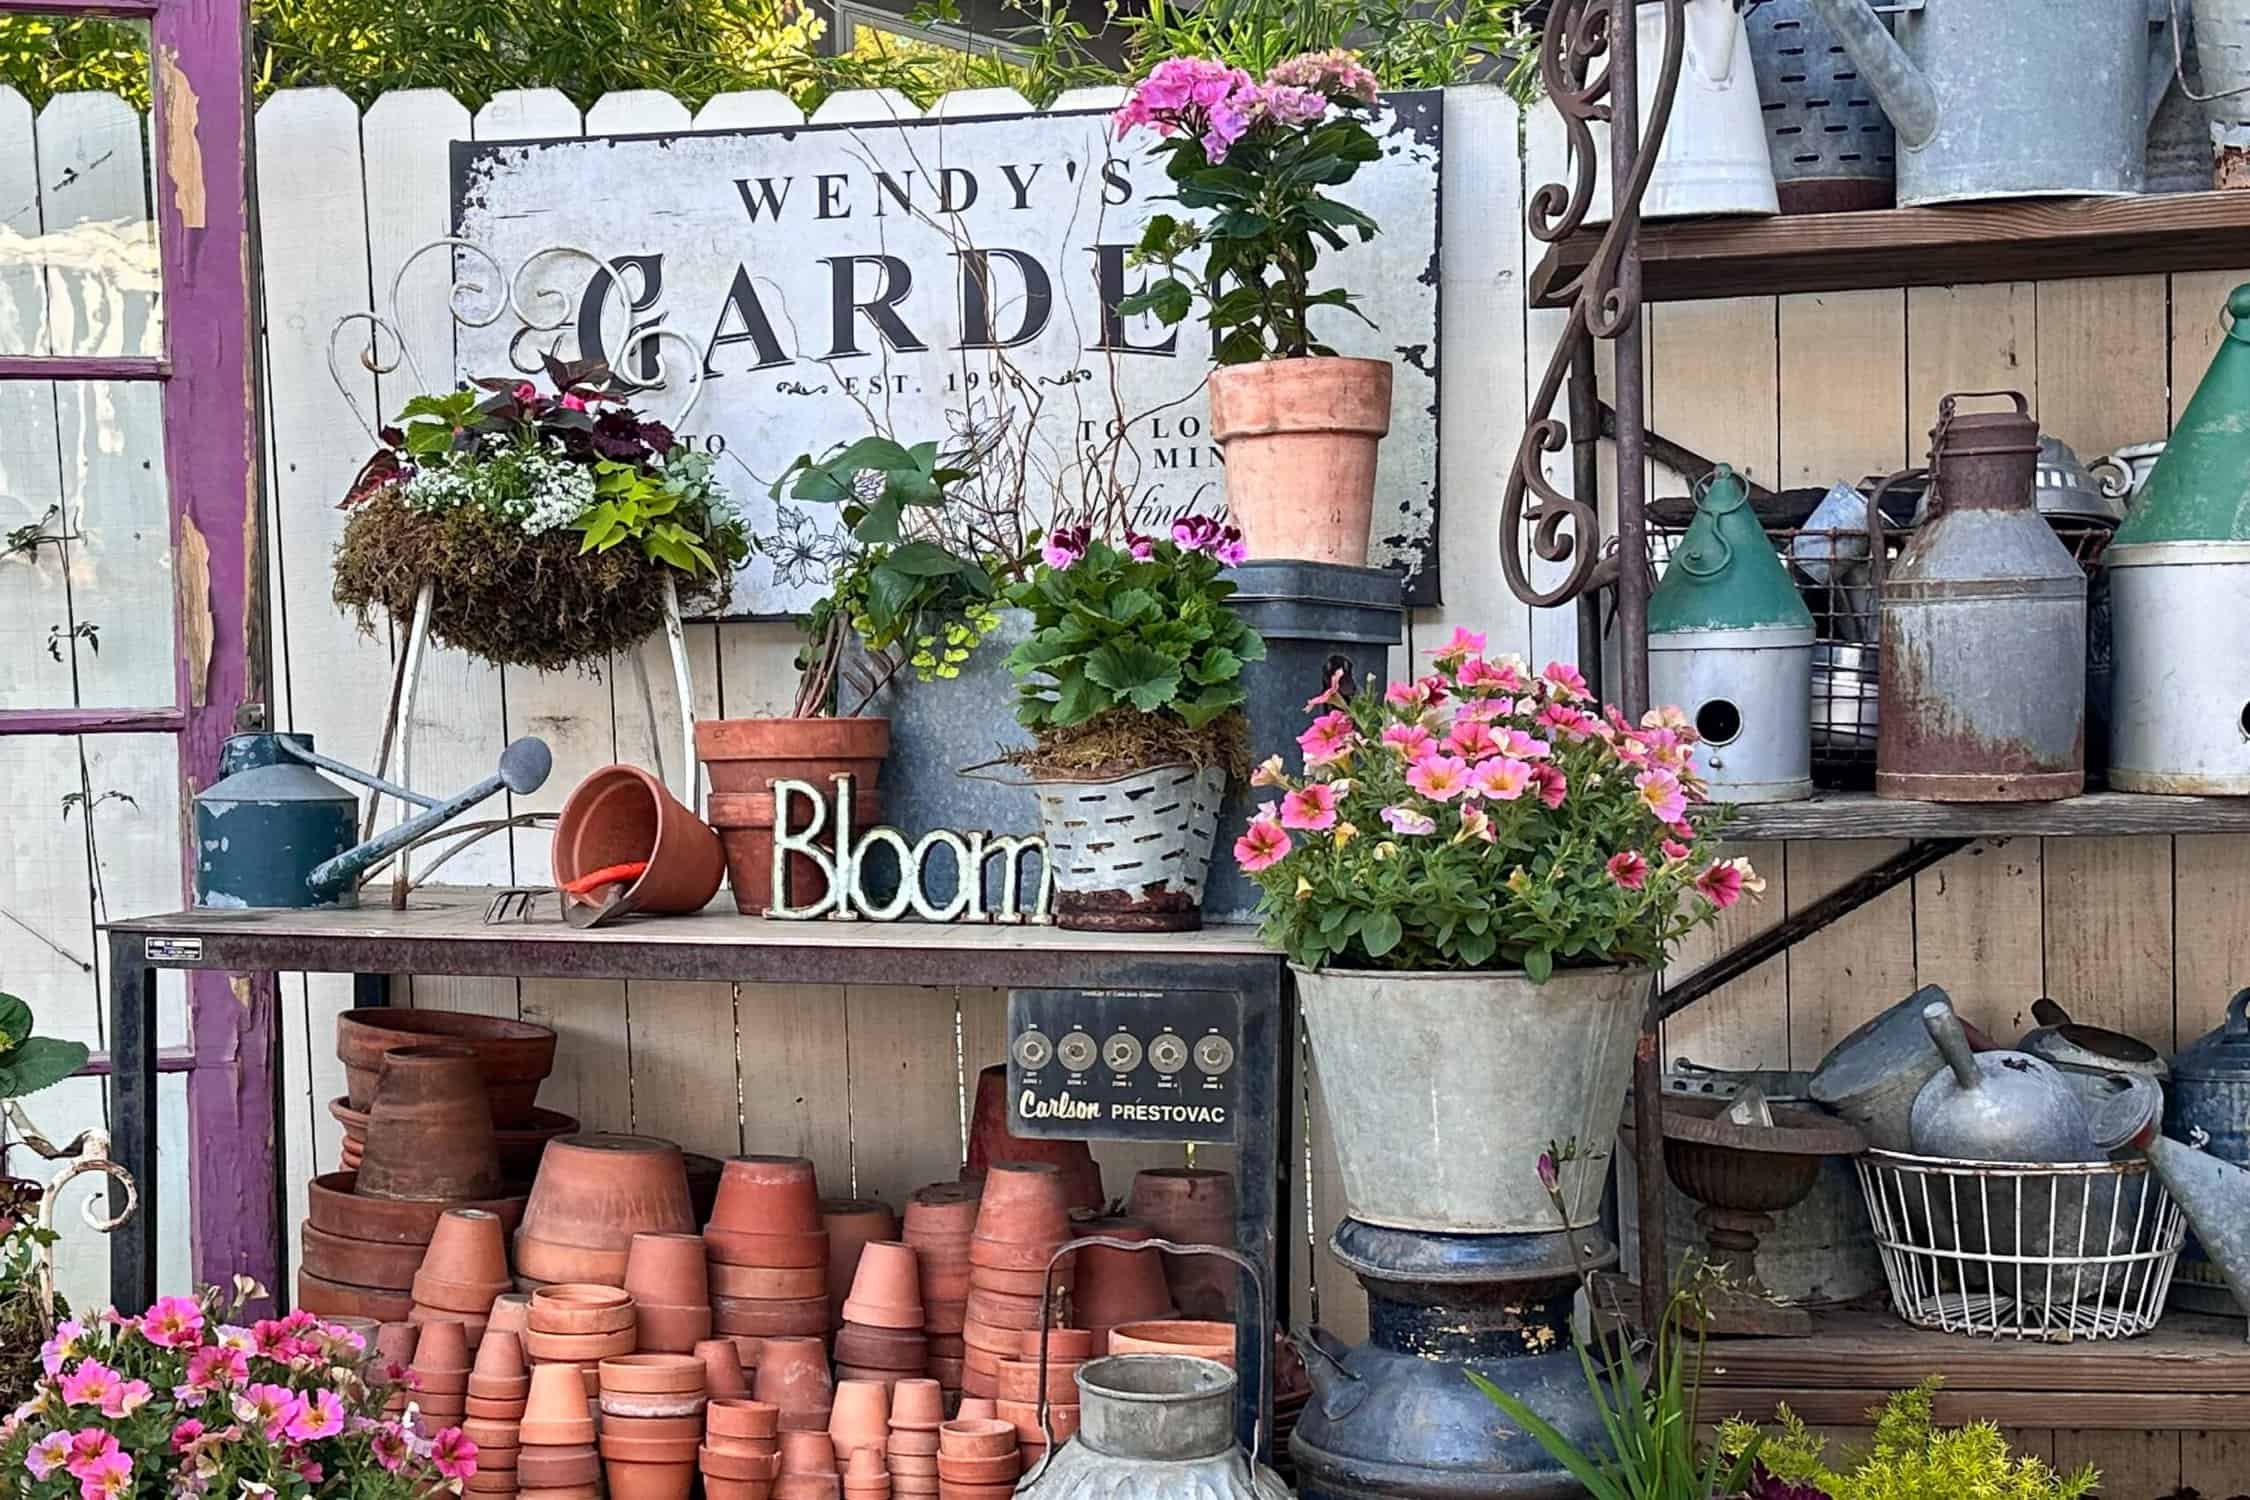
Planting in vintage chairs offers a unique blend of creativity and nostalgia, transforming these classic pieces into a charming planter that enhances any garden space.
Whether positioned on a front porch to welcome guests with a touch of whimsy or nestled into a cozy corner of the back deck, these planters add a personal and artistic touch to outdoor living areas.
Beyond their visual appeal, vintage chair planters encourage sustainable gardening practices by repurposing and revitalizing old furniture. This fusion of form, function, and sustainability makes a beautiful planter and a delightful addition to any outdoor space.
Don’t forget to check out all the other container gardening posts.
Coming up in our garden journey is Lora @lorabloomquist. I’m a big fan of Lora’s distinctive style, and I’m confident you’ll be, too. She will showcase an intriguing assortment of garden containers with a unique junk-style flair.


Did you make this chair?
We would love to see what you have created, so mention us @wmdesignhouse or tag us using #wmdesignhouse so we can see your creations!
More about me!

Hello, I’m Wendy – a dedicated homemaker with a deep passion for decorating, gardening, cooking, and crafting. I find joy in harmonizing beautiful elements to fashion a space that is both comfortable and inspiring. I will help you create a beautiful home, one project at a time.

I tried reading this and I’m sure it’s interesting, but it’s difficult to read with all of these ads and videos.
Hi there. Thank you so much for your comment. I know exactly how you feel; the unfortunate part of being a blogger is that these ads account for 75% of our income, so we can’t live without them.
I appreciate you taking the time to share this with me.
Wendy,
I love your garden chair. Congratulations, you are being featured on TFT. I hope you stop by.
https://www.eclecticredbarn.com/2024/04/spring-vignettes-on-tft.html
Hugs,
Bev
Thank you, Beverly, I am so excited. I will stop by for a visit.
Such a fun and darling upcycle, Wendy! I love this chair planter. Thank you for sharing
Thank you Besth, I am glad you enjoyed the post.
This is such a beautiful project Wendy, I’m going to keep my eyes open for a suitable chair everywhere I go from now on! Thanks for sharing with us at Handmade Monday, this will be a feature this week 🙂
Hi Julie, I am so glad you liked my post, and thank you for the feature; I sure appreciate it. Let me know if you find a chair and plant it, I would love to see yours.
Just Amazing. I love the idea of repurposing old furniture into something beautiful for the garden. I’m curious, though, what types of plants have you found work best in these chair planters? Do you have any personal favorites or recommendations?
I always swoon over these sorts of displays you share with us Wendy. Then reality kicks me in the rear, and I admit to myself I just do not think I could ever pull them off. If it were not for weeds, I would not have any flowers. I used Google Lens to identify what I thought was a flower growing in our flower beds, which of course, I was tickled about, then that darn Google informed me they are weeds, purple dead nettles to be more specific. If anyone needs any, I have them in spades. Truthfully, I have thought about keeping them since I also learned bees like them, but I think I need to do more research on them before I make a final decision. I imagine you are chuckling along with me at my excitement for flowers, only to find more weeds are on the horizon here.
You crack me up! I am going to have to look that one up. Some weeds produce lovely flowers.
I think we should call them wildflowers. I, too, have a wildflower (weed) that I can’t get rid of. It is like a small purple violet, and there is no killing them. So, I have embraced them and made them part of my gardens. I bet you could dry those pretty flowers, too. We could start a weed club, or should I say widlflower club :))))
Wendy I absolutely love this idea, what a beautiful idea for a porch or any spot! Hugs- Tanya 🙂
Thank you, Tanya!
What a fun and beautiful idea, Wendy! Those rusty white chairs are so perfect for a romantic garden! I’m so inspired, thanks for sharing!
Thank you, Cindy! I love how the chairs turned out. They are the perfect addition to my garden.
Your chair project is so unique and lovely! A perfect addition to any garden!
Thanks so much, Kim! Happy gardening season!
These are adorable!
Thank you Susan.
This would be such a fun project to try Wendy! Thank you for the inspiration and excellent tutorial. Your garden chair is absolutely gorgeous!
Thank you, Michelle. It feels so good to be back out in the garden now that spring is here!
Oh my, Wendy, this is so inspiring! Loved seeing all your different versions. The one with the moss back and succulents is my favorite! I’ve been wanting to do this for awhile; totally giving it a try this summer. I’ve got a metal loveseat frame that would be amazing with succulents. Sad thing is I won’t be able to keep it thru the winter:( MN gardening problem.
Thank you Lora. I can’t wait to see how yours turns out.
What a fun way to dress up your potting station, Wendy! This chair is so cute and I know it will be a big hit on your garden too. It’s positively magical. Hugs, CoCo
Thank you, CoCo. I love how the planter adds a bit of whimsy to our garden!
Brilliant as always my friend! Can I just say, that succulent chair absolutely takes my breath away!!!! (and that’s not my usual style)
Thank you Diane. I’m tickled you love it as much as I do!
Such a clever and beautiful way to create a unique garden display! Well done, Wendy!
Thank you Missy. I’m thrilled to be out creating in the garden again.
I’ve seen chair in gardens and have always wanted one but never knew how to make it work. Chicken wire and moss is genius! I’m so excited about this. Looking forward to trying it out next time I’m at the farmhouse. Thank you for joining in. You always write the best posts. Love your creativity Wendy! pinned
It’s always so much fun to join this talented group of ladies. Thank you Cindy!
What a lovely addition to your garden, Wendy. I love using old vintage finds as containers. Using the chicken wire to make a basket is a great idea.
Thank you Carol. You know I have a soft spot for vintage garden finds.
This is SO pretty, Wendy!! What an amazing way to up-cycle an old chair! The flowers look stunning against the rusty metal 🙂
Thank you, Rachel. I love the new addition to our garden.
Wendy
Your chair looks amazing. You are so creative.
Thank you Rachel