Dividing Dahlia Tubers: An Easy Step By Step Guide
If you’ve ever lifted a big clump of dahlias and wondered how on earth you’re supposed to divide it, you’re not alone. Dividing dahlia tubers can feel overwhelming at first. What looks like one plant is actually a tangled clump made up of individual tubers — and each one has the potential to become a brand new dahlia plant next season.
Learning how to divide dahlia tubers the right way is what turns one healthy plant into armfuls of blooms the following year. Once you understand where the eyes form, how the crown works, and when to divide, it becomes much less intimidating.
Knowing when to divide dahlia tubers is just as important as knowing how — timing really does make all the difference.
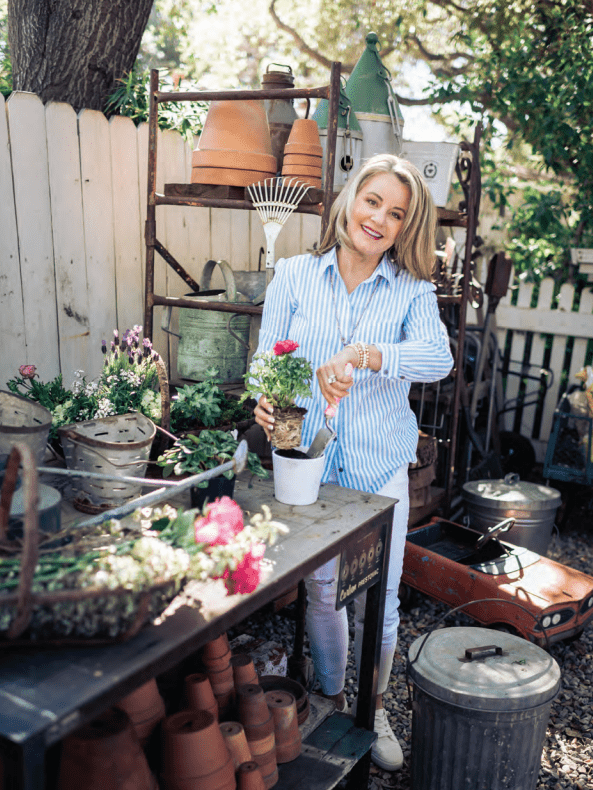
Before we go any further, I want to say something clearly — I’m a home gardener, not a commercial grower.
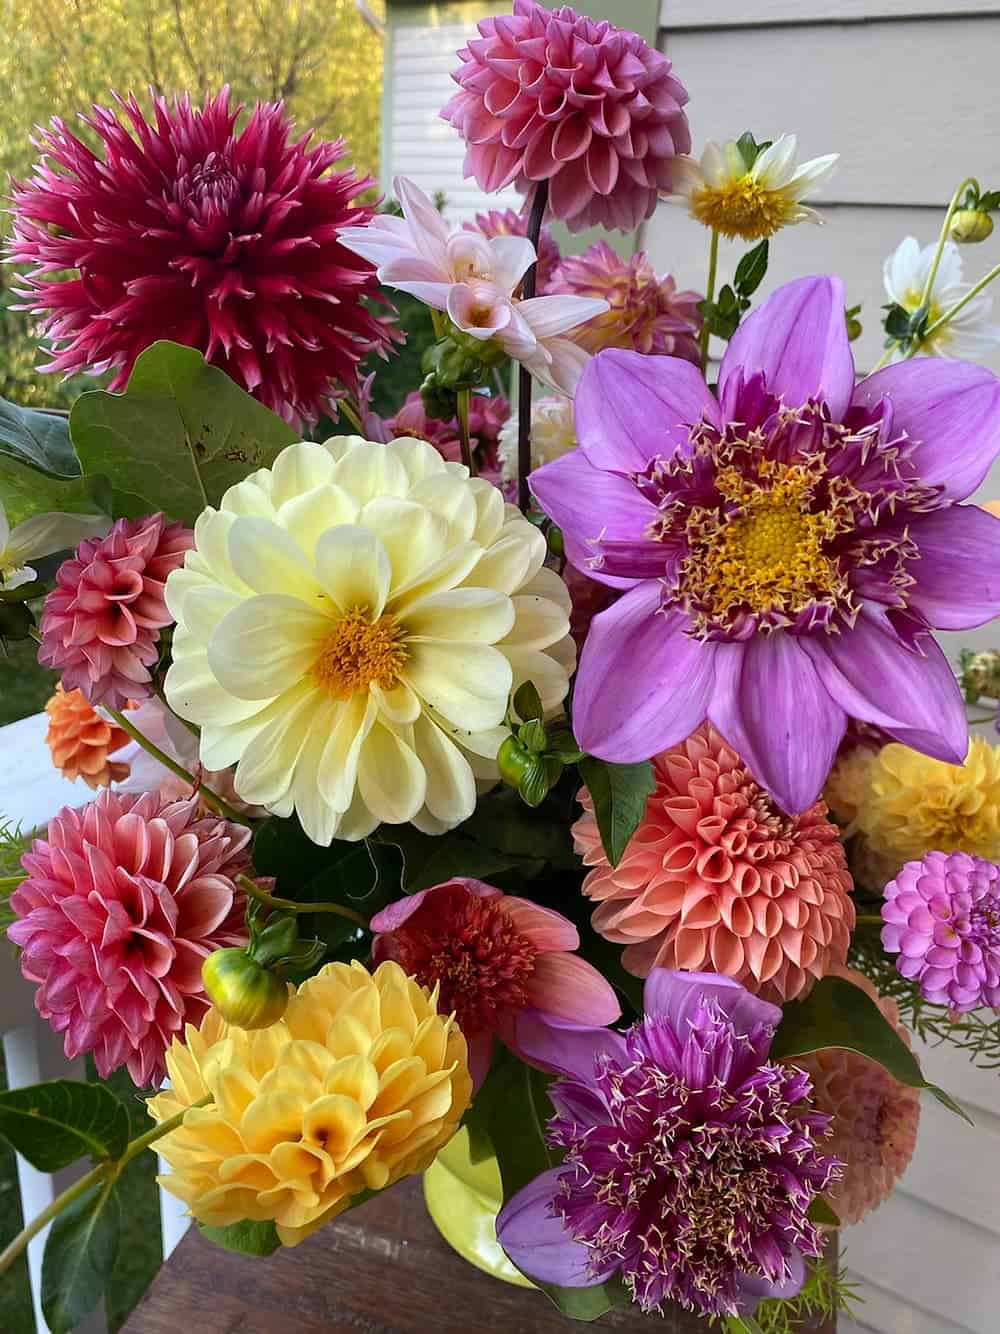
I grow dahlias because I love beautiful flowers in my garden and fresh blooms on my kitchen counter. If you’ve read my guide on growing dinner plate dahlias, you know how much I love these plants. And dividing my tubers simply means more flowers to enjoy and share.
Jump to How to Divide Dahlia Tubers

On my blog WM Design House, I may sometimes use affiliate links, which means a small commission is earned if you purchase via the link. The price will be the same whether you use the affiliate link or go directly to the vendor’s website using a non-affiliate link. Read my full disclosure policy here.
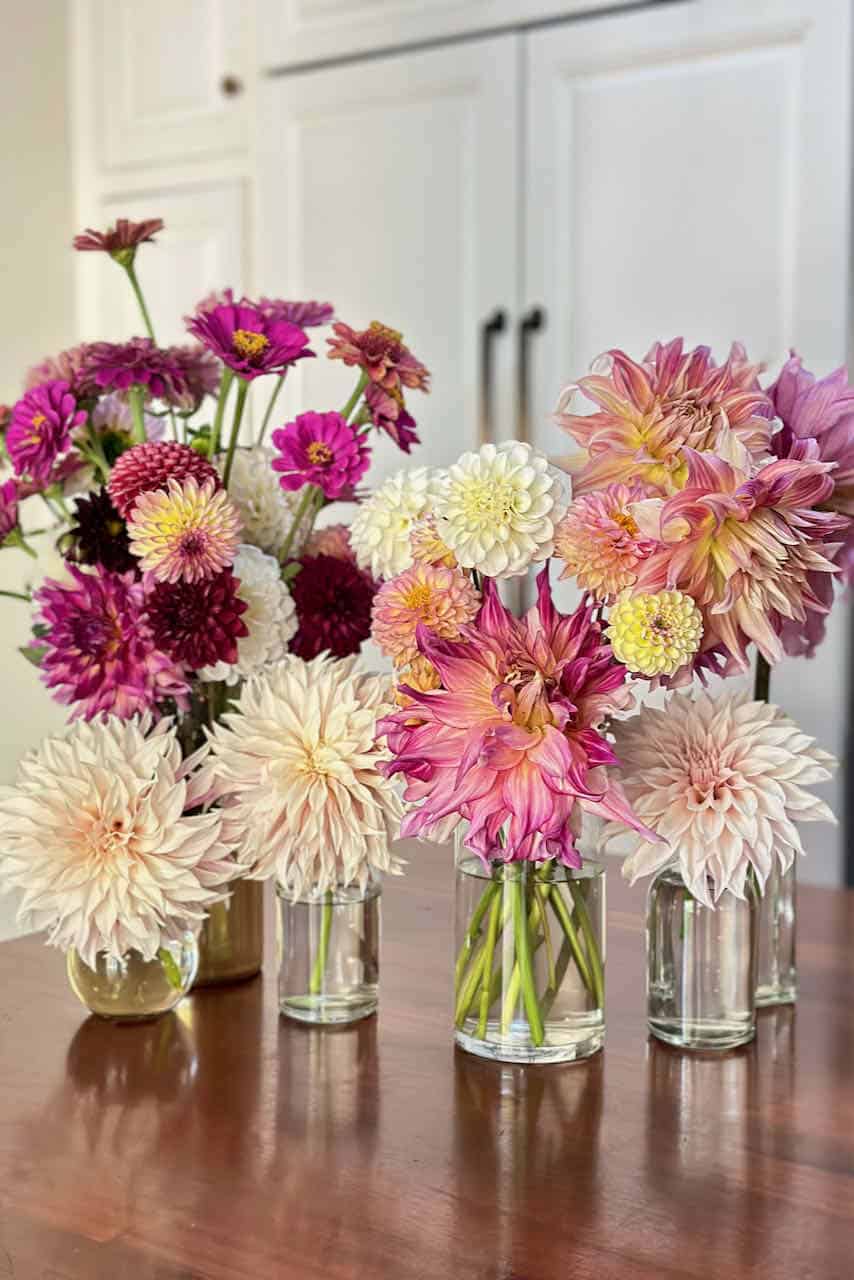
That is why I divide my dahlia clumps. I want more plants for my own garden, and I love sharing extra viable tubers from different varieties with fellow gardeners. One healthy plant can produce lots of tubers, and dividing them means more blooms and more stems for dahlia cutting the following year.
What Does It Mean to Divide Dahlia Tubers?
To divide dahlia tubers means separating a mature tuber clump into smaller individual tuber divisions. Each division must include the structures required for growth.
A viable division must have:
- A viable eye
- A portion of crown tissue
- An intact neck
- A firm tuber body
If any of those elements are missing, that tuber will not grow into a new plant.

Dividing is not random cutting. It is understanding how the dahlia plant stores energy and where new growth begins.
Dahlia Tuber Anatomy Explained
Understanding anatomy is the most important step in learning how to divide dahlia tubers correctly.

The Crown and Where Eyes Form
The crown is the firm, woody area at the top of the tuber clump where all tubers attach to the original stem. Viable eyes form on the crown.
A tuber without crown tissue cannot grow. Even a small amount of crown tissue, roughly the size of a AAA battery end cap, is usually enough to support eye formation.
The crown is where next year’s plant begins.

What Is a Viable Eye?
A viable eye is the small growth point that develops into the new stem of the dahlia plant.
Eyes form only on the crown near where last year’s stem was attached. They do not form on the body of the tuber itself.
In early spring, eyes may look like small pink bumps or raised nodules. If you cannot see eyes clearly, allow tubers to warm slightly. As dormancy ends, the eyes swell and become easier to identify.
A tuber without a viable eye will not sprout.

Dormant vs Active Eyes
Dormant eyes are small and flat. Active eyes are swollen and beginning to elongate.
Dividing when eyes are visible greatly reduces the risk of creating blind divisions.
How to Warm Dahlia Tubers Before Dividing if Needed
Warming dahlia tubers simply helps the viable eyes swell so you can see them more clearly before dividing. You are not trying to force growth, just gently wake them up.
Move tubers out of storage and place them in a room that stays around 60–70°F with bright, indirect light. A spare room or near a softly lit window works well.
Leave them there for 5 to 10 days. During that time, small pink or green bumps should begin forming on the crown where last year’s stem was attached.
Keep the tubers dry. Do not mist, soak, or seal them in plastic. Warmth plus moisture can cause rot.
Once the eyes are visible, you’re ready to divide with much more confidence.
The Neck and Why It Matters

The neck connects the tuber body to the crown. It is narrow and fragile.
If the neck breaks, the tuber cannot transfer stored energy to the eye. That tuber will not grow.
This is why you should never twist apart dahlia clumps. Always cut through the crown with a sharp knife.
Understanding the Mother Tuber
The mother tuber is often the largest tuber attached closest to the old stem. It supported the plant during its first year. It tends to be slightly darker and have a more woody texture. You can clearly see that in the image on the right.
However, it is not always the best tuber for next year. It may show signs of rot or shriveling. Newer tubers attached to the crown are often stronger, so it is advisable to get rid of the mother tuber if it is not in great shape.
Evaluate firmness and health before deciding which tubers to keep.


When Is the Best Time to Divide Dahlia Tubers?
The best time to divide dahlia tubers depends on your climate, but the guiding principle is the same everywhere: divide when the plant is dormant or just beginning to wake up.
If you’re starting fresh instead of dividing, I’ve also shared how to plant dahlia tubers so they get off to a strong start.
In Cold Climates
In areas with freezing winters, dahlias are typically dug after the first frost blackens the foliage. Once frost kills the top growth, the plant has finished sending energy down into the tubers for the following year.
At that point, you can:
- Lift the entire dahlia clump
- Clean off excess dirt
- Store the tubers for winter
- Divide either in fall or in early spring
While fall division is possible, many home gardeners prefer dividing in early spring. By that time, viable eyes are beginning to swell, which makes it much easier to see exactly where to cut and create viable tubers.
In Warm Climates
In mild climates like Southern California, where frost is rare or nonexistent, dahlias do not naturally die back from cold.
Instead of waiting for frost, timing is based on growth stage. Once blooming slows and the plant begins to wind down, you can cut back the stems. Tubers may either be lifted and stored, or left in the ground.
The best time to divide in warm climates is late winter to early spring, just before strong new growth begins. Dividing too late, once stems are tall and fragile, increases the risk of breaking growth points.
Why Early Spring Is Often Ideal
Across climates, early spring is often the safest and most reliable time to divide dahlia tubers.
At this stage:
- Tubers are still firm and dormant
- Viable eyes are visible or beginning to swell
- Crown structure is easier to interpret
- You can confidently create viable divisions
Dividing at the correct stage gives each new plant the strongest possible start and leads to better bloom production during the growing season.
How to Dig and Prepare Dahlia Clumps for Division
Lifting a Large Clump Safely
Dig at least 8 to 12 inches away from the base. Dahlia clumps extend farther under the dirt than expected.
And having the best soil mix for dahlias makes a huge difference in how strong those tubers develop in the first place.


Lift from underneath to avoid snapping necks.
Cleaning Dirt and Curing Tubers
Shake off loose dirt or rinse lightly. If rinsed, allow tubers to dry in a well-ventilated area before storing.
Excess moisture increases the risk of rot.

How to Spot Signs of Rot
Spotting a rotten tuber is fairly easy. You can usually see or feel the problem right away.
Discard tubers that are:
- Soft or mushy
- Slimy
- Moldy
- Foul smelling
Healthy viable tubers remain firm and slightly plump.


Tools You Need to Divide Dahlia Tubers
You only need a few basic tools:
- A sharp knife
- Clippers
- Rubbing alcohol for sanitizing
- Gloves
- Labels for different varieties
A sharp knife ensures clean cuts. Sanitizing prevents spreading disease between clumps.
Step-by-Step: How to Divide Dahlia Tubers
Step 1: Warm the Tubers to Encourage Eyes
In early spring, allow tubers to sit at room temperature for several days. This helps viable eyes swell and become visible.


Step 2: Trim the Roots and Stems
Trim any of the long roots and the stems of the dahlia tuber clump.
Step 3: Identify the Crown and Viable Eyes
Examine the tuber clump carefully. Locate visible eyes before making any cuts.
Step 4: Cut the Large Tuber Clump into Sections
Using a sharp knife, cut through the crown to divide the large clump into manageable sections.
This particular clump of tubers was a little tricky as you can see it has two stems with crowns, so I first split the clump into 2 sections.
Never twist or pull apart tubers.


Step 5: Separate Each Individual Tuber
Each division must have:
- A viable eye
- A piece of crown
- An intact neck
- A firm tuber body
Discard any division that lacks these components.
As you separate each tuber, label it right away. Once they’re cut apart, it becomes almost impossible to remember which variety is which. I like to attach a tag to each division or write on the actual tuber with a sharpie so nothing gets mixed up. This is also so helpful when you dig them up next year.


Step 6: Allow Cuts to Callous Before Storage or Planting


Let divisions dry for about 24 hours. This reduces the risk of rot.
With practice, dividing becomes almost muscle memory.
What Happens If You Divide Dahlias Incorrectly?
If you remove crown tissue, the tuber will not grow.
When a neck breaks, energy cannot reach the eye.
If divisions are too small, they may lack enough stored energy to produce strong stems.
Understanding these risks improves your success rate dramatically.
How Many Plants Can One Dahlia Clump Produce?
A healthy large clump can contain lots of tubers. Depending on its size and maturity, one clump can yield five to twenty viable tubers.


Each viable division becomes a new plant capable of producing multiple stems and blooms.
This is how one plant multiplies into an entire cutting garden.
And honestly, that’s the part that still amazes me every single year.
Small vs Large Tubers: Does Size Matter?
Dahlia tubers come in all shapes and sizes, but size alone does not determine success.
A tuber roughly the size of a AAA battery can grow beautifully if it has a viable eye and intact crown.
A large tuber without crown tissue will not grow at all.
Structure matters more than size.
Tuber Storage: How to Store Divided Dahlia Tubers for Next Year
When it comes to storing dahlia tubers, all three materials work well. The goal is the same: protect viable tubers from excess moisture while preventing them from drying out completely.
Choosing Container and Medium to Overwinter Dahlia Tubers
Choose a container that breathes. I like to use plastic crates lined with burlap, then fill them with vermiculite before adding the tubers.


Common storage fillings include:
- Wood shavings
- Peat moss
- Vermiculite
🌿 Vermiculite
Best for moisture balance and insulation.
- Holds a small amount of moisture without staying wet
- Helps prevent shriveling in dry storage areas
- Provides light insulation against temperature swings
- Clean and easy to handle
Vermiculite is a good choice if your storage area is dry or fluctuates in humidity.
🌾 Wood Shavings
Best for airflow and separation.
- Excellent air circulation
- Helps prevent tubers from touching
- Reduces risk of rot spreading
- Lightweight and easy to layer
Wood shavings are ideal if you’ve had rot issues in the past or store larger quantities.
🌱 Peat Moss
Best for maintaining consistent humidity.
- Holds more moisture than vermiculite
- Good for very dry climates
- Needs careful monitoring to avoid excess dampness
Peat moss works well, but it can hold more moisture than you want if your storage area is already humid.
The Simple Rule
If your tubers tend to shrivel, choose a material that holds a bit more moisture.
Temperature and Moisture Control
You’ll want to store your dahlia tubers in a cool spot, ideally between 40–50°F.
Too much moisture leads to rot. Too little causes shriveling.
Check monthly and remove any tubers showing signs of rot.
How Often to Check for Rot
Inspect storage containers at least once a month.
Early detection prevents problems from spreading.
Healthy mature tubers generally store well when conditions remain stable.
How Dividing Dahlia Tubers Improves Bloom Production


Overcrowded clumps produce smaller blooms because stems compete for nutrients.
Dividing your tuber clumps reduces competition and allows each new plant to develop strong roots.
Strong roots support stronger stems.
Stronger stems produce more blooms.
For home gardeners who love cutting and sharing flowers, dividing directly increases the number of stems available throughout the season.
And if you really want continuous blooms all season long, learning deadheading your dahlias throughout the season makes just as much of a difference as dividing them.
And if you’re looking for ideas, I’ve shared over 10 ways to arrange dahlias once they’re cut.
Common Mistakes When Dividing Dahlia Tubers
- Dividing before eyes are visible
- Breaking the neck
- Keeping tubers without crown tissue
- Storing tubers while damp
- Forgetting to label different varieties
- Assuming the mother tuber is always best
Avoiding these mistakes makes each following year easier than your first year.
FAQ ABOUT DIVIDING DAHLIA TUBERS
- How Do I Know If a Tuber Is Viable?
- A viable tuber must have a viable eye, crown tissue, an intact neck, and a firm body.
- Will Divided Tubers Bloom the First Year?
- Yes. Healthy divisions typically bloom that same growing season.
- Can I Plant an Entire Clump Without Dividing?
- Yes, but overcrowding may reduce bloom size and stem production over time.
- What Is the Best Tool for Splitting Dahlia Tubers?
- A sharp knife is best because it cuts cleanly through the crown.
- What If I Cannot See Any Eyes?
- Warm the tubers for several days in early spring. Many will eye up and become easier to divide correctly.
- How Often Should I Divide Dahlia Tubers?
- Many gardeners divide yearly. Others divide every two to three years to maintain vigor.
- Why Do Tubers Shrivel in Storage?
- Shriveling usually indicates conditions that are too warm or too dry. Adjust the storage medium and location.
- What Should I Do If I See Signs of Rot?
- Remove affected tubers immediately to protect the remaining viable tubers.
Wrapping Up
Well, I know this was a long post, but it’s filled with important information and I didn’t want to miss a thing. Dividing dahlia tubers might feel overwhelming at first, but once you understand what to look for, it truly becomes manageable. With a little patience and the right timing, one healthy clump can turn into multiple strong plants for next year. And for me, that simply means more blooms to enjoy and more beautiful flowers to share.


A few other dahlia guides for you!


More about me!

Hello, I’m Wendy – a dedicated homemaker with a deep passion for decorating, gardening, cooking, and crafting. I find joy in harmonizing beautiful elements to fashion a space that is both comfortable and inspiring. I will help you create a beautiful home, one project at a time.