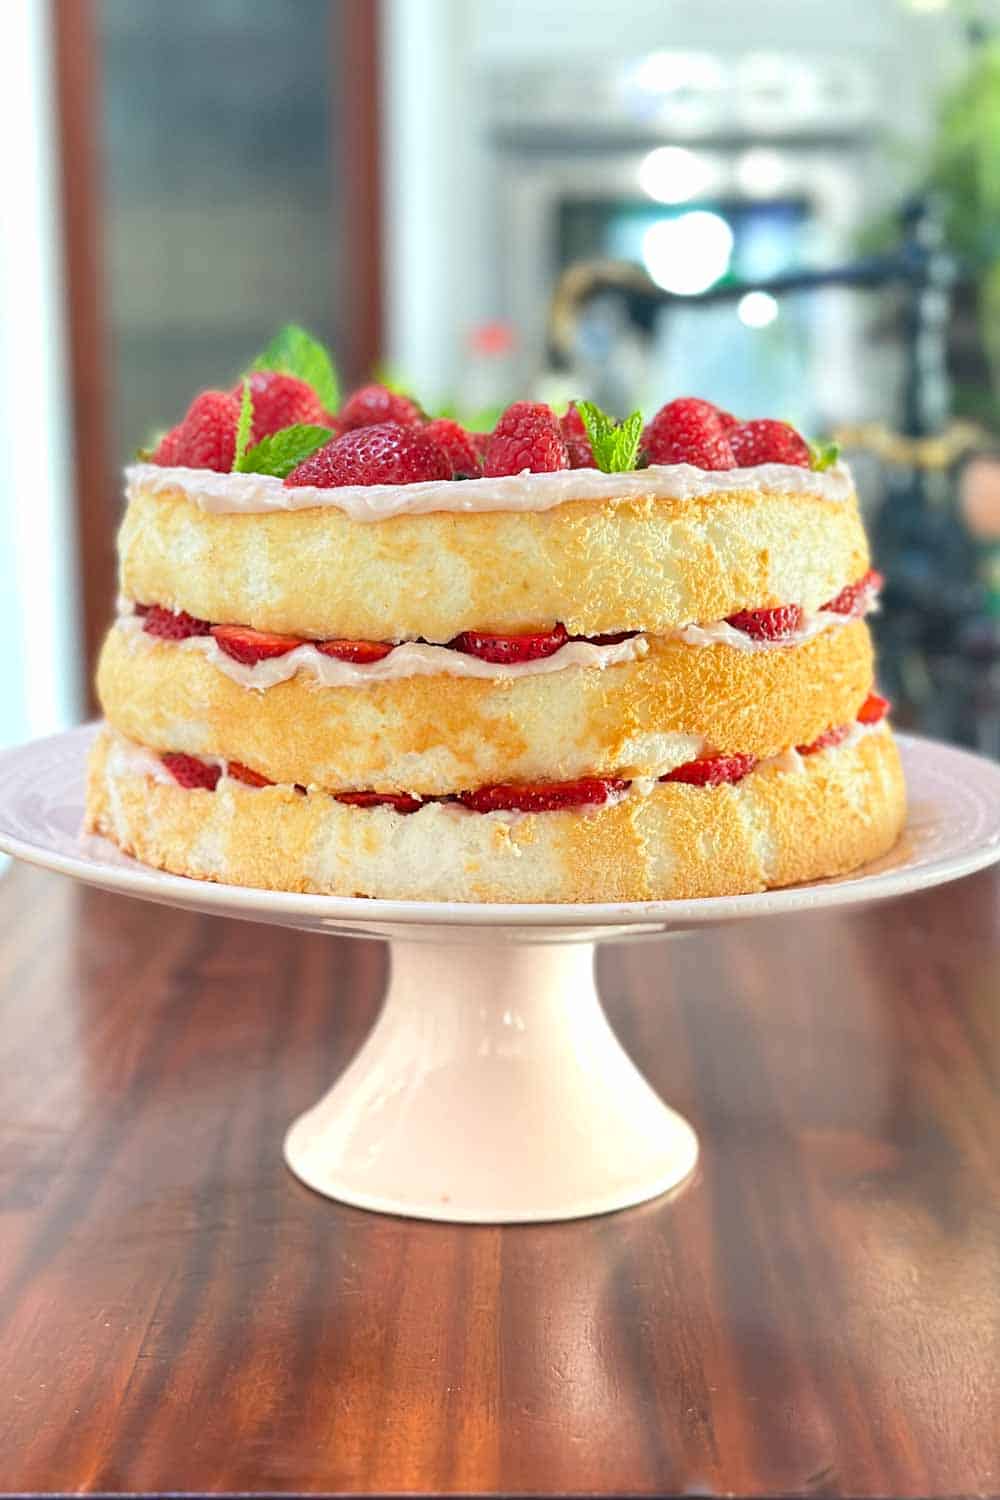
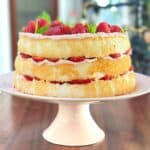
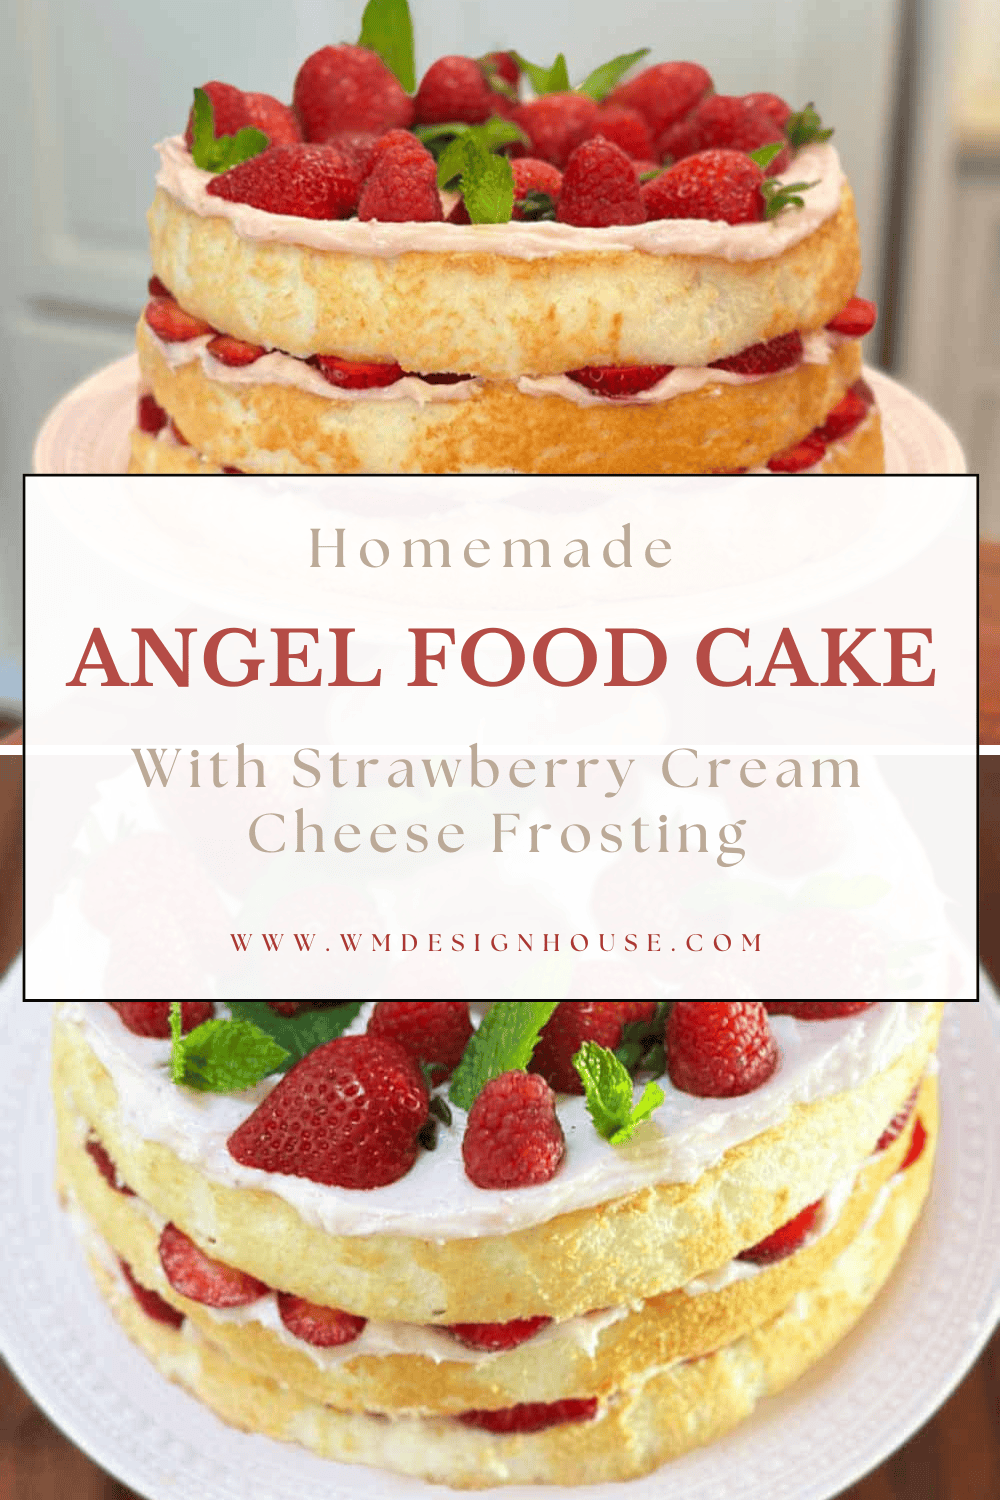
Layered Angel Food Cake with Cream Cheese Frosting
Enjoy a sweet summertime treat with this simple recipe for old fashioned angel food cake with cream cheese frosting and fresh berries!
On my blog WM Design House, I may sometimes use affiliate links, which means a small commission is earned if you purchase via the link. The price will be the same whether you use the affiliate link or go directly to the vendor’s website using a non-affiliate link. Read my full disclosure policy here.
Easy Angel Food Cake with Cream Cheese Frosting
I love angel food cake, and it has always been one of my go-to desserts. It’s light, not too sweet, and perfect for warm weather. But when you layer it with cream cheese frosting and fresh berries? That’s when it really shines. This is one of those desserts that feels a little fancy but is surprisingly easy to make.
I enjoy bringing it out for birthdays, brunches, or summer gatherings when I want something beautiful that doesn’t feel heavy. It’s always a crowd-pleaser and just the kind of sweet treat that makes people smile.
Why You’ll Love This Recipe
- Simple Ingredients – Made with pantry staples like eggs, sugar, and flour, this recipe is easy to pull together but feels like something you’d buy from a fancy bakery.
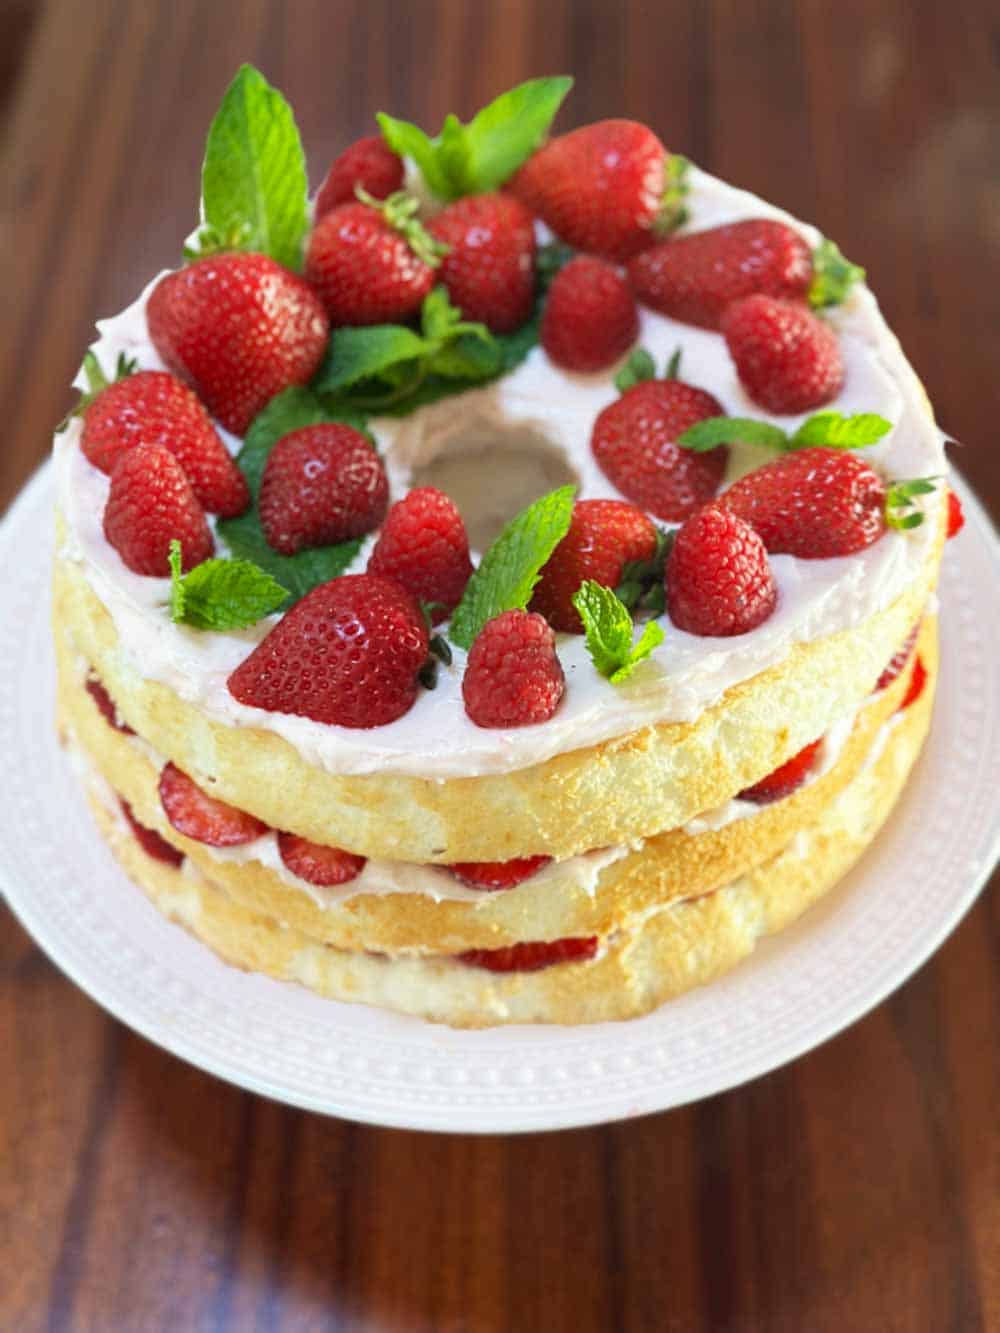
- Beautiful Presentation – With soft layers, swirls of cream cheese frosting, and fresh berries on top, this cake looks impressive without being fussy.
- Perfect for Entertaining – Whether it’s brunch with friends, a summer holiday, or a backyard dinner party, this cake is always a hit and makes any gathering feel a little more special.
Ingredients for Layered Angel Food Cake
For the Carrot Cake
- 7/8 to 1 cup of cake flour or all-purpose flour
- 1 3/4 cups granulated sugar, divided
- 1 1/2 tsp cream of tartar
- 1 2/3 tsp vanilla extract
- 1/4 tsp salt
- 1 1/2 cups large egg whites (approximately 10-12 large eggs), at room temperature
Tip from wendy’s kitchen:
Wondering what to do with your egg yolks? There are many great uses for egg yolks after you separate eggs. Here are a few of my favorites:
- Mayonnaise: Egg yolks are a key ingredient in mayonnaise, along with oil, vinegar, and lemon juice. They help to emulsify the ingredients and give mayonnaise its smooth texture.
- Custard: Custard is a thick, creamy dessert that is made with milk, eggs, sugar, and vanilla extract. Egg yolks help to thicken the custard and give it its rich flavor.
- Panna cotta: Panna cotta is an Italian dessert that is made with cream, milk, sugar, and gelatin. Egg yolks are sometimes added to panna cotta to give it a richer flavor.
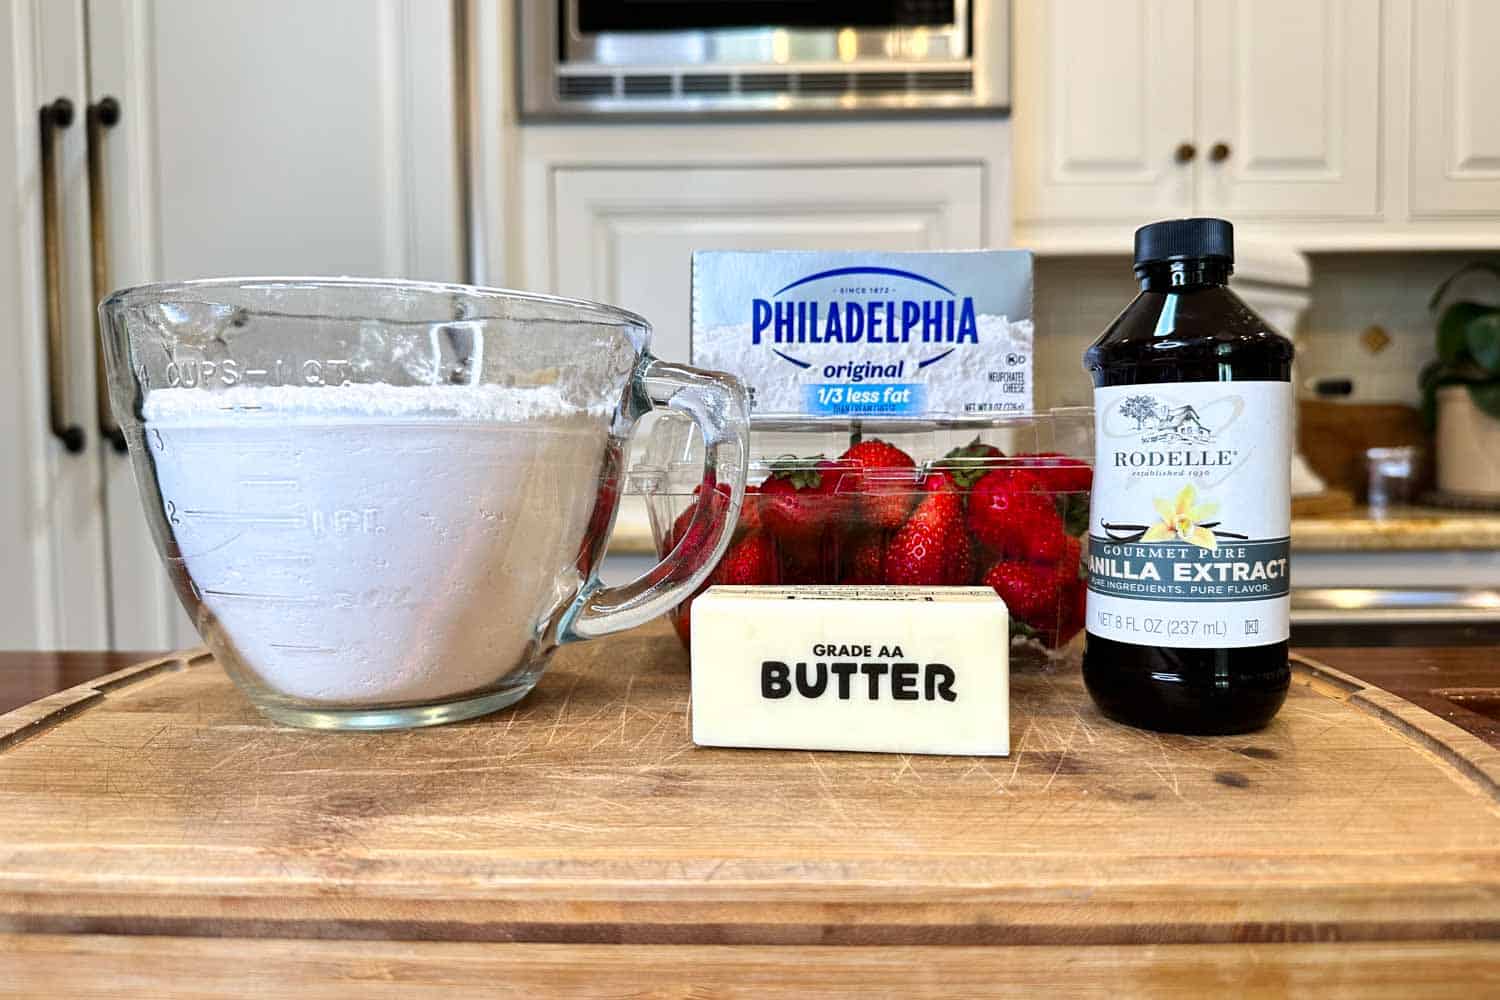
For the cream cheese frosting
- One stick of butter (room temperature)
- One block of cream cheese at room temperature (do not use the low-fat version)
- One box of powdered sugar (this is about 3.5 cups)
- 1 Teaspoon of vanilla
- 1/4 Cup of fresh strawberry puree (made from fresh strawberries)
- 1-2 Tablespoons of granulated sugar
Equipment Needed
- Tube cake pan
- Measuring cups
- Measuring spoons
- Large mixing bowl
- Whisk
- Sifter
- Hand mixer or stand mixer
- Spatula
- Frosting knife
How to Bake an Angel Food Cake
Step 1: Preheat Your Oven and Mix the Dry Ingredients
First, preheat your oven to 375°F and make sure the rack is in the lowest position in the oven.
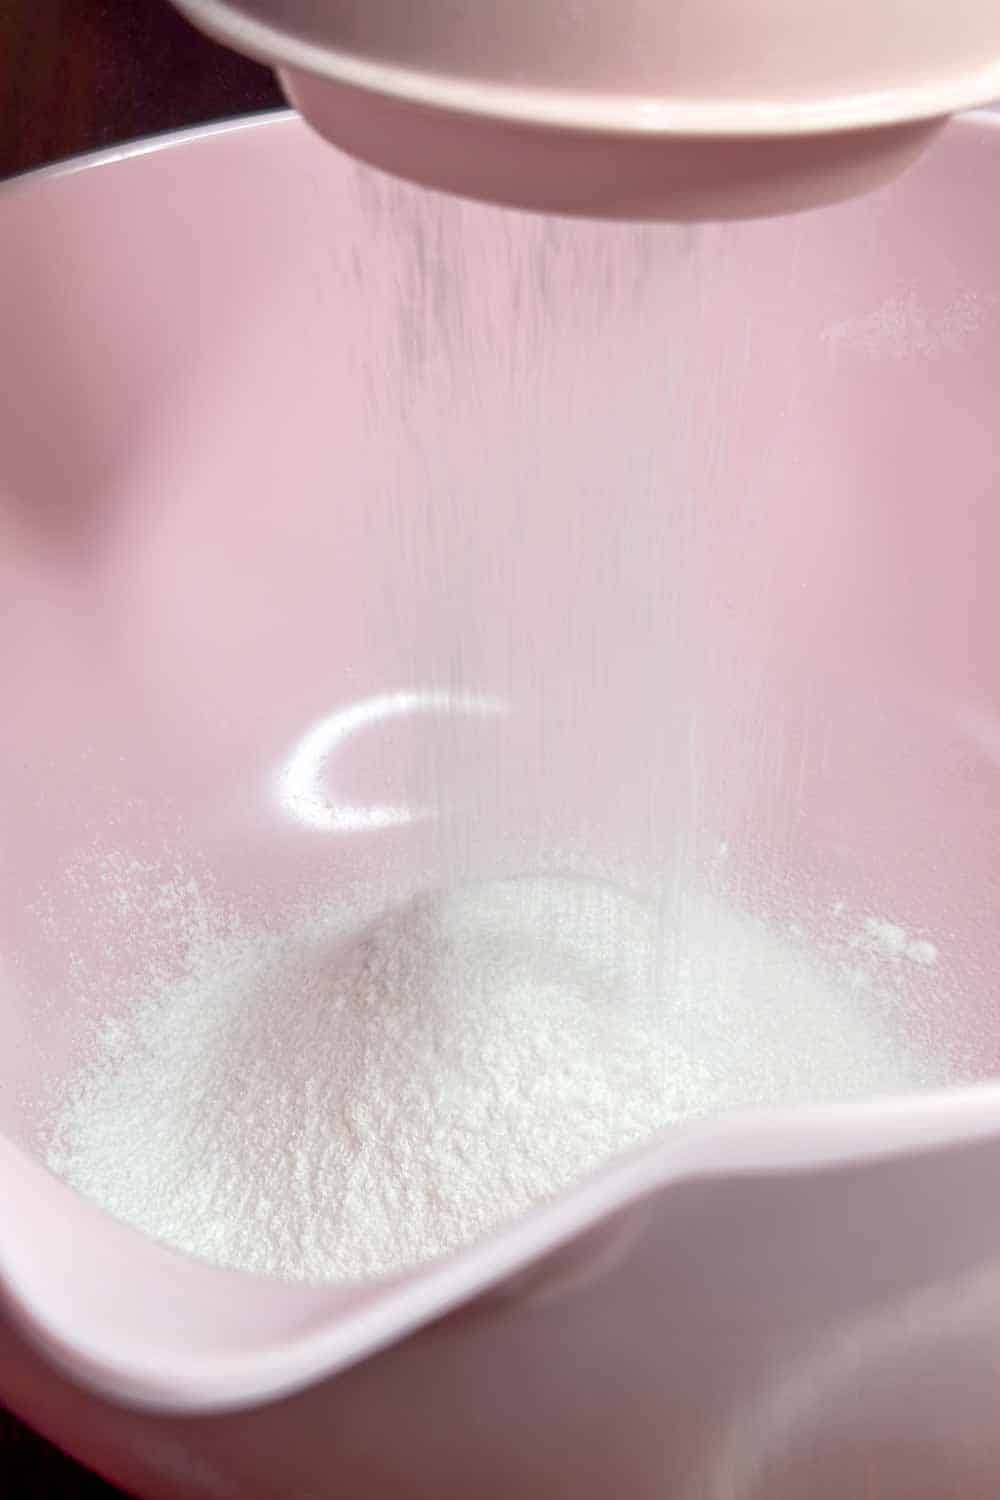
In a medium bowl, whisk together the flour, salt, and half of the sugar. Then sift the mixture 4 to 6 times to ensure it’s light and airy.
Tip from wendy’s kitchen:
Cake flour is best! Cake flour has a lower protein content than all-purpose flour, which makes it ideal for angel food cake. The lower protein content helps to create a tender, delicate crumb.
Step 2: Beat the Egg Whites
Next, in a large mixing bowl, beat the egg whites on medium speed using the whisk attachment of your electric mixer until they become frothy.
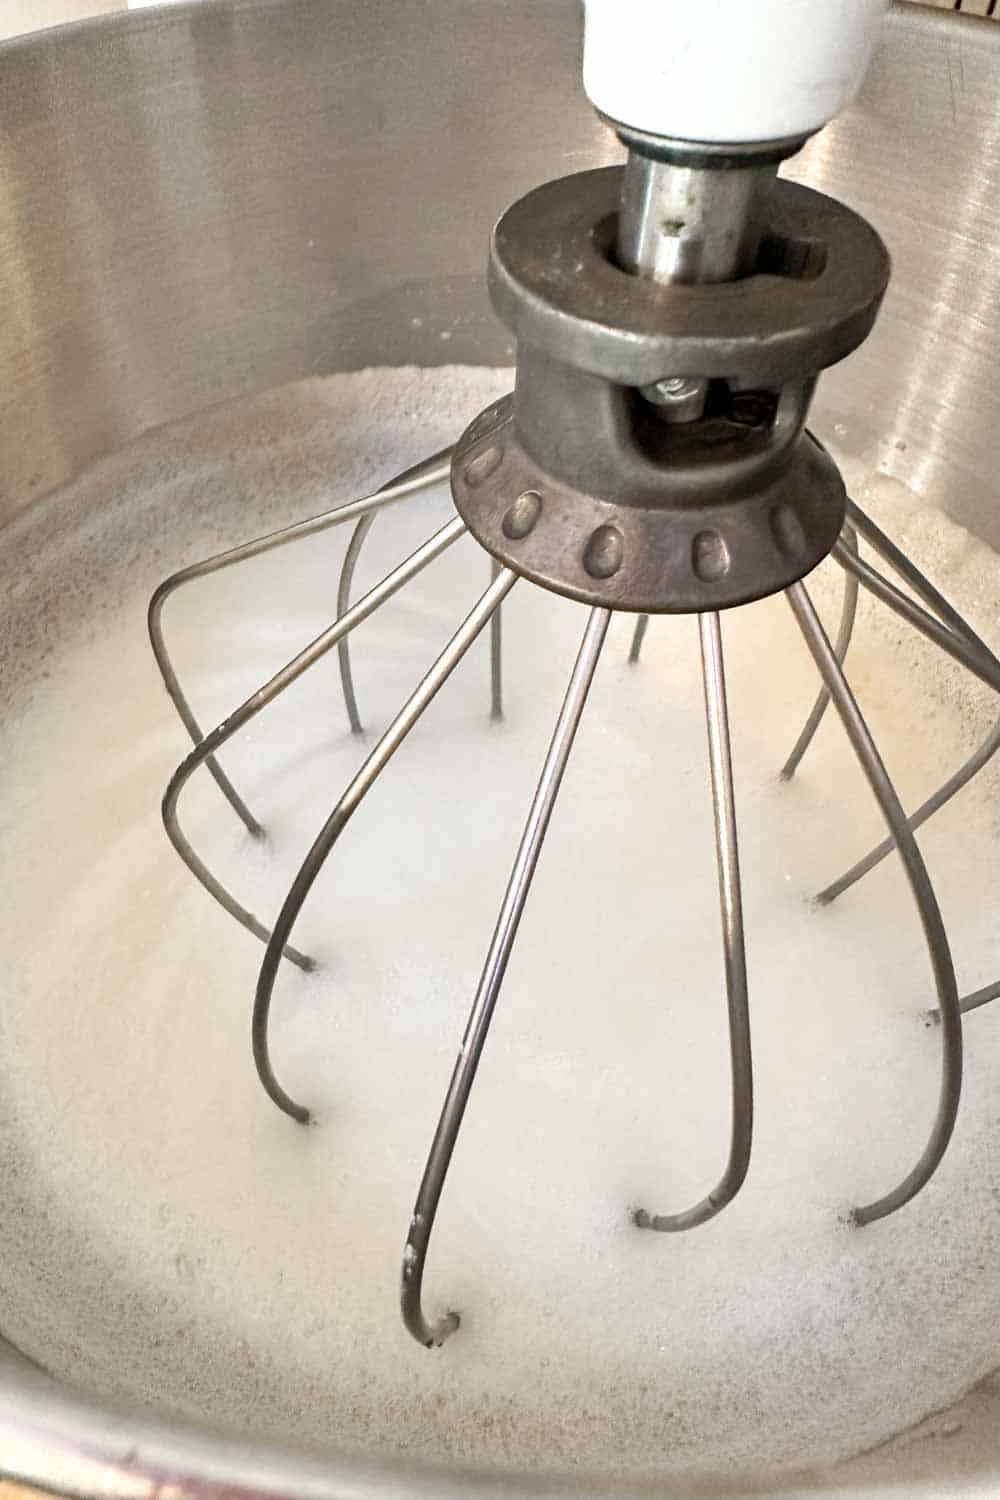
Then add the cream of tartar and vanilla extract to the egg whites. Increase the mixer speed to high and slowly add the remaining sugar, one teaspoon at a time. Adding the sugar gradually will help to prevent the egg whites from curdling. Continue beating until stiff peaks form.
Tip from wendy’s kitchen:
Use room-temperature egg whites. Egg whites at room temperature will whip up more quickly and hold more air, giving your cake a light and airy texture.Be careful not to overbeat the egg whites or they will become dry and tough.
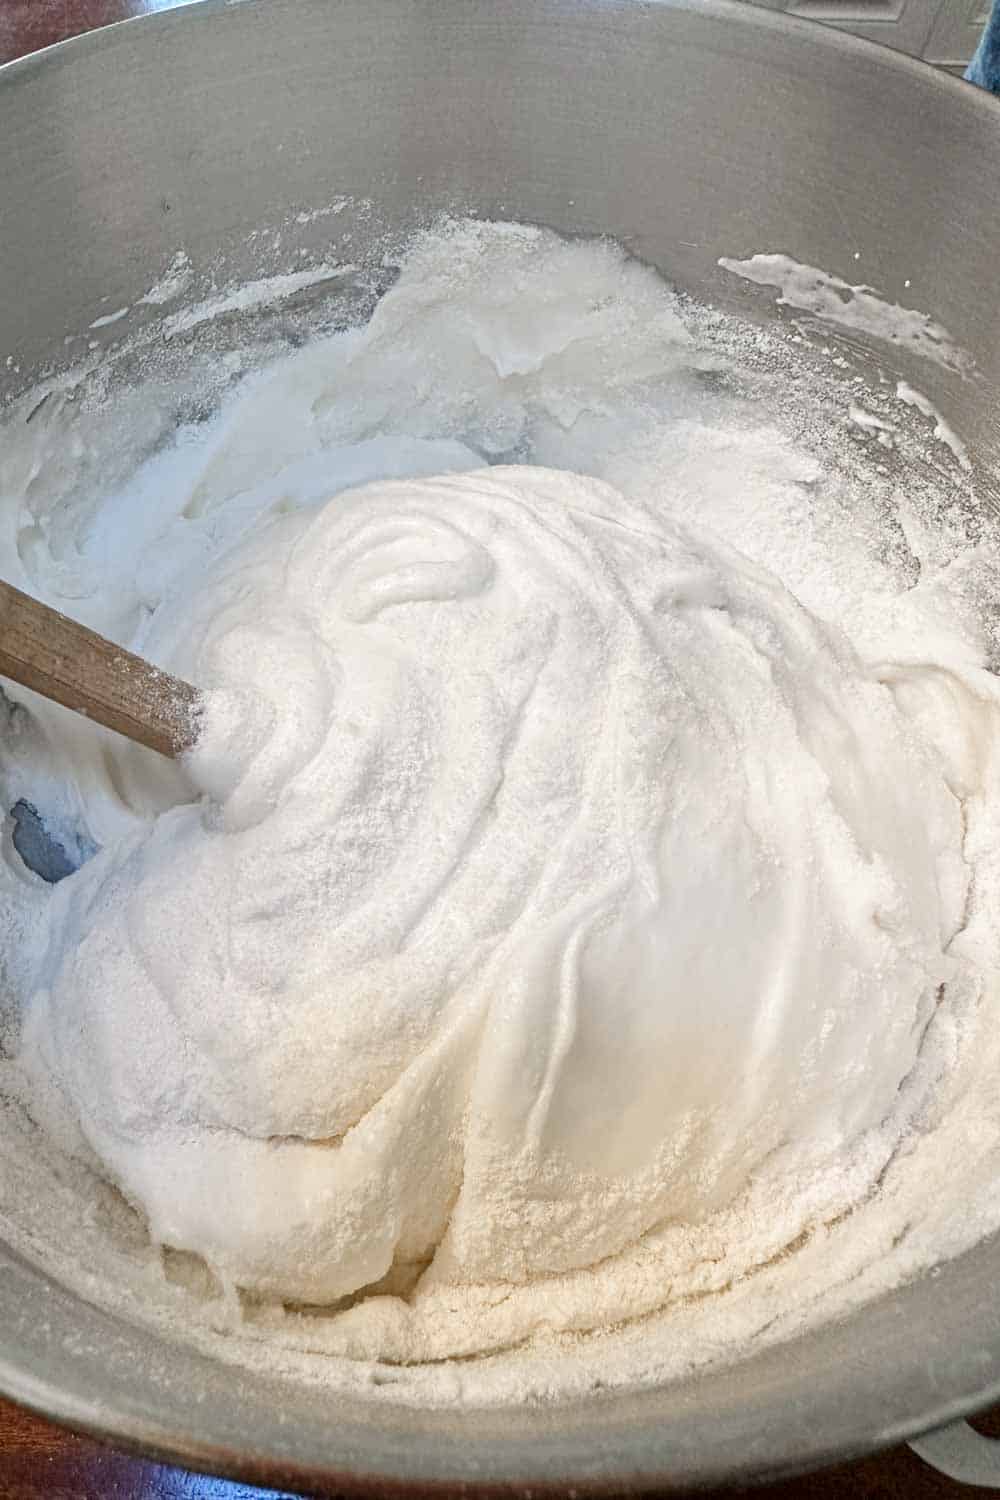
Step 3: Fold in the Dry Ingredients
Gently fold the dry mixture into the whipped egg whites, adding one-third at a time. Take your time to avoid deflating the batter.
Tip from wendy’s kitchen:
Want to add a bit of extra flavor? You can easily change up the flavor of your angel food cake! Try adding ½ teaspoon of almond extract to the batter for a subtle twist. Or, for a light citrusy flavor, mix in 1 teaspoon of fresh lemon juice and a bit of fresh lemon zest. It’s the perfect way to brighten things up.
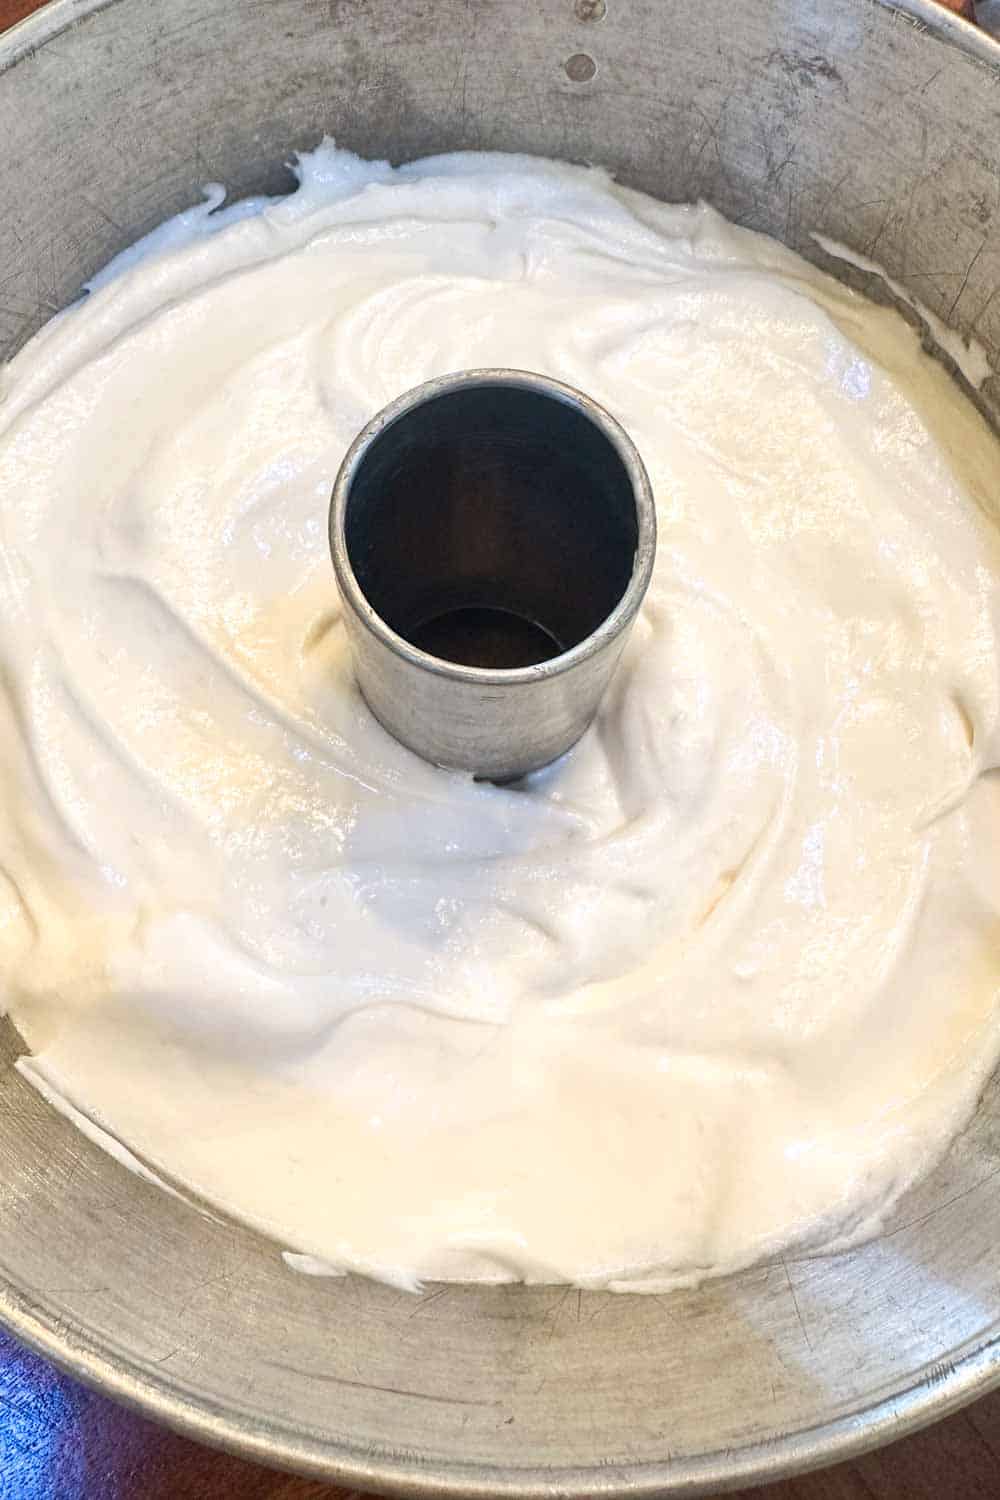
Step 4: Pour the Batter in Your Pan
Next, pour the batter into a non-greased tube pan and smooth out the top. Gently tap the pan on the counter a few times to release any large air bubbles.
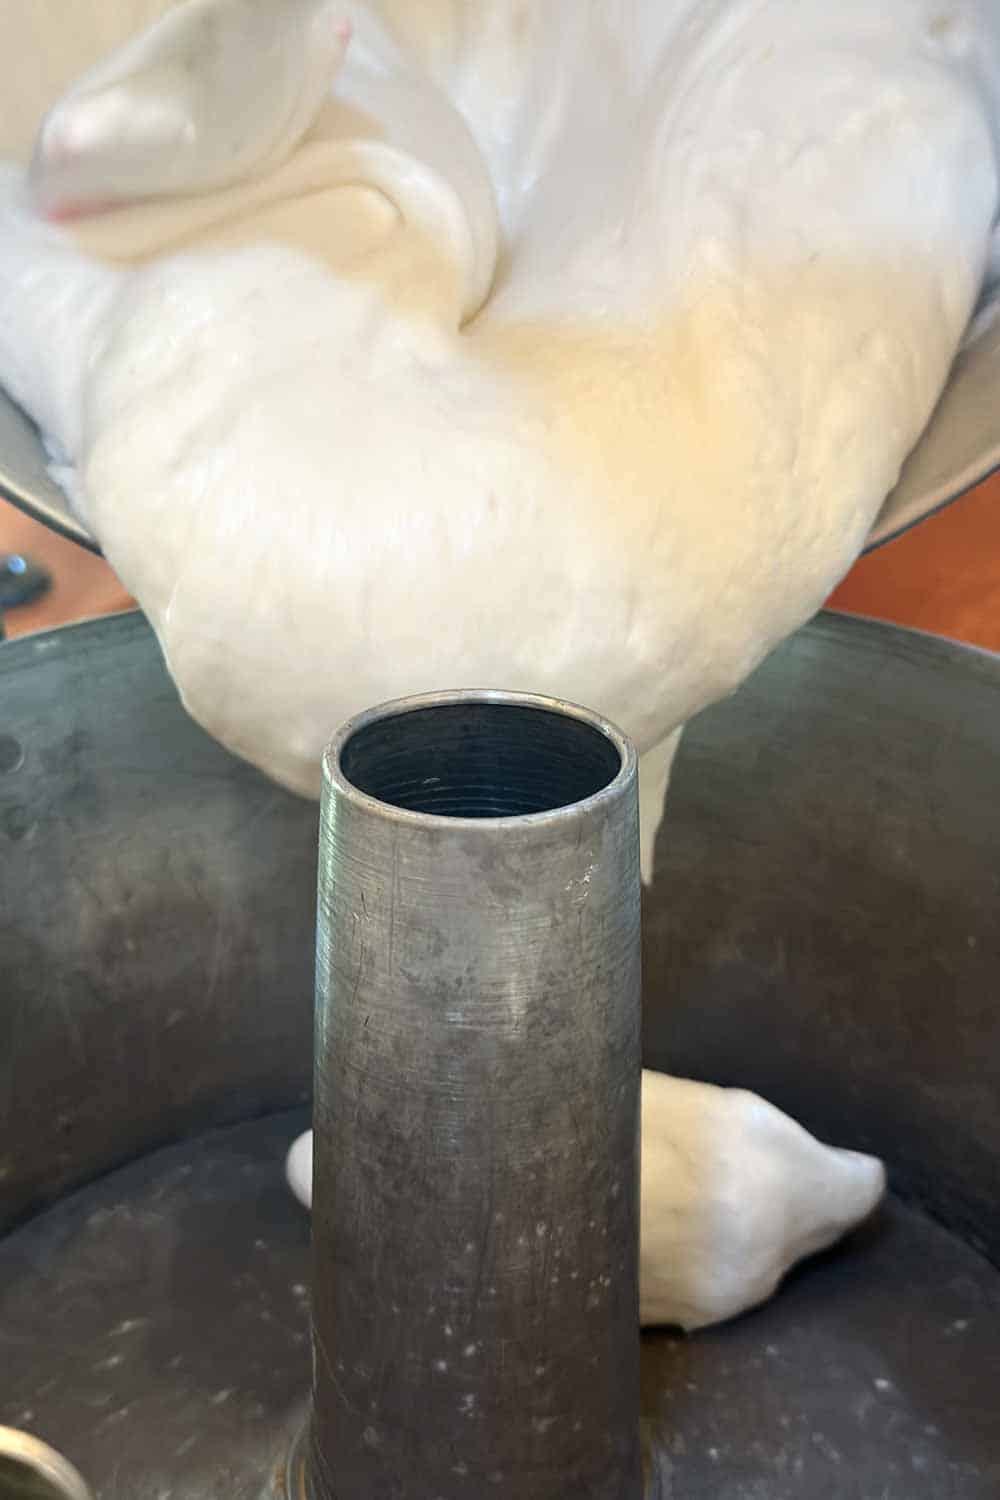
Note: Be sure to use a tube pan and not a bundt pan!
Step 5: Bake the Cake
Once the angel food cake batter is ready, place the pan on the lowest rack in the oven and bake for 25 to 30 minutes, or until a cake tester inserted into the center comes out clean.

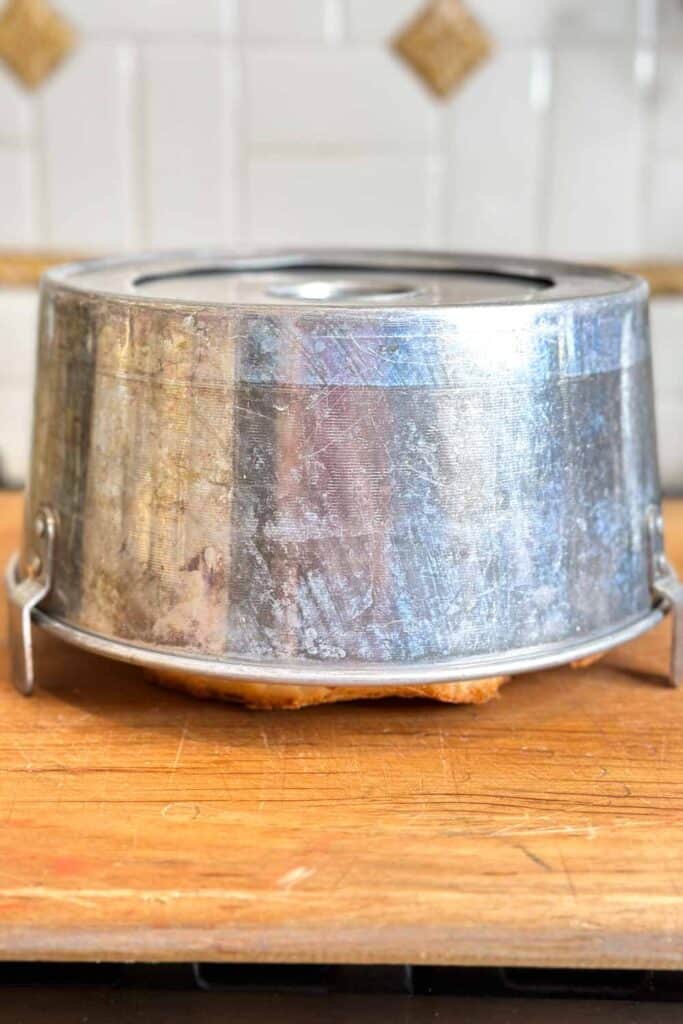
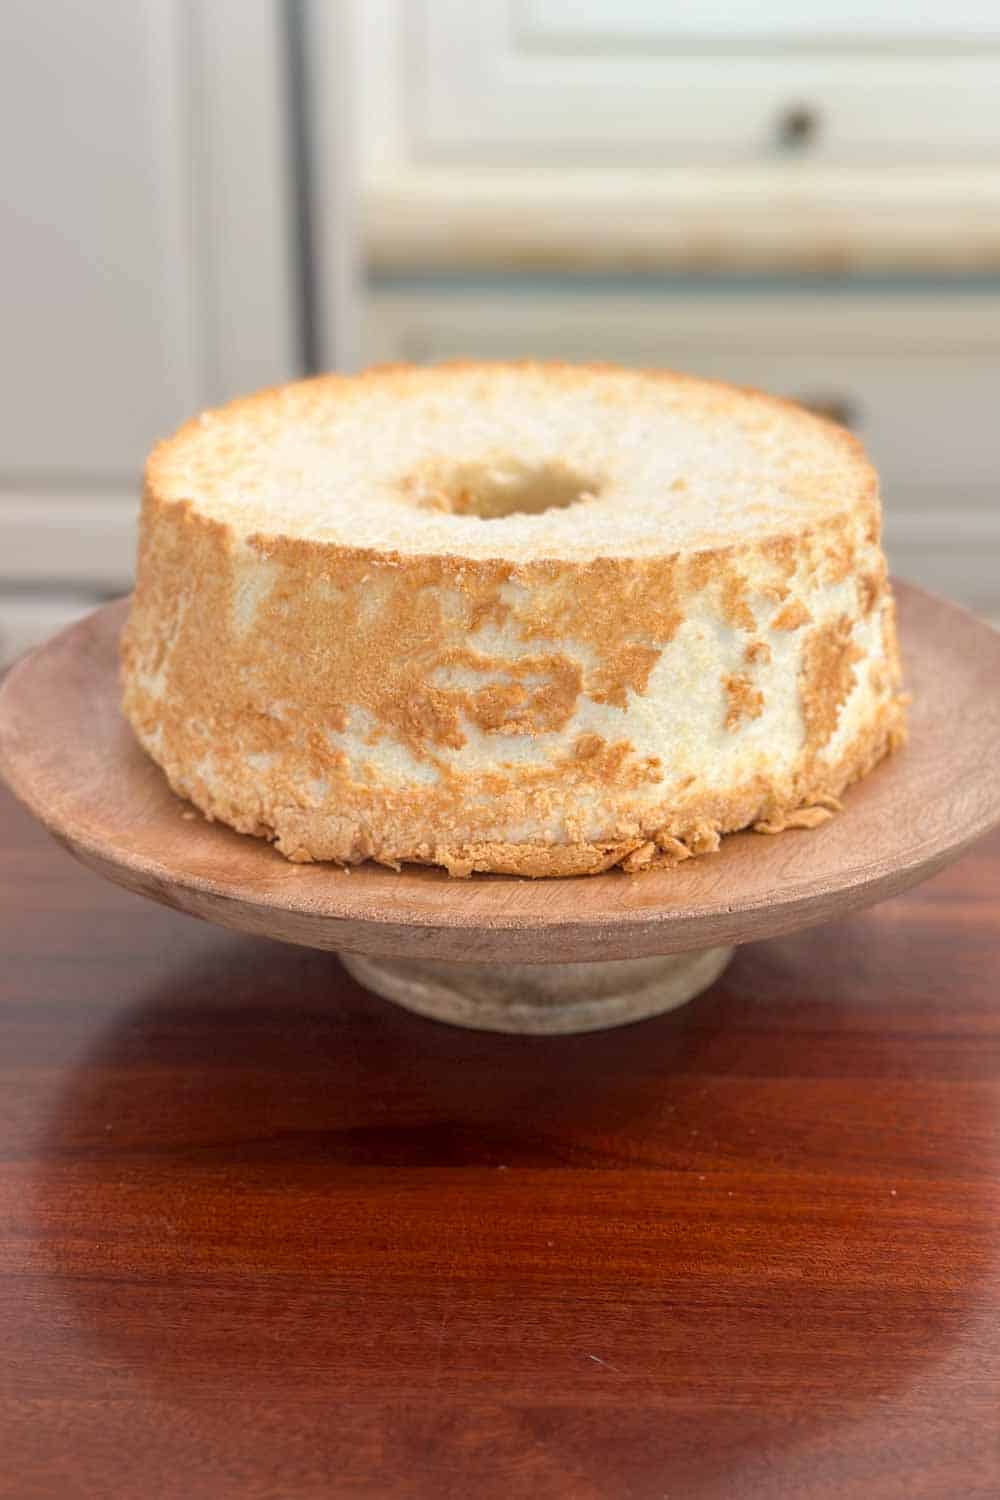
Remove the cake from the oven and immediately invert the pan onto a wire rack. Then let the cake cool completely while upside down to prevent it from collapsing.
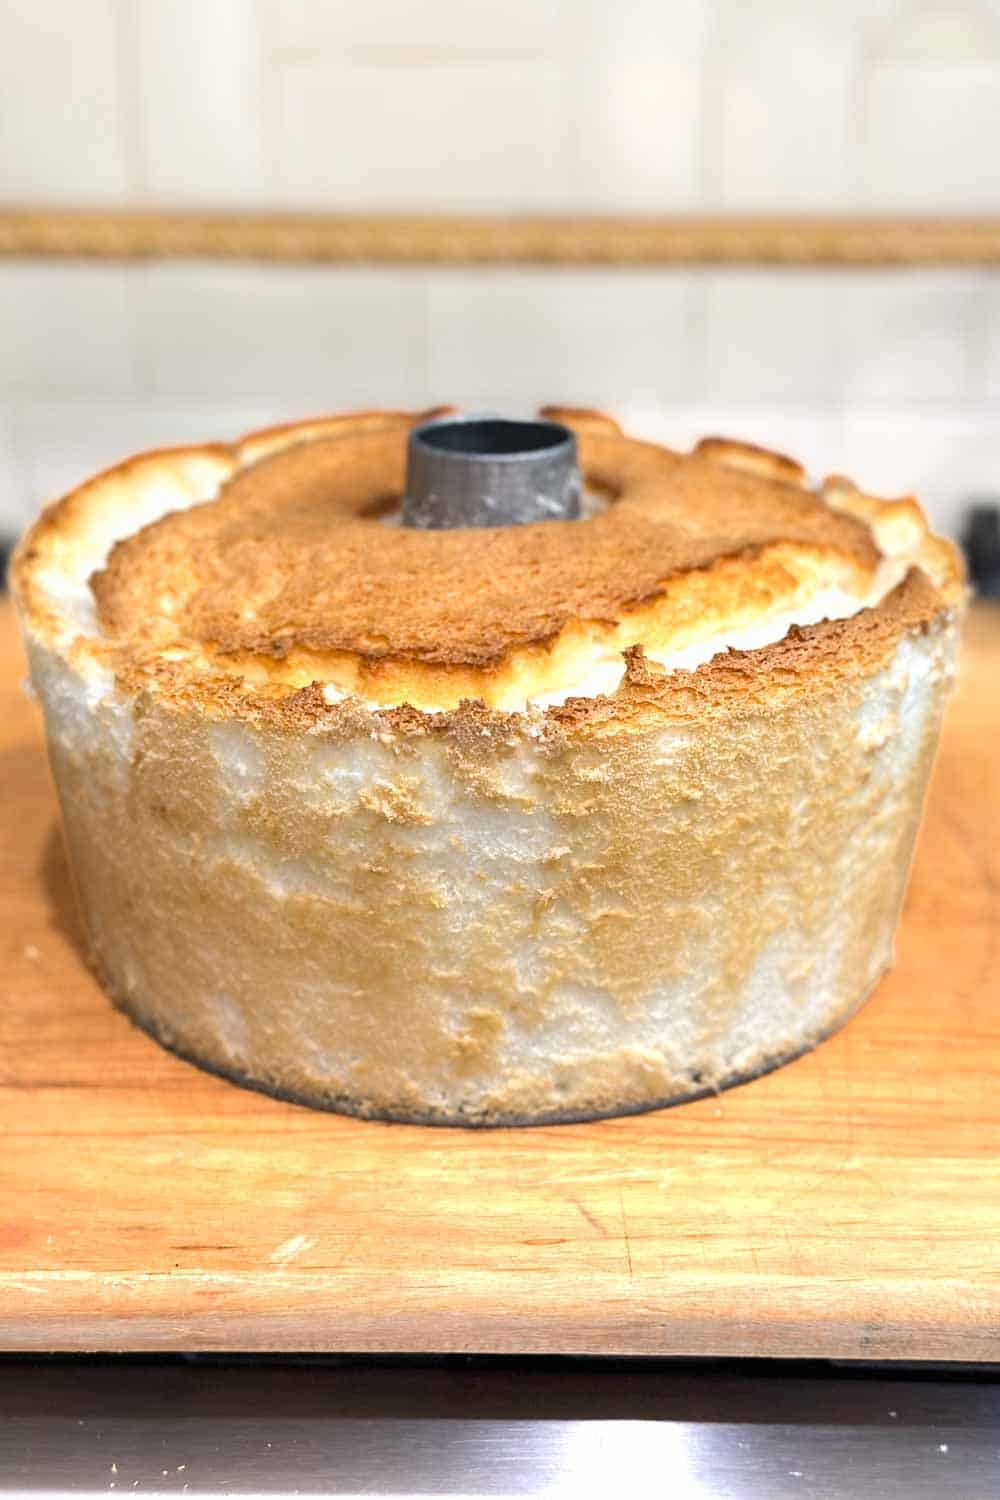
Once the cake is completely cool, run a knife around the edges of the pan to loosen it. Invert the cake onto a serving plate and you’re ready to frost or serve!
How to Make Cream Cheese Frosting
Step 1: Cream the Butter and Cream Cheese
Make sure both the butter and cream cheese are at room temperature.
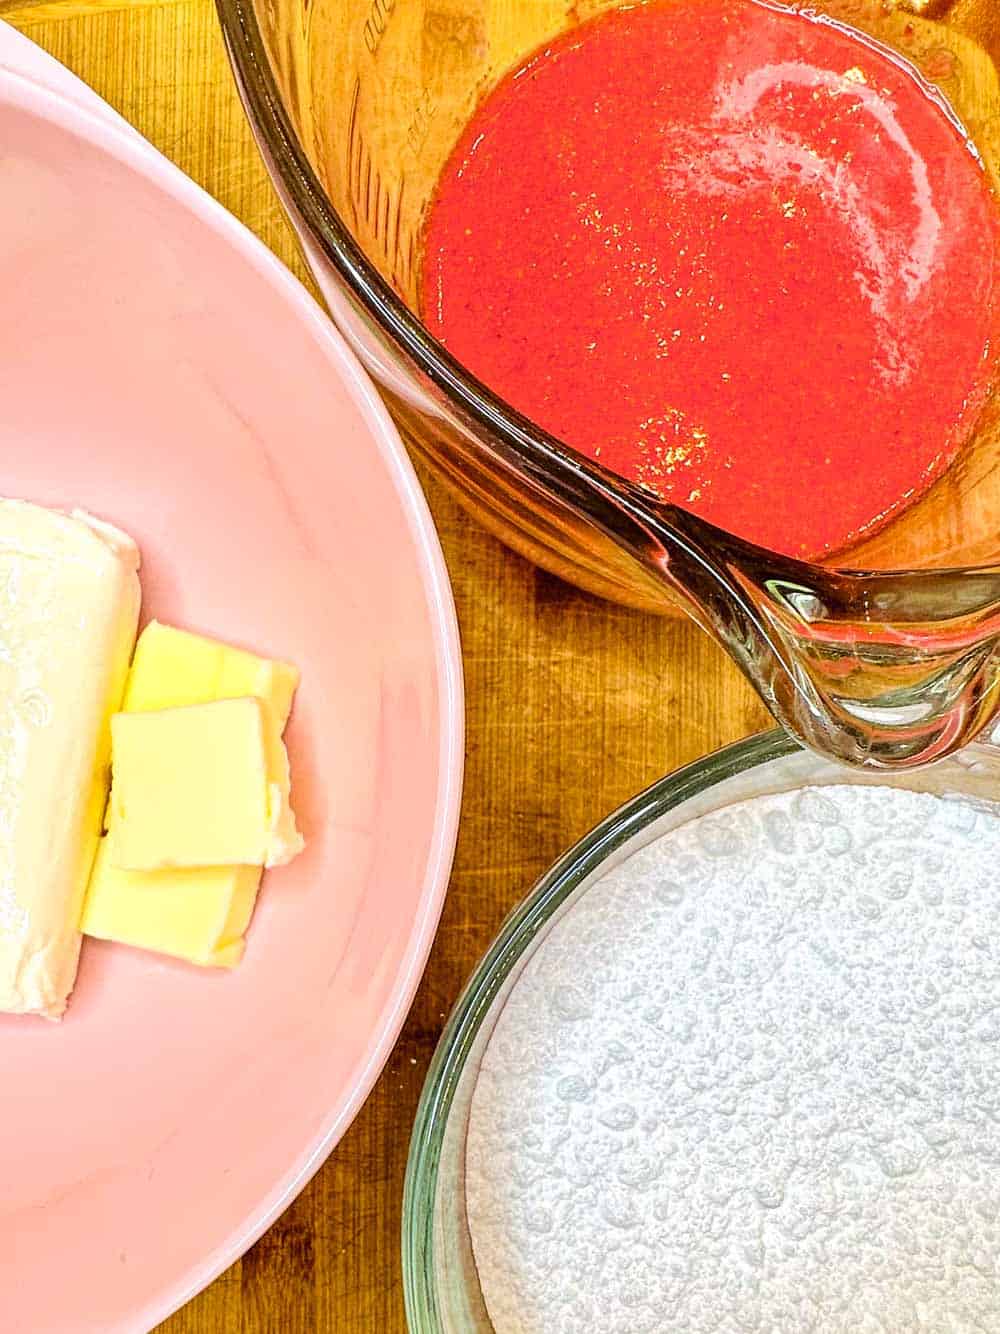
In a large bowl, beat them together until smooth and fluffy.
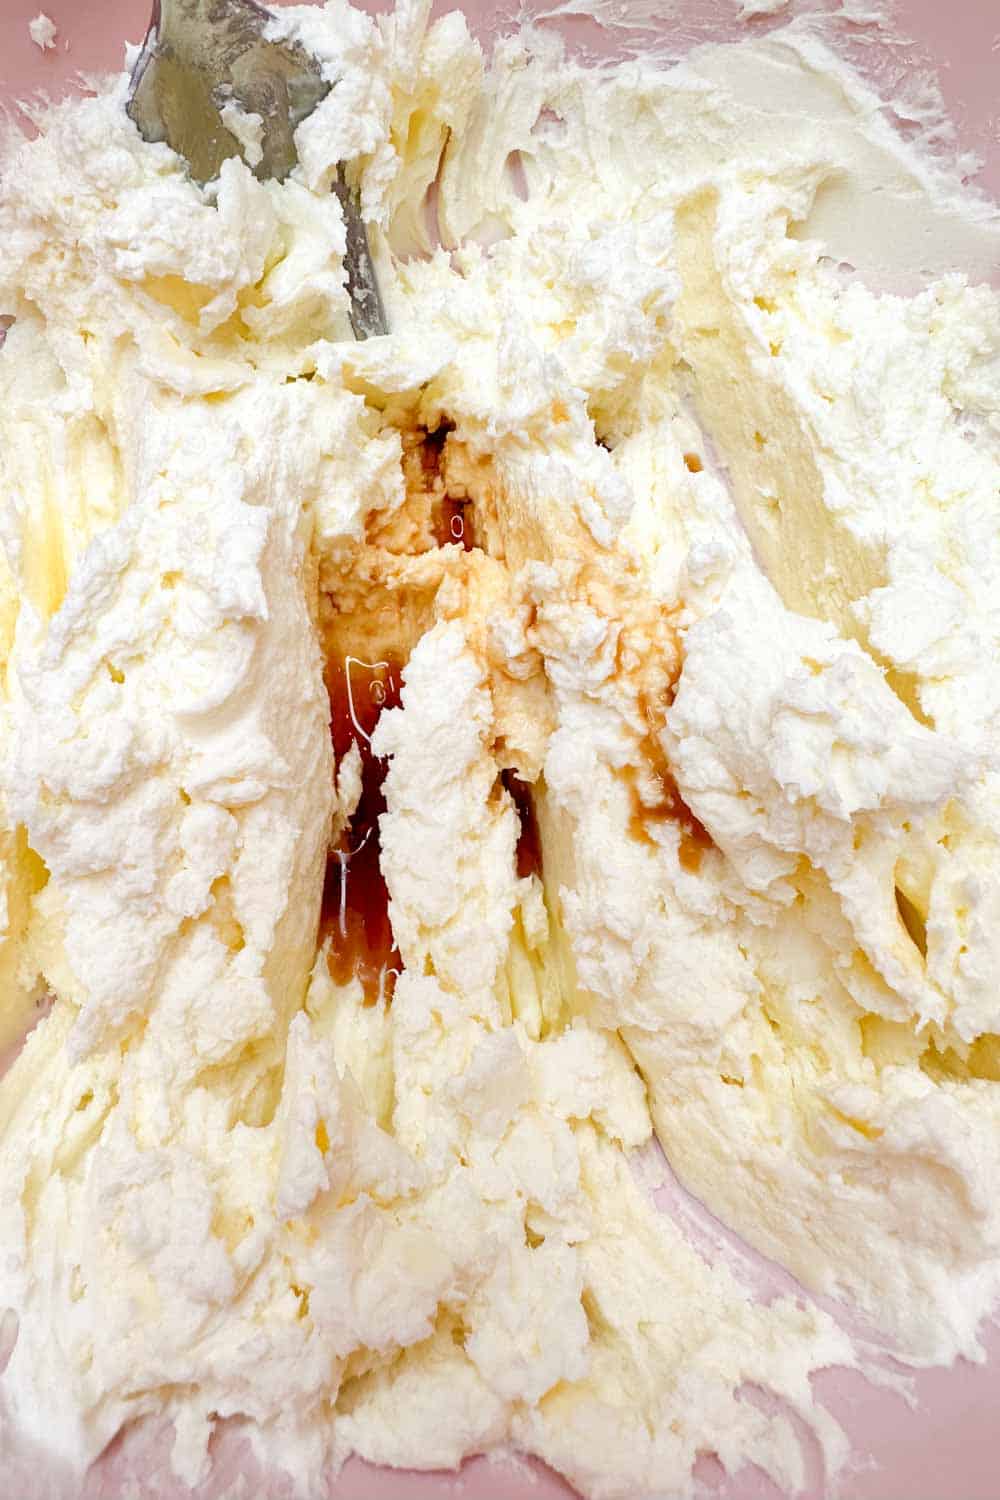
You can use a stand mixer, a hand mixer, or even mix by hand if you prefer. Then mix in the vanilla extract until fully incorporated.
Step 2: Prepare the Strawberry Purée
Next, in a small bowl, blend about ½ cup of fresh strawberries with a sprinkle of granulated sugar.
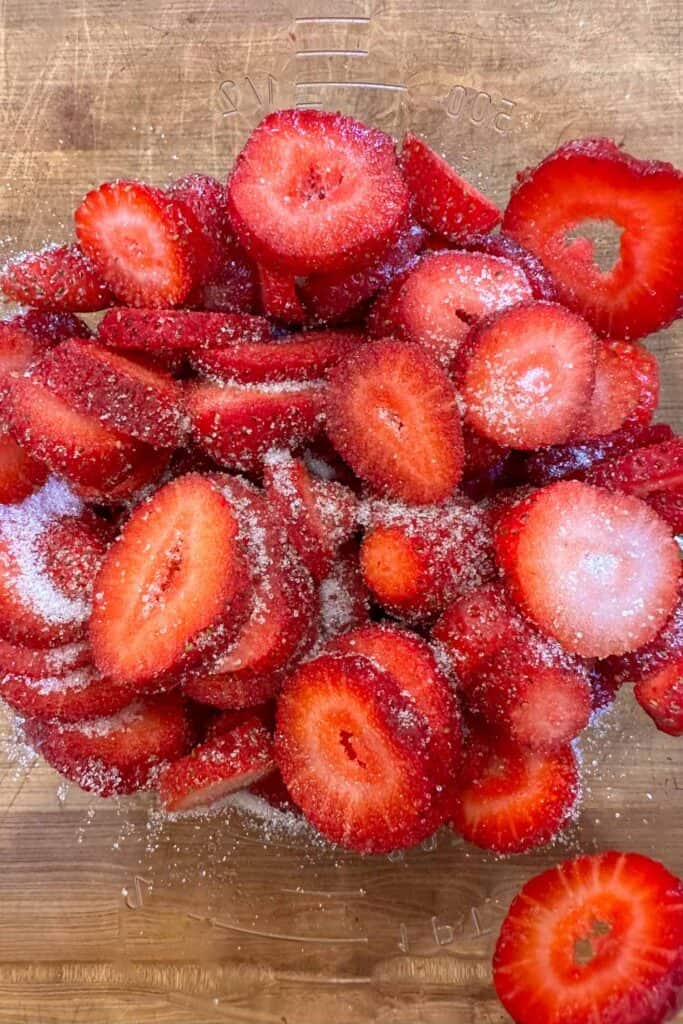
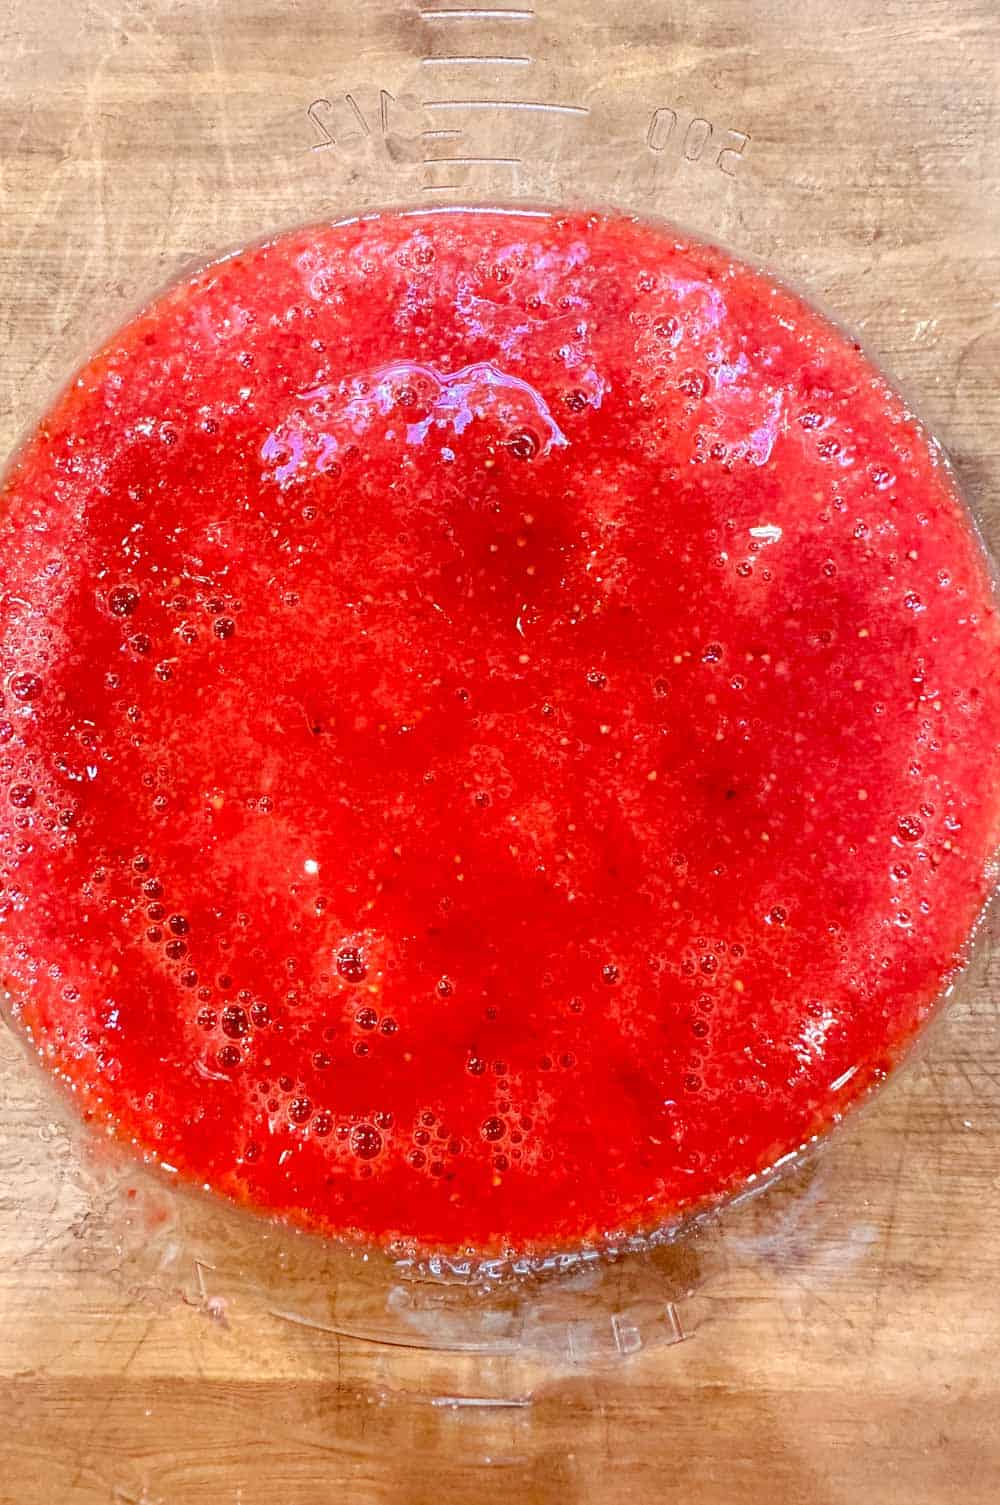
Use an immersion blender or food processor to purée until smooth.

Then add ¼ cup of the strawberry purée to the cream cheese mixture. Blend well until the color and flavor are evenly distributed.
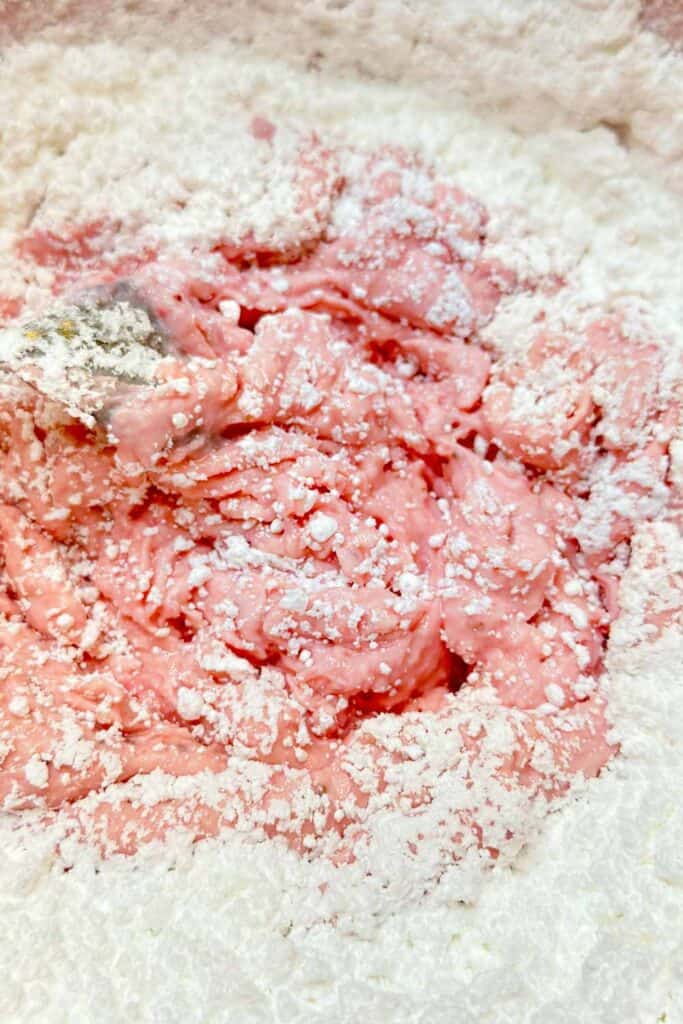
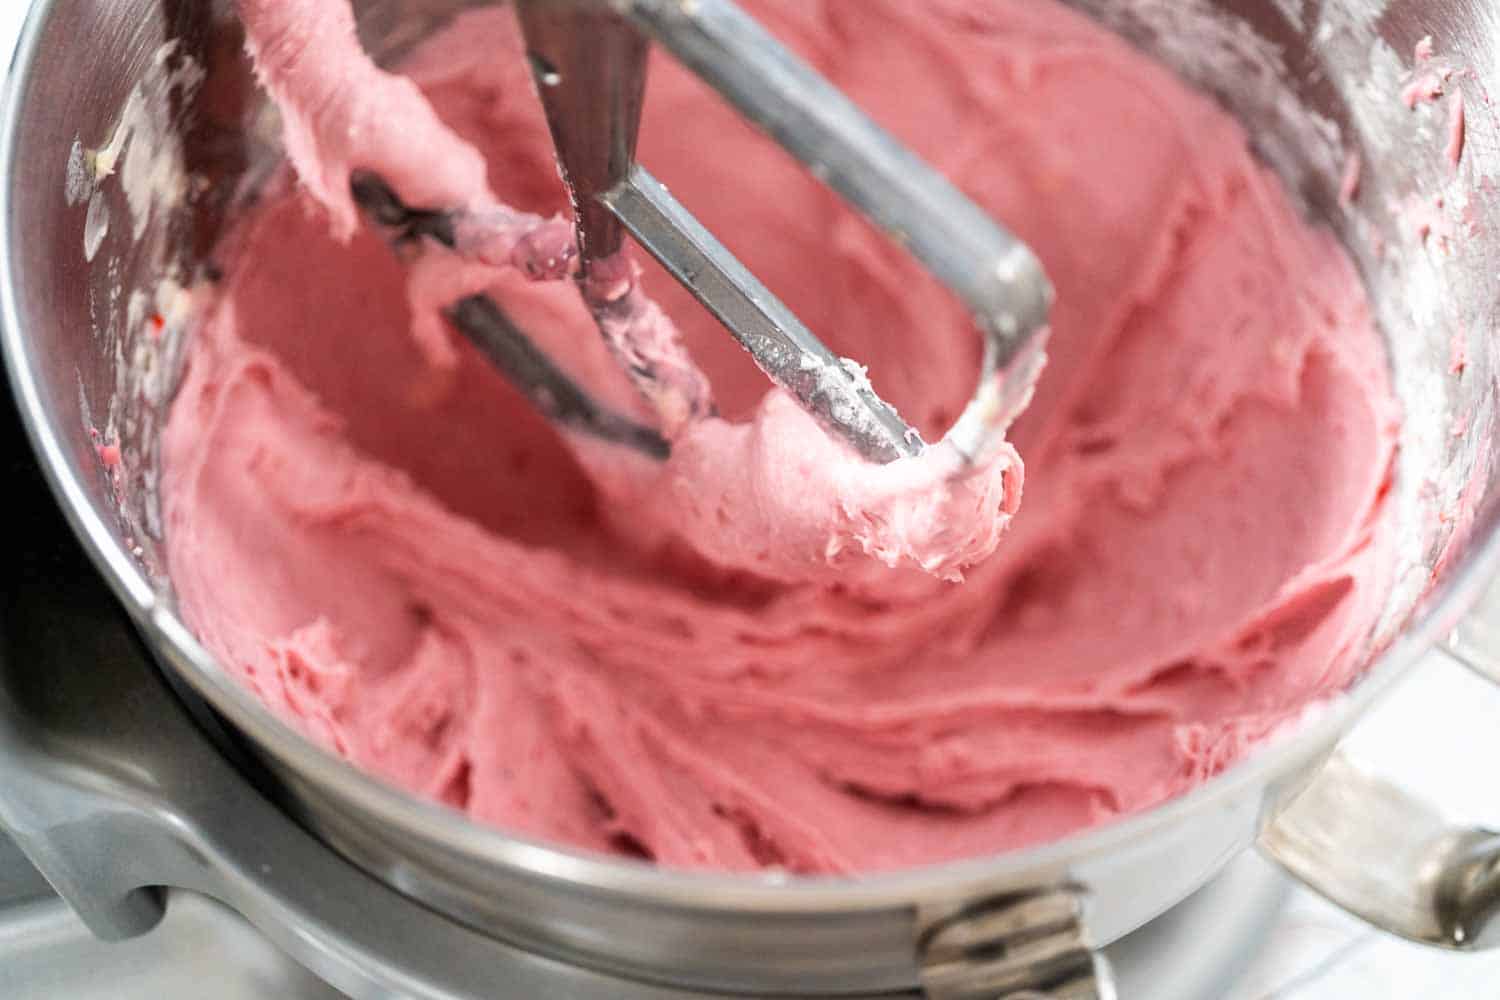
Step 3: Add the Powdered Sugar
To finish your frosting, gradually add powdered sugar to the cream cheese mixture, beating until the frosting is thick, creamy, and spreadable.
How to Assemble Your Cake
Step 1: Slice the Cake into Layers
First, carefully cut your angel food cake horizontally into three even layers using a long serrated knife.
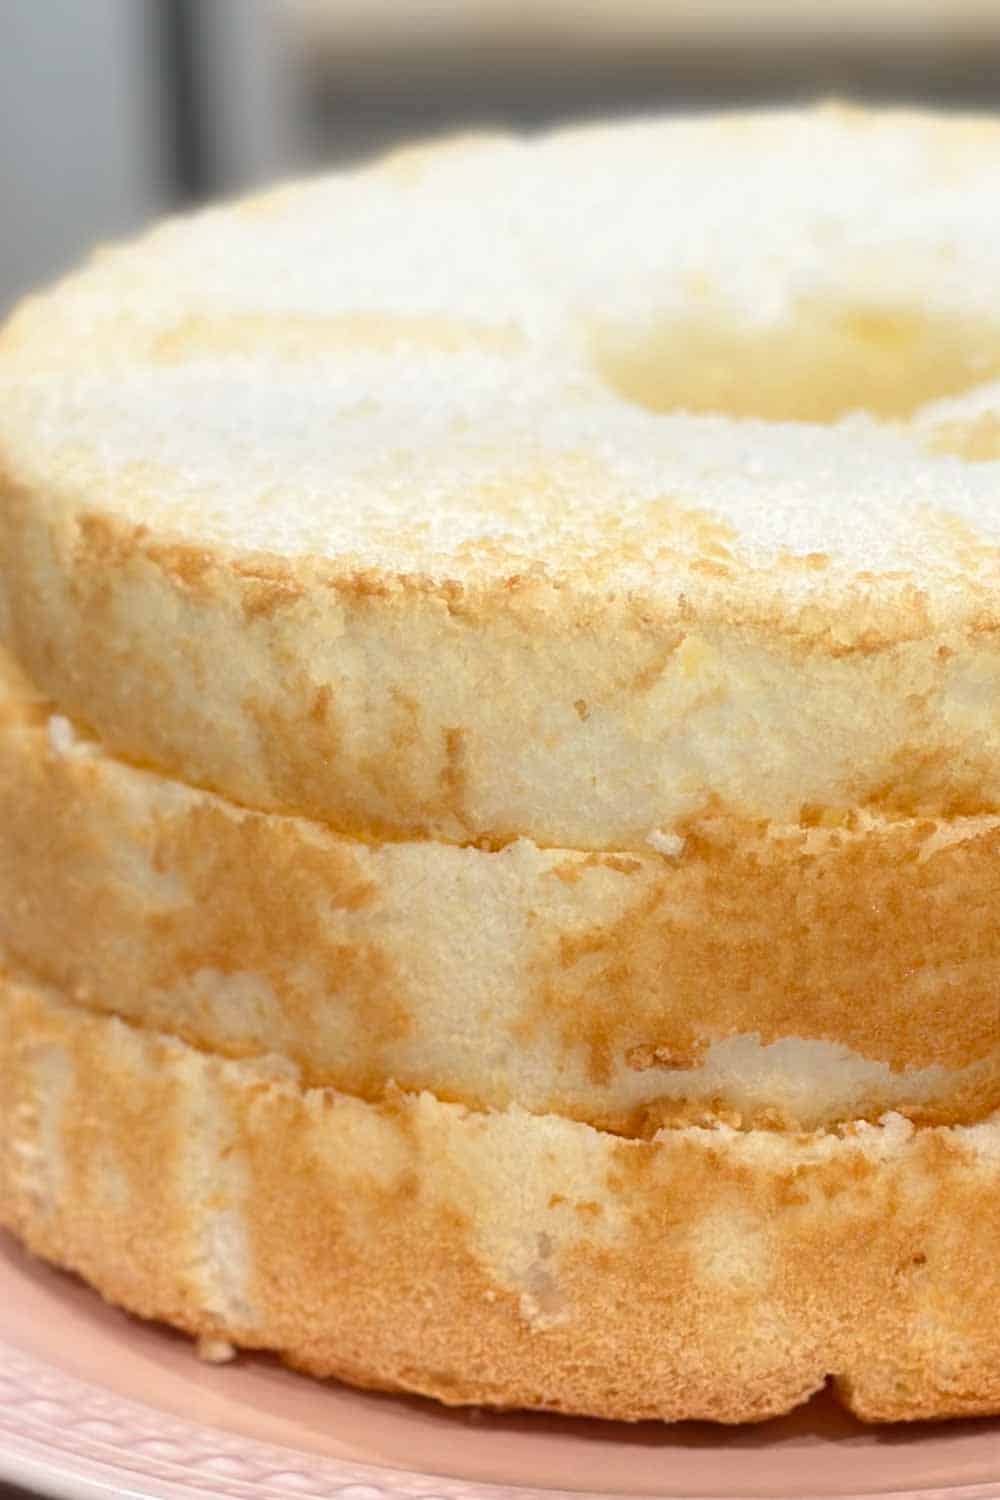
Take your time to keep the layers as level as possible. Then gently lift and separate the cake layers. It helps to slide a flat spatula or cake lifter underneath to avoid tearing the delicate cake.
Step 2: Add the Frosting and Filling
Spread ⅓ of the cream cheese frosting on the bottom layer of the angel food cake. Top with a generous layer of fresh sliced strawberries.
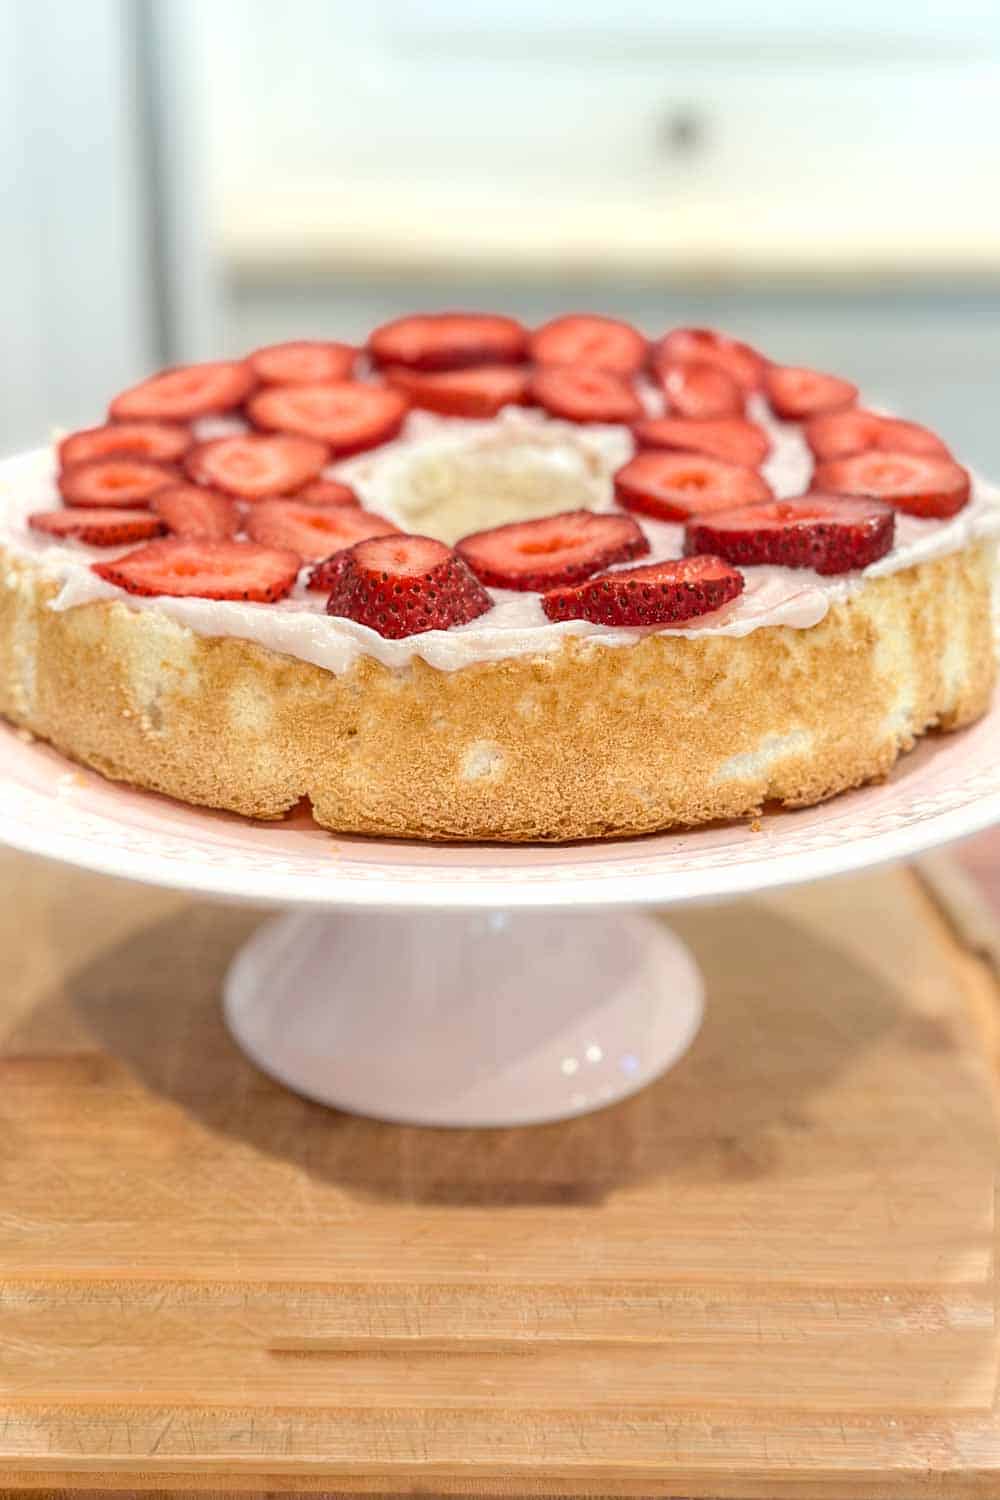
Repeat this step for the second layer—frosting first, then strawberries.
Step 3: Frost the Top and Decorate
Now place the top layer of the angel food cake back on, and then spread the remaining ⅓ of the cream cheese frosting over the top.
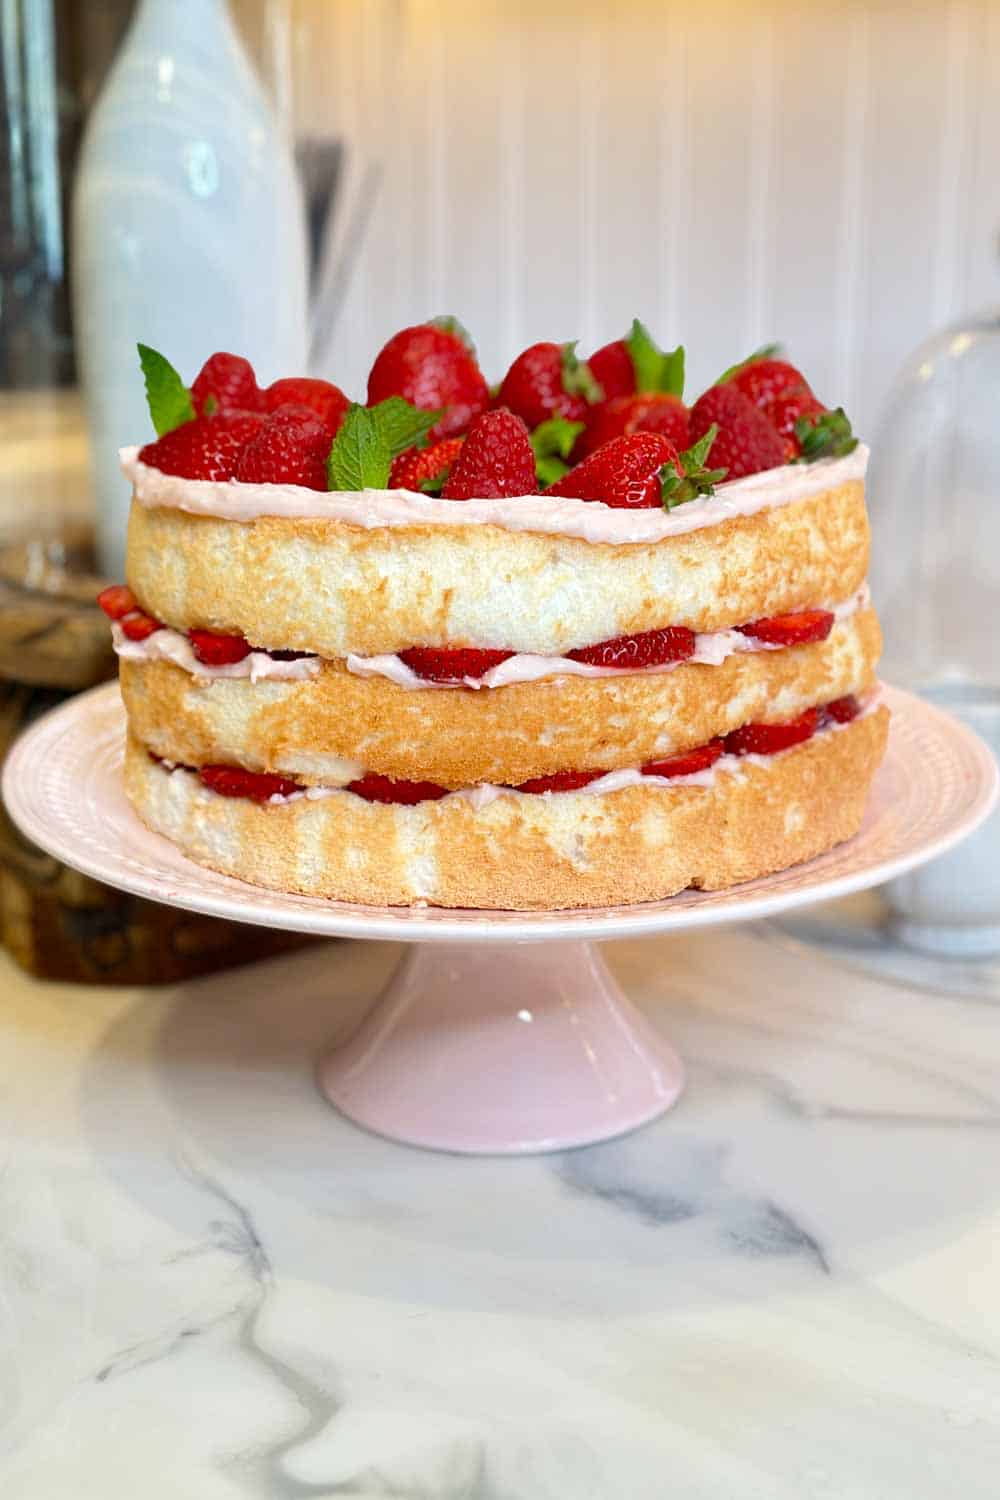
Finish it off with fresh strawberries and a few sprigs of mint for a beautiful and refreshing garnish.
What to Serve with Your Layered Angel Food Cake
This light and fluffy angel food cake with cream cheese frosting is perfect for any summer celebration. It’s a beautiful dessert for Mother’s Day, a baby shower, or a sunny afternoon garden party.
The bright red berries also make this festive dessert ideal for patriotic holiday get-togethers like a Memorial Day pincnic or a 4th of July dinner party.
Try serving your cake with a summer cocktail like a rose spritzer, or even a simple glass of homemade lemonade.
If you’re planning a full meal, this angel food cake recipe pairs perfectly with something like my steak and corn relish stack , and round out your menu with a few summer sides or even a pretty charcuterie board.
Frequently Asked Questions
Can I make this recipe with a hand mixer?
You can make this cake with a hand mixer or a stand mixer. I prefer my stand mixer as it always gets the job done so well.
However, If you only have a hand mixer, it will do the job but may take a little longer. You want to make sure your egg whites come to a firm peak when whipping.
Can I make my layered angel food cake in advance?
I do not suggest you assemble the cake until ready to serve it.
The fruit holds a lot of moisture, making the cake soggy, and in addition, the fruit is heavy and can cause the cake to collapse.
angel food cake layers can be made and stored in an airtight container in the refrigerator for up to 3-4 days or at room temperature overnight.
In addition, you can make the cream cheese frosting ahead of time.
Can I make any ingredient substitutions or swaps?
I find angel food cake to be a bit fussy, so sadly, I wouldn’t say I like to make substitutions for this recipe.
I also find that cake flour works better than all-purpose flour due to its quantity of protein.
How do I store leftover angel food cake?
The cake can be stored at room temperature in an airtight container for 2-3 days.

Other Dessert Recipes You’ll Love!


Closing Thoughts
I hope this layered angel food cake brings a little sweetness to your next celebration. It’s light, beautiful, and just the right amount of indulgent. Whether you’re serving it for a summer holiday or a quiet afternoon with friends, it’s sure to be a crowd favorite. Thanks so much for stopping by the blog today.
I always love sharing these special recipes with you, and I can’t wait to hear if you give this one a try!
Happy baking,

Print the Recipe: Angel Food Cake with Cream Cheese Frosting
Angel Food Cake with Cream Cheese Frosting
Equipment
- 1 Hand or stand mixer
- 1 Mixing Bowl
- 1 Angel food cake tube pan
- 1 measuring cup
- 1 Spatula
- 1 Sifter
- 1 Set of measuring spoons
Ingredients
Angel Food Cake Ingredients
- 7/8-1 Cup Cake flour or all purpose flour
- 1 3/4 Cup Granulated sugar
- 1 1/2 tsp Cream of tartar
- 1 3/4 tsp Vanilla
- 1/4 tsp Salt
- 1 1/2 Cup Egg whites
Cream Cheese Frosting Ingredients
- 1 Stick Butter
- 1 Block Cream cheese at room temperature (do not use the low-fat version)
- 1 Box Powdered sugar
- 1 tsp Vanilla
- 1/4 C Fresh strawberry puree ( optional)
- 1-2 Tbsp Sugar
Instructions
Angel Food Cake Directions
- Preheat oven to 375 degrees F.
- Whisk the flour, salt and half of the sugar in a medium bowl. Sift 4-6 times.
- In a large bowl, beat the egg whites on medium speed quickly until frothy with an electric mixer using the whisk attachment. Add the cream of tartar and vanilla extract, and increase to high speed. Gradually add the remaining sugar, one teaspoon at a time, beating until stiff peaks form.
- Gently fold the dry ingredients into the egg whites, 1/3 of the mix at a time.
- Pour the cake batter into the ungreased tube pan and smooth the top. Tap it on the counter a few times to eliminate any air bubbles. (You must use a tube pan and NOT a bundt pan)
- Bake for 25-30 minutes (on the lowest oven rack at the bottom of the oven) or until a cake tester inserted into the center comes clean.
- Immediately remove the cake from the oven, invert cake onto a wire rack, and let the cake cool.
- Once the cake is completely cool, run a knife around the edges of the pan to loosen the cake. Invert the cake onto a serving plate.
Cream Cheese Frosting Directions
- Cream the room-temperature butter and cream cheese together until smooth. You can do this by hand, using an electric hand mixer or a stand-alone mixer.
- Add the vanilla and continue to mix.
- Using an immersion blender, puree about 1/2 c. of fresh strawberries sprinkled with granulated sugar.
- Add 1/4 C of the strawberry puree to the cream cheese mixture
- Add the powdered sugar to the cream cheese mixture and mix well.
To Assemble
- Cut your cake into three even layers.
- Starting with the first layer, spread 1/3 of the cream cheese frosting and a layer of sliced strawberries on top.
- Repeat for the next two layers. Garnish the top with additional fresh berries and mint as desired.

More about me!

Hello, I’m Wendy – a dedicated homemaker with a deep passion for decorating, gardening, cooking, and crafting. I find joy in harmonizing beautiful elements to fashion a space that is both comfortable and inspiring. I will help you create a beautiful home, one project at a time.


Thank you for sharing my angel food cake today! Your walnut boxes are beautiful, and your flowers are too!!! the wedding will be beautiful.
Oh my, this truly looks angelic. On the shopping list for next week, thank you for sharing!
Thank you so much!
This looks delightful. I bet that almond flavoring is the perfect thing. Pinning. Visiting from Senior Salon Pit Stop.
Thank you, Jennifer, I am glad you stopped by.
Thank you, Kim! so sweet of yu to share.
Thank you so much Stacy! I am looking forward to seeing you in Waco this year.
This looks amazing Wendy! I love angel food cake and anything strawberry. I will definitely be trying this!
Thank you, Michele. This is the first time I have tried to actually use this type of frosting on an angel food cake. It was delicious! However, if you try it, put it together right before you serve it.
If you asked me when I was growing up who invented Angel Food Cake, I would have replied, my grandmother! She made one for me for each birthday. I did not know you could add a frosting to it though, you just made my day Wendy! I cannot wait to share that with her, she is quickly approaching 101 years old, and I think she will get a kick out of that! Yours looks just like I remember, it has been some years since she has made one, but despite living in a nursing home now, she sure does want to get back in the kitchen. She hates their food, and complains everyday, thinking she can teach them a thing or two about cooking. Yep, she is an ornery one these days. 😉
Oh my goodness, what a blessing to still have your grandmother. 101???? Wow, that is amazing. If I lived closer, I would be making a cake to take to her.
I love that she baked them for you for so many years. What great memories that you have with her. It was recently my birthday and my son wrote me the sweetest card.
One of the things he says he loves about me is my Angel Fook Cake, so It’s a good thing that we are creating these memories for our families. This was the first time I added a frosting like this, but it was so delicious! Typically I use whipped cream and berries, but I wanted to try something different.
I’ve never thought to cut it into layers and use filling! This is exciting for me and I’m looking forward to trying this!! Woohoo! pinned
Thank you, Cindy! Not that I needed the extra calories, but it was for a friend’s birthday and it was delicious.
You are the Queen of Angel Food Cake! This takes me back to my childhood when my mother would make angel food cake. Her version was filled with lemon curd and coconut. That is the beauty of angel food cake…you can do so much with it. Thanks for a great post!
Oh my, that sounds delicious! I think you need a blog post on that cake for sure.