
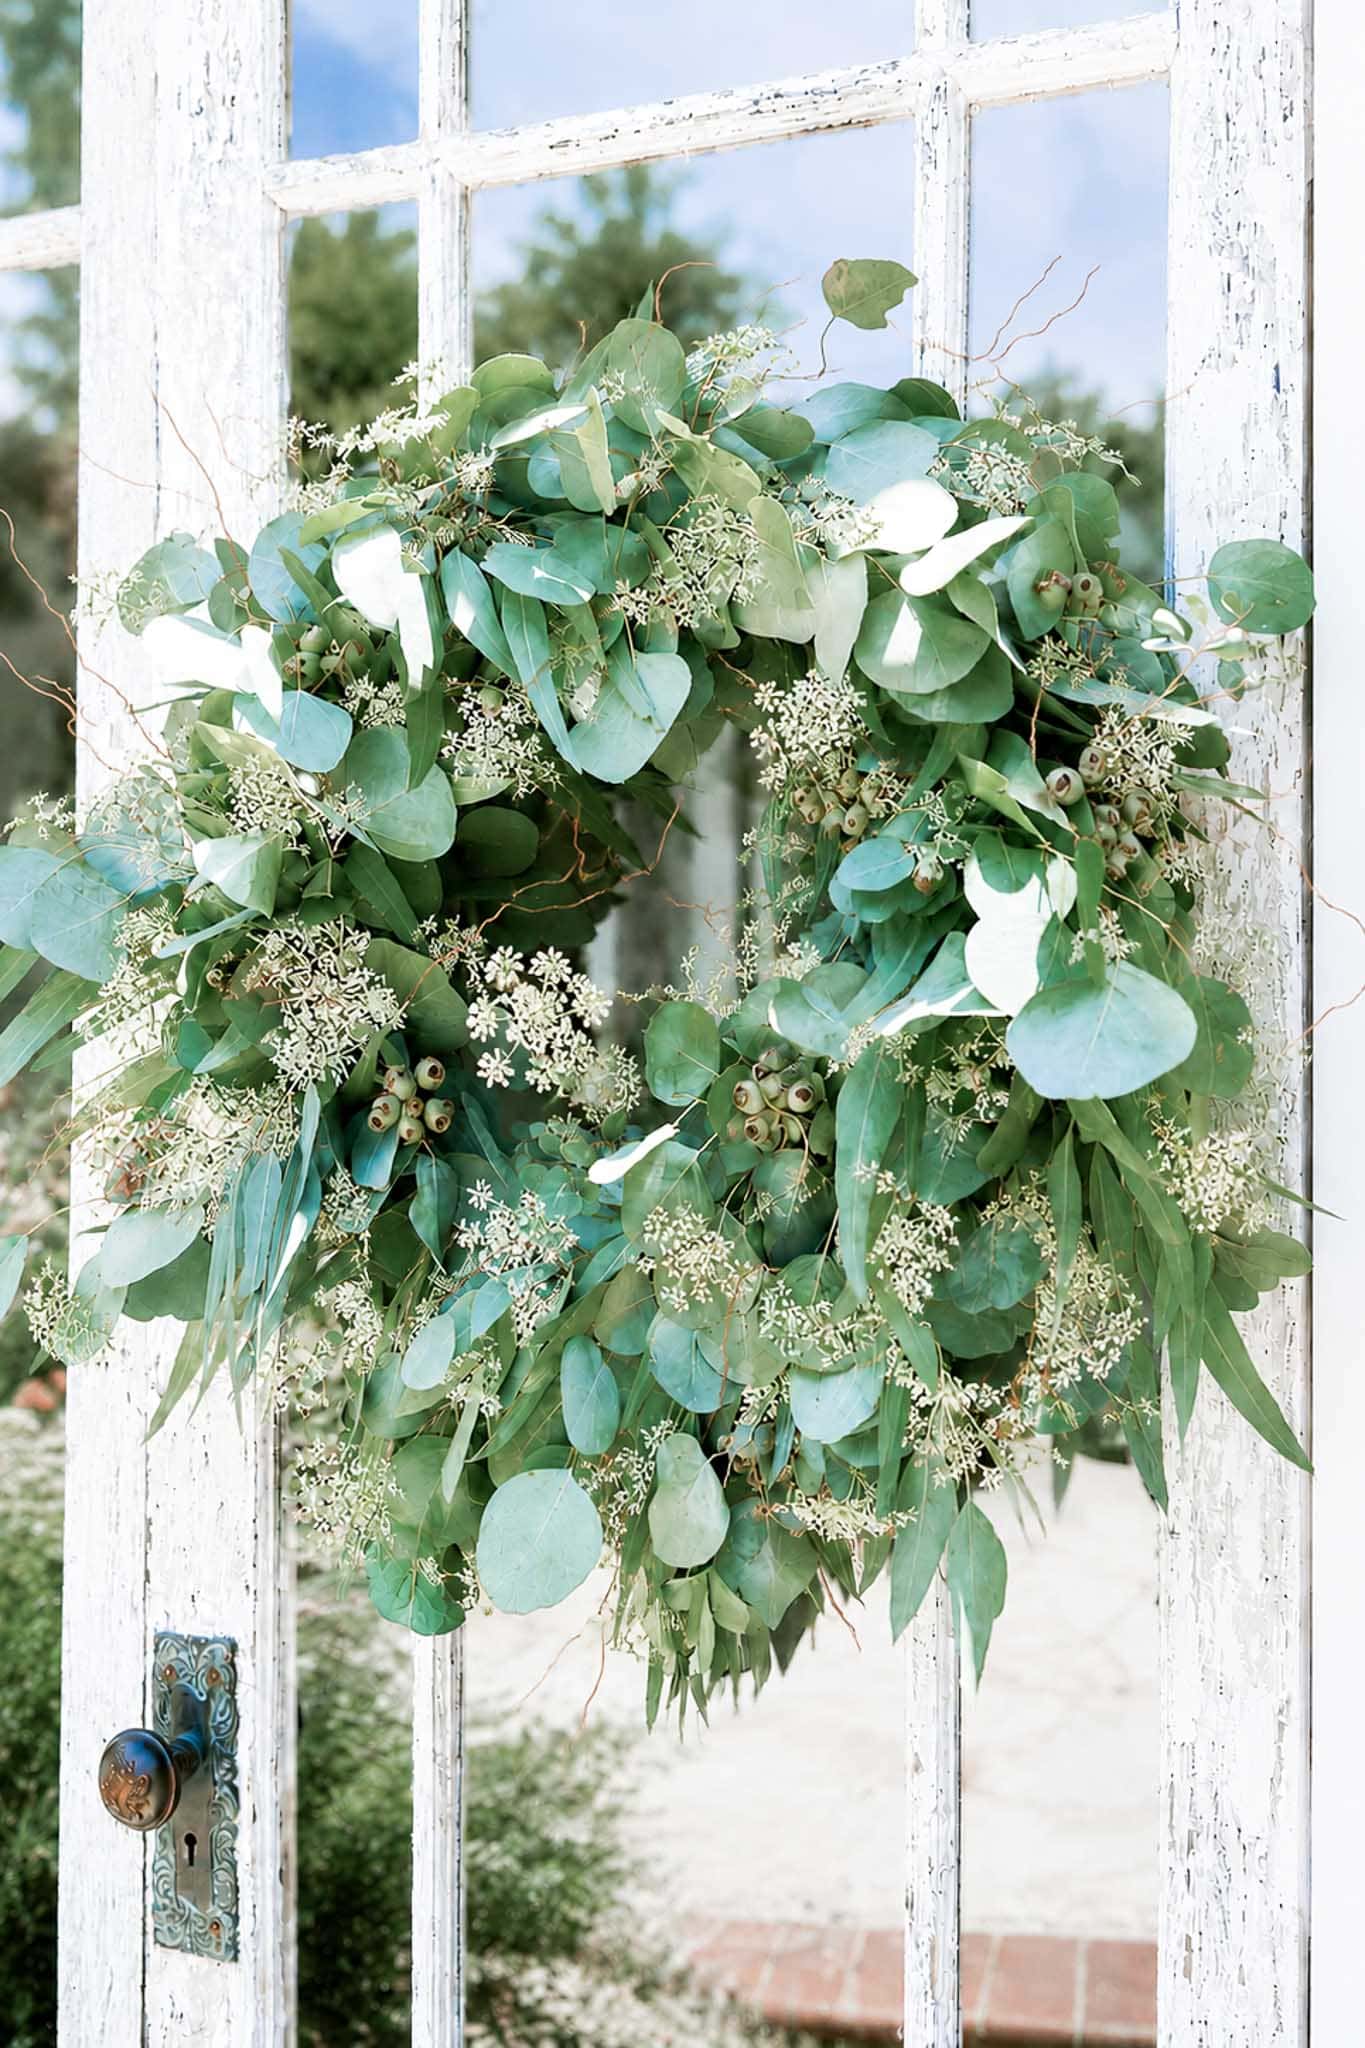
If you have ever wondered how to make a fresh eucalyptus wreath you can use all year, this is the tutorial for you. With a grapevine base, two kinds of foraged eucalyptus, and a quiet afternoon, you can create one wreath that carries your front door through every season.
On my blog WM Design House, I may sometimes use affiliate links, which means a small commission is earned if you purchase via the link. The price will be the same whether you use the affiliate link or go directly to the vendor’s website using a non-affiliate link. Read my full disclosure policy here.
There is something so calming about eucalyptus. The soft silvery-green color, the gentle way it drapes, that fresh garden scent the moment you bring it indoors, it is one of those greens that makes everything around it feel a little more peaceful.
So when it came time to make a new wreath for the door of my she shed this spring, a eucalyptus wreath was the only thing I wanted. It is simple, it is beautiful, and the very best part, it works just as well in July or November as it does in April. One base, every season, endless little ways to make it feel new again.
With a grapevine base, two kinds of foraged eucalyptus, and a quiet afternoon, you can make one too, and I will show you how to restyle it for spring, summer, fall, and winter so it carries your front door through the whole year.
In This Post
In this tutorial, I’ll show you how to:
- Forage and prepare two kinds of fresh eucalyptus for your wreath.
- Build a full, natural-looking eucalyptus wreath in three simple rounds.
- Style it for spring with delicate white flowers.
- Restyle the same wreath for summer (lemons + lavender), fall, and a Christmas/winter look, so one wreath base carries your door through the whole year.
Why I Love a Eucalyptus Wreath
A eucalyptus wreath is one of those door pieces that feels finished without trying too hard. It is soft and full, but it is also quiet. The silvery-green tones go with absolutely everything, every door color, every season, every style of home, and the longer it dries on the door, the more lovely it becomes. Fresh eucalyptus slowly turns to a beautiful muted sage color, deepening in color and softening in shape, so the wreath actually gets better with time.
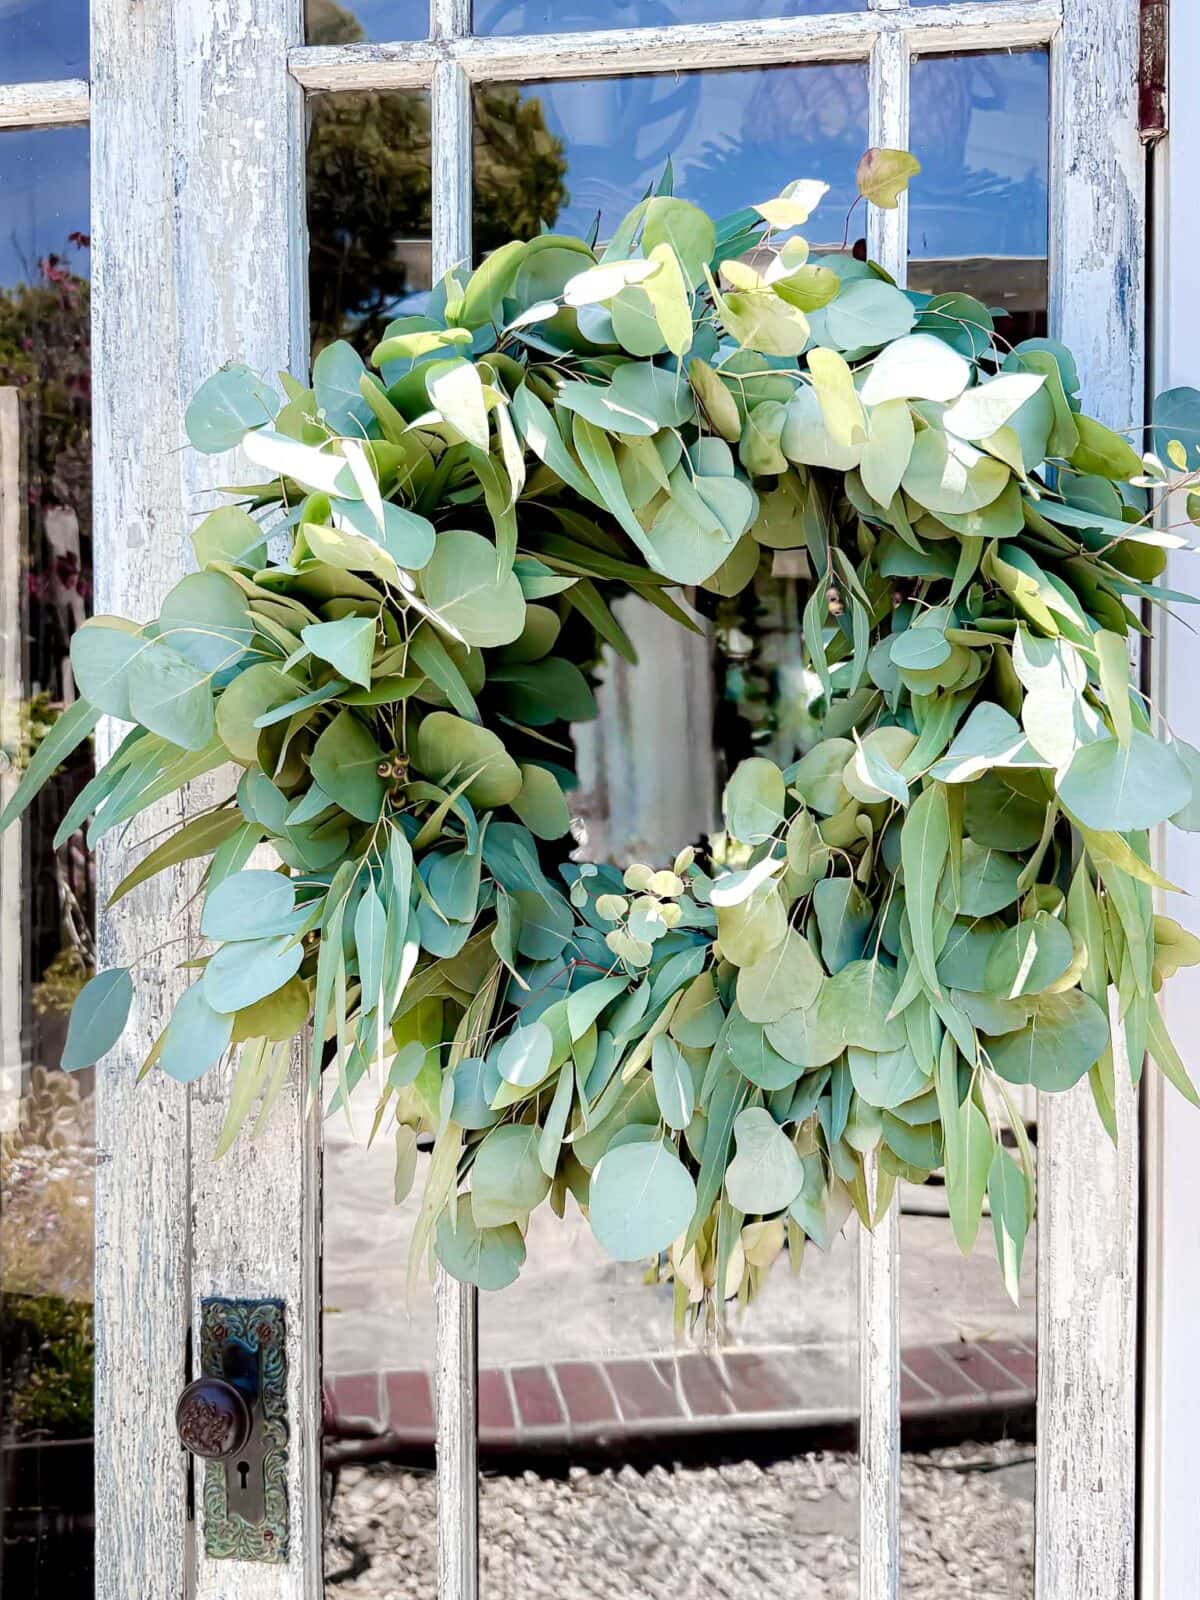
And here is the part I love most. You do not have to make a new wreath every season. With one good eucalyptus base, you can simply restyle it.
A few stems of fresh white Queen Ann’s in spring, lemons and lavender in summer, feathers, pods, and a rust colored bow in fall, and evergreen, pinecones and berries, and a velvet bow for Christmas. One wreath. All year long.
Supplies You’ll Need
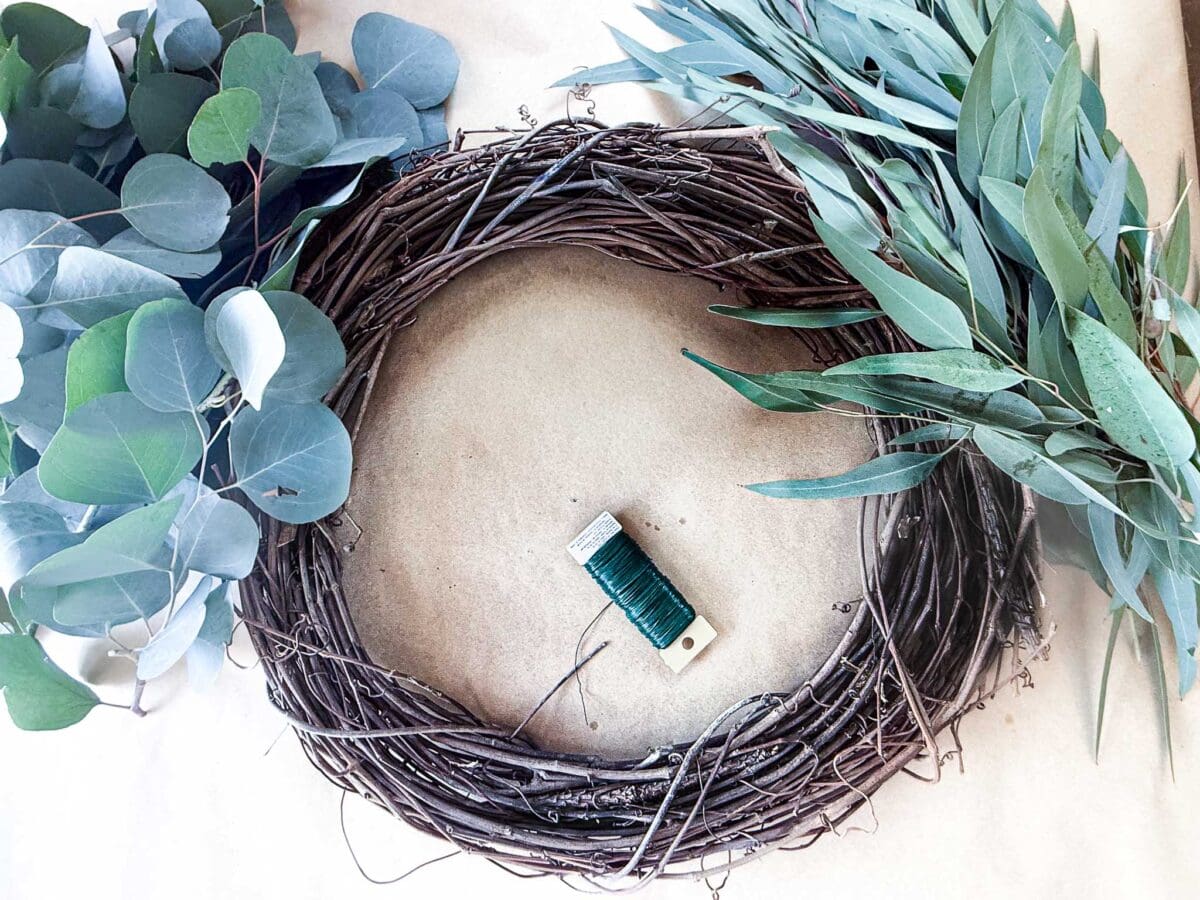
- A grapevine wreath base (I used an 18-inch base, but any size works. Just gather more eucalyptus for a larger wreath)
- Fresh silver dollar eucalyptus (about 1 large bundle)
- Fresh seeded or longleaf eucalyptus (about 1 large bundle)
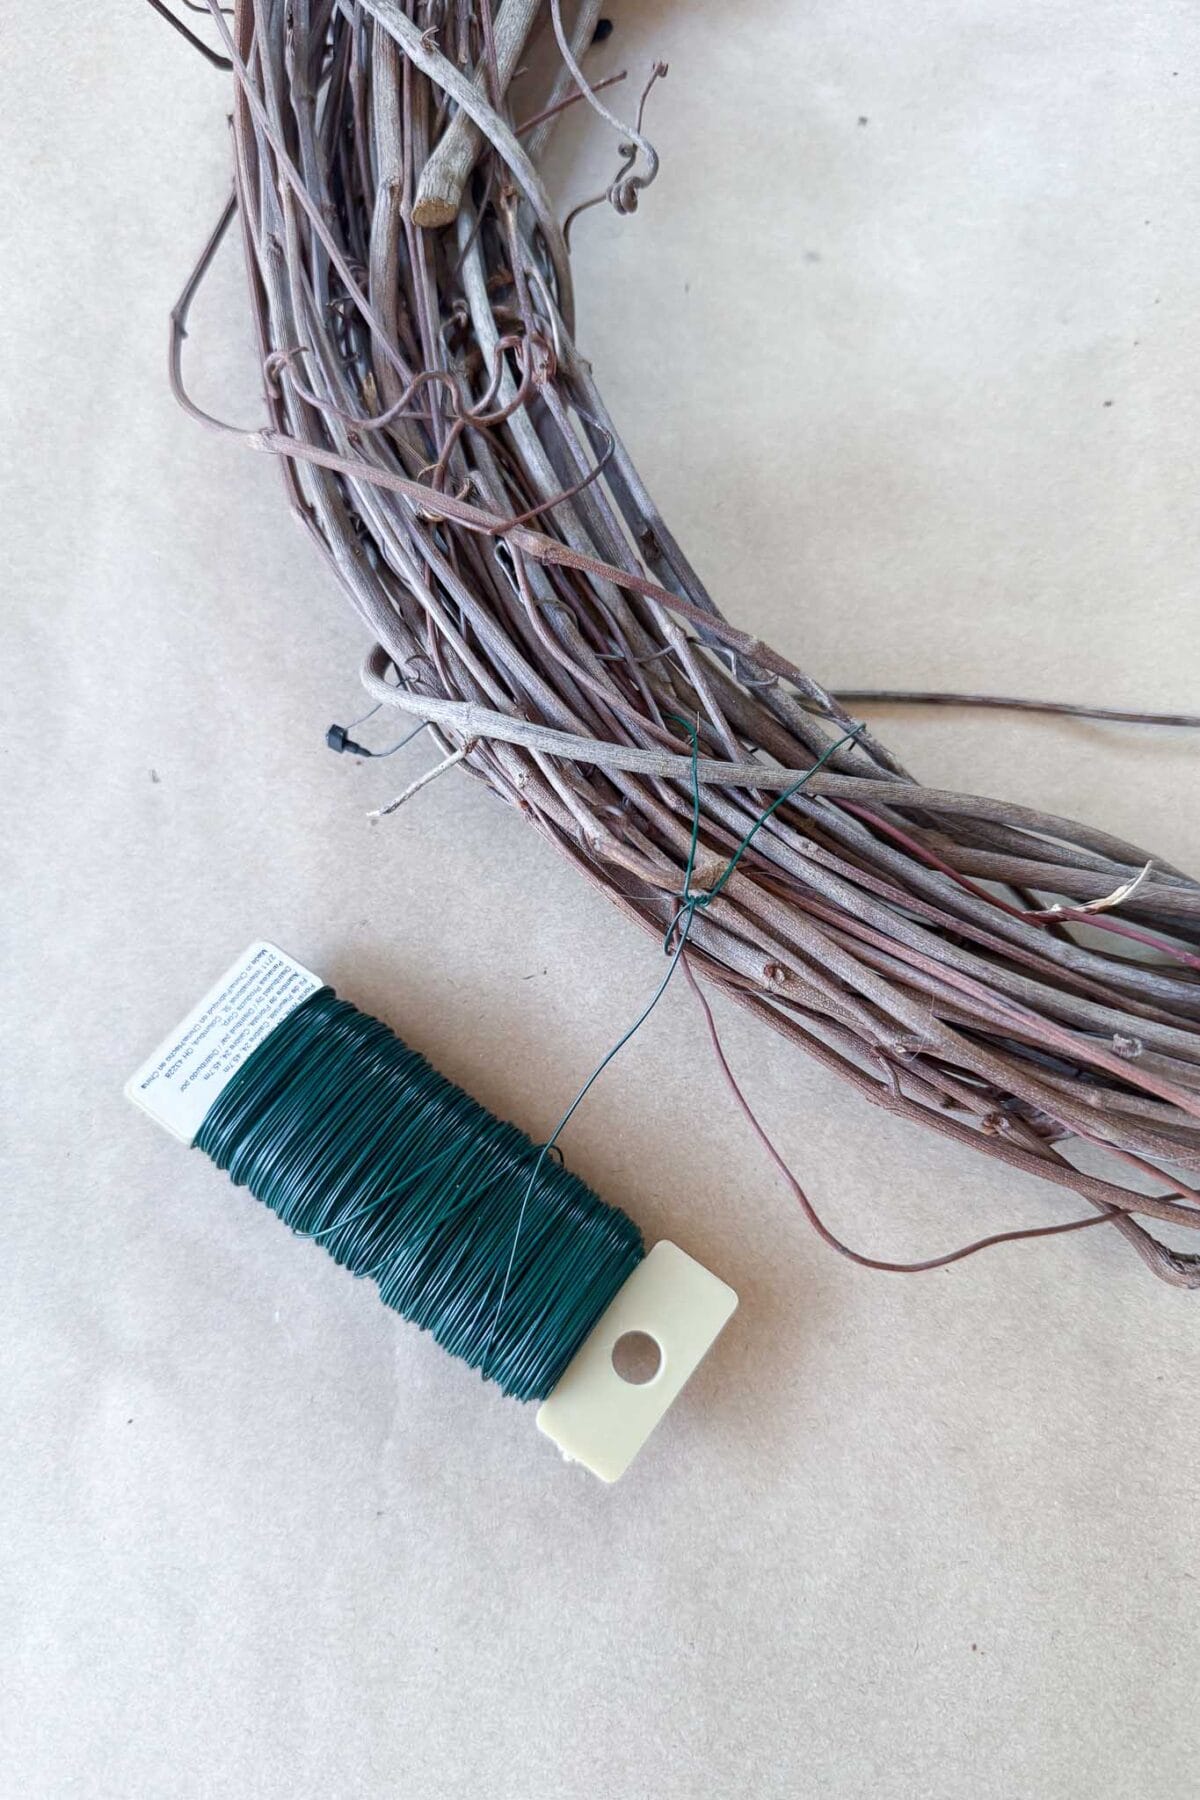
- A spool of floral wire (22-gauge paddle wire works beautifully)
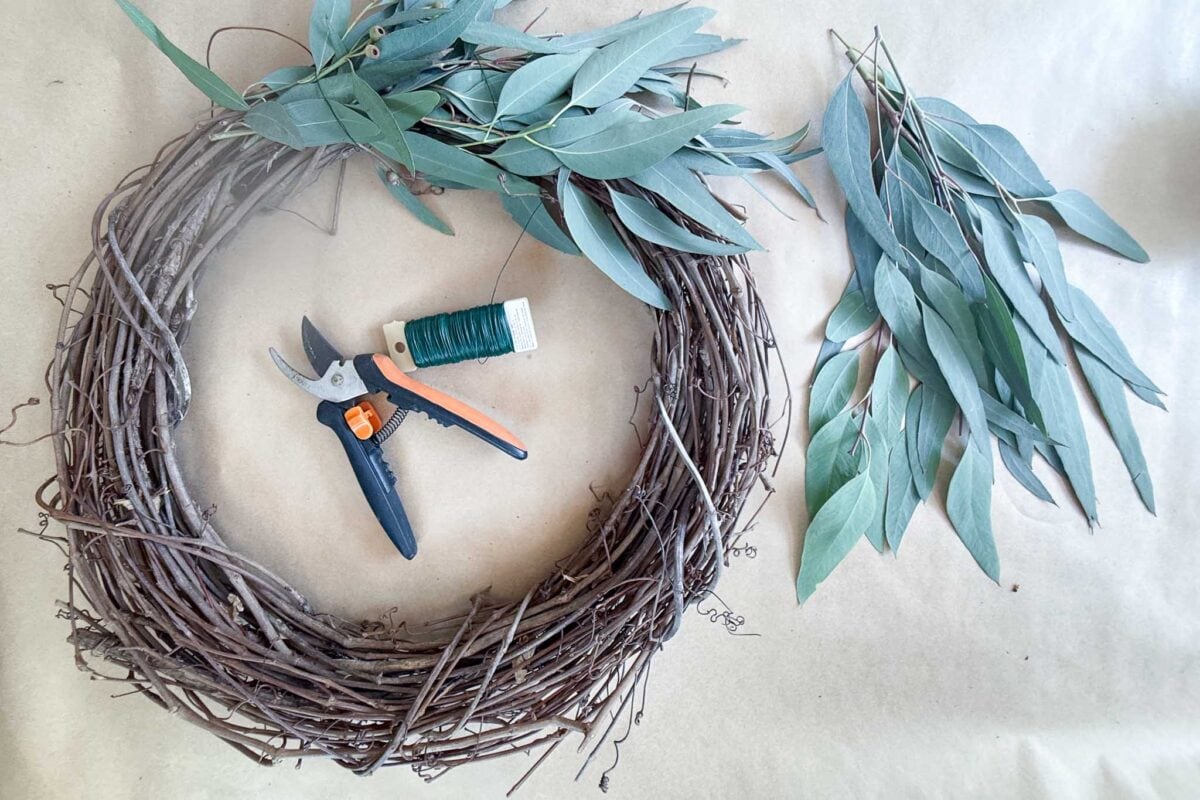
- Sharp garden snips or floral shears
- A clean sink or bucket for washing
- A handful of small white spring flowers for styling. I used delicate white blooms from the garden, but baby’s breath, waxflower, or fresh chamomile would all be lovely
Two Kinds of Eucalyptus to Look For
The secret to a wreath that feels lush and natural is using two different kinds of eucalyptus instead of one. The contrast in leaf shape and texture is what makes the whole thing look gathered, not store-bought.
I was lucky enough to find both kinds growing right in my own neighborhood. Eucalyptus grows beautifully here in Southern California, and a quiet walk with my clippers was all it took. If you do not have eucalyptus growing nearby, your local florist or farmers market is the next best stop, and you can often find both kinds bundled together at Trader Joe’s in the spring.
For this wreath I used:
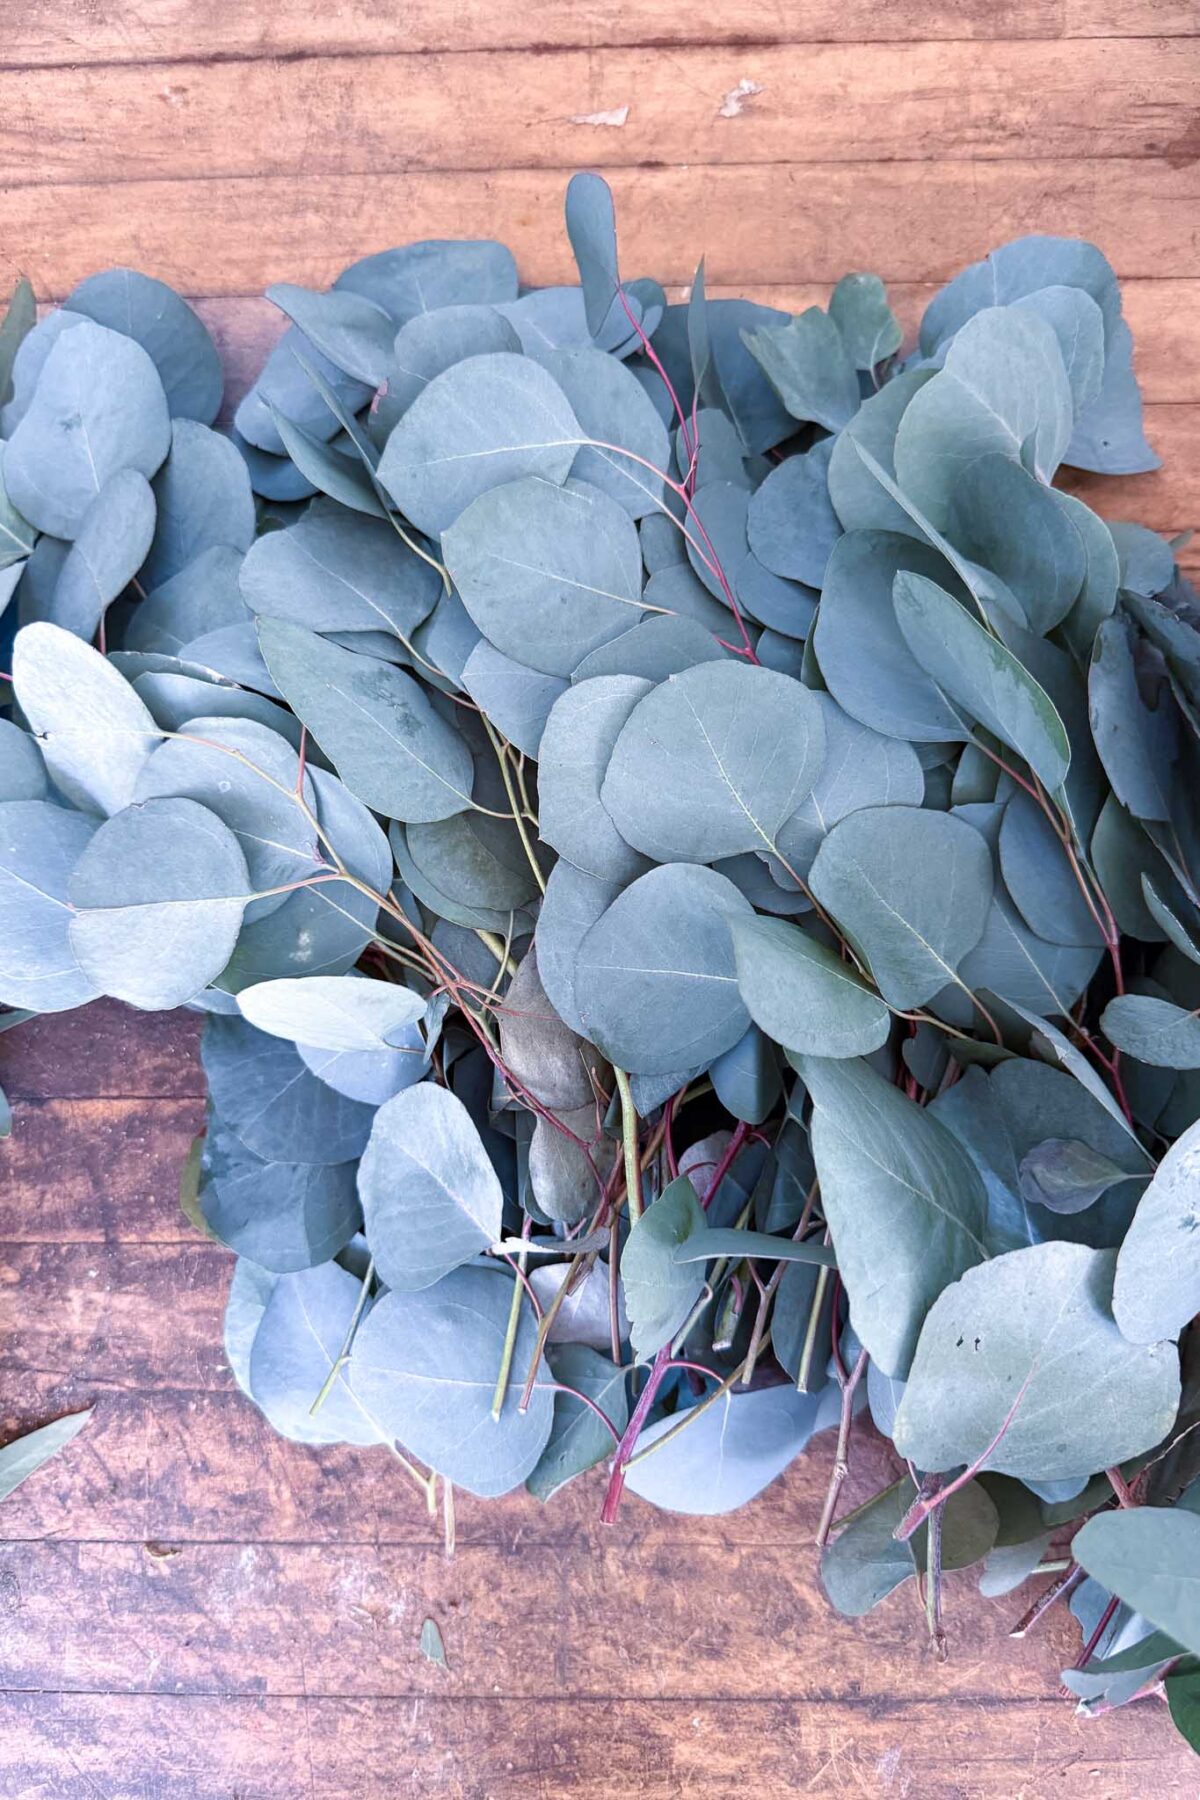
Silver Dollar Eucalyptus
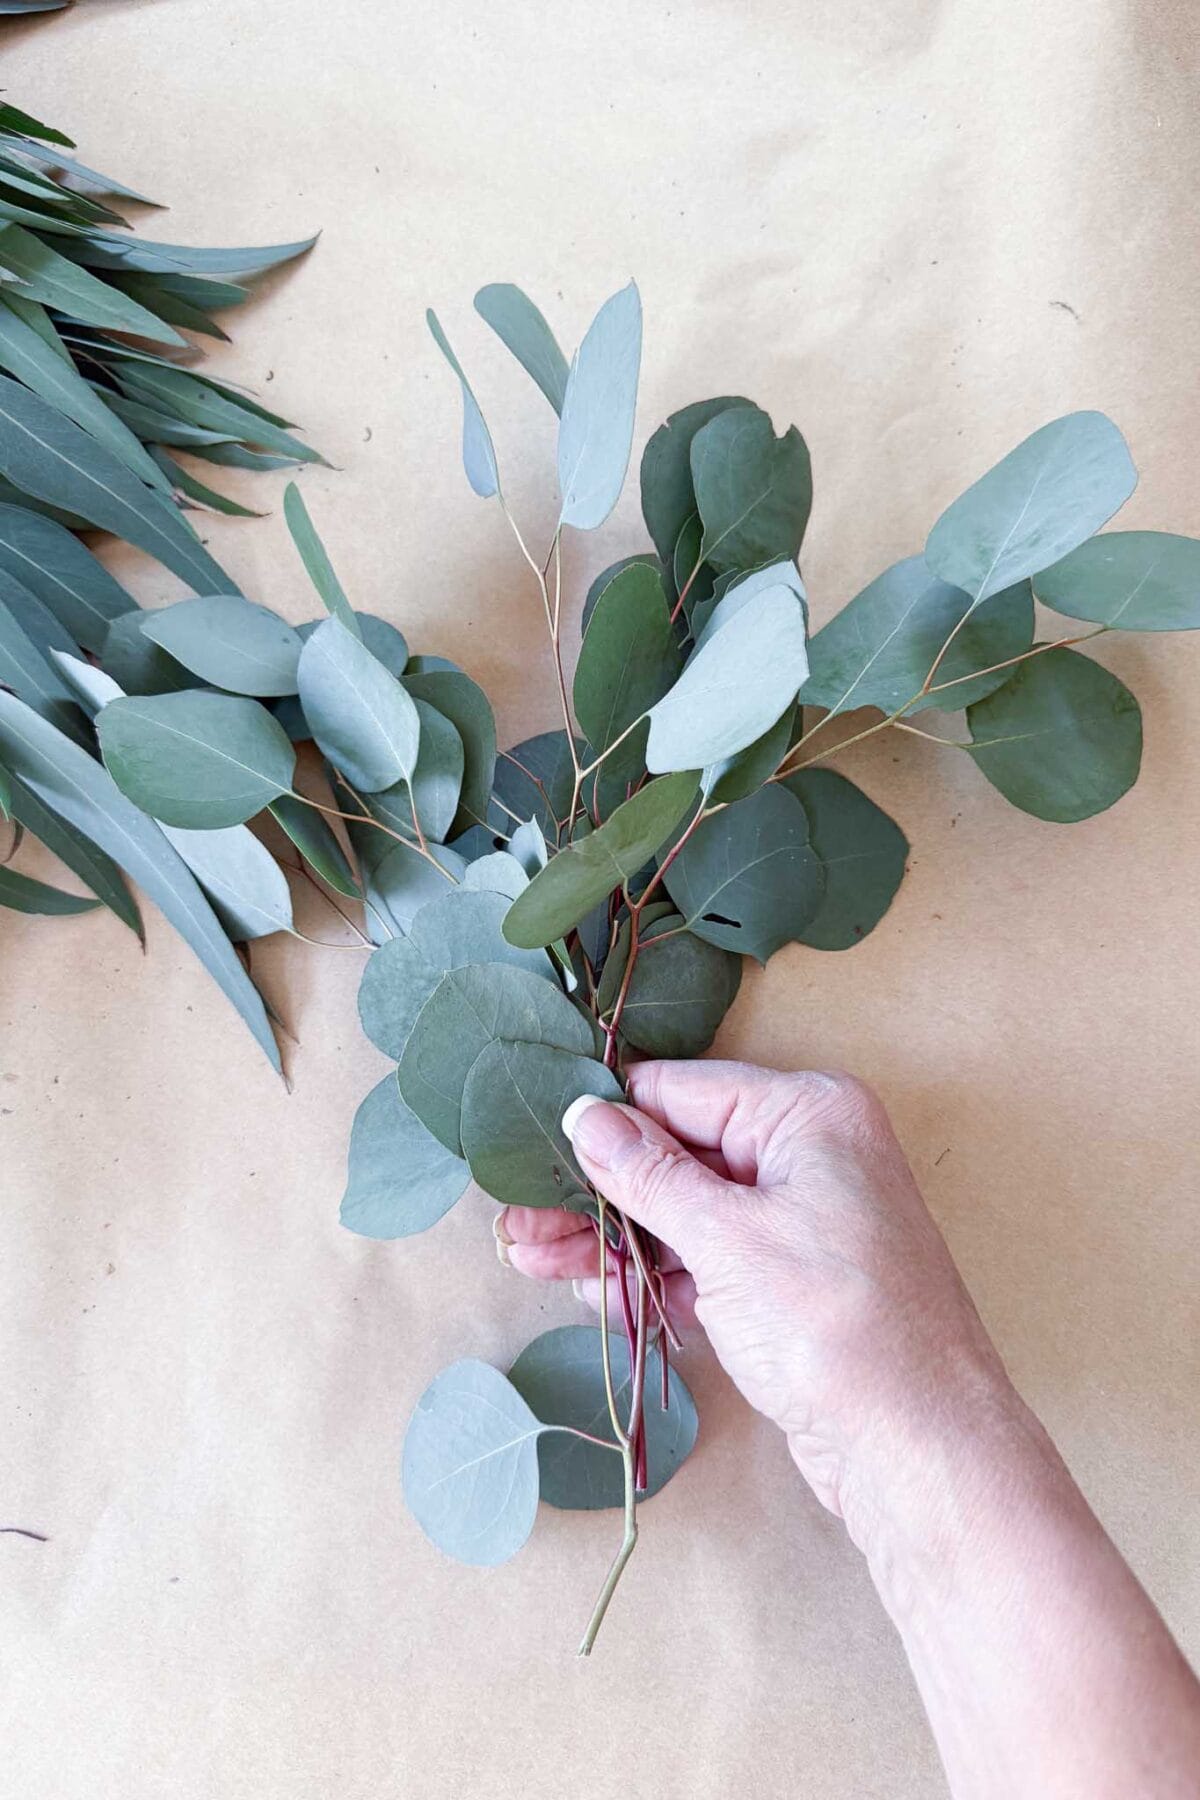
The round, coin-shaped leaves in that soft silvery-blue color. These do the visual heavy lifting. They fill the wreath with that classic eucalyptus look everyone recognizes and give the base its lovely full shape.
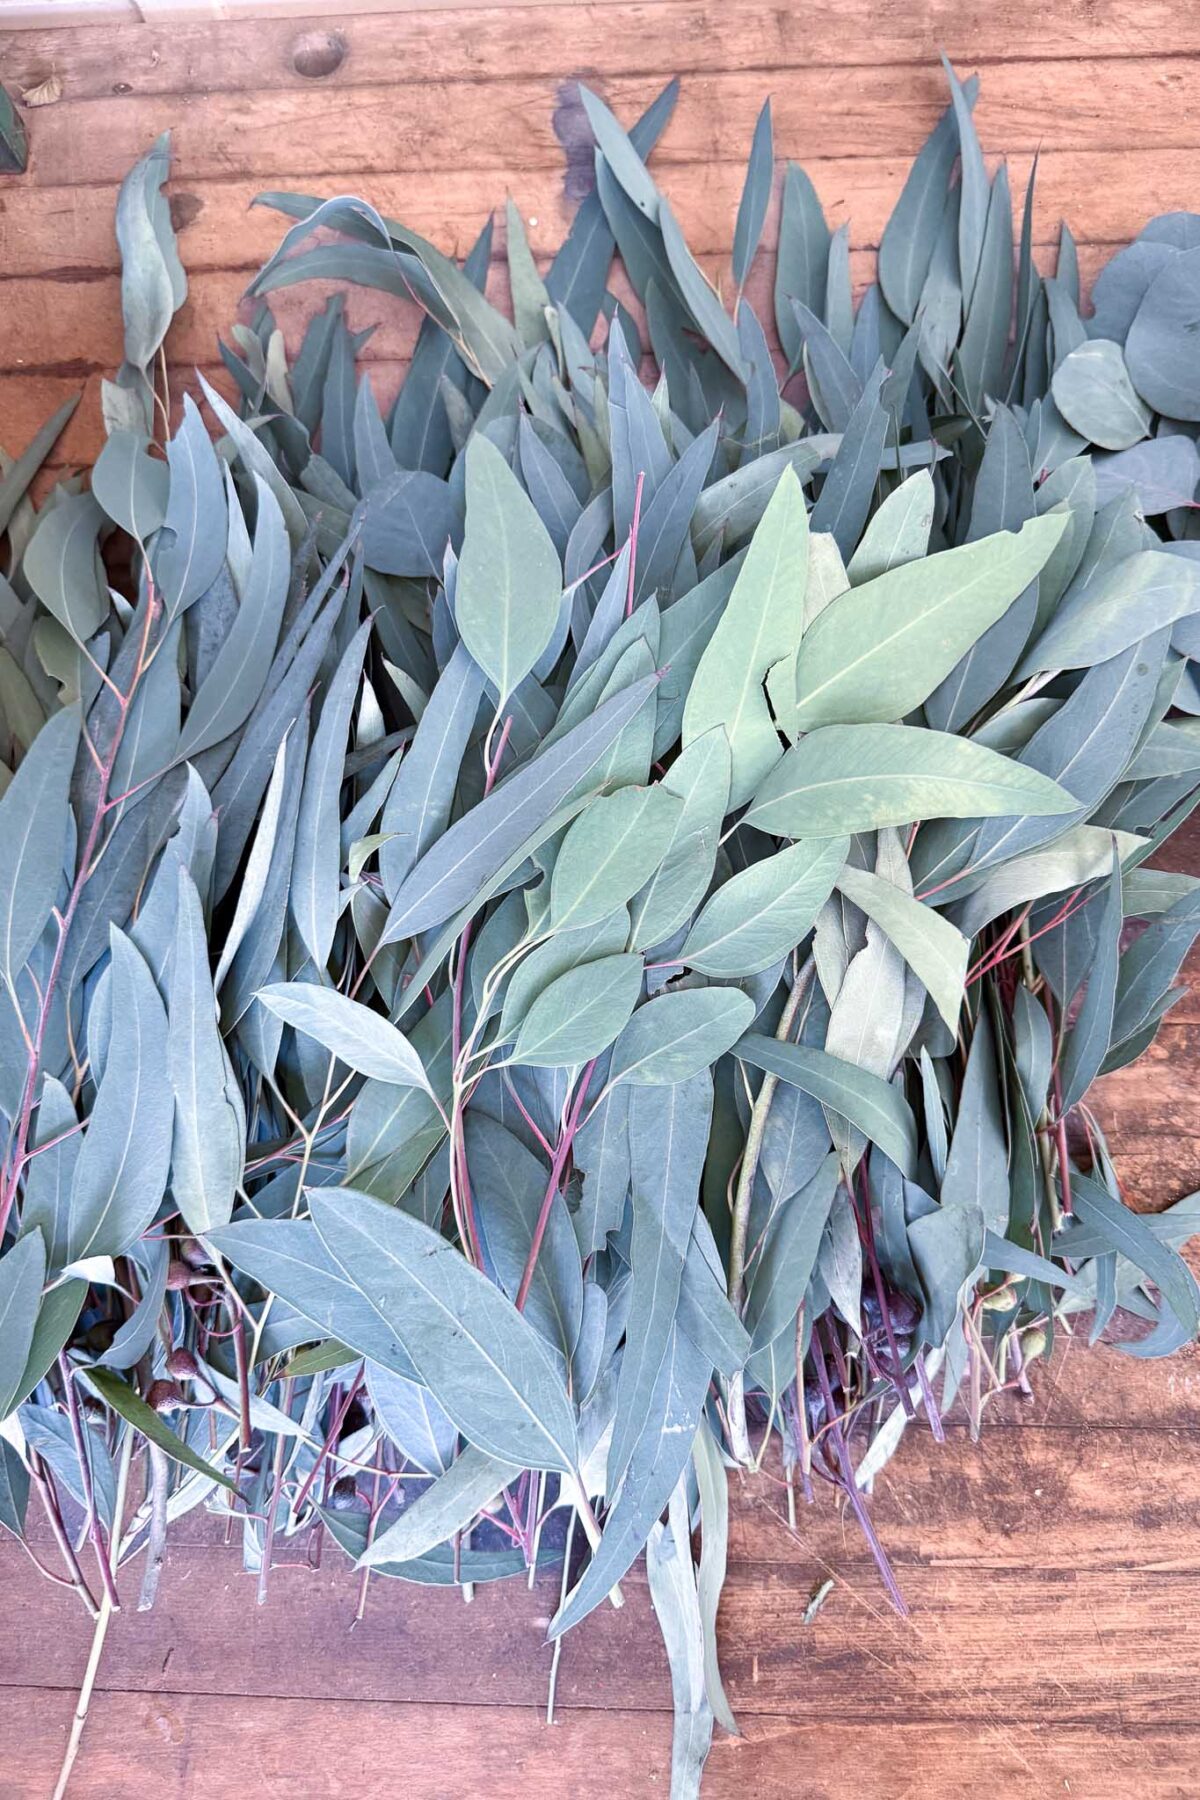
Seeded (Longleaf) Eucalyptus
The longer, slimmer leaves with little seed pods running along the stems. This is the one that gives the wreath its movement and that wild, just-foraged feeling. The trailing tips at the bottom of the wreath are all longleaf.
Tip from wendy’s craft room:
If you are foraging, always ask permission if the trees are on someone else’s property, and only take what you can use that day. Eucalyptus wilts quickly once cut, so plan to make your wreath the same afternoon you forage.
Can I Make this Wreath with Faux Eucalyptus Instead?
Absolutely. Faux eucalyptus has come a long way and looks lovely, and it lets you keep the wreath indefinitely. The same building method works. The only difference is you will not get that fresh eucalyptus scent or the natural way the real stems dry over time.
How to Make a Eucalyptus Wreath
This is my favorite part. The whole process is honestly so calming. There is something about wrapping wire and tucking greens that feels relaxing and its so easy to accomplish in under 20 minutes.
Step 1: Forage and Wash Your Eucalyptus
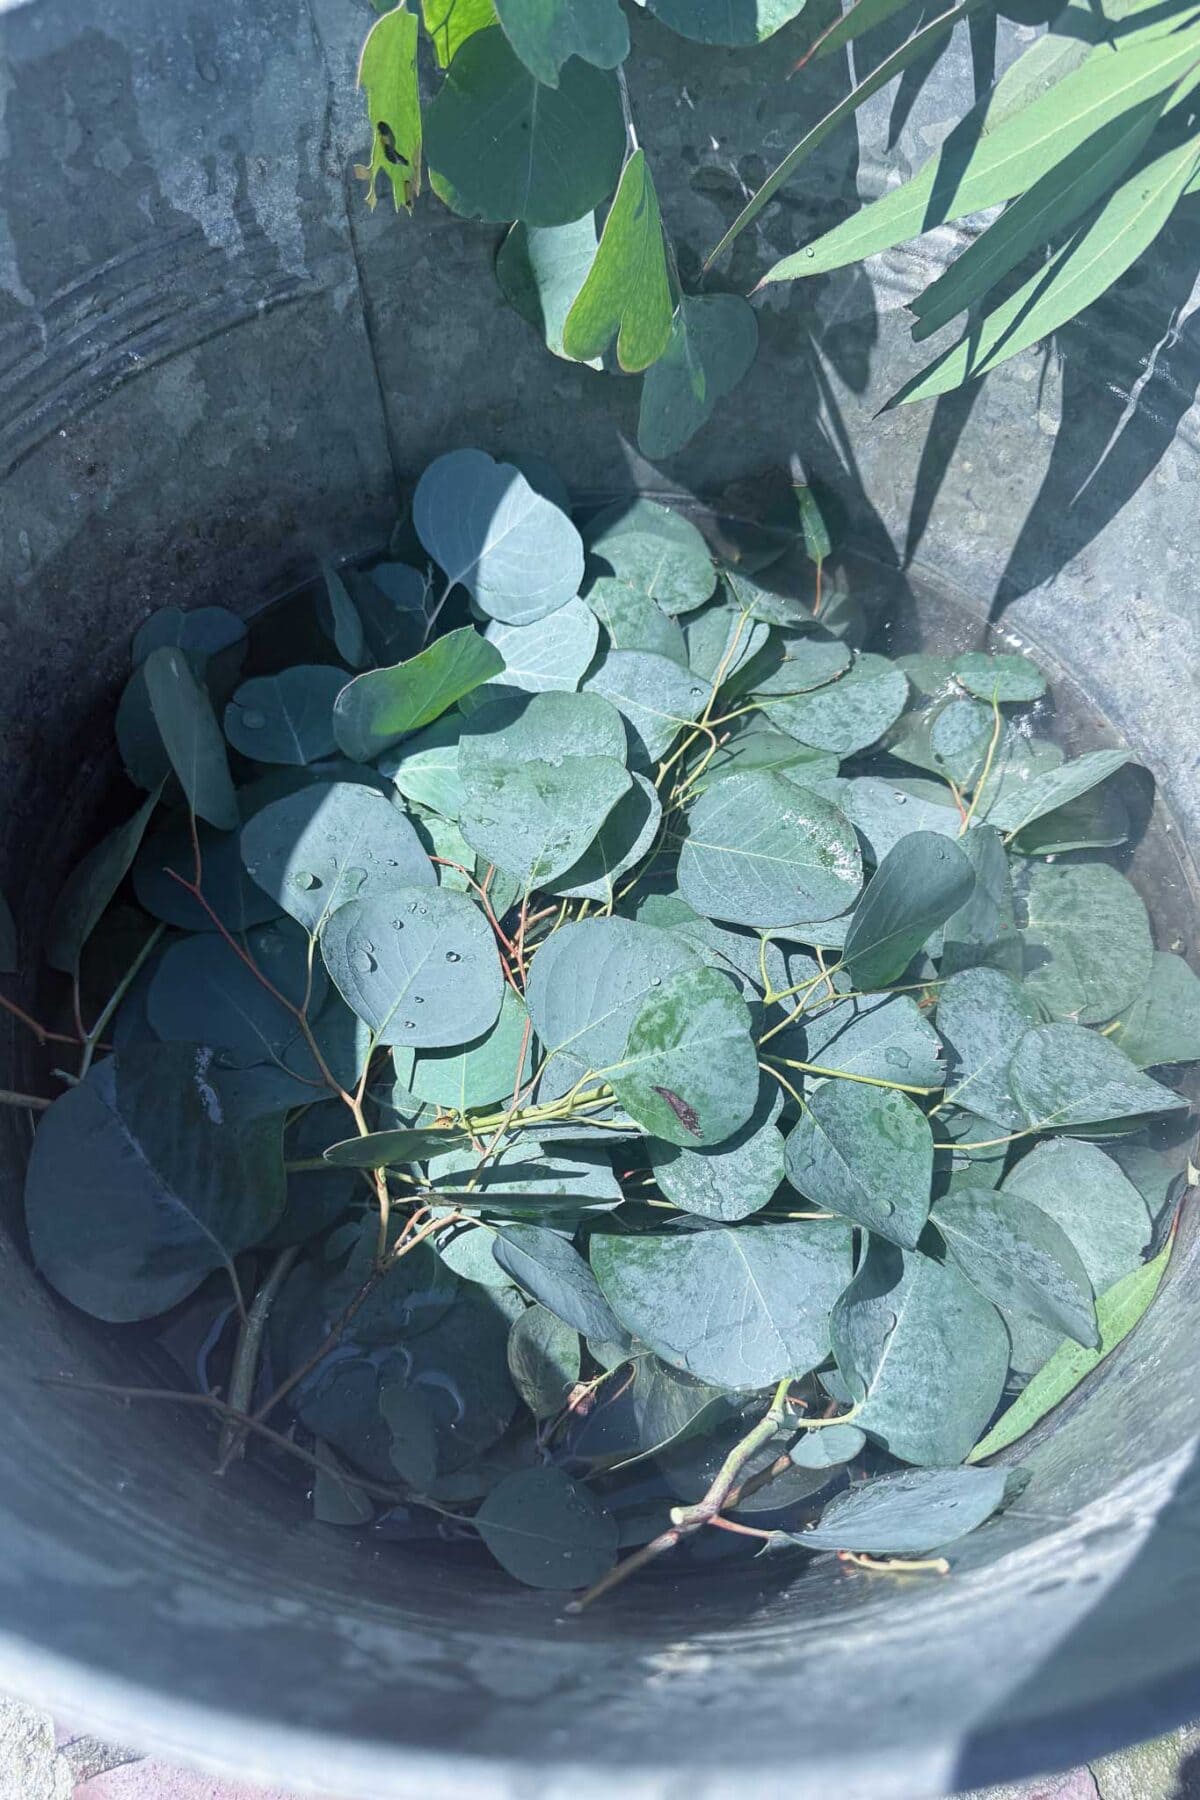
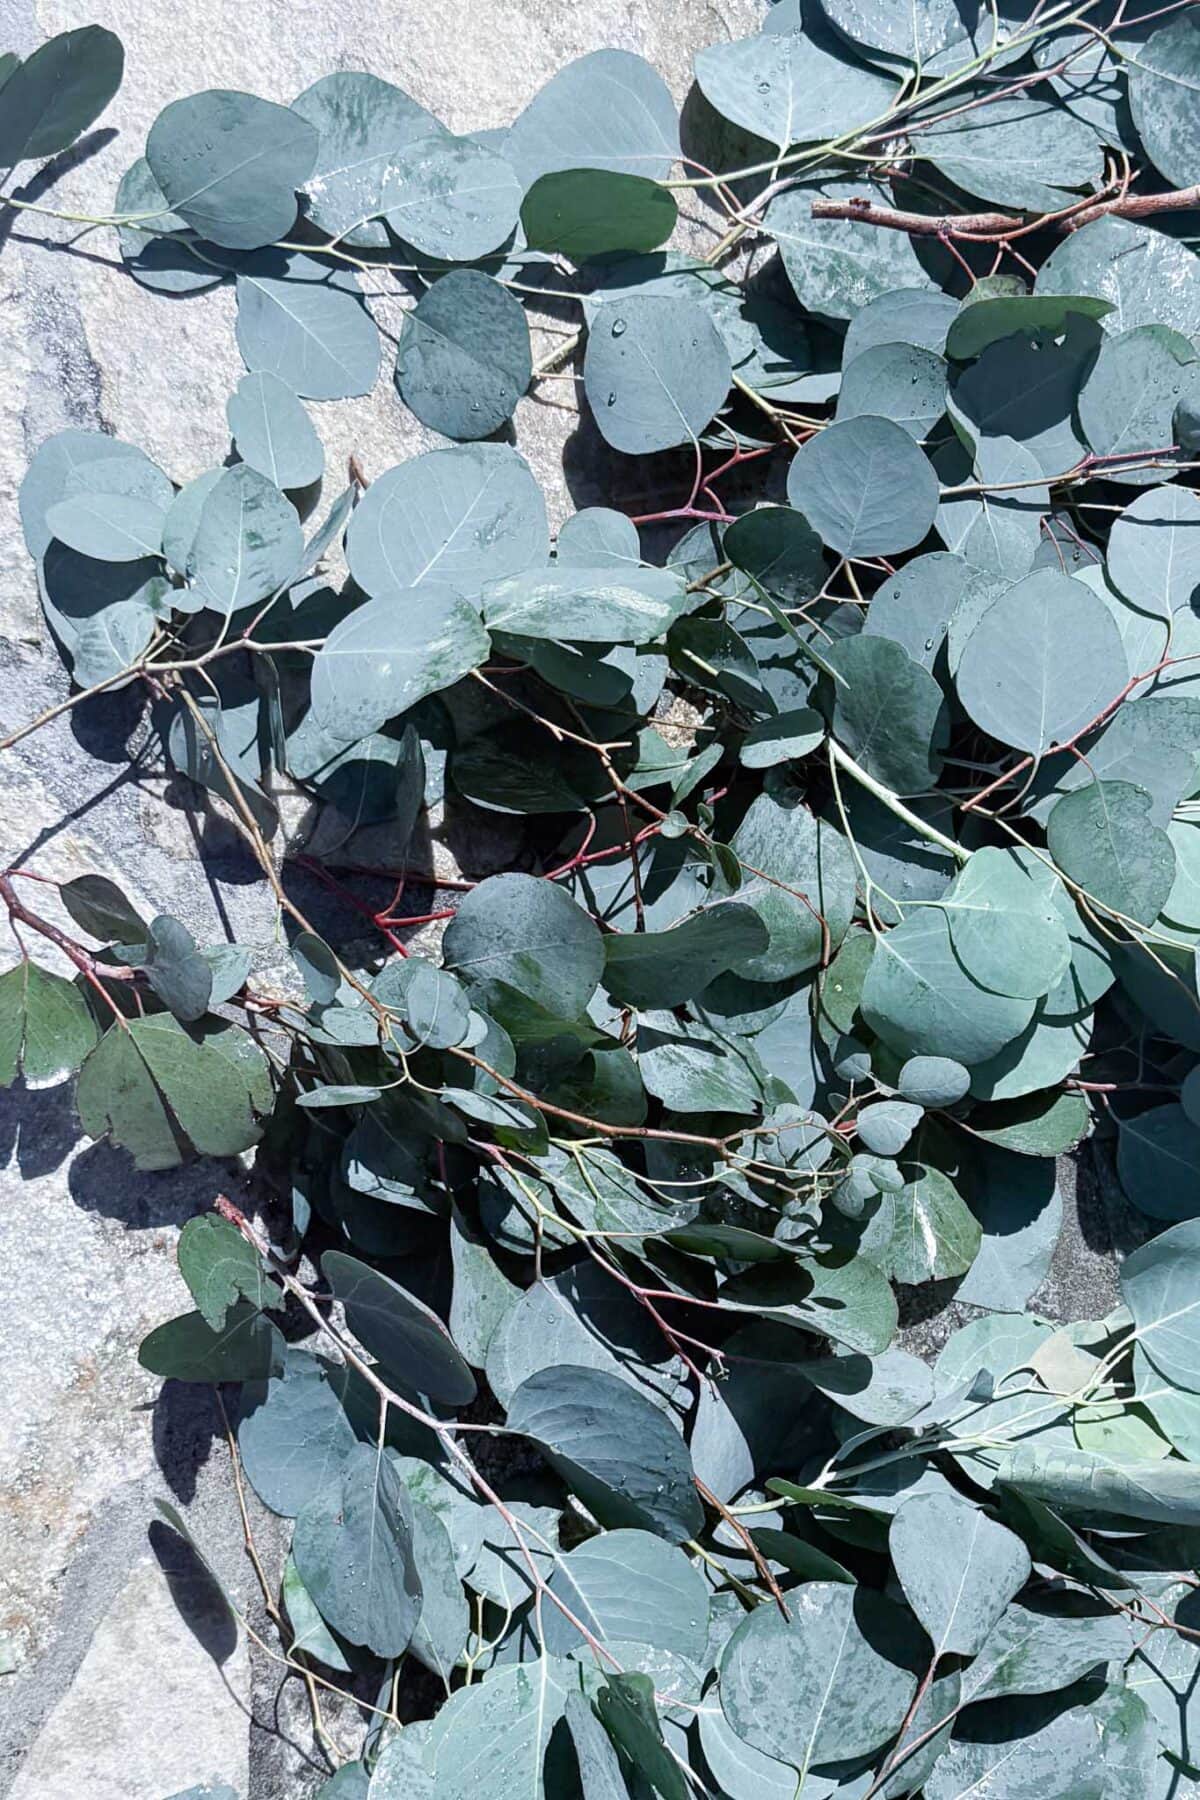
Once you have gathered your two kinds of eucalyptus, give every stem a good wash in the sink or a bucket outside. I rinse mine under cool water to get any dust, pollen, or little garden friends off the leaves. Lay the stems out in a sunny spot and let them dry while you gather your supplies.
Step 2: Cut the Eucalyptus Into Smaller Pieces
Trim each stem into 6 to 8-inch lengths. You want pieces small enough to bundle but long enough to give the wreath movement and texture. Keep the two kinds of eucalyptus in separate piles as you cut. This makes the next steps much easier.
Tip from wendy’s craft room:
Save the leftover bits. Eucalyptus dries beautifully and is perfect for tucking into napkin rings, garlands, or tying onto a gift later.
Step 3: Attach Your Floral Wire to the Grapevine Base
Take the end of your floral wire spool and wrap it tightly around the grapevine wreath a few times to anchor it. Do not cut the wire. You will be working straight from the spool. This is the trick that makes the whole process so much faster.
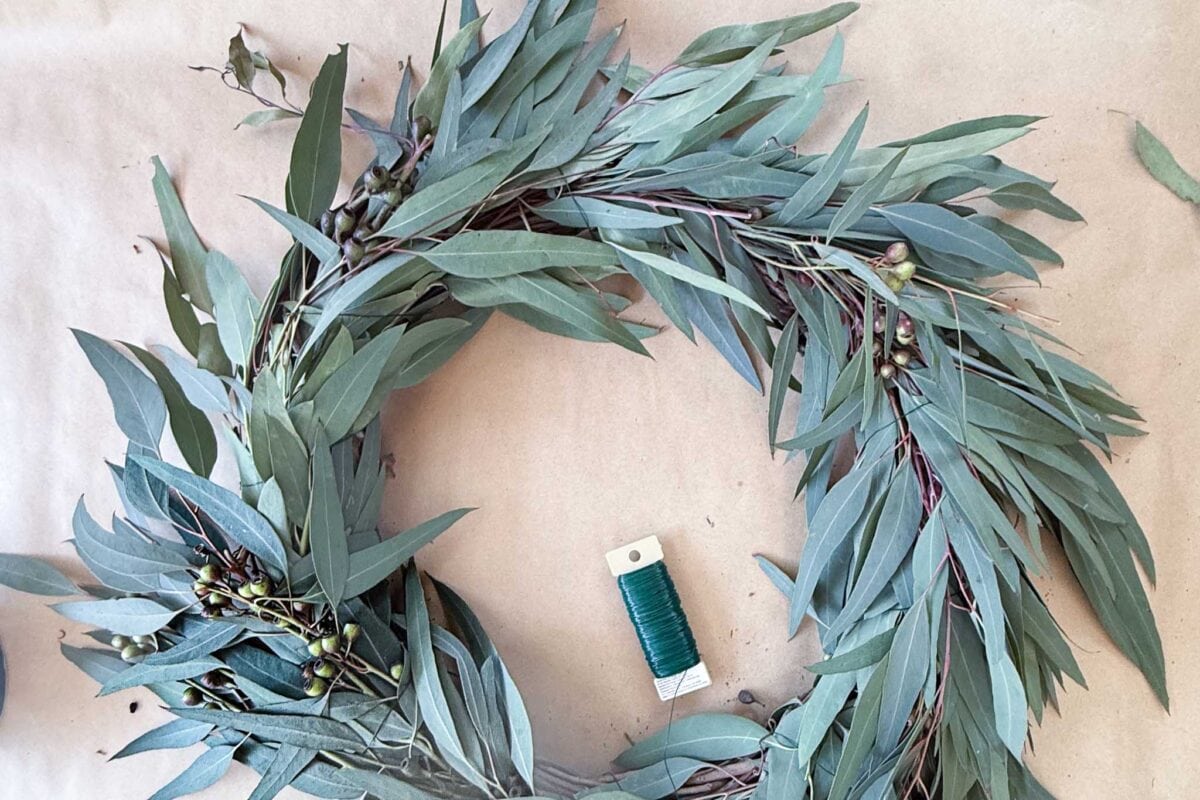
Step 4: First Round, The Seeded Eucalyptus
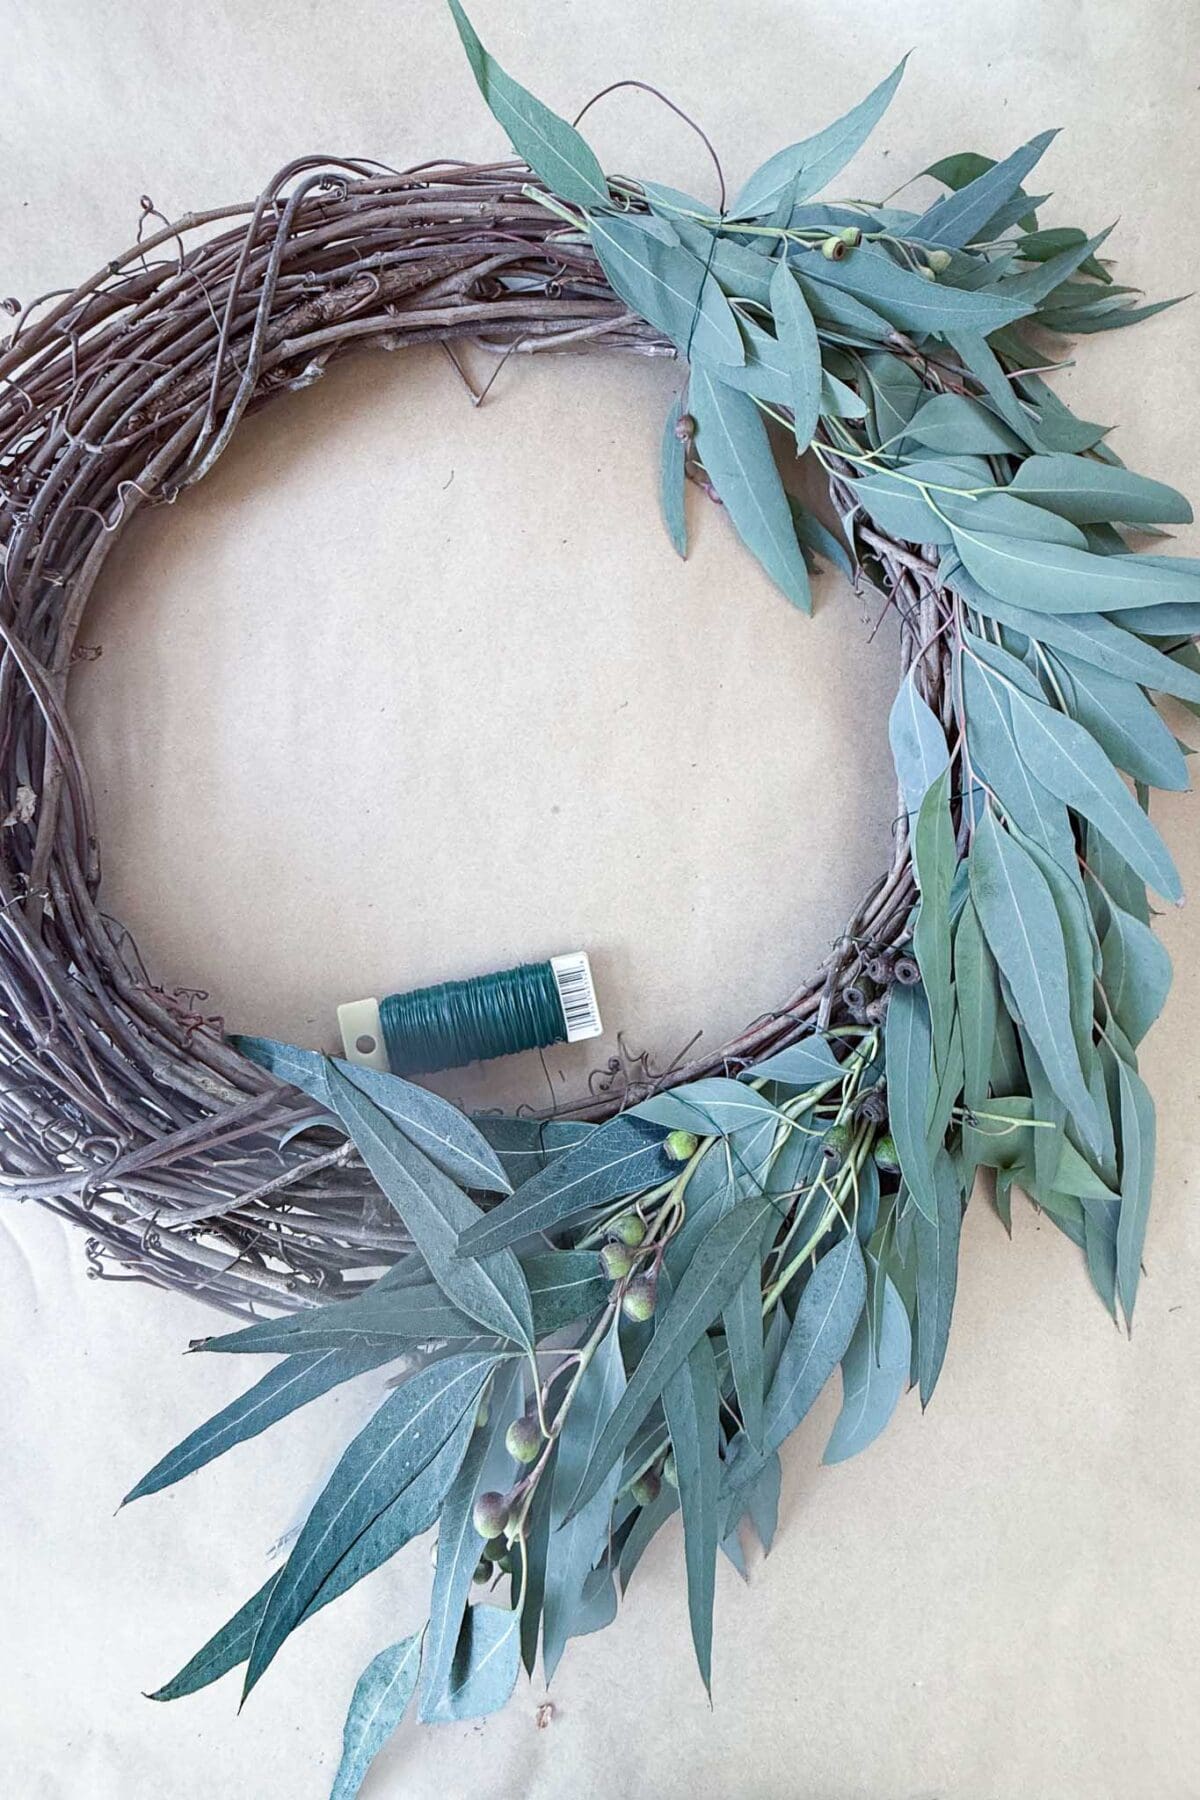
Gather a small bundle of seeded longleaf eucalyptus, about 3 to 4 stems, and lay it flat against the grapevine base. Wrap the wire around the stems two or three times to secure them.
Then add a second small bundle, slightly overlapping the first so the wire and stems of the previous bundle are hidden. Wrap the wire again. Keep adding bundles all the way around the wreath, always working in the same direction.
When you get back to where you started, tuck the last stems gently underneath the first bundle so the wreath has no visible “start” or “end.”
Step 5: Second Round, The Silver Dollar Eucalyptus
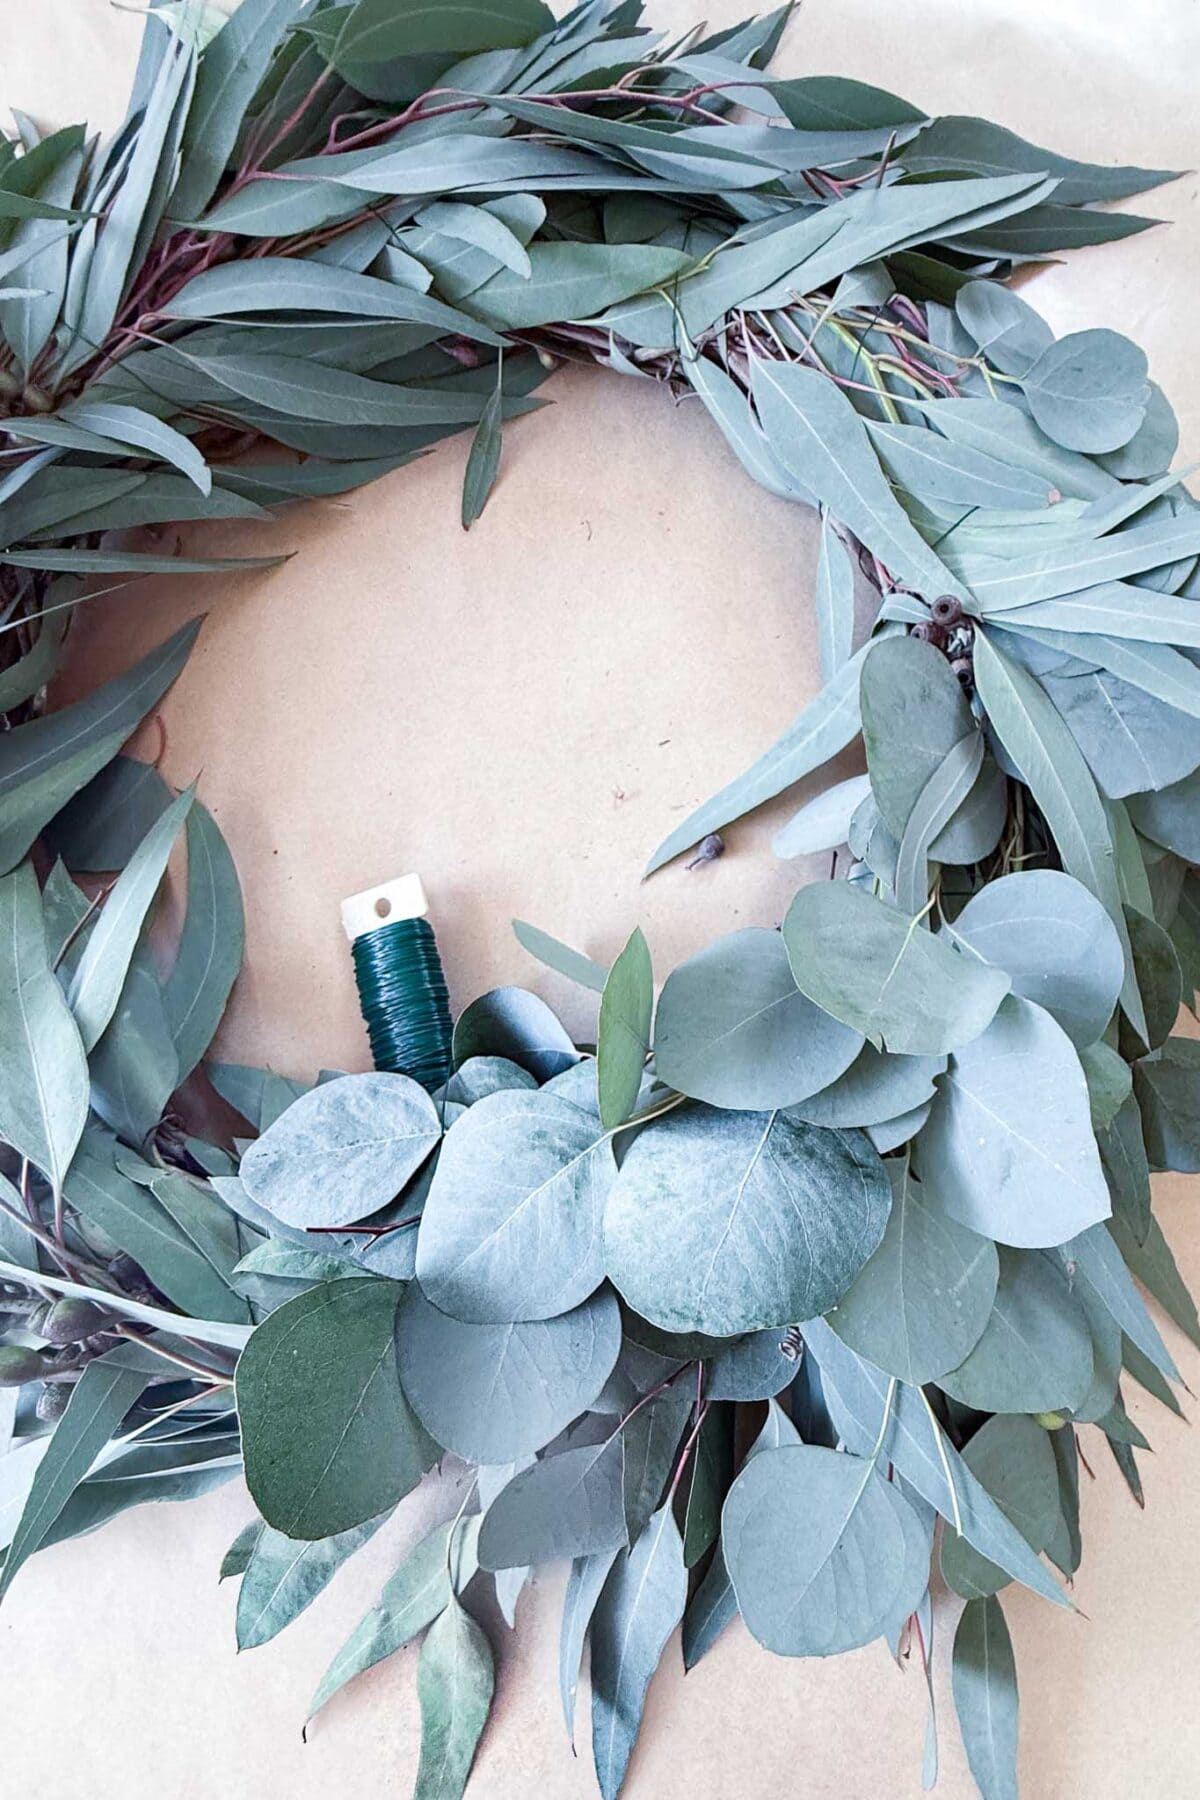
Without cutting the wire, start a second full round, this time using the silver dollar eucalyptus. Add bundles the same way, overlapping each one to hide the stems of the last. The silver dollar layer will add body and that beautiful coin-shaped leaf pattern over the top of the longleaf base.
Step 6: Hang It Up and Add a Third Mixed Round
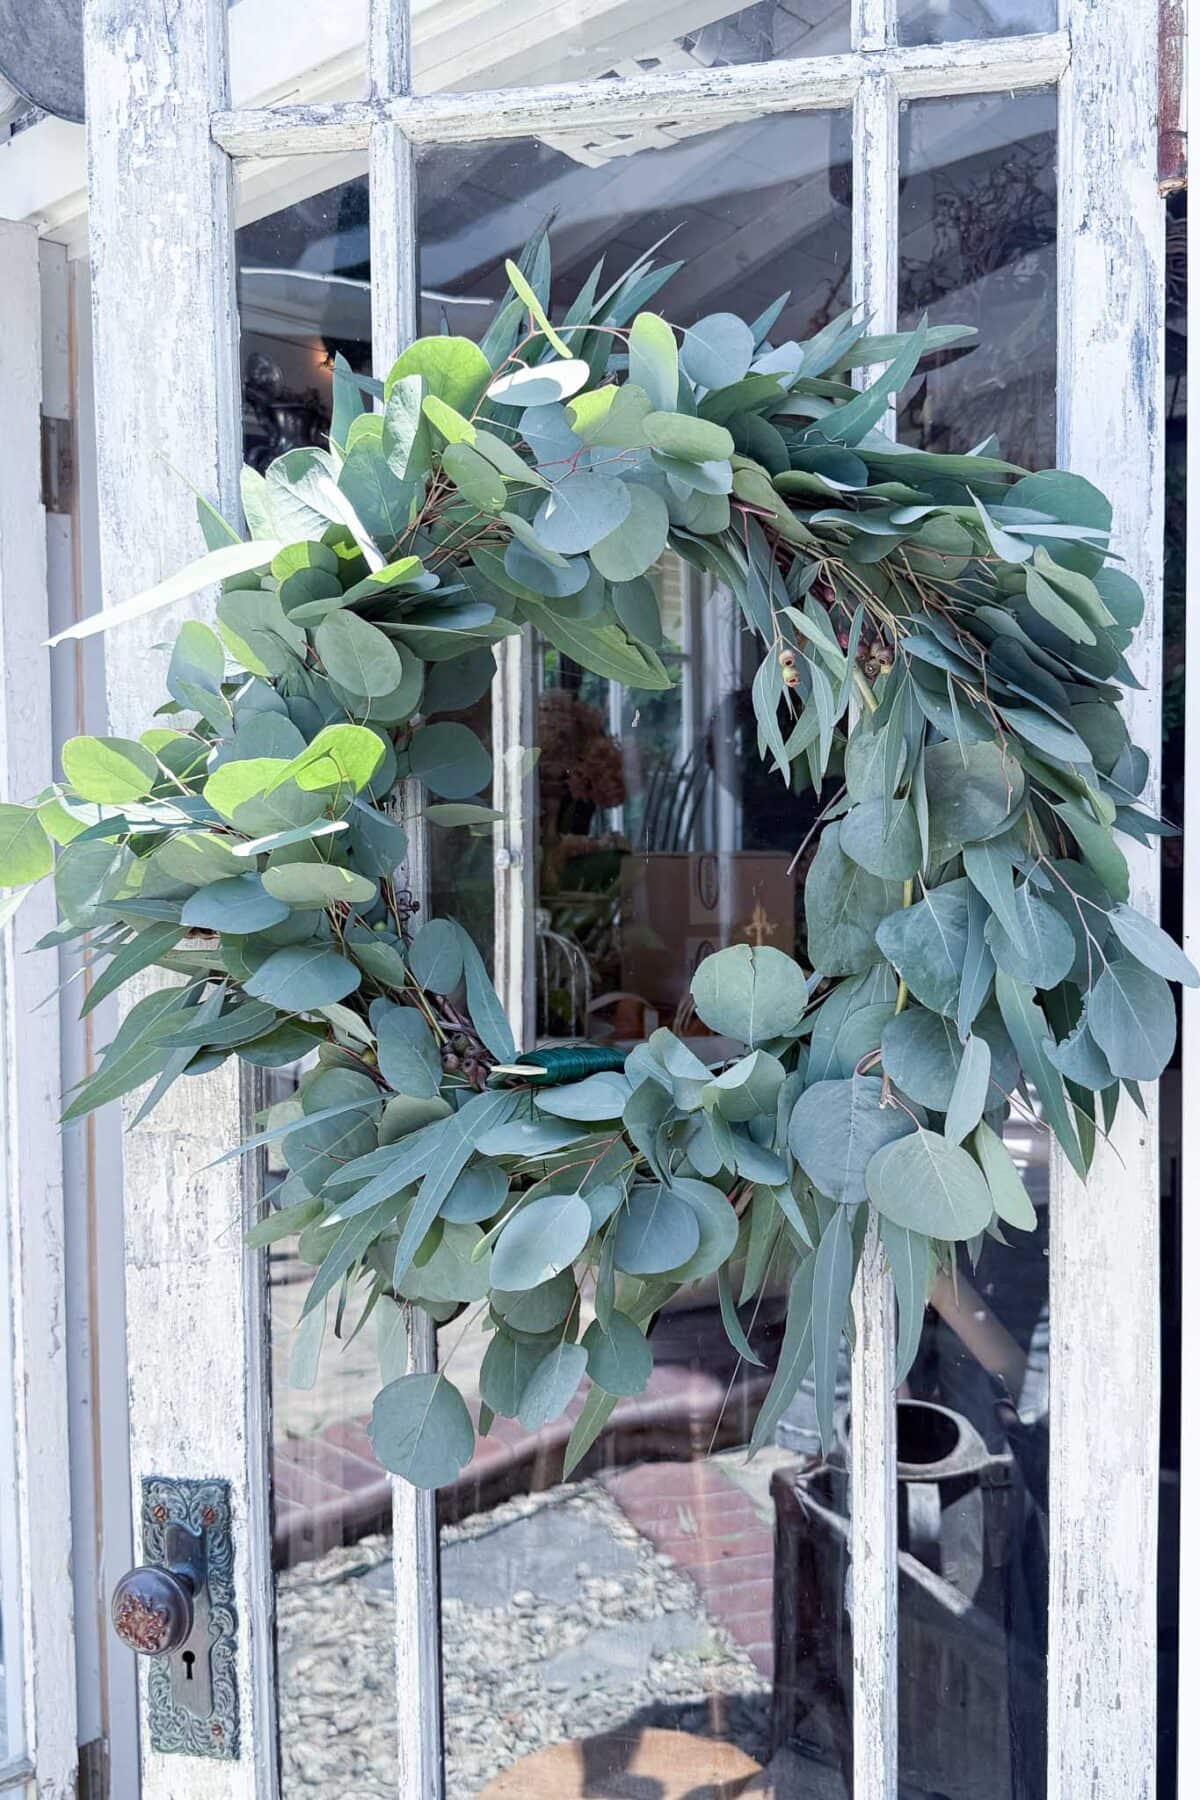
Here is the little tip that made the biggest difference for me. Hang the wreath up before you finish. Once it is on the door, you can see where it needs more fullness and where it sits a little flat.
Then do a third round, mixing the two kinds of eucalyptus together. This is where the wreath goes from “nice” to truly beautiful. The mixed bundles fill in the gaps, even out the shape, and give the whole wreath that gathered, abundant look. Tuck stems where you need them, build up any thin spots, and step back often to see how it is coming together.
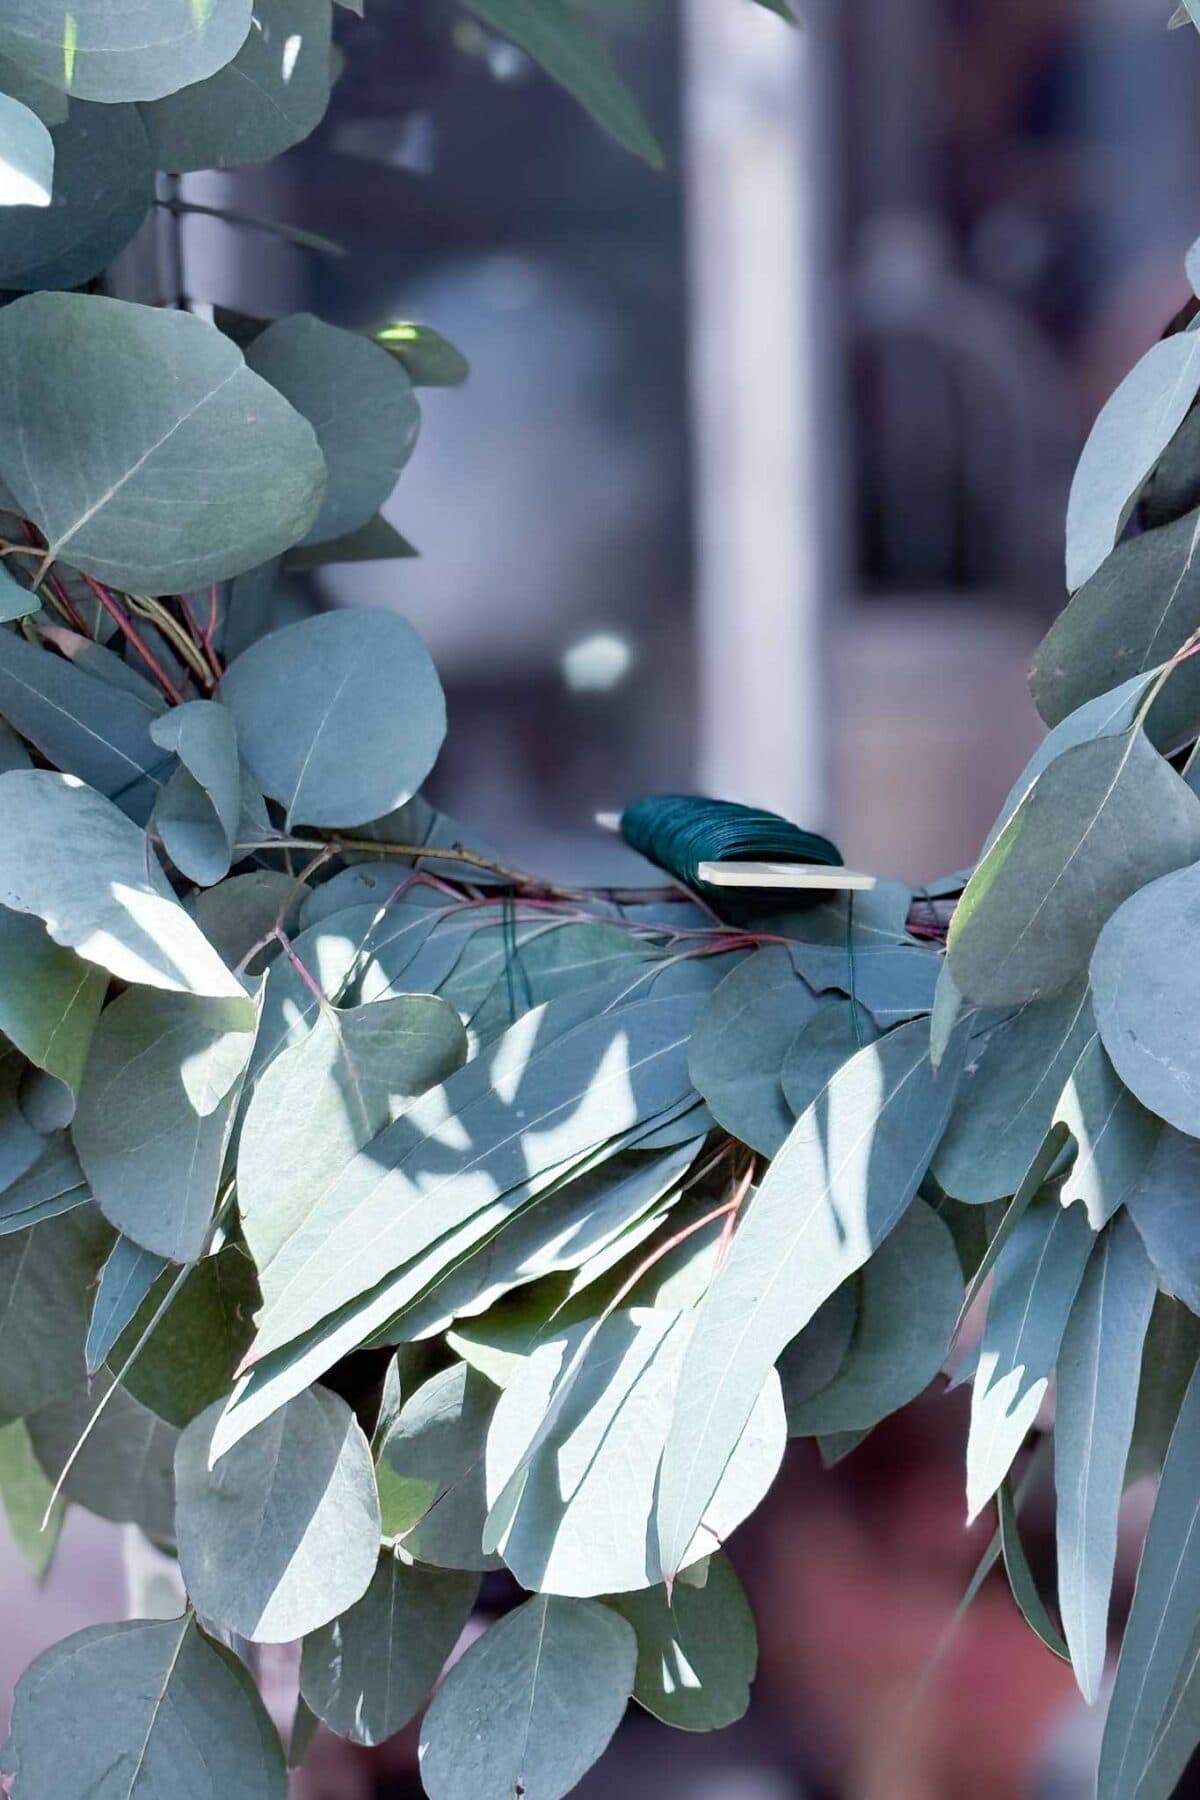
Once you are happy, snip the wire from the spool, leaving a few extra inches, and wrap it tightly around the back of the grapevine to secure.
Styling Your Eucalyptus Wreath for Every Season
This is what I love most about this wreath. Once the eucalyptus base is built, you have a foundation that will carry your front door through the whole year. A few small tucks of seasonal accents, and it feels brand new every time.
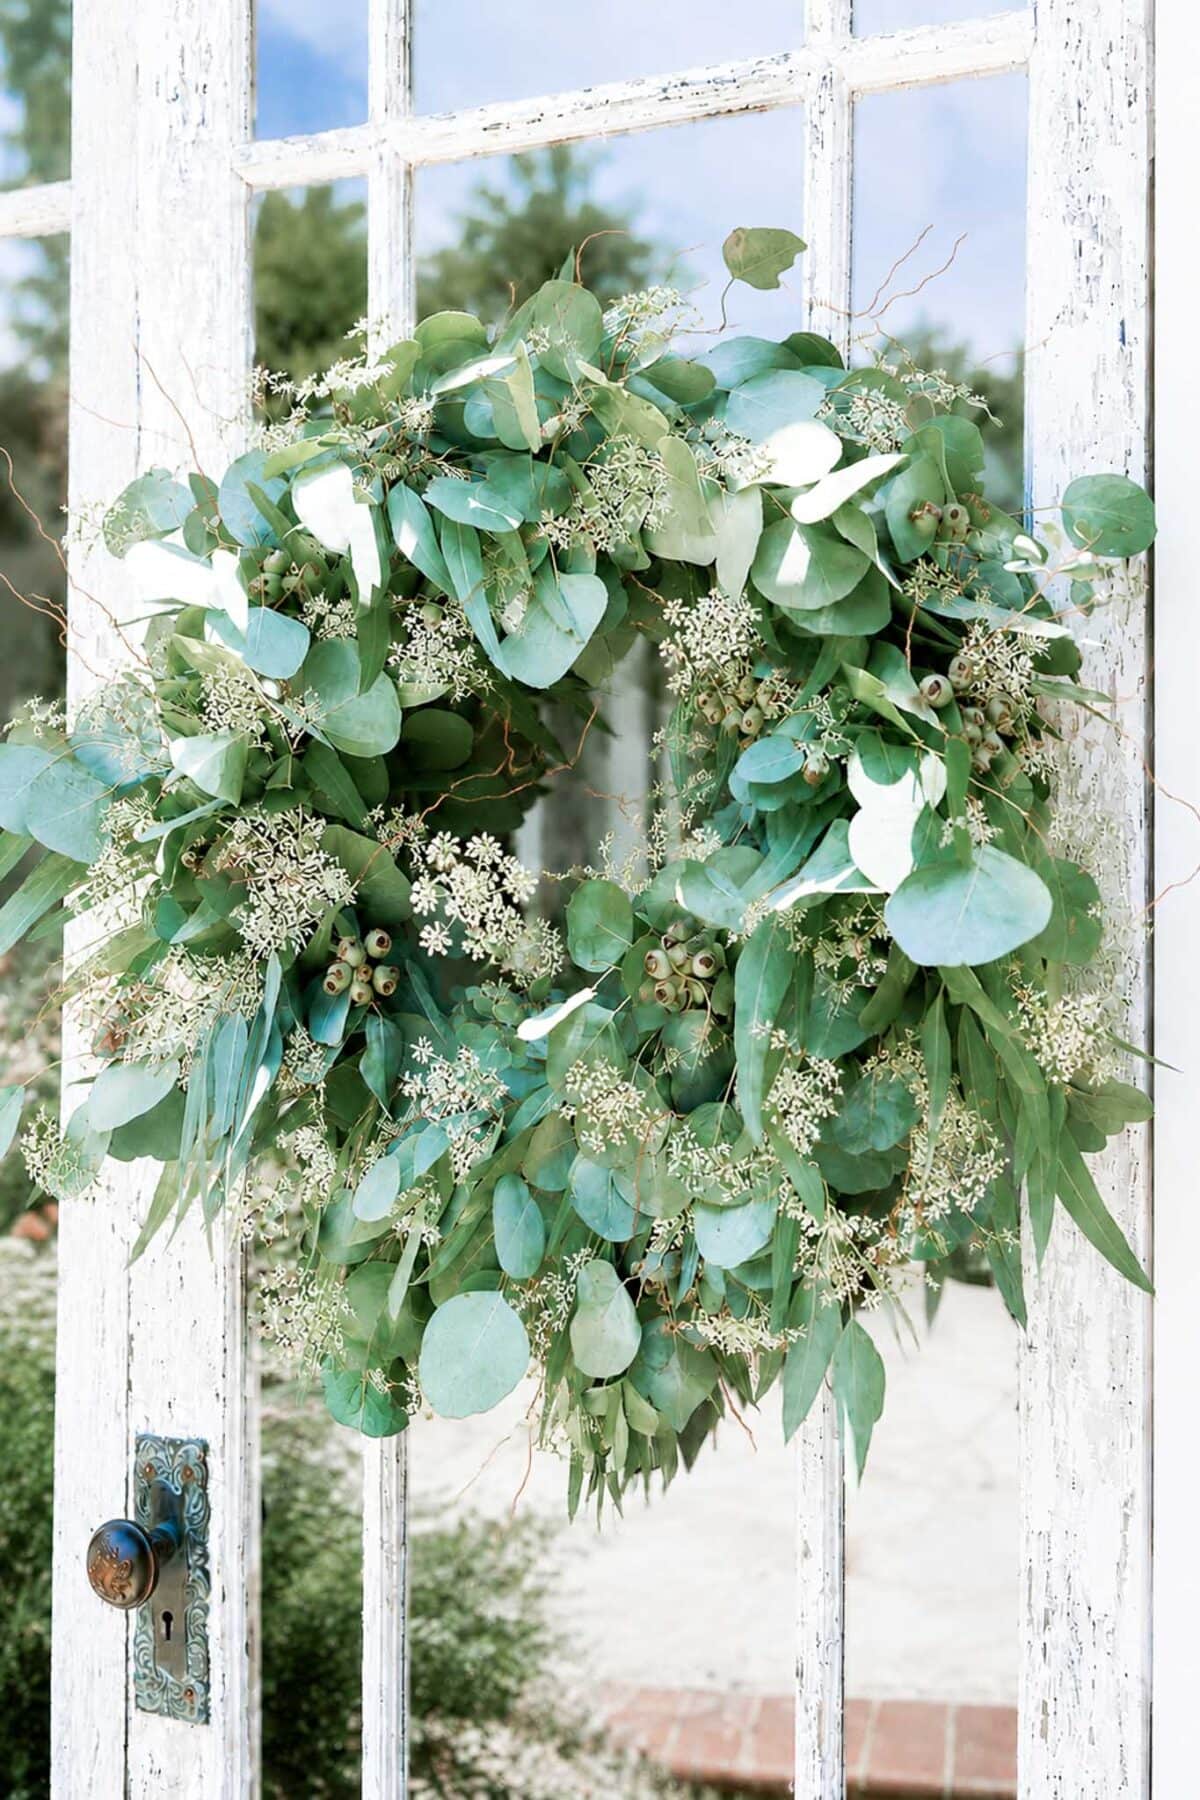
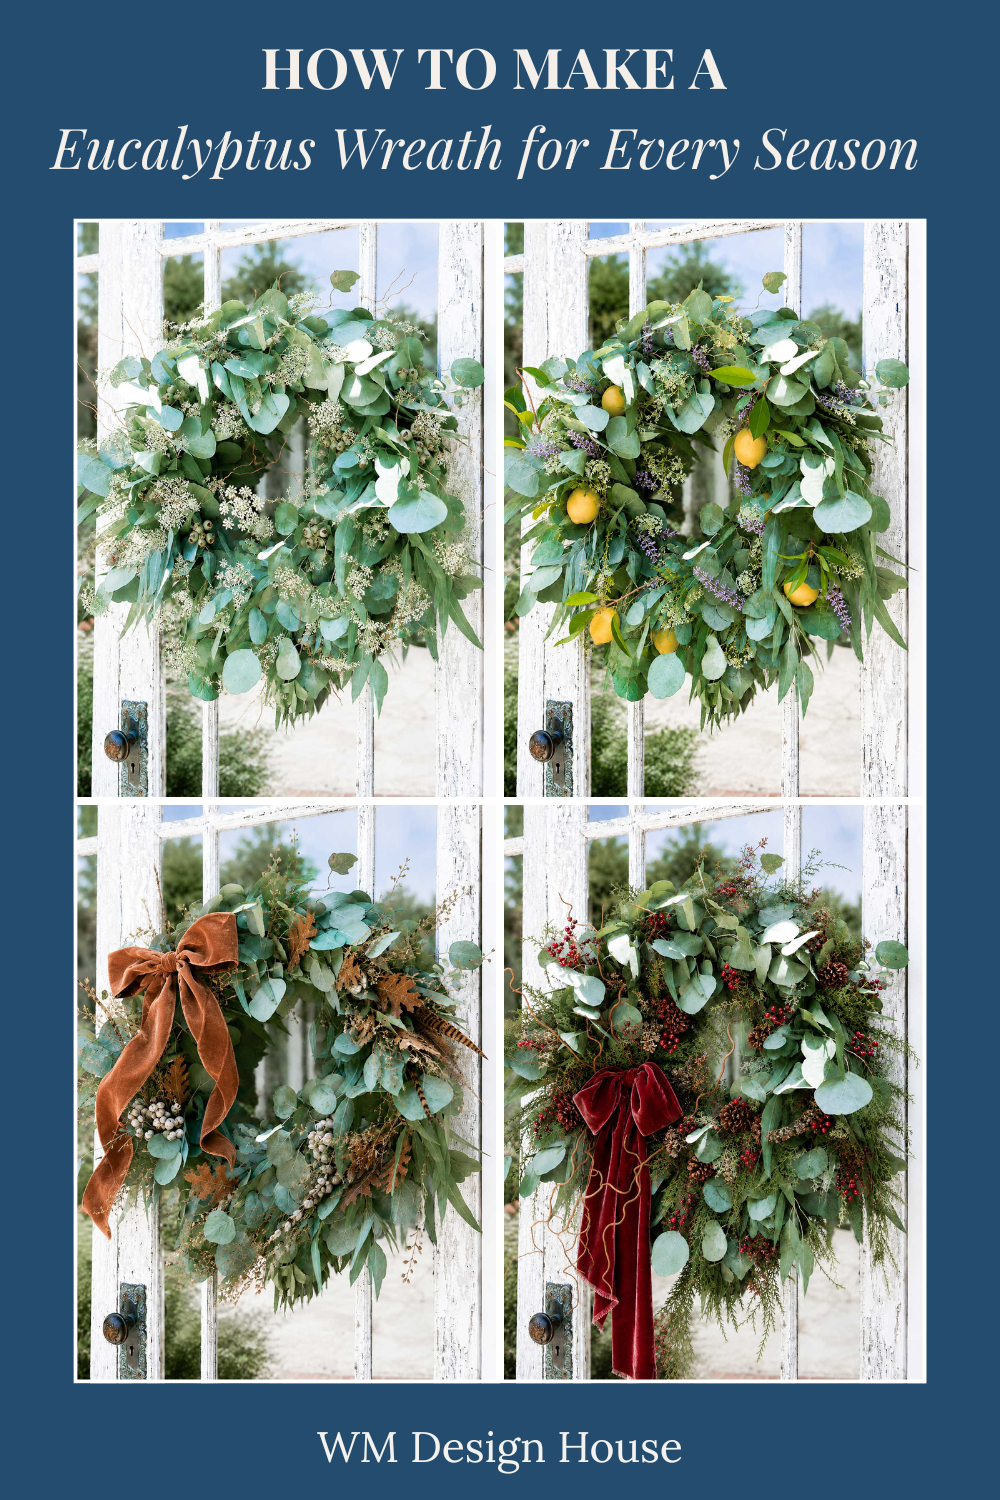
Spring Eucalyptus Wreath with Queen Anne’s Lace and Curly Willow
This is the part where the wreath becomes yours. For spring, I wanted something light, delicate, and very natural looking.
For spring, I added sprigs of faux Queen Anne’s lace and a few delicate branches of curly willow throughout the wreath. Not in clusters, but as individual blooms scattered naturally across the greens, so they look like little wildflowers that have drifted in on their own. Single stems fill the wreath evenly and give the whole thing that soft, just-foraged feeling.
Tip from wendy’s craft room:
Keep flower stems long enough to slip down into the grapevine wreath, where they hold themselves in place without any wire. This way it is easy to remove them at the end of the season.

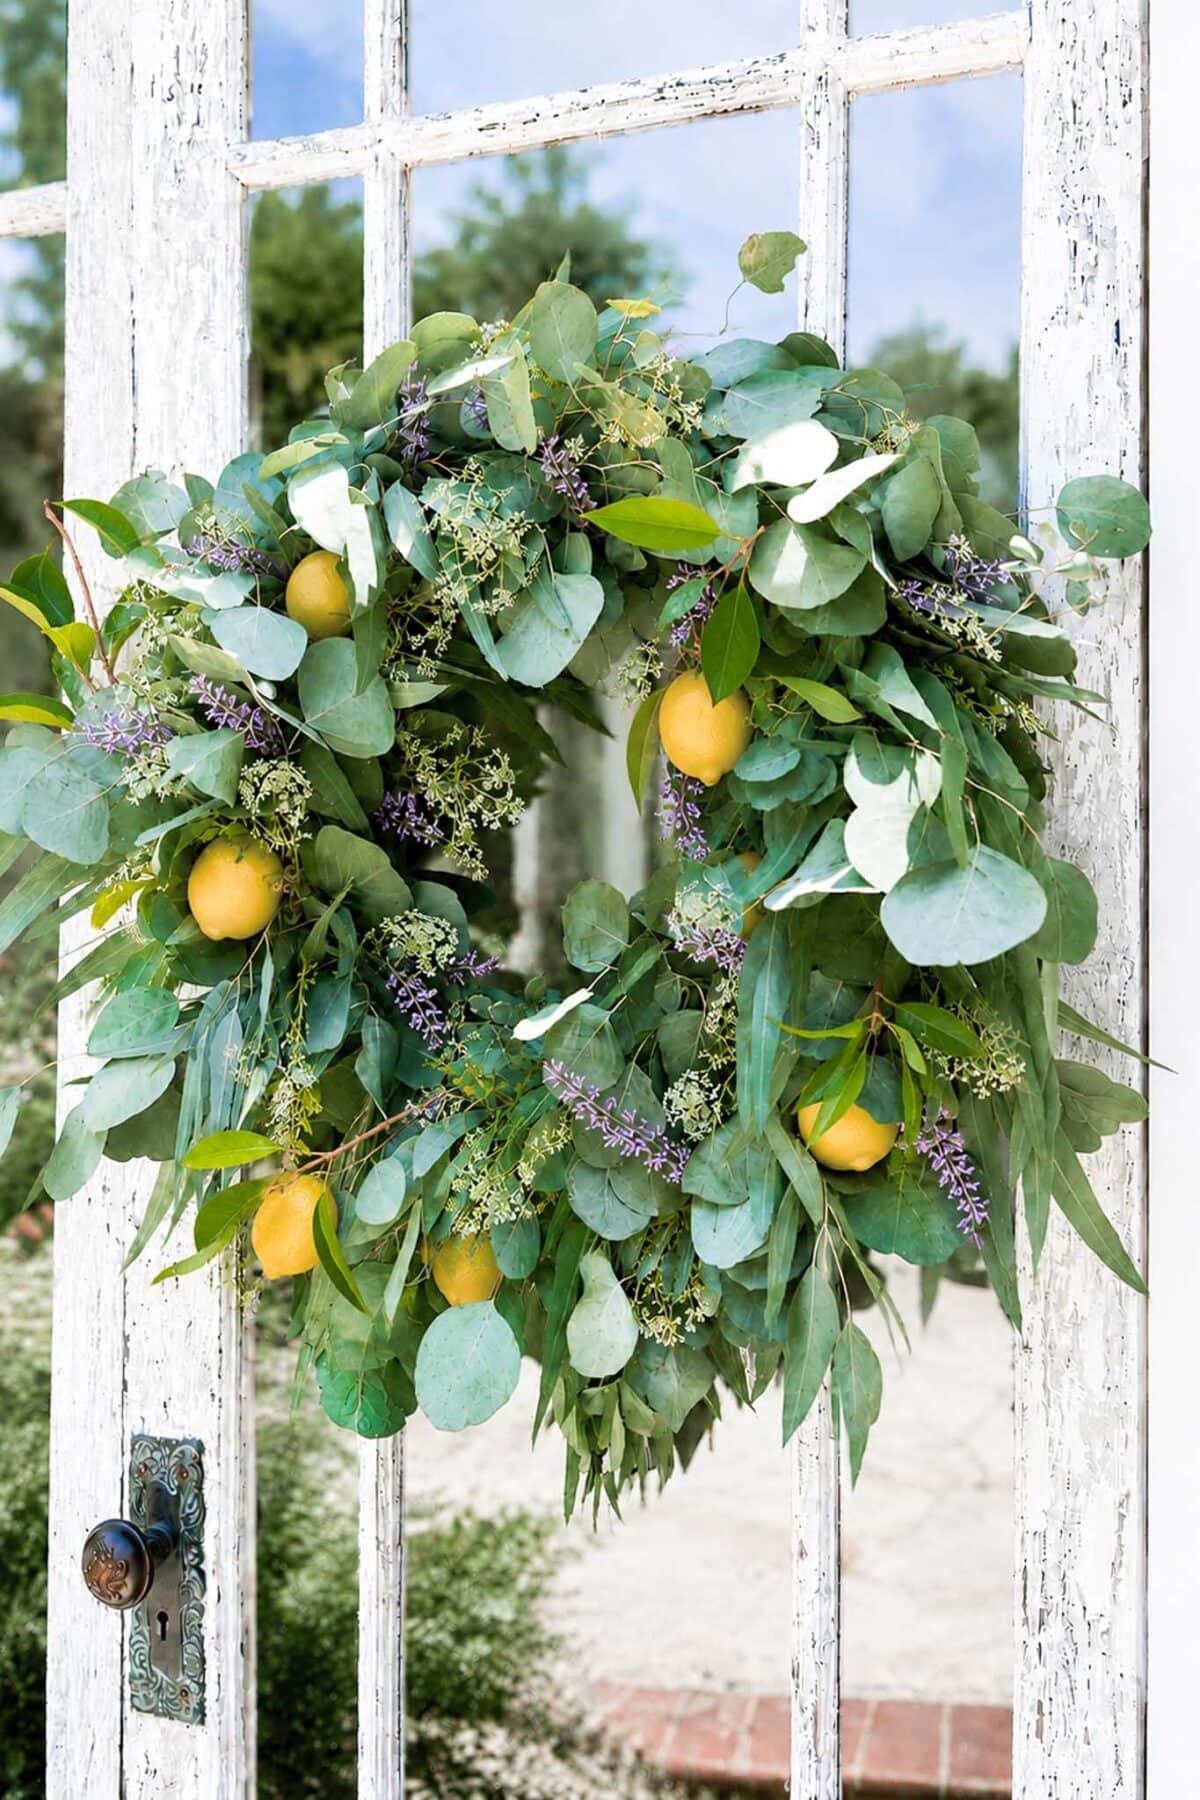
Summer Eucalyptus Wreath with Meyer Lemons and Lavender
By summer, I wanted something a little brighter and sunnier on the door. I left a few sprigs of the Queen Anne’s lace from spring still tucked into the wreath, added a few fresh Meyer lemons from our backyard tree, and threaded sprigs of faux purple lavender throughout. The longleaf eucalyptus from the base is what you see trailing through the wreath, and its deeper, glossier green makes the lemons really pop.
To attach the lemons, I gently pushed a long floral pick up into the base of each lemon and poked the other end into the grapevine wreath. Space them around the wreath as individual pieces of fruit so they look like they have grown right there in the eucalyptus. The lavender just tucks in, no wire needed.
Tip from wendy’s craft room:
If your lemons start to soften after a couple of weeks, simply swap them out for fresh ones. The eucalyptus base will hold up beautifully much longer than the fruit will.
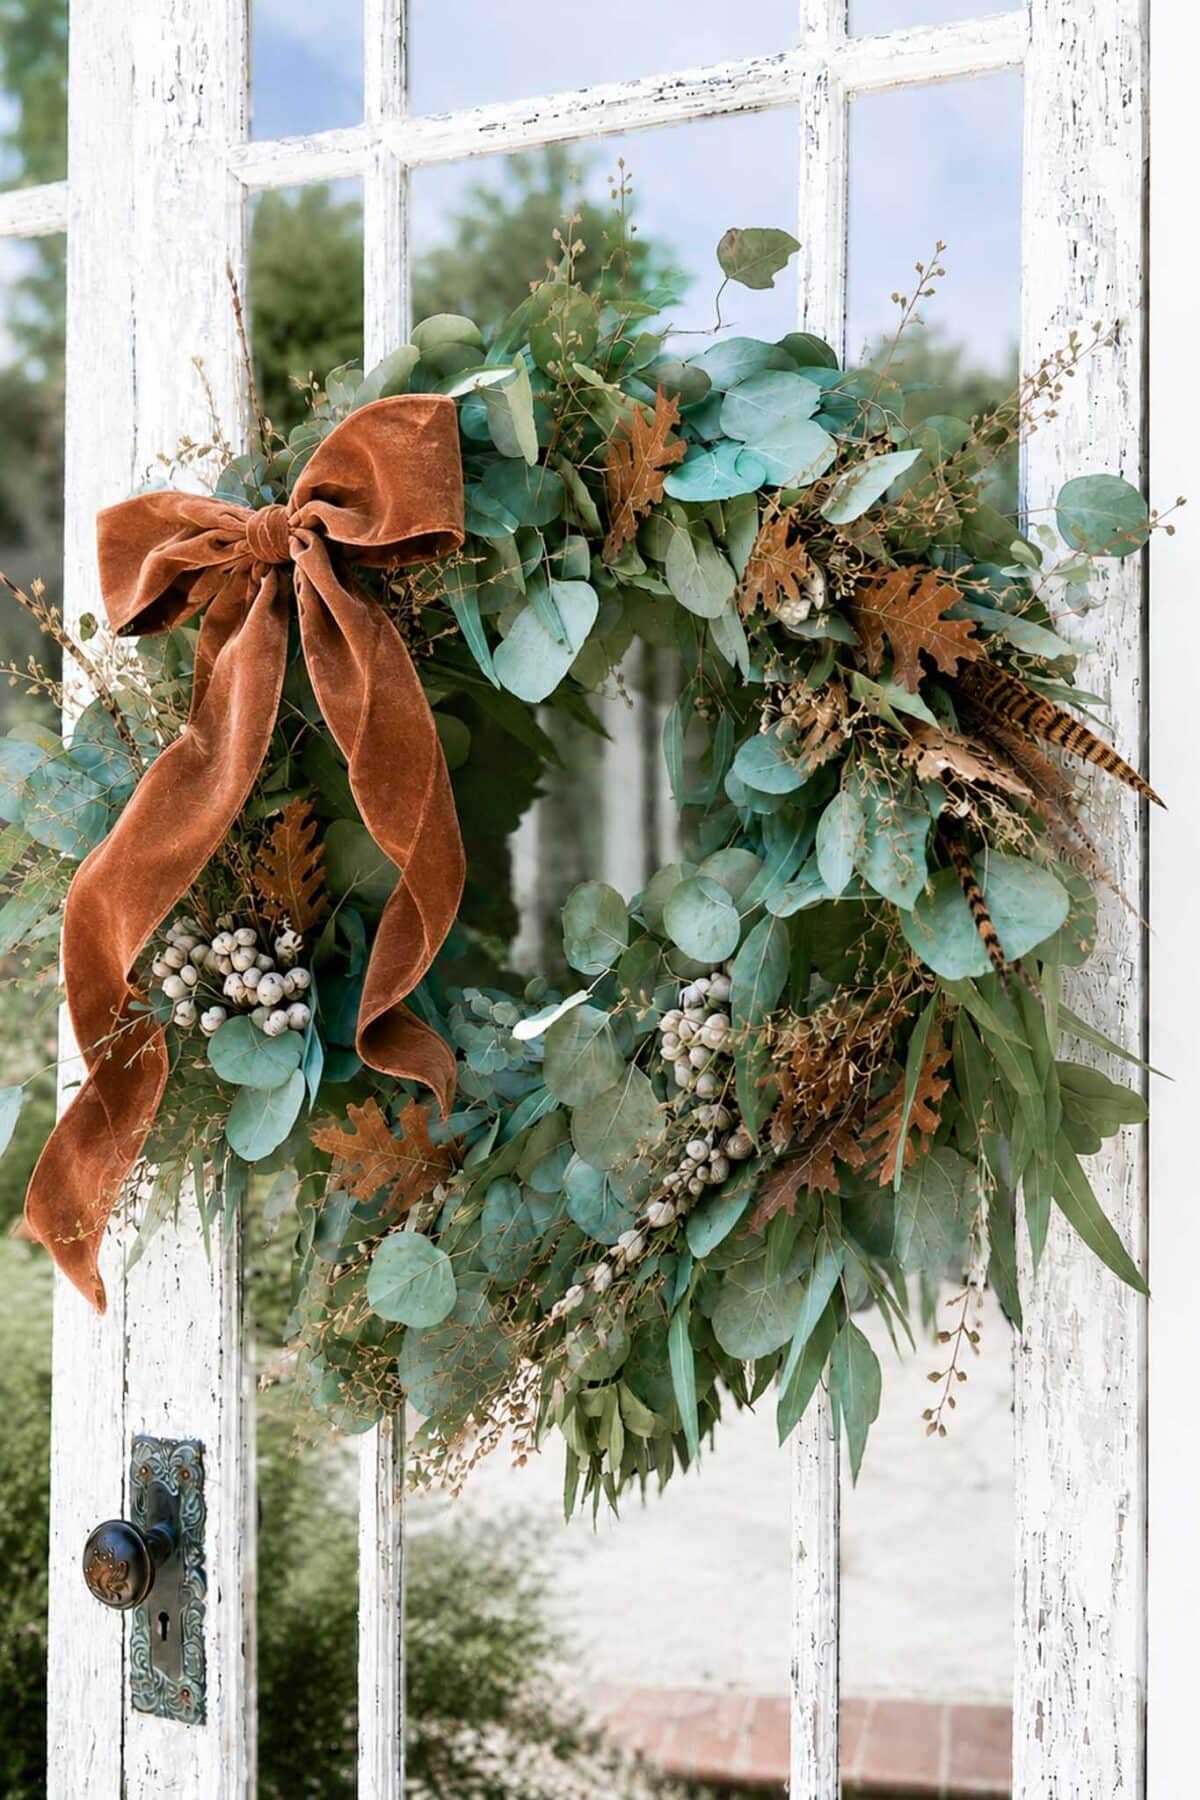
Fall Eucalyptus Wreath with Rust Velvet Bow and Oak Leaves
By the time autumn arrives, the eucalyptus base has dried on the door into the loveliest muted sage and deeper silver-green tones, already a beautiful fall color on its own.
For fall, I added a rust-colored velvet bow I made and tied at the top, with the tails left long to trail down the side of the wreath. Then I tucked in a few dried oak leaves for that warm autumn color, a cluster of cream tallow berries, and a few pheasant feathers off to the side for a little texture and movement.
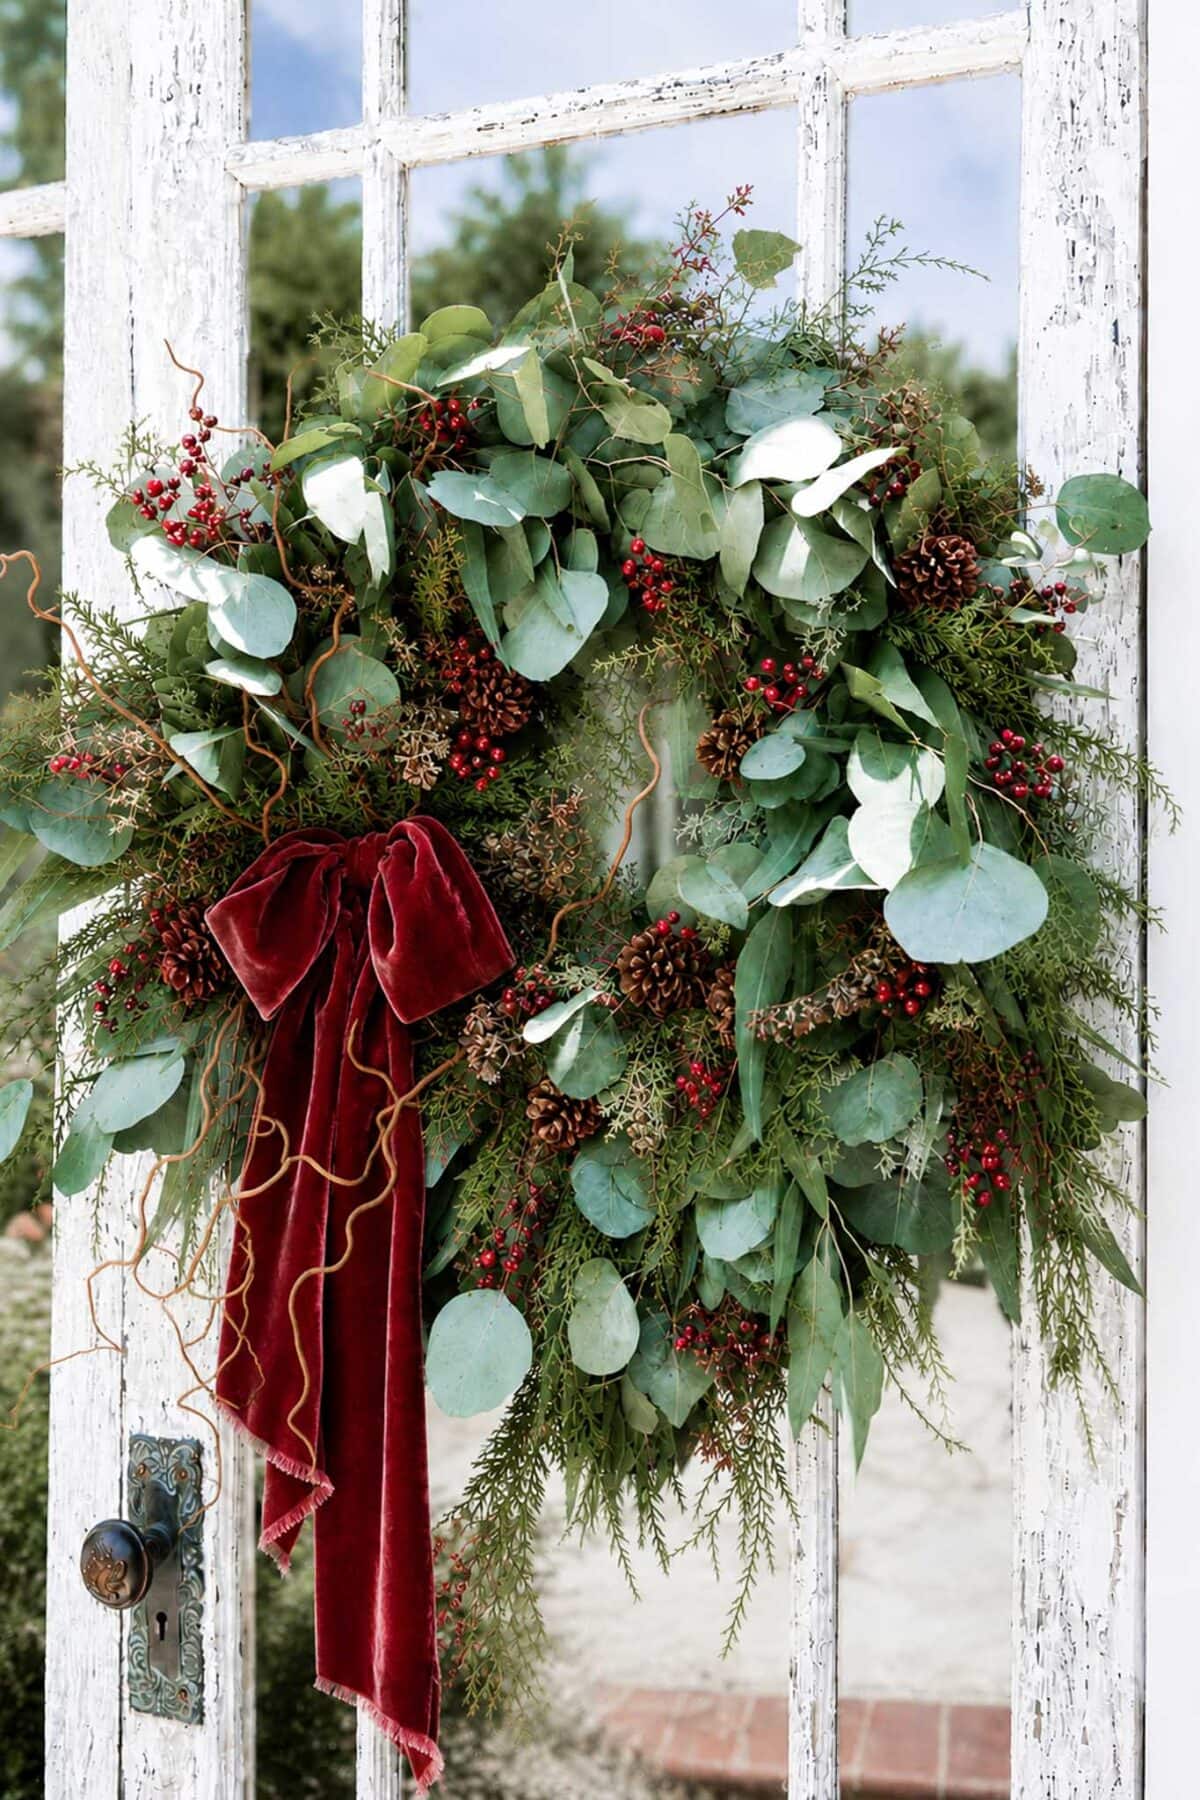
Christmas Eucalyptus Wreath with Burgundy Velvet Bow
Christmas is where this wreath truly steals the show. By December, the eucalyptus has dried into the most beautiful muted sage green. The perfect backdrop for everything that says holiday.
I added sprigs of cedar and juniper ( you can choose fresh or faux) tucked throughout for that classic Christmas evergreen layer, clusters of bright red berries (faux berries hold their color all season and are so worth the small investment), a handful of small pinecones wired into the base, and a few stems of curly willow from Trader Joe’s that wind out the sides for movement.
Then, the showstopper. A deep burgundy velvet bow that I made myself by tearing a strip of velvet fabric and tying it at the top of the wreath, with the tails left to trail down past the door. The torn edges fray naturally for that soft, lived-in finish. (A handmade bow makes such a difference. Store-bought ribbon never quite looks the same.)
Other Easy Seasonal Swaps
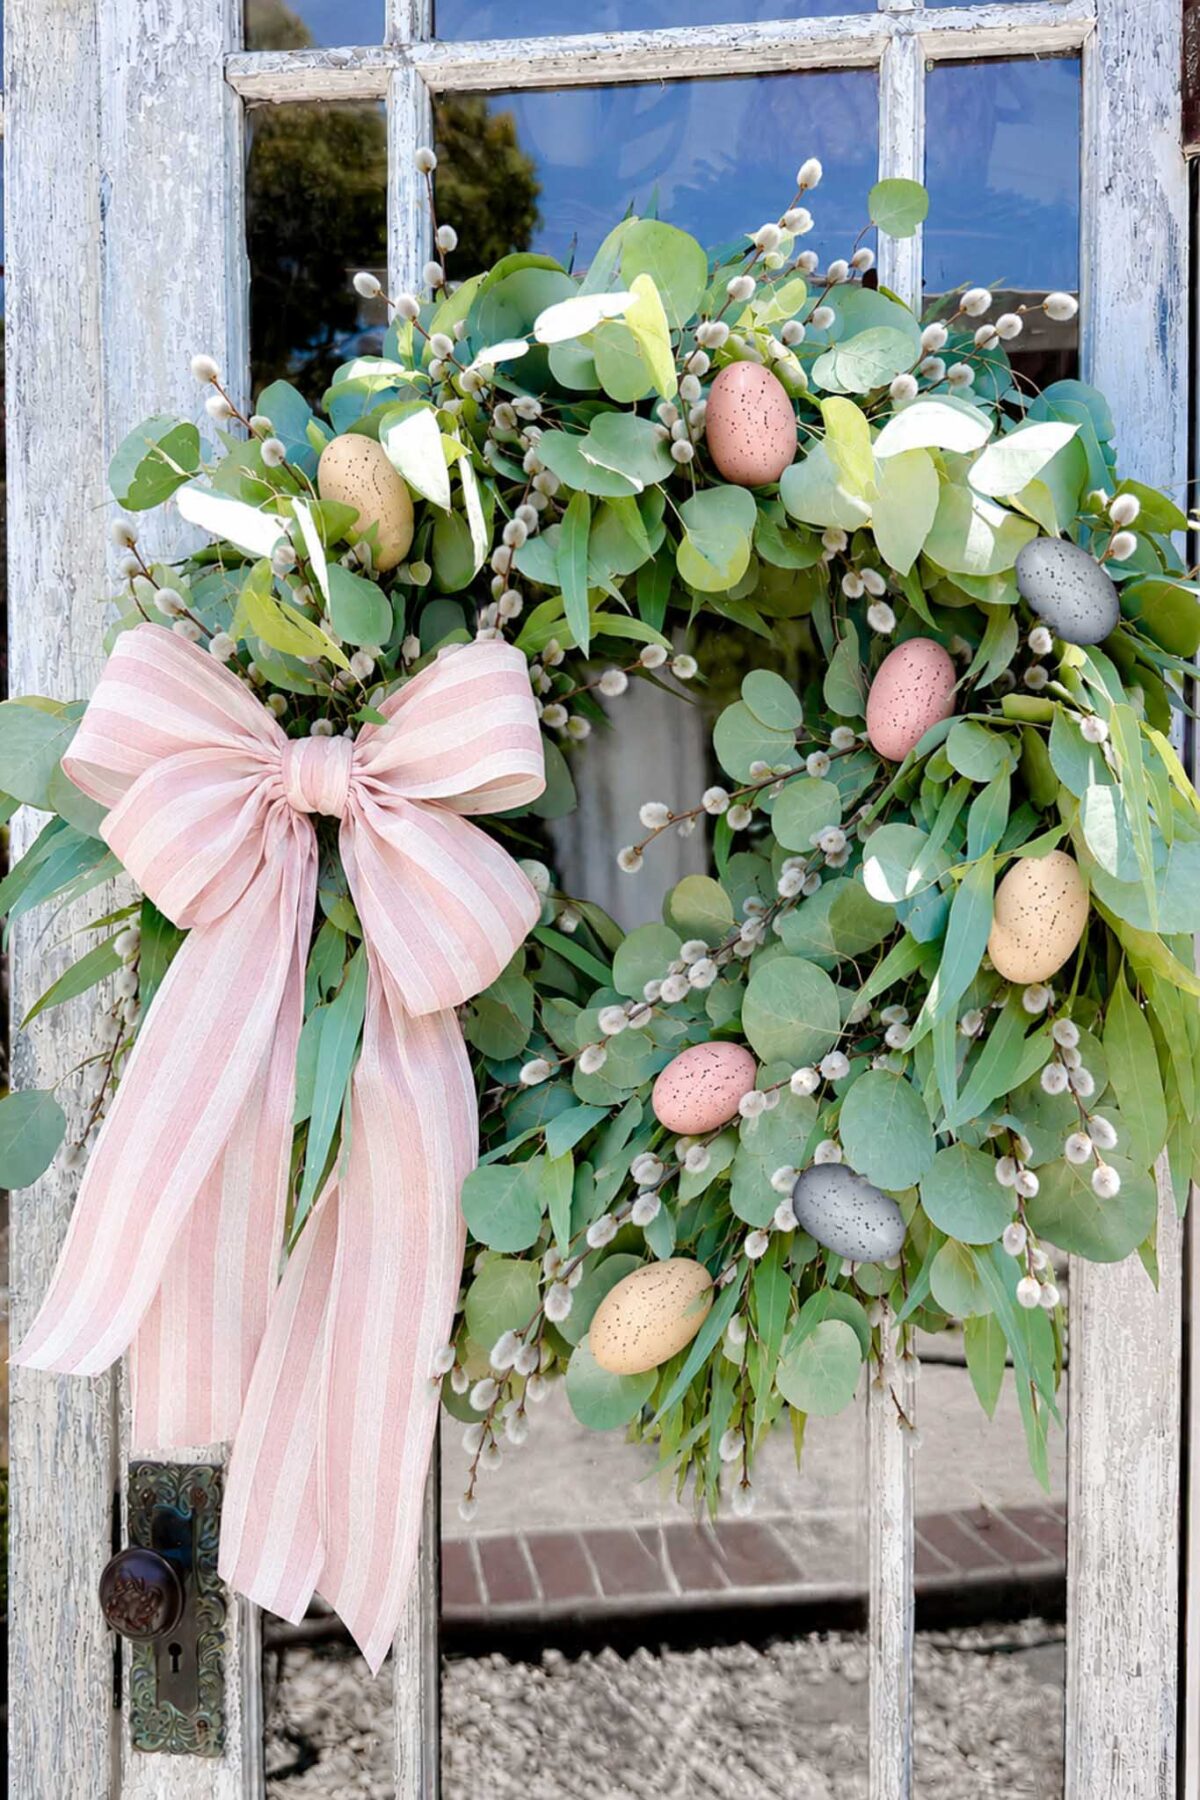
- Late Spring / Easter: a few pastel paper or wooden eggs tucked in among the eucalyptus and added pussy willow with a pretty striped linen bow.
- Fourth of July: a simple navy and cream striped grosgrain ribbon with a few stars and metallic streamers.
- Halloween: and a few black feathered crows, some corn stalks and a fun halloween mesh bow.
- Thanksgiving: dried wheat, pumpkins, pinecones and fall foliage, with a simple natural linen or burlap bow.
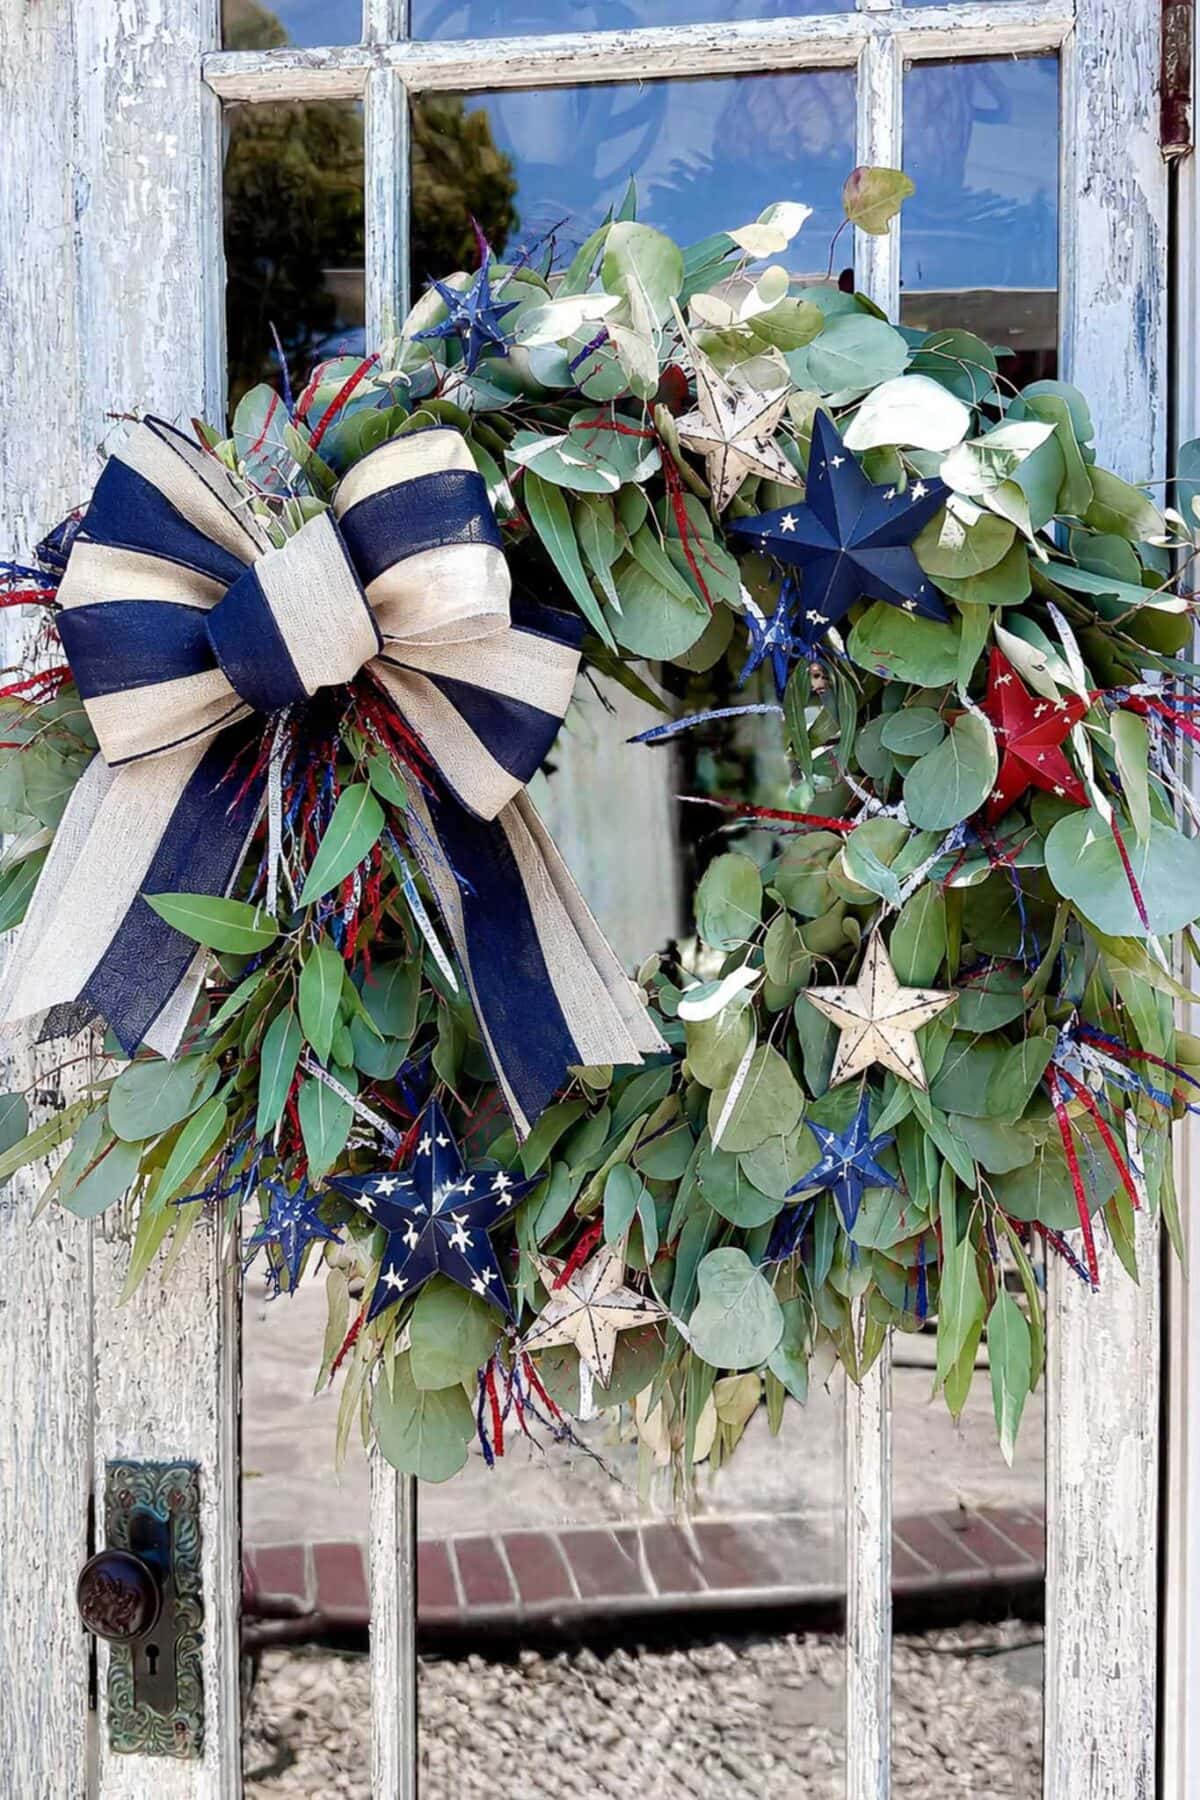
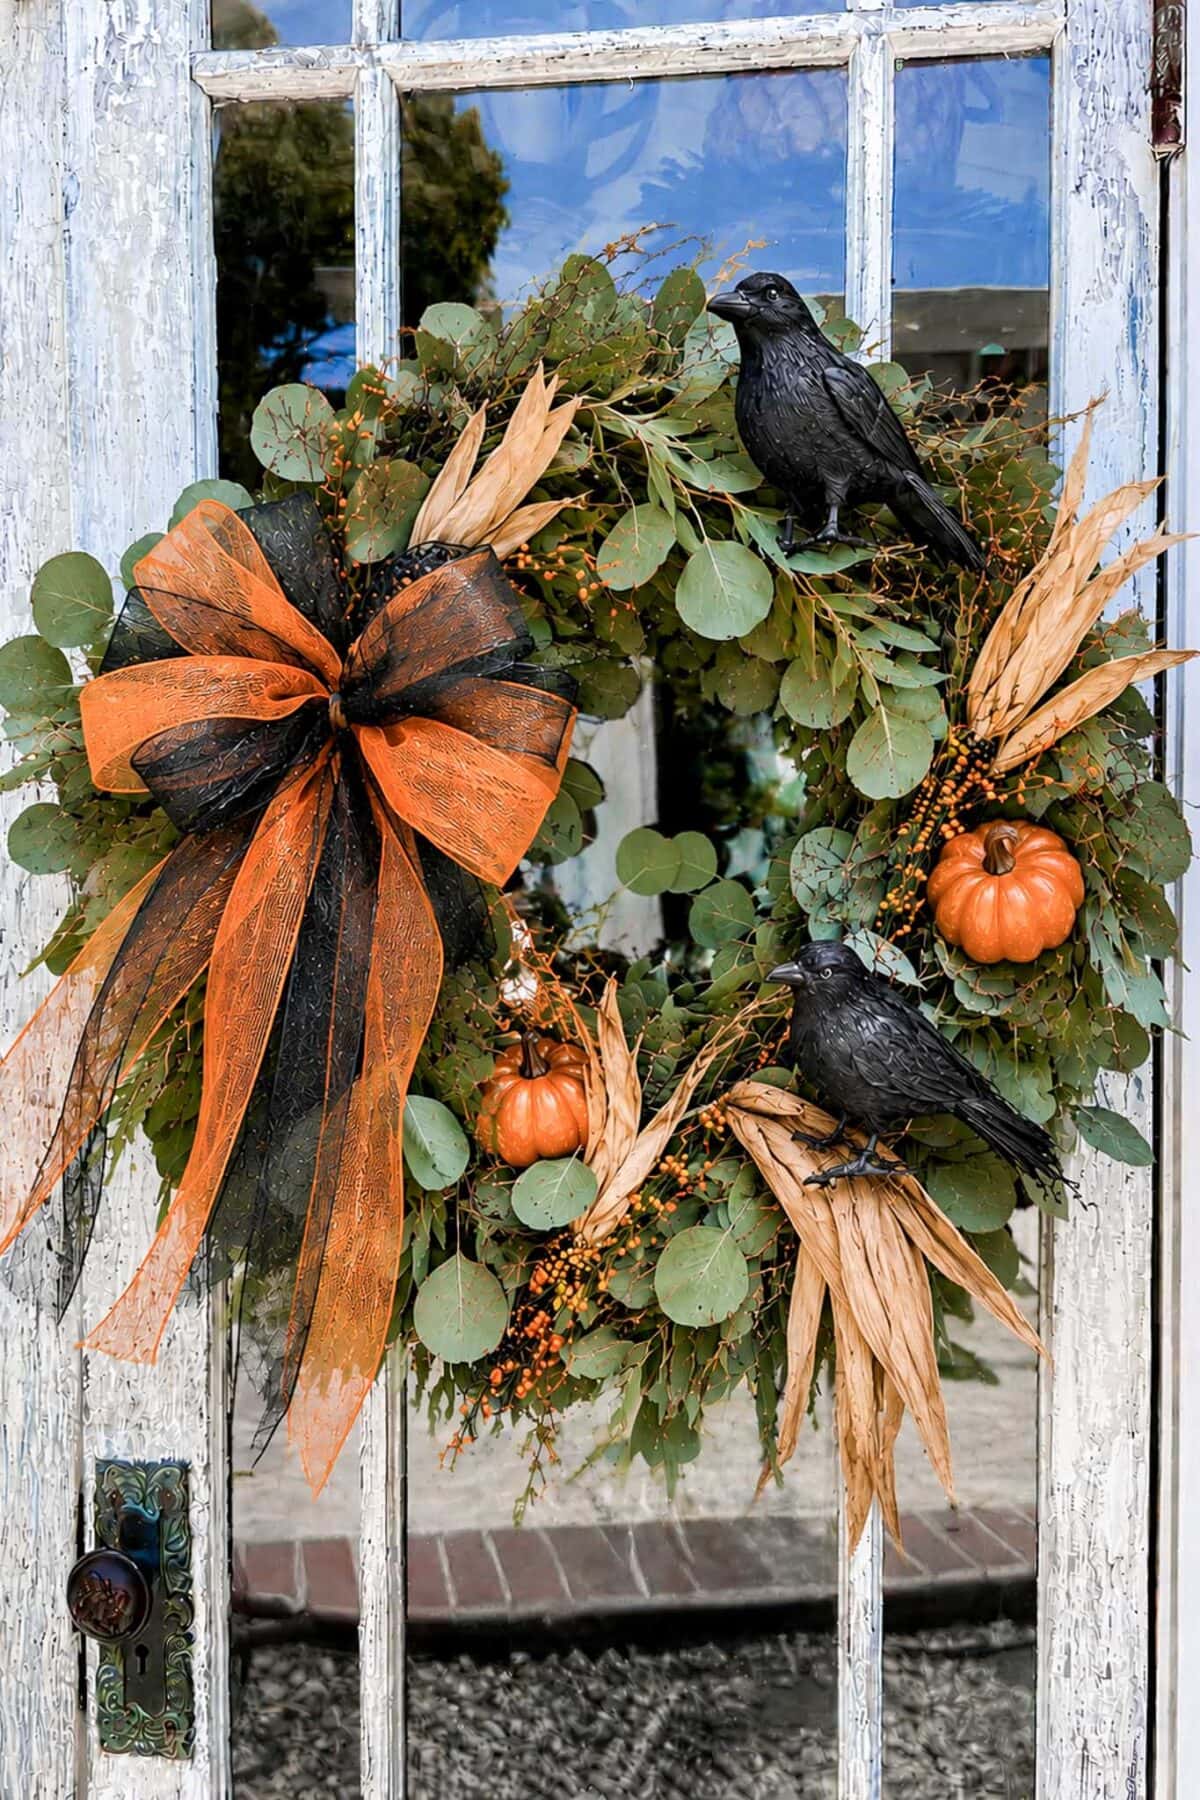
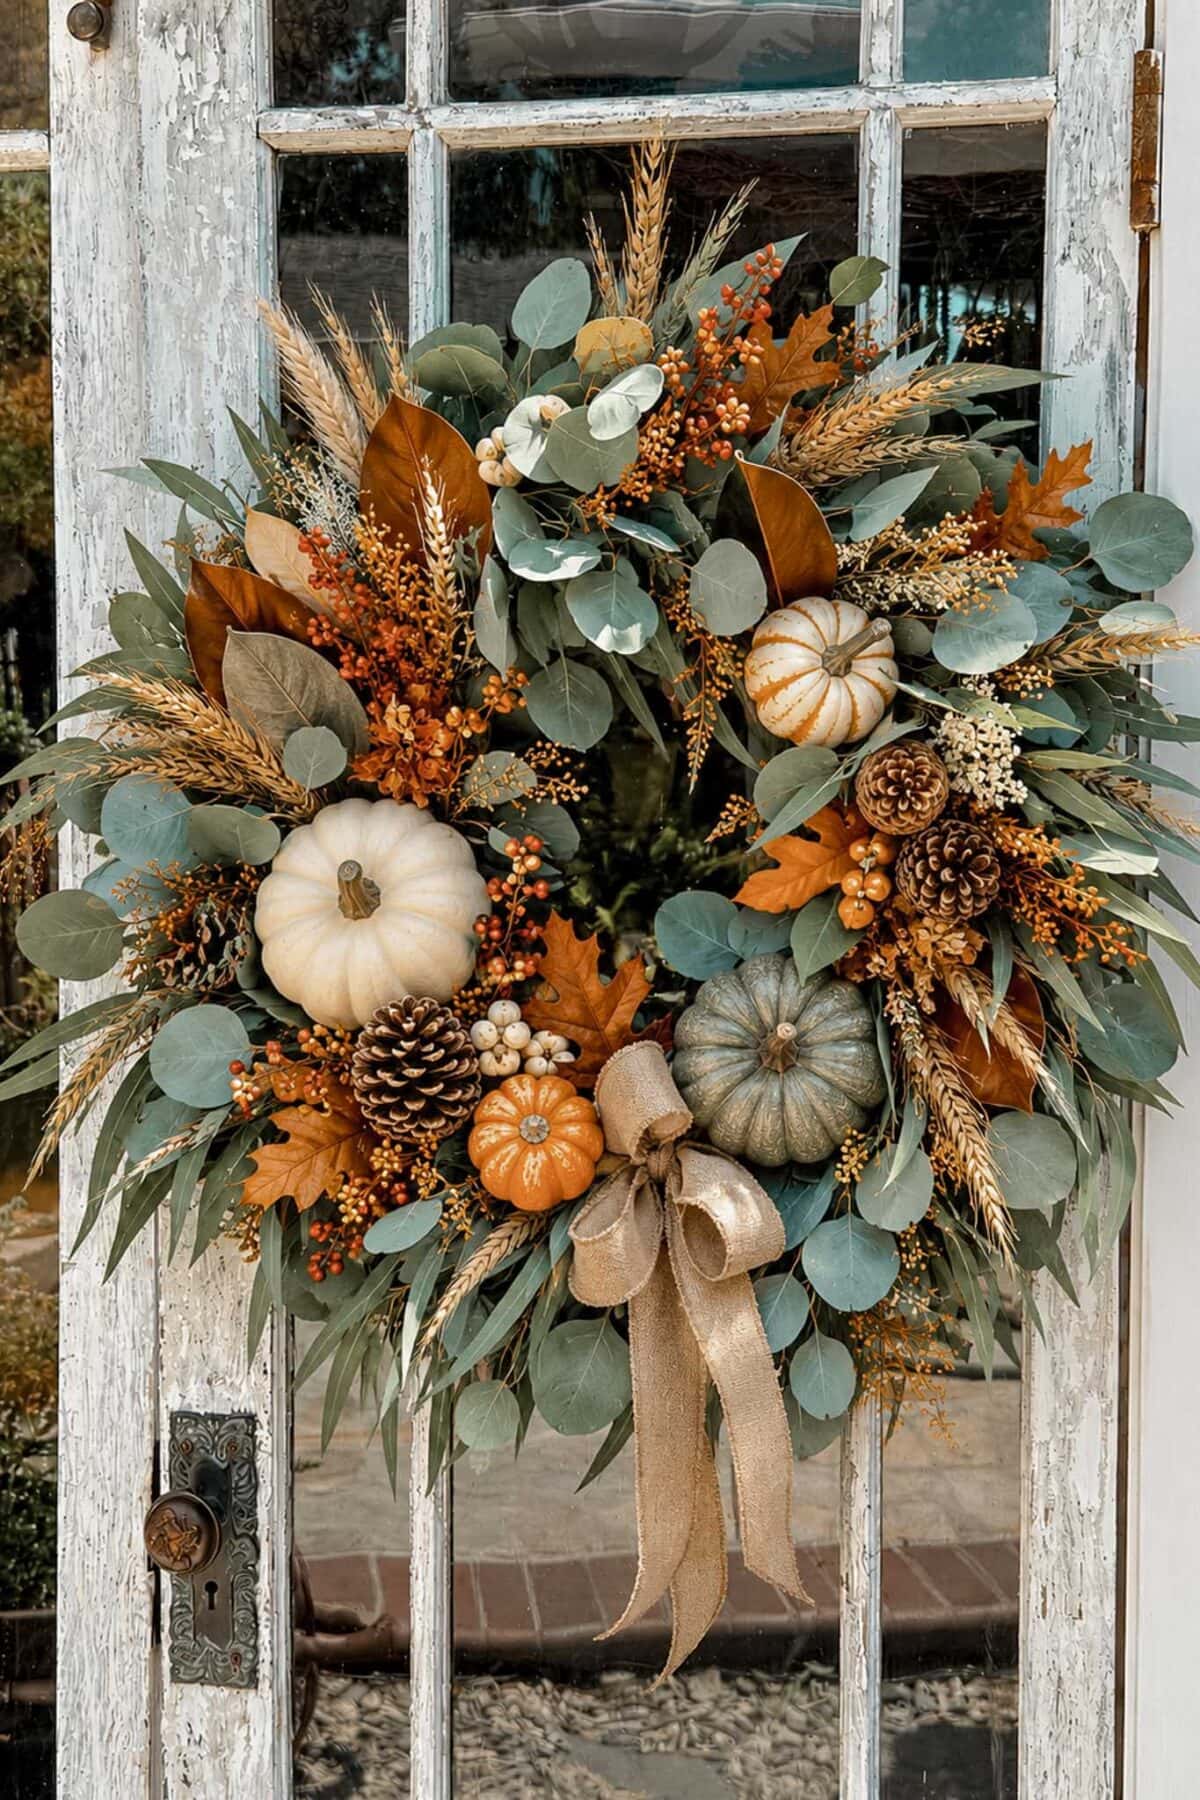
The eucalyptus itself will slowly dry on the door from fresh sage-green into a soft muted sage, which is a beautiful look in its own right and works for every season. Your base just gets more lovely as the year goes on.
How to Store Your Eucalyptus Wreath
When not in use, hang your eucalyptus wreath in a cool, dry closet or place it loosely in a paper grocery bag. Avoid plastic, which traps moisture and can cause the eucalyptus to break down faster.
Frequently Asked Questions
Does eucalyptus dry well on a wreath? Yes, that is one of the best things about it. Eucalyptus is one of the easiest greens to dry, and it holds its shape and color far better than most foliage. You do not have to do anything special. Just hang it and let it dry naturally right on the door.
Do I need to do anything to preserve the eucalyptus? Not really. If you want to keep that fresh green color a little longer, you can mist it with water every few days during the first week. After that, simply let it dry on its own. Many people actually prefer the soft, muted look it takes on once dried.
Where can I buy fresh eucalyptus if I can’t forage it? Your local florist or farmers market is the best place to start, and you can often find both silver dollar and seeded eucalyptus bundled together at Trader Joe’s, especially in spring. Grocery store floral departments frequently carry it, too.
What kind of base should I use for a eucalyptus wreath? A grapevine wreath base works beautifully. It is sturdy, gives you something to tuck and wire stems into, and the natural twigs help hold everything in place. I used an 18-inch base, but any size works. Just gather more eucalyptus for a larger wreath.
How do I attach the eucalyptus to the wreath? Work straight from a spool of floral wire so you never have to cut and restart. Lay small bundles against the base, wrap the wire a few times to secure, then add the next bundle slightly overlapping the last to hide the stems. Keep going all the way around.
Wrapping Up
With a grapevine base, two kinds of foraged eucalyptus, and a little overlapping patience, you end up with a wreath that feels gathered, natural, and genuinely beautiful. And because it is just a simple eucalyptus base underneath, you can restyle it again and again.
Queen Anne’s lace in spring, lemons and lavender in summer, a rust velvet bow for fall, and a deep burgundy bow for Christmas, all on the same wreath.
Once you have made one, I have a feeling you will be looking at every wreath base a little differently. If you love this wreath project, be sure to check out more of my DIY wreaths here.
Happy crafting!


Did you make this craft?
We would love to see what you have created, so mention us @wmdesignhouse or tag us using #wmdesignhouse so we can see your creations!
More about me!

Hello, I’m Wendy – a dedicated homemaker with a deep passion for decorating, gardening, cooking, and crafting. I find joy in harmonizing beautiful elements to fashion a space that is both comfortable and inspiring. I will help you create a beautiful home, one project at a time.