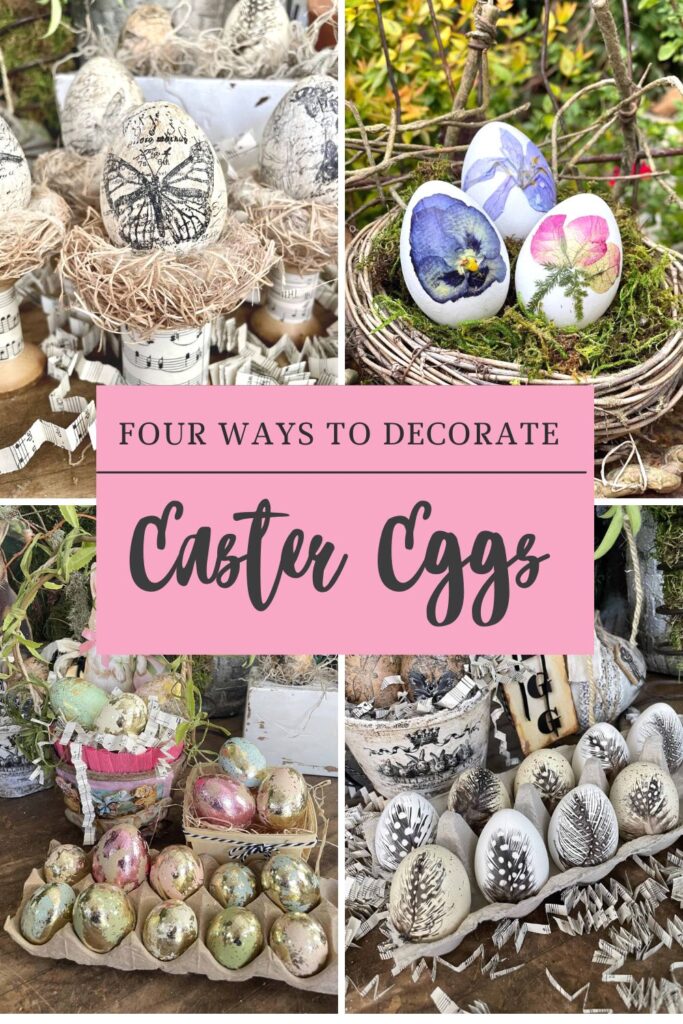
Adult Easter Egg Ideas; Four of the Easiest Ways to Decorate Eggs
Are you looking for some Adult Easter egg ideas? Well, I have you covered.
Today, I am going to share not one but four different ways adults can decorate Easter eggs. I have used all faux eggs so that you can enjoy these eggs year after year.
Each of these Easter egg crafts is quick and easy. Just be sure to have your supplies on hand, and you will be ready to go.
I have linked all the underlined supplies you need to make it convenient. I receive a small commission if you purchase through my links. However, the cost is the same as if you were to buy direct from Amazon. This is just a small way for me to support my blog.
So, it’s time to make our DIY Easter eggs. Today I share four DIY adult easter egg ideas.
- Dried flowered eggs
- Feathers eggs
- Gold foiled eggs
- Hand Stamped eggs
This post may contain affiliate links that I make a small commission from.
Supply list to make all four adult Easter egg ideas
- Faux eggs of your choice
- Dried flowers (see below for directions on how to dry flowers)
- Feathers of your choice
- Mod Podge
- Gold Foil in gold
- Gold foil in pink
- Gold Foil adhesive
- White chalk paint
- Dark wax
- Clear wax
- Small piece of sponge to apply adhesive
- Paintbrush for Mod Podge
- Dry chip brush for gold foil process
- Rubber stamps, Botanical, handwriting wooden stamps, wooden bird stamp
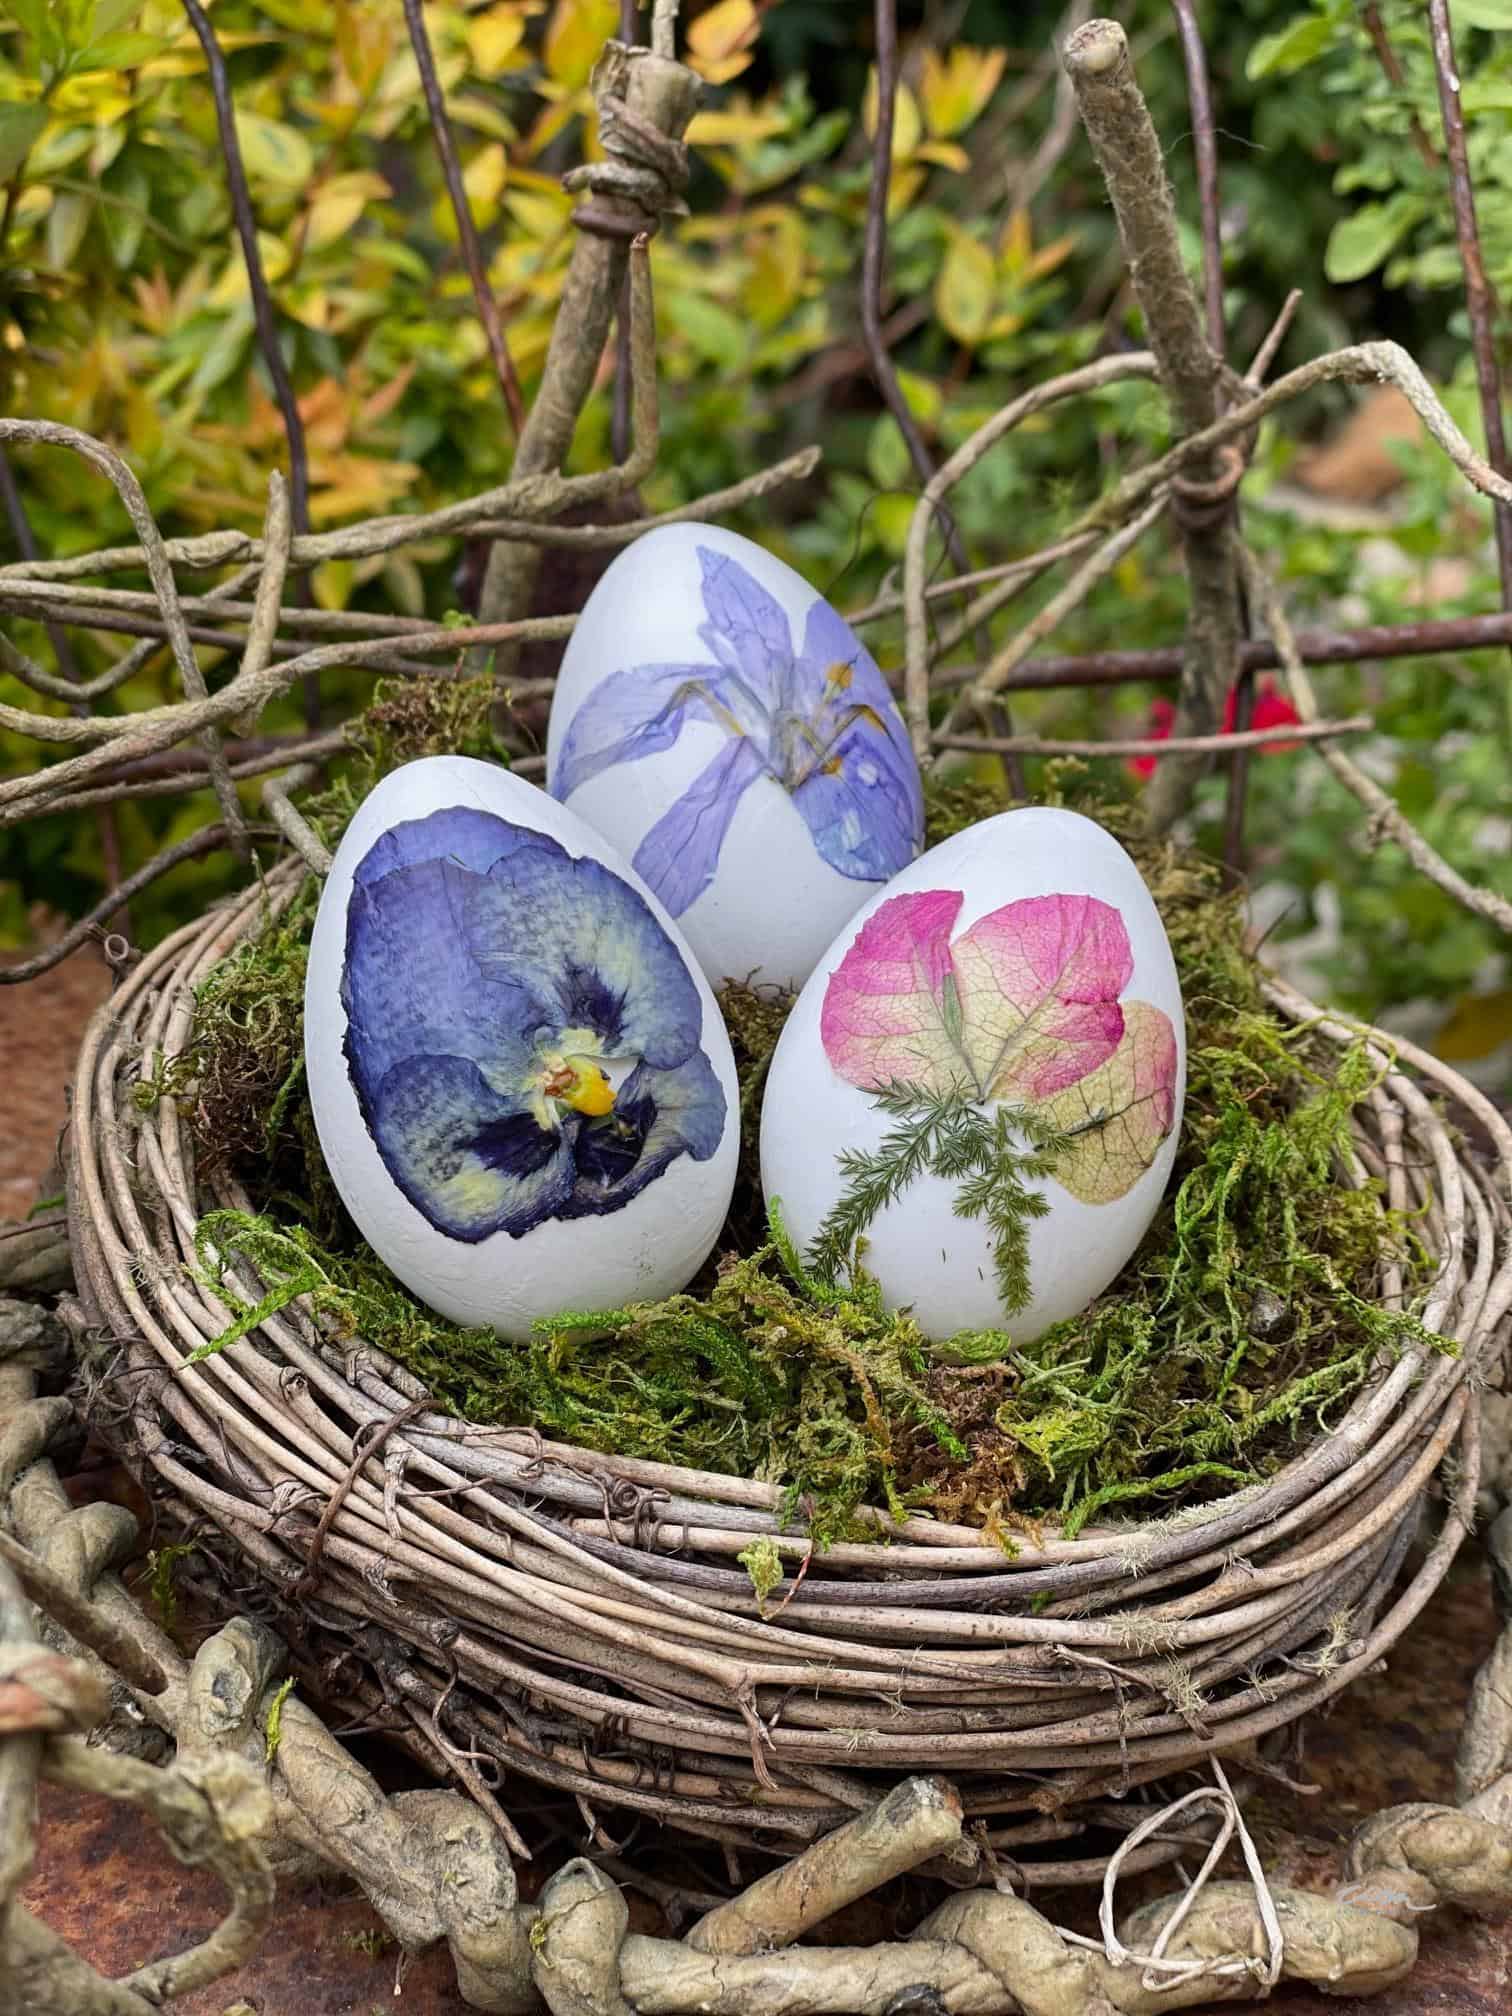
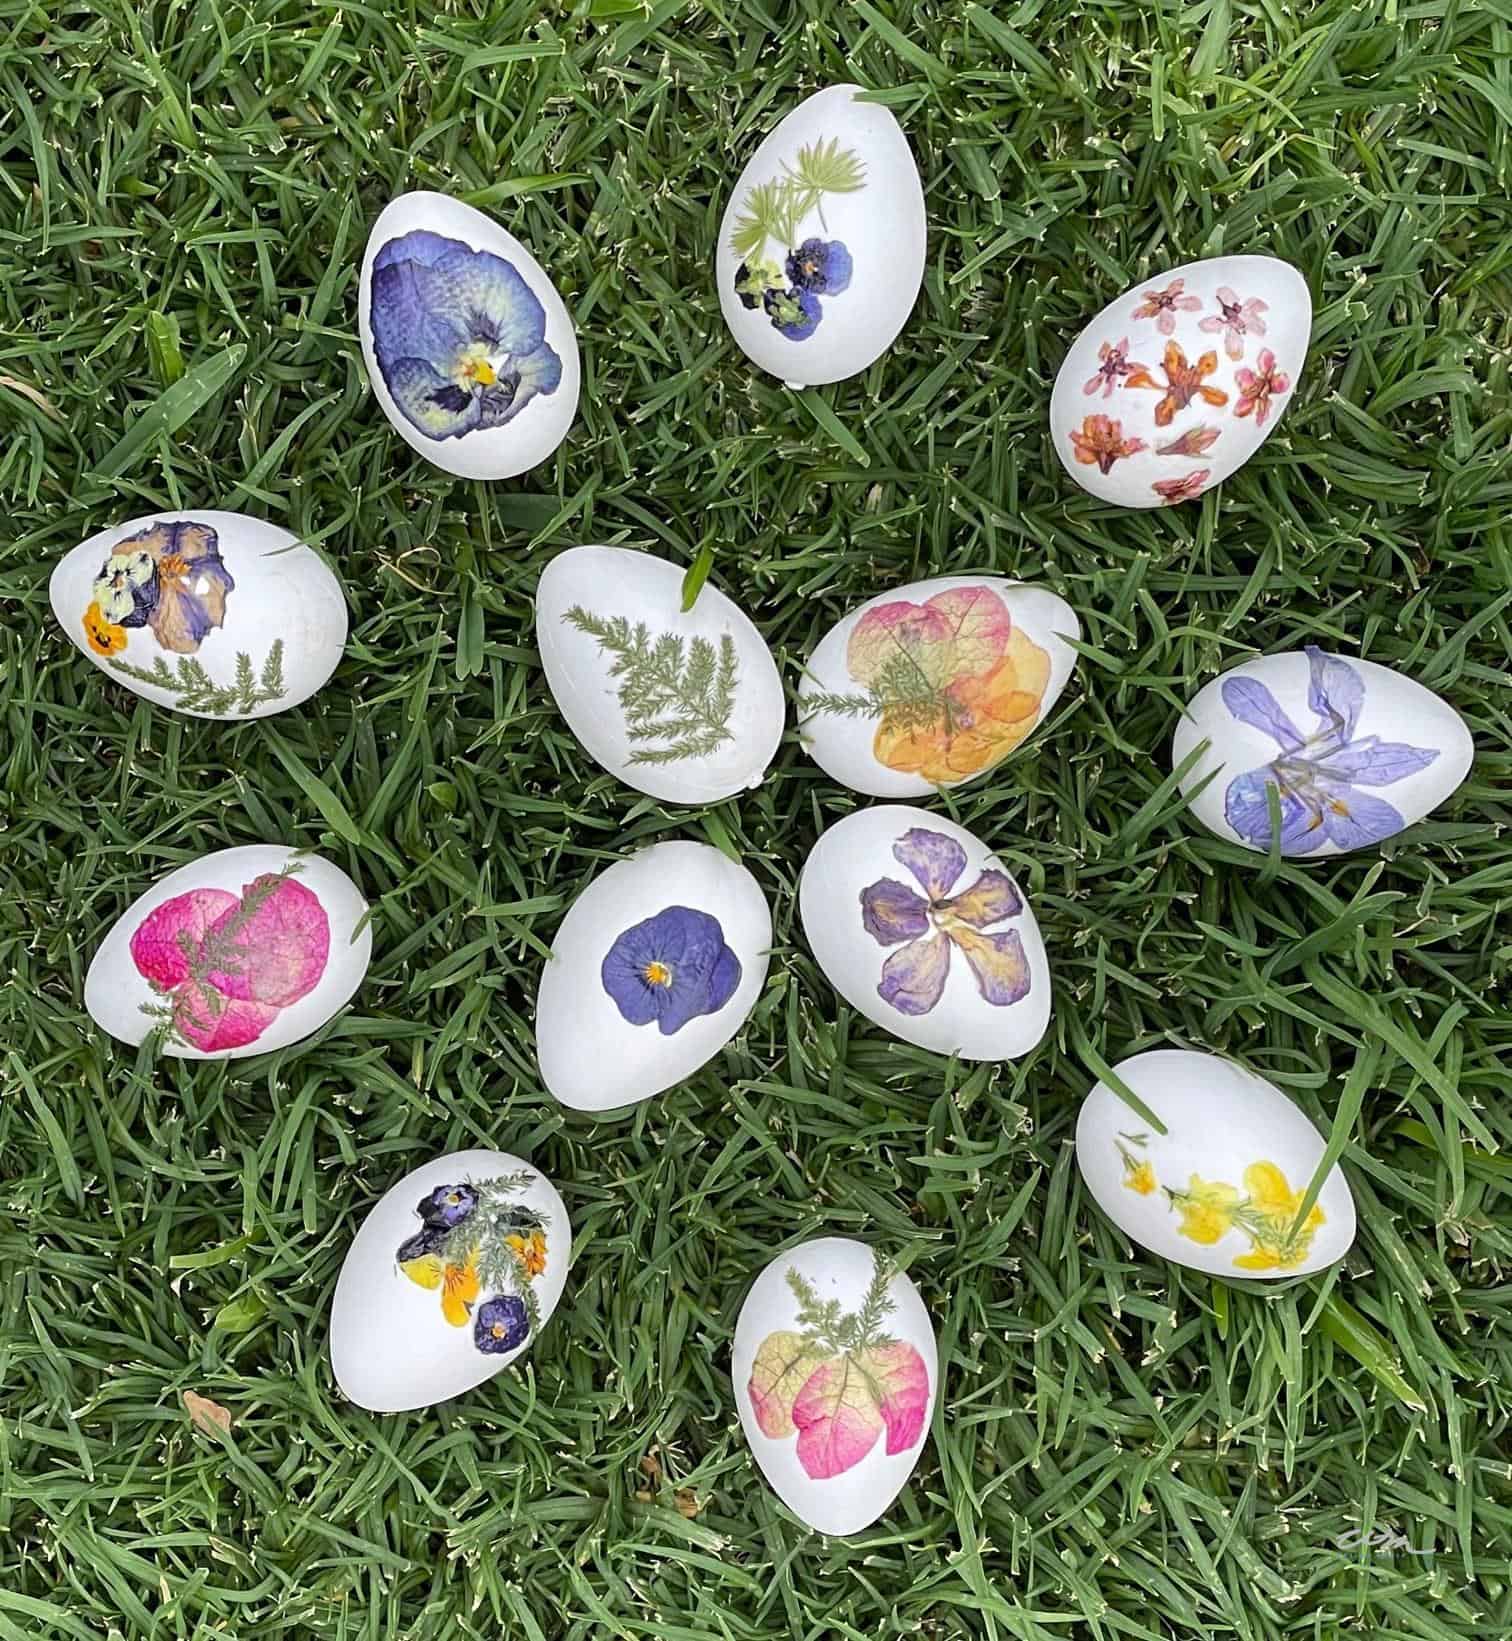
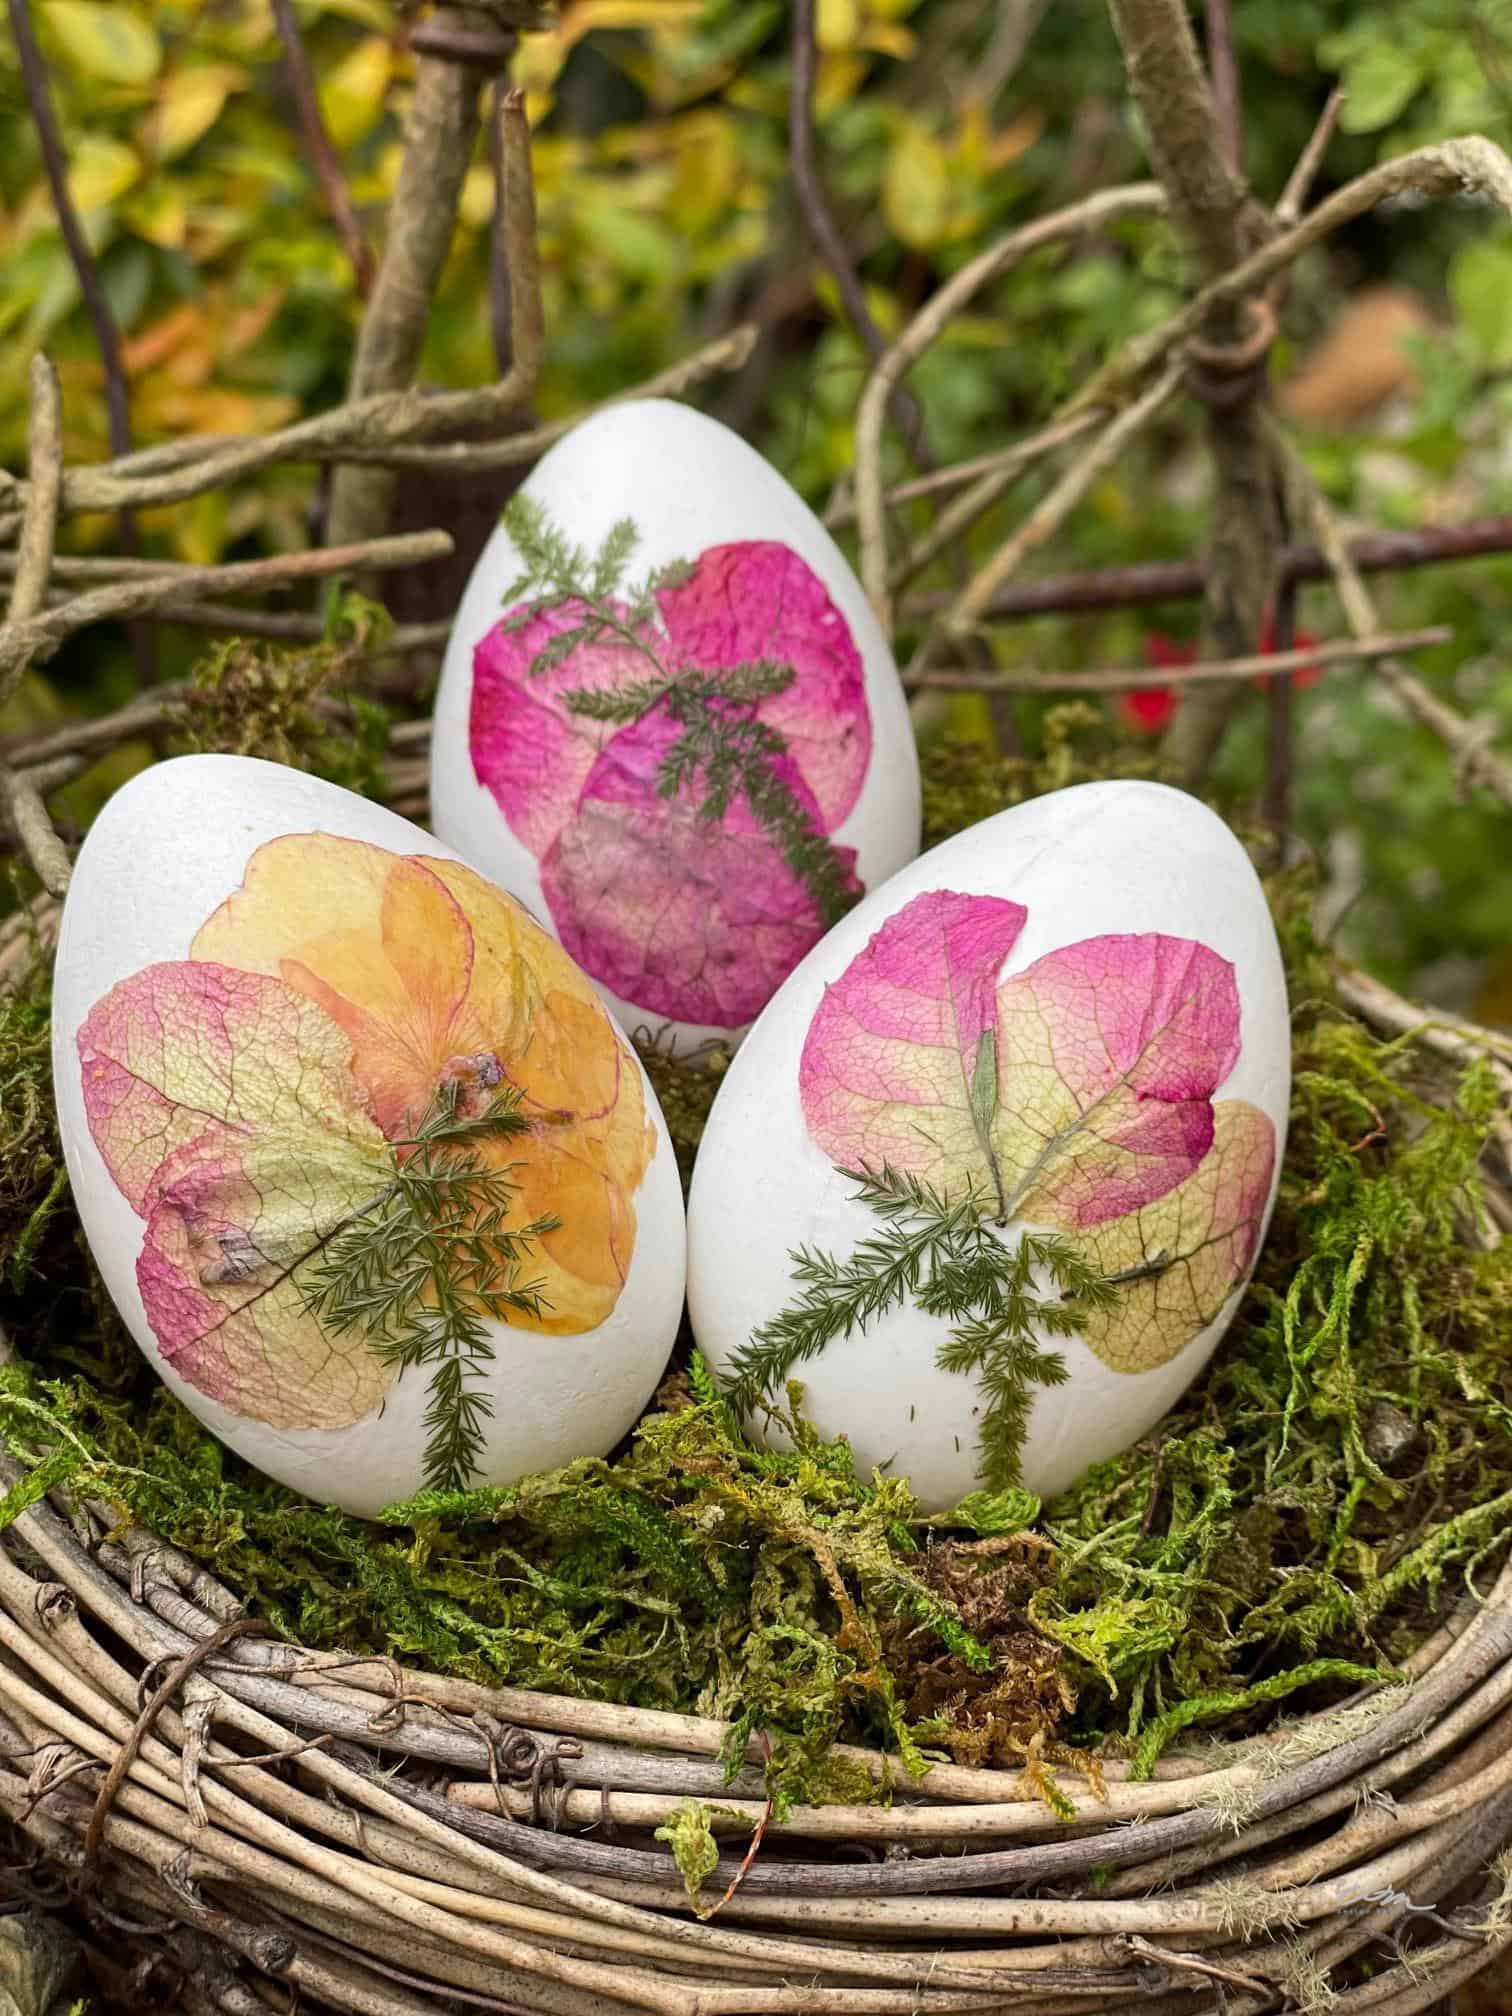
Directions for making dried flower eggs
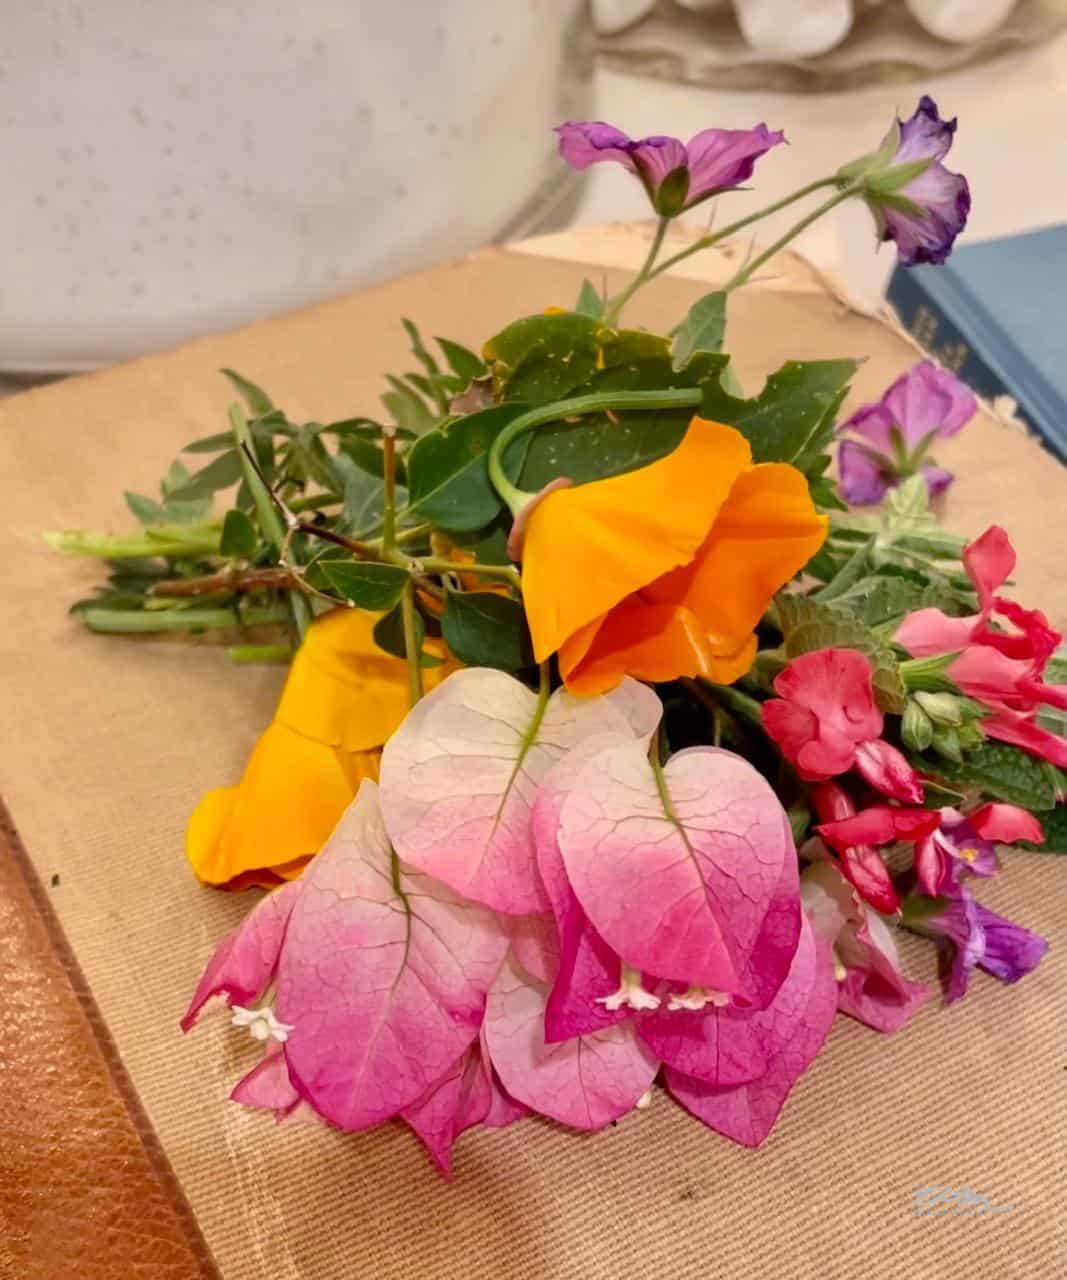
You will need an assortment of fresh flowers. I pick them along my walk (shhh, don’t tell anybody) and several from my yard.
I used the following types of flowers:
- Pansies
- Bougainvillea
- Iris
- Poppies
- Fern
- A few other small flowers
How to Dry Flowers
There are several ways to dry flowers.
This is likely the most popular way to press flowers, and it is also the easiest.
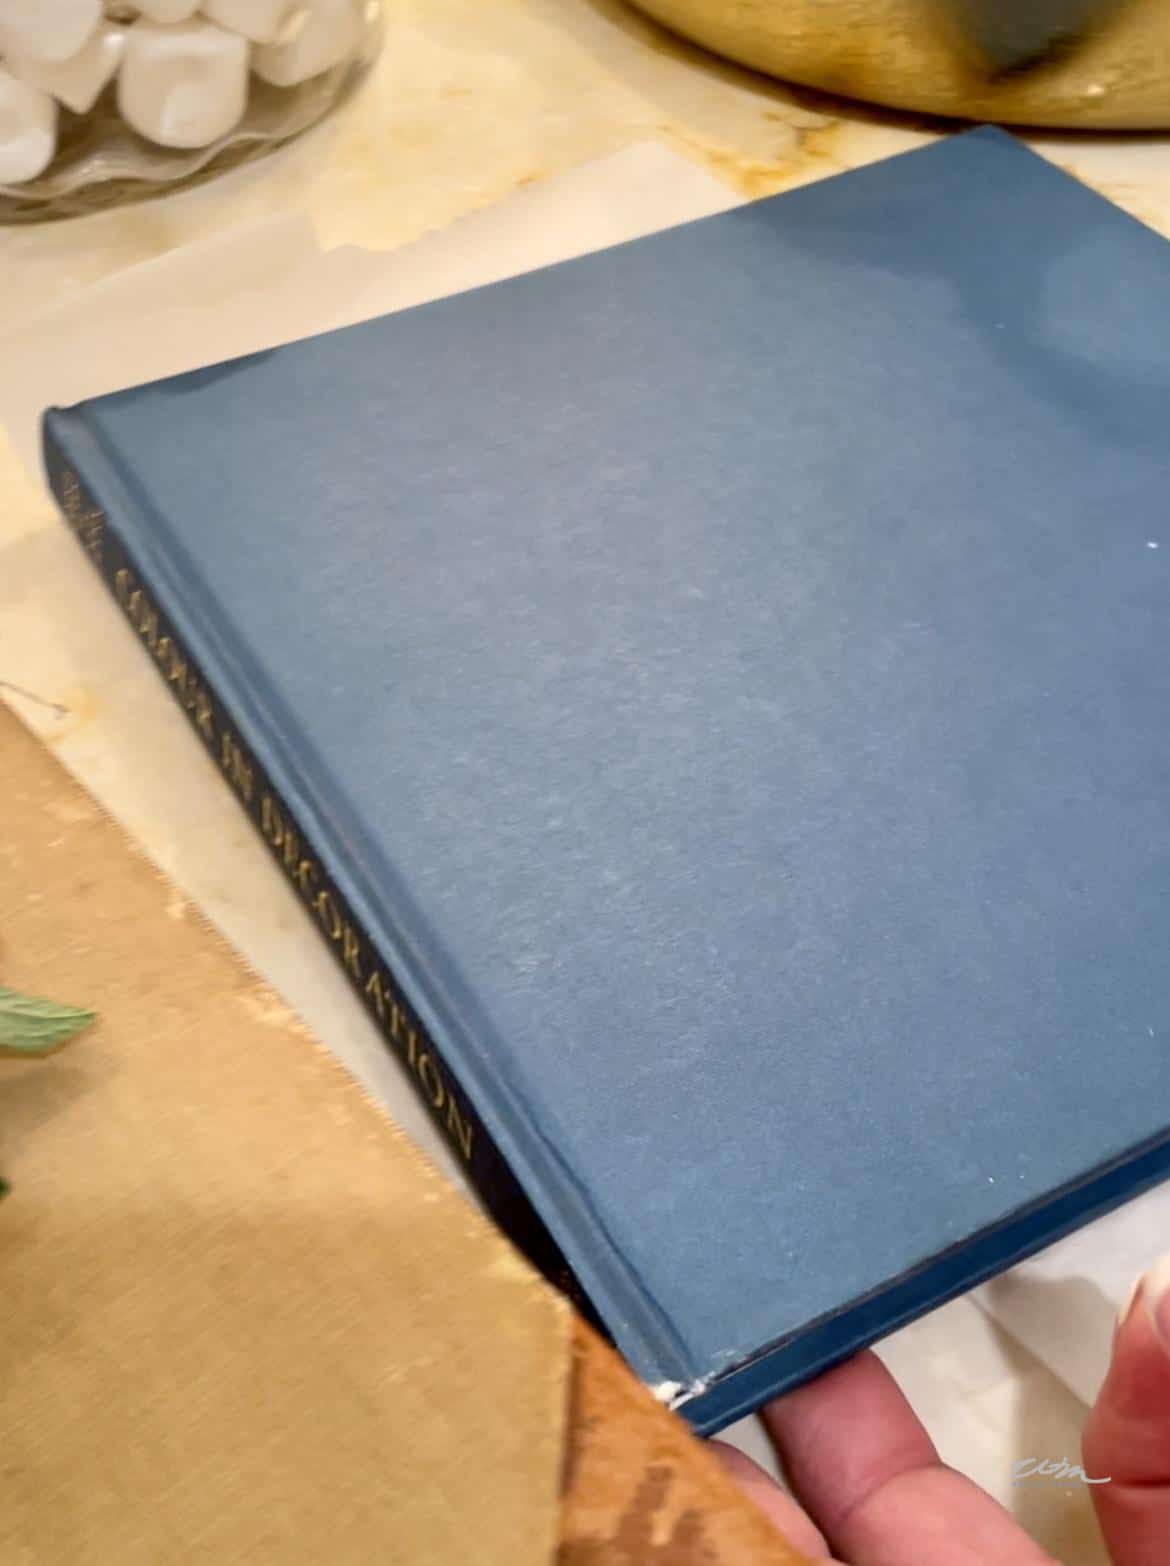
- First, choose the heaviest book you can find, such as a dictionary.
- Place the flower between two pieces of waxed paper and place them underneath the book on a hard surface. Depending on the size of the book, you can press multiple flowers at once. However, be sure to space them out to not touch each other.
- Use more books, or perhaps a brick, to weigh down the books. Be sure not to disturb the arrangement of the flowers upon closing.
- Let them dry for 4-7 days. When removing, use a pair of tweezers, or very carefully use your fingers, as a completely dry flower is delicate, and you don’t want them to break.
- Try different types of flowers. Some work better than others. For example, avoid woody flowers with a large bulky center or stem.
There are other ways to dry flowers, such as using an actual flower press or an iron to dry and flatten the flowers.
You can even use a microwave to dry flowers. You can purchase a microwave flower press here or easily make one yourself.
- Use two ceramic tiles and rubber bands to hold them together.
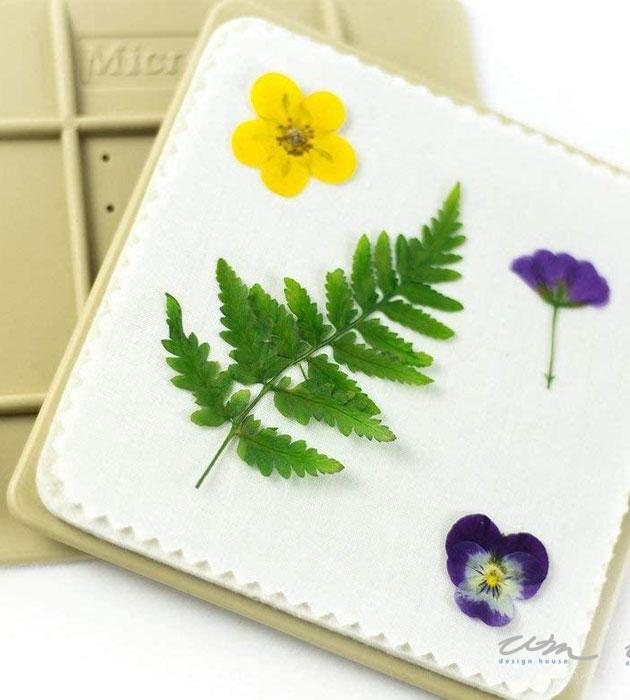
- Add a piece of cardboard inside each tile and waxed paper when using a homemade press with tiles. Finally, place the flower in the middle and sandwich everything together.
- Using a low temperature (a high-heat setting can turn the flowers brown), heat for 30 seconds, and repeat this process until they are dry and flat. Allowing everything to cool between each heat cycle.
- Complete the process using the book method or the microwave flower press to dry your flowers. They should dry within two days.
Now that you have dried flowers, it is time to apply them to your eggs. You will love how simple this process is.
Applying the dried flowers to eggs
- Apply some matte mod podge to the egg where you want the flowers to adhere.
- Apply some Mod Podge to the back of your flower.
- Pick up the flower and apply it to the egg using your brush.
- Note that eggs have curves, so you must use pliable flowers.
- Let them dry until the Mod Podge is clear and not tacky.
- You can add a second layer of Mod Podge once the first layer has dried.

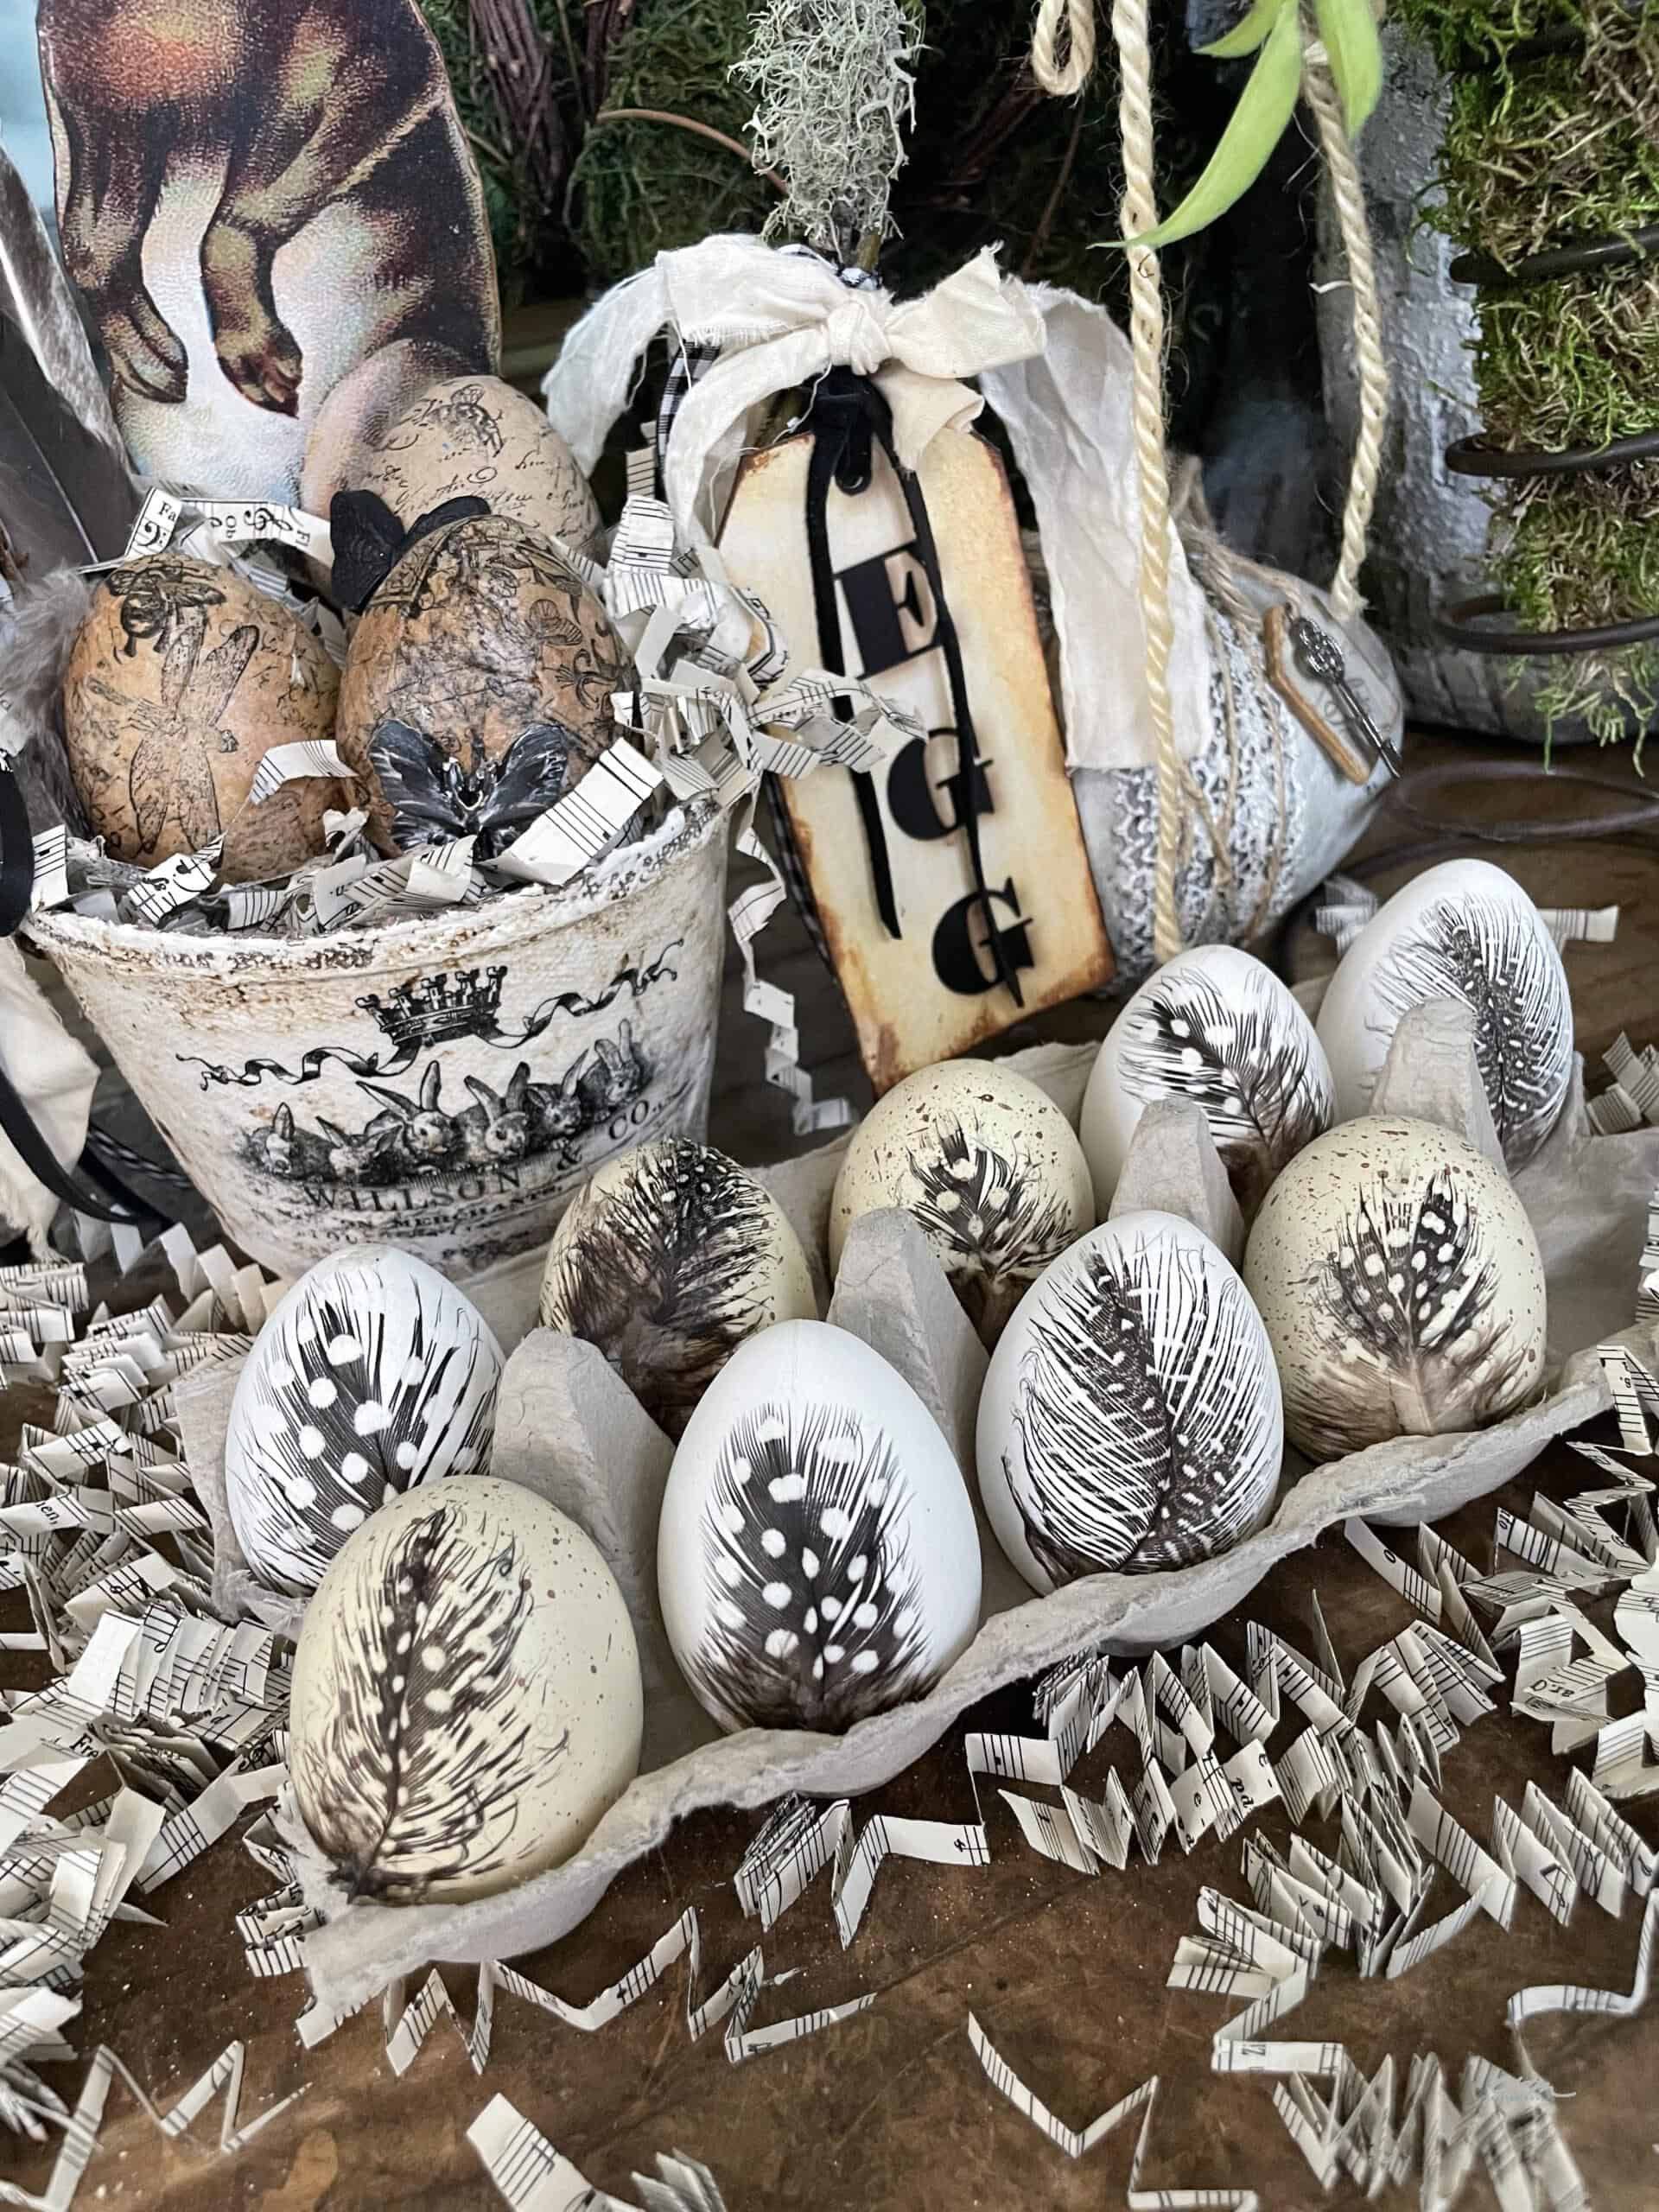
How to make feathered Easter eggs
These feathered eggs are indeed the easiest adult egg decorating idea.
You will use the same process to apply the feathers as the dried flowers to the Easter eggs.
Directions to make feathered Easter eggs
- First, paint a thin coat of Mod Podge onto the egg where you want to place the feather.
- Place the feather onto the egg, and then brush a coat of Mod Podge over the feather with your brush.
- Be sure you brush in the direction of the feather.
- Let the eggs dry, and then apply a second coat of Mod Podge.
- Let the eggs dry overnight.
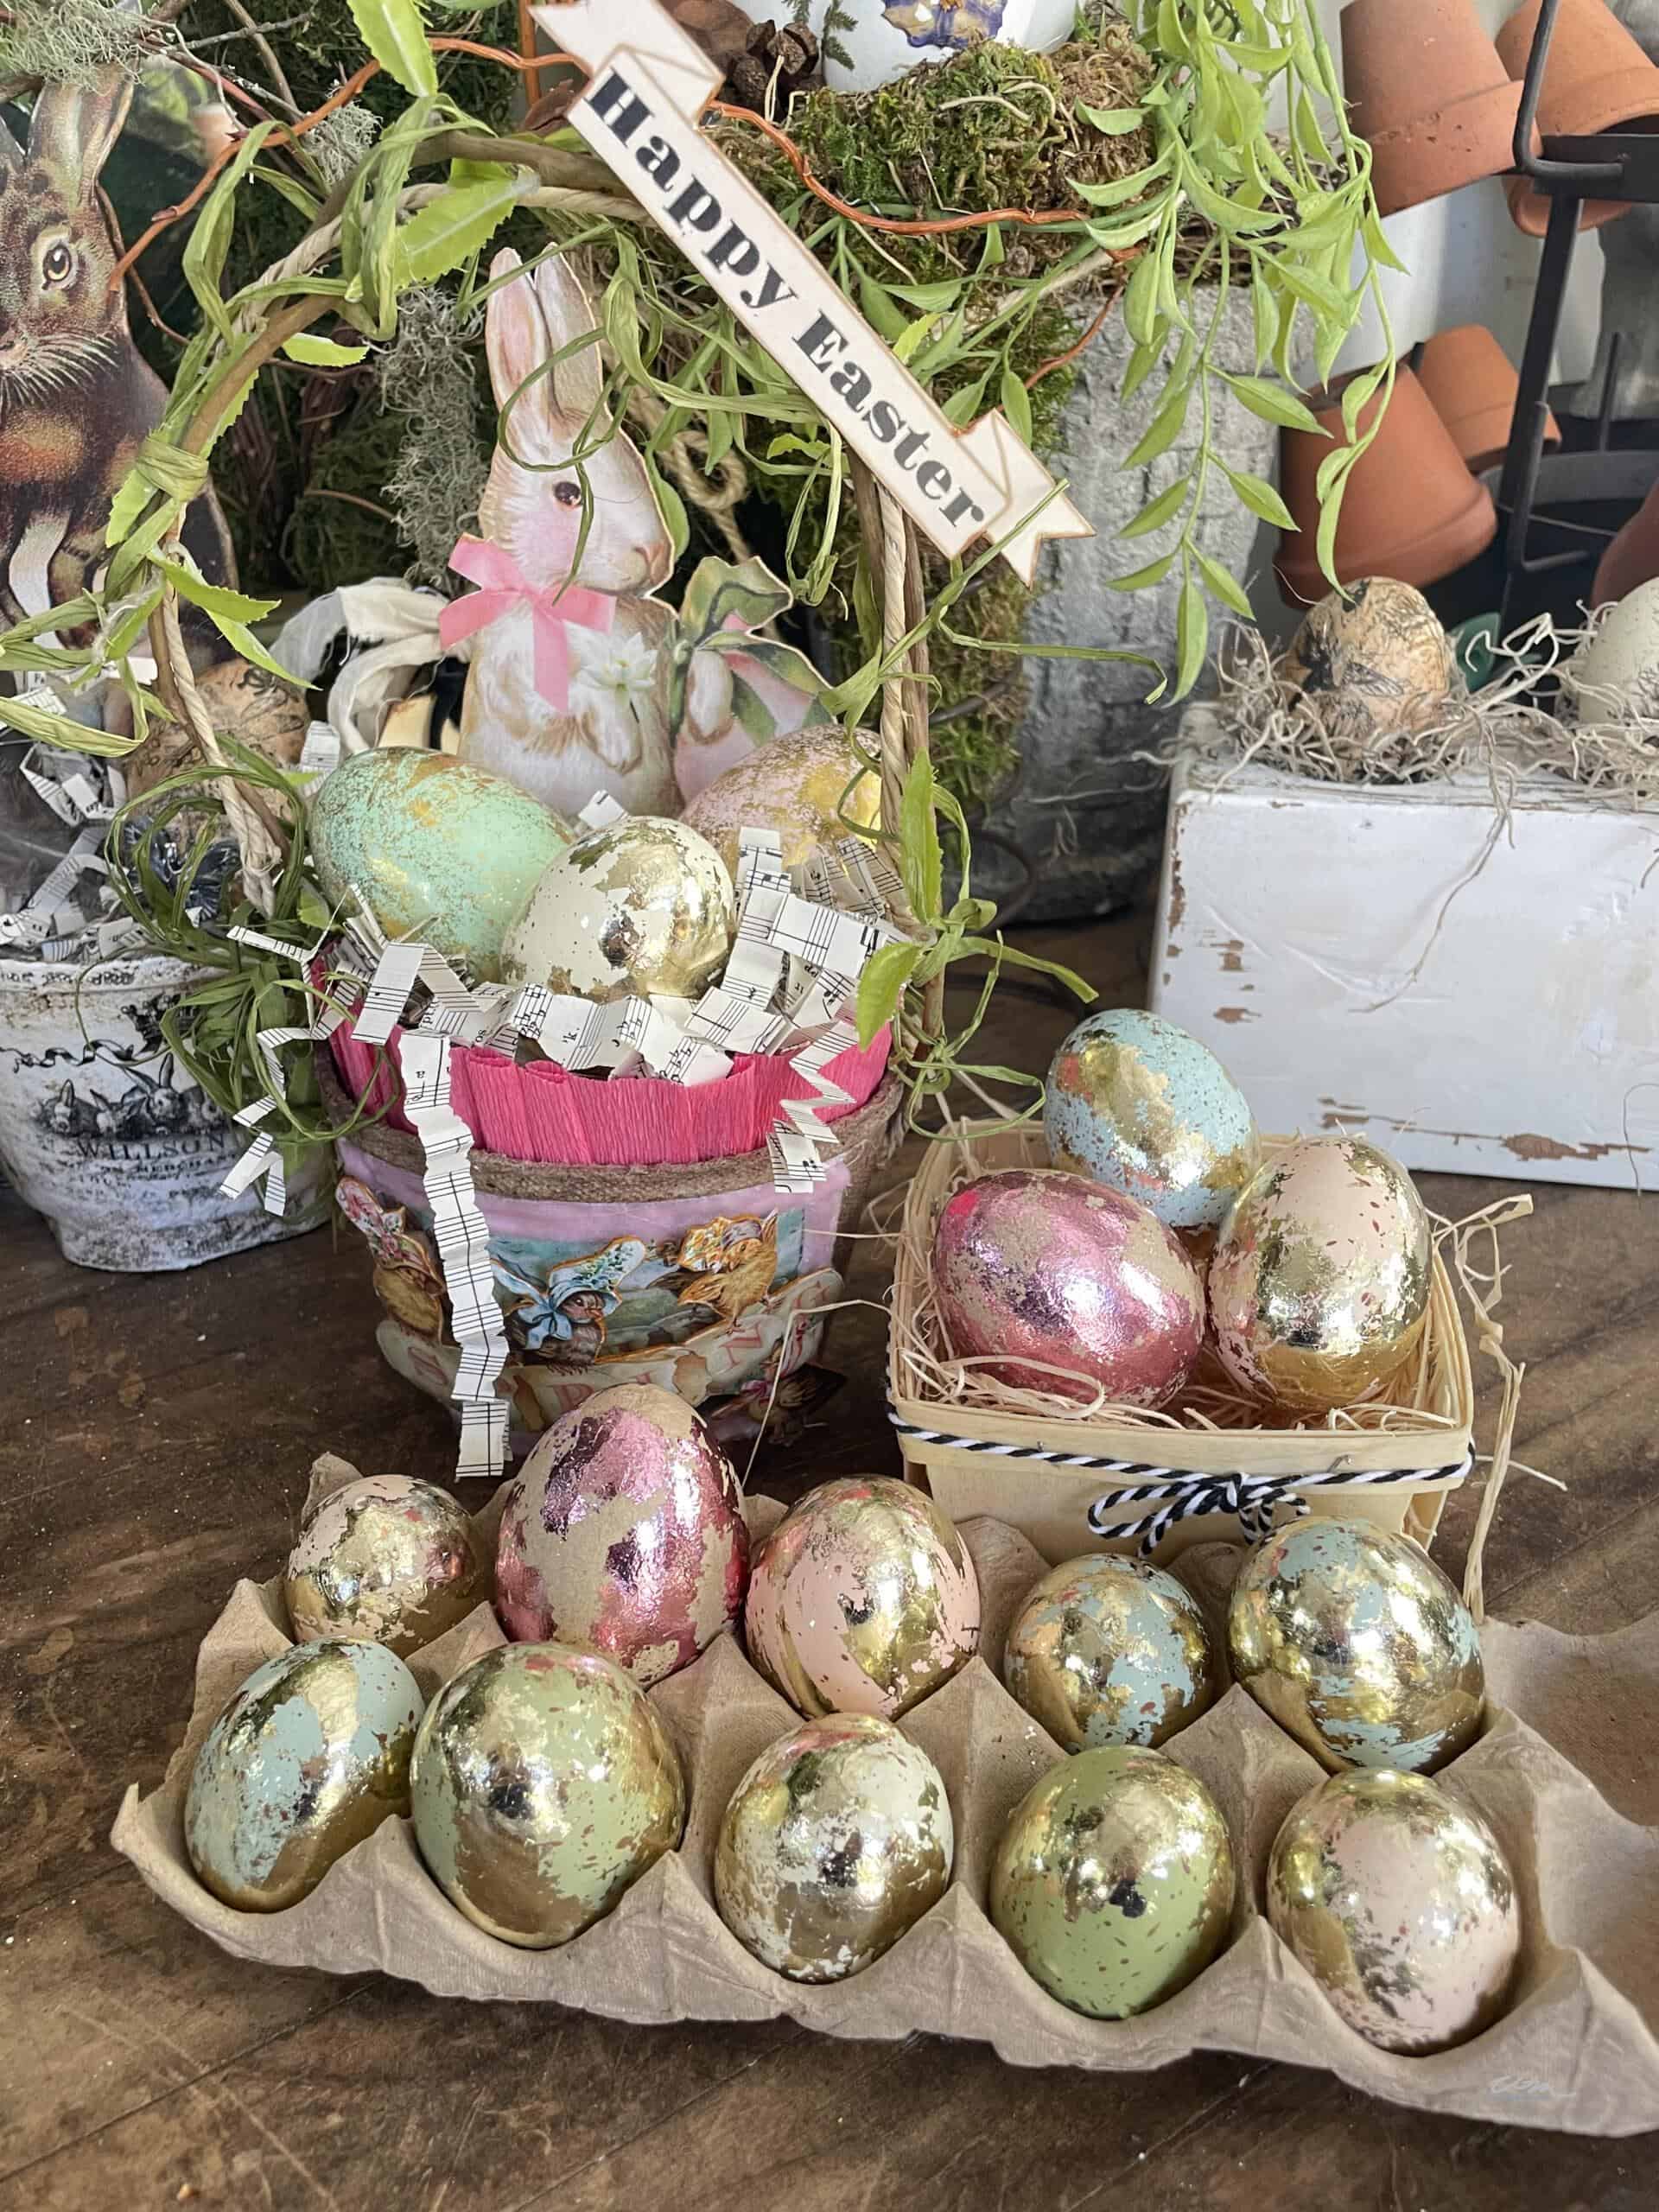
Gold foiled Easter egg craft for adults.
This is a fun and fast craft, but it gets messy.
I love how elegant these eggs look.
Directions to gold foil Easter eggs
- Use speckled eggs I found here and a few brown paper mache eggs.
- Using a sponge, I put some adhesive onto it and blotted it onto the egg where I wanted the gold foil to adhere.
- I did not cover the entire egg as I wanted you to see parts of the original egg.
- Remember, you can always add more, but you can’t remove it.
- Let the adhesive dry for about 20-30 minutes. You want the adhesive to be dry but tacky.
- Place the sheet of gold foil onto the egg and wrap it around. You most likely will need two sheets per egg.
- Now comes the messy part. Take a dry chip brush and brush off the excess gold foil.
- This process is called burnishing and will leave your gold foil smooth and shiny.
- Go to my YouTube channel WM Design House for a full tutorial.
Hand-stamped Easter egg decorating ideas for adults
These Easter eggs are one of my favorite Adult Easter egg ideas.
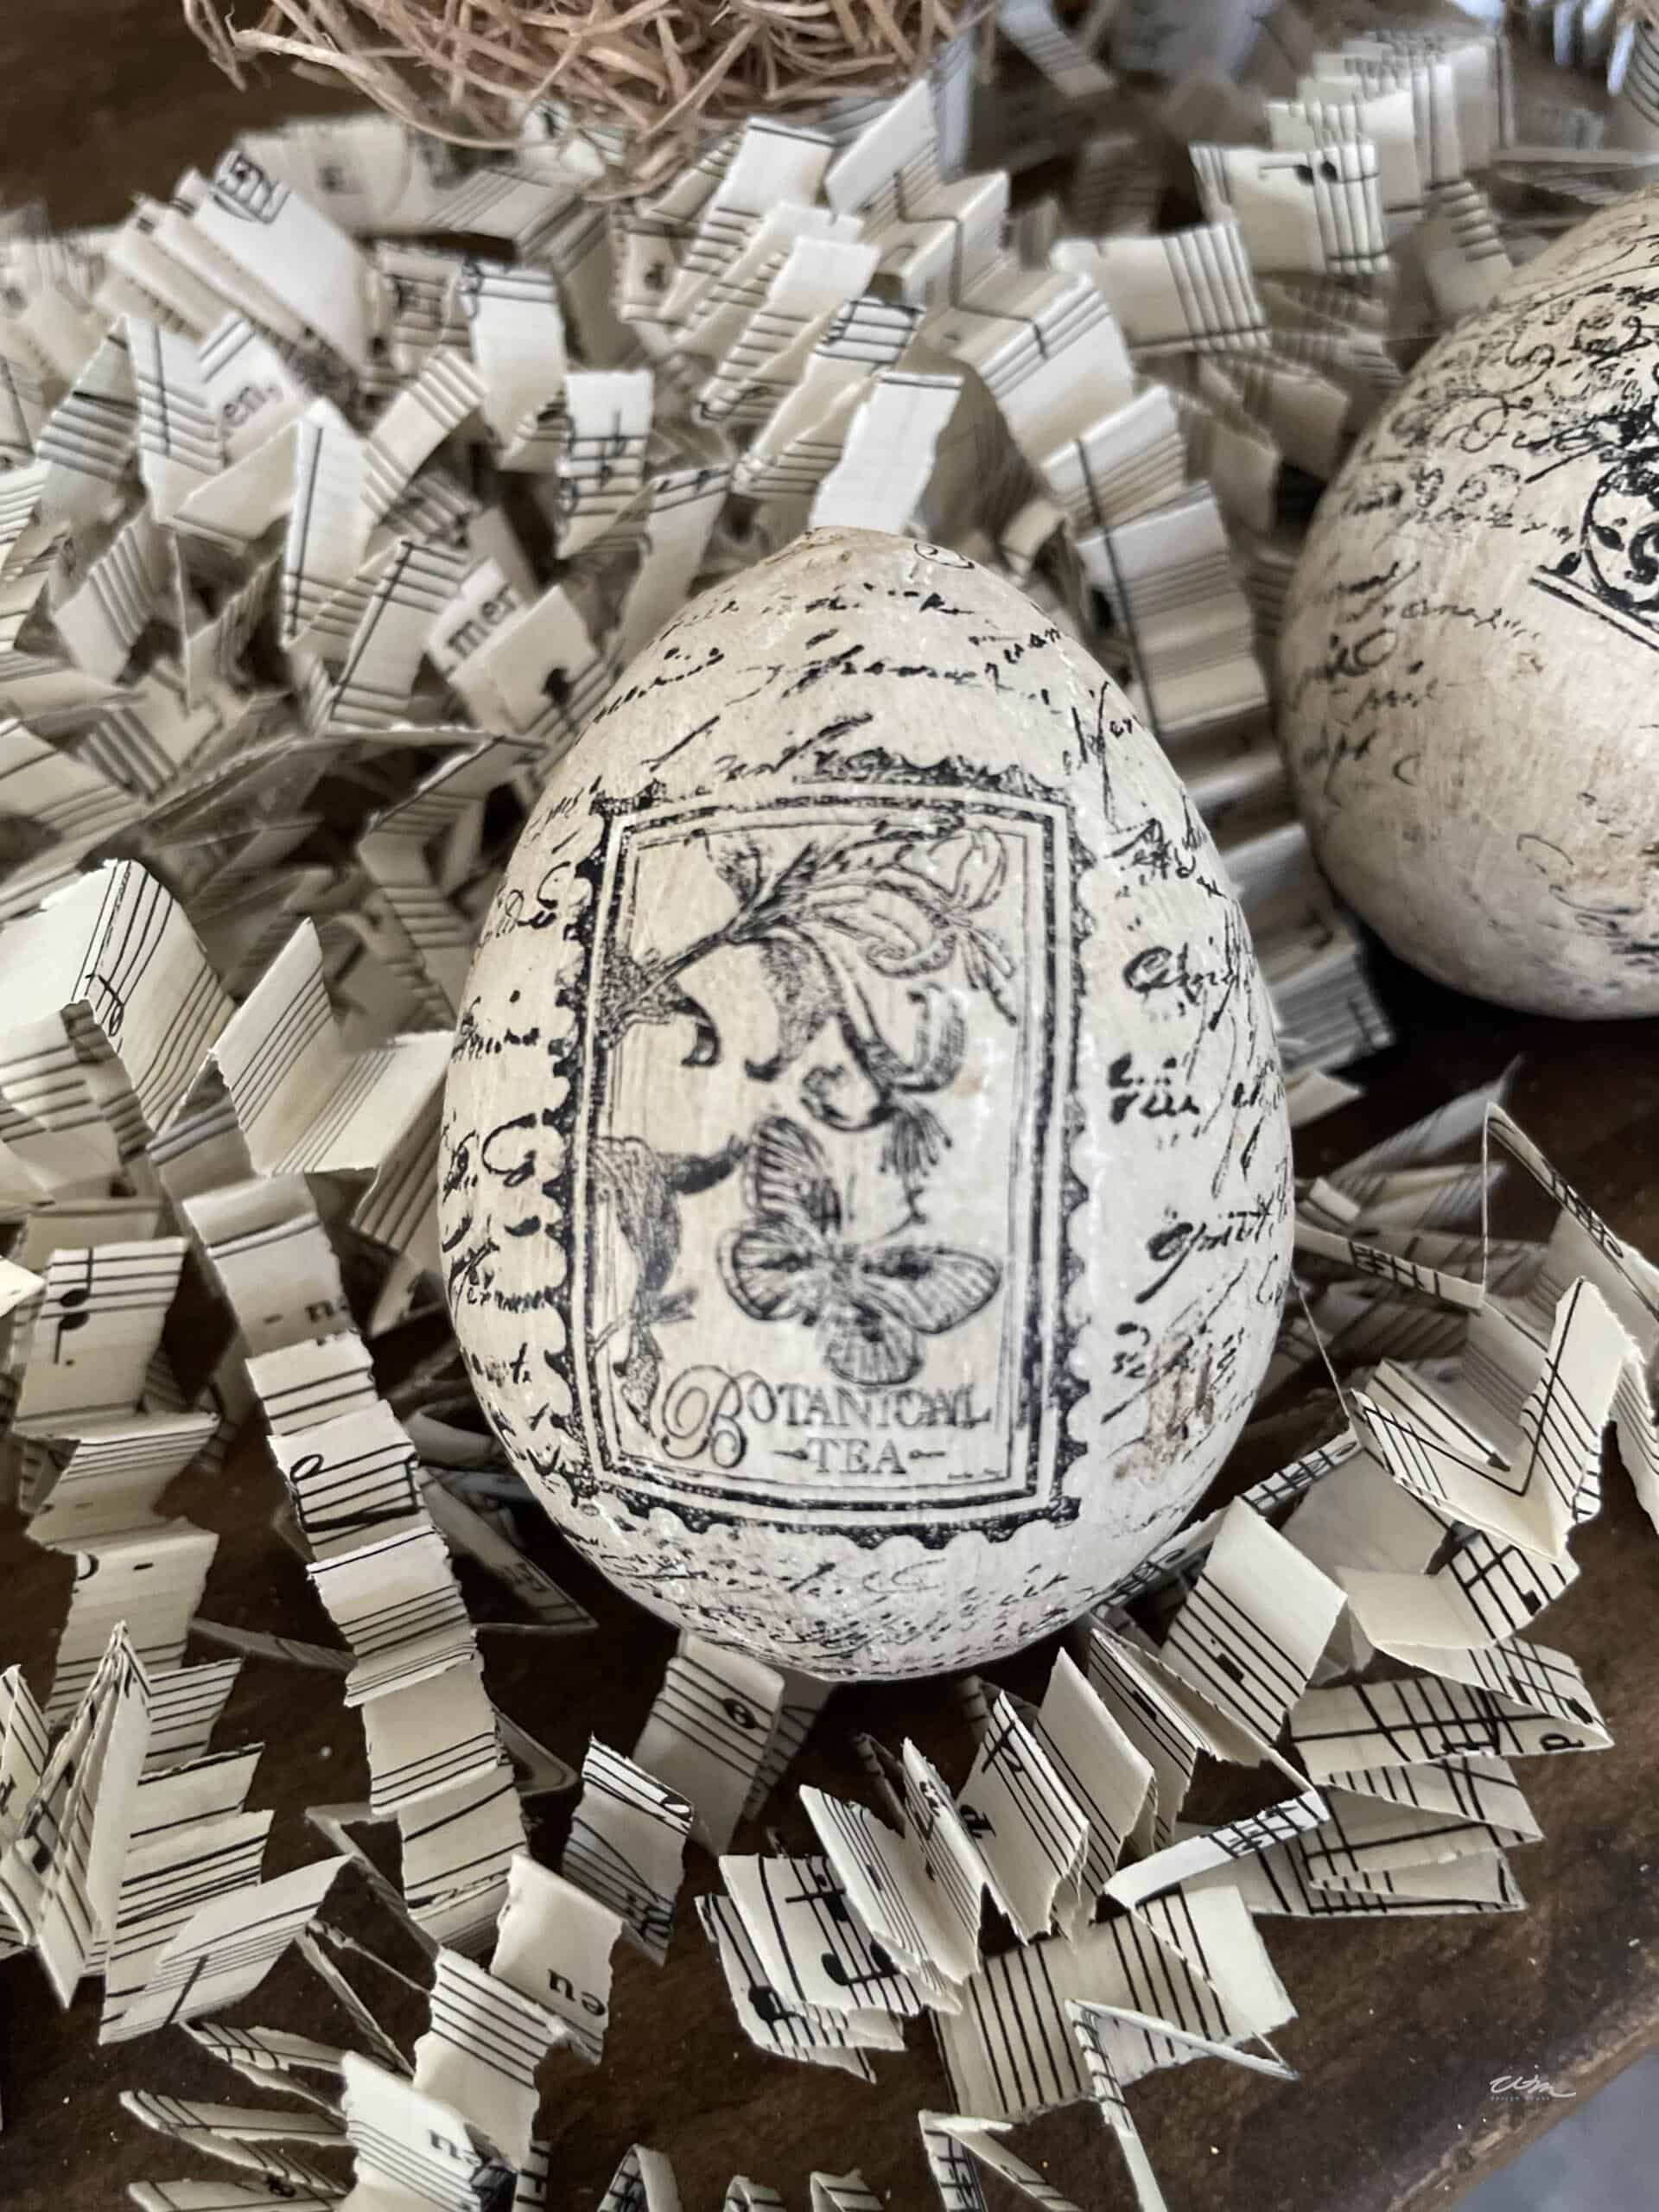
- Start with a basic faux egg and give it two coats of white chalk paint.
- Then, using a Stazon ink pad, imprint the egg using rubber stamps until you get the desired look.
- Once the ink is dry, you can antique the egg using dark wax.
- This is an easy process; just put a bit of dark wax on a dry cloth and rub the egg until you have the desired look.
- You can also mix the dark wax with a clear wax to control the amount of antiquing you want. I find this the best way if you have dark and clear wax.
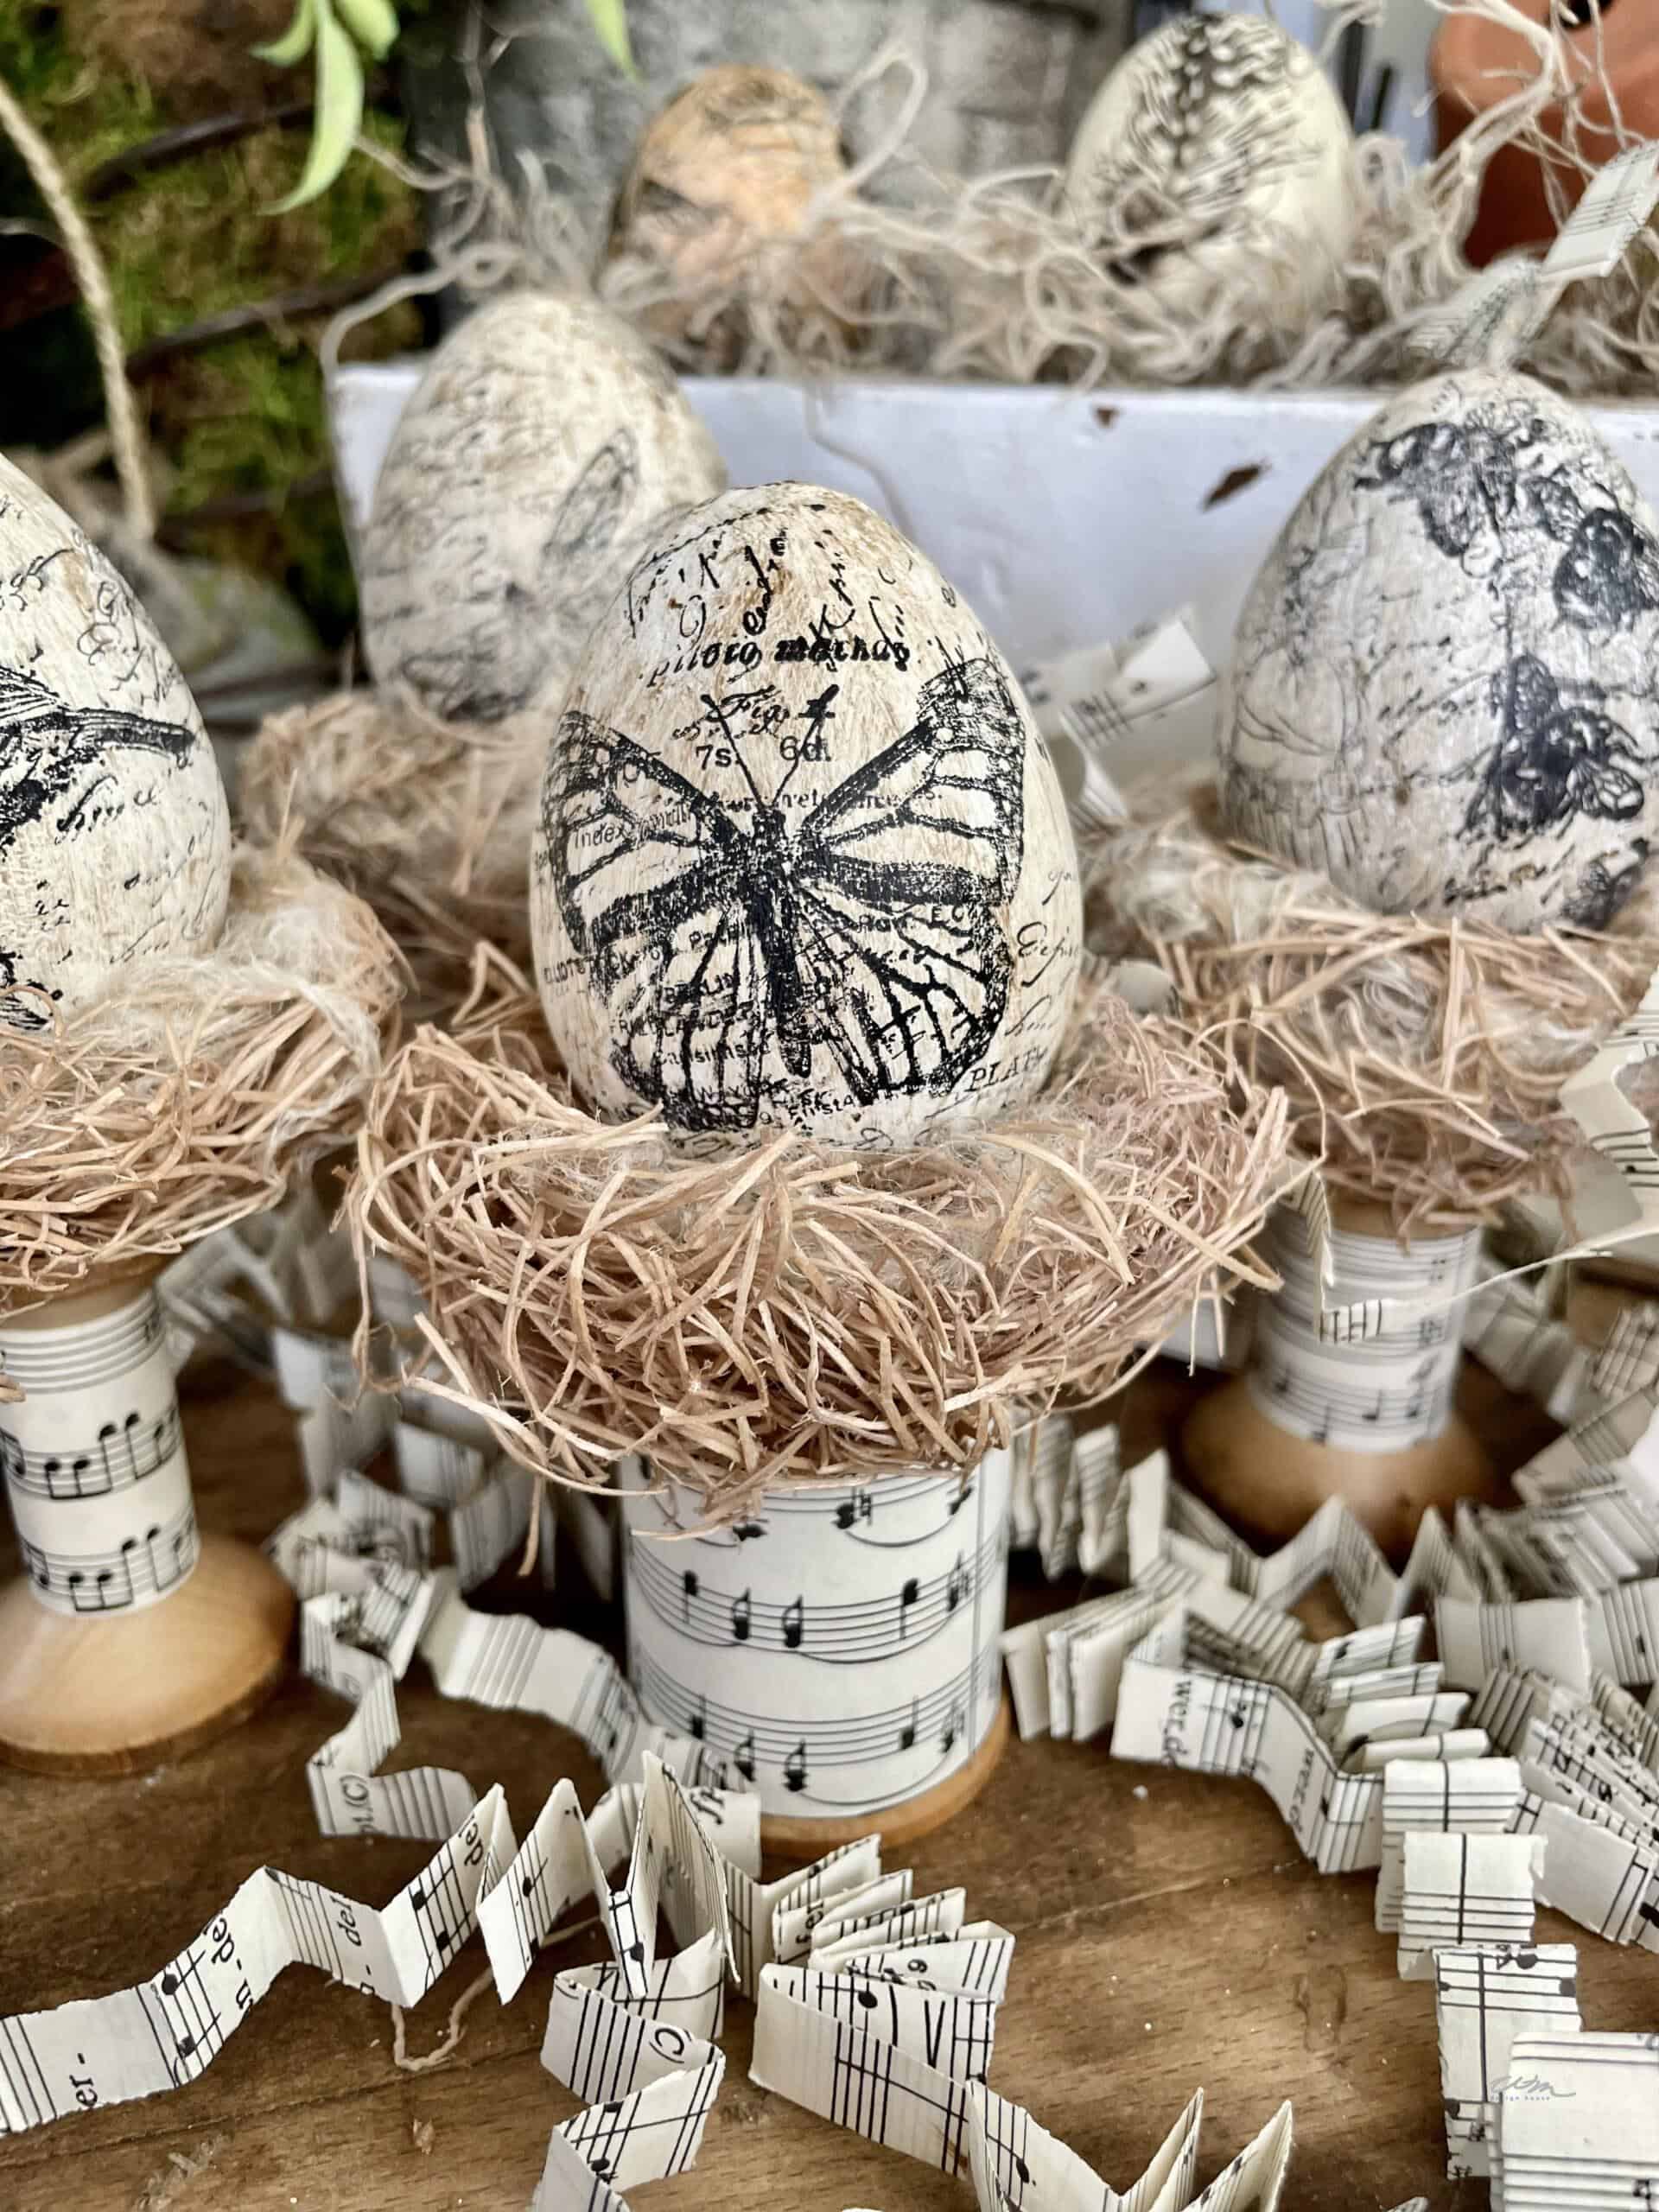
You can create a small nest using thread, Spanish moss, yarn, and spray adhesive to display your eggs. You can see the full tutorial on my YouTube channel WM Design House.
Then, I glued the nest to a large wooden thread spool and glued the egg on top of the nest.
I also wrapped the spool with some old sheet music.
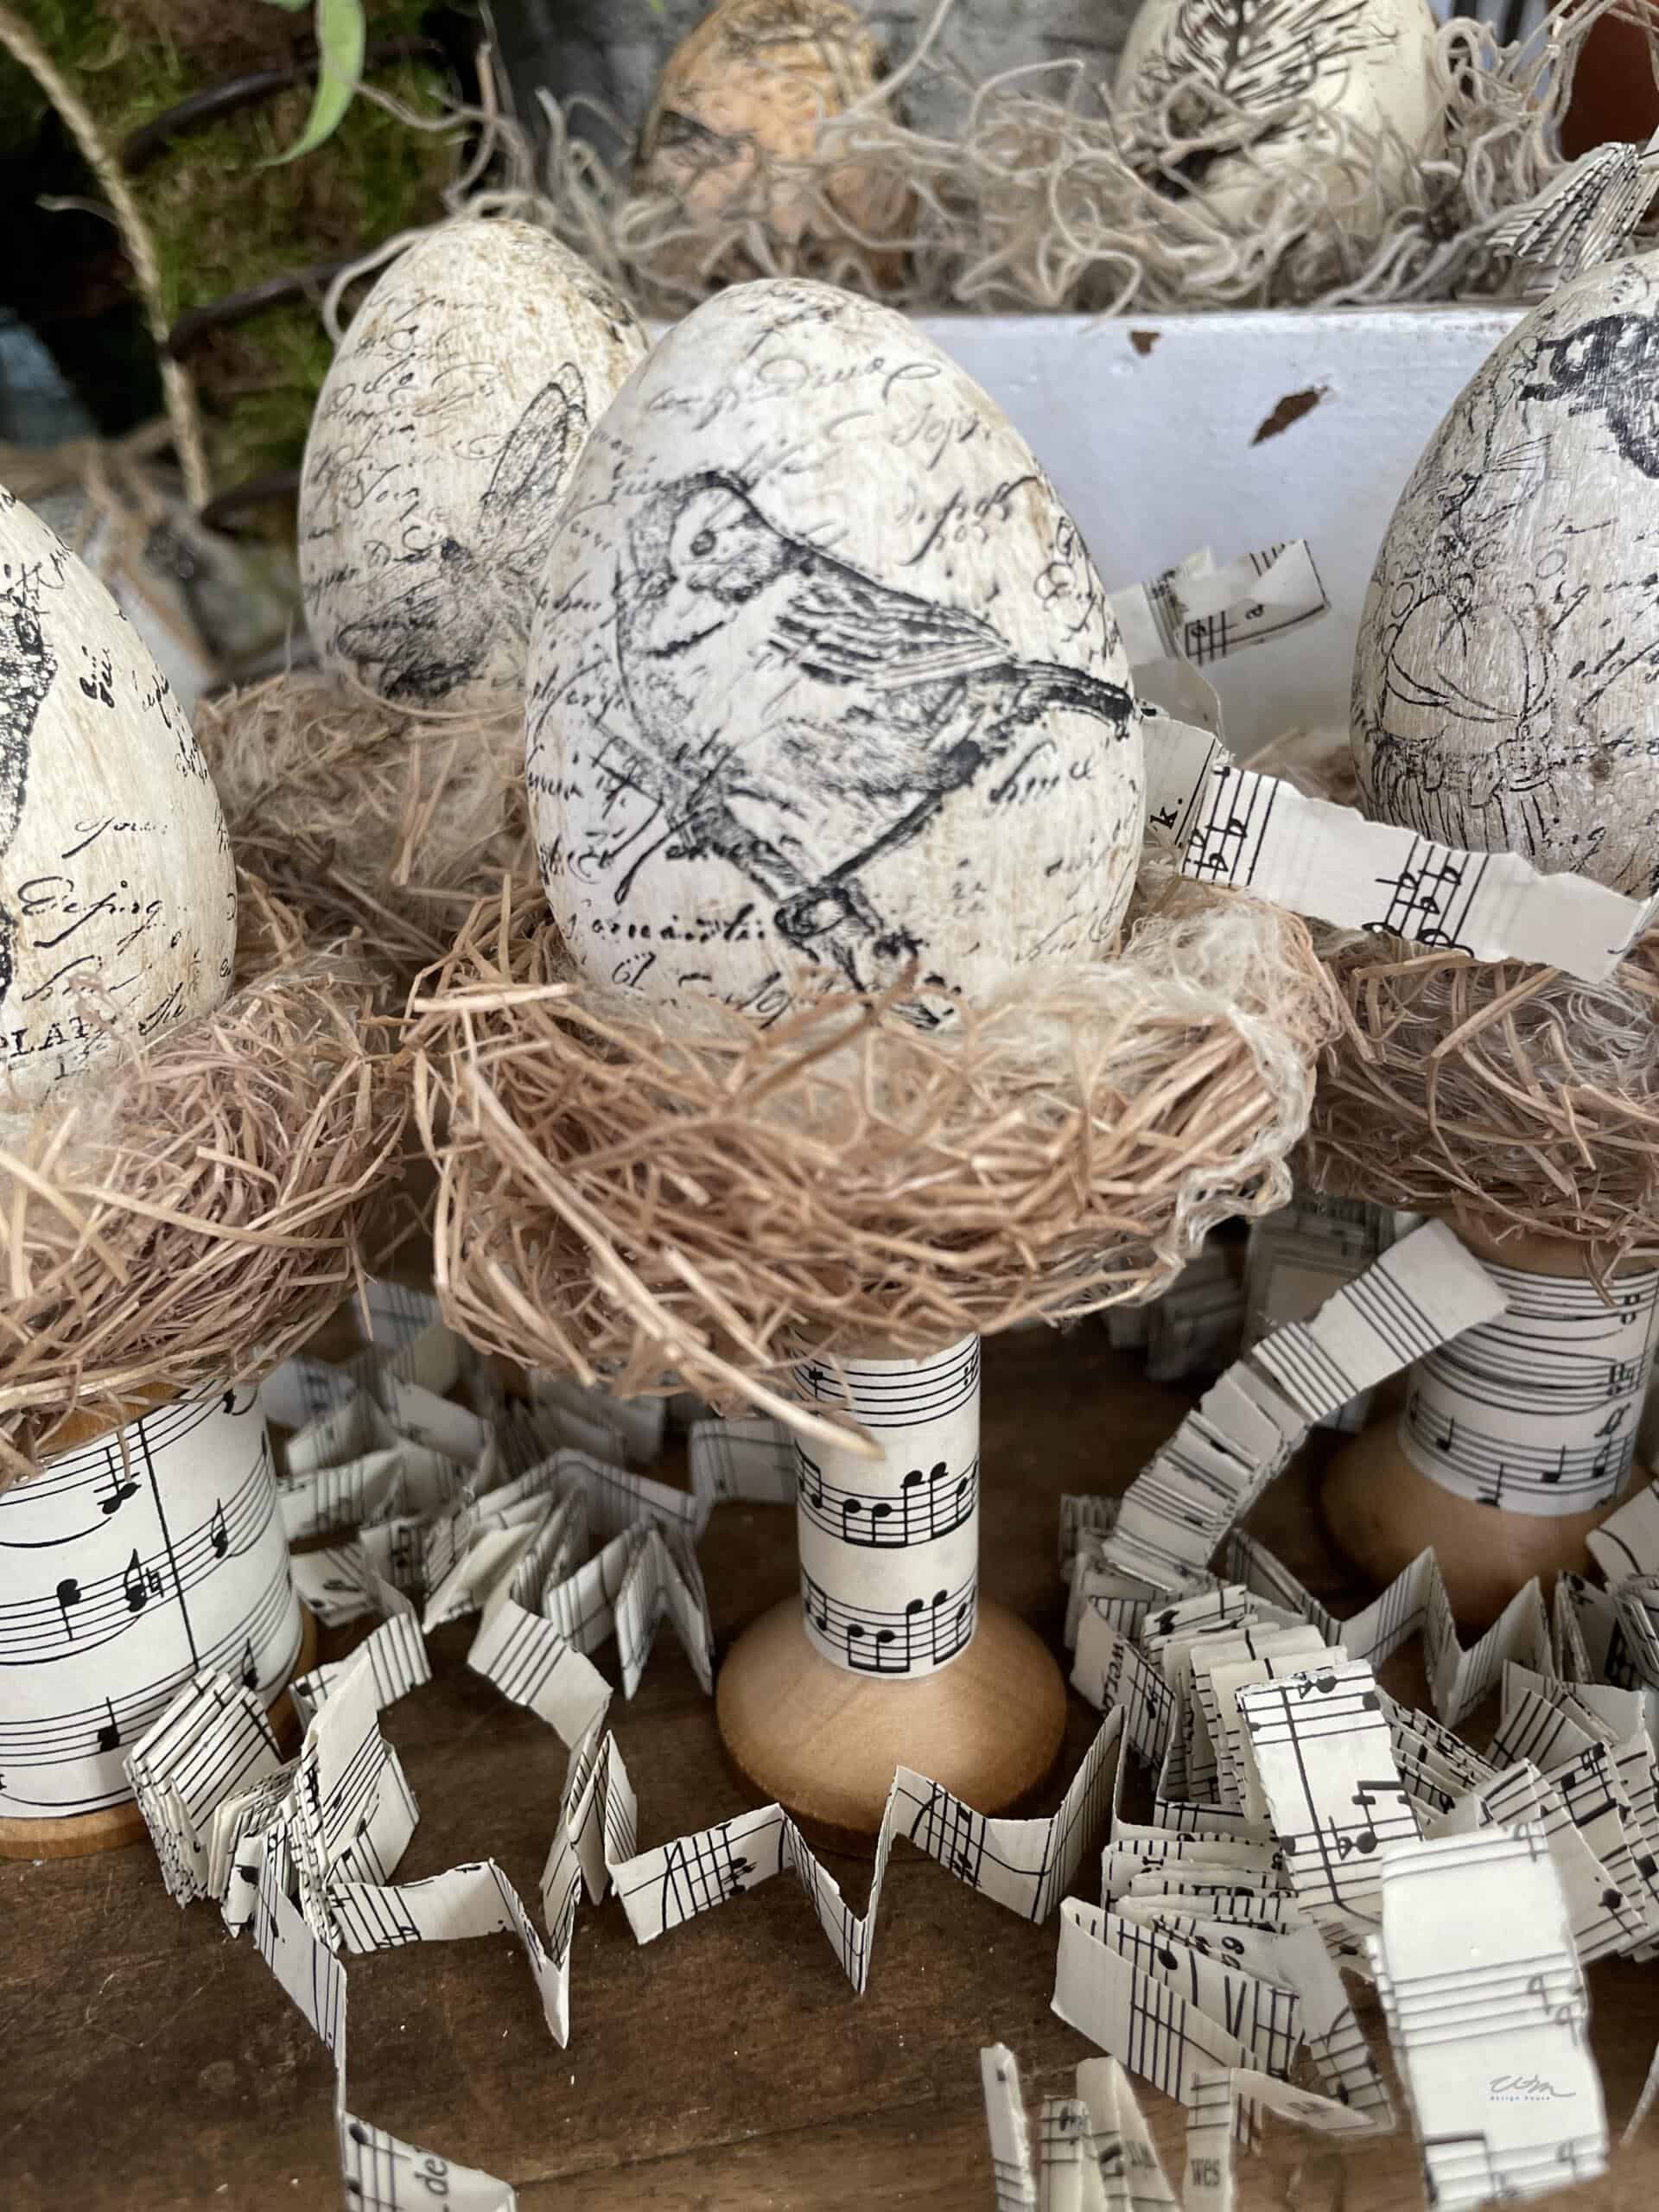
Ultimately, you can display them in a bird’s nest, in an egg crate, or scatter them on a table and have egg decorations for years.
Happy Egg Decorating!

SHOP THE POST

How to Make Gorgeous Floral Arrangements: A Step-by-Step Guide
Learn how to easily make gorgeous floral arrangements yourself with help from this step-by-step guide that will teach you all the basics.
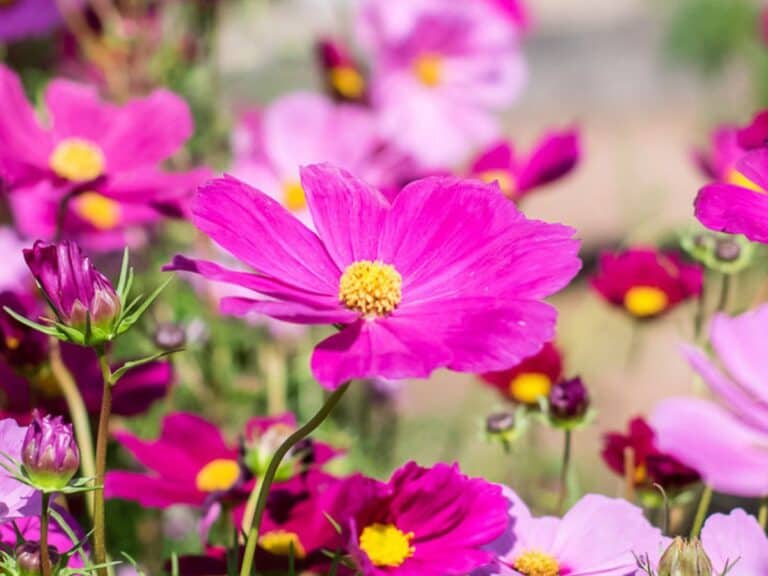
Cosmos: How to Plant, Grow, and Nurture Cosmos Flowers
A complete guide to planting, growing, and nurturing cosmos from seed or plants. Find the perfect plant for your cut flower garden today.
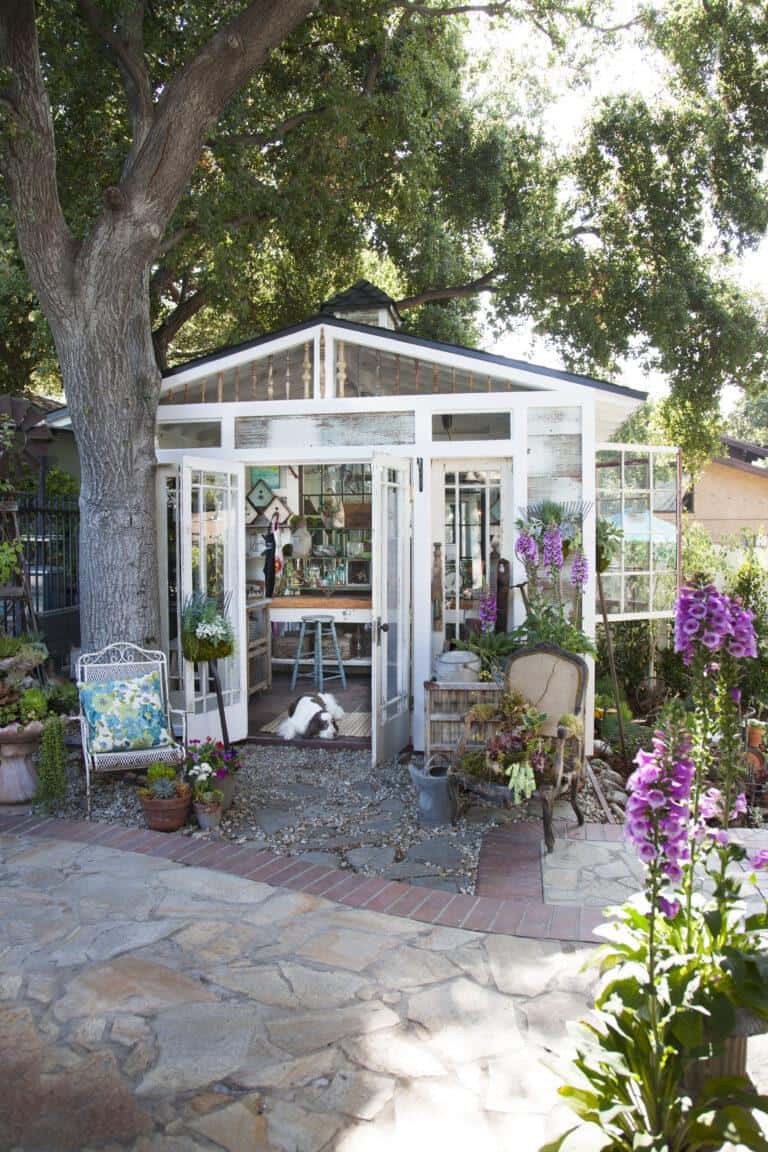
Welcome to The She Shed: Inside My Design Studio
Most of you probably know that my creative studio, where I bring all my gardening and craft ideas to life, is lovingly referred to as “The She Shed.” But you may be wondering how The She Shed came to be. So, I am sharing the story of its beginnings and highlight some of my favorite…

Wendy, these eggs are all SO beautiful! It is hard for me to pick which ones are my favorite! Pinned!
They are all so pretty!! The dried flowers are my favorite. Each way is so much fun though, and can be used year after year!!
Wendy
You are so talented. I love all these ideas and can’t wait to share them on Sunday! .
Thank you so much Rachel. You are so sweet. Have a wonderful weekend.
Each idea is magnificent Wendy! Thank you for sharing them with us on Farmhouse Friday. I can hardly wait to try at least one idea. Pinned and featuring it this week. Hope you link up again soon. 🙂
Thank you Cindy! I am so excited to be a feature on you link party. I will link up again real soon.
LOVE all four of these fabulous DIYs, Wendy! We will be featuring you starting Wednesday at the Creative Crafts Linky Party! Pinned and shared
Creatively, Beth
Thank you so much Beth, I enjoy seeing all of the creative ideas on your link party.
These Easter eggs are all incredibly well done, beautiful and inspiring all of them. I have yet to create Easter eggs this year. You’ve inspired me.
Thank you, Leanna, you will have a hard time choosing what you want to do with your Easter eggs.