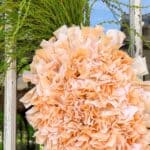
Yield: 1 Carrot Wreath
How to Make a DIY Carrot Wreath
Discover how to create the perfect Easter wreath with this engaging step-by-step guide on crafting a DIY Easter Carrot Wreath.
Equipment
- Sharp scissors
- Wire cutters
Materials
- Two pounds of fresh carrots grated
- One and a half yards of bleached white muslin
- One yard of natural muslin
- Grater
- Boiling water
- Disposable pan to dye the fabric
- Two candy cane wreath forms or one carrot-shaped wire wreath form from the Dollar Store.
- Burlap-covered wire
- Faux greenery for the carrot top
- Pipe cleaner or zip ties to make a wreath hanger
Instructions
- Directions to Make a Carrot Wreath
Before assembling your Easter carrot wreath, dye the fabric. This initial step is crucial; the fabric must be completely dry before creating your wreath.How to Dye Fabric with Carrots - I prefer to use muslin for my rag wreaths because I like how the fabric dyes and tears so easily. I purchase white and off-white muslin, so I have a variety of colors to choose from. Typically, it takes around 2-2.5 yards per wreath.
- If you want to soak your fabric in a mordant like Alum, it will help to set the dye in the fabric and keep the wreath looking fabulous for next year.
- Shred two pounds of carrots into a deep pan. (I like to use the disposable roasting pans) and allow the carrots to steep in the water for about an hour.
- Add enough boiling water to cover the carrots, and allow them to steep for about an hour.
- Strain the water so you no longer have the carrots in your dye.
- Submerge your fabric in the carrot dye and let it sit for 30-60 minutes. The longer it sits, the darker the fabric will become. Using different colors of muslin will give you various shades of orange fabric.
- This will yield mostly shades of light orange fabric. Add a drop or two of Rit orange dye if you want a deeper orange color.
- Hang your fabric outside to dry. (Be sure to put a towel underneath the fabric to catch the drips).
- Once the fabric is dry, tear it into one-inch-wide strips and cut them into 7" long strips.
- Stack the strips in similar color piles.
- Assembling the DIY Carrot Wreath
- I first made this wreath before Dollar Tree sold the carrot-shaped wreath forms, so I used two candy cane forms and then created the tip of the frame with jute-coated wire.
- You can use the carrot wreath form, but I suggest adding some wire strands going North and South to add more fabric, or your wreath will not be as complete as mine.
- If you are using the candy cane forms, wire them together.
- Create a V shape at the bottom of the frames using a heavier-coated floral wire.
- Add a wireline in the middle of the V so you have an extra wire to attach your fabric.
- In addition, I added two strands of wire to the center hole of the frame, going north and south, for the same reason.
- Attaching your Fabric to the Carrot Wreath Wire Frame
- I started attaching the fabric at the bottom of the wireframe, but you can start anywhere you want.
- Fold one of the strips in half and slide the loop end under the wire and up.
- Insert the two ends of the fabric strip through the loop and pull tight.
- Alternate your colors until you have covered the entire carrot with fabric strips.
- Push the strips of fabric together so they are tight on the frame to create the carrot shape.
- Trim any ends that are sticking out or too long.
- Adding a Carrot Top
- I purchased a small bush of greenery that looked like carrot tops and stuck the stem into the wireframe on top of the carrot.
- Make a loop with a pipe cleaner and attach it to the back of the wireframe at the top of the carrot.
