Yield: 6 Cards
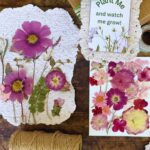
DIY Seed Paper
Learn how to make DIY seed paper at home with this easy step-by-step tutorial. Perfect for handmade cards, Mother's Day gifts, and botanical stationery.
Equipment
- 1 Blender
- 1 Bowl
- 1 Mold and deckle (or a screen attached to a wooden frame)
- 1 Shallow tub or rimmed baking sheet
- 1 Sponge
- 1 Clean towels or felt squares
- 1 Roll of paper towels
Materials
- 1 cup recycled paper scraps torn into small pieces
- 3 to 4 cups warm water
- 1 to 2 tablespoons small wildflower seeds
- Pressed flowers or petals optional, for decoration
Instructions
Instructions
- Soak the torn paper scraps in warm water for at least 2 hours, or overnight.
- Add the soaked paper to a blender with fresh water. Blend on high until smooth and slurry-like.
- Pour the pulp into a shallow tub. Gently stir in wildflower seeds by hand. Never blend the seeds.
- Scoop or pour the pulp onto your screen, spreading it evenly. Shake gently to level the surface.
- Press firmly with a sponge to remove excess water. Add pressed flowers or petals on top if desired.
- Carefully transfer the paper to a clean towel and air-dry flat for 24 to 48 hours. Do not use heat.
- Once fully dry, tear or trim into cards, tags, or stationery shapes.
To Plant
- Place the seed paper on top of moist soil, cover with a thin layer of soil, water well, and keep moist. Sprouts appear in 7 to 14 days.