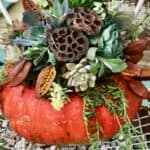
How To Make a Succulent Pumpkin
Create a stunning centerpiece for fall with our step-by-step guide to making a succulent pumpkin! Whether you're a seasoned gardener or a crafty beginner, this project is perfect for bringing the beauty of nature into your home this season.
Materials
- 1 Cinderella Pumpkin
- 1 Can of Spray Glue
- 1 Bag of Sphagnum Moss
- Floral Pins
- Assorted Succulents
- Assorted Pods

Instructions
- Select a Pumpkin: Choose one of the desired size and shape. Use a large pumpkin for a centerpiece, or make small ones for each guest to take home.
- Prepare the Pumpkin: Clean your pumpkin. This will serve as the base for the succulent arrangement.
- Add a Moss Bed: Use spray glue and some floral pins to attach a dense mound of sphagnum moss on the top of your pumpkin. 4.
- Select Succulent Cuttings: Choose succulent plants in different shapes, sizes, and colors. It's best to select compatible plants regarding water and light requirements. Succulents like echeveria, sedum, and hens and chicks are popular choices.
- Plant Succulents: Place a small amount of hot glue onto the stem of your succulent and insert it into the moss bed on top of the pumpkin. The plant's roots will grow right through or around the hot glue.
- Care and Maintenance: Water the succulent arrangement sparingly, ensuring that excess water can drain out or off of the pumpkin. Place the pumpkin planter in a location with bright, indirect light. Succulents are relatively low-maintenance plants and don't require frequent watering.
This arrangement will last several months since we did not cut into the pumpkin. When finished with the planter, you can remove the succulents and re-plant them directly into the ground or another pot.