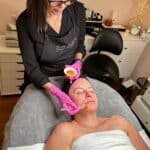
DIY Home Pumpkin Facial
Enjoy a DIY Homemade Pumpkin Facial for a glowing, autumn-inspired skincare treat!
Servings 1
Cost $5
Equipment
- 1 small bowl
- 1 Facial brush
Ingredients
- 2 Tbsp Canned or cooked pumpkin puree (unsweetened)
- 1/2 tsp Honey (for added moisture and antibacterial properties)
- 1/2 tsp Plain yogurt (for its natural exfoliating and soothing properties)
- 1/2 tsp Finely ground oats (optional for additional exfoliation)
- 1 pinch Cinnamon (optional for a pleasant scent and potential anti-inflammatory benefits)
Instructions
- Prepare the Pumpkin Puree: If you don't have canned pumpkin puree, you can make your own by cooking and mashing fresh pumpkin. Ensure it's cool before using it in the mask.
- Combine Ingredients: In a small bowl, mix together the cooled pumpkin puree, honey, yogurt, and finely ground oats (if using). If you add cinnamon, include a small pinch, but be cautious, as it can irritate some skin types.
- Cleanse Your Face: Before applying the mask, ensure your face is clean and free from makeup or dirt. You can use a gentle cleanser to wash your face.
- Apply the Mask: Using clean fingers or a brush, apply the pumpkin mask evenly to your face, avoiding the eye area. Be gentle when applying it to prevent any skin irritation.
- Relax: After applying the mask, relax for about 10-15 minutes. You may experience a tingling sensation, which is normal due to the natural enzymes in the pumpkin.
- Rinse Off:You can use a soft cloth or your hands to gently remove the mask.
- Moisturize: After rinsing, pat your face dry with a clean towel and follow up with your regular moisturizer to lock in the moisture.